External links now open in a new browser tab - turn this off in your UCP - Read more here.

New Paint!

Post your photos and videos here!
davintosh
Posts: 13957
Joined: Jan 28, 2009 1:05 AM
Location: Sioux Falls, SD
Contact:

New Paint!

Post by davintosh »

Edit: added thumbnails so the initial hit on opening isn't so hard. Click on the thumbnails to see the high-res images.

Just got things reassembled after a repaint, and it's looking pretty good. I did the work myself, so don't look too closely; 10 feet would be good! :banana:

Image Image

Image Image

Image Image

Image Image

Here are a few shots of what it looked like in the midst of prep, before the paint went on. I love how easily the trim hardware comes off!

Image Image

Image Image

Image

And here are a few taken soon after I bought the car last winter, so you have an idea of why the repaint was necessary; it was really, really rough. One of the previous owners had had the car resprayed (I hope the shop that did it is no longer in business) and they did a totally craptastic job of it. Overspray everywhere, paint over dirty unsanded original paint, chunks flaking off everywhere etc... I know some of the purists out there will give me a hard time for straying from the original paint color, but gray/silver is one of my least favorite colors for a car. Besides, it's my car, it's a daily driver, the closest to a show it will ever be is the parking lot, and I'll do what I please with it, thank you very much! :D

Image Image

Image Image
Last edited by davintosh on Aug 20, 2009 11:19 AM, edited 1 time in total.
2ndeagle
Posts: 1140
Joined: Oct 13, 2007 12:20 PM
Location: Los Angeles, CA

Post by 2ndeagle »

Looking good. ;) Unique color. Not quite red, not quite burgundy. If you have any paint left over, it would be nice to shoot the mirrors.
bkbimmer
Posts: 5878
Joined: Mar 02, 2007 2:33 AM
Location: Portland, Or.

Post by bkbimmer »

Did you spray all of the jams, hood, trunk, doors, gas filler door?

Looks a million times better!
CSBolger
Posts: 3485
Joined: Nov 27, 2007 12:00 AM
Location: Palmdale, CA

Post by CSBolger »

Holy Hell dude! That color is sweet!

What did you use to paint with?
davintosh
Posts: 13957
Joined: Jan 28, 2009 1:05 AM
Location: Sioux Falls, SD
Contact:

Post by davintosh »

2ndeagle wrote:Looking good. ;) Unique color. Not quite red, not quite burgundy. If you have any paint left over, it would be nice to shoot the mirrors.
Thanks! I was debating whether to do them body color or black... Had almost decided on black, but now I'm not sure again. Dang.
davintosh
Posts: 13957
Joined: Jan 28, 2009 1:05 AM
Location: Sioux Falls, SD
Contact:

Post by davintosh »

bkbimmer wrote:Did you spray all of the jams, hood, trunk, doors, gas filler door?

Looks a million times better!
Spray? Not exactly...
davintosh
Posts: 13957
Joined: Jan 28, 2009 1:05 AM
Location: Sioux Falls, SD
Contact:

Post by davintosh »

CSBolger wrote:Holy Hell dude! That color is sweet!

What did you use to paint with?
Rustoleum #7768502 - Burgundy

ImageImage

Yes, it's the dreaded $50 Paint Job, done with a foam roller & thinned down Rustoleum. And it worked out better than I expected. I was shooting for "better than it was before" and ended up with a decent looking paint job. If only I had spent a little more time on the prep work it would look even better close-up.

There. The cat's out of the bag. I feel a little better now, at least until the flames start and the bricks start flying. :brick:

:popcorn:
Son of a
Posts: 2366
Joined: Jul 17, 2007 8:50 PM
Location: Housatonic, MA

Post by Son of a »

Awesome. No flames from me. IMHO, you'd be more in-line for a flaming if you had spent a few grand painting an eta. It looks good. Reminds me of an early '80s GM brick red. There were many things wrong with GM in that era, but their exterior colors were one of the few things they did right. I had a high school classmate who drove an old Volvo 240 repainted almost that same color, looked great. The Swedes should have considered painting some of those old bricks red right from the factory.
mogie
Posts: 2575
Joined: Feb 12, 2006 12:00 PM
Location: Norwalk, CT

Post by mogie »

Yes, it's the dreaded $50 Paint Job, done with a foam roller & thinned down Rustoleum. And it worked out better than I expected. I was shooting for "better than it was before" and ended up with a decent looking paint job. If only I had spent a little more time on the prep work it would look even better close-up.

:clap:
I've heard of some people really messing up doing it this way but yours looks GREAT! Awesome job and congrats. Looks waaaay better than it did before
davintosh
Posts: 13957
Joined: Jan 28, 2009 1:05 AM
Location: Sioux Falls, SD
Contact:

Post by davintosh »

Son of a wrote:Awesome. No flames from me. IMHO, you'd be more in-line for a flaming if you had spent a few grand painting an eta. It looks good...
Thanks! My wife would've been first in line for that flaming, had I spent multiple thousands on it, so words cannot express how glad I am that it turned out well!

And almost forgot to mention the addition of the Saab moonroof. Fits a little snug, but I like it!
davintosh
Posts: 13957
Joined: Jan 28, 2009 1:05 AM
Location: Sioux Falls, SD
Contact:

Post by davintosh »

mogie wrote:
Yes, it's the dreaded $50 Paint Job, done with a foam roller & thinned down Rustoleum. And it worked out better than I expected. I was shooting for "better than it was before" and ended up with a decent looking paint job. If only I had spent a little more time on the prep work it would look even better close-up.

:clap:
I've heard of some people really messing up doing it this way but yours looks GREAT! Awesome job and congrats. Looks waaaay better than it did before
I've heard the same, and was a little fearful of what I might end up with. I took my time with it though and learned a lot through the process; after the project, auto paint isn't the dark magic it once was to me, so the thought of making repairs to paint on this car and others won't paralyze me like it once did. Prep, wet-sanding & buffing/polishing are the key steps in the whole process.

I'm working on a writeup of the whole job on my blog; should be done this afternoon. Click the www button under my sig line to go there.
Brad D.
Beamter
Beamter
Posts: 10735
Joined: Feb 12, 2006 12:00 PM
Location: San Antonio, TX
Contact:

Post by Brad D. »

I think it looks really good, especially considering the method. I wouldn't have guessed that from the pics.
Nebraska_e28
Beamter
Beamter
Posts: 9072
Joined: Apr 13, 2006 11:18 PM
Location: Council Bluffs, IA
Contact:

Post by Nebraska_e28 »

No flames from this way, looks damn good! I'd take that over a the total rust look anyday.
davintosh
Posts: 13957
Joined: Jan 28, 2009 1:05 AM
Location: Sioux Falls, SD
Contact:

Post by davintosh »

Big Bronze Rim wrote:I think it looks really good, especially considering the method. I wouldn't have guessed that from the pics.
Thanks! It's pretty hard to tell in person too; not much that gives it away. A guy I work with called me a liar when I told him how I painted it. Not sure if he's convinced yet, but I know what I did!

While I was working on it I wondered whether the same method would work using regular automotive paint. As long as the paint doesn't eat the foam rollers & brushes, I don't see why it wouldn't.
EZE84WIP
Posts: 346
Joined: Sep 29, 2008 2:59 PM
Location: Kansas City

Post by EZE84WIP »

The paint looks real good.. car looks alot better than before. Nice Work!!!

Now ya gotta do something about the cruddy window trim around the front and back windows.
davintosh
Posts: 13957
Joined: Jan 28, 2009 1:05 AM
Location: Sioux Falls, SD
Contact:

Post by davintosh »

EZE84WIP wrote:The paint looks real good.. car looks alot better than before. Nice Work!!!

Now ya gotta do something about the cruddy window trim around the front and back windows.
That and the mirrors. After the first comment, I'm all up in the air about whether to go body color or black. Any opinions would be welcome! :D
rlomba8204
Posts: 4869
Joined: Feb 12, 2006 12:00 PM
Location: Washington, DC

Post by rlomba8204 »

Looks great. I would replace the lockstrips with the chrome ones from BMW -- buy two rears and cut one for the front as it's cheaper. Then I would also paint the mirrors too. But for a first time out, using the method you did, you deserve a hoist. :beer:
bkbimmer
Posts: 5878
Joined: Mar 02, 2007 2:33 AM
Location: Portland, Or.

Post by bkbimmer »

davintosh wrote:
bkbimmer wrote:Did you spray all of the jams, hood, trunk, doors, gas filler door?

Looks a million times better!
Spray? Not exactly...
:laugh: How long did that take to dry, I bet there dust stuck all over it!

I would have never guessed!

My e12 was painted with grey rustoleum when I bought it, looked aweful!
davintosh
Posts: 13957
Joined: Jan 28, 2009 1:05 AM
Location: Sioux Falls, SD
Contact:

Post by davintosh »

bkbimmer wrote:
davintosh wrote:
bkbimmer wrote:Did you spray all of the jams, hood, trunk, doors, gas filler door?

Looks a million times better!
Spray? Not exactly...
:laugh: How long did that take to dry, I bet there dust stuck all over it!

I would have never guessed!

My e12 was painted with grey rustoleum when I bought it, looked aweful!
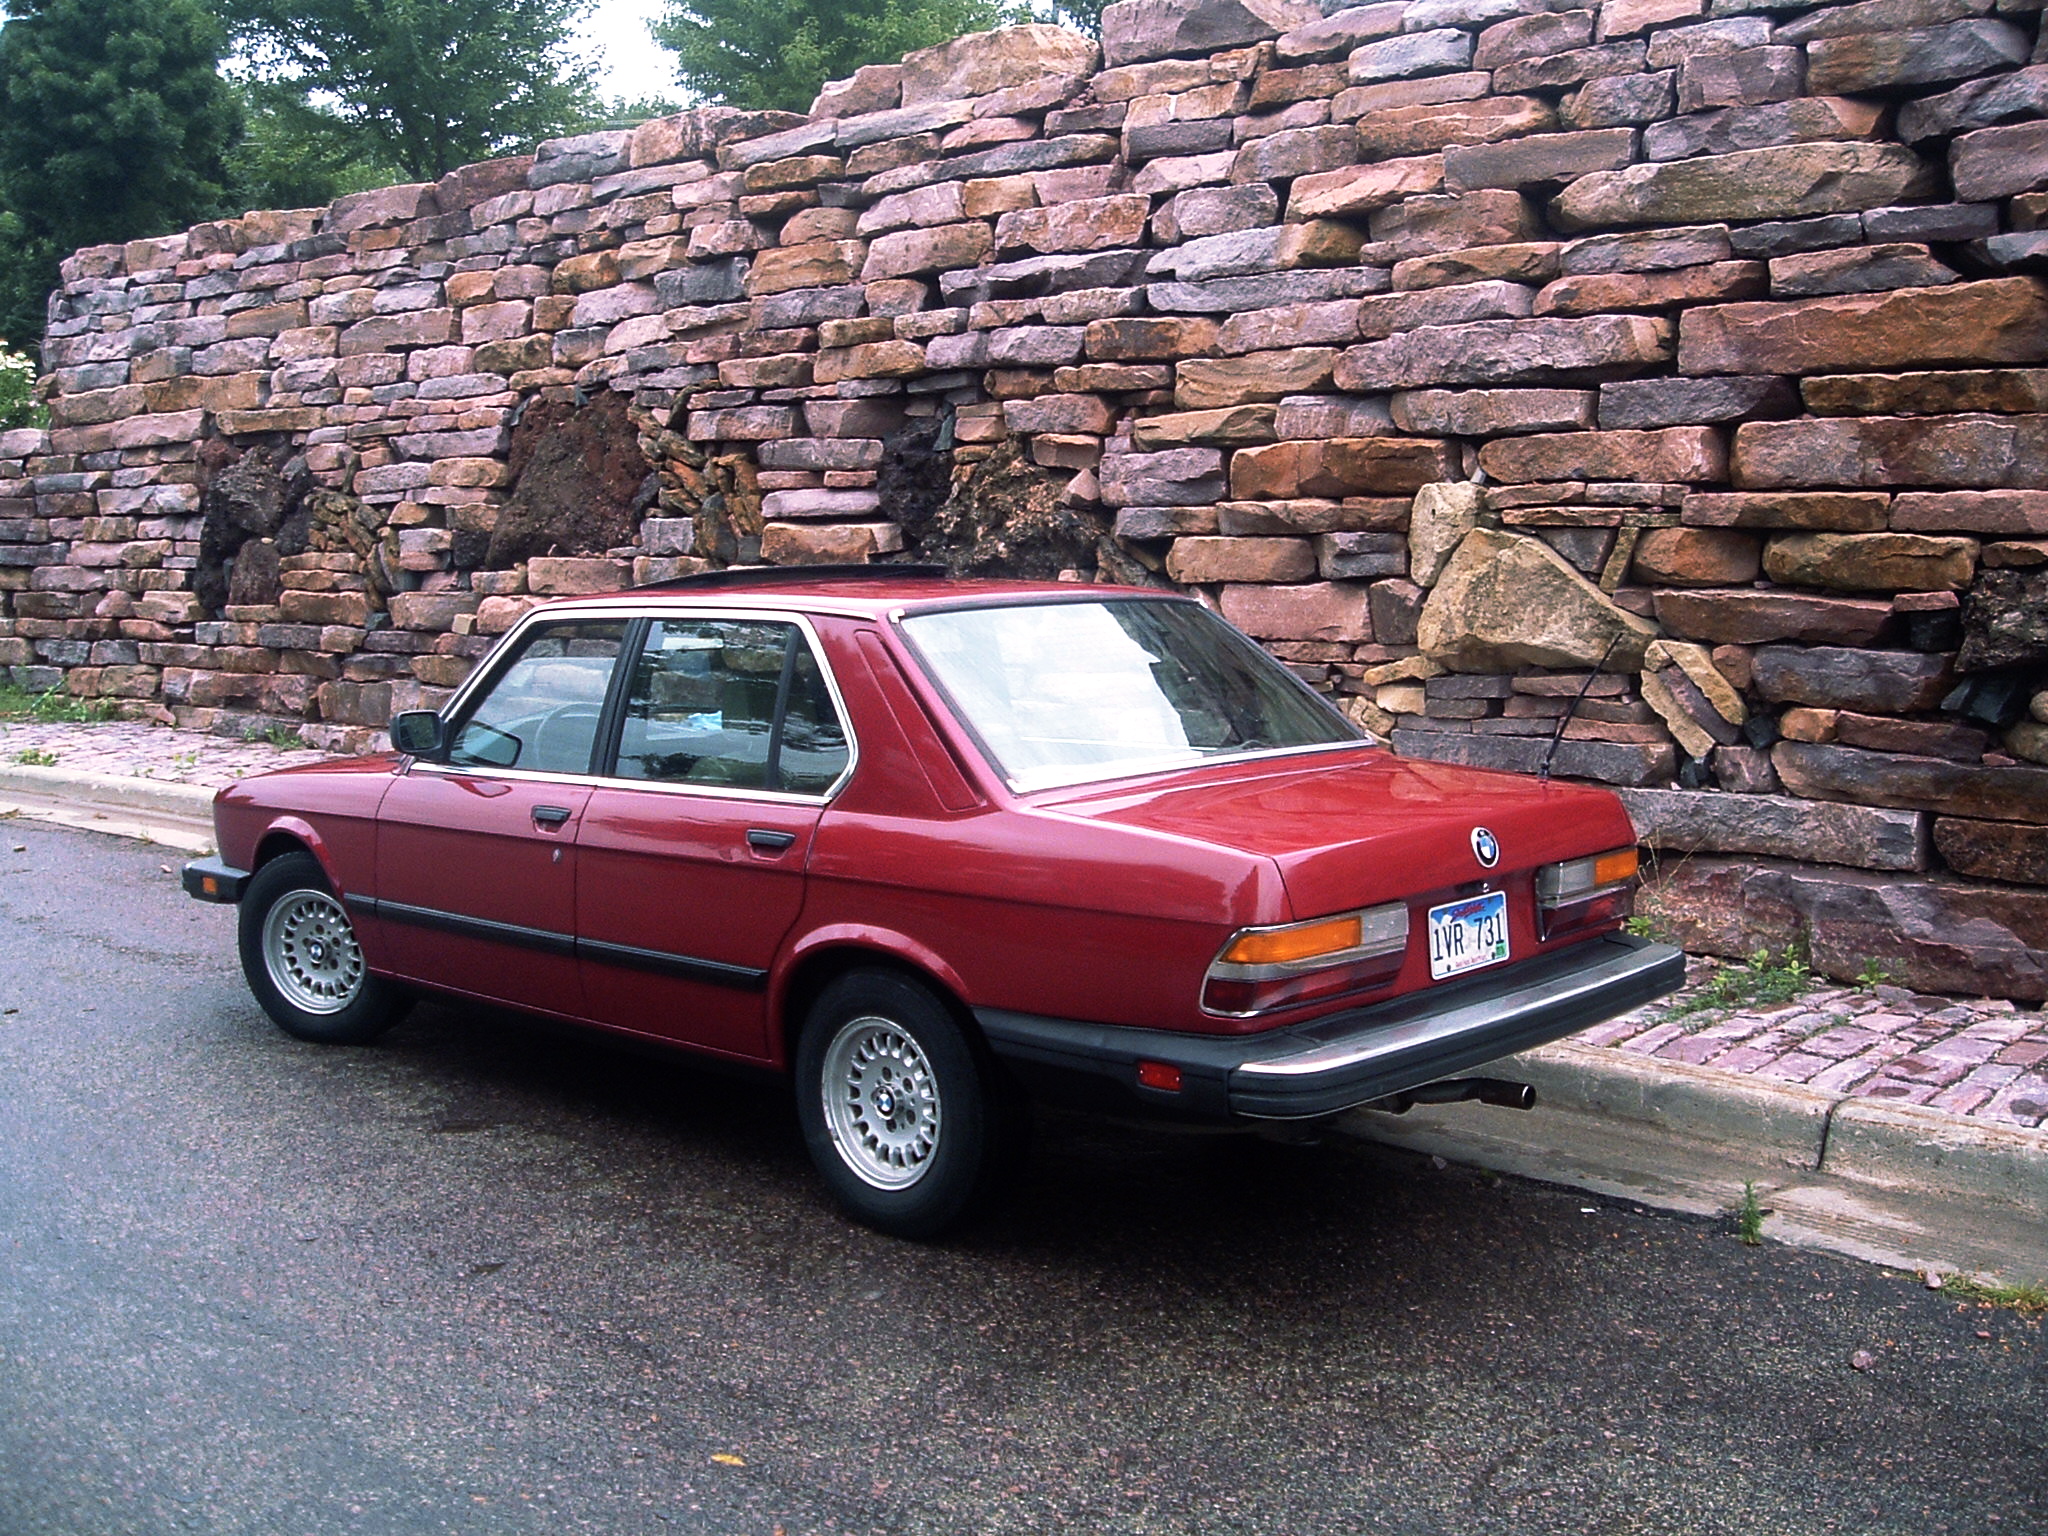
You've got to read up on the process a little; this isn't your father's cheapo Rustoleum paint job... [shameless plug]If you've got some time to waste, click through on my www link to read my blog post on what I did. [/shameless plug]

Actually, dry time wasn't bad. On the body, the paint was thinned down about 50/50 with mineral spirits, and on the door jambs I'm using (still working on that...) about half as much mineral spirits so the paint goes down heavier for fewer coats. The heavier mix takes about two coats to fully cover, and each coat dries overnight. And no dust! (or if you can find it, you deserve to find it!)

The body has eight (or nine?) coats on it -- started by putting the first coat on in the evening, let it dry overnight, put another coat on in the morning, let it dry while at work, wet-sanded in the evening, another coat in the morning, etc... Basically put two coats down, wet-sand, two more coats, wet-sand... The thinned-down paint levels out nicely and dries to the touch in a couple of hours, but I gave it plenty of time to cure out.

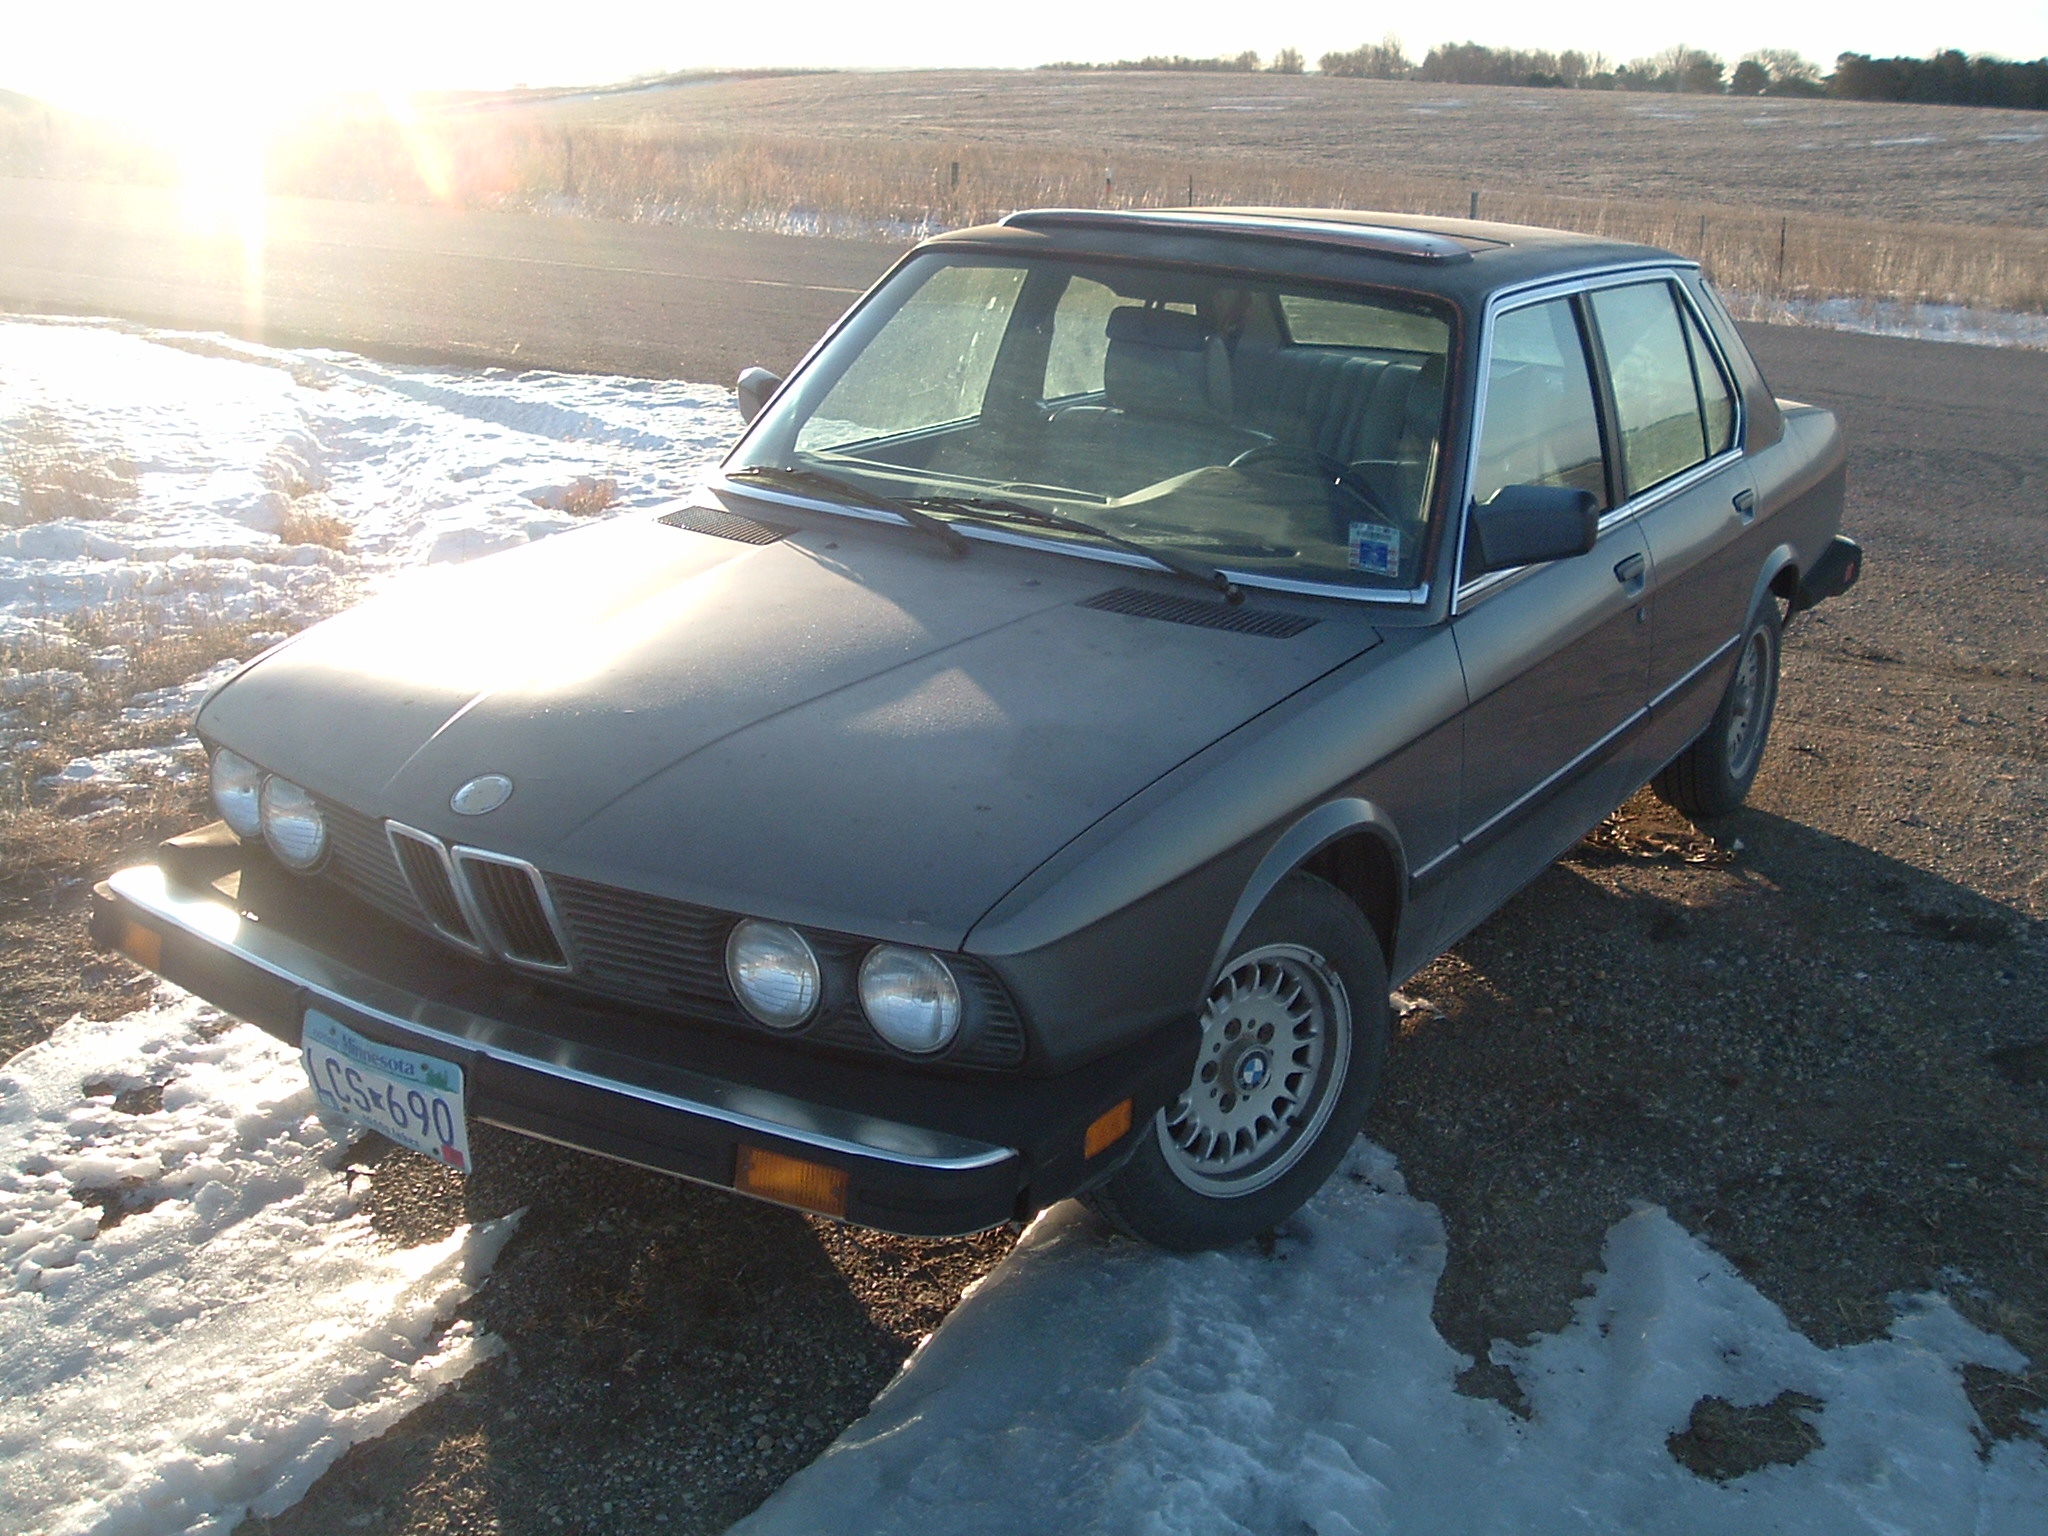
I using a matching can of spray for some of the hard-to-get-to areas, like behind the gas filler door and around the door hinges. Takes longer to mask things off for spraying than it does to brush on a coat. It doesn't look as nice as the body panels, but it didn't get the buff & polish either.

I haven't done anything with the underside of the hood or trunk lid yet. When prepping for paint, I pulled the foam padding from under the hood (to get at the previously-painted-over windshield sprayers :evil: ) and discovered some surface rust on the underside of the vent intakes. Nothing major, but that combined with some of the dents in the hood (that I did a poor job of fixing) makes me want to track down a replacement hood for it. The underside of the trunklid will probably just get a couple of quick roller coats, then reinstall the stock cover. When I get around to it.
wkohler
Posts: 50928
Joined: Oct 05, 2006 11:04 PM
Location: Phönix, Arizona, USA
Contact:

Post by wkohler »

Son of a wrote:Awesome. No flames from me. IMHO, you'd be more in-line for a flaming if you had spent a few grand painting an eta. It looks good. Reminds me of an early '80s GM brick red. There were many things wrong with GM in that era, but their exterior colors were one of the few things they did right. I had a high school classmate who drove an old Volvo 240 repainted almost that same color, looked great. The Swedes should have considered painting some of those old bricks red right from the factory.
They did. There were a few reds.
davintosh
Posts: 13957
Joined: Jan 28, 2009 1:05 AM
Location: Sioux Falls, SD
Contact:

Post by davintosh »

wkohler wrote:
Son of a wrote:Awesome. No flames from me. IMHO, you'd be more in-line for a flaming if you had spent a few grand painting an eta. It looks good. Reminds me of an early '80s GM brick red. There were many things wrong with GM in that era, but their exterior colors were one of the few things they did right. I had a high school classmate who drove an old Volvo 240 repainted almost that same color, looked great. The Swedes should have considered painting some of those old bricks red right from the factory.
They did. There were a few reds.
Ya, shore, you betchah!

Image
bjh102
Posts: 112
Joined: Dec 28, 2008 10:03 PM
Location: pleasanton, CA

Post by bjh102 »

looks great man! i say shadow line it and keep the mirrors black. just clean them up.
INTREPID 1
Posts: 241
Joined: Jul 25, 2009 4:29 AM
Location: Orange, CA.

Post by INTREPID 1 »

Painted by hand with a roller?? You could've fooled me. It came our great. IMHO I would paint the mirrors the body color. I did that when I had my car repainted in March 2009 and that gives it a more finished look. Are you planning on staying with the 390 bottlecap wheels? Tires will cost you an arm and a leg when it's time to replace, if it's your desire to keep car as original as possible, with the exception of changing paint colors.
Mark 88/M5 Houston
Posts: 8548
Joined: Feb 12, 2006 12:00 PM
Location: Far North Houston

Post by Mark 88/M5 Houston »

Looks great!

Other than the front and rear lock-strips and the mirrors.
D_Rumba01
Posts: 514
Joined: Feb 26, 2008 7:59 PM
Location: Buford, GA

Post by D_Rumba01 »

Hotness!

now come do my car


:rofl:
E28CFX1
Posts: 949
Joined: Mar 13, 2007 1:31 PM
Location: Colorado

Post by E28CFX1 »

That is absolutely incredible, great work man! I'm sitting here with some friends looking your photos in disbelief! :D As for your side mirrors, I vote for the color match. Keeping them black with your body color makes them look like boring after-market replacements.

Fox
Denver, CO
davintosh
Posts: 13957
Joined: Jan 28, 2009 1:05 AM
Location: Sioux Falls, SD
Contact:

Post by davintosh »

INTREPID 1 wrote:Painted by hand with a roller?? You could've fooled me. It came our great. IMHO I would paint the mirrors the body color. I did that when I had my car repainted in March 2009 and that gives it a more finished look. Are you planning on staying with the 390 bottlecap wheels? Tires will cost you an arm and a leg when it's time to replace, if it's your desire to keep car as original as possible, with the exception of changing paint colors.
Thanks! I'll probably stick with the bottlecaps as long as the tires last. I've got two sets with tires on them; the car had fairly new tires on it when I bought it, but they are 185/65/R14's and looked a bit small. Speedo was off a bit because of them as well I'd guess. I picked up the set of bottlecaps scm65 had for sale a few weeks back; they've got decent 195/70/R14 Bridgestone Turanza's on them, and should last a while. The car looks a lot better with them on; I haven't checked the speedo, but judging by the flow of traffic, I'm thinking the 195's are a lot closer to where I ought to be. I'll bide my time a while & wait for a nicer set of non-metric wheels to present themselves.

Mark 88/M5 Houston wrote:Looks great!

Other than the front and rear lock-strips and the mirrors.
Yeah; those are next on my list, after getting things sorted out in the interior & getting my back seat out of my basement and in the car.
D_Rumba01 wrote:Hotness!

now come do my car

:rofl:
Thanks! I'd love to help you out, but I'm afraid you couldn't afford me. :D
EZE84WIP
Posts: 346
Joined: Sep 29, 2008 2:59 PM
Location: Kansas City

Post by EZE84WIP »

What did you originally use to prep the car for paint/use to remove the factory paint?
davintosh
Posts: 13957
Joined: Jan 28, 2009 1:05 AM
Location: Sioux Falls, SD
Contact:

Post by davintosh »

EZE84WIP wrote:What did you originally use to prep the car for paint/use to remove the factory paint?
The factory paint is still there; it's better than any other rust preventative you could put on the car. I just roughed it up a bit with sandpaper to give the paint something to stick to.
Jake D
Posts: 2107
Joined: Jun 20, 2008 1:08 AM
Location: Spokane, WA
Contact:

Post by Jake D »

Hell, that looks fantastic!!

I did a write up on fixing the chrome lock strips with Aluminum Duct tape! Works great for super cheap!
Post Reply