Another restoration - 83' 528i
Re: Another restoration - 83' 528i
The reason I suggested it is because when I first did the modification it made sense to allow movement in both directions. In reality the lower the car is then the greater the negative camber and toe out. Most of the correction is to toe in.
You can dial out the negative camber with your set up which also affects the toe so having both adjustments will be an improvement on the standard set up.
Another thing with the adjusters is that you really need the "sliding bearing" as fitted to the e34 M5 and 750. These were fitted as standard to the trailing arms and allow the misalignment of the adjusters. The rubber bushes do not work as well.
Does your car have the "dogbones"?
Re: Another restoration - 83' 528i
That's great info, thanks! I dug around some and looks like many people (but not all) had to machine the M5/750 bearings down a bit to fit them into E24/E28/E34 trailing arms. Machining or not, this looks like a good option. I'll keep that in mind.///M wrote: Oct 01, 2021 1:47 PM Another thing with the adjusters is that you really need the "sliding bearing" as fitted to the e34 M5 and 750. These were fitted as standard to the trailing arms and allow the misalignment of the adjusters. The rubber bushes do not work as well.
It does.
Re: Another restoration - 83' 528i
The "dogbones" are a lever to change the toe on the rear arm. As the suspension compresses the movement causes the wheel to toe in. Using the sliding bearing means it moves with ease. The rubber bushes are more resistant to the movement. It was the top of the range 7 series that first had the sliding bearing.
The downside is the cost but if you use the later trailing arms or the ones from the e34 535i you get the best rear set up for an e28
With the attention to detail you have put into your car it deserves to have the best.
The downside is the cost but if you use the later trailing arms or the ones from the e34 535i you get the best rear set up for an e28
With the attention to detail you have put into your car it deserves to have the best.
Re: Another restoration - 83' 528i
Time for my yearly update!
October 2021
A couple of photos from last October that got left out from previous post.
Bought some 2K spray can paint to cover various trinkets on the underside. Paint code RAL1015. It matches quite well the ochre yellow undercoat I used, although I think RAL1014 might have been an even better fit.
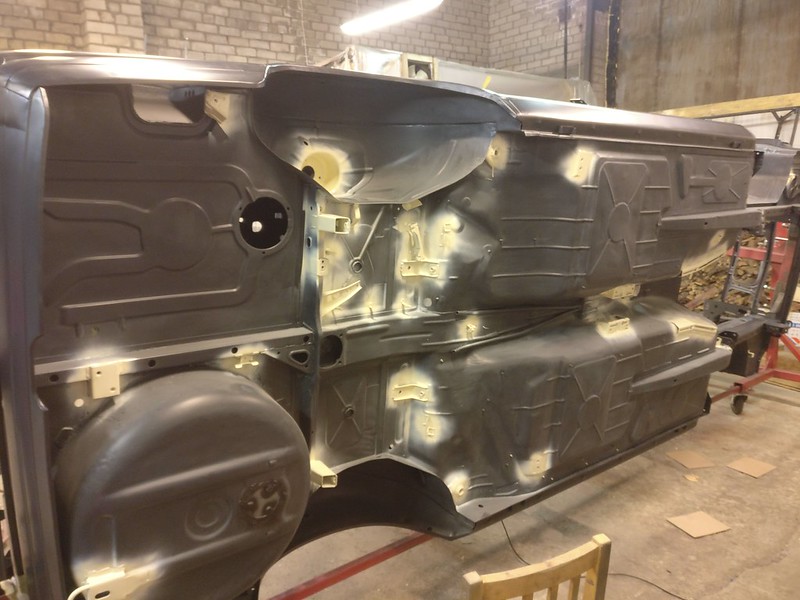
Next, I borrowed a gun to shoot the undercoat - Teroson 9320 SF in ochre yellow. Had some trouble with setting up the gun so the texture is not perfect. Otherwise, it’s a nice rubbery product and the color matches the OEM undercoat/sealant.
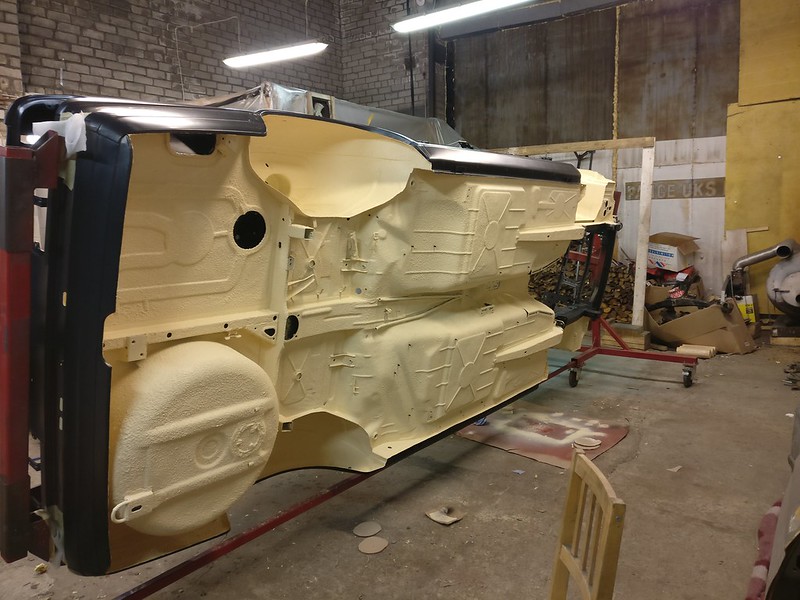
Great time to make the new brake and fuel lines while car is still on the rotisserie. Cunifer piping for brake lines.

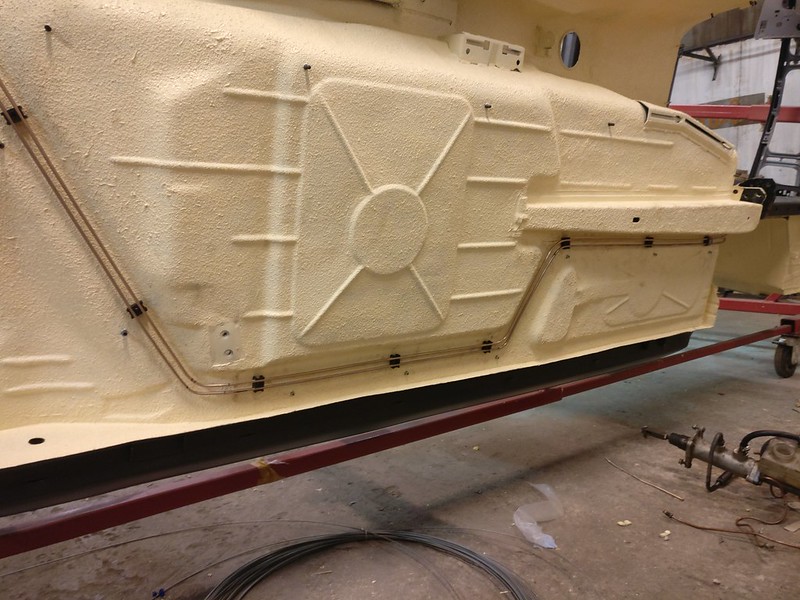
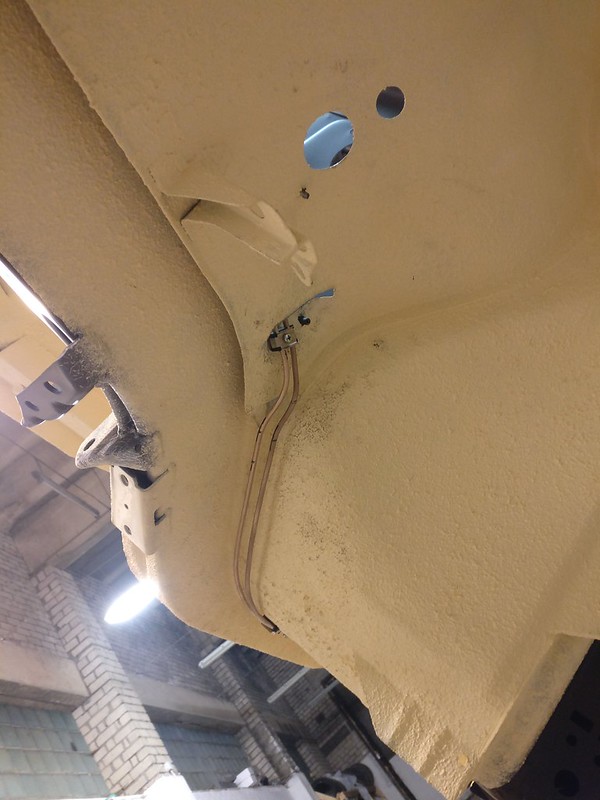
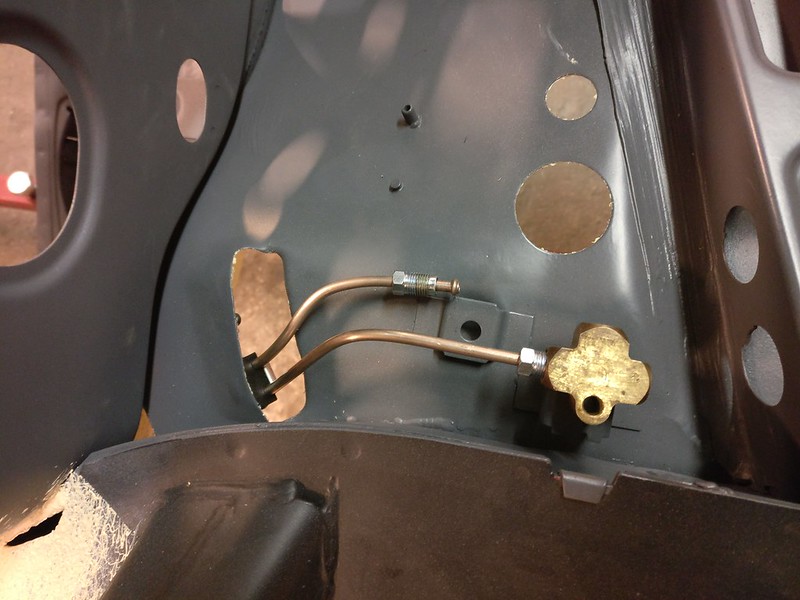
This is where the progress halted as I had some more pressing issues to take care of.
May 2022
Fast forward to may. Continued with making the fuel lines. Used cunifer piping for these as well.
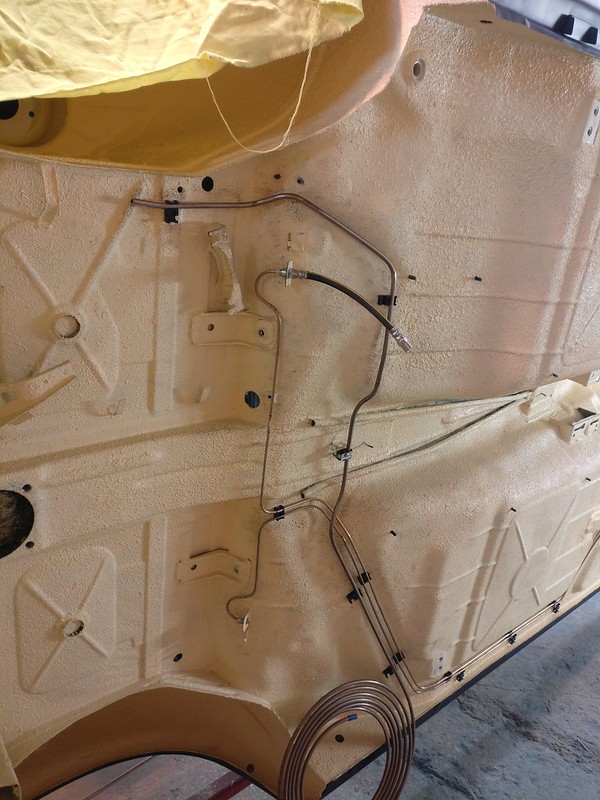
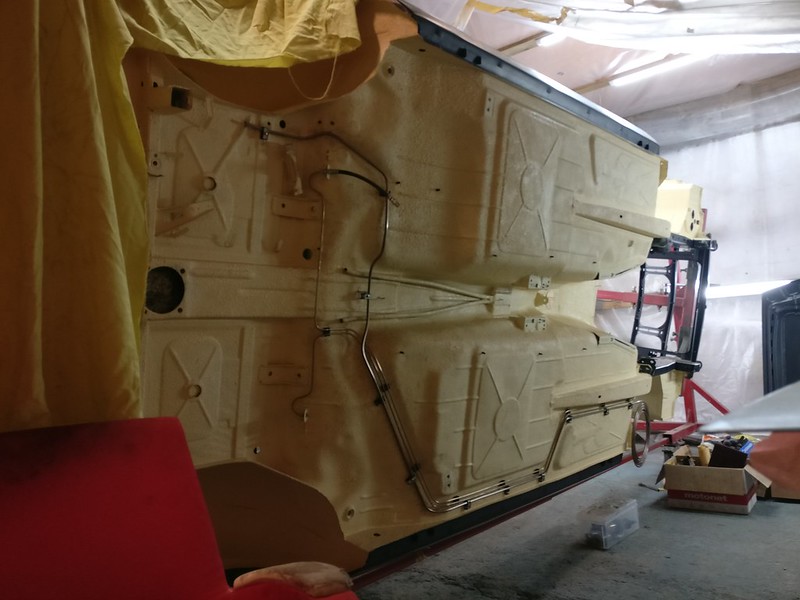

Then I had to rebuild the top end on my daily. That pretty much killed my mojo for the summer.
Sept-Oct 2022
Which brings us to September. Next up were the doors.
Driver’s side front door was in the worst state regarding the rust.
A patch here
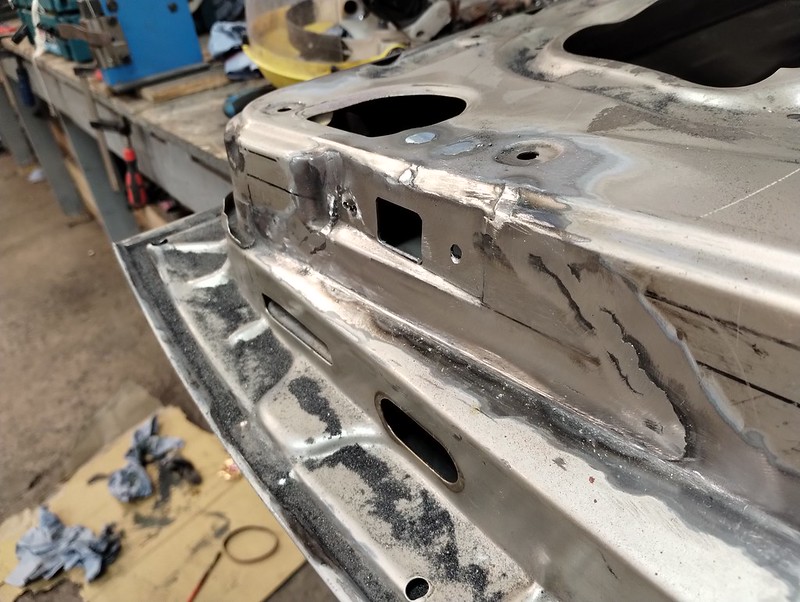
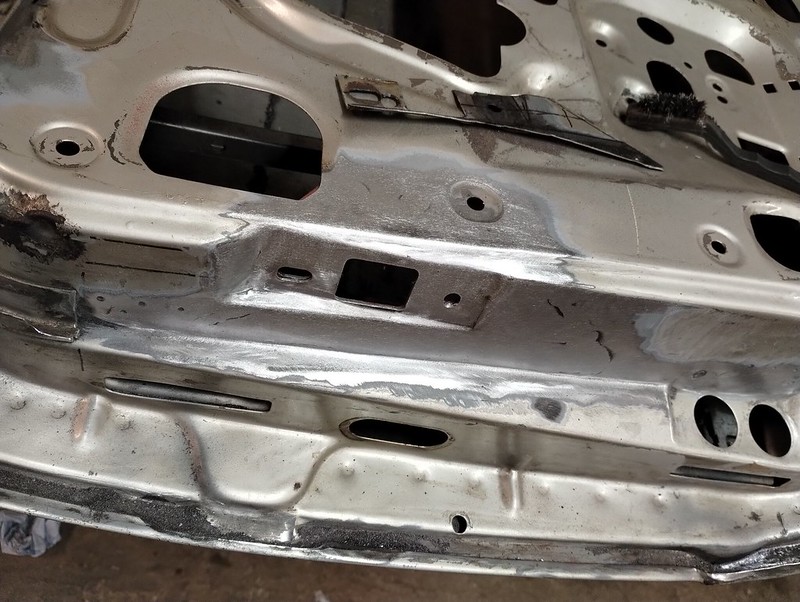
A patch there

And one more here. Underneath that, a teeny-tiny piece of outer skin was replaced. It wasn’t rusted through but the pitting was a bit too deep to my liking.
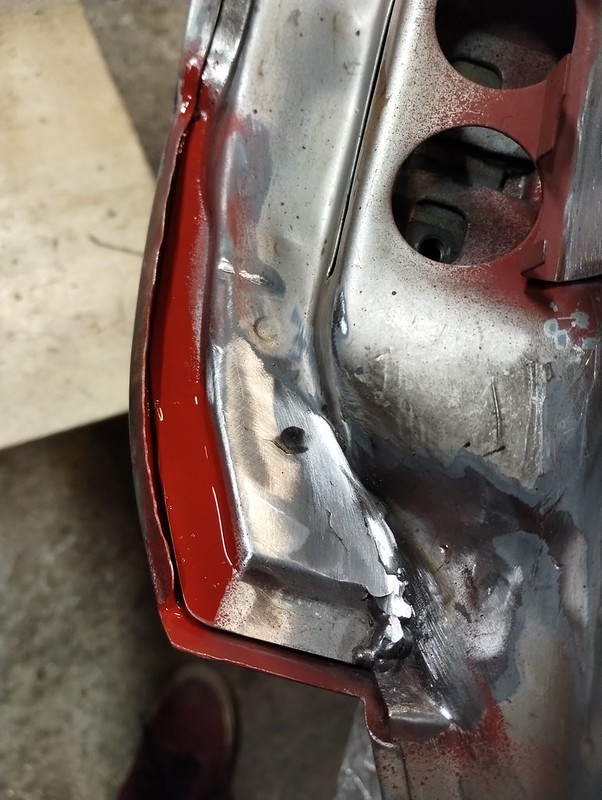
New channels for the weatherstrip.
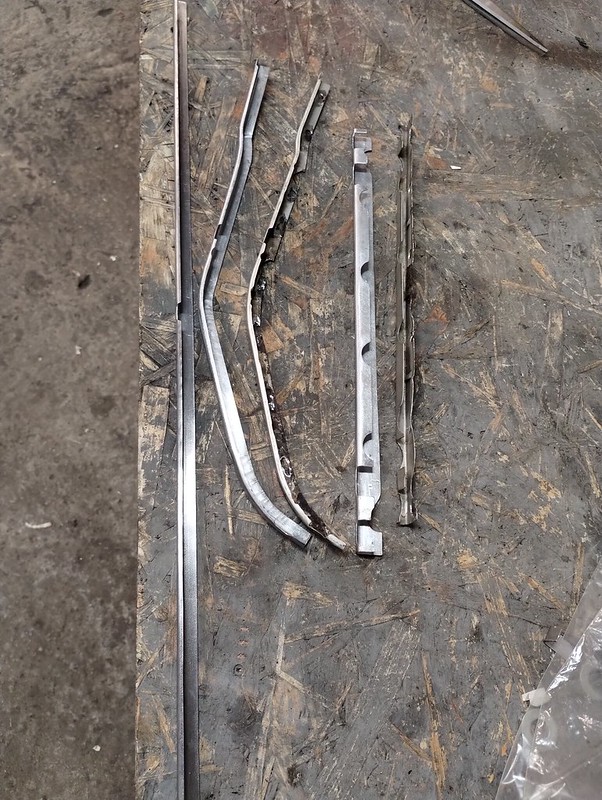


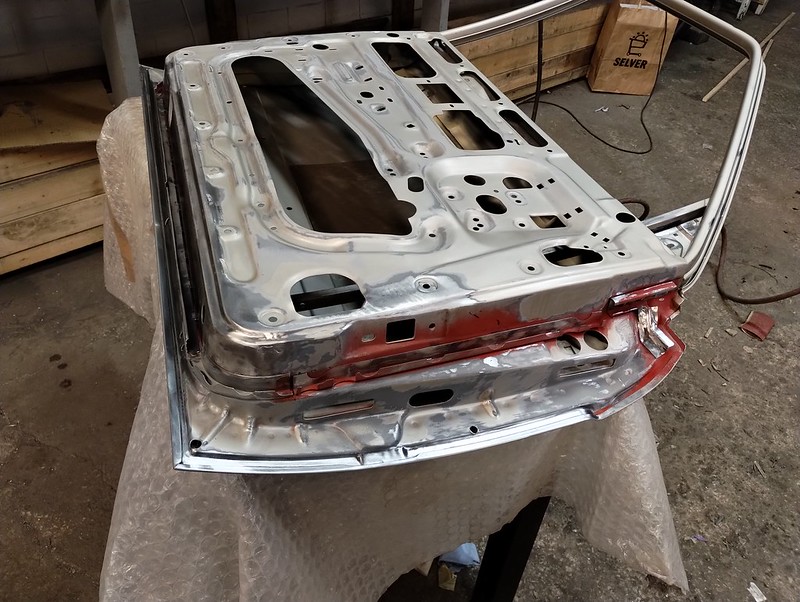
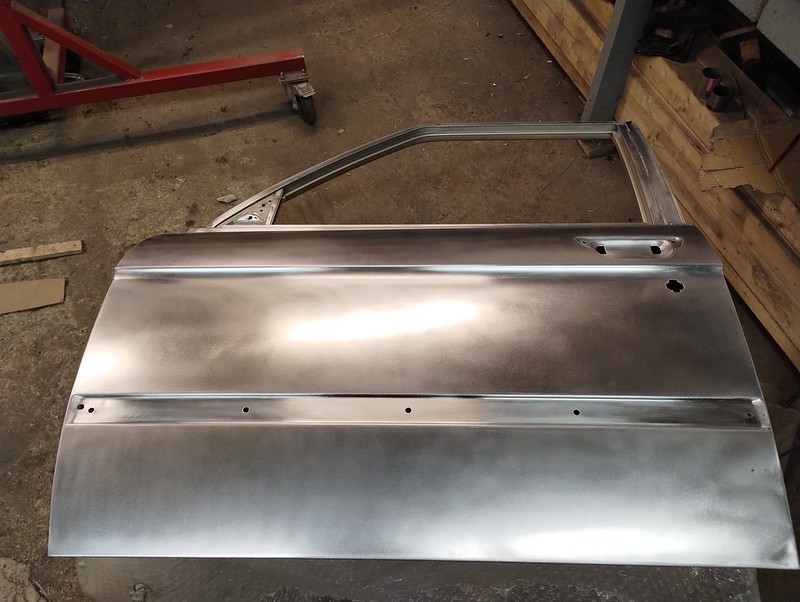
Passenger’s side front door was in relatively good shape. Channels were clean, a couple of dents to take care of. I removed and reinstalled the small piece for weatherstrip so I could properly clean the corner of rust.

Funny story. Notice the small sheet metal tabs bolted to the hinge slots. I used these to hang the doors for painting. You know what happens if you use too long bolts there, don’t you? I realized my error a bit too late and ended up with a nice bung on the outer skin. Nothing that couldn’t be fixed though.

Driver’s side rear door. A couple of small dents to remove. Bottom channel was already replaced year ago.


Bought a used passenger’s rear door online. Kind of a lottery but it’s quite impossible to find anything half decent locally nowadays. If you recall, both the doors I had were in a bad shape.

The bottom channel needed to be replaced but that could be seen from the pictures in the ad.

What wasn’t visible from the pictures was all the accident damage hiding behind that bondo.
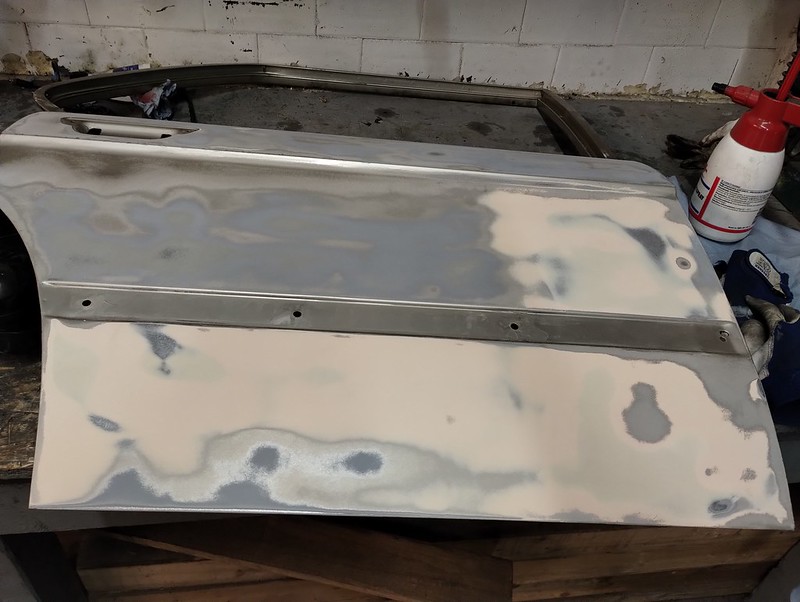
The damage wasn’t too bad. Thickness of that bondo was less then 1mm in most parts with a couple of thicker spots, maybe 2mm tops. I was able to work most of the deeper dents out and even out the surface a bit. Still needs a bit of filling though.
Unfortunately, sheetmetal underneath the bondo was scratched up pretty bad during the previous repair. Damaged areas had like 24 or 40 grit scratches on them. Sanding those out would turn the outer skin into a foil. I hope they won't be too noticeable once the car is painted.
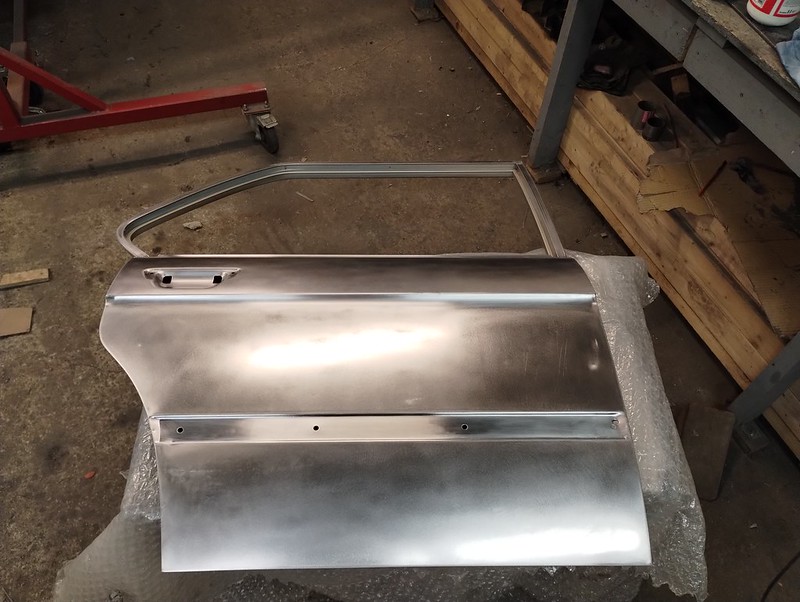
Bottom edges of the doors needed some straightening. Also made sure that doors line up nicely with each other and with front fender.
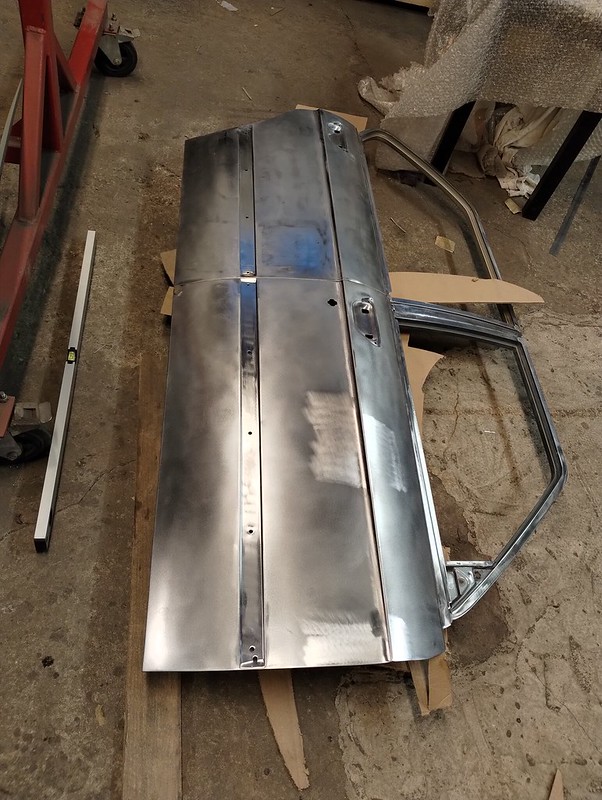
Shot some etching primer.

Asked my buddy to do the primer.
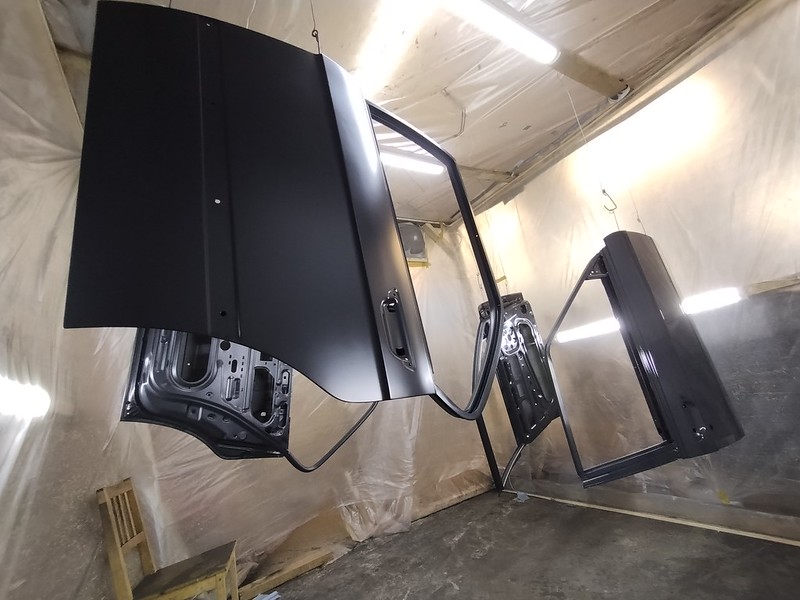
Now I need to make them fit well and see if anything needs some more adjustment before the paint.
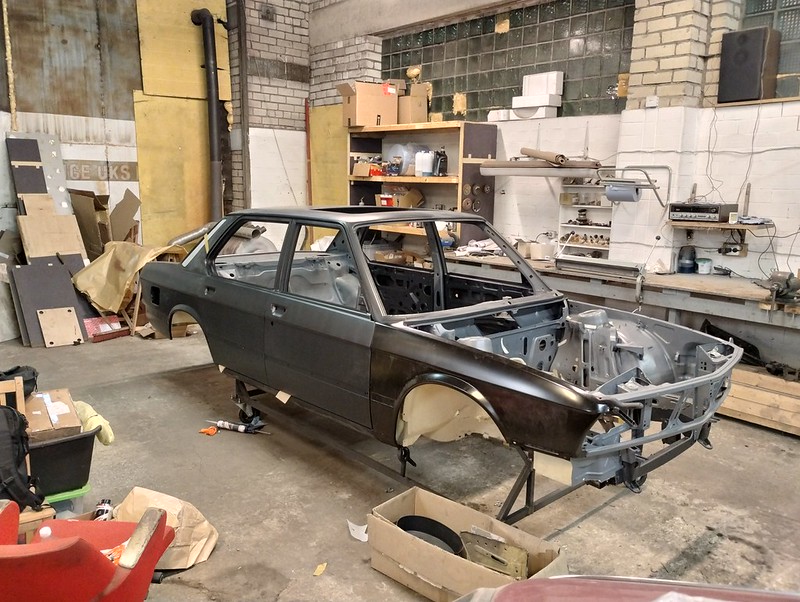
For some reason, I always thought these were made of plastic. Turns out it’s aluminum.

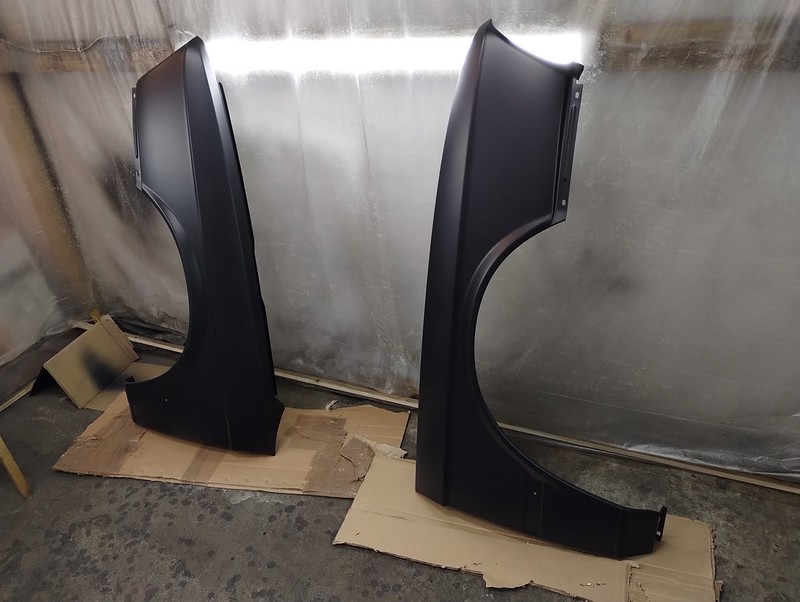
Some primer on the fenders so I could fit them permanently before paint.
12kg of fasteners. Should cover most from the axles, engine, engine compartment, panels and some of the interior. Minus a couple of odd sized fasteners that I’ll probably order OEM and bolts for doors and trunk hinges that I forgot to order.

Next in the list would be sealing the seams in engine compartment (cabin and trunk are already done), fit panels properly so I could mount the fenders, get the hood to my PDR guy and retrieve my trunk lid from him. Then I think it should be ready for the paint shop.
That would be all.
October 2021
A couple of photos from last October that got left out from previous post.
Bought some 2K spray can paint to cover various trinkets on the underside. Paint code RAL1015. It matches quite well the ochre yellow undercoat I used, although I think RAL1014 might have been an even better fit.

Next, I borrowed a gun to shoot the undercoat - Teroson 9320 SF in ochre yellow. Had some trouble with setting up the gun so the texture is not perfect. Otherwise, it’s a nice rubbery product and the color matches the OEM undercoat/sealant.

Great time to make the new brake and fuel lines while car is still on the rotisserie. Cunifer piping for brake lines.


This is where the progress halted as I had some more pressing issues to take care of.
May 2022
Fast forward to may. Continued with making the fuel lines. Used cunifer piping for these as well.


Then I had to rebuild the top end on my daily. That pretty much killed my mojo for the summer.
Sept-Oct 2022
Which brings us to September. Next up were the doors.
Driver’s side front door was in the worst state regarding the rust.
A patch here


A patch there

And one more here. Underneath that, a teeny-tiny piece of outer skin was replaced. It wasn’t rusted through but the pitting was a bit too deep to my liking.

New channels for the weatherstrip.


Passenger’s side front door was in relatively good shape. Channels were clean, a couple of dents to take care of. I removed and reinstalled the small piece for weatherstrip so I could properly clean the corner of rust.

Funny story. Notice the small sheet metal tabs bolted to the hinge slots. I used these to hang the doors for painting. You know what happens if you use too long bolts there, don’t you? I realized my error a bit too late and ended up with a nice bung on the outer skin. Nothing that couldn’t be fixed though.

Driver’s side rear door. A couple of small dents to remove. Bottom channel was already replaced year ago.


Bought a used passenger’s rear door online. Kind of a lottery but it’s quite impossible to find anything half decent locally nowadays. If you recall, both the doors I had were in a bad shape.

The bottom channel needed to be replaced but that could be seen from the pictures in the ad.

What wasn’t visible from the pictures was all the accident damage hiding behind that bondo.

The damage wasn’t too bad. Thickness of that bondo was less then 1mm in most parts with a couple of thicker spots, maybe 2mm tops. I was able to work most of the deeper dents out and even out the surface a bit. Still needs a bit of filling though.
Unfortunately, sheetmetal underneath the bondo was scratched up pretty bad during the previous repair. Damaged areas had like 24 or 40 grit scratches on them. Sanding those out would turn the outer skin into a foil. I hope they won't be too noticeable once the car is painted.

Bottom edges of the doors needed some straightening. Also made sure that doors line up nicely with each other and with front fender.

Shot some etching primer.

Asked my buddy to do the primer.

Now I need to make them fit well and see if anything needs some more adjustment before the paint.

For some reason, I always thought these were made of plastic. Turns out it’s aluminum.

Some primer on the fenders so I could fit them permanently before paint.

12kg of fasteners. Should cover most from the axles, engine, engine compartment, panels and some of the interior. Minus a couple of odd sized fasteners that I’ll probably order OEM and bolts for doors and trunk hinges that I forgot to order.

Next in the list would be sealing the seams in engine compartment (cabin and trunk are already done), fit panels properly so I could mount the fenders, get the hood to my PDR guy and retrieve my trunk lid from him. Then I think it should be ready for the paint shop.
That would be all.
-
muleskinner
- Posts: 1339
- Joined: Sep 08, 2007 11:17 AM
- Location: John Graham ATL
Re: Another restoration - 83' 528i
If I were the manager of BMW Classic https://www.bmwgroup-classic.com/en.html, I'd hire you right now.
-
CanadianMiniFan
- Posts: 140
- Joined: Oct 16, 2011 6:31 PM
Re: Another restoration - 83' 528i
Top notch worksmanship, really inspiring to see the complexity of some of your repairs. I’m not going near as far as a bare shell restoration, but I commend you for doing so. I hope the project is still moving along!
Re: Another restoration - 83' 528i
There have been some setbacks and delays but the project is still moving on!
Nov 2022 - May 2023
First, let’s continue where we left off.
Applied seam sealer to the engine compartment and to all the small sections of nose frame. I decided to leave the edges of trunk, hood and doors for paint shop as they can probably do a better job replicating the look of factory seams.
Then installed hood vents. Since I had them primed separately for better access I opted for stainless pop rivets for installation. And of course a layer of seam sealer in between.
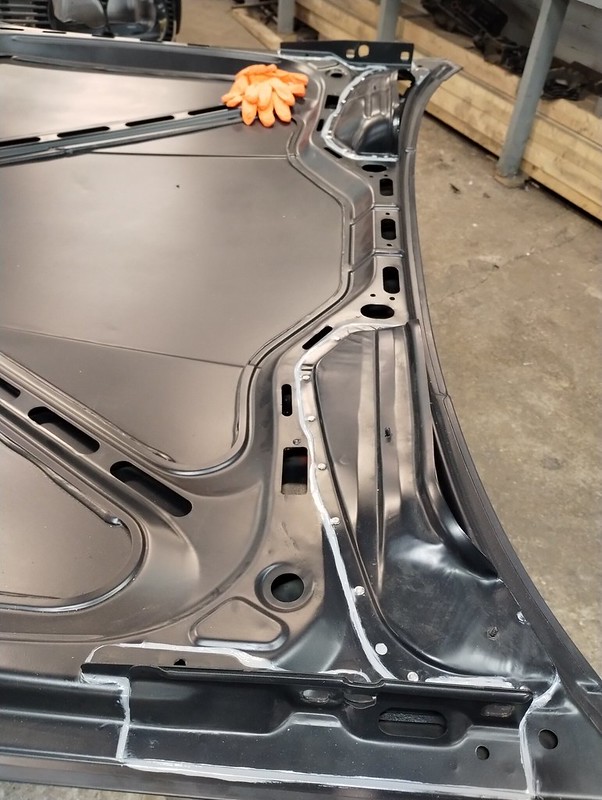
Before the final installation of front fenders I took my time to align everything properly.
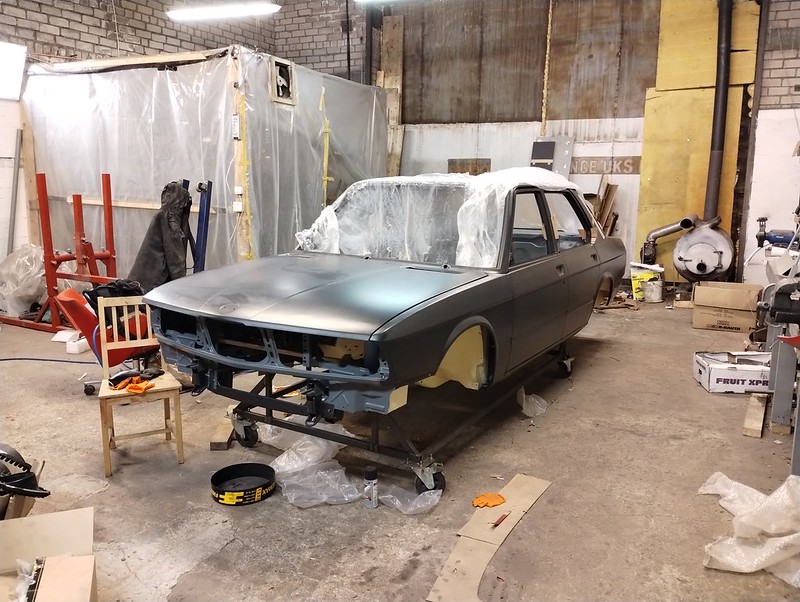
Getting the new fenders to fit took some effort. Actually, I tried to fit some used OE fenders I had lying around and they seemed to fit better than the new ones. Anyway, after some struggle I got them in place. Instead of this thick black goo they used in the factory I decided to use seam sealer to install them. My reasoning was that seam sealer would be more runny and make the installation easier; and it still has some adhesive properties to lock them in place.
That’s pretty much all done with the chassis. At some point in November a paint guy came to check the car. He seemed interested in taking on the job but I didn’t get a definitive answer for a while. After a couple months had passed by I decided to explore other options. Thankfully, a buddy of mine helped me find another paint guy and we managed to fix a date.
Meanwhile, I went back to some more tedious stuff like doing a proper inventory, sorting and cleaning all the parts and ordering what’s still missing. I’ll spare you the boring cleaning pictures (which I didn’t take) and rather get some shots from assembly in the future.
A while back I stole all the data for my car from realoem and imported it to a spreadsheet to have a better overview what needs to be replaced, fixed, blasted and where something is stored. I also bagged and boxed all the parts according to realoem diagrams so it would be easier to find parts later on.
Spreadsheet looks like this. There’s room for improvement and I’d probably do it a bit differently next time but it works for me and it’s super helpful. I can also do some basic queries there. E.g I can quickly find all the parts that need to get plated.

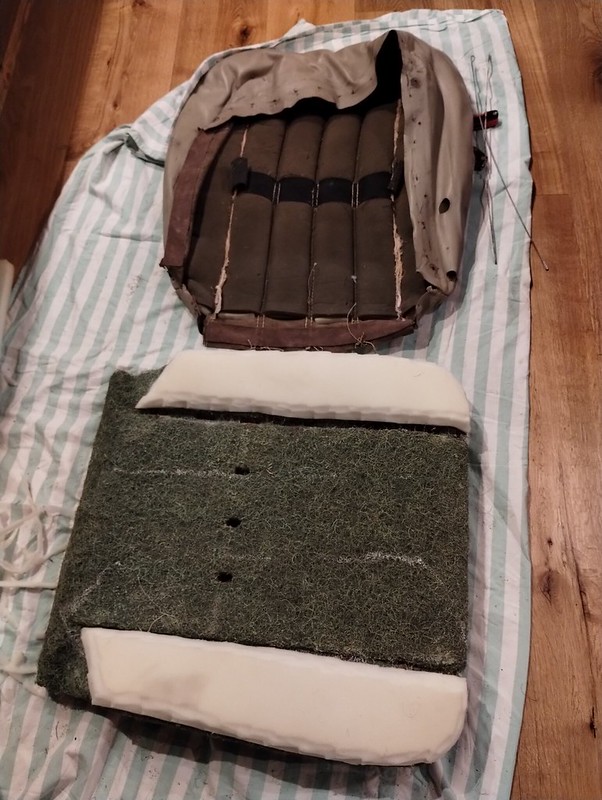
Some upholstery work. Added more foam to the front seat bottoms. You might notice, there’s also new foam ribs in between the old foam and leather. Installed the leather seat cover and did the leatherique treatment. Rear bench is still undone. These seats will have to do until I source some sport seats (from E28 or E34) and get them done professionally.
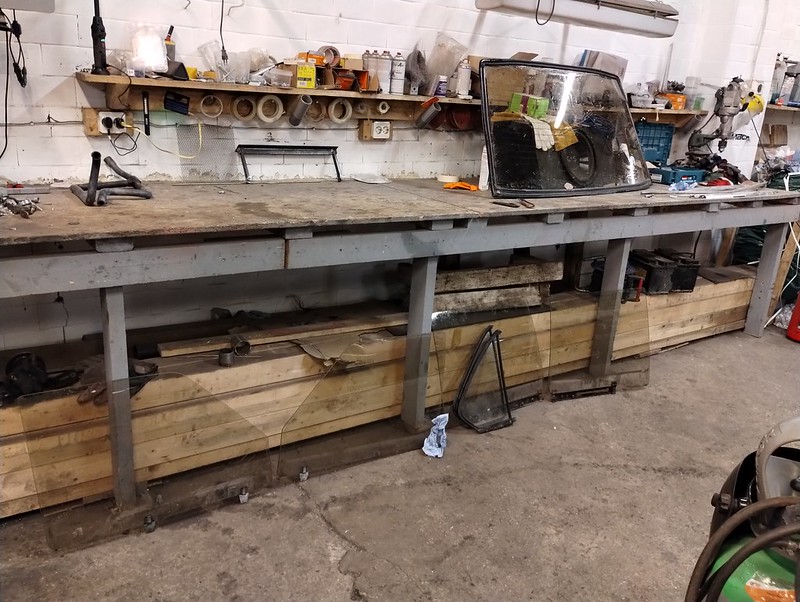
Scored a set of bronze glass (minus the windshield).
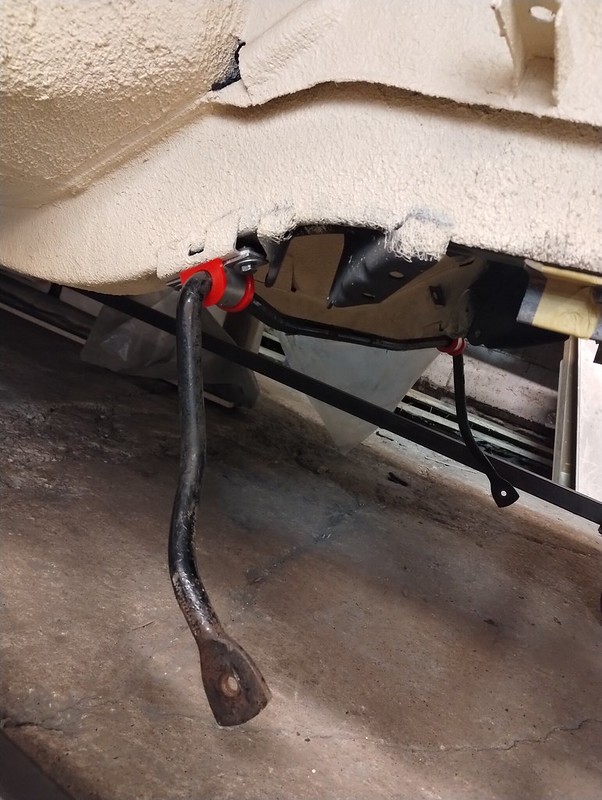
Made clamps for sway bars. The rear ones (bottom ones on the picture) I had made earlier seemed a bit too stiff with the poly bushings so I made another set. Fronts are from 3mm steel, rears 2mm.

As a side project, I’ve been helping my buddy to fix up his E28. It’s more of a beater car so mostly some rough patches.


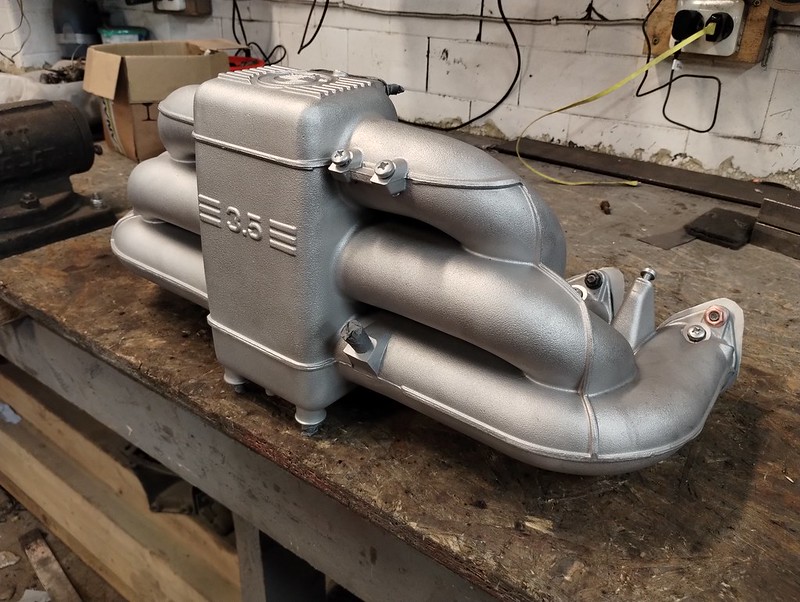
Did some upgrades to our blasting cabinet. A dedicated blast gun and pressure regulator and replaced sand with glass bead. And glass bead is the way to go in such cabinet. I can blast aluminum parts with it and it is still capable of taking care of rust. Furthermore, much less dust than with sand. Which means better visibility when working on something. Here are some results.

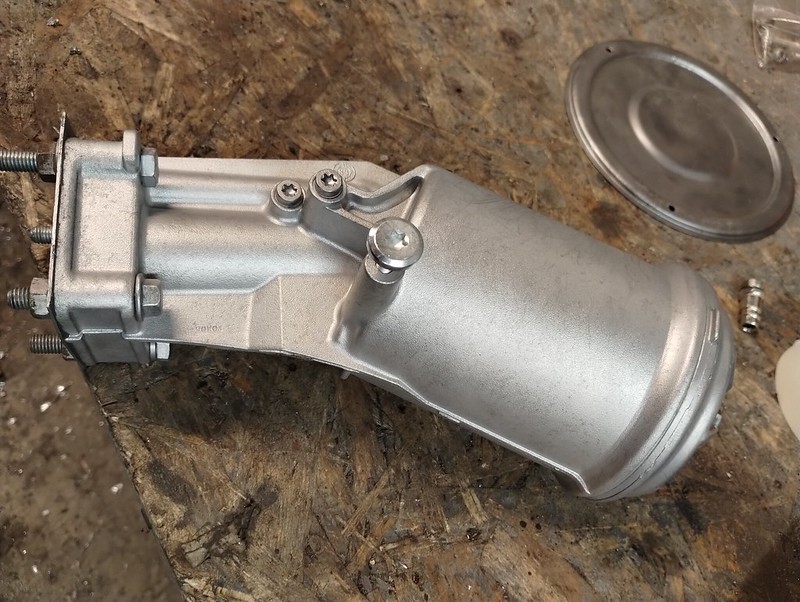
Before:

After:

My buddy took the intake manifold for a couple of cycles in the industrial parts washer. This removed some of the black paint from it.

Blasting took care of the rest
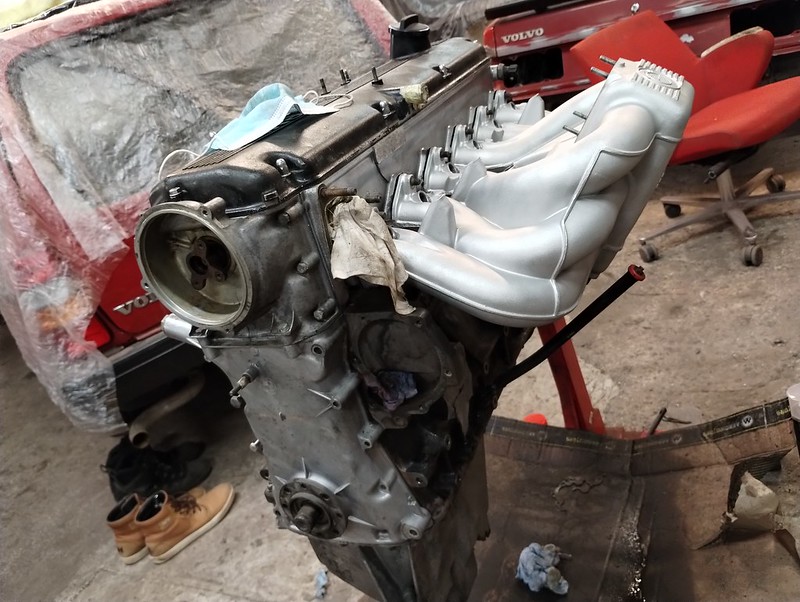
For most parts, I just cut out a sheet metal plate and bolted it down with gasket maker to seal up any holes I didn’t want the blasting media to end up in. With oil pan I went an extra mile and added an additional layer of tape and plastic sheet to all the openings. Then RTV-d a piece of plywood to the pan. It was a total PITA to remove but I am happy to report that I didn’t find any dust between the plastic and wooden backing after the blasting.
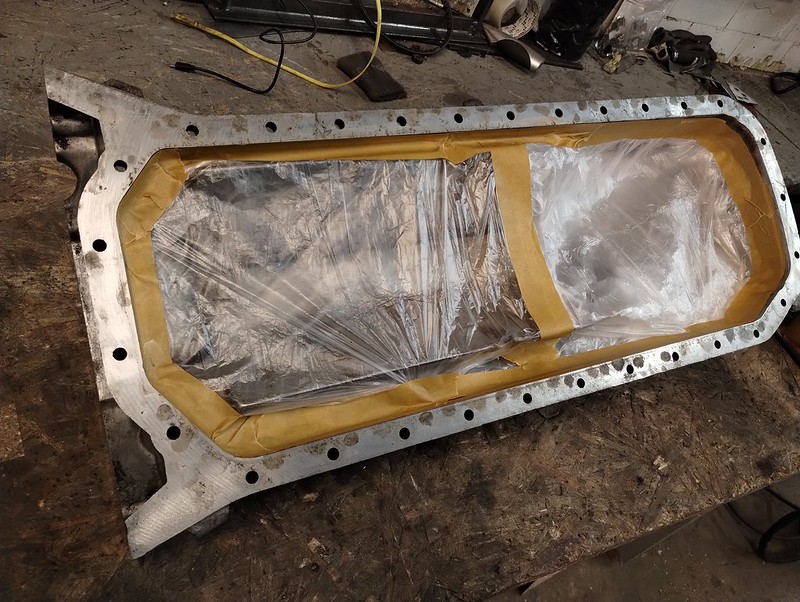

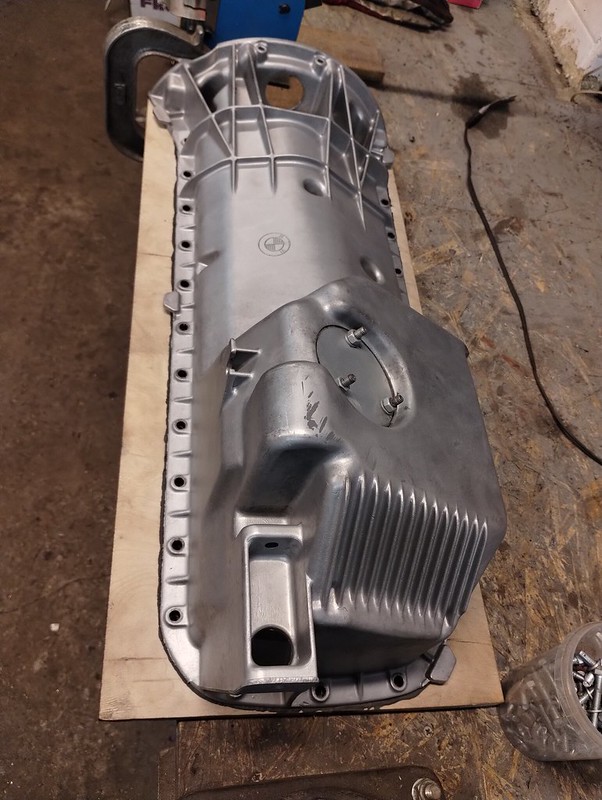
I did a wax treatment on all the blasted aluminum parts in the hopes it would keep them nice and shiny a bit longer. Not sure if it helps much but at least I can feel good about it.
As you might have guessed I’ve been slowly getting into the engine. My goal was to keep the head on, clean and reseal everything else. And then maybe down the road find another engine to build on the side. Many years ago I did a compression test on that engine and it was fine, not perfect but fine and even. About a year ago I had a leak down tester at hand. Audible leaks to crank case but numbers were rather good. So I assumed the engine will do for now.
Well, it doesn’t. When the oil pan was off, I went on and checked the rod and main bearings - all worn.

And off came the head with everything else.
Oil pump casing was scratched badly.
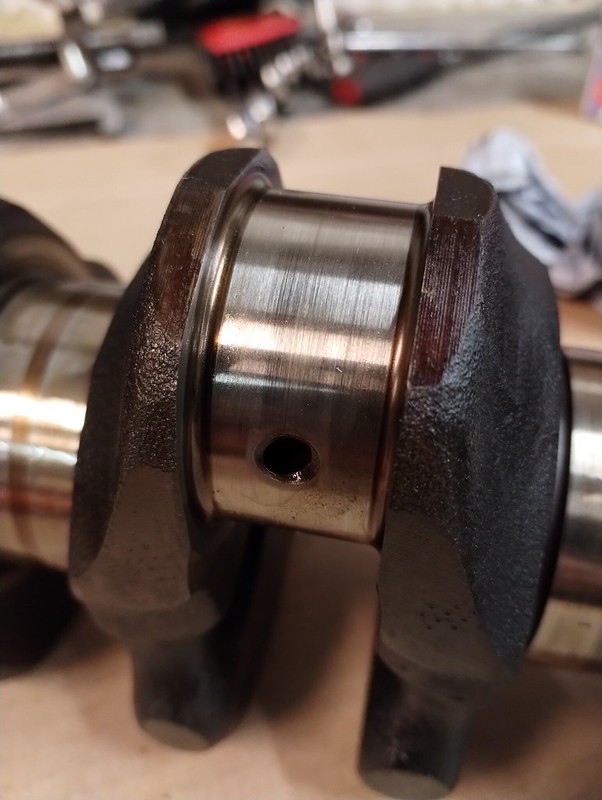
Crank was okay for the most part but one rod journal had a tiny scratch that caught the fingernail.
Pistons and cylinder walls were worn visibly.
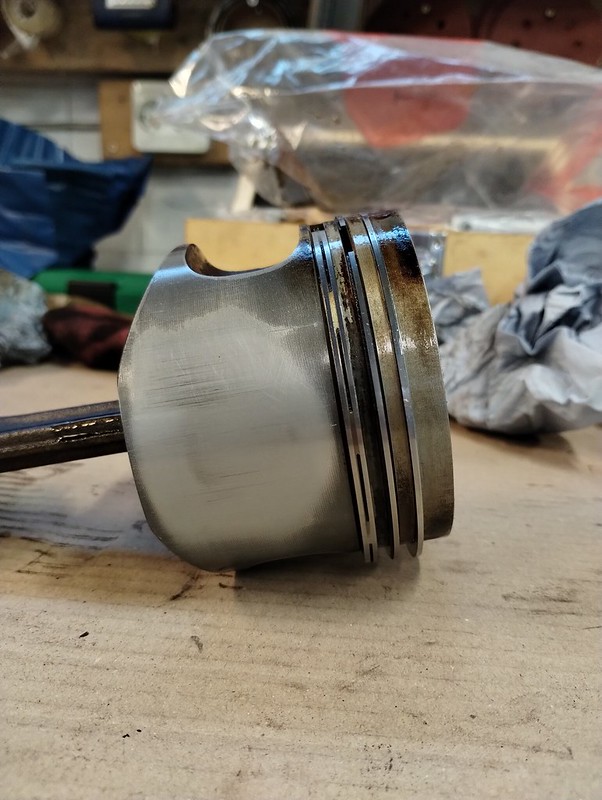
Borrowed some tools so I could take measurements.
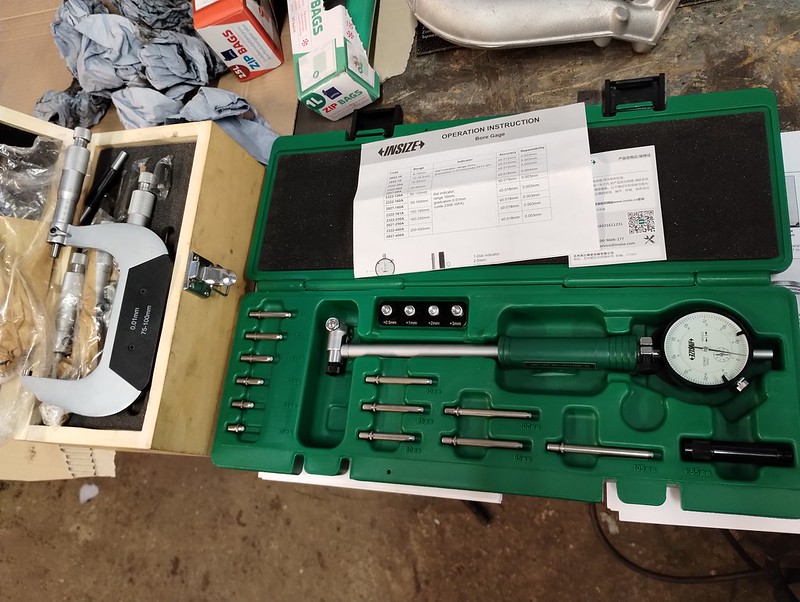
Here are the results. All in mm. Cylinder bore measurements go from top to bottom.
Now, another m30b35 just popped up for sale. It was advertised as a dirty high CR m30b35. So I pulled the trigger and brought it home. These engine are getting more and more expensive and rare in these parts of the world.
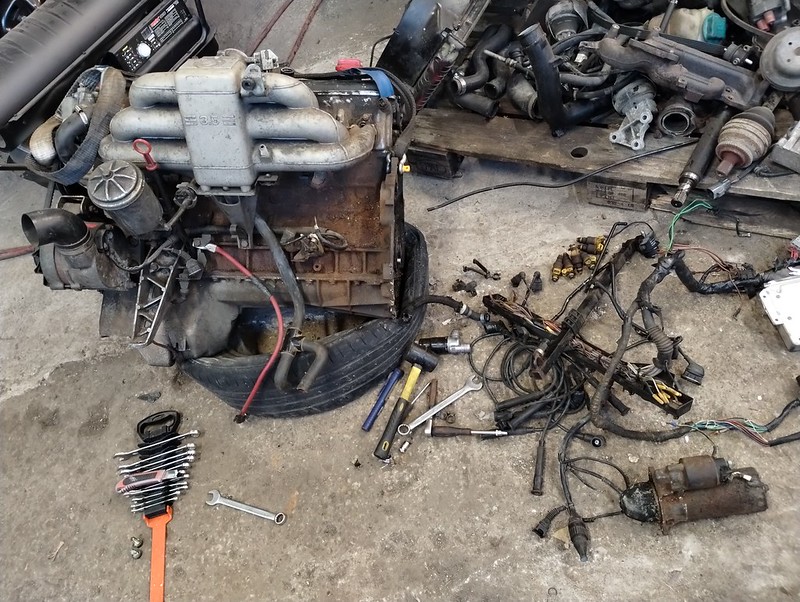
I begun the teardown right away and oh boy what I found.
My personal favorite is this one

Oil pump pickup full of RTV. And of course the casing wasn’t any better than the old one.

One of the rocker rods has been previously used as a pry bar. Other than the hose clamps and that rod the head was okay. I can reuse most of the rockers and cam is actually in much nicer shape than the other one.

Cylinder #6 is toast. Not that it matters since I found a major crack in one of the water pockets.

And while the pistons are in better shape than mine, these are not the advertised high CR pistons, just the regular m30b35 ones.
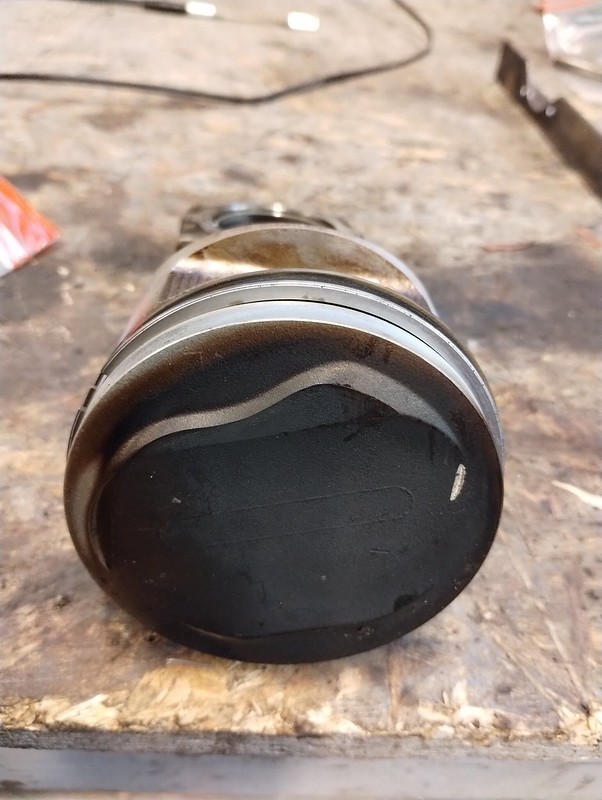
After finding all that I contacted the seller, we came to an agreement and he made me whole again. So my respect for that.
I’ll probably keep my eyes open for another engine. Or block, as I could probably run those pistons with a decent block. If nothing comes my way soon enough, I might just get a new oil pump, throw the new pistons into the “old” block so I could get the car moving again. Then find another engine down the road and do a proper rebuild. Buying oversized pistons and boring out the block is a bit too steep for me at the moment.
Back to more cheerful topics. My PDR guy went over all the doors, trunk lid and hood and smoothed out any small dents and imperfections he found.
Finished off the rear axle carrier by adding some reinforcements - a couple of tabs to support the trailing arm mounts and some additional plates for diff mount. Then last week I sent everything out for sandblasting.


Brand new OE brake backing plate
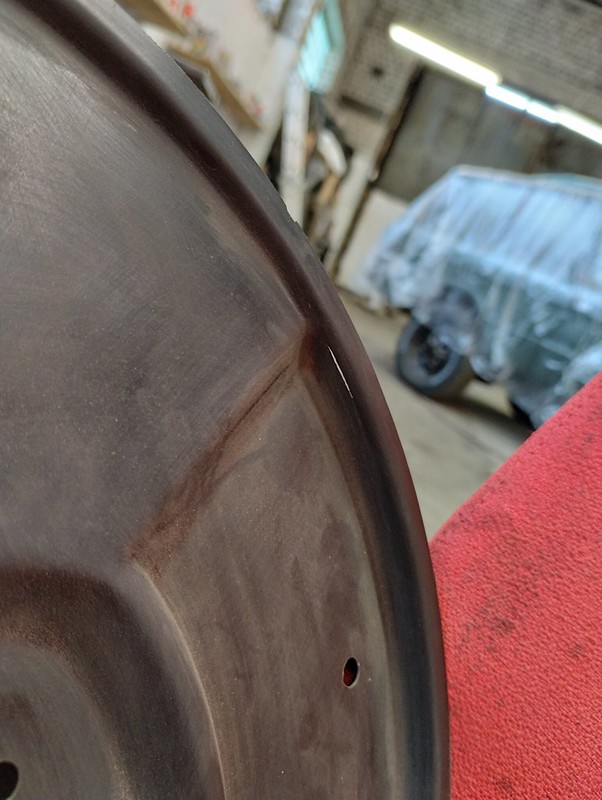
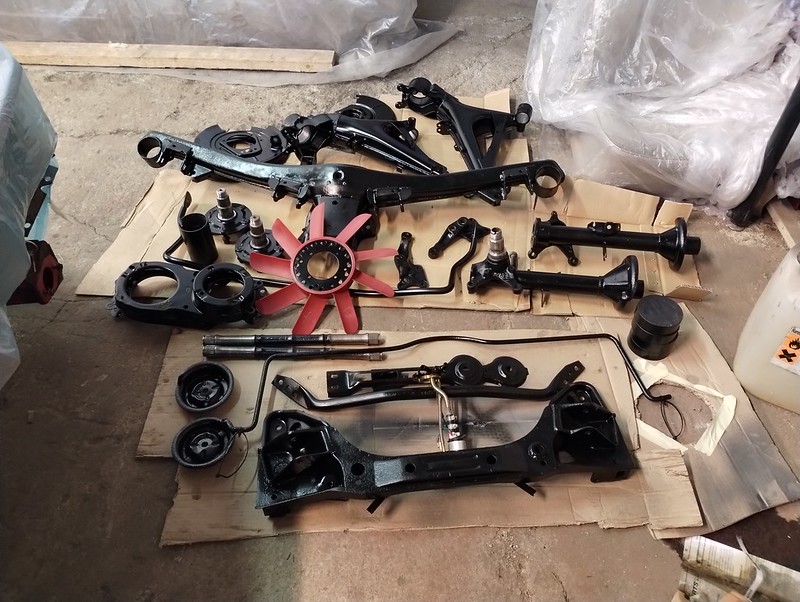
Went over all the blasted parts with wire wheel to clean up any residue. Then some epoxy primer and some paint.
Did the first batch myself

And my buddy took care of the second batch of parts
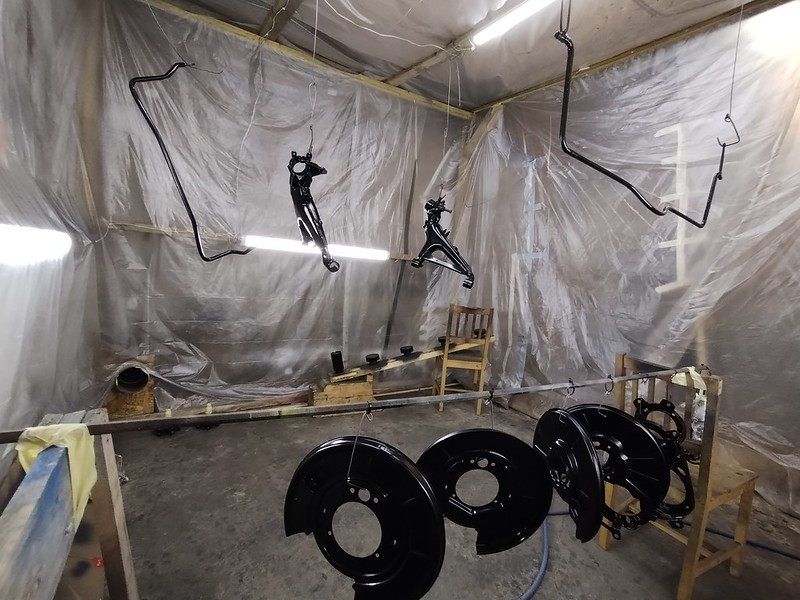
All the goodies
Finally, it was time to take the car to the paint shop! So, on Friday I loaded the chassis on a trailer and took it out for a drive.

Trip to the shop went as smoothly as expected.

Work should begin tomorrow, on May 23rd.
Next steps for me would be to get a new headliner made as this would be one of the first items to go back on the car, get a lot of stuff zinc plated, paint some other stuff and start to assemble what I can.
Nov 2022 - May 2023
First, let’s continue where we left off.
Applied seam sealer to the engine compartment and to all the small sections of nose frame. I decided to leave the edges of trunk, hood and doors for paint shop as they can probably do a better job replicating the look of factory seams.
Then installed hood vents. Since I had them primed separately for better access I opted for stainless pop rivets for installation. And of course a layer of seam sealer in between.

Before the final installation of front fenders I took my time to align everything properly.

Getting the new fenders to fit took some effort. Actually, I tried to fit some used OE fenders I had lying around and they seemed to fit better than the new ones. Anyway, after some struggle I got them in place. Instead of this thick black goo they used in the factory I decided to use seam sealer to install them. My reasoning was that seam sealer would be more runny and make the installation easier; and it still has some adhesive properties to lock them in place.
That’s pretty much all done with the chassis. At some point in November a paint guy came to check the car. He seemed interested in taking on the job but I didn’t get a definitive answer for a while. After a couple months had passed by I decided to explore other options. Thankfully, a buddy of mine helped me find another paint guy and we managed to fix a date.
Meanwhile, I went back to some more tedious stuff like doing a proper inventory, sorting and cleaning all the parts and ordering what’s still missing. I’ll spare you the boring cleaning pictures (which I didn’t take) and rather get some shots from assembly in the future.
A while back I stole all the data for my car from realoem and imported it to a spreadsheet to have a better overview what needs to be replaced, fixed, blasted and where something is stored. I also bagged and boxed all the parts according to realoem diagrams so it would be easier to find parts later on.
Spreadsheet looks like this. There’s room for improvement and I’d probably do it a bit differently next time but it works for me and it’s super helpful. I can also do some basic queries there. E.g I can quickly find all the parts that need to get plated.

Some upholstery work. Added more foam to the front seat bottoms. You might notice, there’s also new foam ribs in between the old foam and leather. Installed the leather seat cover and did the leatherique treatment. Rear bench is still undone. These seats will have to do until I source some sport seats (from E28 or E34) and get them done professionally.

Scored a set of bronze glass (minus the windshield).

Made clamps for sway bars. The rear ones (bottom ones on the picture) I had made earlier seemed a bit too stiff with the poly bushings so I made another set. Fronts are from 3mm steel, rears 2mm.


As a side project, I’ve been helping my buddy to fix up his E28. It’s more of a beater car so mostly some rough patches.


Did some upgrades to our blasting cabinet. A dedicated blast gun and pressure regulator and replaced sand with glass bead. And glass bead is the way to go in such cabinet. I can blast aluminum parts with it and it is still capable of taking care of rust. Furthermore, much less dust than with sand. Which means better visibility when working on something. Here are some results.


Before:

After:

My buddy took the intake manifold for a couple of cycles in the industrial parts washer. This removed some of the black paint from it.

Blasting took care of the rest


For most parts, I just cut out a sheet metal plate and bolted it down with gasket maker to seal up any holes I didn’t want the blasting media to end up in. With oil pan I went an extra mile and added an additional layer of tape and plastic sheet to all the openings. Then RTV-d a piece of plywood to the pan. It was a total PITA to remove but I am happy to report that I didn’t find any dust between the plastic and wooden backing after the blasting.


I did a wax treatment on all the blasted aluminum parts in the hopes it would keep them nice and shiny a bit longer. Not sure if it helps much but at least I can feel good about it.
As you might have guessed I’ve been slowly getting into the engine. My goal was to keep the head on, clean and reseal everything else. And then maybe down the road find another engine to build on the side. Many years ago I did a compression test on that engine and it was fine, not perfect but fine and even. About a year ago I had a leak down tester at hand. Audible leaks to crank case but numbers were rather good. So I assumed the engine will do for now.
Well, it doesn’t. When the oil pan was off, I went on and checked the rod and main bearings - all worn.

And off came the head with everything else.
Oil pump casing was scratched badly.
Crank was okay for the most part but one rod journal had a tiny scratch that caught the fingernail.

Pistons and cylinder walls were worn visibly.

Borrowed some tools so I could take measurements.

Here are the results. All in mm. Cylinder bore measurements go from top to bottom.
| # | Cyl long. | Cyl trans. | Piston |
| I | 92.06 92.07 92.05 |
92.05 92.02 92.03 |
91.89 |
| II | 92.06 92.06 92.04 |
92.05 92.03 92.04 |
91.88 |
| III | 92.05 92.06 92.04 |
92.05 92.03 92.04 |
91.88 |
| IV | 92.04 92.05 92.04 |
92.04 92.04 92.04 |
91.88 |
| V | 92.04 92.06 92.05 |
92.03 92.03 92.03 |
91.89 |
| VI | 92.09 92.07 92.05 |
92.04 92.02 92.03 |
91.89 |
Now, another m30b35 just popped up for sale. It was advertised as a dirty high CR m30b35. So I pulled the trigger and brought it home. These engine are getting more and more expensive and rare in these parts of the world.

I begun the teardown right away and oh boy what I found.
My personal favorite is this one

Oil pump pickup full of RTV. And of course the casing wasn’t any better than the old one.

One of the rocker rods has been previously used as a pry bar. Other than the hose clamps and that rod the head was okay. I can reuse most of the rockers and cam is actually in much nicer shape than the other one.

Cylinder #6 is toast. Not that it matters since I found a major crack in one of the water pockets.

And while the pistons are in better shape than mine, these are not the advertised high CR pistons, just the regular m30b35 ones.

After finding all that I contacted the seller, we came to an agreement and he made me whole again. So my respect for that.
I’ll probably keep my eyes open for another engine. Or block, as I could probably run those pistons with a decent block. If nothing comes my way soon enough, I might just get a new oil pump, throw the new pistons into the “old” block so I could get the car moving again. Then find another engine down the road and do a proper rebuild. Buying oversized pistons and boring out the block is a bit too steep for me at the moment.
Back to more cheerful topics. My PDR guy went over all the doors, trunk lid and hood and smoothed out any small dents and imperfections he found.
Finished off the rear axle carrier by adding some reinforcements - a couple of tabs to support the trailing arm mounts and some additional plates for diff mount. Then last week I sent everything out for sandblasting.


Brand new OE brake backing plate

Went over all the blasted parts with wire wheel to clean up any residue. Then some epoxy primer and some paint.
Did the first batch myself

And my buddy took care of the second batch of parts

All the goodies

Finally, it was time to take the car to the paint shop! So, on Friday I loaded the chassis on a trailer and took it out for a drive.

Trip to the shop went as smoothly as expected.

Work should begin tomorrow, on May 23rd.
Next steps for me would be to get a new headliner made as this would be one of the first items to go back on the car, get a lot of stuff zinc plated, paint some other stuff and start to assemble what I can.
-
CanadianMiniFan
- Posts: 140
- Joined: Oct 16, 2011 6:31 PM
Re: Another restoration - 83' 528i
Excited to see your continued progress! Keep at it man, at least you are over the hump of the metalwork, which you did beautifully.
Re: Another restoration - 83' 528i
Thanks! I actually have one more panel to fix or make or obtain and I've put it off for a long time now - the heater closing panel. But I'll get to it. Eventually.CanadianMiniFan wrote: May 22, 2023 5:27 PM Excited to see your continued progress! Keep at it man, at least you are over the hump of the metalwork, which you did beautifully.
Jun 2023 - Aug 2023
Not much work happened on this E28 during the summer. Mostly, been busy fixing rust on my daily Volvo and, well, doing summer things.
I had some leftovers from painting the axles which I used to paint some more thingies. When I first started this project I replaced the fuel tank with a new aftermarket tank but used some cheapish products to cover it. So this had to be redone.
As you can see, some of the paint already came off next to the sender unit (fuel spill!).

Gooey stuff. Paint remover worked rather well on that.

Tank stripped

And painted. Together with drive shaft and steering box.

Did some not too pretty TIG welding on the pedal box. Both pedal boxes I had were crack-free, hopefully they now stay that way.

I stumbled upon some interesting product one day. It was some 2K paint in aerosol can, ready to use without mixing and supposed shelf-life is in months after first use. Theory is that moisture in the air triggers the hardening process. Sounds perfect for painting smaller parts every now so I bought two cans of it. It turned out to be rubbish. Paint was already turning into tiny lumps inside the can and a ton of crap flew out during painting. When I took the other can back to the store I learned that it’s a known issue with these paints - sometimes air gets into the can and ruins it. Anyway, never using it again.

Bought some regular 2K automotive paint in spray can instead and did all these.

Finished up my single in-tank fuel pump conversion. Bought a couple of fittings and ground one down a bit. Then cut the feed pipe and TIG-welded the fitting to the pipe. Pump itself is a Deatschwerks DW200.

Used some stainless zip ties, like suggested in this thread, to fix the pump in place.

Then, a couple of days back I received a phone call from the paint guy. He wanted me to come by and go through the chassis together before he lays down the final coats. He had done really nice job all around. I’ll get some photos of the progress from him later on, but for now, you get a single shot of the chassis. Ready for paint.

The same evening I received some photos of the interior, trunk and engine compartment painted. I had a long thought about how to go with the engine and decided that I don’t want the paint to be too shiny there. So engine bay and the interior was done in a matching single-stage paint.
Late last night I received a timelapse of him doing the exterior so today I went by the shop and took some pictures. Lo and behold, it’s not bronzit or yellow or black anymore. Let me present to you - a calypsorot e28. Or well, the chassis of it.
Until now, I had some doubts about my choice of color. Not any more. I absolutely love it!

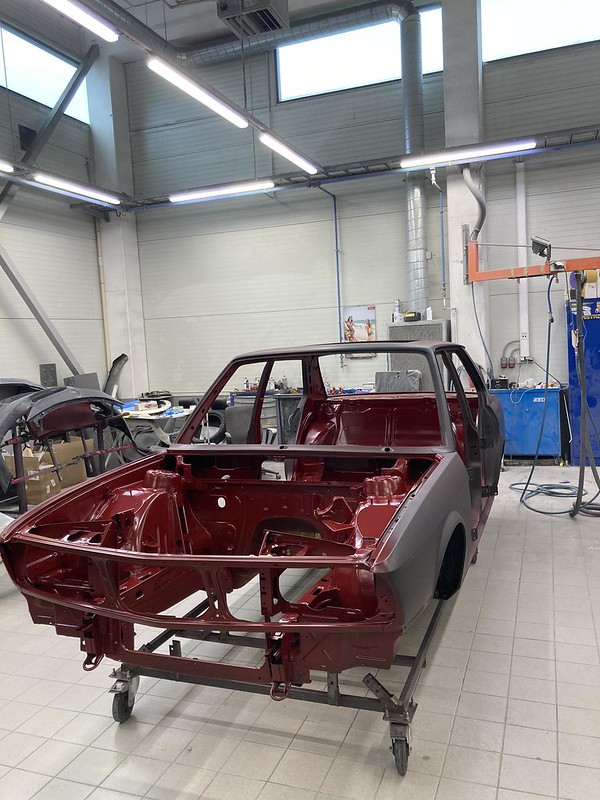
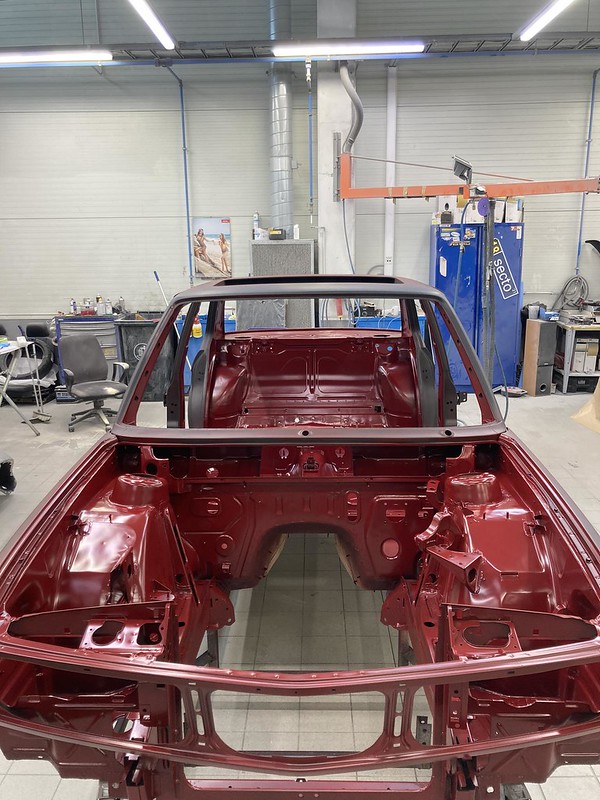


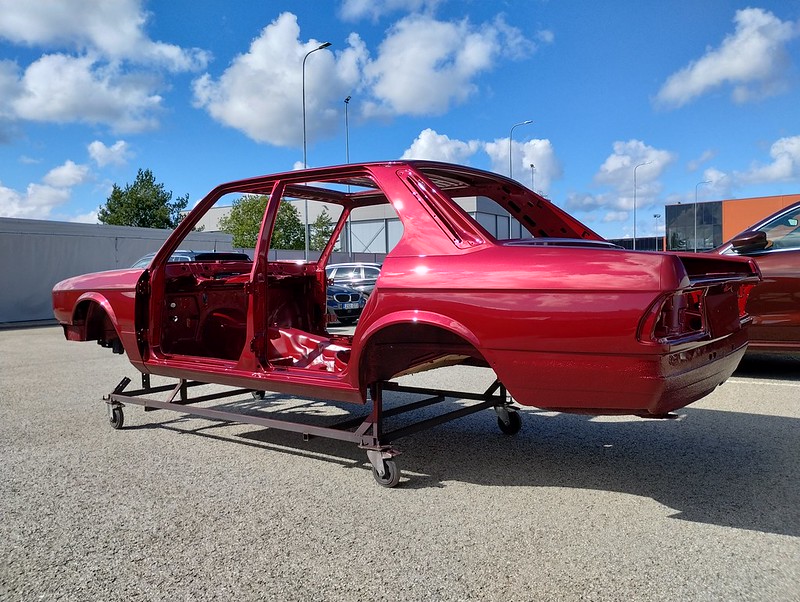


The paint guy did an amazing job, really happy with it.
In the beginning of the project I was really adamant of doing it in one of the original colors put on the e28. Later, I was really looking for something that's never done on an E28. I know there are one or two calypsorot E28s in Europe. Fortunately, I realized I don't actually care about any of that.
As you can see, under direct sunlight the difference between the single-stage paint and calypsorot becomes visible. But all in all it’s actually a pretty good match. In the shade or inside the shop the difference is negligible.
Doors, trunk, hood and other small trinkets are still on the to do list and it might be a while before he gets to it. This is a side hustle for him after all. Good news is, I can soon take the chassis back home and begin the assembly.
-
muleskinner
- Posts: 1339
- Joined: Sep 08, 2007 11:17 AM
- Location: John Graham ATL
Re: Another restoration - 83' 528i
Epic restoration. Another $50K+ e28 if you ever sell it.
Re: Another restoration - 83' 528i
Love the color! Are you not worried about waiting to paint the other parts? Its always been my understanding its really tough to perfectly match paint colors without blending, particularly with metallic colors?
Re: Another restoration - 83' 528i
Not too worried. I believe they can mix the paints quite accurately nowadays. I've heard there's some minimum amount of paint you have to mix up that guarantees a perfect match, something around 150 ml. Same paint, same primer, so I think we're good. I know next to nothing about painting cars so I'd rather let my paint guy do what he feels right and what's comfortable for him.Machtig wrote: Sep 23, 2023 10:00 PM Love the color! Are you not worried about waiting to paint the other parts? Its always been my understanding its really tough to perfectly match paint colors without blending, particularly with metallic colors?
-
f2892704-SCAM
- Posts: 12
- Joined: Jul 26, 2023 7:25 PM
- Location: Bakersfiled, CA
Re: Another restoration - 83' 528i
You did a great job
Re: Another restoration - 83' 528i
Sep 2023 - Oct 2023
In mid-September I brought the painted chassis back to shop.

Keeping it under the cover until I can get the interior sealed up.

Began with installing minor stuff like grommets, clips etc.

Put some sound deadening in the cabin. One of the most dreadful jobs so far. Also, makes me sad to cover up all that fresh paint.
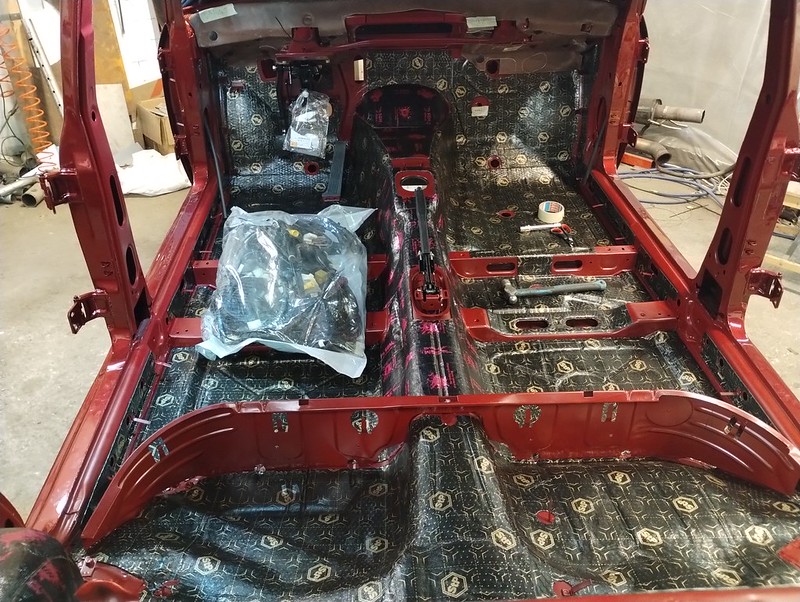
All the cavities with are now filled with this stuff.

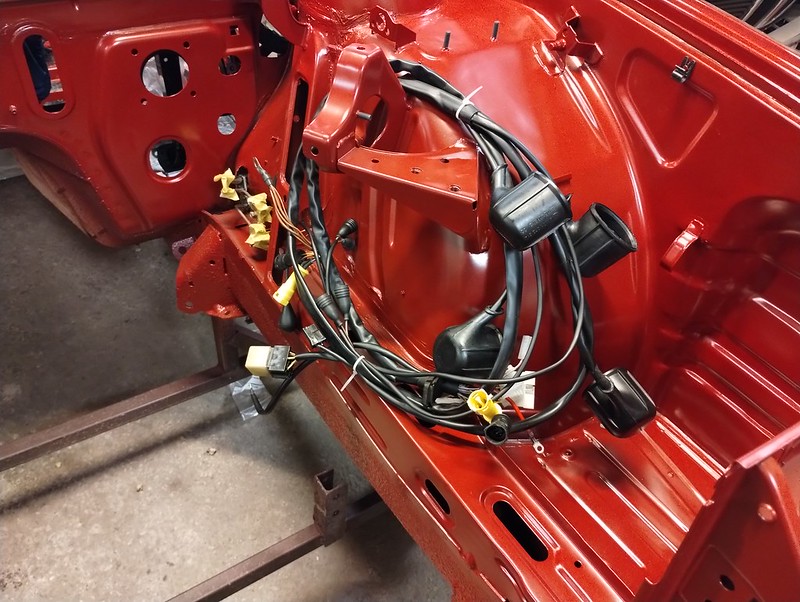
Still need to tidy up some zip ties under the dash but wiring is installed and every connector is in it’s place ready to be plugged in. All the connector housings are cleaned, corroded pins replaced, harnesses rewrapped. I wonder how many pins got mixed up in the process…


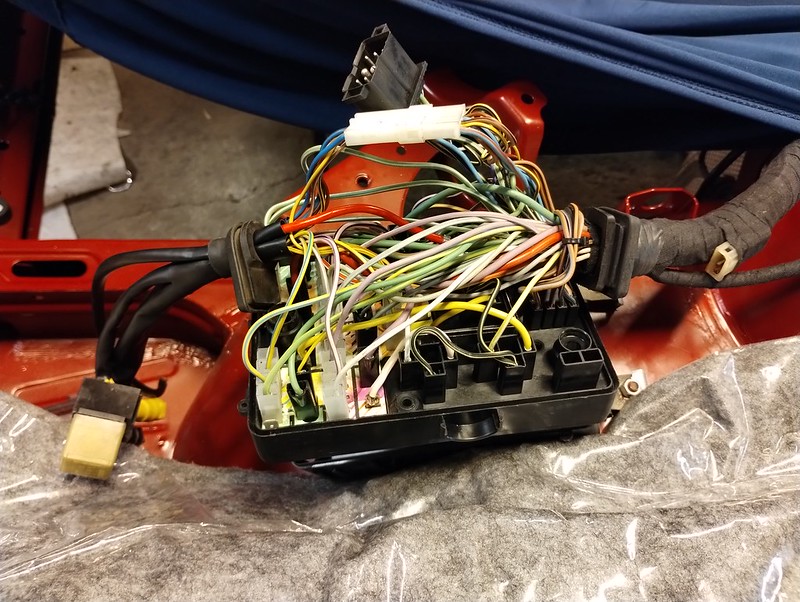
Although the colors on the paper label were mixed into a big blob and completely faded away rewiring the fuse box was rather easy. I took a photo of each cable before unplugging when taking it apart and that helped a lot during reassembly. I hope to go for Holy Grail Labs fuse box kit one day but I promised myself to stop spending money on non-critical items until I have a working engine. So this has to wait.
After going through what others around here have used on the firewall I settled on this - Design Engineering Floor and Tunnel shield II. So far, I’m really happy with the product. It was easy to install and looks good. I like that I was able to trace all the beads and high areas in the sheet metal - makes it look a bit more like a factory part.

This doesn’t work, don’t do this.
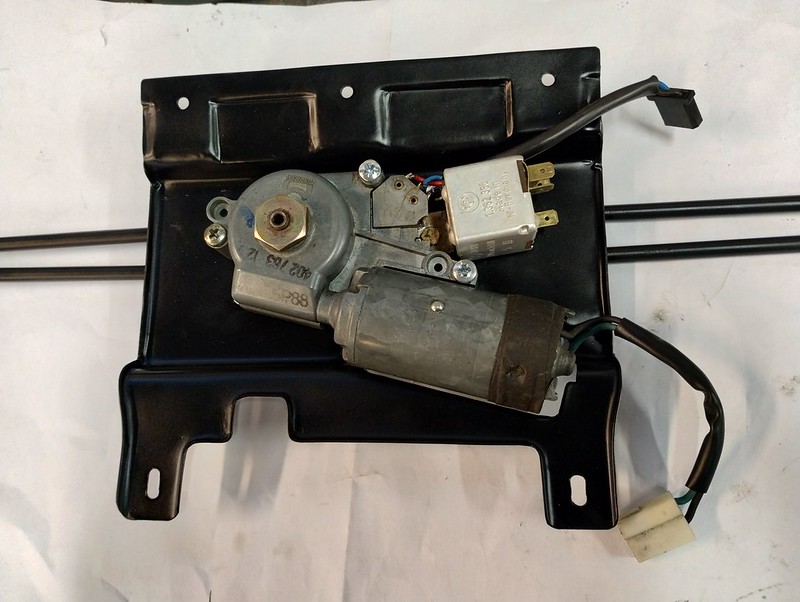
I wasn’t able to find correct piping for sale and I was close to skipping the whole electric conversion on the sunroof when I realized it just a piece of sheet metal.
So, a quick prototype to check all the clearances.

And then the final plate I based on the photos found online. I skipped doing the beads on the sides as it was strong enough already and these would have been a pain to do.

Painted some stuff. 2K spray paint this time (RAL9005 Matte). Color matches really well to the original black e-coat.

And reinstall.

This is what was installed underneath the headliner. The rear section of this yellow foam thing had some black mold spots so I did what vinceg did and installed only the front section around the sunroof opening. Rear part is some closed cell foam in the same thickness. Open cell foam on the C pillars. Underneath hides a couple of strategically placed pieces of Dynamat. It's really pricey but I don't trust the glue on any of the cheaper stuff.

New headliner in. I opted for this fabric instead of vinyl.


Sunroof mechanism installed and adjusted. New fasteners, new slides. I had ordered the springs that realoem shows (see: this)
Looks like the springs help to bring the sunroof to vent position, we’ll see if they make much difference. I also got the rubber buffers. These were too small to stay in those openings in that plastic part. Ended up just gluing them in place.
I found some thin butyl tape (HPX butyl sealing tape 8000) to seal all the guides and metal pieces around the sunroof. Being 2mm x 20mm I had to trim the width a bit before installation but the thickness felt spot on.
Can’t properly test it before I have my sunroof back from paint shop. Sunroof is the only thing holding the slides in the grooves. If I’d try to run it like this the sliding parts would push outwards and scratch up the paint in the sunroof opening.

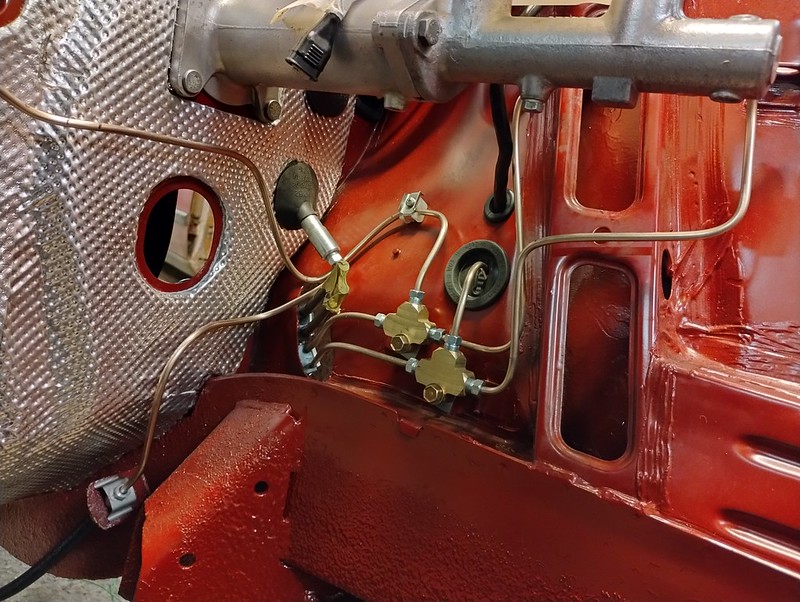
Installed hard lines for the front brakes. I had the new lines in lengths listed in realoem. First, I routed the FR like this.

Ended up around 5-6cm short in the wheel well. I guess I could’ve just skipped the dip next to the clutch master opening on the left side. I first though it would otherwise interfere with clutch master but you could actually just run it over the master cylinder.
I refused to redo everything and ended up with this

As far as I can recall, this brake booster and master cylinder were fine and leak free so I just cleaned them up and installed with new paper gasket between firewall and booster. This gasket didn't seem to be available separately so I ended up cutting a new paper gasket from a sheet. I did get a new foam gasket that goes on the inside between firewall and pedal frame.

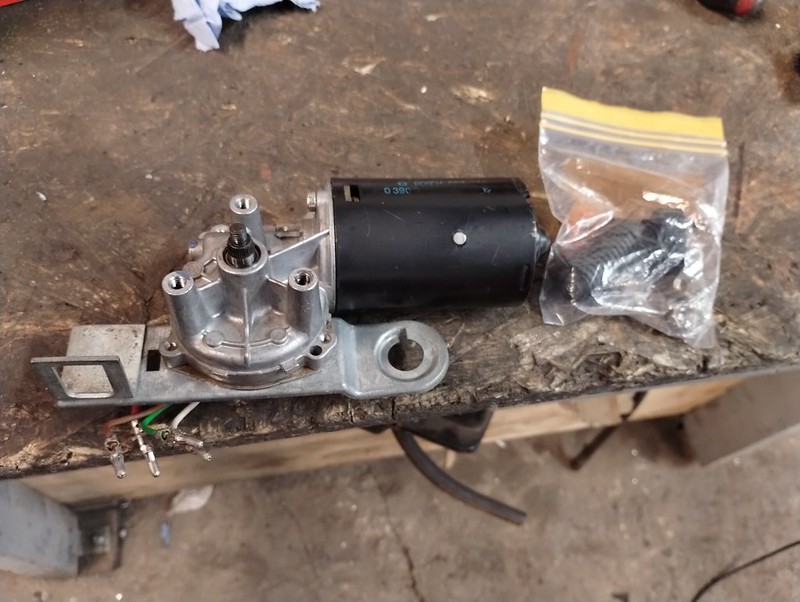
Cleaned and regreased the wiper motor and mechanism. Motor brushes had plenty of life left so I just left them as is.
Old skunk in the gearbox.

Packed with fresh grease and reassembled. Used some universal grease in the gearbox and PTFE in the joint of the mechanism.
Now, I’m slowly running out of things to do as I’m still waiting for all the parts I sent out for galvanizing.
In mid-September I brought the painted chassis back to shop.

Keeping it under the cover until I can get the interior sealed up.

Began with installing minor stuff like grommets, clips etc.

Put some sound deadening in the cabin. One of the most dreadful jobs so far. Also, makes me sad to cover up all that fresh paint.

All the cavities with are now filled with this stuff.

Still need to tidy up some zip ties under the dash but wiring is installed and every connector is in it’s place ready to be plugged in. All the connector housings are cleaned, corroded pins replaced, harnesses rewrapped. I wonder how many pins got mixed up in the process…


Although the colors on the paper label were mixed into a big blob and completely faded away rewiring the fuse box was rather easy. I took a photo of each cable before unplugging when taking it apart and that helped a lot during reassembly. I hope to go for Holy Grail Labs fuse box kit one day but I promised myself to stop spending money on non-critical items until I have a working engine. So this has to wait.

After going through what others around here have used on the firewall I settled on this - Design Engineering Floor and Tunnel shield II. So far, I’m really happy with the product. It was easy to install and looks good. I like that I was able to trace all the beads and high areas in the sheet metal - makes it look a bit more like a factory part.

This doesn’t work, don’t do this.
The motor will hang way too low and makes it impossible to install the front headliner cover. It’s not a matter of a couple of millimeters, more like 15-20. Glad I caught this before installing the headliner.taavipa wrote: Dec 06, 2020 4:05 PM A while back I sourced an electric motor and harness for the sunroof. Instead of putting time and money into finding a correct mounting plate for the electric version I decided to repurpose my manual plate and tubes. This means cutting into the plate to make room for the motor and figuring out how to secure the motor to the plate.
Both manual crank and electric motor are mounted using three bolts but only one of them is exactly in the same position. Second hole is a little bit off, third one even more so. I decided to clean off the copper coating, weld the two holes shut and redrill them in the correct position.
Someone had already separated the plate from the tubing and put them back together using bolts, possibly for the same purpose. Well, that's one less thing for me to do.
So here's the finished product. Might do some more work on it to make it look like it originally came this way but it’s not too bad as it is. On the plate itself I just elongated the original holes, you can get an idea how much the original holes were off.
I wasn’t able to find correct piping for sale and I was close to skipping the whole electric conversion on the sunroof when I realized it just a piece of sheet metal.
So, a quick prototype to check all the clearances.

And then the final plate I based on the photos found online. I skipped doing the beads on the sides as it was strong enough already and these would have been a pain to do.

Painted some stuff. 2K spray paint this time (RAL9005 Matte). Color matches really well to the original black e-coat.

And reinstall.


This is what was installed underneath the headliner. The rear section of this yellow foam thing had some black mold spots so I did what vinceg did and installed only the front section around the sunroof opening. Rear part is some closed cell foam in the same thickness. Open cell foam on the C pillars. Underneath hides a couple of strategically placed pieces of Dynamat. It's really pricey but I don't trust the glue on any of the cheaper stuff.

New headliner in. I opted for this fabric instead of vinyl.


Sunroof mechanism installed and adjusted. New fasteners, new slides. I had ordered the springs that realoem shows (see: this)
Looks like the springs help to bring the sunroof to vent position, we’ll see if they make much difference. I also got the rubber buffers. These were too small to stay in those openings in that plastic part. Ended up just gluing them in place.
I found some thin butyl tape (HPX butyl sealing tape 8000) to seal all the guides and metal pieces around the sunroof. Being 2mm x 20mm I had to trim the width a bit before installation but the thickness felt spot on.
Can’t properly test it before I have my sunroof back from paint shop. Sunroof is the only thing holding the slides in the grooves. If I’d try to run it like this the sliding parts would push outwards and scratch up the paint in the sunroof opening.

Installed hard lines for the front brakes. I had the new lines in lengths listed in realoem. First, I routed the FR like this.

Ended up around 5-6cm short in the wheel well. I guess I could’ve just skipped the dip next to the clutch master opening on the left side. I first though it would otherwise interfere with clutch master but you could actually just run it over the master cylinder.
I refused to redo everything and ended up with this

As far as I can recall, this brake booster and master cylinder were fine and leak free so I just cleaned them up and installed with new paper gasket between firewall and booster. This gasket didn't seem to be available separately so I ended up cutting a new paper gasket from a sheet. I did get a new foam gasket that goes on the inside between firewall and pedal frame.


Cleaned and regreased the wiper motor and mechanism. Motor brushes had plenty of life left so I just left them as is.
Old skunk in the gearbox.

Packed with fresh grease and reassembled. Used some universal grease in the gearbox and PTFE in the joint of the mechanism.

Now, I’m slowly running out of things to do as I’m still waiting for all the parts I sent out for galvanizing.
Re: Another restoration - 83' 528i
Was this car a diesel from the factory? It has the fuel filter bracket which I've only seen on diesels
Re: Another restoration - 83' 528i
It was a 528i. Had to look up where fuel filter is attached on diesels.Galahad wrote: Nov 09, 2023 10:57 AM Was this car a diesel from the factory? It has the fuel filter bracket which I've only seen on diesels
Do you mean the bracket that sits between wheel well and coolant tank bracket ?
I thought all m30 cars had that. The early 525i (the green car) had the fuel pulsation dampener attached to it.
Re: Another restoration - 83' 528i
whoops, you're right. I've never had an M30 car so I hadn't noticed.
Re: Another restoration - 83' 528i
Indeed.
I apologize I have not been keeping up with this thread and am astonished on your accomplishment. This car is and will be stunning.
On the Hydraulic Booster, go ahead now and replace it and/or rebuild it. I made the very same decision and ultimate mistake not addressing mine when I was at this very stage you're at now. When (I notice I don't say 'If') it fails after you've put everything back together and it craps all over your interior carpet, you will regret this choice not to take action now every single day.
Besides, it sounds like you have some down-time and are looking for things to do; go ahead and put this at the top of your list.
I too like the Calypsorot, it was one of the better colors for the E34.
Re: Another restoration - 83' 528i
Great work on all of the fabrication, wow! Impressive you have done the metal forming and then welding all yourself!
I am sure you are excited with how it is coming together and the paintwork...
I am sure you are excited with how it is coming together and the paintwork...
Re: Another restoration - 83' 528i
I was afraid that I'm not getting away with this. Ordered a rebuild kit from Jay Stratton.vinceg101 wrote: Nov 10, 2023 12:47 PM On the Hydraulic Booster, go ahead now and replace it and/or rebuild it.
Re: Another restoration - 83' 528i
Nov 2023 - Dec 2023
Just a small update this time.
In the middle of November the parts came back from plating. I chose this particular plating service (out of country) because in addition to yellow and blue they advertised olive passivation on their website. When it turned out they won’t be able to offer it to me I just decided to stick with them.
Although I had everything labelled and sorted into separate boxes they were able to mess up the order and did all the small parts in yellow (as they should’ve) but all the bigger parts ended up white/blue. The smaller parts look really nice. The quality of coating on larger parts, which I assume they did in rack instead of a barrel, was rather poor and uneven.
Ended up taking most of the white stuff to a local plater for replating. Yesterday morning I found out that Google had conveniently moved their e-mails along with some unpaid bills into my spam folder. So, the parts have been ready for a couple of weeks but I’ll be able to get my hands on them after the holidays.


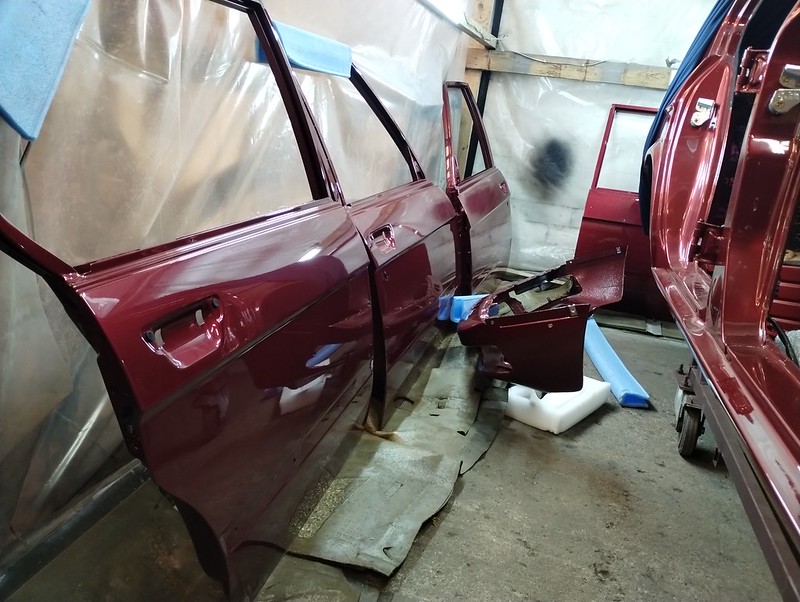
Got some early Christmas presents from my paint guy.

For those who worried - the paint match looks spot on.


Now, it’s time to put on our Christmas sweaters and enjoy the holidays with our loved ones!

Merry Christmas and all the best for the upcoming new year!
Just a small update this time.
In the middle of November the parts came back from plating. I chose this particular plating service (out of country) because in addition to yellow and blue they advertised olive passivation on their website. When it turned out they won’t be able to offer it to me I just decided to stick with them.
Although I had everything labelled and sorted into separate boxes they were able to mess up the order and did all the small parts in yellow (as they should’ve) but all the bigger parts ended up white/blue. The smaller parts look really nice. The quality of coating on larger parts, which I assume they did in rack instead of a barrel, was rather poor and uneven.
Ended up taking most of the white stuff to a local plater for replating. Yesterday morning I found out that Google had conveniently moved their e-mails along with some unpaid bills into my spam folder. So, the parts have been ready for a couple of weeks but I’ll be able to get my hands on them after the holidays.


Got some early Christmas presents from my paint guy.

For those who worried - the paint match looks spot on.


Now, it’s time to put on our Christmas sweaters and enjoy the holidays with our loved ones!

Merry Christmas and all the best for the upcoming new year!
-
muleskinner
- Posts: 1339
- Joined: Sep 08, 2007 11:17 AM
- Location: John Graham ATL
Re: Another restoration - 83' 528i
Ho! Ho! Ho! (trying to stay away from those best I can  )
)
Looking forward to seeing your progress on this top quality restoration.
Looking forward to seeing your progress on this top quality restoration.
Re: Another restoration - 83' 528i
Your car looks fantastic and I appreciate you sharing your progress with us. I can't wait to see the finished product. 
-
Chimi-Changa
- Posts: 1648
- Joined: Nov 08, 2011 11:02 PM
- Location: West Bro, MA
Re: Another restoration - 83' 528i
The sweater matches the car even!


