Holy Grail Labs - Blade Fuse Upgrade Kits
-
carnutdallas
- Posts: 1915
- Joined: Apr 13, 2008 3:22 PM
- Location: Frisco, TX
- Contact:
Re: Blade Fuse Retrofit Kits -Carnutdallas
Sleep and fresh eyes fixed the lights. But still no LED’s. I rocked that switch more than a few times. Am I missing how it is powered in instructions?
-
Chimi-Changa
- Posts: 1657
- Joined: Nov 08, 2011 11:02 PM
- Location: Massachusetts
Re: Blade Fuse Retrofit Kits
Carnut,
The Black lead coming though the front should be for the lights, and needs to go to ground. ( I used the one above the battery) Your post mentions going to the battery with that? Is the ground wire connected to the correct pin underneath?
The Black lead coming though the front should be for the lights, and needs to go to ground. ( I used the one above the battery) Your post mentions going to the battery with that? Is the ground wire connected to the correct pin underneath?
carnutdallas wrote: Aug 27, 2021 1:02 AM None of my LEDs work on board either. I grounded lead to battery.
-
carnutdallas
- Posts: 1915
- Joined: Apr 13, 2008 3:22 PM
- Location: Frisco, TX
- Contact:
Re: Blade Fuse Retrofit Kits
Yes, only one small pin for it to go to. Grounded to main body ground from battery. No LED's light up. I guess solder could be cracked on pin from installation of ground wire - tight fit, but seems highly unlikely. Switch may be bad?? Having the lights would be super cool. Pretty decent 12V guy.
Re: Blade Fuse Retrofit Kits
Carnut-
The LEDs are powered off the fuses themselves, so you only need to hook up the ground wire.
I would be very surprised if the switch went bad during shipping; I test all the boards before packaging them.
Can you post a photo or two? That may be helpful in diagnosis the issue.
The LEDs are powered off the fuses themselves, so you only need to hook up the ground wire.
I would be very surprised if the switch went bad during shipping; I test all the boards before packaging them.
Can you post a photo or two? That may be helpful in diagnosis the issue.
Re: Blade Fuse Retrofit Kits
Shipping update: I just dropped off orders through #1060, and I expect to have the remaining orders (as of right now) dropped off on Monday
-
carnutdallas
- Posts: 1915
- Joined: Apr 13, 2008 3:22 PM
- Location: Frisco, TX
- Contact:
Re: Blade Fuse Retrofit Kits
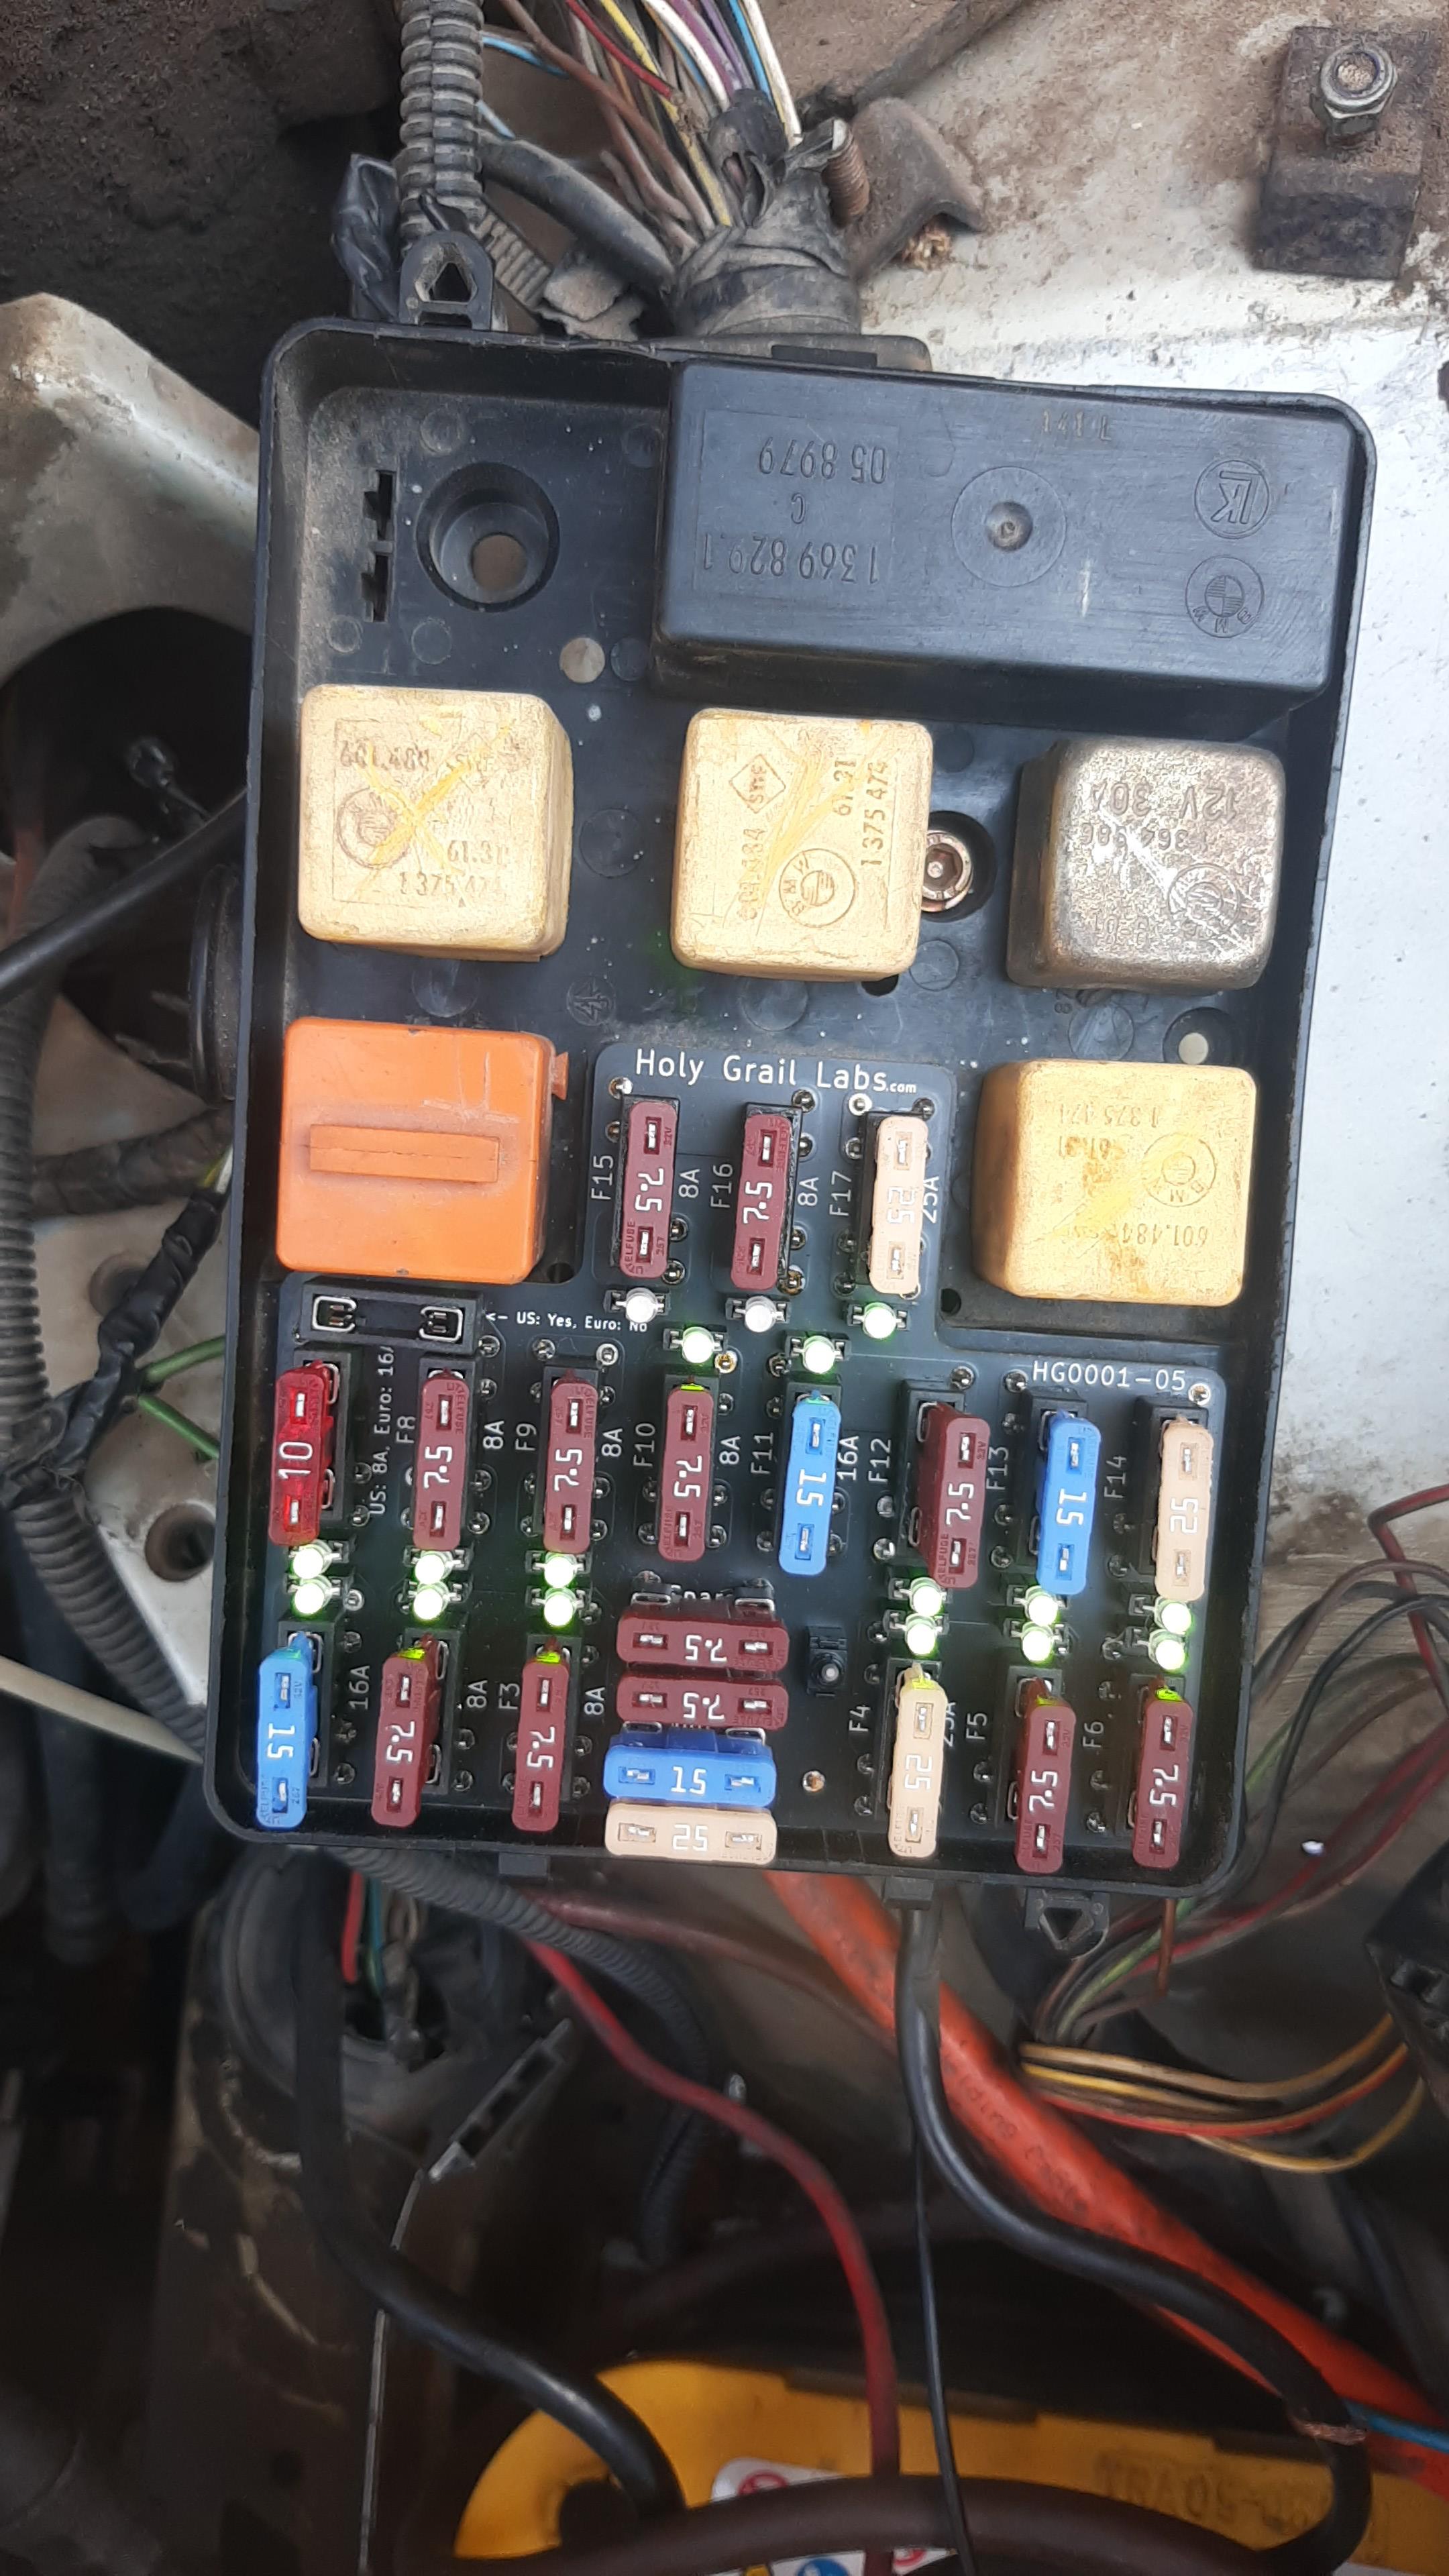
<a href="https://app.photobucket.com/u/carnutdal ... aa84d823ce" target="_blank"><img src="https://hosting.photobucket.com/images/ ... G_8437.MOV" border="0" alt="IMG_8437"/></a>
Video of Fuse Panel - Link to Photobucket.
Video of Fuse Panel - Link to Photobucket.
Re: Blade Fuse Retrofit Kits
carnut -
That's pretty weird, it looks like it's set up correctly. The only thing I can think is the ground wire somehow came unplugged from the pin while you were screwing the case back together, but you said you tested that. I'll have to think some more.
That's pretty weird, it looks like it's set up correctly. The only thing I can think is the ground wire somehow came unplugged from the pin while you were screwing the case back together, but you said you tested that. I'll have to think some more.
-
carnutdallas
- Posts: 1915
- Joined: Apr 13, 2008 3:22 PM
- Location: Frisco, TX
- Contact:
Re: Blade Fuse Retrofit Kits
Yeah, I plugged my test light on positive and touched it to the pin on top of circuit board. Light came on, so ground has to be good. And I would imagine if my whole car works, then board has power. Even if I had something not plugged in, some would light and some would not. Anyway to test the switch?
Re: Blade Fuse Retrofit Kits
Got my kit on late Friday. Didn't check it out yet as i work in a different town. Will check it out this thursday! But it has arrived! Thank You!Galahad wrote: Aug 23, 2021 2:04 PMIf your e23 is e28 based, it'll work. I'm working on figuring out what changes (if any) I need to make for this to work with e12 based cars.
This thread has good information about the us vs euro e28 fuse boxes and may help you out.
Yours was the first international order - I'm really hoping I didn't goof up the customs information.
Re: Blade Fuse Retrofit Kits
If you have a multimeter, check the resistance between the center pin of one of the LEDs and the ground pin below the switch. With the switch in one position it should be open, the other should be around 550 Ohms.carnutdallas wrote: Aug 29, 2021 9:41 PM Yeah, I plugged my test light on positive and touched it to the pin on top of circuit board. Light came on, so ground has to be good. And I would imagine if my whole car works, then board has power. Even if I had something not plugged in, some would light and some would not. Anyway to test the switch?
-
carnutdallas
- Posts: 1915
- Joined: Apr 13, 2008 3:22 PM
- Location: Frisco, TX
- Contact:
Re: Blade Fuse Retrofit Kits
Ok, will update tomorrow. Thanks!Galahad wrote: Aug 30, 2021 10:08 PMIf you have a multimeter, check the resistance between the center pin of one of the LEDs and the ground pin below the switch. With the switch in one position it should be open, the other should be around 550 Ohms.carnutdallas wrote: Aug 29, 2021 9:41 PM Yeah, I plugged my test light on positive and touched it to the pin on top of circuit board. Light came on, so ground has to be good. And I would imagine if my whole car works, then board has power. Even if I had something not plugged in, some would light and some would not. Anyway to test the switch?
Re: Blade Fuse Retrofit Kits
Just received my kit today. I won't be able to install it this weekend but I'm definitely looking forward to getting the fusebox looking better and more functional than before!
Re: Blade Fuse Retrofit Kits
I've DHLed it to Israel.


Thanks.


Thanks.
Re: Blade Fuse Retrofit Kits
Got mine last week and installed Saturday morning.
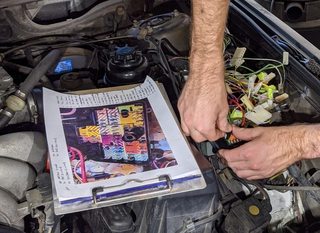
I took the extra step of printing the color coded cardboard card from the flickr page and used it as a guide to label each wire as I unplugged.
That is, I numbered each connection in the photo (and marked an X through all the unused connections) and labeled the each wire as I pulled it off. On the wires with the white connectors, I used a fine point Sharpe and for the wires with the black connector or no plastic, I used masking tape.

With respect to removing the old fuse holders, I found that having a screw driver with a narrow blade to fit between the plastic and the metal connector AND a long enough handle so that the handle extends beyond the housing, was the best solution to get the connectors moving. Once I got the metal loose from the plastic I'd use needle nose pliers to get them out.
Everything worked right away. I almost missed reconnecting one of the ground wires I took off the main ground lug. I did take the opportunity to thoroughly clean the ground and the ground bolt. Both were slightly corroded.
My only problem is that I am blowing one of the 7.5A fuses. I think the problem is that I have an aftermarket wireless remote lock/unlock system in the trunk. That fuse used to be 8.0A. I must be pulling just a bit more power than the 7.5A fuse can handle. I put a 10A fuse in its place for now without a problem.
Thanks for such a well made piece of kit.
I took the extra step of printing the color coded cardboard card from the flickr page and used it as a guide to label each wire as I unplugged.
That is, I numbered each connection in the photo (and marked an X through all the unused connections) and labeled the each wire as I pulled it off. On the wires with the white connectors, I used a fine point Sharpe and for the wires with the black connector or no plastic, I used masking tape.

With respect to removing the old fuse holders, I found that having a screw driver with a narrow blade to fit between the plastic and the metal connector AND a long enough handle so that the handle extends beyond the housing, was the best solution to get the connectors moving. Once I got the metal loose from the plastic I'd use needle nose pliers to get them out.
Everything worked right away. I almost missed reconnecting one of the ground wires I took off the main ground lug. I did take the opportunity to thoroughly clean the ground and the ground bolt. Both were slightly corroded.
My only problem is that I am blowing one of the 7.5A fuses. I think the problem is that I have an aftermarket wireless remote lock/unlock system in the trunk. That fuse used to be 8.0A. I must be pulling just a bit more power than the 7.5A fuse can handle. I put a 10A fuse in its place for now without a problem.
Thanks for such a well made piece of kit.
Re: Blade Fuse Retrofit Kits
Thanks for the review, glad you're happy with it!gump wrote: Sep 14, 2021 7:50 PM [...]
My only problem is that I am blowing one of the 7.5A fuses. I think the problem is that I have an aftermarket wireless remote lock/unlock system in the trunk. That fuse used to be 8.0A. I must be pulling just a bit more power than the 7.5A fuse can handle. I put a 10A fuse in its place for now without a problem.
[...]
My car has the same issue - blowing the door lock fuse using an aftermarket fob. Some of my locks are sticky which may contribute to the problem.
I wouldn't expect the difference between 7.5A and 8A to be meaningful, but putting in a 10A shouldn't be a problem based on how the door locks work.
Re: Blade Fuse Retrofit Kits
Got mine installed yesterday. Took a little extra time because I didn't have adequate lighting. I tried using a razor blade but wound up switching to Craftsman multitool. I would have done better if I had a steady hand and a Dremel to open up the slots.
Maybe 6hours total. My interior lights now work. Which was a surprise since I thought the display on the radio was broken.
I just need to work out why my high beams aren't lighting up
Maybe 6hours total. My interior lights now work. Which was a surprise since I thought the display on the radio was broken.
I just need to work out why my high beams aren't lighting up
Re: Blade Fuse Retrofit Kits
I just ordered it 
(Order #1076)
Last weekend I went for a drive, used the AC and when I stopped at a toll heard a noise and the evap fan stopped.
Fuse got a bit melty... even though I had bought "ceramic" fuses (evidently they weren't ceramic
 )
)
(Order #1076)
Last weekend I went for a drive, used the AC and when I stopped at a toll heard a noise and the evap fan stopped.
Fuse got a bit melty... even though I had bought "ceramic" fuses (evidently they weren't ceramic
Re: Blade Fuse Retrofit Kits
Done.
Super product.
M535-DC71

Super product.
M535-DC71

Re: Blade Fuse Retrofit Kits
Looks great! Always happy to hear installation went well.
Re: Blade Fuse Retrofit Kits
Can someone post a couple of pics for me?
-
Chimi-Changa
- Posts: 1657
- Joined: Nov 08, 2011 11:02 PM
- Location: Massachusetts
Re: Blade Fuse Retrofit Kits
What 'chu need Bro?
Re: Blade Fuse Retrofit Kits
Question for people who have bought one overseas: were customs fees included in the shipping price? I haven't found a way to tell on my end.
Re: Blade Fuse Retrofit Kits
I had to pay customs fee in Sweden of about 75 USD.Galahad wrote: Nov 11, 2021 1:00 PM Question for people who have bought one overseas: were customs fees included in the shipping price? I haven't found a way to tell on my end.
Re: Blade Fuse Retrofit Kits
I don't ship directly to Israel. I have a US address and from it I'm DHL'ing to Israel as a 20$ "plastic cover".
Re: Blade Fuse Retrofit Kits
Thank you both for the reply. That's not the first time I've heard of using a reshipper to avoid fees.Sagi wrote: Nov 12, 2021 10:31 PM I don't ship directly to Israel. I have a US address and from it I'm DHL'ing to Israel as a 20$ "plastic cover".
-
Chimi-Changa
- Posts: 1657
- Joined: Nov 08, 2011 11:02 PM
- Location: Massachusetts
Re: Blade Fuse Retrofit Kits
Curious- Anyone else experiencing lower vehicle voltage while running/ driving after installing one of these? Used to be in the 13-14v range while running. ( new Alternator last Spring, board was installed over summer)
Ben German noticed my voltage meter seemed lower while driving out to Limerock. Using a 12v air compressor recently in the car, it was barely working compared to how it used to work....
Ben German noticed my voltage meter seemed lower while driving out to Limerock. Using a 12v air compressor recently in the car, it was barely working compared to how it used to work....
Re: Blade Fuse Retrofit Kits
Same as Sagi, used a freight forwarding company.Galahad wrote: Nov 11, 2021 1:00 PM Question for people who have bought one overseas: were customs fees included in the shipping price? I haven't found a way to tell on my end.
Re: Blade Fuse Retrofit Kits
Check that you are actually charging your vehicle, alternator exciter wire goes through C101 (the connector on the side of the fusebox)Chimi-Changa wrote: Nov 15, 2021 3:47 PM Curious- Anyone else experiencing lower vehicle voltage while running/ driving after installing one of these? Used to be in the 13-14v range while running. ( new Alternator last Spring, board was installed over summer)
Ben German noticed my voltage meter seemed lower while driving out to Limerock. Using a 12v air compressor recently in the car, it was barely working compared to how it used to work....
Re: Blade Fuse Retrofit Kits
I just installed mine and apparently I screwed some wires up. I have issues with fuse 2 and 8 blowing up. I just re-opened the box (found a couple of disconnected wires and fixed these) and after going through the ETM I did realize that I had plugged two wires on the wrong spot. I'm about to this once again but the ETM doesn't list all of the fuses in the fuse box section so you have to go through the pages and find them.
The engine eventually runs but the fuse blows and then it dies so I need to fix this.
Is there a better reference out there with the colors going in and out of each fuse?
The engine eventually runs but the fuse blows and then it dies so I need to fix this.
Is there a better reference out there with the colors going in and out of each fuse?
Re: Blade Fuse Retrofit Kits
Which fuses are you still having trouble with?

