Page 12 of 23

Re: E12 M535i Project - 06-27-15 Update

Posted: Jul 11, 2015 2:14 AM
by bkbimmer
wkohler wrote:"I only deal with people who have no interest in dealing with me." - Chris Kohler, 3-14-15

The perfect business plan for an introvert.

Re: E12 M535i Project - 06-27-15 Update

Posted: Jul 11, 2015 2:16 AM
by wkohler
Unfortunately, I'm the one trying to get things done. I'm on the wrong side of the fucking counter, I guess. :roll:

Re: E12 M535i Project - 06-27-15 Update

Posted: Jul 11, 2015 6:50 AM
by bkbimmer
wkohler wrote:Unfortunately, I'm the one trying to get things done. I'm on the wrong side of the fucking counter, I guess. :roll:
I see now, I was looking at it from my perspective. Nothing to see here, folks!

Re: E12 M535i Project - 07-29-15 Update

Posted: Jul 29, 2015 3:53 AM
by wkohler
Unfortunately, to take some steps forward, I had to take some steps back. Due to what could be described as poor planning on my part, I didn't have any of the plating done prior to the car coming home. In reality, since the plater I use has a minimum charge per batch, I wanted to get as much in there as possible. Being the only place locally that does yellow cad plating, I don't have many options. I've used them in the past with great results, so if I can get enough stuff together to make it worth it, great. I sent in a bucket for yellow cad and a bucket for clear zinc. The clear zinc stuff included my door latch mechanisms, strikers along with the hubs and stub axles. I removed the grease from the latches and the springs along with all of the rubber buffer pieces. I actually was able to remove all of them without damage, but I did strip a set from an E28 and cleaned and conditioned all of those pieces for use on the E12. Everything went in on June 29th. They told me I'd have it back on Friday, but then they realized Friday was the 3rd, so I should expect a call Monday morning. Great.

On June 22nd, I had taken all of my hard brake and fuel lines to the tube and hose shop I use to have them duplicated. I was not originally going to do this since my lines looked fine, but the fittings on the brake lines were corroded and I really couldn't think of a solution for that. They gave me estimates on each line and I added everything up. Supposedly, they were liberal estimates, so I was expecting to pay about $500 for them. It seemed high since they just made a straight line for a guy with double flares and fittings for $10. I was kinda expecting something like that. It would have actually cost about the same or less to buy new lines from BMW, but I had been told they were of poor quality, particularly compared to what was on the cars originally, so I opted for the custom lines. I was a bit disappointed by the idea that none of their suppliers could offer an M10x1 bubble flare fitting with an 11mm hex. I was really pushing back on that given that the fittings were the only reason I was doing this to begin with. Eventually, I just gave up and figured I'm destined for failure anyway, so why not just spend the maximum amount of money possible to do it. As long as the fittings are the same across the car, I guess I will live. When I do brake stuff, I have an 11mm flare wrench and a 14mm combination wrench. I don't want to have to remember a 10mm for one car. So, since they had to order all of these wrong fittings, they figured it would be a week or so and they'd call me. Great. Whatever.

I had four sets of tail lamps in varying conditions. I thought I had gotten the end-all-be-all of used tail lamps in 2010 from a B7 Turbo, but it turned out I didn't, so all four sets came apart and the best components of each went into building a nice pair of tail lamps with correct Euro lenses. I got the left one done and installed. I ran into some complications with the right side since I didn't have enough good parts to make one tail lamp, so I had to make good parts. New tail lamps are NLA and even the seals are NLA, too. I had a nice pair of seals from the B7 Turbo (30k mile Oregon car), so I used those.

Image
Image

In the meantime, I decided I needed to replace those shitty radius rod bushings on the 530i, so here's what 40-year-old standard radius rod bushings look like next to 35-year-old Motorsport bushings.

Image
Image

Image
Image

I had put another standard set in the car, but I didn't think to compare them to the old Motorsport ones until after I swapped them. I should have just put the old Motorsport ones in the 530i!

On June 30, I received a call back from Jim Blanton. I had reached out to him about looking at my 265/5 and the sideloader 3:07 LSD. My transmission has a noisy 4th and 5th gear (likely a bearing) and the diff leaks profusely, but I would like to put new clutches in it despite it passing all of the lockup tests. He asked how much of a purist I am and then told me to contact BMW and buy a reman G280 for $4200 or so. That's great, but it's not correct for my application and doesn't have a speedo drive. He also spent about 20 minutes telling me how we need to find a 3:46 from an E34 535i and take the ring and pinion and put them in my sideloader to work with the 280 ratios. Once I explained to him that I likely have the only E12 on dollies ever and that I'm certifiably insane, he realized that maybe I wouldn't want to go that route. I have five spare doglegs, but I was figuring that since the one from the car would take a hit in value with the noisy bearing, why not go through it? He then suggested that I bring him all six transmissions. He will take them all apart and take the best parts from each and build me one good one for $4500. To go through the diff with new clutches and seals, $2500. I'm tabling this for a while.

On July 6, I called the hose shop and was greeted by, "Oh, you're the guy whose number we lost!" Yeah. That's me. It's been a couple weeks now, so I wanted to know what was going on. They figured it would be another week or so. I said fine. They just have to go in before anything else can, so how about you get that number of mine again? I called the plater and they said my order wasn't done but might be done this week. WTF? It's a 24-7 operation. They told me to check back Wednesday.

I got a call from the tube and hose shop on Wednesday. Lines were done. Total was $900. ARE YOU SERIOUS? NINE HUNDRED DOLLARS?! Are you kidding? This is ridiculous. I was quoted $500 on the high end and you're coming in 80% higher? Why was I not called about this? "Oh, I didn't know we quoted you." You did. He asked if I had a tax ID. No. I'm just a person. A very poor person in way over his head on a car he doesn't want to finish. Eventually, I got them to give me a discount and eat the tax by writing it up as a repair. $730 out the door. Well, at least I'm getting lines that fit and are nicer than BMW ones right?

I go pick them up and they look fine. I was delighted to see that my fittings took an 11mm wrench. Of course, not as delighted as I would have been in they had come in where they said they would, but whatever. I can make more money. Doing what, I don't know. I took them home and discovered that what I had could best be described as "an artist's interpretation of E12 brake and fuel lines." :(

Image
Image
Image
Image

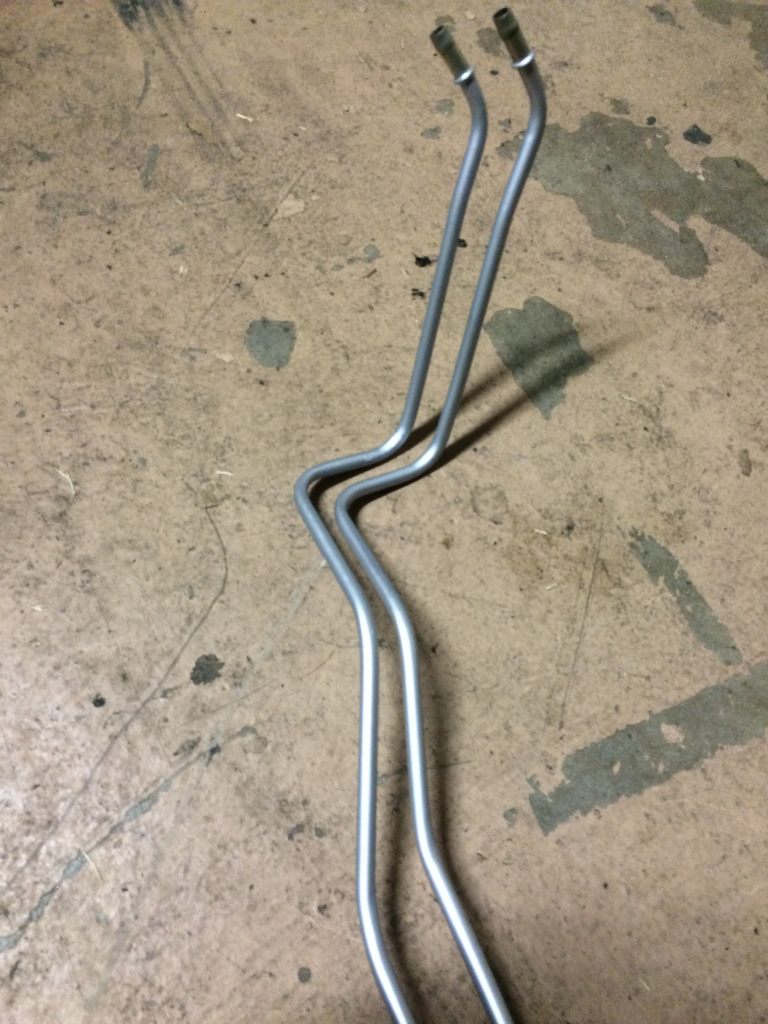
I tried to figure out how to handle this. I'm sure the people at the shop would try to make it right, but giving them the right lines to begin with and giving them the same lines again is going to accomplish what? I put all the old stuff back together and made sure it went where it needed to go. It did. So, I ended up spending several hours (about seven) re-bending just the hard fuel lines and the brake line that goes to the rear. I had to take the lines in and out of the car to get every bend as close as possible to the original. The hardest part was where the lines come under and around the left frame rail. Since I didn't have the clamps from the plater, I pulled some off the 635 to use in the interim.

Image
Image
Image
Image

Also on Wednesday, I called the plater and they said the cad was done, but the zinc wasn't. Well, I said I'd get the cad since I can at least get the hood and trunk closed and get my brake/fuel lines installed whenever they get finished. I head over there and the parts look shitty. I was disappointed. I've been told, "You just sit there and eat that shit sandwich instead of making people do what they are supposed to do." I decided this time I didn't feel for a shit sandwich since I had one for lunch already with the brake lines, so I went back inside and asked if the gold color was supposed to just rub off with my thumb. "Uhhh, no." Of course, uhhh, no. I said, "there were parts in here with 40-year-old plating that held up fine, but would have looked poor next to brand new plating. Now it's all ruined." "What would you like us to do?" Well, give me what I paid for. I then asked if this is a widespread issue as I can't imagine this is the only cad they have been doing. By the end of asking a bunch of questions, I decided to have the stuff done in yellow zinc. I left, got back to work and then decided that was a stupid move since yellow zinc looks cheap and shitty on fasteners. This stuff is supposed to be yellow cad and that's what I want! So, knowing they were open 24-7, I went back down there. I talked to the shop foreman and said I don't want yellow zinc. I paid for cad and I want cad. I was going to leave a note, but he said he'd take care of it, then showed me the cadmium plating process. I think I will die five years sooner due to the exposure, but I'm sure those five years would suck anyway. I'm told to check back with them on Friday and everything should be done. Fine.

Thursday, I put together the right tail light and got it installed to at least give me some sort of motivation.
Image

Friday rolls around and I call the plater. Cad is done, but zinc isn't. WHAT THE FUCK? All I can think of is the Seinfeld bit at the car rental place. So, I come by to get the cad and it's worse than the last batch. People are asking me what is wrong with my hands. It's not my hands! It might be your face though (fortunately, I thought better of saying that, though it might have been entertaining nonetheless). Finally this guy walks over (the guy who took my order) and he looks at it and says it's wrong. They'll redo it again and when I come back Monday, I'll have everything. They were racking my zinc plating when I walked out. Whatever. I don't care anymore.

Monday, I get a call saying my cad is finished. I am going to be slammed with work from the previous weekend's shows, but I may as well grab this stuff as I need to get something done before I leave for Portland. Just so I can see some sort of progress.

Finally, it looks good!
Image

The zinc was done too.

Image

So, I took a couple of breaks during my editing and got the lines secured under the car:

Image
Image
Image

I got the hood hardware reinstalled too.

Image
Image

I had a pair of new notches (they're like $140 ea, which ridiculous), but the plating on the new parts is totally wrong, so I had them and several others plated. Unfortunately, due to the plastic roller on the roller guide, I had to buy new, but they're only $33 or so.

Image

Trunk latch is in:
Image

Unfortunately, the spring in the latch itself broke after all the plating crap, so I had to grab another one I had. I cleaned it up and discovered that the new cad is a dead-on-balls-accurate color match to the old, so no problem there.

Power steering fluid canister reassembled:
Image

After getting home from Portland, I had work stacked up, but I really needed to take some breaks here and there. I wanted to get the latches reinstalled and what not.

Image

Image

Everything went together well. The only thing I didn't put together was the central locking stuff as I still have some work to do on that stuff. Plus, I want to get the window stuff in first, I think. I put the original door handles on since the new ones doubled in price. They were already expensive, but at $111 per, I think I can have some redone for less and maybe even get a better job. Hard to say. With my experiences recently, maybe I should just spend the money.

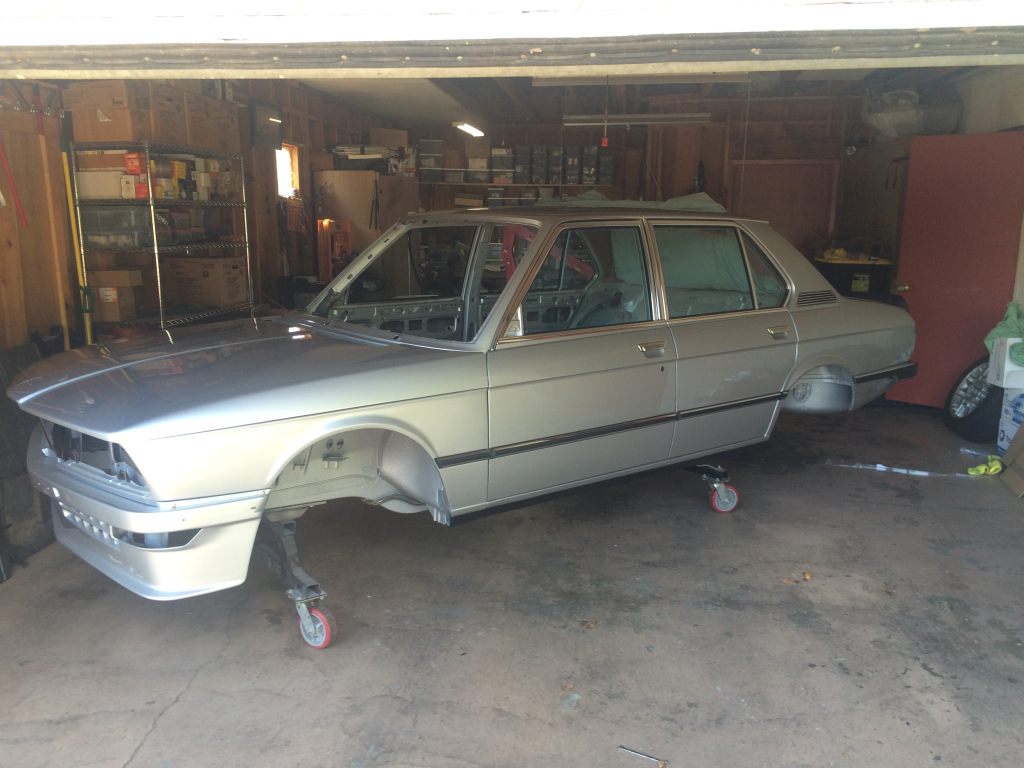
Doors closed, adjusted and fully functional. Also re-adjusted the hood.

Image

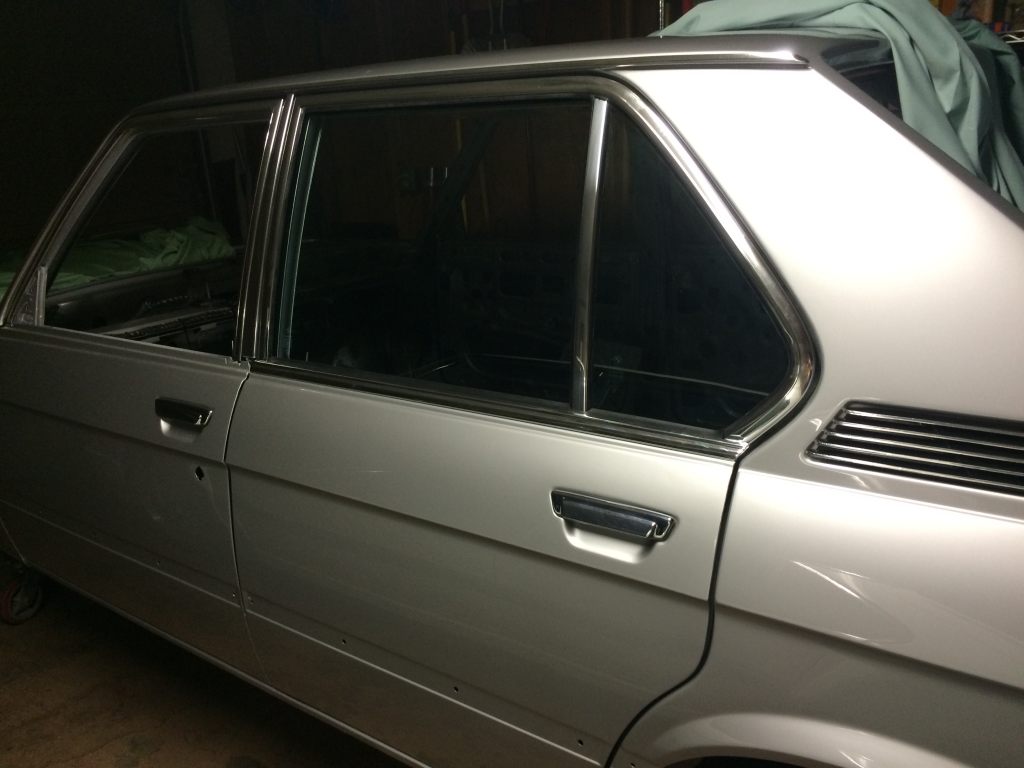
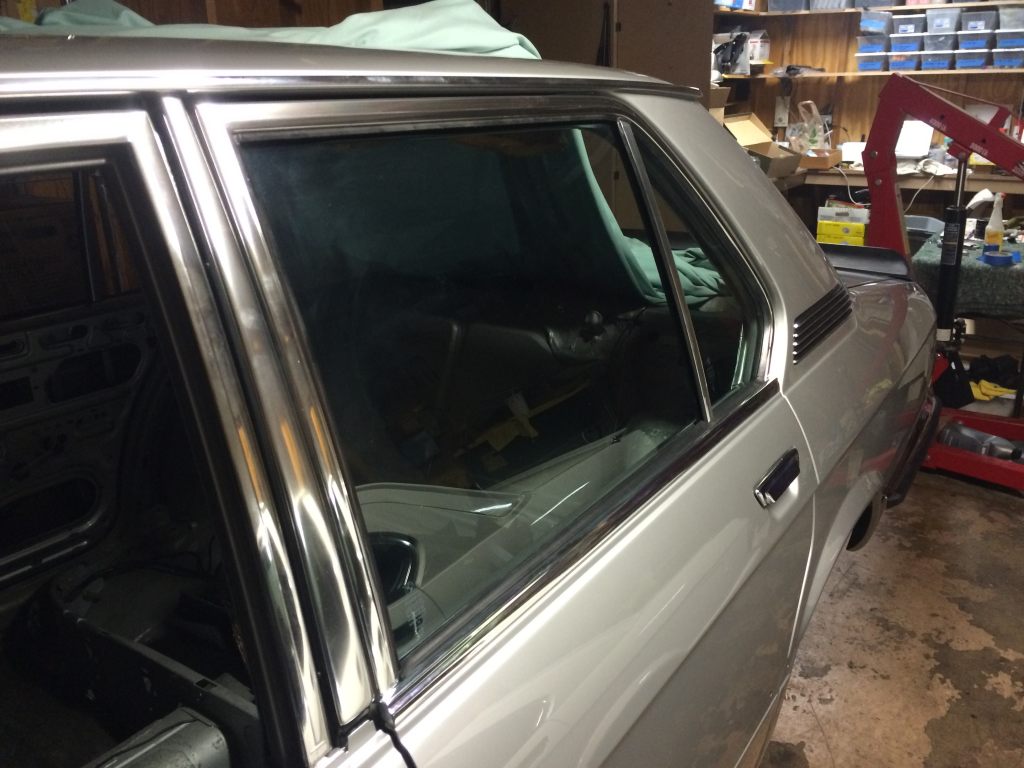
I decided to throw the b-pillar trim piece on, though I don't have the screws for them. I had a couple of them, so I might put them on with what I've got until I've got more. I also grabbed the refinished drip rails from the back wall of the garage and installed those, which, as usual, is a pain in the ass, but I'm pretty good at it. These were in better shape than the ones I got for the B7, despite one of them having an annoying bend in it, but I carefully removed it. They're ceramic-coated instead of anodized, so the fact I could remove a bend without seeing a lasting sign is a big plus for the ceramic.

Image

Re: E12 M535i Project - 07-29-15 Update

Posted: Jul 29, 2015 5:56 AM
by bkbimmer
Bummer on those lines, I would have freaked out on them. At least you got it handled.

The car is looking very nice. I am envious of your progress.

Re: E12 M535i Project - 07-29-15 Update

Posted: Jul 29, 2015 10:56 AM
by tig
Great work Chris. Sorry it's not all going smoothly, but this car is going to be stunning!

Question for you: How are you sure which parts should be clear v. cad? I mean, in lots of cases it's obvious because the part still has some zinc left on it, but in others the results are "indeterminate". Is there a reference you have or do you just look on your other cars? It seems like E12s had a lot more clear stuff than E28s?

Image

Re: E12 M535i Project - 07-29-15 Update

Posted: Jul 29, 2015 12:51 PM
by Adam W in MN
I wondered when you'd post with a bunch of updates, you're really setting the standard!

Re: E12 M535i Project - 07-29-15 Update

Posted: Jul 29, 2015 1:52 PM
by wkohler
cek wrote:
Question for you: How are you sure which parts should be clear v. cad? I mean, in lots of cases it's obvious because the part still has some zinc left on it, but in others the results are "indeterminate". Is there a reference you have or do you just look on your other cars? It seems like E12s had a lot more clear stuff than E28s?
It looks like a lot of clear but I agonized over what to do with the stub axles and hubs. Since I was already paying a minimum charge, I decided to have them plated. I had been reading through a few restorations in various places of contemporary BMWs and it seems pretty common.

Basically every fastener on the car with a rating of 8.8 or below is yellow cadmium plated. Anything higher than that is black oxide as the plating process creates stress that adversely affects hardened fasteners. There are various screws and whatnot used inside the car that aren't but for the most part, everything is cad plated. Of course, since cadmium plating is really really terrible for the environment, it's not very common anymore so most will use yellow zinc in lieu of it. I am pretty sure the only place on the car yellow zinc is used is with the brake calipers. That's how Ate did it. As far as clear, the only parts I'm aware of are the door latch mechanisms, the wedge plates (which if you buy new are yellow zinc) and the strikers. Really no different than the E28.

Re: E12 M535i Project - 07-29-15 Update

Posted: Jul 29, 2015 3:48 PM
by Mark 88/M5 Houston
The car is looking great Chris. I feel for you on the disappointing quality of work on the plating and tubing. You handled it better than I think I would have. Please keep us posted on your progress.

Re: E12 M535i Project - 07-29-15 Update

Posted: Jul 29, 2015 5:30 PM
by white chocolate
Fantastic progress.

This car is awesome.

Re: E12 M535i Project - 07-29-15 Update

Posted: Jul 30, 2015 8:21 AM
by kzolee
The car is fantastic.

Those prices of the hard lines and transmission rebuild makes my untrained european eye :shock:

Last time my LSD rebuild was $700 with new clutches, seals, bearings and oil. My buddys dogleg transmission rebuild was about $2500 last year... As I can figure out from US threads, the part prices are nearly equal here and overseas.

Re: E12 M535i Project - 07-29-15 Update

Posted: Jul 31, 2015 5:02 PM
by unt0uchable
Holy shit balls you have some patience, good sir. And let me add one more Holy shit balls for the rebuild price of the transmission and diff!!! That's insane.

So you showed some progress on that other taillight after stating that you didn't have enough good parts. What did you have to do to massage the "not so good" parts into shape?

Lovin' the progress, as usual. We will miss you when you're gone, and we will certainly blame the cad plating exposure. :laugh: Sounds like a neat tour tho..

Re: E12 M535i Project - 08-15-15 Update

Posted: Aug 15, 2015 9:17 PM
by wkohler
Over the last month or so, I’ve been working out what to do with the brake calipers themselves. I did some research into rebuilt calipers and decided I didn't want to go that route. The front calipers are specific to the M535i, due to the spacers between the halves and in all reality, my brakes worked great in this car. Probably the one system that was really good. Whenever they were last serviced, good parts were used, but by the time I got the car, rotors and pads were approaching the end of their life.

In my research, I came across a company in Utah, called PMB Performance. They specialize in Porsche calipers, but they're Ate calipers and they've done BMW stuff before. They had a nice write-up on a proper DIY rebuild, so I called them up and talked to one of the guys. They'd charge me $600 to rebuild all four, provided my pistons and whatnot are good. I figured they would be but hey. Never know. Then the guy told me that if I have dealt with calipers before, there's no reason I couldn't do this myself. I even have a plater that I use. I started thinking about it. I also looked into having them rebuilt through another source that services most of the parts stores and I was pretty concerned about getting my calipers back and the quality of the parts they're replacing. I've got seal kits already and they carry the caliper half seals, so why not? I took the calipers apart and everything came apart well. Seals were all good. Dust boots even. I started cleaning up the pistons and I noticed some pits. Damn.

I called PMB and got a different guy on the line. I asked about pitting in the pistons. The ones I removed appeared to have been hard-chromed and the pitting is in the chrome. Pistons are NLA from BMW (are we shocked?!) I mentioned that I’ve got a couple sets of calipers from different cars that use the same pistons, so if I came up with a complete set of good pistons for one set of calipers, would that be the way to go? He suggested I just put everything in a box and send it to them. This wasn’t really the same attitude I had gotten before and it just made me more interested in doing the work myself. Sure, I have a good probability of getting a great result using them but I’m kinda burned out on having people do stuff for me and who knows what kind of fishing expedition they will be on.

Everywhere I had read suggested that the bolts used to secure the caliper halves together are stretch bolts and are not to be reused. Of course, being that the bolts for the front calipers are M9x85x1.25 with a 14mm hex head and the rears are two different length M7 socket cap bolts with M7 nuts (using an 11mm wrench), they really weren’t easy to find. In fact, impossible is more like it. NLA from BMW and Ate doesn’t sell them. McMaster-Carr’s website crashed when I searched for M9 (well, not really) and Copper State Nut and Bolt looked at me like I was nuts (ha) and they have everything…well, everything that would work if you’re not as picky as I am, but nothing in an M7 or M9. So, what are the rebuilders using for these stretch bolts? From what I can tell, they’re all using the originals. Even the writeup gave torque specs for reuse of the bolts, so how are people not dying?

I remembered from a few years ago, I had a complete kit to rebuild M5 front calipers from Walloth and Nesch I had purchased from a friend in Portland while I was there for the M5 calipers I had purchased for my 533i. It was about $300 worth of stuff. Of course, after I wrecked the 533i and sold the brakes I had never installed, I sent it with them. Knowing that those parts are basically all the same going back to the E3/E9, etc, I checked their site and I bought all eight front and four rear pistons along with a couple of other bits and anti-rattle clips for front and rear. They had rebuilt rear calipers available for a large sum of money, but also had bolts. I didn’t see anything that was 85mm long, so I asked. They didn’t have rears listed either. Despite the warnings of death and impotence if you reuse the bolts, they don’t sell the rears and it makes you wonder what is in their rebuilt calipers! I ordered the 8 bolts for the fronts with the pistons and they ran about $50. Had them in two days. Amazing.

I bought a brand new set of Balo rotors. Rear brakes are stock E12 on the M535i, and even though I’ve got two E24s with vented rear brakes, I think the best route for me is to just stay stock with the car, so that’s what we’re doing. I already had new FTE rebuild kits I was supposed to put on the 530i in March, as it really needs them (I see myself doing this again pretty soon), so I decided to just use those for these calipers.

While I had the ear of an expert on mechanical and material failures (among other things), I decided to discuss the issue surrounding the bolts since I forgot to bring it up while I was standing in his shop on the way home from Oregon. The thing that threw me on the idea of these actually being a stretch bolt is that they’re hardened. The bolts have an 11.9 rating, both front and rear, so there should be no reason they wouldn’t be reusable. He rebuilt the calipers on his E9 and split the halves and realized there was no big deal and has never had any issues. He just re-torqued them properly. While I had read so much that would contradict this on the Internet, if there’s one person I trust when it comes to this, it’s this guy.

I spent quite a bit of time trying to clean off the 35 years of caked on crud and gunk from the calipers. I was happy to see that there was still evidence of yellow zinc plating in the spacers and other areas of the calipers. Once I finally got everything as clean as I could, I took the caliper halves, spacers, bleeders and whatnot down to the plater I used before. They do tons of zinc plating, so I figured this wouldn’t be that big of a deal. Obviously, they have a minimum charge, but when it comes to rack plating, it’s generally a per-piece thing and given that some pieces like the bleeders are really barrel items, it gets a little complicated. The reason for not replacing the bleeders is that these are in nice shape and also take a 7mm wrench. New bleeders take an 8mm wrench. I also brought the new rotors since you cannot buy the new, coated rotors for E23s or E3/9/12/24, and the marginal cost is so low, if I even eclipsed the minimum charge that it made sense. These people do rotors all day long for several suppliers, so I figured I could trust they’d get it right. I had them done in yellow zinc and specified 25-30 seconds in the yellow dichromate to promote corrosion-resistance. They told me I’d have them in a week. Great. We will see how that goes.

Image

Image

With that, I decided to turn my attention to the bolts. I had brought them along with the rest of the stuff to see if maybe they’d hook me up and just run them through the black chromate, but I was looking at another $150 for that, and it just wasn’t worth it. Of course, also being grade 11.9, they shouldn’t be zinc plated, so that’s something that I didn’t really like about the rebuild services offered. They were originally black oxide, and that’s what they should be. I asked if they knew anyone that did black oxide and they said no. Fine. I saw a guy with a kit on a Porsche board, so I thought about asking him if he’d do them since I didn’t want to drop $200 on chemicals to do my own. I then figured there had to be someone, and a quick Google search later, indeed there was! I dropped by with my 16 bolts and 8 nuts and they looked at me wondering where the rest of the stuff was. I told them that these were the only bolts on the car I needed (since I already bought new bolts for everything else). They asked me if I needed them today and I said, “no. Take your time!” He responded, “Okay, bring $30 cash tomorrow at 9am and you can pick them up.” Okay, great. I get a call at 9:30 and they ask if I can come at noon. Sure. No problem. Why can’t I get this service from anyone else?! I really think I need more black oxide in my life. I swing by around 12:30 and there are my bolts. They look good, so they dip them in some oil and I leave.

The only piece of the puzzle I needed was the new seals for the fluid passages between the calipers and spacers. I didn’t want to order from W&N since they were about $3 ea plus shipping and duty, etc, so I ordered them from PMB for $1 ea and $6 shipping. I ordered 20 just in case though I only needed 16. I figure I’m going to have to order a bunch more for the other calipers I’ll be doing, so I don’t mind having some extras.

Yesterday morning, I went and picked up the calipers and rotors from the plater and they came out pretty nice. No complaints. I paid the money and headed home. I was going to work on putting the caliper halves together but I destroyed the belt on the touring when an idler seized, so that ate up a good portion of my day getting back home. I was hoping the seals were going to show up, but they didn’t. I guess it really is two days from Utah to Phoenix. Must go to Vegas first or something.

The seals showed up today. Yay! So, rebuilding commenced.

Image

Image

I started with the rear calipers. The key with 2-piston Ate calipers is that they put a notch in the piston that has to be set at 20º relative to the base of the opening for the pads. There are special tools for this, but I own a protractor, got an A- in Geometry, an A in Trigonometry and have lots and lots of cardboard at my disposal. It doesn't have to be perfect (it can be off by as much as a millimeter), but may as well try anyway. The notch also has to face the rotation of the rotor, so depending on which side of the hub the caliper sits, these factors all change from one car to the next. The idea is to make the pads engage the rotors evenly. Without this, the leading edge of the pad will wear prematurely and dig into the rotor, which is another reason I need to rebuild the calipers on the 530i!

Image

Image

Here are the two halves of the left-rear caliper before assembly.

Image

I had to buy another torque wrench as the torquing procedure for the bolts uses values below what either of the torque wrenches I have specify. I learned that Sears is terrible and should go out of business. As a result of that knowledge, I went to Harbor Freight and found a Taiwanese-made 3/8 drive torque wrench that works from 5 ft-lbs to 80 ft-lbs. It was on sale and I used a 20% off coupon and it was mine for less than $20. I followed the proper procedure. Here are the two assembled rear calipers:

Image

Image

I turned my attention to the fronts. The four-piston calipers don't have the issue that the two-piston calipers have, but the new pistons had the notches, which suggest to me that they are likely for another Ate caliper, but happen to be the right size for the bores on these. I did some research but turned up nothing concrete, so I decided to just set the 20º angle on these too since after all, I made this damn tool.

Image

Image

I decided to reuse the original bolts for the front calipers. I have new ones from Walloth and Nesch, but they can stay new and if there is a problem with reusing them, I'm sure we will find out and at that point, I can use the new ones, but I doubt I will ever need to.

Image

And, since I never showed you the plated rotors, here's a shot of those with the rebuilt calipers:

Image

This process probably didn't need to be done now, but it needed to be done soon enough. Did I save any money? Likely no. In fact, I'm sure that if I added it up, I'd have paid more than $600 to do the set, but really, I gained experience and I think they came out well. I wouldn't hesitate doing this again, and that's good since I will definitely have to!

Since I have most everything I need to put the suspension together, that's on the horizon. I've ordered new stainless soft lines from Ireland Engineering since I prefer the color of their lines to UUC or others (they don't scream "HEY! I'M AFTERMARKET!!!!!!!1111111one"). Subframe bushings, e-brake cables, etc finally showed up, so that can all start going together, but I'm thinking I will work on wiring first. At least everything from the firewall back.

Re: E12 M535i Project - 08-15-15 Update

Posted: Aug 15, 2015 9:43 PM
by Karl Grau
Wow! :up:

Re: E12 M535i Project - 08-15-15 Update

Posted: Aug 15, 2015 9:55 PM
by m-racer
Beautiful work. The shot of the rear without the bumper made me remember how beautiful the E12 really is...and something about a silver car. So nice.

Re: E12 M535i Project - 08-15-15 Update

Posted: Aug 15, 2015 10:50 PM
by tig
The 911 calipers have a similar notch in the pistons and require that 20 degree angle thing. I made the same tool when I did mine; thank god for cardboard.

As usual, nice work Chris. Sounds like slightly less drama than the last installment!

Re: E12 M535i Project - 08-15-15 Update

Posted: Aug 16, 2015 12:37 AM
by Mark 88/M5 Houston
Beautiful work Chris!!!!

Re: E12 M535i Project - 08-15-15 Update

Posted: Aug 16, 2015 9:37 AM
by Adam W in MN
You've really been busy!

Re: E12 M535i Project - 08-15-15 Update

Posted: Aug 17, 2015 12:22 PM
by white chocolate
The knowledge and attention to detail is staggering, awesome work!

Re: E12 M535i Project - 08-15-15 Update

Posted: Aug 17, 2015 12:44 PM
by LeiseyJr
Wow... this Makes my operation at home look like toddlers with hammers trying to put squares in the circle slot.

Image

Amazing work!
Would Schmiedmann have any of the parts your after? I know they pull through with Euro E28 stuff, maybe e12 too?

Re: E12 M535i Project - 08-15-15 Update

Posted: Aug 17, 2015 5:24 PM
by Adam W in MN
LeiseyJr wrote: Would Schmiedmann have any of the parts your after? I know they pull through with Euro E28 stuff, maybe e12 too?
Nah, I think Chris's next step should be posting a wanted thread to use someone else's euro title and registration. Seems to work pretty well.

Re: E12 M535i Project - 08-15-15 Update

Posted: Aug 21, 2015 2:06 AM
by LeiseyJr
Adam W in MN wrote:
Nah, I think Chris's next step should be posting a wanted thread to use someone else's euro title and registration. Seems to work pretty well.
:laugh:

Re: E12 M535i Project - 08-15-15 Update

Posted: Aug 21, 2015 2:08 AM
by wkohler
Maybe with someone else's VIN, maybe I could get some traction!

I've got a few things half-ready to go on the car. That's frustrating. I'd like to get ONE thing done.

Re: E12 M535i Project - 08-15-15 Update

Posted: Aug 22, 2015 9:18 PM
by bkbimmer
Needs Moar cowbell.

Re: E12 M535i Project - 08-15-15 Update

Posted: Aug 24, 2015 8:23 PM
by stoney
You're definitely not cutting any corners on this restoration.

You know you're doing it right when you start getting buckets of bolts plated.

Re: E12 M535i Project - 08-15-15 Update

Posted: Nov 03, 2015 6:23 PM
by delvin
Yesterday it was seeing the resurrection of rusty and today I stumble upon this. Wow, amazing work, amazing attention to detail, amazing everything. Looking forward to seeing more updates and the final product.

I should probably do some work now, feeling a bit guilty after reading through this whole damn thing.

Re: E12 M535i Project - 08-15-15 Update

Posted: Dec 11, 2015 2:20 PM
by jhall
Stumbled into this after following a link on the m535i for sale ad. I haven't looked at this thread for a looong time and all I can say is wow. Kudos on this project, keep up the amazing work. Threads like this make me feel woefully inadequate because they set a high-water mark I know I can't personally achieve. :up:

Re: E12 M535i Project - 08-15-15 Update

Posted: Dec 12, 2015 2:44 AM
by wkohler
Thanks! Been sidetracked lately with work and a few other projects, not to mention the finances taking a big hit with the addition of the M5. Still, I'm seeing light at the end of the tunnel on the biggest project, so once that is on it's way, I can get back to the E12, which has now fallen greatly "behind schedule."

Re: E12 M535i Project - 01-15-16 Update

Posted: Jan 16, 2016 3:50 AM
by wkohler
It's been a while. I bought a Euro E28 M5 which took the entire operating budget for the M535i and then some. Then, pretty much at the same time, I began work on a relatively extensive E28 sorting project. That project was finished up just after the first of the year, so it was then time to get back onto the E12 M535i, which hadn't been touched since August. It's been in the garage with sheets over to keep dust and dirt to a minimum.

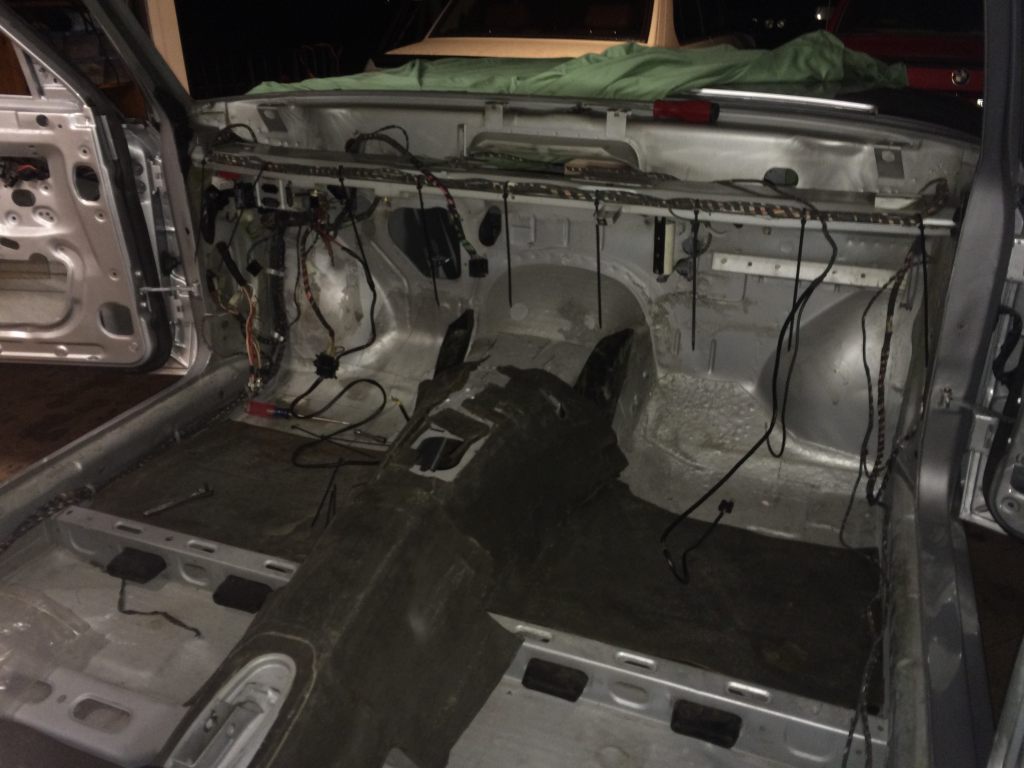
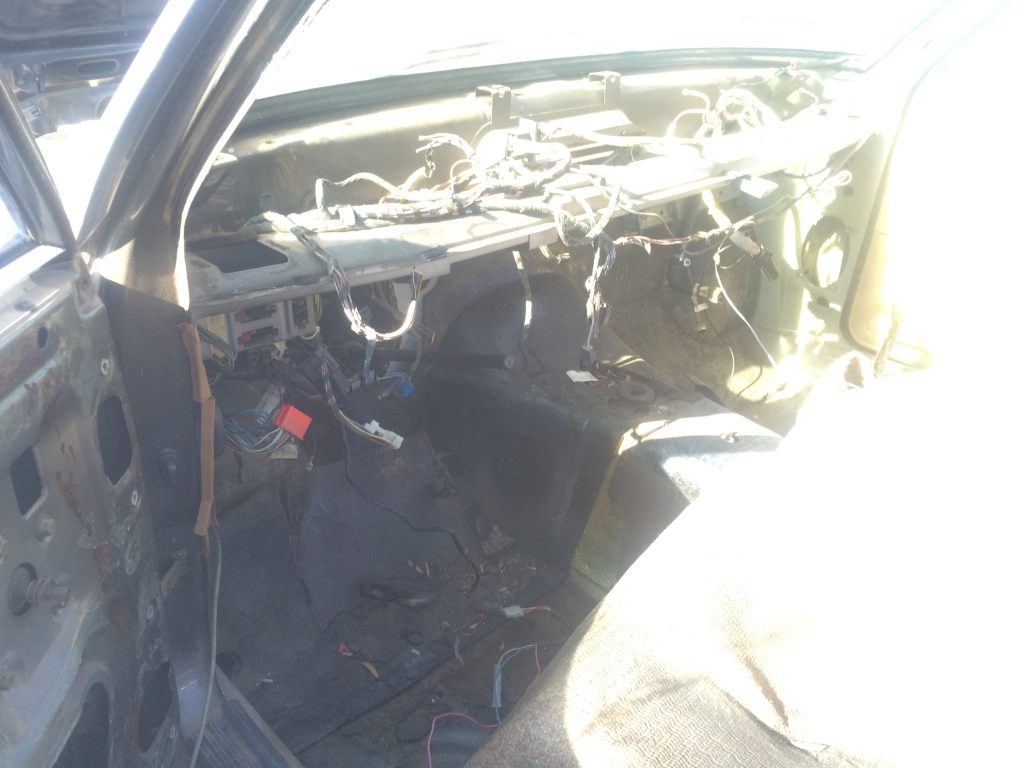
They dropped a '77 530i at a yard west of Phoenix. I decided that I needed to get that firewall insulation, so I went out there. I removed the dash, AC, heater, pedals, brake master and booster, etc and discovered that there was no way to remove this in either one piece or a series of pieces that would remain usable. Oh what fun.
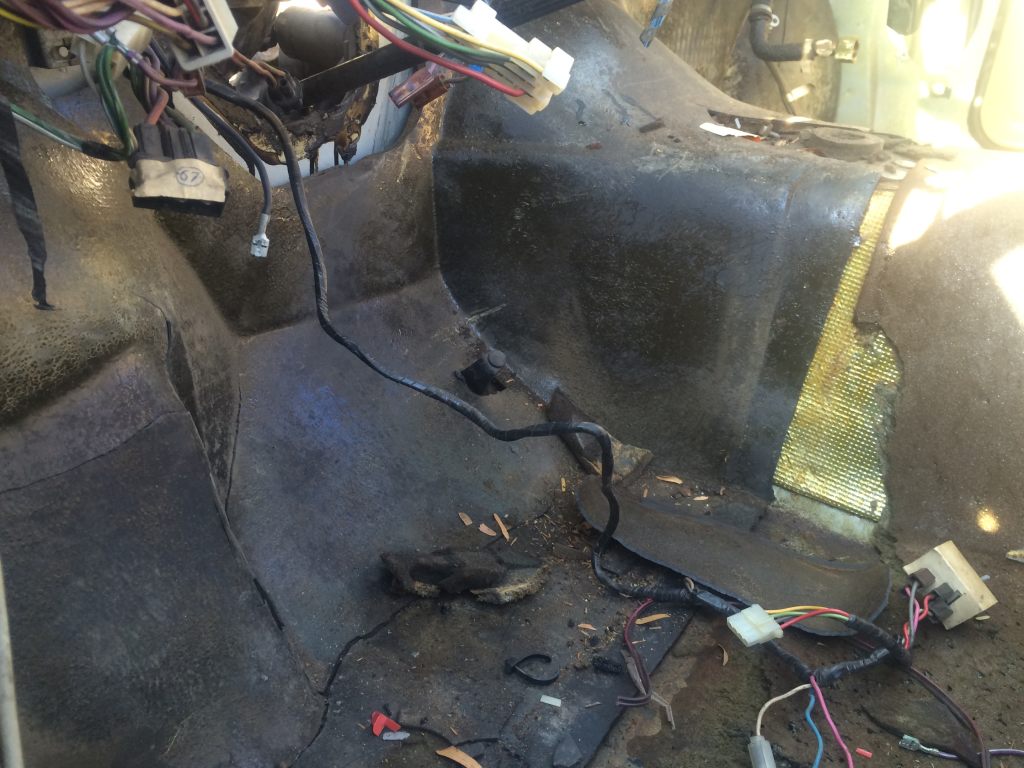
Image

Image

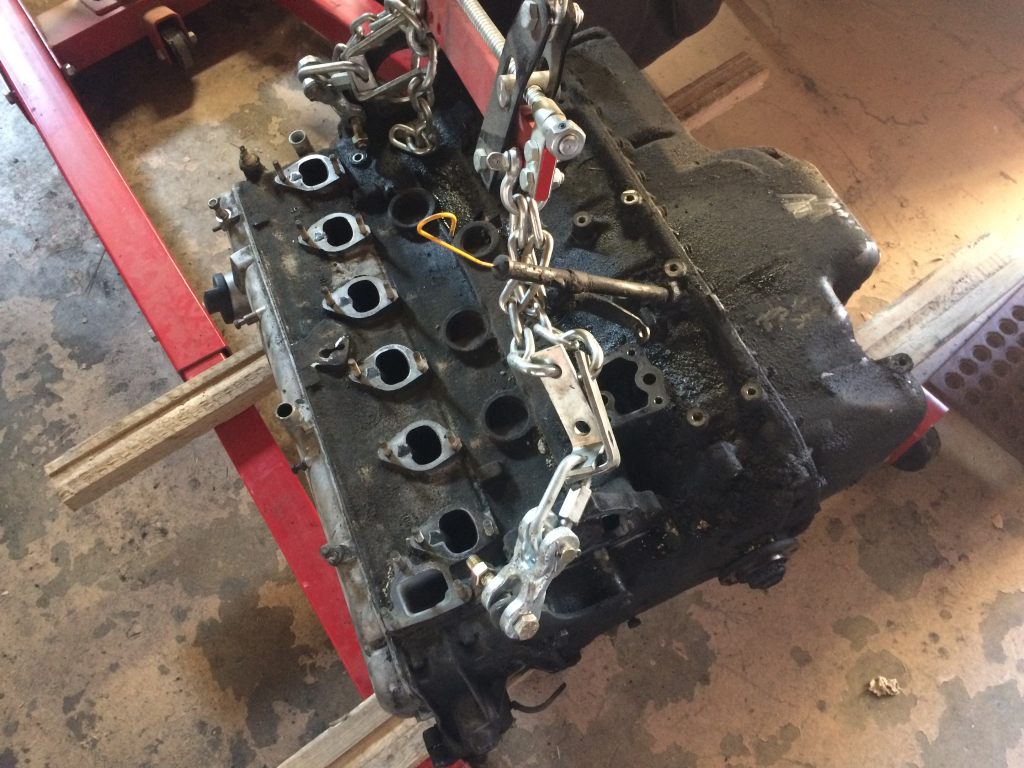
I started talking with my mechanic about working on the M90. We worked out a plan (though that has gotten delayed a bit). I decided to tear the motor down to the longblock.

The first thing I did was stance my dolly. No point in trying to work on a motor properly supported. It sucks to roll hard, bro.
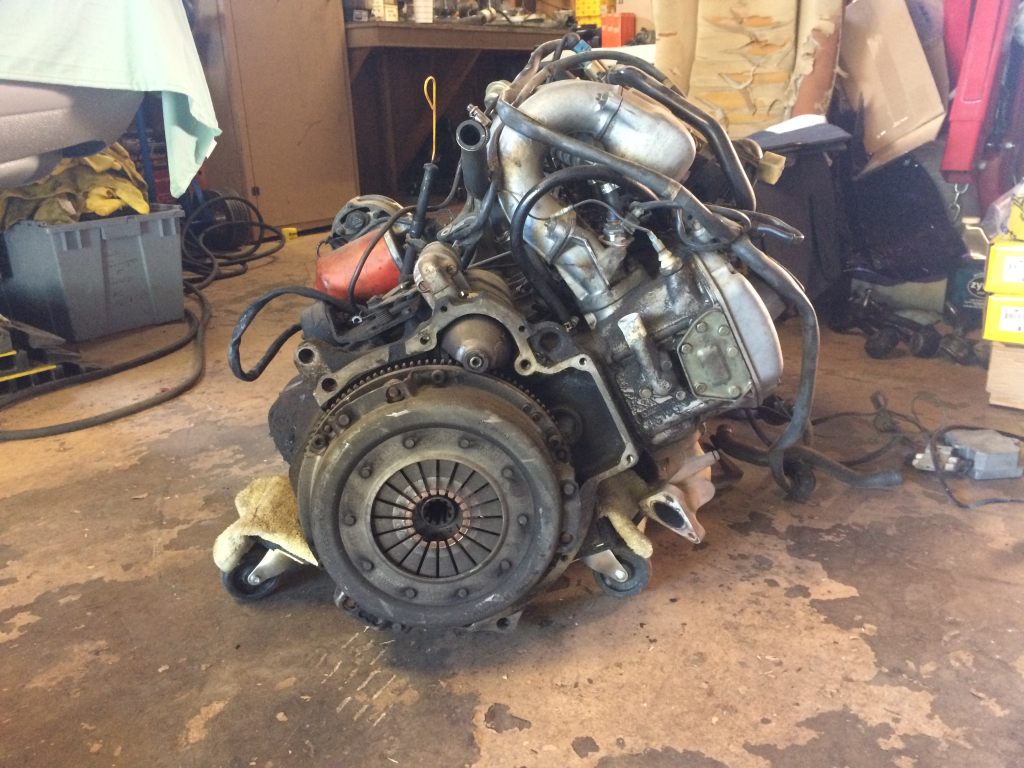
Image

It helps that when you drain the fluids from the motor, don't forget to also drain the filter housing. The unexpected stancing caused a mess in that regard.
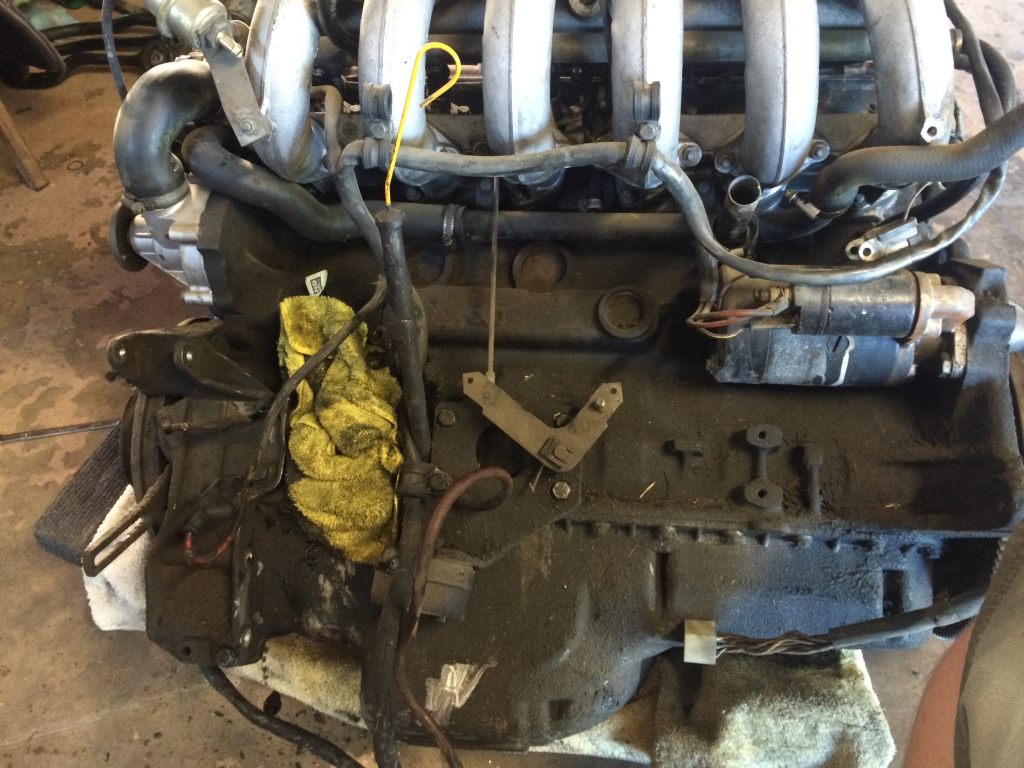
Image

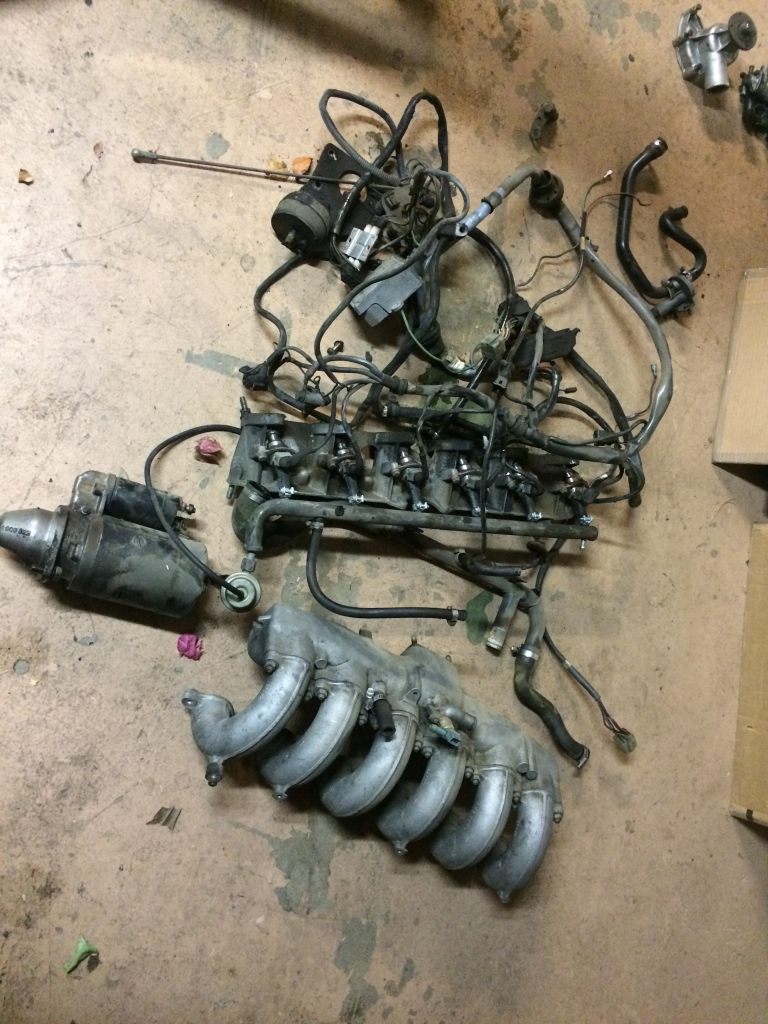
Here's a bunch of stuff removed:

Image

Here it is ready for transport:

Image

One thing I did work on over that time was trying to get some trim refinished. There are a few pieces of the brightwork that are NLA or the currently-available part is useless (as is the case for the front lower windshield trim). I found a local polishing shop that had been getting good reviews in the hot rod community, so I swung by and he quoted me a reasonable price for 9 pieces of trim. I dropped these pieces off in early August. I happened to see a sign in the office suggesting they do chrome as well. There are only a couple of chrome pieces on an E12. Tail light surrounds and the door handles. I had an excellent set of tail lamps, but of the multiple sets of door handles I have, I had a good set, but it's just a good set. Interestingly, the best set I have ever gotten came off of THIS car. So, I asked about the chrome and he has a connection with a chrome shop in Tucson. New handles are $144 ea, which doubled in price from when I first considered them in 2010. I scoffed at the price then and did the same now, though I was actually ready to pay the $70 ea for them. Go figure. Well, several months went by. Sometime in October, I think, I swung by to see what was happening and the chrome guy was there with my door handles. I checked them out and they looked good, but I saw a spot on two of them I didn't like, so they went in to be redone. I still don't have them. Finally, in mid-December, I got the polished pieces. The polisher suggested I just use the Blue Magic metal polish. I explained that these pieces have to resemble the new trim on the car. I understand matching it is impossible since the original process is a bright-dip anodize that I cannot replicate between the five anodize shops here in Phoenix. I need a coating to take some of the punch out of the polished aluminum and to protect it. I didn't unwrap anything, instead, I took it all straight to the powder-coater I use. They do lots of firearms stuff and specialty coatings, so I wanted to have them do the ceramic clear that a shop in CA uses. They didn't stock it and had to order it. About three weeks went by and I got to see a sample. They used the piece that goes between the tail lamps on the tail panel. It was terrible. The "world's strongest clear-coat" can only be removed by blasting, according to the manufacturer, once the cure time has been reached. Ugh. They did another sample for me and it was better. I called the manufacturer and they gave me some tips, but the shop kinda wrote them off saying "we go back and forth with these people all the time." I gave them a suggestion and a few days later, I had the rest of the pieces. They stripped the tail panel test piece, had it re-polished and re-coated it. Of all the pieces they did, it was actually the nicest. It was by far the worst piece of trim when the process started, though.
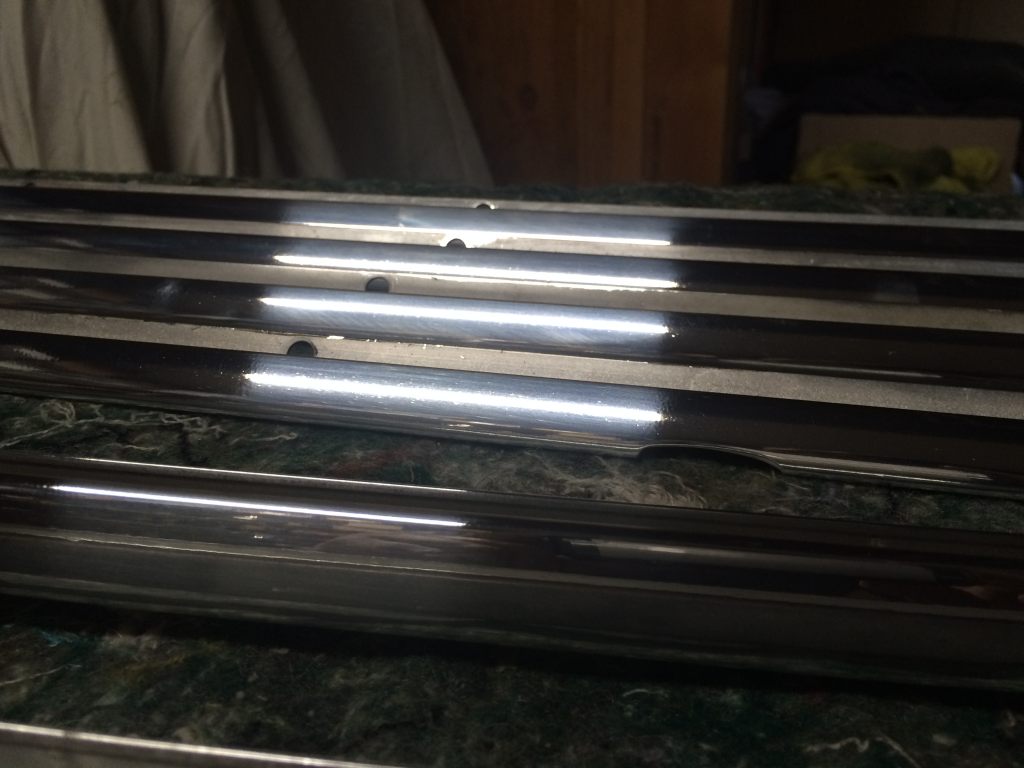
Image

At this point, I was pretty excited to have these pieces back. I got to thinking about what to do next. I started by installing that piece of trim.
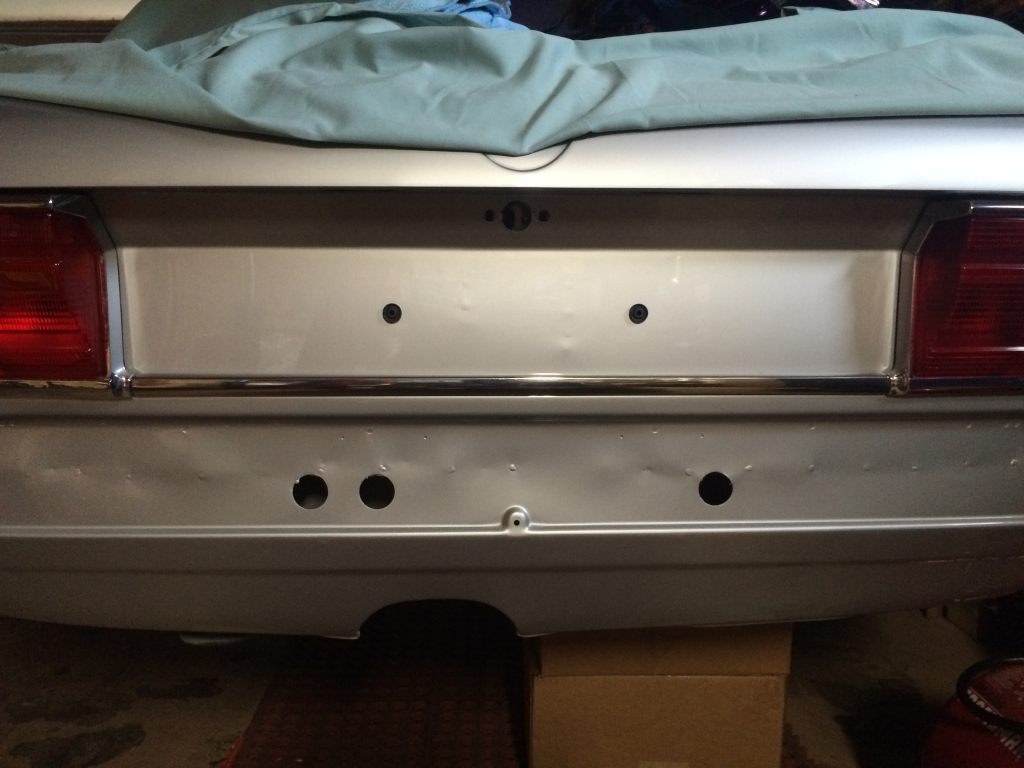
Image

I figured I needed to get going on these harnesses. Starting with the ones behind the firewall, I figured out there were three separate harnesses. First is the standard harness, second is central locking and since my car is plagued with power windows, it has one of those too. The central locking was in primo shape, so I left it alone. The other two had areas where the tape was coming off, so I re-wrapped those with friction tape. Unfortunately, the friction tape is too wide for the skip-wrapped harnesses, so I split it down the middle and wrapped it that way. I think it came out well. Once they were situated, I started running them through the car.
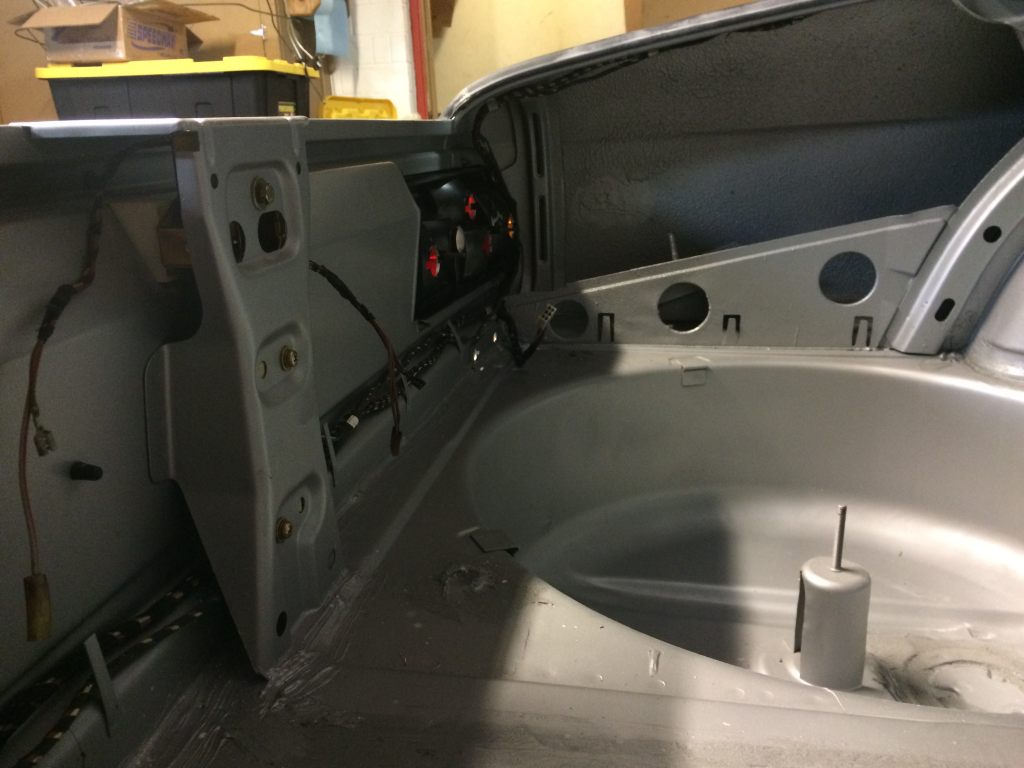
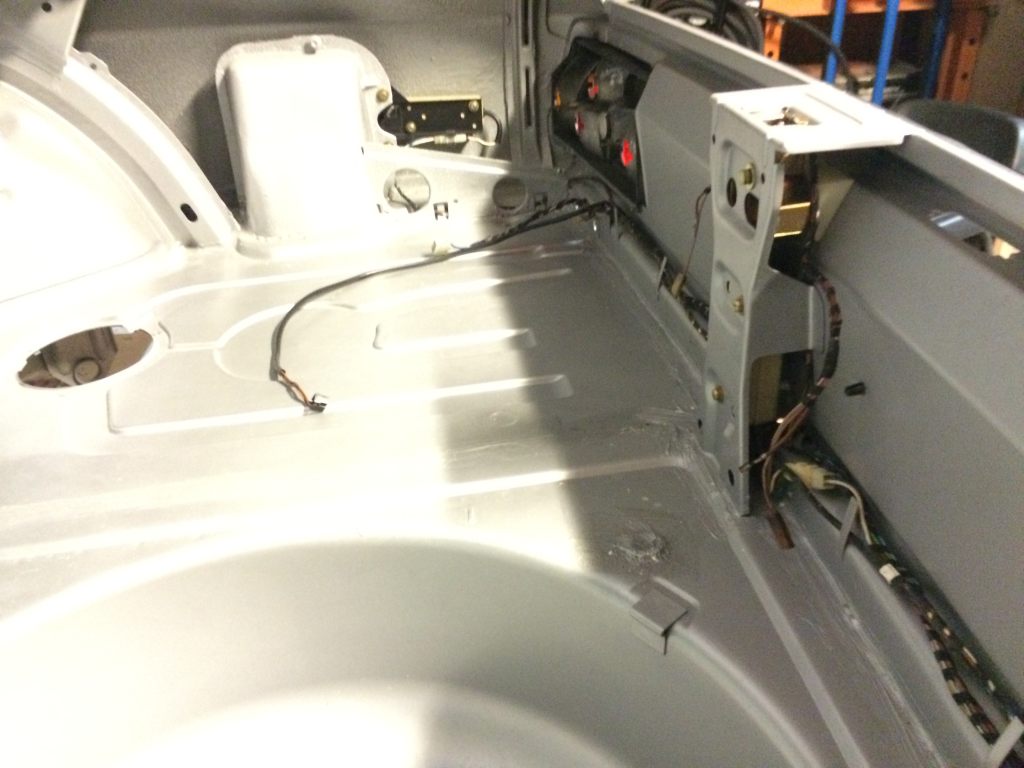
Image

Image

Image

Until I'm satisfied everything is right where it needs to be, I'll sinch up the zip ties and cut the tails off. There are lots of wires that end up in the left front corner of the cabin. I can't start tidying this stuff up until I run the forward harness into the car.
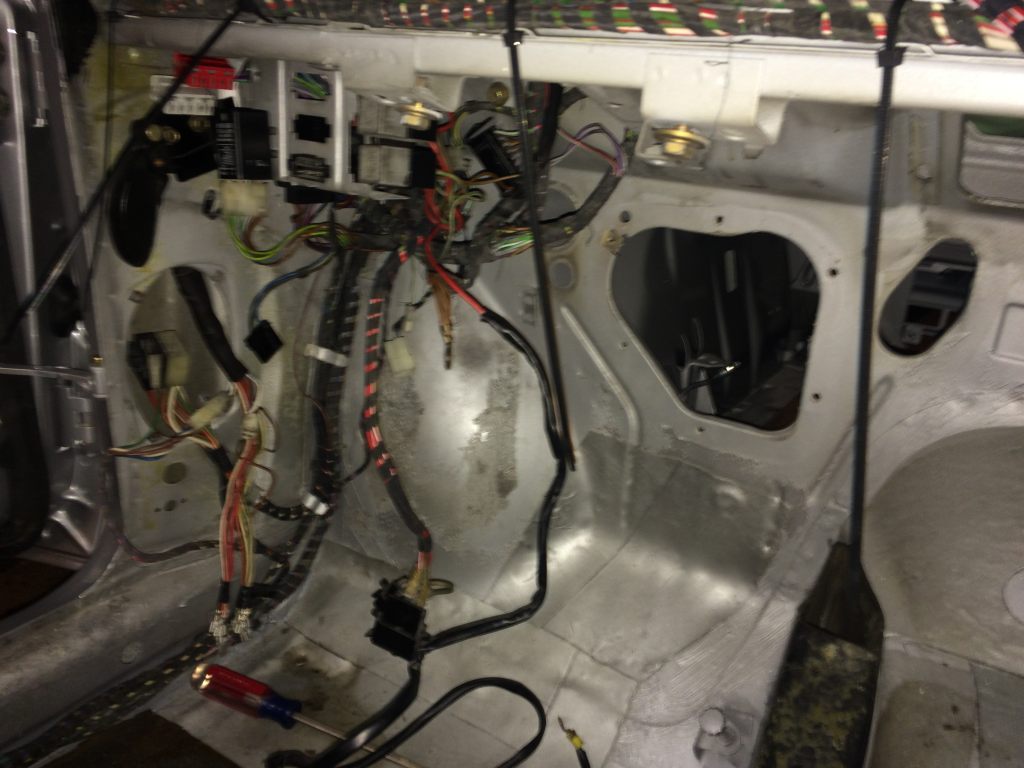
Image

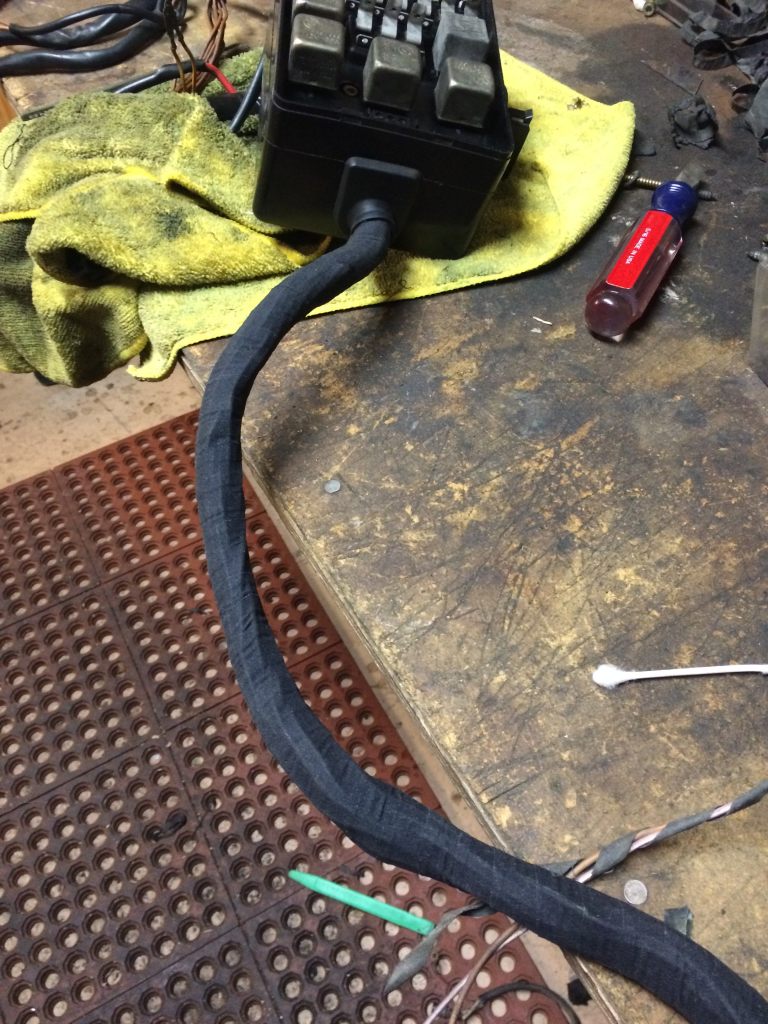
I started work on the forward wiring harness. There are several areas where it was Federalized and those wires need repair. I started with re-wrapping the main harness and also replaced the fusebox grommet with a mint one from the Super Eta.
Image

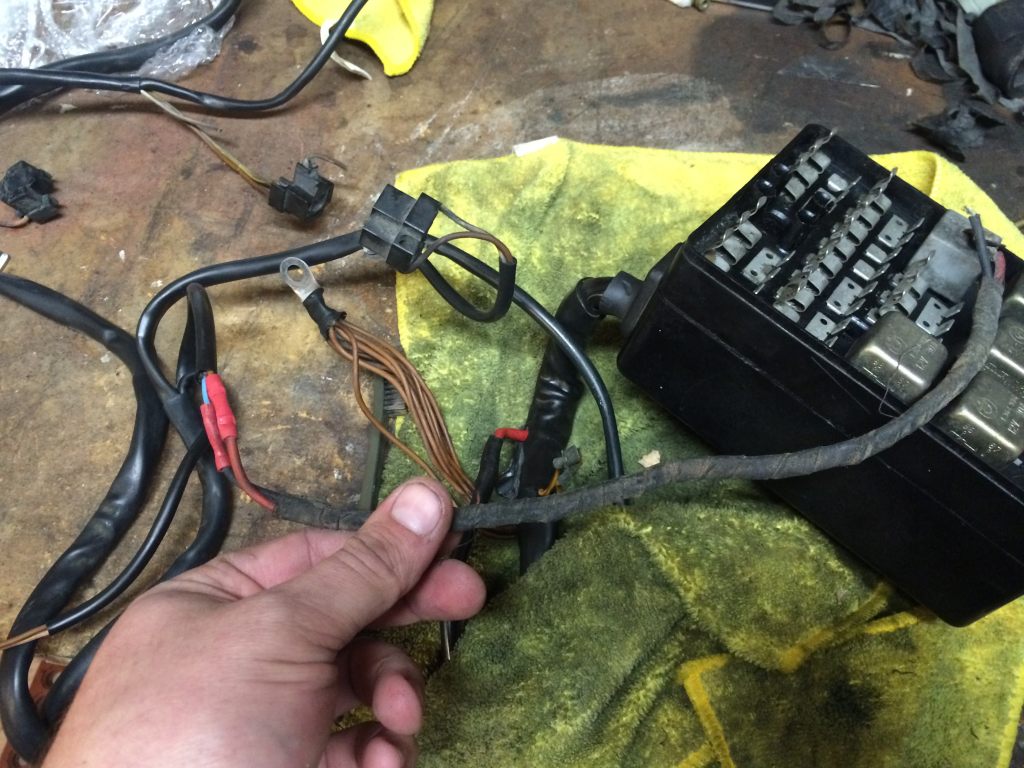
This is the wiring for the left front turn signal. It was cut short and replaced with a red ground wire and black positive wire. No connector. The ends were soldered to the tabs on the lamp.
Image

I ordered some of the correct terminal connectors and a proper German crimping tool ($$$). While I waited for them to show up, I decided to just start installing all of the parts I've been buying and storing since 2010.

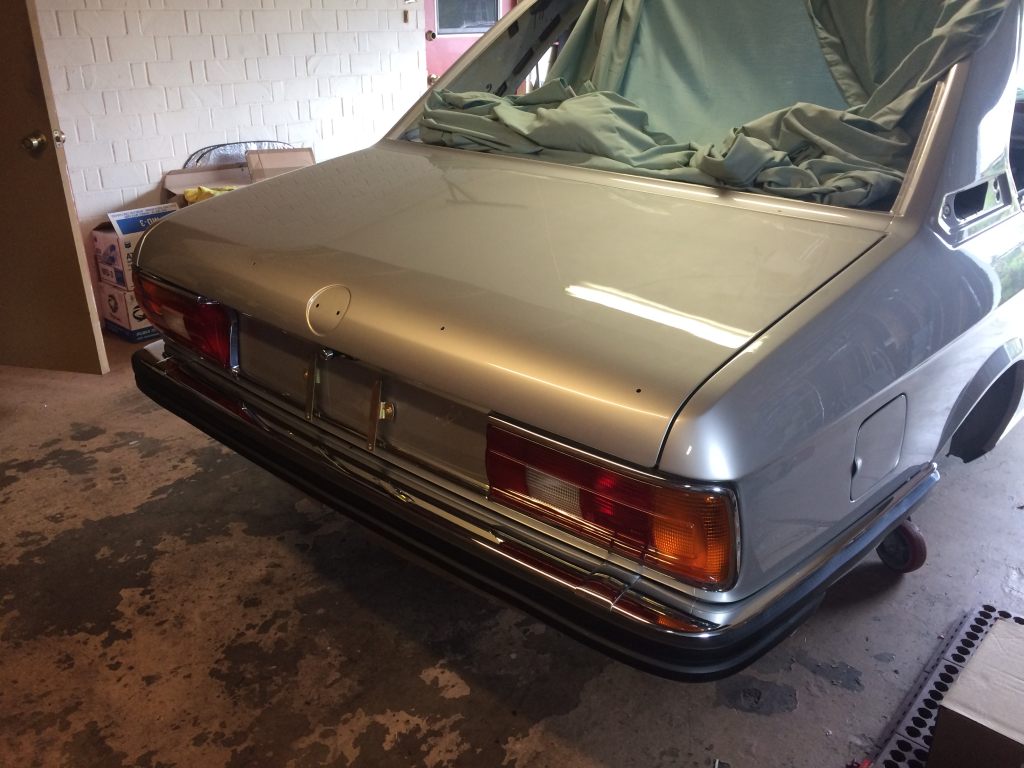
I started with the rear bumper. All brand new parts. Pretty frustrating to assemble since you swear you're going to break the seam covers getting them into position. Installing the strips is an aggravating experience too since they go in a specific order and have very tight tolerances. I also had two "complete" hardware sets and found that neither set had everything needed, but it was a start. They're NLA now anyway.
Image

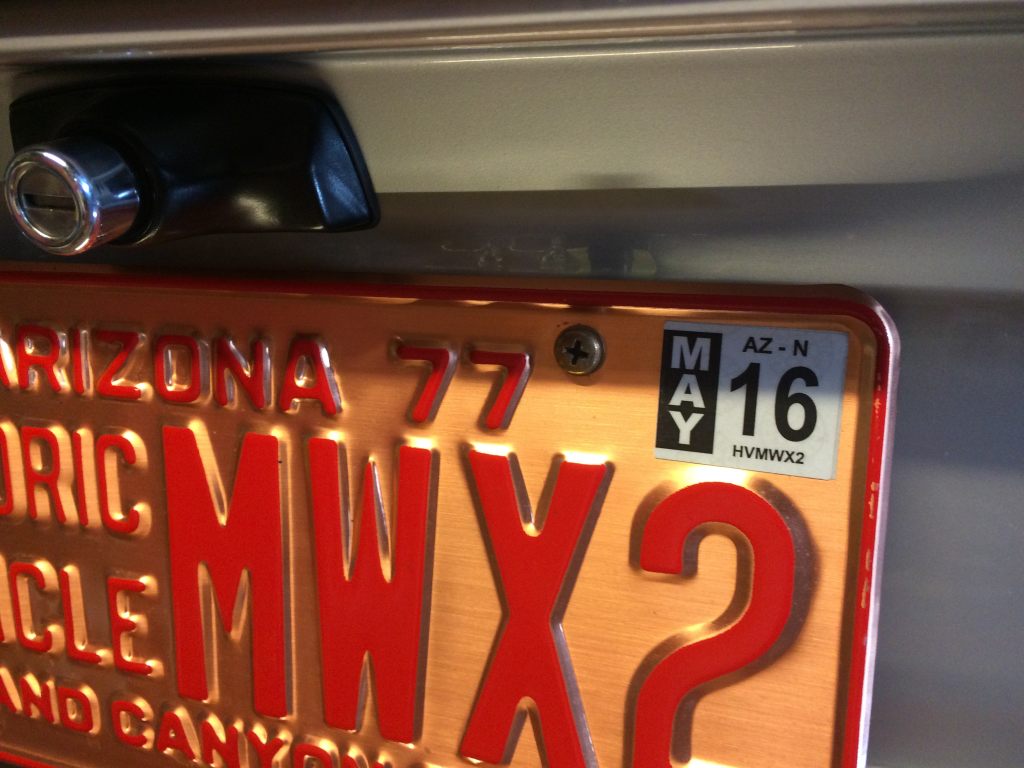
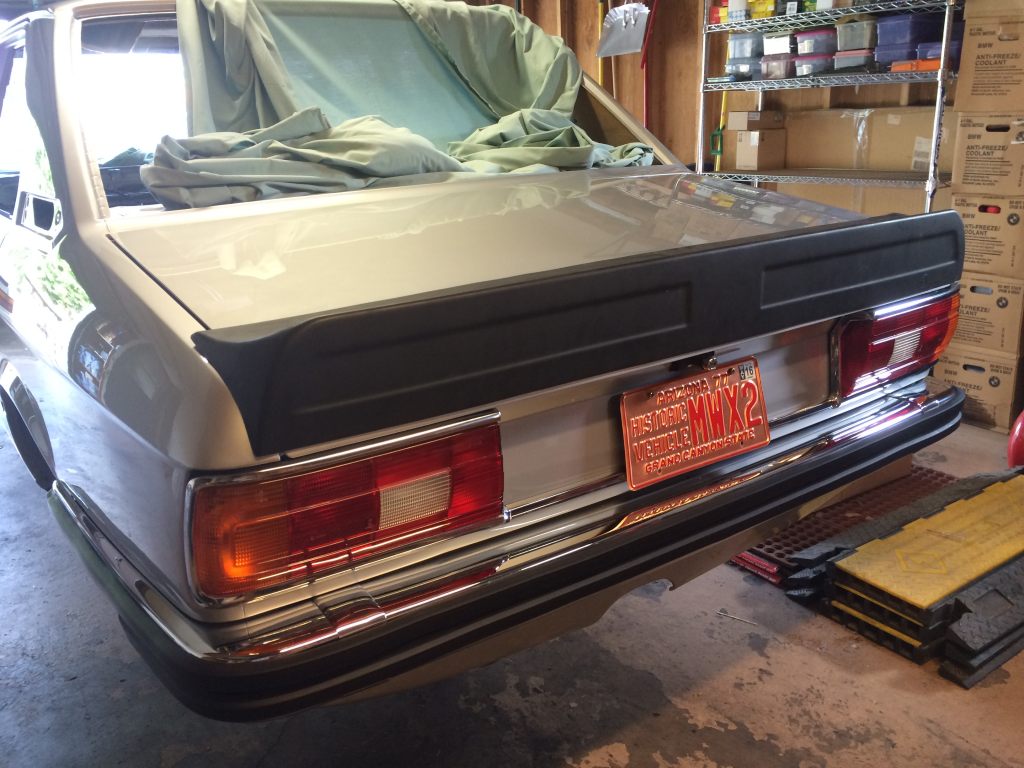
Once I saw that, I decided I had to just see what the back of the car was going to look like, so I set the spoiler on the trunk and put the license plate on.
Image

It's still registered!

Image

I also completely disassembled the trunk lock, painted the surround and used o-rings to replace the seal. Unfortunately the o-rings don't have the lubricidity the nearly-missing seal did, so it's a little tight. I might revisit that later, but it is functional nonetheless.

I moved on to assembling the doors. I had just done all of the window weatherstripping on the E28, so the process was still fresh. I had everything new, which can be tricky to fit since it all likes to take up too much space. The rear guide rail was refinished with the other trim pieces.
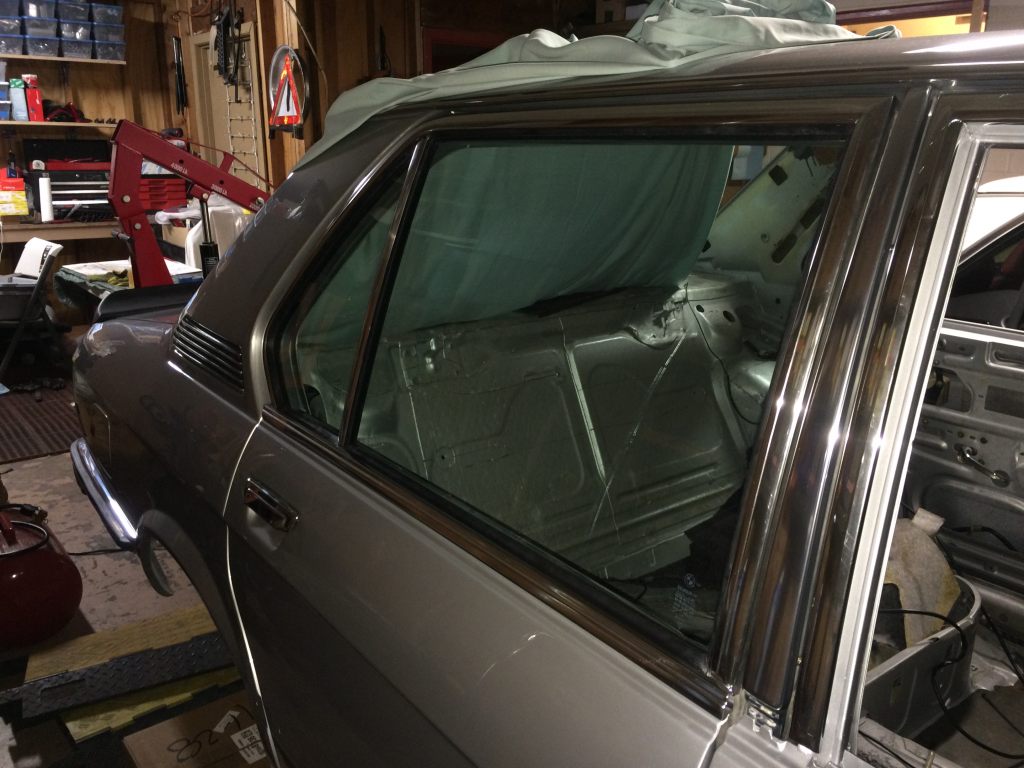
Image

I went to the other side:

Image

Image

Right front door done and I then decided to install the belt line trim, too. Rocker trim will come later. Mike didn't make the holes in the fenders. It's something I could probably do though.
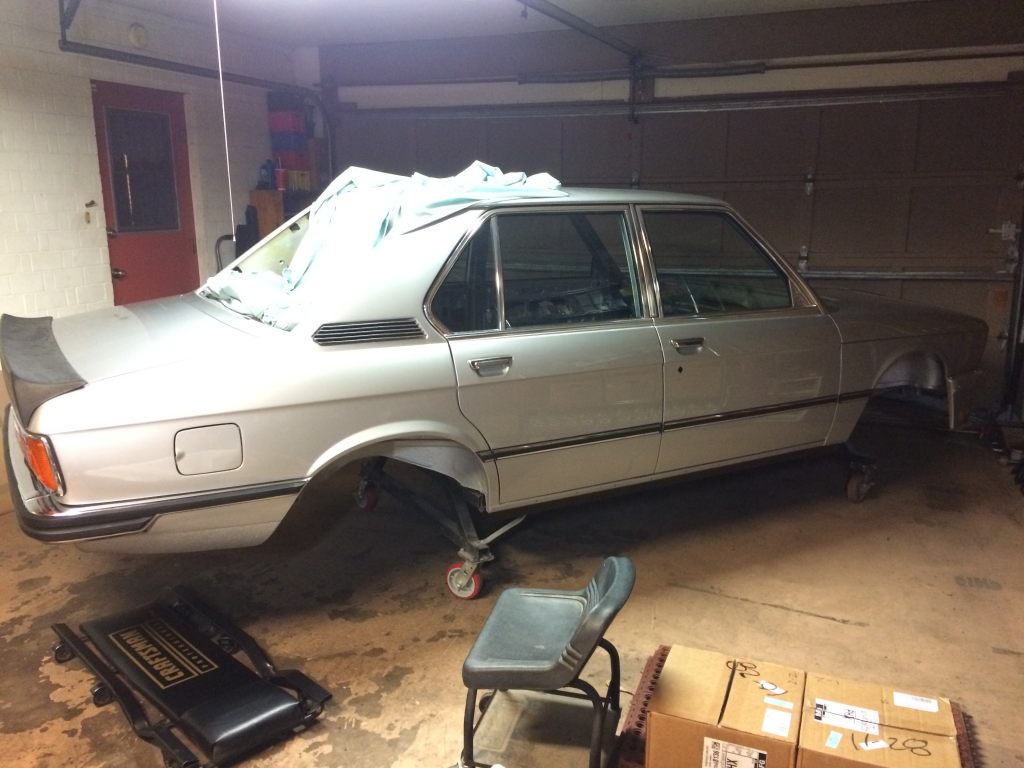
Image

And here's the left side:

Image

At this point, I was very happy with the hood alignment. I got that thing installed right on the first try. Still, I can't know for sure unless I try out the grilles to make sure they sit properly relative to the hood and fenders.
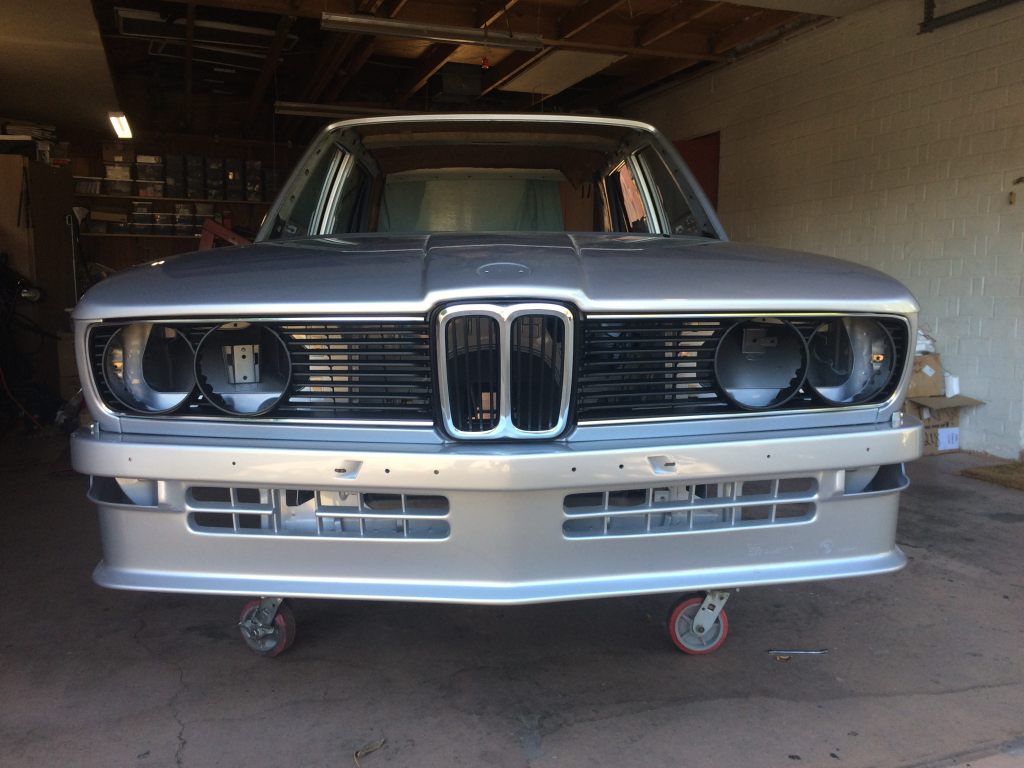
Image

Good. Unfortunately, it looks kinda stupid. I have completely new headlamps. Why not check those out too?
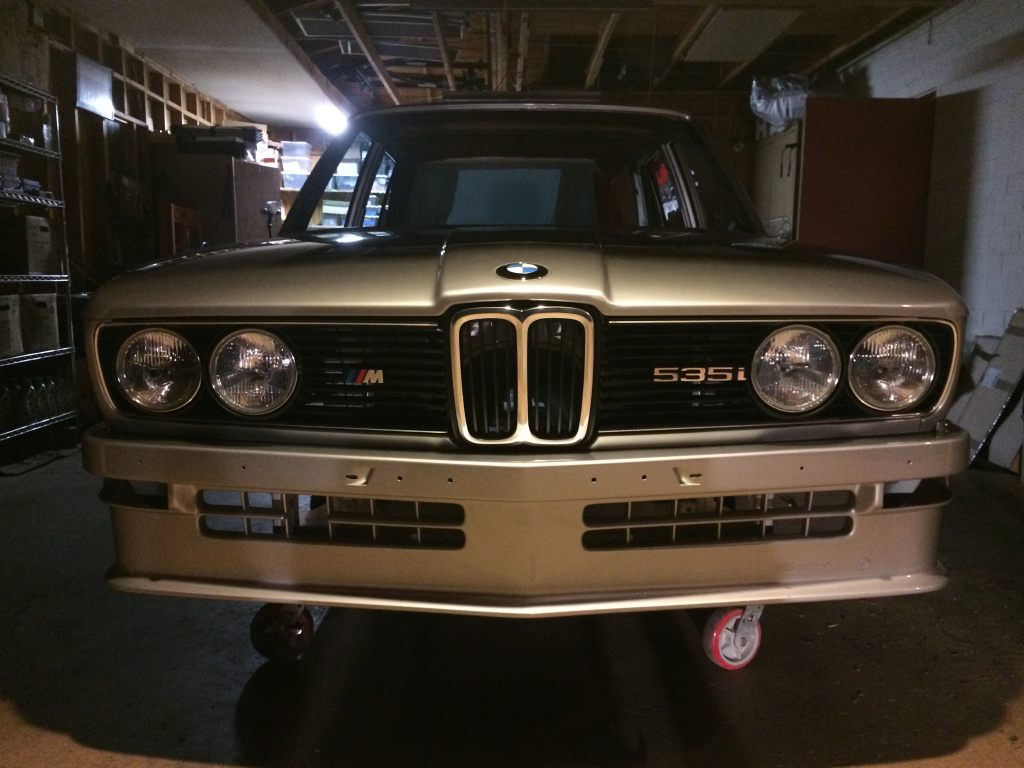
Image

Sadly, I happened to catch a glimpse of the garbage fuel hard lines I paid insane money for and noticed that they were starting to accrue and undesirable amount of surface corrosion. I was never told that the lines were bare steel. For what I paid, they should have been stainless, but I was given junk. Junk which didn't fit properly.
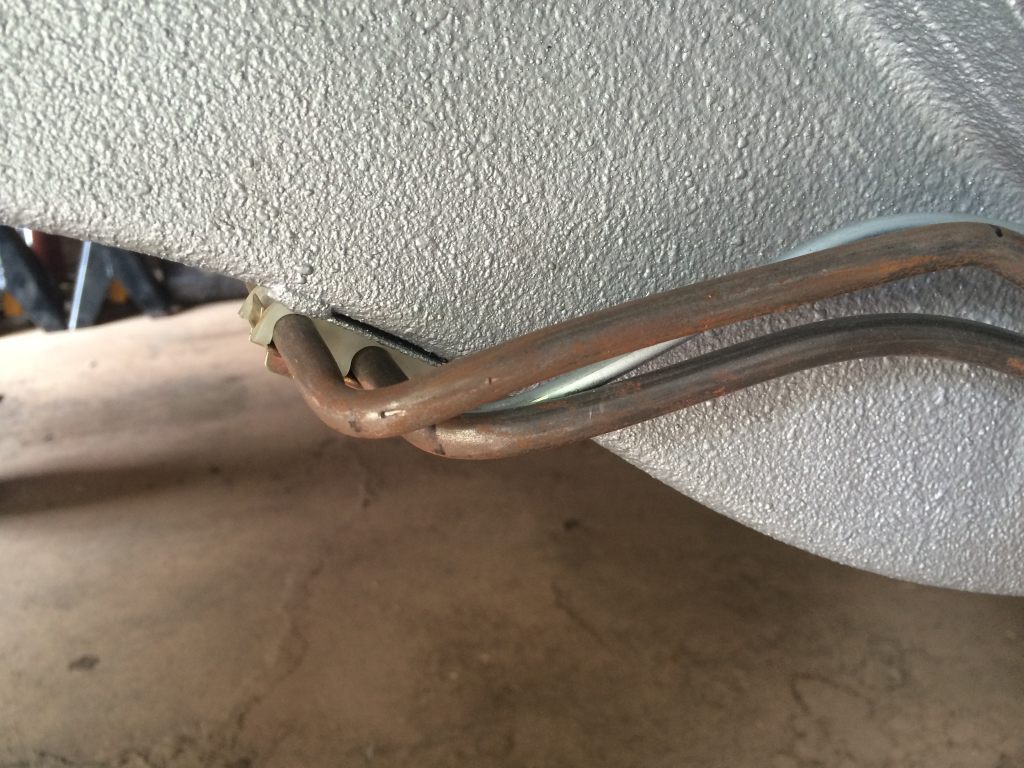
Image

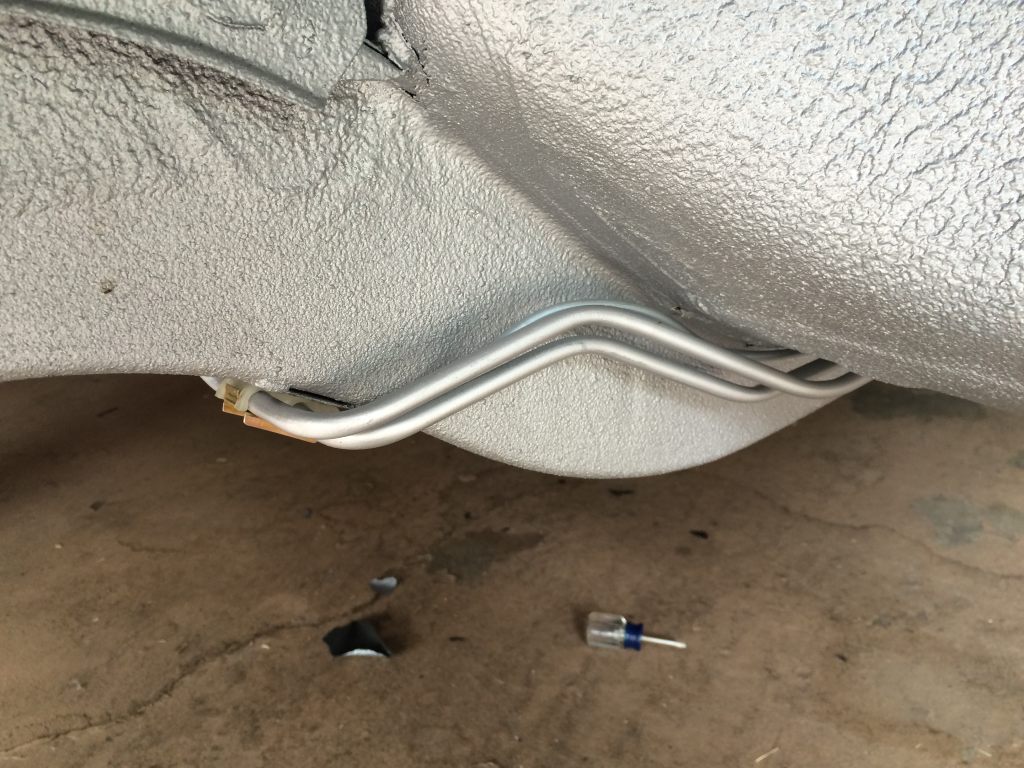
After getting extremely upset, I considered my options. I decided to refinish the original lines since they fit properly and are actually in pretty nice shape. I did much sanding and decided to go with a silver finish. The originals were plated but that's not an option now due to their size.
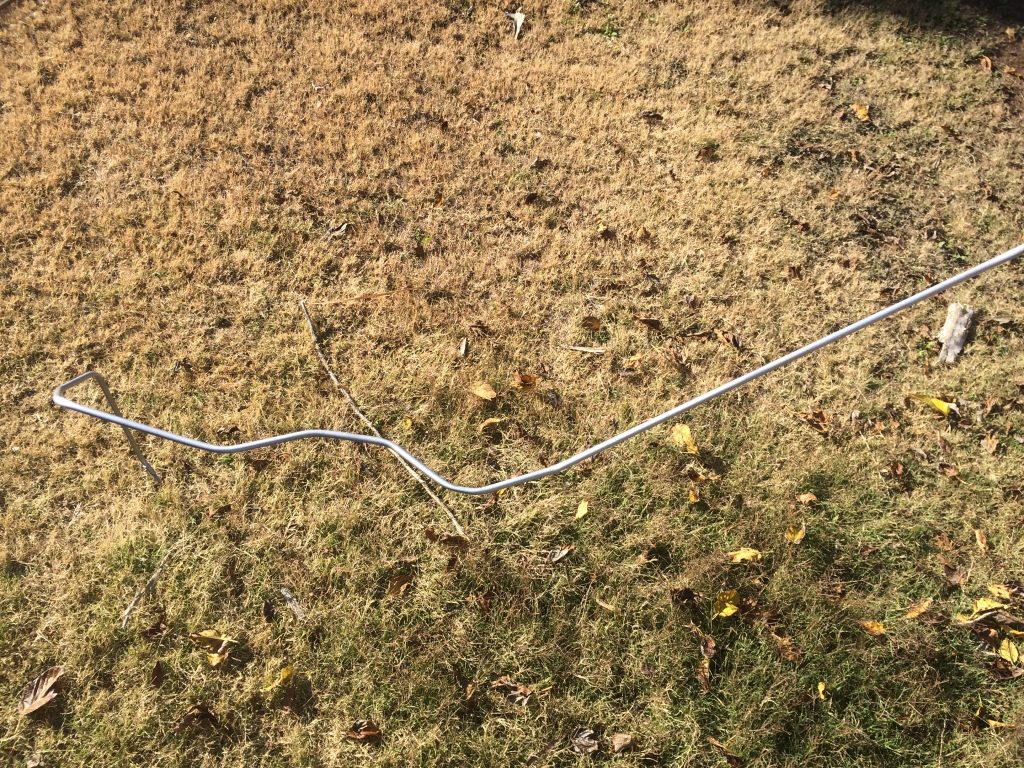
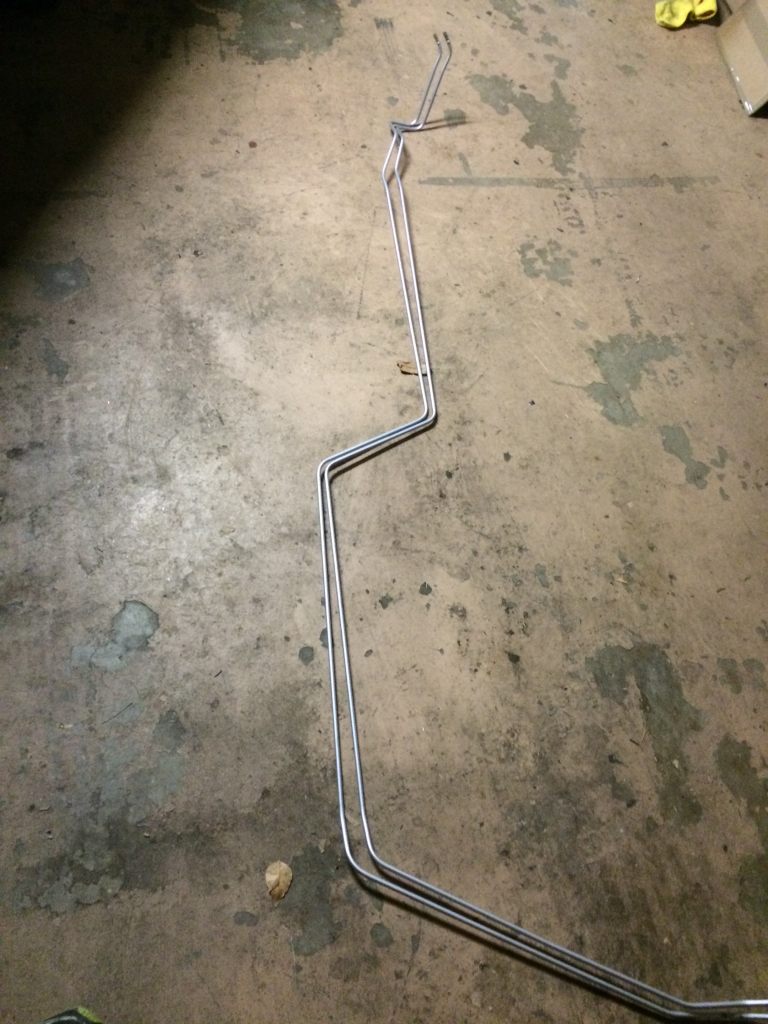
Image

Image

Image

Image

Once that was done, I realized that I should have waited to install the new lines until I did the firewall insulation. I was very lucky and was able to get ahold of a brand new piece of firewall insulation a few years ago. I found it was particularly tricky to fit. It took nearly 90 minutes to get into position. I installed the pedal bracket as well.
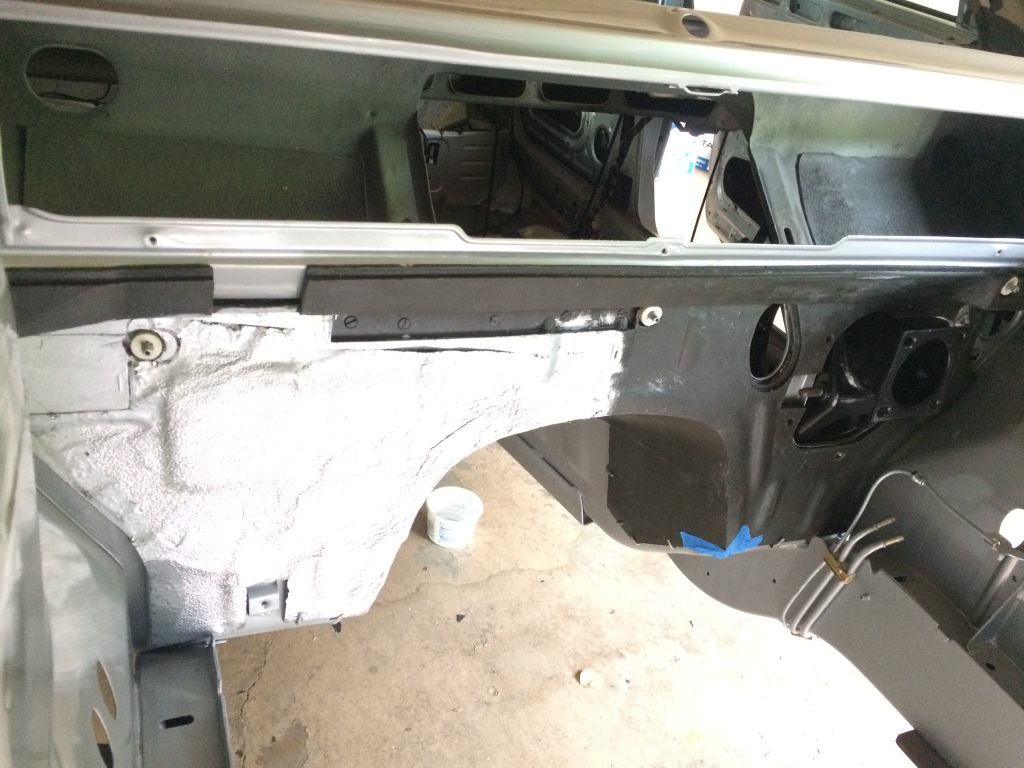
Image

Now that the insulation was installed, I could then run the brake lines for the right front, which run across the firewall. I found that they were made about as well as my fuel lines.
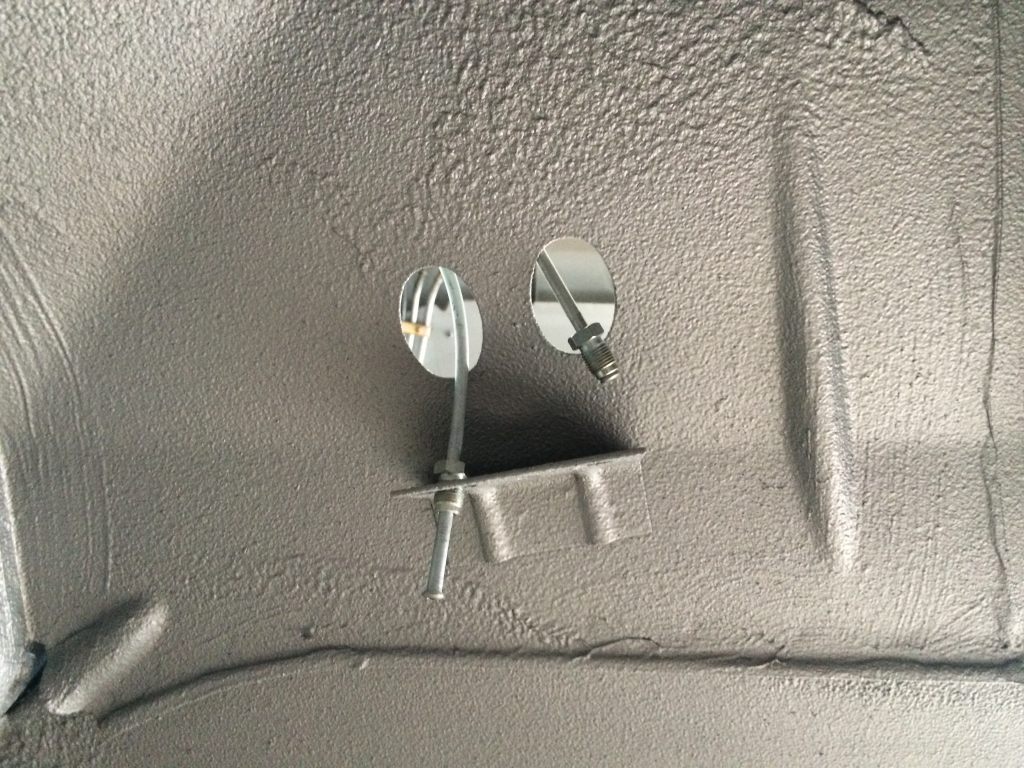
Image

After about two hours of adjusting, bending, and installing and reinstalling, I finally got it.
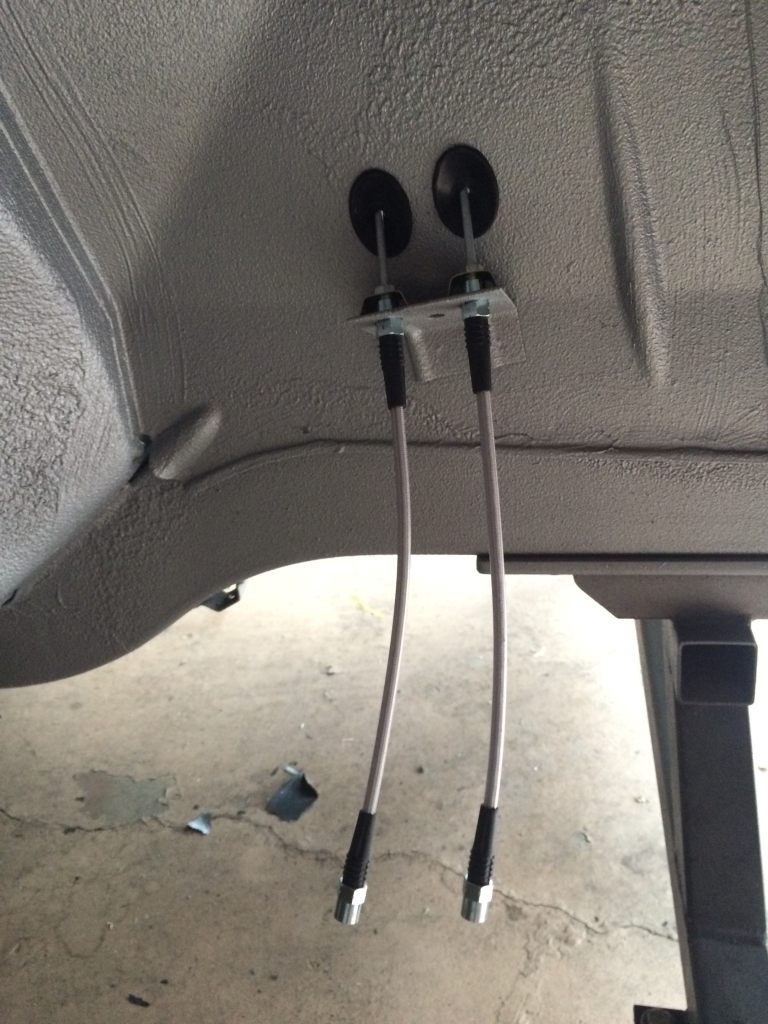
Image

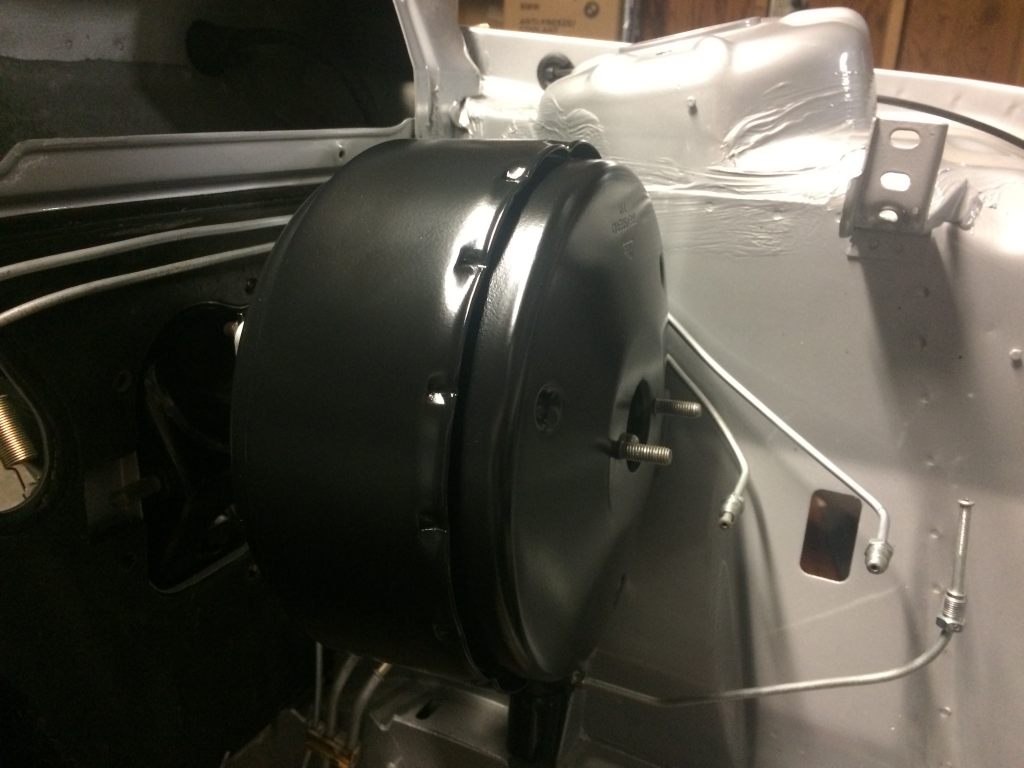
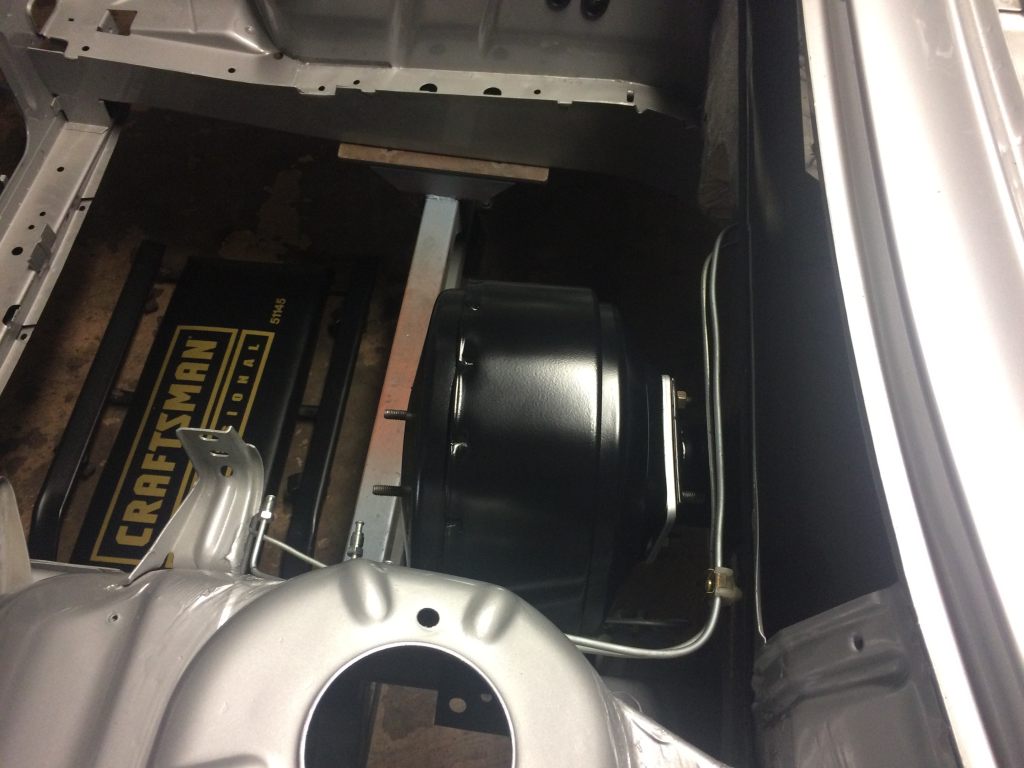
I hadn't decided what to do with my rebuilt brake booster. I was debating just having Mike paint it but I thought this is something I could handle myself. At first, I thought it had a paint on it, but given how my hands smelled after handling it and some sanding, I found it was bare metal. Great. I bought a 2K epoxy primer by SprayMax and a 2K Hot Rod Satin Black, also by SprayMax. I primed the booster. Here it is hanging out to dry at a cool 98.8º.
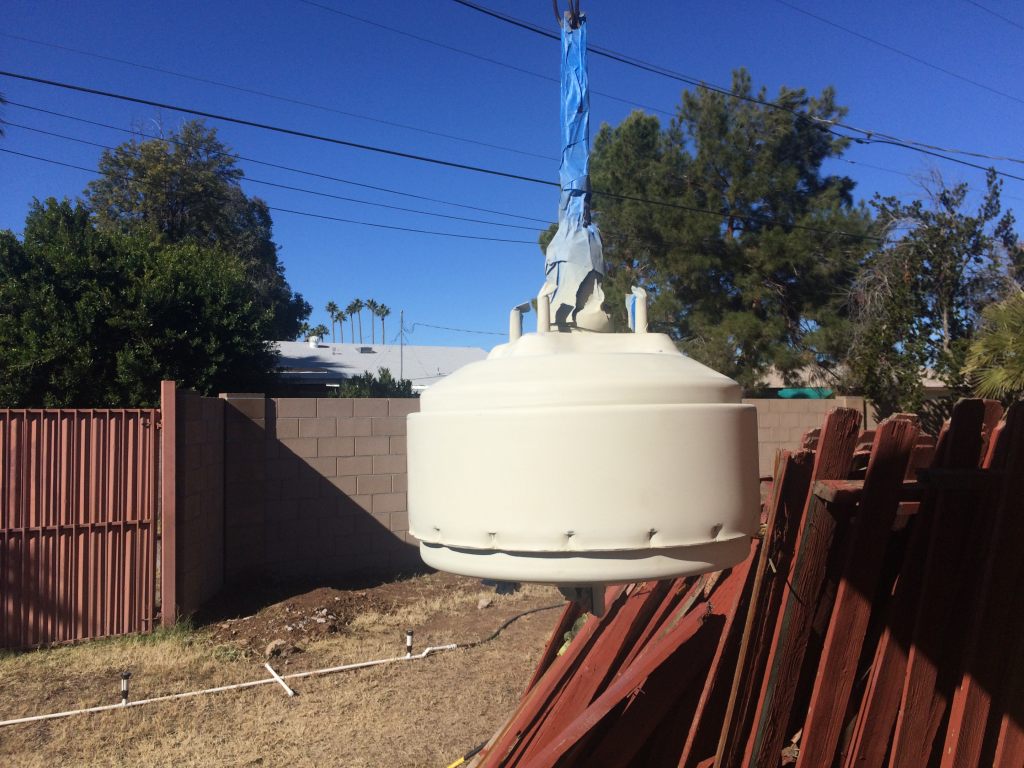
Image

I sanded the primer with 400 grit dry paper and sprayed it with the black next day. I ended up with a poor result because I didn't put the coats on heavy enough. As a result, I had to wet-sand that and buy another can. I used the entire can on the booster and it did come out pretty well, I think.
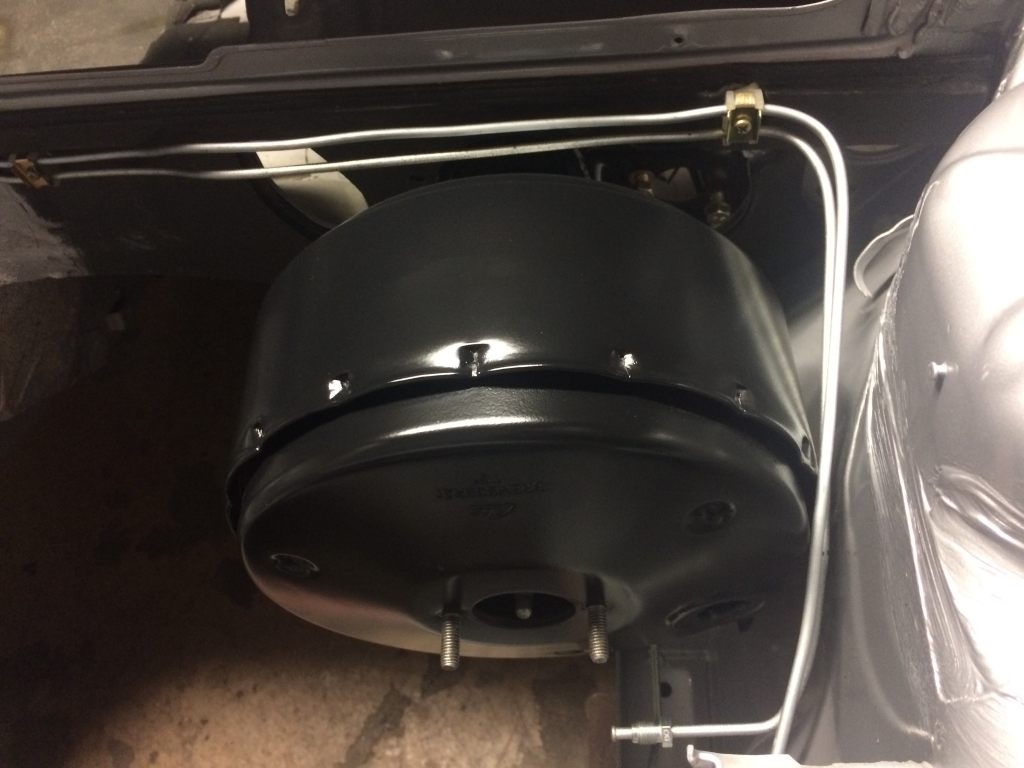
Image

Image

Image

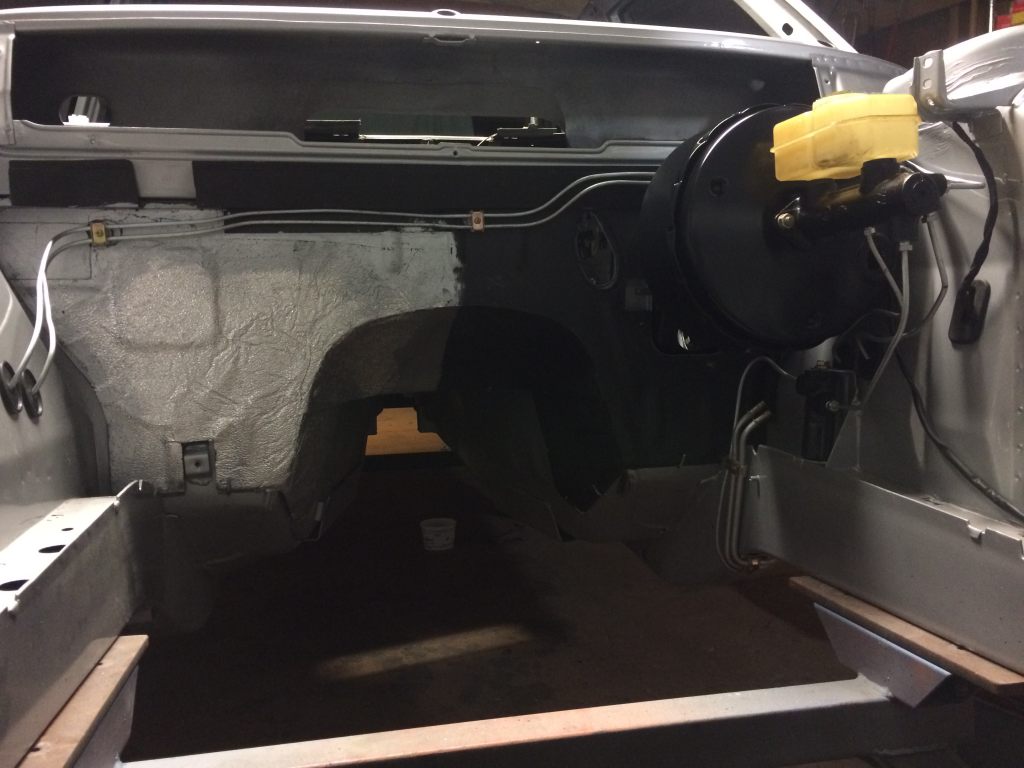
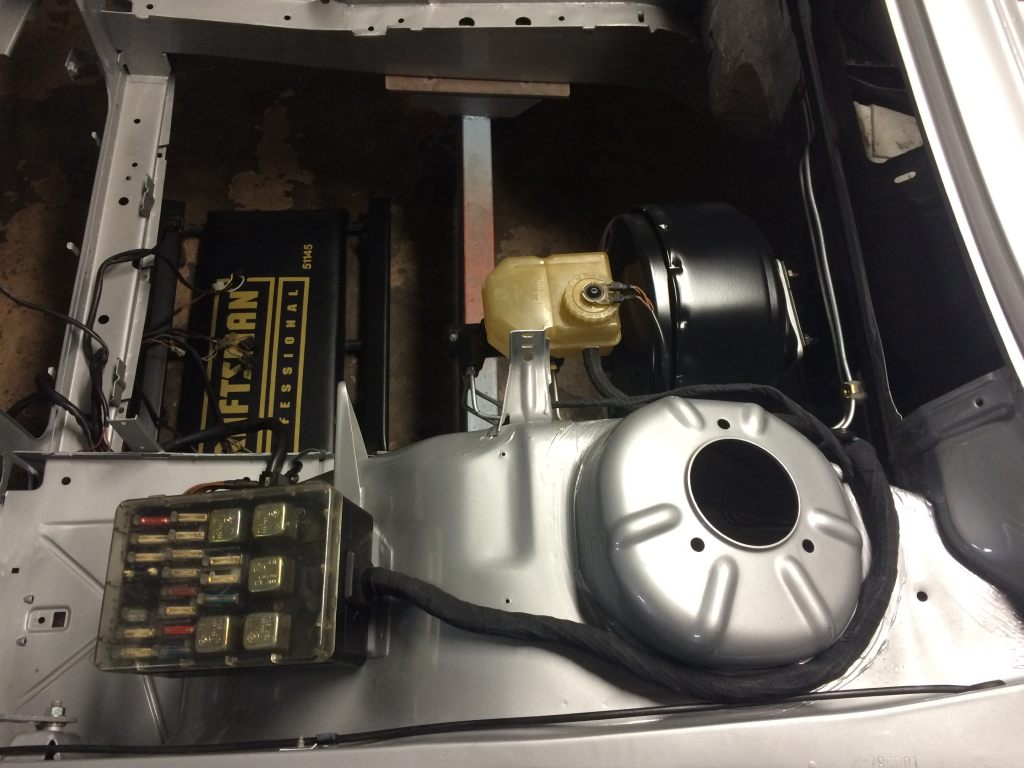
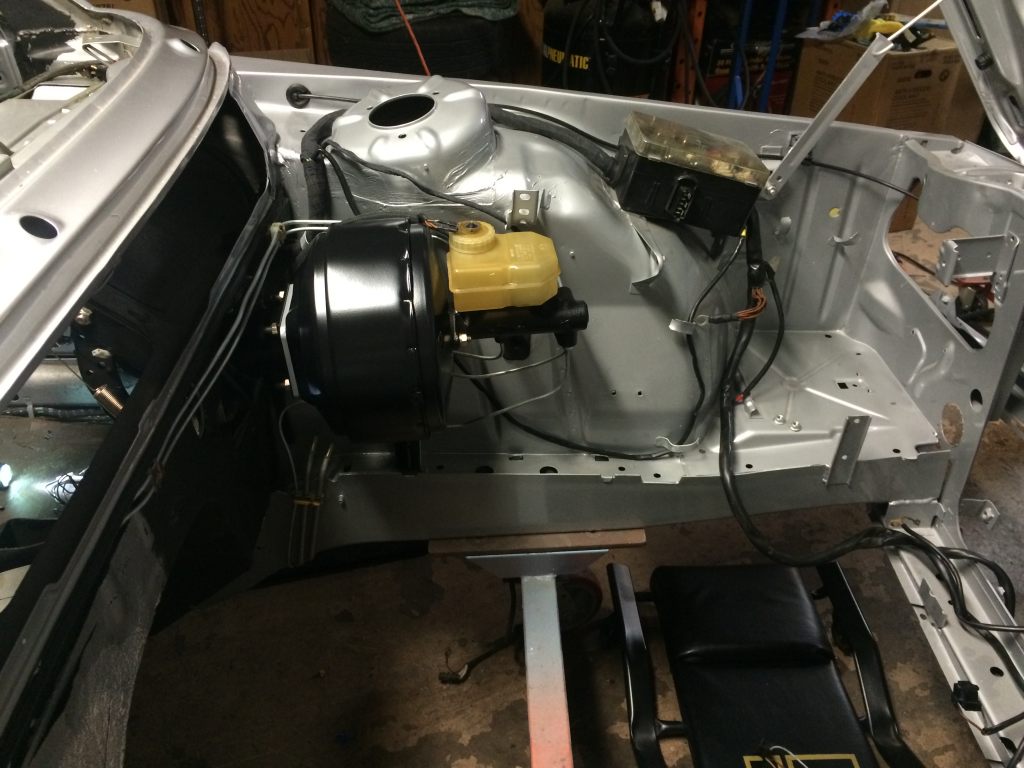
Thursday, after work, I started repairing the harness. I had some issues soldering, so after some guidance from those who know more than I, I got that nailed down Friday morning and finished the repairs. That evening, I was able to feed the connectors in through the firewall and route the harness on the inner fender. With that done, I installed the clutch master cylinder on the pedal bracket, the brake booster and the master cylinder. I had already mocked up all of the lines before painting the booster. Surprise, they all needed to be adjusted or re-bent from scratch. Once that was done, we ended up with this:
Image

Image

Image

I picked up a bunch of new parts today including my heater core, new heater valve and some various other pieces. I need to get all of the wiring situated in the car. I have everything I need to get the subframes in the car and will probably work on that soon.

Re: E12 M535i Project - 01-16-16 Update

Posted: Jan 16, 2016 4:42 AM
by jodystevens
Booster and lines look excellent! Well done.