Page 15 of 23

Re: E12 M535i Project - 02-12-16 Update

Posted: Feb 13, 2016 3:53 AM
by bkbimmer
Cars are expensive to build, the good news is the nicest cars make the best parts cars.

Re: E12 M535i Project - 02-12-16 Update

Posted: Feb 14, 2016 8:29 PM
by Nanajoth
I'm glad you will be putting those pistons to use!

Re: E12 M535i Project - 02-12-16 Update

Posted: Feb 14, 2016 8:35 PM
by T_C_D
wkohler wrote:
I've officially given up on Jim's Upholstery, they just don't seem to give a shit anymore.
They did a great job on my seats 6 years ago and a good job on a different set 8 years ago but the I sent them a simple repair job last year and it was very expensive comparatively and a recent quote was very high. I guess I should not recommending them. :cry:

Re: E12 M535i Project - 02-12-16 Update

Posted: Feb 14, 2016 8:40 PM
by Kyle in NO
ICE must have paid them a visit.

Re: E12 M535i Project - 02-12-16 Update

Posted: Feb 14, 2016 8:54 PM
by wkohler
Well, here's the thing. They can do decent work on stuff, but they don't really care. You can show them a seam that clearly isn't right and they say they don't see anything wrong with it. Fine. I think for what you pay, they do fine work. Also, a leather interior is a bit more forgiving, but there details like the tiebacks in the E28 sport seats that they don't do. Still, doing an entire interior with rear headrests in leather including materials for about $1500 in less than a day is something.

Unfortunately, when I had them do this work (July, 2010), I didn't realize all of the nuances to a good upholstery job.

They did a nice job on my 535is interior, with the exception of omitting the tiebacks and whatnot, but I think the problem here was twofold:

I was told they could get the same vinyl and I actually selected a swatch of it that matched, but the vinyl they got was clearly lighter. Also, dealing with a cloth with a distinct pattern, like the corduroy, requires extra care and attention to ensure that everything lines up as it should. Unfortunately, that didn't happen. They also didn't follow the pattern for the rear seat or put the piping on. Brenda told me it would be no trouble to replace the vinyl (but I'd, of course, have to pay again). Sure, they could replace the vinyl, but I'd end up with something as bad or worse (from a quality perspective) as what I have now. So, the frustrating part is the waste of the cloth. The money I paid to Jim's sucks, but I put that out of my mind years ago. It's all sunk cost (and boy is there a lot of that on this turd).

Either way, my cloth has been secured, so, that's great. I'm not sure what the next step is. I have so much work to do now that I'm having a hard time staying focused on it because this snafu is on the forefront of my thoughts. I'm easily distracted to begin with.

Re: E12 M535i Project - 02-12-16 Update

Posted: Feb 14, 2016 8:57 PM
by 1st 5er
...

Re: E12 M535i Project - 04-18-16 Update

Posted: Apr 18, 2016 5:16 AM
by wkohler
I've been really busy with work and whatnot over the last couple of months, plus with taxes, I haven't had any time to relax. Fortunately, there has been some progress over the last couple of months, so I guess we will do it in chronological order.

First off, my begging for the interior firewall insulation piece finally paid off. ldsbeaker spent considerable time and effort salvaging this piece from an E28 he's been working on and it's close enough to work well in the E12. It had remained a piece that was virtually unobtanium and an off-handed remark during a text conversation resulted in this - delivered, even!

Image

It fit in the space well and only needed minor modification around the steering column/pedal bracket and the heater outlet. Everything else works well and it's actually in pretty good shape, too.

Of course, the month of February totally sucks for me and it remained in that spot until the end of March when I accidentally had a couple of hours to see how everything would work together.

February 19th, I found out that of the 11 pistons I gave the machine shop, only two were considered "usable." I've got two more M90 motors, but if I totally disassembled two M90s, could I get a full set? Then I'd have torn down motors everywhere and I'd still need rings. At that point, we decided to call JE. Many times. Leaving many messages. Yielding zero response. It has to be me. It just does. Maybe I should read between the lines. That's where everyone else seems to be.

February 22nd, I decided to drop by the wood refinisher to see what had been going on since I hadn't heard anything. They had told me two weeks when I dropped the stuff off but I let it go quite a while. I had dealt with the owner of the shop and it really seemed like we were in sync on what needed to be done and more than anything, I was looking for something to make me feel good as at this point, nearly every other aspect - actually every other aspect of the job - was giving me bad news. While the boss wasn't there, one of the guys was and I talked to him. He showed me what they had done and I had a very hard time not going ballistic. It looked nothing like it was supposed to and in stripping the veneer, they even broke chunks off in places. I was devastated. The one thing I was hoping would just come out totally tits came out totally, uh... AIDS? I don't know. It was terrible. I couldn't even talk so I left. Chunks of veneer missing and they put some varnish or whatever right over the top of it. I don't know how many times I said restoration project and, "it needs to look just like this. Can you do this?" I had total faith in them, but I guess they must have realized I was restoring an E12 and, of course, no one appreciates those.

I did the only thing I could think of and drove home, looked up the business card and got on the talking horn to the owner. He was smart and said he "couldn't comment intelligently" since he didn't have the stuff in front of him, but he'd call me back. I did tell him that I had two perfect pieces in there that I'd have never had refinished but it all had to match. It did all match. It looked like shit. It all looked like shit together, but that's not what I was paying for. I could do this myself and I probably couldn't even do this bad of a job. I respect wood too much. He did call me back as promised and he assured me they would fix it. He had said that what I wanted was something totally different than he was talking about (so much for me reading that conversation of "it needs to look exactly like these two pieces," answered by, "Yes.") So, I decided to give them the benefit of the doubt since it couldn't possibly get any worse and see what else would blow up in my face. After a while, you really start wondering if everyone out there is useless or if you're the problem.

I checked in with Alex to see if there was any progress getting a hold of JE. None. Never got a call back. We tried a couple of other piston manufacturers and they didn't have any interest in my pistons. Finally, I decided to call JE myself and somehow, I got right through to Jeremy in the Import/Exotic department and we talked for a while about every non-M90 motor BMW made that I didn't need pistons for and then finally he came up with the fact they had actually done M90 pistons before with a 9.3:1 CR and all the other stuff copied from an actual piston. So, I was thinking I was making progress and he tells me to fill out the order form and email it to him. I needed to get the bore size from the machine shop. Alex called the machinist and told him we needed the bore size so I could order the pistons. We waited.

I talked to a few other upholsterers. Two didn't want to touch the job at all and the other one seemed promising but after going over everything with them, it was clear we were going to have a bad time.

March 14, I got a call from the wood refinishers. He explained everything they did and had he known it is what I had wanted, he'd have charged me probably three to four times as much. I didn't really push the issue aside from just reiterating that we seemed to be on the same page as to what I was looking for and how he had described the materials they were going to use, etc. He wanted me to come look at it before they did the other three pieces (shifter knob and two center console storage partition bases) that I had brought in a couple days after dropping off the initial pieces. I told him pretty much exactly when I was going to come by and he said he'd be there.

He wasn't. The wood was, though.

Image

Image

I was satisfied. The other three pieces are going to cost me a bunch of money to have done properly, so even though he honored the price we had agreed upon on this job, it all evens out in the end. At this point, I just want something that doesn't look like a kid refinished it. They told me they could do it and from the photos, it looks like they had. I couldn't even find the spots where they ruined the veneer and I'm glad I didn't take photos of the screw up.

The St. Paddy's Day event in San Diego was coming up the following weekend, so I had had made arrangements with a couple of members to help me out with transporting some things I needed worked on. The bell housing and all of the aluminum parts for the engine sans the throttle body and the upper timing cover (at masheen shop with the head) would be refinished and the dash delivered to Just Dashes in Van Nuys, CA. I spent a considerable amount of time removing all of the gaskets and trying to pre-clean the aluminum pieces as much as possible on the day before departure (I had about two hours between jobs). I neglected to get photos of the parts ready to go, but I did get one of the intake manifold during the frustration of the cleaning process:

Image

I was kinda surprised the window broke, but I was pretty mad.

Got all of that loaded up, but I realized at 4:40am when we were in Yuma that I had forgotten the dash, so I'd have to ship that.

I had ordered a couple of windshields from Ivo, but they didn't pan out due to shipping damage. I had also made a deal with another friend who had a NOS E28 windshield he wasn't going to use, so I got to bring that home. Well, not really. There was no way it was going to fit in an E28 safely, so thankfully, geordi offered to bring it to Phoenix, since he and Ramona were heading through there anyway. He even went to get a bicycle box to put it in. It made the trip safely and is now in my living room.

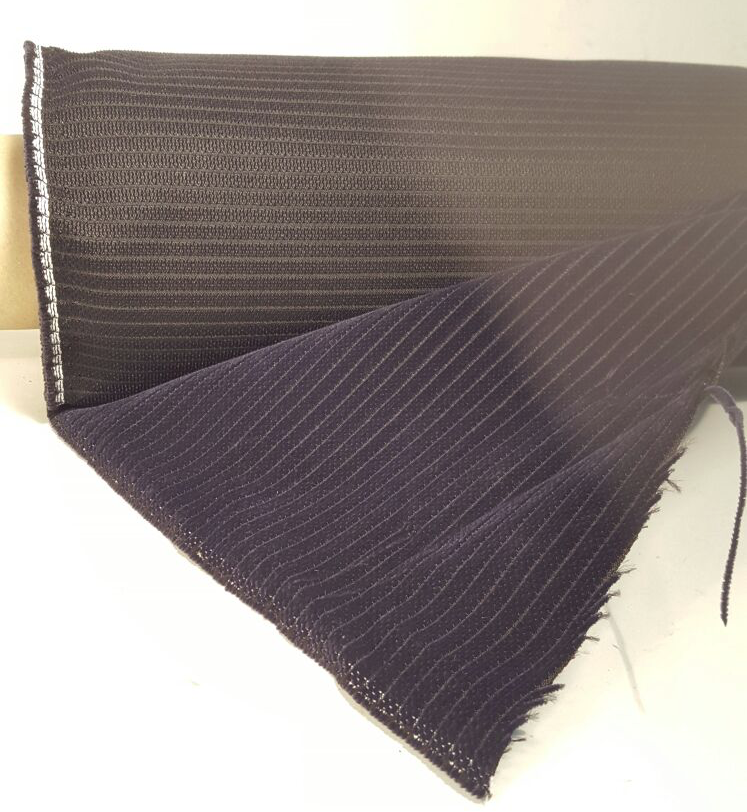
Ivo did have my cloth, though.

Image

When I had inquired with him, it was perfect timing. I had purchased 5 meters the first time and had just enough. Perhaps enough extra to replace a bolster if necessary. Ivo came back and said that BMW had 7 meters left. I bought it all. It was over twice as much as the last batch was per meter, but the fact I could get it made all the difference. Also, with the material being NLA now and the cost, it makes it clear that it's worth it to make sure it's done the right way. I can't take any chances. It's like an insurance policy to make sure my stuff isn't ruined.

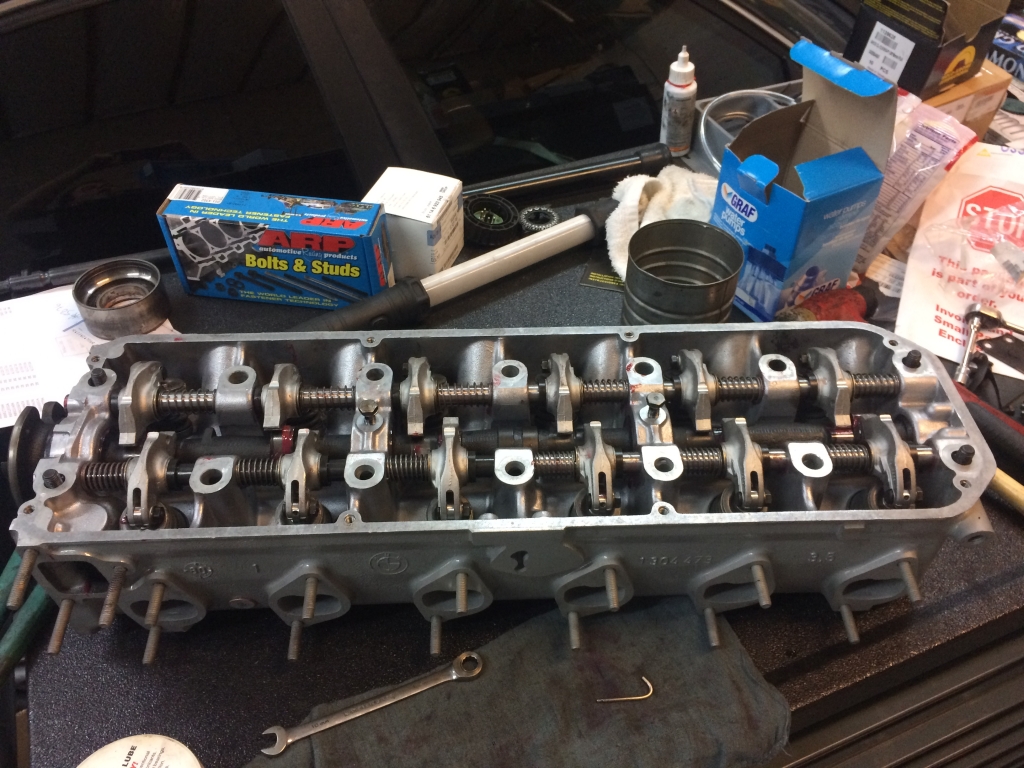
The head was done, so I picked that up.

Image

Crack was repaired, some valves replaced, three angle valve job, etc. Came out nice. I haven't taken it out of the bag. It's safer in the bag.

After picking it up, I walked over to the yard next door and talked to the guys, one of which has known my parents since before I was born. They have a Polaris/Navy cloth '81 528i that's been sitting there for the better part of 10 years. I asked about the rear seat, sharing my predicament. They let me pull this gorgeous rear seat out of that car.

Image

A little bit of Oxyclean on the rough spots and it's good to go.

So, with that sorted, I heard from the machinist a few days later that we needed a minimum bore size of 3.680" due to some minor taper in the cylinders. I filled out my form and emailed it to Jeremy at JE. A few days went by with no response, so I called on April and he was out to lunch. Left a message. No dice. Called back around 4 pm and he processed my order over the phone. Should have the pistons by May 1. Great.

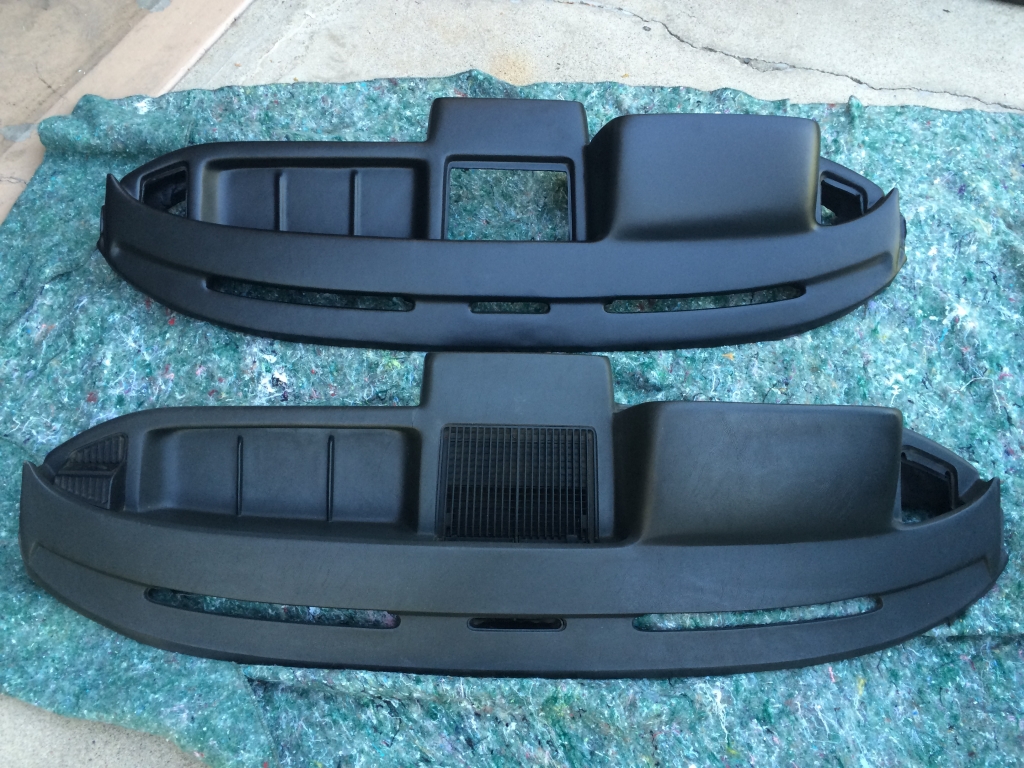
I shipped the dash out to Just Dashes. Took two days to get there and according to their website, from receipt, I should hear from them after 1 week. I called them this past Friday since I hadn't heard from them. Here we go again.

The next day, I called the shop that I decided was the best local option to redo my interior. I brought them the redone interior, the award winning rear seat, the Recaro seat back that has some use and some other various pieces to do the seats. We went over everything again and it was decided they would start with the rear seat and I shouldn't worry about hearing from them for at least a month.

In the meantime, I've been busy with work and tax preparation and other stuff, but I've been forcing myself to work on my engine wiring harness. It was loaded with grease and grime. Totally black. On the whole, it was actually in pretty decent shape, but there were three fuel injector connectors that needed replacing and a couple of the rubber boots on other injectors needed work. I had inherited a collection of various L-Jet harnesses and started cutting out what I needed. I worked with some damaged connectors to practice taking the pins out, then once I felt good enough, I moved on to the salvage connectors to remove everything from them. Success. I worked a little bit at a time, thoroughly cleaning as I went along.

Image

I did spend some time getting a feel for what it was going to take to fit the insulation piece Adam brought me. I put it in, along with the other parts and the carpet. It will take a bit of fettling to get everything to fit right, especially the carpet as it has never actually been in a car before. I decided that once I was satisfied with it, I'd leave it for a bit. A few days or so. I did that.

Friday, I get a notification that my pistons shipped from Ohio and were due on Thursday the 14th.

This last weekend, I removed the carpet and insulation and put it back in the house. I wanted to get all of the in-car wiring squared away. I needed to find my fuel pump wiring, figure out how to route the dome light wiring and get the door switches and unfinished bits taken care of. I took several photos when I took all of this apart in November, 2010 but I took all of the wrong photos. This has been a definite learning experience and I've added a huge hurdle in getting this back together. I've got wiring that's been sitting in a bin for years. Fortunately, I remember some of it pretty well, and with the help of the wiring diagrams in the Blue binder and the haynes manual (more helpful actually), I made a lot of progress. It's not done, but I think that it's at the point the carpet could actually go in if I wanted.

My pistons made it to Phoenix Monday night, but since they weren't scheduled for delivery until Thursday, UPS held onto them. They did show up Thursday, though. I was expecting to have to sign for a $1200 package.

Image

Everything was there (pistons, rings, pins) and I must say, they look okay.

Image

I took them over to the machinist on Friday and I guess I should have a block sometime this coming week.

Today, after work, I spent some time on the injection harness and I am reasonably satisfied with it. I just have one connector to replace for the coolant temp sensor. None of the other harnesses had a good one.

Image

Image

The ignition harness is on deck:

Image

I got started on it and have decided that I'm going to be on the lookout for another one. Fortunately, it was used in US 528i cars, too, so it shouldn't be the end of the world to find one. I'm sure I can get this one looking and working fine, but I would like to see what's out there.

I had also been putting off looking at my throttle body and I was concerned about the complexity of getting it refinished. I then decided that I will only live once and I really shouldn't waste my life not stressing out over springs and e-clips and weird bearing seals and shims that RealOEM says it should have but doesn't so I took it apart:

Image

The three aluminum pieces will be refinished, the other hardware plated and maybe it will work when it all goes back together.

So, at this point, I've got a dash out there, interior at the upholsterer, should have a block soon and there's still a ton to do. I'm going to have to get on the gearbox. I keep forgetting about it.

Re: E12 M535i Project - 04-18-16 Update

Posted: Apr 18, 2016 8:12 AM
by Kyle in NO
That's it?

Re: E12 M535i Project - 04-18-16 Update

Posted: Apr 18, 2016 9:14 AM
by Adam W in MN
Lol Kyle.

Nice update, I knew some of those were in process but it's always a pleasure to read the entire backstory and see the other things you've been working on. It is pretty amazing.

The shop with my M535i has had it for several weeks and there really isn't any progress to report. I'm hoping for updates significant enough to bump my thread one day, and :shock: actually end up with a completed car before I either a) run out of money or b) lose interest. :x

Re: E12 M535i Project - 04-18-16 Update

Posted: Apr 18, 2016 12:59 PM
by harrypalmer
Just like your past Alpina thread, this one I enjoy very much as it is always entertaining, useful and inspiring. Good luck! :clap:

Re: E12 M535i Project - 04-18-16 Update

Posted: Apr 18, 2016 4:54 PM
by dsmith
Chris, I love your build threads for the realism. This is what it's like to restore a rare car. The lows, the depression, the slight gratification, the waiting, the haunting... Then, possibly, maybe, someday, finally, a vision of excellence emerges.

I can't wait to see the finished product.

Re: E12 M535i Project - 04-18-16 Update

Posted: Apr 18, 2016 9:07 PM
by tig
I can wait.

Because I know it'll be worth it.

Re: E12 M535i Project - 04-18-16 Update

Posted: Apr 18, 2016 9:19 PM
by Mark 88/M5 Houston
dsmith wrote:Chris, I love your build threads for the realism. This is what it's like to restore a rare car. The lows, the depression, the slight gratification, the waiting, the haunting... Then, possibly, maybe, someday, finally, a vision of excellence emerges.

I can't wait to see the finished product.
He wrote it so well I can't add anything to it! Keep after it Chris! :alright:

Re: E12 M535i Project - 04-18-16 Update

Posted: Apr 19, 2016 12:58 AM
by ldsbeaker
Glad I could help. When we had this offhand text back and forth and he asked me to save that insulation... I was mortified. I can't do ANYTHING at his level. I spent SO much time and effort pulling that piece and making damn sure that I didn't jack it up. I was so proud when I got it out successfully. (Hell, I'm still proud!)

It was this | | close to getting ripped out and thrown in the garbage... Maybe next time. :D

Re: E12 M535i Project - 04-18-16 Update

Posted: Apr 19, 2016 9:40 PM
by BRRV
I'm enjoying this, and living through it vicariously. I've been there, too, once or twice. Not at this level, but still.. the frustration and mixed results are all too common, I'm afraid.

I hope one day to see it in person. Great work.

Re: E12 M535i Project - 04-18-16 Update

Posted: Apr 20, 2016 1:34 AM
by geordi
ldsbeaker wrote:Glad I could help. When we had this offhand text back and forth and he asked me to save that insulation... I was mortified. I can't do ANYTHING at his level. I spent SO much time and effort pulling that piece and making damn sure that I didn't jack it up. I was so proud when I got it out successfully. (Hell, I'm still proud!)
I can see this as your post USMC occupation. We need a replacement for TCD ;)

Re: E12 M535i Project - 05-28-16 Update

Posted: May 29, 2016 3:36 AM
by wkohler
I have been very busy since the last update. Constantly working. One job has me traveling and the other sitting at a computer. No time to really get anything done. That said, I have forced myself to get things in process so that hopefully I can still make progress.

I mentioned in the last update that I was going to hunt for another ignition wiring harness as mine was quite challenged in the cosmetics department, despite being functional. With the part being used on all 528i cars made after 9/79, I figured it would be something pretty easy to find, especially when you consider all of the people that have swapped to newer M30s and their electronics. Of course, I am the person in need and when I need something, all logic has to go out the window and it will become a difficult search. After having much difficulty and essentially being ignored on the E12 Facebook group (I swear that it's like the E34 section on Bimmerforums over there. I could tell everyone to reply to my post and I'll give them $100. No one would reply.), I was given a hot tip by OcCoupe that there was a 528i in the bay area recently parted by someone we both knew. I reached out to him and sure enough, he had the part. Now we just had to figure out what a fair price was. Eventually, we nailed it down and I now own a much nicer harness that needs work, but simple repairs that I would have probably done anyway. I hope to get to actually cleaning it soon, but as I said, I've been very busy with hardly any time to spend on things like that.

Around the first of the month, I received a call from Terry, the owner of the upholstery shop. He called to let me know they have been making progress on the rear seats, but there are some details they need my input on, so I arranged a time to take a break and head over. I was impressed with the fact he could sew straight lines. He had been working to salvage as much of the original cloth as possible and then went on to show me several areas of just terrible work on the rear seat alone. Lots of short cuts taken and he was even able to tell this just by looking at the concours-condition seat I gave them for reference. With all of that out of the way, the big question came down to how to handle the welting/piping on the seats. A conventional PVC piping wasn't available in a color that approximates the Marineblau. He showed me some European stuff he bought nearly 20 years ago from a European supplier that went out of business, but we didn't think that either of those options would be acceptable, so our ultimate decision was for him to make it using the vinyl I supplied. I was optimistic it would go well, but given my track record on things like this, I was still concerned. With that, he said that the lion's share of the work on the rear seat was done and it was just a matter of sewing it all up, replacing all of the foam and fitting the new covers.

I checked in with the machine shop to see if there had been any progress on the block as I had been told that I'd have had it back in a week or so after dropping off the pistons. I'm not really in a hurry for it, but I need to stay on top of these things, so I checked in and was given an excuse and told another week. Fine.

May 9th, Terry called me and told me the rear seat was ready to pick up. I made arrangements to do that and stopped in to check it out and found a night-and-day difference from the previous job, though it's probably not a fair comparison. He said it would probably be a week or so before he'd have any more progress for me. I handed him a bunch of money and left with this:

Image

It's obviously not installed in the car yet, so some fettling will still be necessary.

Later that day, I ordered over $500 worth of new hardware to assemble the engine and hopefully the accessories. It took me a week or so to compile the list of everything I should need for all of the areas. Of course, after the order went in, I realized I forgot about five things, but they can be ordered later when I remember what they are.

The following weekend, I went to San Diego for the SDBMWCCA Clean Car Contest. I took the '75 E12 and just went to get a break. I wasn't planning on it, but it was such a stressful week, I decided what the hell, so we blasted over at 2am Saturday and came back after the show on Sunday. While I was there, I picked up the aluminum parts that OcCoupe helped facilitate getting refinished. He wasn't there, but he had them sent with a courier.

Image
Image
Image
Image

I'm happy with the results. It was, of course, expensive, but I think it was worth it.

I checked in again with the machinist since I now had the aluminum parts and my order of hardware showed up. I still had to send a bunch of things in to be plated, but I hadn't yet gotten to that. Still, none of that was going inside the motor, so it didn't matter. I still had rings to fit, bearings to replace, etc. They said that they were finishing up the work on balancing the rotating assembly and it should all be ready in a couple of days.

On the 17th, I started wondering why I hadn't heard anything from the wood restorers on those remaining pieces. I decided to give them a call and check in. He said, "It's been done for a while." I asked why I never got a phone call. I explained that I wasn't in a rush for it and didn't want to bug them constantly. Either way, it was done and they wanted my money. I went and picked it up and it looked good.

Image

I had spent some time putting the rubber pieces back into the center console base I'm using in the car. I still have to staple the side pieces on, but I need to pick up the correct length staples for that.

Terry called me on the 18th as he had begun work on the Recaros, which were proving difficult due to errors made and damage done by the previous upholsterers. He spent considerable time working with the foam to take the memory out of it and get it to return to it's proper shape. He hadn't planned to get started on them so soon, but they were on his mind and he decided to jump into it. He was considerably further along than I had anticipated, though. It was clear how difficult this corduroy material is to work with compared to others. I had to get some replacement bolts for the seats as the people at Jim's totally stripped out the allen heads, so all four had to be drilled out on each seat. I got the feeling that Terry was wishing he hadn't taken this job. He told me to expect to pick them up in the next day or two, at which point, he'd be ready for my B-pillar covers, headliner and the carpet pieces I needed.

The machine shop called and my stuff was ready to pick up.

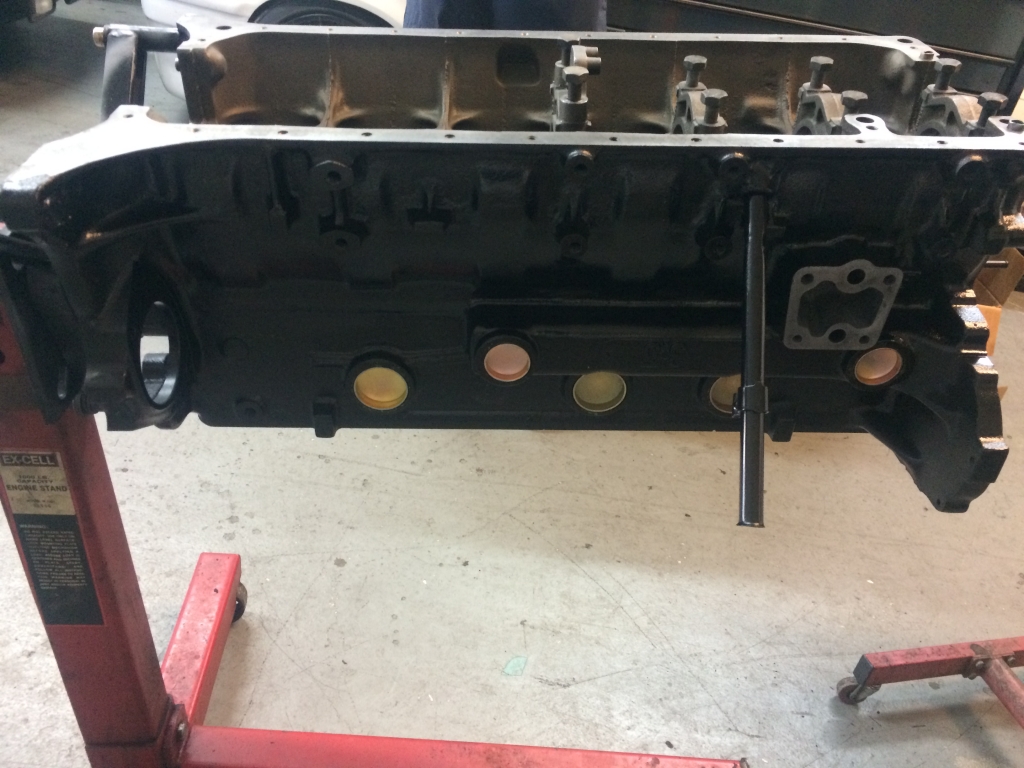
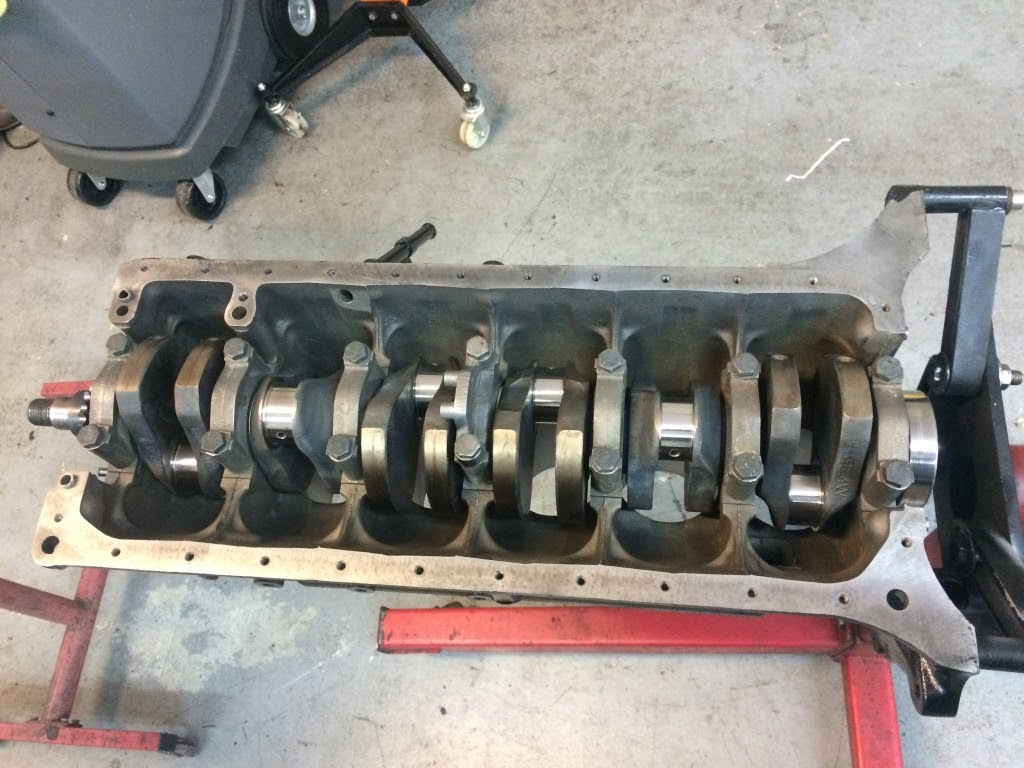
They bored and surfaced the block, shot peened the rods and made the weights the same, polished the crank journals and chamfered the oil holes as it wasn't done well by the factory, surfaced the flywheel, maintaining the correct step and then balanced the rotating assembly. Here are photos of the block and the crank. I'm sure you'll all see plenty more photos of all of the parts in future updates.

Image

Image

I then took all of that over to Alex's shop where we will hopefully begin assembly of the motor on June 3.

The next morning, Terry called me and said my Recaros were ready. When I showed up, he said that he had spent so much time on this stuff that he stopped keeping track. He just assured me that we'd be within the quoted budget, though at the high end, of course. I took the seats home and steamed out a few wrinkles in the centers. They came out pretty well, considering, I guess.

Image

Image

At this point, I gave him the new headlining, the old headliner, the second floor carpet I bought so we could cut it up to make what I needed and the b-pillar covers.

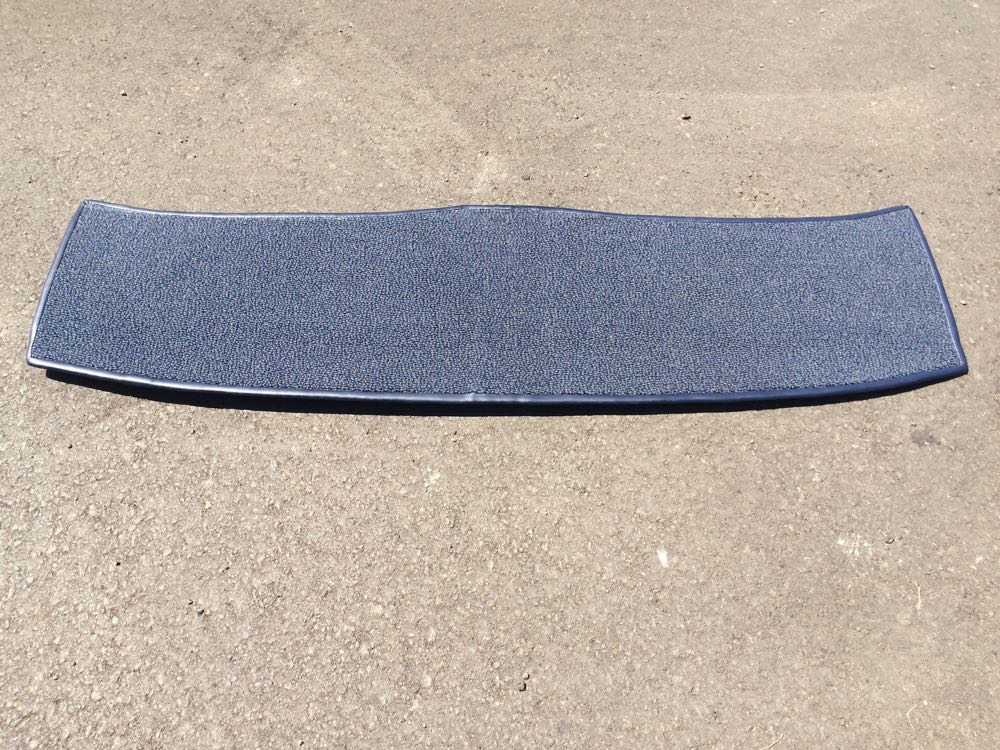
The b-pillar covers were ready the next morning and they came out fine. I could have done them myself, but I wanted them to get done and I was pleasantly-surprised to find that he didn't charge me extra to do them. Of course, there was a problem. My plan for the second carpet was to use the rear floor area to make the carpet for the rear deck. This is the only way you can get new marineblau carpet. I've been watching a potential group buy for this carpet on the E9 board for nearly 3 years with no success. I was going to have to buy a finished trunk carpet to get what I wanted but it's important enough to me that I'd deal with it. There isn't a material I could substitute that would look right and I checked with so many sources. I did buy a couple yards of something that could work, but it wouldn't look right and it has pretty prominent placement in the rear window. What was the problem? Well ol' dumb-ass here didn't account for the hole for the e-brake and it happened to be right in the way. Terry made some calls to several suppliers and was told that someone had something, so we were in a holding pattern until the sample came in. It was near the end of the week, so I wrote it off until the next week.

On the 25th, I paid Just Dashes. The due date for the payment is the 31st, which is the day it will supposedly go into production. I hope it turns out okay.

Terry called on the 26th and he had the headliner sewn up, so he wanted me to pick that up. Also, he said that the carpet sample wasn't correct, so we need to think of something. Well, fortunately, I had a plan. We had plenty of width with the carpet, but depth is where the problem was. Why not cut it and seam it together? I was hoping that maybe we could do two seams by the speaker holes so it wouldn't be so prominent, but that wasn't going to be possible as there wasn't enough width between the edge of the carpet and the hole to fit in the middle, so I said to Terry, "What do you think about cutting it and splicing it together?" He emphatically said no. I retorted with the idea that it's done all the time in carpet installations. If I need to carpet a 20'x20' room, they're not going to bring a 20' wide roll of carpet. Terry said that household carpet has a nap to it that this doesn't. Yeah, that's true, but what about commercial carpet? Very similar in a lot of ways. I told him that I was willing to give it a shot as frankly, I've got nothing to lose. I need the kick panel pieces anyway. Can't get the piece for the base of the rear seat new and since it's molded, we can't make it, but I have a couple of used ones that should clean up. It's not a UV-rich environment. We traced out the parcel shelf, then made the cut. Cut that into two and I went carpet shopping. I went by a place that has been near my house for years. I talked to the guy and he had some concerns but his installer was on an installation and wasn't there. He seemed really upset that he couldn't help me and I just said, "hey, it's not a rush thing. I can come back." His face lit up and he said, "Oh, well come back tomorrow then!" Okay. I will come back tomorrow.

The next morning, I went back to the carpet store where I met Don, the installer. He's been doing it for years and was pretty interested in what I had. I pointed out what we were going for and then he started asking about the car. I told him a bit about it - trying to stay out of dissertation mode - and he got his tools and went to work.

Image

One of the problems with the molded carpet is that it doesn't lay perfectly flat, so we had to help it along. Fortunately, heat will relieve some of these areas and they're pretty relaxed to start. Of course, I forgot to take a photo of the finished product, but it worked about as well as could be expected - better, actually since Don didn't even charge me, so I have an obligation to go to them first when I have flooring needs. The backing was a bit different from conventional carpets but it worked well with the seam tape and didn't melt the carpet itself. At this point, it is two pieces of carpet seamed together, so hopefully next week I can see how it's going to come out. The tape didn't add any perceptible thickness, so I'm confident it will work well enough.

Lastly, I found out about another 1:18 scale model of the E12 M535i made by a company called Norev. It's a similar model to the Otto that was made in 2014 in that it's a static model where nothing opens and wheels don't turn but this one came in two colors. Alpinweiß and Polaris! Finally. I bought one on the eBay, using my eBay account and it showed up today.

Image

It's not as detailed as the Otto and there are a couple of things that made me shake my head, but it's silver, it's an E12 M535i and it sorta represents my car.

Re: E12 M535i Project - 05-28-16 Update

Posted: May 29, 2016 7:12 AM
by harrypalmer
Love the corduroy seats. Thanks for the update.

Re: E12 M535i Project - 05-28-16 Update

Posted: May 29, 2016 11:54 AM
by 5280 JB
I can't believe the "before" picture of the back seat is the same piece as the "after" picture - it just looks great! This is why we need specialists and craftspeople in restoration projects. Great progress, Chris, some really great looking pieces are starting to come back from refinishing and will look great on the finished car! :)

Jim

Re: E12 M535i Project - 05-31-16 Update

Posted: Jun 01, 2016 2:15 AM
by wkohler
Thanks. I'm seeing a light of sorts at the end of the tunnel. It's dim, but things are happening. I have a long way to go and a short time to get there if I have any hope of meeting my goal.

This morning, I was expecting a call from Terry to either suggest I was an idiot for thinking this would work or maybe even give me a time frame on completion. As the morning went on, I figured it wasn't coming. Of course, right after I said that, he called and had the parcel shelf done. I asked him how it worked and of course, I got to hear about how difficult it was, but he said the seam is good. Great. I went over to have a look for myself. Not bad if I say so myself. As far as I know, it's the only E12 parcel shelf with new marineblau carpet, so it has that going for it.

Image

He didn't make the holes for the speakers or the headrest posts. He was going to, but I really didn't have the time today, so I suggested that I just hang onto it and since it can't go into the car until the damn headliner is done :/ , I'll just have him do it while they have the car for the headliner. Times like this where I wish I had a trailer. Of course, just a trailer wouldn't do me much good since I'd then need a truck. Anyway...

Later today, I decided to see how it looked in the car. Sure, there's nothing in the car, but I figured I better find out now if it is going to fit properly. Doesn't look too bad.

Image

Just a small update, but I figured I left with enough of a cliffhanger the other day that I better finish that story.

Re: E12 M535i Project - 05-31-16 Update

Posted: Jun 01, 2016 8:51 AM
by tschultz
I'm excited to see this car coming together!

Interestingly, I had a quick work trip to Phoenix yesterday and today but not enough time to meet up with anybody. Would be neat to see at some point...

Re: E12 M535i Project - 05-31-16 Update

Posted: Jun 01, 2016 9:46 AM
by Adam W in MN
Stunning progress!

Re: E12 M535i Project - 05-31-16 Update

Posted: Jun 01, 2016 12:14 PM
by MicahO
Outstanding work. So cool to see the 'new' corduroy fabric seats!!

Re: E12 M535i Project - 05-31-16 Update

Posted: Jun 01, 2016 12:29 PM
by white chocolate
"It's been done for a while."
People are just the best.

Re: E12 M535i Project - 05-31-16 Update

Posted: Jul 26, 2016 3:51 AM
by wkohler
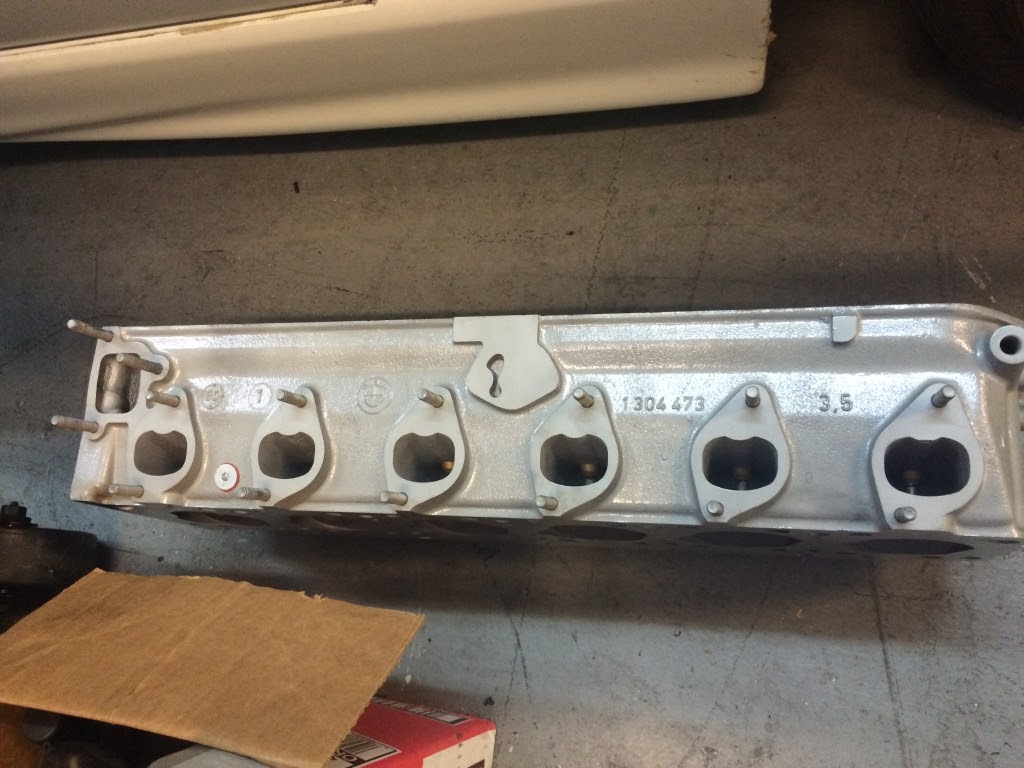
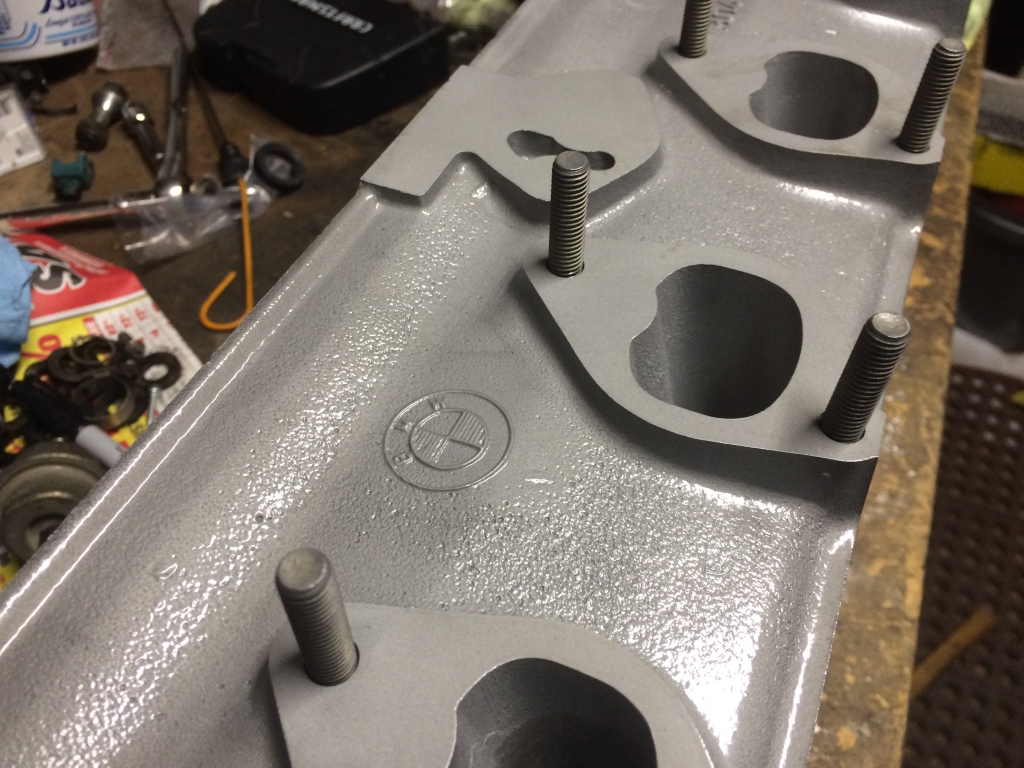
I took the head over to my powder-coater and had them put a satin Cerakote clear on it. I figured it will help seal the casting and keep it easier to clean and it should hold up well. It wasn't cheap, but I figure it's a lot better than some of the other options. I was looking at the Eastwood 2K Ceramic high-temp clear, but they don't make it anymore and I figured how hard could this be. It wasn't difficult, but it wasn't cheap either.
Image

Image

For the hell of it, I decided to just put the ceramic-coated exhaust manifolds on as well.
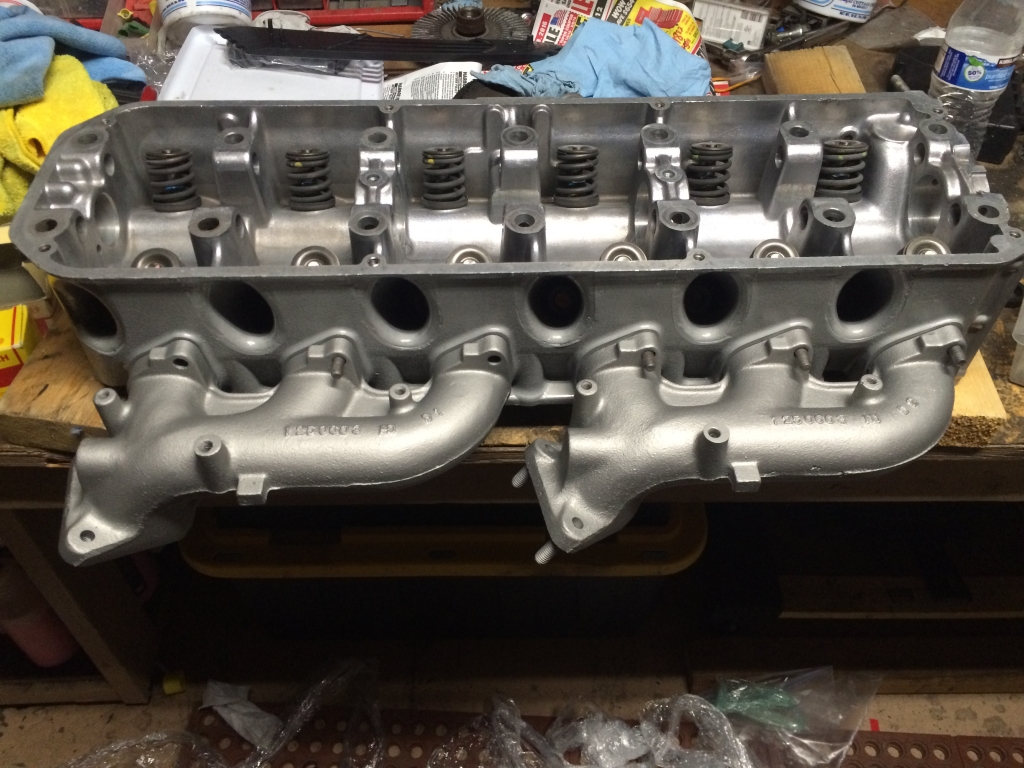
Image

I picked up a bunch of stuff from the plater, so with that done, I could mount the oil cooler. It didn't need to be mounted now, but I figured why not.
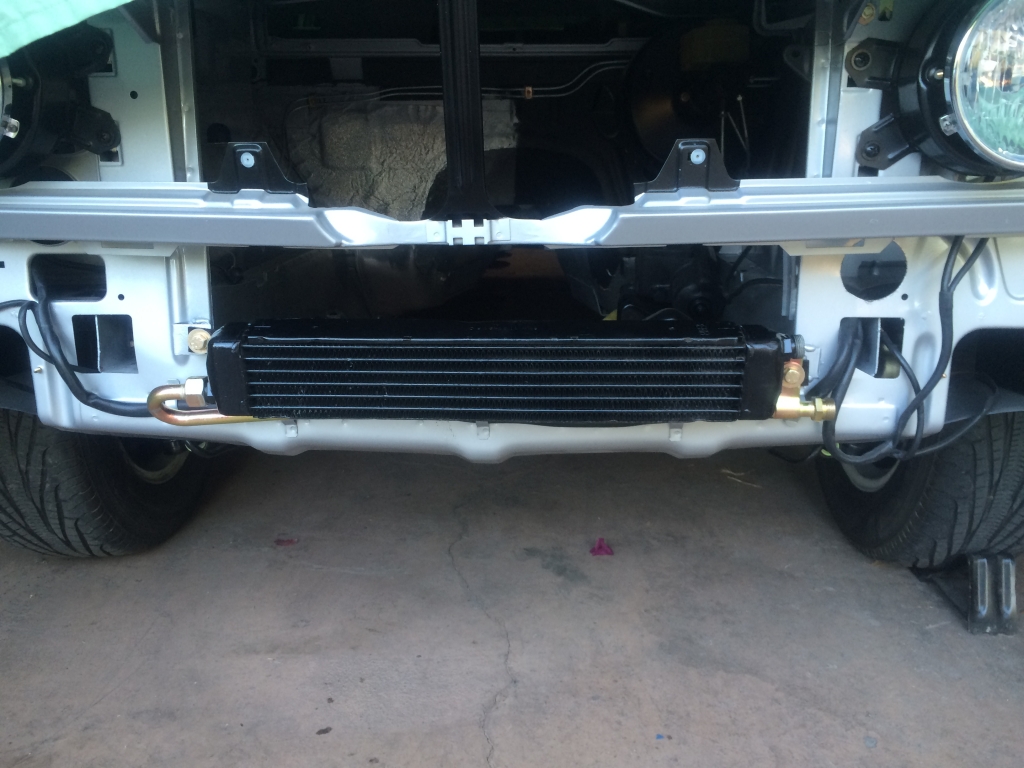
Image

Also, with that, I had previously talked to a Porsche shop about having them rebuild my oil cooler lines. I talked to them because they had listed a custom line for a 914 which had an M22x1.5 fitting but apparently they couldn't sell me any, so he said he had the hose, the crimp collars and the crimping tool. All I had to do was get my old fittings plated, bring them and the old hose to them and they would make it happen. I sold the guy a set of BBS E75s a few years ago for a vintage FIA race car they were working on, so it seemed like that connection was going to pay off.

While waiting for all of the pieces to fall into place to start motor assembly, I cleaned up the replacement ignition harness I purchased. It was very supple and in nice shape, so it was worthwhile. Much nicer than my original.
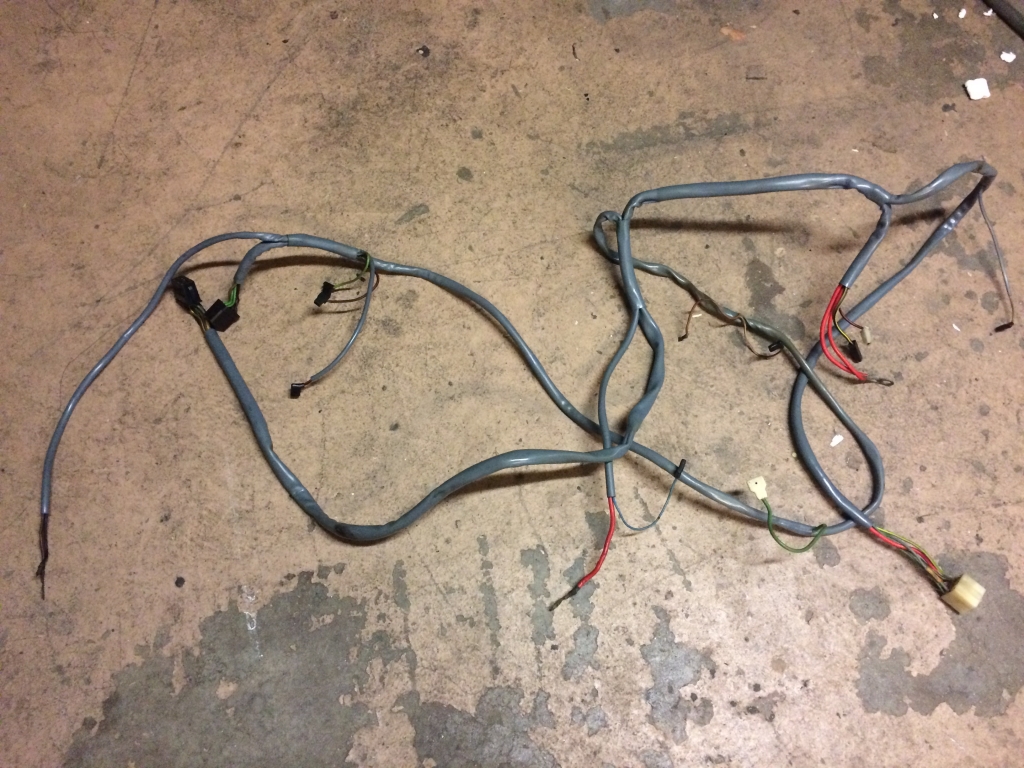
Image

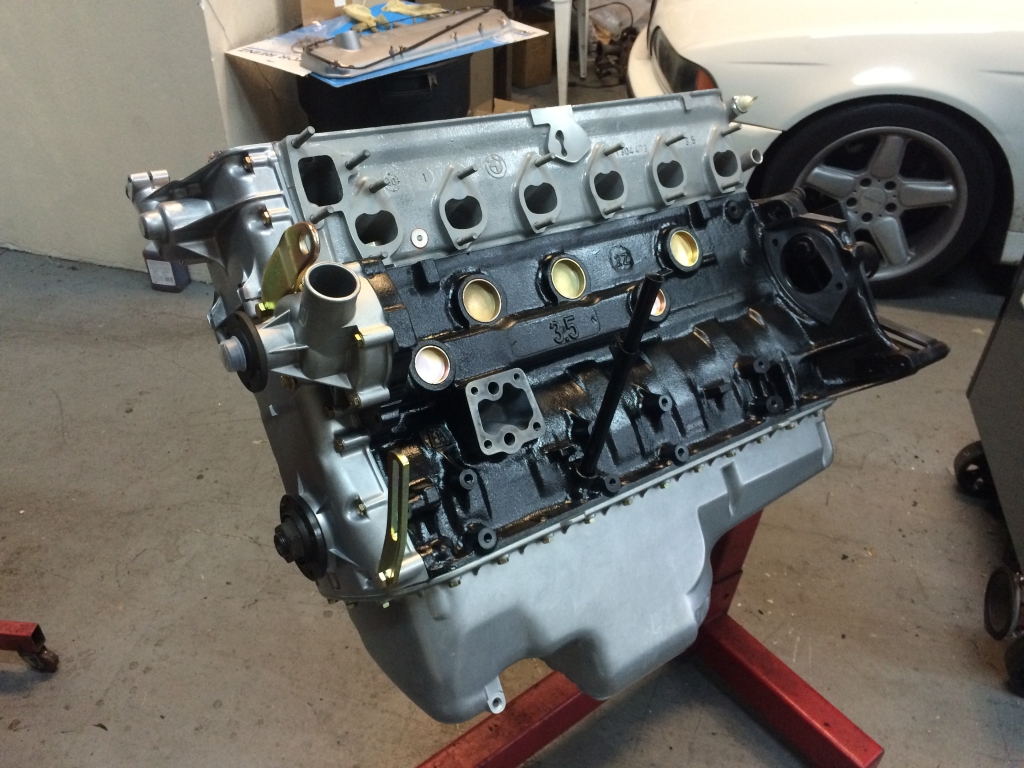
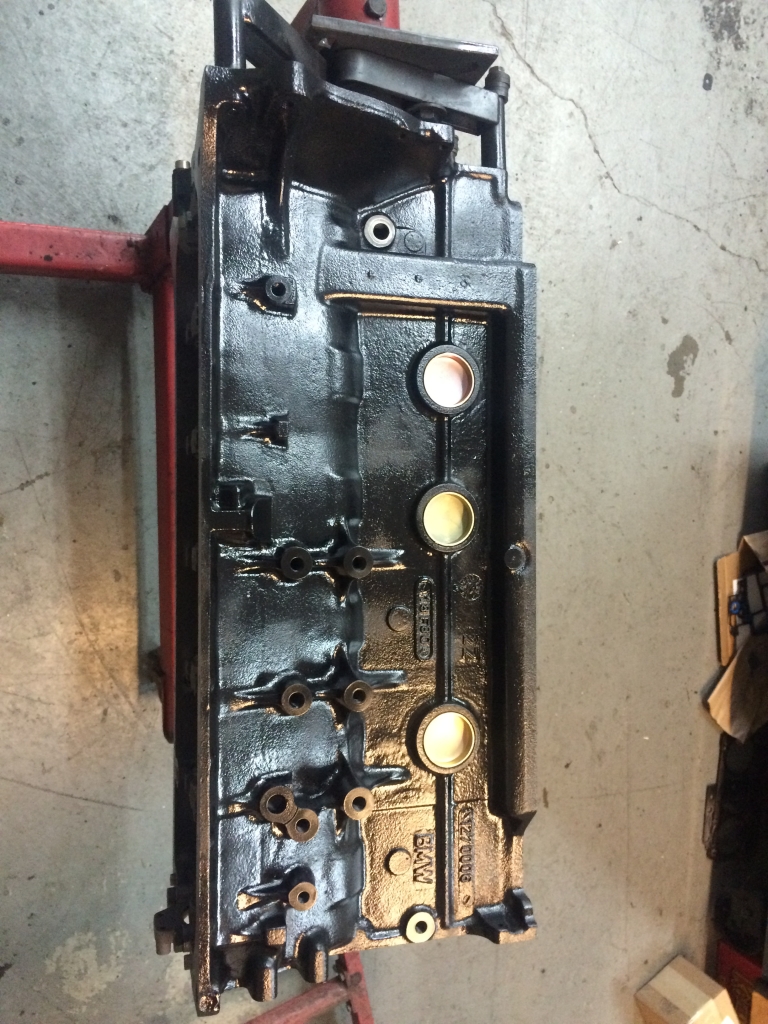
Work finally began on motor assembly June 16. Block was primed and painted. Morning of the 17th, we began with freeze-plug installation.
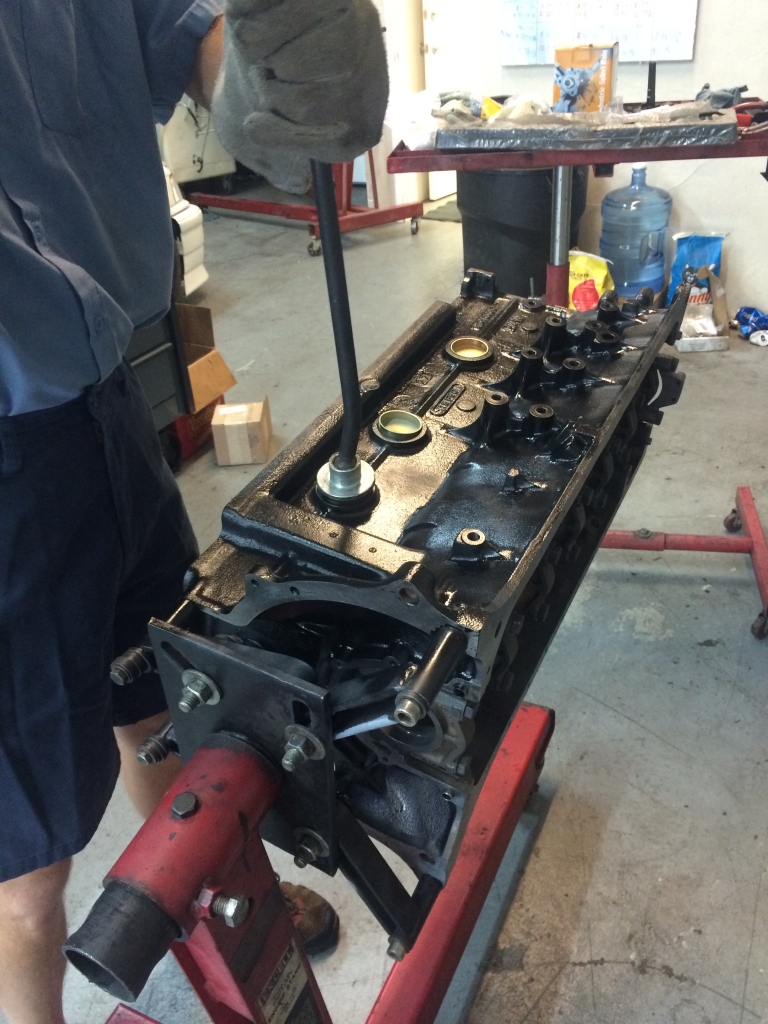
Image

Image

Image

It pays to have the right tools. Getting these things seated properly is critical. It takes a lot of effort too. Fingers crossed they all seal and we don't have to replace one in the car.

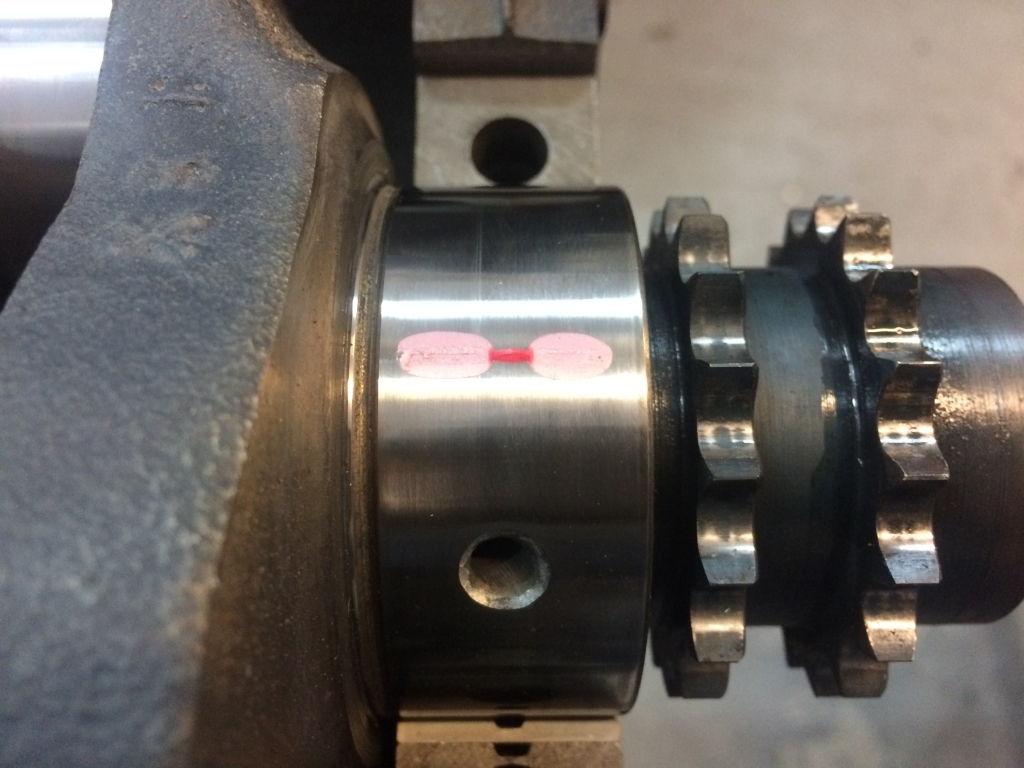
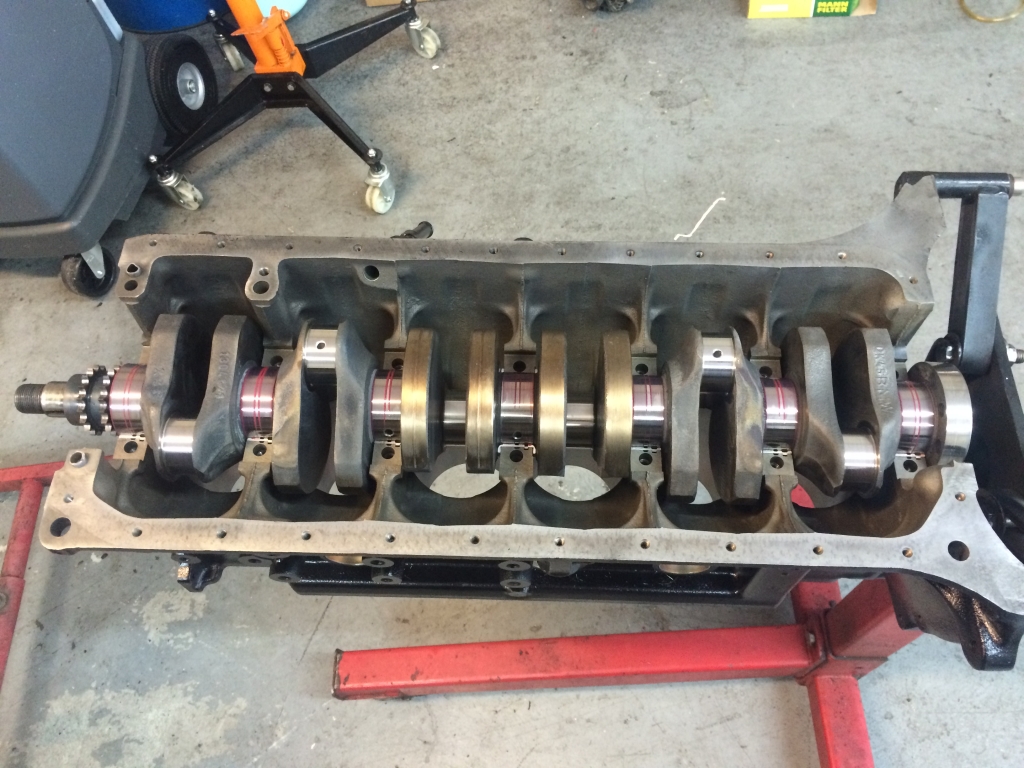
Next, we started with the crank bearings. My original crank was in excellent shape, measured out perfectly for standard bearings. My original bearings weren't even worn. Here's a shot of the plastigauge on the #1 main bearing:
Image

The other six were dead-on, so we were a go with the standard bearings.
Image

Image

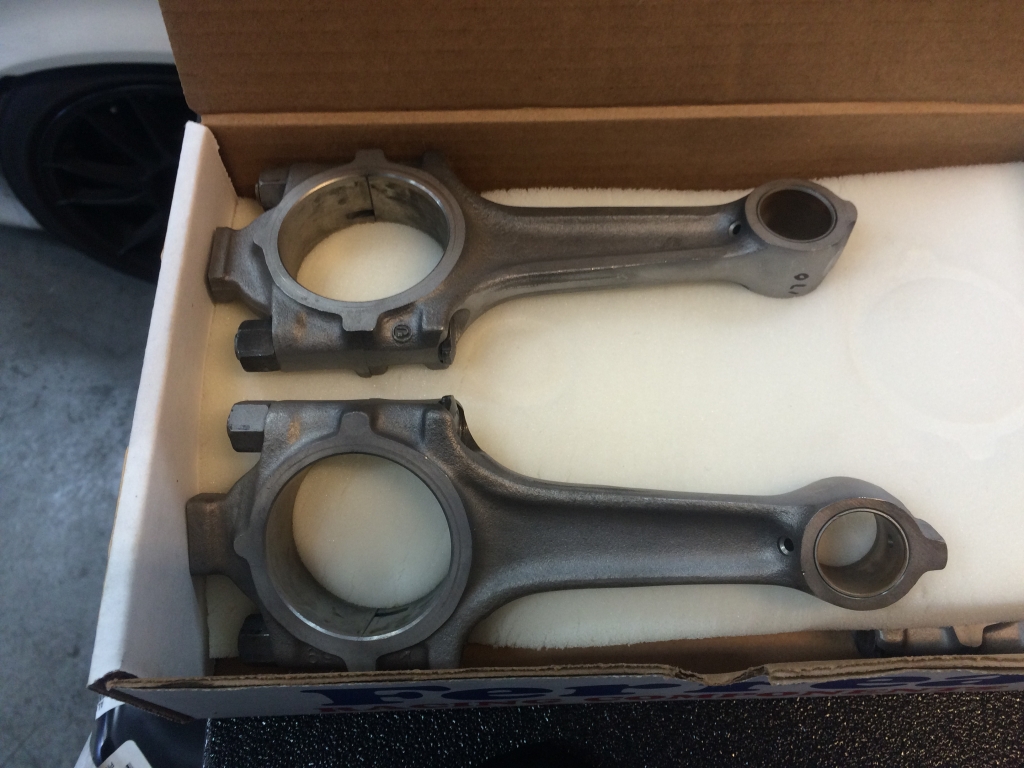
Here is a shot of my shot-peened rods.
Image

Everything was within spec for those as well. I had to go to work, unfortunately, so I missed the fitting of the rings and whatnot. By the end of the day, 5 of the 6 pistons were installed. #6 was installed Monday morning due to a problem with the oil rings for that one. At that point, the really time-intensive, focused work was completed.

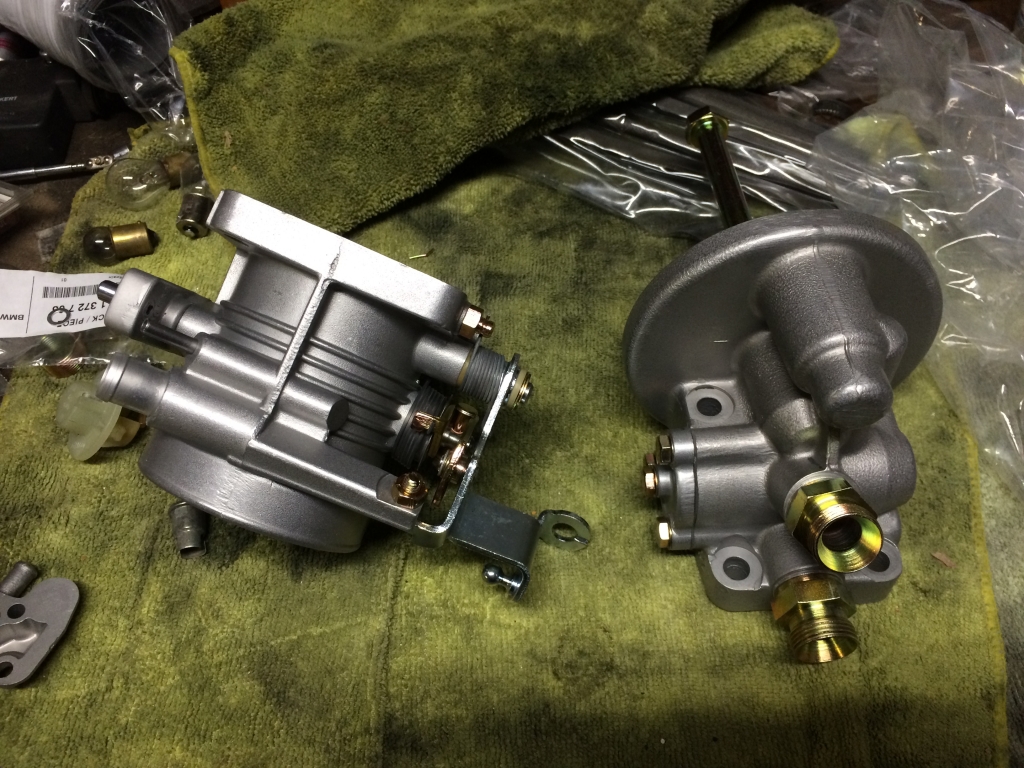
Of course, I still had plenty to do like reassemble my throttle body and the oil filter housing.
Image

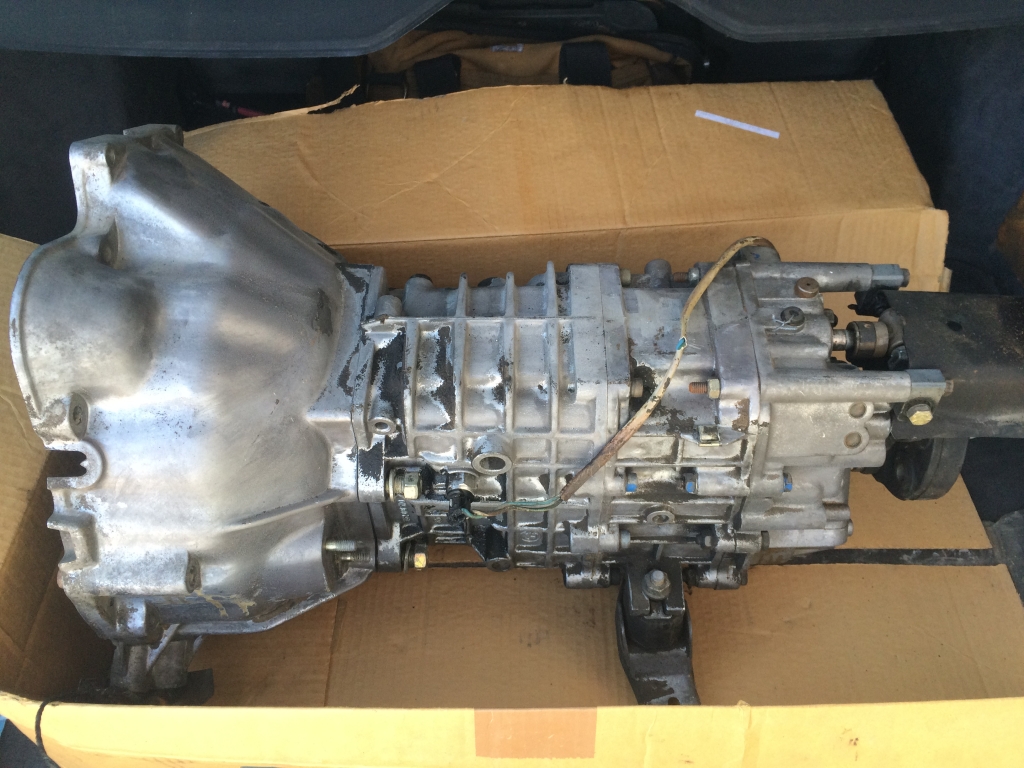
I went to storage and pulled this dogleg off the shelf. Came from a Euro 635CSi that had an engine fire. Pretty low miles, too, and I could assume that it was not the reason the car caught fire.
Image

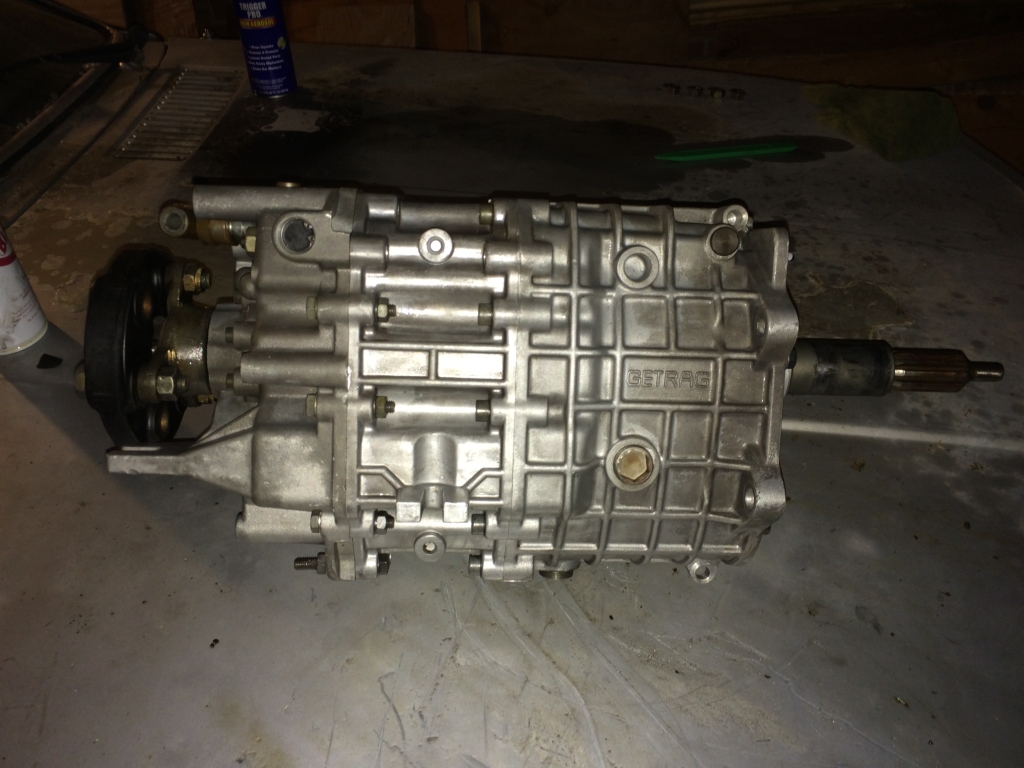
I spent the next several hours cleaning it up on my outdoor workbench.
Image

With that sorted, I turned my attention toward getting the wiring straightened out in the car. I had talked to Terry about getting the car in to do the headliner and he was booked up solid, suggesting that July 11 was the earliest he could take it. I explained where I was at, behind on everything, and while it wasn't his fault, headliner has to go in before the rest of the interior. He said he'd take it June 27. Great.

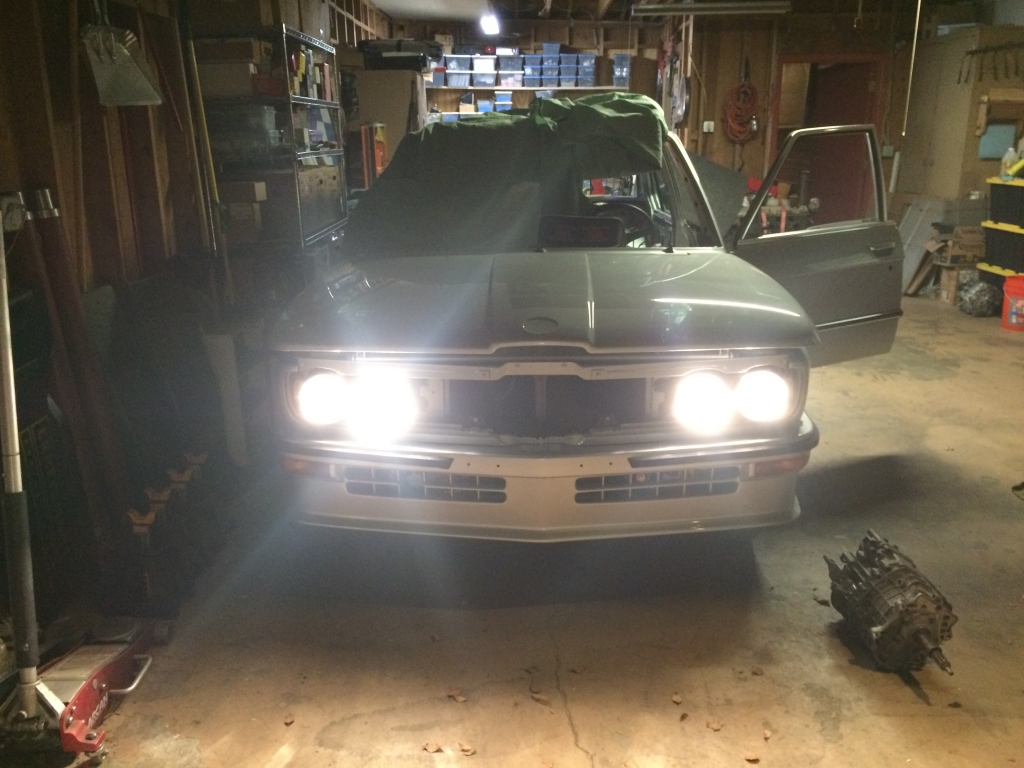
So, I put a battery in it and figured I'd either die or see some progress.
Image

I didn't die.

Image

Image

So, that was progress. At the time, I had some lock motors acting up and only the driver window worked. Still, Nothing shorted out and I called it a win considering the last time this car had electricity was August, 2010.

Back to the motor. This time, head assembly!
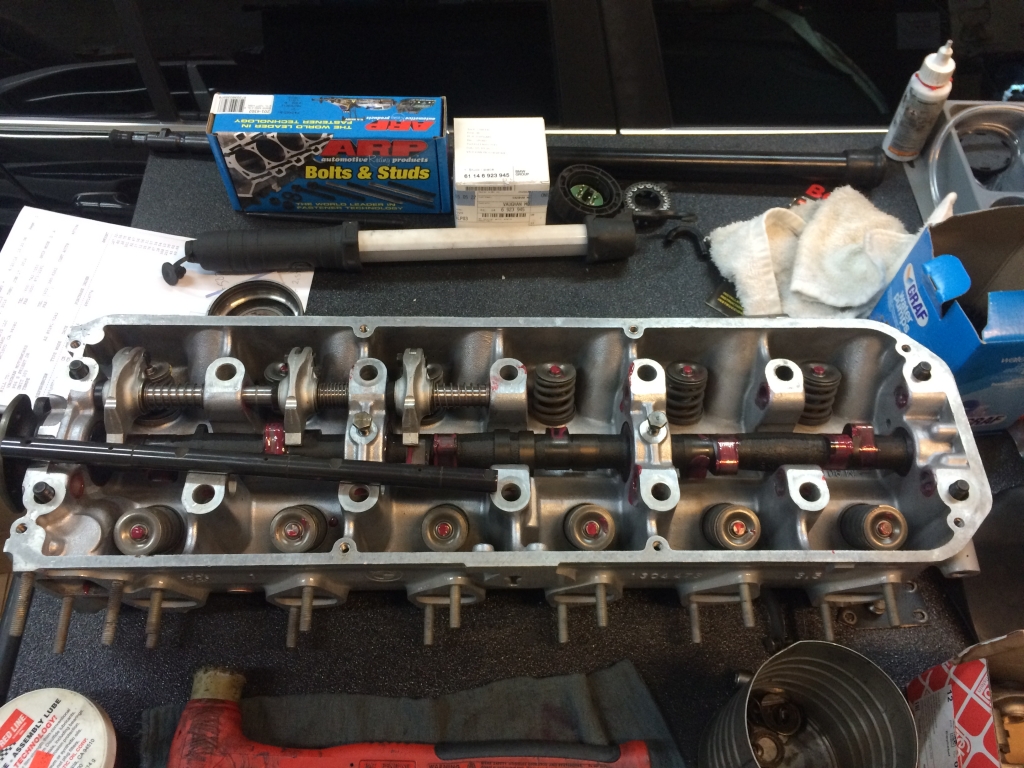
Image

And voila!

Image

We discovered that you cannot buy the oil pump sprocket anymore. It comes on a new pump, but it cannot be purchased separately. It might have made the decision between spending $475 on pump rebuild parts versus $530 on a new pump, but the only part of the pump that was reused was the pickup, so I guess it wasn't that bad. Febi stopped making it, too, so we ran into some issues. Alex found a new one on eBay, so we waited.

I confirmed my appointment with the upholstery shop. They had me down for Monday, so I made the final push over the weekend to finish up everything I thought was necessary for them to install the headliner. After confirmation, I ordered a tow truck for first thing Monday.

Back at home, I installed all of my stereo wiring and installed my Bosch power antenna. It took several careful, deliberate readings of the instructions, but we finally got it.
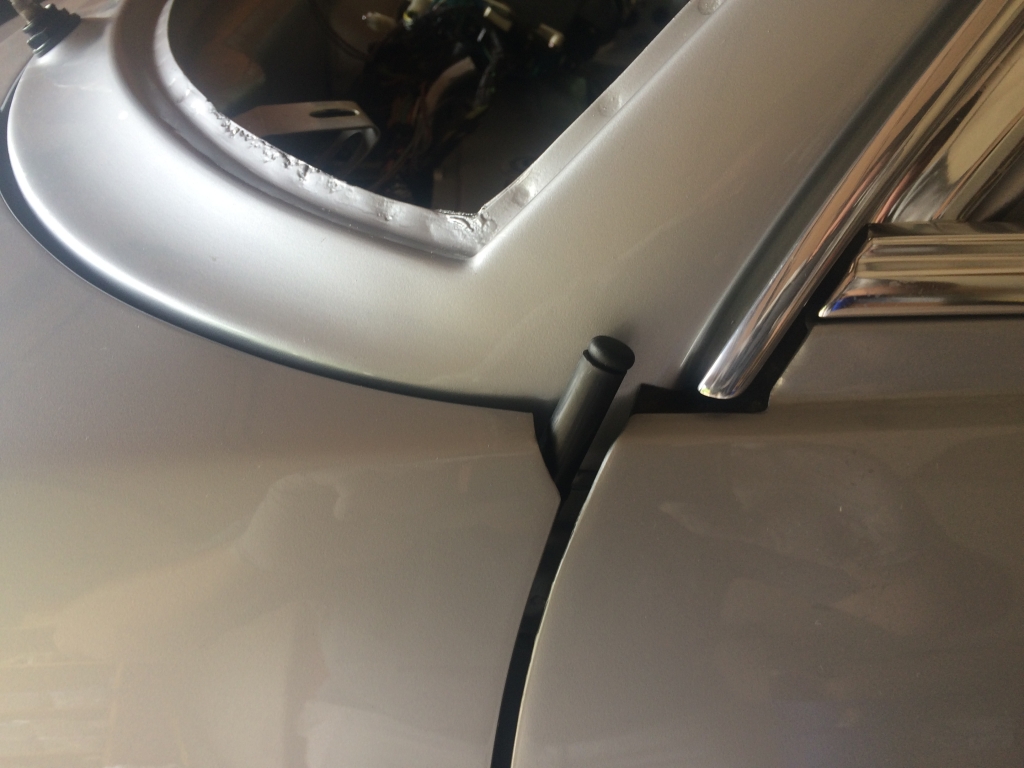
Image

Monday, June 27 rolled around and the car rolled onto a tow truck. Oh how I wished Sonny G would have picked up his phone.
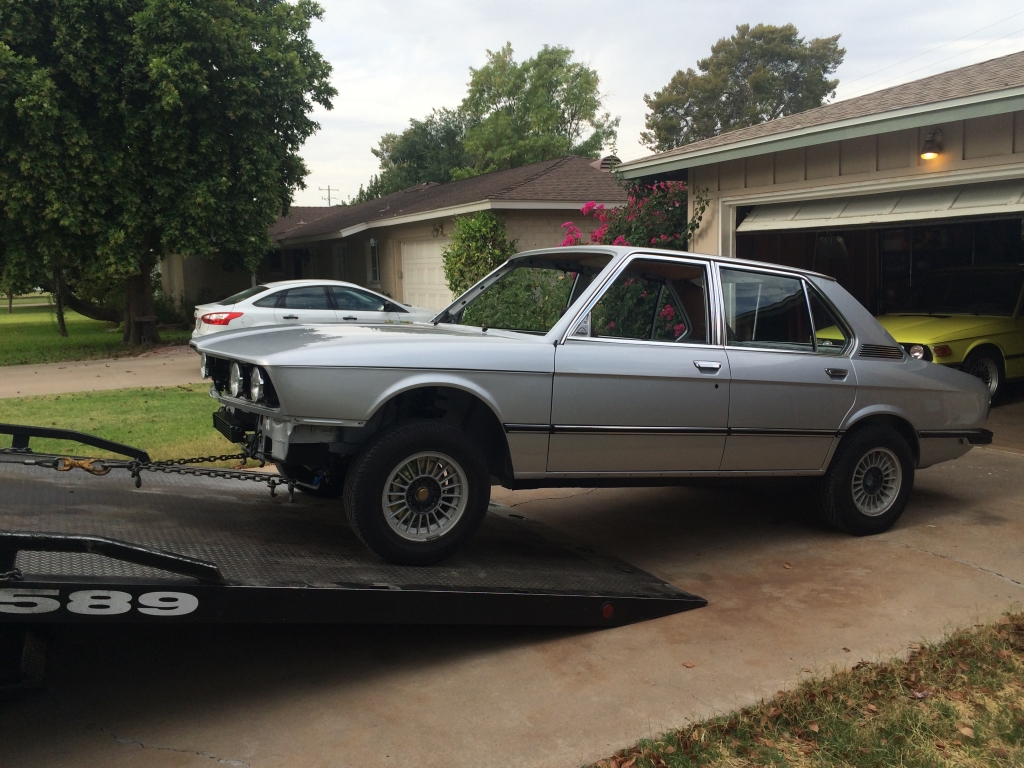
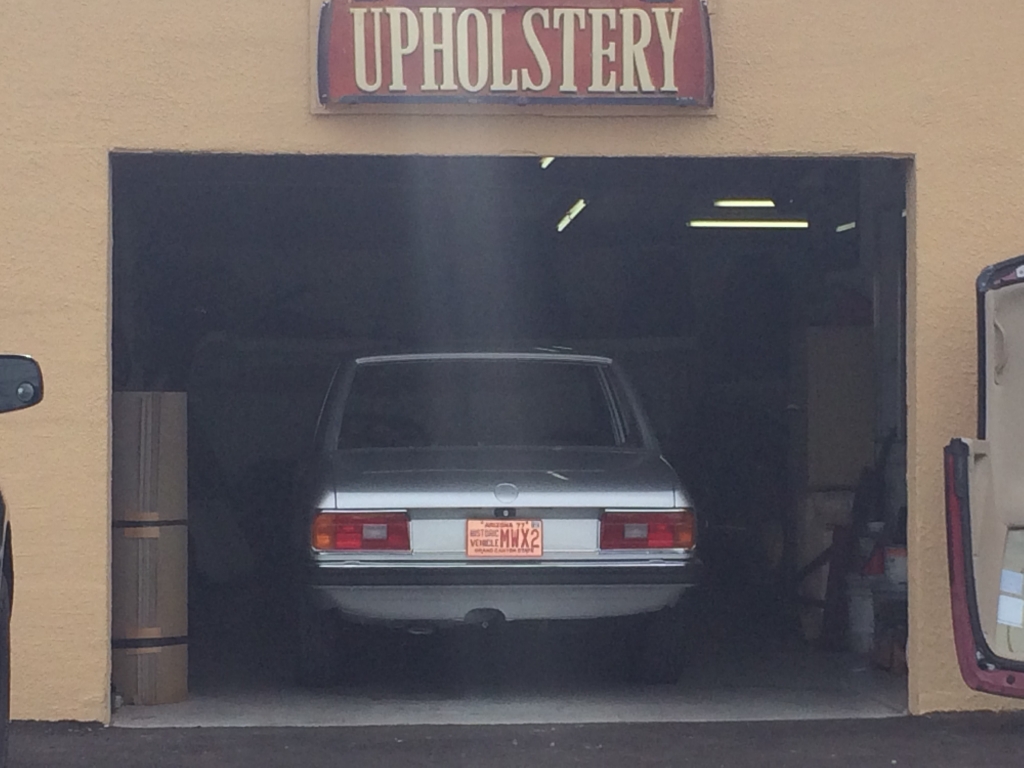
Image

Image

I show up and was asked why I was there and why the car was there as I wasn't on the schedule. When we pulled up, it was clear there were many cars there. Fortunately, they took the car and Terry got on it ASAP, after he went through how much work was going to be involved. I showed him a few things on the '75 E12 so he can see how the headliner goes in, as on E12s, the rear of the headliner is a floating piece, not wrapped around the pinch weld, like E28s - not that he knows E28s, but it's an important distinction.

He had a couple of questions later in the day, so he asked I come by to answer them. He had already made progress.
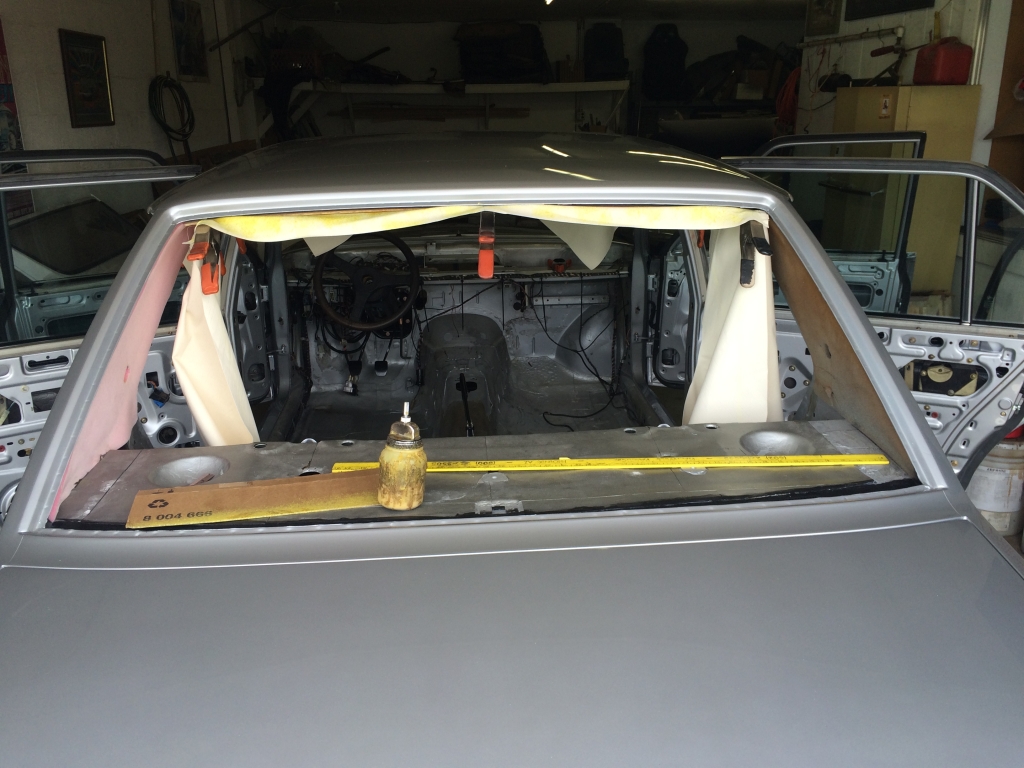
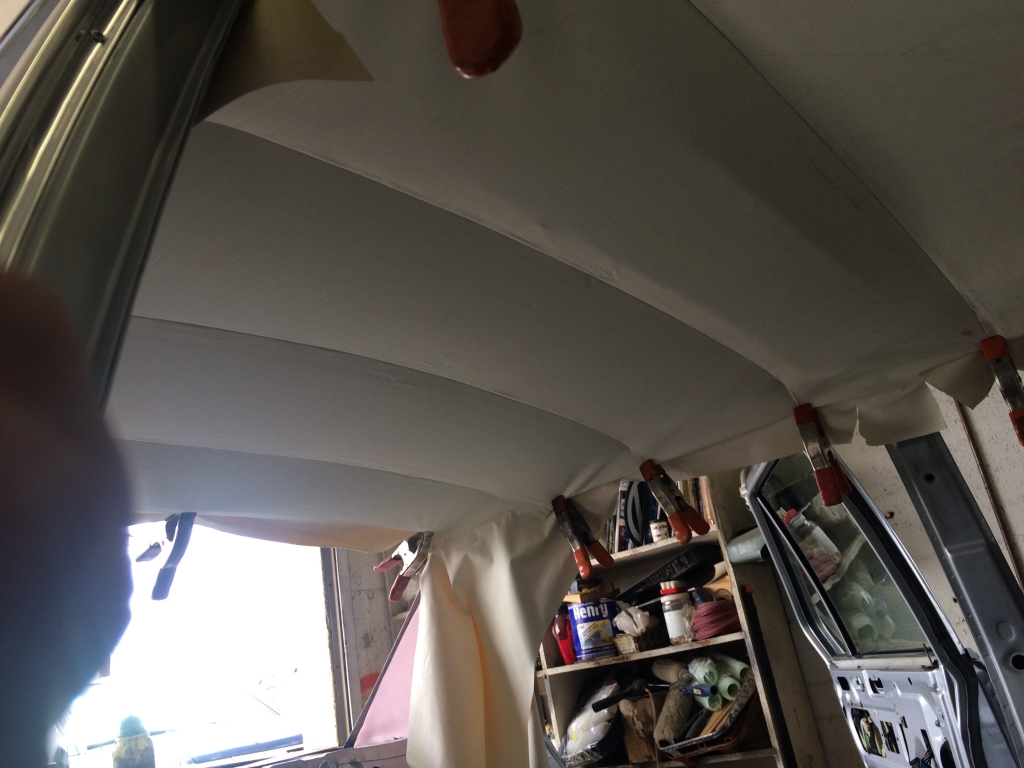
Image

Image

Image

Terry suggested he had a long way to go on it, so I kept working on things on my end. I had a decent batch of stuff at the powder coater, so I picked all of that up.
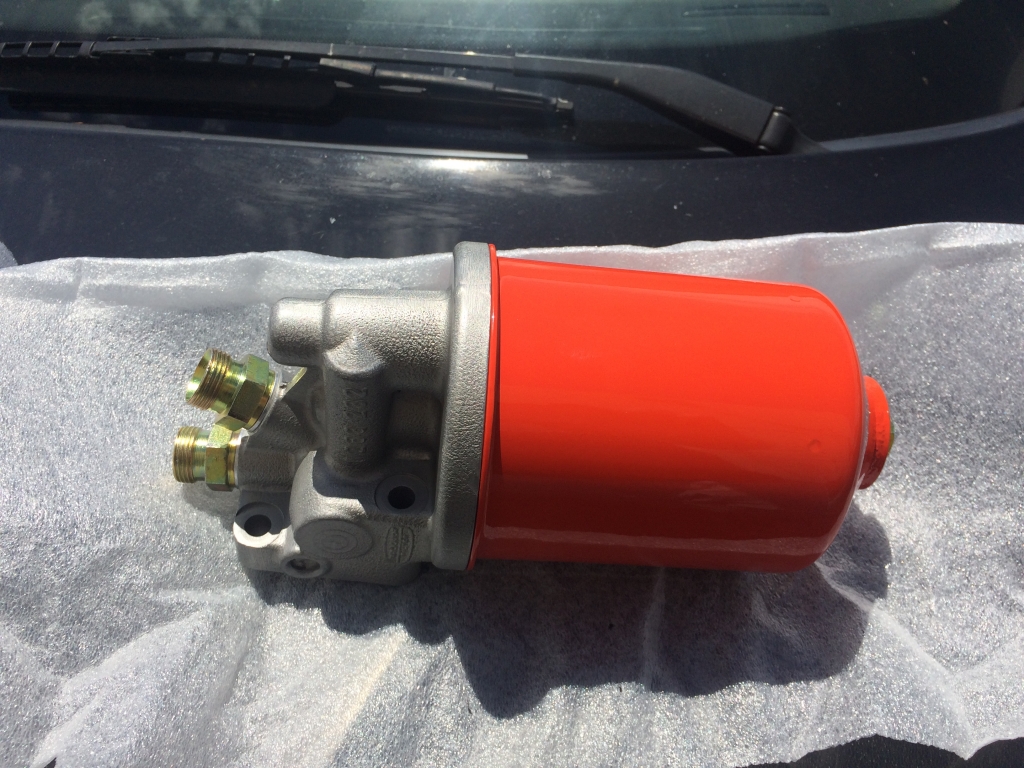
Image

I put my power steering pump back together.
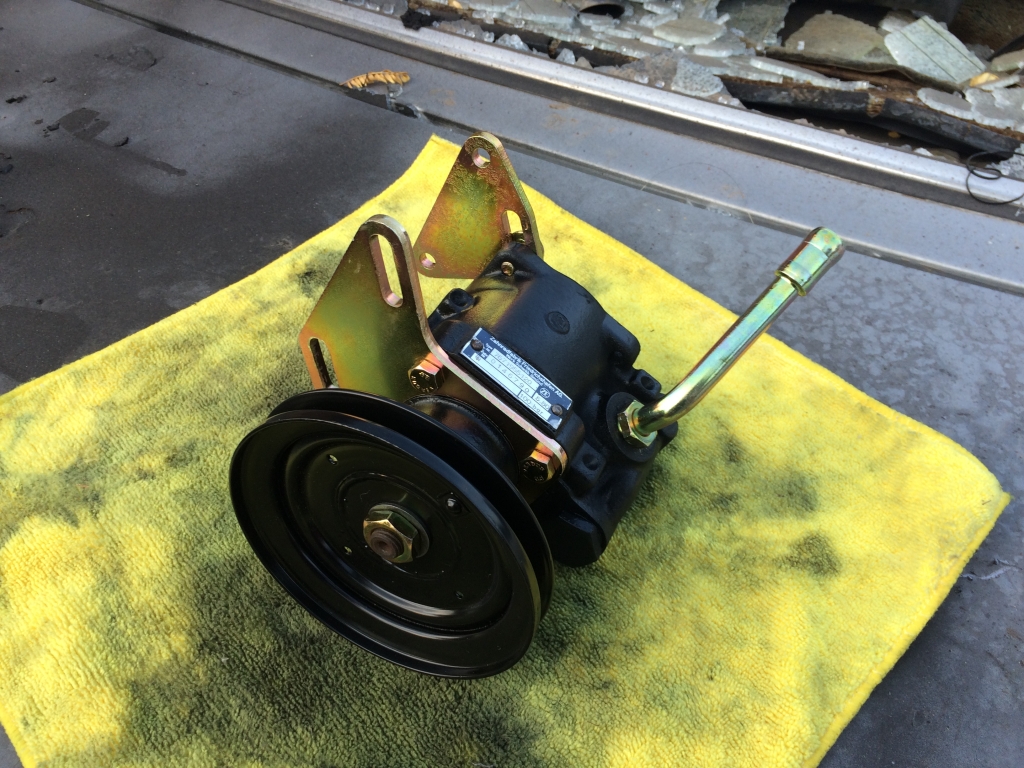
Image

Then while looking at something on one of the E24s, I happened to notice that one of them had the harness connector I needed for the CTS attached to the CSV. So, I harvested that guy to replace this:
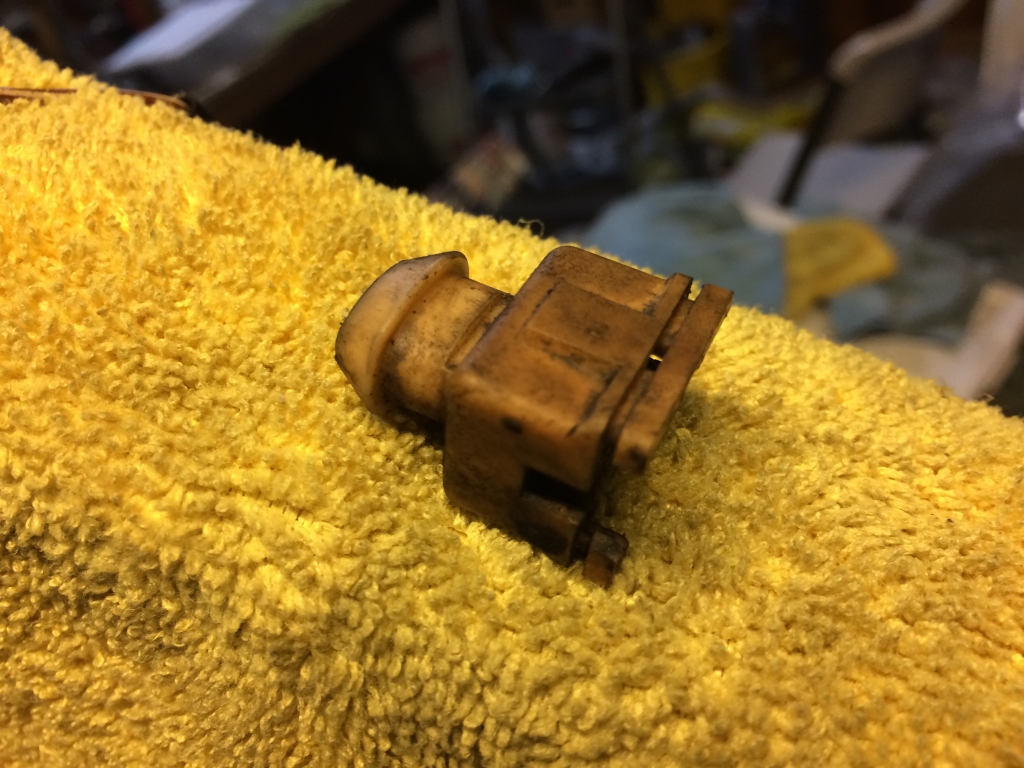
Image

Now that I'm a pro at de-pinning these Bosch connectors, I made quick work of it and replaced the boot, too.
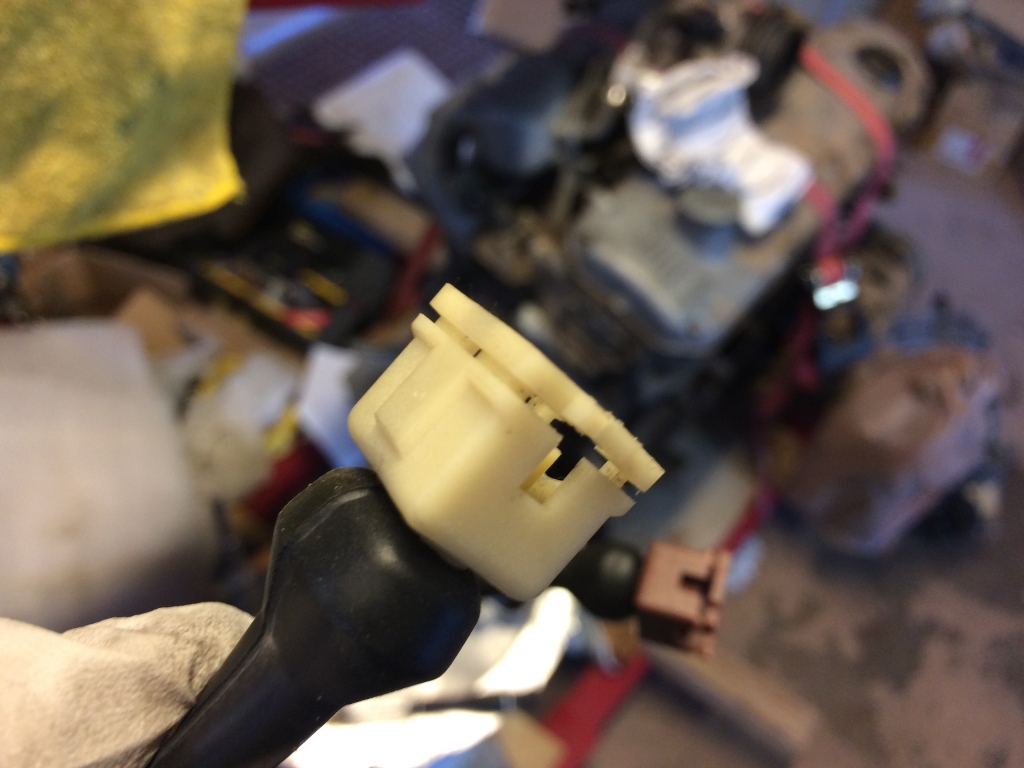
Image

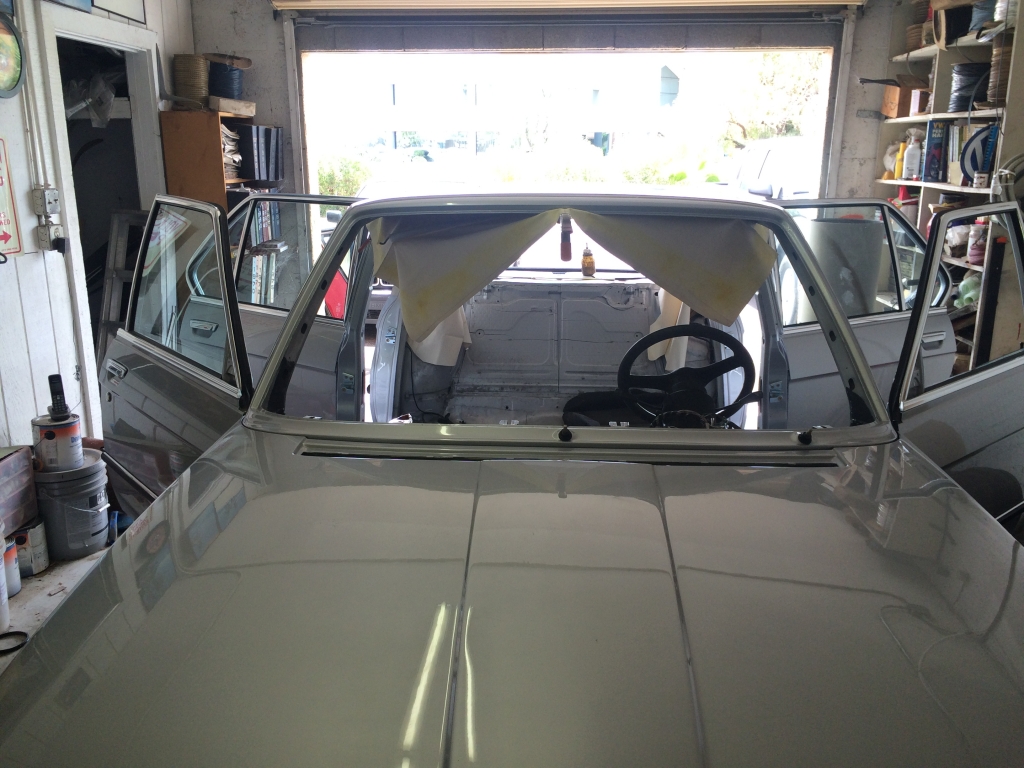
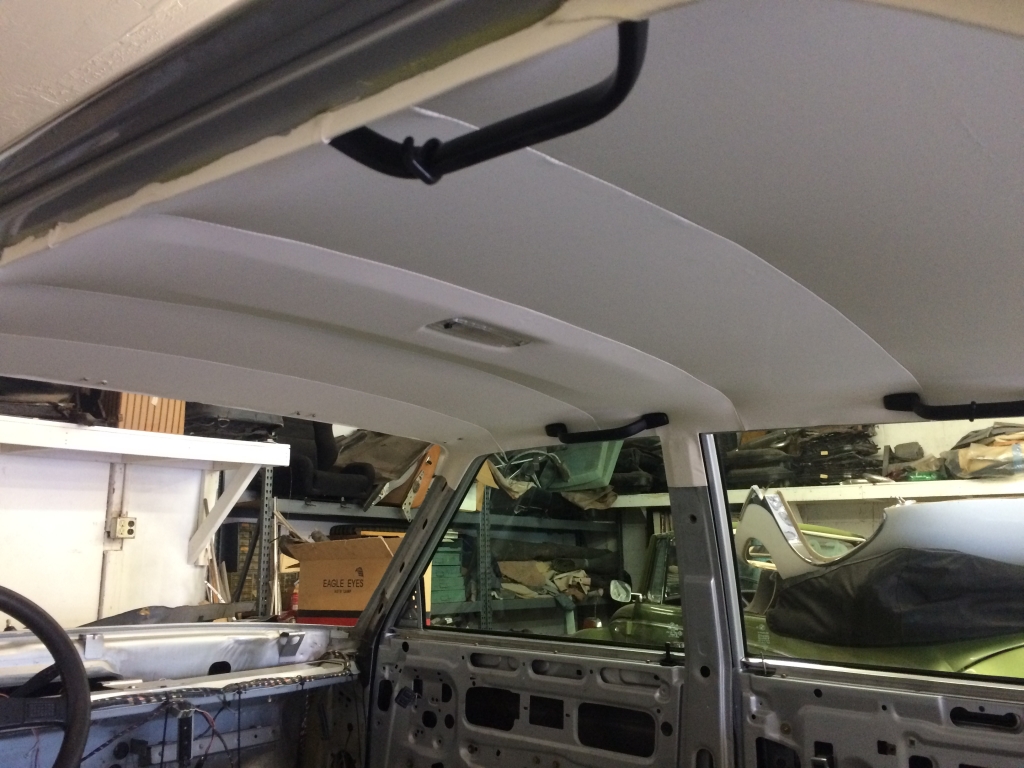
Tuesday, June 28, I got a call around 10am saying the car was ready to go. I went over and had a look.
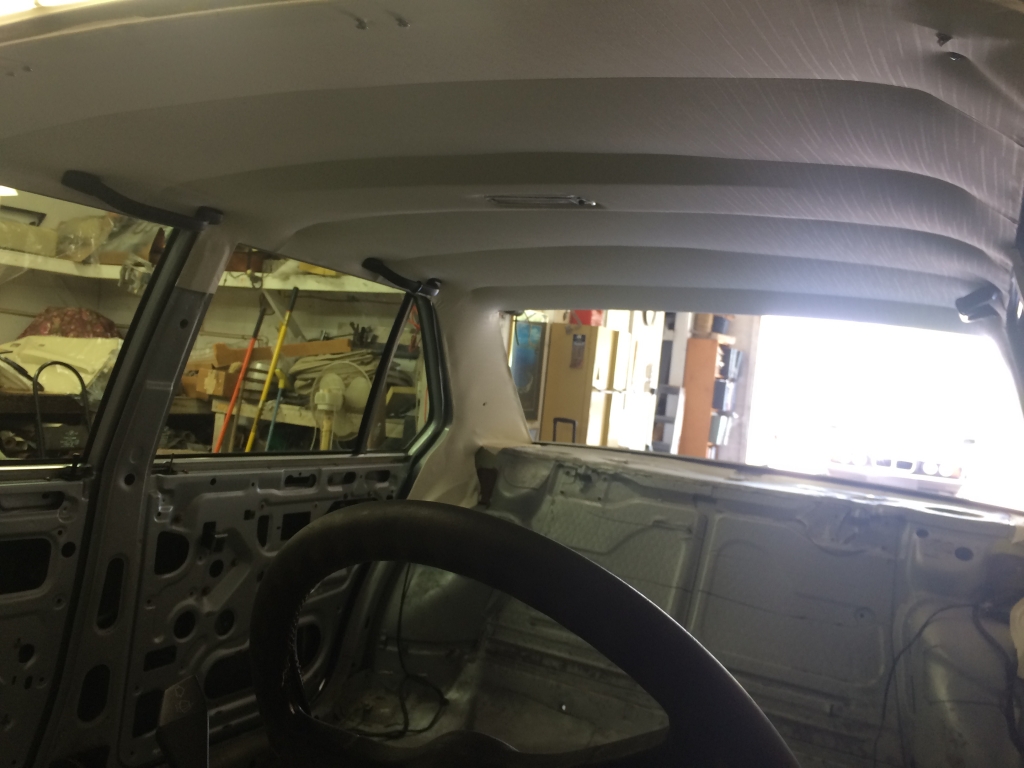
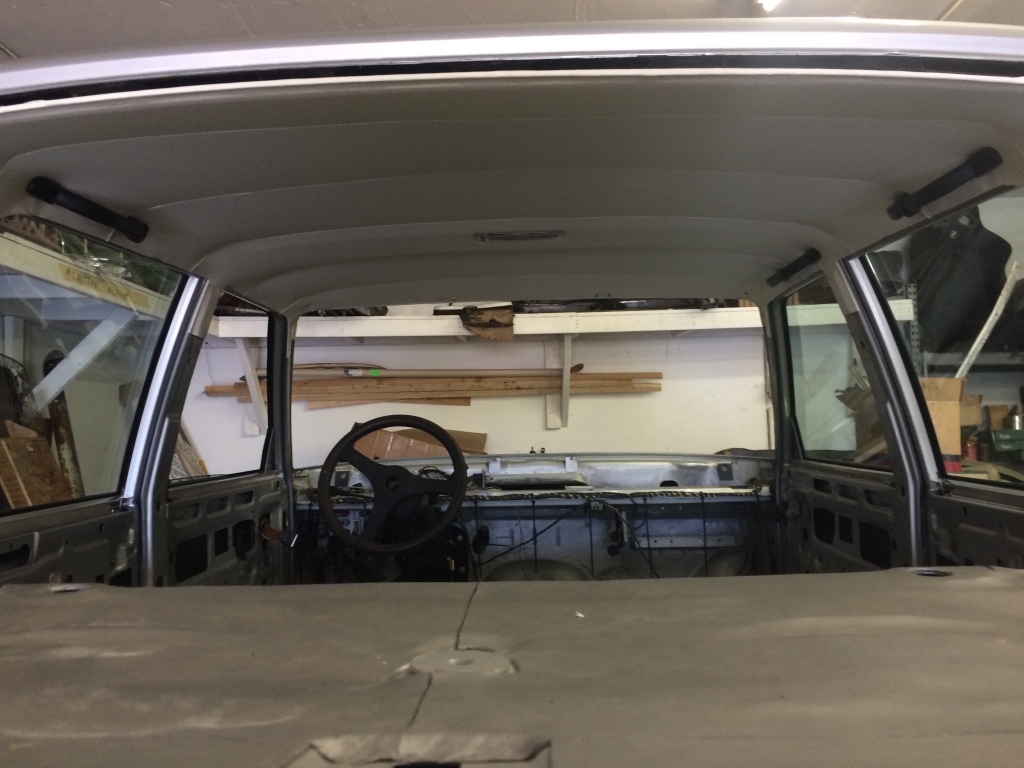
Image

Image

Image

Installation cost was $700 (with a discount!). Towing was $100. Sewing the headliner was $200 and the fabric cost $150 from BMW (3 meters). There were other people that could have installed it but I didn't want more complaining and excuses suggesting that the headliner they didn't sew was wrong versus a failure in their process or vice-versa. I figured the person who made the headliner should be responsible. Of course the B7 Turbo was a headliner I bought sewn for $75, $150 to install and no towing. It also only took 2 hours to install, so this whole process was sticker shock to me.

Friday, July 1, back on the motor. The oil pump sprocket showed up Friday morning thanks to the USPS last mile delivery where it takes three days to get something after it shows up in your city. Of course, despite the eBay photo showing it coming with the nut, there was no nut. Fortunately, Alex had one. It's an M10x1 jam nut, so not exactly super common.

With that sorted, oil pump was installed, head installed and first torque sequence squishing my $140 headgasket.
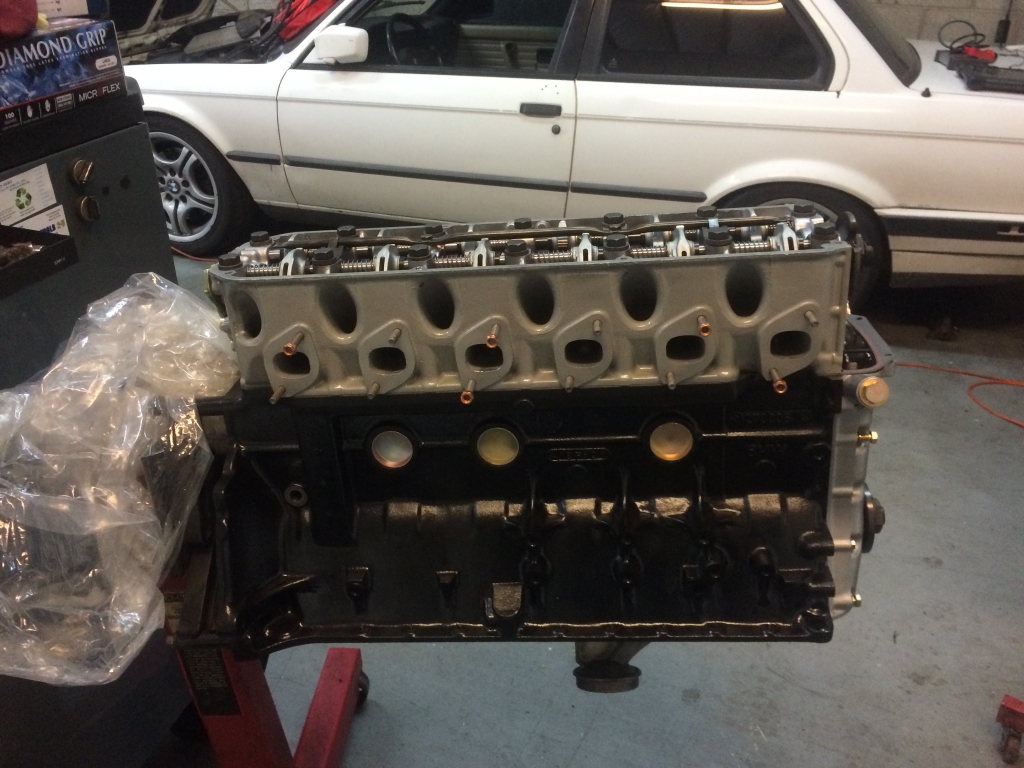
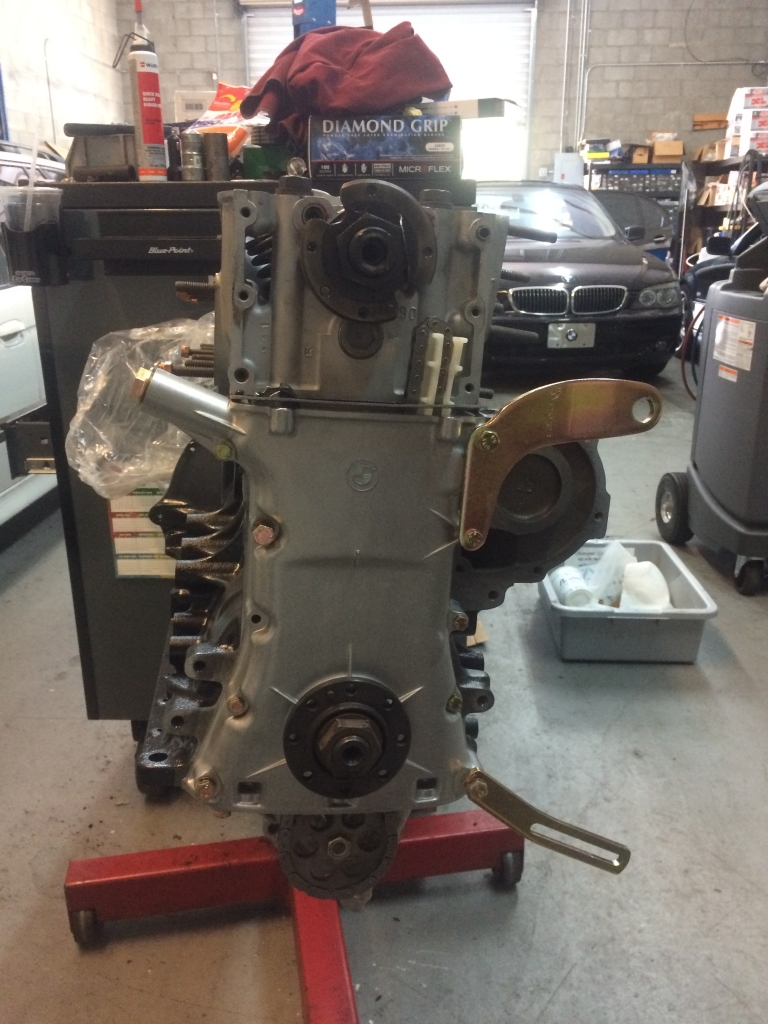
Image

Image

While waiting for the second torque sequence, we installed the oil pan.
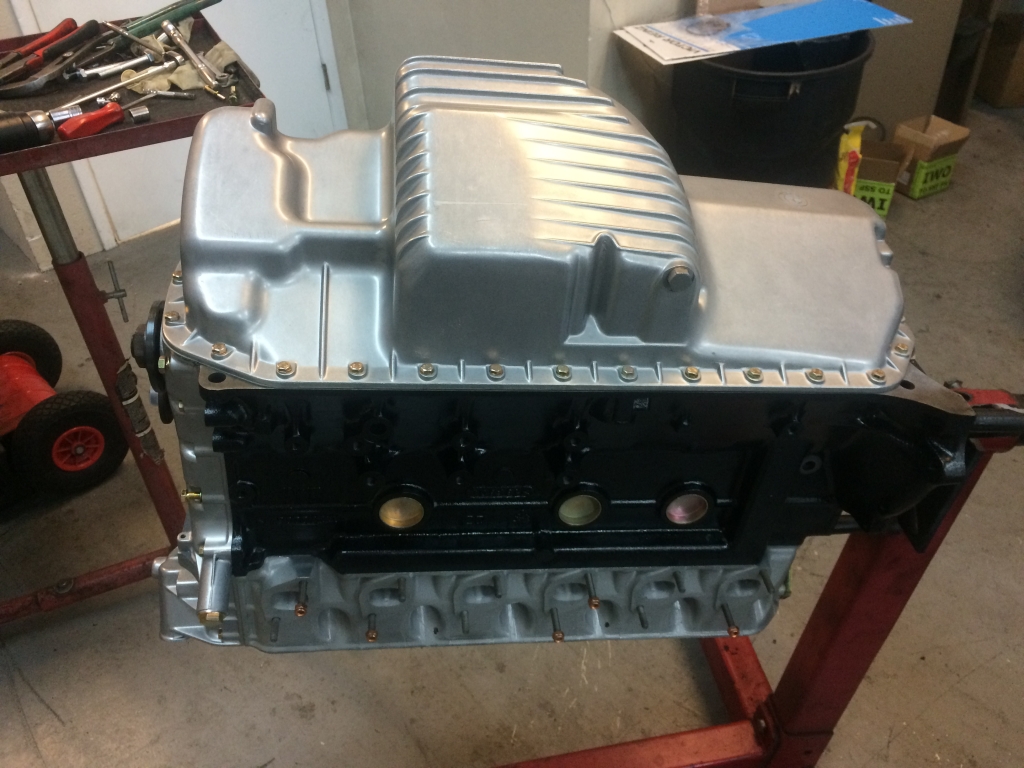
Image

Finished up the chain, primed the tensioner, installed the upper timing cover.
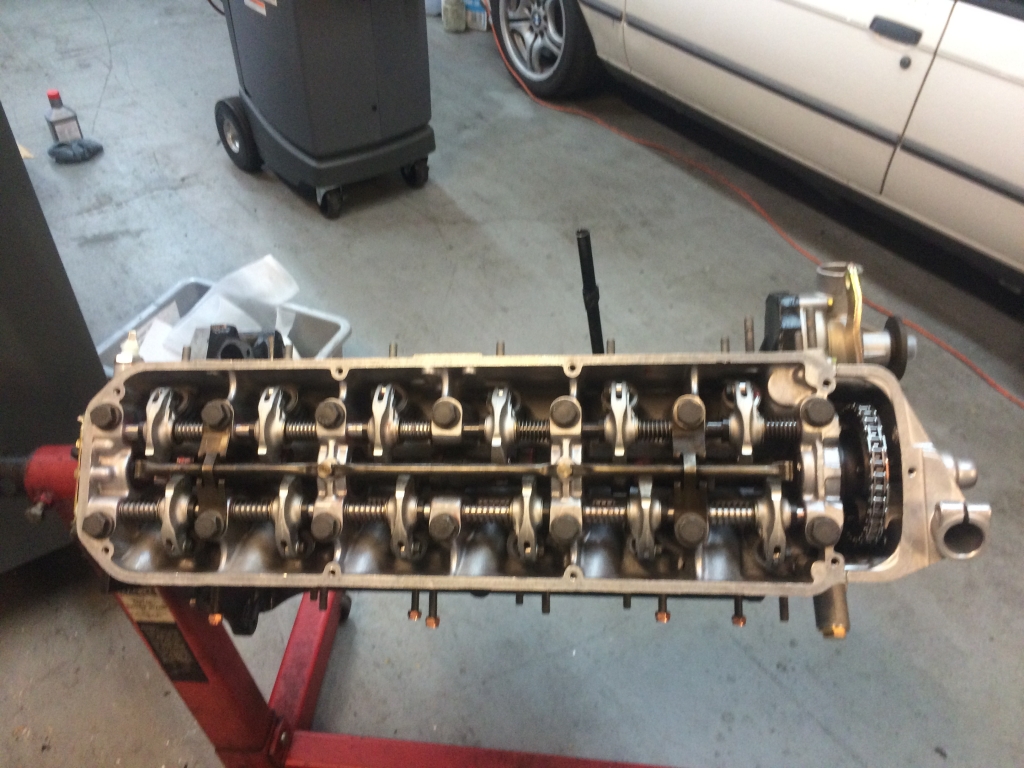
Image

Image

Valve adjustment done and this motor is ready to go in the trash.
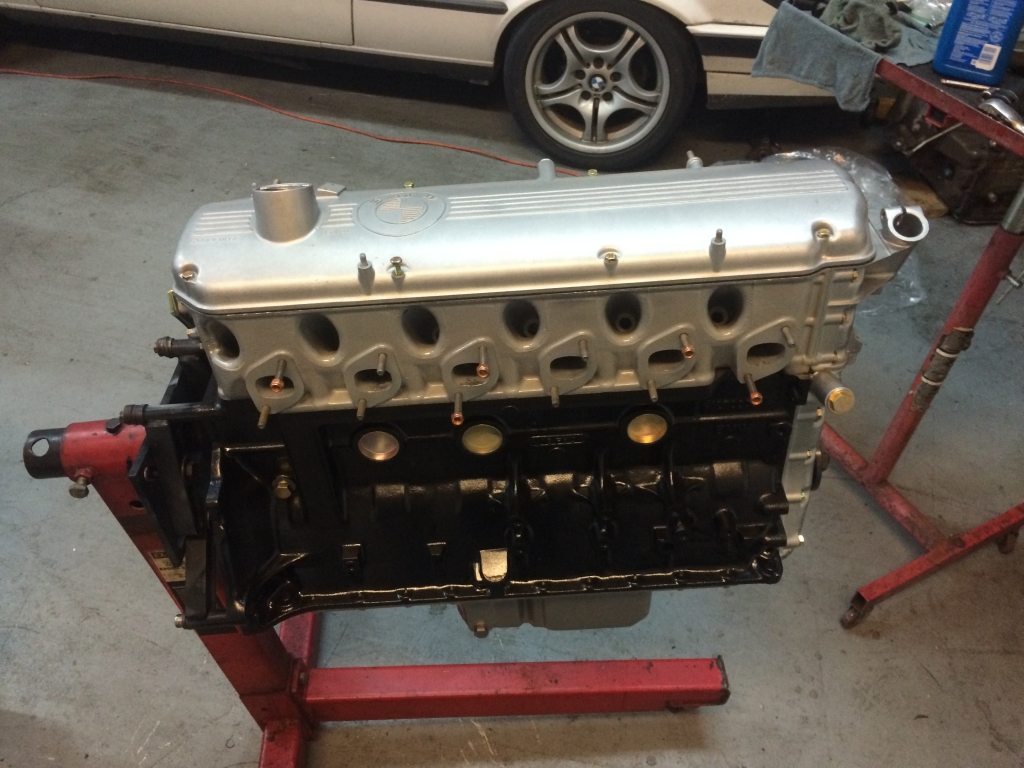
Image

Off the stand onto the hoist. Install the rear freeze plug, then the flywheel.
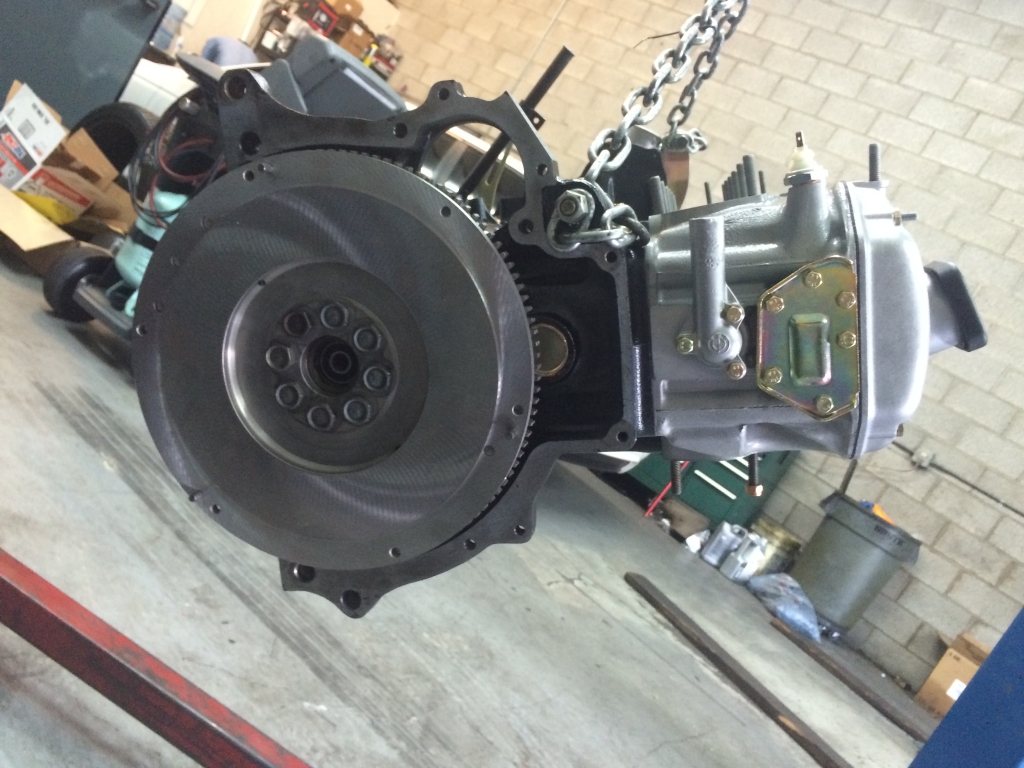
Image

We loaded it into the back of his Aztek and I drove that to my house and unloaded my motor, then started attaching things to it since I didn't know what else to do with it.
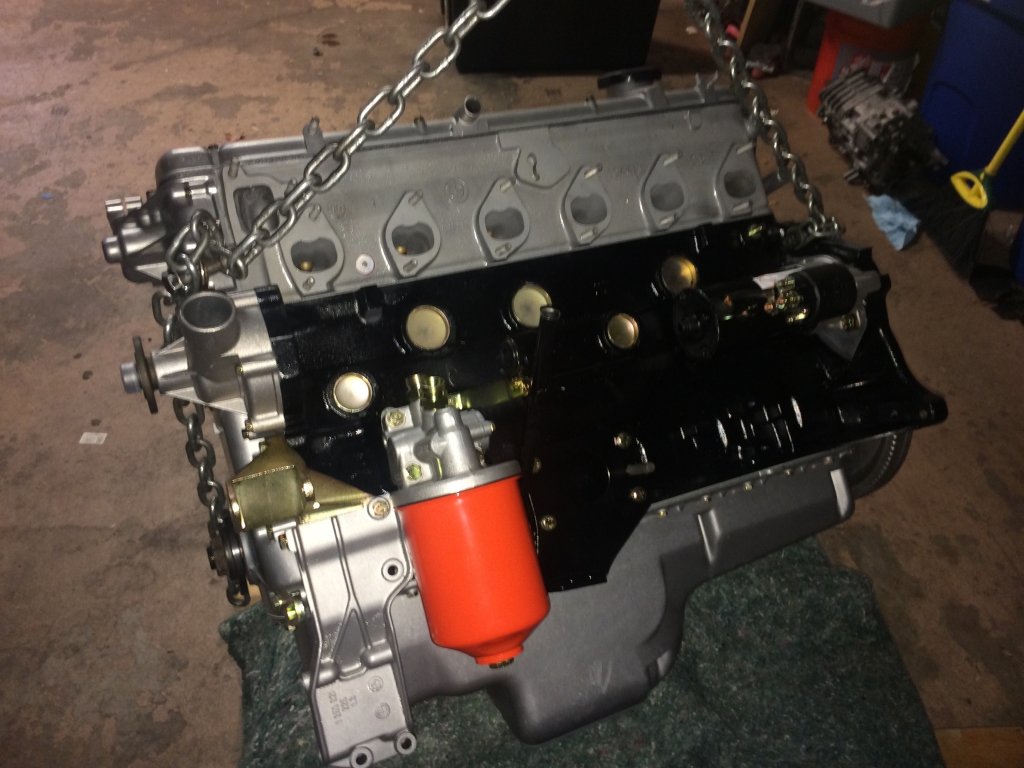
Image

I had to order motor mounts on eBay, so my idea of putting it in the car over the weekend was a no-go.

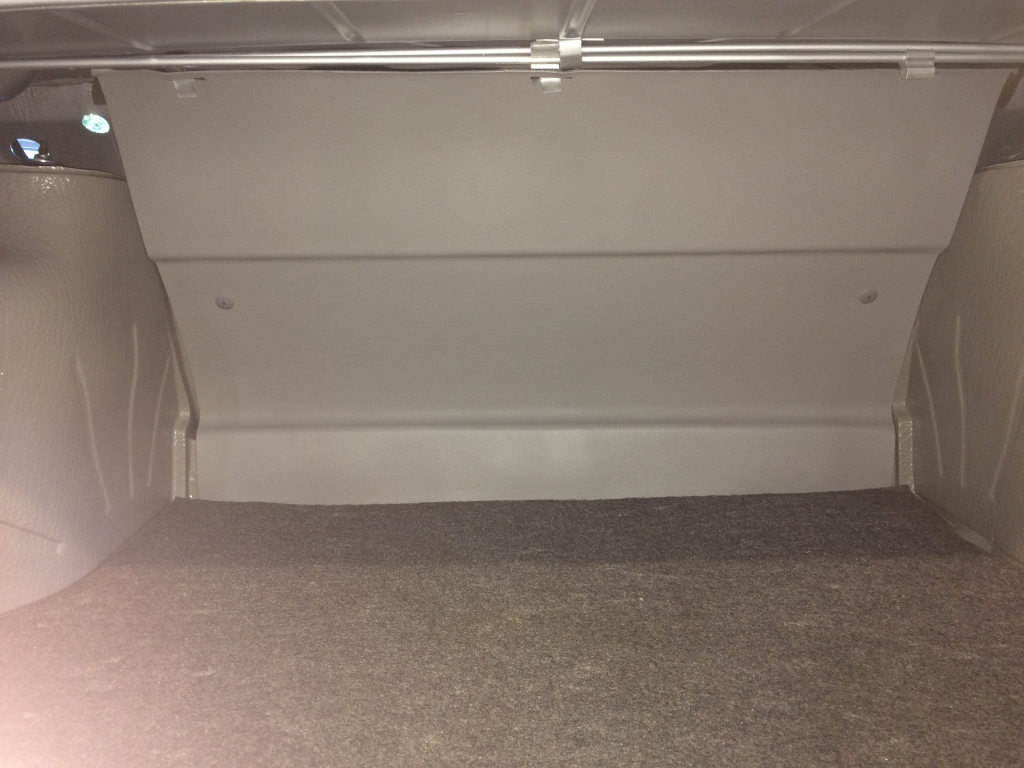
Mike, the painter, came over Sunday morning to fix a spot under the car next to the transmission. While he was there, he re-textured these for me and I painted them.
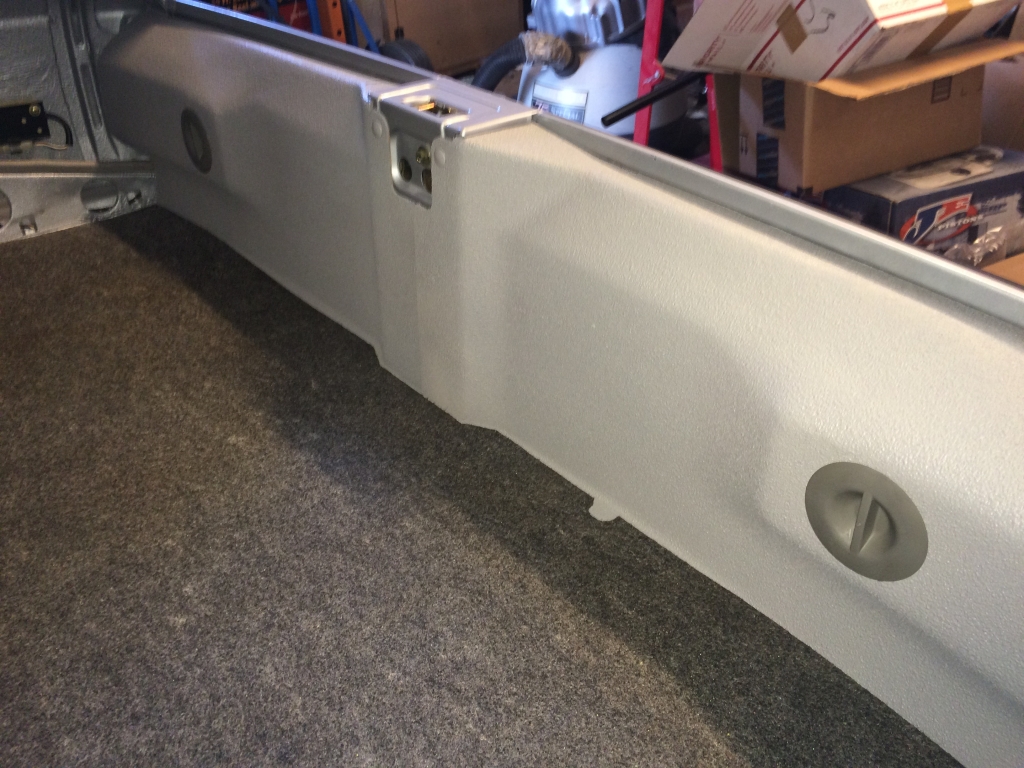
Image

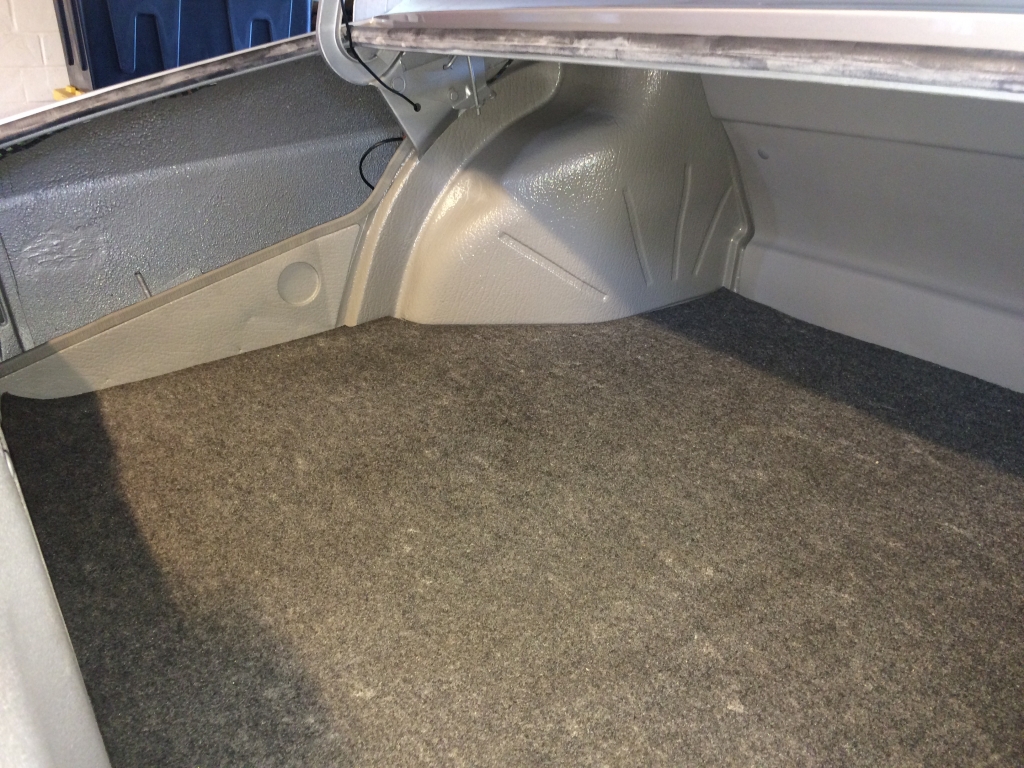
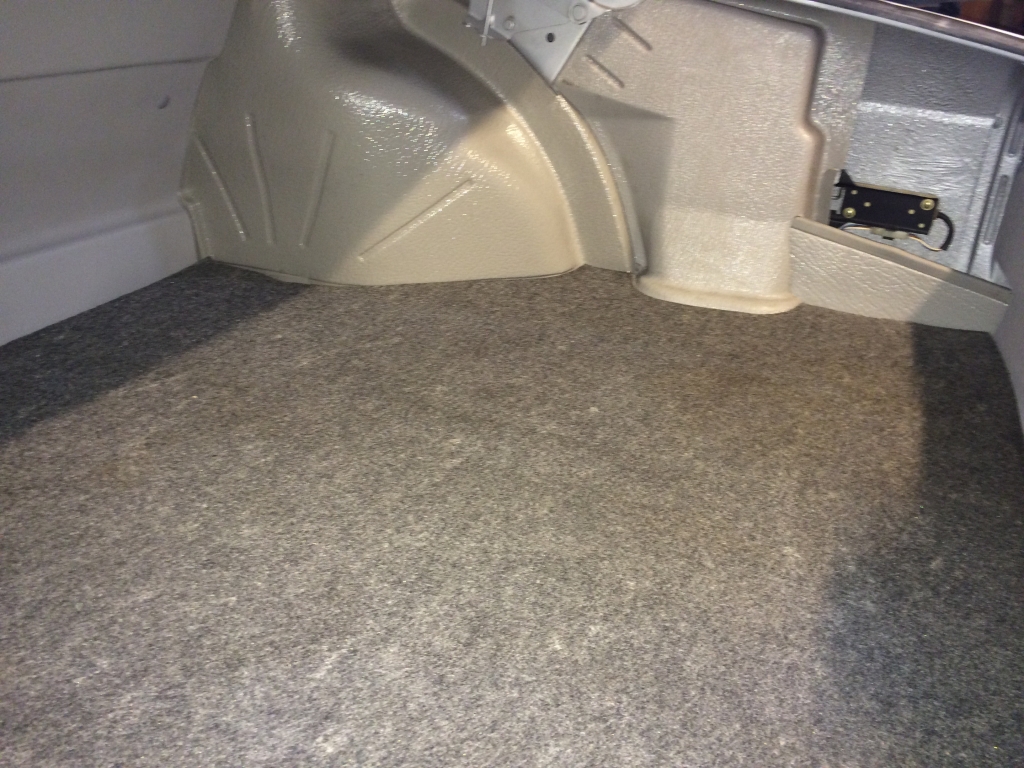
Then I worked on the rest of the trunk plastics which are fragile and a pain in the ass.
Image

Image

Image

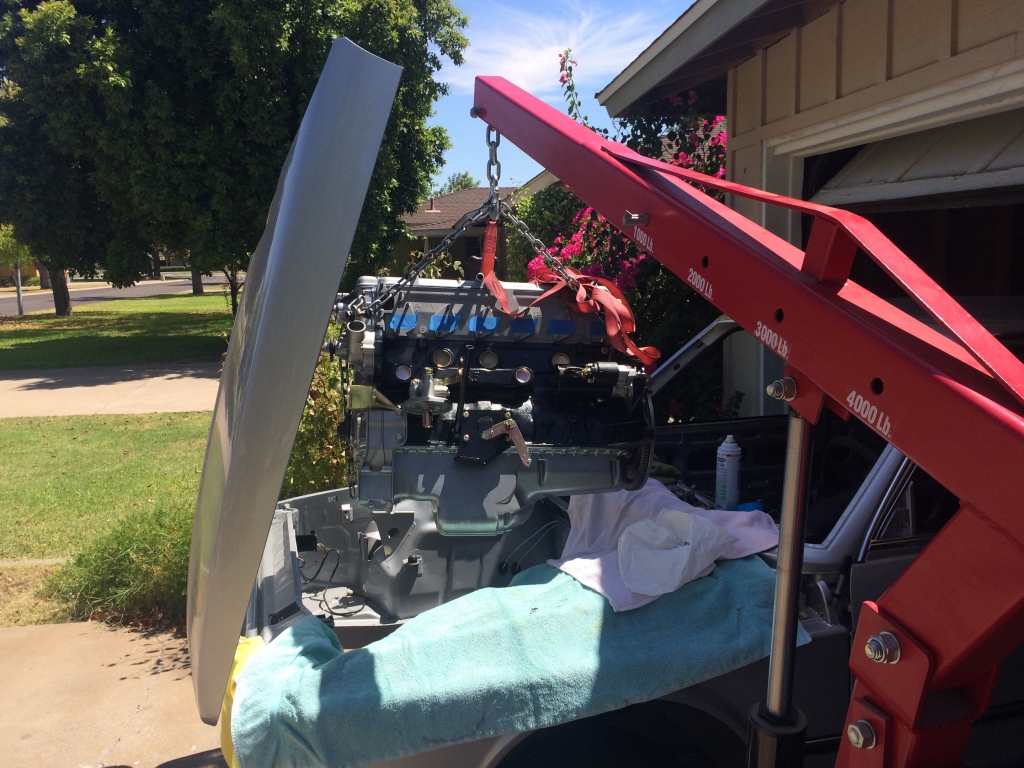
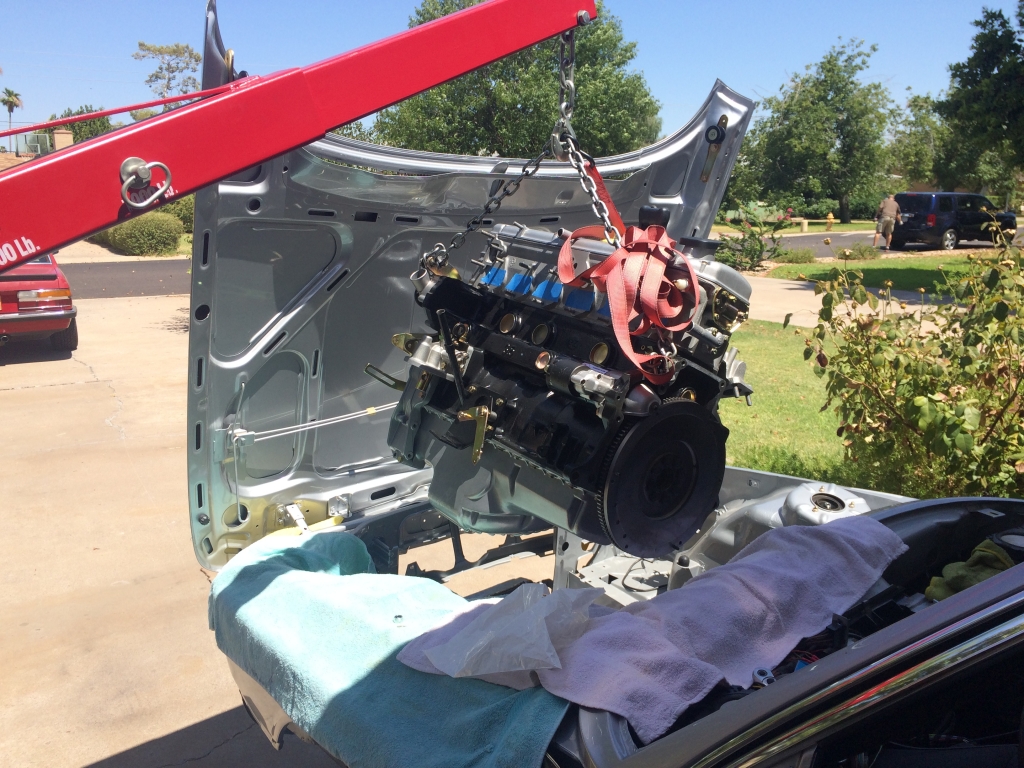
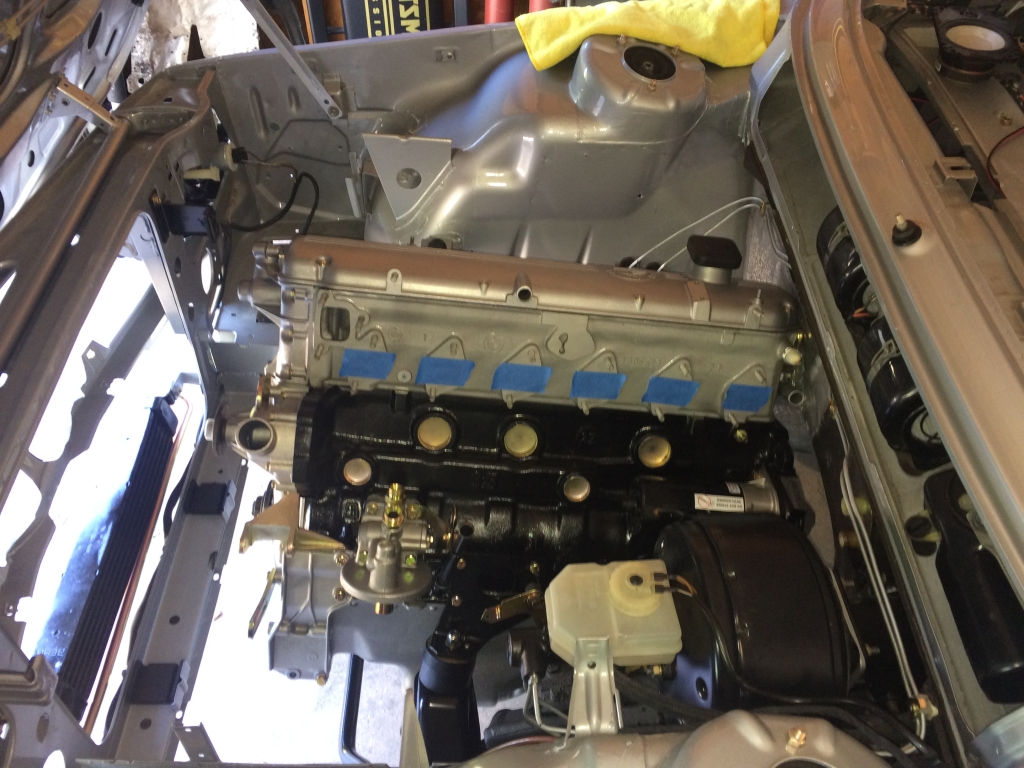
I thought quite a while about how to put the motor into the car. I was going to put it in from underneath but the reality is that without a lift, it would be a disaster. The problem with going in from the top is the hood and the angle of the motor, but my friend Scott (scarey013) helped me resolve the angle issue. I had thought about using a ratchet strap but I wasn't totally comfortable with it. Sure enough, it worked perfectly. With that ready, the motor was ready to go in. Adam (ldsbeaker) came up from Yuma for a visit and my motor mounts had just arrived, so we fueled up on Waffle House and got to work!
Image

Image

It was at this point we figured out to remove the left front wheel and he just happened to have his impact ready with a 17mm on it, so he's in the background there.
Image

It took maybe 10 min to put the motor in the car. 30 min start to finish from moving the engine hoist to lowering the car off the jack.

Alex came by that afternoon and we torqued the crank nut.

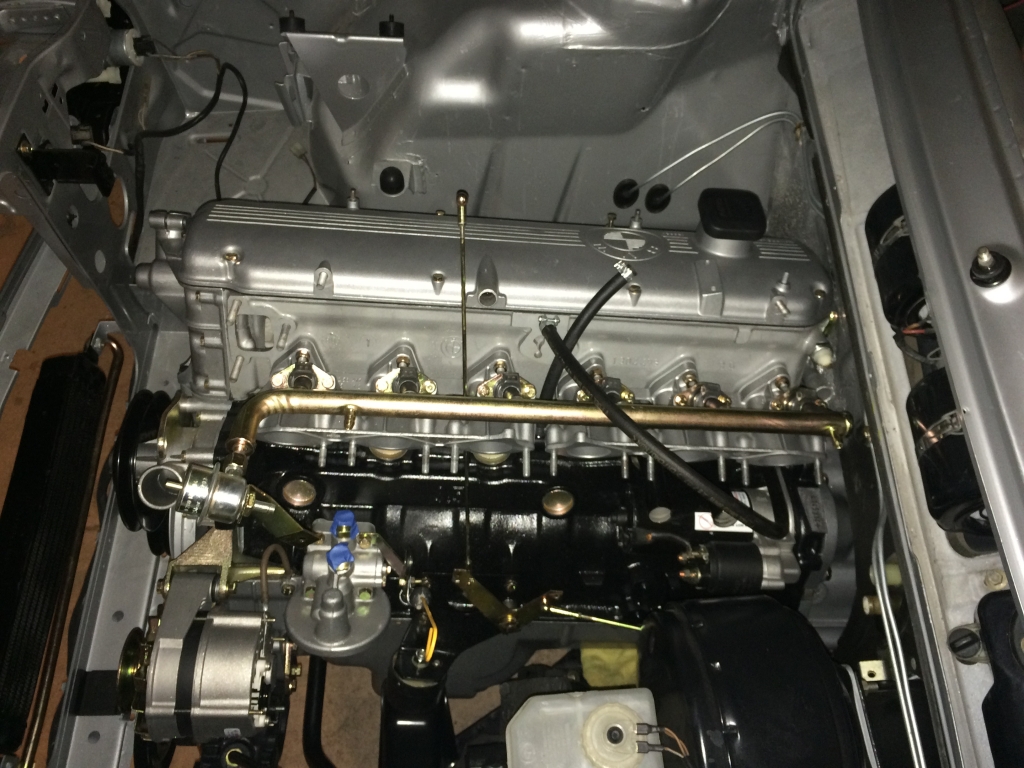
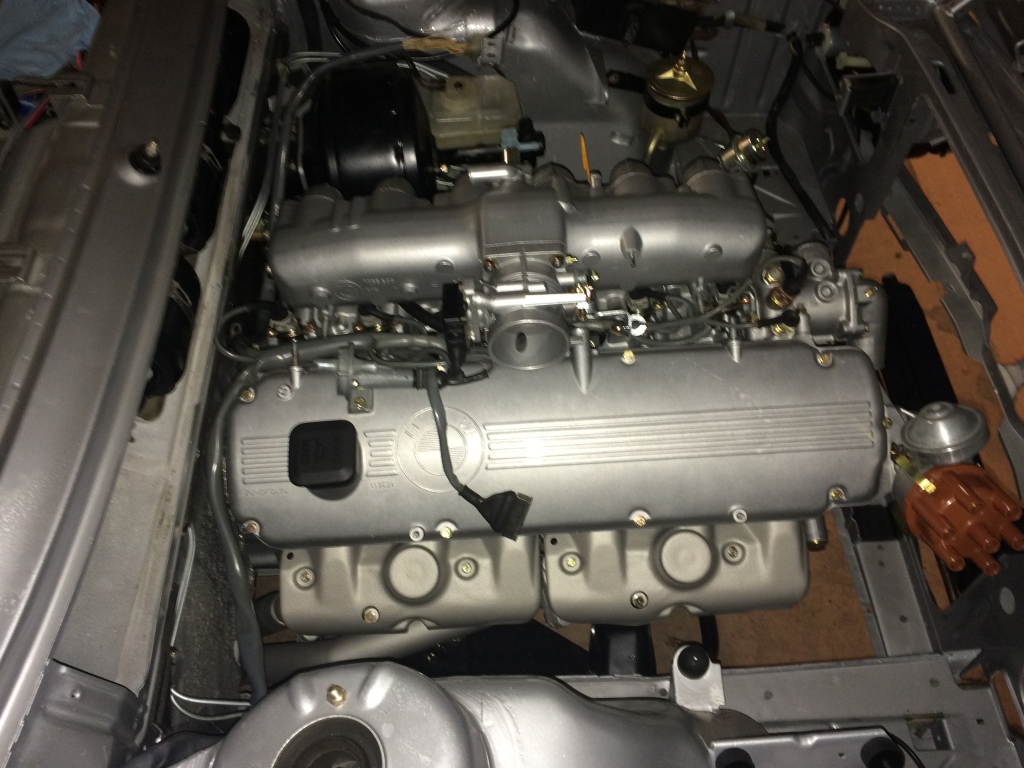
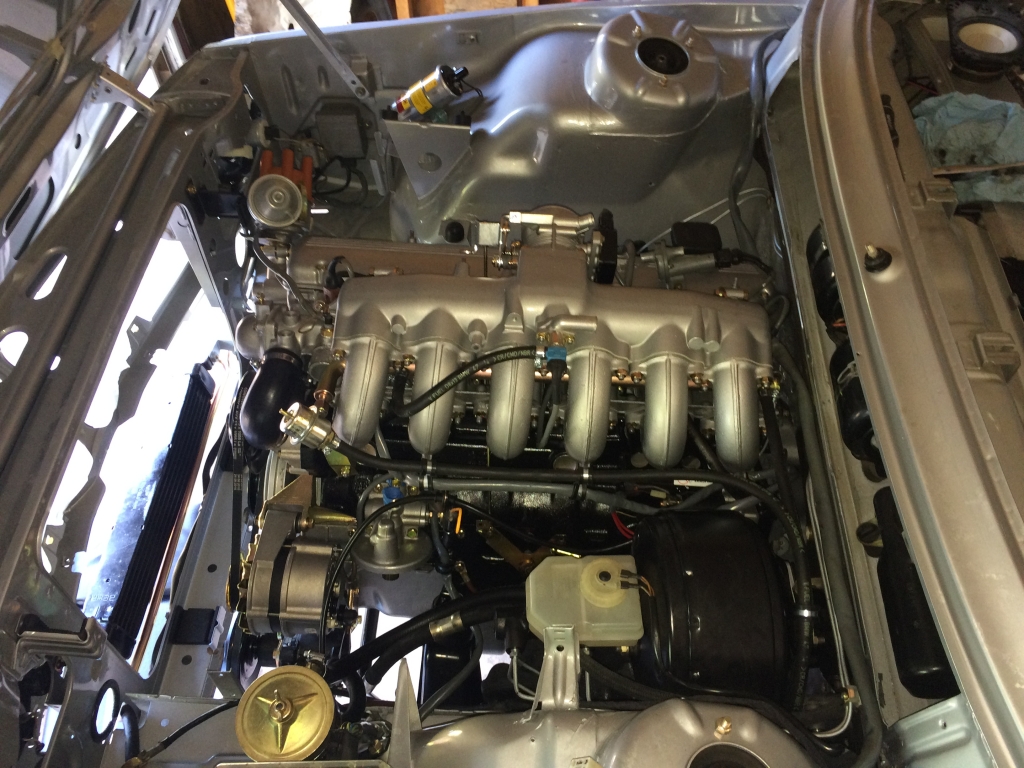
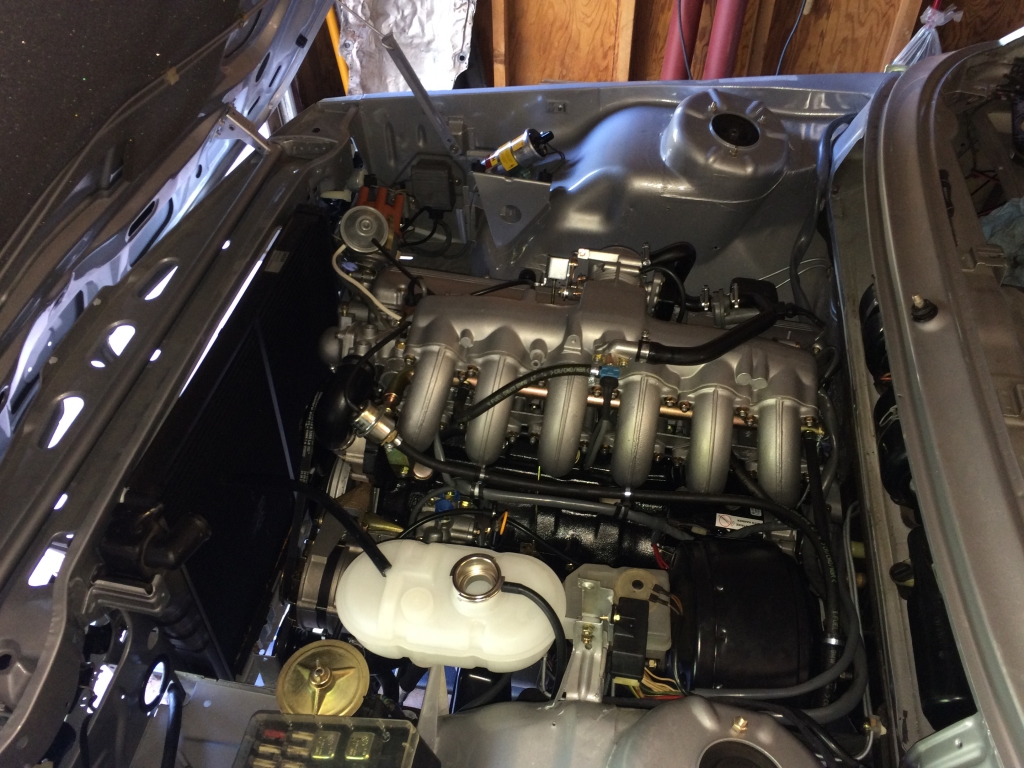
With the motor in the car, that's like a big deal and now I can just work on stuff. I started putting my intake manifold together.
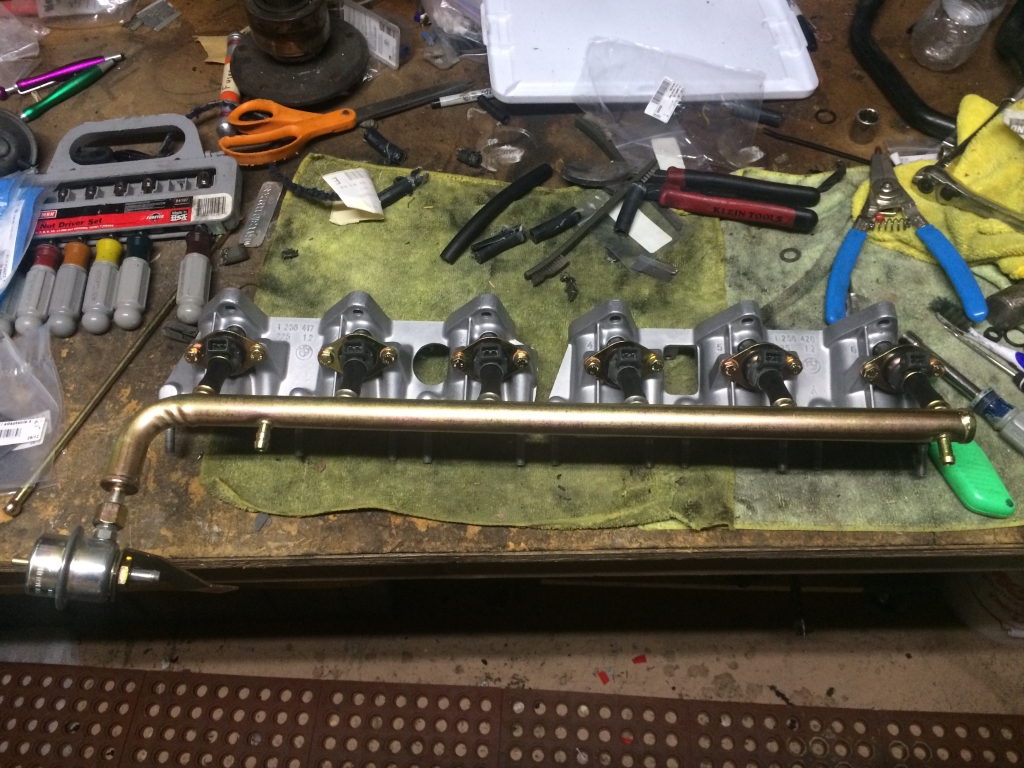
Image

Of course, waiting on parts, so I installed the accessories.
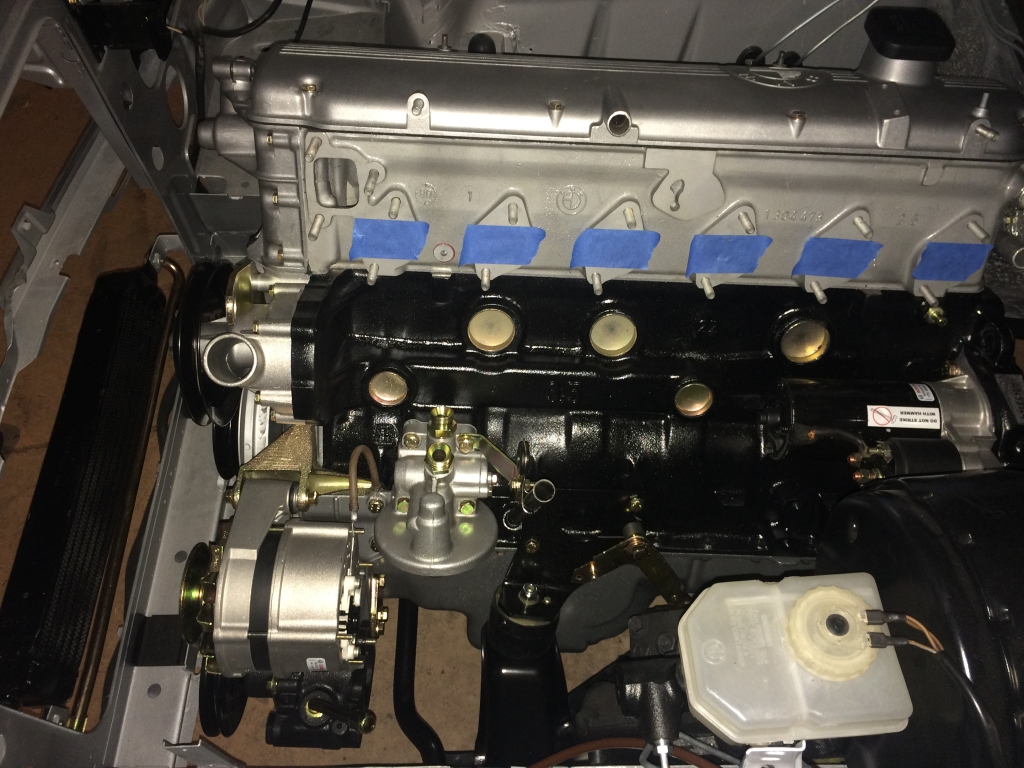
Image

and the harmonic balancer, of course.
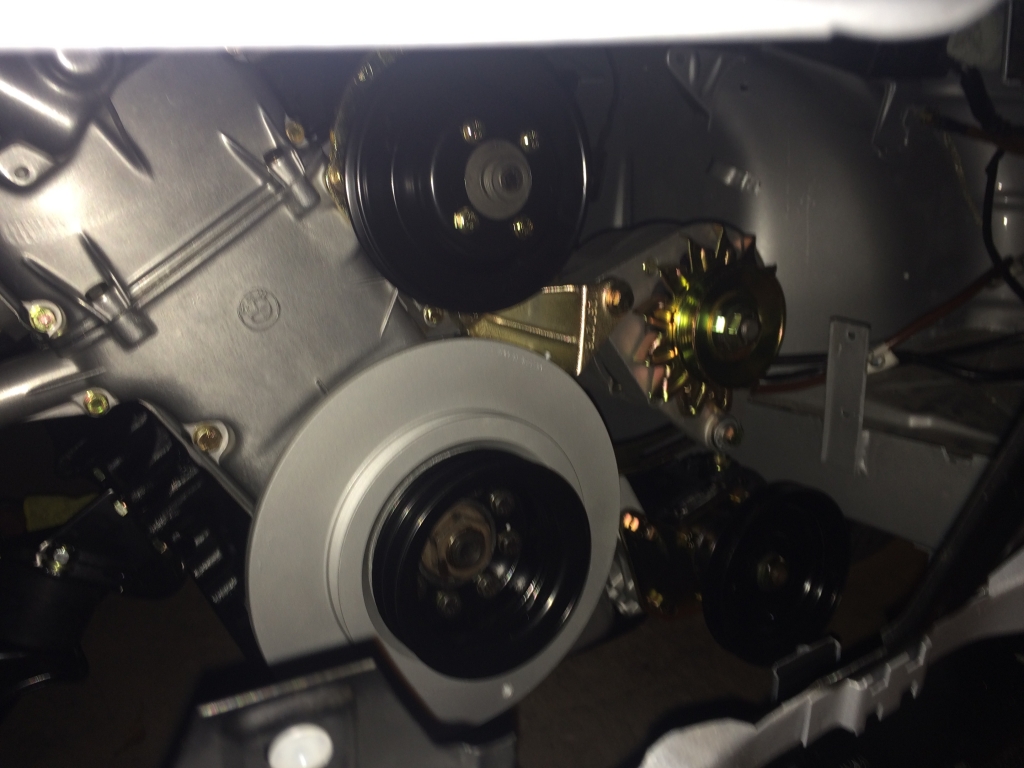
Image

I went to the exhaust side and installed the exhaust manifolds and their heat shields.
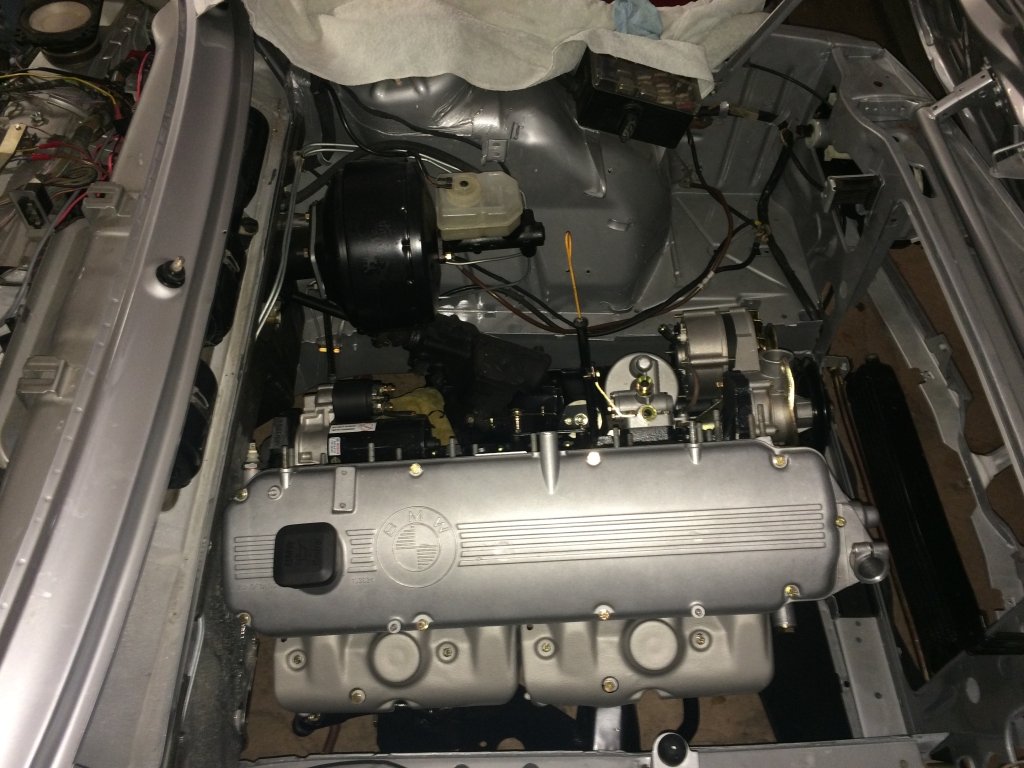
Image

Back to the intake side.

Image

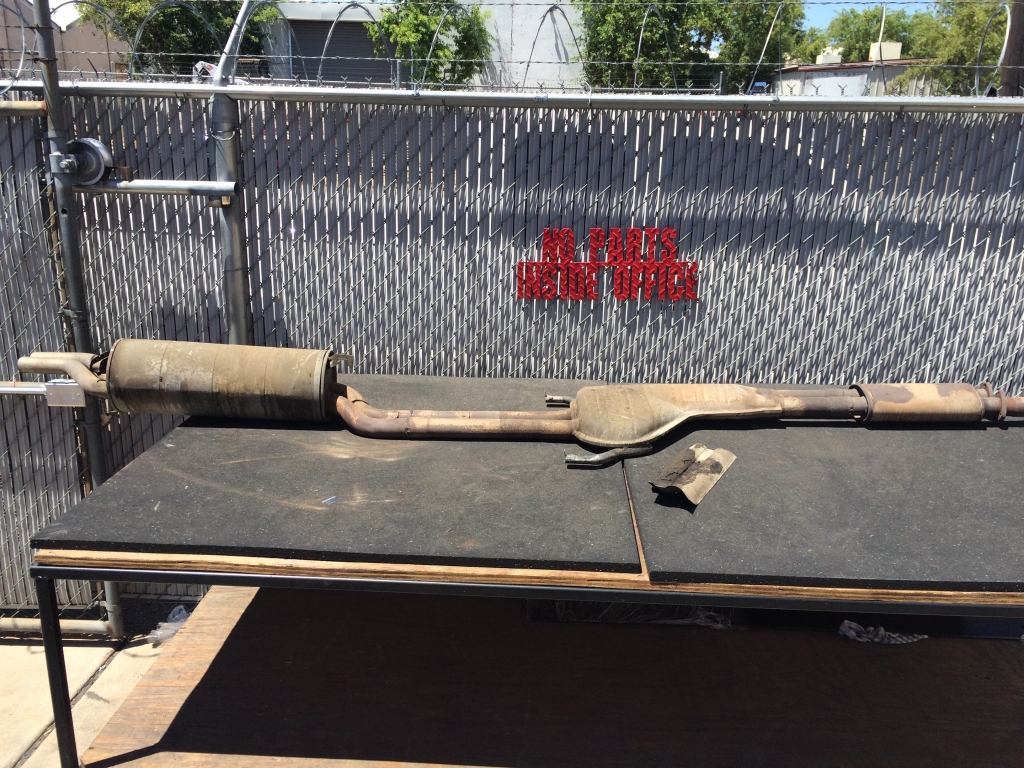
Either the exhaust on my car is original and just in awesome shape or it was replaced at some point. I looked into buying new, but the car sounded great before and it didn't even show any weak spots, so I borrowed a van from work and took it to the powder-coater to have it ceramic coated to match my manifolds and downpipes.
Image

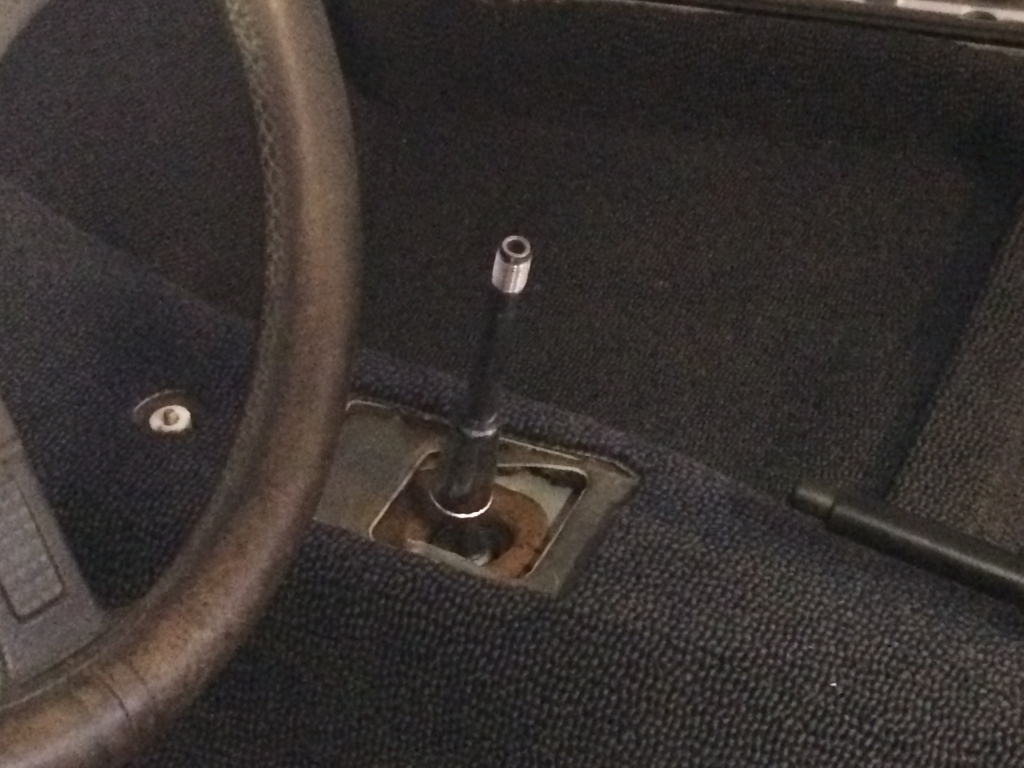
My next task was to work on installing a transmission in this thing. I wanted to get the engine properly supported rather than leaning against the firewall. I installed the clutch using an alignment tool. Everything went great. Installed the bell housing with a new clutch fork, pivot pin and spring. I was going to go with the stainless pivot pin, but the original lasted this long. I then started doing the final tasks on the transmission. selector shaft seal, new reverse light switch, make sure the fill plug is loose, install the speedo drive, etc. Everything went fine until I got to the last one. I pulled the plug out and found that instead of having a gear on the output shaft that drives the speedo drive, it had a spacer. I looked into what it would take to swap it, since I have the 262 box of rocks from the 530i and found that I'd have to pretty much take the back of the transmission apart unless I wanted to make a special tool on the milling machine I don't have drilling 3.999mm holes for 4mm screws then slicing them at the right angle to grab the gear and pull it out. Plus, that would also require pulling the output flange, etc. So, I went back to the shelf of doglegs and grabbed another one, supposedly rebuilt, that I bought from Al Taylor in '09. It came from an early 6er, so I cleaned it up. Of course, I already used my selector shaft seal on the other one and despite the selector shaft seal being used on 40 different BMWs - even current models, there was no way I could find one in town on a Saturday, so I popped the old one out (from 2006) and decided to tap a new one in while it was installed. So, I got under the car, put the transmission on my right thigh and got it up into position, only to find it stopping about 1/2" from the bell housing. I moved it around, tried turning the shaft (I put it in gear, in case I had to rotate it to get through the clutch). Nothing. I did this four more times over the course of three hours. No luck. I put the alignment tool in each time and it was right on and smooth. I couldn't believe it and while Kyle told me the tools are junk, I refused to believe it. I finally gave up and sent Alex a text asking if there was more than one size of pilot bearing or something. I measured all of mine in the garage at the time (2 265/5, 1 265/6 and a 262) and they were all the same. He said he'd come help me out the next morning. I didn't want to put him out on a Sunday but he insisted.

The next morning, he came by and we spent quite a bit of time on it, ultimately starting from scratch,but using the transmission to align the clutch. That did the trick and we got it within 1/8" and that was enough to snug up with the nuts. It also worked out perfectly that a mechanic of his was at the shop working on his own project, so I could swing by and grab a selector shaft seal! Back in business. I got back to work and put the shifter in.
Image

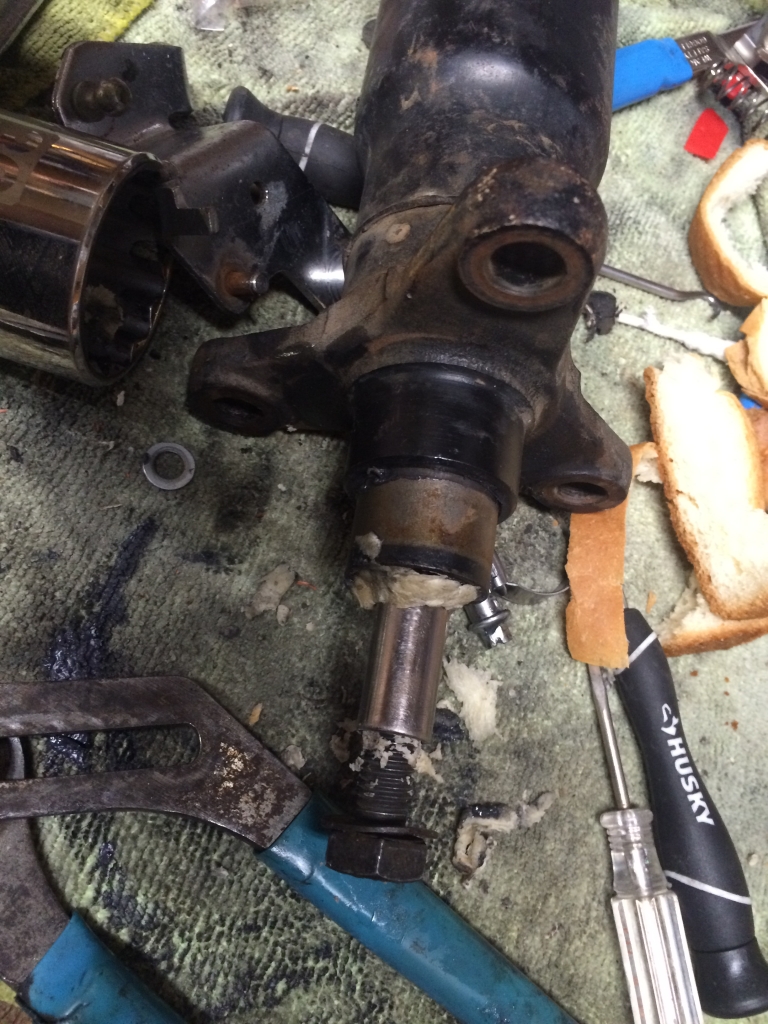
After that, it was driveshaft time. I wish I could go to the store and buy individual packs of bread - like two pieces. Enough for a sandwich, since I don't want a loaf of white bread. After using white bread for what I used it for, I definitely don't want to eat white bread.
Image

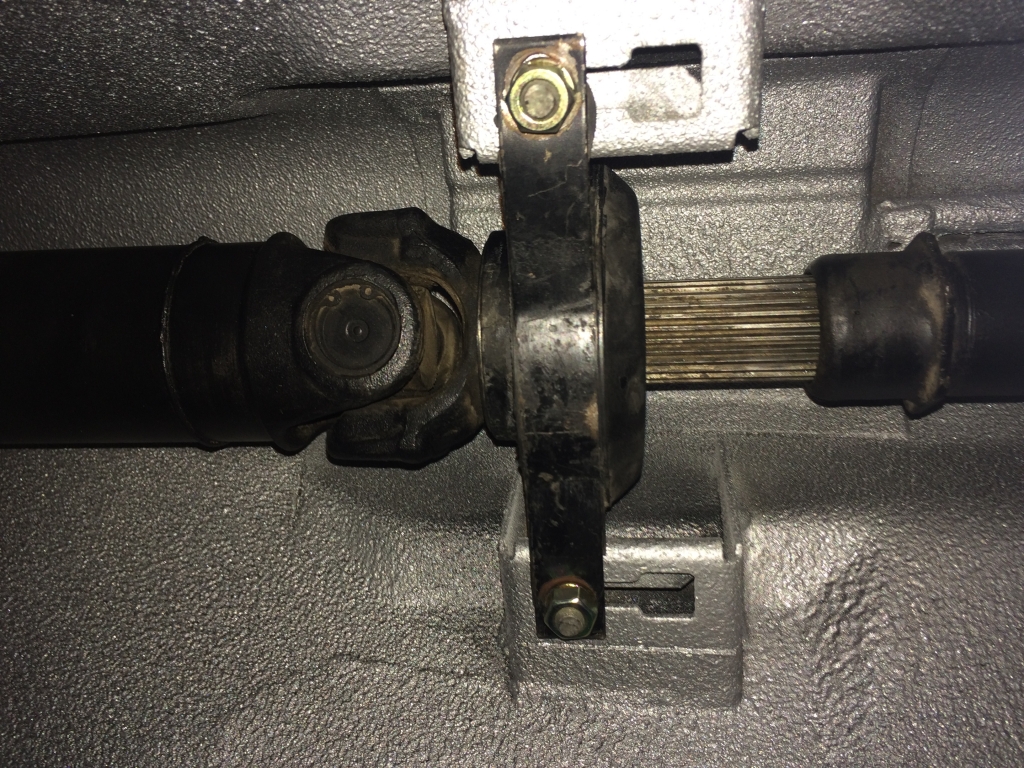
I cleaned up my Beyer reman driveshaft and put it in the car. Unfortunately, it seemed too short. This driveshaft came from the E24 and was about 1000 miles old. I'm not sure it started the fire either.
Image

I didn't get it. Couldn't pre-load the bearing and I had WAY too much of the splines showing. I started wondering if it was the wrong shaft, but compared to the other E28 265 shaft at the house, it was the same.

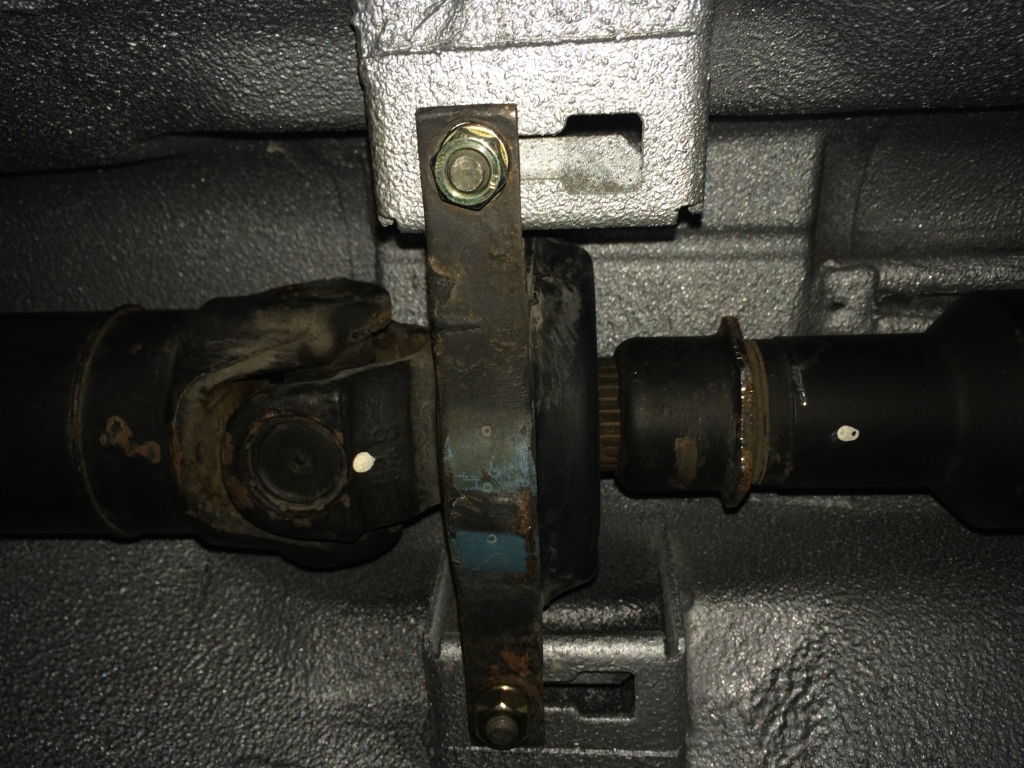
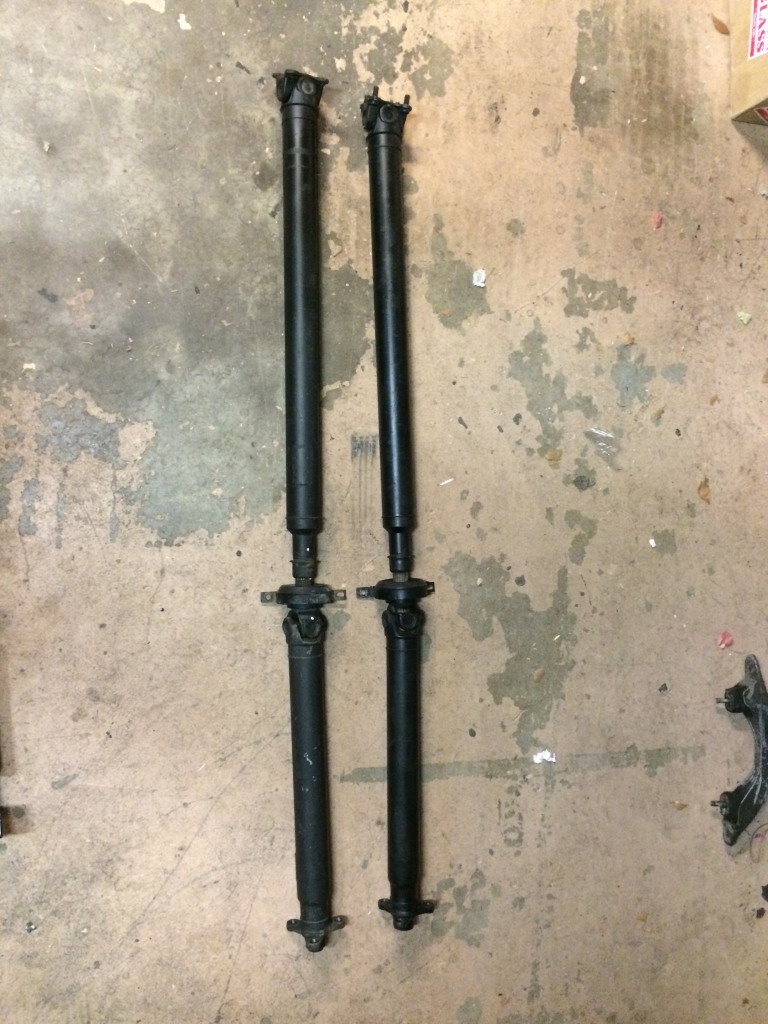
I made a trip to storage to grab the original driveshaft from this car. It was in phenomenal shape. center bearing like new, pilot bushing tight like a tiger and the u-joints were silky smooth. I wiped it down and decided to Czech it out before I cleaned it up.
Image

E28 is on the right.

Image

Center bearing is pre-loaded and it looks correct!

I figured out later that the side-loader diff is shorter in length compared to the E28 diffs. I was stuck. Shifter hole was in the same spot, center bearing mount is further back and the diff mount is in the same spot, so the only variable is the location of the input flange, which would add length to the shaft.

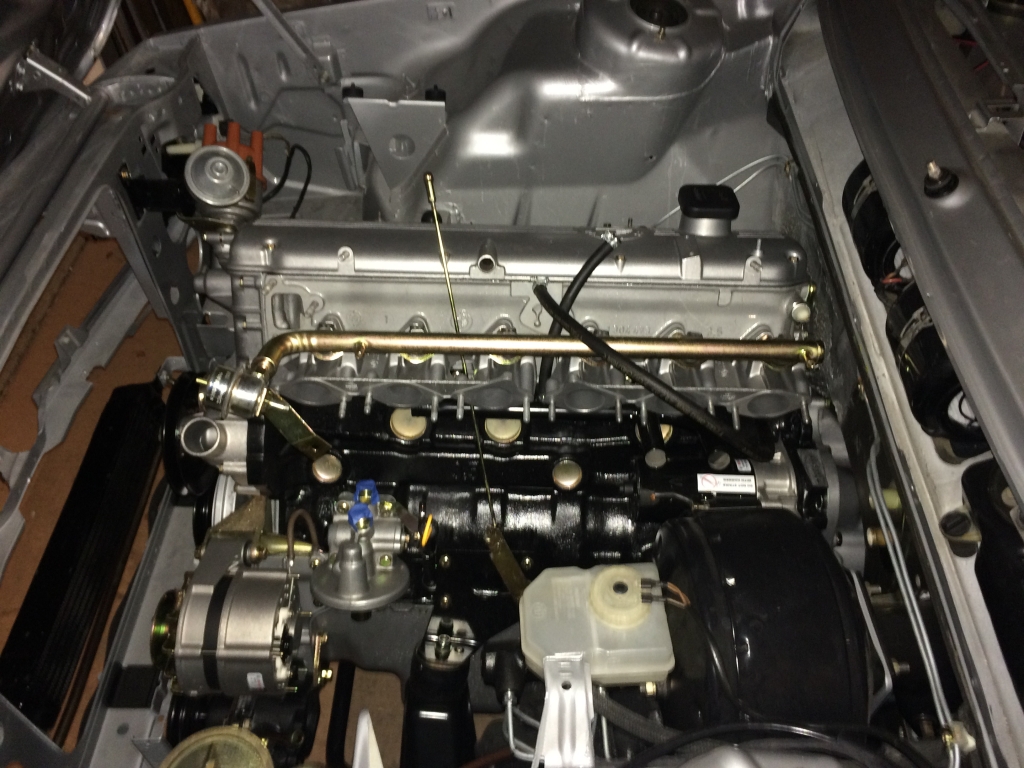
So, once that was all done, the motor was properly supported.
Image

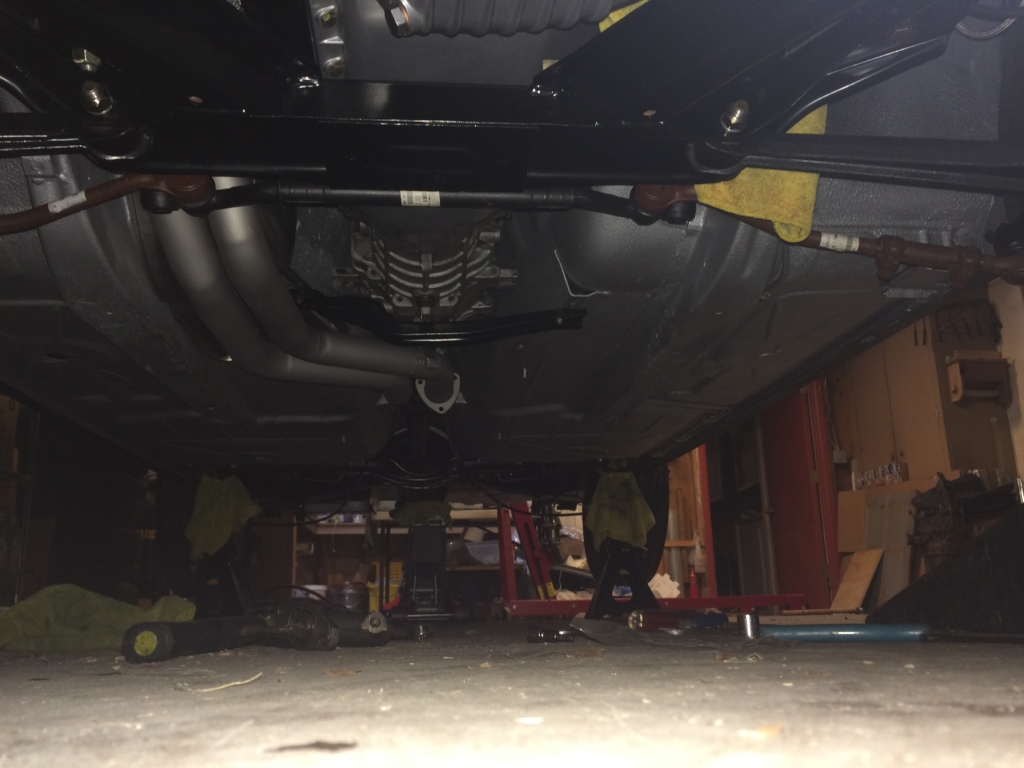
Then I installed the downpipes and called it a night.
Image

I put all of the tools away and went to 5erWest. While on the way, I decided to check in again with the Porsche shop about my oil cooler lines, since this is something that shouldn't be taking this long and it's holding me up, since I need to attach the cooler lines with the airdam off, then install the airdam before I put the radiator in so I can get to all of the fasteners. Sure there are other ways to do it, but I shouldn't have to. Turns out, apparently, they had to order a couple different kinds of hose since nothing they had was working. I told him I'd be gone a week and I'd check in when I came back.

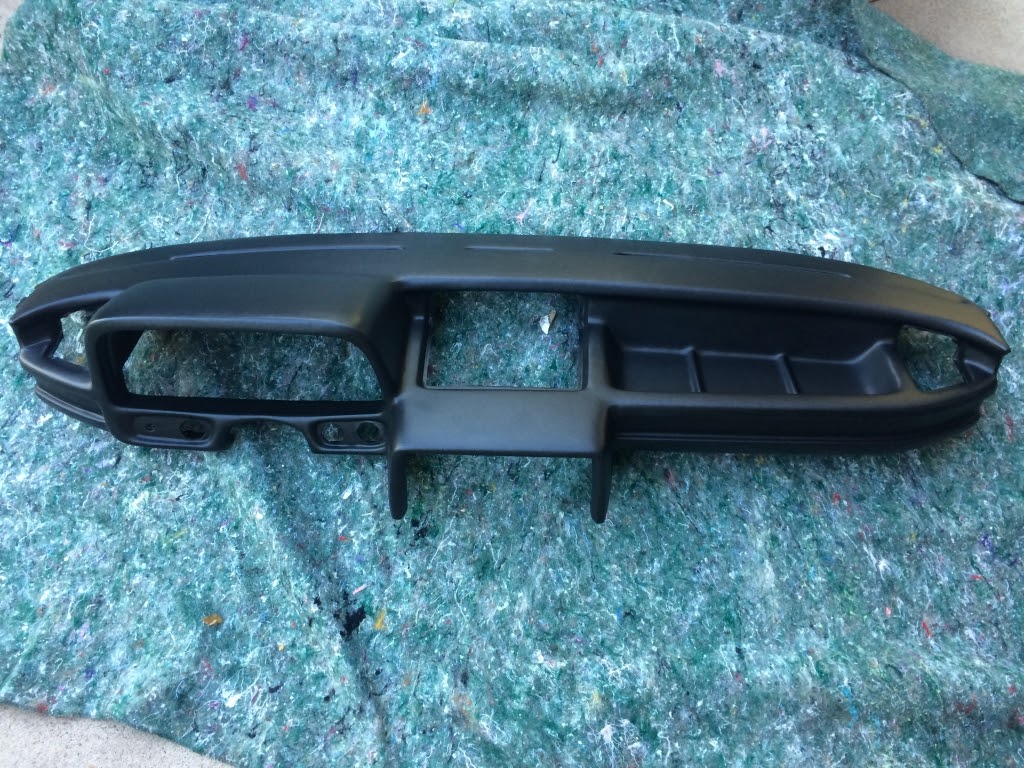
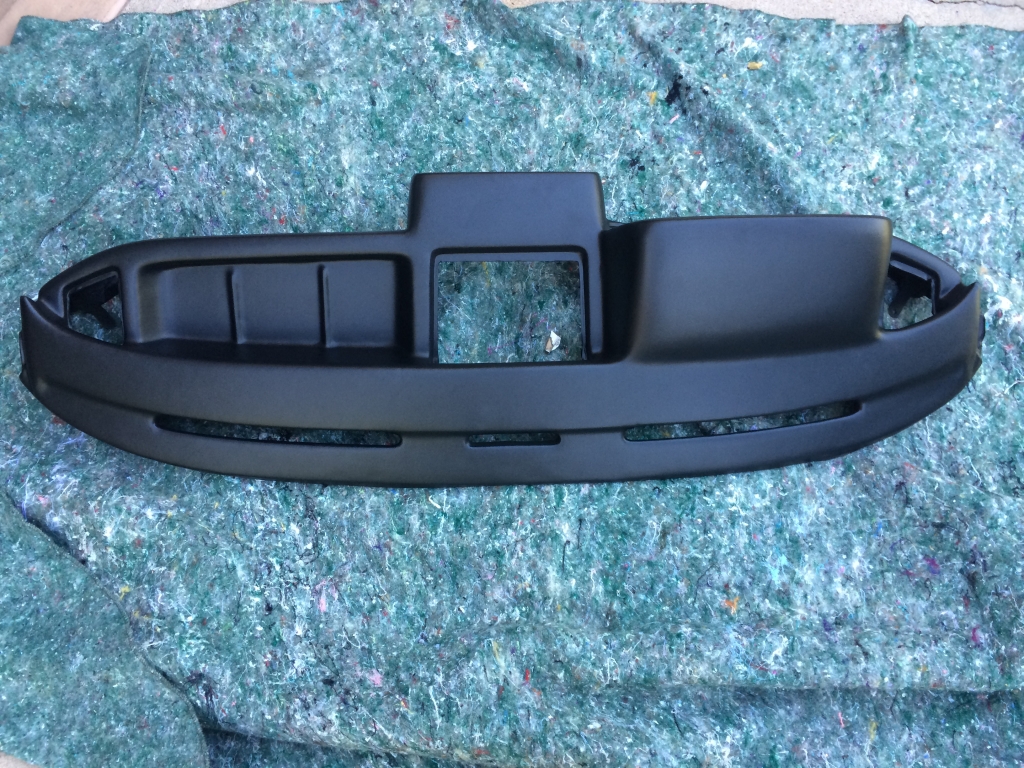
While I was gone, I got a shipment notification on my dashboard. It showed up while I was gone, so I opened it when I came home.
Image

Image

Image
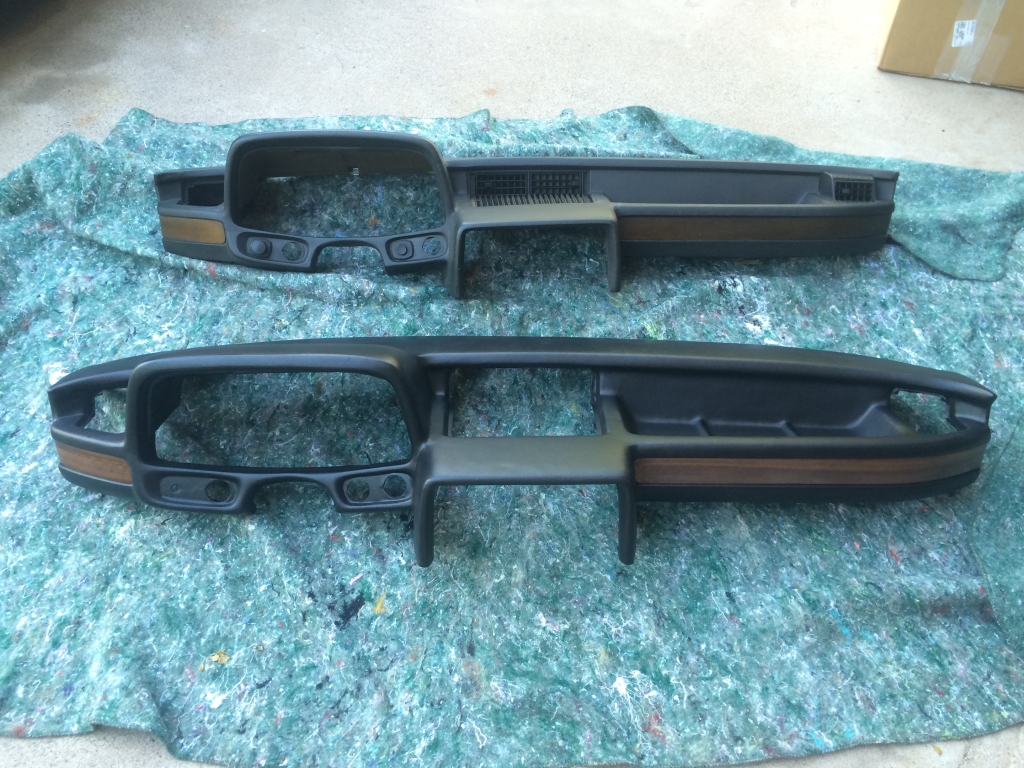
An original dash is in the foreground. They're the same size.

I decided to install the wood.
Image

I'm not sure what I think about it. I see a lot about it that I don't like. Meh. Of course, there's nothing I'm going to be able to do about it, so fuck it, I guess.

So, I got back to work on things I can do something about.
Image

Image

Image

Image

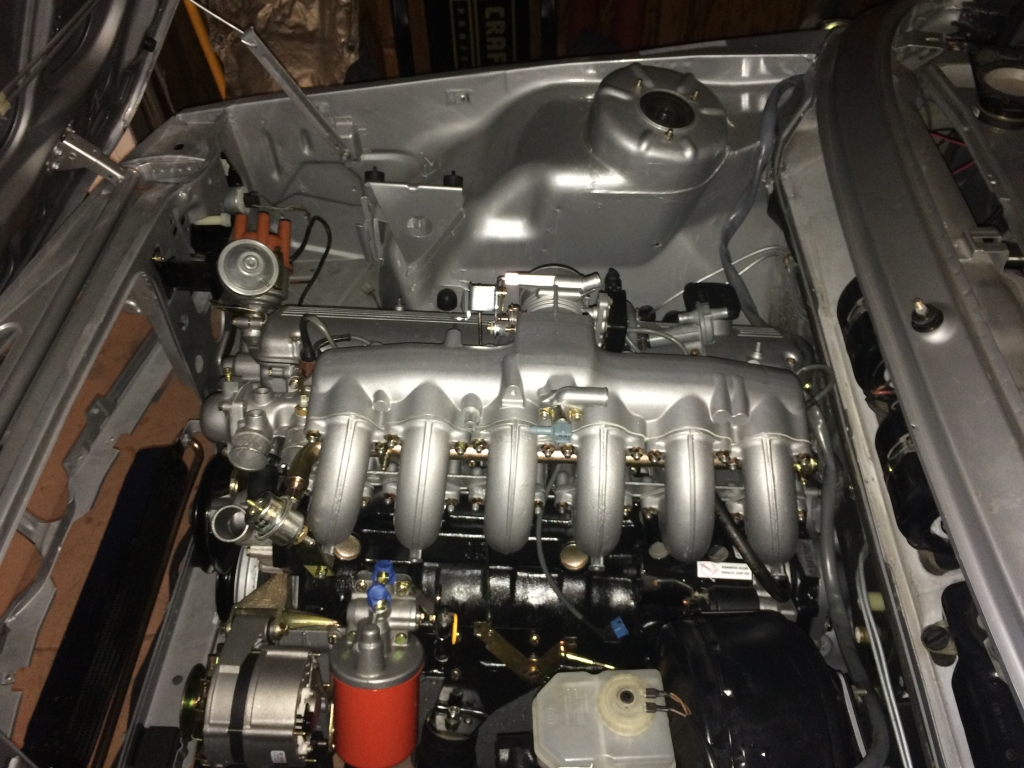
The radiator is only in there to measure the length to cut the overflow hose and make sure my hoses go where they're supposed to. I had to order all of the hoses from the dealer, but they're apparently suggesting that the heater hoses are Euro parts and I have no ETA on those.

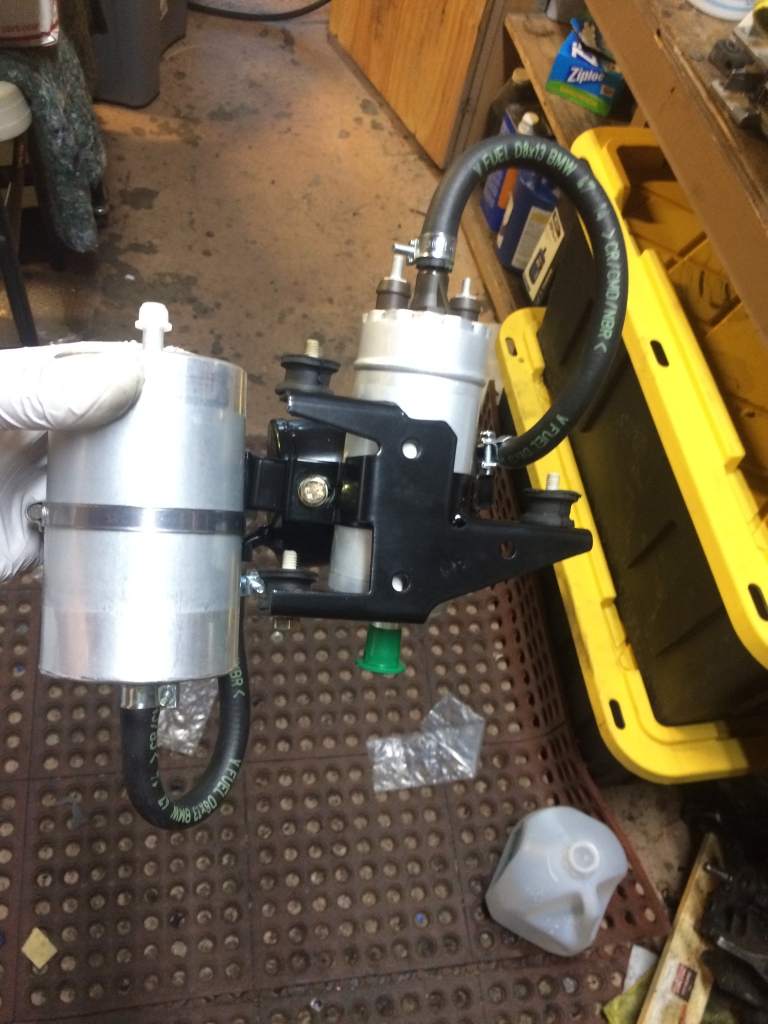
So, with that kinda done up front, I decided to wrap up the tasks under the car that would be easier to do without the exhaust in the way. I torqued all of my axle bolts, made a tie-rod adjustment and installed all of the cotter pins for those and then I put my fuel pump bracket together.
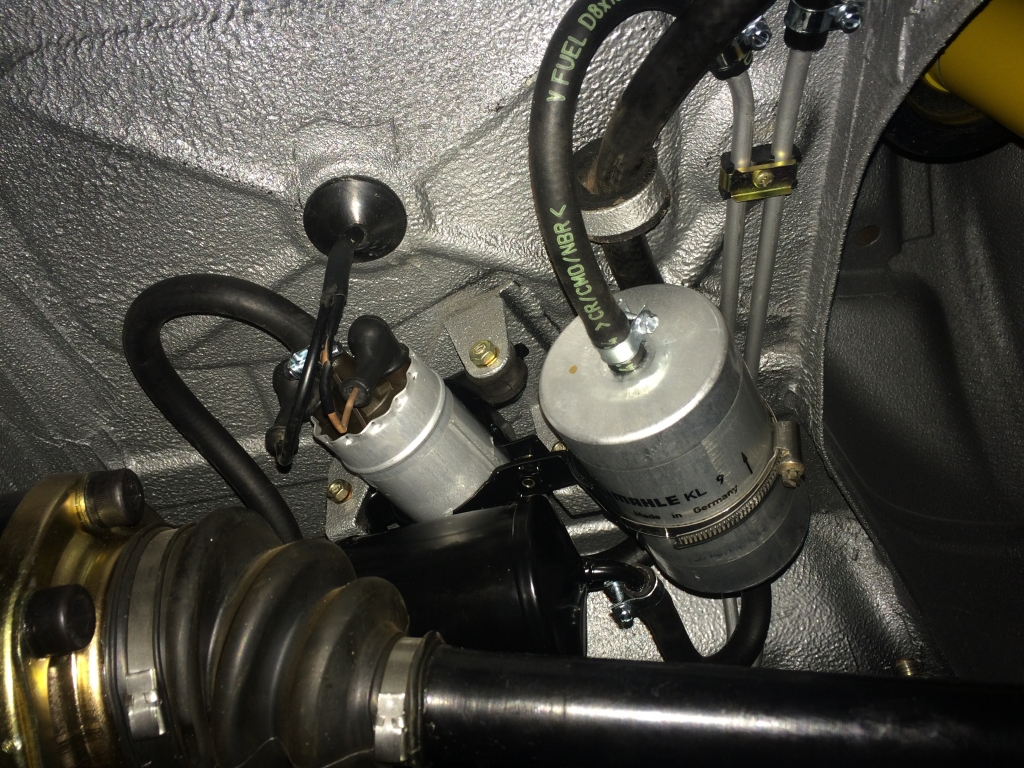
Image

Those rubber mountings are $11 ea.

Image

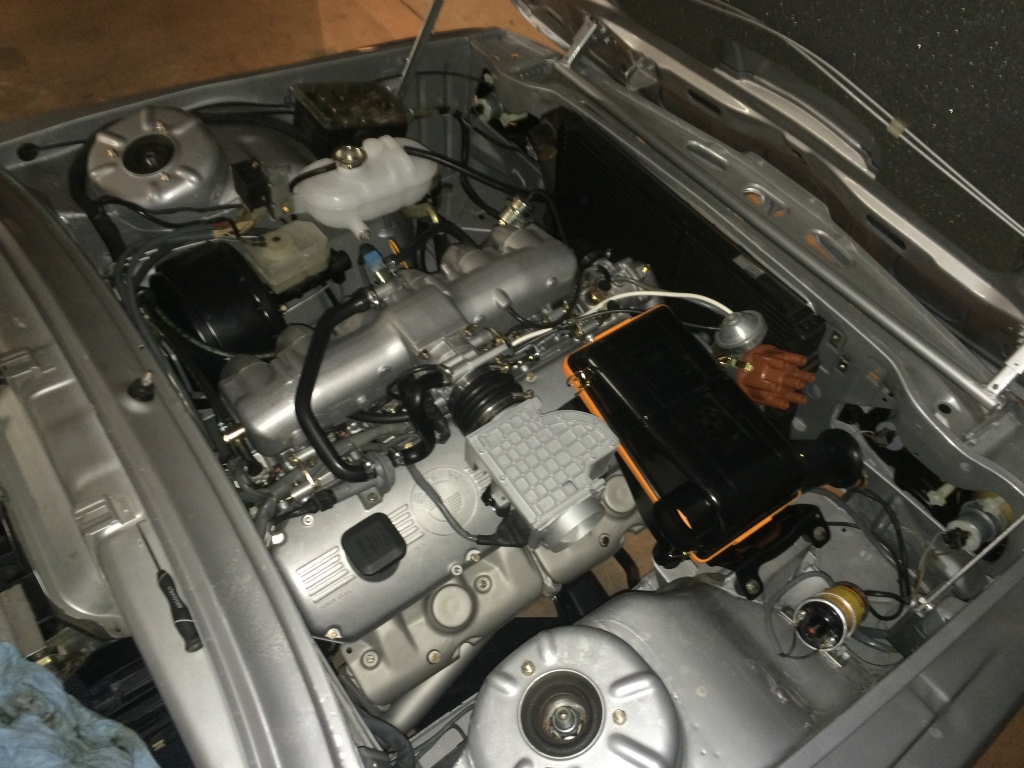
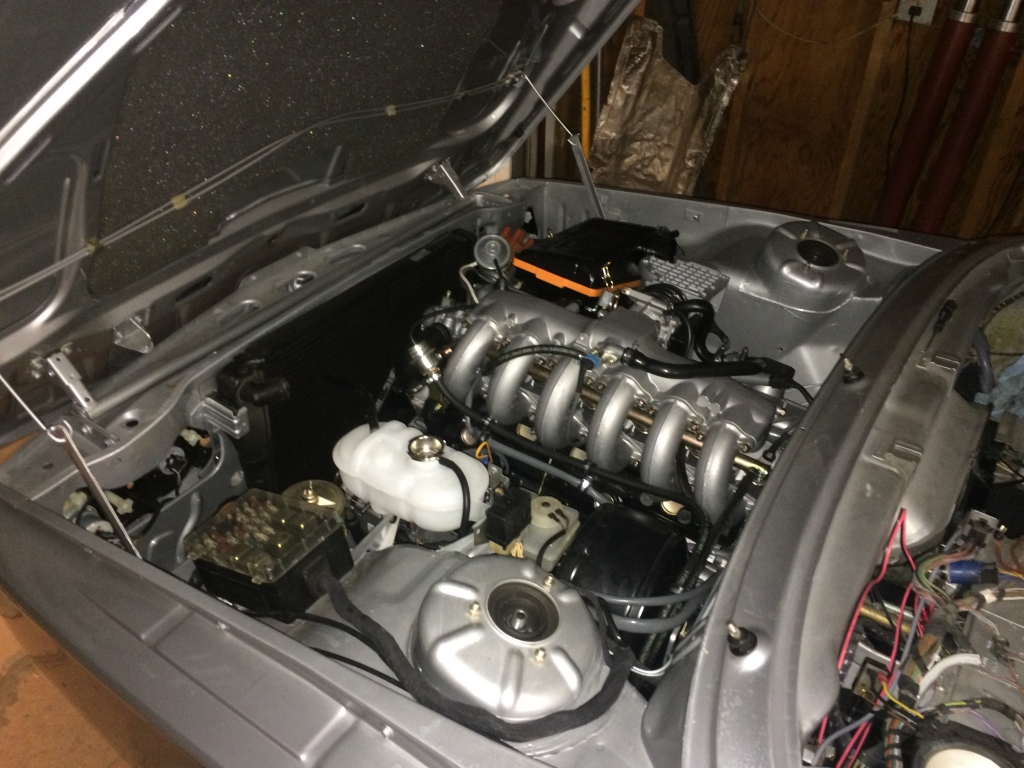
I put the air box together despite waiting on the AFM elbow and the intake boot, but I wanted to see how the airbox looked under the hood. It's been a long time since any of this has been in the car.
Image

Image

You will also note that the hood insulation is installed.

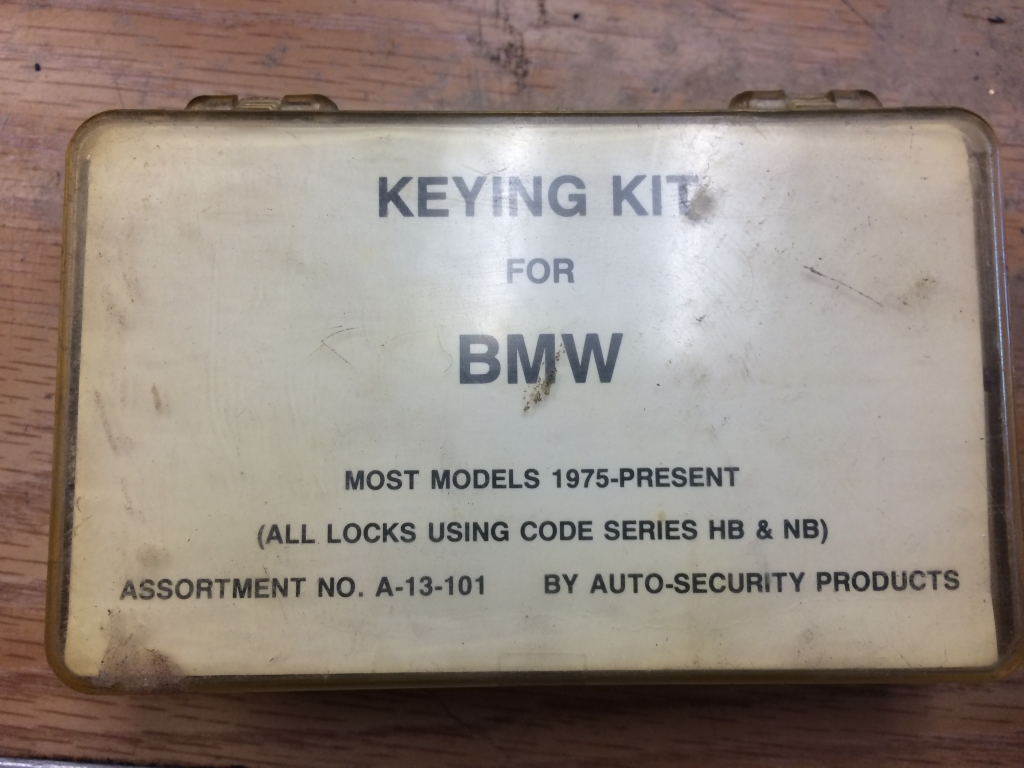
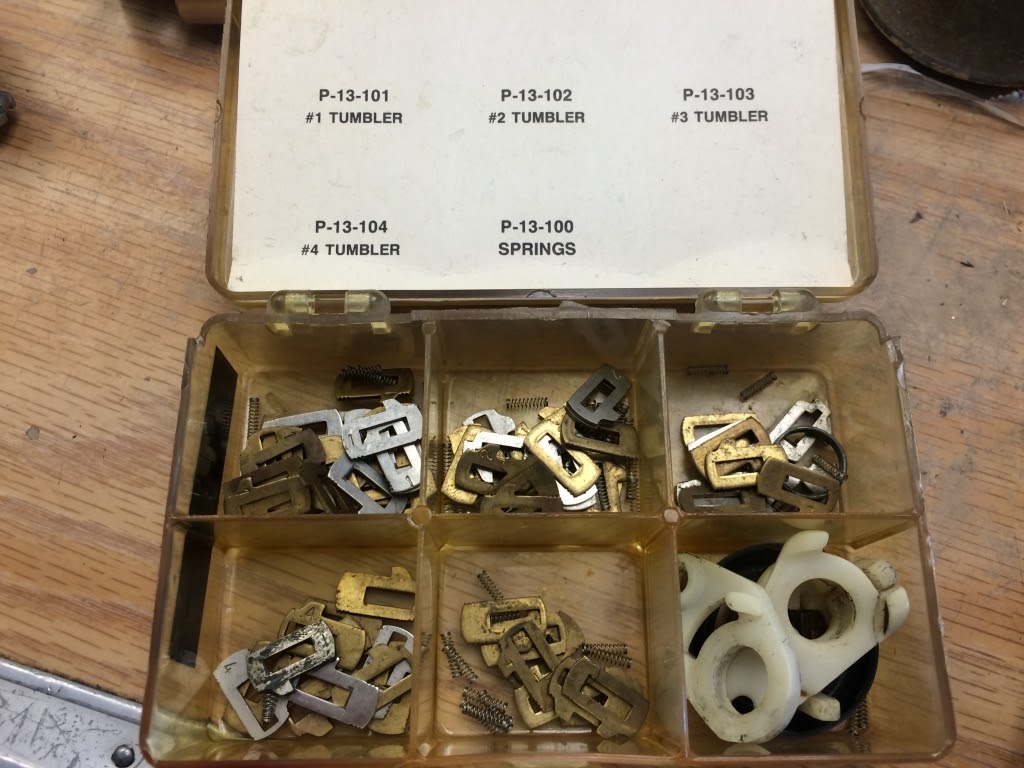
I apparently lost my driver door lock. I found it with some trim clips I pulled off the car years ago and decided to put it in a safe place. No idea where that is, but I managed to get another one from a car in the yard. Despite having several E28 lock cylinders, the E12 ones don't use plastic trim rings, so they're different. I gave up on looking for it as right now, I just don't have the time and I have essentially a matter of days to finish this car, so today, I took the lock over to a locksmith I've known forever and she wouldn't do it. I was frustrated since the place she recommended isn't someone I'd want to deal with, but after talking for a short time, she remembered she got a bunch of weird stuff from a guy who went out of business and amongst it was this:
Image

Image

$10 and it was mine. This wasn't something I really wanted to do myself, but she taught me a lot years ago about locksmithing so I figured what the hell. I might enjoy it even though I'd rather trade money for time at this point.

Later today, I picked up the MTL/MT-90 for the transmission and I had the oil for the diff on hand already. I picked up some more parts and was frustrated that nothing was getting done and I've got work stacking up, so I decided to just work on the car some more.

I filled the transmission and the differential and rekeyed my lock cylinder to the key. Works perfectly, so pretty happy about that. At this point, I'm ready to put the rest of the exhaust in, which I hope to do tomorrow. Would be cool to bleed the clutch and brakes so I can put it back on the ground, but I'm not going to get ahead of myself.

Sorry for such a short update, but it's tough to keep track of every little thing that happens.
Re: E12 M535i Project - 07-26-16 Update

Posted: Jul 26, 2016 5:15 AM
by bkbimmer
That is looking stupendous.

Re: E12 M535i Project - 07-26-16 Update

Posted: Jul 26, 2016 10:10 AM
by Adam W in MN
It's like watching a restoration that BMW Mobile Traditions would do. Everything is so perfect and shiny, wow.

Your attention to detail is tremendous!

Re: E12 M535i Project - 07-26-16 Update

Posted: Jul 26, 2016 10:49 AM
by Karl Grau
Epic! I can't wait to see it at Monterey.

Re: E12 M535i Project - 07-26-16 Update

Posted: Jul 26, 2016 11:07 AM
by leadphut
dayum Son!

you're gonna need a showroom before too long.

Re: E12 M535i Project - 07-26-16 Update

Posted: Jul 26, 2016 1:15 PM
by Sapotorito
Wow Chris, this is really extraordinary!