E12 M535i Project - 08-21-19 Update
Re: E12 M535i Project - 05-31-16 Update
I'm excited to see this car coming together!
Interestingly, I had a quick work trip to Phoenix yesterday and today but not enough time to meet up with anybody. Would be neat to see at some point...
Interestingly, I had a quick work trip to Phoenix yesterday and today but not enough time to meet up with anybody. Would be neat to see at some point...
-
Adam W in MN
- Posts: 5053
- Joined: Feb 12, 2006 12:00 PM
- Location: Don't waste my motherf***in' time!
- Contact:
Re: E12 M535i Project - 05-31-16 Update
Stunning progress!
Re: E12 M535i Project - 05-31-16 Update
Outstanding work. So cool to see the 'new' corduroy fabric seats!!
-
white chocolate
- Posts: 428
- Joined: Sep 21, 2011 9:44 PM
- Location: Canton, Ohio
Re: E12 M535i Project - 05-31-16 Update
People are just the best."It's been done for a while."
Re: E12 M535i Project - 05-31-16 Update
I took the head over to my powder-coater and had them put a satin Cerakote clear on it. I figured it will help seal the casting and keep it easier to clean and it should hold up well. It wasn't cheap, but I figure it's a lot better than some of the other options. I was looking at the Eastwood 2K Ceramic high-temp clear, but they don't make it anymore and I figured how hard could this be. It wasn't difficult, but it wasn't cheap either.
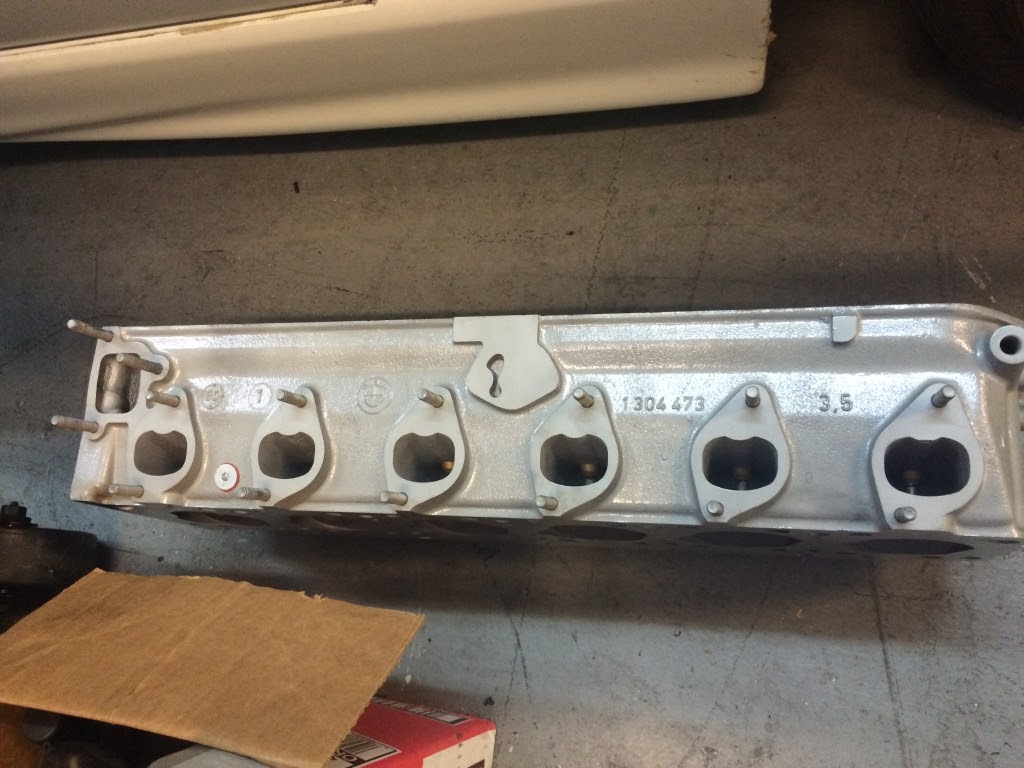
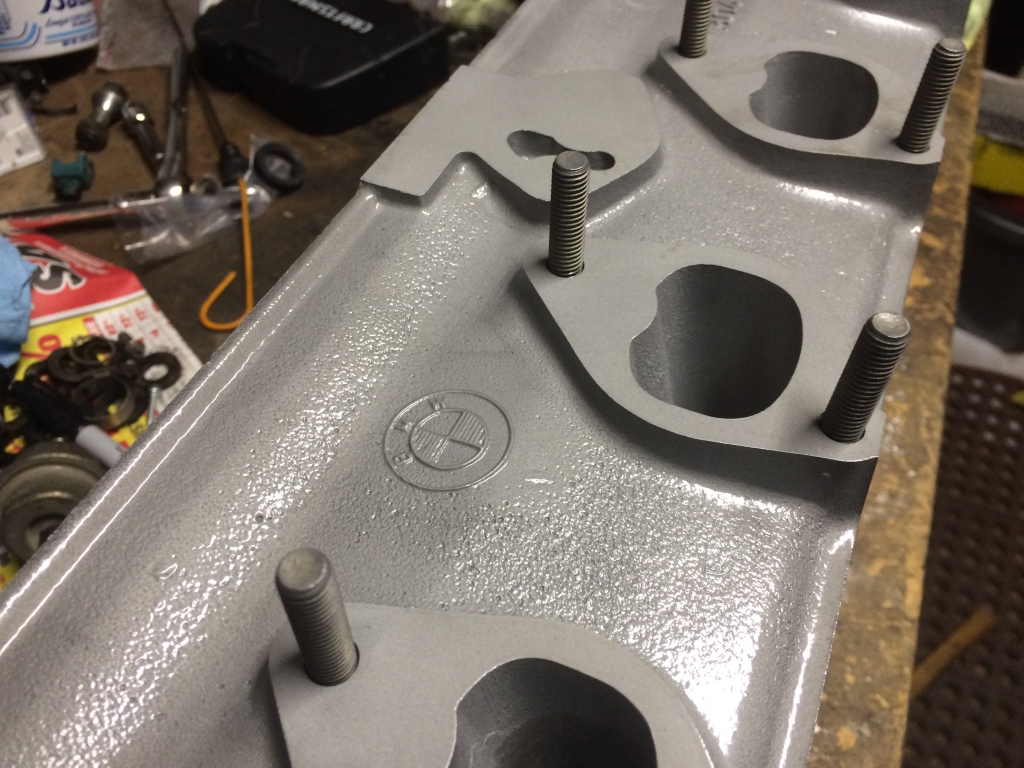
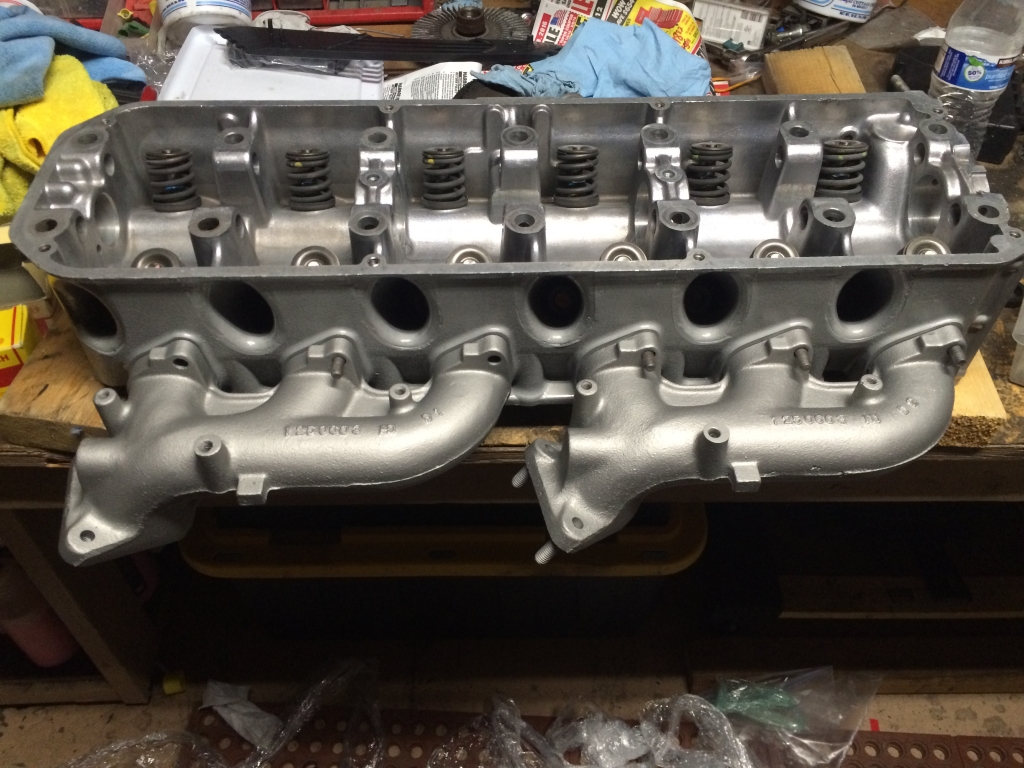
For the hell of it, I decided to just put the ceramic-coated exhaust manifolds on as well.
I picked up a bunch of stuff from the plater, so with that done, I could mount the oil cooler. It didn't need to be mounted now, but I figured why not.
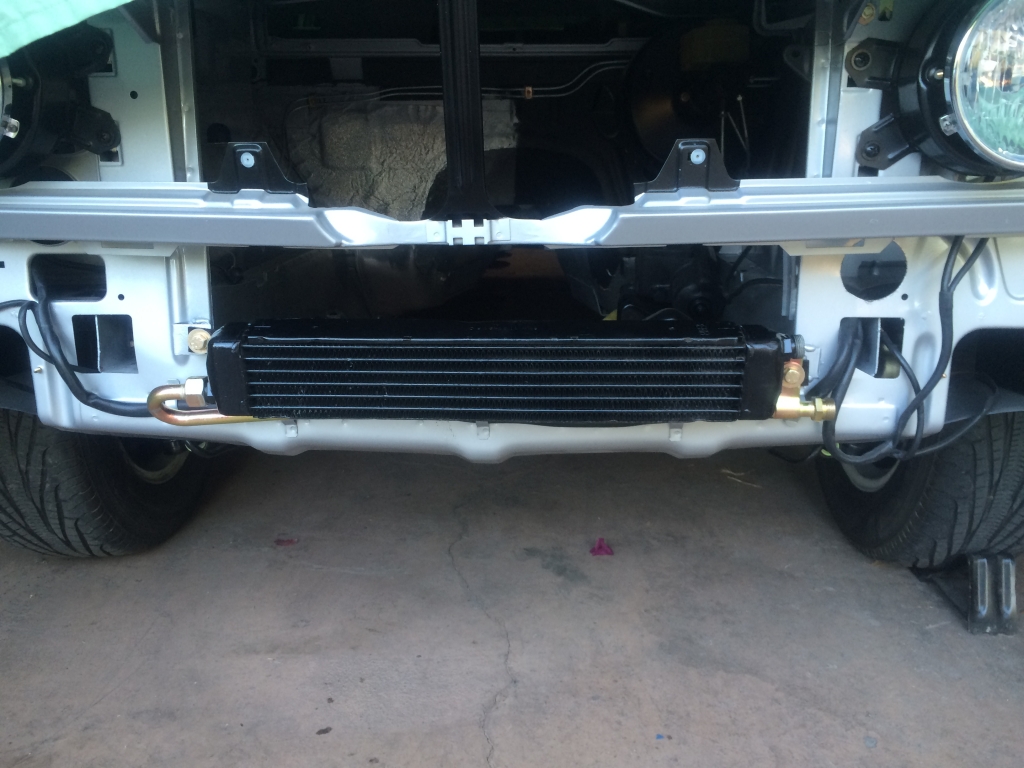
Also, with that, I had previously talked to a Porsche shop about having them rebuild my oil cooler lines. I talked to them because they had listed a custom line for a 914 which had an M22x1.5 fitting but apparently they couldn't sell me any, so he said he had the hose, the crimp collars and the crimping tool. All I had to do was get my old fittings plated, bring them and the old hose to them and they would make it happen. I sold the guy a set of BBS E75s a few years ago for a vintage FIA race car they were working on, so it seemed like that connection was going to pay off.
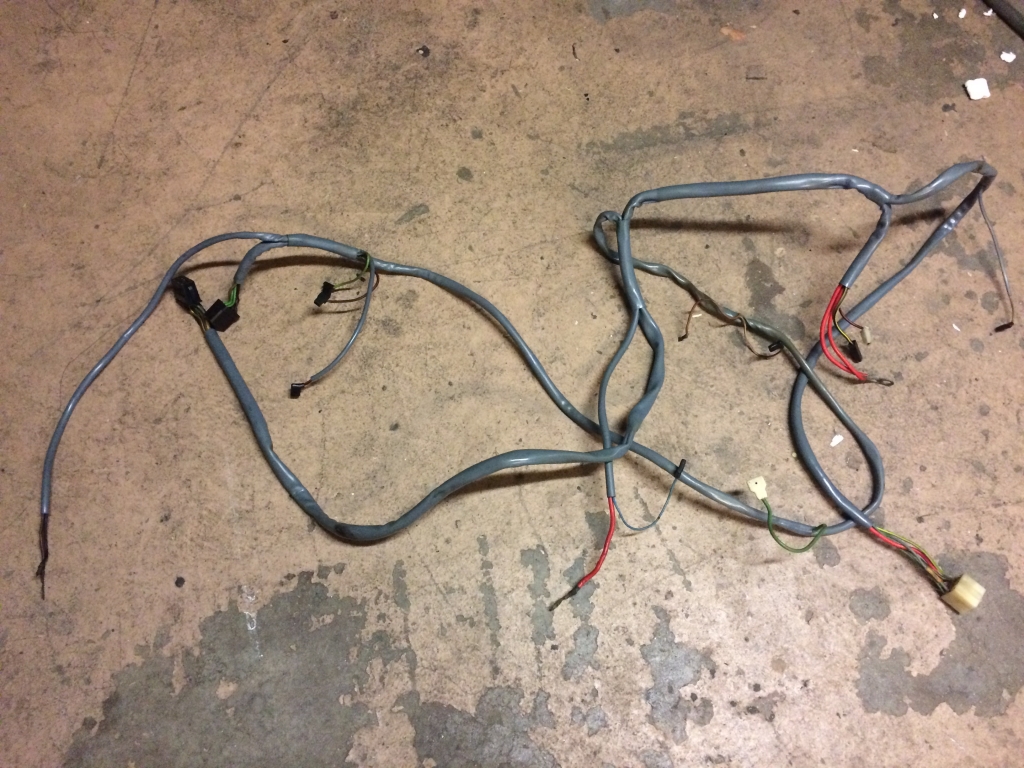
While waiting for all of the pieces to fall into place to start motor assembly, I cleaned up the replacement ignition harness I purchased. It was very supple and in nice shape, so it was worthwhile. Much nicer than my original.
Work finally began on motor assembly June 16. Block was primed and painted. Morning of the 17th, we began with freeze-plug installation.
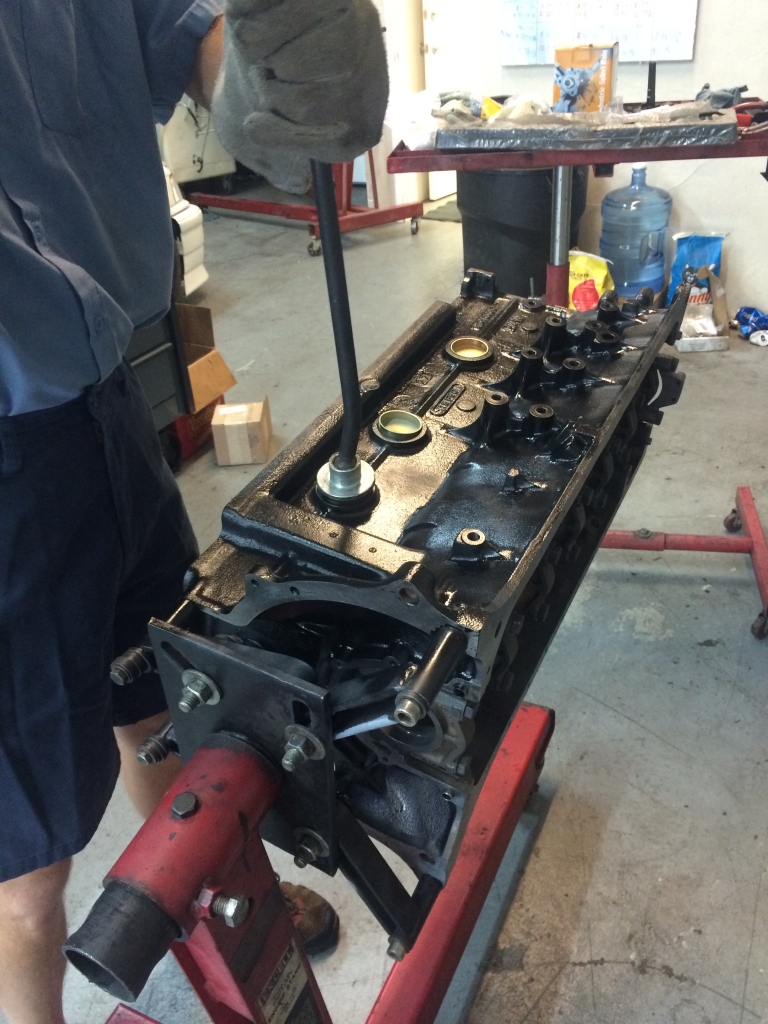
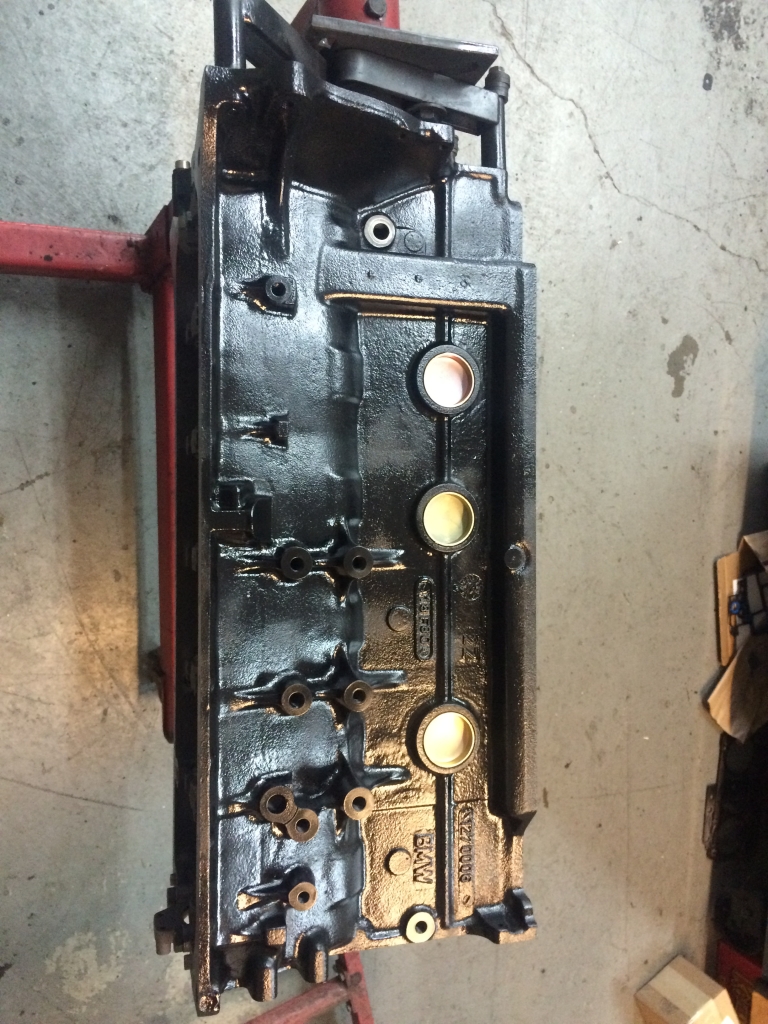
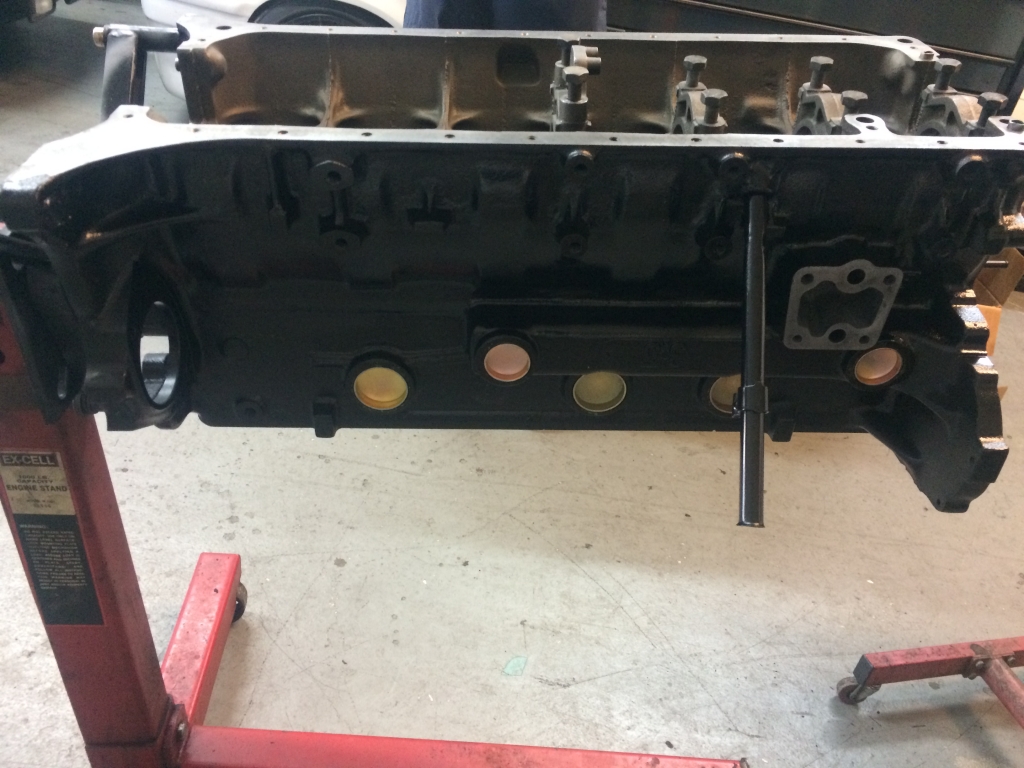
It pays to have the right tools. Getting these things seated properly is critical. It takes a lot of effort too. Fingers crossed they all seal and we don't have to replace one in the car.
Next, we started with the crank bearings. My original crank was in excellent shape, measured out perfectly for standard bearings. My original bearings weren't even worn. Here's a shot of the plastigauge on the #1 main bearing:
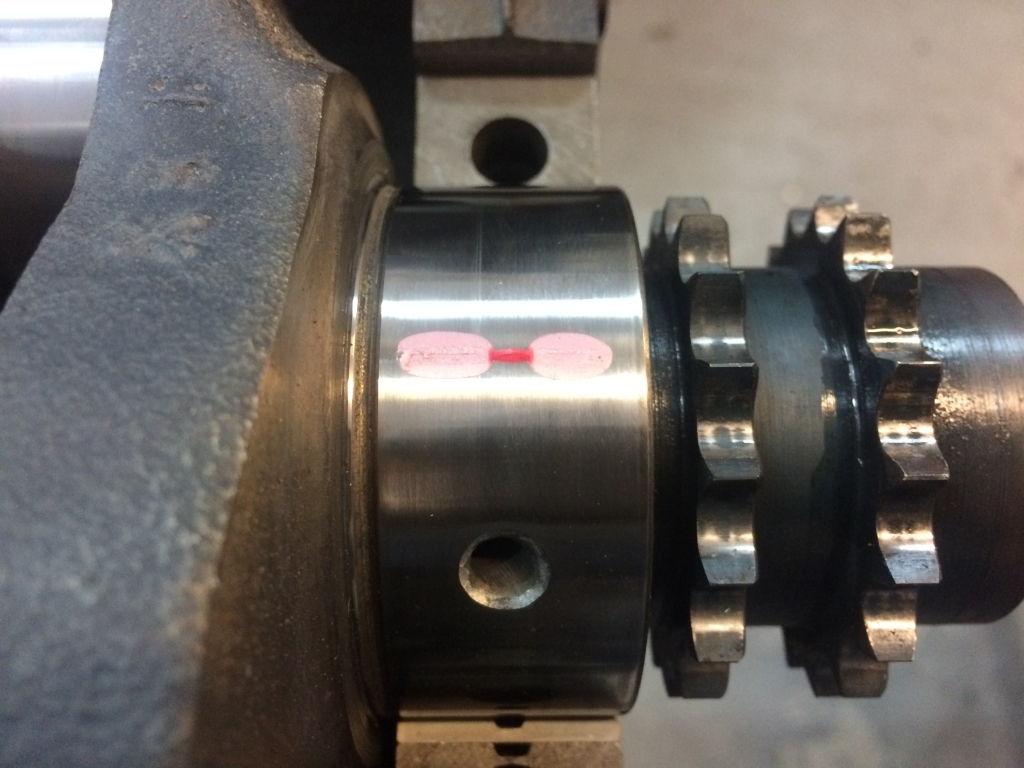
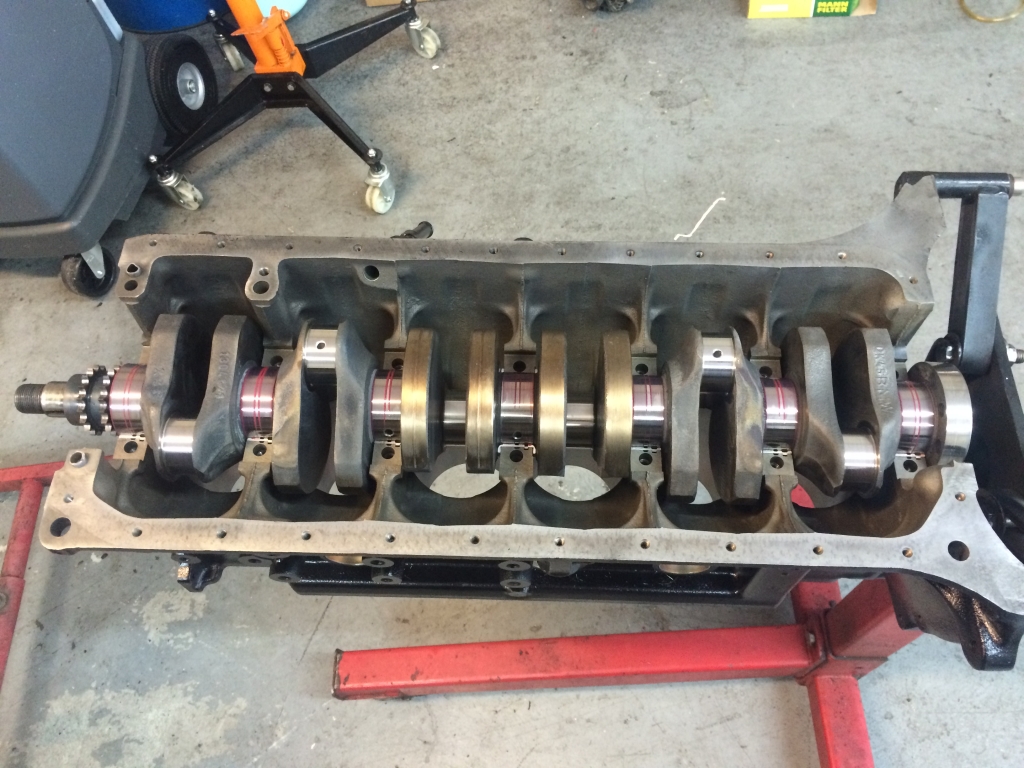
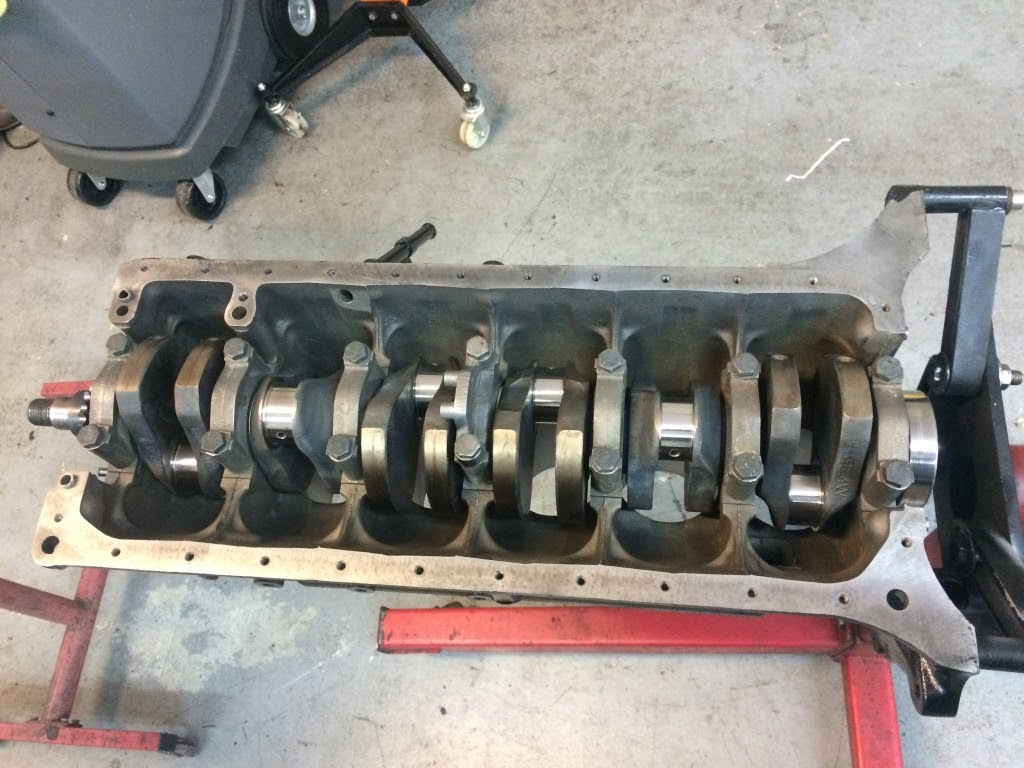
The other six were dead-on, so we were a go with the standard bearings.
Here is a shot of my shot-peened rods.
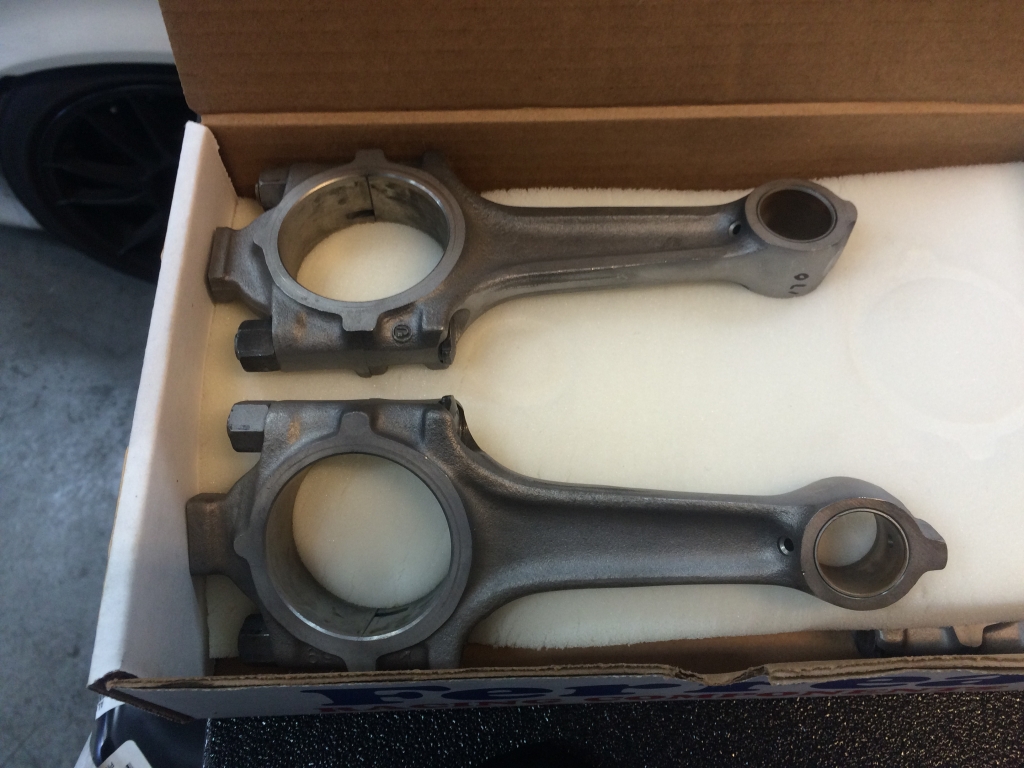
Everything was within spec for those as well. I had to go to work, unfortunately, so I missed the fitting of the rings and whatnot. By the end of the day, 5 of the 6 pistons were installed. #6 was installed Monday morning due to a problem with the oil rings for that one. At that point, the really time-intensive, focused work was completed.
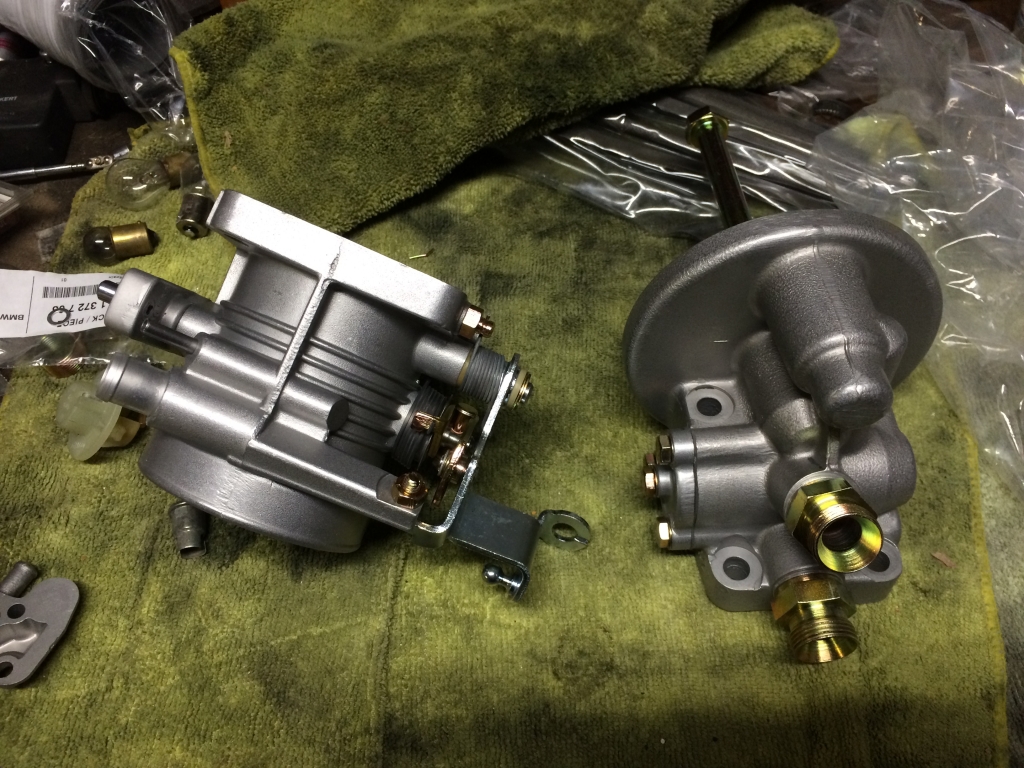
Of course, I still had plenty to do like reassemble my throttle body and the oil filter housing.
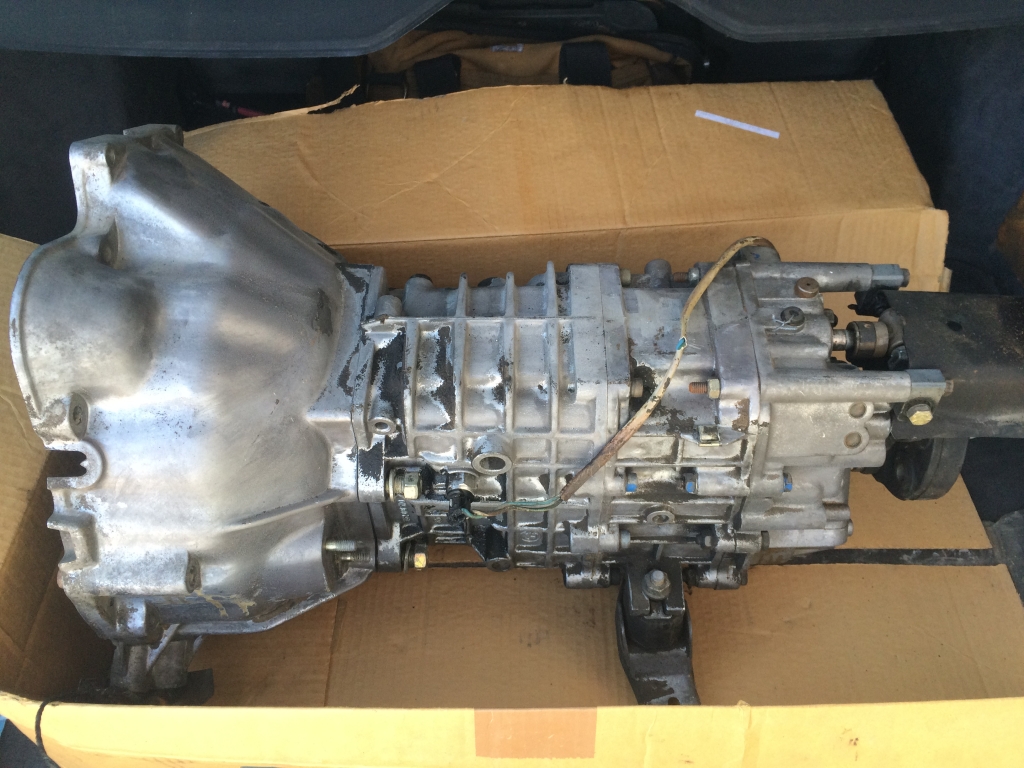
I went to storage and pulled this dogleg off the shelf. Came from a Euro 635CSi that had an engine fire. Pretty low miles, too, and I could assume that it was not the reason the car caught fire.
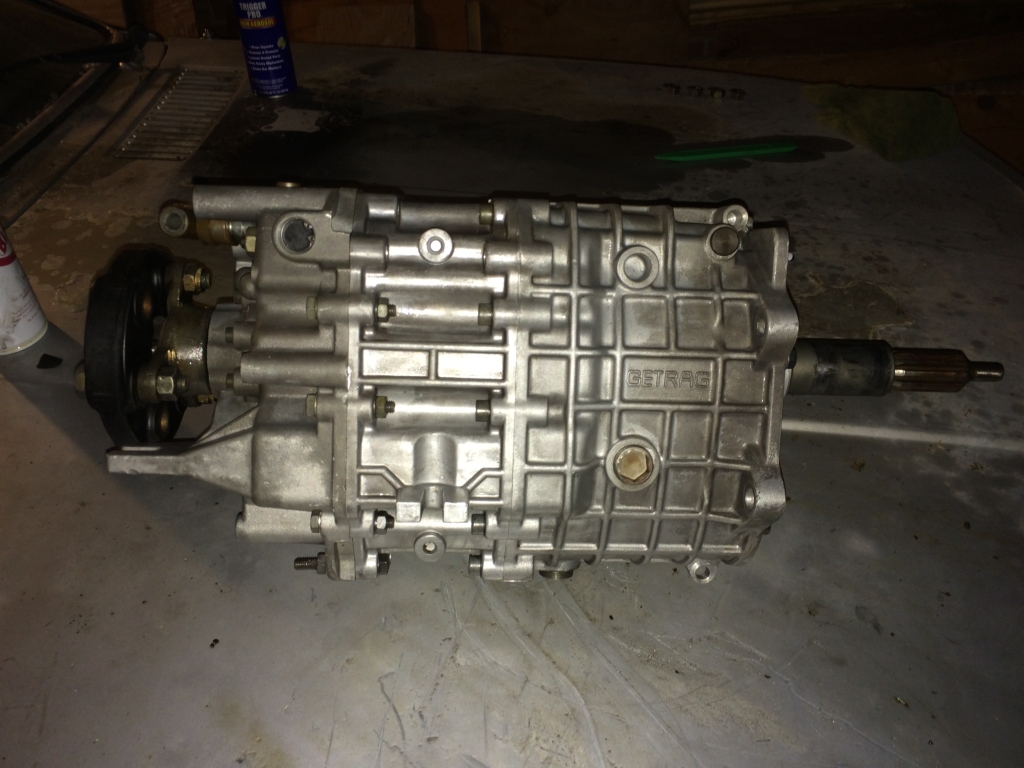
I spent the next several hours cleaning it up on my outdoor workbench.
With that sorted, I turned my attention toward getting the wiring straightened out in the car. I had talked to Terry about getting the car in to do the headliner and he was booked up solid, suggesting that July 11 was the earliest he could take it. I explained where I was at, behind on everything, and while it wasn't his fault, headliner has to go in before the rest of the interior. He said he'd take it June 27. Great.
So, I put a battery in it and figured I'd either die or see some progress.
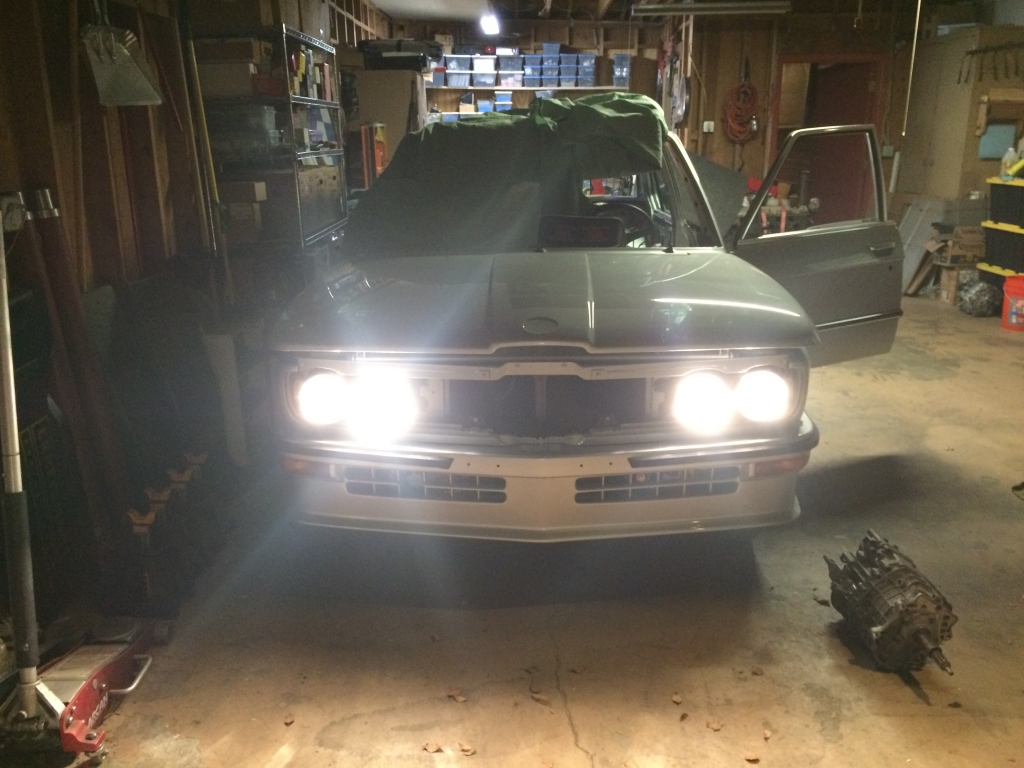
I didn't die.
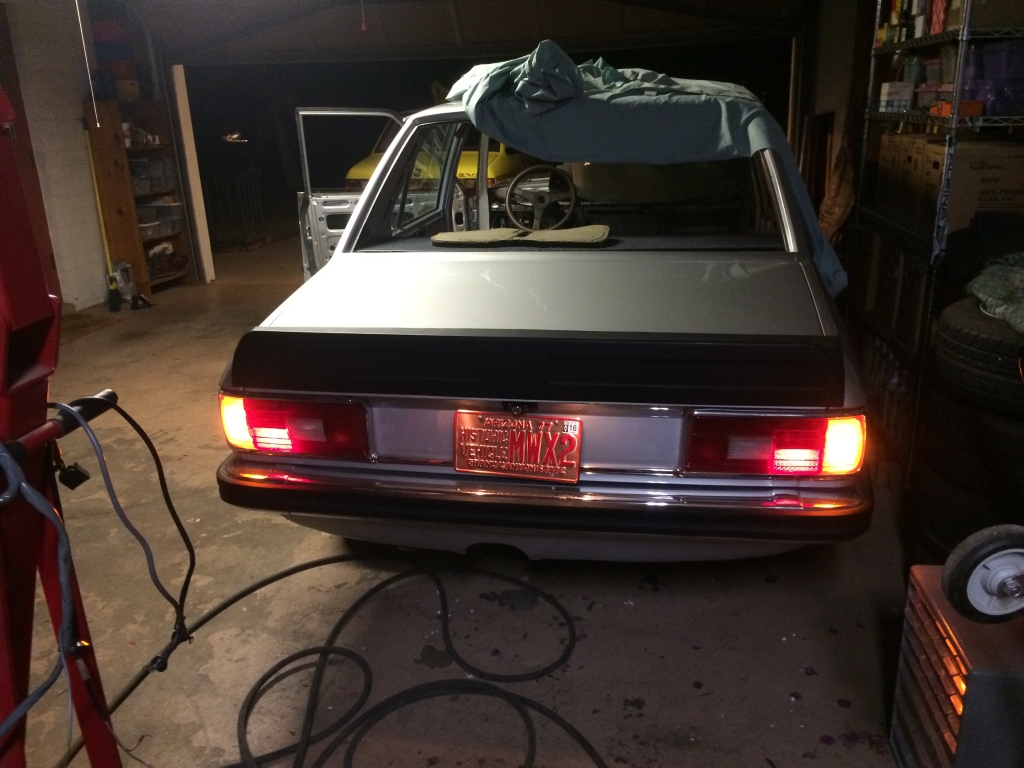
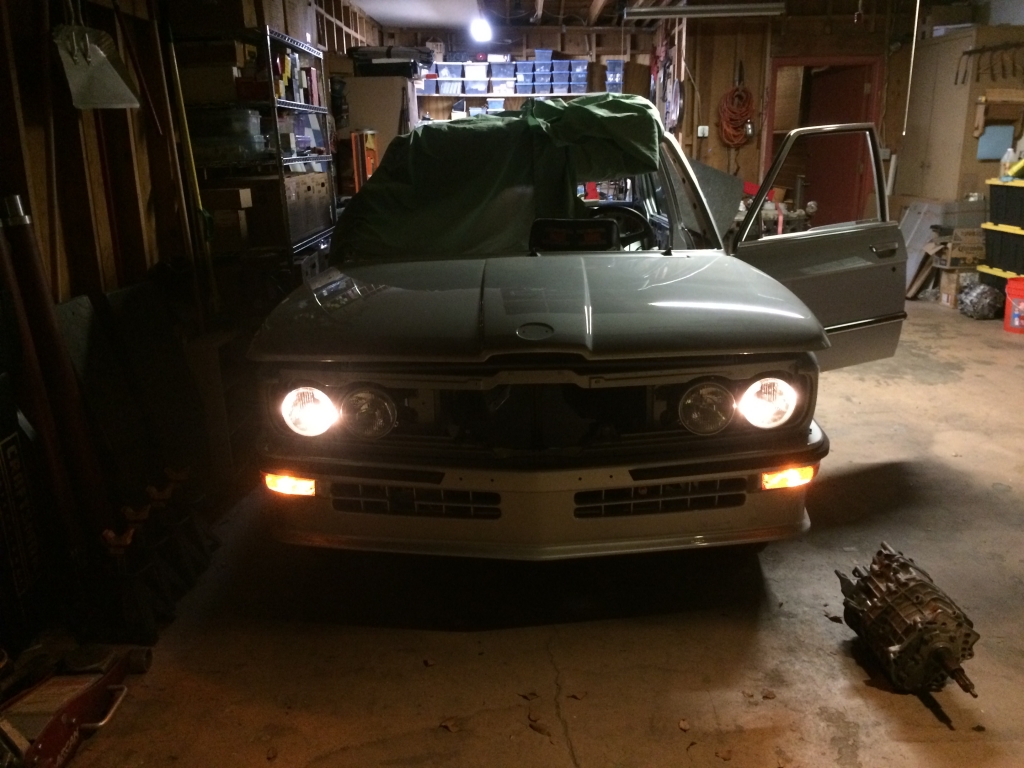
So, that was progress. At the time, I had some lock motors acting up and only the driver window worked. Still, Nothing shorted out and I called it a win considering the last time this car had electricity was August, 2010.
Back to the motor. This time, head assembly!
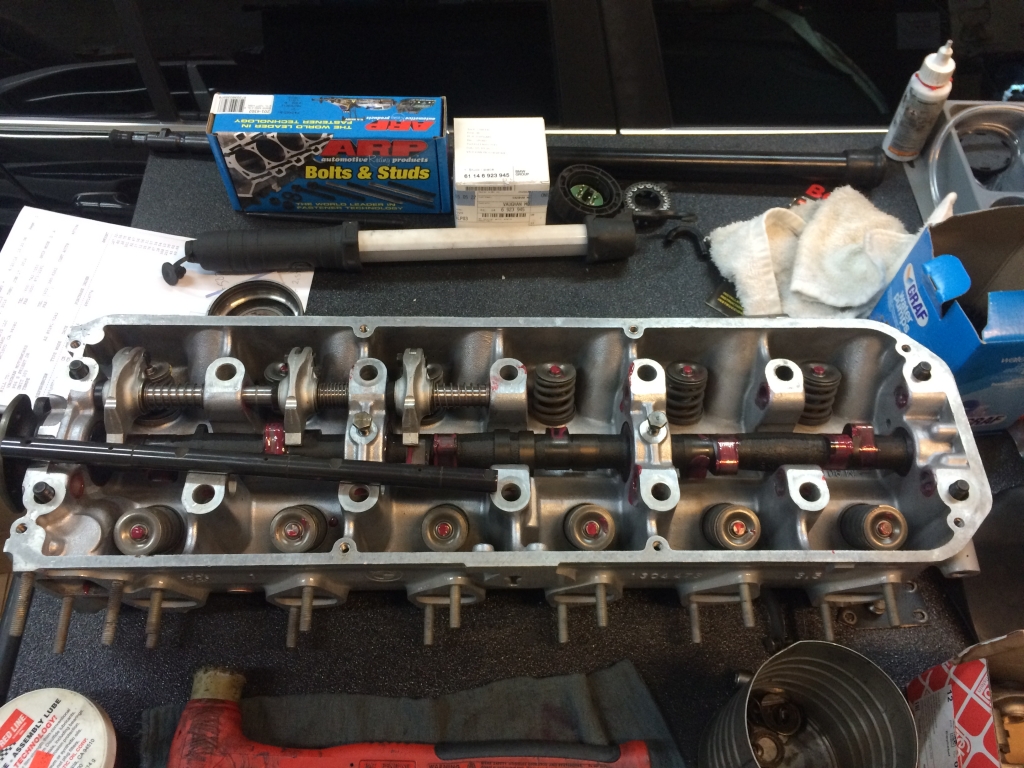
And voila!
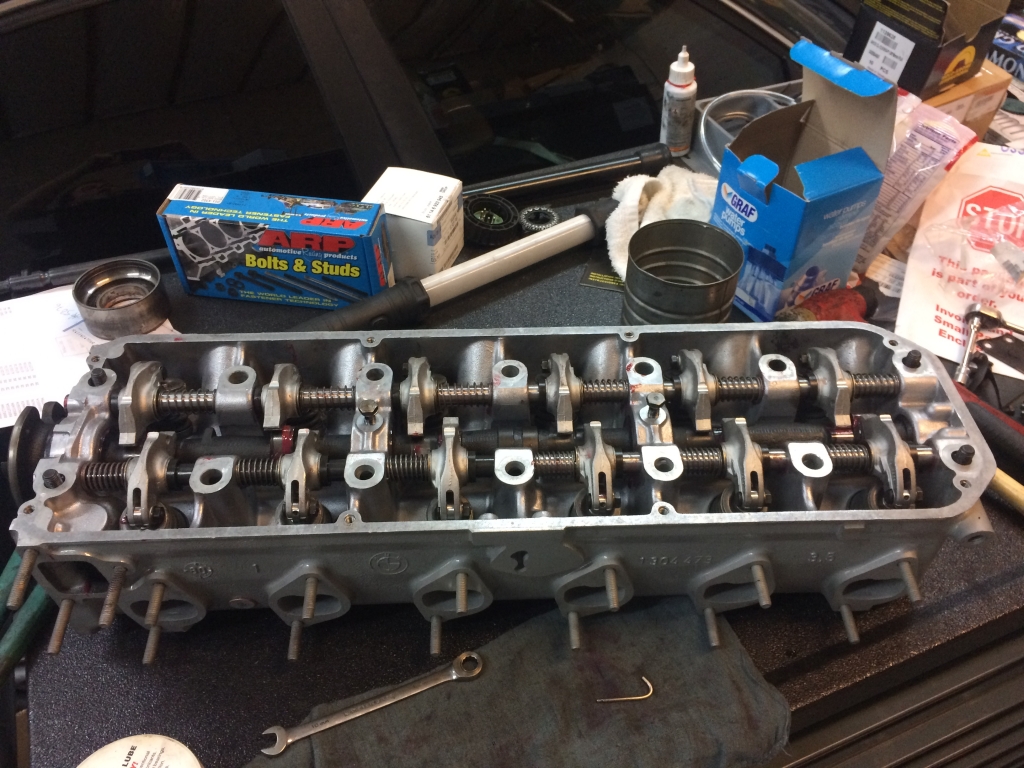
We discovered that you cannot buy the oil pump sprocket anymore. It comes on a new pump, but it cannot be purchased separately. It might have made the decision between spending $475 on pump rebuild parts versus $530 on a new pump, but the only part of the pump that was reused was the pickup, so I guess it wasn't that bad. Febi stopped making it, too, so we ran into some issues. Alex found a new one on eBay, so we waited.
I confirmed my appointment with the upholstery shop. They had me down for Monday, so I made the final push over the weekend to finish up everything I thought was necessary for them to install the headliner. After confirmation, I ordered a tow truck for first thing Monday.
Back at home, I installed all of my stereo wiring and installed my Bosch power antenna. It took several careful, deliberate readings of the instructions, but we finally got it.
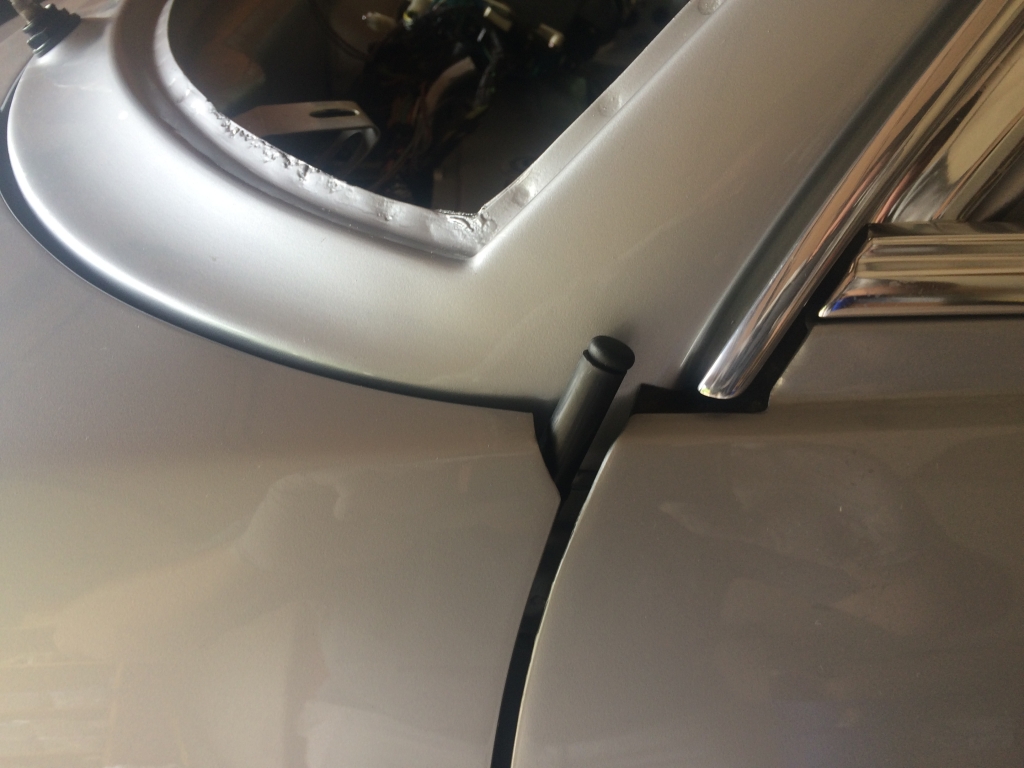
Monday, June 27 rolled around and the car rolled onto a tow truck. Oh how I wished Sonny G would have picked up his phone.
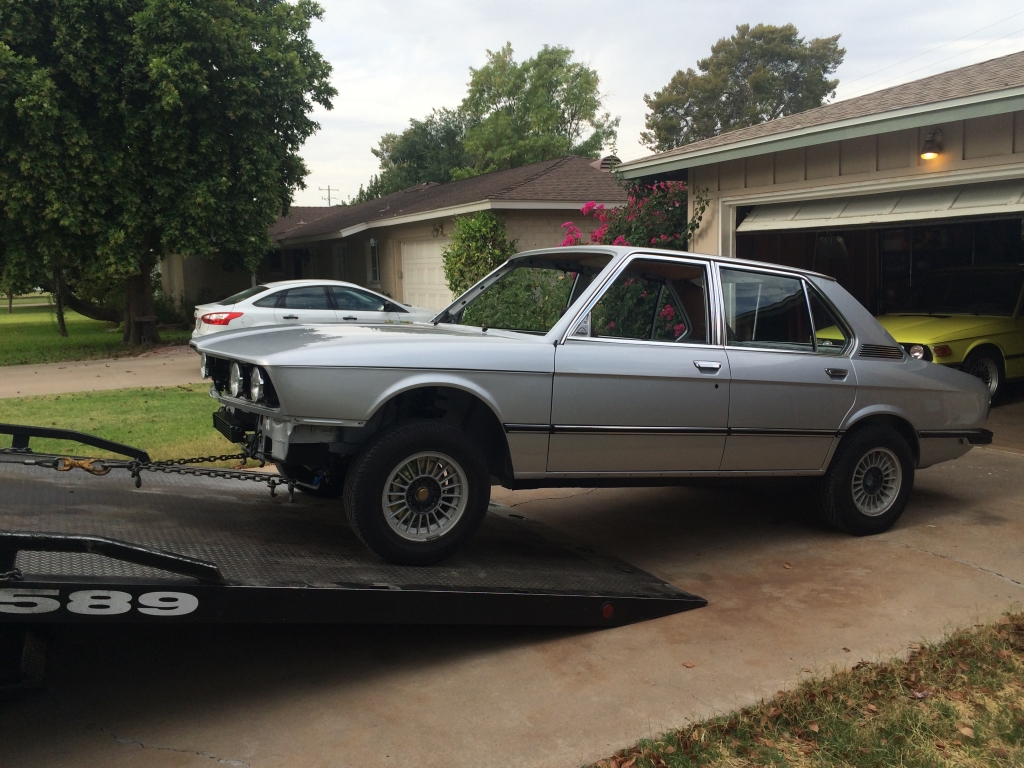
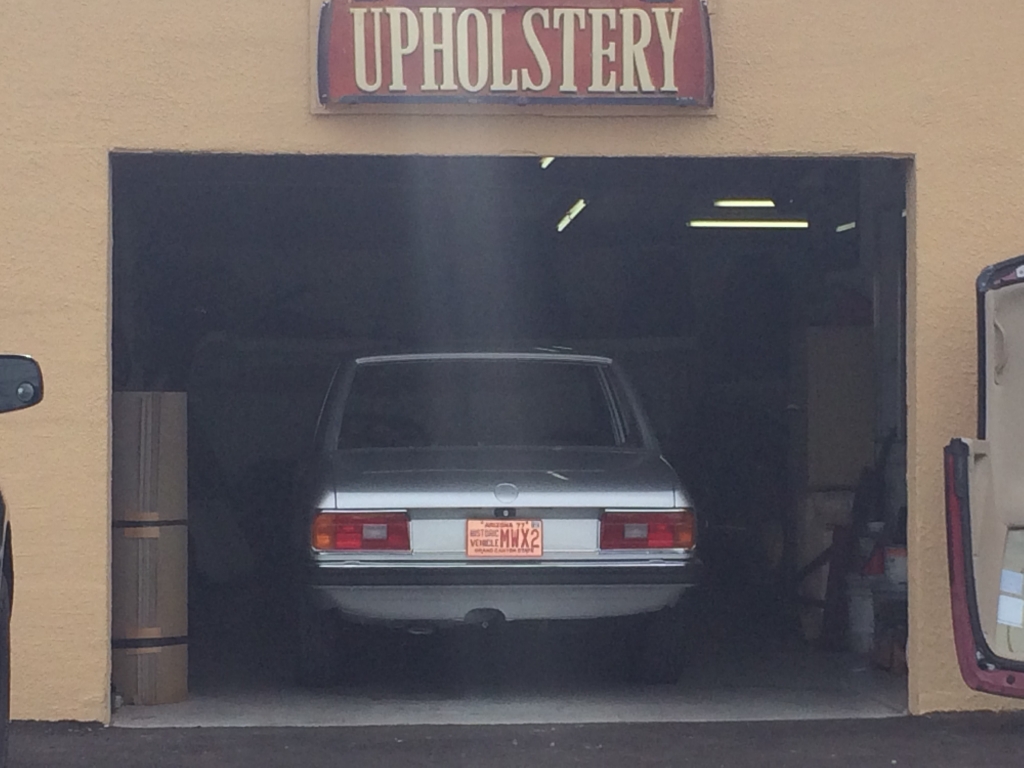
I show up and was asked why I was there and why the car was there as I wasn't on the schedule. When we pulled up, it was clear there were many cars there. Fortunately, they took the car and Terry got on it ASAP, after he went through how much work was going to be involved. I showed him a few things on the '75 E12 so he can see how the headliner goes in, as on E12s, the rear of the headliner is a floating piece, not wrapped around the pinch weld, like E28s - not that he knows E28s, but it's an important distinction.
He had a couple of questions later in the day, so he asked I come by to answer them. He had already made progress.
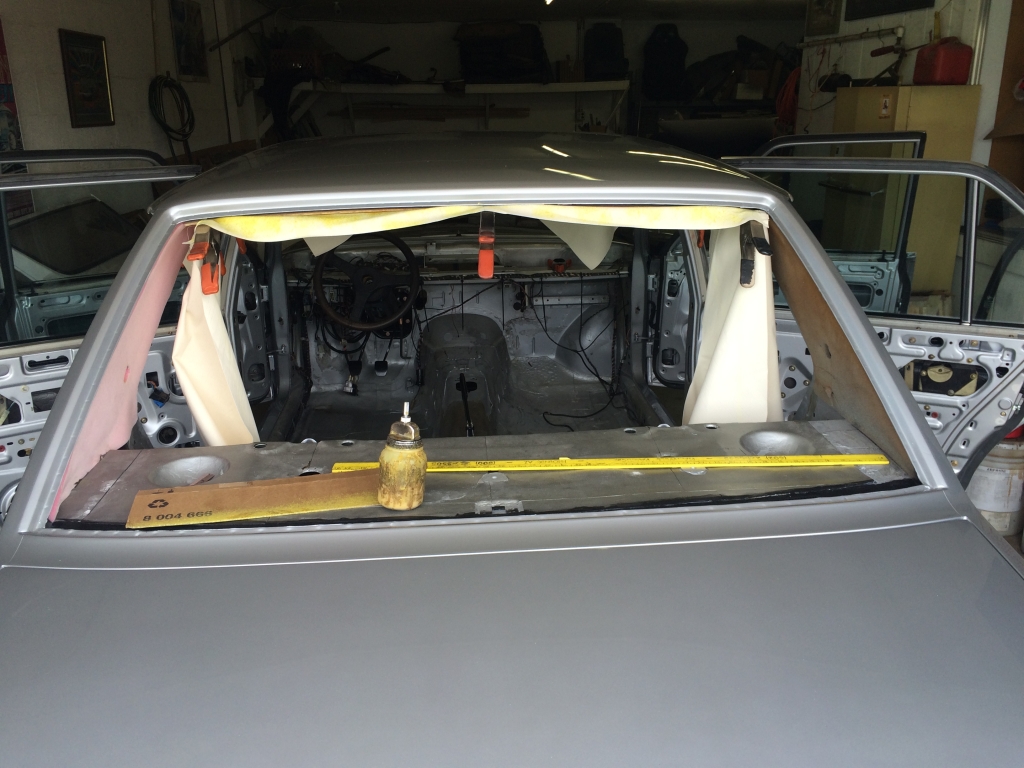
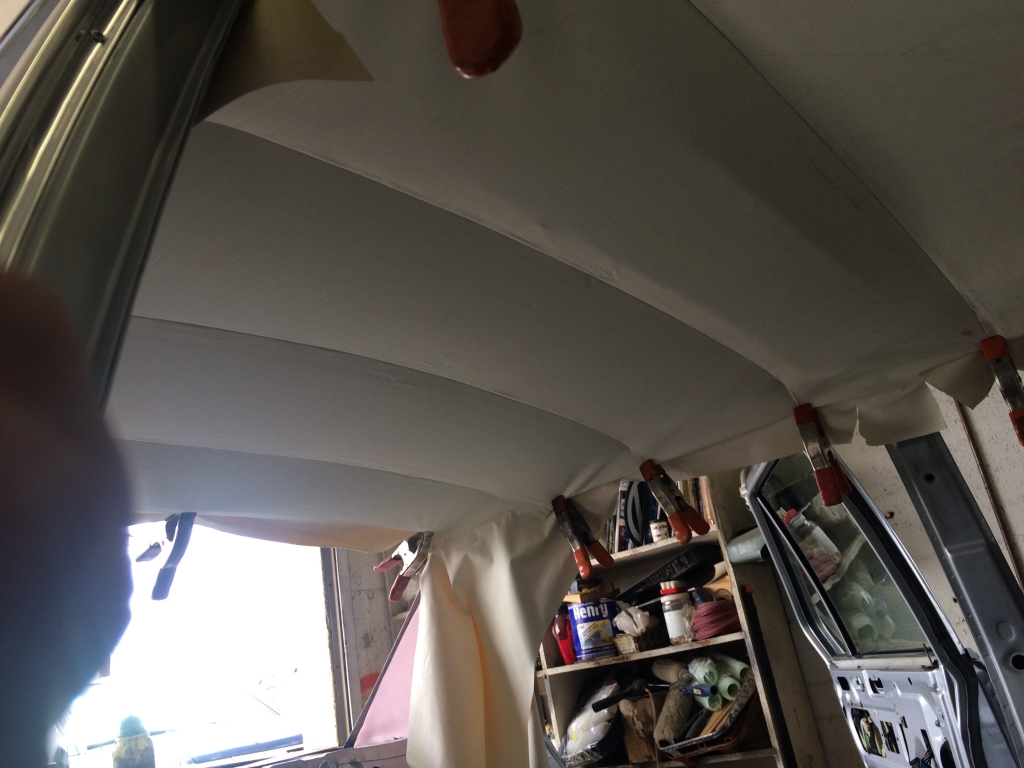
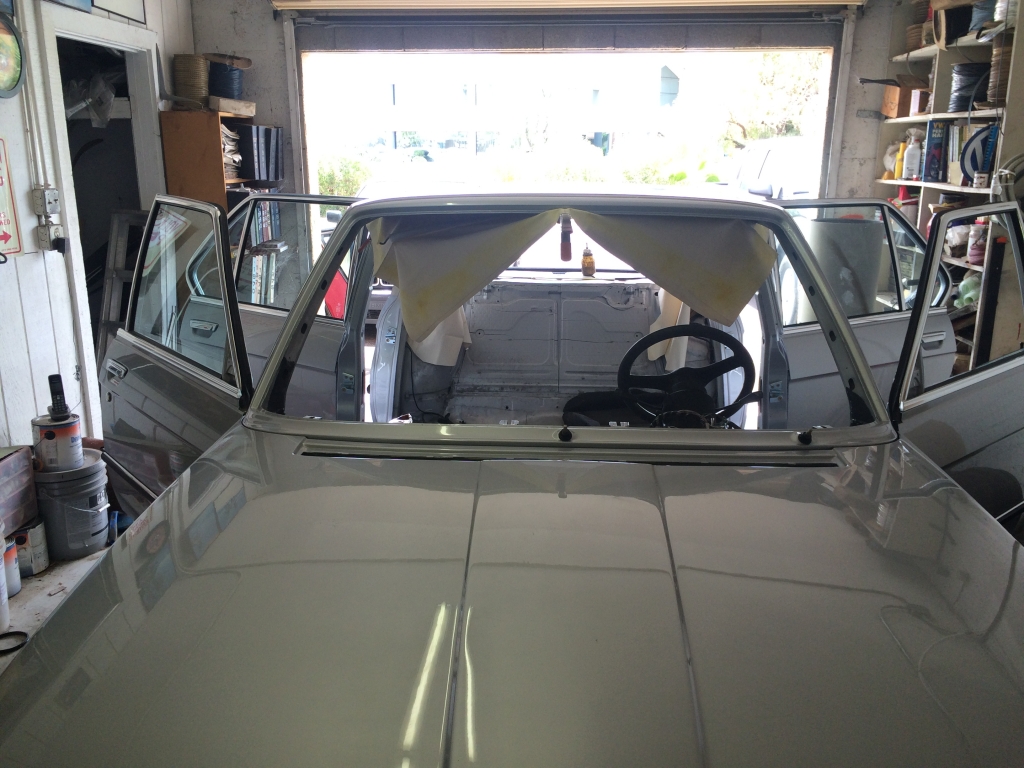
Terry suggested he had a long way to go on it, so I kept working on things on my end. I had a decent batch of stuff at the powder coater, so I picked all of that up.
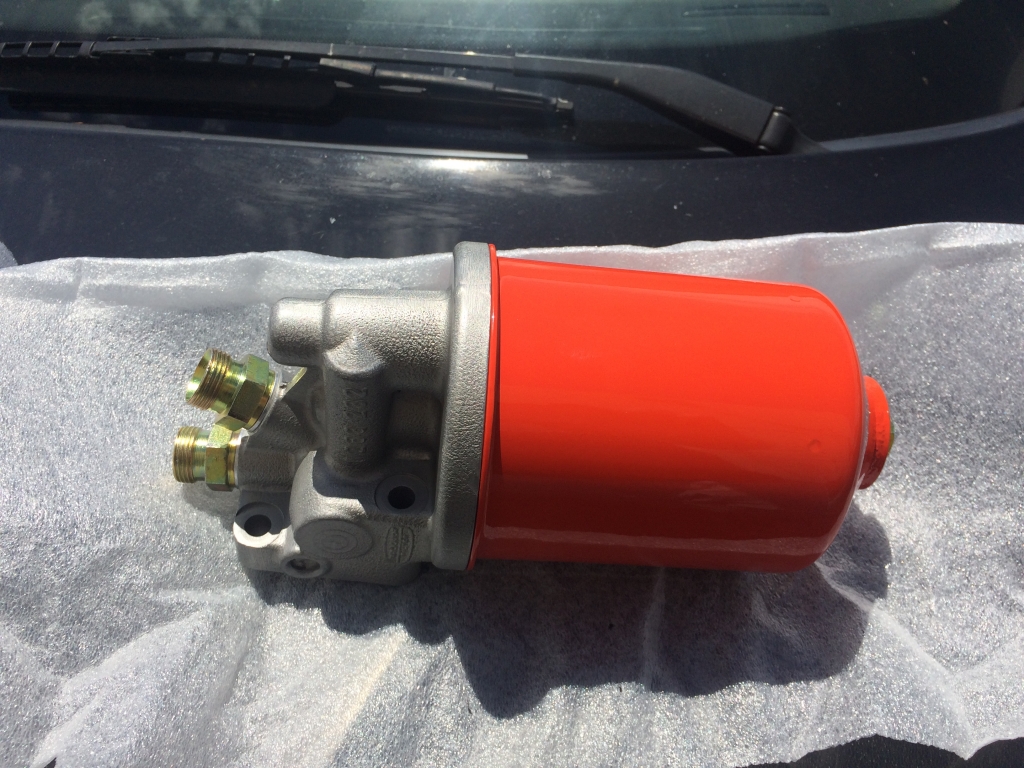
I put my power steering pump back together.
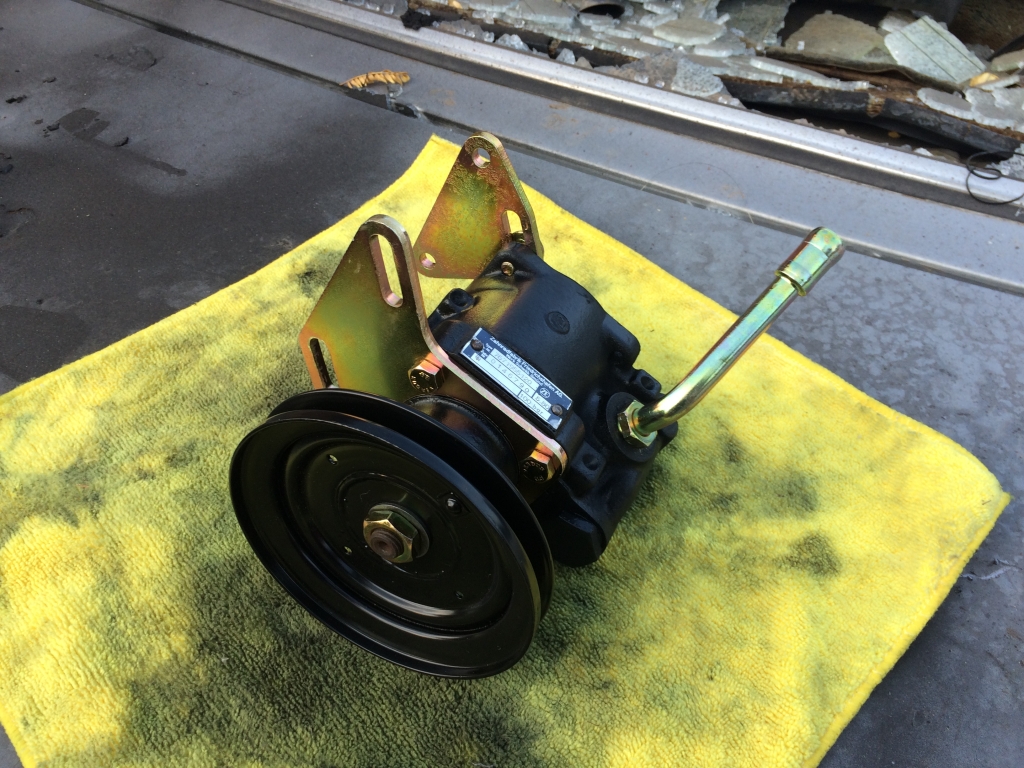
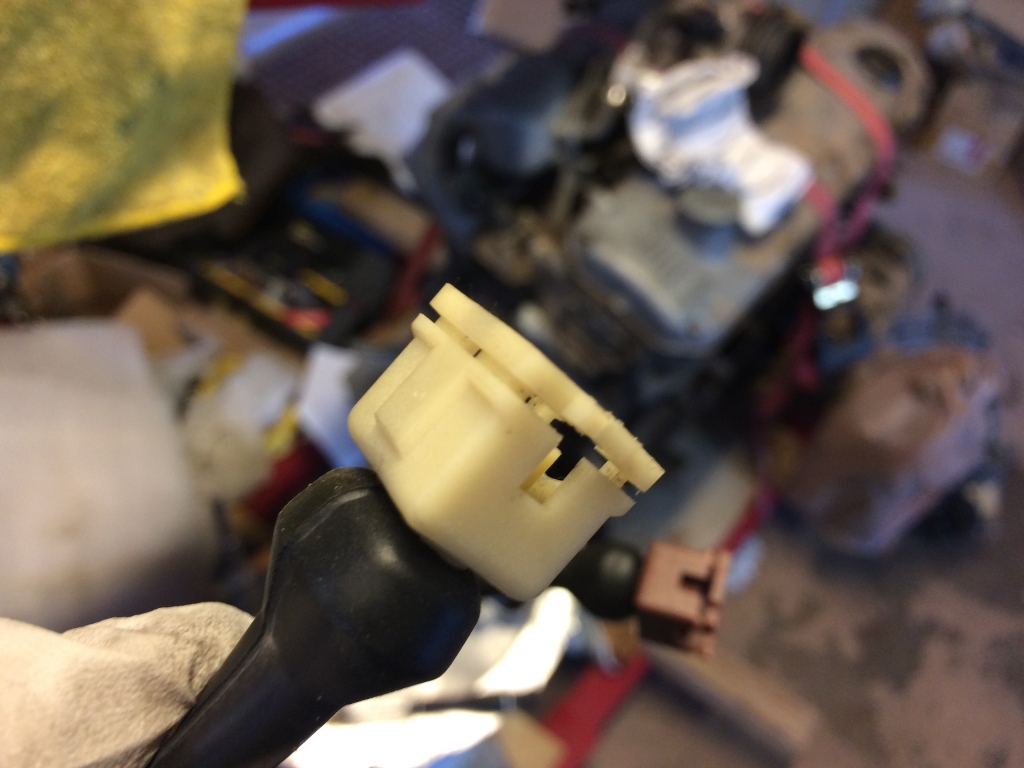
Then while looking at something on one of the E24s, I happened to notice that one of them had the harness connector I needed for the CTS attached to the CSV. So, I harvested that guy to replace this:
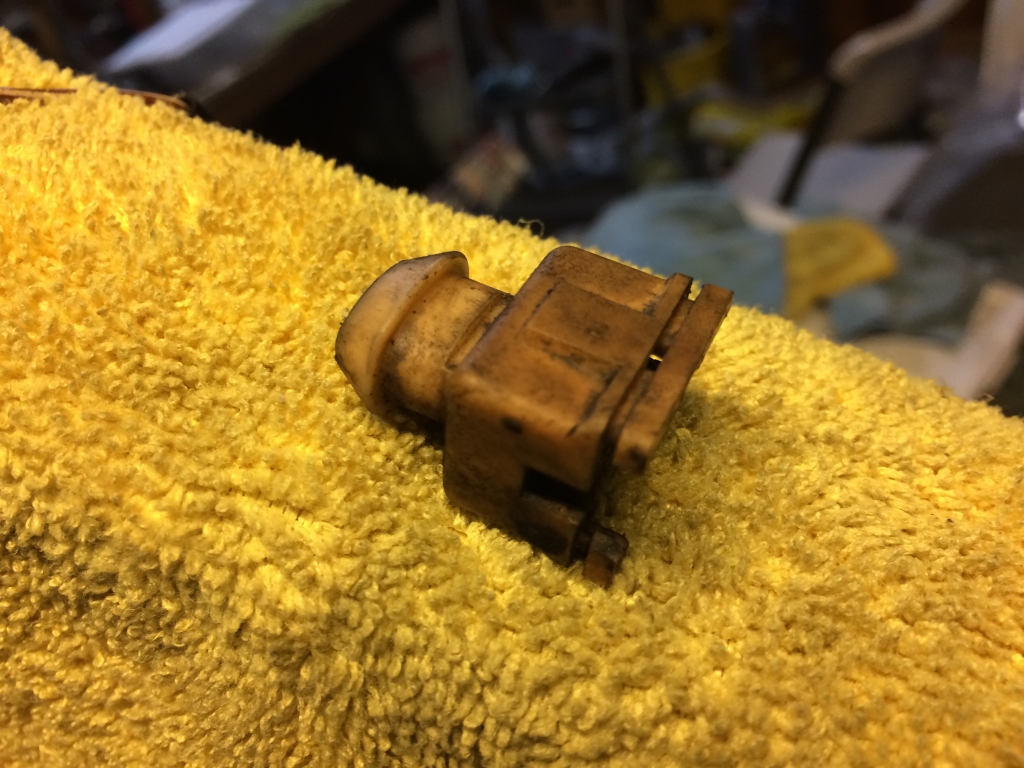
Now that I'm a pro at de-pinning these Bosch connectors, I made quick work of it and replaced the boot, too.
Tuesday, June 28, I got a call around 10am saying the car was ready to go. I went over and had a look.
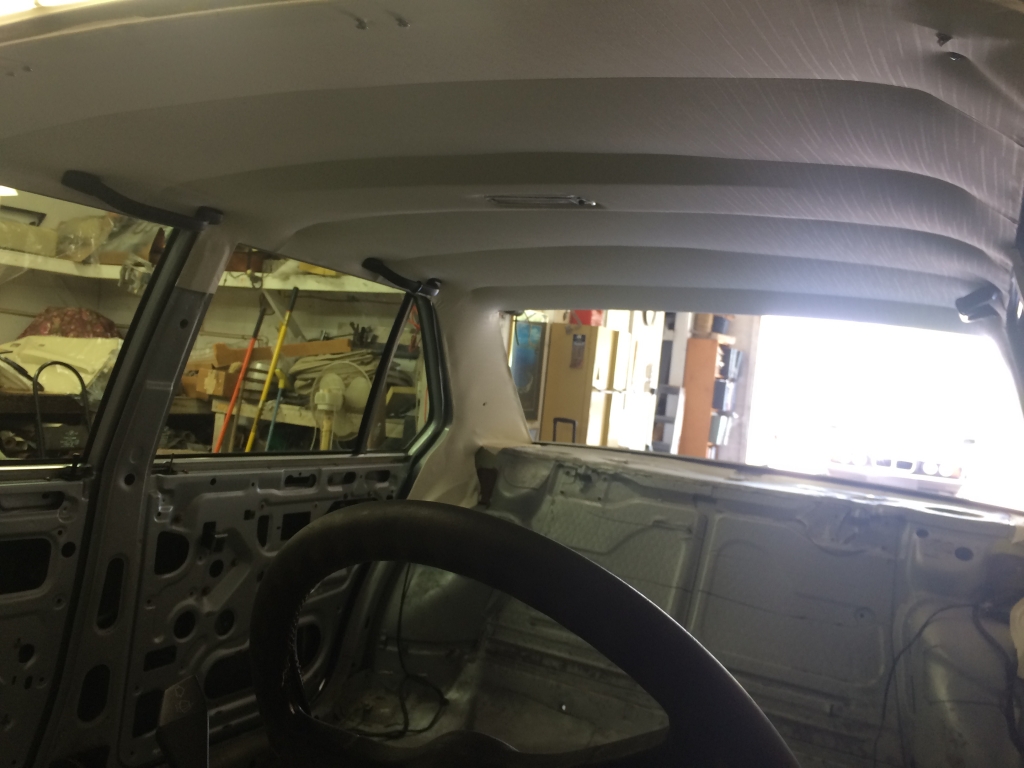
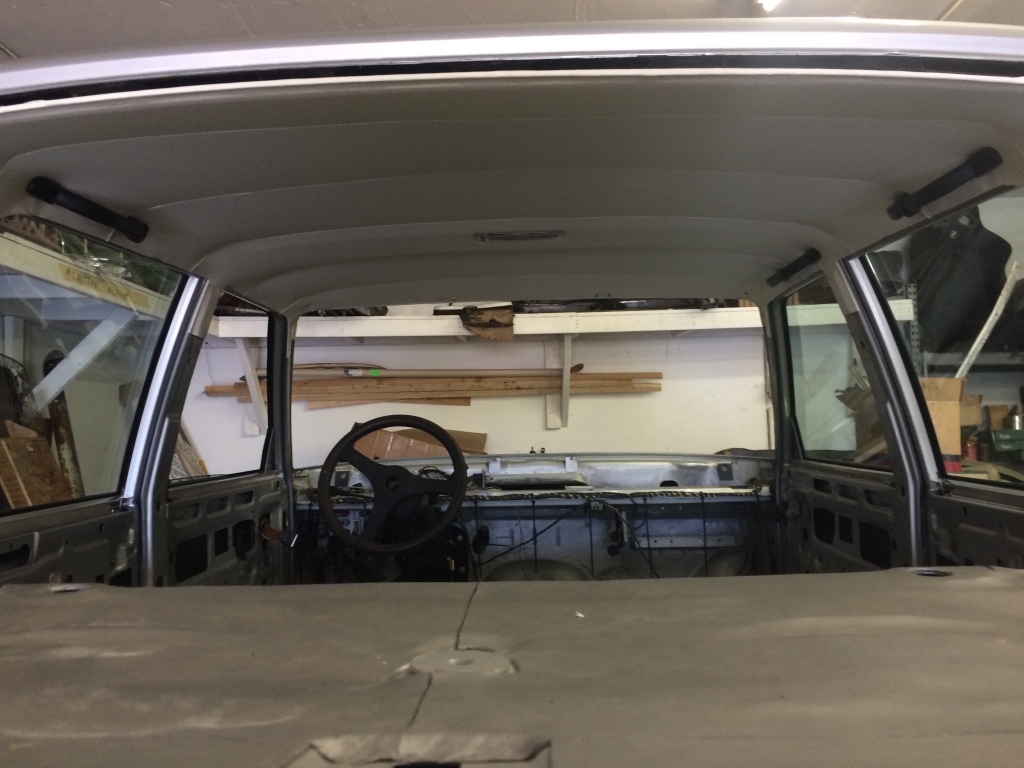
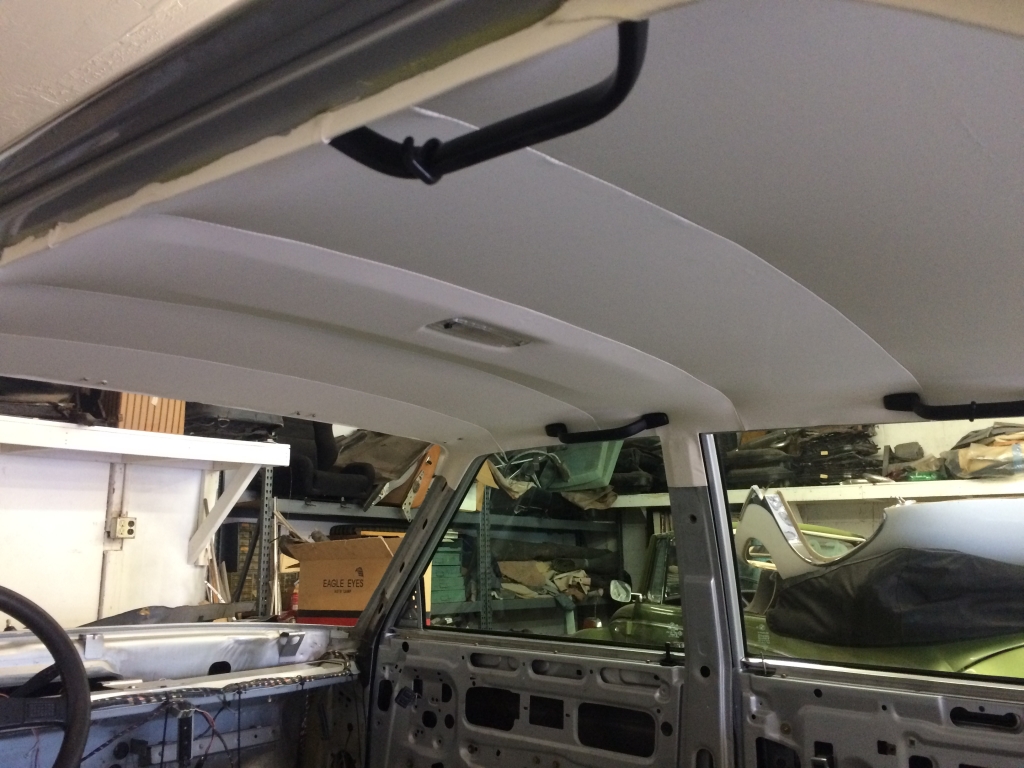
Installation cost was $700 (with a discount!). Towing was $100. Sewing the headliner was $200 and the fabric cost $150 from BMW (3 meters). There were other people that could have installed it but I didn't want more complaining and excuses suggesting that the headliner they didn't sew was wrong versus a failure in their process or vice-versa. I figured the person who made the headliner should be responsible. Of course the B7 Turbo was a headliner I bought sewn for $75, $150 to install and no towing. It also only took 2 hours to install, so this whole process was sticker shock to me.
Friday, July 1, back on the motor. The oil pump sprocket showed up Friday morning thanks to the USPS last mile delivery where it takes three days to get something after it shows up in your city. Of course, despite the eBay photo showing it coming with the nut, there was no nut. Fortunately, Alex had one. It's an M10x1 jam nut, so not exactly super common.
With that sorted, oil pump was installed, head installed and first torque sequence squishing my $140 headgasket.
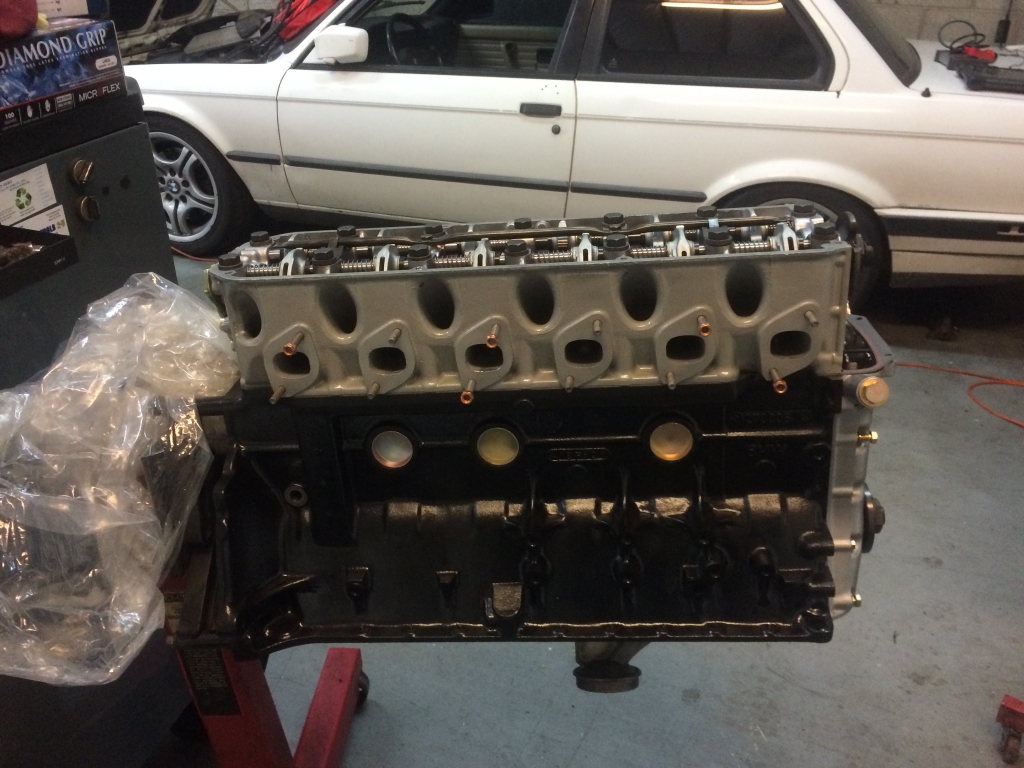
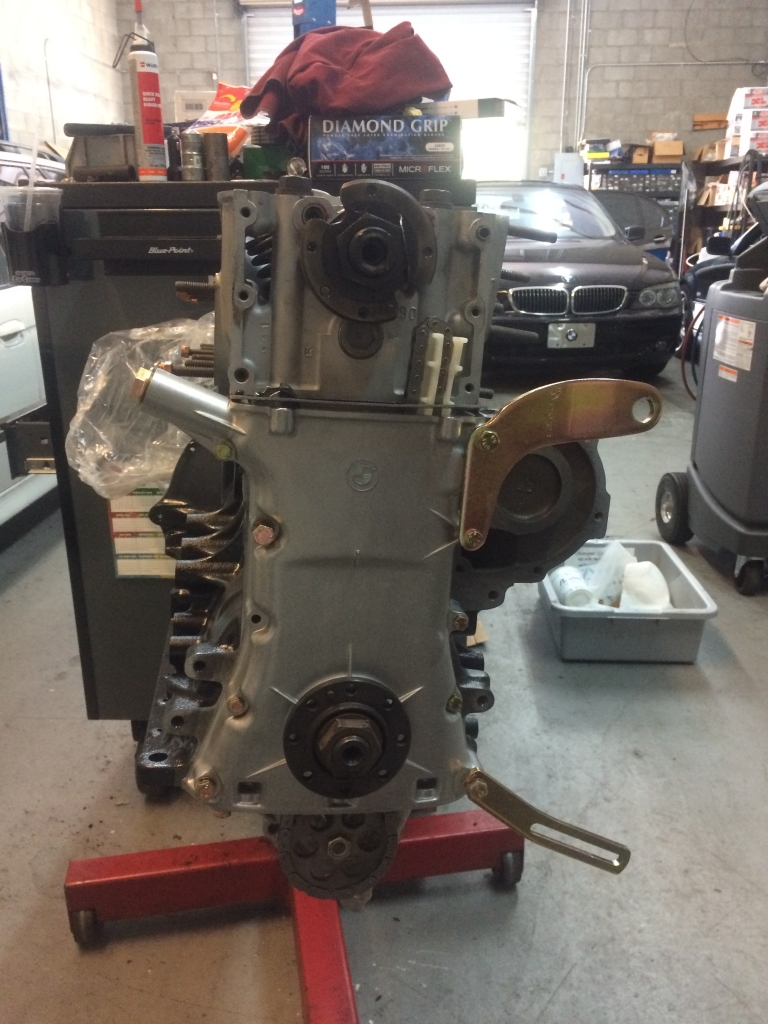
While waiting for the second torque sequence, we installed the oil pan.
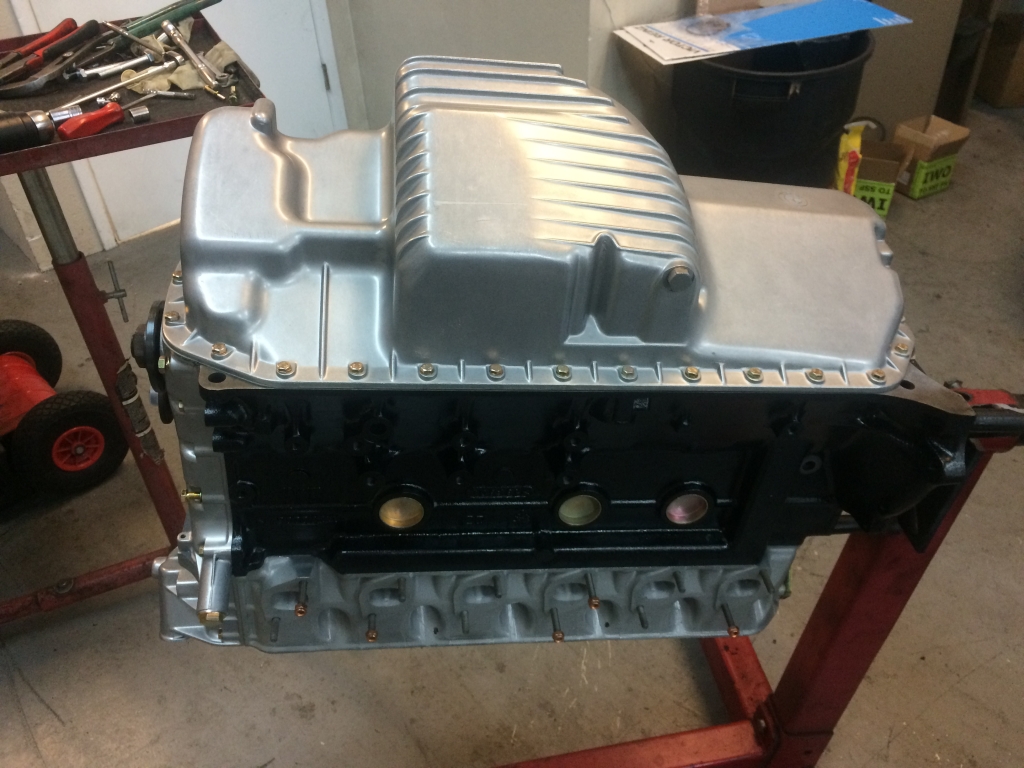
Finished up the chain, primed the tensioner, installed the upper timing cover.
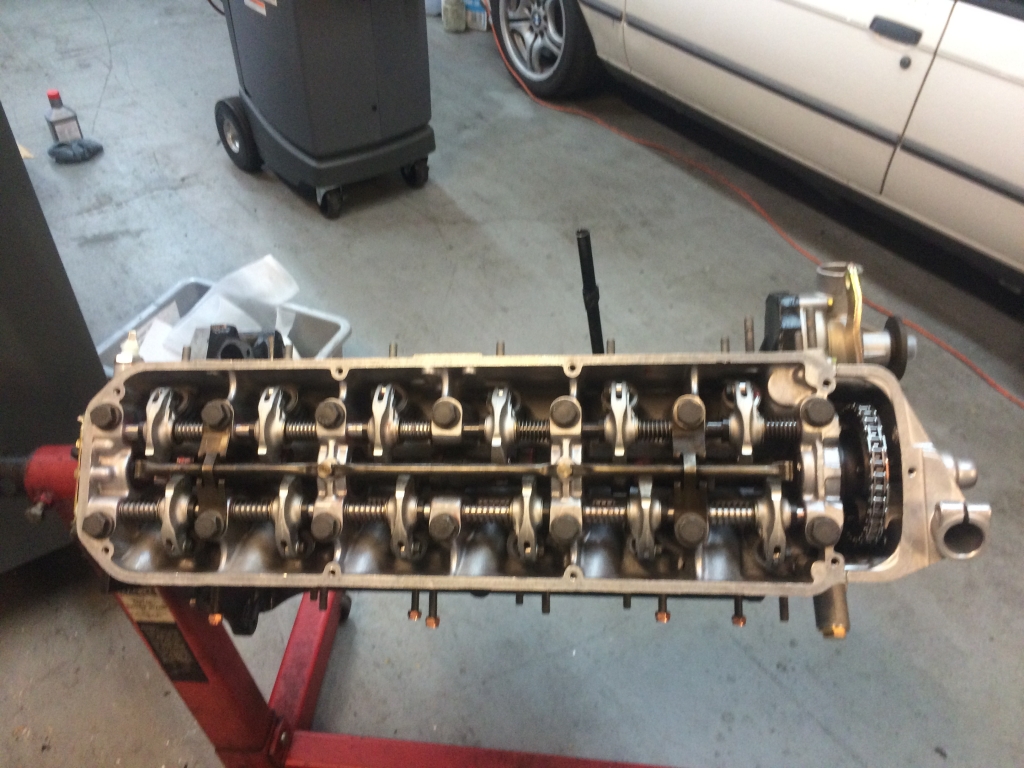
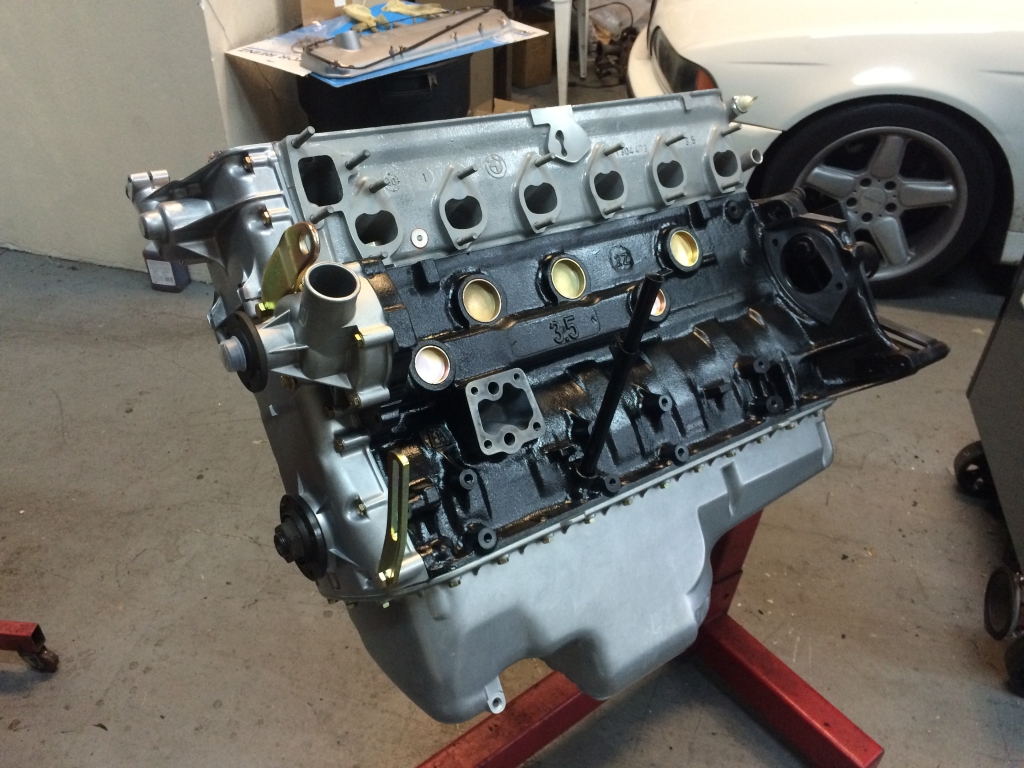
Valve adjustment done and this motor is ready to go in the trash.
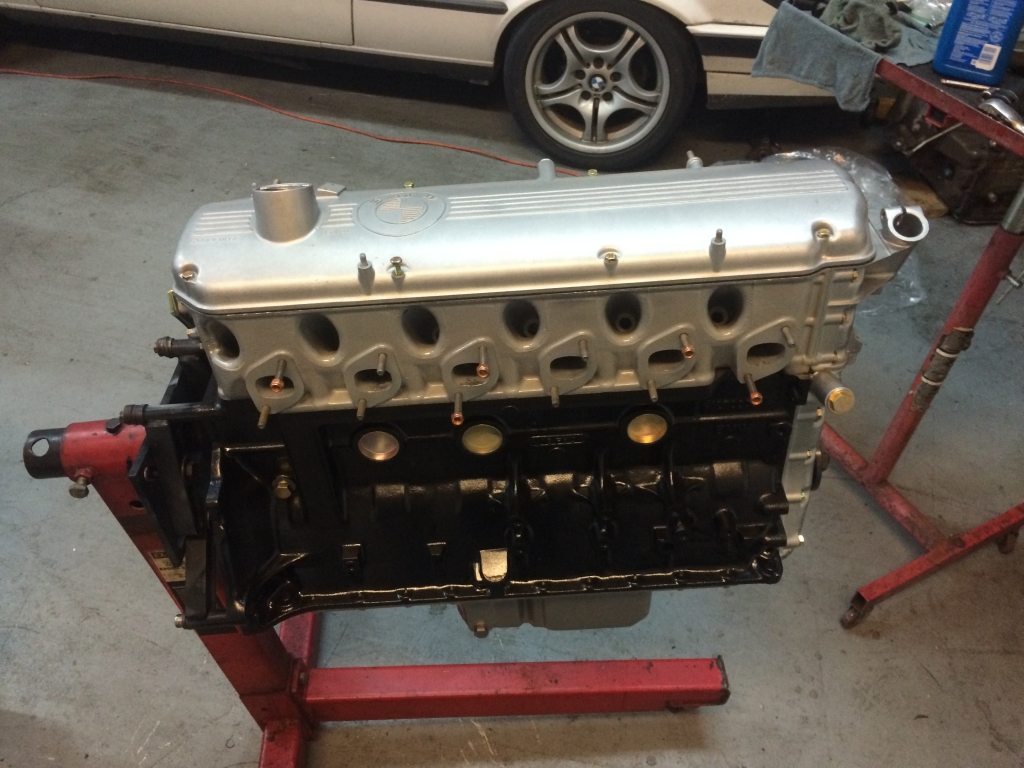
Off the stand onto the hoist. Install the rear freeze plug, then the flywheel.
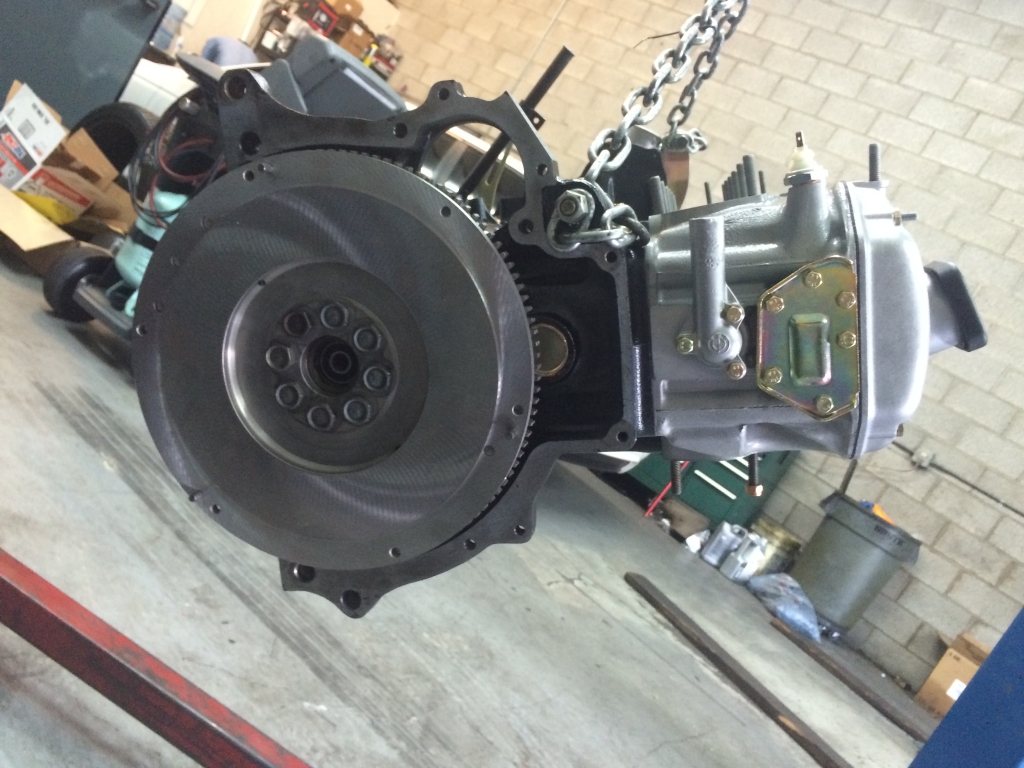
We loaded it into the back of his Aztek and I drove that to my house and unloaded my motor, then started attaching things to it since I didn't know what else to do with it.
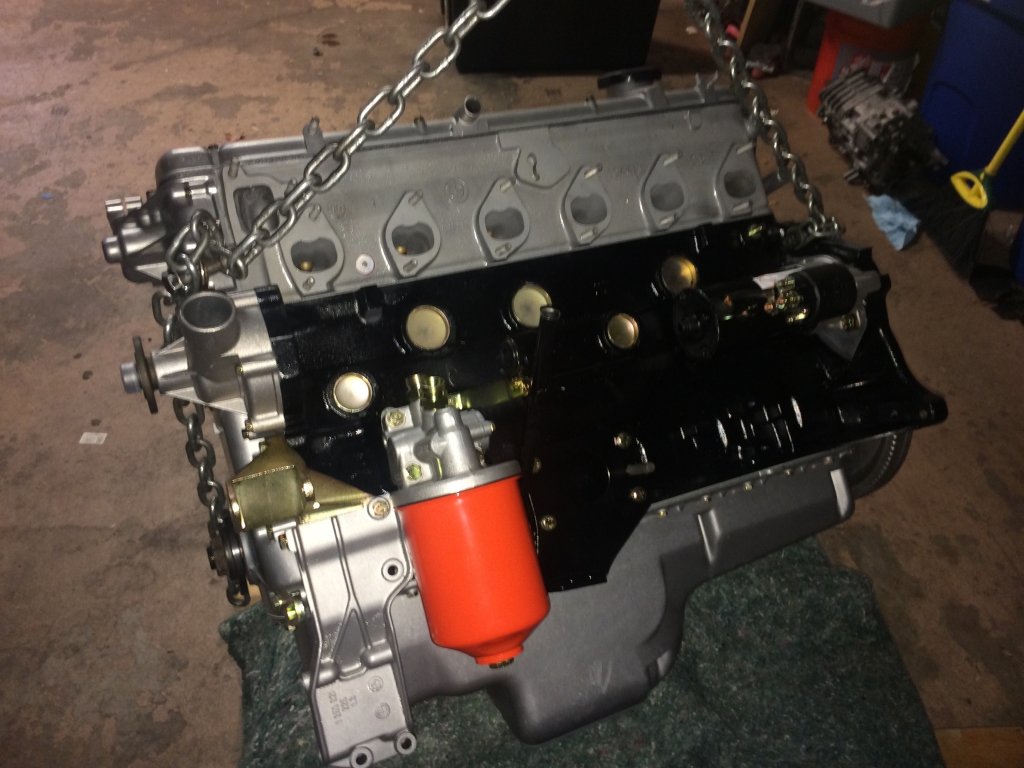
I had to order motor mounts on eBay, so my idea of putting it in the car over the weekend was a no-go.
Mike, the painter, came over Sunday morning to fix a spot under the car next to the transmission. While he was there, he re-textured these for me and I painted them.
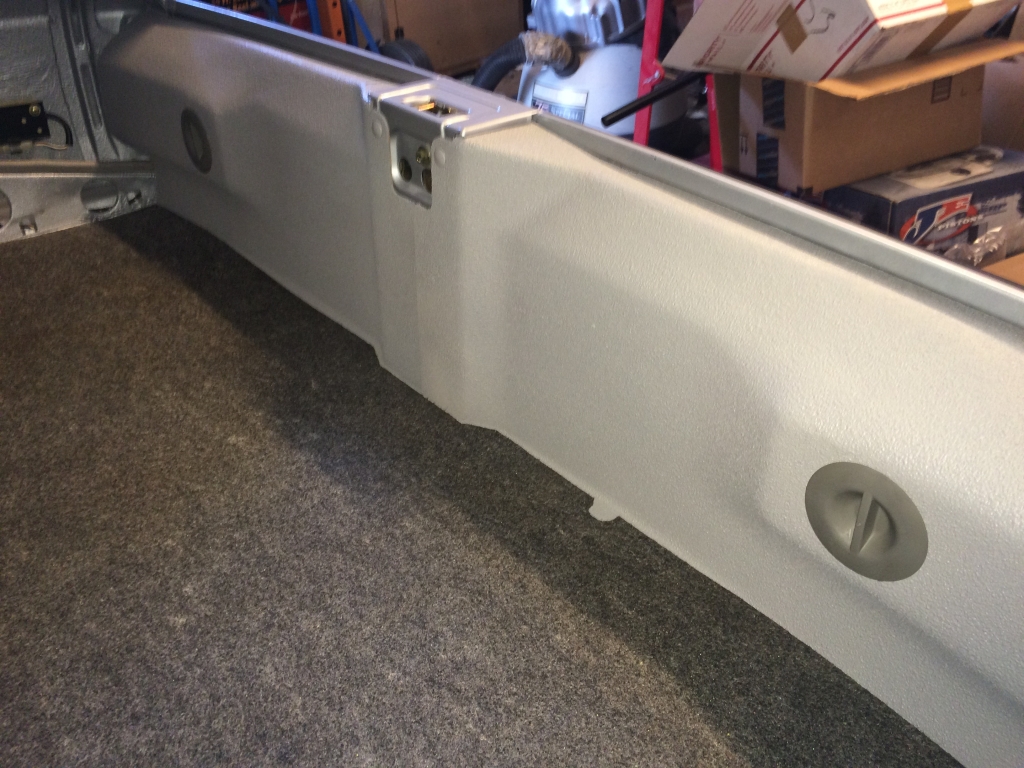
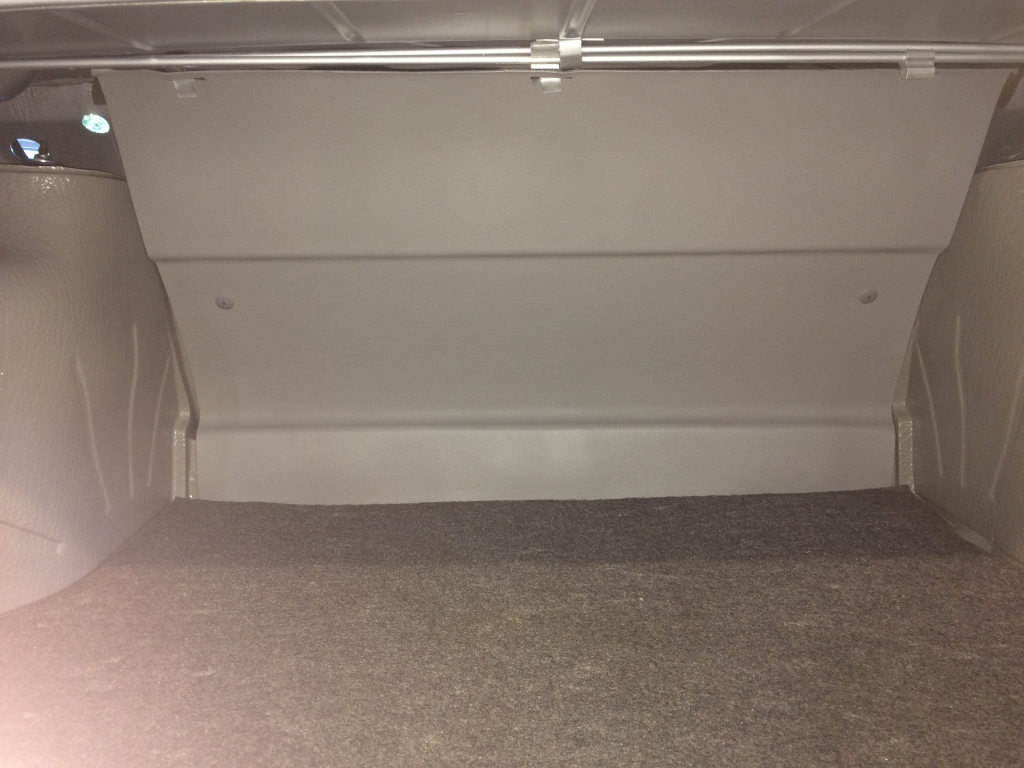
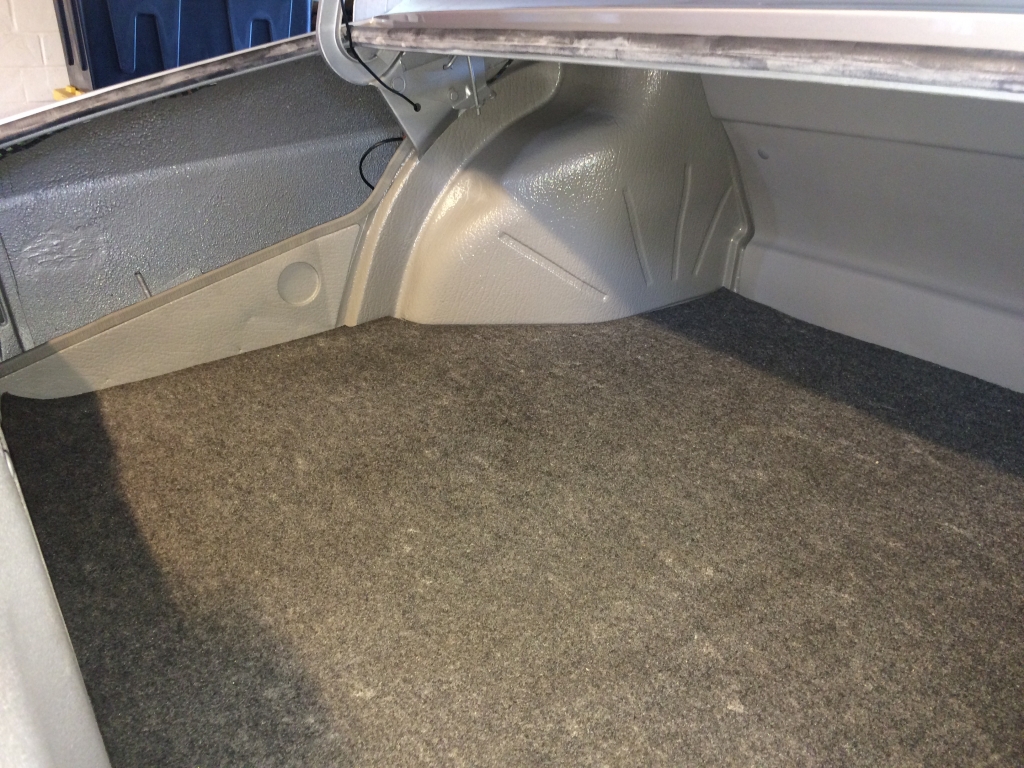
Then I worked on the rest of the trunk plastics which are fragile and a pain in the ass.
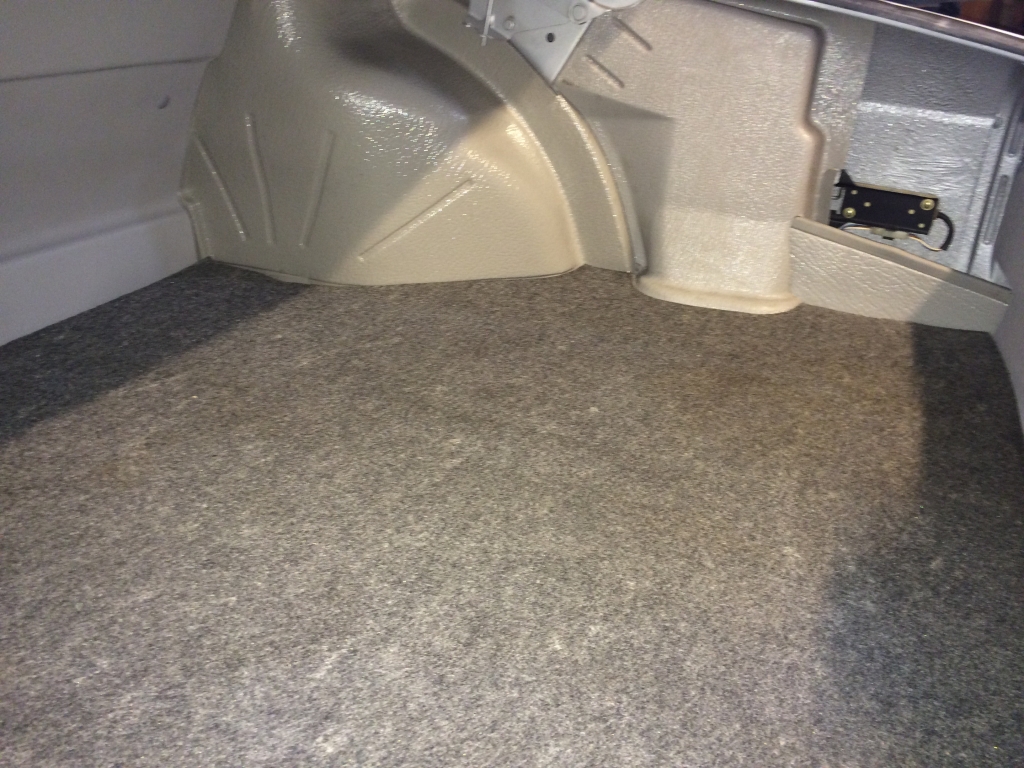
I thought quite a while about how to put the motor into the car. I was going to put it in from underneath but the reality is that without a lift, it would be a disaster. The problem with going in from the top is the hood and the angle of the motor, but my friend Scott (scarey013) helped me resolve the angle issue. I had thought about using a ratchet strap but I wasn't totally comfortable with it. Sure enough, it worked perfectly. With that ready, the motor was ready to go in. Adam (ldsbeaker) came up from Yuma for a visit and my motor mounts had just arrived, so we fueled up on Waffle House and got to work!
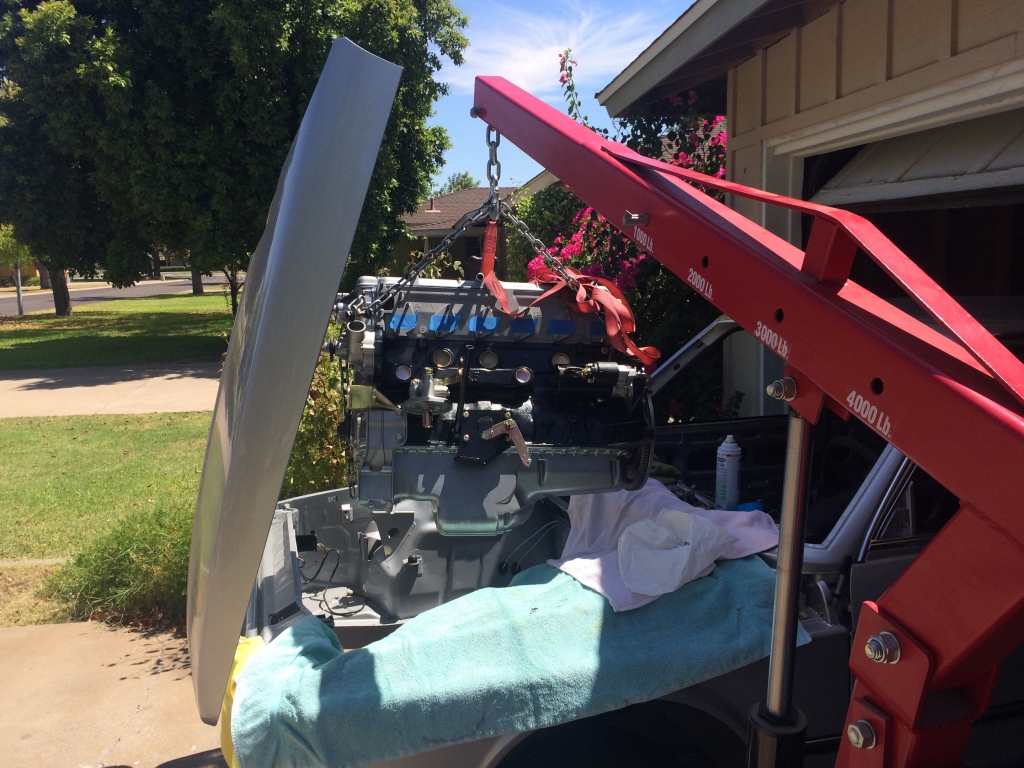
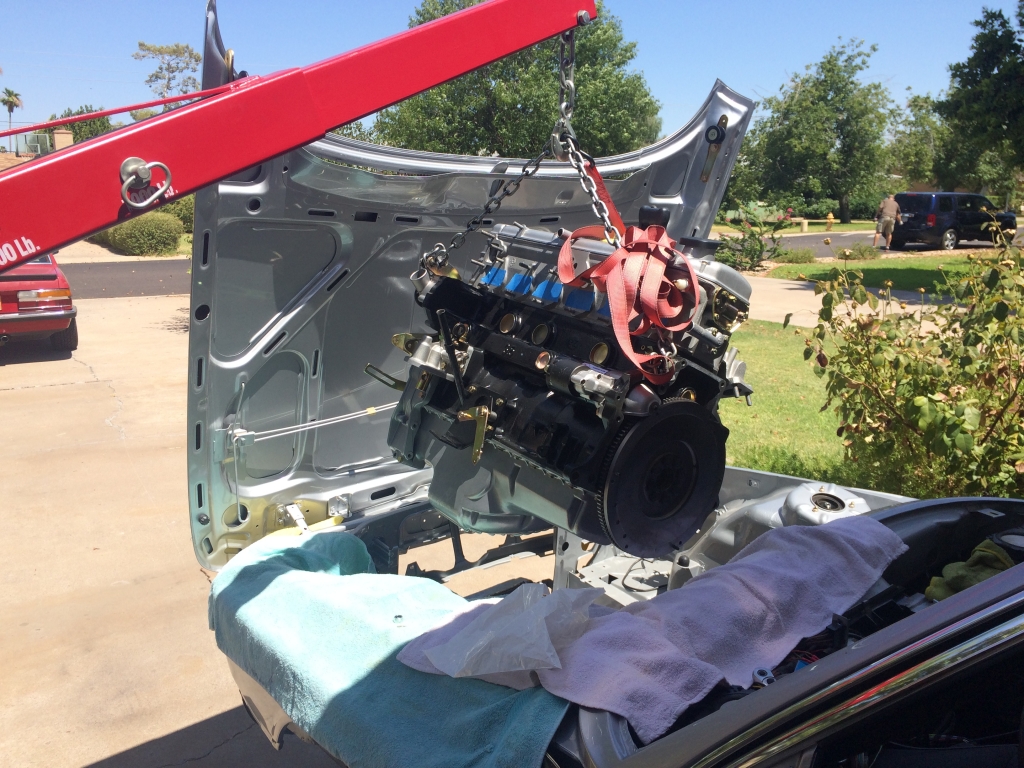
It was at this point we figured out to remove the left front wheel and he just happened to have his impact ready with a 17mm on it, so he's in the background there.
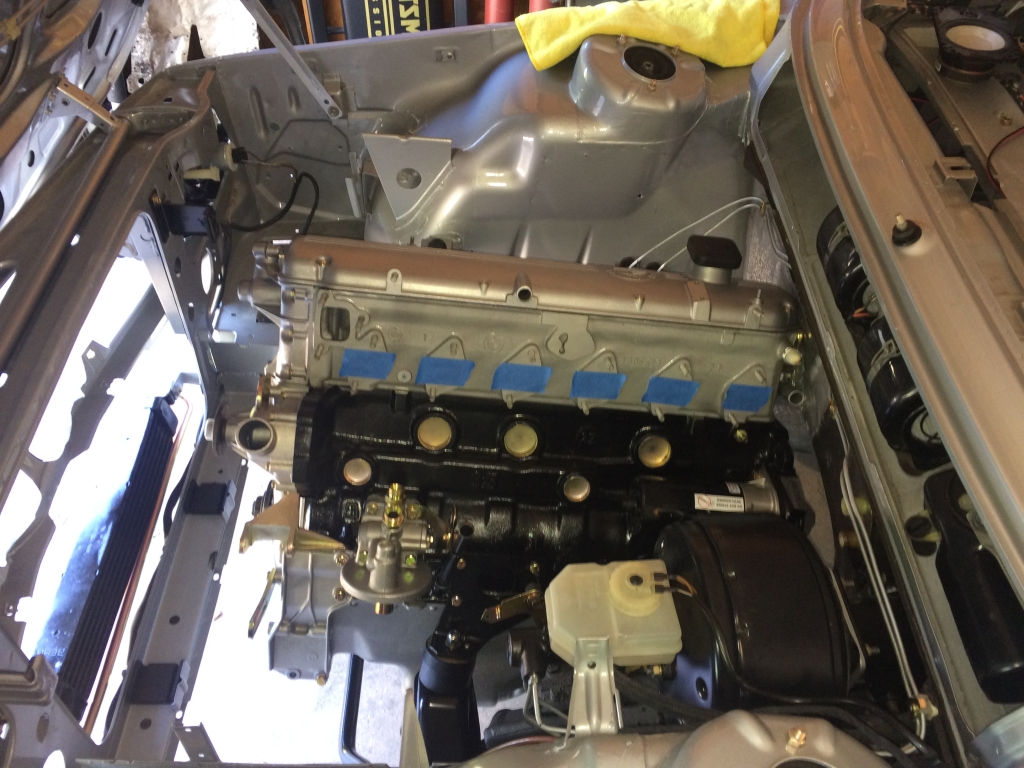
It took maybe 10 min to put the motor in the car. 30 min start to finish from moving the engine hoist to lowering the car off the jack.
Alex came by that afternoon and we torqued the crank nut.
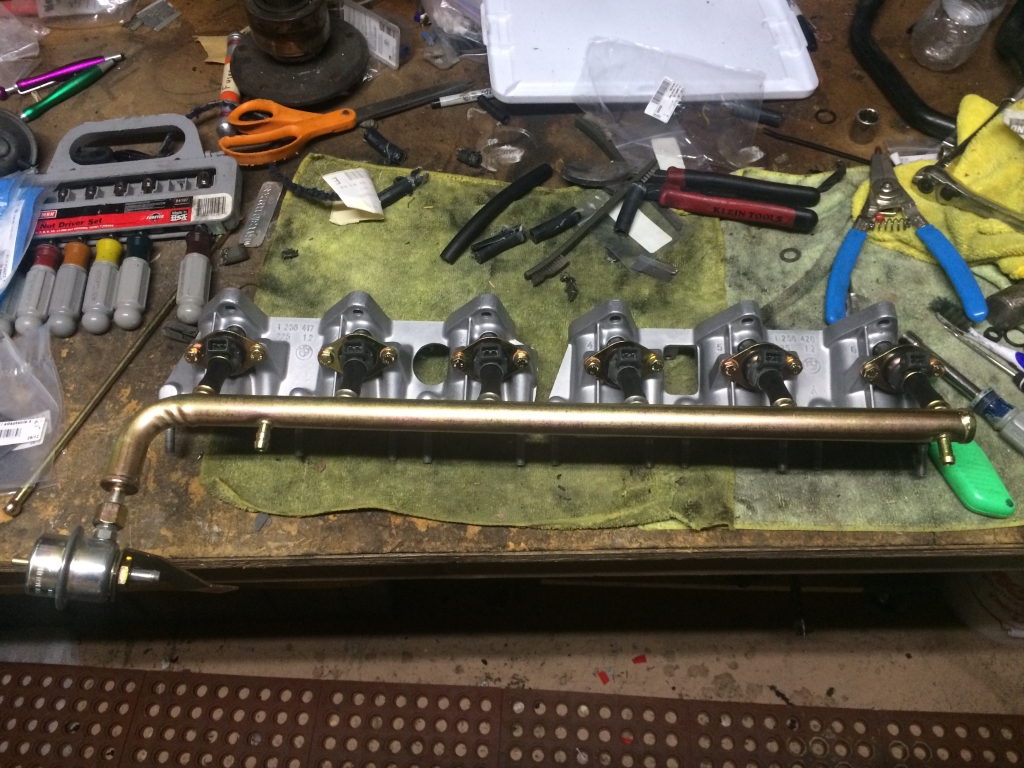
With the motor in the car, that's like a big deal and now I can just work on stuff. I started putting my intake manifold together.
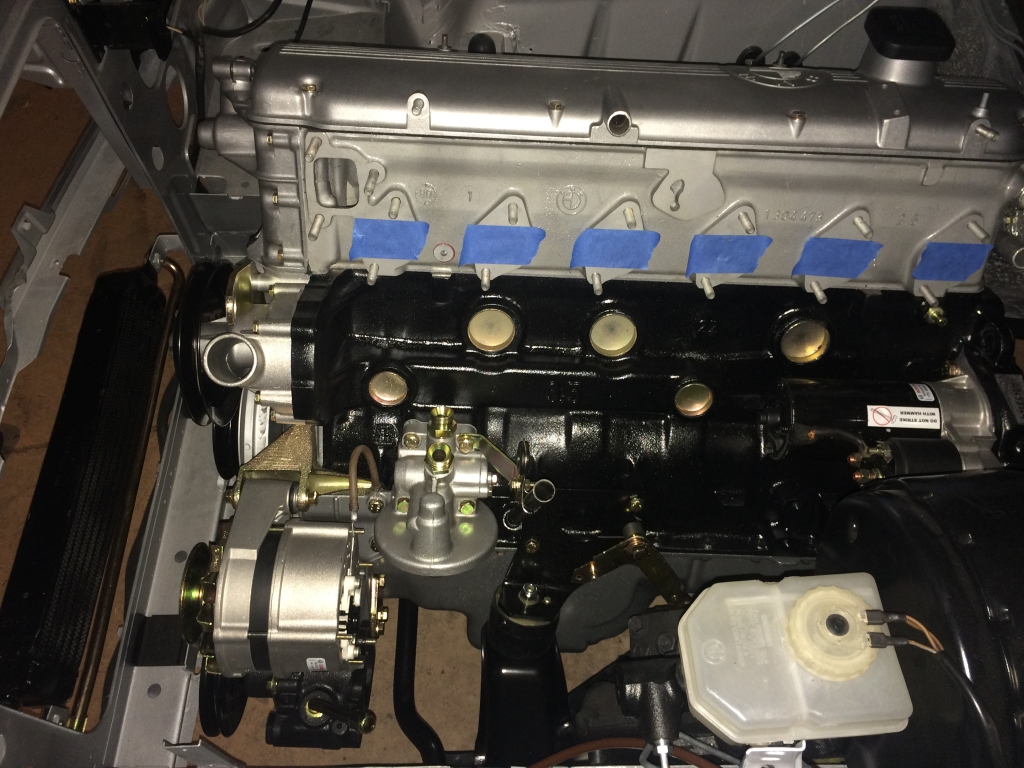
Of course, waiting on parts, so I installed the accessories.
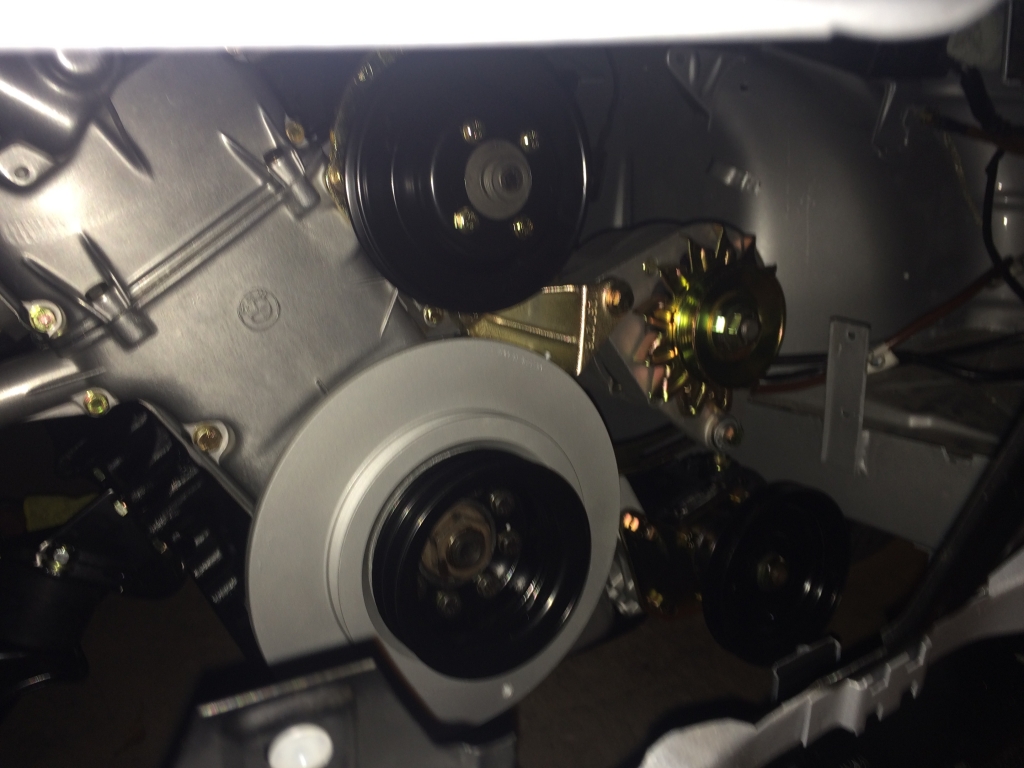
and the harmonic balancer, of course.
I went to the exhaust side and installed the exhaust manifolds and their heat shields.
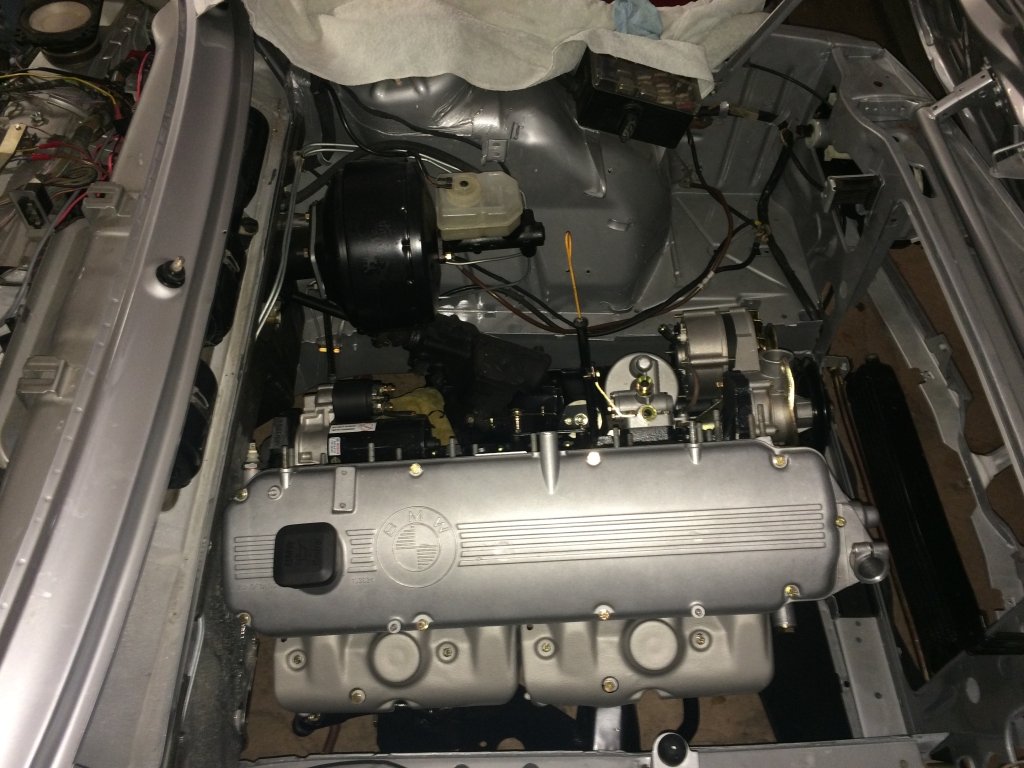
Back to the intake side.
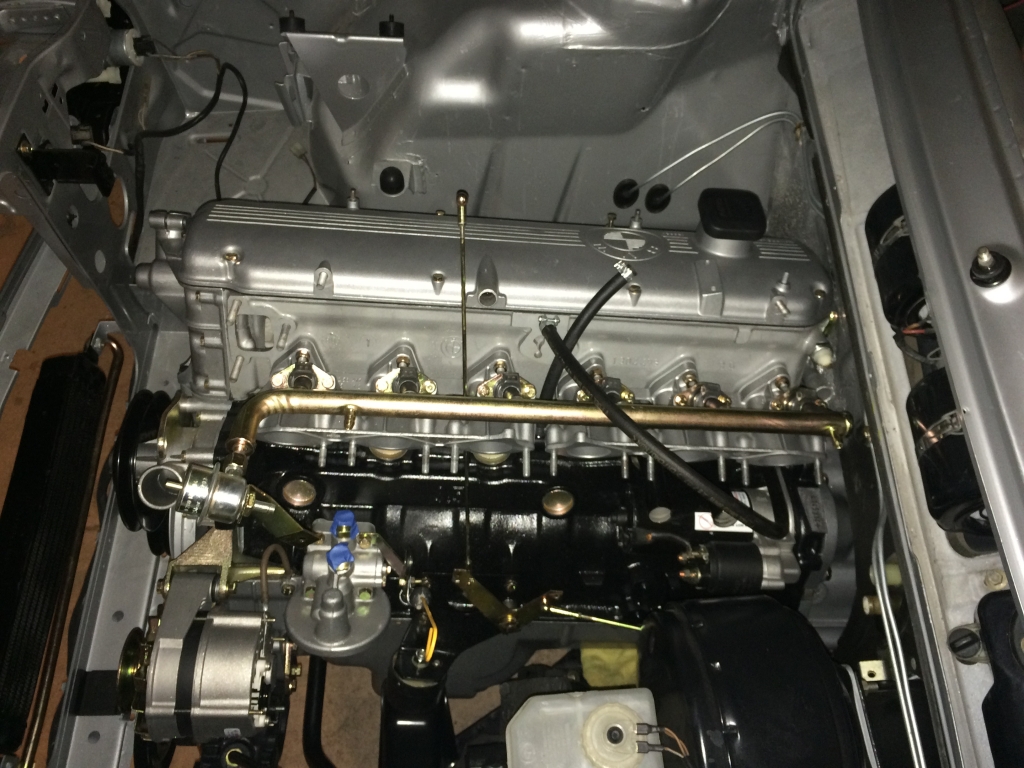
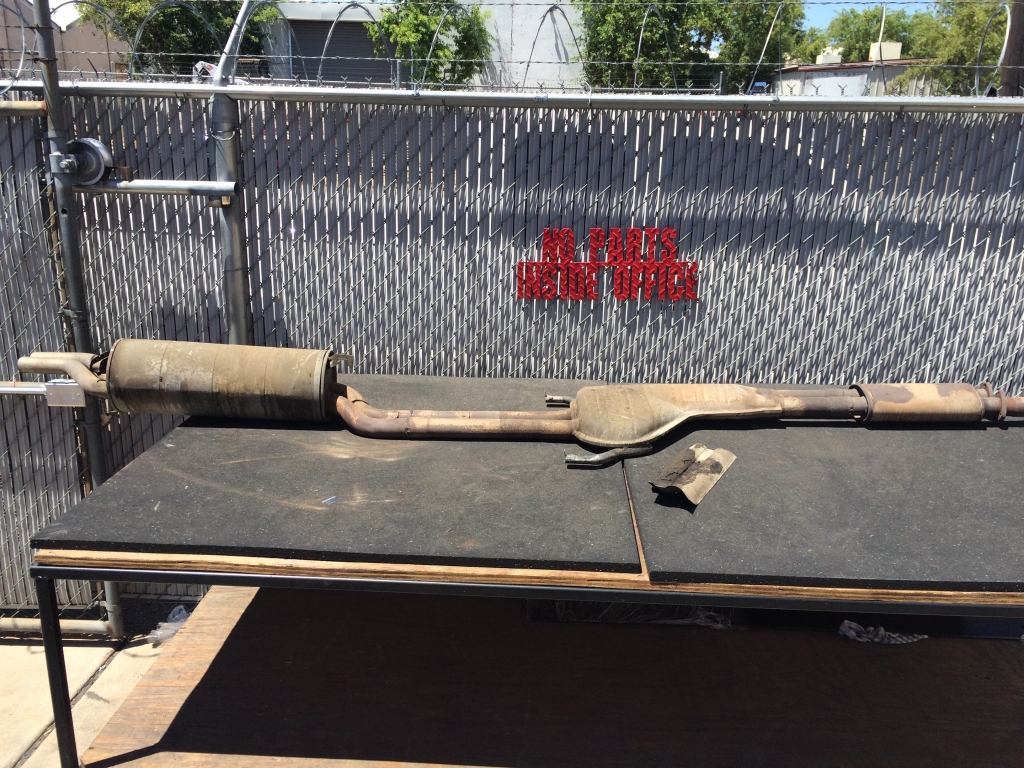
Either the exhaust on my car is original and just in awesome shape or it was replaced at some point. I looked into buying new, but the car sounded great before and it didn't even show any weak spots, so I borrowed a van from work and took it to the powder-coater to have it ceramic coated to match my manifolds and downpipes.
My next task was to work on installing a transmission in this thing. I wanted to get the engine properly supported rather than leaning against the firewall. I installed the clutch using an alignment tool. Everything went great. Installed the bell housing with a new clutch fork, pivot pin and spring. I was going to go with the stainless pivot pin, but the original lasted this long. I then started doing the final tasks on the transmission. selector shaft seal, new reverse light switch, make sure the fill plug is loose, install the speedo drive, etc. Everything went fine until I got to the last one. I pulled the plug out and found that instead of having a gear on the output shaft that drives the speedo drive, it had a spacer. I looked into what it would take to swap it, since I have the 262 box of rocks from the 530i and found that I'd have to pretty much take the back of the transmission apart unless I wanted to make a special tool on the milling machine I don't have drilling 3.999mm holes for 4mm screws then slicing them at the right angle to grab the gear and pull it out. Plus, that would also require pulling the output flange, etc. So, I went back to the shelf of doglegs and grabbed another one, supposedly rebuilt, that I bought from Al Taylor in '09. It came from an early 6er, so I cleaned it up. Of course, I already used my selector shaft seal on the other one and despite the selector shaft seal being used on 40 different BMWs - even current models, there was no way I could find one in town on a Saturday, so I popped the old one out (from 2006) and decided to tap a new one in while it was installed. So, I got under the car, put the transmission on my right thigh and got it up into position, only to find it stopping about 1/2" from the bell housing. I moved it around, tried turning the shaft (I put it in gear, in case I had to rotate it to get through the clutch). Nothing. I did this four more times over the course of three hours. No luck. I put the alignment tool in each time and it was right on and smooth. I couldn't believe it and while Kyle told me the tools are junk, I refused to believe it. I finally gave up and sent Alex a text asking if there was more than one size of pilot bearing or something. I measured all of mine in the garage at the time (2 265/5, 1 265/6 and a 262) and they were all the same. He said he'd come help me out the next morning. I didn't want to put him out on a Sunday but he insisted.
The next morning, he came by and we spent quite a bit of time on it, ultimately starting from scratch,but using the transmission to align the clutch. That did the trick and we got it within 1/8" and that was enough to snug up with the nuts. It also worked out perfectly that a mechanic of his was at the shop working on his own project, so I could swing by and grab a selector shaft seal! Back in business. I got back to work and put the shifter in.
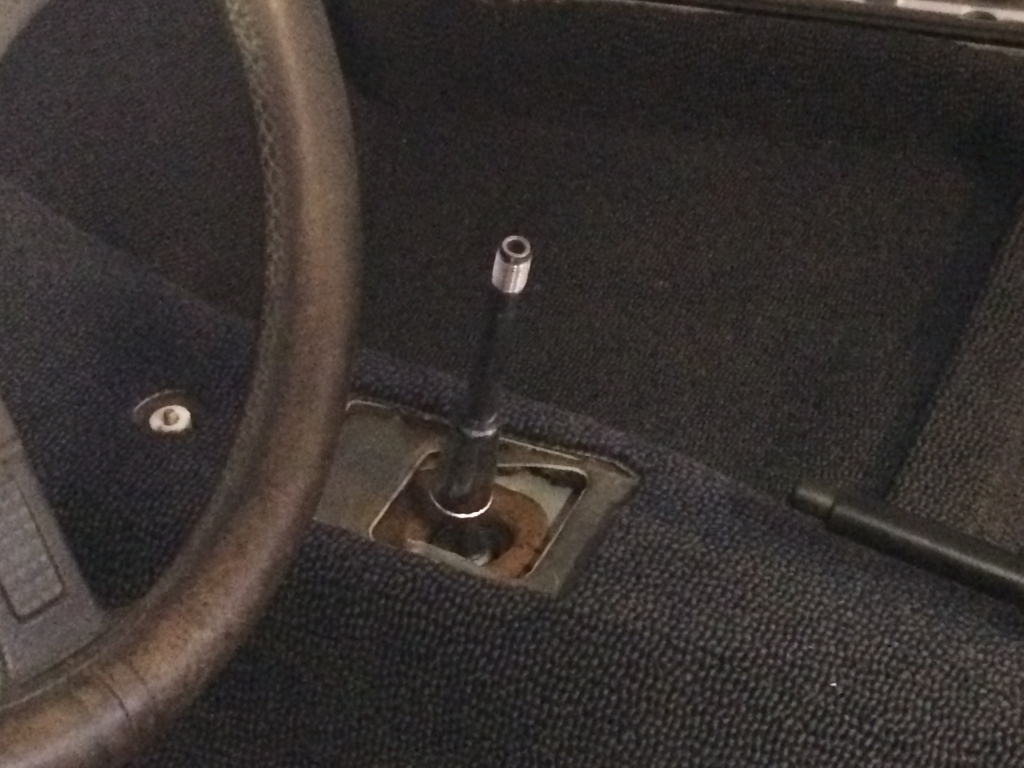
After that, it was driveshaft time. I wish I could go to the store and buy individual packs of bread - like two pieces. Enough for a sandwich, since I don't want a loaf of white bread. After using white bread for what I used it for, I definitely don't want to eat white bread.
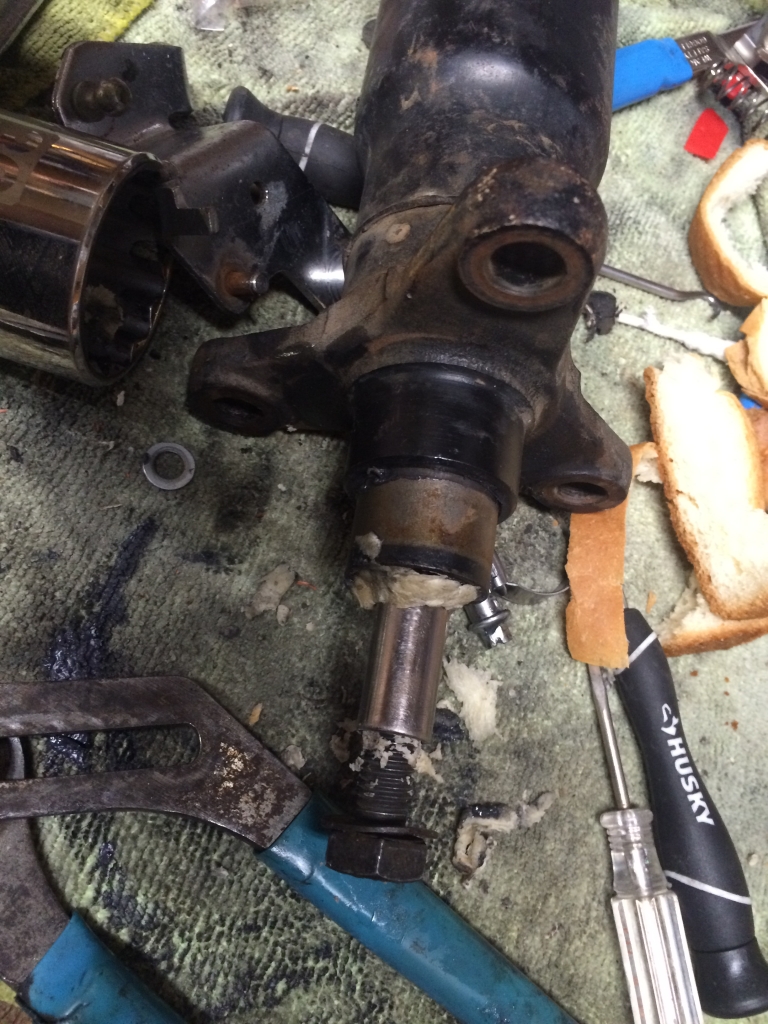
I cleaned up my Beyer reman driveshaft and put it in the car. Unfortunately, it seemed too short. This driveshaft came from the E24 and was about 1000 miles old. I'm not sure it started the fire either.
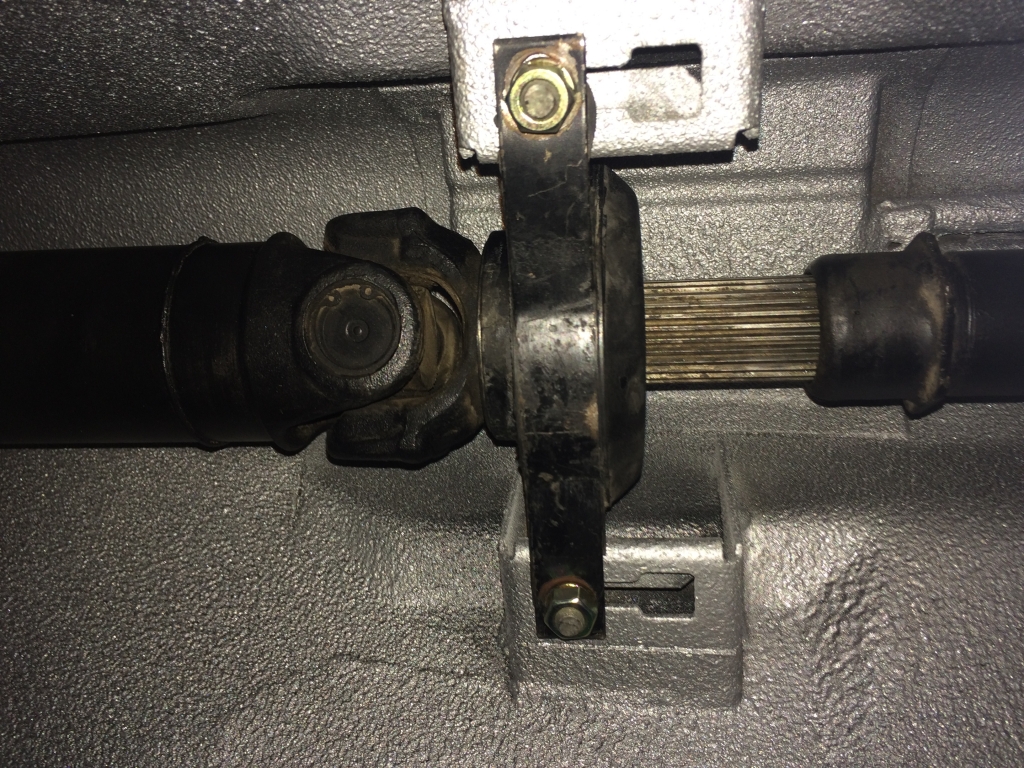
I didn't get it. Couldn't pre-load the bearing and I had WAY too much of the splines showing. I started wondering if it was the wrong shaft, but compared to the other E28 265 shaft at the house, it was the same.
I made a trip to storage to grab the original driveshaft from this car. It was in phenomenal shape. center bearing like new, pilot bushing tight like a tiger and the u-joints were silky smooth. I wiped it down and decided to Czech it out before I cleaned it up.
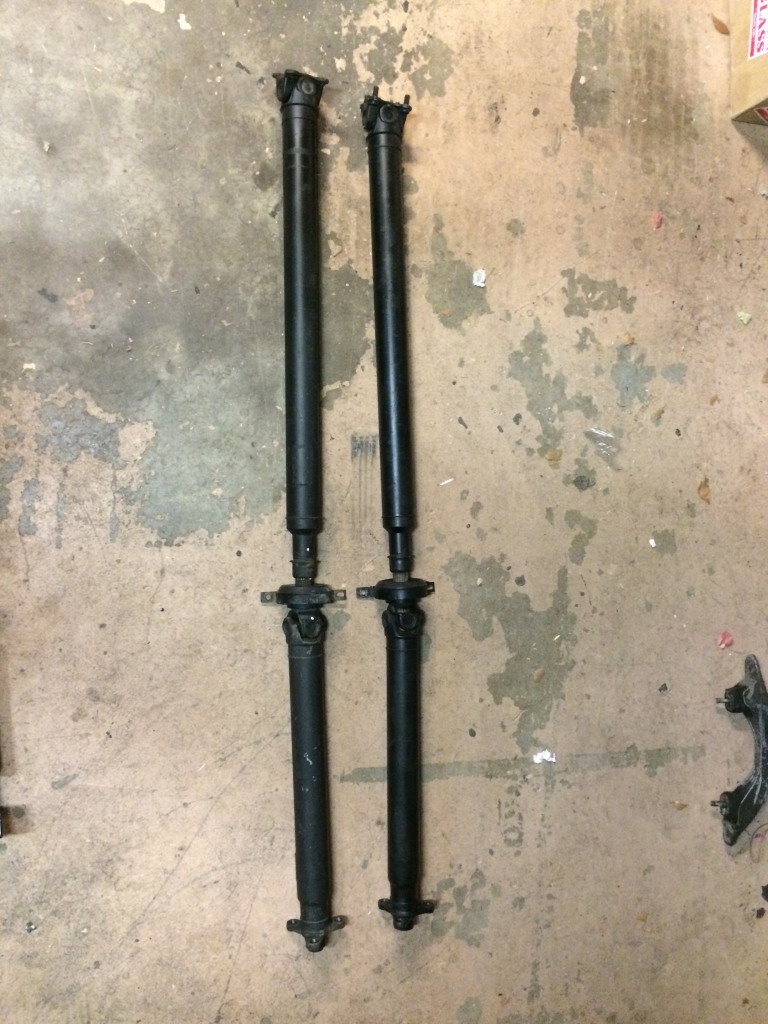
E28 is on the right.
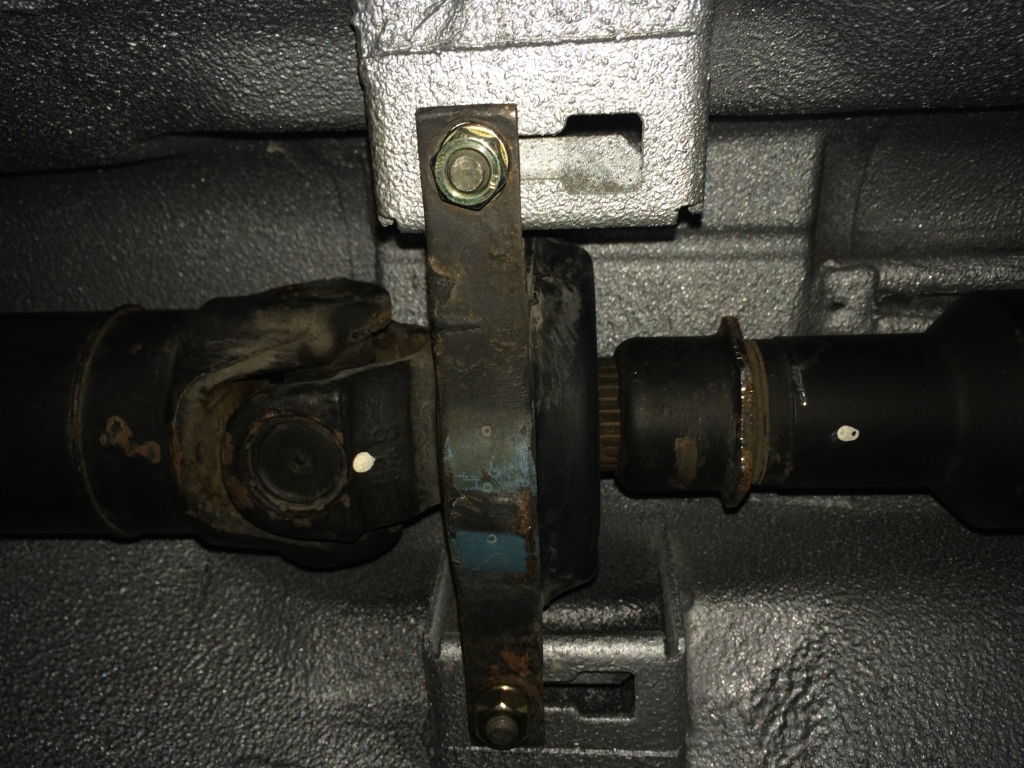
Center bearing is pre-loaded and it looks correct!
I figured out later that the side-loader diff is shorter in length compared to the E28 diffs. I was stuck. Shifter hole was in the same spot, center bearing mount is further back and the diff mount is in the same spot, so the only variable is the location of the input flange, which would add length to the shaft.
So, once that was all done, the motor was properly supported.
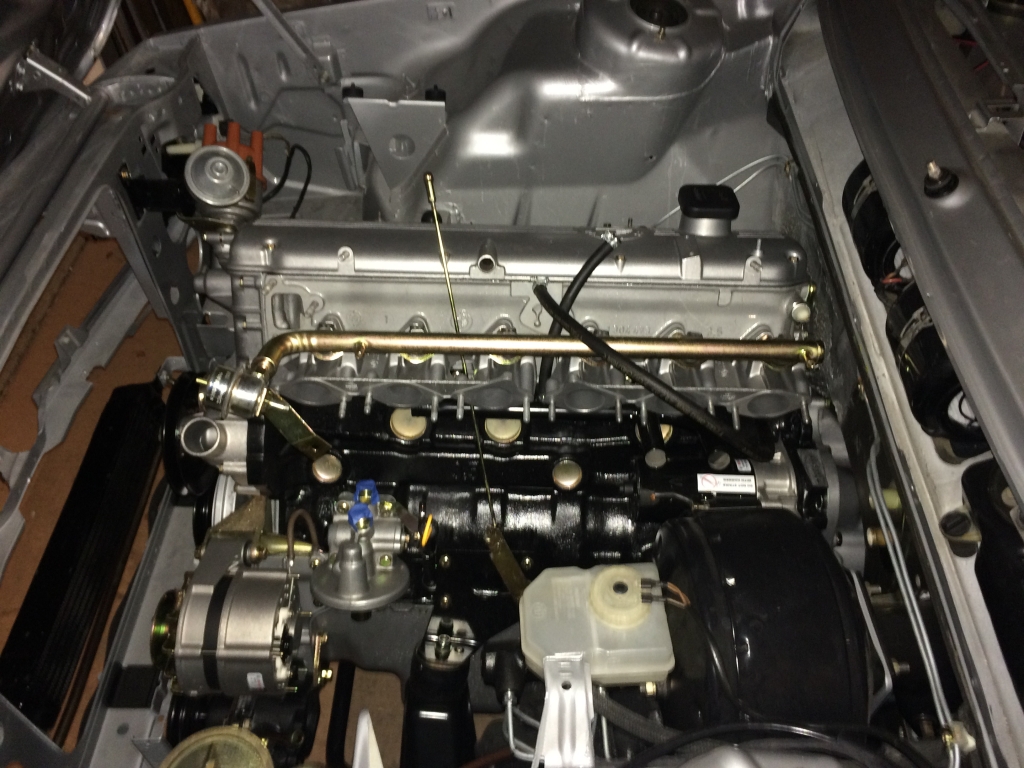
Then I installed the downpipes and called it a night.
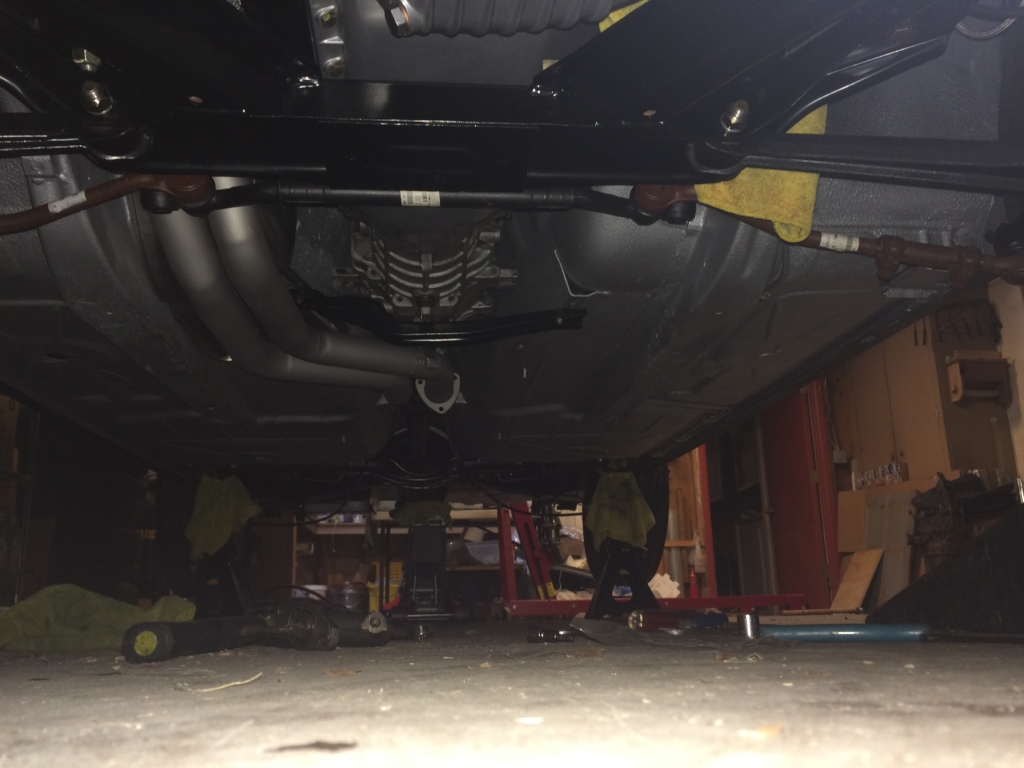
I put all of the tools away and went to 5erWest. While on the way, I decided to check in again with the Porsche shop about my oil cooler lines, since this is something that shouldn't be taking this long and it's holding me up, since I need to attach the cooler lines with the airdam off, then install the airdam before I put the radiator in so I can get to all of the fasteners. Sure there are other ways to do it, but I shouldn't have to. Turns out, apparently, they had to order a couple different kinds of hose since nothing they had was working. I told him I'd be gone a week and I'd check in when I came back.
While I was gone, I got a shipment notification on my dashboard. It showed up while I was gone, so I opened it when I came home.
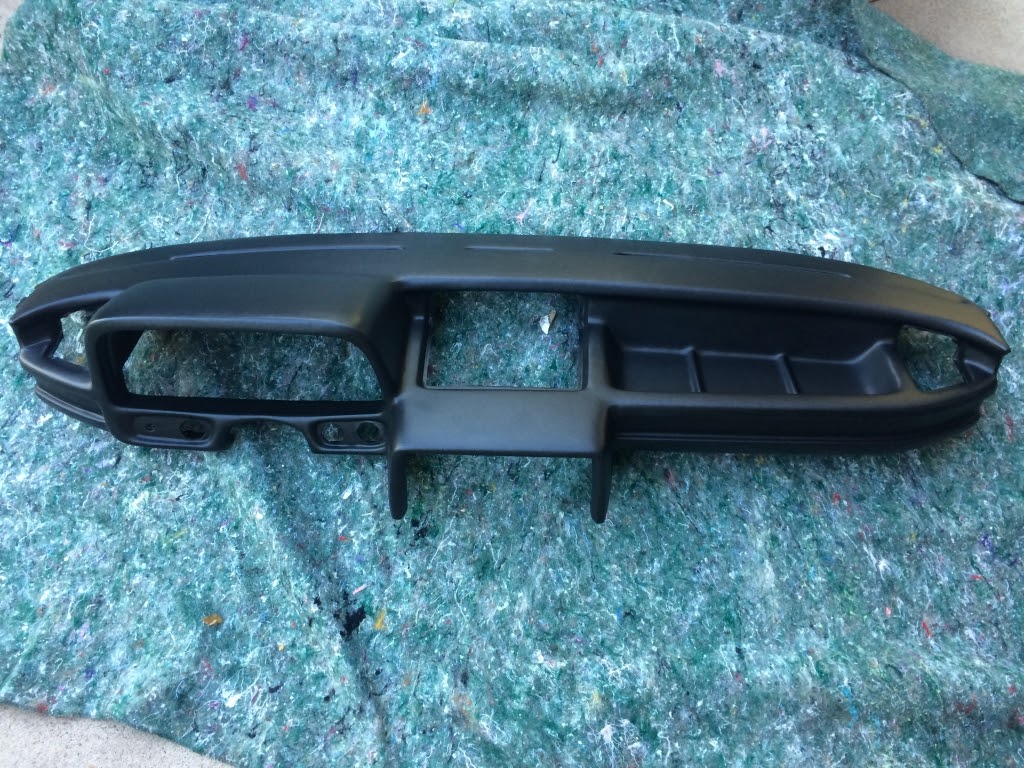
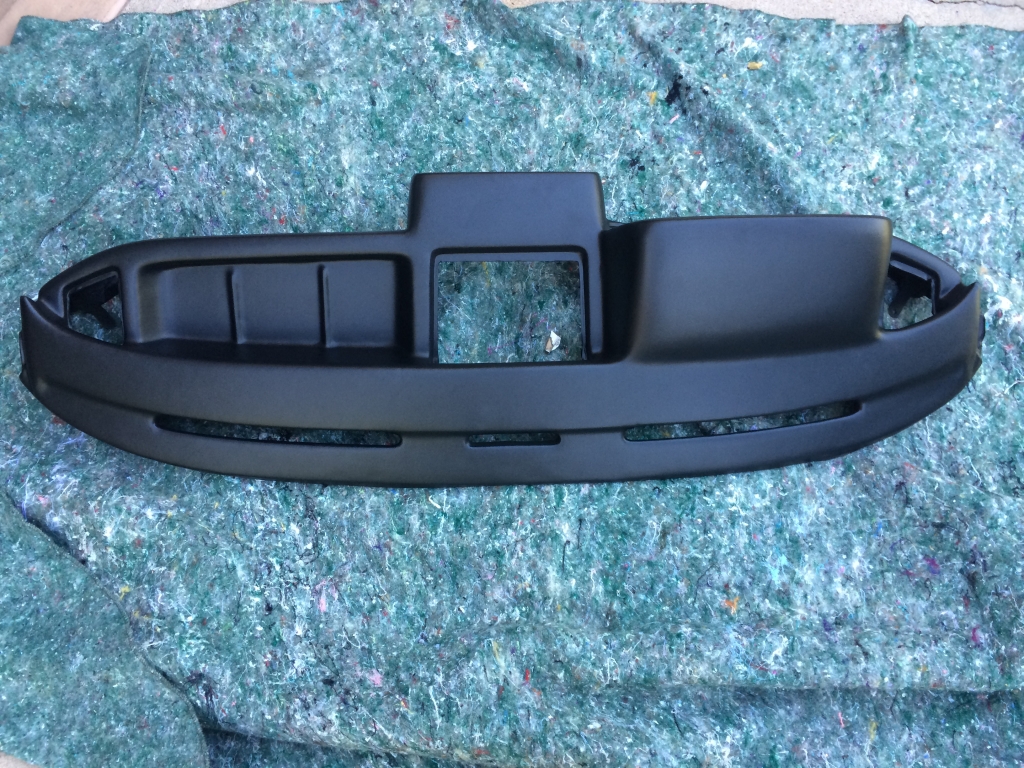
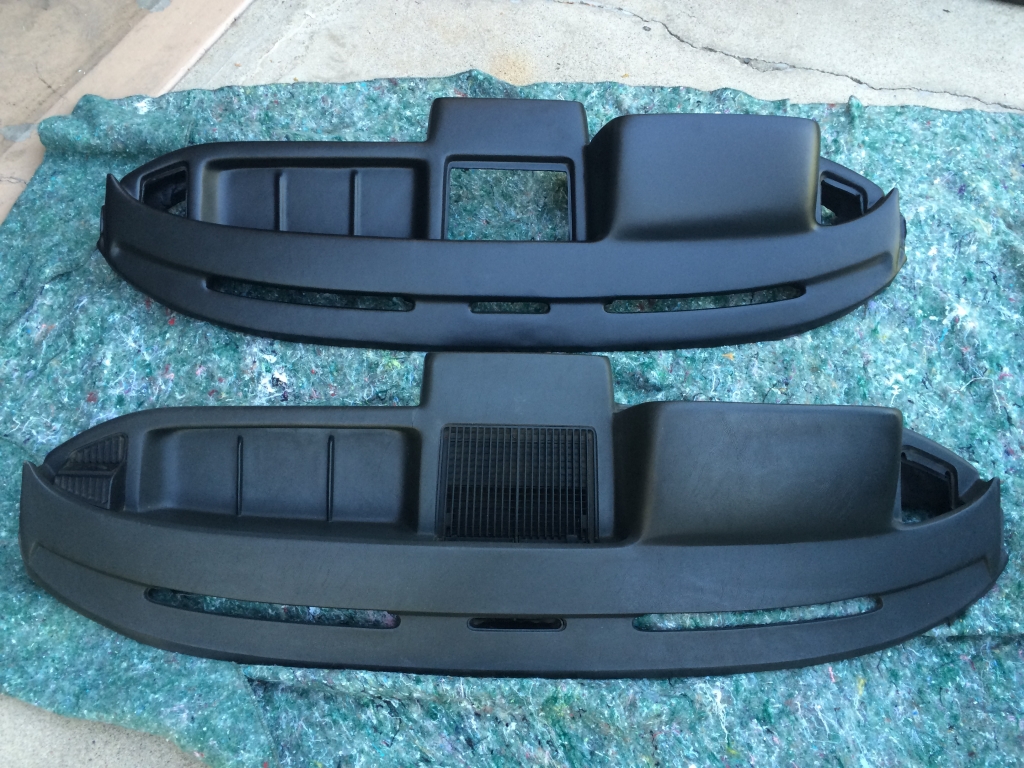
An original dash is in the foreground. They're the same size.
I decided to install the wood.
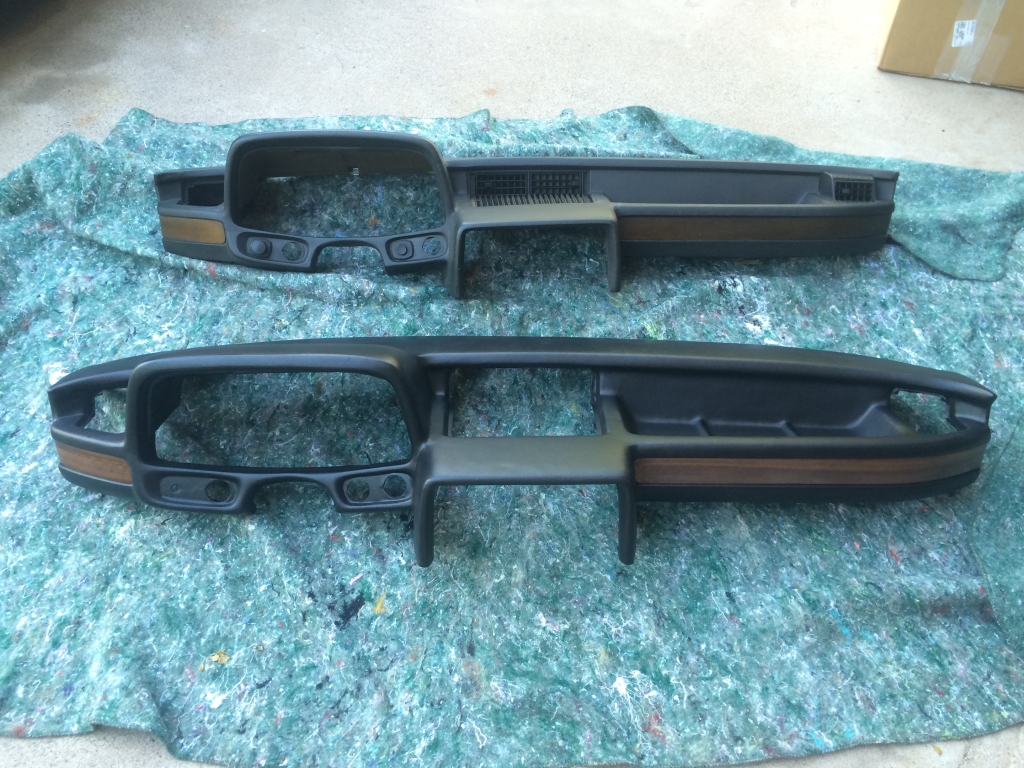
I'm not sure what I think about it. I see a lot about it that I don't like. Meh. Of course, there's nothing I'm going to be able to do about it, so fuck it, I guess.
So, I got back to work on things I can do something about.
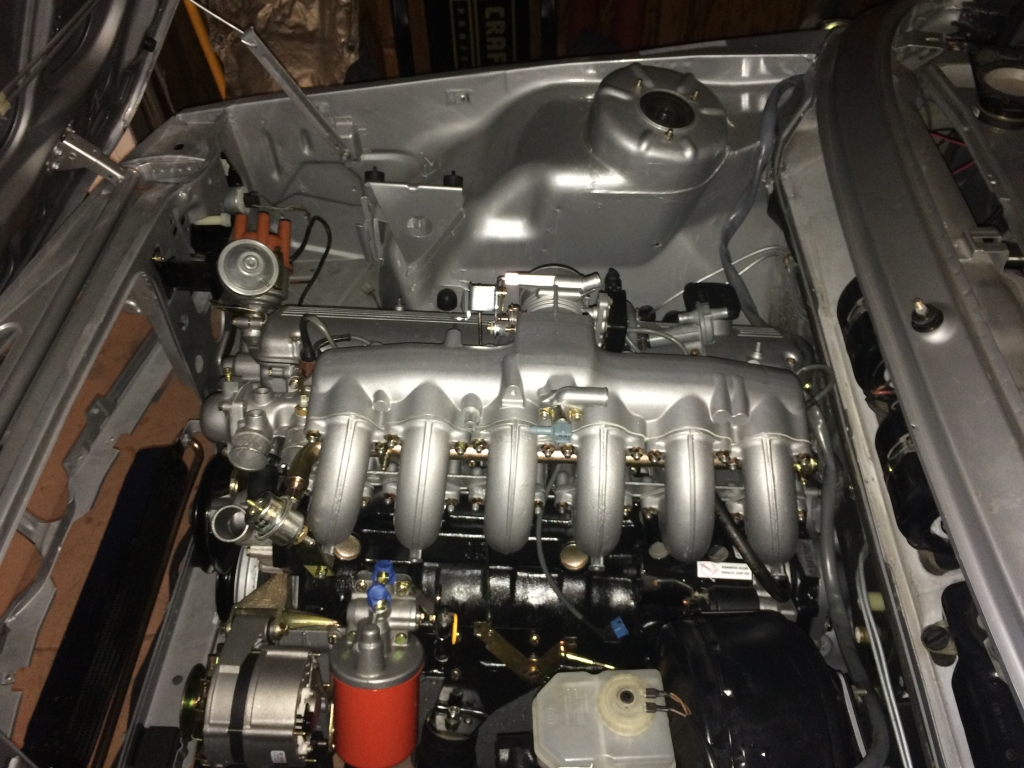
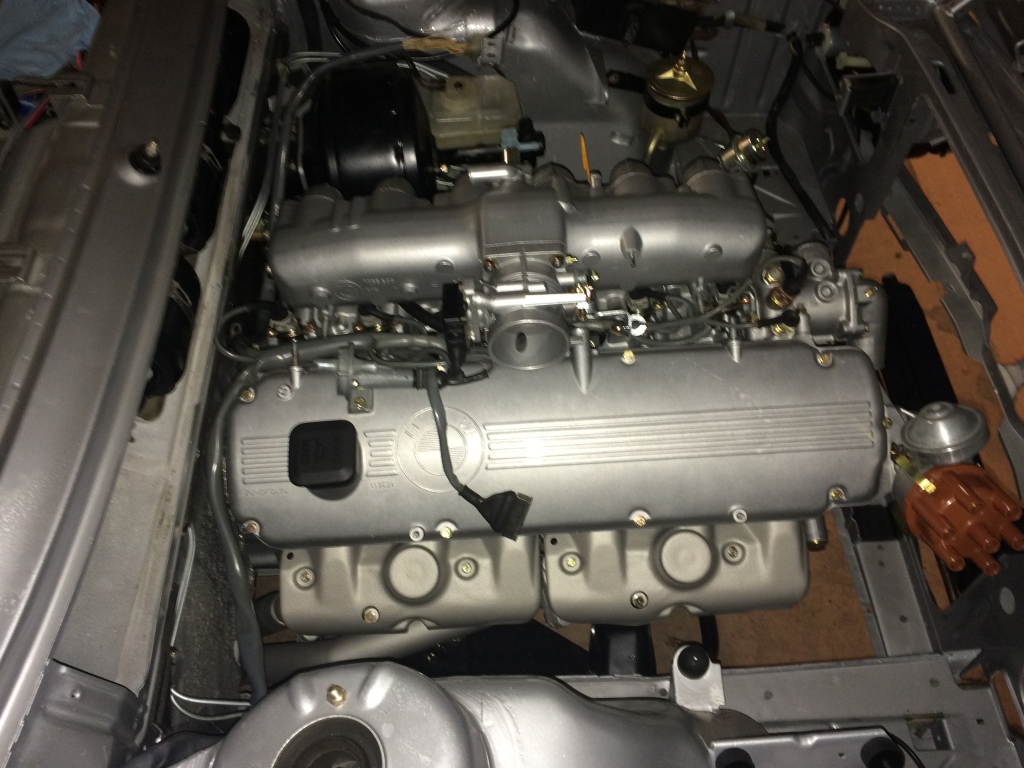
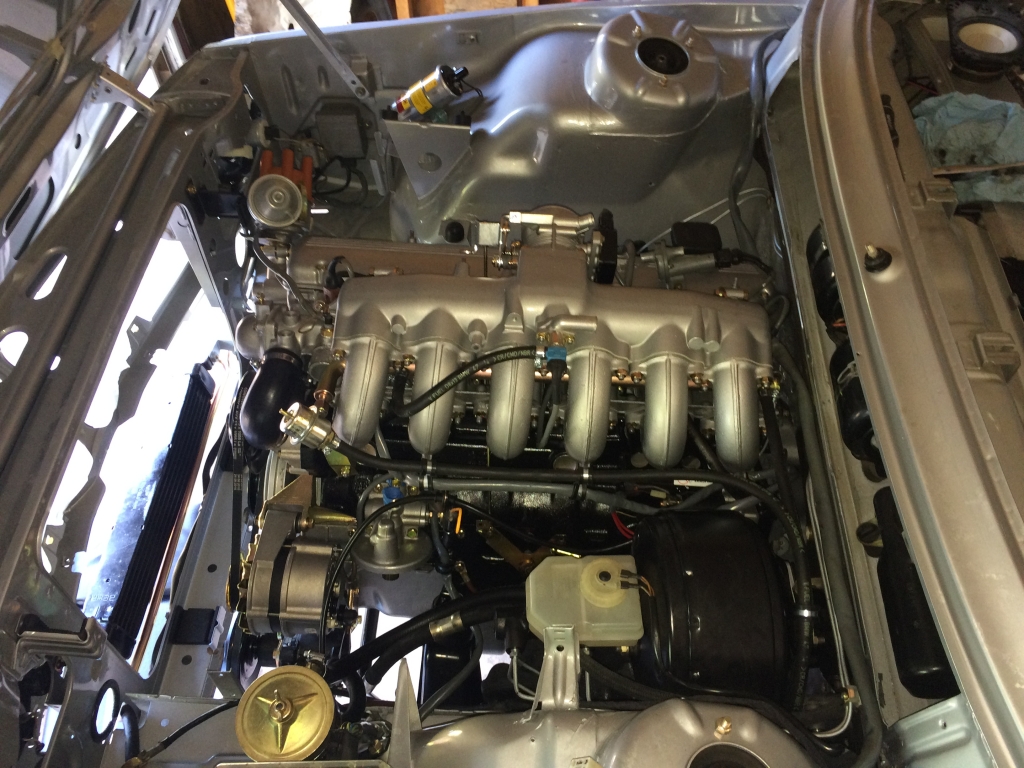
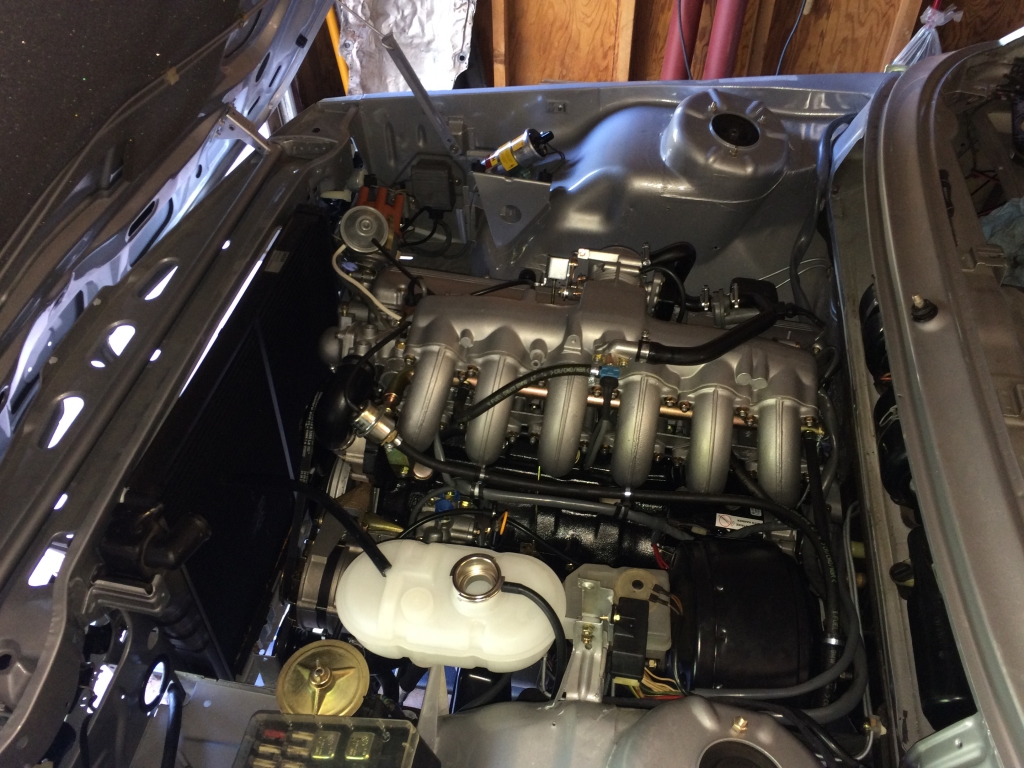
The radiator is only in there to measure the length to cut the overflow hose and make sure my hoses go where they're supposed to. I had to order all of the hoses from the dealer, but they're apparently suggesting that the heater hoses are Euro parts and I have no ETA on those.
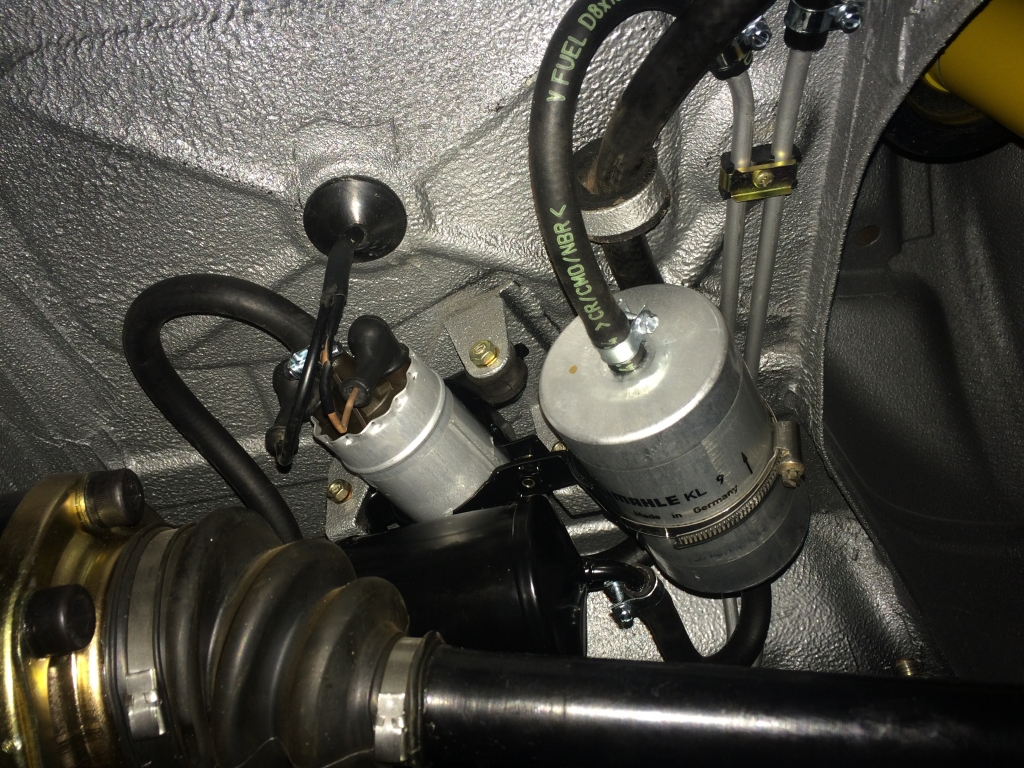
So, with that kinda done up front, I decided to wrap up the tasks under the car that would be easier to do without the exhaust in the way. I torqued all of my axle bolts, made a tie-rod adjustment and installed all of the cotter pins for those and then I put my fuel pump bracket together.
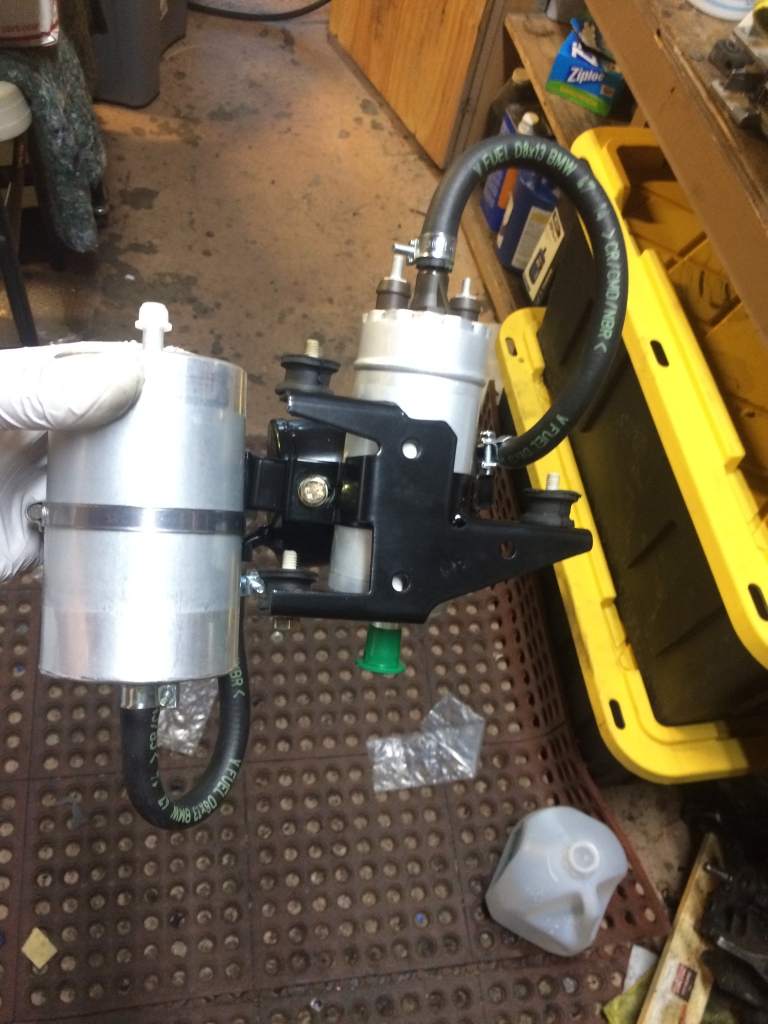
Those rubber mountings are $11 ea.
I put the air box together despite waiting on the AFM elbow and the intake boot, but I wanted to see how the airbox looked under the hood. It's been a long time since any of this has been in the car.
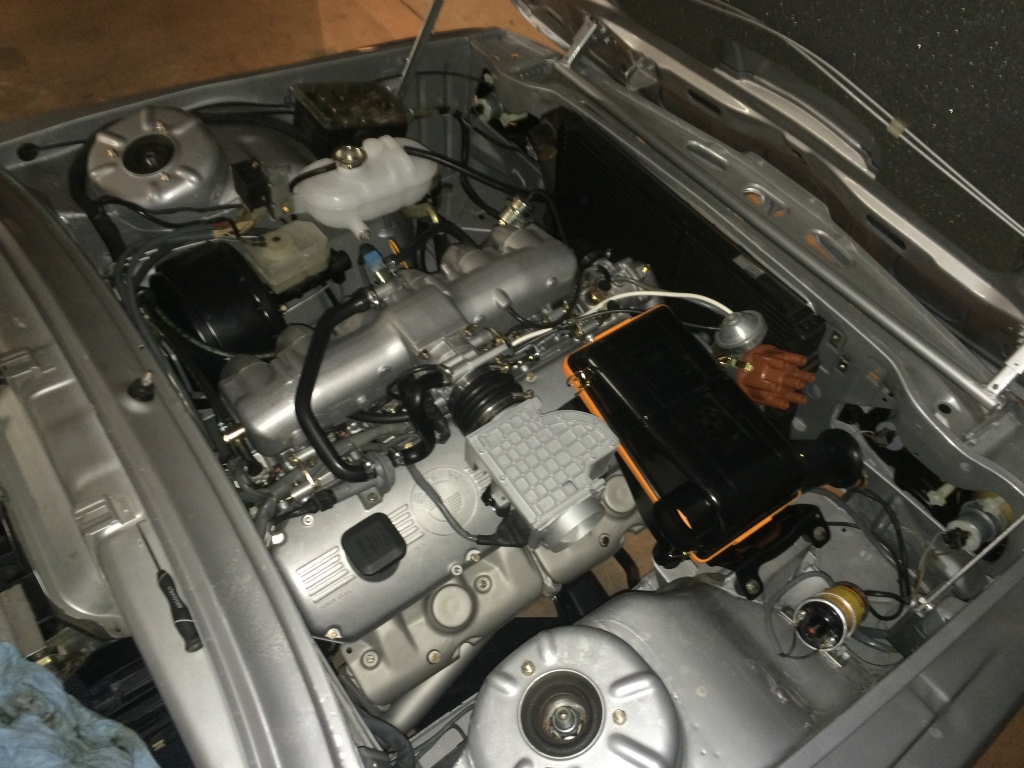
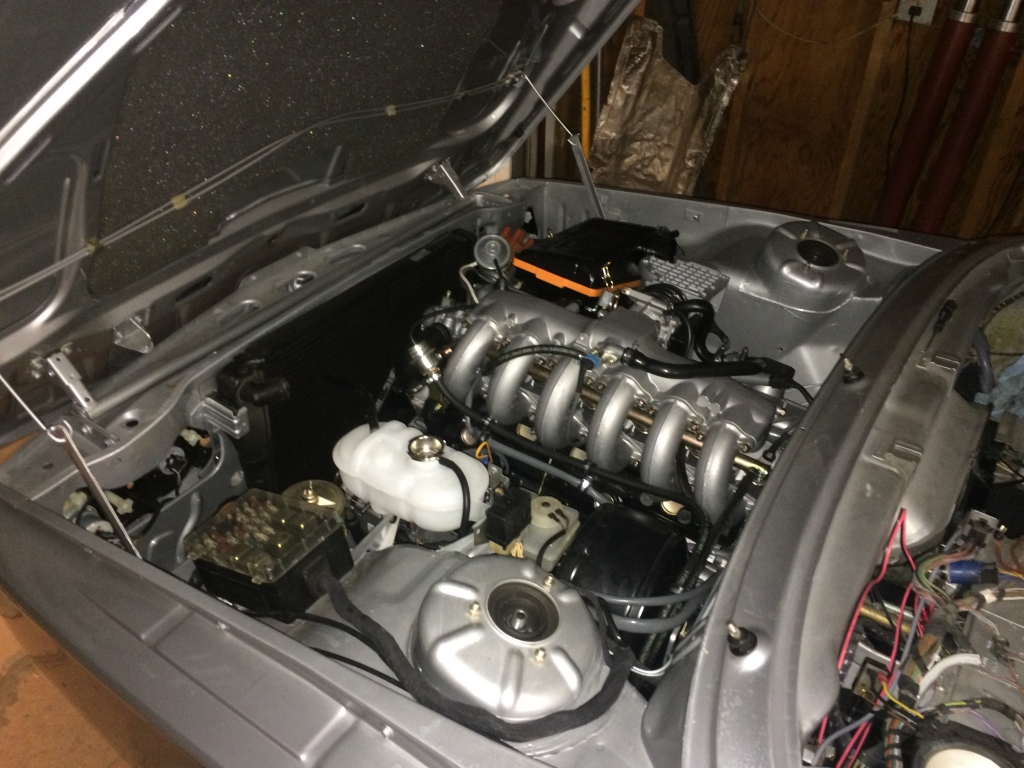
You will also note that the hood insulation is installed.
I apparently lost my driver door lock. I found it with some trim clips I pulled off the car years ago and decided to put it in a safe place. No idea where that is, but I managed to get another one from a car in the yard. Despite having several E28 lock cylinders, the E12 ones don't use plastic trim rings, so they're different. I gave up on looking for it as right now, I just don't have the time and I have essentially a matter of days to finish this car, so today, I took the lock over to a locksmith I've known forever and she wouldn't do it. I was frustrated since the place she recommended isn't someone I'd want to deal with, but after talking for a short time, she remembered she got a bunch of weird stuff from a guy who went out of business and amongst it was this:
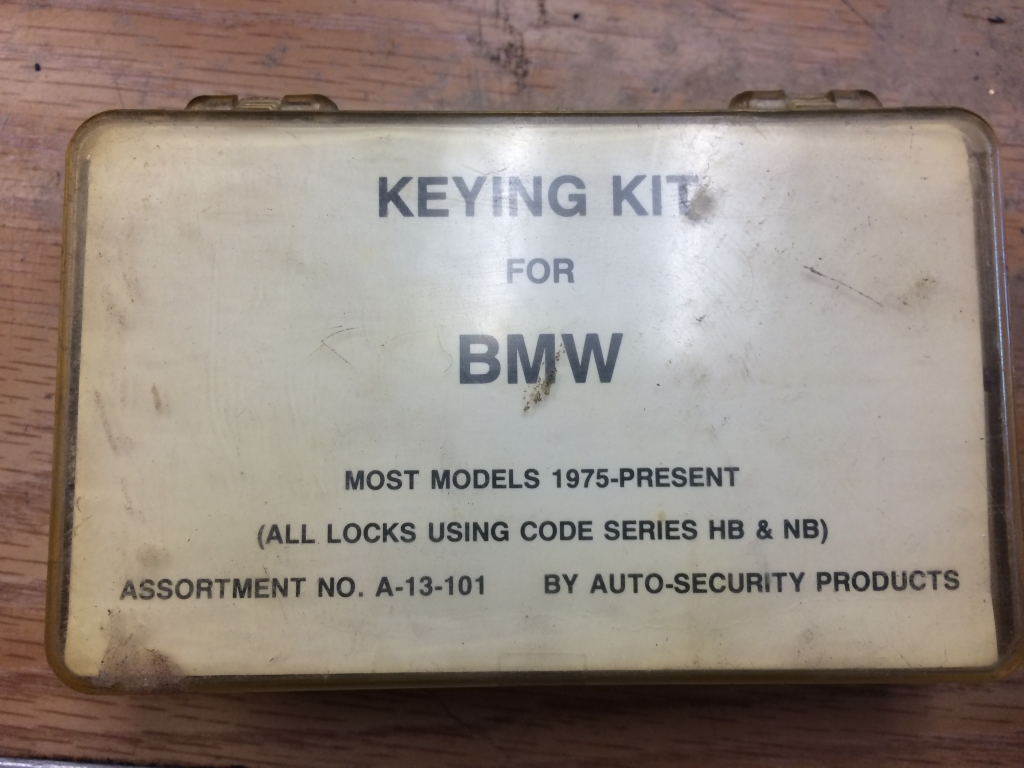
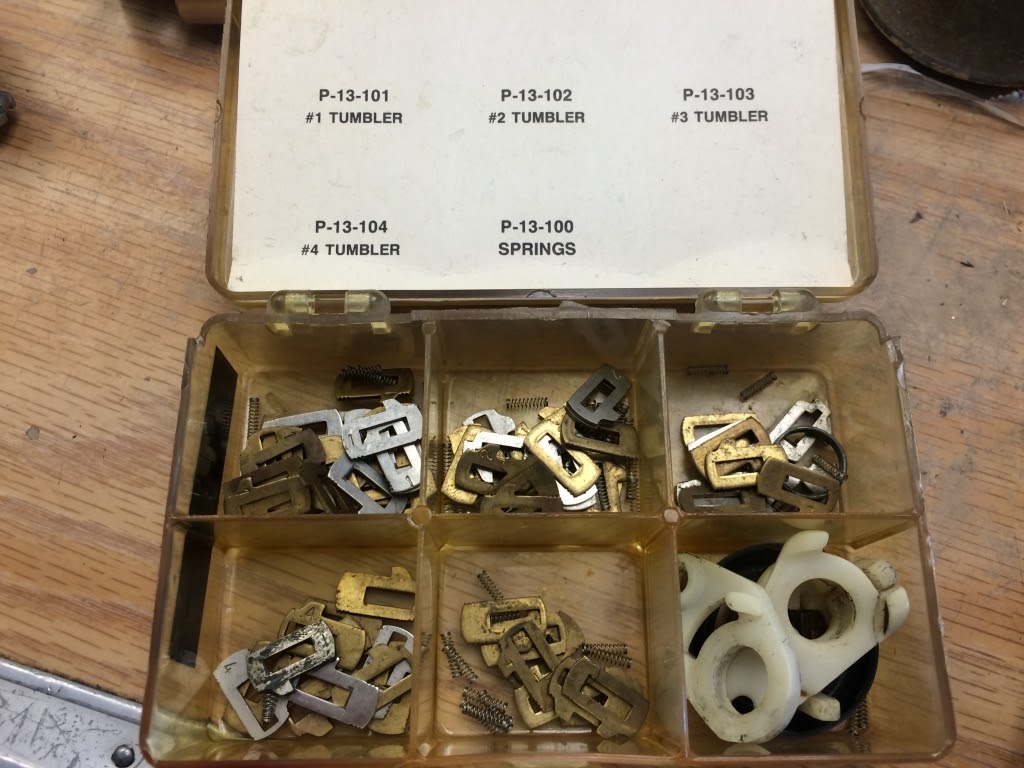
$10 and it was mine. This wasn't something I really wanted to do myself, but she taught me a lot years ago about locksmithing so I figured what the hell. I might enjoy it even though I'd rather trade money for time at this point.
Later today, I picked up the MTL/MT-90 for the transmission and I had the oil for the diff on hand already. I picked up some more parts and was frustrated that nothing was getting done and I've got work stacking up, so I decided to just work on the car some more.
I filled the transmission and the differential and rekeyed my lock cylinder to the key. Works perfectly, so pretty happy about that. At this point, I'm ready to put the rest of the exhaust in, which I hope to do tomorrow. Would be cool to bleed the clutch and brakes so I can put it back on the ground, but I'm not going to get ahead of myself.
Sorry for such a short update, but it's tough to keep track of every little thing that happens.
For the hell of it, I decided to just put the ceramic-coated exhaust manifolds on as well.
I picked up a bunch of stuff from the plater, so with that done, I could mount the oil cooler. It didn't need to be mounted now, but I figured why not.
Also, with that, I had previously talked to a Porsche shop about having them rebuild my oil cooler lines. I talked to them because they had listed a custom line for a 914 which had an M22x1.5 fitting but apparently they couldn't sell me any, so he said he had the hose, the crimp collars and the crimping tool. All I had to do was get my old fittings plated, bring them and the old hose to them and they would make it happen. I sold the guy a set of BBS E75s a few years ago for a vintage FIA race car they were working on, so it seemed like that connection was going to pay off.
While waiting for all of the pieces to fall into place to start motor assembly, I cleaned up the replacement ignition harness I purchased. It was very supple and in nice shape, so it was worthwhile. Much nicer than my original.
Work finally began on motor assembly June 16. Block was primed and painted. Morning of the 17th, we began with freeze-plug installation.
It pays to have the right tools. Getting these things seated properly is critical. It takes a lot of effort too. Fingers crossed they all seal and we don't have to replace one in the car.
Next, we started with the crank bearings. My original crank was in excellent shape, measured out perfectly for standard bearings. My original bearings weren't even worn. Here's a shot of the plastigauge on the #1 main bearing:
The other six were dead-on, so we were a go with the standard bearings.
Here is a shot of my shot-peened rods.
Everything was within spec for those as well. I had to go to work, unfortunately, so I missed the fitting of the rings and whatnot. By the end of the day, 5 of the 6 pistons were installed. #6 was installed Monday morning due to a problem with the oil rings for that one. At that point, the really time-intensive, focused work was completed.
Of course, I still had plenty to do like reassemble my throttle body and the oil filter housing.
I went to storage and pulled this dogleg off the shelf. Came from a Euro 635CSi that had an engine fire. Pretty low miles, too, and I could assume that it was not the reason the car caught fire.
I spent the next several hours cleaning it up on my outdoor workbench.
With that sorted, I turned my attention toward getting the wiring straightened out in the car. I had talked to Terry about getting the car in to do the headliner and he was booked up solid, suggesting that July 11 was the earliest he could take it. I explained where I was at, behind on everything, and while it wasn't his fault, headliner has to go in before the rest of the interior. He said he'd take it June 27. Great.
So, I put a battery in it and figured I'd either die or see some progress.
I didn't die.
So, that was progress. At the time, I had some lock motors acting up and only the driver window worked. Still, Nothing shorted out and I called it a win considering the last time this car had electricity was August, 2010.
Back to the motor. This time, head assembly!
And voila!
We discovered that you cannot buy the oil pump sprocket anymore. It comes on a new pump, but it cannot be purchased separately. It might have made the decision between spending $475 on pump rebuild parts versus $530 on a new pump, but the only part of the pump that was reused was the pickup, so I guess it wasn't that bad. Febi stopped making it, too, so we ran into some issues. Alex found a new one on eBay, so we waited.
I confirmed my appointment with the upholstery shop. They had me down for Monday, so I made the final push over the weekend to finish up everything I thought was necessary for them to install the headliner. After confirmation, I ordered a tow truck for first thing Monday.
Back at home, I installed all of my stereo wiring and installed my Bosch power antenna. It took several careful, deliberate readings of the instructions, but we finally got it.
Monday, June 27 rolled around and the car rolled onto a tow truck. Oh how I wished Sonny G would have picked up his phone.
I show up and was asked why I was there and why the car was there as I wasn't on the schedule. When we pulled up, it was clear there were many cars there. Fortunately, they took the car and Terry got on it ASAP, after he went through how much work was going to be involved. I showed him a few things on the '75 E12 so he can see how the headliner goes in, as on E12s, the rear of the headliner is a floating piece, not wrapped around the pinch weld, like E28s - not that he knows E28s, but it's an important distinction.
He had a couple of questions later in the day, so he asked I come by to answer them. He had already made progress.
Terry suggested he had a long way to go on it, so I kept working on things on my end. I had a decent batch of stuff at the powder coater, so I picked all of that up.
I put my power steering pump back together.
Then while looking at something on one of the E24s, I happened to notice that one of them had the harness connector I needed for the CTS attached to the CSV. So, I harvested that guy to replace this:
Now that I'm a pro at de-pinning these Bosch connectors, I made quick work of it and replaced the boot, too.
Tuesday, June 28, I got a call around 10am saying the car was ready to go. I went over and had a look.
Installation cost was $700 (with a discount!). Towing was $100. Sewing the headliner was $200 and the fabric cost $150 from BMW (3 meters). There were other people that could have installed it but I didn't want more complaining and excuses suggesting that the headliner they didn't sew was wrong versus a failure in their process or vice-versa. I figured the person who made the headliner should be responsible. Of course the B7 Turbo was a headliner I bought sewn for $75, $150 to install and no towing. It also only took 2 hours to install, so this whole process was sticker shock to me.
Friday, July 1, back on the motor. The oil pump sprocket showed up Friday morning thanks to the USPS last mile delivery where it takes three days to get something after it shows up in your city. Of course, despite the eBay photo showing it coming with the nut, there was no nut. Fortunately, Alex had one. It's an M10x1 jam nut, so not exactly super common.
With that sorted, oil pump was installed, head installed and first torque sequence squishing my $140 headgasket.
While waiting for the second torque sequence, we installed the oil pan.
Finished up the chain, primed the tensioner, installed the upper timing cover.
Valve adjustment done and this motor is ready to go in the trash.
Off the stand onto the hoist. Install the rear freeze plug, then the flywheel.
We loaded it into the back of his Aztek and I drove that to my house and unloaded my motor, then started attaching things to it since I didn't know what else to do with it.
I had to order motor mounts on eBay, so my idea of putting it in the car over the weekend was a no-go.
Mike, the painter, came over Sunday morning to fix a spot under the car next to the transmission. While he was there, he re-textured these for me and I painted them.
Then I worked on the rest of the trunk plastics which are fragile and a pain in the ass.
I thought quite a while about how to put the motor into the car. I was going to put it in from underneath but the reality is that without a lift, it would be a disaster. The problem with going in from the top is the hood and the angle of the motor, but my friend Scott (scarey013) helped me resolve the angle issue. I had thought about using a ratchet strap but I wasn't totally comfortable with it. Sure enough, it worked perfectly. With that ready, the motor was ready to go in. Adam (ldsbeaker) came up from Yuma for a visit and my motor mounts had just arrived, so we fueled up on Waffle House and got to work!
It was at this point we figured out to remove the left front wheel and he just happened to have his impact ready with a 17mm on it, so he's in the background there.
It took maybe 10 min to put the motor in the car. 30 min start to finish from moving the engine hoist to lowering the car off the jack.
Alex came by that afternoon and we torqued the crank nut.
With the motor in the car, that's like a big deal and now I can just work on stuff. I started putting my intake manifold together.
Of course, waiting on parts, so I installed the accessories.
and the harmonic balancer, of course.
I went to the exhaust side and installed the exhaust manifolds and their heat shields.
Back to the intake side.
Either the exhaust on my car is original and just in awesome shape or it was replaced at some point. I looked into buying new, but the car sounded great before and it didn't even show any weak spots, so I borrowed a van from work and took it to the powder-coater to have it ceramic coated to match my manifolds and downpipes.
My next task was to work on installing a transmission in this thing. I wanted to get the engine properly supported rather than leaning against the firewall. I installed the clutch using an alignment tool. Everything went great. Installed the bell housing with a new clutch fork, pivot pin and spring. I was going to go with the stainless pivot pin, but the original lasted this long. I then started doing the final tasks on the transmission. selector shaft seal, new reverse light switch, make sure the fill plug is loose, install the speedo drive, etc. Everything went fine until I got to the last one. I pulled the plug out and found that instead of having a gear on the output shaft that drives the speedo drive, it had a spacer. I looked into what it would take to swap it, since I have the 262 box of rocks from the 530i and found that I'd have to pretty much take the back of the transmission apart unless I wanted to make a special tool on the milling machine I don't have drilling 3.999mm holes for 4mm screws then slicing them at the right angle to grab the gear and pull it out. Plus, that would also require pulling the output flange, etc. So, I went back to the shelf of doglegs and grabbed another one, supposedly rebuilt, that I bought from Al Taylor in '09. It came from an early 6er, so I cleaned it up. Of course, I already used my selector shaft seal on the other one and despite the selector shaft seal being used on 40 different BMWs - even current models, there was no way I could find one in town on a Saturday, so I popped the old one out (from 2006) and decided to tap a new one in while it was installed. So, I got under the car, put the transmission on my right thigh and got it up into position, only to find it stopping about 1/2" from the bell housing. I moved it around, tried turning the shaft (I put it in gear, in case I had to rotate it to get through the clutch). Nothing. I did this four more times over the course of three hours. No luck. I put the alignment tool in each time and it was right on and smooth. I couldn't believe it and while Kyle told me the tools are junk, I refused to believe it. I finally gave up and sent Alex a text asking if there was more than one size of pilot bearing or something. I measured all of mine in the garage at the time (2 265/5, 1 265/6 and a 262) and they were all the same. He said he'd come help me out the next morning. I didn't want to put him out on a Sunday but he insisted.
The next morning, he came by and we spent quite a bit of time on it, ultimately starting from scratch,but using the transmission to align the clutch. That did the trick and we got it within 1/8" and that was enough to snug up with the nuts. It also worked out perfectly that a mechanic of his was at the shop working on his own project, so I could swing by and grab a selector shaft seal! Back in business. I got back to work and put the shifter in.
After that, it was driveshaft time. I wish I could go to the store and buy individual packs of bread - like two pieces. Enough for a sandwich, since I don't want a loaf of white bread. After using white bread for what I used it for, I definitely don't want to eat white bread.
I cleaned up my Beyer reman driveshaft and put it in the car. Unfortunately, it seemed too short. This driveshaft came from the E24 and was about 1000 miles old. I'm not sure it started the fire either.
I didn't get it. Couldn't pre-load the bearing and I had WAY too much of the splines showing. I started wondering if it was the wrong shaft, but compared to the other E28 265 shaft at the house, it was the same.
I made a trip to storage to grab the original driveshaft from this car. It was in phenomenal shape. center bearing like new, pilot bushing tight like a tiger and the u-joints were silky smooth. I wiped it down and decided to Czech it out before I cleaned it up.
E28 is on the right.
Center bearing is pre-loaded and it looks correct!
I figured out later that the side-loader diff is shorter in length compared to the E28 diffs. I was stuck. Shifter hole was in the same spot, center bearing mount is further back and the diff mount is in the same spot, so the only variable is the location of the input flange, which would add length to the shaft.
So, once that was all done, the motor was properly supported.
Then I installed the downpipes and called it a night.
I put all of the tools away and went to 5erWest. While on the way, I decided to check in again with the Porsche shop about my oil cooler lines, since this is something that shouldn't be taking this long and it's holding me up, since I need to attach the cooler lines with the airdam off, then install the airdam before I put the radiator in so I can get to all of the fasteners. Sure there are other ways to do it, but I shouldn't have to. Turns out, apparently, they had to order a couple different kinds of hose since nothing they had was working. I told him I'd be gone a week and I'd check in when I came back.
While I was gone, I got a shipment notification on my dashboard. It showed up while I was gone, so I opened it when I came home.
An original dash is in the foreground. They're the same size.
I decided to install the wood.
I'm not sure what I think about it. I see a lot about it that I don't like. Meh. Of course, there's nothing I'm going to be able to do about it, so fuck it, I guess.
So, I got back to work on things I can do something about.
The radiator is only in there to measure the length to cut the overflow hose and make sure my hoses go where they're supposed to. I had to order all of the hoses from the dealer, but they're apparently suggesting that the heater hoses are Euro parts and I have no ETA on those.
So, with that kinda done up front, I decided to wrap up the tasks under the car that would be easier to do without the exhaust in the way. I torqued all of my axle bolts, made a tie-rod adjustment and installed all of the cotter pins for those and then I put my fuel pump bracket together.
Those rubber mountings are $11 ea.
I put the air box together despite waiting on the AFM elbow and the intake boot, but I wanted to see how the airbox looked under the hood. It's been a long time since any of this has been in the car.
You will also note that the hood insulation is installed.
I apparently lost my driver door lock. I found it with some trim clips I pulled off the car years ago and decided to put it in a safe place. No idea where that is, but I managed to get another one from a car in the yard. Despite having several E28 lock cylinders, the E12 ones don't use plastic trim rings, so they're different. I gave up on looking for it as right now, I just don't have the time and I have essentially a matter of days to finish this car, so today, I took the lock over to a locksmith I've known forever and she wouldn't do it. I was frustrated since the place she recommended isn't someone I'd want to deal with, but after talking for a short time, she remembered she got a bunch of weird stuff from a guy who went out of business and amongst it was this:
$10 and it was mine. This wasn't something I really wanted to do myself, but she taught me a lot years ago about locksmithing so I figured what the hell. I might enjoy it even though I'd rather trade money for time at this point.
Later today, I picked up the MTL/MT-90 for the transmission and I had the oil for the diff on hand already. I picked up some more parts and was frustrated that nothing was getting done and I've got work stacking up, so I decided to just work on the car some more.
I filled the transmission and the differential and rekeyed my lock cylinder to the key. Works perfectly, so pretty happy about that. At this point, I'm ready to put the rest of the exhaust in, which I hope to do tomorrow. Would be cool to bleed the clutch and brakes so I can put it back on the ground, but I'm not going to get ahead of myself.
Sorry for such a short update, but it's tough to keep track of every little thing that happens.
Re: E12 M535i Project - 07-26-16 Update
That is looking stupendous.
-
Adam W in MN
- Posts: 5053
- Joined: Feb 12, 2006 12:00 PM
- Location: Don't waste my motherf***in' time!
- Contact:
Re: E12 M535i Project - 07-26-16 Update
It's like watching a restoration that BMW Mobile Traditions would do. Everything is so perfect and shiny, wow.
Your attention to detail is tremendous!
Your attention to detail is tremendous!
Re: E12 M535i Project - 07-26-16 Update
Epic! I can't wait to see it at Monterey.
Re: E12 M535i Project - 07-26-16 Update
dayum Son!
you're gonna need a showroom before too long.
you're gonna need a showroom before too long.
-
Sapotorito
- Posts: 323
- Joined: Apr 18, 2014 10:31 AM
- Location: Chandler, Arizona
Re: E12 M535i Project - 07-26-16 Update
Wow Chris, this is really extraordinary!
Re: E12 M535i Project - 07-26-16 Update
Dang!!! So much awesome.
-
Mark 88/M5 Houston
- Posts: 8548
- Joined: Feb 12, 2006 12:00 PM
- Location: Far North Houston
Re: E12 M535i Project - 07-26-16 Update
Chris, you set a standard of restoration that has to rival many manufacturers specialty shops. I am in awe! I hope to make it to Phoenix one of these days and see your collection, buy you dinner and a couple of beers. 
Re: E12 M535i Project - 07-26-16 Update
very impressive work and awesome looking car. keep on swimming.
-
Chimi-Changa
- Posts: 1652
- Joined: Nov 08, 2011 11:02 PM
- Location: Westboro, MA
Re: E12 M535i Project - 07-26-16 Update
Savage progress!
Better than new. This is the stuff dreams are made of.
Better than new. This is the stuff dreams are made of.
Re: E12 M535i Project - 07-26-16 Update
I would pay to watch. Seriously. No 'omo.
-
austin8753
- Posts: 1492
- Joined: May 16, 2010 1:37 AM
- Location: Portland, Oregon, USA
Re: E12 M535i Project - 07-26-16 Update
Fuck yeah! Looks fantastic, Chris.
Re: E12 M535i Project - 07-26-16 Update
If your plan/goal is to have the car ready for Legends in Monterey next month, I'll keep an eye out for you and say hello if I see 'ya. Then I'll get you some demerits by drooling all over this fine beast. 
Jim
Jim
-
maybeillbuyit
- Posts: 535
- Joined: Feb 01, 2014 12:00 PM
- Location: Vancouver BC
Re: E12 M535i Project - 07-26-16 Update
Beautiful work! Detail, detail , detail! Many thanks for spending the time to document and share. Its a privilege to to be able to watch your progress and read the thought process. I almost feel part of the action ( you wouldn't want that  )
)
Re: E12 M535i Project - 07-26-16 Update
Just stunning. I absolutely love these updates! Not that Chris even considered such, but it has to be comforting to know that since this project got underway the market value for the M535i has easily doubled if not tripled in price. 
What a treasure it is to be able to follow along in the professional restoration of such a rare and special car.
Regards,
Chuck
What a treasure it is to be able to follow along in the professional restoration of such a rare and special car.
Regards,
Chuck
Re: E12 M535i Project - 07-26-16 Update
Chris,
Thanks for taking the time to share with everyone. It's a fun and educational read!
-Matthias
Thanks for taking the time to share with everyone. It's a fun and educational read!
-Matthias
Re: E12 M535i Project - 07-26-16 Update
Can not wait to see it finished...Bravo!
Re: E12 M535i Project - 08-13-16 Update :(
I have been going back and forth on posting an update. Still not sure it's a great idea but whatever.
Also, Google broke the Picasa thing, so if the pictures don't show up, don't worry. They sucked anyway.
Right around the time I posted this update, I ordered tires from Tire Rack. They said I'd have three the next day and two in a week. Great.
I had been going back and forth with the Porsche shop that was working on my oil cooler lines. There's really no good reason it should be taking this long, but apparently the correct cloth-wrapped hose is not available with the correct OD/ID for this application, so we had to look elsewhere. We made arrangements for Friday the 29th. His schedule has been tough since they're moving their shop of 30 years into a brand new 30,000 square foot facility and obviously this piddly oil line project for a non-Porsche has taken enough of their time. Of course, he didn't say any of that and I really did appreciate the effort they have put into doing this the right way.
I got the driveshaft heat shield installed. It sucked, mostly because it's not in really great shape, but believe it or not, the original from the car is the best one I've found. Part number was superseded to the E28 style which doesn't fit the E12 since the studs are in different locations. Fortunately, I did my homework on that before ordering one blindly. Of course, as with everything on the car, it took two hours to attach six M6 nuts and washers. Not sure why but whatever.
While I was still pissed off from the heat shield, I decided to hang that giant, heavy, hard-to-balance exhaust alone on my back with the car on jack stands. I got it done, though I did have to do some light sanding and whatnot due to the thickness of the ceramic coating where the front muffler mates with the downpipes. I was so excited by the experience I didn't take photos.
With that done, I called it a night. On the 29th, I went to get the cooler lines and said that since the motor and oil cooler are in the car, why don't I take the lines before we crimp them and make sure they fit. He showed me what he had for hose and while it wasn't as nice as the original, it was better than many things being a high temp, high pressure hose. We put them together and I went home, and mocked them up.


The shorter line was really tight and I didn't like the way it was sitting. Couldn't be right. Frustrated, I went back and explained the situation. He knew the measurements. One hose was 29" and the other was 25.5". Turns out the one he gave me was the leftover scrap from the section of hose, so that was easily rectified. He crimped the collars, I paid him and I thought there was a real chance I'd get this damn thing running the next day.
Why the next day? Well at this point, the radiator wasn't installed and neither was the airdam since I wanted to make sure the oil cooler connections were correct, then install the airdam then do the radiator, since it would be a lot easier to do it than trying to feel around for the fasteners, etc.
After I got the hoses, I popped on over to the polishing shop in Mesa. Years ago, I pulled this nifty aluminum oil cap off of a '67 1600 that I found in the yard. A beam had fallen on the car and there really wasn't much I was interested in, but the oil cap was neat and I took the fuel cap as well (still have - super nice shape). I have used this oil cap on a couple of cars, but it had some light scratches and I thought it would be something he could knock out in a day or two if I asked nicely. He told me to have a seat and read a magazine. The top one was a 1956 issue of Car Craft, and it was pretty interesting seeing what people were doing to pre-war cars back then. I only had time to read a couple articles and he came back out with a nicely polished cap for an image of Alexander Hamilton.
After running other errands and finishing up some other work, I did what needed to be done. Installed the radiator, shroud, fan, "intake muffler" and added six quarts of this stuff:
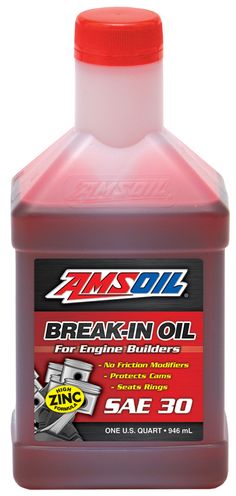
I bought 8 and figured that after the oil cooler thermostat opened, I'd add more, but for initial startup, I'd be good with the 6.
I had to take the valve cover off to install the distributor. Since the crank nut was tightened and whatever, I wasn't sure if the top of the motor was at TDC anymore. I probably could have figured it out by looking through the oil cap, but I decided to be careful and make sure that #1 was in fact at TDC, and that required turning the motor a full revolution, so glad I checked that out!
By that evening, we were here:


I decided this thing was going to run on my birthday and that it would be awesome.
The next morning, I added coolant and brake fluid. I then chased down all of the brake fittings that weren't tight, dumped distilled water over pretty much everything and then bled the brakes. I wasted a ton of brake fluid bleeding the rear calipers, since I figured that air was actually coming in through the threads on the bleeder. Couldn't figure out all these stupid bubbles. I could have probably poured it back in but I was certain that my catch bottle was contaminated with something so I disposed of it anyway. I got a great clutch pedal, but the brakes weren't good. I'm thinking that the fronts need to be done again, likely the right front - I don't think I had the bleeders open long enough. I decided to do that when I get my tires mounted since I didn't feel like taking the wheels off again.
With all of that done, it was time to take the battery out of the 530i and put it in the M535i. Then I realized I needed fuel. I got five gallons of fuel and poured that in the tank. Nothing was leaking, everything seemed good to go.
I pushed the car out into the driveway so that if something did happen like a backfire or something, I had less of a chance of burning down my house. I approximated the position of the distributor looking at one of the 6ers. Turned the key to run and noticed the fuel pump was running, which shouldn't be happening. I briefly looked into that, but figured fuel was probably good, so I cranked it and it fired right up. No extra cranking for fuel pressure or anything. Then it died. Bummer. Tried again, same thing. I started pouring over wiring diagrams and making sure everything was correct and given I had no exact M90 with this version of L-Jet, everything looked correct. I was hoping to have Alex come by so he could do the final torque on the head, but I put that off until I had this thing running.
I couldn't figure out the fuel pump running with the key on. I figured it had to be related. I was getting very spotty voltages, I had solid grounds with good continuity. I was stuck. My birthday totally sucked. I was sweating all over my car. I didn't even get a chance to get any of the free meals I was looking forward to. Shitty day. This car was ruining my life. It had to run. Had to. The next morning, I had to work, but I conferred with experts on wiring, L-Jet and E12s in general. Everything was pointing to the combo relay, but I bought a new one when I got the car and had two other very recent ones I pulled from cars in the yard. Of course, I didn't know if they were good and very well could have been the reason they were there. I spent hours on the phone trying to work this out, swapping components and I had even heard the words "broken wire in the harness" and that wasn't going over well. The problem I kept having was that sometimes I'd get power at both pins 10 and 29 ad the ECU, but sometimes I'd only get power at either 10 or 29. Swap combo relay then it changes. Couldn't figure it out. Every time I made a change, start the car. It runs for two seconds then dies.
Monday morning, it was suggested that I run a wire from terminal 1 on the 530i's coil to the trigger for the ECU and see if I can get the injectors to pulse. I said, okay, I'll do that, but instead I decided to order a new combo relay since I knew I could get one and try that first before hooking the two cars together since it was easier, especially considering I only had the one battery. Before I installed it, I checked every damn thing to make sure that I didn't screw something up in the car with the fuel pump wiring and that it was feeding from another circuit. Once I was satisfied, I plugged the combo relay in. I turned the key to run. Fuel pump wasn't running. Whoa. Cranked it and the damn thing fired right up. It was running around 2000 rpm, so I rotated the distributor to retard the timing some and I ran back over to check the cluster and that's when I saw the oil light didn't go out. It had been about 20 seconds. I shut it off immediately. I had heard people say it could take 30 seconds or so for the light to go out on the initial start, but as long as there was flow, we were fine. I opened the oil cap and I didn't see any oil at the top of the motor. Still some assembly lube, but no oil. I called Alex and he said he'd think about it and get back with me. He told me to see if the filter canister had oil in it. I confirmed that it did after disconnecting the battery and loosening the bolt for that stupid contraption.
My tires showed up.

Tuesday morning, he called and said he thinks he may have not installed the pressure relief valve in the oil pump. He had me call a tow truck. So, in order for that to happen, I had to remove the airdam. I grabbed the original front housing of my oil pump and sure enough, the relief valve was still in place.

This showed up Tuesday, just in time to help.

Wednesday evening, I got these photos.


He said everything looked good and the next morning, they were going to put the oil back in it, install the fan, etc and I could come get it running when I had a chance.
The next morning (Thursday), he sent me a text saying they had oil pressure. He unplugged the combo relay and got pressure by cranking. Light went out. Great.
I got to the shop around 1pm and was pretty excited. I put some of the wiring I had changed so I could close the hood back the way it was when the car ran. Cranked the car over and nothing happened. Just cranking. Weird. I did a bunch of testing and found I didn't have spark, but what I couldn't figure out was that I had 12v coming out of pin 1 on the ECU harness without the AFM installed and 6v with it installed. I was stuck, so I spent quite a bit of time on the phone with both Mike W. and Peter Florance and while I thought I had all of the grounds hooked up, it turns out I didn't. Peter said that there's supposed to be a ground for the coolant temp sensor and it grounds pin 5 at the ECU. I didn't have ground at pin 5, so I went digging. The ground for the coolant temperature sensor was hidden from view when I installed the harnesses and I guess, after I jiggled everything around enough checking before installing the new combo relay, it must have made contact with the plate for the duck gasket or something. Once I connected that ground, all of the voltages normalized and the fuel pump only ran when the AFM door was moved, which is correct operation. Couldn't believe it. I figured the car had to start now. Nope. No dice. Well, I figured maybe everything I did fried an ignition module. I did fry an ECU.
Friday morning, I came to the shop with four ignition modules (one had screws replacing the rivets, so I had to figure it was good), my original ignition harness, another distributor and a couple of ballast resistors and went to work. I swapped an ICM to start and no dice. Then I pulled the distributor cap to check for a pulse from the reluctor wheel in the distributor. I was able to rotate it enough to get a good pulse, but I wanted to make sure it was repeatable, so I bumped the starter to move the distributor rotor.
It didn't move.
It didn't move!
I pulled the distributor and it looked like the gear that drives the distributor was embedded in the upper timing cover. Looking further, that wasn't my only problem.

Alex came over and told me to hit the key. Cam gear moved, but the cam didn't. He grabbed a pair of pliers and the cam is seized in the head and it's obviously broken. I don't think punched in the stomach is quite enough to describe how I felt. I couldn't even say anything. I've got so much money and time into this car and I was within sight of my goal to have it in Monterey for the Festorics/O'Fest this year and this happens.
The thought is that the cam seized from lack of lubrication after I shut the engine off. The next time the motor was cranked, that broke the cam. Obviously valves have hit pistons and everything is all screwed up. Of course, it all comes back to an oversight of omitting the pressure relief valve in the oil pump.
I had a duty to tell those who helped me troubleshoot the car that I found the spark issue. I got a lot of support from them and even some ideas of how to overcome this. Some more feasible than others. At this point, it looks like I at least need the whole top of the motor. Ray has an M90 and had been talking about selling it so I asked him about it. It's from a 1980 Euro E24 we parted, so it should have the correct head. He offered it to me suggesting we can settle up later. I had a thought of just cleaning it up and putting it in for now and addressing this later, but you might notice in the photos (if you can see them) that front and rear glass is still not installed along with the dash - very useful for troubleshooting, which is why I wanted a running car before the interior went in. Putting a motor in, then doing all of that in less than a week by myself is a tall order and that's if everything goes smoothly. Nothing has been done to the car since. Alex is waiting to take it apart until we get the motor from Ray. Obviously, everything is going to be inspected, but it's not a situation either of us want to be in and it's all because of an oversight.
I spent the weekend trying to decide what to do regarding the trip to Monterey. Most of my expenses were already paid and the whole thing I had been working on wasn't going to be there, so I really didn't feel like even going. I didn't register for some of the things I wanted to do because of cost simply trying to get the car done and the things I did register for seemed like a waste. I ended up deciding to make the best of it, so I'll bring the B7 Turbo since they're doing something special for Alpina cars this year, so it will be nice to have it there. Not the outcome I was hoping for, but whatever.
Monday morning, I had an appointment with a local shop (Parts Score in North Scottsdale) to get my tires mounted on the refinished BBS RAs and road-force balanced. There was a certain degree of this is a waste of time and money now since the car is broken, but in reality, progress still needs to be made, I had an appointment and the wheels and tires will take up less space when the tires are on the wheels. I ended up choosing Parts Score because I know someone who works there and through him, I found out they are the only shop in the state to have the latest whiz-bang Hunter truly touchless mounting machine and the road-force balancer.

Here we are figuring out that the extra thickness of the RA centers necessitate an alternate securing method. From this photo, you can see that the machine holds the wheel from the hub, unlike conventional machinery. It is guaranteed not to damage a wheel and consequently has an HD camera on board in the event something does happen. They did a great job getting everything done, and even taped one vulnerable area to ensure it wasn't damaged. Road force was good all around. One wheel/tire had a road force rating of 4 and didn't require any weight. I guess it's great news that it is actually the spare. Anyway, that worked out great and I was happy with the work and really the cost was hardly more than having the Discount people mount/balance/scratch the wheels and actually less than the super high end specialty shops that do this. I imagine that this equipment will bring quite a few customers through their doors - not that they're hurting for business.

I don't know when I'll have further updates, but I do hope that maybe by the end of September I could have it done. Hopefully for SoCal Vintage. It's registered for a show in Sedona in a month, but I'm not sure that's enough time. It's not on my schedule right now. I'd offer to help with disassembly/assembly, but I am going to be out of town until the 28th.
Also, Google broke the Picasa thing, so if the pictures don't show up, don't worry. They sucked anyway.
Right around the time I posted this update, I ordered tires from Tire Rack. They said I'd have three the next day and two in a week. Great.
I had been going back and forth with the Porsche shop that was working on my oil cooler lines. There's really no good reason it should be taking this long, but apparently the correct cloth-wrapped hose is not available with the correct OD/ID for this application, so we had to look elsewhere. We made arrangements for Friday the 29th. His schedule has been tough since they're moving their shop of 30 years into a brand new 30,000 square foot facility and obviously this piddly oil line project for a non-Porsche has taken enough of their time. Of course, he didn't say any of that and I really did appreciate the effort they have put into doing this the right way.
I got the driveshaft heat shield installed. It sucked, mostly because it's not in really great shape, but believe it or not, the original from the car is the best one I've found. Part number was superseded to the E28 style which doesn't fit the E12 since the studs are in different locations. Fortunately, I did my homework on that before ordering one blindly. Of course, as with everything on the car, it took two hours to attach six M6 nuts and washers. Not sure why but whatever.
While I was still pissed off from the heat shield, I decided to hang that giant, heavy, hard-to-balance exhaust alone on my back with the car on jack stands. I got it done, though I did have to do some light sanding and whatnot due to the thickness of the ceramic coating where the front muffler mates with the downpipes. I was so excited by the experience I didn't take photos.
With that done, I called it a night. On the 29th, I went to get the cooler lines and said that since the motor and oil cooler are in the car, why don't I take the lines before we crimp them and make sure they fit. He showed me what he had for hose and while it wasn't as nice as the original, it was better than many things being a high temp, high pressure hose. We put them together and I went home, and mocked them up.
The shorter line was really tight and I didn't like the way it was sitting. Couldn't be right. Frustrated, I went back and explained the situation. He knew the measurements. One hose was 29" and the other was 25.5". Turns out the one he gave me was the leftover scrap from the section of hose, so that was easily rectified. He crimped the collars, I paid him and I thought there was a real chance I'd get this damn thing running the next day.
Why the next day? Well at this point, the radiator wasn't installed and neither was the airdam since I wanted to make sure the oil cooler connections were correct, then install the airdam then do the radiator, since it would be a lot easier to do it than trying to feel around for the fasteners, etc.
After I got the hoses, I popped on over to the polishing shop in Mesa. Years ago, I pulled this nifty aluminum oil cap off of a '67 1600 that I found in the yard. A beam had fallen on the car and there really wasn't much I was interested in, but the oil cap was neat and I took the fuel cap as well (still have - super nice shape). I have used this oil cap on a couple of cars, but it had some light scratches and I thought it would be something he could knock out in a day or two if I asked nicely. He told me to have a seat and read a magazine. The top one was a 1956 issue of Car Craft, and it was pretty interesting seeing what people were doing to pre-war cars back then. I only had time to read a couple articles and he came back out with a nicely polished cap for an image of Alexander Hamilton.
After running other errands and finishing up some other work, I did what needed to be done. Installed the radiator, shroud, fan, "intake muffler" and added six quarts of this stuff:

I bought 8 and figured that after the oil cooler thermostat opened, I'd add more, but for initial startup, I'd be good with the 6.
I had to take the valve cover off to install the distributor. Since the crank nut was tightened and whatever, I wasn't sure if the top of the motor was at TDC anymore. I probably could have figured it out by looking through the oil cap, but I decided to be careful and make sure that #1 was in fact at TDC, and that required turning the motor a full revolution, so glad I checked that out!
By that evening, we were here:
I decided this thing was going to run on my birthday and that it would be awesome.
The next morning, I added coolant and brake fluid. I then chased down all of the brake fittings that weren't tight, dumped distilled water over pretty much everything and then bled the brakes. I wasted a ton of brake fluid bleeding the rear calipers, since I figured that air was actually coming in through the threads on the bleeder. Couldn't figure out all these stupid bubbles. I could have probably poured it back in but I was certain that my catch bottle was contaminated with something so I disposed of it anyway. I got a great clutch pedal, but the brakes weren't good. I'm thinking that the fronts need to be done again, likely the right front - I don't think I had the bleeders open long enough. I decided to do that when I get my tires mounted since I didn't feel like taking the wheels off again.
With all of that done, it was time to take the battery out of the 530i and put it in the M535i. Then I realized I needed fuel. I got five gallons of fuel and poured that in the tank. Nothing was leaking, everything seemed good to go.
I pushed the car out into the driveway so that if something did happen like a backfire or something, I had less of a chance of burning down my house. I approximated the position of the distributor looking at one of the 6ers. Turned the key to run and noticed the fuel pump was running, which shouldn't be happening. I briefly looked into that, but figured fuel was probably good, so I cranked it and it fired right up. No extra cranking for fuel pressure or anything. Then it died. Bummer. Tried again, same thing. I started pouring over wiring diagrams and making sure everything was correct and given I had no exact M90 with this version of L-Jet, everything looked correct. I was hoping to have Alex come by so he could do the final torque on the head, but I put that off until I had this thing running.
I couldn't figure out the fuel pump running with the key on. I figured it had to be related. I was getting very spotty voltages, I had solid grounds with good continuity. I was stuck. My birthday totally sucked. I was sweating all over my car. I didn't even get a chance to get any of the free meals I was looking forward to. Shitty day. This car was ruining my life. It had to run. Had to. The next morning, I had to work, but I conferred with experts on wiring, L-Jet and E12s in general. Everything was pointing to the combo relay, but I bought a new one when I got the car and had two other very recent ones I pulled from cars in the yard. Of course, I didn't know if they were good and very well could have been the reason they were there. I spent hours on the phone trying to work this out, swapping components and I had even heard the words "broken wire in the harness" and that wasn't going over well. The problem I kept having was that sometimes I'd get power at both pins 10 and 29 ad the ECU, but sometimes I'd only get power at either 10 or 29. Swap combo relay then it changes. Couldn't figure it out. Every time I made a change, start the car. It runs for two seconds then dies.
Monday morning, it was suggested that I run a wire from terminal 1 on the 530i's coil to the trigger for the ECU and see if I can get the injectors to pulse. I said, okay, I'll do that, but instead I decided to order a new combo relay since I knew I could get one and try that first before hooking the two cars together since it was easier, especially considering I only had the one battery. Before I installed it, I checked every damn thing to make sure that I didn't screw something up in the car with the fuel pump wiring and that it was feeding from another circuit. Once I was satisfied, I plugged the combo relay in. I turned the key to run. Fuel pump wasn't running. Whoa. Cranked it and the damn thing fired right up. It was running around 2000 rpm, so I rotated the distributor to retard the timing some and I ran back over to check the cluster and that's when I saw the oil light didn't go out. It had been about 20 seconds. I shut it off immediately. I had heard people say it could take 30 seconds or so for the light to go out on the initial start, but as long as there was flow, we were fine. I opened the oil cap and I didn't see any oil at the top of the motor. Still some assembly lube, but no oil. I called Alex and he said he'd think about it and get back with me. He told me to see if the filter canister had oil in it. I confirmed that it did after disconnecting the battery and loosening the bolt for that stupid contraption.
My tires showed up.
Tuesday morning, he called and said he thinks he may have not installed the pressure relief valve in the oil pump. He had me call a tow truck. So, in order for that to happen, I had to remove the airdam. I grabbed the original front housing of my oil pump and sure enough, the relief valve was still in place.
This showed up Tuesday, just in time to help.
Wednesday evening, I got these photos.
He said everything looked good and the next morning, they were going to put the oil back in it, install the fan, etc and I could come get it running when I had a chance.
The next morning (Thursday), he sent me a text saying they had oil pressure. He unplugged the combo relay and got pressure by cranking. Light went out. Great.
I got to the shop around 1pm and was pretty excited. I put some of the wiring I had changed so I could close the hood back the way it was when the car ran. Cranked the car over and nothing happened. Just cranking. Weird. I did a bunch of testing and found I didn't have spark, but what I couldn't figure out was that I had 12v coming out of pin 1 on the ECU harness without the AFM installed and 6v with it installed. I was stuck, so I spent quite a bit of time on the phone with both Mike W. and Peter Florance and while I thought I had all of the grounds hooked up, it turns out I didn't. Peter said that there's supposed to be a ground for the coolant temp sensor and it grounds pin 5 at the ECU. I didn't have ground at pin 5, so I went digging. The ground for the coolant temperature sensor was hidden from view when I installed the harnesses and I guess, after I jiggled everything around enough checking before installing the new combo relay, it must have made contact with the plate for the duck gasket or something. Once I connected that ground, all of the voltages normalized and the fuel pump only ran when the AFM door was moved, which is correct operation. Couldn't believe it. I figured the car had to start now. Nope. No dice. Well, I figured maybe everything I did fried an ignition module. I did fry an ECU.
Friday morning, I came to the shop with four ignition modules (one had screws replacing the rivets, so I had to figure it was good), my original ignition harness, another distributor and a couple of ballast resistors and went to work. I swapped an ICM to start and no dice. Then I pulled the distributor cap to check for a pulse from the reluctor wheel in the distributor. I was able to rotate it enough to get a good pulse, but I wanted to make sure it was repeatable, so I bumped the starter to move the distributor rotor.
It didn't move.
It didn't move!
I pulled the distributor and it looked like the gear that drives the distributor was embedded in the upper timing cover. Looking further, that wasn't my only problem.
Alex came over and told me to hit the key. Cam gear moved, but the cam didn't. He grabbed a pair of pliers and the cam is seized in the head and it's obviously broken. I don't think punched in the stomach is quite enough to describe how I felt. I couldn't even say anything. I've got so much money and time into this car and I was within sight of my goal to have it in Monterey for the Festorics/O'Fest this year and this happens.
The thought is that the cam seized from lack of lubrication after I shut the engine off. The next time the motor was cranked, that broke the cam. Obviously valves have hit pistons and everything is all screwed up. Of course, it all comes back to an oversight of omitting the pressure relief valve in the oil pump.
I had a duty to tell those who helped me troubleshoot the car that I found the spark issue. I got a lot of support from them and even some ideas of how to overcome this. Some more feasible than others. At this point, it looks like I at least need the whole top of the motor. Ray has an M90 and had been talking about selling it so I asked him about it. It's from a 1980 Euro E24 we parted, so it should have the correct head. He offered it to me suggesting we can settle up later. I had a thought of just cleaning it up and putting it in for now and addressing this later, but you might notice in the photos (if you can see them) that front and rear glass is still not installed along with the dash - very useful for troubleshooting, which is why I wanted a running car before the interior went in. Putting a motor in, then doing all of that in less than a week by myself is a tall order and that's if everything goes smoothly. Nothing has been done to the car since. Alex is waiting to take it apart until we get the motor from Ray. Obviously, everything is going to be inspected, but it's not a situation either of us want to be in and it's all because of an oversight.
I spent the weekend trying to decide what to do regarding the trip to Monterey. Most of my expenses were already paid and the whole thing I had been working on wasn't going to be there, so I really didn't feel like even going. I didn't register for some of the things I wanted to do because of cost simply trying to get the car done and the things I did register for seemed like a waste. I ended up deciding to make the best of it, so I'll bring the B7 Turbo since they're doing something special for Alpina cars this year, so it will be nice to have it there. Not the outcome I was hoping for, but whatever.
Monday morning, I had an appointment with a local shop (Parts Score in North Scottsdale) to get my tires mounted on the refinished BBS RAs and road-force balanced. There was a certain degree of this is a waste of time and money now since the car is broken, but in reality, progress still needs to be made, I had an appointment and the wheels and tires will take up less space when the tires are on the wheels. I ended up choosing Parts Score because I know someone who works there and through him, I found out they are the only shop in the state to have the latest whiz-bang Hunter truly touchless mounting machine and the road-force balancer.
Here we are figuring out that the extra thickness of the RA centers necessitate an alternate securing method. From this photo, you can see that the machine holds the wheel from the hub, unlike conventional machinery. It is guaranteed not to damage a wheel and consequently has an HD camera on board in the event something does happen. They did a great job getting everything done, and even taped one vulnerable area to ensure it wasn't damaged. Road force was good all around. One wheel/tire had a road force rating of 4 and didn't require any weight. I guess it's great news that it is actually the spare. Anyway, that worked out great and I was happy with the work and really the cost was hardly more than having the Discount people mount/balance/scratch the wheels and actually less than the super high end specialty shops that do this. I imagine that this equipment will bring quite a few customers through their doors - not that they're hurting for business.
I don't know when I'll have further updates, but I do hope that maybe by the end of September I could have it done. Hopefully for SoCal Vintage. It's registered for a show in Sedona in a month, but I'm not sure that's enough time. It's not on my schedule right now. I'd offer to help with disassembly/assembly, but I am going to be out of town until the 28th.
Re: E12 M535i Project - 08-13-16 Update :(
Sorry to hear about the motor, Chris. I'm sending positive vibes your way. I can only imagine how frustrated you are.
Re: E12 M535i Project - 08-13-16 Update :(
Fingers crossed for a quick recovery.
Re: E12 M535i Project - 08-13-16 Update :(
Good luck....you are due.
-
Adam W in MN
- Posts: 5053
- Joined: Feb 12, 2006 12:00 PM
- Location: Don't waste my motherf***in' time!
- Contact:
Re: E12 M535i Project - 08-13-16 Update :(
Chris's run of bad luck on this project is really gut-wrenching, especially considering the sweat equity and thoroughness he's put into it.
Re: E12 M535i Project - 08-13-16 Update :(
When Chris told me about the cam I felt like I'd taken a hit to the stomach. I can only imagine what he felt like.
Re: E12 M535i Project - 08-13-16 Update :(
Good God that sucks. 
Re: E12 M535i Project - 08-13-16 Update :(
so sorry Chris. really tough news.
Re: E12 M535i Project - 08-13-16 Update :(
The cam issue is an obvious setback, but remember Chris, this is a project meant for long term enjoyment. Whether it is SoCal Vintage, or some other event as its debut, the quality of your work will ultimately be what you will remember.

