Maytag: The Alpine '87 529i
Re: Maytag: The Alpine '87 528e Bench Player
After helping Mr. Quon buy just about the most perfect 1985 300SD from just about the most perfect 70+ yr old German couple, and after waiting for the power to come back on, I dove in...
Last time I did this, I assembled the strut lower plates and control arms with the control arms attached to the car. That was dumb. This was much easier:
As you can see I had the shocks way too low:
It's pretty easy adjusting these things once on the car. Just undo the 3 nuts holding the struts to the strut tower brace, letting the assembly settle onto a jackstand. Then just spin the top part of the strut counter clockwise to make it longer. I added about 3.8cm of length for my second try to decided it's close enough. When I get it aligned I'll have them dial it in perfectly.
Ta-da:
Then I tried my hand at the string-alignment technique. It was already pretty close to tits, but I was able to get it even closer. I didn't measure it, but the camber looks almost 0. The BC Racing coil overs have tons of camber adjustment.
Went for a spirited shakedown drive in the rain/dark/wind. Felt fine. Tracked straight, turned left and right as expected, stopped, and even went over some bumps. Nothing fell off (I checked when I got it back on the lift).
I had to use the freeway to get to my indoor soccer game and it felt a little squirlley. I think its a combination of both the front & rear not being aligned (I clearly have some (-) toe in the rear), the rear being about 1.27cm higher than the front (relatively), and the squishy sidewalls of the Nokian Hakkapeliitta snow tires. Ride feels great.
Hope to get it in to be aligned on tues or weds.
Last time I did this, I assembled the strut lower plates and control arms with the control arms attached to the car. That was dumb. This was much easier:
As you can see I had the shocks way too low:
It's pretty easy adjusting these things once on the car. Just undo the 3 nuts holding the struts to the strut tower brace, letting the assembly settle onto a jackstand. Then just spin the top part of the strut counter clockwise to make it longer. I added about 3.8cm of length for my second try to decided it's close enough. When I get it aligned I'll have them dial it in perfectly.
Ta-da:
Then I tried my hand at the string-alignment technique. It was already pretty close to tits, but I was able to get it even closer. I didn't measure it, but the camber looks almost 0. The BC Racing coil overs have tons of camber adjustment.
Went for a spirited shakedown drive in the rain/dark/wind. Felt fine. Tracked straight, turned left and right as expected, stopped, and even went over some bumps. Nothing fell off (I checked when I got it back on the lift).
I had to use the freeway to get to my indoor soccer game and it felt a little squirlley. I think its a combination of both the front & rear not being aligned (I clearly have some (-) toe in the rear), the rear being about 1.27cm higher than the front (relatively), and the squishy sidewalls of the Nokian Hakkapeliitta snow tires. Ride feels great.
Hope to get it in to be aligned on tues or weds.
Re: Maytag: The Alpine '87 528e Bench Player
3.8 cm... I lol'd.
Nice work.
Now I'll just wait until you tire of your fancy-schmancy suspension, return it to stock, and sell those lousy coilovers to, um, me.
At a nice discount.
Nice work.
Now I'll just wait until you tire of your fancy-schmancy suspension, return it to stock, and sell those lousy coilovers to, um, me.
At a nice discount.
Re: Maytag: The Alpine '87 528e Bench Player
I hereby declare Operation "Coil-Overs + replace every suspension and steering component except the steering box" complete.
I got the car back from Kevin at KD Motorsports (same guy who's doing the Blue car; I wanted to compare his alignment service to Byron at Tru-Line whom I've used exclusively before) Friday night. He actually wasn't done with it when I went by there at about 7pm and so I was able to work with him on the final tweaks. Fun.
We did discover that I had over-torqued something causing steering to bind (not automatically return to center). This morning I discovered it was the nut connecting the idler arm to the subframe; I had over torqued it. Besides that he approved of all my work .
Took it for a nice fast drive this morning and, damn, it drives well. I had started with the shocks at "soft" and could immediately tell it was too soft because bounce. I put 2 full turns in on all 4 corners and now it feels great. I may try an experiment at full "hard" to see the difference, but for now it seems great for how I use this car. Tracks straight at all speeds. Corners like it always should have (but never did). No wobbles. No shakes. Firm and crisp but not jarring. Color me happy.
And I think we got the ride height just right (see more details in this thread).
Left Front: 568mm,
Left Rear: 545mm
Right Front: 565mm
Right Rear: 538mm
Summary:
Left Front: 568mm, Left Rear: 545mm (23mm)
Right Front: 565mm, Right Rear: 538mm (17mm)
Avg: 567mm F, 542mm R
Recall from above, stock should be (with 16" wheels):
Front: 589±10mm (23±3/8")
Rear: 527±10mm (20 3/4±3/8")
Diff front to rear: 62mm
Thus Maytag is about 22mm (.9") lower than stock in the front and 15mm (.6") HIGHER than stock in the rear.
Happy to have the RX wheels back on the car as I think they look swell. The snow tires are a bit squishy for super spirited driving, but likely necessary given the cold weather we've been having...
I got the car back from Kevin at KD Motorsports (same guy who's doing the Blue car; I wanted to compare his alignment service to Byron at Tru-Line whom I've used exclusively before) Friday night. He actually wasn't done with it when I went by there at about 7pm and so I was able to work with him on the final tweaks. Fun.
We did discover that I had over-torqued something causing steering to bind (not automatically return to center). This morning I discovered it was the nut connecting the idler arm to the subframe; I had over torqued it. Besides that he approved of all my work .
Took it for a nice fast drive this morning and, damn, it drives well. I had started with the shocks at "soft" and could immediately tell it was too soft because bounce. I put 2 full turns in on all 4 corners and now it feels great. I may try an experiment at full "hard" to see the difference, but for now it seems great for how I use this car. Tracks straight at all speeds. Corners like it always should have (but never did). No wobbles. No shakes. Firm and crisp but not jarring. Color me happy.
And I think we got the ride height just right (see more details in this thread).
Left Front: 568mm,
Left Rear: 545mm
Right Front: 565mm
Right Rear: 538mm
Summary:
Left Front: 568mm, Left Rear: 545mm (23mm)
Right Front: 565mm, Right Rear: 538mm (17mm)
Avg: 567mm F, 542mm R
Recall from above, stock should be (with 16" wheels):
Front: 589±10mm (23±3/8")
Rear: 527±10mm (20 3/4±3/8")
Diff front to rear: 62mm
Thus Maytag is about 22mm (.9") lower than stock in the front and 15mm (.6") HIGHER than stock in the rear.
Happy to have the RX wheels back on the car as I think they look swell. The snow tires are a bit squishy for super spirited driving, but likely necessary given the cold weather we've been having...
Re: Maytag: The Alpine '87 528e Bench Player
Very nice. I sincerely believe Chuck would approve also.
Re: Maytag: The Alpine '87 528e Bench Player
man i wish my car was still clean like that underneath mines bathing in oil constantly and the harder i drive it the more oil gets out its never low in a 3000 mile interval though.
Re: Maytag: The Alpine '87 528e Bench Player
foamy wrote:man i wish my car was still clean like that underneath mines bathing in oil constantly and the harder i drive it the more oil gets out its never low in a 3000 mile interval though.
There's nothing magical about getting it clean. No need to wish. It's just hard work. This car is leaking oil like a sieve too, from the HG between 3 & 4. I know that because I cleaned it.
Re: Maytag: The Alpine '87 528e Bench Player
About two weeks ago Maytag started not starting on the first try.
I diagnosed it down to the in-tank fuel pump. 211,000 miles...
I decided to do the same single-pump conversion I had done on Vlad, using a TRE 255-LPF in-tank pump, with pump-by-filter delete.
Should be easy, right?
As I dug in, I realized I hadn't replaced the fuel lines at the back of the car when I basedlined it. I thought I had, but I must have been remembering Vlad. Much easier to replace the lines that go to the evap tank with the fuel tank out of the car. So it came out.
Then I noticed (remembered) the left-rear tow-hook was badly broken on this car. At some point in its life some hard force was applied and it sheared in two places. Good thing I now know how to weld...
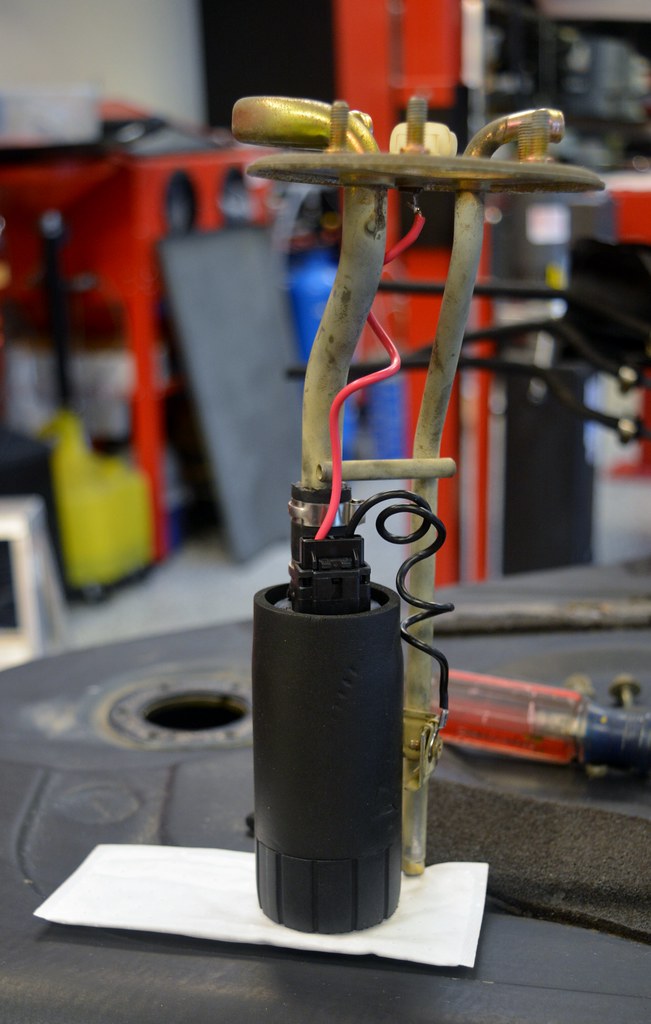
I'll post more in the in-tank fuel pump modification thread, but here's the rebuilt in-tank pump using the TRE unit:
Given the TRE pump is only $79 shipped, and you get to delete a point of failure, I can't imagine why anyone would want to not do this when their pumps fail.
Today's job is to fix that tow-hook, fix some surface rust on the gas tank, and get 'er all back together...
Re: Maytag: The Alpine '87 528e Bench Player
After all that. Sigh...
I got everything back together after painting the parts of the tank I sanded surface rust from and painting the fine welding job I did fixing the tow hook... Didn't have any alpine white, but this is the underside...
Connected all the hoses and tested the new pump by jumping the pump relay. Made good noises and I could hear fuel pumping. Yay.
Still wouldn't start. Da fuq?
Previously in diagnosing the no start I found I had fuel (wet plugs) and spark (took a plug out and did the "see spark?" test). This is why I was convinced it was fuel supply and replacing the in-tank pump and filter would fix the problem.
Nope.
So I started from scratch again.
By the end of the day I:
Tried a backup 2.5 BAR FPR (and replaced all fuel hoses while I was "in there." I had never replaced the lower fuel hoses and they were still original. I was waiting to replace the engine since getting to the nipples by the steering box is a bitch). No Joy.
Pulled the disty and rotor off. The cap broke on me. I figured "YAY, that's it". The brushes were pretty scored/corroded too, making me think "that must be it". I don't remember if I replaced the cap & rotor when I did the timing belt (11/2013 @ 202k; now has 212k), and my records don't indicate. I'm guessing not because a Bosch cap that new should not break.
Got a new cap/rotor and installed it. No joy.
Double checked that I was getting spark. Yep...but not blue. Yellow.
Tried a backup coil. No joy.
Tried a backup ECU. No joy.
While in the glove box noticed I had a spare main relay in there. Figured, "Might as well try it".
Joy. Started right up.
Mother-fudger. ALL OF THAT AND IT WAS THE MAIN RELAY THE WHOLE TIME. Yes, Ivo, I know you said to check it. Don't know why I didn't.
Anyway I got a bunch of stuff done to the car that I had been planning on doing anyway at some point. Some of it was actually kinda fun. And I feel better knowing those fuel lines have finally been replaced.
The oil leak from the head gasket has spread to the drivers' side... I gotta get that M20B27 build moving along real soon now.
Re: Maytag: The Alpine '87 528e Bench Player
The whole point of this coil-over job was to learn. Well, I'm learning.
I now understand, very viscerally, how spring rates affect how a car rides and handles.
PO had put 9Kg coils front & rear. This is not only much stiffer than what BC Racing normally provides (7Kg front/6Kg rear) but a different ratio. Because drift.
The end result was a pretty bouncy ride over larger depressions/bumps at speed.
After consulting with the nice guys at BC Racing (great customer support, BTW) I went with their stock setup:
Installed them yesterday. Rare glam shot.
Much, much better, but now I need to re-dial in the dampener hardness setting again.
Also replaced that leaking clutch slave. I was going to buy another rebuild kit to rebuild the OE steel unit (again), but given the rebuild started leaking after about 5k miles and the new FTE unit was about the same price as a rebuild kit, I went plastic.
Oh and I re-organized my wrench drawer.
-
- Posts: 4919
- Joined: Feb 12, 2006 12:00 PM
- Location: NNV
Re: Maytag: The Alpine '87 528e Bench Player
You make me feel insignificant...
I would ask what you intend to do with the car and how do you want it to feel? If you want the car set up for aggressive handling, then 7 kg (400 lbs/in) might be appropriate. However, if you want a little more balance with better ride, maybe consider 5.3 - 6.2 kg (300-350 lbs) in front. In order to maintain a decent ride with stiffer springs, you'd want to consider increasing compression in the struts minimally (or not at all) while increasing rebound.
What is your rake front to rear? Measure at the rocker panel line or at the moulding, behind the front wheel well and in front of the rear wheel well. Depending upon how you want the look, I'd recommend 3/4" to 1 1/2". I like 1" to 1 1/4".
When I had my M7 I had compression (compared to stock) minimally increased but rebound was up 33-40%. You don't have to be that aggressive, though...
Re: Maytag: The Alpine '87 528e Bench Player
A plastic clutch slave??? I've never heard of that. Assuming it's strong enough, which I suspect it is, and since a clutch is never going to get a mash it thru the floor pressure like brakes, it doesn't actually sound all bad, if it's the right plastic. But the thought of it has me shaking my head.
Re: Maytag: The Alpine '87 528e Bench Player
I just read this whole thread again. Conclusion: The OP is insane.
Re: Maytag: The Alpine '87 528e Bench Player
For reading 28 pages of a 528e? Yescek wrote:I just read this whole thread again. Conclusion: The OP is insane.
For keeping a solid, no rust 528e in good knick? Hardly.
Re: Maytag: The Alpine '87 528e Bench Player
Yes, but not nearly as crazy as someone who would do it to a Toyota Corona/Corolla/Camry/Cwhateverthefuck, and I'm sure there are those who do. Besides, I'm not a fan of etas, I've never wanted an eta, I've never owned an eta, but now I want one. Yours!cek wrote:I just read this whole thread again. Conclusion: The OP is insane.
Re: Maytag: The Alpine '87 528e Bench Player
cek wrote:I just read this whole thread again. Conclusion: The OP is insane.
Re: Maytag: The Alpine '87 528e Bench Player
Great work as always, cek!
As Vlad and Maytag have been a source of inspiration and insight for my own restoration, I have a question from a couple pages back.
viewtopic.php?p=1398975#p1398975
I'm looking for recommendations on the best way to install the stub axle into the rear wheel bearing without ruining the bearing itself. It looks like you were able to install the stub axle using the freezer and hammer trick. I'm assuming it didn't put any negative stress on the inner race of the bearing? Did you brace the rear of the inner race to keep it from moving when driving the axle inward? Do you think a press would have been a better option?
Also, it appears you have FAG bearings. Did you notice any play with the inner races? On my wheel bearings, the red seals slide ever so slightly in and out. To me, this removes the description of it being a "sealed bearing". Below are pictures of my bearings and the play I'm experiencing.
Appreciate any information you're able to share. Thanks!
Re: Maytag: The Alpine '87 528e Bench Player
Sorry, I don't remember.TCBimmer wrote:Great work as always, cek!
Thanks!
Freezer and hammer trick worked. I'm sure it put some negative stress on the inner race. But when done, there was no more lateral play than before.TCBimmer wrote:I'm looking for recommendations on the best way to install the stub axle into the rear wheel bearing without ruining the bearing itself. It looks like you were able to install the stub axle using the freezer and hammer trick. I'm assuming it didn't put any negative stress on the inner race of the bearing? Did you brace the rear of the inner race to keep it from moving when driving the axle inward? Do you think a press would have been a better option?
A press would be ideal. But in my experience (limited) what I did worked fine.
TCBimmer wrote: Also, it appears you have FAG bearings. Did you notice any play with the inner races? On my wheel bearings, the red seals slide ever so slightly in and out. To me, this removes the description of it being a "sealed bearing". Below are pictures of my bearings and the play I'm experiencing.
Appreciate any information you're able to share. Thanks!
Re: Maytag: The Alpine '87 528e Bench Player
Thank you for the confirmation!
Re: Maytag: The Alpine '87 528e Bench Player
Those shocks are groovy.
Re: Maytag: The Alpine '87 528e Bench Player
I'm slowly making progress in getting the new motor back in. Vacation got in the way, then I keep discovering I'm missing some part. The goal was to use this long weekend to have the transmission connected to the engine by the end of Saturday, the front struts sorted yesterday, and the engine in the car today. But Blunt sending me the wrong flywheel bolts kibosh'd that. I did get the old pilot bearing out (yay bread) but the engine project is stalled until those bolts come.
This morning I was more hungover than I think I ever have been. We went to an amazing 50s themed party last night (after tailgating HARD at the Seahawks game)..
These were parked out front:
Between the hangover and needing to get a 'pass through' socket set to put together the fronts struts, I didn't actually get any wrenching started until about 3pm. For some reason the backsides of the bearings I put on when I installed the BC Racing coilovers rusted like crazy. They threw rust splatter all over the rest of the suspension. These are FAG bearings. Other's I've installed did not do this. Super annoying.
So I cleaned the rust off and put POR15 on them. I also put some POR15 on the edges of the UCBABs because they were rusting too. I hate rust.
When installing Bilstein Performance Plus front struts you need to use a hex key to keep the shaft from turning while you tighten down the 19mm lock nut. I first went to Sears (which was open) and bought their "pass-through" socket set for like $60. Then I got home and realized that set stopped at 18mm. They had another more expensive set that did have 19mm, but I figured I didn't need to spend even more money just for a tool I'd rarely use, so I got the cheaper one. In my hangover induced fog I obviously didn't look closely enough at what I bought.
So after getting home and discovering my mistake I got in the truck and went out again. I bet Harbor Freight would be open and was right. And sure enough, they have a $19.99 pass-through set that includes a 19mm socket. I bought that then went back to Sears and returned the set I shouldn't have bought.
This is the 21 Pc SAE & Metric Go-Thru Socket Set:
Worked dandy. Total crap-quality tool, but got the job done.
[url=https://flic.kr/p/221H7MC]
[url=https://flic.kr/p/233zpjQ]
I got as far as putting the dust shield on before it was too cold, I was hungry, and still hungover... so I quit.
(Caliper is just attached so it's not hanging from the brake line, which I don't want to disconnect).
I really need to get this project finished and Maytag drive-able again quick because I need Maytag off the lift. Minerva is ready to come home and Vlad needs servicing.
Re: Maytag: The Alpine '87 528e Bench Player
For posterity, I'm going to add some stuff from my "e2i" "Stroker" M20B27 build thread here (for me when I forget and search this thread to remember)...
If you saw this thread you know that I am struggling with the fact the clutch pedal disengages clutch too high and how to resolve. I learned a bunch (and discovered there are two variants of getrag 260/5; one with a 5mm deeper bell-housing). But I am still unsure why my engagement point is wrong. I'm moving ahead with what I think will address it: Switching to the shorter variant of the throw out bearing.
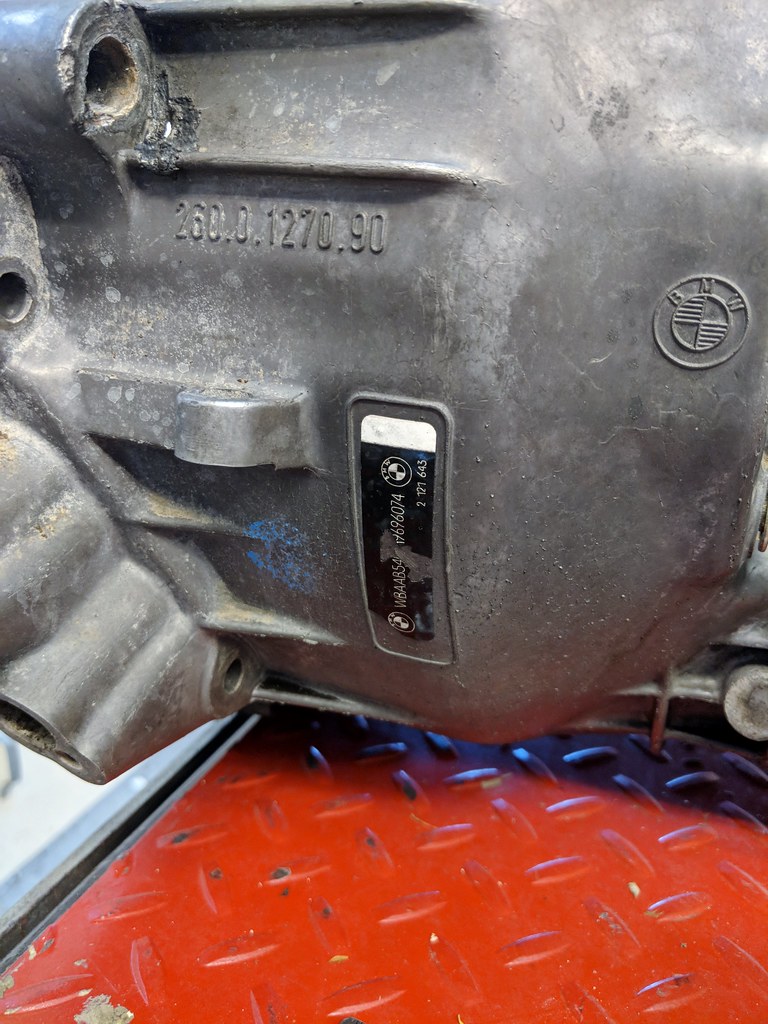
Transmission on Maytag
PN on Bellhousing: 260.0.1270.90
VIN: WBAAB5407H9696074
Model: 1986-07-31 US 325E (not a 528e as I had previously thought)
Housing PN from RealOEM: 23111222657
T/O Bearing PN from RealOEM: 21517521471
OAL (output shaft to bell-housing face): 55mm
Bell-housing length (rear casing front to bell-housing face): 37.5mm
Bell-housing depth (slave face to bell-housing face): 17mm
Got the right flywheel bolts from blunt.
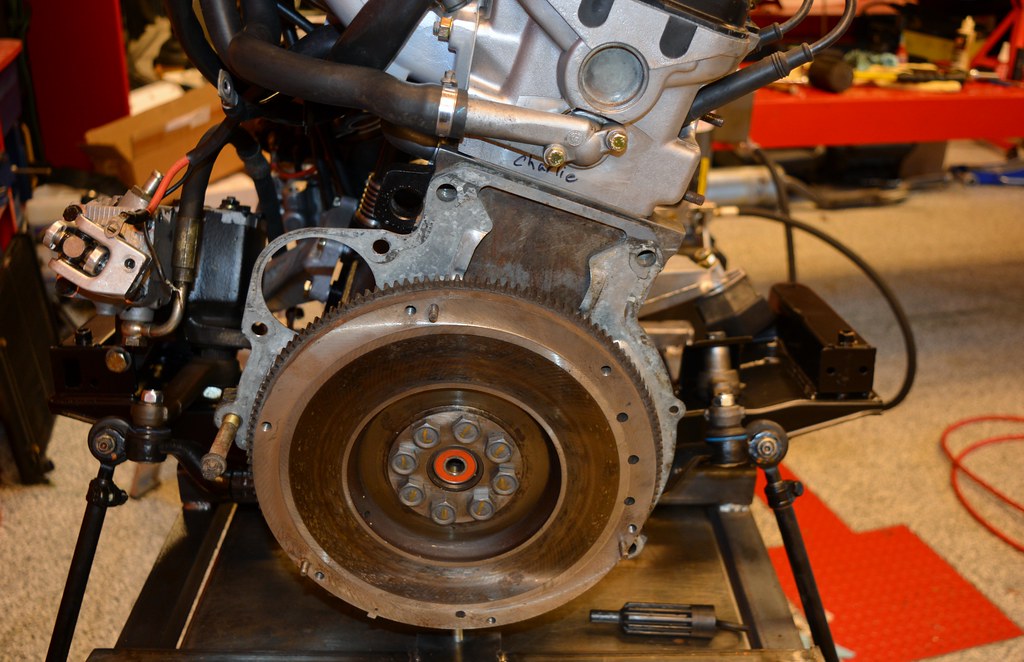
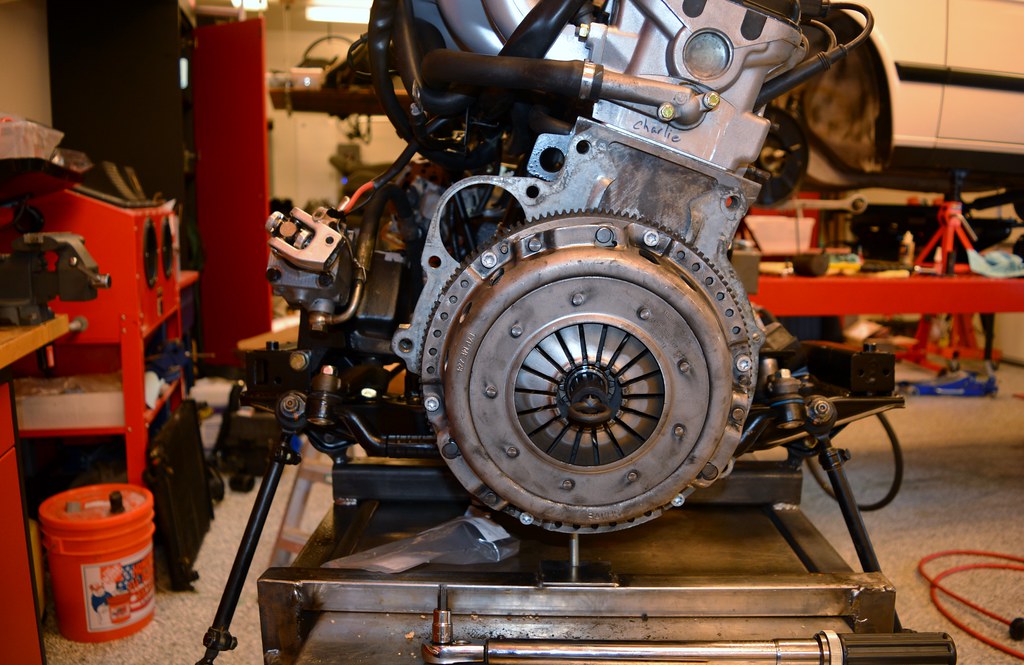
Hooked transmission up. Used the right greases on the splines and TO bearing.
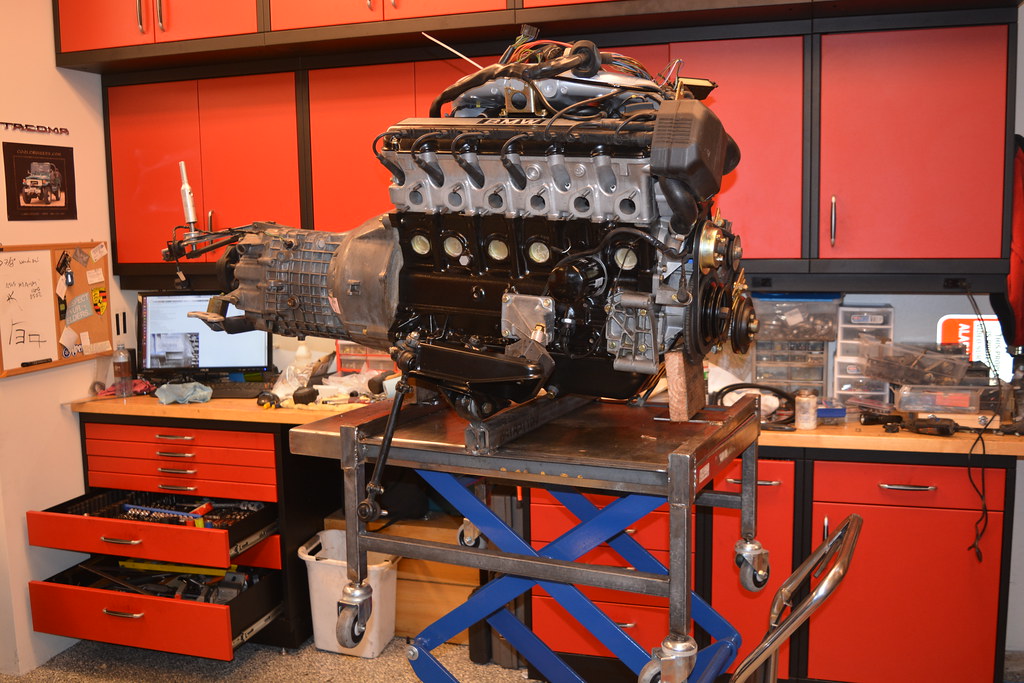
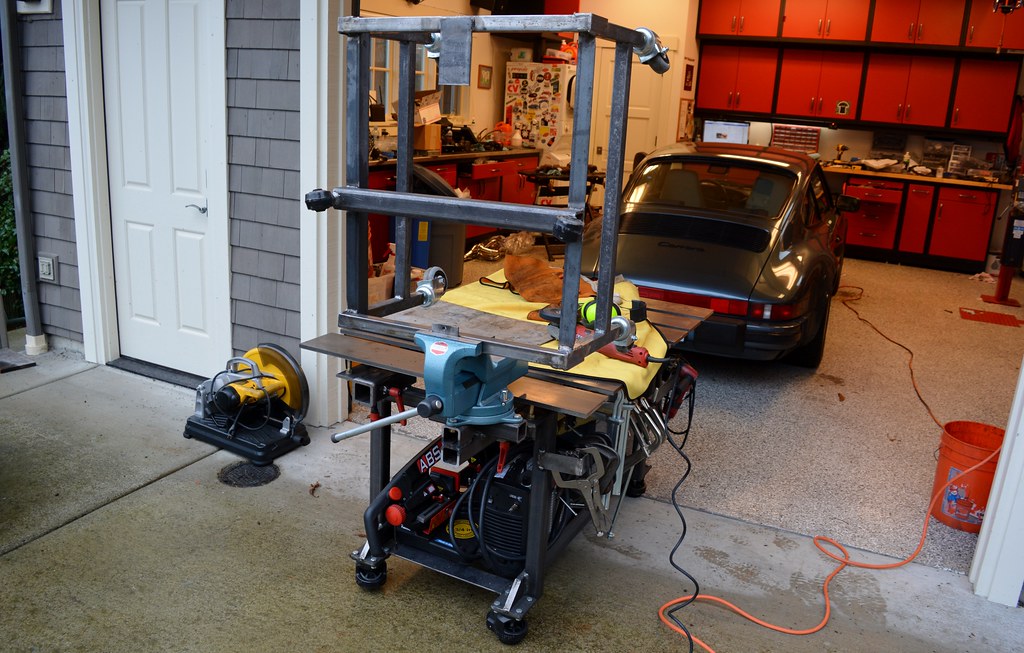
Tried another test-fitting lifting the engine and transmission up through the bottom with the lift table. Realized everything would go much more smoothly if I modified my cradle to mount the assembly further forward; will give more clearance with the front of my 4-post lift.
Always love a chance to get the welding table out!
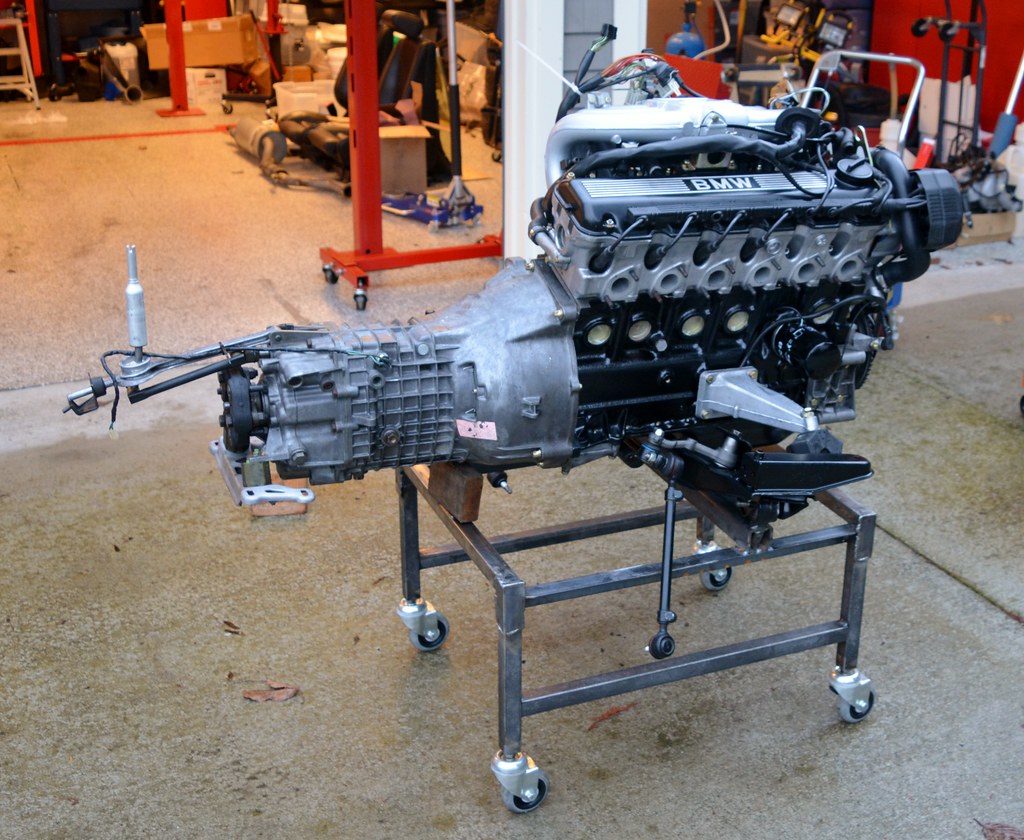
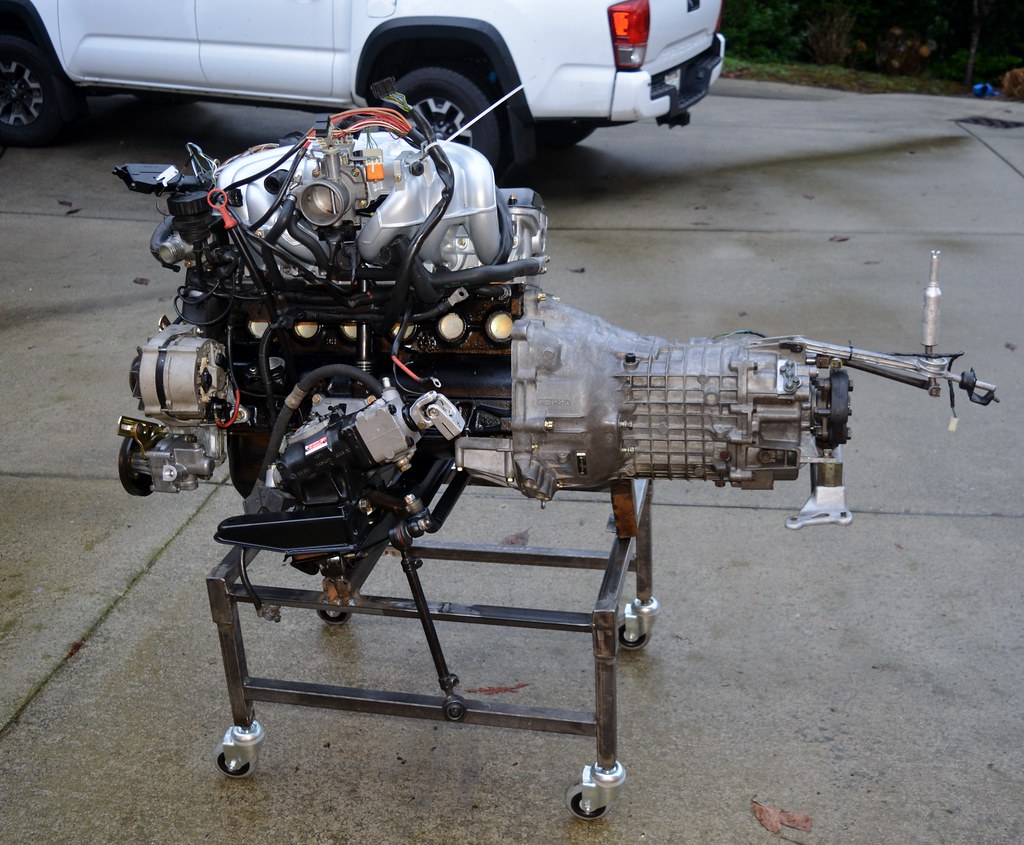
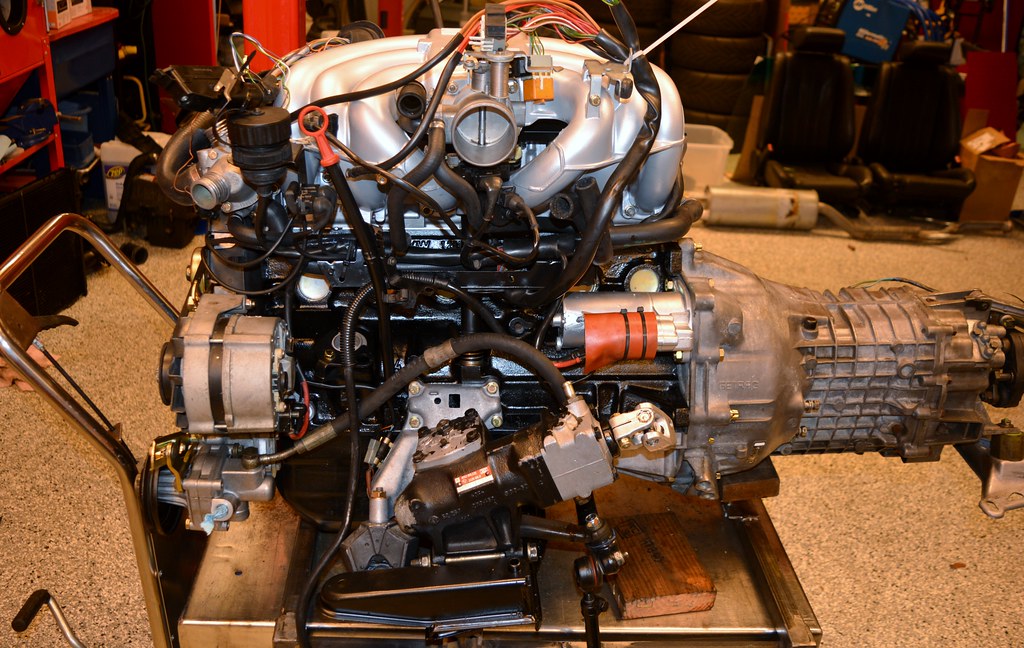
A bit of the grinding wheel and some fresh welds and I set the engine/tranny back on. Much better balance too.
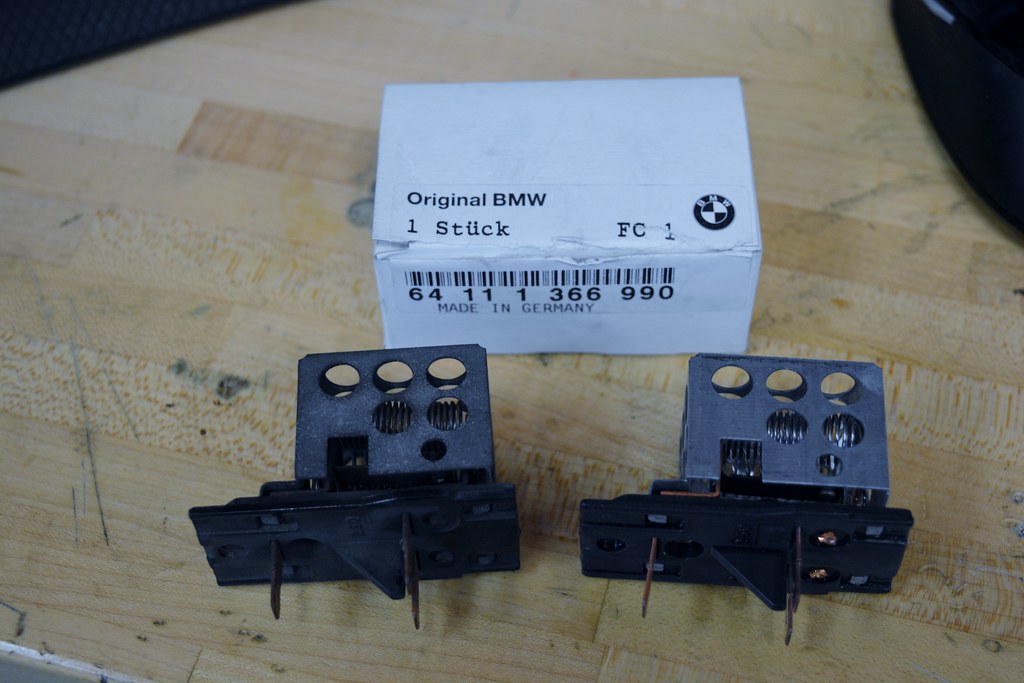
Got the starter installed and hooked up the PS hoses. Everything that needs to go together before it goes in the car is now done. But before I can put it in I need to do a few more things in the engine bay, including installing a new resistor pack. You'll recall my heater fan "races" to full speed at random times any time it is on. I expected the old resistor pack to look super rusty or destroyed. It actually looks fine. Hopefully this actually fixes the problem.
Re: Maytag: The Alpine '87 528e Bench Player
1st 5er wrote:cek wrote:I just read this whole thread again. Conclusion: The OP is insane.
... but he does deliver.