Left Drivers Door Lock Repair/Reassembly/
Posted: May 09, 2012 1:23 PM
Greetings all,
I thought I'd take some time to write up my lock repair. I found a lot of useful information on this topic in this forum, but some of was a little vague as I'm cognitively inept, most times:-)
I've taken some photos and will borrow from already existing. I hope publishers don't mind.
First the list of parts disassembled on the bench (please forgive the lack of parts look up and proper terms) -
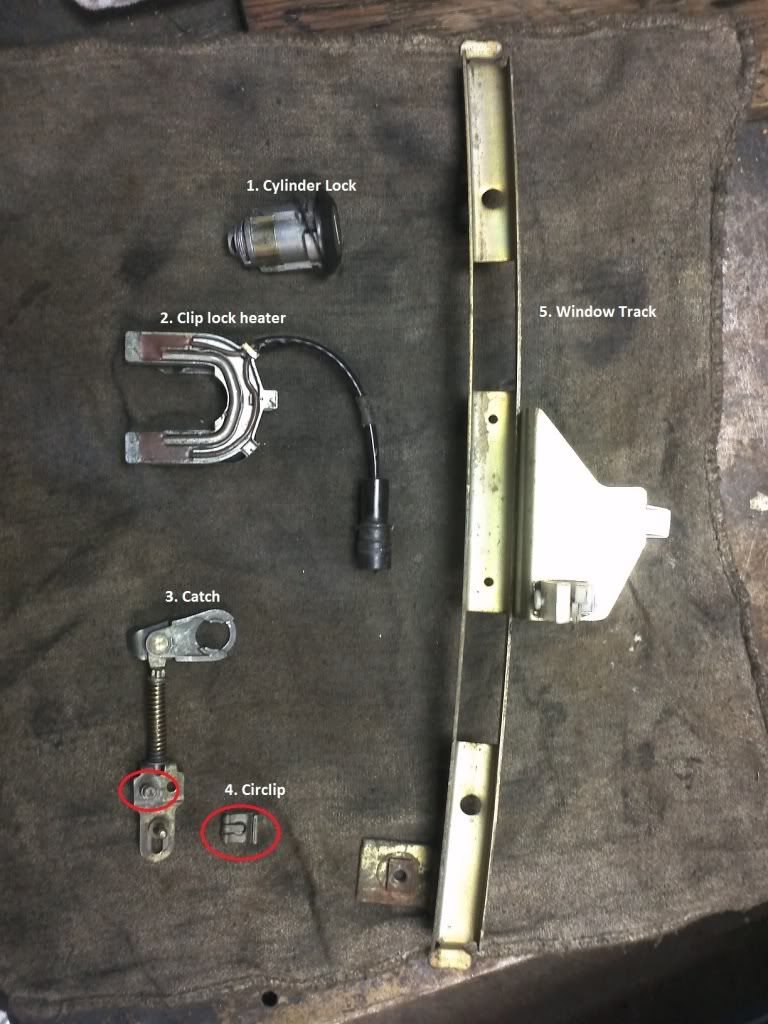
In the above pic we see a list of all the required, removed parts.
Next the Window Track removal -
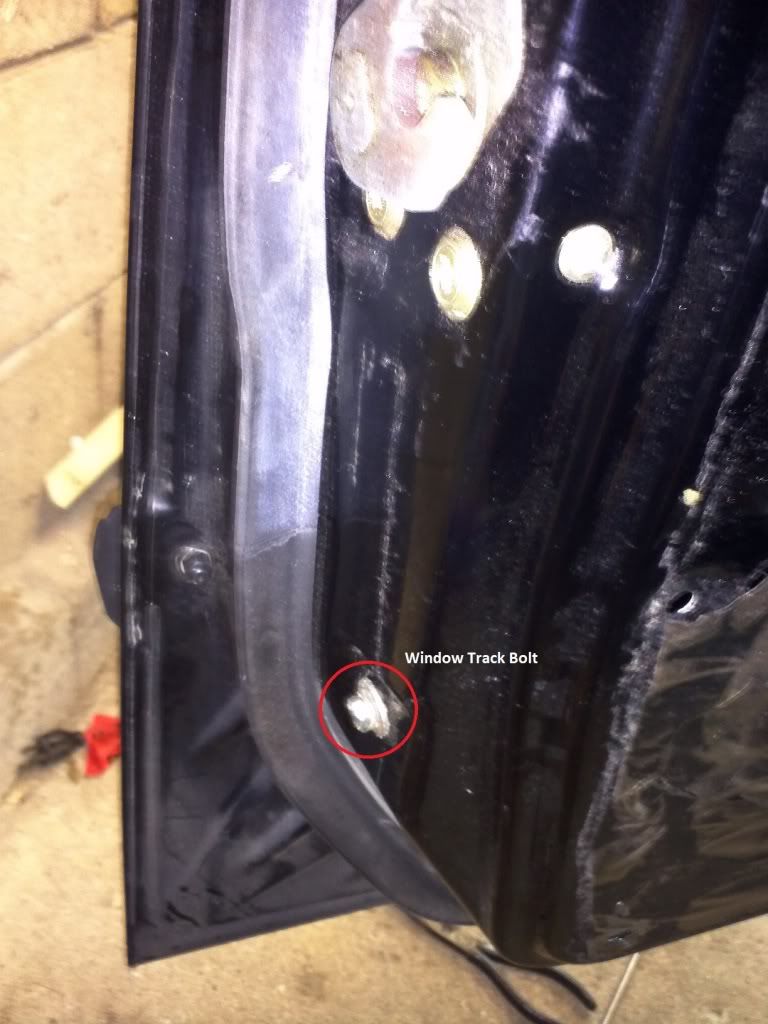
This is a must, because you can't get the circlip off the catch without removing it. It's very easy and should go back in place just as easy. Mind the wiring clip, and just pull the wires out from it before removal.
A borrowed picture of the key cylinder in place (this image has a broken catch, but for all intents and purposes, I believe the re/re to repair would be the same regardless) -
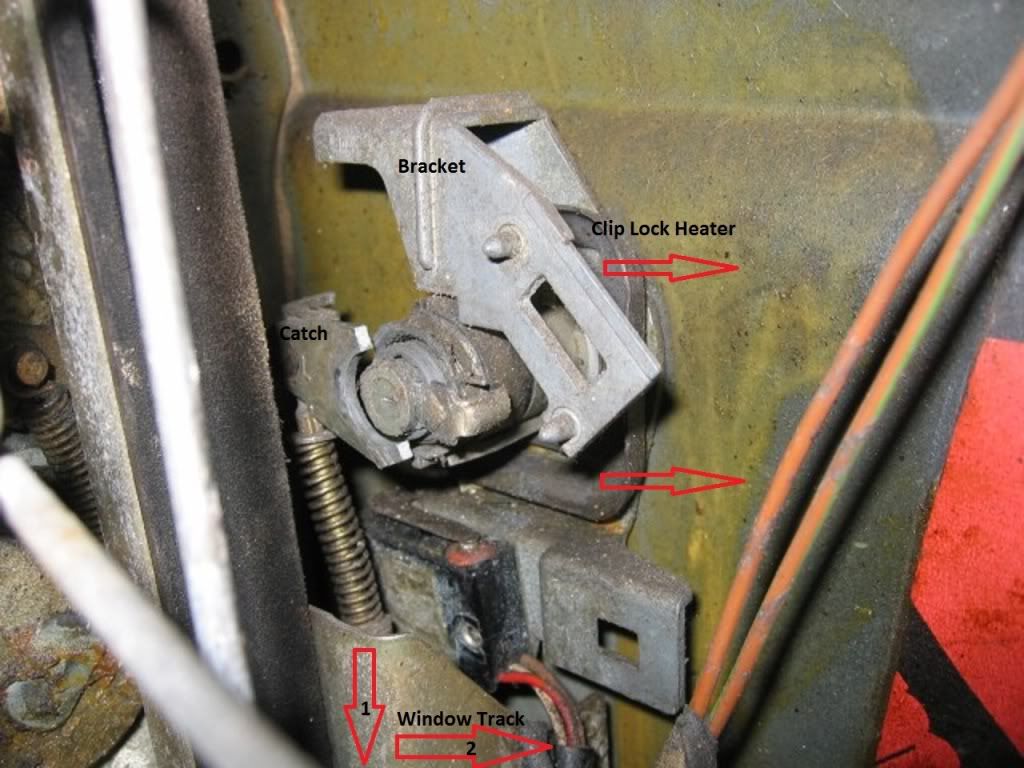
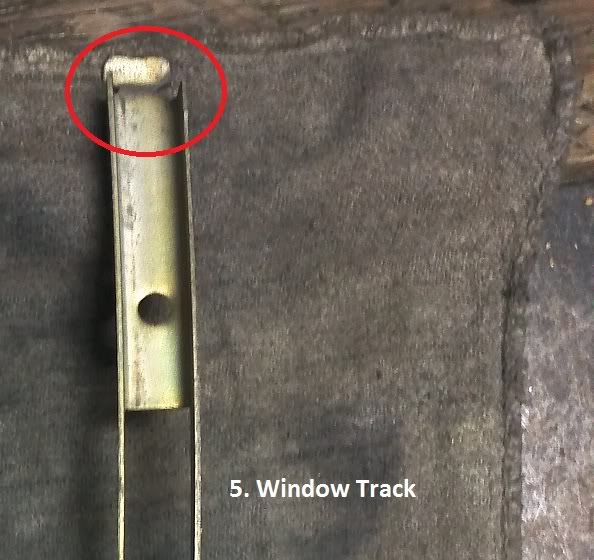
This picture shows the Window Track and how to remove it once the bolt is undone in the step above. The track moves down as you slide it off the rubber, and then away towards the right.
A screw driver angled into the edge of the clip lock heater, near the back of the top arrow in the image, and using the bracket as leverage will get this out. Be careful not to put too much pressure on the bracket as it will break (the bracket holds the actuator switch - don't break it). Before removing the clip lock heater that holds the cylinder in place, make sure you remove the circlip holding the catch below the spring. You'll see the circlip once the window track is out of the way.
Pay close attention to the top and bottom of the track for re-installation, as there are tabs that slides into brackets where the window and track meet. Not hard to spot or to put back, hopefully. The bottom tab by feel - EDIT - Turns out the bottom tab floats. Does not require placement. Window track bolt holds it in place. Just the top tab slips in - EDIT
Now the catch -
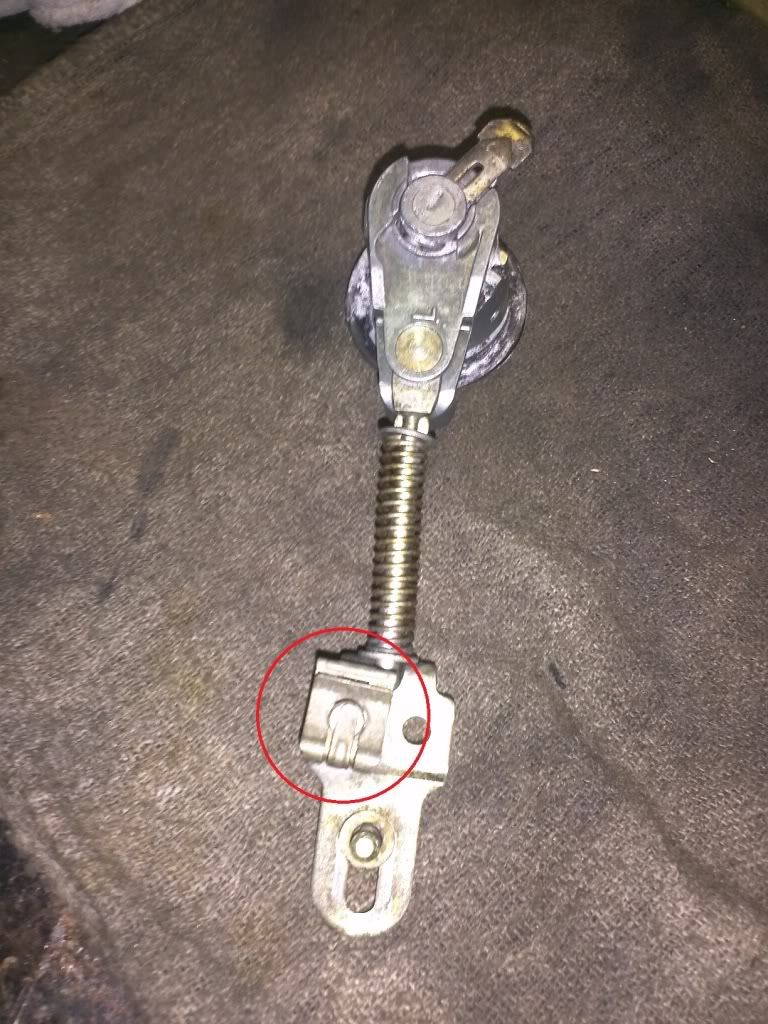
The catch has a small circlip circled in the picture above. This comes off with a screw driver and is done after you move the window track out of the way. Once the circlip is off, and the clip lock heater is removed, seperate it from the piece it was clipped to, then wiggle the cylinder and catch out the key lock cylinder hole from the outside of the door.
The catch's circlip removal -
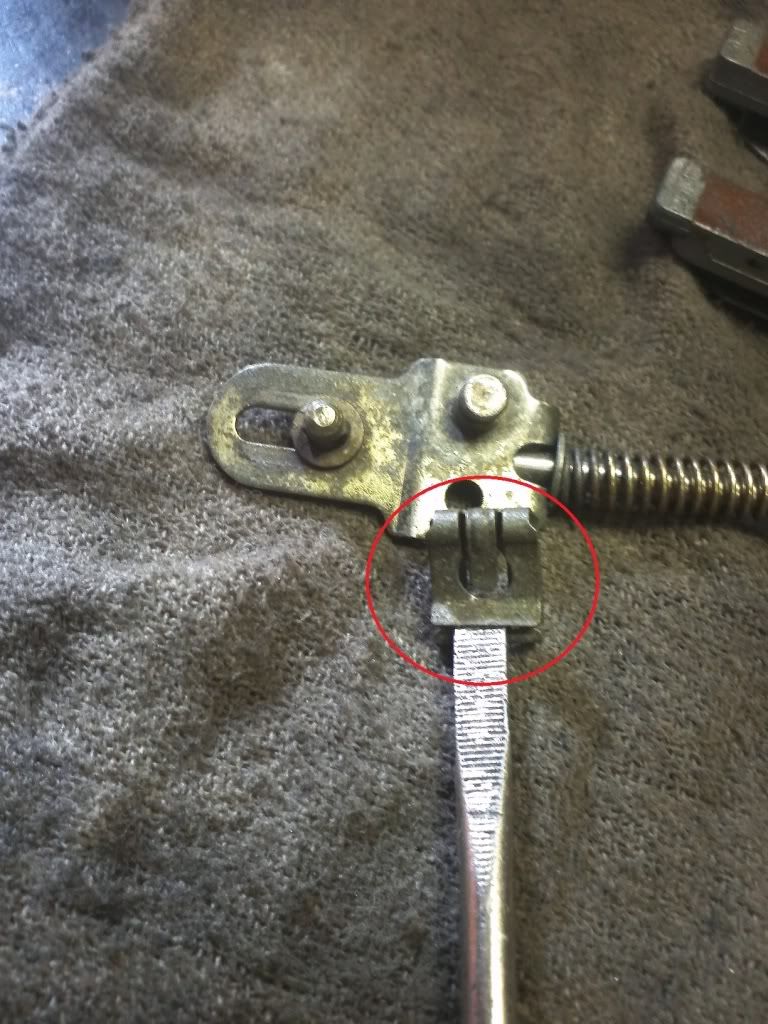
A flat screwdriver will take this clip off and it should also retain it from falling into the car, if you're lucky. If not, grab a magnet and fish. Once the circlip is off, and then the clip lock heater is removed, wiggle the lock out of the hole from the outside of the door, and straighten the catch's spring portion to remove. Wiggle, and jiggle, and angle it out. It'll come out without too much trouble.
The problem in my case -
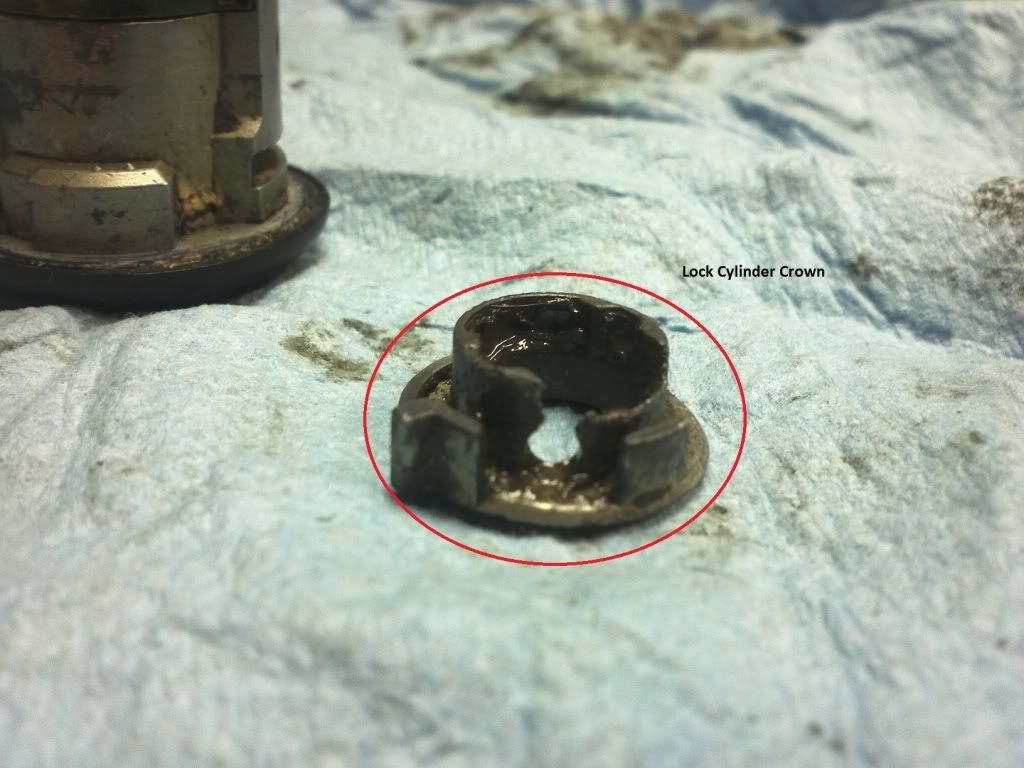
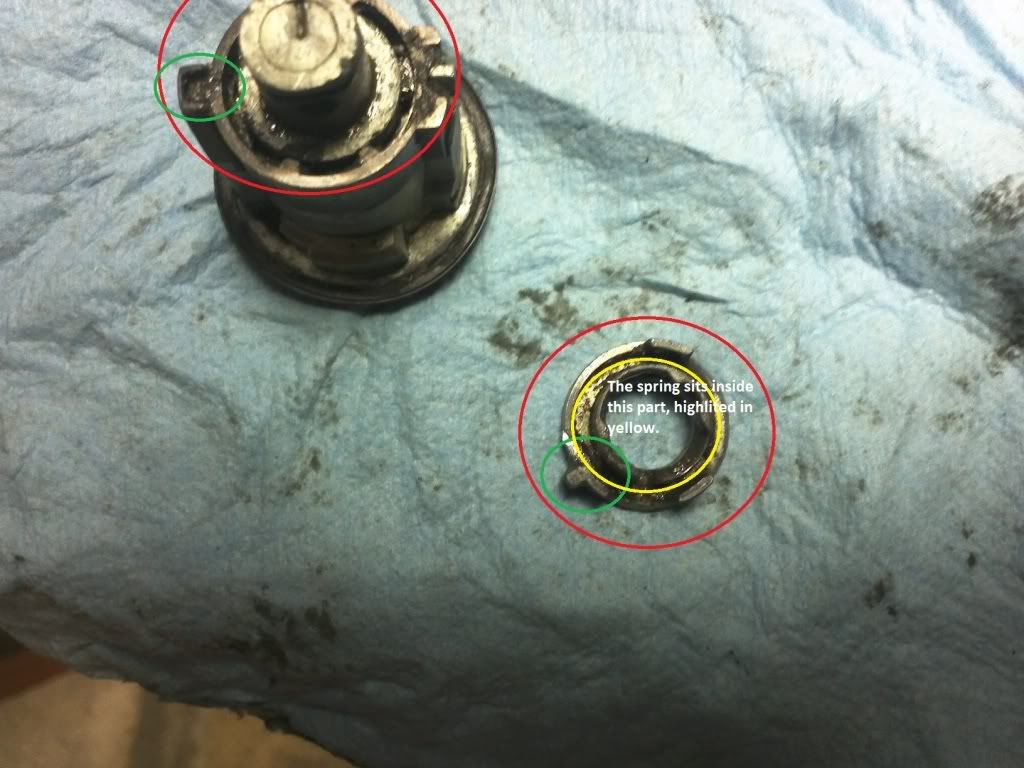
The crown, for lack of a better description degraded and eventually caused the flat pin to fall out, releasing the top of the catch rendering the lock inoperable. Of note, the central locking continued to work through the passenger and trunk locks. Just the key in the drivers door would not operate.
The flat pin -
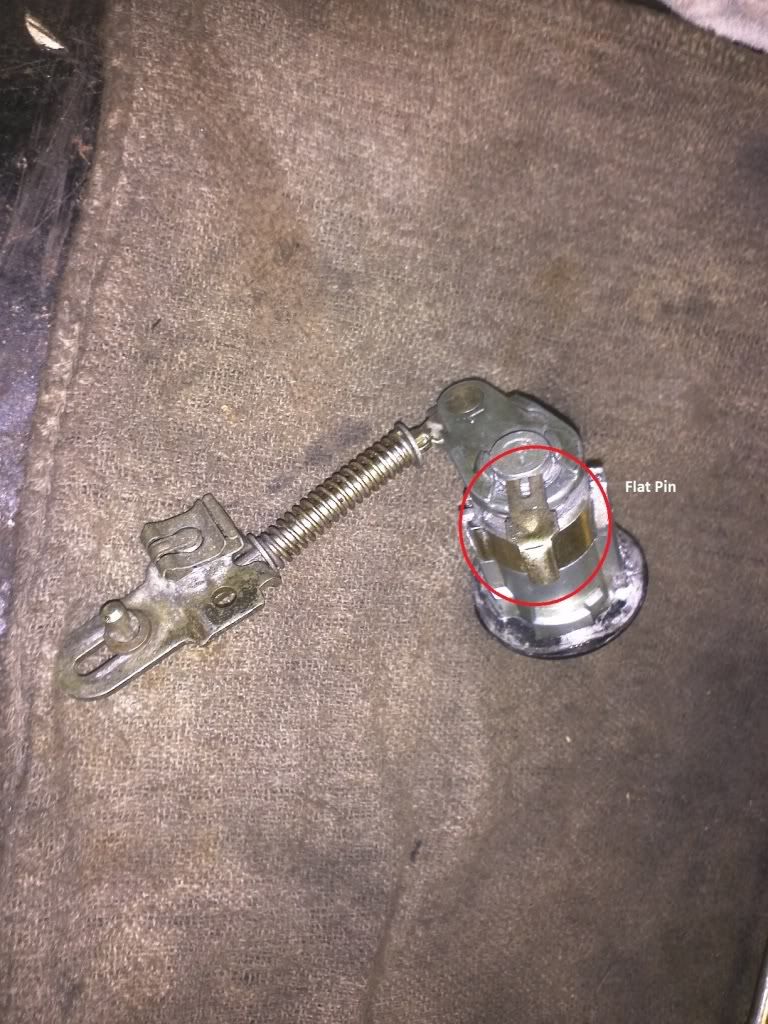
The flat pin comes out, and should only be removed on the bench with the catch still in place. The flat pin angled tab will break if you bend it too much. The catch has to come off from the circlip at the bottom for this whole procedure in my experience, so wait till the cylinder is on the bench to remove the flat pin. A little force with a flat screwdriver from the opposite end of the tab should suffice to pop it out.
Reassembly is reverse, and I haven't gotten to that point yet. I plan on finishing this write up once I get the crown piece from another forum member, hopefully soon. I wanted to write this up while it was fresh in my mind. It'll get very foggy, quickly. I'll post pics of the completed assembly of the cylinder and catch, but there are plenty of references to that already in this forum.
Job Complete -

This is how it looks once complete. Notice the position of the flat pin and how the spring ends keep it in place, as well, the spring brings the key back to base.
Reassembly Notes -
- the circlip is tricky, but long needle nose pliers will do the job pretty good.
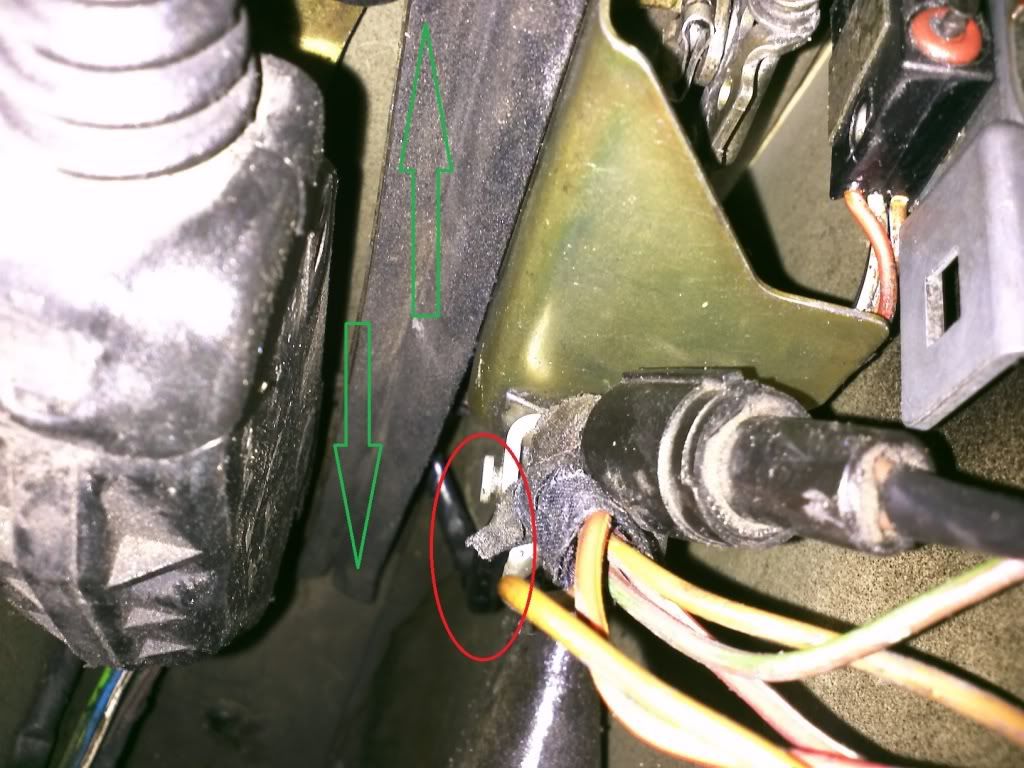
-the track must be clear of wiring
I hope this helps other forum members, as these write ups have helped my significantly. Of recent, the OBC light bar LED upgrade was a sinch and happy to be able to see the display.
Cheers,
George
I thought I'd take some time to write up my lock repair. I found a lot of useful information on this topic in this forum, but some of was a little vague as I'm cognitively inept, most times:-)
I've taken some photos and will borrow from already existing. I hope publishers don't mind.
First the list of parts disassembled on the bench (please forgive the lack of parts look up and proper terms) -

In the above pic we see a list of all the required, removed parts.
Next the Window Track removal -

This is a must, because you can't get the circlip off the catch without removing it. It's very easy and should go back in place just as easy. Mind the wiring clip, and just pull the wires out from it before removal.
A borrowed picture of the key cylinder in place (this image has a broken catch, but for all intents and purposes, I believe the re/re to repair would be the same regardless) -

This picture shows the Window Track and how to remove it once the bolt is undone in the step above. The track moves down as you slide it off the rubber, and then away towards the right.
A screw driver angled into the edge of the clip lock heater, near the back of the top arrow in the image, and using the bracket as leverage will get this out. Be careful not to put too much pressure on the bracket as it will break (the bracket holds the actuator switch - don't break it). Before removing the clip lock heater that holds the cylinder in place, make sure you remove the circlip holding the catch below the spring. You'll see the circlip once the window track is out of the way.
Pay close attention to the top and bottom of the track for re-installation, as there are tabs that slides into brackets where the window and track meet. Not hard to spot or to put back, hopefully. The bottom tab by feel - EDIT - Turns out the bottom tab floats. Does not require placement. Window track bolt holds it in place. Just the top tab slips in - EDIT

Now the catch -

The catch has a small circlip circled in the picture above. This comes off with a screw driver and is done after you move the window track out of the way. Once the circlip is off, and the clip lock heater is removed, seperate it from the piece it was clipped to, then wiggle the cylinder and catch out the key lock cylinder hole from the outside of the door.
The catch's circlip removal -

A flat screwdriver will take this clip off and it should also retain it from falling into the car, if you're lucky. If not, grab a magnet and fish. Once the circlip is off, and then the clip lock heater is removed, wiggle the lock out of the hole from the outside of the door, and straighten the catch's spring portion to remove. Wiggle, and jiggle, and angle it out. It'll come out without too much trouble.
The problem in my case -

The crown, for lack of a better description degraded and eventually caused the flat pin to fall out, releasing the top of the catch rendering the lock inoperable. Of note, the central locking continued to work through the passenger and trunk locks. Just the key in the drivers door would not operate.
The flat pin -

The flat pin comes out, and should only be removed on the bench with the catch still in place. The flat pin angled tab will break if you bend it too much. The catch has to come off from the circlip at the bottom for this whole procedure in my experience, so wait till the cylinder is on the bench to remove the flat pin. A little force with a flat screwdriver from the opposite end of the tab should suffice to pop it out.
Reassembly is reverse, and I haven't gotten to that point yet. I plan on finishing this write up once I get the crown piece from another forum member, hopefully soon. I wanted to write this up while it was fresh in my mind. It'll get very foggy, quickly. I'll post pics of the completed assembly of the cylinder and catch, but there are plenty of references to that already in this forum.
Job Complete -

This is how it looks once complete. Notice the position of the flat pin and how the spring ends keep it in place, as well, the spring brings the key back to base.
Reassembly Notes -
- the circlip is tricky, but long needle nose pliers will do the job pretty good.
-the track must be clear of wiring

I hope this helps other forum members, as these write ups have helped my significantly. Of recent, the OBC light bar LED upgrade was a sinch and happy to be able to see the display.
Cheers,
George
