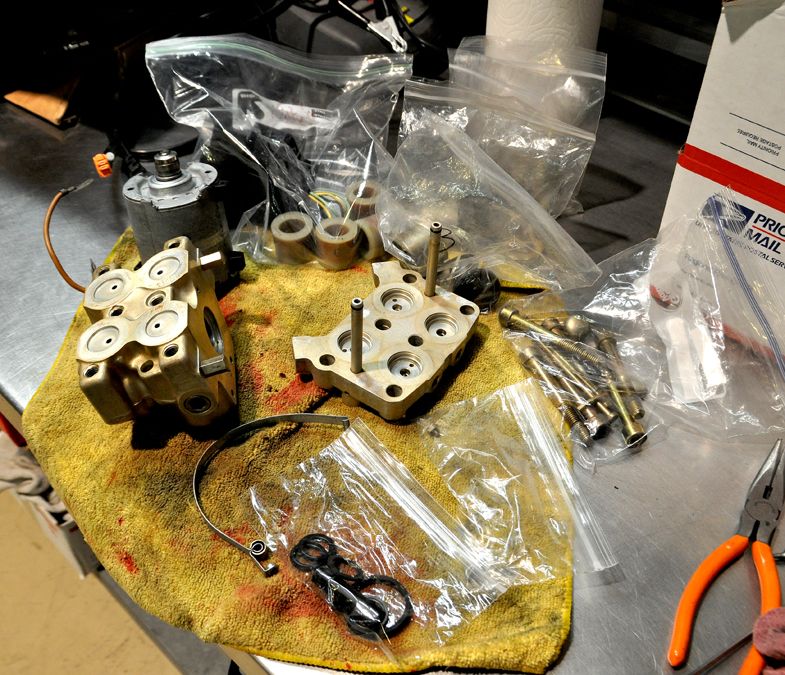
Page 1 of 2

ABS unit cleaning procedure

Posted: Oct 06, 2012 11:03 AM
by Justin535turbo
O.K. guys. I have used this site often for troubleshooting, there is a lot of information on here that is well written and very helpful. It's time I gave back! I took apart my ABS unit a couple of weekends ago and fixed my brake pulling problem. Hopefully other people will find this to be a useful writeup.

STEP 1. remove plastic cover for the electrical connector on the unit. you do this by removing the screw in the center and lifting straight upwards. note the position of the brown ground wire, it is clipped to the side of this plastic cover.
https://www.facebook.com/photo.php?fbid ... aae97e84fb

STEP 2. remove the two screws holding the harness in place, once these two screws are removed, you can remove the electrical connector by lifting it upwards.
https://www.facebook.com/photo.php?fbid ... 0653acb17b

STEP 3. remove all 6 hydraulic lines from the ABS valve block. be patient, and use line wrenches! you don't want to strip these.
https://www.facebook.com/photo.php?fbid ... dce019184e

STEP 4. lift the ABS unit upwards and tilt it rearwards. this is difficult to do because the hydraulic lines are fighting you the whole time. once it is back far enough, remove the nut on the front of the hydraulic motor for the ground wire. now remove the ABS unit.
https://www.facebook.com/photo.php?fbid ... d57276b307

STEP 5. once the ABS unit is removed, your master cylinder will drain itself and make a huge mess on your garage floor. i found that 14 gauge wire worked really well for jamming in there to keep it from dripping out. you only need to block the two lines coming from the master cylinder, they are the two that will be almost pouring brake fluid out.
https://www.facebook.com/photo.php?fbid ... af8f96791f

this is just a closer view of those wires stopping the brake fluid leak.
https://www.facebook.com/photo.php?fbid ... c0aa1ed416

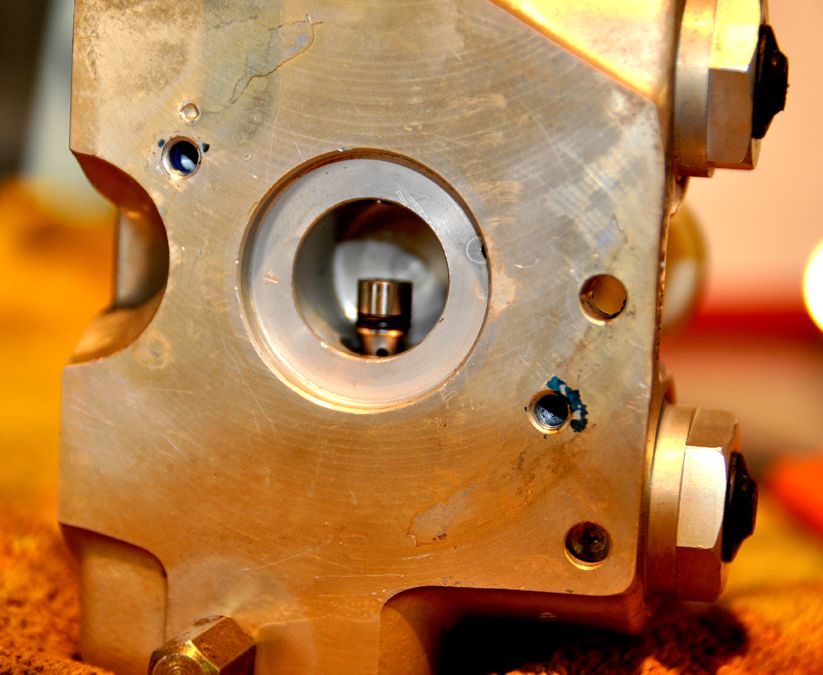
STEP 6. with the ABS unit on a bench, you need to remove the caps that cover the center bolts. these caps are sort of like older wheel bearing style dust caps. you can take a screw driver or punch and get under one edge to lift them up.
https://www.facebook.com/photo.php?fbid ... 62dfcc5aa0

STEP 7. use some penetrating oil on these bolts. they have probably been there for 25 years. notice that they are FIVE sided fasteners... I've never seen those before. i'm sure bosch didn't want anyone getting into these things. I found that a very close fitting allen does work if you tap it in with a hammer. i would not recommend doing this, but it worked for me. i was trying to get this done on a limited time frame and had to try. i am not sure where you can get the special tool for this.
https://www.facebook.com/photo.php?fbid ... 0a93119be5

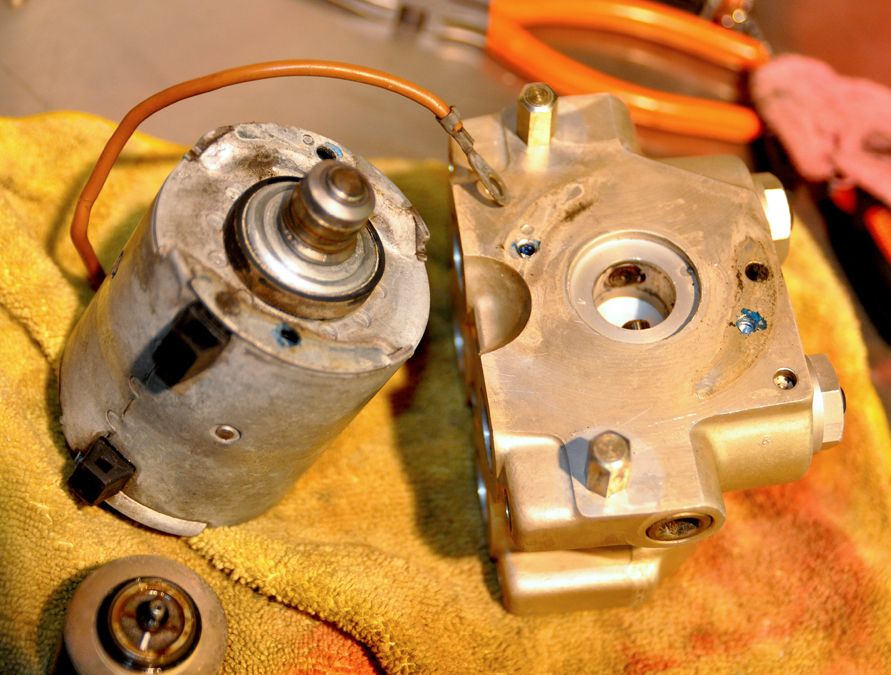
STEP 8. once those bolts are out, you can gently break free the valve block. be gentle because the wires that control those solenoids are still connected to the motor/relay assembly. note the two relays, the metal strap that attaches the relay box to the motor, and the positive wire for the pump
https://www.facebook.com/photo.php?fbid ... 66b17b86bd

STEP 9. remove the two relays. there is a small torx opposite the end of that metal strap, under where the relays were. loosen that bolt and the strap will become loose. remove the other torx bolt for the positive wire to the hydraulic pump. feed this wire down through the hole and lift the electrical section off with the hydraulic solenoids.
https://www.facebook.com/photo.php?fbid ... 924167973b

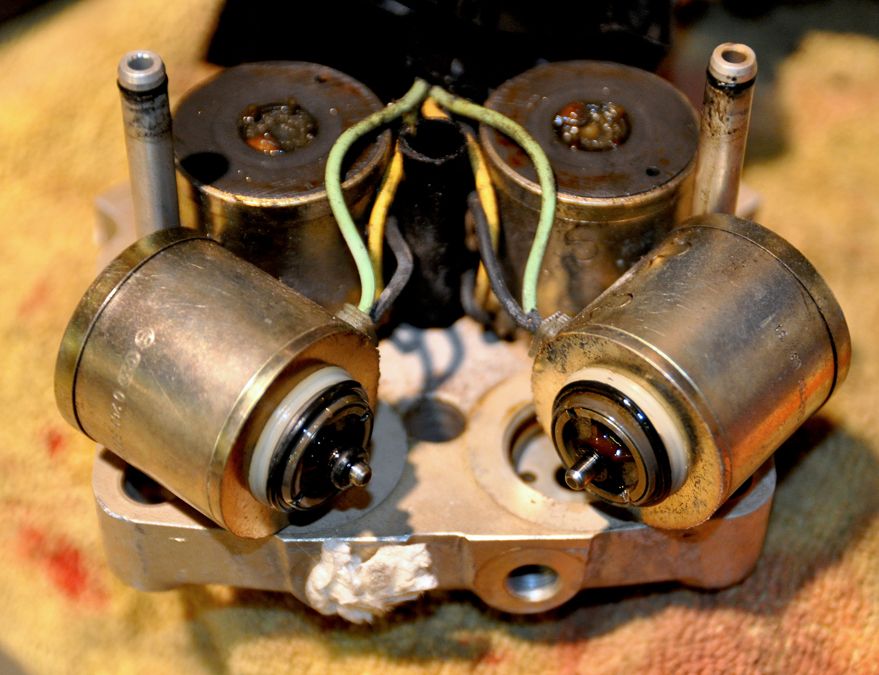
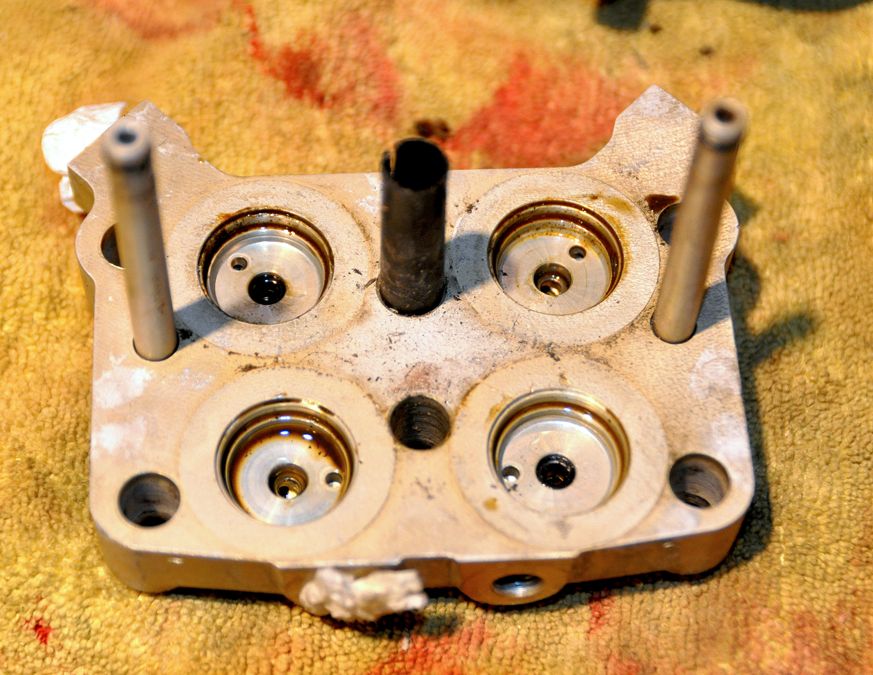
STEP 10. this is what the top valve block looks like. spray brake clean into the holes where the arrows are. fluid should come out of the small holes on top. make sure you really clean these out. do it until it appears that you have even flow out of all of them.
https://www.facebook.com/photo.php?fbid ... fd6dede41f

STEP 10. this is what the underside of the solenoids look like. note the small brown screens on all 4 of them. remove these screens by using a pick to get under the side where the larger piece of plastic is. spray them with brake clean. also spray brake clean into all 4 holes on the block, fluid should come out of the top of the solenoids. again, spray the hell out of it until you think they are all flowing equally.
https://www.facebook.com/photo.php?fbid ... 69f4a69e4d

a close up of one of the solenoids. note the small spring, there is a check ball under it. if it falls out, the ball goes in first, then the small part of the spring (it is tapered) goes towards the ball. the brown screen has a small tab that slides into the spring.
https://www.facebook.com/photo.php?fbid ... d23599ce31

STEP 11. reassemble it all and THOROUGHLY bleed the brakes. doing this fixed my brake pull 100%. i tried activating the ABS, bleeding it a bunch of times. nothing worked, so i tried this. like i said, hopefully other people find this helpful if they discover their ABS unit is causing brake problems. don't worry if you don't see any big chunks of shit coming out of the unit, i was not able to find the source of my restriction either. good luck!
Posted: Oct 06, 2012 12:12 PM
by AT8M5
WOW! What a great write-up, thanks for taking the time to post this. The red arrows make following it all that much easier. :up:

I'll let someone else say "Sticky this".

Karl

Posted: Oct 06, 2012 1:42 PM
by Jeremy
I've seen a method for bleeding the brakes that involved activating the ABS unit (in brief bursts) while pressure bleeding the brake system. Basically, the method was: attach and pressurize pressure bleeder, open caliper bleeder, activate ABS pump for about 10-15 seconds, turn off ABS pump, close caliper bleeder.

The theory was that air has a tendency to get stuck in the ABS unit and activating it while bleeding got those bubble unstuck. I can't recall which pins on which relay you had to jumper in order to manually activate the ABS pump, but it seems like a good first step to try before going through all this trouble. Maybe someone else knows or is better at reading the ETM than I am and can tell us.

Jeremy

Posted: Oct 06, 2012 4:08 PM
by TheLazyDog
Jeremy wrote:I've seen a method for bleeding the brakes that involved activating the ABS unit (in brief bursts) while pressure bleeding the brake system. Basically, the method was: attach and pressurize pressure bleeder, open caliper bleeder, activate ABS pump for about 10-15 seconds, turn off ABS pump, close caliper bleeder.

The theory was that air has a tendency to get stuck in the ABS unit and activating it while bleeding got those bubble unstuck. I can't recall which pins on which relay you had to jumper in order to manually activate the ABS pump, but it seems like a good first step to try before going through all this trouble. Maybe someone else knows or is better at reading the ETM than I am and can tell us.

Jeremy
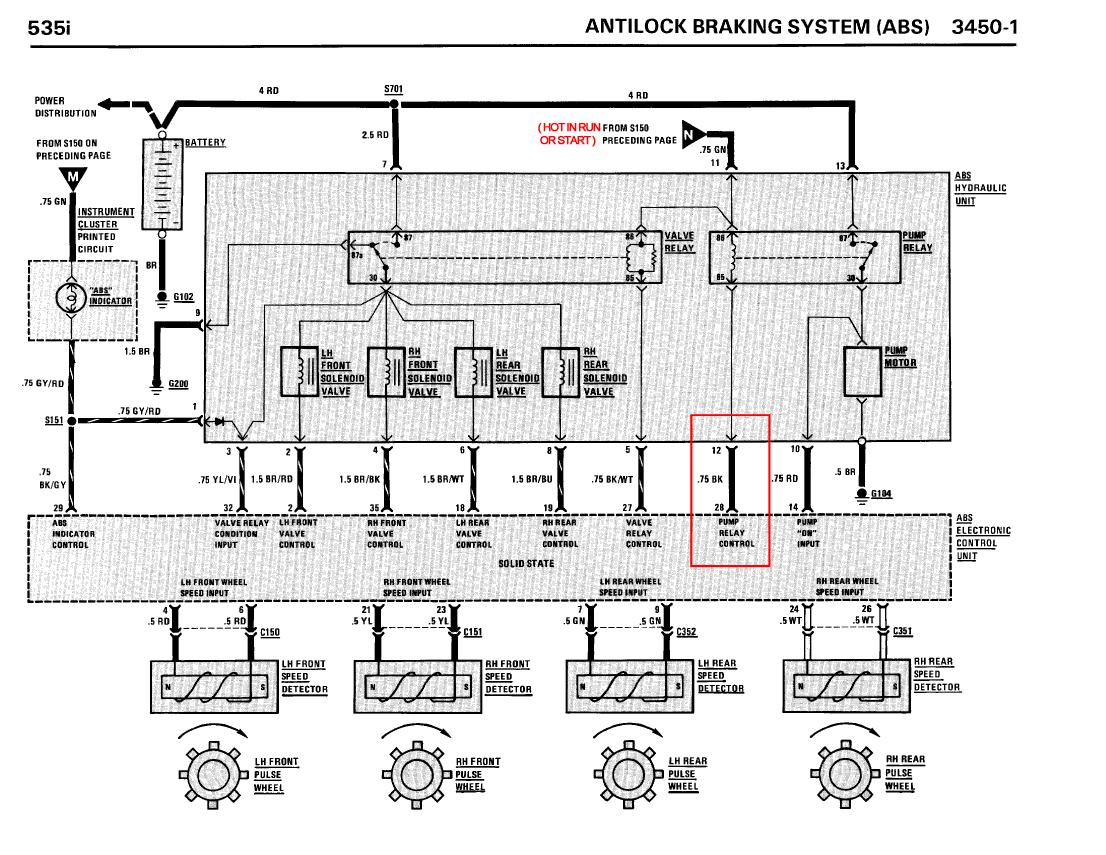
To run just the pump itself, it looks like jumping pin 12 on the hydraulic unit (or 85 on the pump relay) to ground would do it.

Image

I cannot say I know for sure...

Posted: Oct 06, 2012 7:20 PM
by bobby in Derby City
CanisLupusRobotus wrote:
Jeremy wrote:I've seen a method for bleeding the brakes that involved activating the ABS unit (in brief bursts) while pressure bleeding the brake system. Basically, the method was: attach and pressurize pressure bleeder, open caliper bleeder, activate ABS pump for about 10-15 seconds, turn off ABS pump, close caliper bleeder.

The theory was that air has a tendency to get stuck in the ABS unit and activating it while bleeding got those bubble unstuck. I can't recall which pins on which relay you had to jumper in order to manually activate the ABS pump, but it seems like a good first step to try before going through all this trouble. Maybe someone else knows or is better at reading the ETM than I am and can tell us.

Jeremy
To run just the pump itself, it looks like jumping pin 12 on the hydraulic unit (or 85 on the pump relay) to ground would do it.

Image

I cannot say I know for sure...

I manually activated the ABS pump about a month or two ago while trying to bleed a stubborn front driver side caliper on the M5. You have to run the pump and also actuate the solenoid for that line in short 5 second burst. I can't recall all the connections made but above schematic in the ETK will guide you through it as long as one can read it.

Posted: Oct 06, 2012 8:20 PM
by TheLazyDog
bobby in Derby City wrote:
CanisLupusRobotus wrote:
Jeremy wrote:I've seen a method for bleeding the brakes that involved activating the ABS unit (in brief bursts) while pressure bleeding the brake system. Basically, the method was: attach and pressurize pressure bleeder, open caliper bleeder, activate ABS pump for about 10-15 seconds, turn off ABS pump, close caliper bleeder.

The theory was that air has a tendency to get stuck in the ABS unit and activating it while bleeding got those bubble unstuck. I can't recall which pins on which relay you had to jumper in order to manually activate the ABS pump, but it seems like a good first step to try before going through all this trouble. Maybe someone else knows or is better at reading the ETM than I am and can tell us.

Jeremy
To run just the pump itself, it looks like jumping pin 12 on the hydraulic unit (or 85 on the pump relay) to ground would do it.

Image

I cannot say I know for sure...

I manually activated the ABS pump about a month or two ago while trying to bleed a stubborn front driver side caliper on the M5. You have to run the pump and also actuate the solenoid for that line in short 5 second burst. I can't recall all the connections made but above schematic in the ETK will guide you through it as long as one can read it.
In which case you would also jump the corresponding pin for the solenoid you want open (2, 4, 6, or 8). I imagine you can jump the solenoid pin first -- to leave the valve open -- then run the pump. My facts need to be checked though...

Posted: Oct 06, 2012 8:38 PM
by ///Mflossin
Interesting thread. Nice information to have.

Posted: Oct 07, 2012 1:03 AM
by Justin535turbo
i tried activating the ABS, then pressure bleeding it...but not at the same time. there is a procedure for doing that on the newer cars, but i didn't think to do that on this one.

oh, and air stuck in the unit was not the problem. so i am not sure that pressure bleeding it while activating ABS would have worked Anyway. it was some type of restriction. putting pressure on the brake pedal yielded very little result when the left front line was opened up. if it was air trapped in there fluid would still be easy to push out. i had a very hard pedal, and very little fluid flow with that bleeder open at the caliper. AND the line open right after the ABS unit. but not before it. that's how i determined that the source of the restriction was in the unit itself.

Posted: Oct 07, 2012 12:19 PM
by Jeremy
Justin - Doing both together is key, though I agree that it probably wouldn't have helped your specific situation. Sounds like your brake system maybe didn't get fresh fluid at regular intervals at some point in its life and/or some piece of something got stuck in there. A lot can happen over the life of a car as old as these are now.

I presented that info as a starting point for others. It's certainly an easier first step than removing, dismantling, cleaning, and re-assembling the ABS unit. Did you get anything telltale out of the ABS unit as you were cleaning it? Any clues as to what gummed up the ports?

Posted: Oct 07, 2012 1:22 PM
by Justin535turbo
most likely that is what happened. i saved this particular car from sitting in some guys garage after 3 years. so i really doubt that it had been well maintained. i wasn't able to find anything, but i did notice a difference from when i started spraying cleaner through it until when i was finished.

Re: ABS unit cleaning procedure

Posted: Nov 09, 2014 11:25 AM
by trevmmeister
Going to do this today. At the autoparts store right now and I have no idea what size the 5 sided allen is. Anyone know?

Re: ABS unit cleaning procedure

Posted: Nov 10, 2014 7:15 AM
by JohnH
trevmmeister wrote:Going to do this today. At the autoparts store right now and I have no idea what size the 5 sided allen is. Anyone know?
Good luck with finding one of those. There seem to be many ways of measuring a pentagonal key. They seem to either measure the length of one of the flats, or the "diameter" from one of the flats to the angle on the other side. You can find keys on ebay for E30 girling hydraulic units. They are a bit big (c.10mm) so you need to grind them down a bit on a wheel (to about 9mm).

You may be able to use 5 sided security star bit if you can find one of about the right size. I searched but couldn't find one.

Re: ABS unit cleaning procedure

Posted: Nov 10, 2014 2:27 PM
by Jeremy
Not that hard to find. http://www.amazon.com/gp/product/B0026W ... d_i=507846

Other sets are available on Amazon as well. I have no idea if any are better or worse than any of the others.

Re: ABS unit cleaning procedure

Posted: Nov 10, 2014 5:16 PM
by JohnH
Its not that I couldnt find security star set, rather one with big enough bits. I think the TX55 is to small.

Edit. Jeremy that TS50/55 maybe okay. I measured the hydraulic unit cap screw and its 8mm flat to peak. I also measured my TS set and a TS40 was 6mm, a TS35 was 5mm and a TS30 was 4mm so a 45 may be 7mm and a 50 might be 8mm. Fingers crossed.

Its a shame the OP didnt let on.

Re: ABS unit cleaning procedure

Posted: Nov 11, 2014 8:15 PM
by LeiseyJr
Can you describe your brake pulling problem? Was the unit making a lot of noise? I'm hoping this is not my problem for my car.

Re: ABS unit cleaning procedure

Posted: Feb 07, 2015 1:40 AM
by Justin535turbo
The brake pull i had was very odd. During normal braking, it wasn't noticeable at all. On VERY sharp aggressive brake applications however, the car would pull to the right for a split second, then correct itself. As if brake fluid to the left front caliper was somehow "delayed" but then reached equal pressure after 1 second. If i activated the ABS (slid the car on gravel) the brake pull would disappear until the next morning, then it would return. I traced it down to the ABS module by cracking all the lines open one at a time. With a pressure bleeder on the brake fluid reservoir, every line in the car immediately started to seep brake fluid when opened. With the exception of the left front lines. You'd crack it open, wait 1 second, then it would start to flow. every other line flow was immediate. The 2 lines going into the ABS module had perfect flow, the 3 others (left rear, right rear, right front) all had perfect flow. The left front had the same 1 second delay. This is why i thought to just try taking it apart to find out what the issue could be. This worked great for about 18 months. HOWEVER after a year and a half, the brake pull is back... damnit. The E28 is no longer a daily driver, so it's just waiting for me to install a used ABS unit. I also need a front wheel speed sensor (anyone have one?) i damaged one of them when i put on my SPAX springs. so I can't even activate the ABS to get it to go away for a day. Oh, and it was not making any noise, except when the ABS was activated of course.

Re: ABS unit cleaning procedure

Posted: Mar 22, 2015 11:12 AM
by JSmoove
I just wanted to update this thread with what I had discovered yesterday after taking my ABS unit apart.

The problems I was experiencing included uneven brake pressure with a pull to the right when initiating the brakes. Also when I went to bleed the brakes after a big brake upgrade, brake fluid would barely flow out of the bleeder valve. I ended up tearing the seal in my master cylinder because it required so much brake pressure to push fluid through the lines.

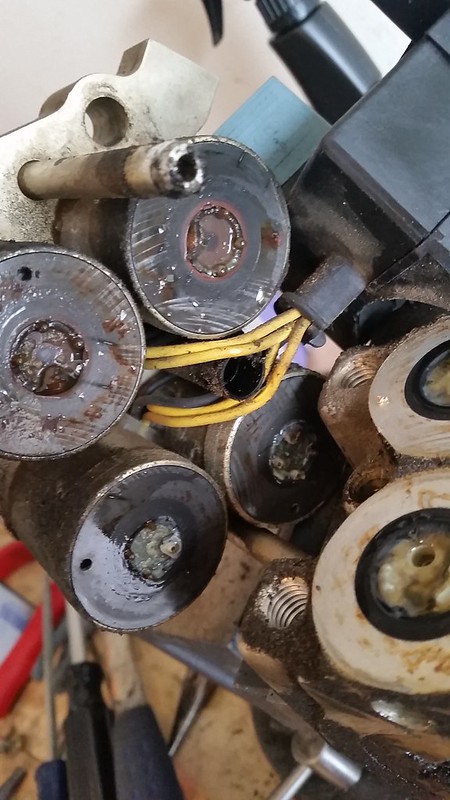
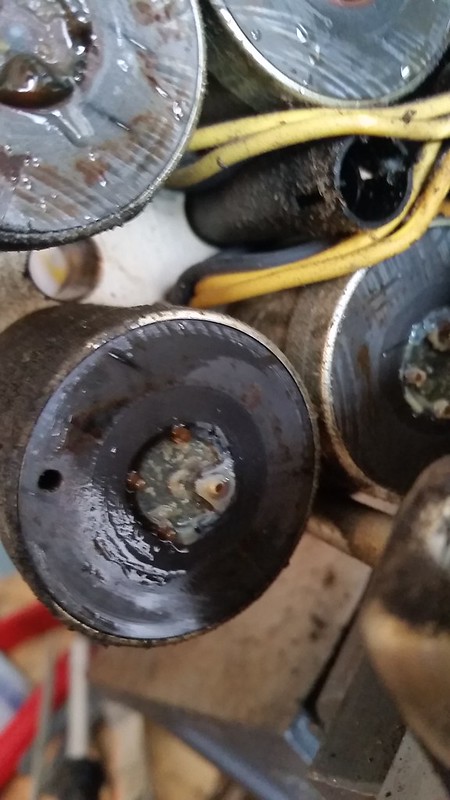
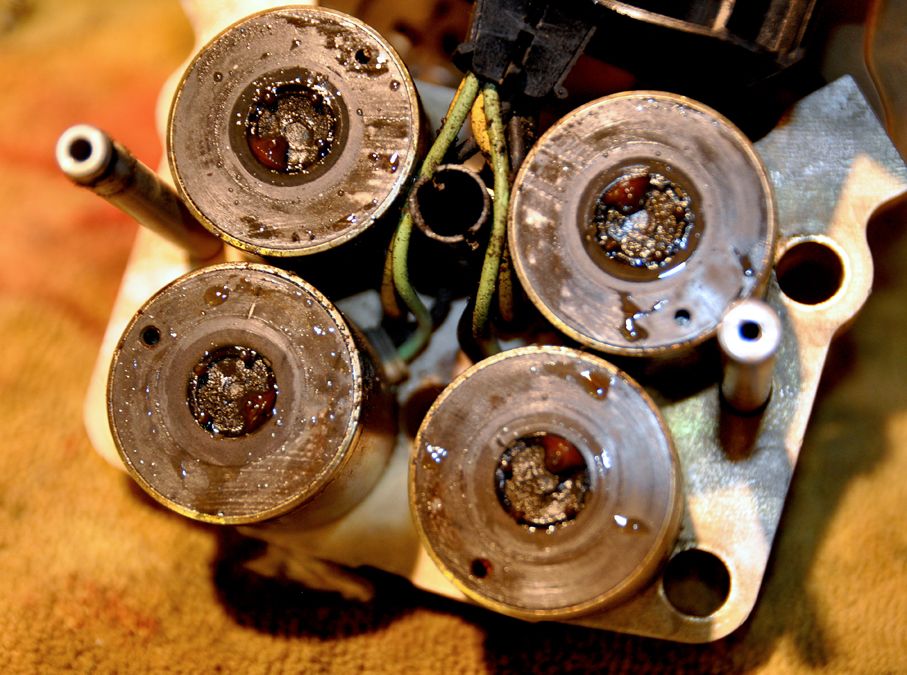
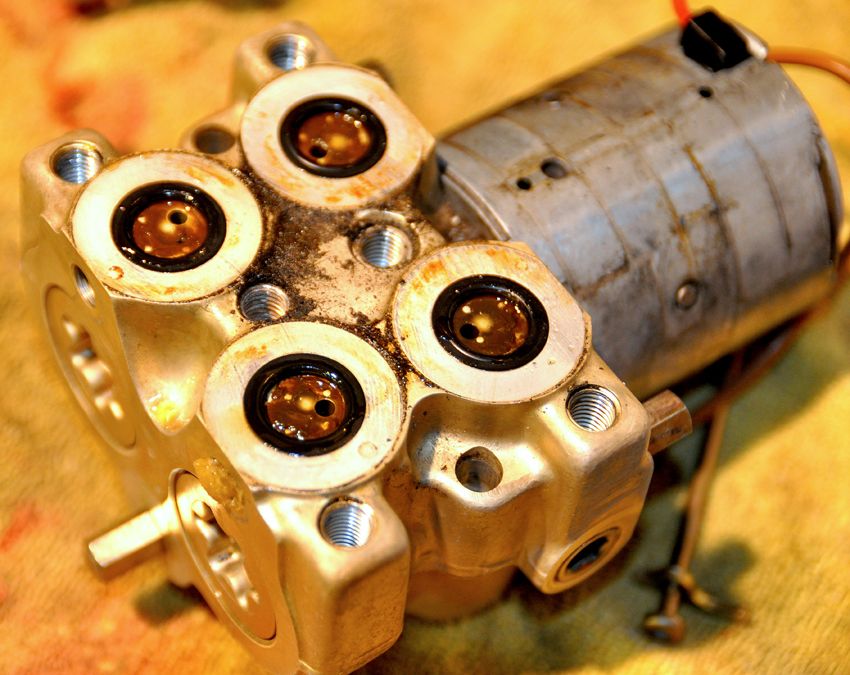
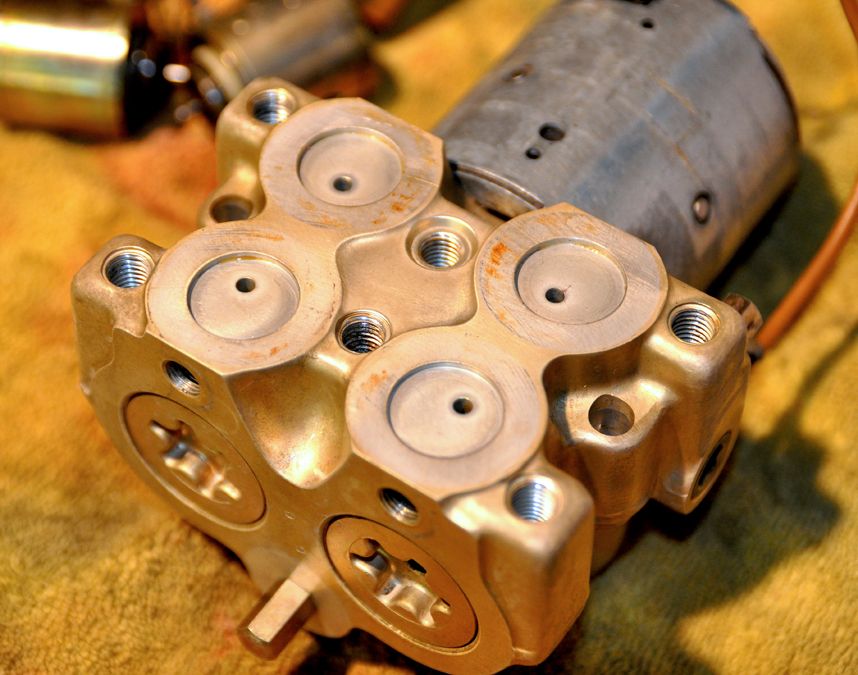
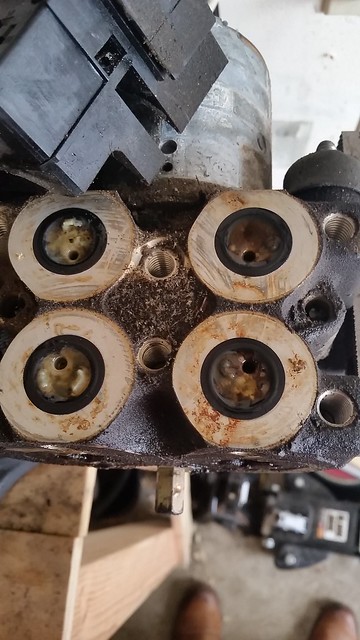
Maybe some one with a little more knowledge can chime in here, but I'm thinking what is shown below might be the problem. My ABS unit looks like someone who is in dire need of a triple bypass surgery. This stuff looks exactly like fat deposits. Change your brake fluid!

ImageABS Unit off '86 BMW 535i by Brobby87, on Flickr

ImageABS Unit off '86 BMW 535i by Brobby87, on Flickr

ImageABS Unit off '86 BMW 535i by Brobby87, on Flickr

Re: ABS unit cleaning procedure

Posted: Sep 08, 2015 10:04 PM
by ScottKendall
I'm resurrecting this thread. Can someone comment on cleaning the ABS pump. Recommended or not? I got the problem described. Right front and left rear not bleeding unless I really push hard on the brake pedal. New lines and calipers did not help. The bleeding/power flushing was done with the caliper and flexible line completely off the car. I thought maybe it would flush out any crud, but that did not happen.

Re: ABS unit cleaning procedure

Posted: Sep 08, 2015 10:51 PM
by Shawn D.
ScottKendall wrote:I'm resurrecting this thread. Can someone comment on cleaning the ABS pump. Recommended or not? I got the problem described. Right front and left rear not bleeding unless I really push hard on the brake pedal. New lines and calipers did not help. The bleeding/power flushing was done with the caliper and flexible line completely off the car. I thought maybe it would flush out any crud, but that did not happen.
Sounds as if it's something your system might benefit from.

Re: ABS unit cleaning procedure

Posted: Sep 09, 2015 7:57 AM
by JSmoove
I say try it out. After cleaning my ABS of the crap shown above, the bleeding process was much easier.

A word of advice, take your time when screwing in the hard fittings on the back of the ABS unit. You don't want to cross thread one and it can be done fairly easily.

Re: ABS unit cleaning procedure

Posted: Sep 11, 2015 7:27 AM
by ScottKendall
So I take it there are no seals that will rip or something that will crack when I take it apart just because it is old. I'm confident in my ability to not do something "wrong". I'll put it that way.

Re: ABS unit cleaning procedure

Posted: Sep 11, 2015 7:30 AM
by JSmoove
Nope. Just remove the little screens that have gunk build up with some needle nose pliers.

Re: ABS unit cleaning procedure

Posted: Nov 21, 2015 10:23 PM
by harrypalmer
JSmoove wrote:I just wanted to update this thread with what I had discovered yesterday after taking my ABS unit apart.

The problems I was experiencing included uneven brake pressure with a pull to the right when initiating the brakes. Also when I went to bleed the brakes after a big brake upgrade, brake fluid would barely flow out of the bleeder valve. I ended up tearing the seal in my master cylinder because it required so much brake pressure to push fluid through the lines.

Maybe some one with a little more knowledge can chime in here, but I'm thinking what is shown below might be the problem. My ABS unit looks like someone who is in dire need of a triple bypass surgery. This stuff looks exactly like fat deposits. Change your brake fluid!

ImageABS Unit off '86 BMW 535i by Brobby87, on Flickr

ImageABS Unit off '86 BMW 535i by Brobby87, on Flickr

ImageABS Unit off '86 BMW 535i by Brobby87, on Flickr
Great pics. After all that hard work, were you successful in "fixing" the brake pull to the side? I may need to do the same and I'm wondering. Thanks

Re: ABS unit cleaning procedure

Posted: Nov 21, 2015 10:29 PM
by JSmoove
Yes this definitely helped. Before doing it I could barely get any brake fluid pushed through 3 out of 4 calipers. Afterwards bleeding all four corners was pretty easy.

The hardest part of the job was getting the abs seated back in and getting the hardlines on without cross threading them. Be careful as I managed to do that to one of the lines.

Re: ABS unit cleaning procedure

Posted: Nov 21, 2015 10:46 PM
by harrypalmer
Hey, Thank you so much for your flash reply! I think I will do this. Good luck!

Re: ABS unit cleaning procedure

Posted: Nov 21, 2015 10:52 PM
by JSmoove
Not a problem. Having this forum through the tapatalk app on my phone makes replying pretty quick and easy.

Good luck. Let us know how it works out for you.

Re: ABS unit cleaning procedure

Posted: Nov 21, 2015 10:57 PM
by harrypalmer
I will. Thanks once again.

Re: ABS unit cleaning procedure

Posted: Nov 21, 2015 11:45 PM
by Justin535turbo
I am glad to see that this is being performed with some success. I am the first to admit that this is in no way a BMW approved procedure. But with cars this old we have to get creative. Remember to double and triple check yourself after a repair like this for any signs of brake fluid leakage around the unit after you are done and periodically afterwards. Luckily our cars do have a low brake fluid warning lamp (assuming yours still works) but you can't be too careful with your braking system.

Re: ABS unit cleaning procedure

Posted: Nov 21, 2016 11:44 PM
by gjargeris
Are replacement parts available for this ABS Hydro Unit. Does anybody know what the technical difference is between a 1988 E28 ABS Hydro Unit Bosch 0265201013 and 026502017? It appear that the former applies to all Series-5, while the latter is for the M5. Are any or all of the parts interchangeable? Thanks.

Re: ABS unit cleaning procedure

Posted: Nov 28, 2016 6:53 PM
by vinceg101
gjargeris wrote:Are replacement parts available for this ABS Hydro Unit. Does anybody know what the technical difference is between a 1988 E28 ABS Hydro Unit Bosch 0265201013 and 026502017? It appear that the former applies to all Series-5, while the latter is for the M5. Are any or all of the parts interchangeable? Thanks.
Unknown about replacement parts but I highly doubt it. Bosch didn't want you to mess with these things and given the sensitive nature and exact demands of an ABS unit, they likely didn't even want regular mechanics mucking about inside them either (hence the security tamperproof Torx bit case screws).
Don't know about the interchangeability either, but they might be since the basic systems are the same. It might be a brake line placement and inlet location or mounting that is different :dunno:

On that note, I tackled this this past weekend. I posted this part in my M535i Restoration thread, but here is the part that is relative to this procedure. This contains some overlap from the previous submissions, so just bear with it. It deals with disassembly only, reassembly is later hopefully after it all has been re-plated:

First off, I wouldn’t have thought this possible if I had not come across this thread:http://www.mye28.com/viewtopic.php?f=3& ... h#p1339558
Most of what I detail here expands from his thread, but I have filled in some detail where it was missing or a tad vague. So read his thread as background preparation.
The ABS Pump is a relatively simple mechanism really as there aren’t too many moving parts; it’s more like an electronically controlled switch or valve.

Step 1: Disassembly
First, disconnect the brake lines from the pump; use an 11mm Flare End wrench. Unscrew the small center screw that secures the black plastic cover over the electrical connections (it doesn’t come out, it just loosens and stays in the cover). Lift off the cover, set aside and then disconnect the electrical harness plug from the switch. Also remove the two relays.
Next loosen the two bolts on the sides of the ABS that secure it to the fender well through the two dome covered rubber bushings. These bushings are just slip-fitted to two hex shaped studs on the ABS. You kind of need to rock and tilt the ABS towards the back (front end up). Be sure to plug the brake line inlet ports and cover the brake line ends themselves; both will be full of residual brake fluid and WILL leak everywhere.
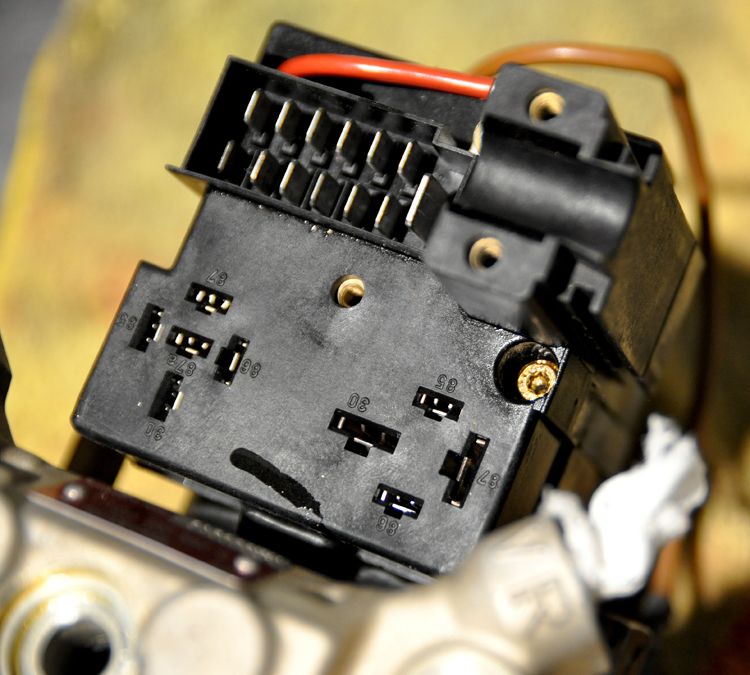
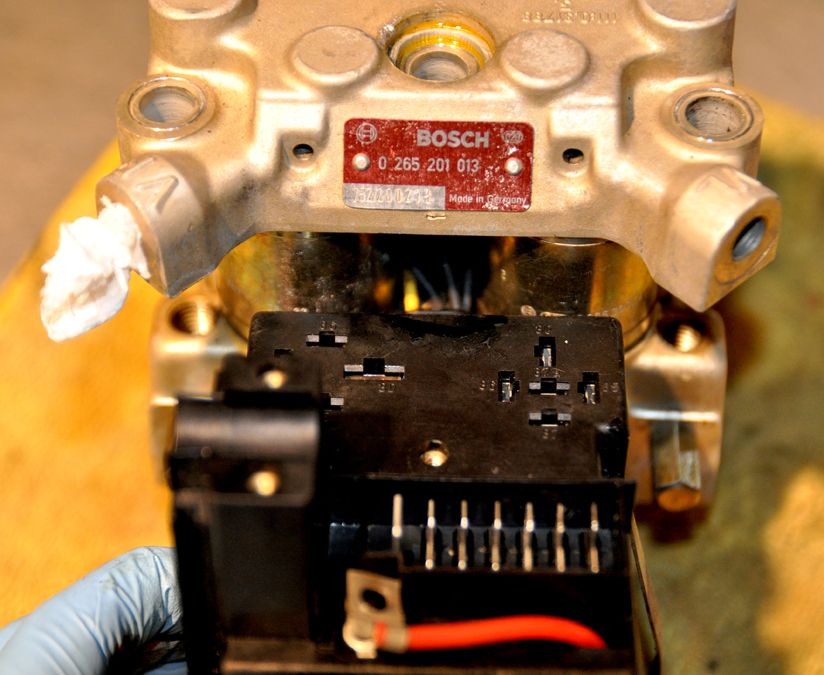
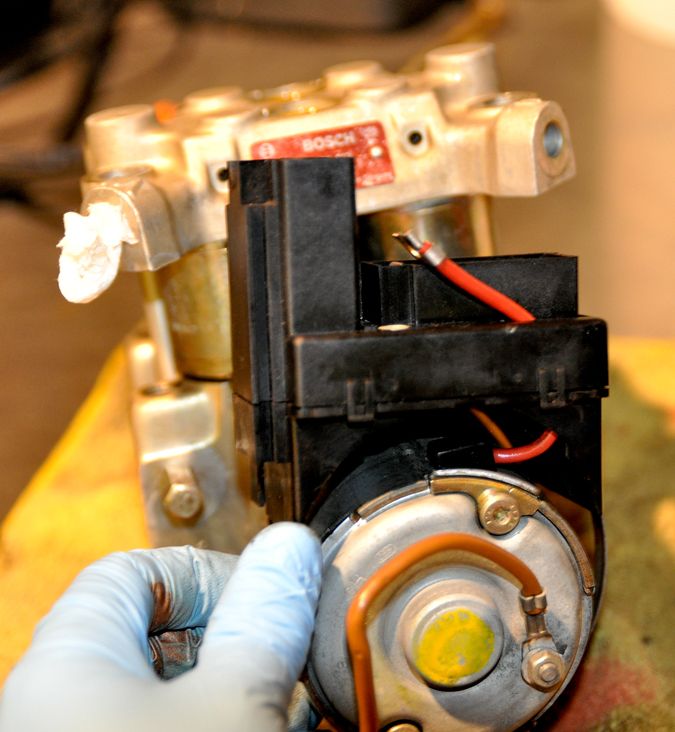
With the ABS on a bench (on top of a towel preferably), you need to remove the electronic module that is piggy-backed on the actual pump unit (the big silver round barrel off the back of the assembly). First disconnect the red power wire, save the really small little screw and washer. Next remove the equally small Torx bit screw over to the side of the top of the plastic terminal:
Image

Completely back this screw out, it secures the thin metal band clamp that goes around the barrel of the pump. Once you remove the screw you can pop the band off. Feed the red power wire through the slot on the back of the terminal, then lift the whole terminal off the barrel:
Image

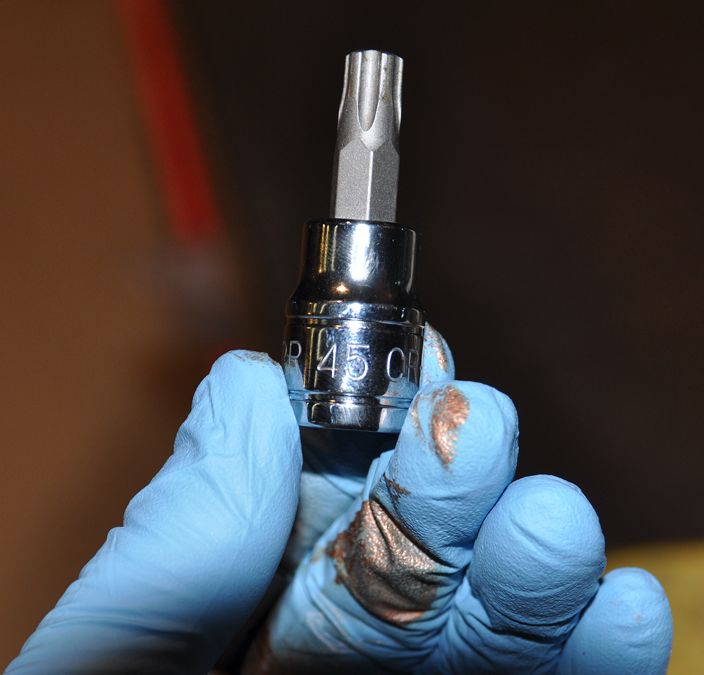
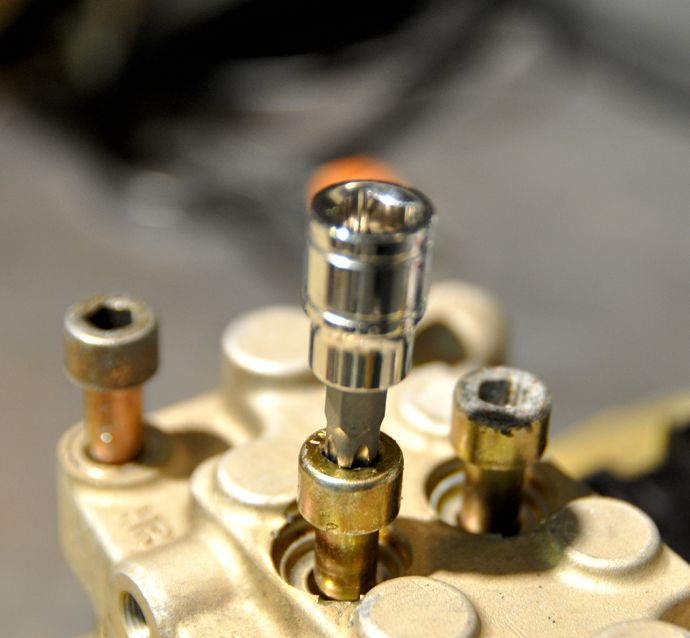
Now you can set about separating the ABS pump into its’ smaller assemblies. First off you need one of these: a 45ITV socket bit, otherwise known as a 5-point Tamperproof Torx Bit:
Image
Image

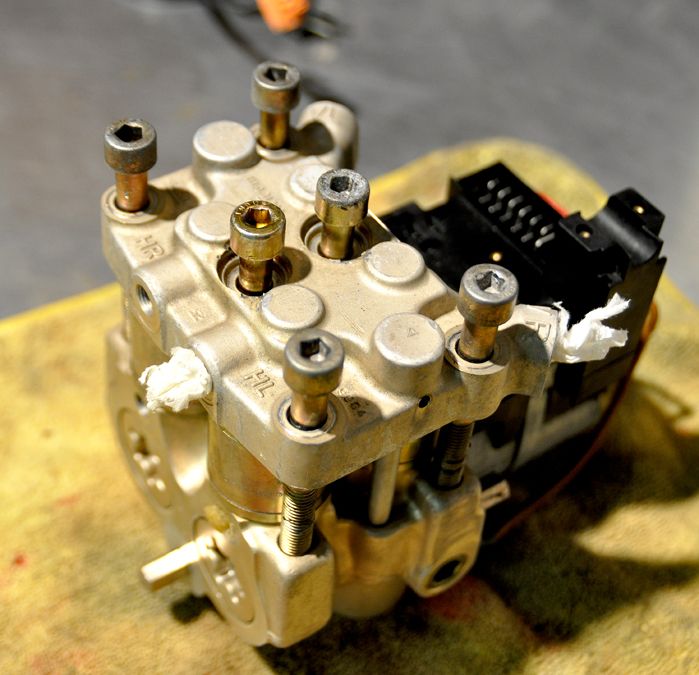
It’s the only way to get the case bolts out (that and a healthy portion of PB Blaster). You need to remove the two domed-shaped cover caps over the two center bolts. Carefully pry them up with a small bit screwdriver, but expect some marring and/or damage; there is no simple easy way to get them off.
Image

Once the bolts are out, pull the top half up off the base (some gentle prying necessary):
Image

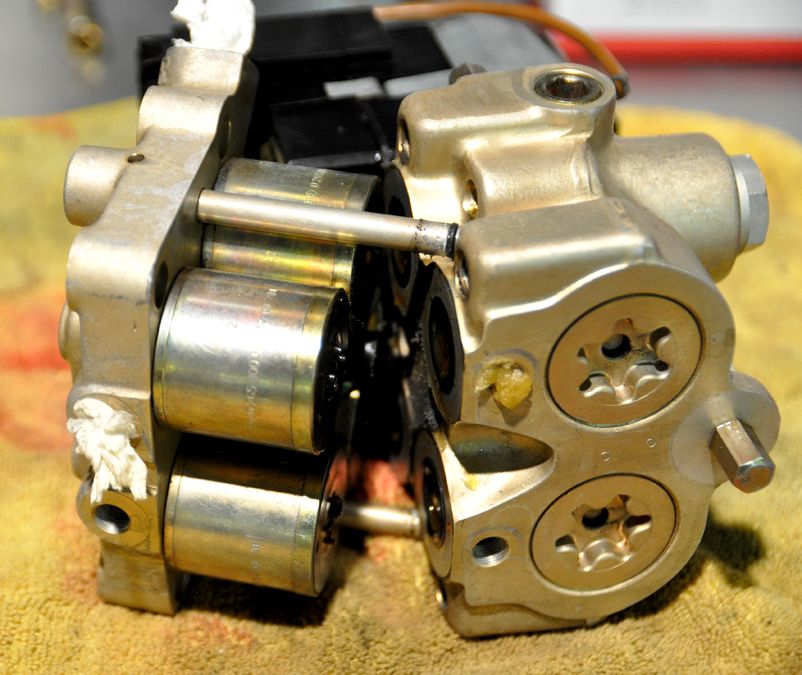
Carefully separate these, the four cylinder filter modules are still hard-wired to the electronic terminal and are only sandwiched between the upper case and lower module. The cylinders will likely be stuck to the upper case cover so you can flip it over. Now you can start to see what the internal condition of the ABS is:
The bottom of the cylinders:
Image

Where the cylinders sit into the bottom assembly:
Image

First the bottom section:
There will be four rubber gaskets set in the top of the bottom portion which is notched to receive the cylinders. Carefully pry these out and drop in some de-greaser to clean. You can see from the photo above, this unit has a lot of old gelatin-ized brake fluid pooled up in these wells. A though going over with brake cleaner will clear this up. Be sure to run cleaner through the holes in the bottom of the wells. These connect to the inlet ports on the side of the case (where the brake lines screw into the ABS). It should resemble this when cleaned:
Image

Next, remove the two small hex bit screws on the back of the big cylinder pump. They each have a small, arched plated washer. These are quite long and go all the way through the pump and attach into the top of the back of the lower module:
Image

This completely frees the main cylinder pump from the lower half of the ABS module. There is shaft that is fitted into the module, carefully pull these apart and remove the rubber ring gasket that goes around the base of the spindle shaft; set aside and clean thoroughly:
Image

I say carefully because there is a spring loaded cylinder valve of sorts that sits inside a hole in the side of the opening that receives the shaft:
Image

This is actually two springs: a smaller thinner one that rests against an equally small ball bearing both of which sit inside a larger, thicker spring. The small valve is sitting of all these under a fair amount of tension. Be aware there is a very small washer ring that sits on the bottom of this valve between it and the spring, don’t lose it. It’s also a bit tricky to put it all back together, so exercise patience. I wasn’t aware of how tricky it was to reassemble because the old brake fluid gunked it all up so it stuck together until I took the valve out and cleaned everything. Thoroughly clean everything prior to reassembly with brake cleaner including the spindle shaft of the cylinder pump that fits into the lower module; it should spin freely. You can chose to reassemble right away following a reverse procedure. I haven’t quite figured out how to insert the spindle shaft back into the lower module yet (you have to find a way to depress the valve in order to fully insert the shaft). I was going to employ a bent piece of thin metal shim (bent at 90 degrees) to apply pressure to depress the valve, then slip the spindle in and slide the shim out. (This is the method used to rebuild and clean Craftsman socket wrenches when dealing with a similar assembly for the ratcheting assembly, but I digress).
However, I am repainting/refinishing the pump barrel as it is aged aluminum and looking a bit tired. I am going through all this effort to beautify the engine bay so why cut corners now?

Second the top section:
As mentioned the four smaller cylinders are just pressure fit into the top case cover; aged fluid is the only thing holding it all together. Give them a small tap and they will pop off:
Image

NOTE: Make yourself a diagram noting which cylinder goes where relating to the case cover; it is important. There are no designations on the cylinders themselves. You can use the wire colors as an aid (black/green vs. black/yellow). Find some way to mark the cylinders themselves, preferably one that doesn’t rub off (hint, Sharpie wasn’t it).

Once this happens, set the whole terminal and cylinder assembly aside and deal with cleaning the upper case cover:
Image

Again, run brake cleaner through it completely cleaning out all the holes and ports. There is hollow black plastic tube acting as a sort of sleeve for one of the case bolts. Pull it out for cleaning, be sure to remember the orientation.

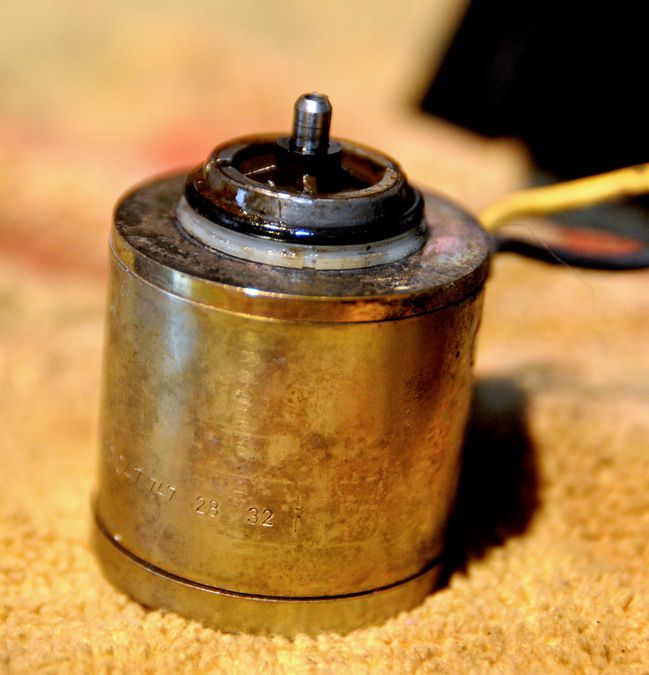
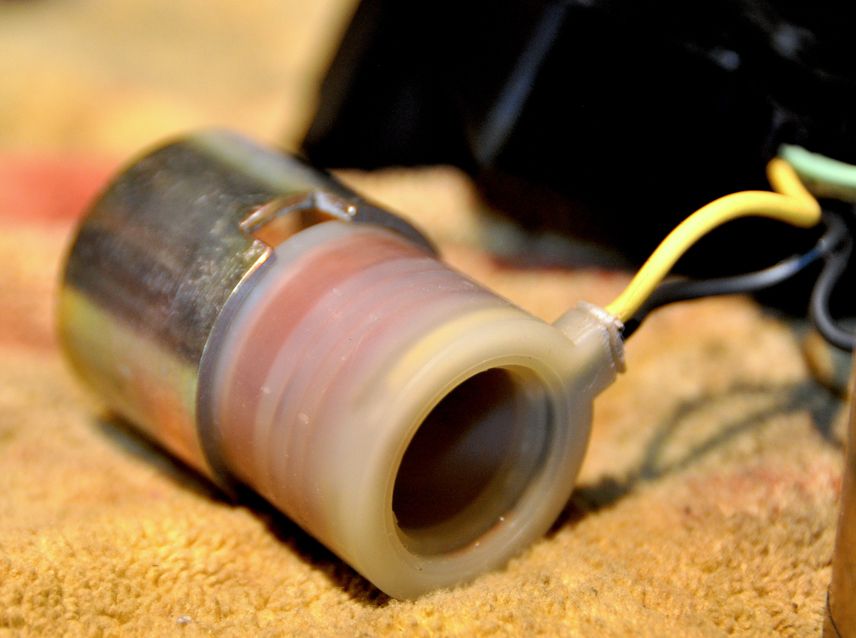
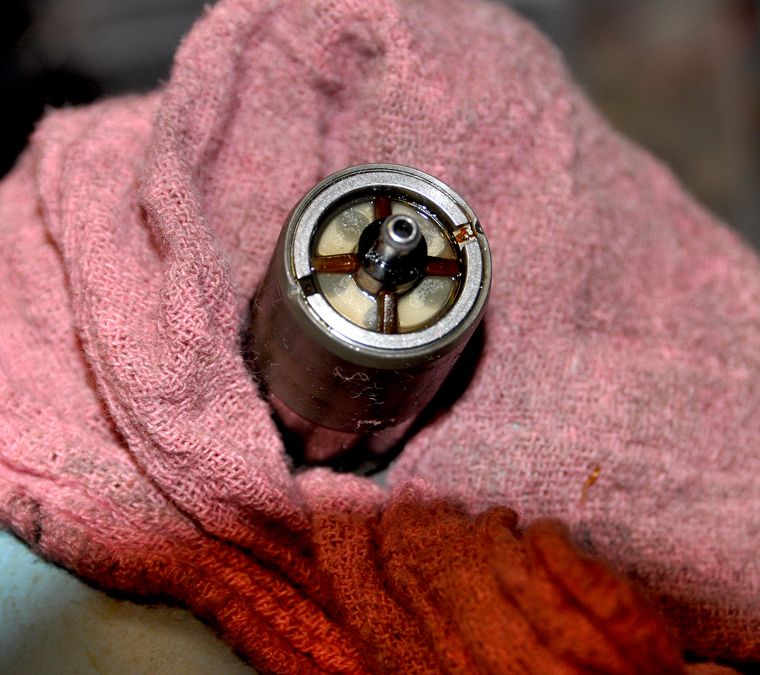
With that done you can turn you attention to the cylinders themselves. Each cylinder is a small sub-assembly unto themselves:
Image

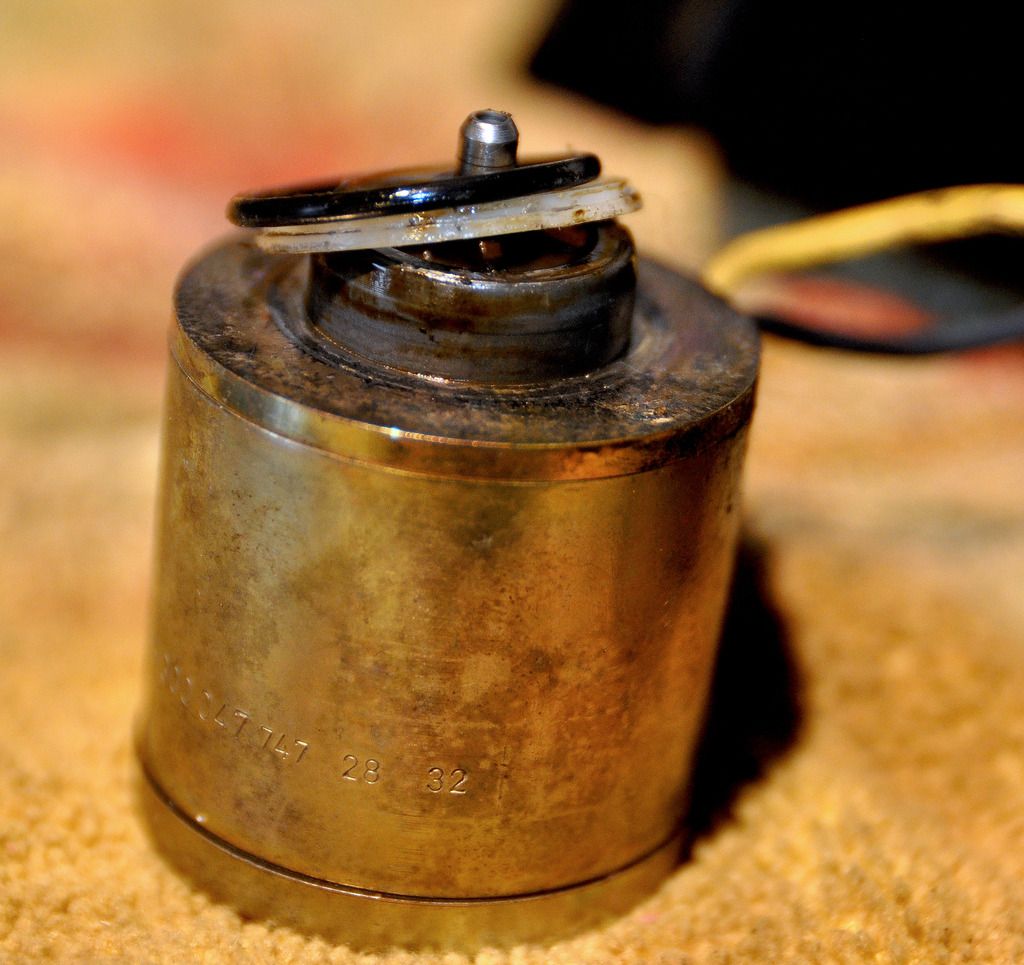
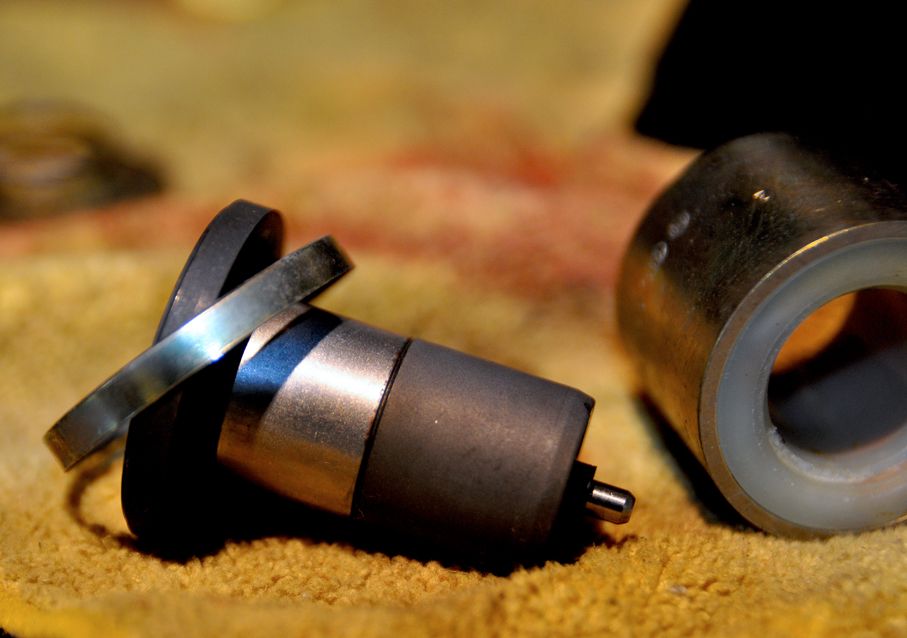
First remove the two washer rings on the top, one white plastic and one black neoprene. Clean and set aside:
Image

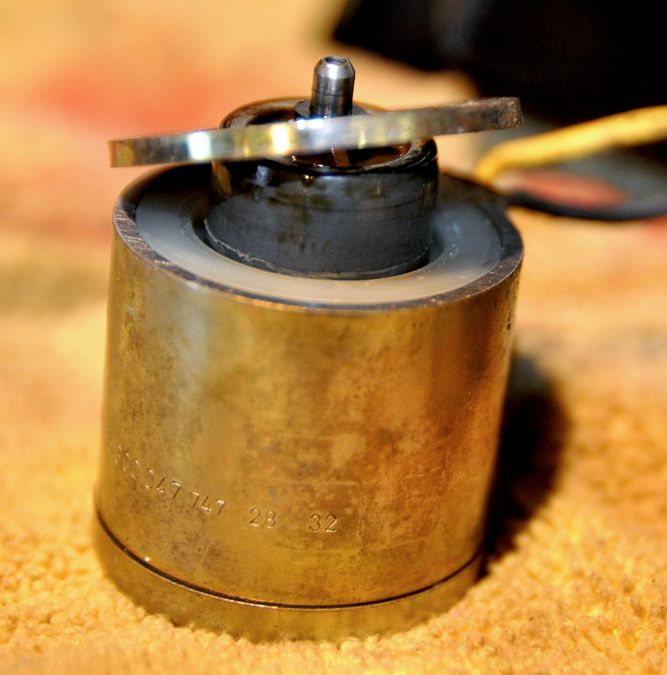
Next there is Cad plated ring which covers the inner coil. Carefully pry it off, it will be stuck on:
Image

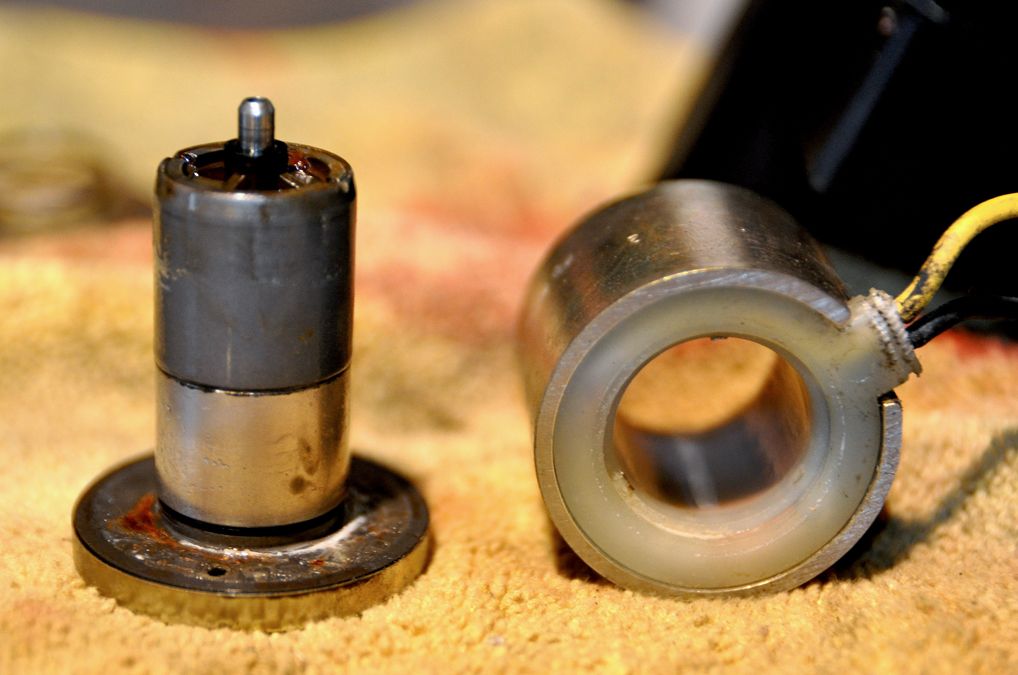
Then slip the center shaft out the bottom, separating it from the inner coil. Put the center shaft aside, we’ll get to it in a minute:
Image

Pull the inner coil out from the Cad plated cylinder case. Thoroughly clean each item (this is where I made my markings identifying each cylinder: Inside of the plated case and on the outside of the inner coil):
Image

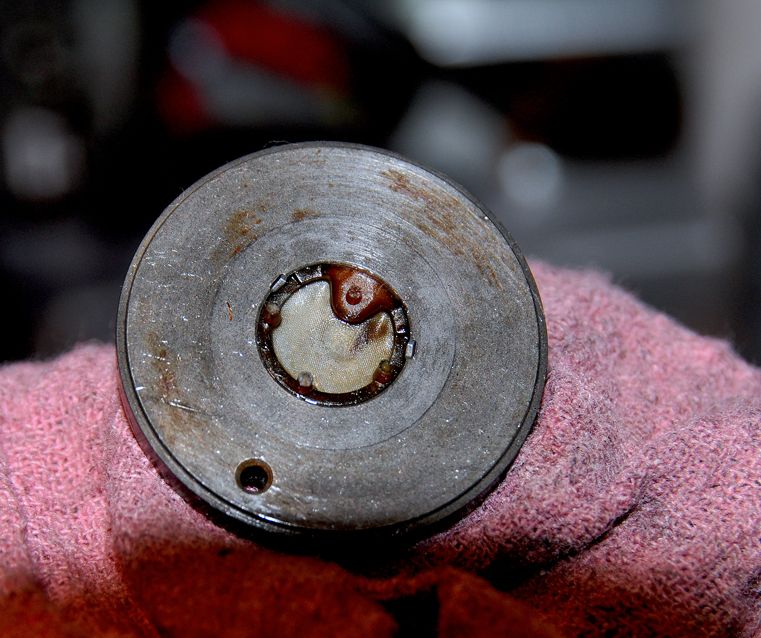
Now turn you attention back to the center shaft. You may not be able to tell, but at each end of this shaft there is an extremely fine micro screen filter that the brake fluid is pushed through. It will likely be gunked up pretty heavy with old fluid so don’t go at it with anything other than a blast of brake cleaner. Thoroughly clean the rest of the shaft:
Image
Image

The last item to remove and clean is a thin Cad plated ring that slips around the large base of the shaft:
Image

Needless to say, bag & tag and photo everything. I’m taking all the Cad plated stuff over to the plater this week to see if they can re-plate the ABS module case itself (carefully covering the delicate parts and Bosch ID tag, of course).
Image