External links now open in a new browser tab - turn this off in your UCP - Read more here.

Mohawk Two-Post Lift Project

Post your photos and videos here!
wkohler
Posts: 50928
Joined: Oct 05, 2006 11:04 PM
Location: Phönix, Arizona, USA
Contact:

Mohawk Two-Post Lift Project

Post by wkohler »

Since Devinder asked for it, I tried to find it and realized there wasn't one.

Believe it or not, it's used.
Image

Image

Image

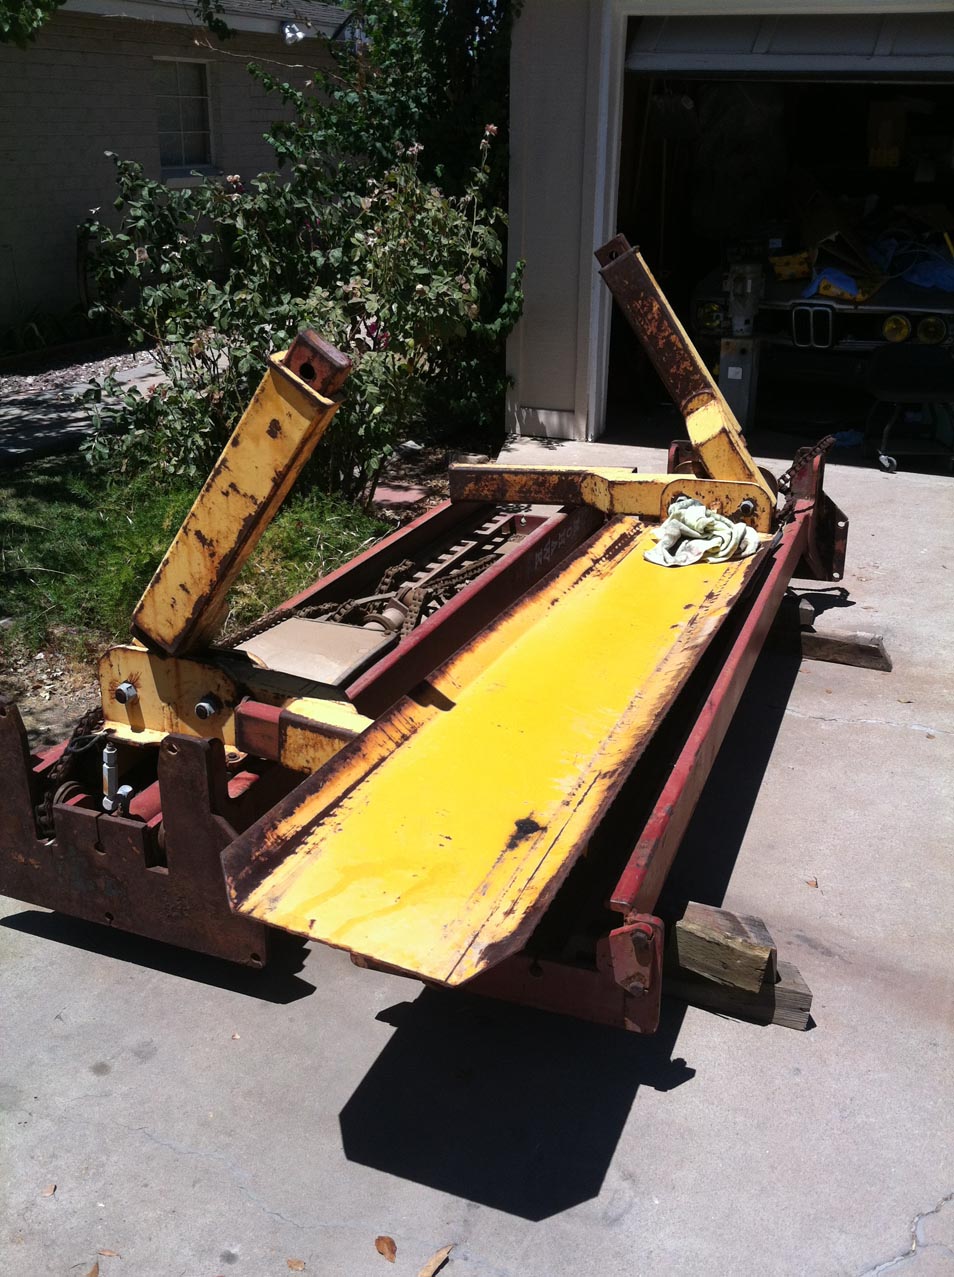
It only weighs 2400 pounds.

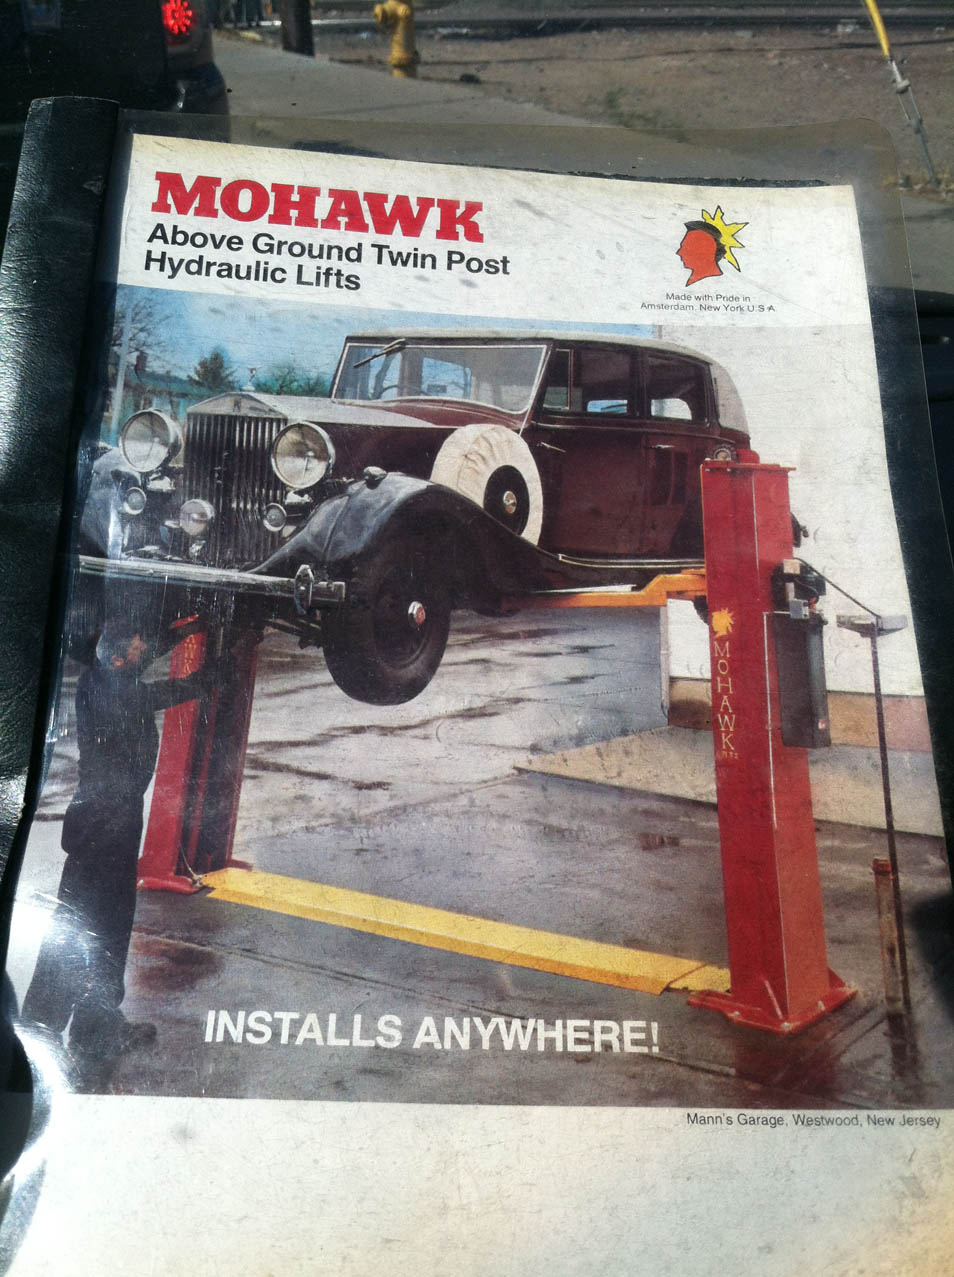
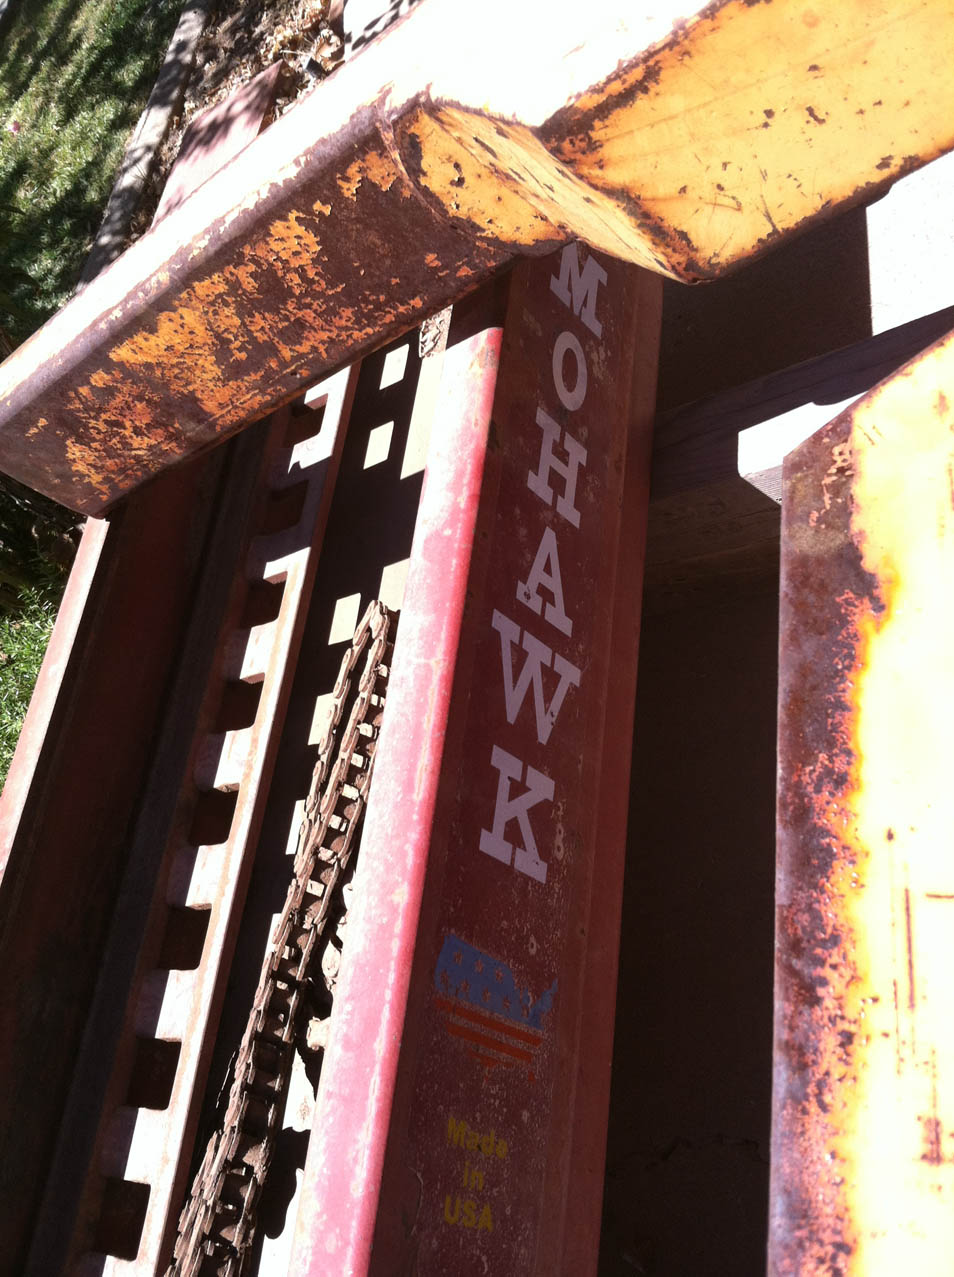
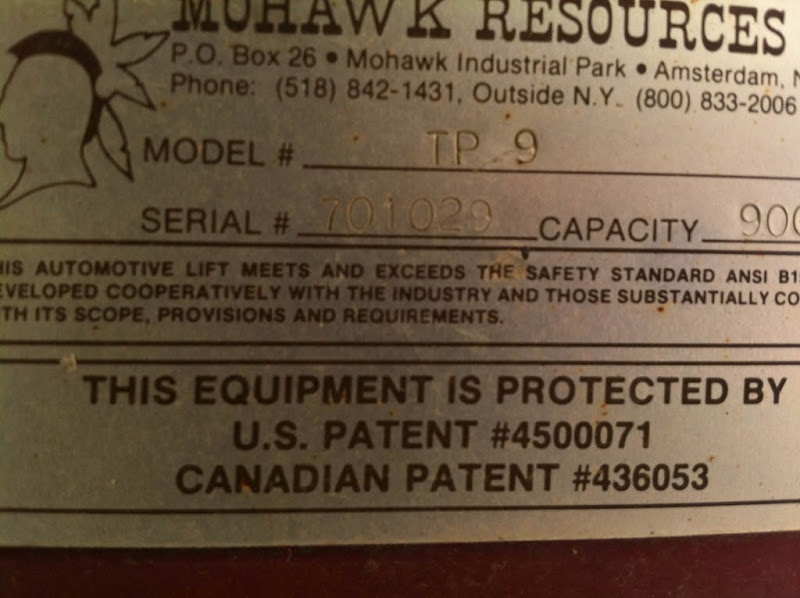
It's a Mohawk TP-9. A 9000 pound capacity lift which went into production in 1981. The serial on this one puts it around 1987.
Image

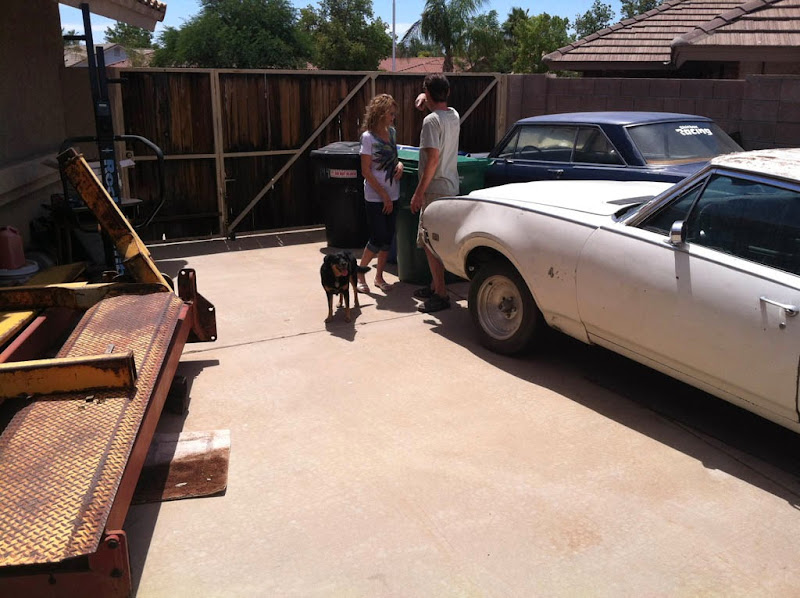
I purchased it from a guy on Craigslist who gave me varying stories on "we're selling the house" and then "I'm moving into the house." Kinda weird. Anyway, his girlfriend (she was pushing 60) owned the lift. Her late husband purchased it from a shop to put up on the side of their house and never got to it, so it sat there.

Here, actually:
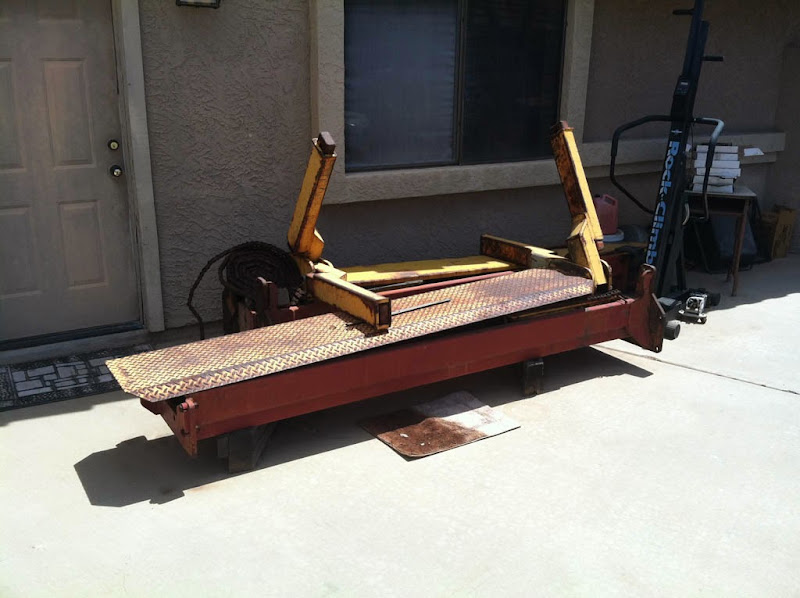
Image

Image

Image

Image

The local dealer was at first reluctant to help me and it took some convincing that this was in fact a Mohawk lift (today's Mohawks are hydraulically-equilized - I'm happy with the chains, thank you very much). Fortunately, after a bit of further convincing they helped me move it from Mesa, AZ to my house, where it has sat for the last six months or so.

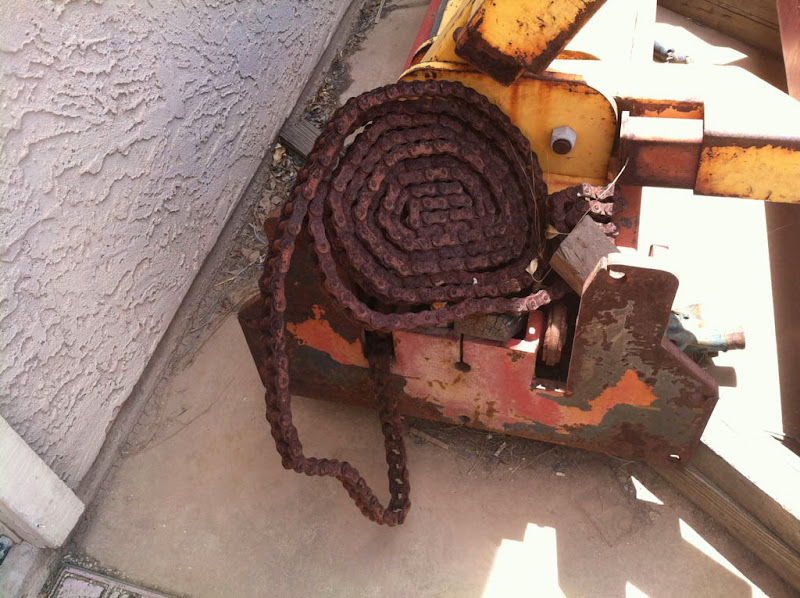
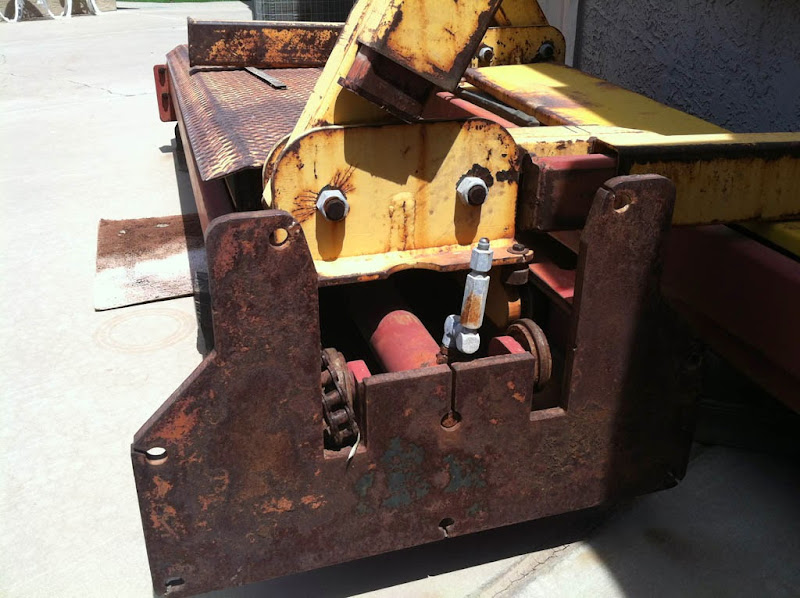
All of the rollers and chains were in less-than-functional condition, and I figured given that I wasn't ready to install this thing, I could take my time and work on it myself.

I started by removing the arms since they were somewhat obtrusive. Then I worked to get the carriages off.
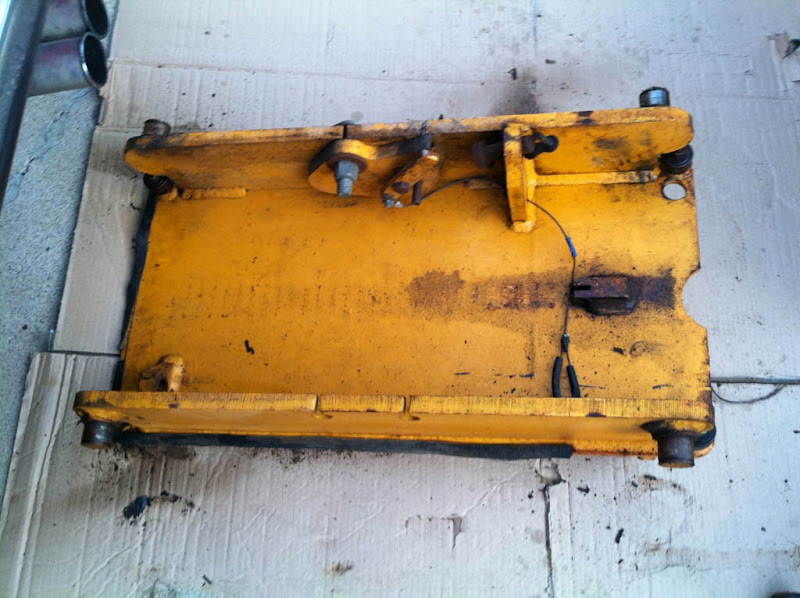
Image

With them out of the way and the circlips off, I could then get to the cylinders.

Image

There are six chain rollers and eight carriage rollers. Each of them has a bearing. New from the lift parts suppliers, these run about $80. $90 for the chain rollers. Yeah, so looks like there's a bearing in there, eh? Got the number off of the bearing (a shielded part made by a company called URB in Romania). They didn't move too well.
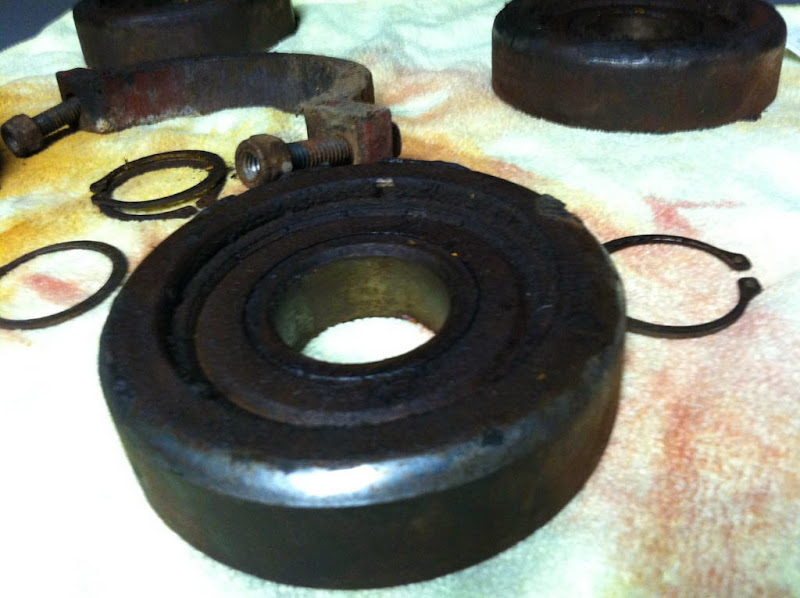
Image

The new lifts come with double-sealed bearings, so I ordered some from eBay. They're made in China, which wasn't something I was terribly excited about but I haven't read much negative about them.
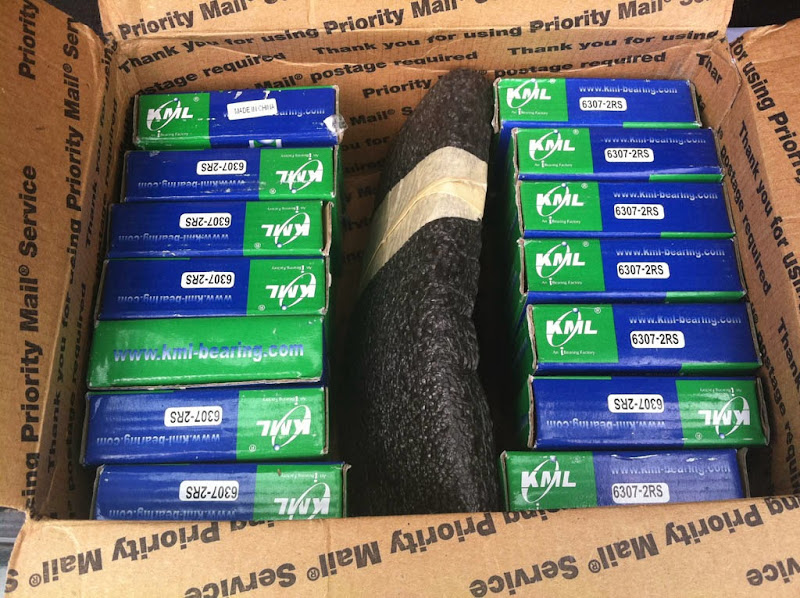
Image

I pressed the old bearings out using my shop press.
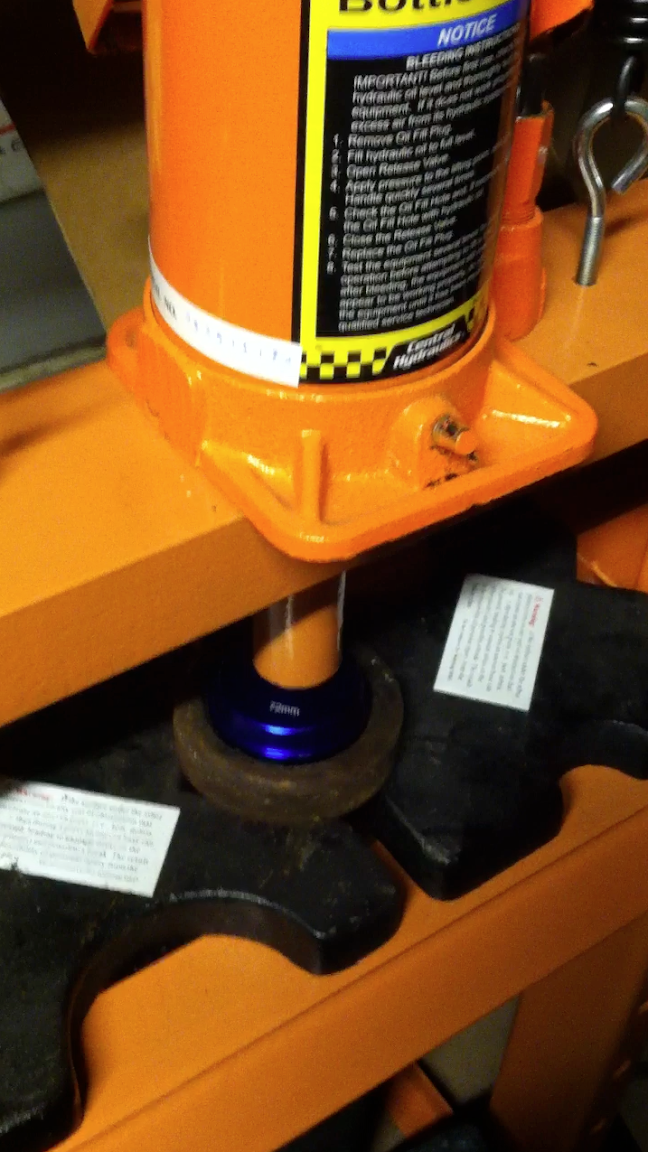
Image

Then life got in the way and it's pretty much been sitting since then.
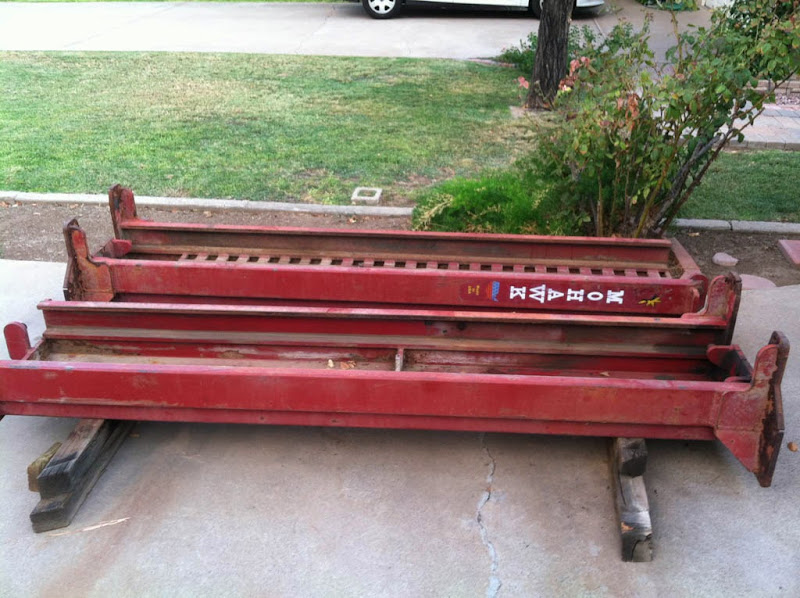
Image

I am well-loved by my neighbors.

Fast forward to December 10. I was coming home in the evening and noticed a neighborhood a 1/2 mile from me was undergoing work for new sidewalk "intersection ramps" that meed ADA specs along with new drainage passages in the intersections. Didn't look like they were totally finished. Great. Looks like the same company that had done similar stuff in my neighborhood and also did a few driveways while they were here. I talked to the homeowners and each were very impressed with the work and inspecting the concrete having been in just over a year, it looks great, as does everything else these guys did sidewalk-wise.

The next morning, I was doing some work at the house and saw a cement truck heading down there. I got in the car and drove down to talk to the guys. Gave them my address and told them what I was looking for.

They came by to see this:
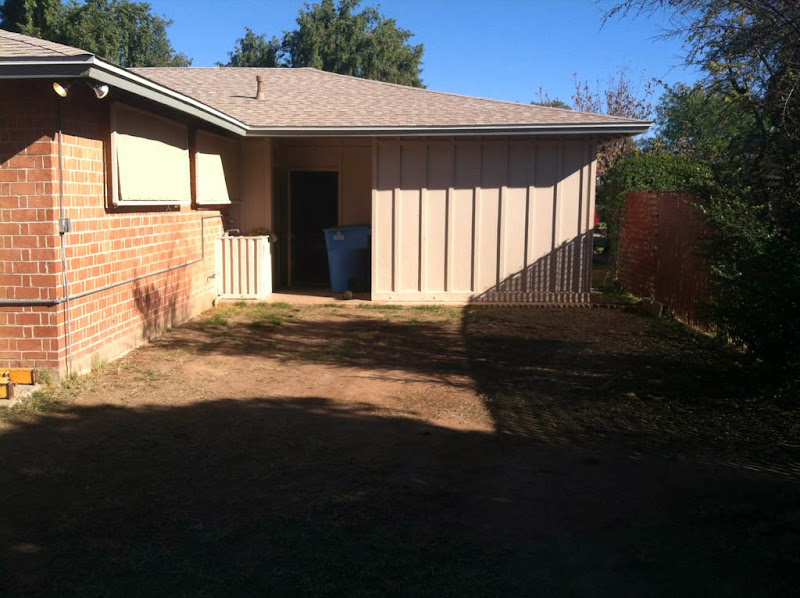
Image

I explained I was looking for. Spec was 4.5" of 4000psi, which I was assured would be sufficient for my purposes. Thanks to my parents getting involved, it ended up being 19x19 4000psi 6" deep with remesh for reinforcement (rebar was not advised by the lift installer, though my dad was pushing for it). Of course, I was on my own for the mesh as their company didn't provide it and they also said that when they pour the concrete at the fire stations, they don't use rebar or anything. Thumbs up on that, we're using the mesh. They gave me a price. It was good enough where I was thinking we could go all the way to the gate, but elected to wait with that until this piece is finished.

They said they could start that afternoon.
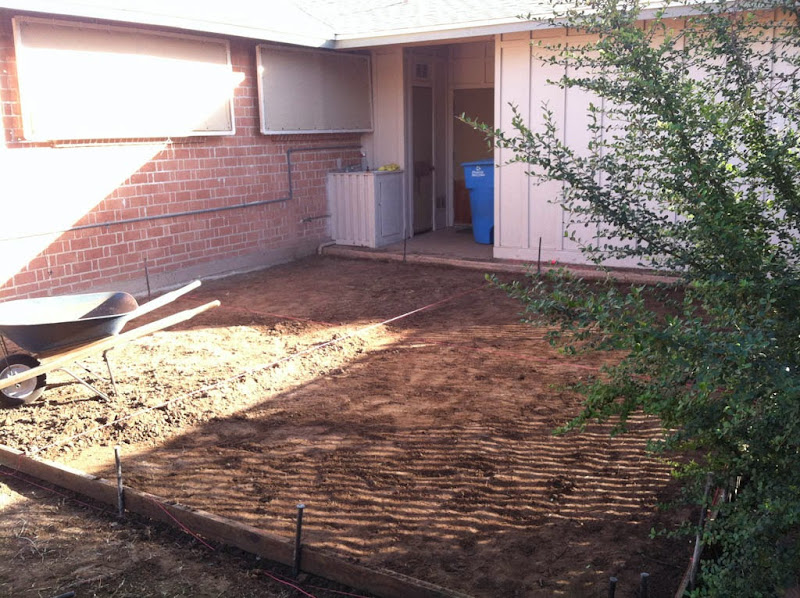
Image

They were there until about 7pm. They left and came back the next morning to drop off some wheelbarrows as they couldn't get a chute long enough for the pour. They finished grading, tamped the dirt, then cut and measured the mesh so they could flatten it out.
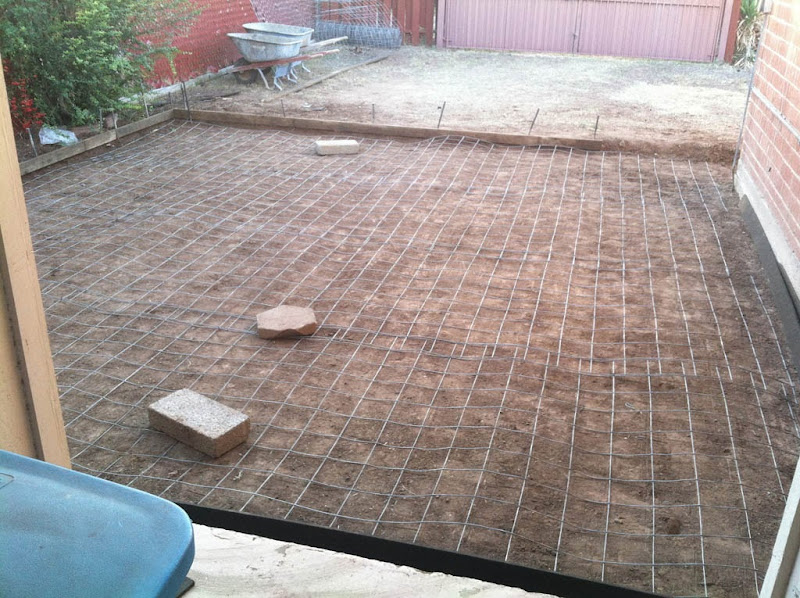
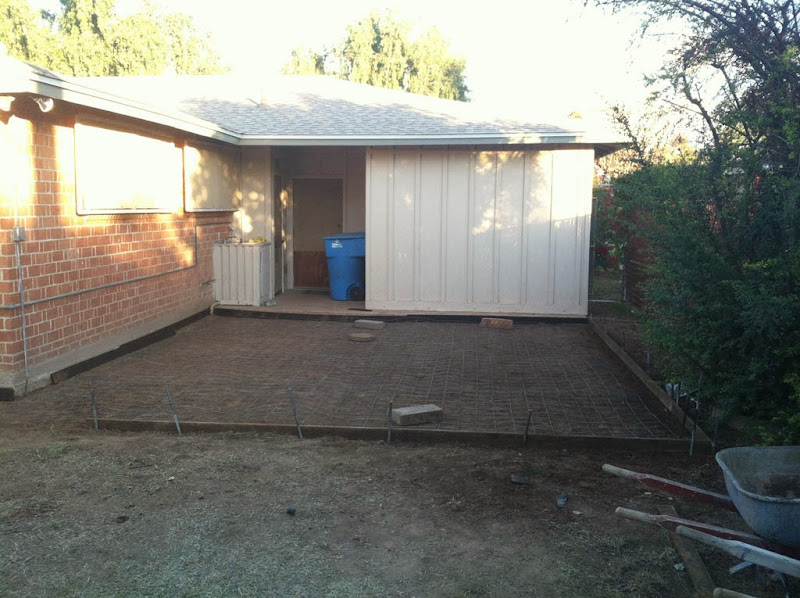
Image

Image

I had them go a bit deeper on the edges. If I didn't, my father wouldn't stop talking about it. Of course, he wouldn't actually talk to the people doing the work, so it got a bit confusing. I finally had my mom make him come over to make sure everything was done the way HE wanted it.

He was fine and ended up being very impressed with the people I enlisted to do the work.

Oh noes! The truck just showed up.
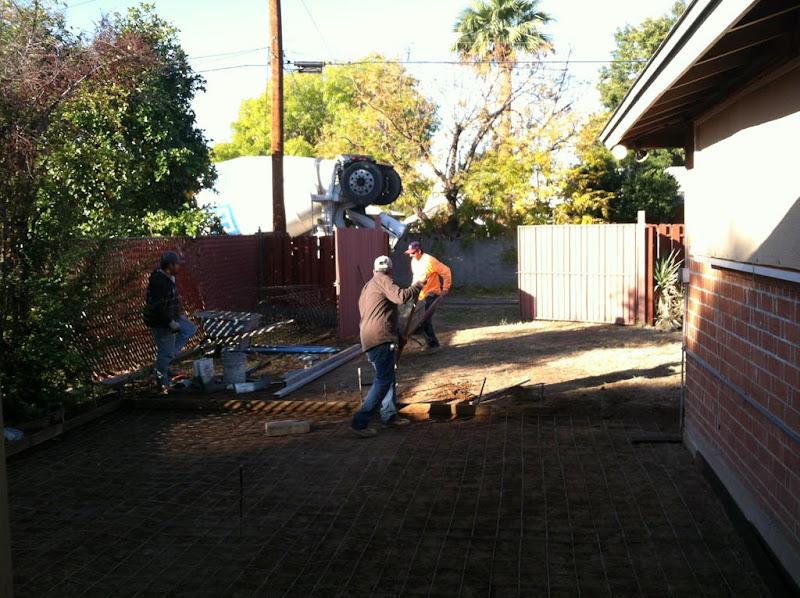
Image

They're pulling the mesh up manually. This guy did a very good job of getting it centered and it certainly seemed to hold it's position.
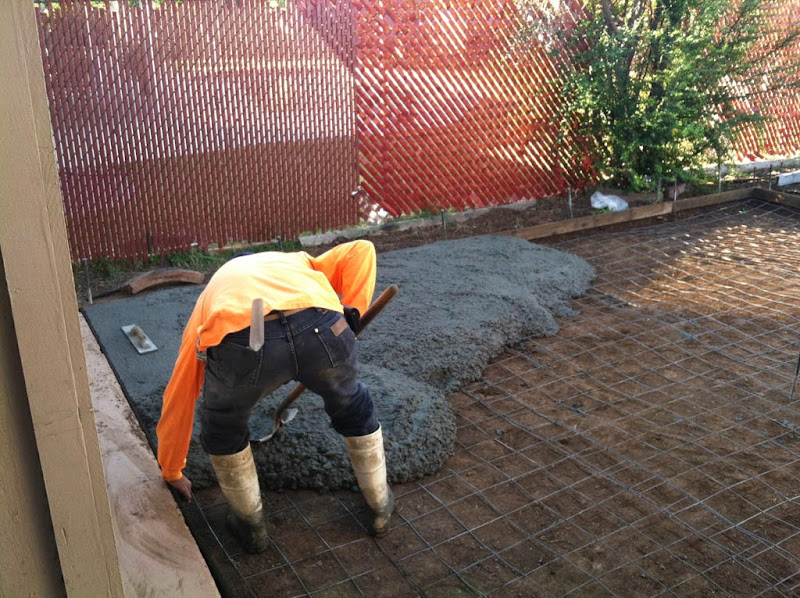
Image

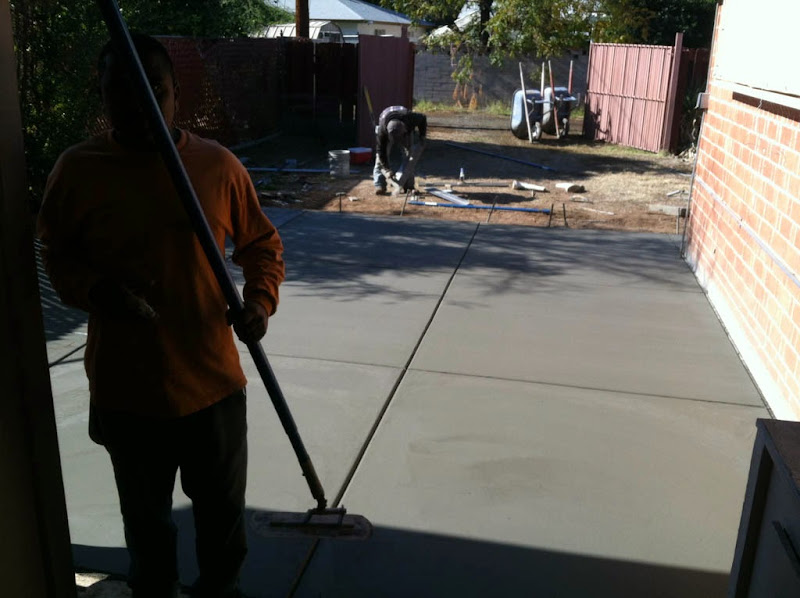
Control joints going in. I was going to have it saw-cut, but decided that if these joints ever became a problem rolling things around, I could fill them with a sealer, but I need to wait for the slab to go through most of it's shrinking phase. The crew were going to do just one each direction, but I explained my life-long love affair with Tic-Tac-Toe, so it had to be done this way.
Image

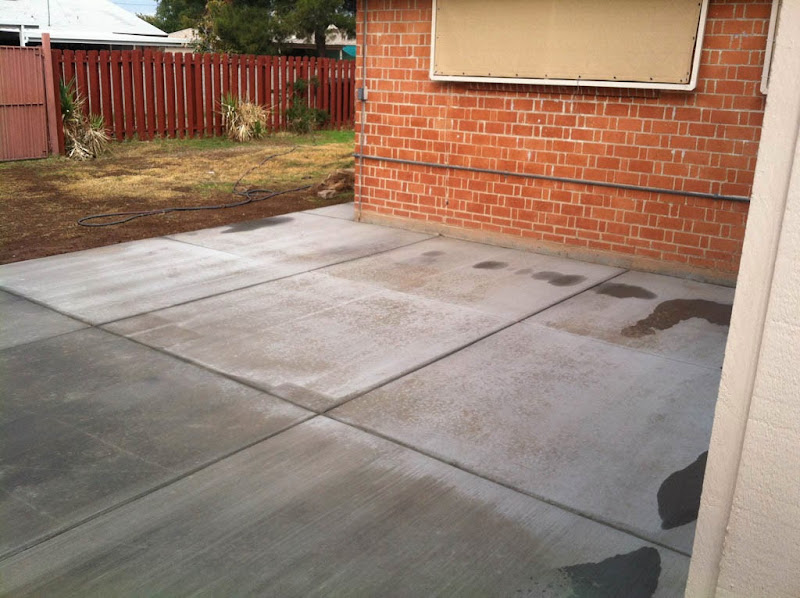
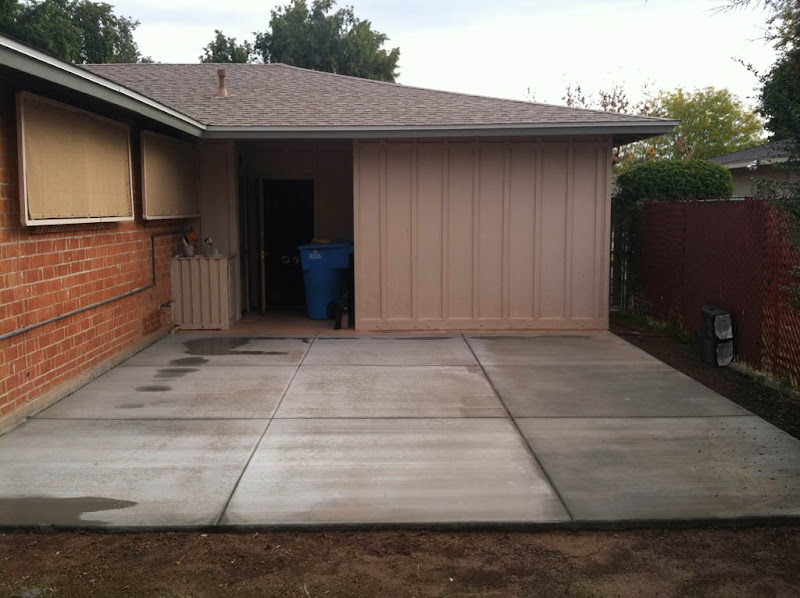
Actually, after measuring the center of gravity on the cars I'd use the lift for, then accounting for sufficient space in front, the lift will sit dead-center on the slab. Since anchors cannot sit less than 6" from a joint, that left us with this setup.
Image

I've been watering it a lot.

Image

Minimum cure time is 28 days before installing the lift, but I'm going to make sure all of my ducks are in a row first. I'm going to take the cylinders and the pump to a hydraulic shop recommended by the dealer (right down the street from my house :alright: ) and have them resealed and gone through. I'd like to think that sometime in February, the lift should be operational.

Once the lift is in, I'll work on getting a shade device in place. Of course, like every project, there's much more to do!
tig
Posts: 9396
Joined: Mar 18, 2013 6:25 PM
Location: Durango
Contact:

Post by tig »

First!
tig
Posts: 9396
Joined: Mar 18, 2013 6:25 PM
Location: Durango
Contact:

Post by tig »

No, seriously this is cool. I'm really intrigued by that lift and am looking forward to more pics.
Adam W in MN
Posts: 5054
Joined: Feb 12, 2006 12:00 PM
Location: Don't waste my motherf***in' time!
Contact:

Post by Adam W in MN »

This is damn cool. I did research a few years ago on used Mohawk lifts and was pretty impressed with the company and their products.
rodpaine
Posts: 1392
Joined: Feb 12, 2006 12:00 PM
Location: 55 miles west of D.C. in northern VA
Contact:

Post by rodpaine »

That's a great lift. Saw one in a little town in Vermont several years ago at an old gas station which caught my attention with its low height lift posts and very robust construction. You've put in a very good pad, too!
-Rod
Kyle in NO
Posts: 17638
Joined: Feb 12, 2006 12:00 PM
Location: Nasty Orleans------> Batten-Rooehjch------>More Souther LA

Post by Kyle in NO »

Nice concreek.
cddallara
Posts: 3513
Joined: Apr 03, 2010 8:45 AM
Location: Lagunitas, Ca

Post by cddallara »

:up:
heinrich535i
Posts: 252
Joined: Jun 21, 2012 12:31 AM
Location: Kalamazoo, MI

Post by heinrich535i »

Only in AZ do people put their garages outside
Mark 88/M5 Houston
Posts: 8548
Joined: Feb 12, 2006 12:00 PM
Location: Far North Houston

Post by Mark 88/M5 Houston »

Very nice Chris! Color me green. ;)
Devinder
Posts: 810
Joined: Feb 12, 2006 12:00 PM
Location: Berkeley, CA

Post by Devinder »

that looks great
tsmall07
Beamter
Beamter
Posts: 12775
Joined: May 22, 2006 4:32 PM
Location: Springfield, vA

Post by tsmall07 »

If they really did put the mesh in the center of the pour, it's not going to do anything. It needs to be near the bottom with about 1"-1.5" of cover. But like they said, it probably wasn't needed anyway. You don't need to wait 28 days to install the lift, just 28 days to use it. You can install it after a week or so. The concrete will likely hit its designed strength in 2-3 weeks and continue to strengthen through 28 days. Most pours I've done breaks on top out 1.5 to 2 times their design strength. I've only been involved with one project where concrete didn't come up to strength and had to be chipped out. I'll probably do core drills and break tests on my carport slab before I install a lift just so I know what I've got.

You were kidding about watering the concrete, right?
1st 5er
Posts: 21881
Joined: Jun 13, 2008 12:15 AM
Location: Cypress
Contact:

Post by 1st 5er »

:up: :up: and yeah, jelly here too.
wkohler
Posts: 50928
Joined: Oct 05, 2006 11:04 PM
Location: Phönix, Arizona, USA
Contact:

Post by wkohler »

The specifications say to wait 28 days. My lift is still in pieces so I'm not exactly chomping at the bit to get it installed. 28, 29 days, whatever it takes. I'd love to make February, but I doubt it will happen. Still need to get it wired up for 220 or 221 or whatever it takes.

The mesh is wherever it needs to be. The guy dealing with that had lots of experience with the mesh. He was Meshican. He didn't pull it way up but it was uniform across and since I don't look at concrete all day, I just assumed it was in the center. Everything I read suggested that having it at the bottom was bad.
WilNJ
Posts: 4193
Joined: Aug 12, 2009 11:22 AM
Location: North Jersey

Post by WilNJ »

Nice cement work.
tsmall07 wrote:You were kidding about watering the concrete, right?
As dry as it is there, I would.
winfred
Posts: 2839
Joined: May 12, 2007 7:15 PM
Location: loserana

Post by winfred »

they aren't hard to install if you've not done one, you can stand the towers up with a engine hoist and rock them into position by hand then level and nail em down
tsmall07
Beamter
Beamter
Posts: 12775
Joined: May 22, 2006 4:32 PM
Location: Springfield, vA

Post by tsmall07 »

WilNJ wrote:Nice cement work.
tsmall07 wrote:You were kidding about watering the concrete, right?
As dry as it is there, I would.
I guess that's a good point. I'd use wet blankets over water spray, though. Don't want to cause surface spalling.
wkohler wrote: Everything I read suggested that having it at the bottom was bad.
Typically, you want reinforcement towards the bottom of the concrete because when you load it, the bottom is in tension and the top is in compression (provided you're not talking about a cantilever). In the center is a "neutral zone" that's not in compression or tension. Concrete is great in compression, but not so much in tension. That's why you need the reinforcement in the bottom. You typically need at lease 1"-1.5" of cover to make sure the concrete doesnt break around the steel and they act together.
Last edited by tsmall07 on Dec 23, 2013 1:45 PM, edited 1 time in total.
WilNJ
Posts: 4193
Joined: Aug 12, 2009 11:22 AM
Location: North Jersey

Post by WilNJ »

Surprised you let me get away with the cement comment.

The mesh is to reinforce the slab through thermal expansion and contraction any structural reinforcement would come through the bar. Which is why if you had a thicker slab with both mesh and rebar, the mesh wouldd be in the top half, the rebar in the bottom half.
grahamular
Posts: 1717
Joined: Feb 12, 2006 12:00 PM
Location: Baltimore, Maryland

Post by grahamular »

Looks great and can't wait to see the lift in action. Also, if your parents decide to buy an RV and shack up next to your house, you'll have the perfect parking pad.

-Graham
wkohler
Posts: 50928
Joined: Oct 05, 2006 11:04 PM
Location: Phönix, Arizona, USA
Contact:

Post by wkohler »

Thankfully, they're not RV people and hopefully if it came to that, they could put it at their own house. :D

I plan to have the people out again to pour a driveway to the gate. I decided that I need more piles of dirt.
tsmall07
Beamter
Beamter
Posts: 12775
Joined: May 22, 2006 4:32 PM
Location: Springfield, vA

Post by tsmall07 »

WilNJ wrote:Surprised you let me get away with the cement comment.
I cringed and rolled my eyes. I figured you said it specifically to get under my skin. :P
The mesh is to reinforce the slab through thermal expansion and contraction any structural reinforcement would come through the bar. Which is why if you had a thicker slab with both mesh and rebar, the mesh wouldd be in the top half, the rebar in the bottom half.
But this slab doesn't have any bar. Every slab on grade I've seen placed with mesh only has had the mesh held up on chairs that put it in the bottom third of the slab. You have more experience than I do, though.
535is-pa
Posts: 1944
Joined: Feb 12, 2006 12:00 PM
Location: south central PA

Post by 535is-pa »

tsmall07 wrote:
WilNJ wrote:Surprised you let me get away with the cement comment.
I cringed and rolled my eyes. I figured you said it specifically to get under my skin. :P
The mesh is to reinforce the slab through thermal expansion and contraction any structural reinforcement would come through the bar. Which is why if you had a thicker slab with both mesh and rebar, the mesh wouldd be in the top half, the rebar in the bottom half.
But this slab doesn't have any bar. Every slab on grade I've seen placed with mesh only has had the mesh held up on chairs that put it in the bottom third of the slab. You have more experience than I do, though.


+1 when jackhammering out slabs like this the mesh is basically irrelevant and breaks up just as easy as the concrete. rebar makes it a bitch to tear apart, i use a torch and take chunks out at a time working in 1'x1' squares, with mesh i just try not to cut myself of the exposed ends, thats all the concern i give it. im sure your setupmight be fine for your use, but if you where a shop working on big trucks every day i think i would want more strength. i would by very concerned with the slabs health over time. cracks are like rust, for every bit you see there is more you cant.

hilti makes patch repair epoxys for when you get a minor crack in it a few years from now that are many times better then home depot crap. the hilti stuff actually works, nothing else really does. make sure you tape your anchors too. and paint/caulk around the area to stop water from accumulating in shield
wkohler
Posts: 50928
Joined: Oct 05, 2006 11:04 PM
Location: Phönix, Arizona, USA
Contact:

Post by wkohler »

^ I have NO IDEA what the hell you are saying. IMPOSSIBLE to read what you wrote. It's a wonder you're not licking a bridge somewhere.
bkbimmer
Posts: 5878
Joined: Mar 02, 2007 2:33 AM
Location: Portland, Or.

Post by bkbimmer »

Lifts make every job better. If I ever have to go back I will kill myself :laugh:
535is-pa
Posts: 1944
Joined: Feb 12, 2006 12:00 PM
Location: south central PA

Post by 535is-pa »

wkohler wrote:^ I have NO IDEA what the hell you are saying. IMPOSSIBLE to read what you wrote. It's a wonder you're not licking a bridge somewhere.
mind my drunken xmas eve post...... basically that looks to be under built for mounting heavy equipment. i would love not to be required to set up rebar for every single piece of concrete ive ever seen with anything mounted to it. but this simply is not the case. they advised you angst rebar out of lazyness, and there is no money in setting it up while concrete is high profit.. if they where building a large shop from scratch with inspectors coming in, there would be rebar. and it is important outside to keep water from getting in the anchors after this is completed. if there full of water and freeze or corrode from the dissimilar metals all bets are off for the strength of the anchors over time. cracks are also bad and will developed over time from the ground moving/ pad settling and age. and without rebar there is nothing keeping the pads integrity as age sets in. mesh is about at strong as rubber bands you can break it with a screwdriver.
tig
Posts: 9396
Joined: Mar 18, 2013 6:25 PM
Location: Durango
Contact:

Post by tig »

Oh, God, please stop the trolling. Its Christmas for Christs sake. Rebar is not necessary for this application.
mooseheadm5
Beamter
Beamter
Posts: 23035
Joined: Apr 08, 2009 10:30 PM
Location: Charlottesville, VA
Contact:

Post by mooseheadm5 »

w/r/t water ingress and freezing, he is in Arizona, not that much of an issue :D
Kyle in NO
Posts: 17638
Joined: Feb 12, 2006 12:00 PM
Location: Nasty Orleans------> Batten-Rooehjch------>More Souther LA

Post by Kyle in NO »

cek wrote:Oh, God, please stop the trolling. Its Christmas for Christs sake. Rebar is not necessary for this application.
He does have a few valid points.
Devinder
Posts: 810
Joined: Feb 12, 2006 12:00 PM
Location: Berkeley, CA

Post by Devinder »

Maybe valid points if you're going to install the lift on a concrete slab cantilevered out over the arctic tundra.

Or, Chris could get the opinion of a licensed engineer who's been out to the site and seen the lift he's going to use. I wonder what that person would say.
wkohler
Posts: 50928
Joined: Oct 05, 2006 11:04 PM
Location: Phönix, Arizona, USA
Contact:

Post by wkohler »

It's a real head-scratcher.

Wouldn't have gone ahead in the direction I did without the opinion of said licensed engineer.

Merry Christmas.
leadphut
Posts: 4499
Joined: Feb 12, 2006 12:00 PM
Location: Portland, OR

Post by leadphut »

That's a nice addition to the house.

Are you leaving the area exposed or covering with a roof of some sort?
Post Reply