Out of the gold, into the gold
I had been looking for a new project when this 87 535i popped up on Craigslist for $900. Ad said that it started and drove but needed brakes. Looked too good to be true. One downside was its an auto. I was really hoping for a manual. I ventured up to the northern reaches of the Olympic Peninsula to take a look. It was worth the drive either way. 169k on the odo and guy said he bought it for his daughter who ended up not liking it. No other history to be found on the car. He said he bought it from the original owner and it spent its life on the OP.
Sure enough, it fired right up, idled, and I was able to drive it around his property. The body was straighter and the interior nicer than I expected. Definitely problems with the brakes. For another $100, the guy delivered it to my driveway.
A close inspection showed that in addition to the brakes, none of the indicator lights worked, the rear muffler was falling off, there was a major oil leak, and several other common problems needed attention.
Good news was that everything was there, the car had never been hacked on, and it had an lsd.
Here she is last summer not long after delivery. She didn't come like this. TRX wheels and tires were replaced with the spoked 16x8 set and new Bridgstones and new fog lenses added.
[/url]
[/url]
First, the brakes.
The calipers were seized and rotors were deeply grooved. Never seen rotors so bad. Someone forced (pounded) the wrong calipers on the rotors. So first major repair was all new brake hardware with the big brakes upfront. Not fun but necessary and very gratifying now that I could actually drive it.
Test drive revealed some suspension clunking, of course. Typical e28 issues. First replaced the subframe bushings, pittman arms, endlinks and sway bushings. Helped tremendously, especially in the rear end and overall NVH reduction. Still a clunking in the front which turned out to be a control arm.
I love the way it drives. Even though it was an auto, it was still fun, especially with the sport mode. At this point I knew I was all in and I would do right by the car.
Next up was a basic tune-up. Cap and rotor were baked and crumbled to pieces. Original? Not sure how it even ran. Plug color indicated good combustion and was consistent across all 6. Still had a stumbly idle at start-up afterwards.
After a tank or so of fuel, it was apparent the fuel pump was going. I replaced with and Airtek unit and threw in a new fuel filter at the same time. I'll rehab the old unit with a good pump later on. The new pump and filter seemed to help start-up and acceleration and of course the fuel starvation issue.
Decided next step was a trip to Seattle on a hot summer day. Opted for adventure over caution. Stuck in Tacoma traffic and started seeing coolant vapor billowing from underhood. Oh boy. Kind folks let me off the highway.Turns out the system was almost dry and my trips around town never got it hot enough to show. A few gallons of coolant later and all was good to get there and home. After some testing, found the fan was shot. I believe this is likely the reason why the original owner sold the car. After replacing the fan and thermostat and all new coolant, I ended up driving the car all over with no overheating issues for almost a year.
There was still the dreaded oil leak. I tried to tighten up the pan bolts and even resealed the upper timing cover but it continued to sling oil. It was running great but I can't tolerate major oil leaks.
Along the way, I met a local enthusiast who just happened to have an e32 with a b35 and 260/6 that had seen better days. Engine and drivetrain was original but had some body and interior damage. After hearing it run and driving it a bit, you guessed it.
[/url]
[/url]
More to come later.
Last edited by tseohs on Jun 18, 2020 8:10 PM, edited 2 times in total.
-
- Posts: 1339
- Joined: Sep 08, 2007 11:17 AM
- Location: John Graham ATL
Re: Out of the gold, into the gold.
Looks like you got a lot of car for a little money. Look forward to seeing the b35 upgrade. If it were on the cover of Rolling Stone magazine, the caption would read "THE COMEBACK OF BRONZIT"
Re: Out of the gold, into the gold
Very clean example, thanks for bringing us along for the ride!
Re: Out of the gold, into the gold
Yes. I was lucky.
As a gesture of gratitude to the community, especially all who have shared their time and talent, all extra parts are free for pick up.
Includes b34 and trans, nutria interior and everything except the engine and drivetrain from the e32. Located in Olympia, WA.
I'm not parting the motor and would rather not separate it from the trans so come take it all. I have a video of it running from last week. PM me if interested.
Exhaust stud solution
Biggest problem encountered thus far was 3 exhaust studs in the rear of the head. I was able to get the nuts and manifold off but the studs didn't respond to penetrating oil and MAPP gas so into the shop it went. The shop was able to get them out but not without some damage to the threads. They suggested helicoils but I had heard mixed reviews, especially in this application.
The solution was to tap the holes to M10 and use "step studs" where half is M10 and half is M8 like the original.
Available from Belmetric:
https://www.belmetric.com/metric-step-s ... od7bb95885
I think the most challenging part was making sure the tap stayed straight. It cut through the head pretty easily making it easy to get misaligned. Slow and steady won the race. You can see that the step studs end up at the same height and torqued down just fine. We'll see how they hold up.
Also good time to chase the threads for the e28 mounts.
[/url]IMG_20200130_190807
[/url]IMG_20200516_150103
Re: Out of the gold, into the gold
Tackling a few of the "while the motor is out" tasks. Heater core is back in. Was able to get that and the AC out with the dash in place. This is an 87. Also had to replace the entire pedal box as mine did not have a return spring perch and fitting e32 pedals onto the e28 bracket isn't exactly straight forward.
[/url]Untitled
Also, just about finished with the bay. Blower is back in and heat shielding replaced. The material is from Design Engineering and supposed to withstand direct heat of 1750F. We'll see.
[/url]Untitled
[/url]Untitled
Also, just about finished with the bay. Blower is back in and heat shielding replaced. The material is from Design Engineering and supposed to withstand direct heat of 1750F. We'll see.
[/url]Untitled
Re: Out of the gold, into the gold
Subscribed! This'll be a neat car if you continue!
Re: Out of the gold, into the gold
Small update.
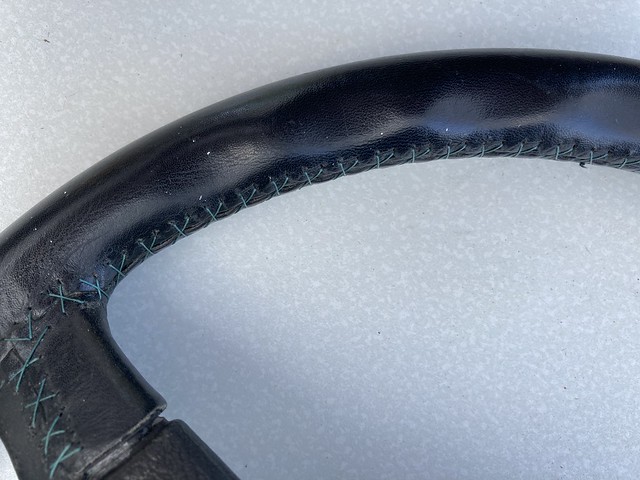
The steering wheel thread had been entirely unraveled but the leather was still in very good condition. Trying to keep costs down so thought I'd try to keep it alive a bit longer.
After inspection, all the original thread holes were intact. They weren't even stretched or distorted. Also, the leather hadn't shrunk and would come together at the seam with a few clamps on the wheel.
I used some bluish upholstery thread my wife had and one of those curved needles. It took several hours but I did it at night while relaxing.
I used a simple "X" pattern instead of the factory 2 rows cinched method. I think it came out looking OK. You can see that the seam is tight and I think it will hold up for awhile. At least until I can afford one of those super sweet wheels from Nosis.
[/url][url=https://flic.kr/p/2jt8CCb]
Re: Out of the gold, into the gold
Not really "eye candy" unless you also appreciate a smooth, safe ride or the aesthetics of yeoman's work.
New upper and lower CAs, tie rods, and center and end links. And of course, welded in the steering arm support. Thanks to Ed for the great product. Sure enough, the weld on my original bracket was cracked on the side nearest the motor.
Oh, and for anyone considering this work, take the lower strut plates off. Honestly, I have to believe it's much more work trying to do it with the plates attached. I borrowed a simple single-bolt press tool from the LAPS and it popped every joint easily.
Re: Out of the gold, into the gold
Finally got all the pedal hardware and plumbing installed. Took a while. Had to source more parts than I initially thought. Big thanks to Ben for the over-center spring and David for the box bracket. Both seem very well engineered.
Question: Should the clutch pedal go PAST the pivot point of the spring when the hydraulic system is not pressurized? I don't have the master connected and bled yet and when I pushed on the pedal it goes to the floor and stays there past the pivot point of the spring. Hoping that when the system has pressure, it will counteract this. Or is it something else?
[/url]Untitled
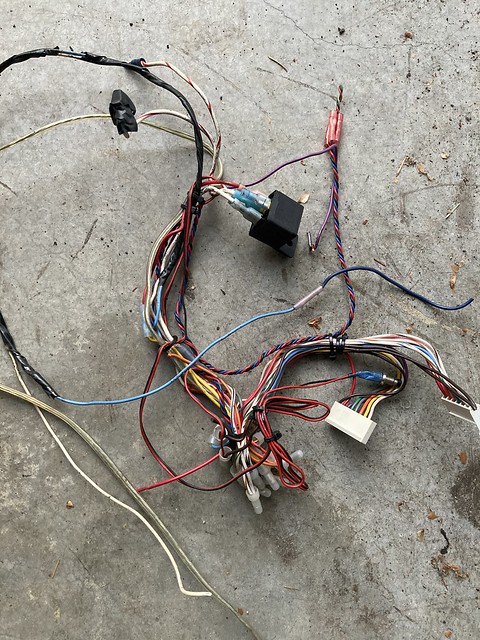
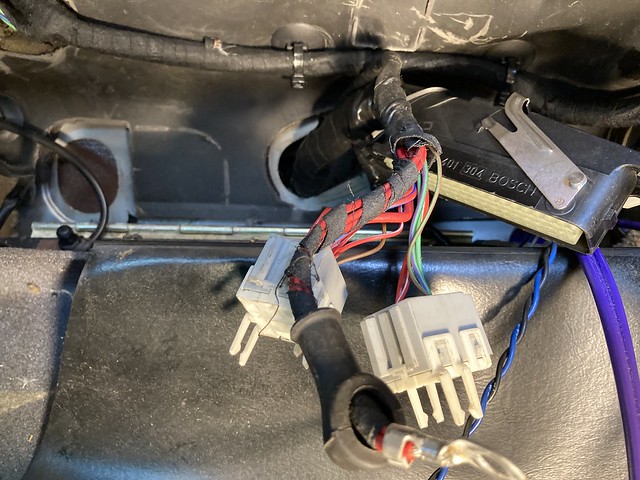
Some not so eye candy. Super fugly wiring from an 80s era alarm system that was hacked into the harness. Hope I didn't mess anything up when I pulled it.
[/url]Untitled
-
- Posts: 966
- Joined: Oct 26, 2017 3:36 PM
- Location: Fleming Island FL
Re: Out of the gold, into the gold
I don't know if it should, but it always does...tseohs wrote: Sep 25, 2020 11:34 AM
Question: Should the clutch pedal go PAST the pivot point of the spring when the hydraulic system is not pressurized? I don't have the master connected and bled yet and when I pushed on the pedal it goes to the floor and stays there past the pivot point of the spring. Hoping that when the system has pressure, it will counteract this. Or is it something else?
Keep going- looks like a great base to build on. Looking forward to more pics.
Re: Out of the gold, into the gold
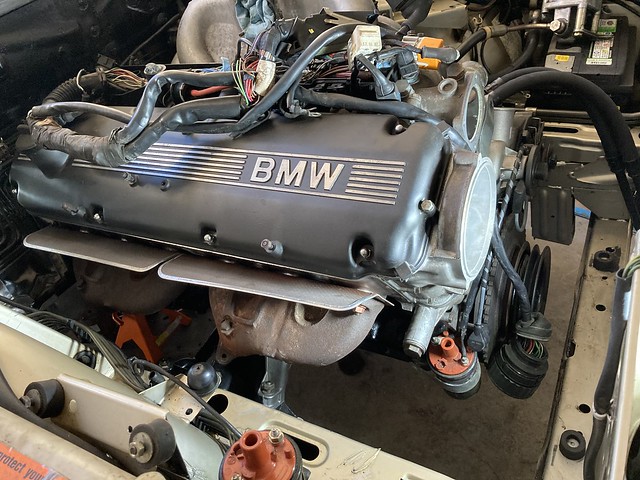
Big weekend, folks. After some delays, finally got the engine and gearbox mated and installed. Put them in together. Went pretty smoothly-took 2 attempts, after getting the rigging correct. There was some trial and error getting everything lined up and bolted. Here's what worked for me: 1) got the trans brace bolted in but not tightened so things could still move about 2) loosely bolted the upper stud of the right mount to the engine side and then inserted the lower mount stud to the cross member as I lowered the motor. 3) bolt the lower stud of the left mount to the cross member first otherwise it won't clear the steering box and then lowered the engine mount onto the upper stud.
Big respect and big thank-you to those of you who have done and documented this. It's quite a bit of work.
[/url]Untitled
[/url]Untitled
next steps are to get the ignition, intake, and cooling system done so I can try to start it.
Cheers.
Big respect and big thank-you to those of you who have done and documented this. It's quite a bit of work.
[/url]Untitled
[/url]Untitled
next steps are to get the ignition, intake, and cooling system done so I can try to start it.
Cheers.
Re: Out of the gold, into the gold
Such a good feeling getting that big step behind you. Nicely done! You are on the home stretch.
Some updates and question about oil cooler mounting
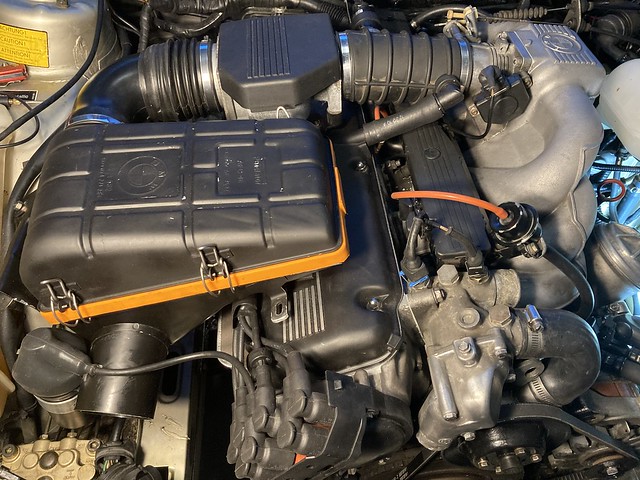
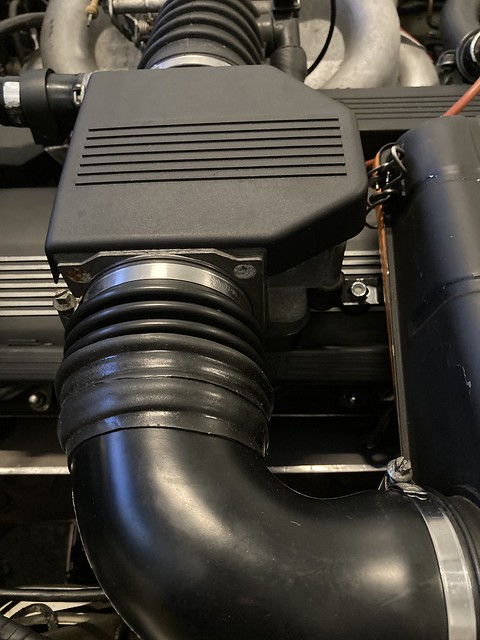
Got the e28 airbox connected to the b35 afm and mounted in original location. Should be airtight and looks factory. Need to put some rubber "feet" on the tabs where the box rests on the valve cover. Used the b35 wires with the b34 coil wire so the coil could go back in place. Also some plumbing, fuel lines in, belts snug.
[/url]Untitled
Had to spring for a new overflow tank, among many other items I was hoping to avoid replacing. You can see the round e32 wiring harness plug behind the tank. That's where it ended up after unraveling the harness and where it needs to be for the adapter to reach the fuse box. I'll mount it the the existing mounts coming off the shock tower. Otherwise, the harness tucks pretty cleanly up against the firewall.
[/url]Untitled
Routed DME and relays into glove box. Yet to be mounted and still need power.
[/url]Untitled
Last, for those using the original b35 oil cooler, where and how did you mount it? The lines end just below the lower radiator support but that doesn't seem like a good location. Would like to use the original but thinking of getting a smaller unit and splicing it in so it can mount inside the engine bay. Ideas?
Thanks.
[/url]Untitled
Had to spring for a new overflow tank, among many other items I was hoping to avoid replacing. You can see the round e32 wiring harness plug behind the tank. That's where it ended up after unraveling the harness and where it needs to be for the adapter to reach the fuse box. I'll mount it the the existing mounts coming off the shock tower. Otherwise, the harness tucks pretty cleanly up against the firewall.
[/url]Untitled
Routed DME and relays into glove box. Yet to be mounted and still need power.
[/url]Untitled
Last, for those using the original b35 oil cooler, where and how did you mount it? The lines end just below the lower radiator support but that doesn't seem like a good location. Would like to use the original but thinking of getting a smaller unit and splicing it in so it can mount inside the engine bay. Ideas?
Thanks.
Re: Out of the gold, into the gold
It turns over! For several seconds even and nothing broke.
I had the fuel pump fuse out and was just trying to get the fluids circulating to check for leaks. Big deal, long time coming. This makes me confident it will start.
Just need to build an exhaust, find a shifter arm and selector rod, and go figure out a drive shaft.
At least something other than the motor and trans from the e32 fit.
[/url]Untitled
And a few washers as a tribute. I like the wheel lower too.
[/url]Untitled
Re: Out of the gold, into the gold
Started on the first try. Oil light goes out immediately, idles well even without an exhaust or O2 sensor. Oil leaking from the pan and just under the tensioner bolt so looks like some resealing is needed. Didn't really expect this because the mating surfaces were pristine smooth and clean and everything was torqued in pattern / sequence. At least the cooling system is leak free.
Finally got the correct shift arm and selector rod so shifter is all together. Driveshaft just arrived so that is next and have started cutting and fitting the downpipes.
Things back in their right place.
[/url]Untitled
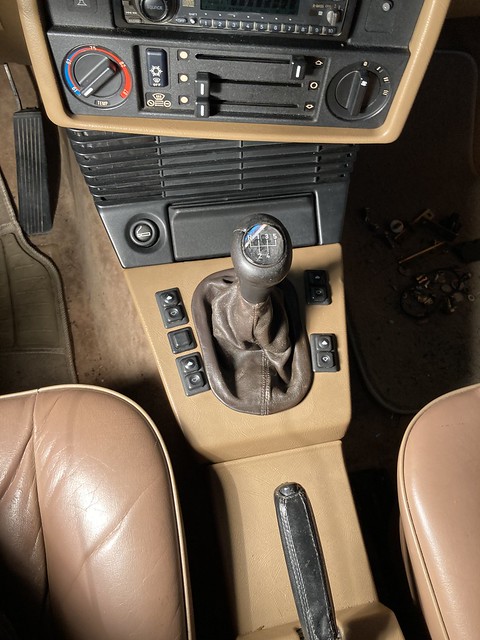
Shift boot is from the e32 donor. It had to be cut and stitched to fit the e28 shift frame and then the boot was glued and clamped in several steps to get it to fit the frame and sit nicely in the console. The frame came from someone in Denmark who is 3-D printing them. Fit well. Just needed to notch the console for the tabs to fit into.
[/url]Untitled
B35 afm with B34 air box.
[/url]Untitled
And some feet for the airbox to rest on the cam cover.
[/url]Untitled
-
- Posts: 5052
- Joined: Feb 12, 2006 12:00 PM
- Location: Don't waste my motherf***in' time!
- Contact:
Re: Out of the gold, into the gold
Looking good, keep posting on the progress.
-
- Posts: 966
- Joined: Oct 26, 2017 3:36 PM
- Location: Fleming Island FL
Re: Out of the gold, into the gold
Digging this build and the customizations. Clean work my friend.
Re: Out of the gold, into the gold
Got the new Portland DS installed last night with shiny new 10.9 hardware. 2-day delivery included in the cost! Made sure to torque nuts only on the flanges, not the guibo. For the shifter arm mount, I opted for the bolt-on versus 2-piece weld-on method even though I had a body mount from the donor. I used the existing hole in the mount and drilled 2 more. Bolt size is fairly small so plenty of metal left and it is quite stiff once tightened. Unlike the DS, the trans brace, shift arm, and rod are getting hard to find so keep that in mind if considering this swap.
Now back to those damn leaks.
Cheers!
[/url]Untitled
Now back to those damn leaks.
Cheers!
[/url]Untitled
Exhaust coming together
Happy New Year all.
Got the oil pan and heater valve plumbing redone. Ended up getting a new valve for a good price so changed that out as well.
[/url]Untitled
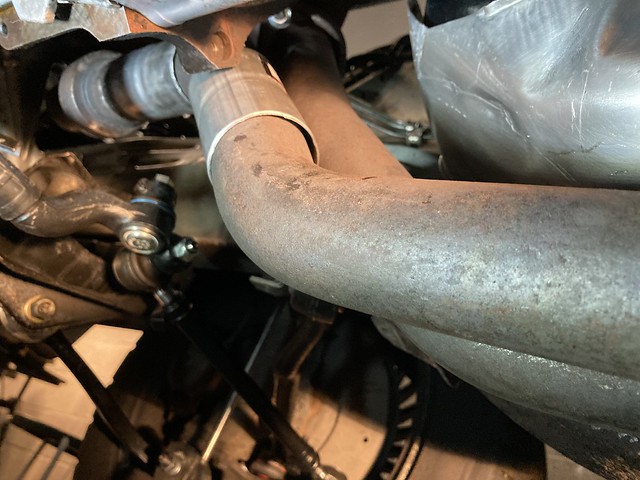
Started on the exhaust which should be one of the last major mechanical tasks. I'm modifying the downpipes and then everything back will be new. Only the front pipe needs to be cut and welded to fit. The rear pipe fits. One difference is they switch sides to fit.
The front needs to be shortened about an inch in the horizontal section. The vertical section needs to be shortened to clear the sway bar and then the bottom horizontal section needs to rotate about 20 degrees or so so it will fit into the hanger. From there back it will be routed like the original system with 2 round resonators in the center and an ANSA rear muffler. I want the system to be relatively quiet so I got the largest resonators I could find that will fit. We'll see.
[/url]Untitled
You can see that the 2" adapters are just a bit larger than the original pipes. To get good welds, I tacked a few spots and then hammered the edge down to fit snug on the pipe. I hadn't welded in quite a while. I used to have access to a Miller 350. Now I just have an HF flux-core machine. Although after some practice, not beautiful but it'll do. There's a nice even heat ring on the inside, no burn through, and it's sealed.
This is the first one. They'll get better. Would definitey be better if I had a dedicated welding table and not hunched over a workmate.
[/url]Untitled
Re: Out of the gold, into the gold
Decided to weld these resonators together hoping it will add some rigidity to the center section. It will also help get things lined up and fit.
I chose these because I couldn't find a single unit that was 2 in 2 out, 2" ID, and would fit well in the tunnel. Each of these has a 4"OD and about 24" long case which makes the C to C pipe spacing about 4" and they fit very well in the tunnel under the heat shield. From there it will route to the down pipes and rear muffler section.
The casing is heavy gauge so I hope they are relatively quiet. Plan to give it a coat of hi-temp paint.
[/url]Untitled
Re: Out of the gold, into the gold
Front section is all welded. Rear is fit but still needs welding. That rearmost joint will be clamped so the entire system can be disassembled easily. Everything lines up nicely. Also need to fit the O2 bung. Front hanger will be a modified version of the original. Rear hanger will be a single piece of round stock welded to both pipes and then laced through rubber donuts. More work than I had expected.
[/url]Untitled
[/url]Untitled
Re: Out of the gold, into the gold
Small update. Rear exhaust section is welded up. Don't mind the flux and stickers, it will get wire brushed and some HT paint. Most importantly, the front and rear sections align well with the resonator section after final welding. There will be clamps before and after the resonators. Also got the O2 bung welded in front. I'm satisfied that I met the objectives of 1) full 2" dual pipe system 2) as few pieces as possible 3) mostly welded lap joints and 4) relatively easy to remove if needed.
[/url]Untitled
[/url]Untitled
Re: valance touch-ups
I'm not ready to go full bumper swap yet and I couldn't just slap the valance back on. It was pretty damaged on one side. The corner was caved in several inches, the tow hook hole was really mangled, and there was a significant crease at the paint transition line out to the edge. Using a small ball peen and other makeshift tools I was able to get it pretty straight and fit a new tow hook cover. Add some trim paint and it looks decent. We'll see.
[/url]Untitled
[/url]Untitled
[/url]Untitled
[/url]Untitled