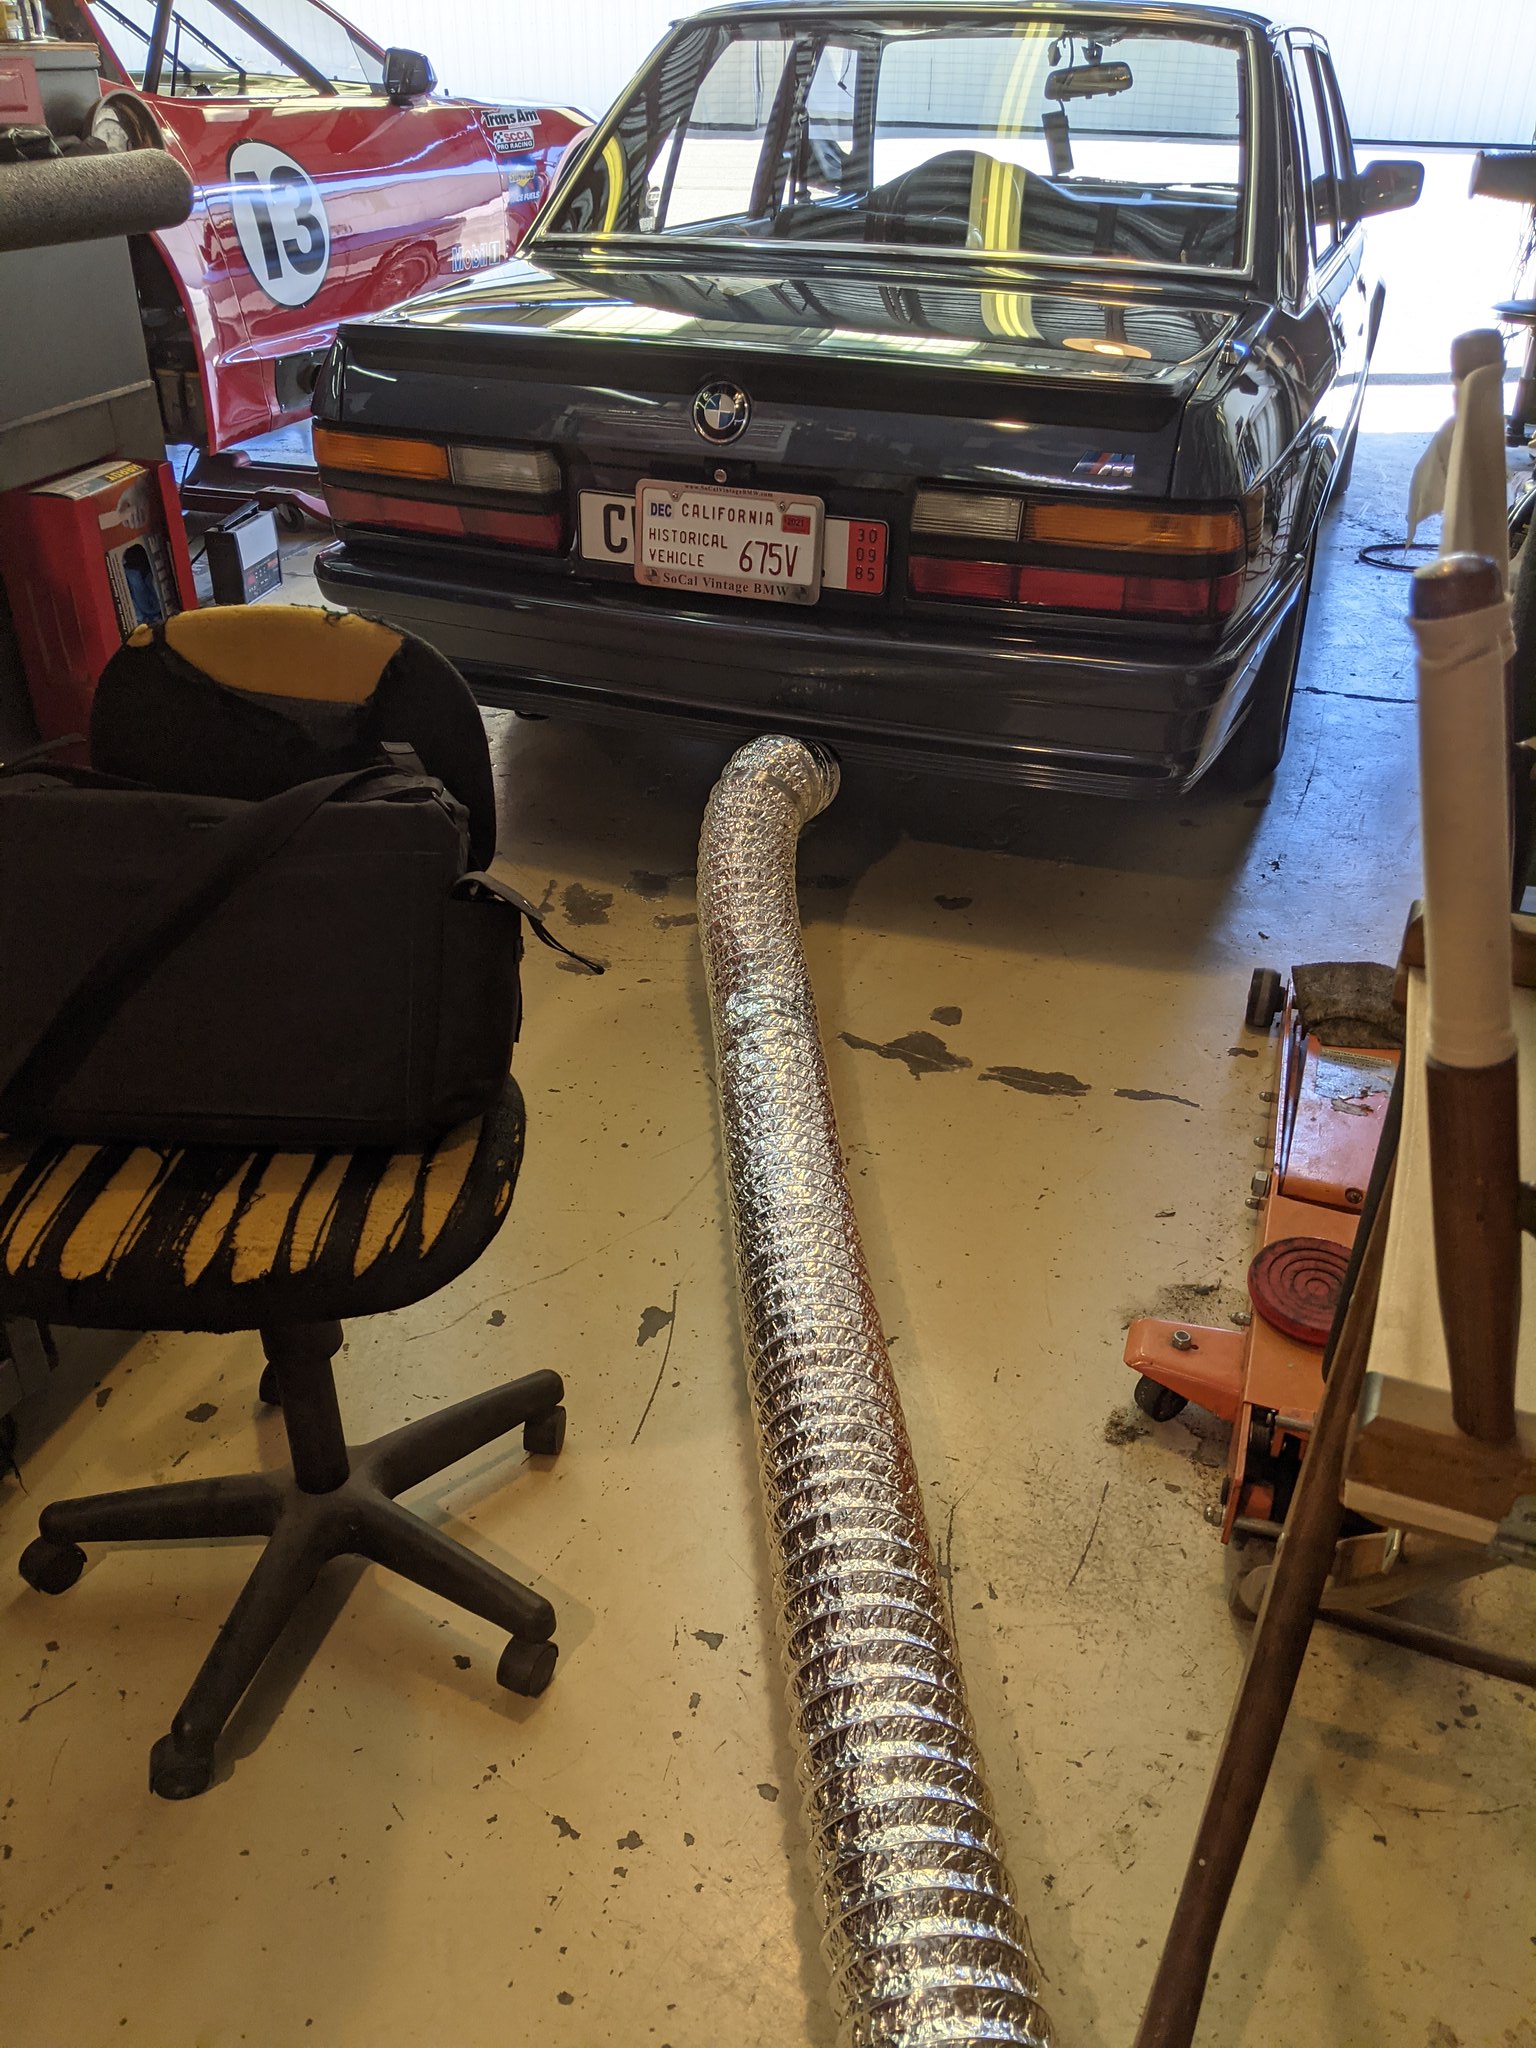
I like it! Even with my stuff that I think of as new just about asphyxiates me if I have been backed in and do a cold start, I can only imagine what the hanger and the M535i must be like.vinceg101 wrote: Mar 30, 2021 3:41 AM I made this little tool sometime back last summer, but I had to fire up the M535i since I couldn't remember the last time it left The Hangar.
Even with the hangar door open and the rear door open also, running a car in here gets problematic.
Simple parts: 33' of 6" diameter high temperature vent hose, (1) 6" Inline Duct Fan, (1) 6" hose clamp and some HVAC seam tape. Works like a charm and I don't pass out. Yay!
External links now open in a new browser tab - turn this off in your UCP - Read more here.
What did you do in/to your Garage today?
Re: What did you do in/to your Garage today?
Re: What did you do in/to your Garage today?
first time I started my diesel after doing the timing belt I got a face full of that stink. Had the door open and the back end of the car was facing it, but I get a pretty steady breeze coming in through the door. Diesel engines reek despite what the brodozer crowd seems to think.
Re: What did you do in/to your Garage today?
boat motor is back together, spent time polishing it. Need to hit the lower unit with some rubbing compound. It has a bit of an orange stain from the water, and I'd prefer it go away. Need to get some touch-up paint too, over the last 14 years there are some spots where the paint rubbed off. Still need to change the lower unit oil, so I'll do that first and then detail the motor.
Re: What did you do in/to your Garage today?
oil changed. Had just enough, pump started sucking air as it started coming out of the fill level hole.
Re: What did you do in/to your Garage today?
put up some shelving and did some organizing. Still needs more work but its a step in the right direction and I haven't filled the shelves yet.
Re: What did you do in/to your Garage today?
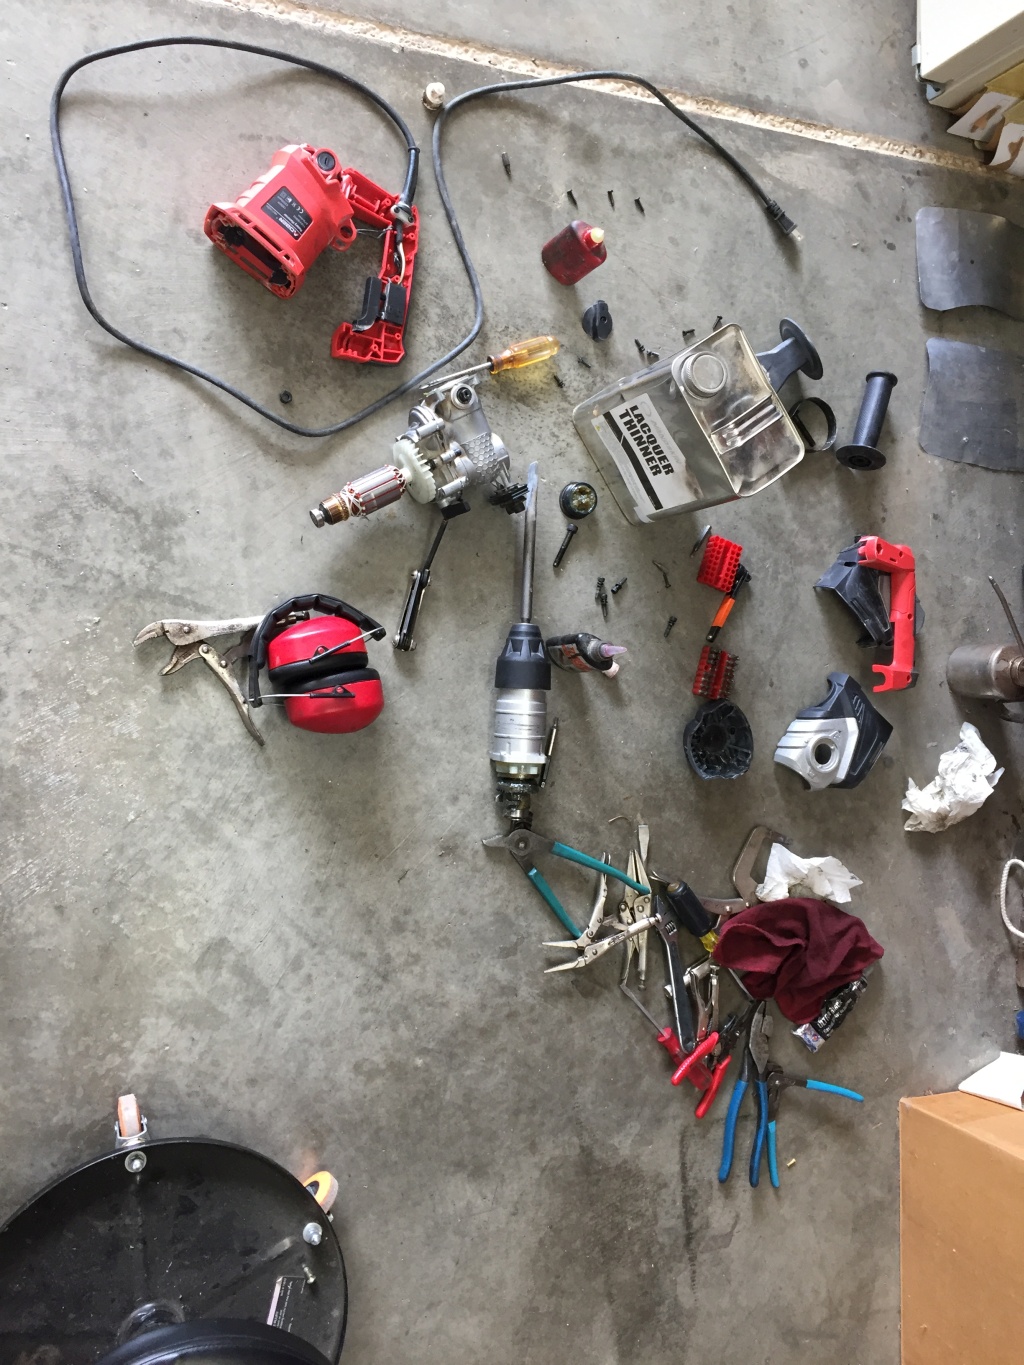
Fixed my Roto hammer. It was still hammering, but not rotoring anymore. Wasn't, it is now.  No diagram and no parts left over, and it works! Locknut on the clutch came loose and wasn't locking anymore. Retorqued with locktite and away we go. I should probably have taken an after pick, but that's less interesting. I was in as far as the armature, short of rewinding I'm not sure I could have gone much further.

Re: What did you do in/to your Garage today?
Winterized the boat, and while I had the ladder un-blocked I cleaned the gutters on the garage. How excitement.
I need a better home for that ladder, the only wall I have open enough to accomodate it is blocked by the boat so its a whole process to get it out. I've considered hanging it overhead with a rope and pulley system but quite honestly having things hanging above me and/or the cars makes me nervous.
Earlier in the week I aligned headlights for a friend with my old Hoppy headlight aimer.
Re: What did you do in/to your Garage today?
Okay, so about time I came back to this thread.
Winter in The Hangar is full of small pickup projects; some for the cars and some for the shop space. As an ongoing project that never seems to end is my upgrading this small wooden roller drawer box. It's a wonderful little tank of a box home-built by some DIY'er that I managed to pick up off Craigslist locally back around when we first got The Hangar space.
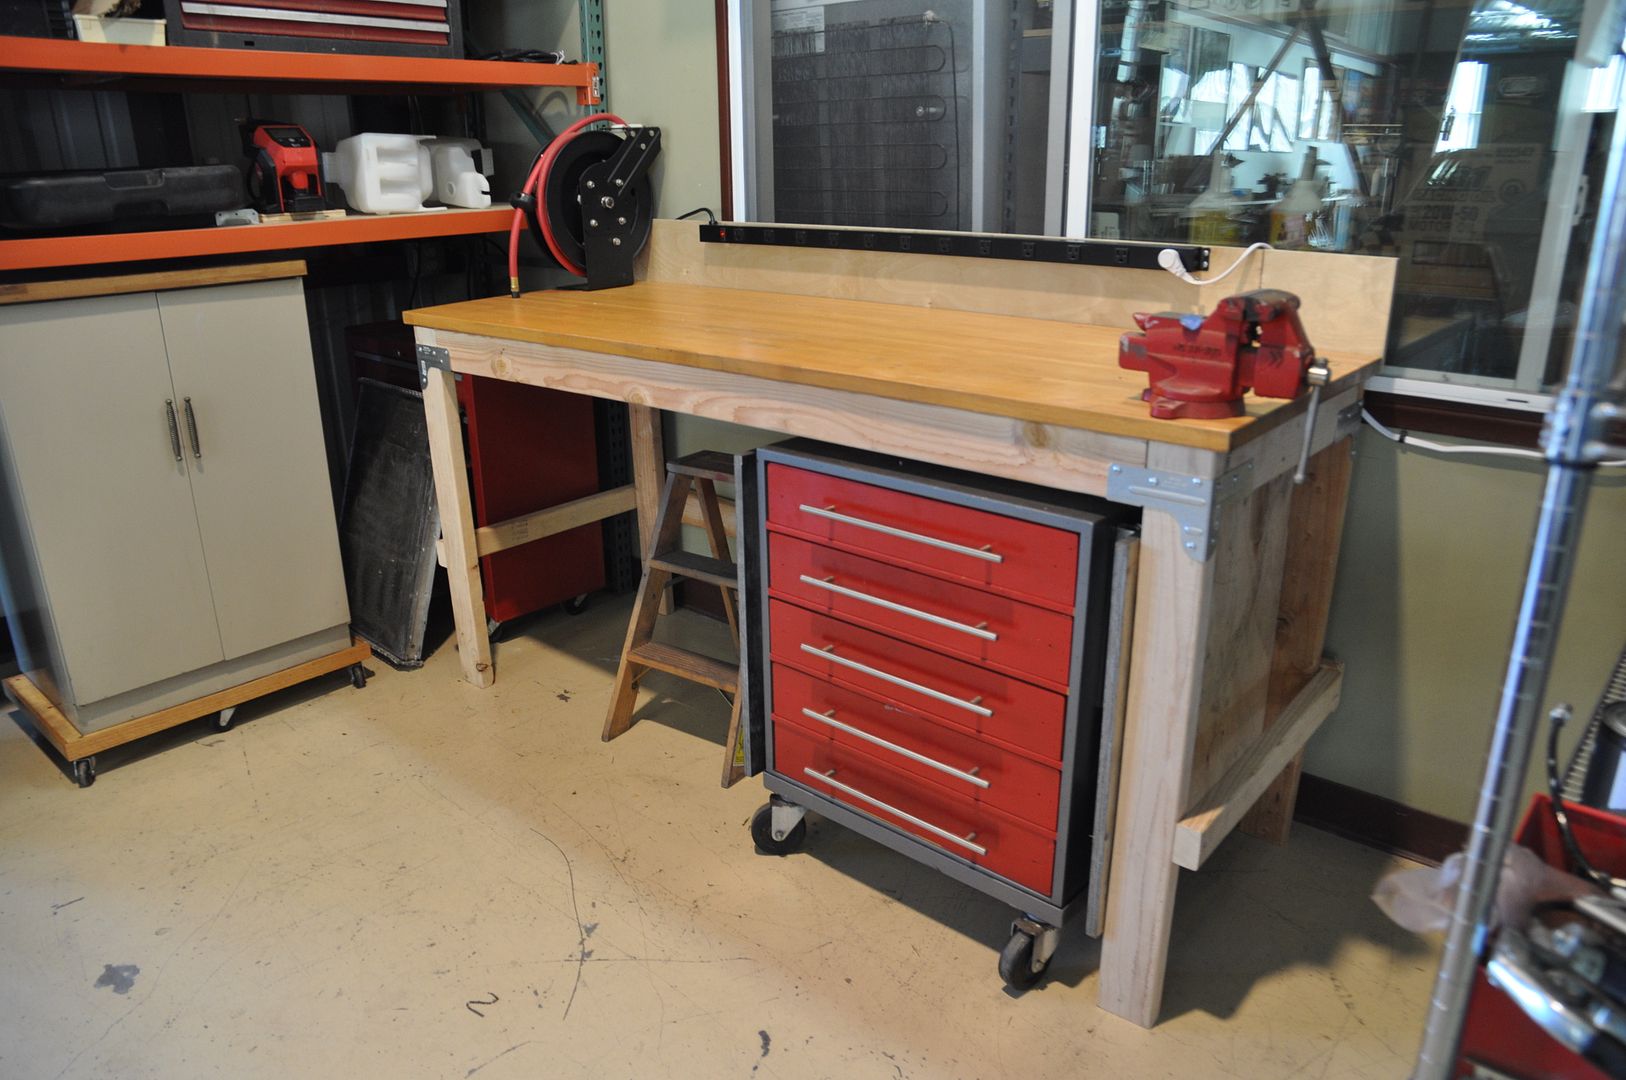
I haven't really done much with it except for adding the drop-leaf sides which extends the working surface which has come in REALLY handy as it's at the perfect height especially for working on seats. I have plans to add metal top plates to make a hardy work surface but haven't got around to them yet.
The only other think I've done is paint it to match my other Craftsman tool chests. The interiors of the drawers all came divided which wasted a lot of space so I removed a lot of them, but I didn't really have an immediate use for this nifty little box so I really didn't know what to put into it.
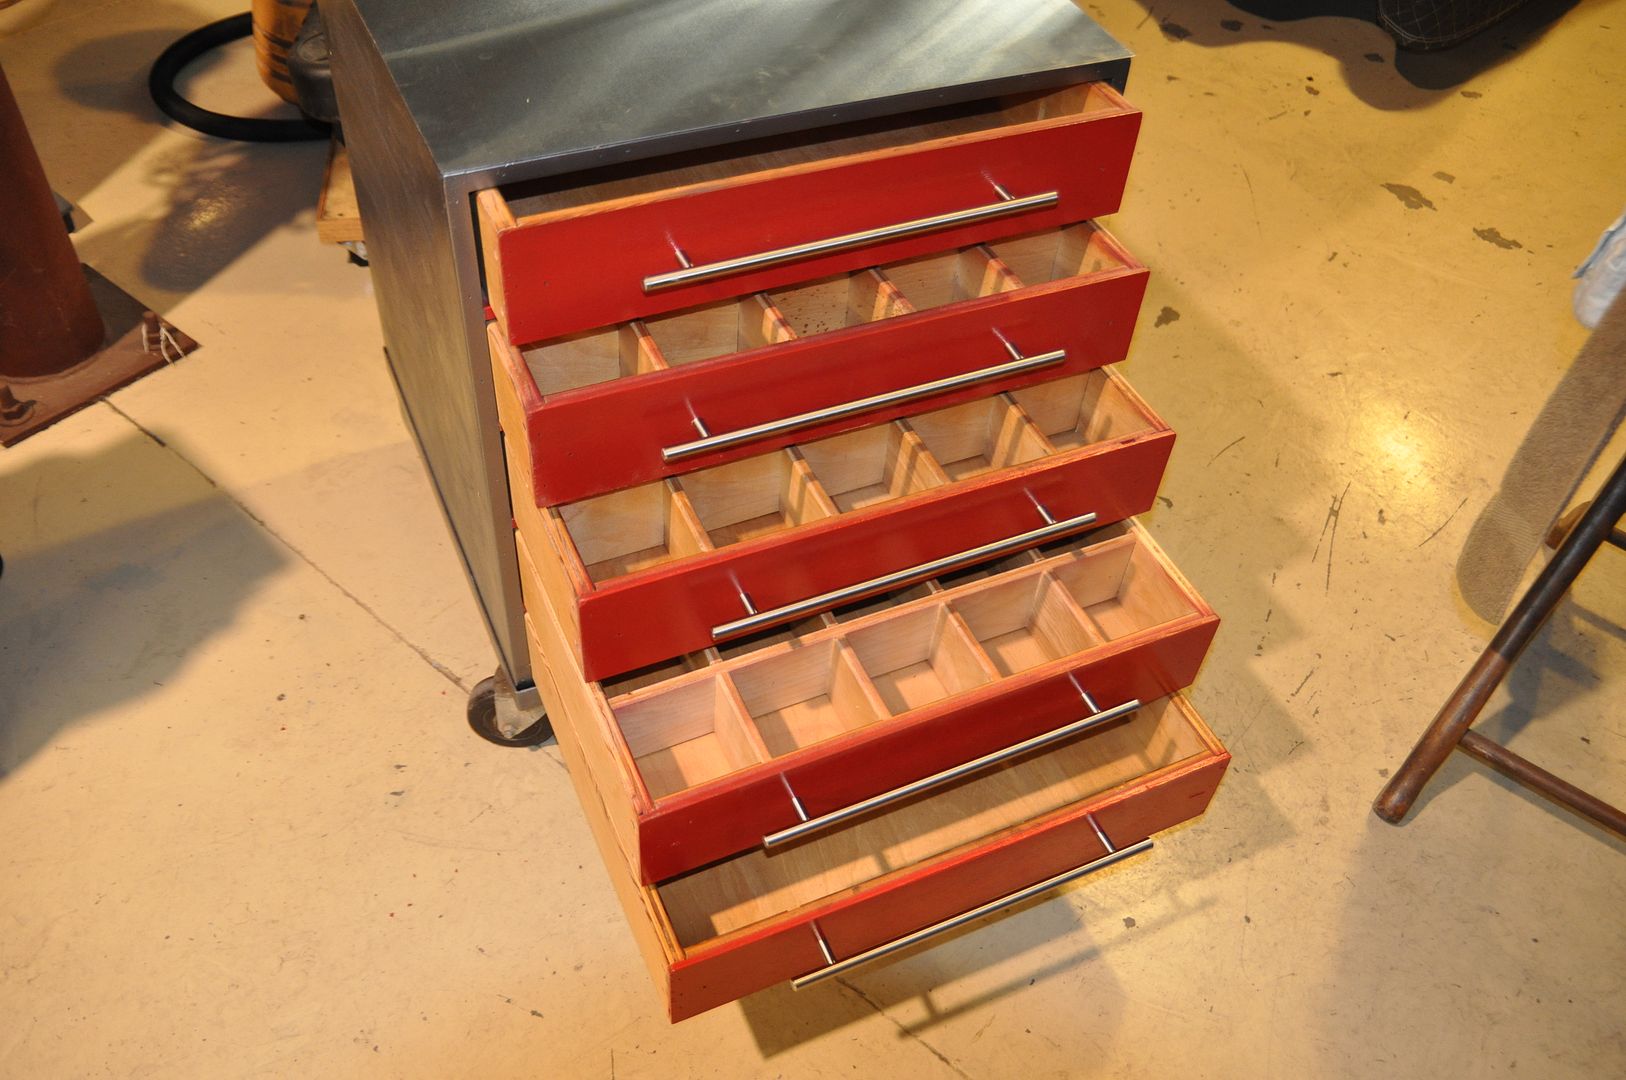
Since then it has become my hardware cabinet which I then had to add back in dividers and bins to hold everything. That has turned into a long task of trial and error trying out various products.
I think I finally found something that will work:
These were what I was using from Rubbermaid: interlocking shallow trays. Downside is trying to divide them in half and labeling:
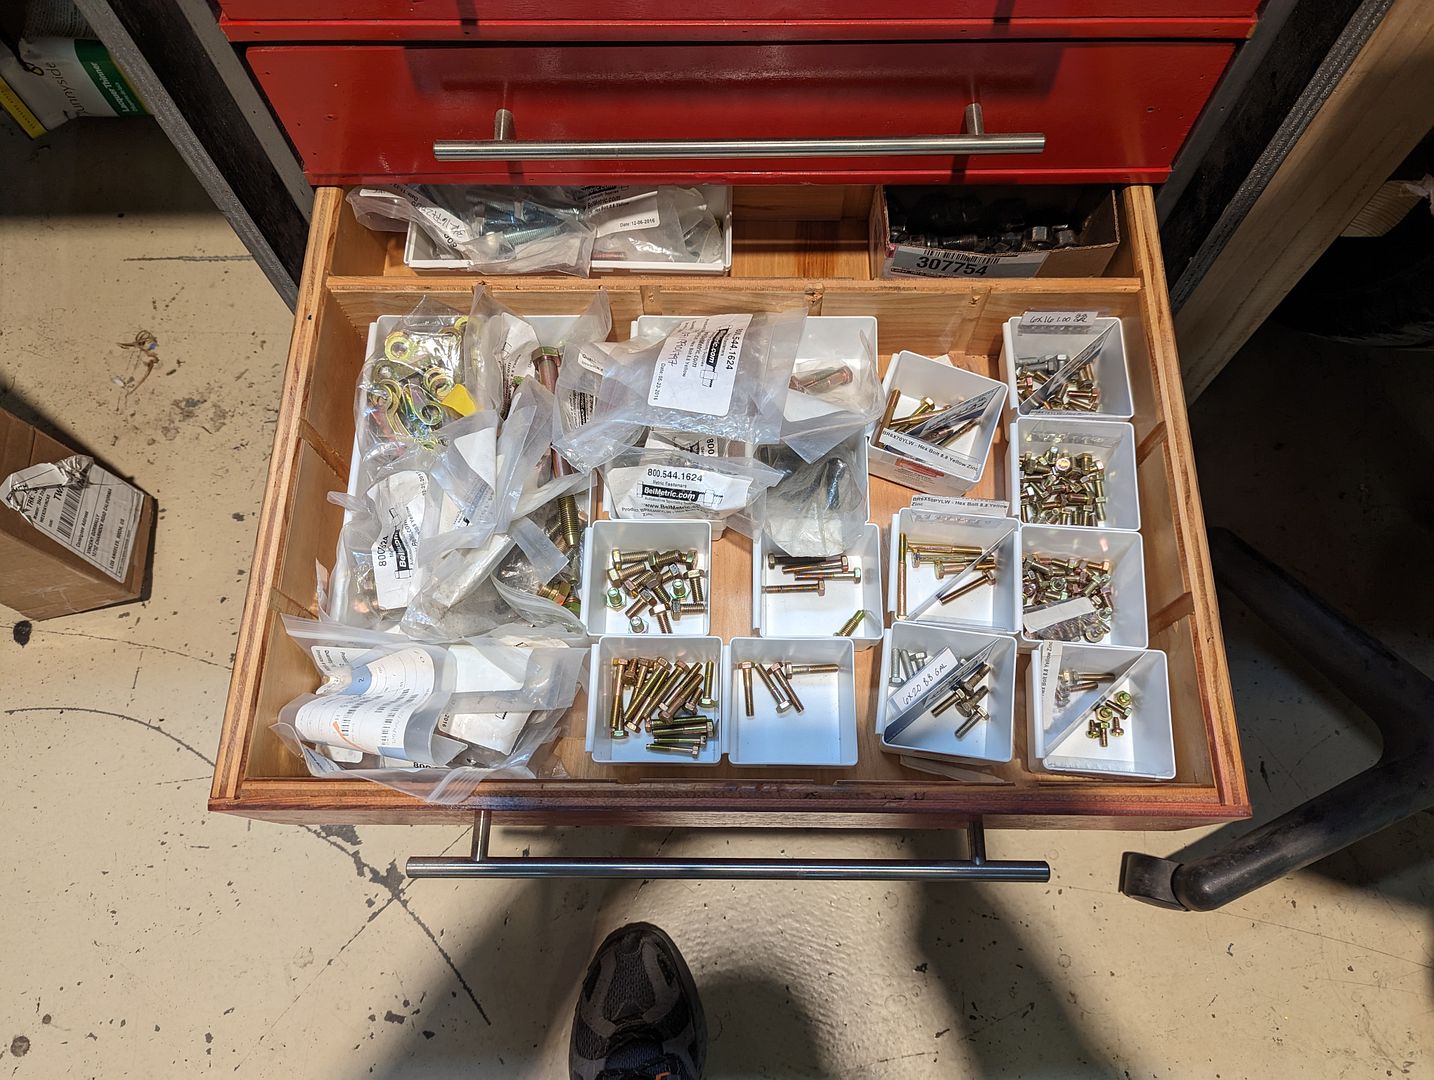
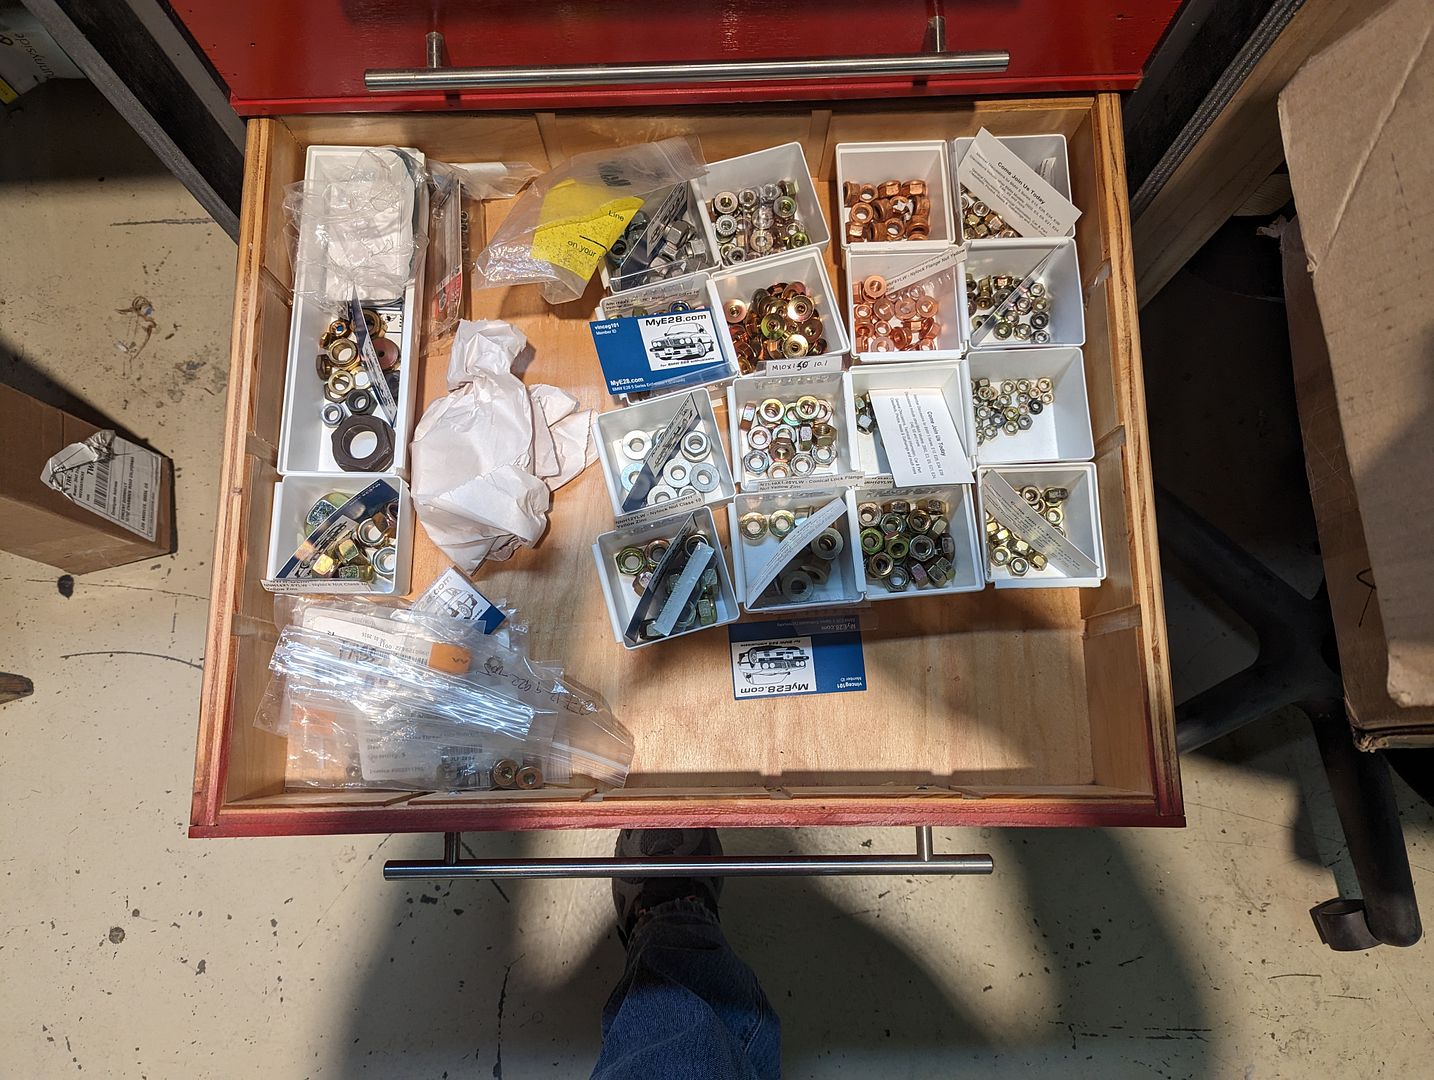
I found these recently on Uline.com which are meant to go into the plastic parts bins. They just fit vertically in the drawers, small enough to separate out all the various different hardware varieties and have a nice little tab for a label (those are forthcoming):
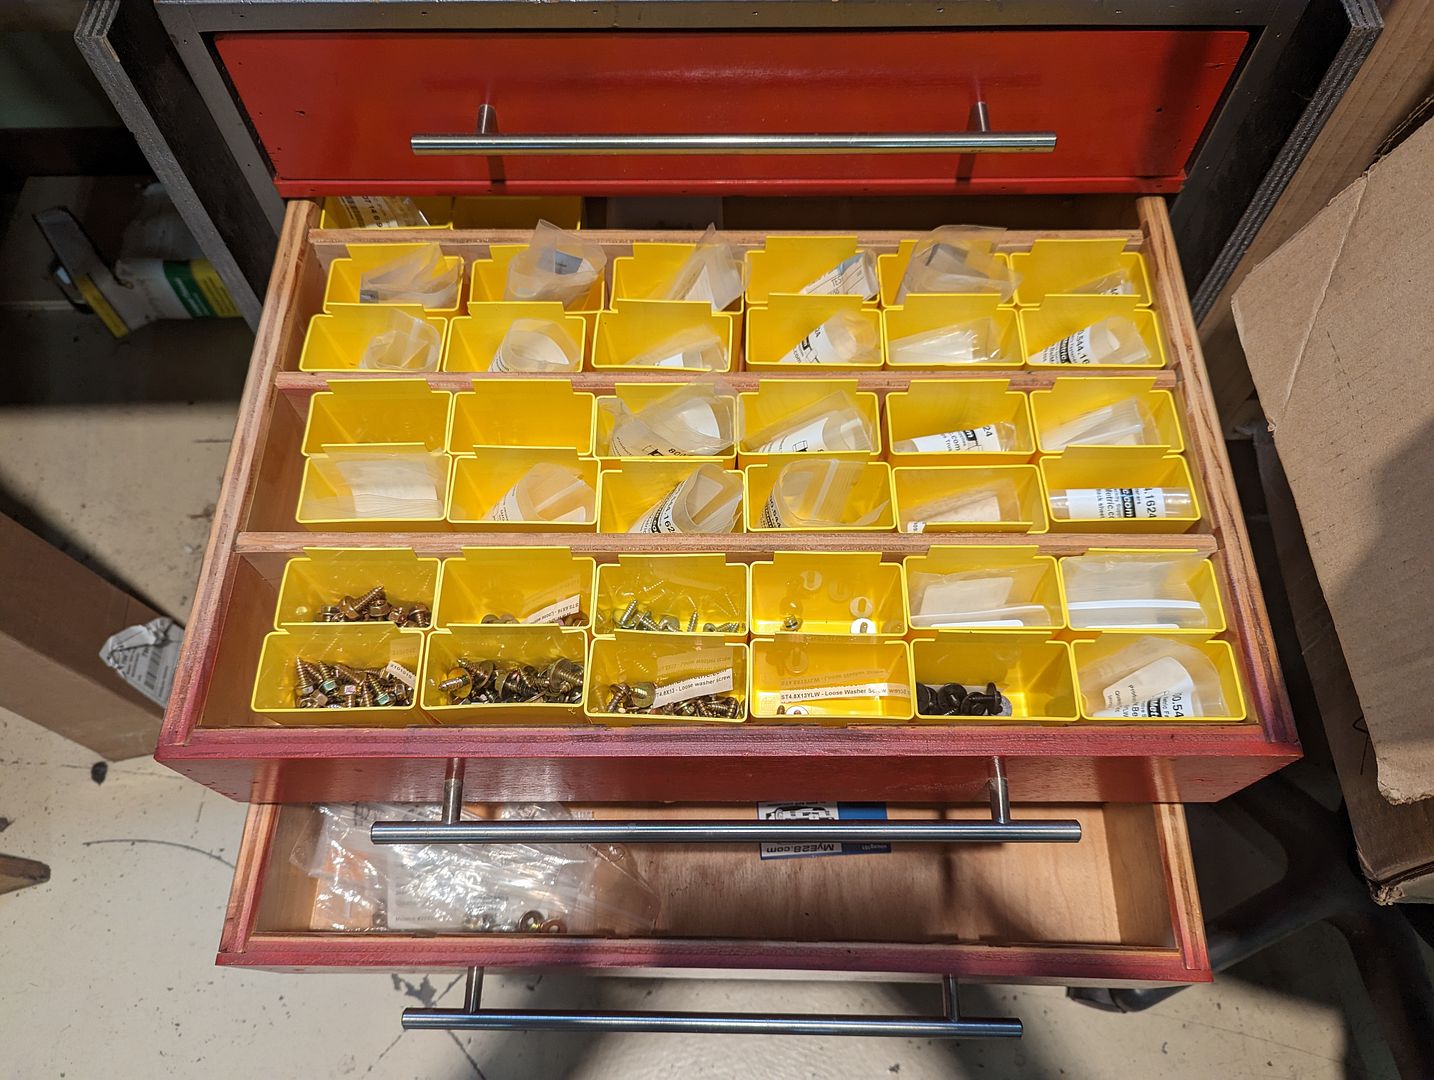
As you can see I had to put back in some of the dividers to organize all the bins best. They also have a larger bin cup style will work better for larger bolts and such; of course I will also need to keep a few of the larger Rubbermaid white bins.
Small progress.
Winter in The Hangar is full of small pickup projects; some for the cars and some for the shop space. As an ongoing project that never seems to end is my upgrading this small wooden roller drawer box. It's a wonderful little tank of a box home-built by some DIY'er that I managed to pick up off Craigslist locally back around when we first got The Hangar space.

I haven't really done much with it except for adding the drop-leaf sides which extends the working surface which has come in REALLY handy as it's at the perfect height especially for working on seats. I have plans to add metal top plates to make a hardy work surface but haven't got around to them yet.
The only other think I've done is paint it to match my other Craftsman tool chests. The interiors of the drawers all came divided which wasted a lot of space so I removed a lot of them, but I didn't really have an immediate use for this nifty little box so I really didn't know what to put into it.
Since then it has become my hardware cabinet which I then had to add back in dividers and bins to hold everything. That has turned into a long task of trial and error trying out various products.
I think I finally found something that will work:
These were what I was using from Rubbermaid: interlocking shallow trays. Downside is trying to divide them in half and labeling:


I found these recently on Uline.com which are meant to go into the plastic parts bins. They just fit vertically in the drawers, small enough to separate out all the various different hardware varieties and have a nice little tab for a label (those are forthcoming):

As you can see I had to put back in some of the dividers to organize all the bins best. They also have a larger bin cup style will work better for larger bolts and such; of course I will also need to keep a few of the larger Rubbermaid white bins.
Small progress.
Re: What did you do in/to your Garage today?
I've been recovering my garage. We had the house painted inside and out, and I had to move into the back half of my garage at the same time to allow for the install of new garage doors. The result was chaos stacked on chaos.
Oh - and leading up to this (with about 24 hours separation) I had the family Mazda up because my middle spawn smacked the edge of a driveway at close to 45mph.
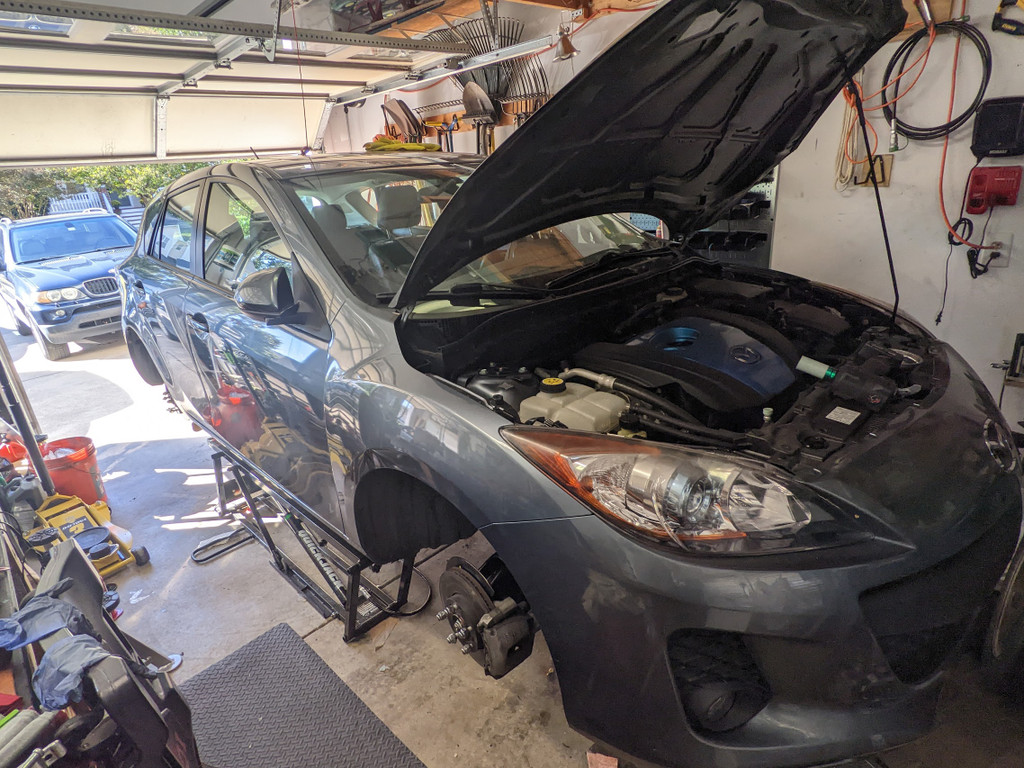
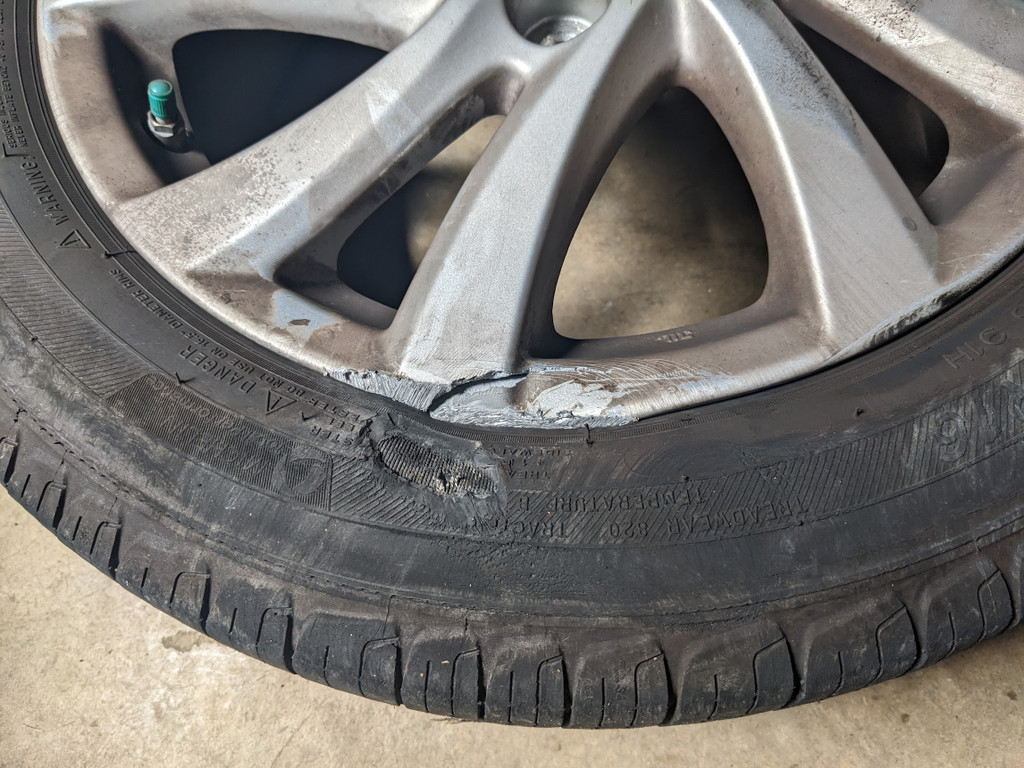
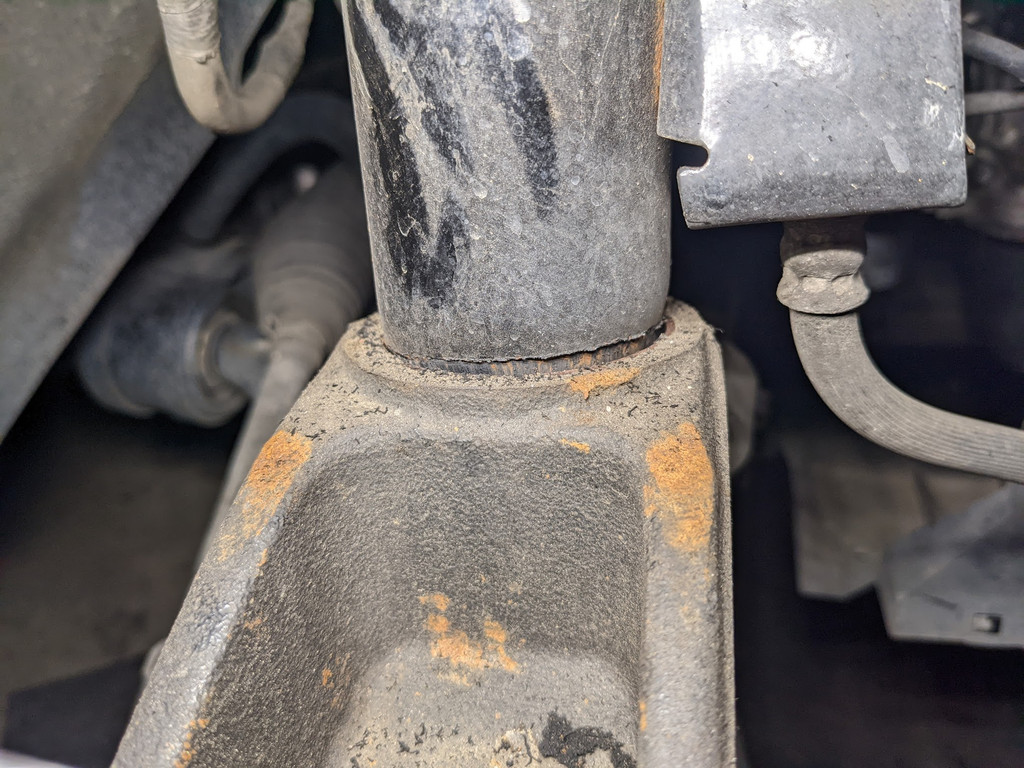
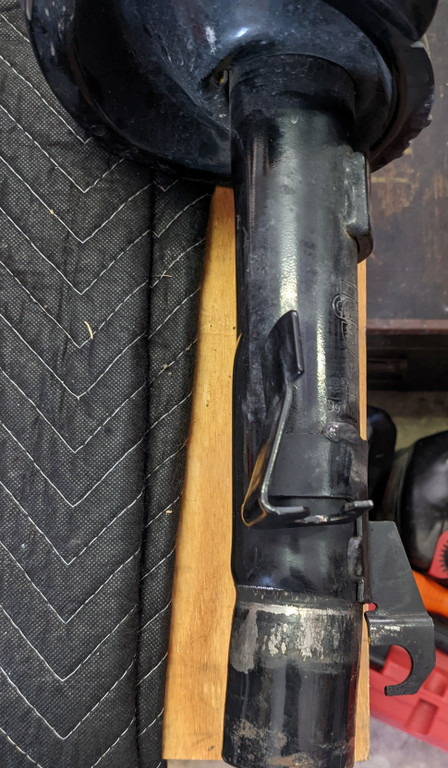
The result was obviously replacing essentially everything in that wheel well (Front passenger) except the brake caliper and carrier. I even did the wheel bearing and the hub, and of course the control arm/etc. Most of that (not the hub) was mirrored on the other side. And since I took the opportunity to upgrade the front struts to Koni, I did the rear shocks to match.
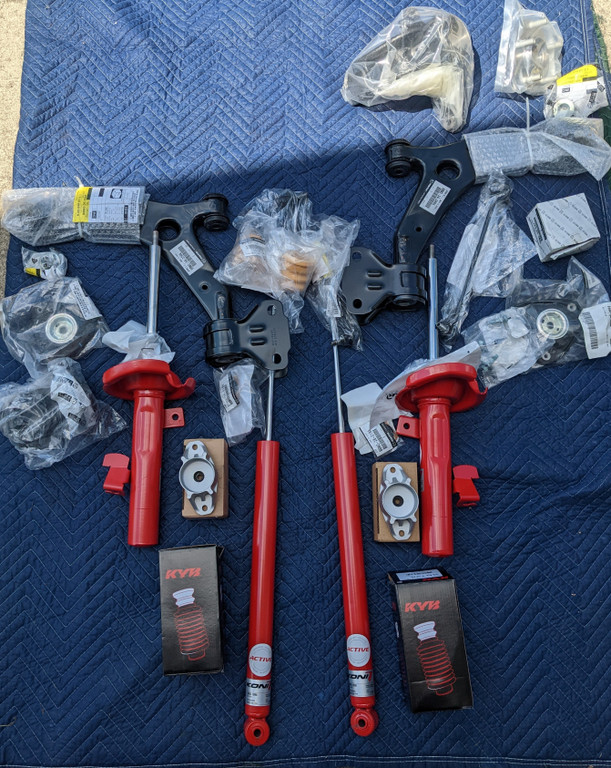
That process was a bit...progressive. A couple times I had to order things I didn't know were borked or decided to add to the 'build'
The result was my garage was a mess. I took some time to really dig through some things before I just rolled it all back, so that was a process too.
And, of course, we've had other fun with the family cars to deal with, so it was a rockin' good time.
I did take the opportunity to get my box organized too. That felt good.
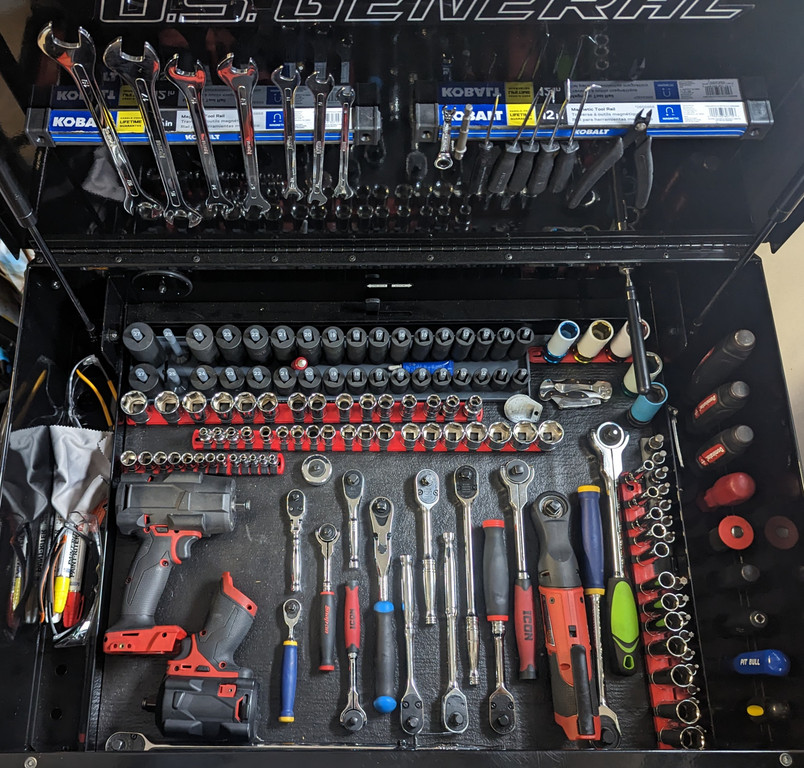
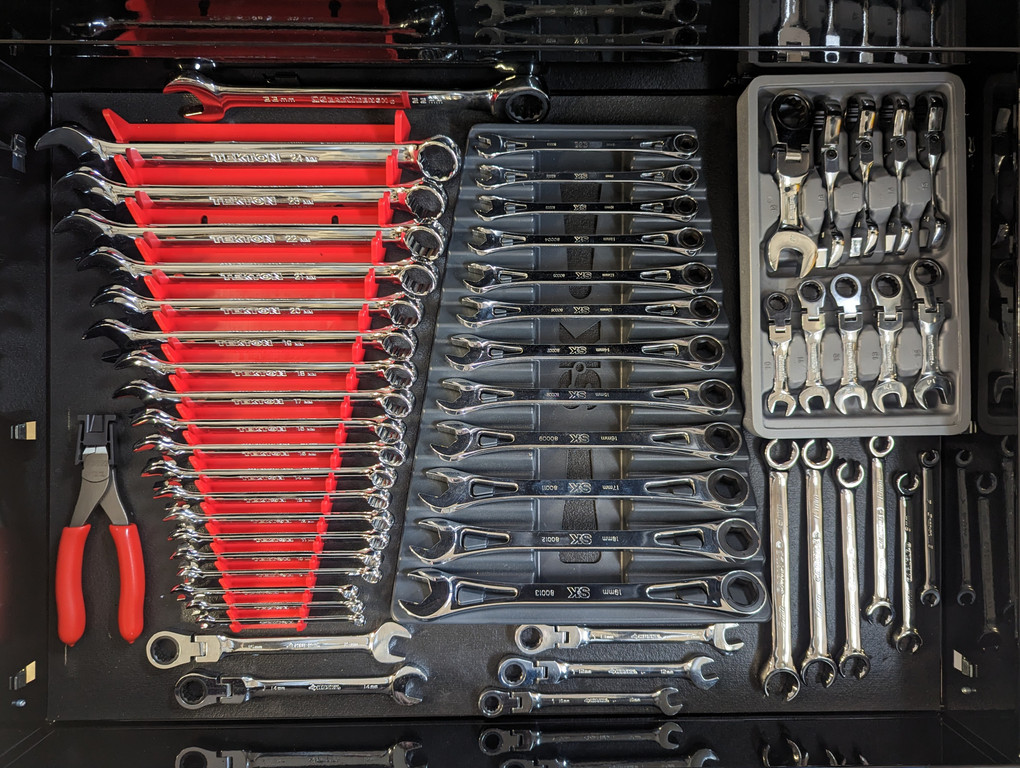
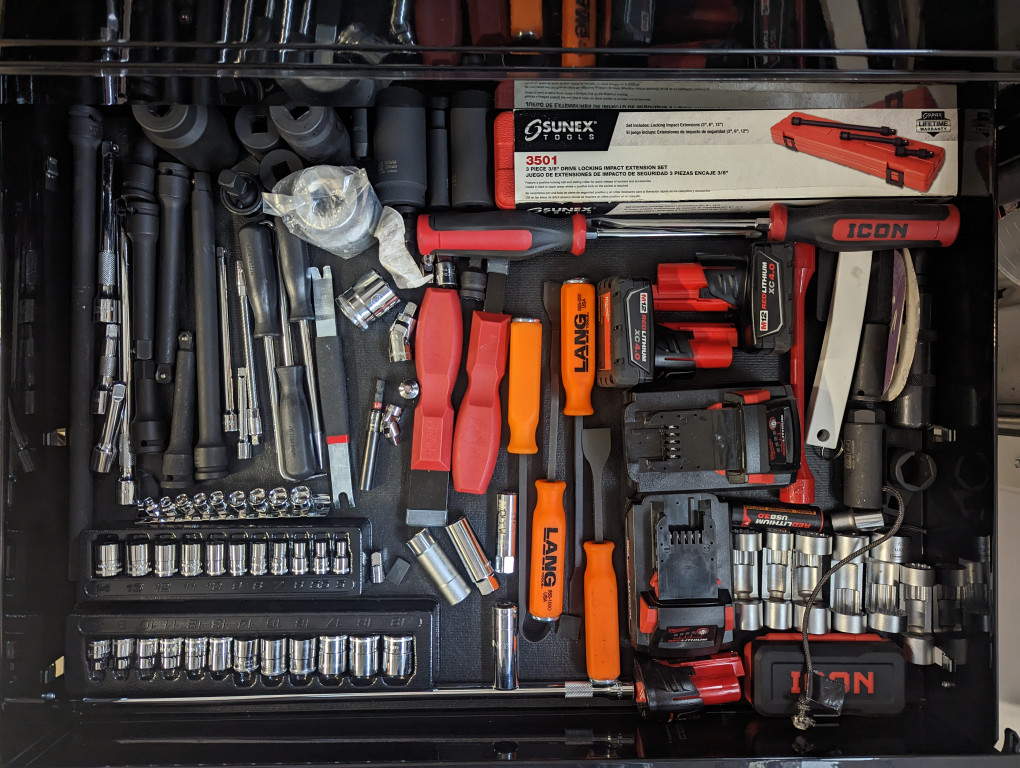
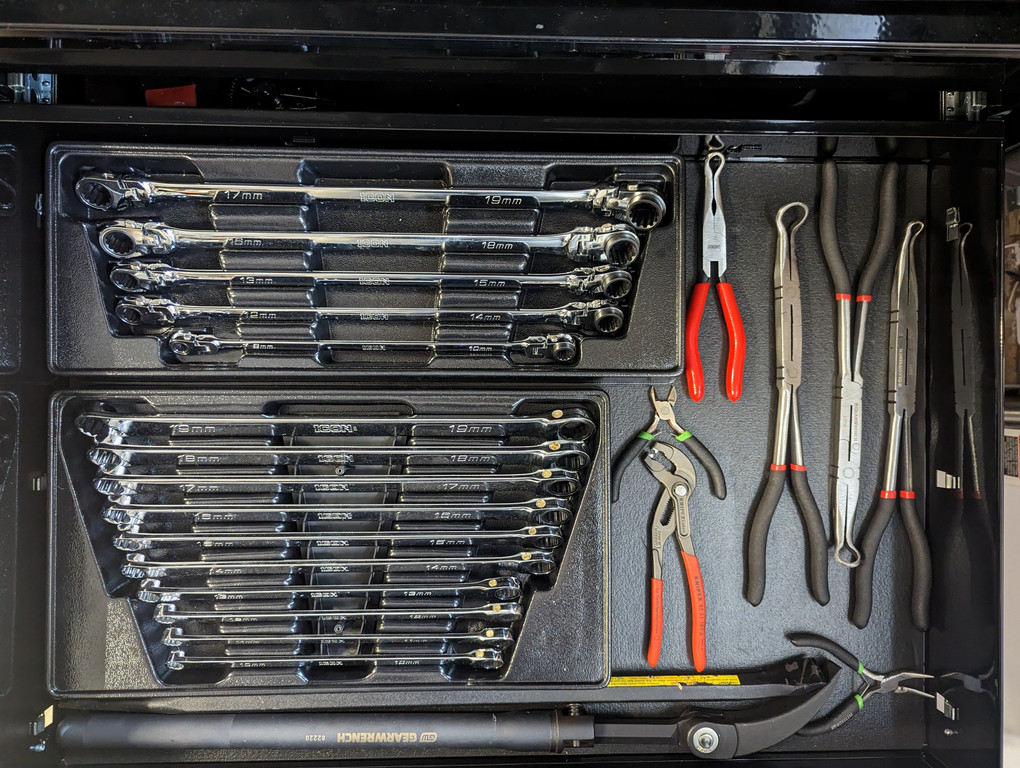
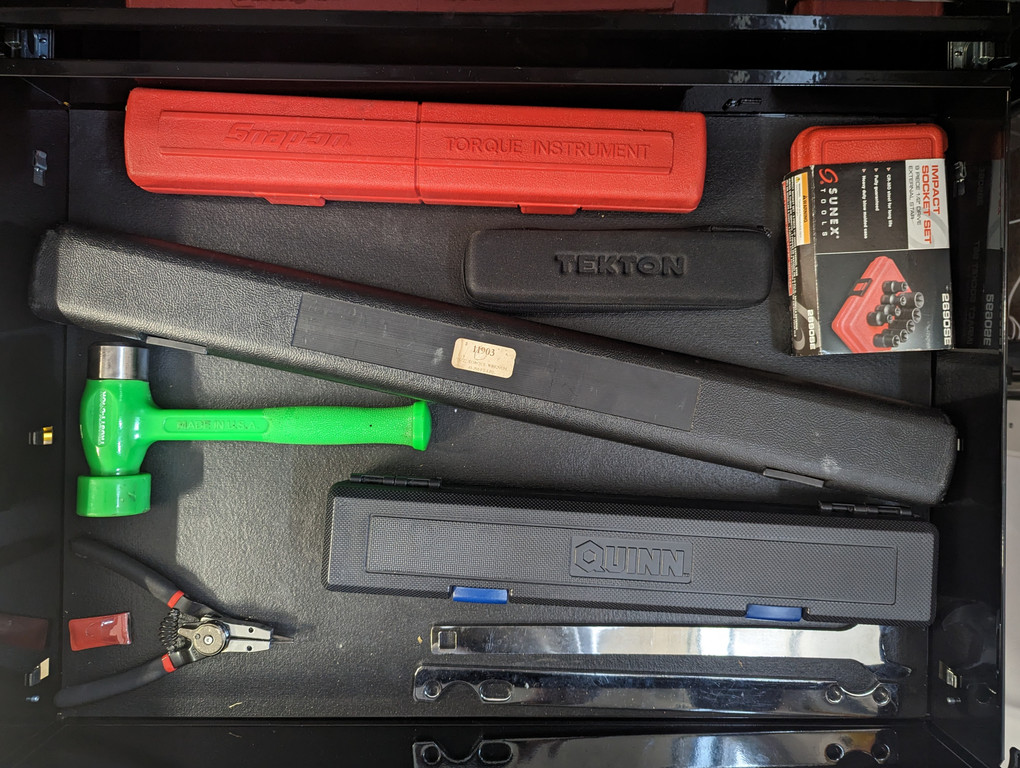
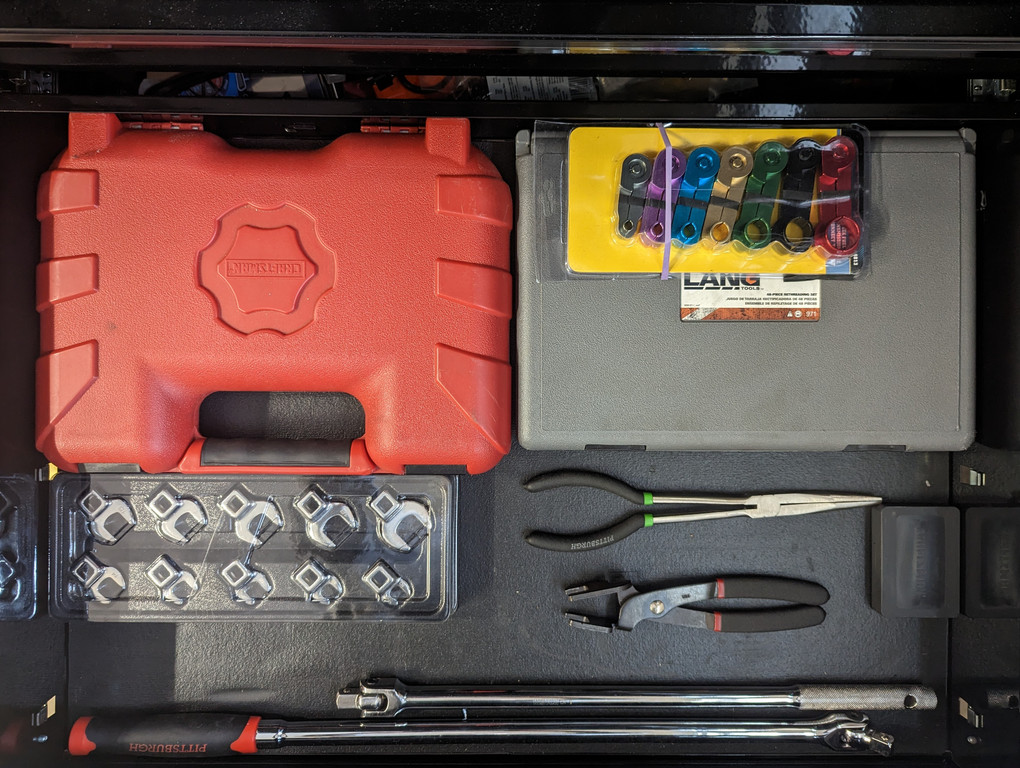
And then... the drawer of shame..
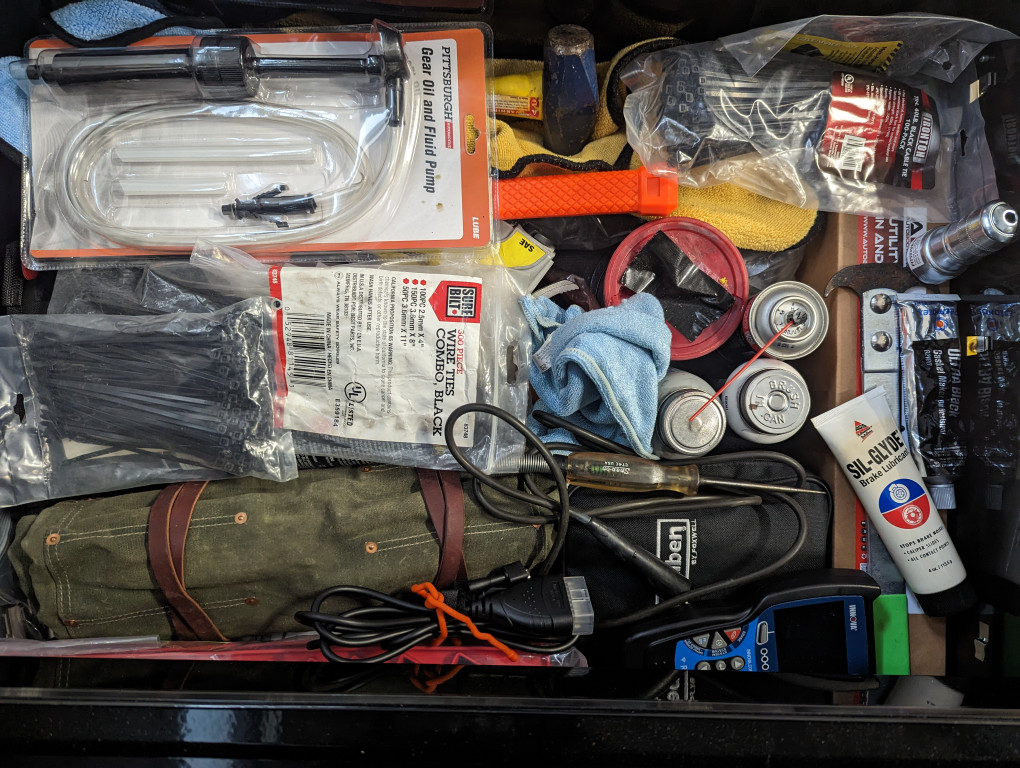
All that's left is to sort the pile into trash/recycle/donate/keep, and then I get to fully own my garage again
Oh - and leading up to this (with about 24 hours separation) I had the family Mazda up because my middle spawn smacked the edge of a driveway at close to 45mph.


The result was obviously replacing essentially everything in that wheel well (Front passenger) except the brake caliper and carrier. I even did the wheel bearing and the hub, and of course the control arm/etc. Most of that (not the hub) was mirrored on the other side. And since I took the opportunity to upgrade the front struts to Koni, I did the rear shocks to match.

That process was a bit...progressive. A couple times I had to order things I didn't know were borked or decided to add to the 'build'
The result was my garage was a mess. I took some time to really dig through some things before I just rolled it all back, so that was a process too.
And, of course, we've had other fun with the family cars to deal with, so it was a rockin' good time.
I did take the opportunity to get my box organized too. That felt good.


And then... the drawer of shame..

All that's left is to sort the pile into trash/recycle/donate/keep, and then I get to fully own my garage again
Re: What did you do in/to your Garage today?
That is home built? Must have been a cabinetmaker. Wow, I'm impressed.vinceg101 wrote: Feb 14, 2023 6:42 PM Okay, so about time I came back to this thread.
Winter in The Hangar is full of small pickup projects; some for the cars and some for the shop space. As an ongoing project that never seems to end is my upgrading this small wooden roller drawer box. It's a wonderful little tank of a box home-built by some DIY'er that I managed to pick up off Craigslist locally back around when we first got The Hangar space.

Re: What did you do in/to your Garage today?
Yes, it is impressive. It's built like a small tank and weighs equally so. All the dividers are rabetted and stapled into the drawer bodies not to mention the smaller cross dividers are slot cut so they can stack fit into the larger ones. 3/4" and 1/2" plywood.Mike W. wrote: Feb 16, 2023 12:15 AMThat is home built? Must have been a cabinetmaker. Wow, I'm impressed.No full extension ball bearing glides though?
There is nothing "mechanical" on that box: no glides, there weren't even any handles on it; just the roller base. It was just unfinished plywood; felt like they never finished the project.
When I painted it, I took it apart, sanded it all the drawers then waxed the hell out of the box and drawers and put handles on it (although I will probably change the handles to better match the Craftsman cabinets). Then I added the drop leaf side panels (sorry no pic at the moment). I had to drill some vent holes in the sides of the outer carcass box since there is too much air pressure resistance when you push the drawers back in (doesn't help that much).
All in all it was a good catch and worth while purchase for not a lot of money.
Re: What did you do in/to your Garage today?
Aligned headlights on a friend's car. Whee. He bribed me with a stupidly long screwdriver so it was a whole lot easier.
Need to pull the suction cups off my old Hoppy aimers. They're kind of petrified and have a tendency to fall off the headlights unless fairly heavily gooped with silicone grease. Have some wintergreen oil and alcohol that will soften rubber but I found that a 3 parts alcohol to 1 part oil mix left overnight dissolved a turntable platter mat into slime. I might try a 6:1 mix and less time.
Need to pull the suction cups off my old Hoppy aimers. They're kind of petrified and have a tendency to fall off the headlights unless fairly heavily gooped with silicone grease. Have some wintergreen oil and alcohol that will soften rubber but I found that a 3 parts alcohol to 1 part oil mix left overnight dissolved a turntable platter mat into slime. I might try a 6:1 mix and less time.
Re: What did you do in/to your Garage today?
Added a carport, if only I could post a pic. 
Re: What did you do in/to your Garage today?
Very cool.Mike W. wrote: Mar 30, 2021 1:09 PMI like it! Even with my stuff that I think of as new just about asphyxiates me if I have been backed in and do a cold start, I can only imagine what the hanger and the M535i must be like.vinceg101 wrote: Mar 30, 2021 3:41 AM I made this little tool sometime back last summer, but I had to fire up the M535i since I couldn't remember the last time it left The Hangar.
Even with the hangar door open and the rear door open also, running a car in here gets problematic.
Simple parts: 33' of 6" diameter high temperature vent hose, (1) 6" Inline Duct Fan, (1) 6" hose clamp and some HVAC seam tape. Works like a charm and I don't pass out. Yay!
I’ve been pondering similar set up to work inside in the winter.
How tight is the seal on the exhaust pipe and how did you seal that up, if so?
Re: What did you do in/to your Garage today?
It's not that tight, the hose diameter is 6" but the spiral wire is sort of flexible so it fits snugly above the exhaust pipes and the bumper cover. I am able to push it down so the exhaust tips are inside the hose a good 4" or so. With a standard US exhaust and bumper I could see you needing some way to secure the hose to the tips. Probably one of those 6" hose clamps cinched down(?)Mashford wrote: Feb 27, 2023 12:07 PMHow tight is the seal on the exhaust pipe and how did you seal that up, if so?
With the engine pushing the exhaust and the fan pulling it from the other end, I found I don't really need a tight seal. Sure a little gets out, but not enough to worry about.
I have a bigger problem at the outlet side since I have a swinging door just of out to the frame of the photo (it would be over your right shoulder if you were taking that photo). The hose is only so long and I can't really close the door all the way, so some of the exhaust exiting the hose migrates it's way back inside when the wind blows. If you have the means and opportunity then making a permanent outlet in either the exterior wall of the garage or garage door would be ideal as you can weatherproof it (just like you do with a clothes dryer vent, in fact one of those weather-hood outlets is what you would use).
Re: What did you do in/to your Garage today?
Makes sense. Thank you.vinceg101 wrote: Mar 01, 2023 7:21 PMIt's not that tight, the hose diameter is 6" but the spiral wire is sort of flexible so it fits snugly above the exhaust pipes and the bumper cover. I am able to push it down so the exhaust tips are inside the hose a good 4" or so. With a standard US exhaust and bumper I could see you needing some way to secure the hose to the tips. Probably one of those 6" hose clamps cinched down(?)Mashford wrote: Feb 27, 2023 12:07 PMHow tight is the seal on the exhaust pipe and how did you seal that up, if so?
With the engine pushing the exhaust and the fan pulling it from the other end, I found I don't really need a tight seal. Sure a little gets out, but not enough to worry about.
I have a bigger problem at the outlet side since I have a swinging door just of out to the frame of the photo (it would be over your right shoulder if you were taking that photo). The hose is only so long and I can't really close the door all the way, so some of the exhaust exiting the hose migrates it's way back inside when the wind blows. If you have the means and opportunity then making a permanent outlet in either the exterior wall of the garage or garage door would be ideal as you can weatherproof it (just like you do with a clothes dryer vent, in fact one of those weather-hood outlets is what you would use).
Re: What did you do in/to your Garage today?
Wow, can't believe I (or anyone else for that matter) hasn't revisited this thread for nearly 16 months.
Okay, so I have been kind of busy this year with some much needed and long planned improvements to The Hangar.
The first is a Pneumatic Distribution System:
One of the long-outstanding projects in the Hangar was the shop-wide pneumatic system. I had bought a large compressor (Sanborn 5hp 60ga) long ago that we used occasionally but was inconvenient since we had to run miles of pneumatic hoses in and around cars. So it’s been kind of languishing. True to my nature, I planned the hell out of a whole hangar-wide distribution network with multiple connections and a few hose reels in strategic locations. I even purchased a large part of the system components years ago in preparation, but other car projects got in the way (also typical for me).
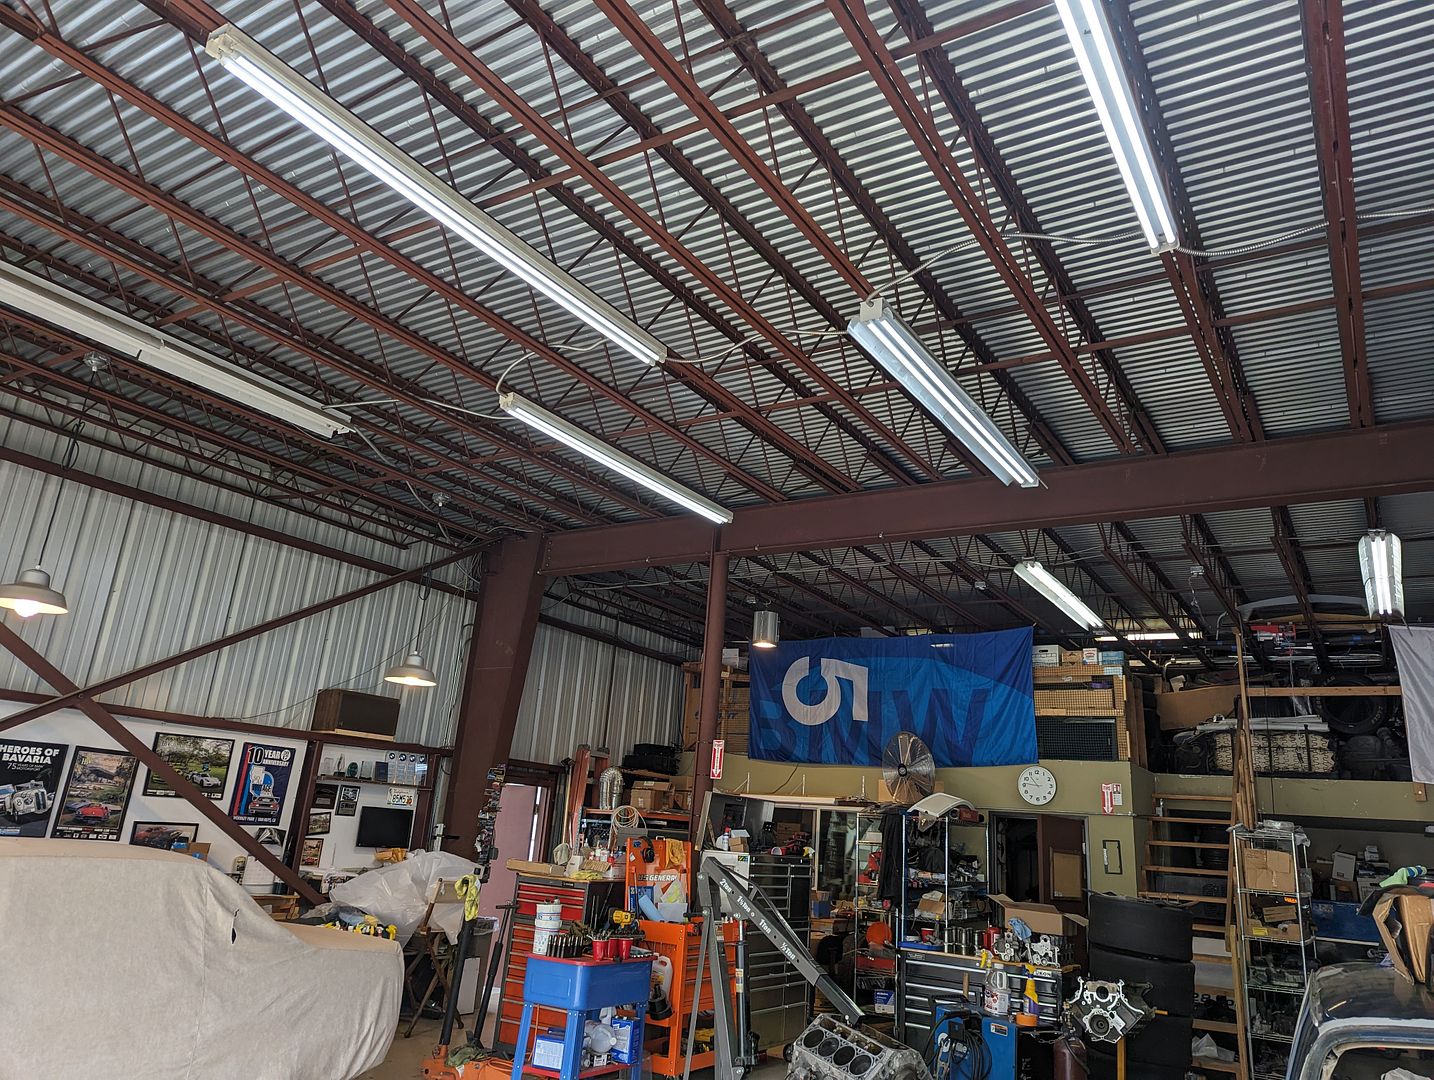
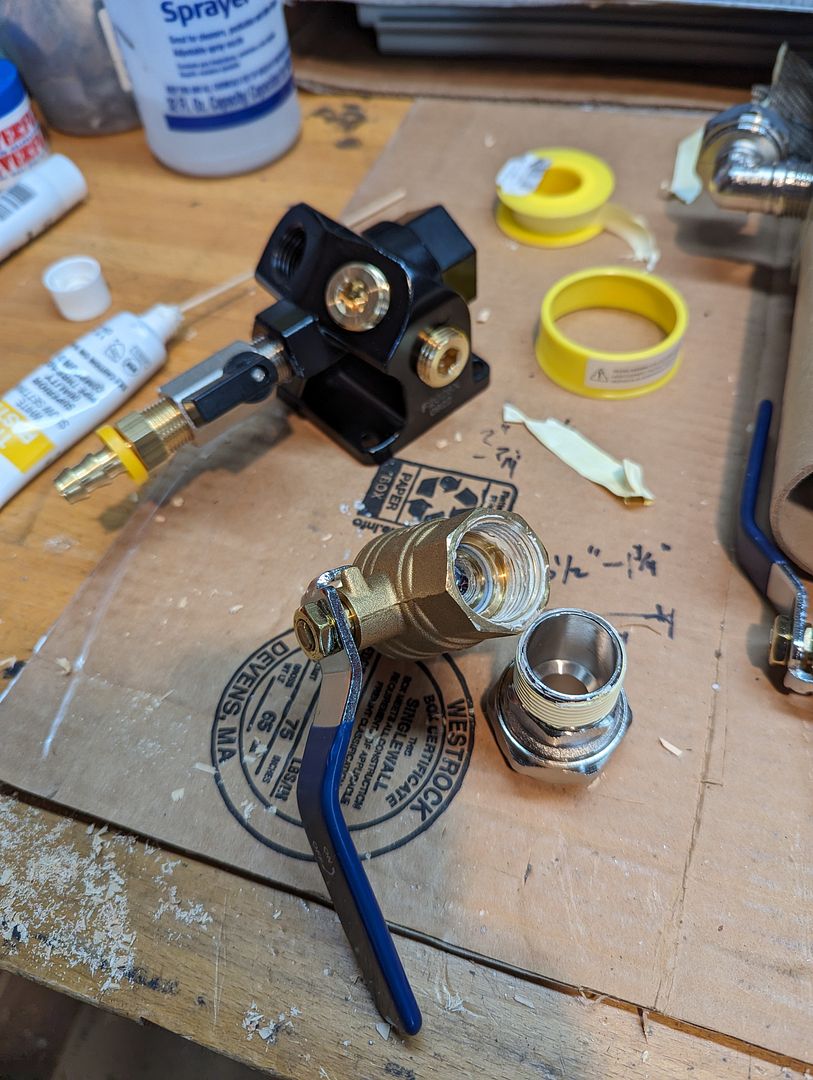
Given the large area to cover, I decided to limit the amount of copper & brass sections due to costs, not to mention that installing copper lines 13’ in the air was not something I looked forward to. So I decided to make an hybrid system with copper lines at the compressor (which is in the rear of the shop under the loft storage stairs) and then switch to RapidAir's Maxline semi-flexible tubing and their fittings at the extremities. So I set out getting all the components; many boxes and trips to local hardware stores later, I had all the parts.
This was the really the best solution in terms of costs and ease of installation. I was able to run the ¾” lines and connectors by myself with the use of a 12’ step ladder in pretty much a few weekends. I read up on a bunch of forums about this stuff and knew I needed to make sure to use plenty of Teflon tape and tubes of thread sealant at every connection (not to mention plenty of torque when wrenching the fittings together). One upside to this system is that if I ever leave this place, I can mostly take it all with me (leaving the copper behind).
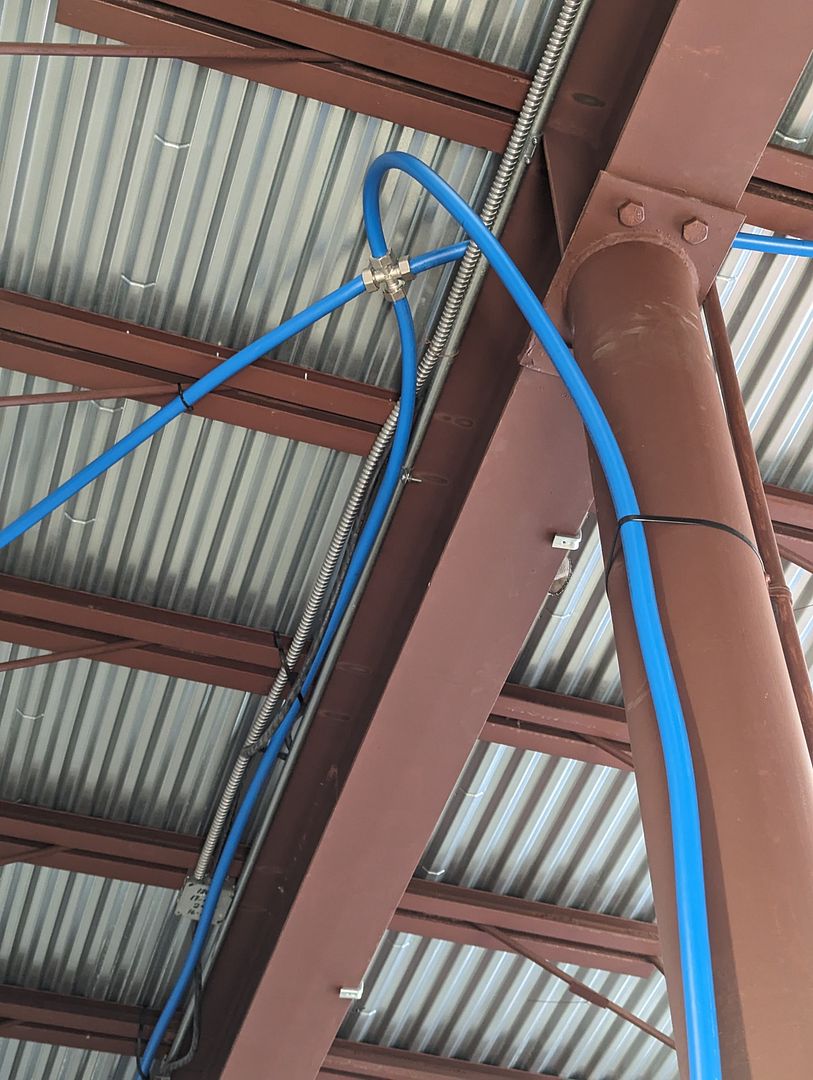
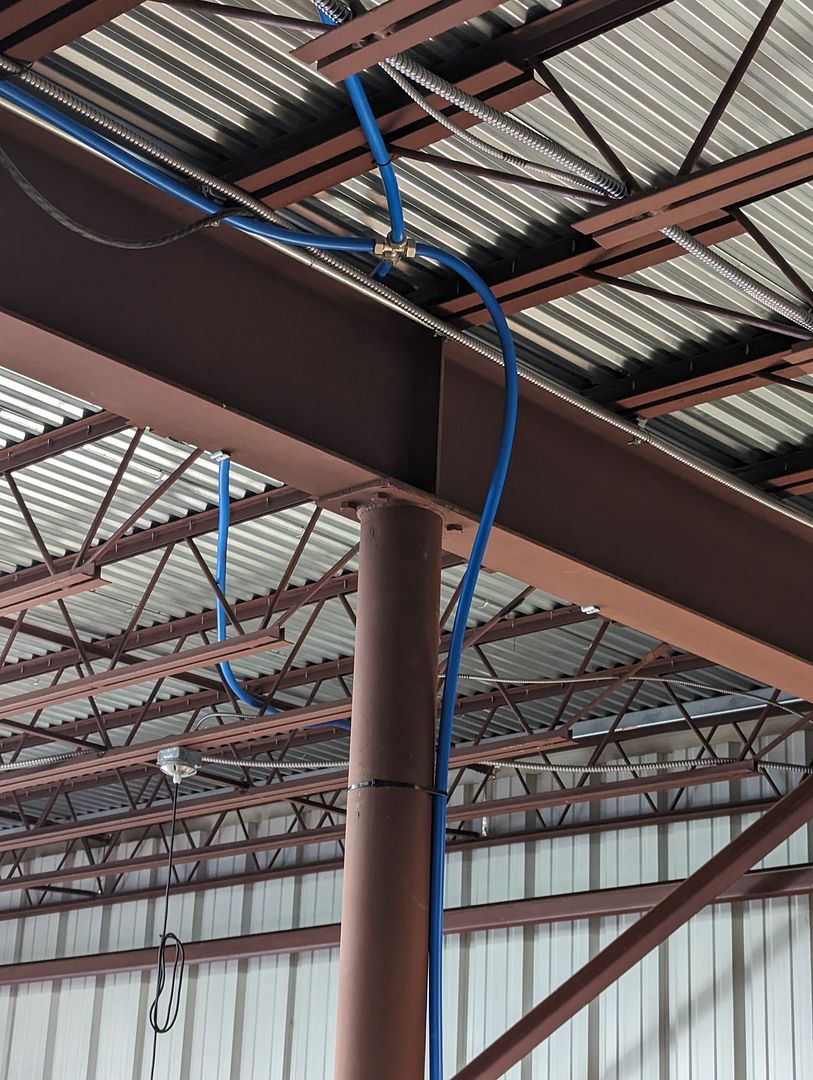
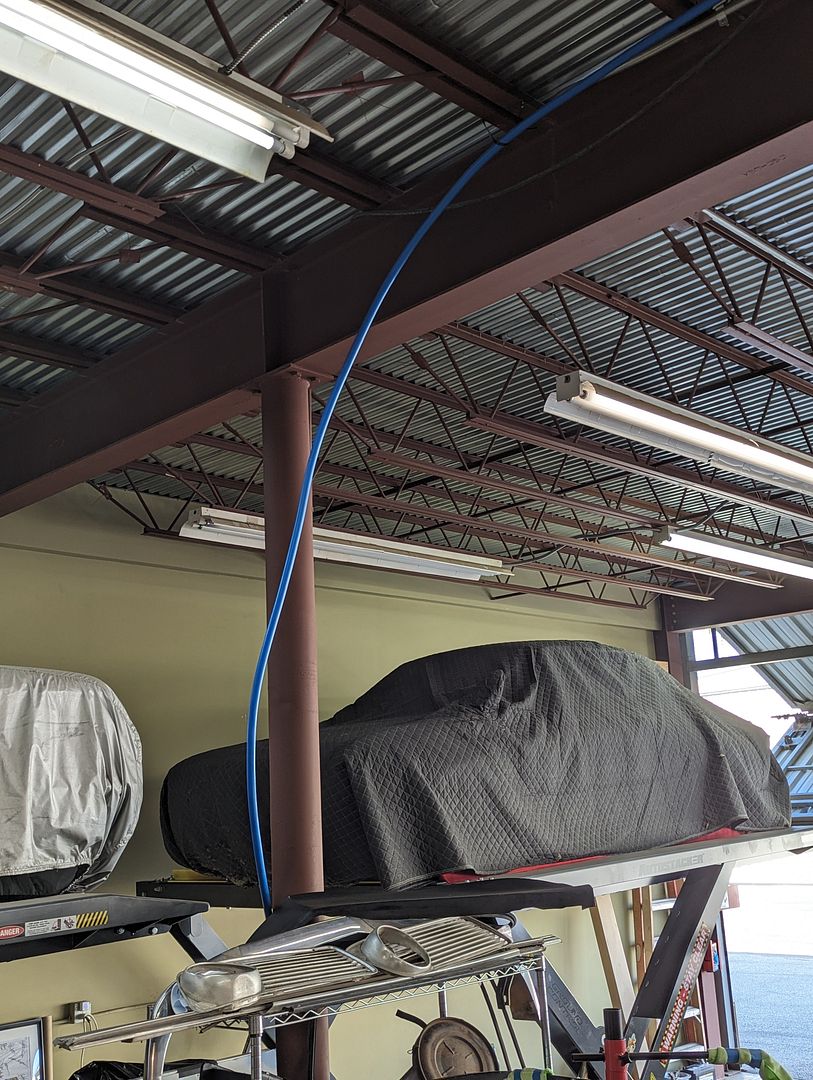
I made sure to install plenty of valves to isolate various sections in case air pressure & distribution got spread too thin (so far not an issue), as well as for maintenance. I also have plenty of filtration and driers installed to keep it all clean & dry.
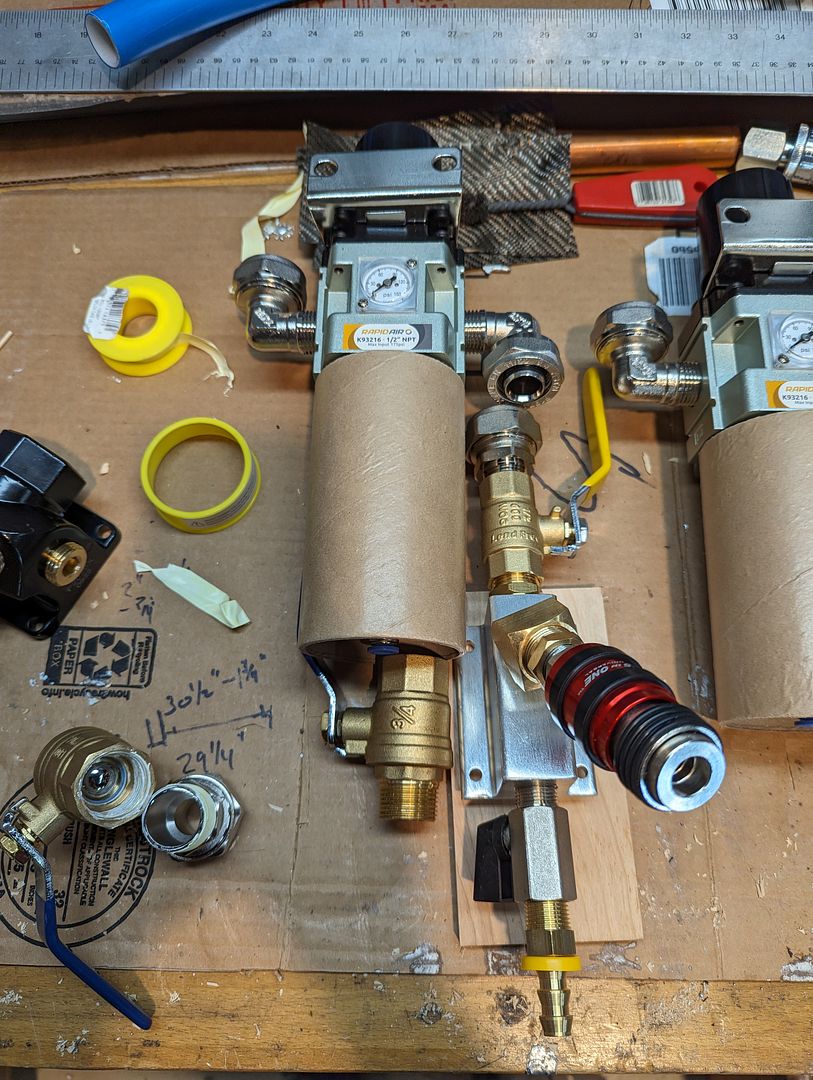
The system has five sections:
-Supply: Compressor, Main Driers & Filters, one convenience connector, one 25’ hose reel. This has the ¾” copper vertical line up to the ceiling and RapidAir transition.
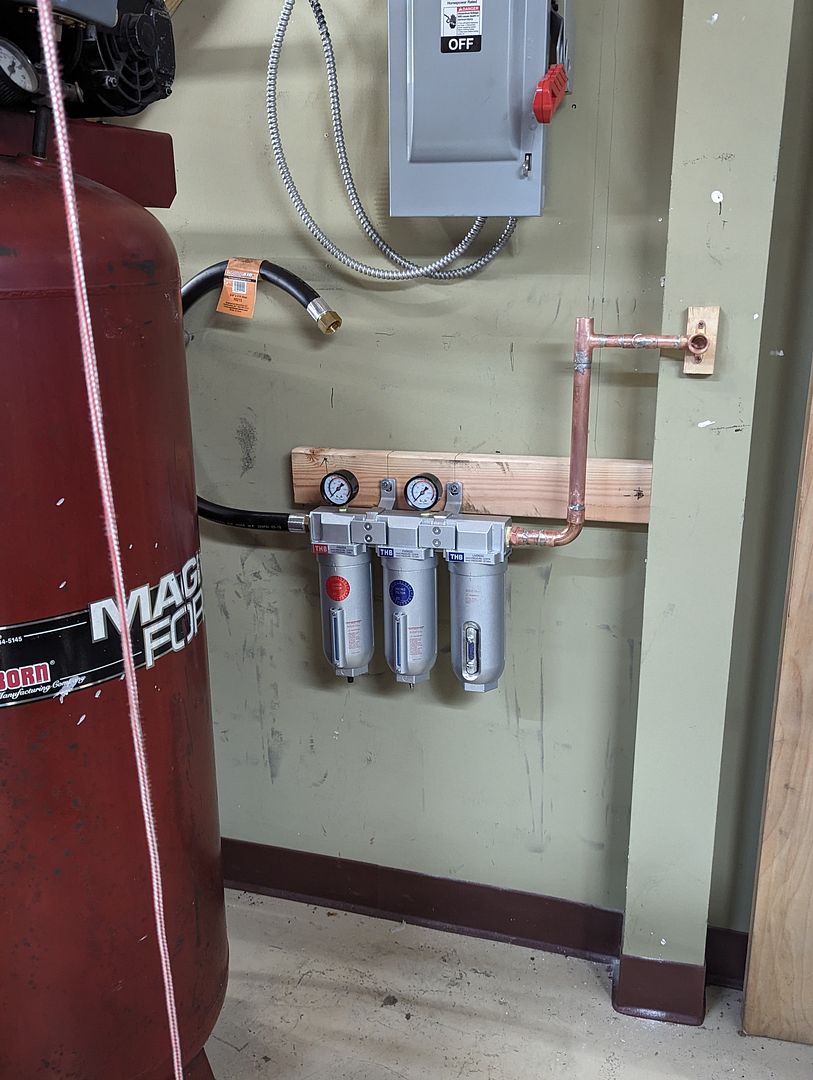
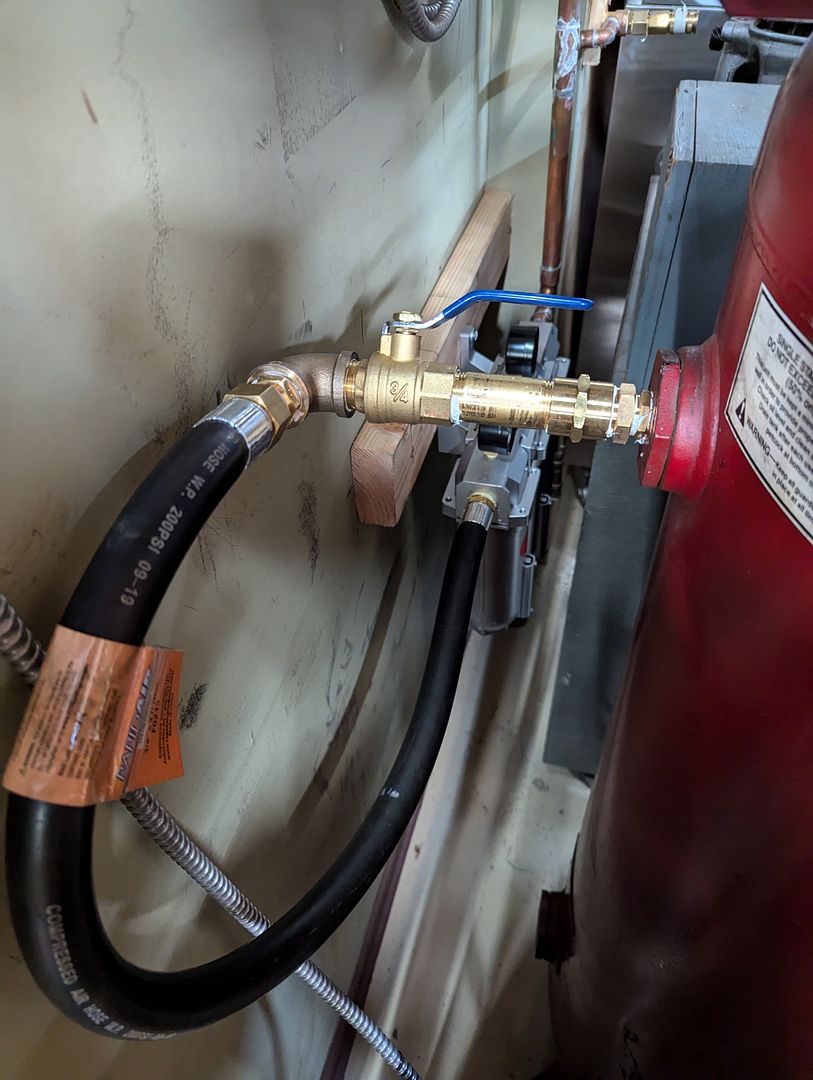
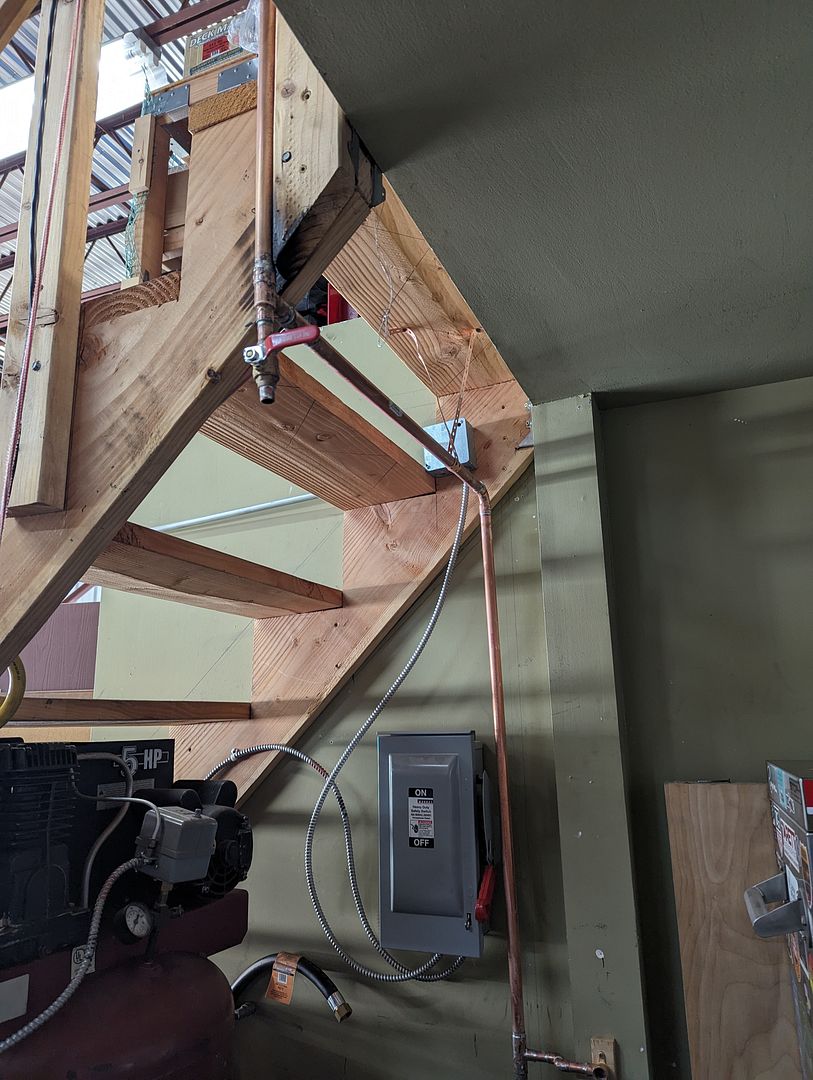
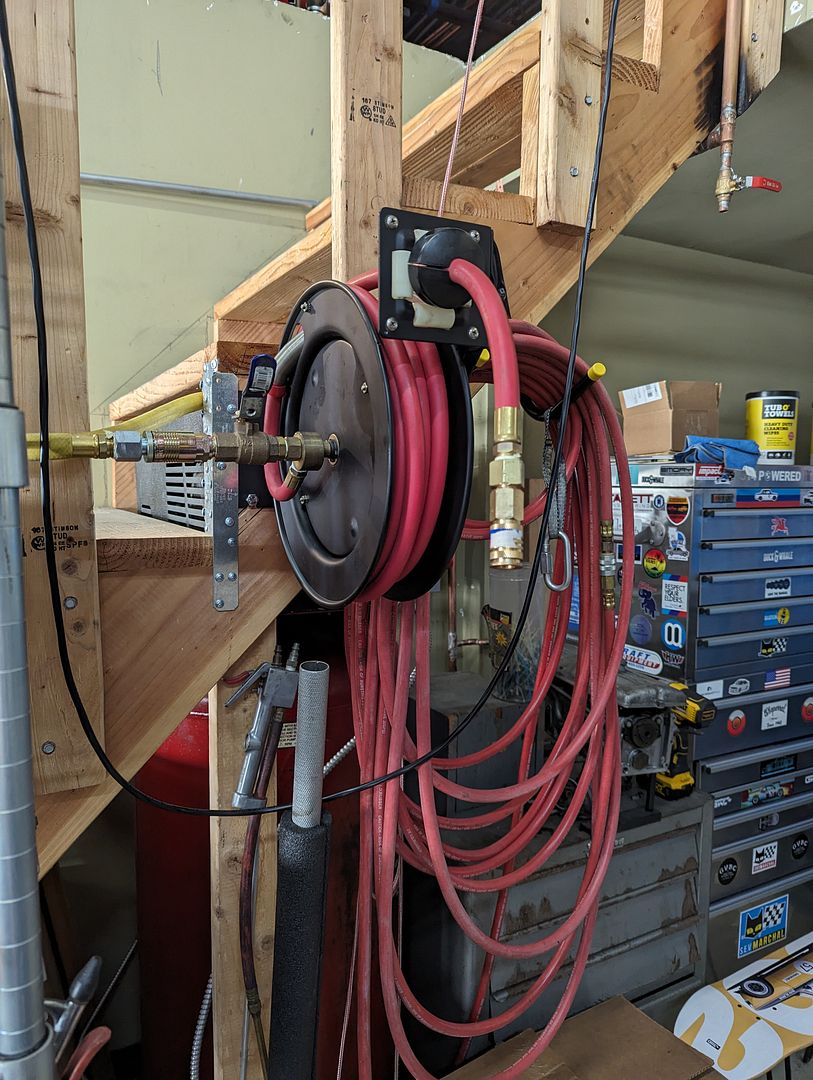
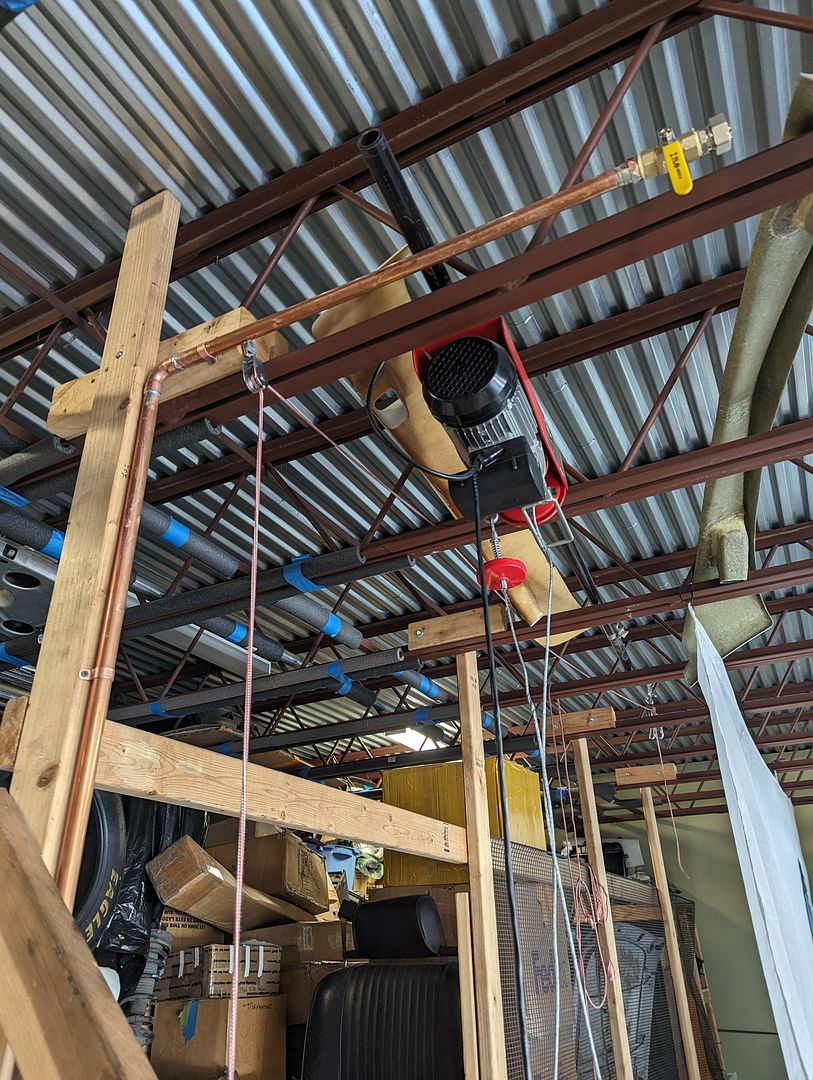
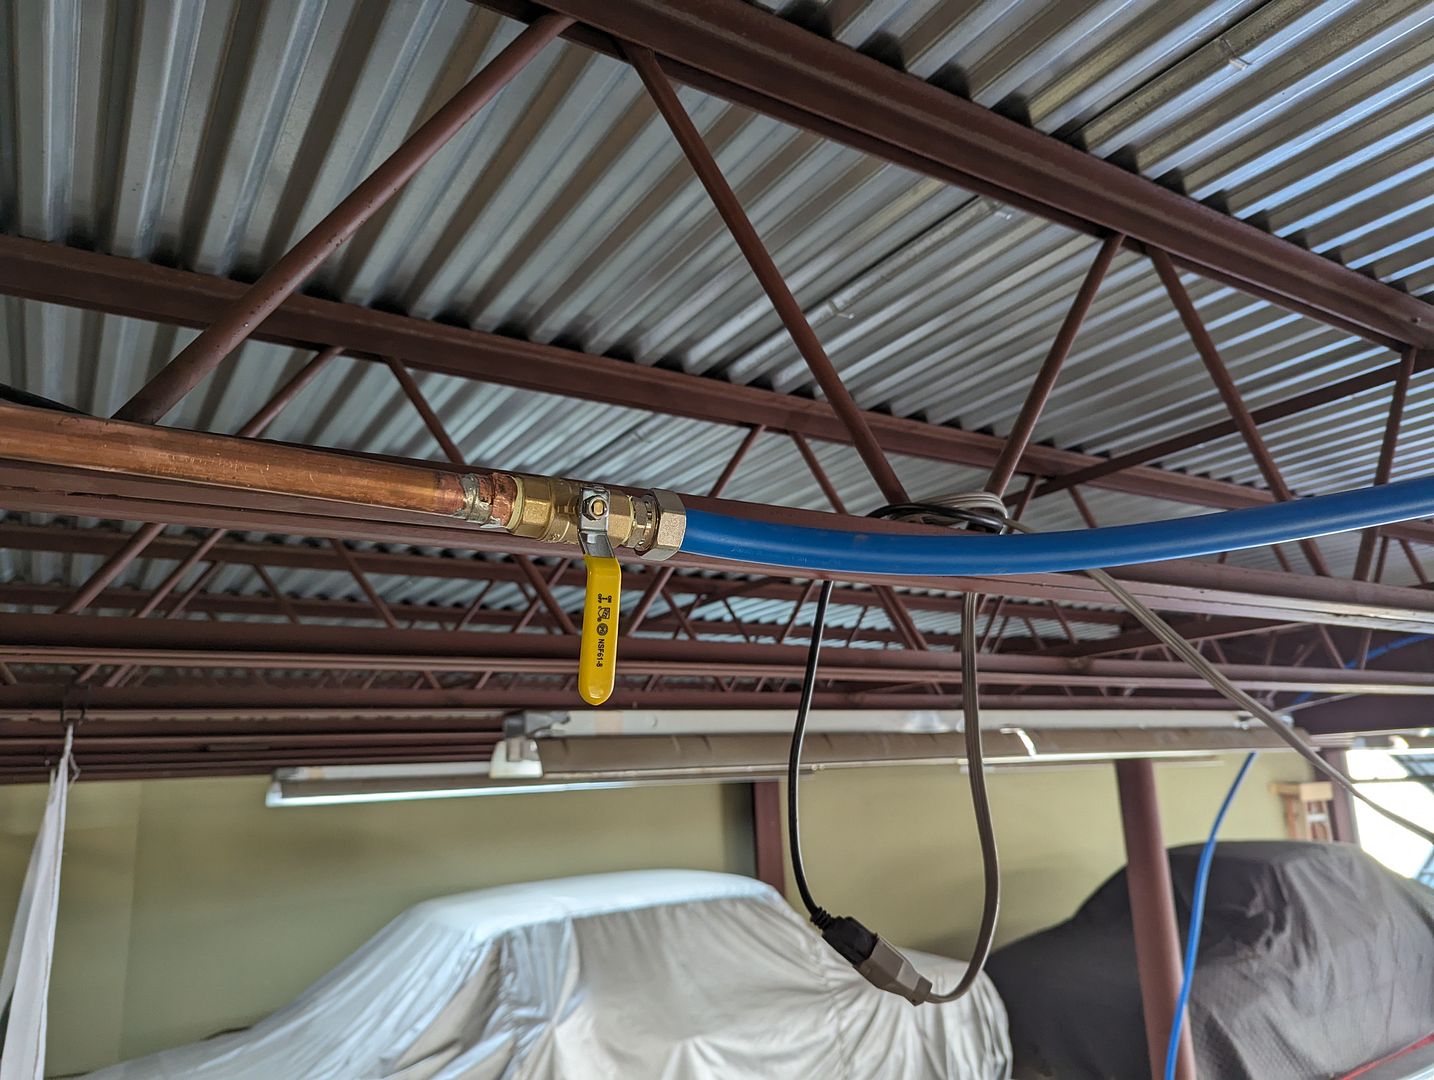
-Drops 1 & 2: There are two columns in the space (east & west) that I attached a pressure regulator, filter/drier, and connector to for use in the middle of the hangar where the cars are. There is a drain line attached to each of these just in case. A mix of RapidAir and Milton fittings.
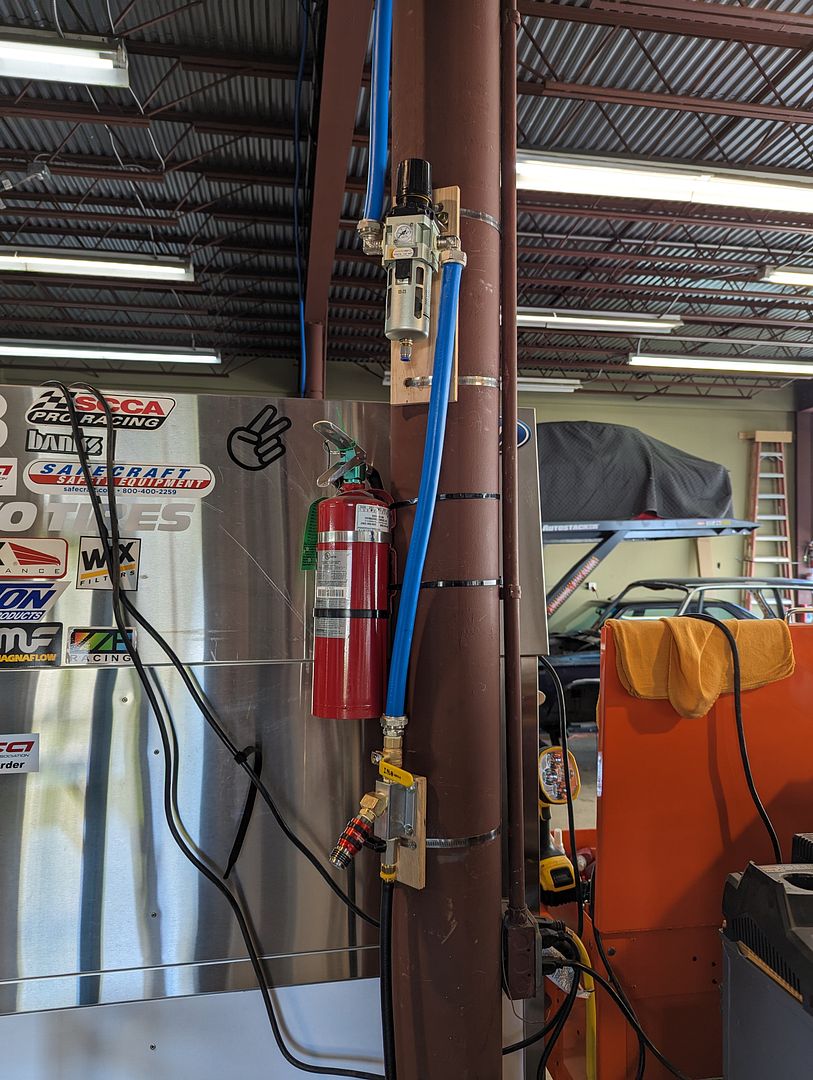
-Lift Drop: This was introduced once I started getting serious about a 4-post lift (specifically a BendPak which is the only one that needs a pneumatic supply. See next entry). This is a ½” drop line that connects to the lift to run the safety brakes as well as the pneumatic/hydraulic bridge jack.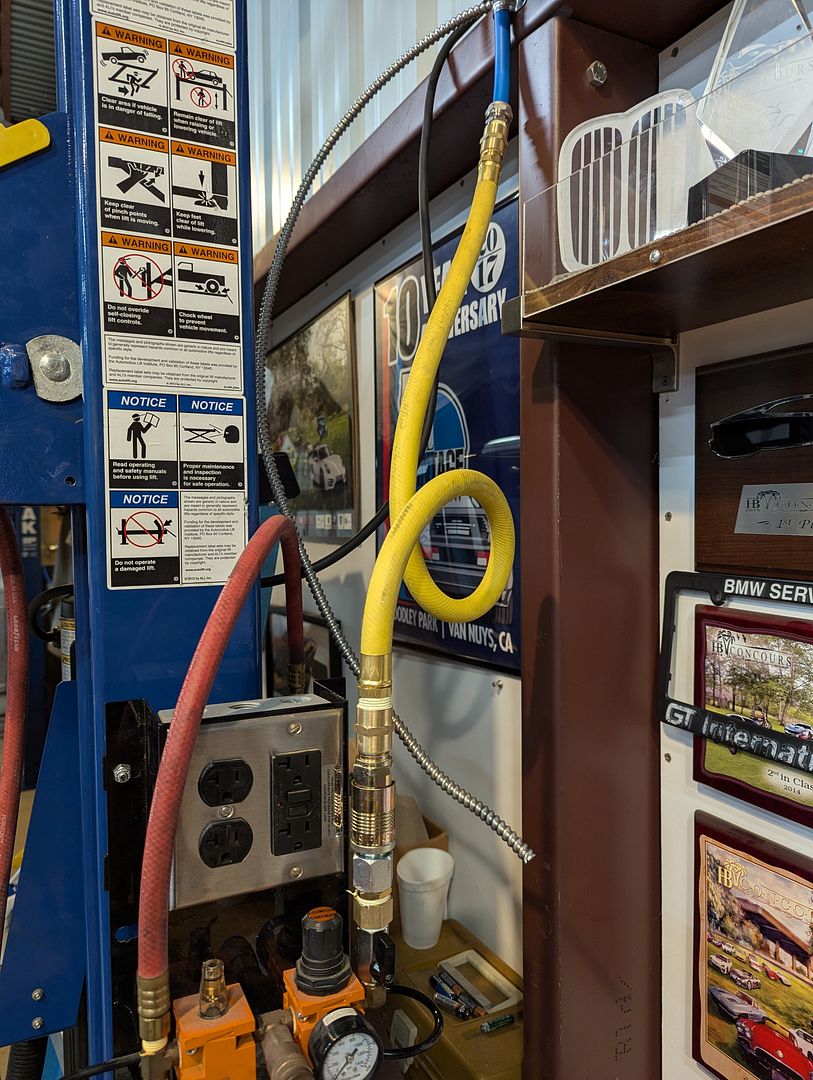
-Drop 3: The end run at the farthest point of the system comes down to another pressure regulator, filter/drier and a muliti-connector. Attached to this is the big 50’ ½” hose reel (Milton) which is joy to work with and leagues better than the Harbor Freight one I have at the compressor (I had it and needed to use it). I also added a 25’ multi-tap electrical extension cord reel here.
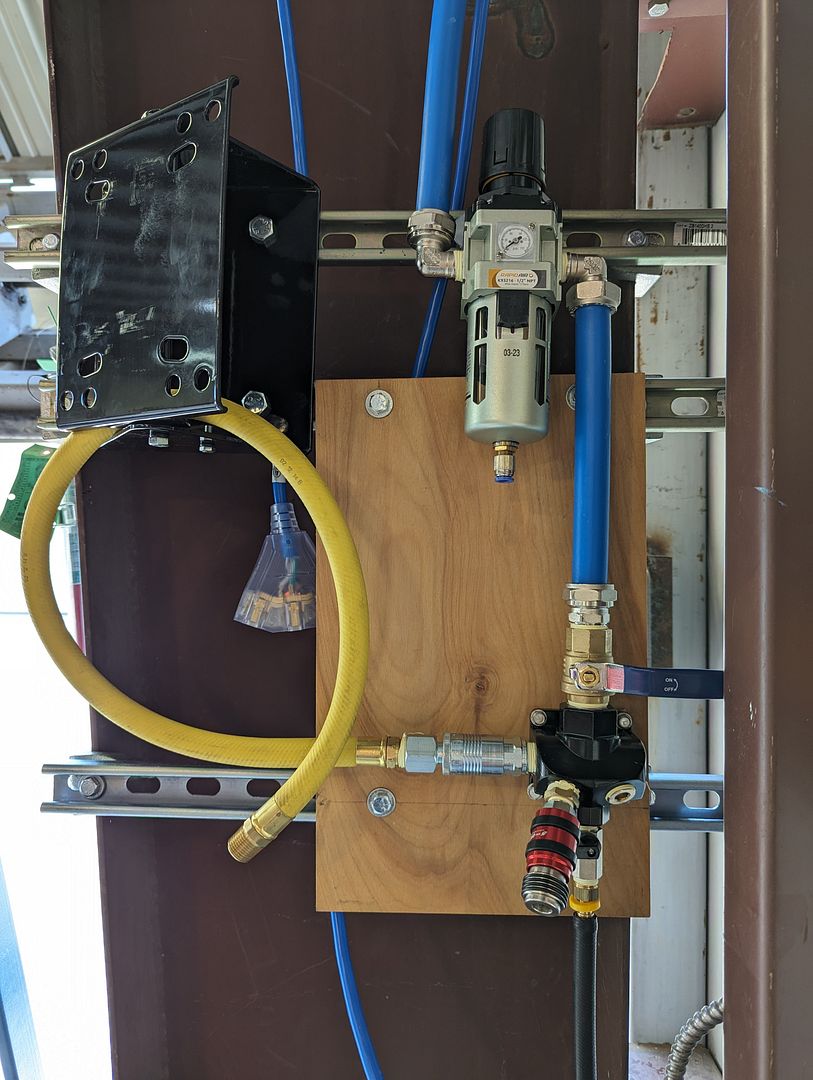
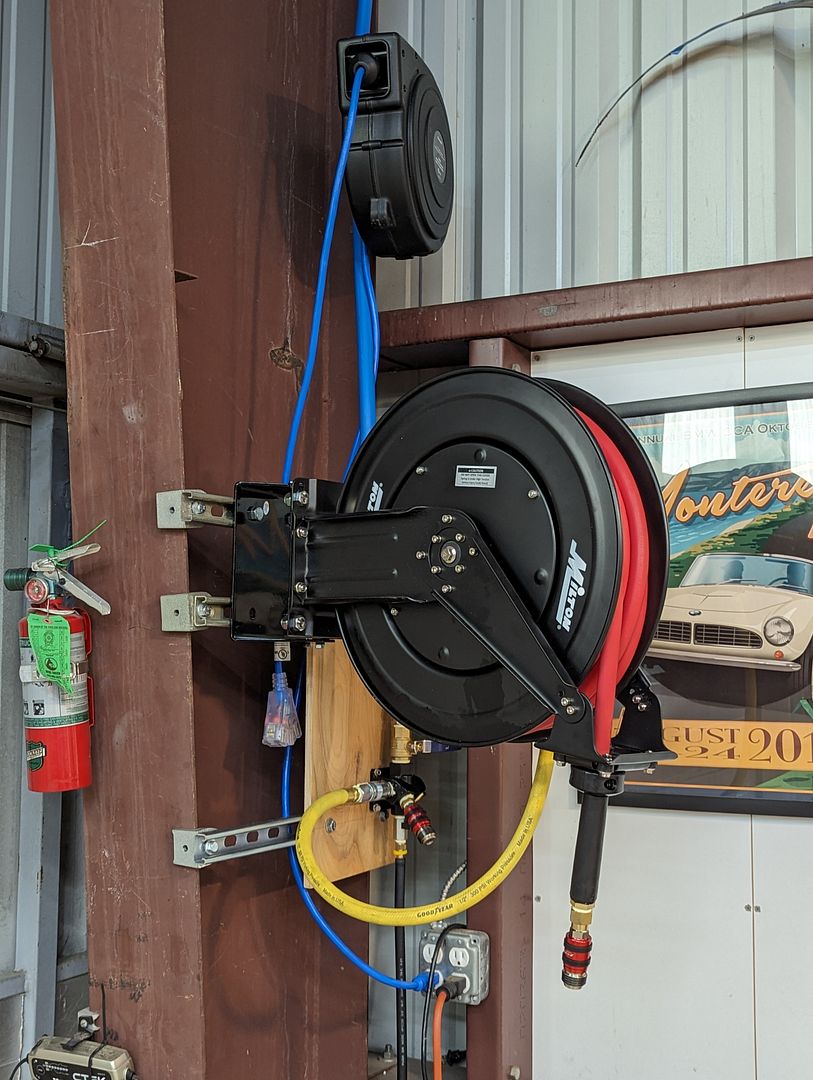
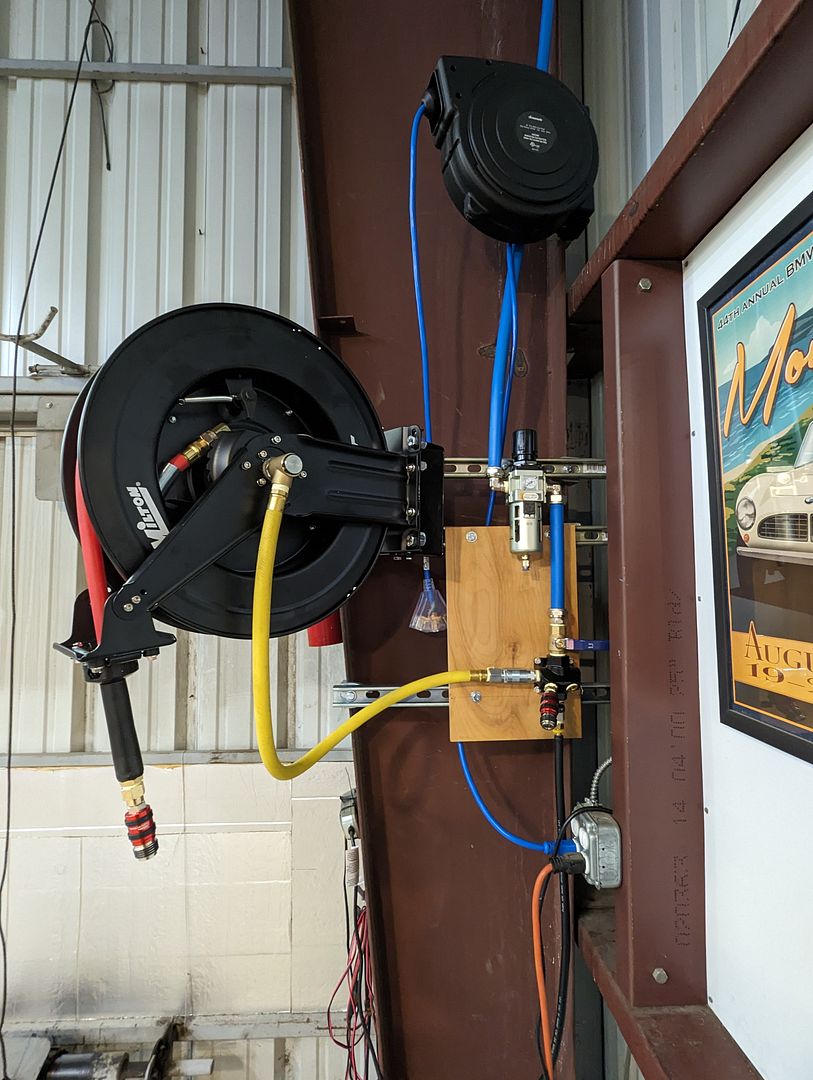
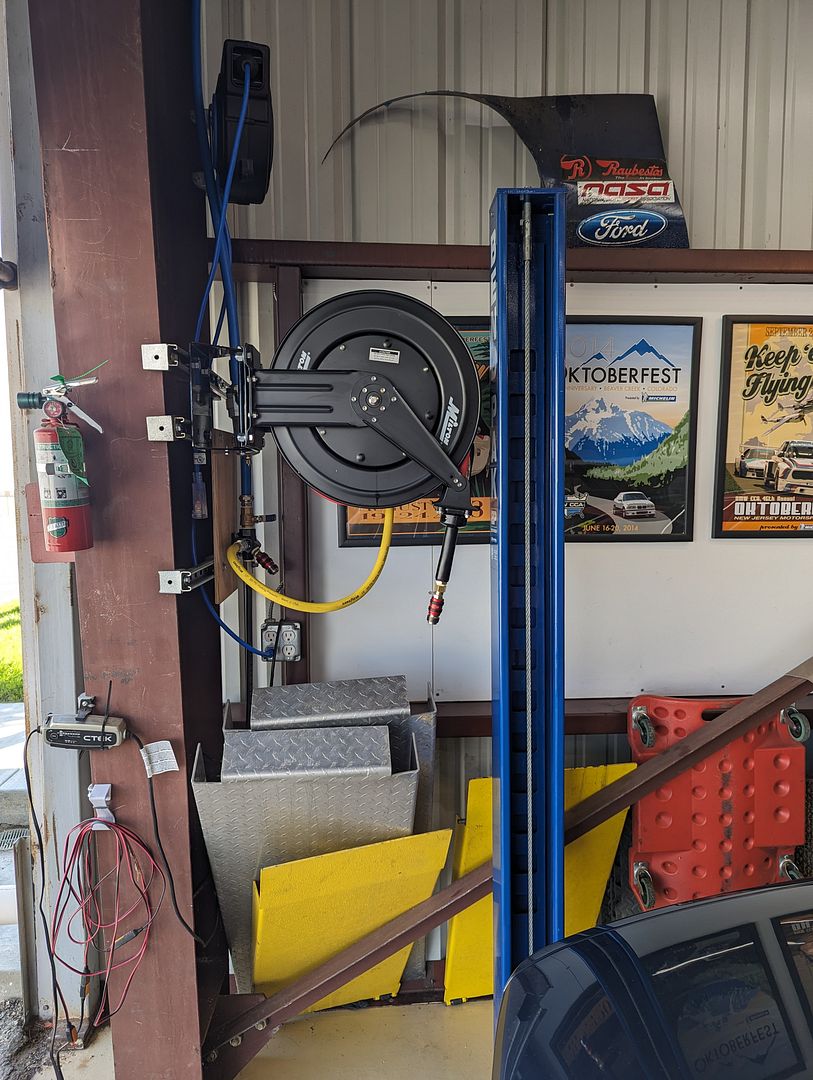
The whole system has been up and running for a few months (had to when the lift came in) with only a few small items to address (three leaks that needed some tightening and more sealant and switching out the rear hose reel connection) that I have slated to finish this weekend. So far, it’s working great, but other than the lift, I haven’t used it terribly much yet. But I plan to.
Okay, so I have been kind of busy this year with some much needed and long planned improvements to The Hangar.
The first is a Pneumatic Distribution System:
One of the long-outstanding projects in the Hangar was the shop-wide pneumatic system. I had bought a large compressor (Sanborn 5hp 60ga) long ago that we used occasionally but was inconvenient since we had to run miles of pneumatic hoses in and around cars. So it’s been kind of languishing. True to my nature, I planned the hell out of a whole hangar-wide distribution network with multiple connections and a few hose reels in strategic locations. I even purchased a large part of the system components years ago in preparation, but other car projects got in the way (also typical for me).

Given the large area to cover, I decided to limit the amount of copper & brass sections due to costs, not to mention that installing copper lines 13’ in the air was not something I looked forward to. So I decided to make an hybrid system with copper lines at the compressor (which is in the rear of the shop under the loft storage stairs) and then switch to RapidAir's Maxline semi-flexible tubing and their fittings at the extremities. So I set out getting all the components; many boxes and trips to local hardware stores later, I had all the parts.
This was the really the best solution in terms of costs and ease of installation. I was able to run the ¾” lines and connectors by myself with the use of a 12’ step ladder in pretty much a few weekends. I read up on a bunch of forums about this stuff and knew I needed to make sure to use plenty of Teflon tape and tubes of thread sealant at every connection (not to mention plenty of torque when wrenching the fittings together). One upside to this system is that if I ever leave this place, I can mostly take it all with me (leaving the copper behind).


I made sure to install plenty of valves to isolate various sections in case air pressure & distribution got spread too thin (so far not an issue), as well as for maintenance. I also have plenty of filtration and driers installed to keep it all clean & dry.


The system has five sections:
-Supply: Compressor, Main Driers & Filters, one convenience connector, one 25’ hose reel. This has the ¾” copper vertical line up to the ceiling and RapidAir transition.


-Drops 1 & 2: There are two columns in the space (east & west) that I attached a pressure regulator, filter/drier, and connector to for use in the middle of the hangar where the cars are. There is a drain line attached to each of these just in case. A mix of RapidAir and Milton fittings.

-Lift Drop: This was introduced once I started getting serious about a 4-post lift (specifically a BendPak which is the only one that needs a pneumatic supply. See next entry). This is a ½” drop line that connects to the lift to run the safety brakes as well as the pneumatic/hydraulic bridge jack.

-Drop 3: The end run at the farthest point of the system comes down to another pressure regulator, filter/drier and a muliti-connector. Attached to this is the big 50’ ½” hose reel (Milton) which is joy to work with and leagues better than the Harbor Freight one I have at the compressor (I had it and needed to use it). I also added a 25’ multi-tap electrical extension cord reel here.


The whole system has been up and running for a few months (had to when the lift came in) with only a few small items to address (three leaks that needed some tightening and more sealant and switching out the rear hose reel connection) that I have slated to finish this weekend. So far, it’s working great, but other than the lift, I haven’t used it terribly much yet. But I plan to.
Re: What did you do in/to your Garage today?
The BendPak I'm guessing is an air-powered hydraulic pump? The old in-ground lifts ran on air, I didn't know anyone was making a 2 post that functioned that way.
About an hour ago I went home from work to modify a tool on the lathe. Nothing fancy, basically a chunk of 5/8 allen key with a section in the middle turned down for clearance. The part in the middle had initially been done on a grinder and it was uneven and a little too big. Stuck it on the lathe to remove the lumps so it cleared properly. Not exactly complex machine work but it looks and works better now.
About an hour ago I went home from work to modify a tool on the lathe. Nothing fancy, basically a chunk of 5/8 allen key with a section in the middle turned down for clearance. The part in the middle had initially been done on a grinder and it was uneven and a little too big. Stuck it on the lathe to remove the lumps so it cleared properly. Not exactly complex machine work but it looks and works better now.
Re: What did you do in/to your Garage today?
Onto the second improvement this year:
4-Post Lift:
So I finally got serious and got myself a 4-post lift. This has been in the back of my mind for many years now but for many reasons I decided now was the time:
-I always wanted one for both service and storage (although not having it prevented me from looking at another car which probably kept me out of divorce court)
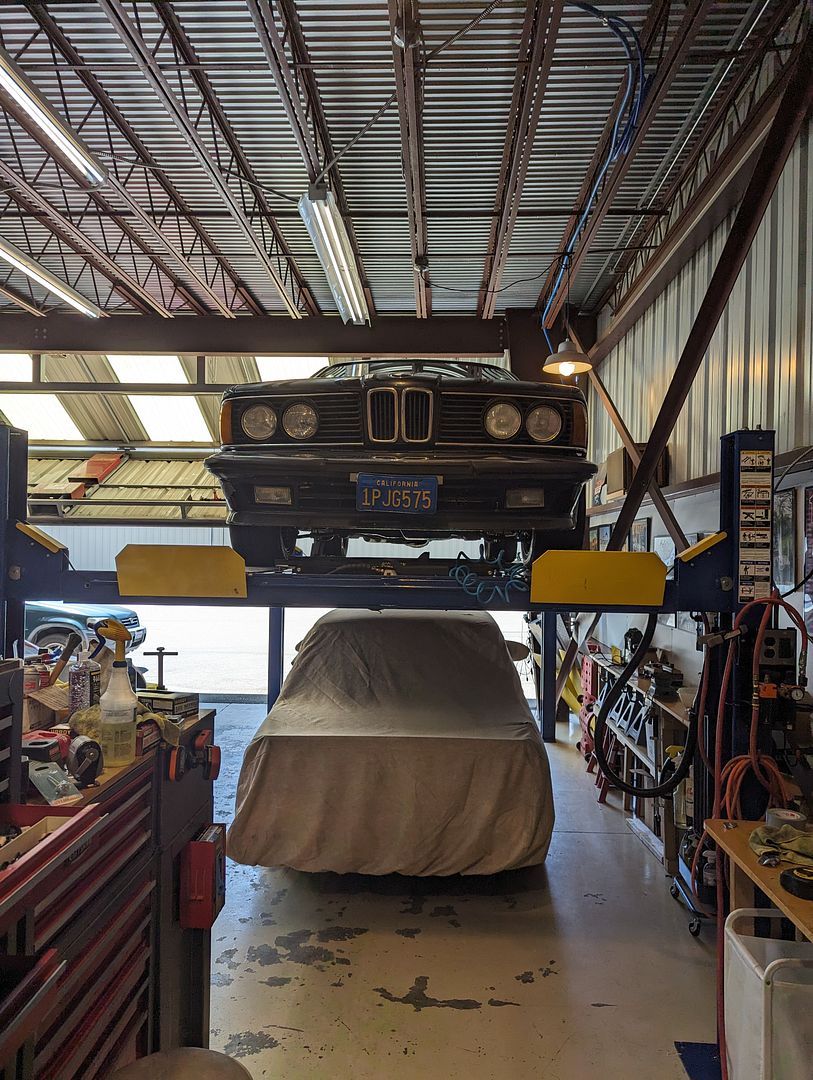
-A good friend and compatriot (Phil) is going to lose his garage space at his apartment and needed a place to store his E24
-I am older now (58) and after crawling on the floor under my car during my last transmission replacement, my body has determined that I’m too old for that sh*t anymore
There are dozens of lift companies out there currently; some good, some unknown, ranging in price. ALL are made in China with varying levels of quality control. The thing about using a 4-post lift as a service lift is you need a bridge jack in order to make it useful. Those raise the cost significantly especially if you want it to be pneumatic. I set out researching and shopping and reduced it down to two companies: BendPak or DirectLift. I chose them mainly since they are largely US companies and while the actual stuff is made in China, their lifts have much higher and stricter certifications (the ‘Gold’ label). They are markedly more expensive, but I decided that my life and that of the car was worth the extra money. Dover Elevator is the parent company of DirectLift so there is whole century of hydraulic experience behind them as well as friend’s recommendations. BendPak is one of the top commercial lift companies out there and very local to us here in SoCal (they’re in Santa Paula just up the road). But the higher buy-in costs of new equipment along with added delivery and installation costs caused me pause.
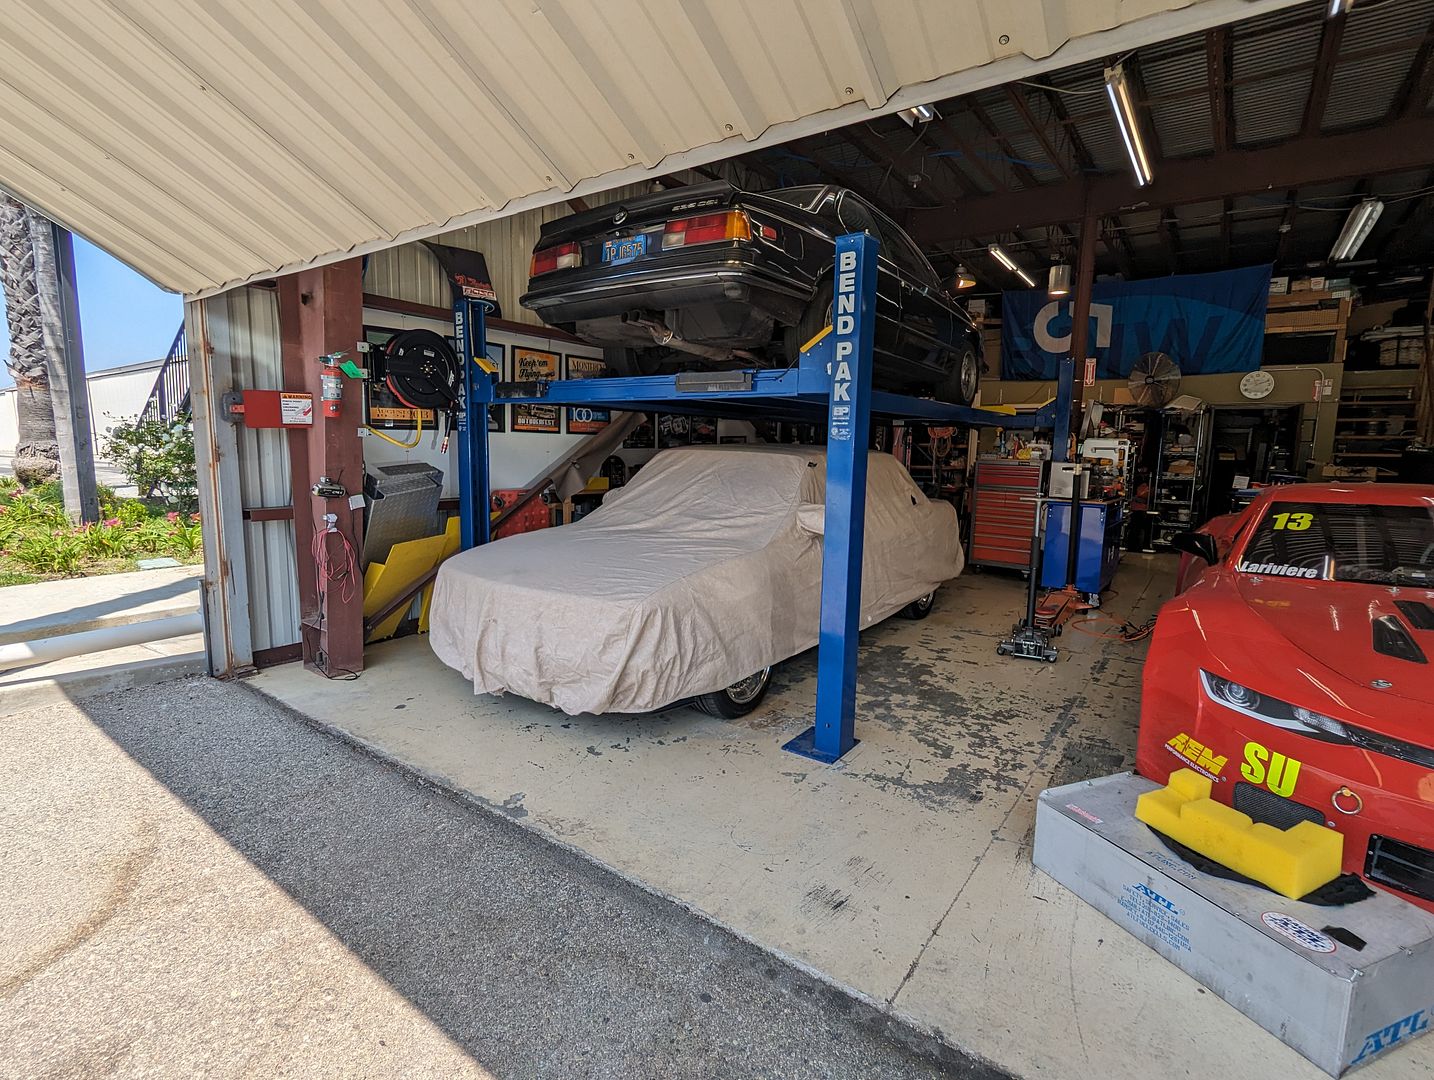
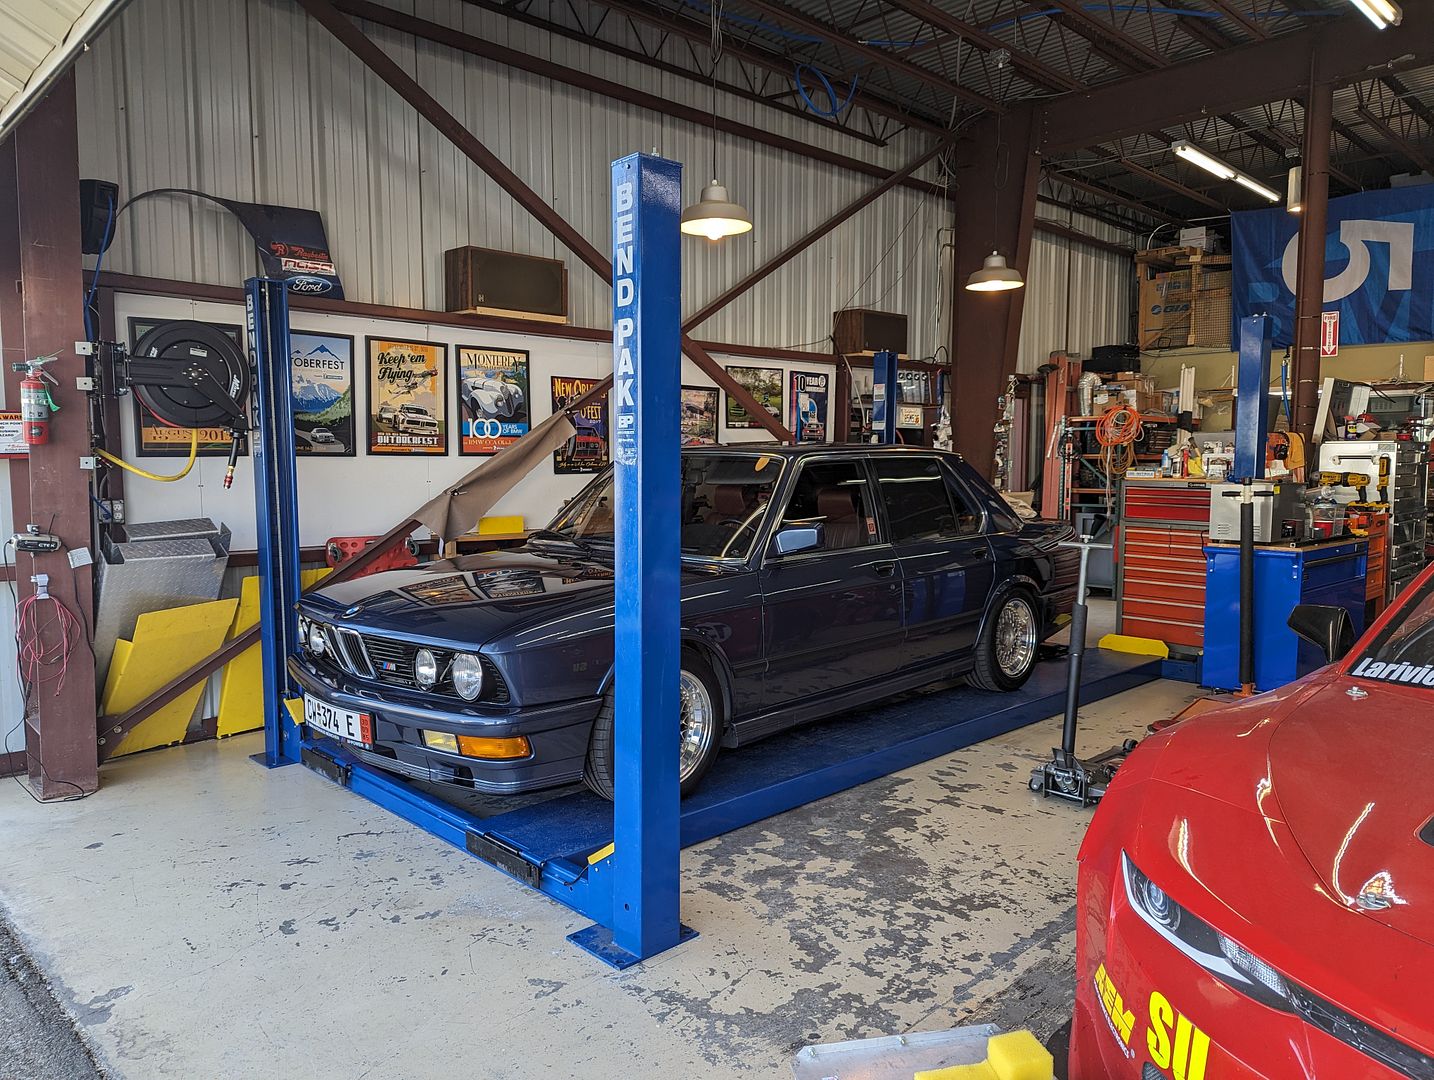
I looked at used lifts (a lot) and came to the conclusion that pretty much all weren’t much of a bargain since most were much older, heavily used, came with questionable service histories, and/or sales were dependent on my coming and dismantling, hauling it away and installing it myself. Not to mention they were still about 2/3’s the cost of new lifts on average. That is until I came across one for sale on Facebook Marketplace: BendPak HD-9XL with a pneumatic bridge jack for an average price. I didn’t give it much thought until I contacted the seller and asked a bunch of questions: turns out it’s not that old, he is a car enthusiast like us so it was lightly used, it came with two sets of ramps (the standard heavy ones and lightweight low-profile aluminum ones), a rolling oil collection tray AND he was willing to knock it down, transport it up from Orange County AND install it for the advertised price (plus the rental truck costs). Hot damn, sign me up.
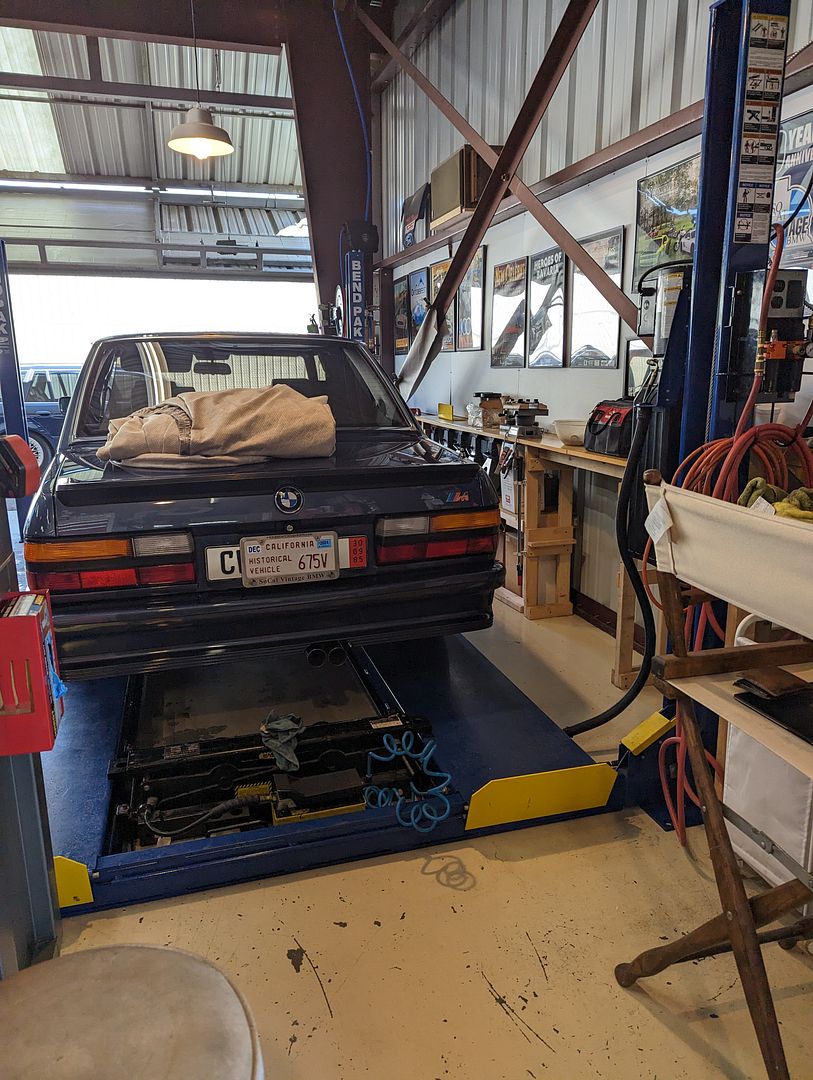
I then had to get the hangar prepped by getting in both a dedicated 30A 220V circuit and finish my pneumatic system. BendPak is the only manufacturer that requires a 30psi pneumatic supply to operate the safety brakes (actually the air is needed to disengage the brakes so you can fully lower the lift). It’s one of the added safety features that set BendPak’s apart and up in a higher quality bracket of lifts. The HD-9XL (9,000 lb, extra-long) is not the one I was looking at in their newer models (I wanted the HD-9STX which is the standard length but extra tall for the added headroom under it). I had to do some serious space measuring and adjustments to make it fit in my bay of the hangar; it’s a bit tight and wish it were slightly shorter, narrower, and taller, but given all the extras with the sale, I was happy to compromise and save some money to boot.
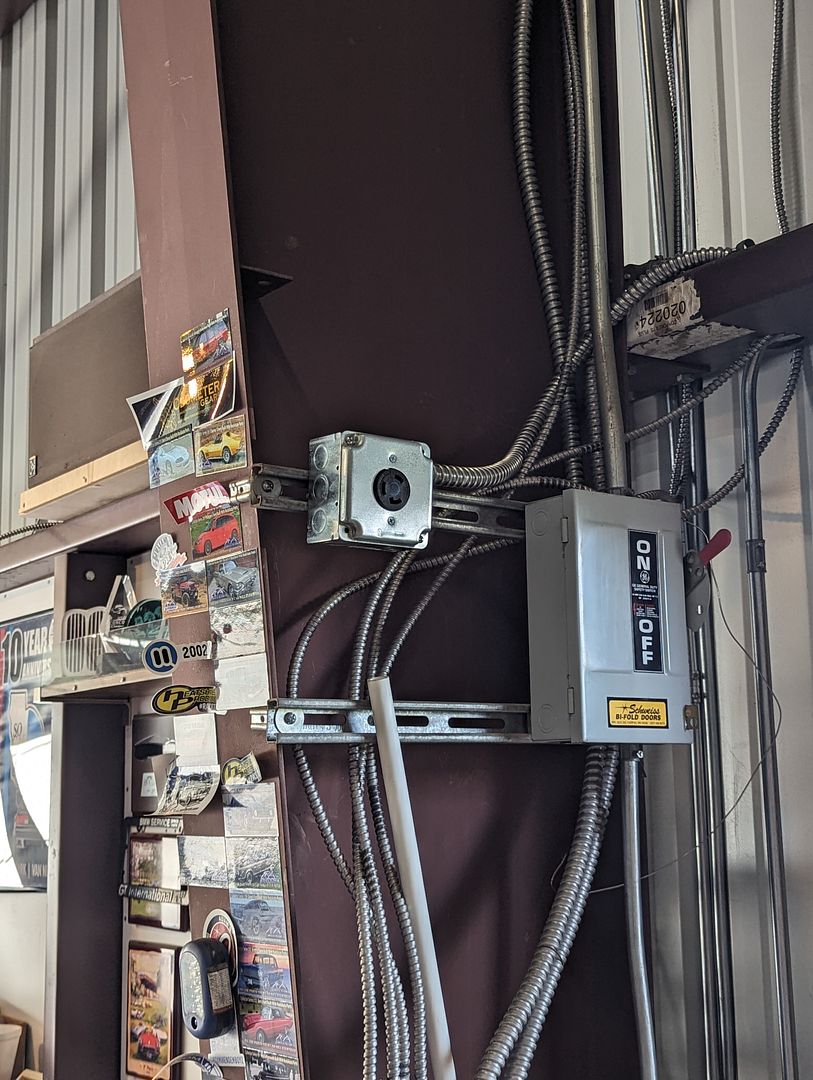

Dave (the seller) is a super great car guy (AC Cobra’s) and very generous with his time (it took both a Saturday and Sunday to finish the installation even with my help/hindrance). He was happy it was going to a good home and will get the use it deserves. It needs another round of final level setting (this Friday), but it’s been working fine as is.
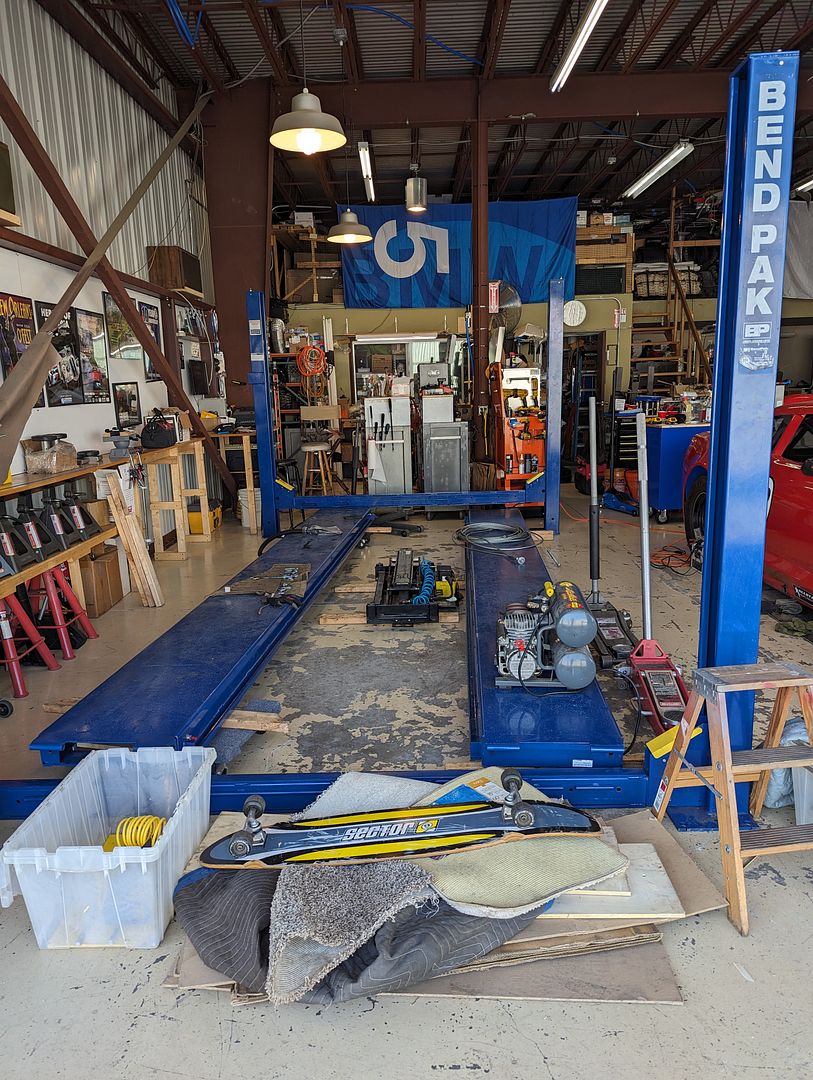
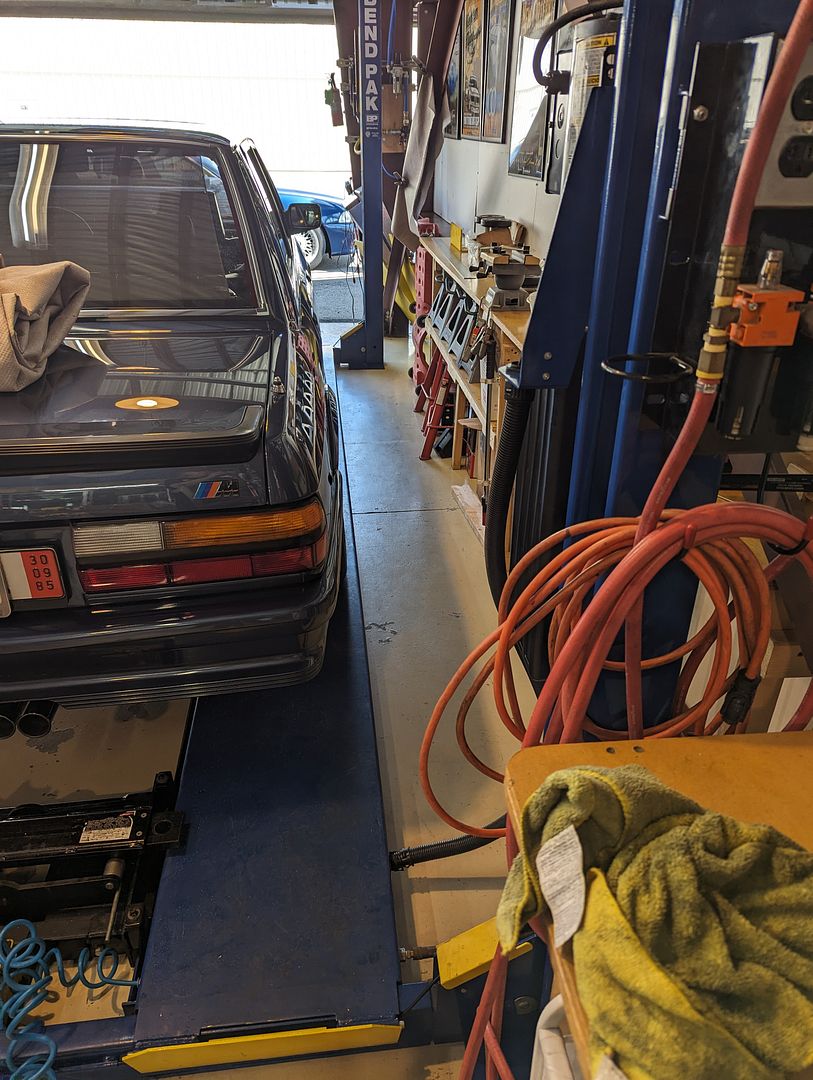
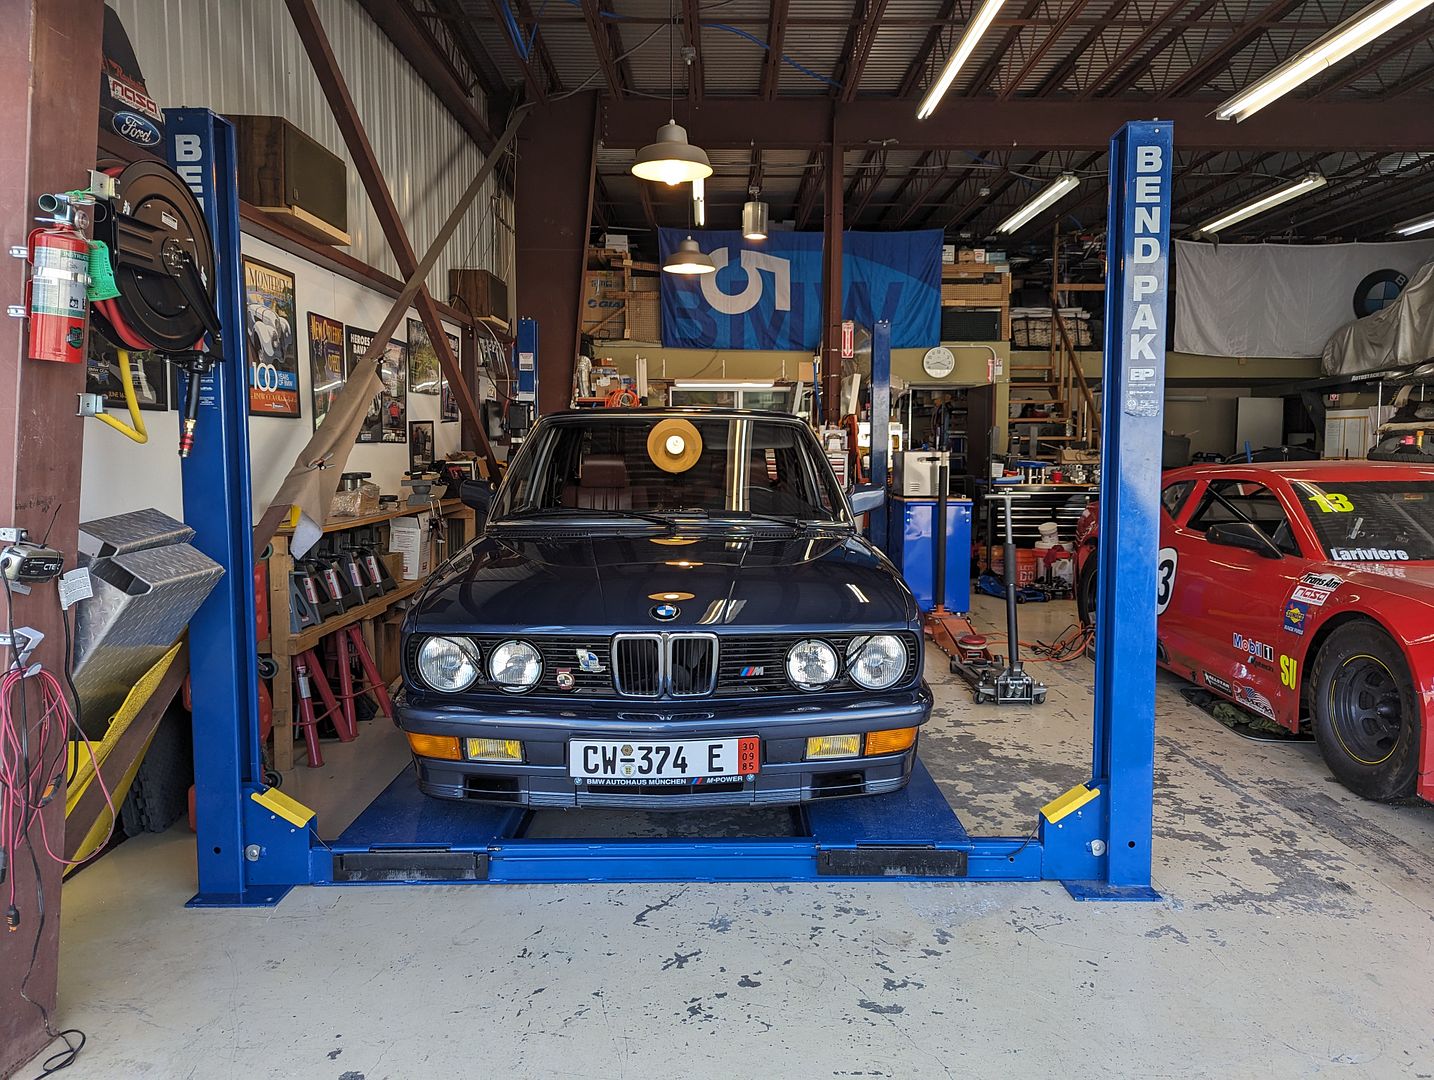
I have a couple of small improvement projects underway for the lift:
Drip Pans:
I can’t figure out why a set of drip pans are so expensive for this. BendPak’s are plastic and nearly $400(!). Other metal ones were twice that. “Screw that”, I said and set out to build a better (and cheaper) mousetrap. After a bunch of online research, I looked across the hangar floor and saw a old metal drip pan that I bought at the local O’Reilly’s ($14.99) and saw the potential.
With some modifications (cutting and rolling the short ends so the pan could lock into the runway rails), these are way better than the plastic ones. I can always add more if needed.
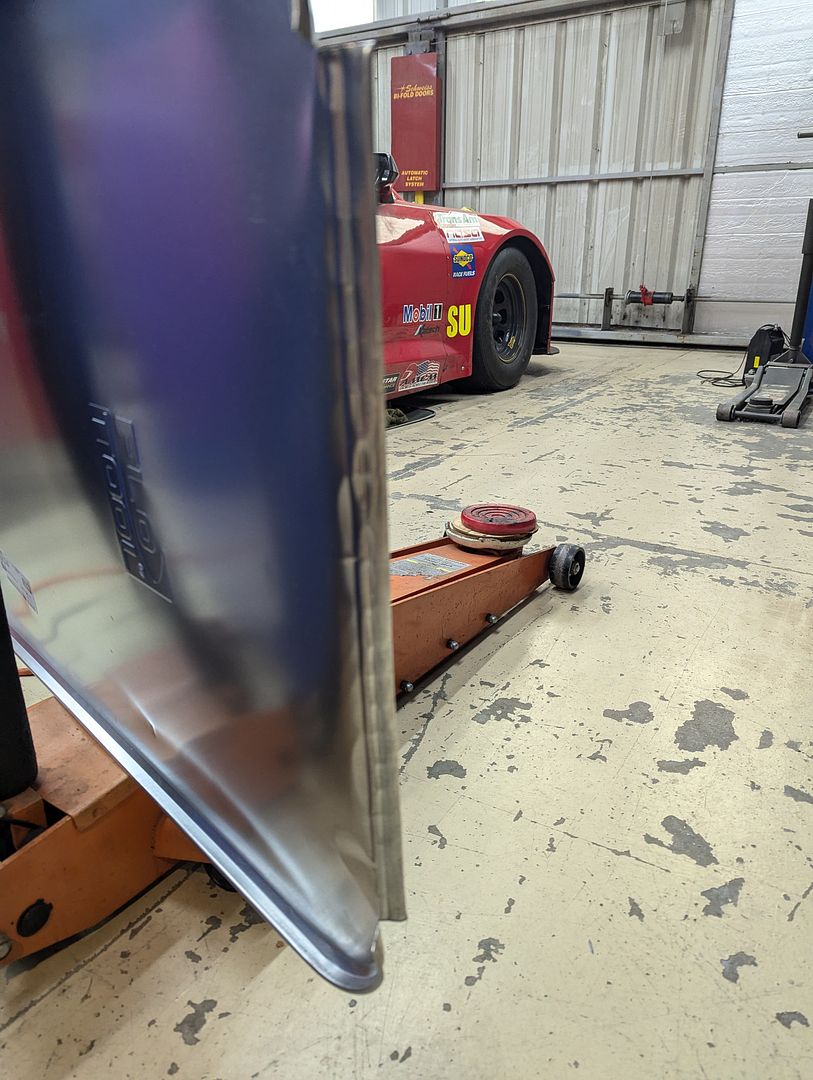
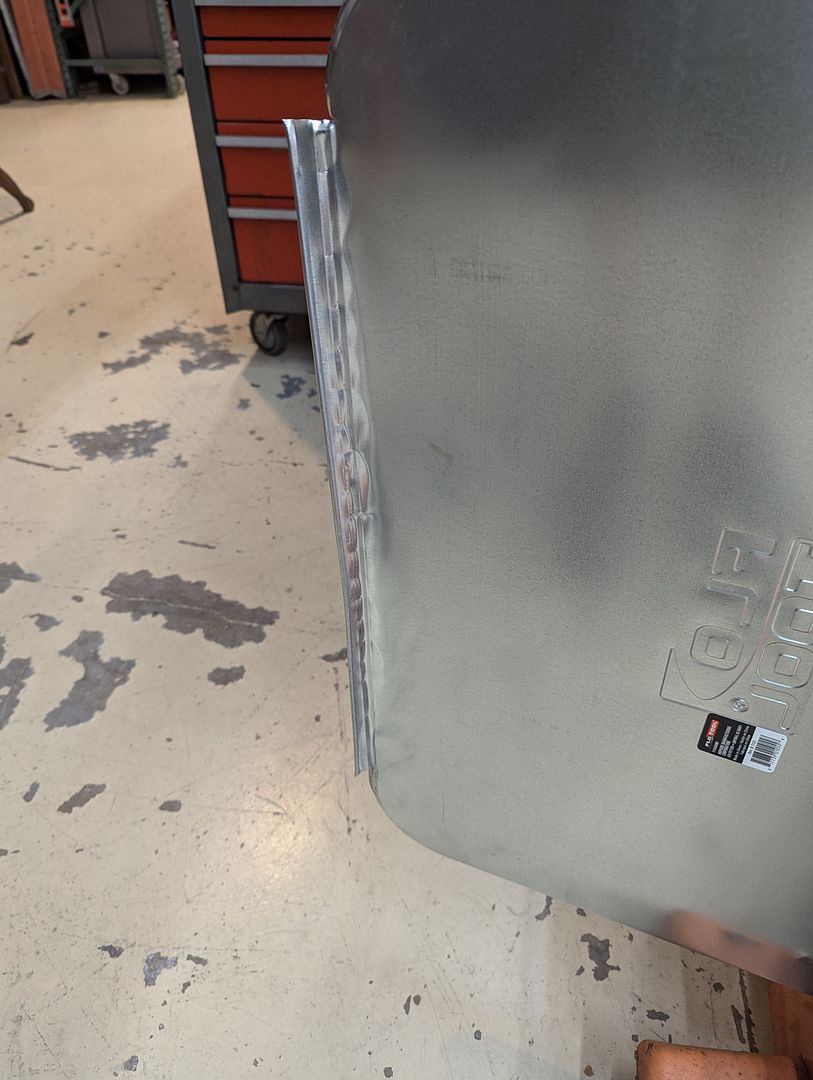
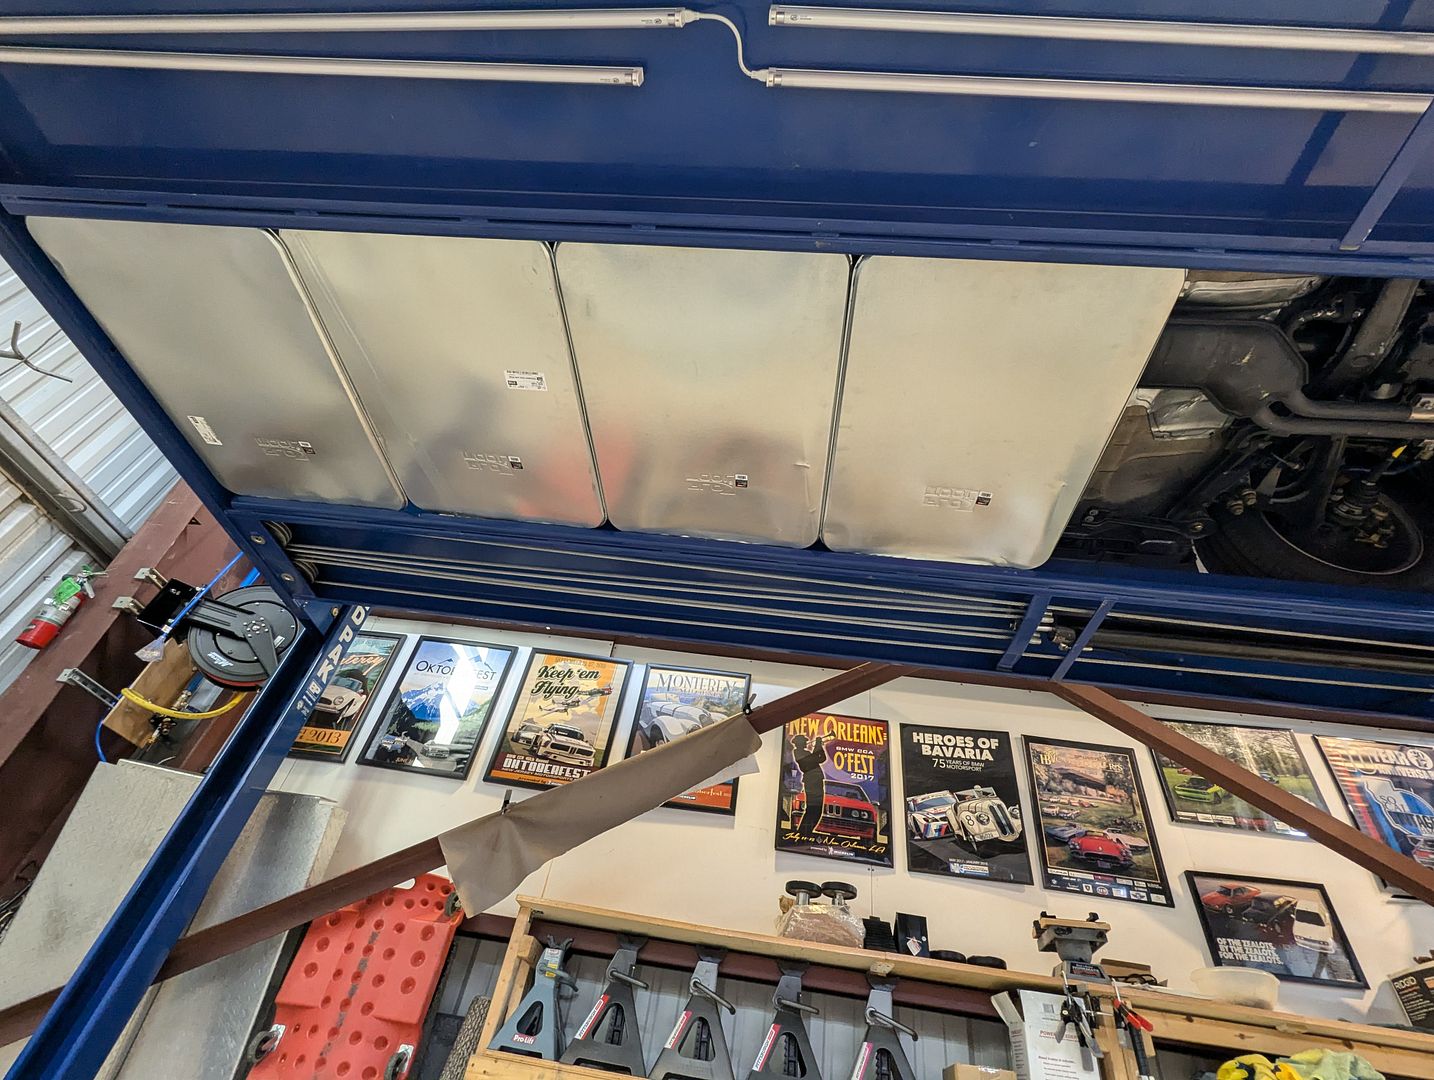
The other ongoing project (no pictures yet) is some LED task lighting for both the upper and lower areas. This is progressing now that I have all the Amazon parts. More to come.
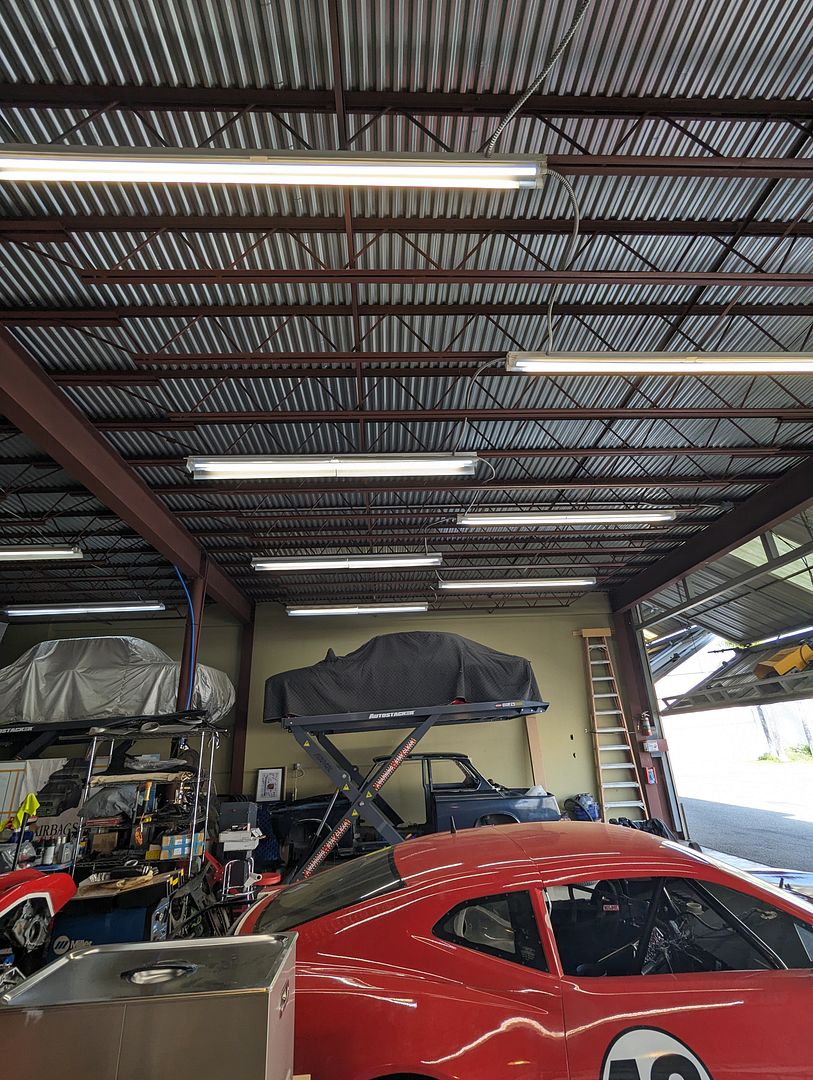
The only other improvement we made recently was to improve the overhead lighting. This was changing out of the 8’ fluorescent tubes and bad ballasts and convert them over to LED lamps. It was very dark in there before and with a mix of 5K cooler and 3K warm lamps, it is much, much better in there. The landlord started this task and I had his electrician finish it when we got lift power installed during the preparation.

And a dedicated outlet for a portable welder:
4-Post Lift:
So I finally got serious and got myself a 4-post lift. This has been in the back of my mind for many years now but for many reasons I decided now was the time:
-I always wanted one for both service and storage (although not having it prevented me from looking at another car which probably kept me out of divorce court)
-A good friend and compatriot (Phil) is going to lose his garage space at his apartment and needed a place to store his E24
-I am older now (58) and after crawling on the floor under my car during my last transmission replacement, my body has determined that I’m too old for that sh*t anymore
There are dozens of lift companies out there currently; some good, some unknown, ranging in price. ALL are made in China with varying levels of quality control. The thing about using a 4-post lift as a service lift is you need a bridge jack in order to make it useful. Those raise the cost significantly especially if you want it to be pneumatic. I set out researching and shopping and reduced it down to two companies: BendPak or DirectLift. I chose them mainly since they are largely US companies and while the actual stuff is made in China, their lifts have much higher and stricter certifications (the ‘Gold’ label). They are markedly more expensive, but I decided that my life and that of the car was worth the extra money. Dover Elevator is the parent company of DirectLift so there is whole century of hydraulic experience behind them as well as friend’s recommendations. BendPak is one of the top commercial lift companies out there and very local to us here in SoCal (they’re in Santa Paula just up the road). But the higher buy-in costs of new equipment along with added delivery and installation costs caused me pause.
I looked at used lifts (a lot) and came to the conclusion that pretty much all weren’t much of a bargain since most were much older, heavily used, came with questionable service histories, and/or sales were dependent on my coming and dismantling, hauling it away and installing it myself. Not to mention they were still about 2/3’s the cost of new lifts on average. That is until I came across one for sale on Facebook Marketplace: BendPak HD-9XL with a pneumatic bridge jack for an average price. I didn’t give it much thought until I contacted the seller and asked a bunch of questions: turns out it’s not that old, he is a car enthusiast like us so it was lightly used, it came with two sets of ramps (the standard heavy ones and lightweight low-profile aluminum ones), a rolling oil collection tray AND he was willing to knock it down, transport it up from Orange County AND install it for the advertised price (plus the rental truck costs). Hot damn, sign me up.
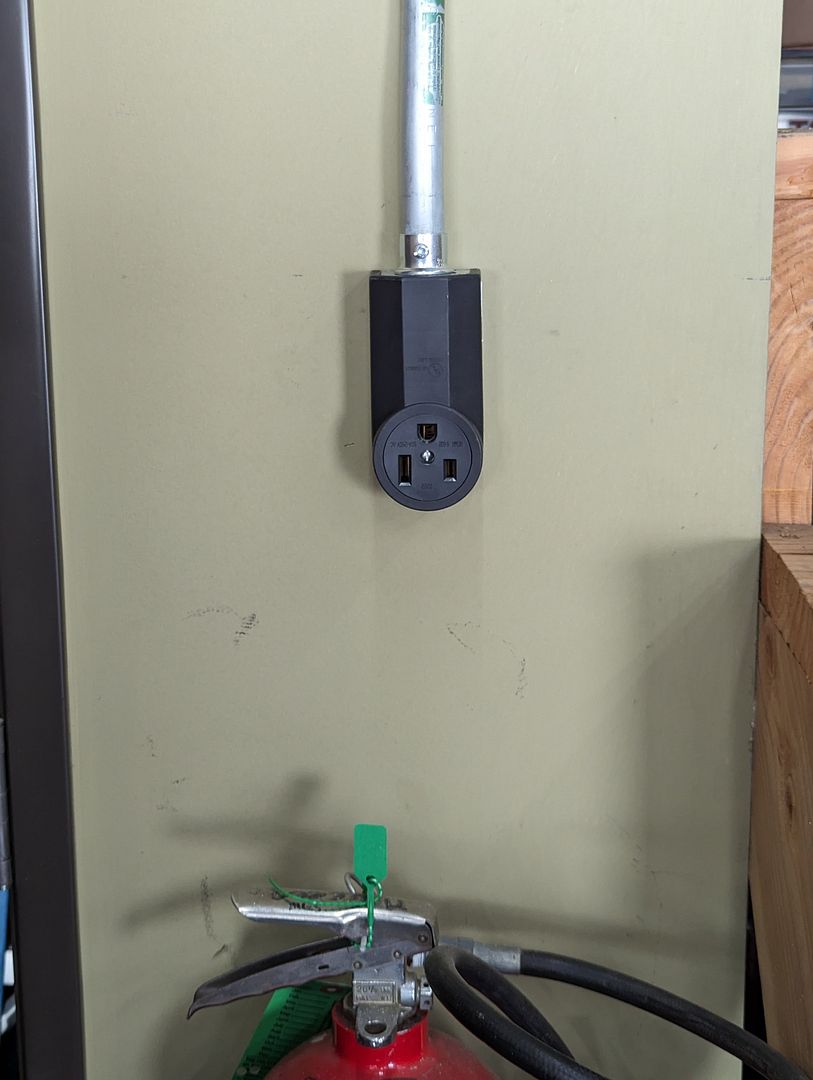
I then had to get the hangar prepped by getting in both a dedicated 30A 220V circuit and finish my pneumatic system. BendPak is the only manufacturer that requires a 30psi pneumatic supply to operate the safety brakes (actually the air is needed to disengage the brakes so you can fully lower the lift). It’s one of the added safety features that set BendPak’s apart and up in a higher quality bracket of lifts. The HD-9XL (9,000 lb, extra-long) is not the one I was looking at in their newer models (I wanted the HD-9STX which is the standard length but extra tall for the added headroom under it). I had to do some serious space measuring and adjustments to make it fit in my bay of the hangar; it’s a bit tight and wish it were slightly shorter, narrower, and taller, but given all the extras with the sale, I was happy to compromise and save some money to boot.


Dave (the seller) is a super great car guy (AC Cobra’s) and very generous with his time (it took both a Saturday and Sunday to finish the installation even with my help/hindrance). He was happy it was going to a good home and will get the use it deserves. It needs another round of final level setting (this Friday), but it’s been working fine as is.


I have a couple of small improvement projects underway for the lift:
Drip Pans:
I can’t figure out why a set of drip pans are so expensive for this. BendPak’s are plastic and nearly $400(!). Other metal ones were twice that. “Screw that”, I said and set out to build a better (and cheaper) mousetrap. After a bunch of online research, I looked across the hangar floor and saw a old metal drip pan that I bought at the local O’Reilly’s ($14.99) and saw the potential.
With some modifications (cutting and rolling the short ends so the pan could lock into the runway rails), these are way better than the plastic ones. I can always add more if needed.


The other ongoing project (no pictures yet) is some LED task lighting for both the upper and lower areas. This is progressing now that I have all the Amazon parts. More to come.
The only other improvement we made recently was to improve the overhead lighting. This was changing out of the 8’ fluorescent tubes and bad ballasts and convert them over to LED lamps. It was very dark in there before and with a mix of 5K cooler and 3K warm lamps, it is much, much better in there. The landlord started this task and I had his electrician finish it when we got lift power installed during the preparation.


And a dedicated outlet for a portable welder:

Last edited by vinceg101 on Aug 10, 2024 5:29 AM, edited 1 time in total.
Re: What did you do in/to your Garage today?
It's a 4-Post, and yeah, BendPak is the only one with that feature. More on the next post.gadget73 wrote: Aug 06, 2024 4:05 PM The BendPak I'm guessing is an air-powered hydraulic pump? The old in-ground lifts ran on air, I didn't know anyone was making a 2 post that functioned that way.
EDIT: I need to clarify: the lift is a standard hydraulic like all other 4-post lifts on the market. BendPak is the only one with a pneumatically controlled set of safety brakes in parallel to the standard brakes. The air is needed to release the brakes so you can lower the rampways. The pneumatic system is completely separate from the hydraulic system and is not used for lifting or lowering (which is why only 30psi is required).
Last edited by vinceg101 on Aug 10, 2024 5:12 AM, edited 1 time in total.
Re: What did you do in/to your Garage today?
Nice work, as always Vince!
Re: What did you do in/to your Garage today?
As we, get older, I notice the need for more light working on things. Not just me, when I did a lighting project at the County Fleet building they were screaming about a prior project that while it saved some energy, gave them less usable light. I fixed that.  But yeah, you need light to work on stuff, especially as we're no longer in our, ahem, 20's?
Re: What did you do in/to your Garage today?
Well, the day in the hangar started out so promising:
Met the service tech from Universal Hydraulic Service to perform the final calibration. Final set on BendPak's is a bit of a science in order to get all four safety brakes to engage simultaneously. It's a balance between post & ramp level, cable adjustments and latch ladder adjustments (inside the columns there are steel ladders that the brakes engage as it climbs upwards).
The tech got it in about an hour (Phil and I wasted two weekends trying do this). But then power supply took a dump. Actually it was the 2.5HP motor but they sell it and hydraulic pump & reservoir and switch as one unit.
So I'm trying to track down a replacement to have in time for next weekend so I can swap it out and get to wrenching on the E39 cooling system (which is what I was supposed to be doing after the tech finished today).
From there the day just continued to go downhill; everything I touched just turned to crap from then on. But that's a story for another day.
Re: What did you do in/to your Garage today?
Such great work, Vince! Lighting and/or a Lift (L&L) are two of the most rewarding upgrades you can make to a garage space. In my home garage, I added LED overhead lighting (from the Big Ass Fan boys) with motion sensor on/off and it was transformative. Plus, it's just cool to see them click "on" when I hit the first step from the laundry room into the garage  And....don't have to worry about leaving them "on" for hours and hours when no one is in the garage. Makes such a difference!
Love the drip pan solution, too - does the job perfectly well without the ridiculous cost. When I was in shopping/learning mode for a lift, one of the best pieces of advice I got from those w/experience was to "not" waste your time with the plastic drip pans because sooner or later they *will* get stepped on and will break apart. The metal pans are the way to go.
Jim
Re: What did you do in/to your Garage today?
Thanks, Jim.5280 JB wrote: Aug 11, 2024 9:43 AMLove the drip pan solution, too - does the job perfectly well without the ridiculous cost. When I was in shopping/learning mode for a lift, one of the best pieces of advice I got from those w/experience was to "not" waste your time with the plastic drip pans because sooner or later they *will* get stepped on and will break apart. The metal pans are the way to go.
Those accessory catalogs that the lift companies have can get ridiculous cost wise. BP and others had the options of solid steel panels to infill the center which is the only useful one there (besides the bridge jacks) since you can slip manual jacks, jack stands, etc. on them. But you're right, anything not metal will be gone within a year of installing them.
In my research I was leaning towards aluminum appliance drip pans (water heaters, clothes washers,etc.). They come is larger sizes and deeper but only a few were narrow enough to fit within the rampway rails. But they were several times more expensive than these oil drip pans and with these being somewhat modular, I could add/subtract these as needed and still not break the bank (because, as I mentioned above, I have more stuff to spend serious money on now).


