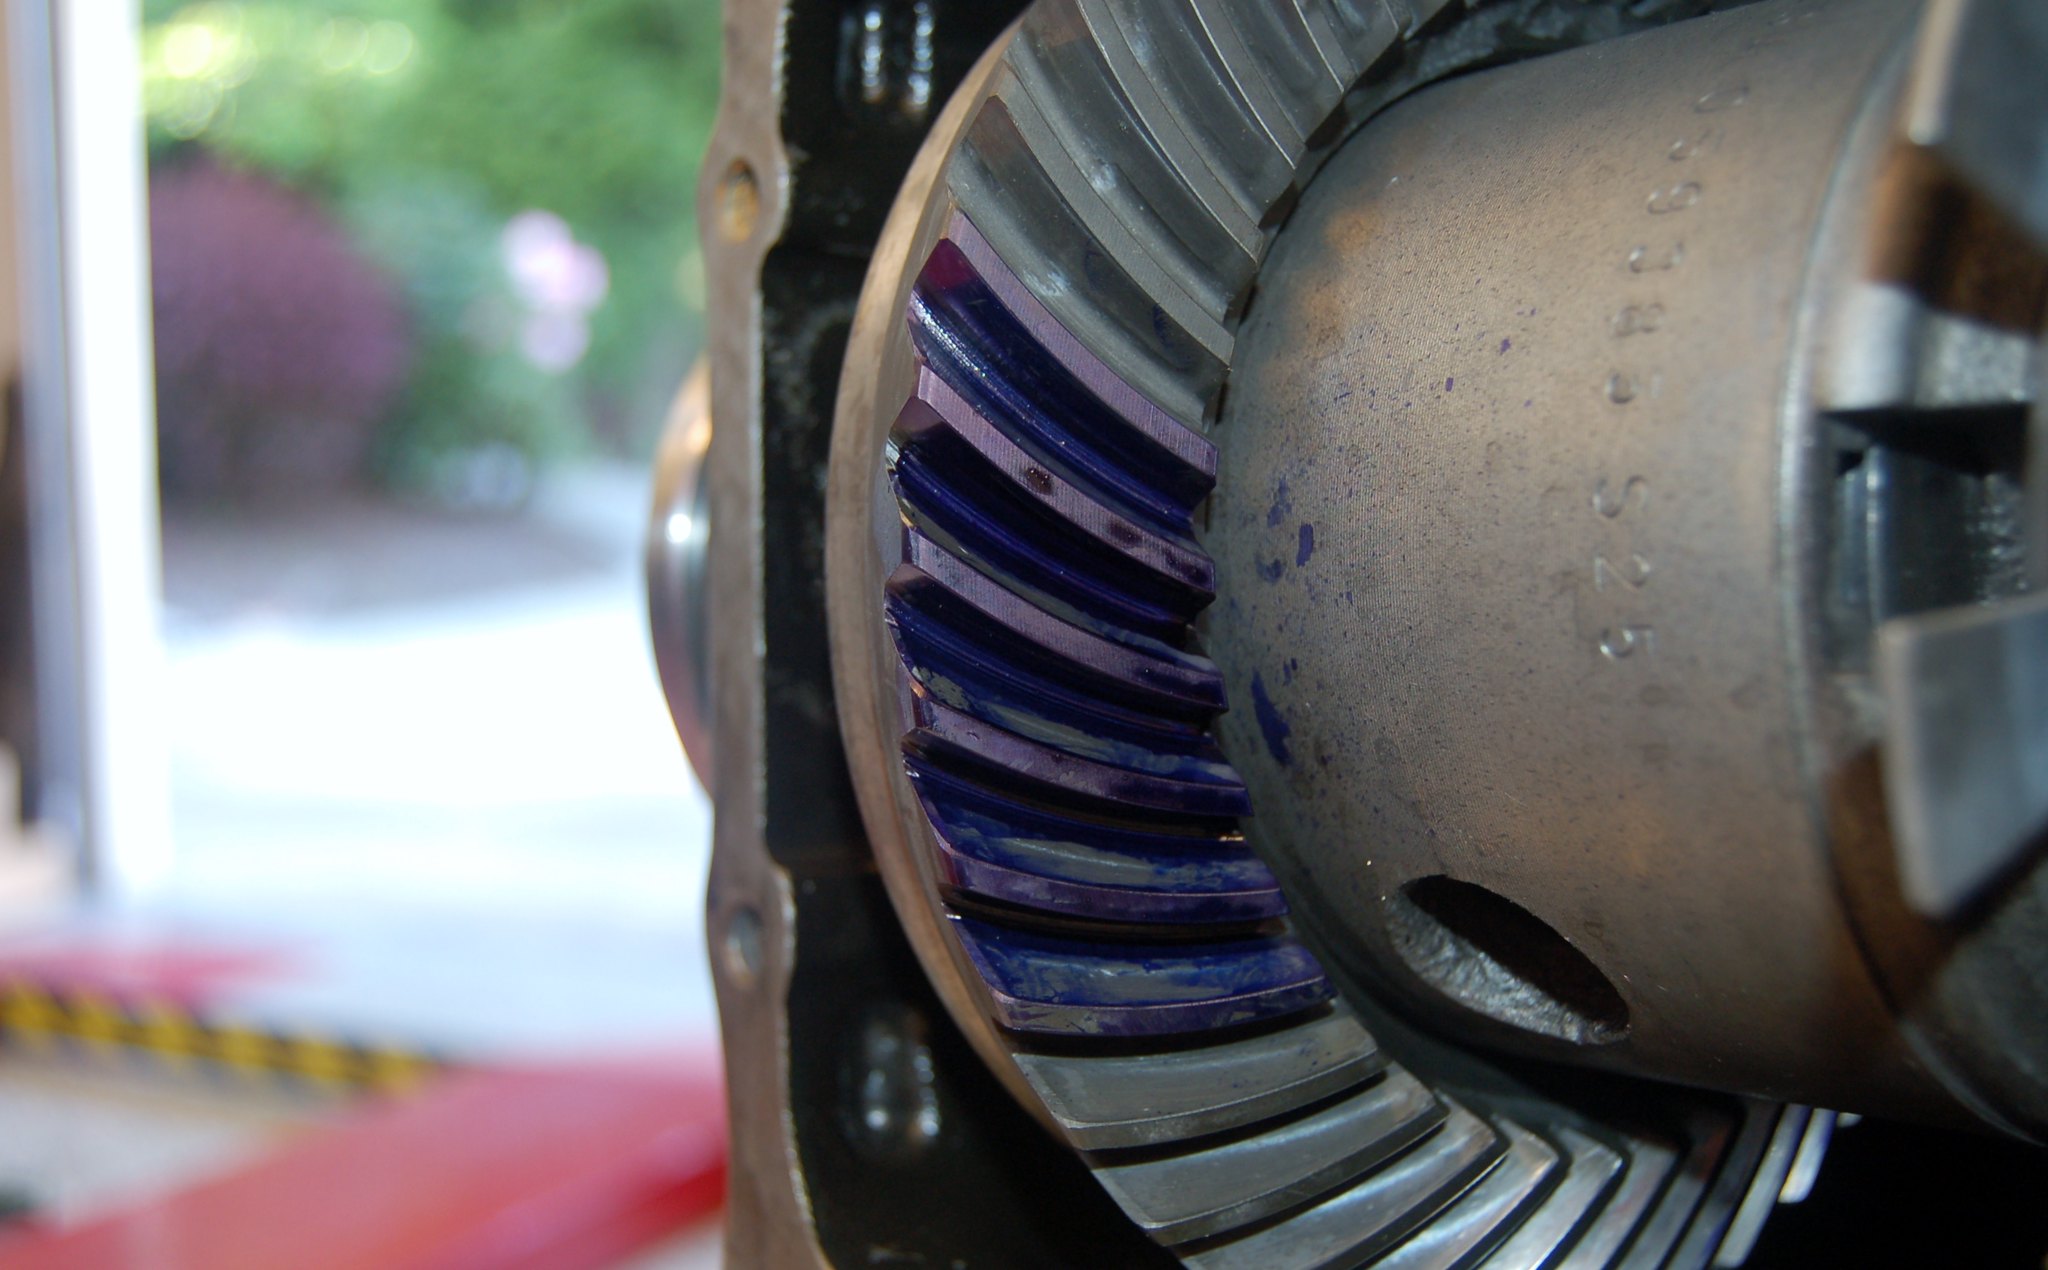
Differentials: Medium Case Diff Rebuild FAQ
Posted: Jan 31, 2017 9:03 PM
*** FAQ FOR REVIEW / COMMENT ***
Problem: Cabin noise and/or vibration that is not affected by engine RPM or cornering, but is affected by vehicle speed.
Cause: Differential Pinion and/or Carrier Bearing failure
How to fix: Change the Diff Pinion and Carrier Bearings, see below.
Applicability: Generally this procedure can likely be applied to any rear differential, although the Pinion Bearing preload setting and fastener toque values may vary.
Tools required:
- Shop press
- Various sized mandrels. I used a variety of 'round' things from around the shop. This kit (or similar) came in handy:
OTC 4507 Bearing Race and Seal Driver (I bought my generic kit at Princess Auto (CDN) - try Harbour Freight in US)
https://www.amazon.ca/OTC-4507-Bearing- ... B000O824Y8
I have not included specific sizes in the procedure below since I simply don't know if all variants of BMW diffs use the exact same size bearings. Use good judgment here.
- Bearing splitter (1/2" - 3" size), example:
http://www.princessauto.com/en/detail/1 ... -p2990103e
- Impact gun
- 1/4" drive Beam Torque Wrench
- 3/8" drive Click-type torque wrench
- Large breaker bar
- Pinion Yoke Holding Tool
- Various typical shop supplies
Parts List:
Pelican Parts (USD):
33131213893 $20 Tapered Roller Bearing (carrier) (2 required)
23211490120 $3.25 Securing Plate (1 required, good to order a spare)
33107505602 $7.25 Shaft Seal (output) (2 required)
33111214144 $4.25 O-Ring (2 required)
33131207280 $0.50 Lock Ring (2 required)
33111211708 $5.50 Diff Cover Gasket
33121744368 $7.25 Crush Sleeve (1 required, good to order a spare. One came with the Pinion bearings from Thayer below)
Thayer Motorsports:
Pinion Brgs w/seal/crush collar $65.00
Pinion Nut (about $5.00)
Other Suppliers:
- Fasteners, see below.
- O-ring for the Speed Sensor, available from a hardware store. Here is the size:
w. 3/32"
ID. 1 5/16"
OD. 1 1/8"
Torque Values*: (unlubricated, no thread lock)
Bearing Cap Bolts:
12-off M8x25 - Gr 8.8 - 15 lb-ft*
Diff Cover Bolts:
8-off M10x25 - Gr 8.8 - 30 lb-ft*
Rear Horizontal Support Bracket
2-off M12 x 1.5 x 50 - Gr 10.9 - 100 lb-ft*
Front Support Bracket
3-off M14 x 1.5 x 25 - Gr 10.9 - 150 lb-ft*
* Not from BMW or Bentley, derived using best practice. Use at your own discretion.
Diagnosis:
For the past few years I've been noticing a cabin noise that sounded very similar to a wheel bearing on its way out, increasing slowly over time. A couple years ago I changed the front wheel bearings and while it got a bit better the noise was still there. At this point it's enough to vibrate the dash while driving a certain speeds and while it's still not 'loud', when the car stops rolling and things are quite you kind of feel like you just woke up from a Metallica concert the night before. Anyway, on a few occasion I've had the chance to isolate the noise to the diff. This past summer I had the axles out for a rebuild and was able to spin the diff alone and it was obvious this is where the sound was coming from.
Other details:
The diff is a BMW Medium188mm open type with a ratio of 3.64:1. It has roughly 190,000 KM on it and I would imagine it had its first oil change when I bought the car ~6 years ago (168,000 km). I just drained this 6 yr old fluid for the rebuild and even it came out black, obviously I should have done a better job flushing it 6 yrs ago. The outside of the diff was dirty but not really rusty.
For the most part the pictures do the talking. I assume anyone tackling this has enough experience to know the basics, i.e. pressing things in/out straight, how much force to use, what surfaces to apply pressure on and how to support properly. I have a bunch of random round parts, like old wheel bearing races and seal drivers, which made the job go smoothly. I've seen people use a slide hammer on some of the races, but with the right sized mandrels for the press the slide hammer isn't required.
References:
- While I found bits and pieces all over the net, I generally just dove in.
- This link has good tear down / rebuild documentation that I found:
https://www.bimmerforums.com/forum/show ... Pic-heavy)
- Forum member cek has successfully rebuilt / documented his diff rebuild here (wish I had seen this before starting mine!):
http://www.mye28.com/viewtopic.php?f=3&t=127886
- If you want to check / set gear backlash, there is a section in this link that covers it (courtesy of cek):
https://www.bmw2002faq.com/articles.htm ... -build-r74
Procedure:
I have not covered the diff removal from the car, I assume anyone tackling this project knows how to do this.
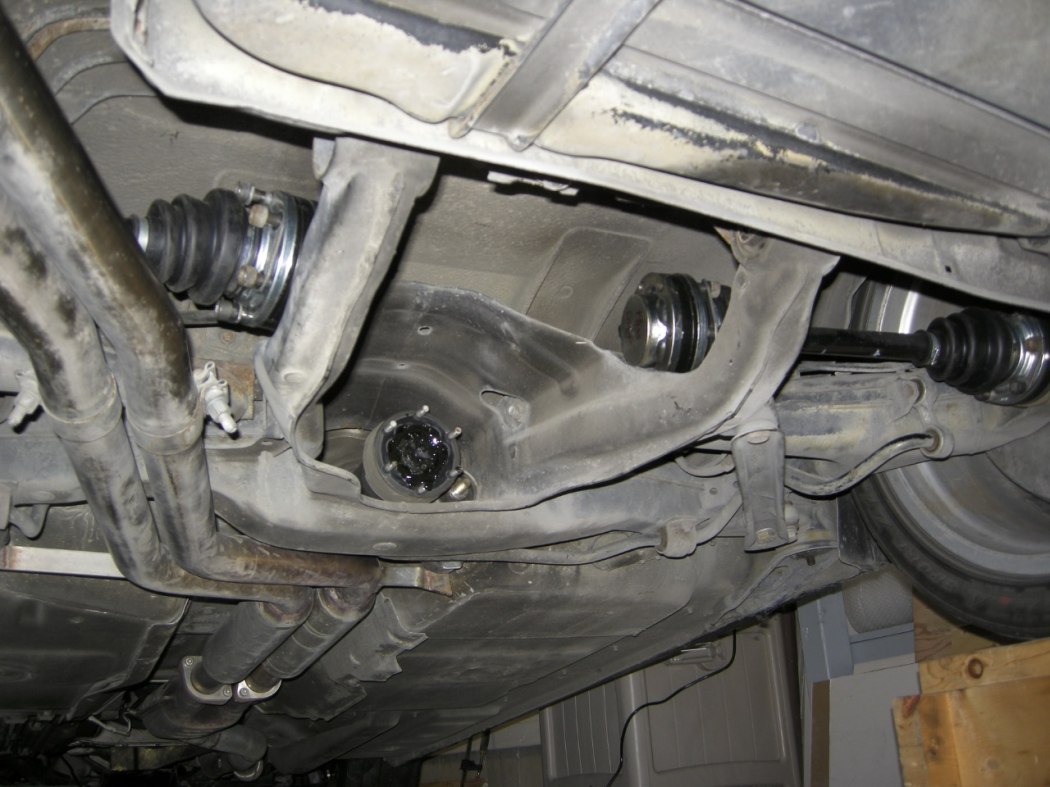
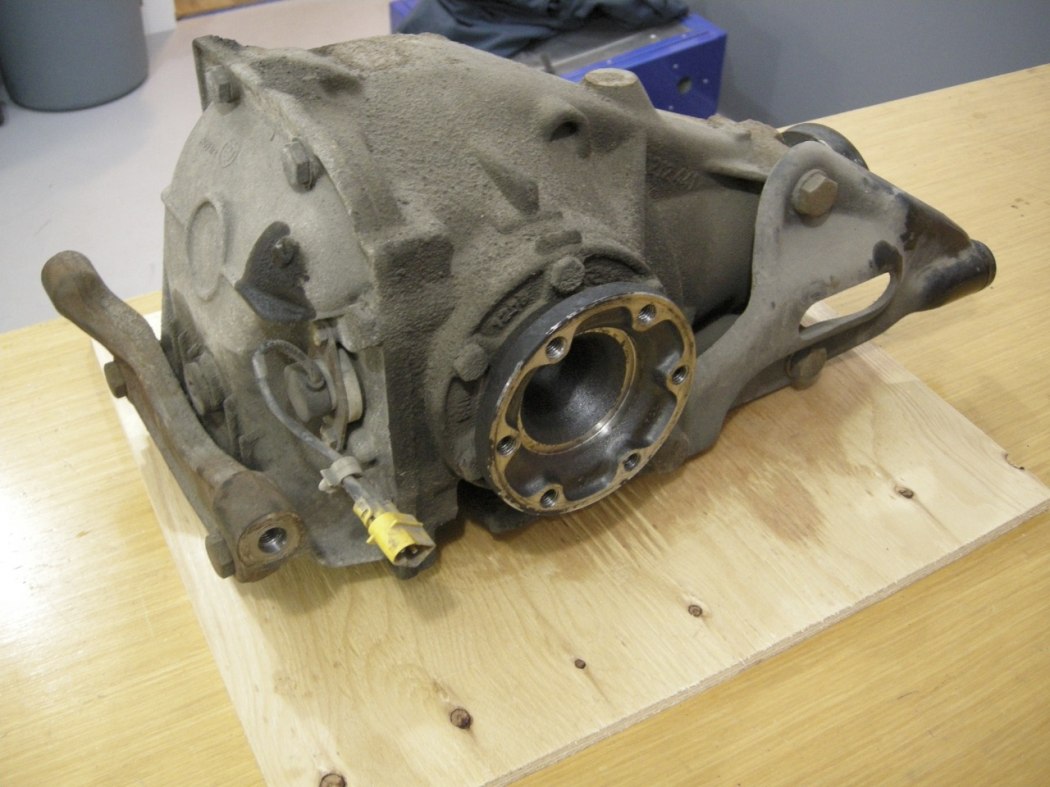
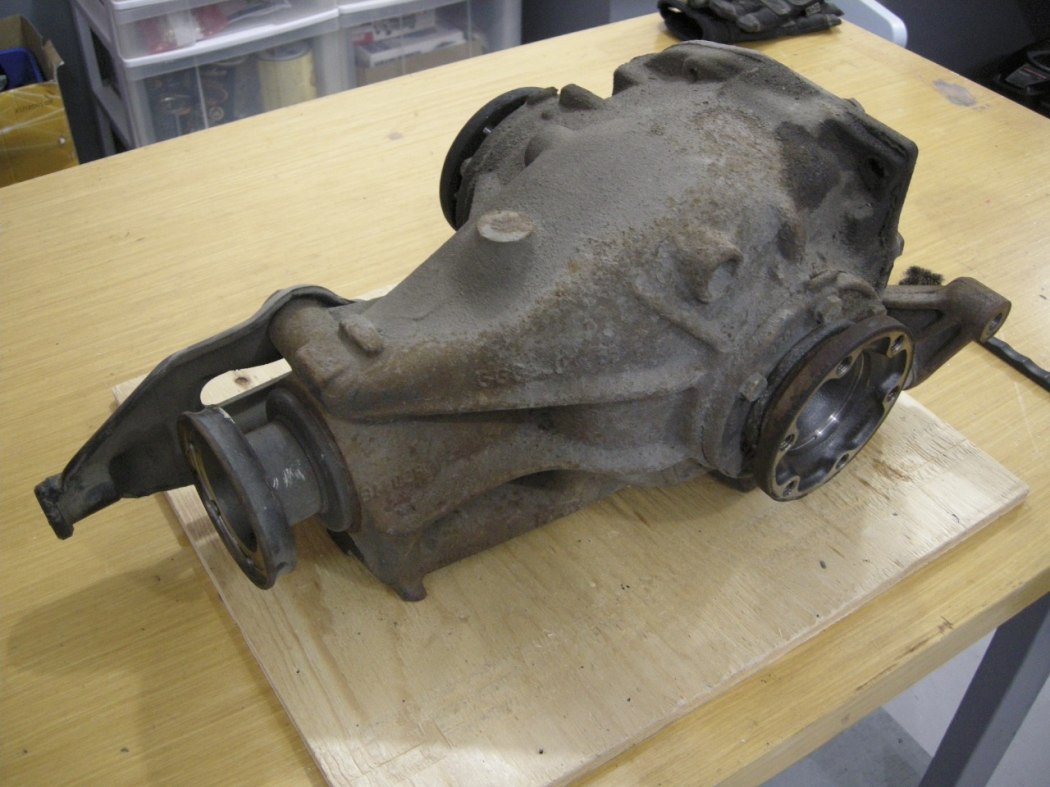
Disassembly:
The Output Drive Flanges simply pop out. Use a screw driver for leverage if they are a bit stubborn but they shouldn't be.
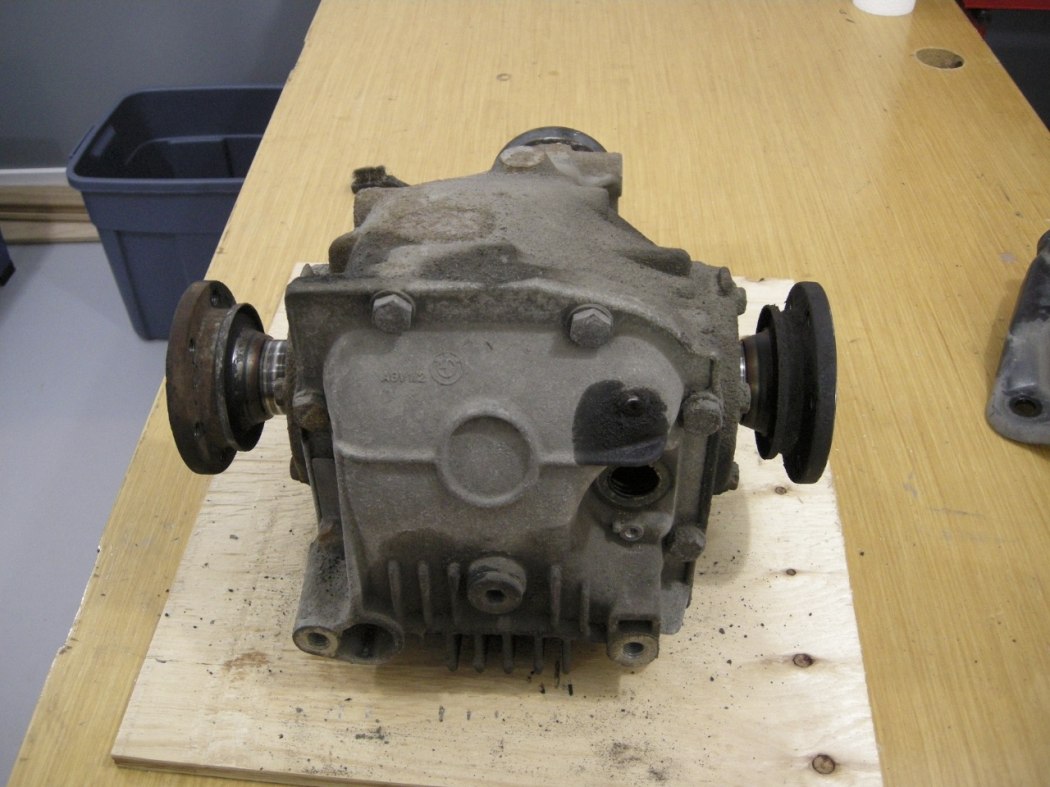
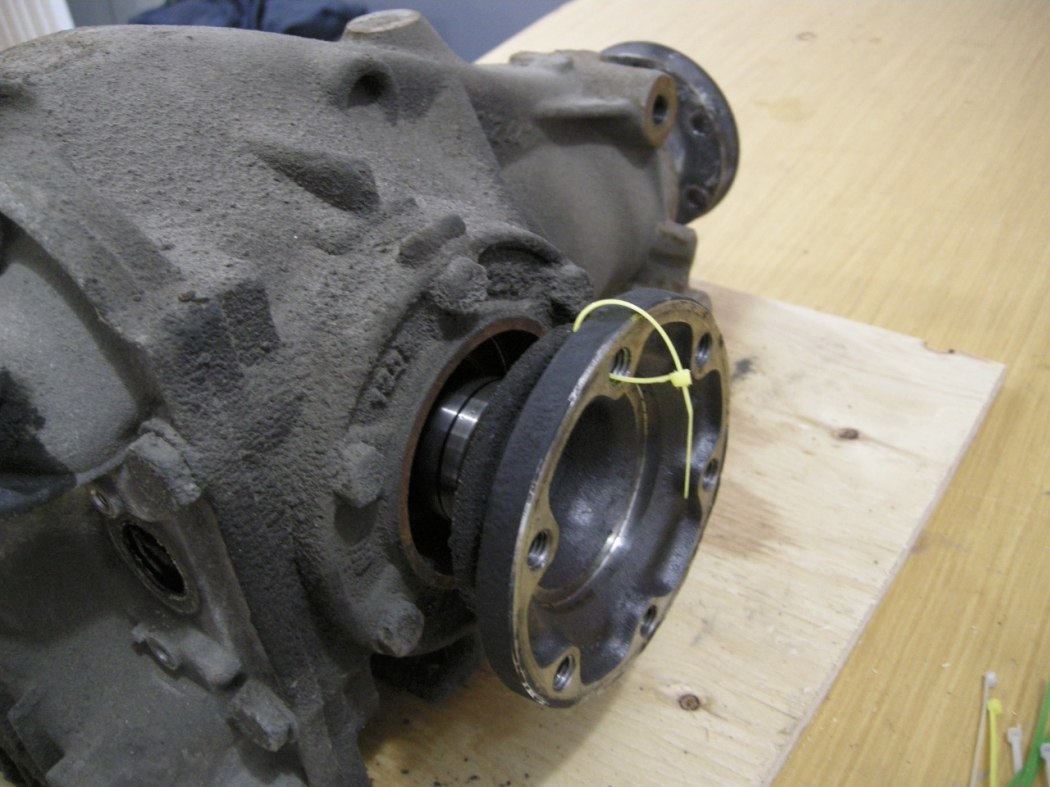
Tag one side with a zip tie or similar. This particular part could be installed on either side I believe, but it's better to be safe than sorry.
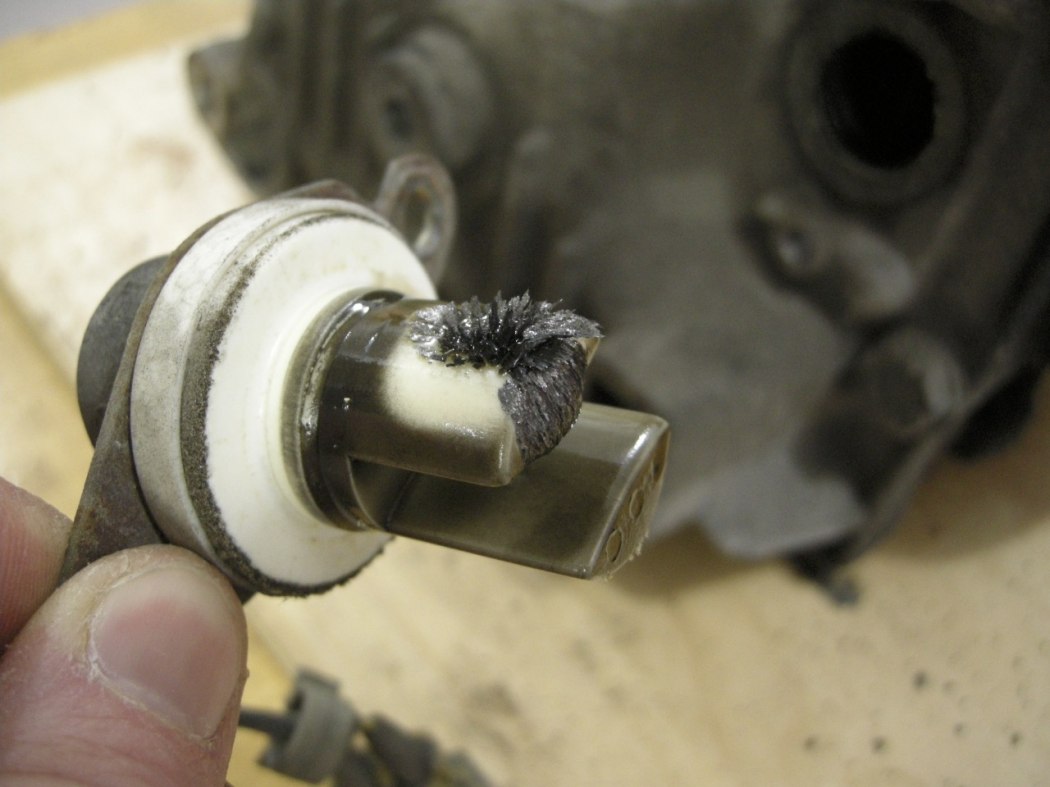
The Speed Sensor is easily removed by first removing the 2-off M6x10 screws. The sensor just pulls out, there is an o-ring that seals it to the diff cover. Notice the metal shaving that were attracted to the sensor.
The Bearing Caps are next, and using a flat blade screw driver for leverage helps here. Again, doesn't take much to pop these out. There is a specifically sized (thickness) shim under each bearing cap. Tag these so they go back on the same side. This is extremely important.
Also notice the witness patch from the OE assembly, where they used sealant on that (and another) particular threaded hole. These 4 holes (2 for each Bearing Cap) are through holes into the Diff Case.
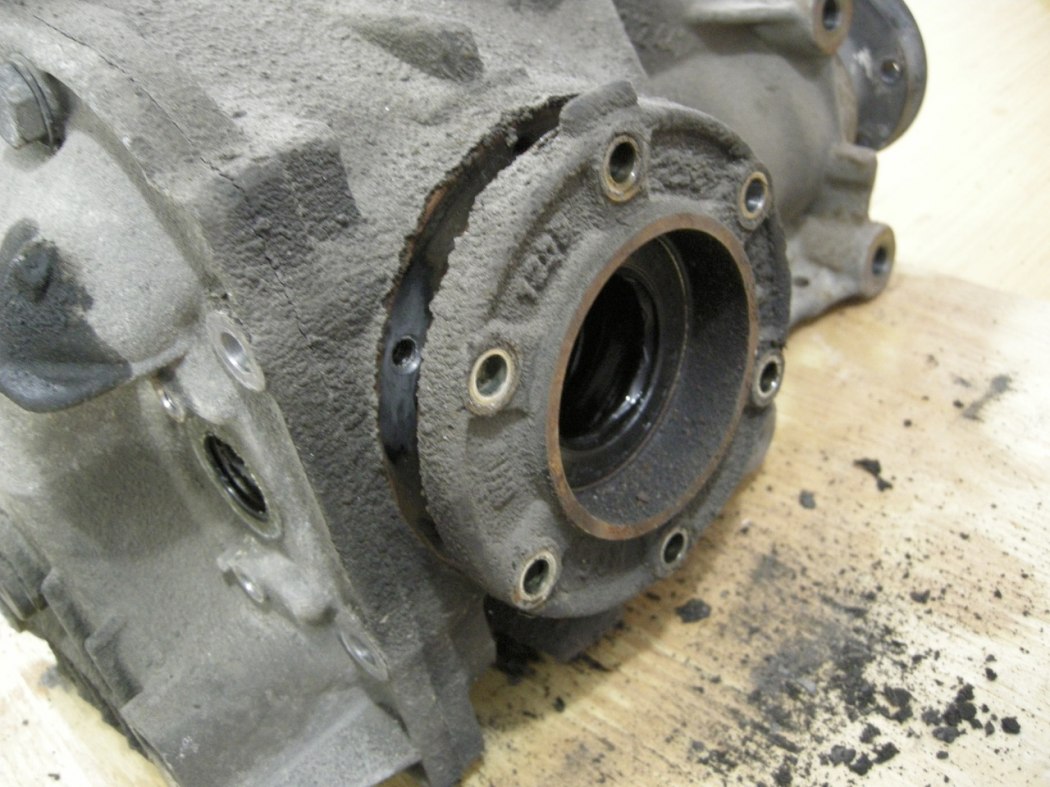
Remove the 8-off M10x25 bolts holding the Diff Cover on and remove the Diff Cover. Notice the fluid level witness line left behind by the contaminated oil.
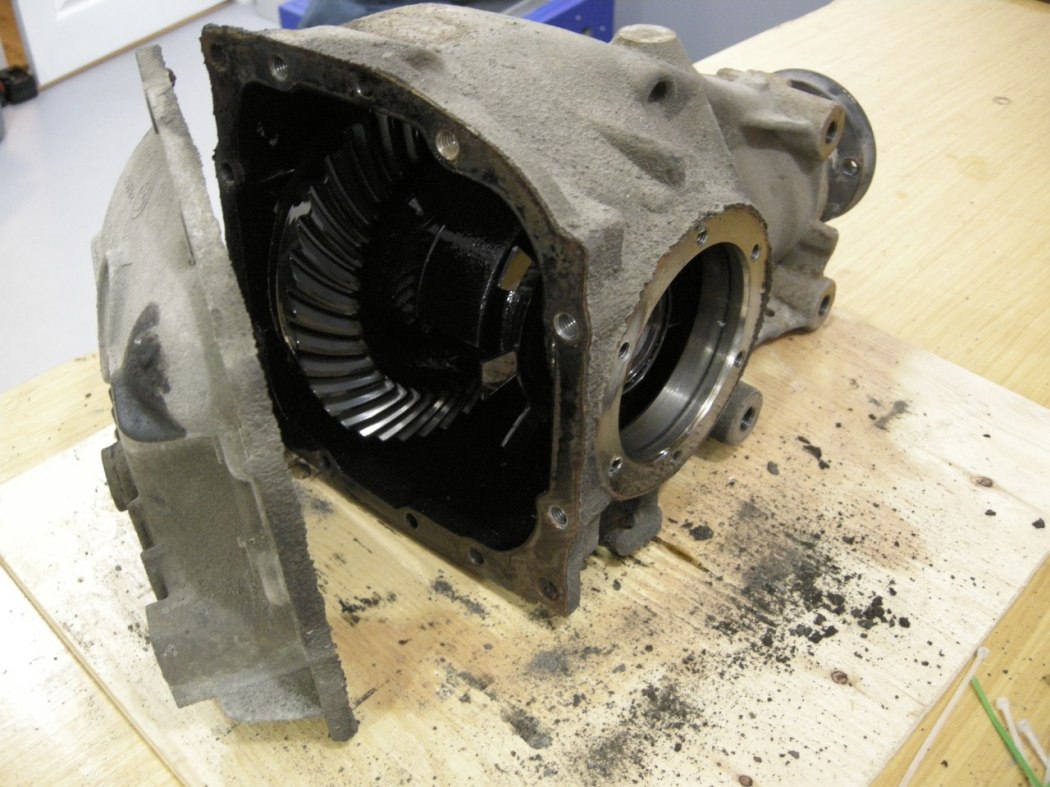
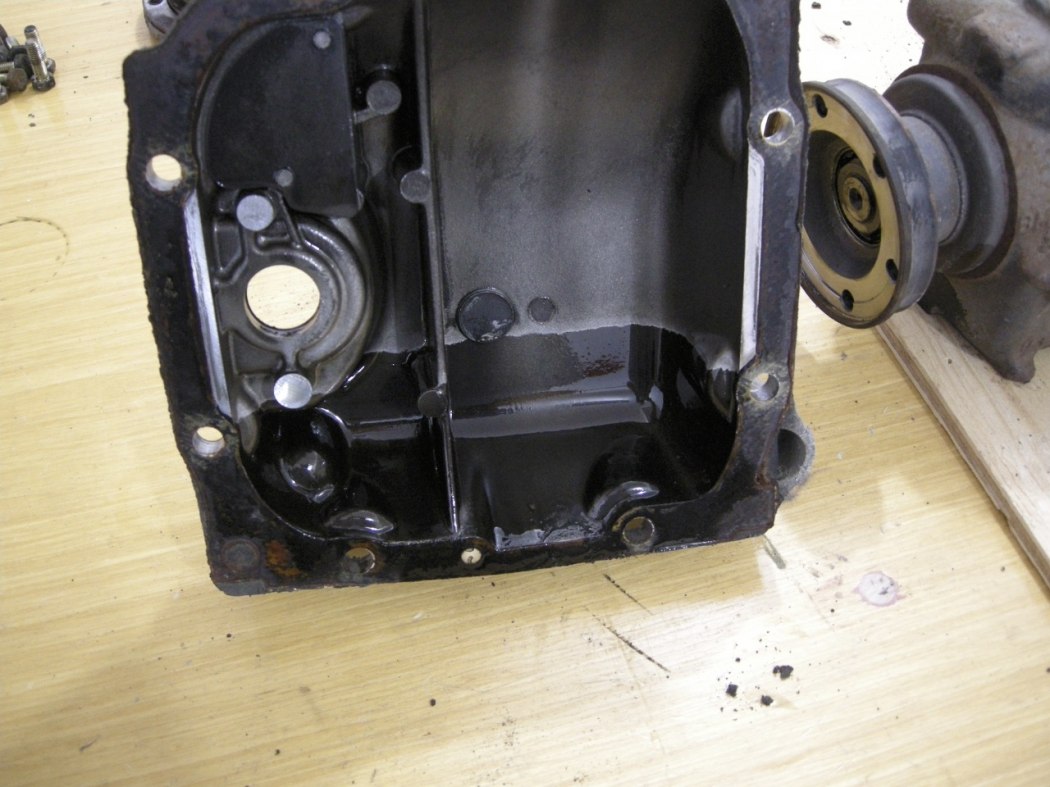
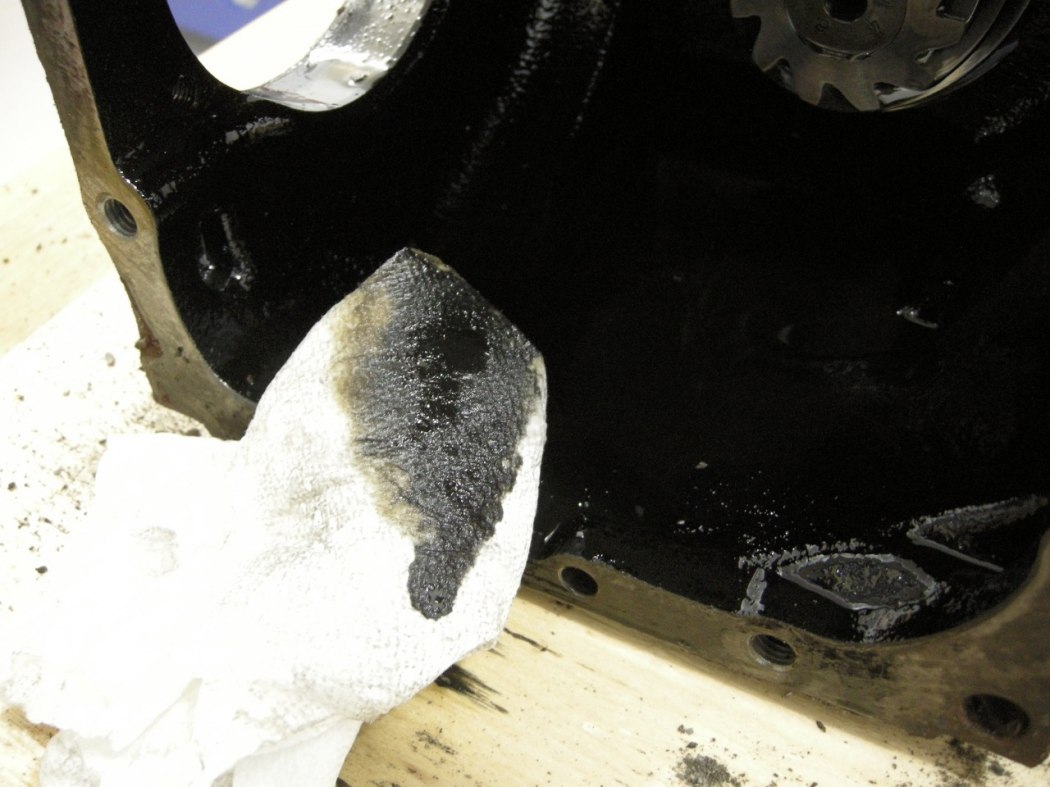
The Diff itself just drops out the back. Keep things organized and in tagged so that all pieces go back on the same side / where they belong. Nothing worse than getting it all back together and it's too tight or loose.
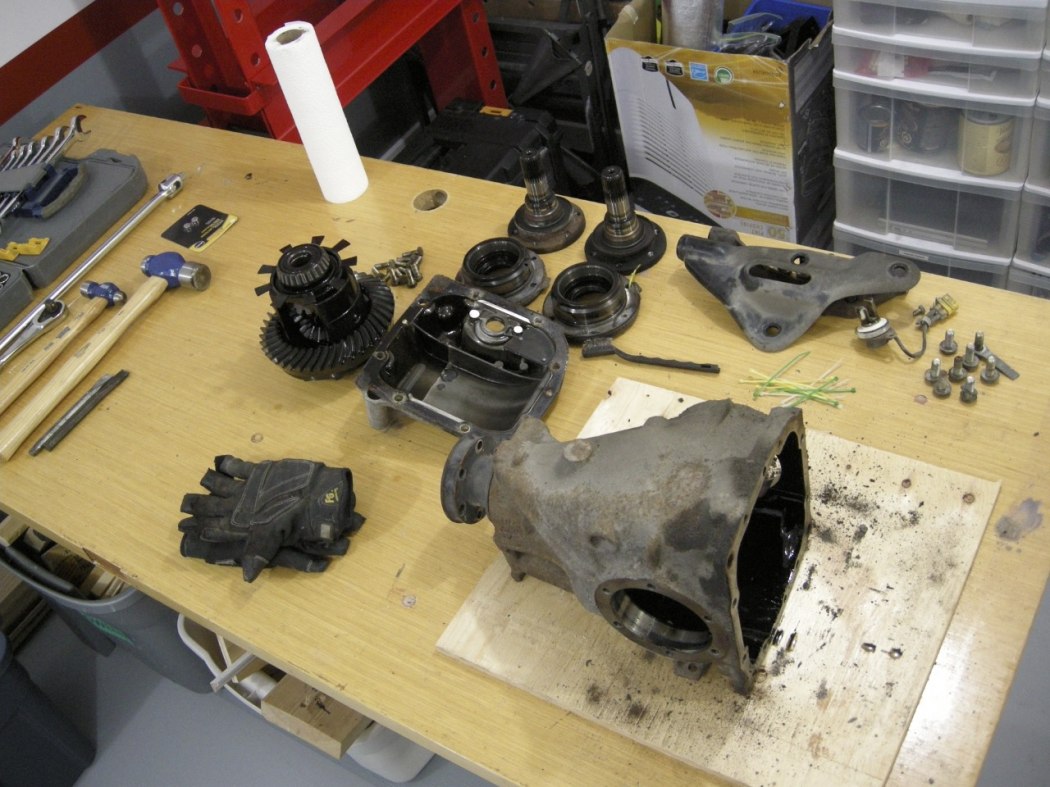
Pinion Removal:
The Pinion Nut is prevented from loosening by a Securing Plate. Drill a small hole in this, partially drive a sheet metal screw into it, and pry it out.
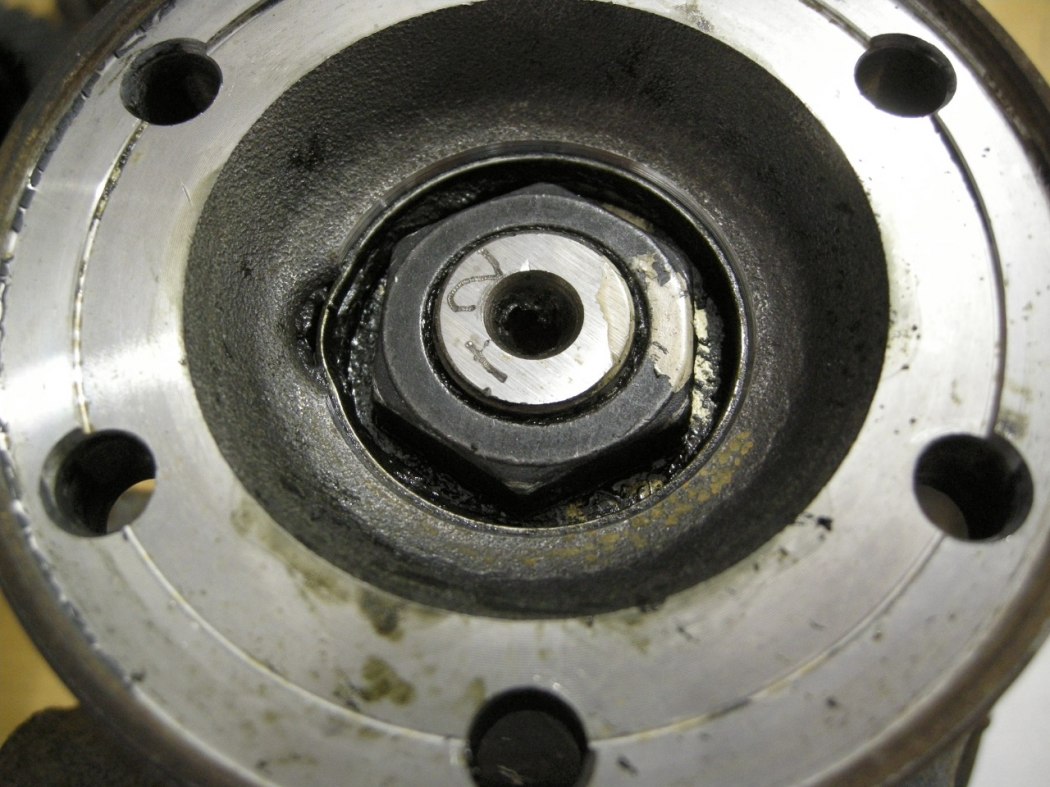
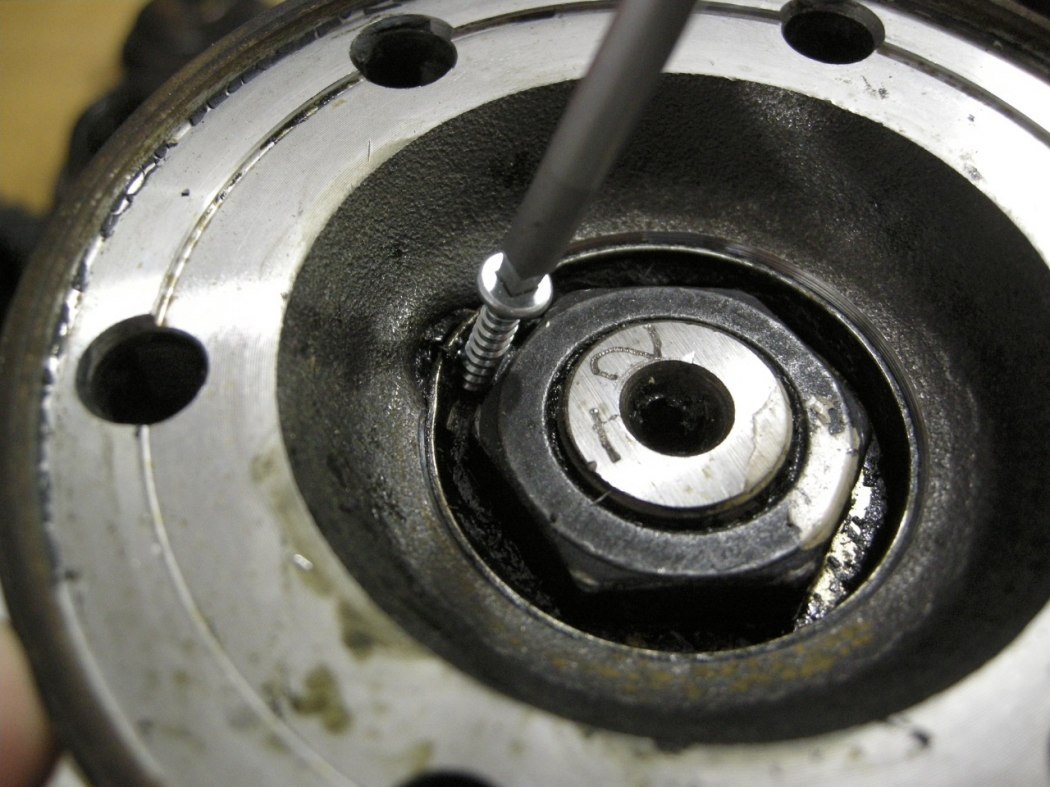
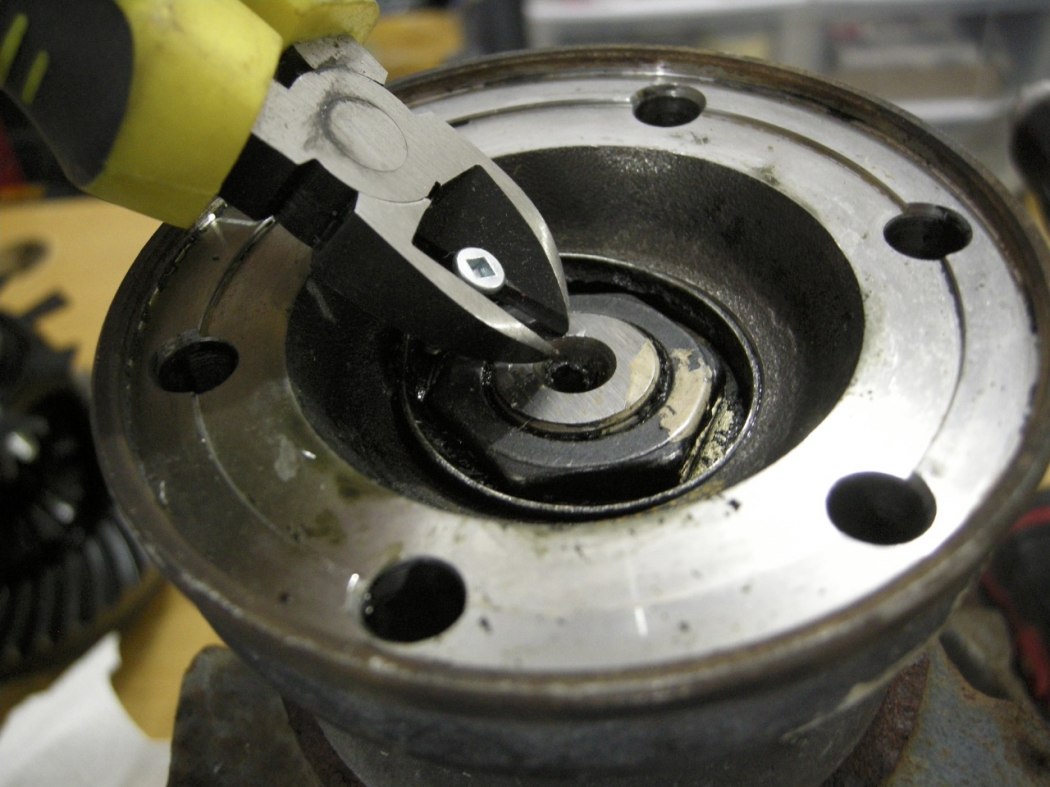
Then using an impact gun, zip the nut off. It helps to hold the Pinion gear on the inside of the Diff Case to prevent it from spinning. Because we're using an impact the Pinion gear does not need to be held very tight.
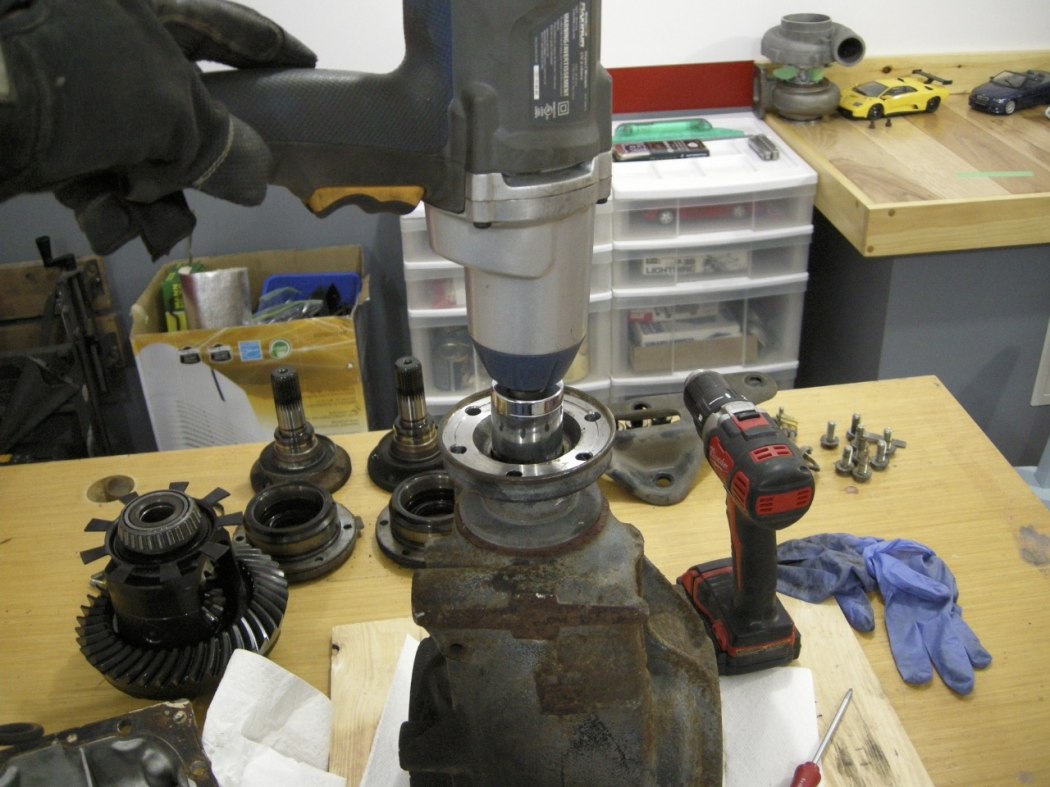
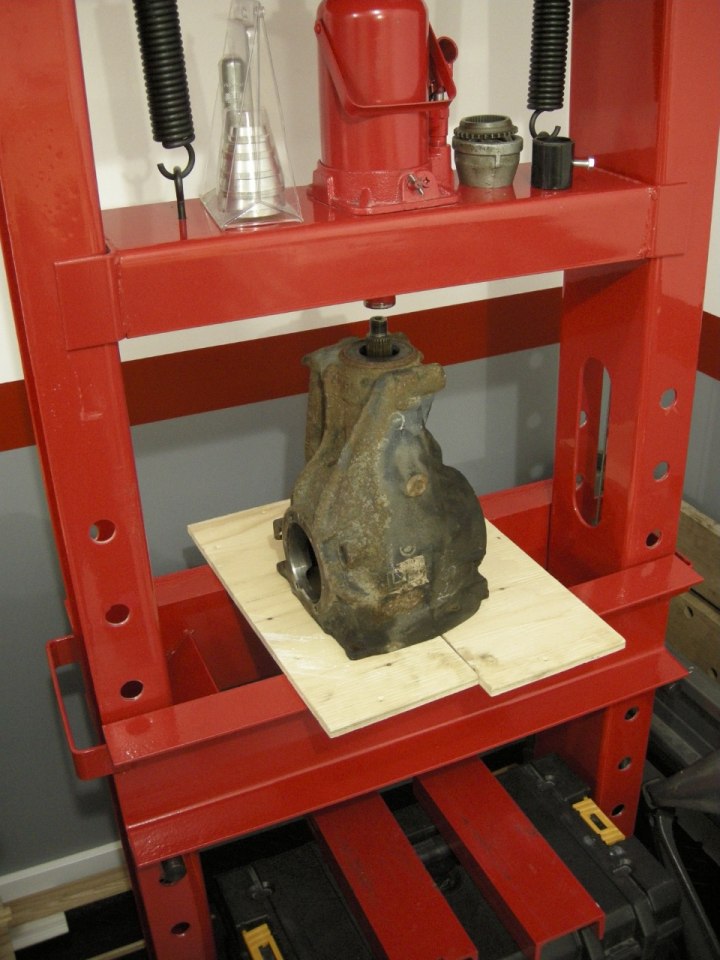
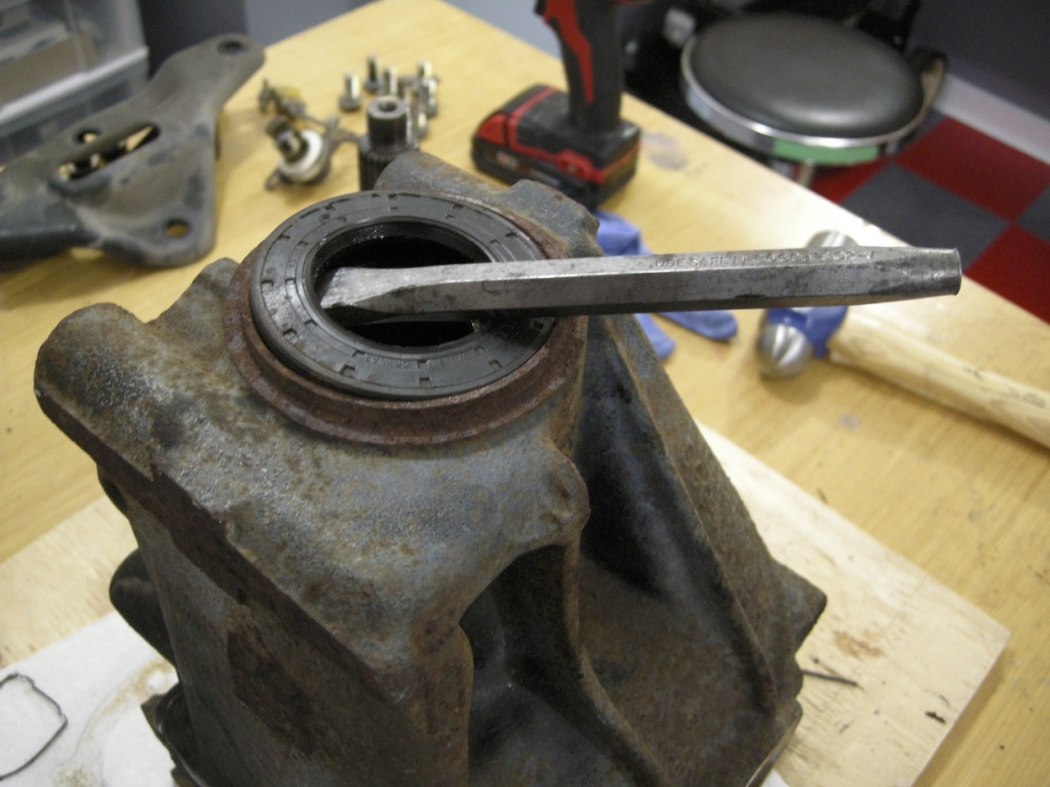
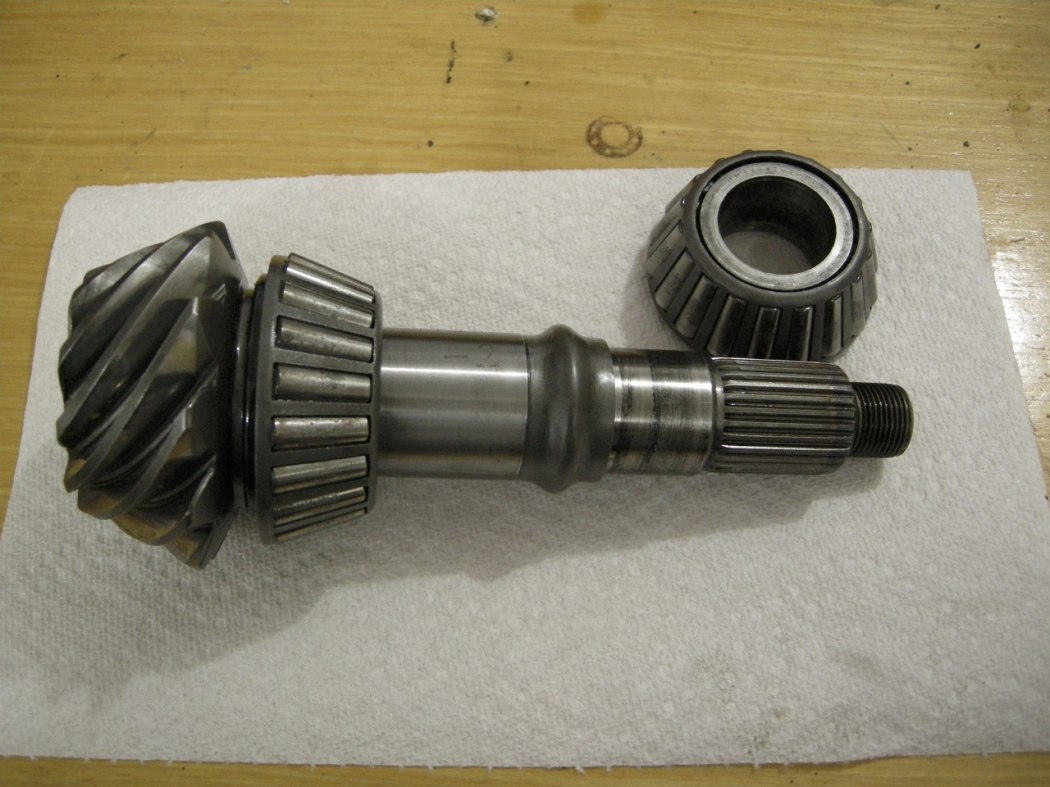
Jump on the press and drive out the Pinion. Now you can pry the Pinion Seal out with a seal pry bar or anything else. The Small (outside) Pinion Bearing will now be free and can be removed / discarded.
Pinion Bearing Race Removal:
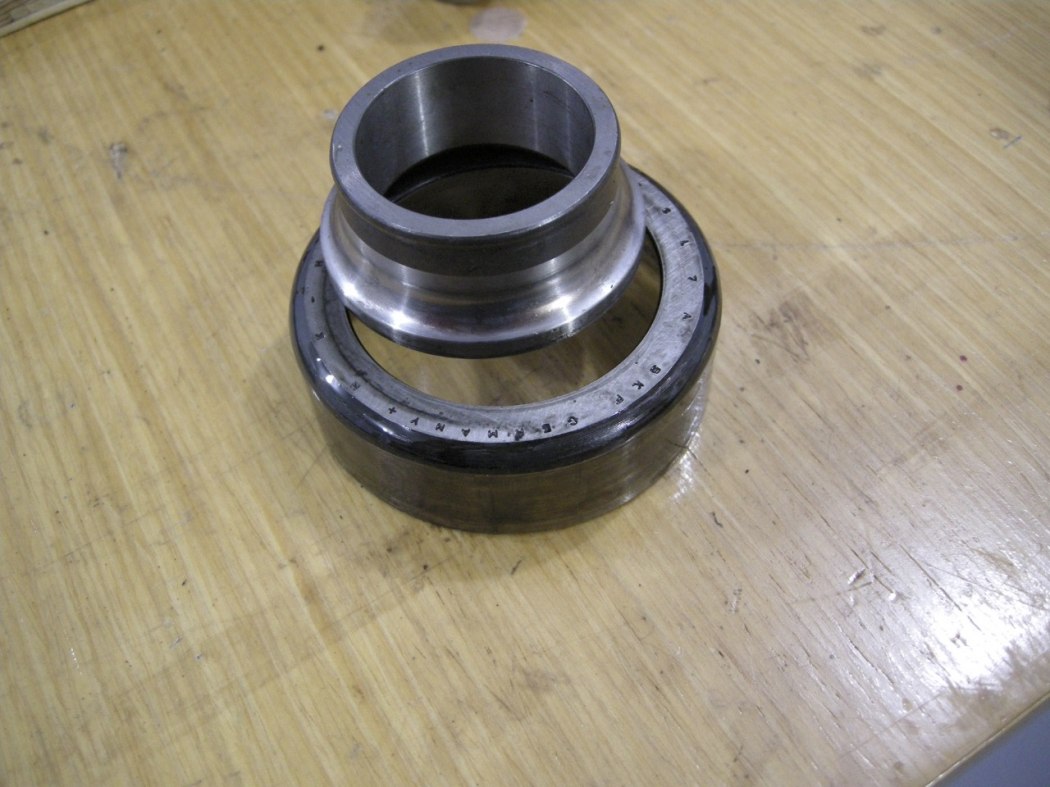
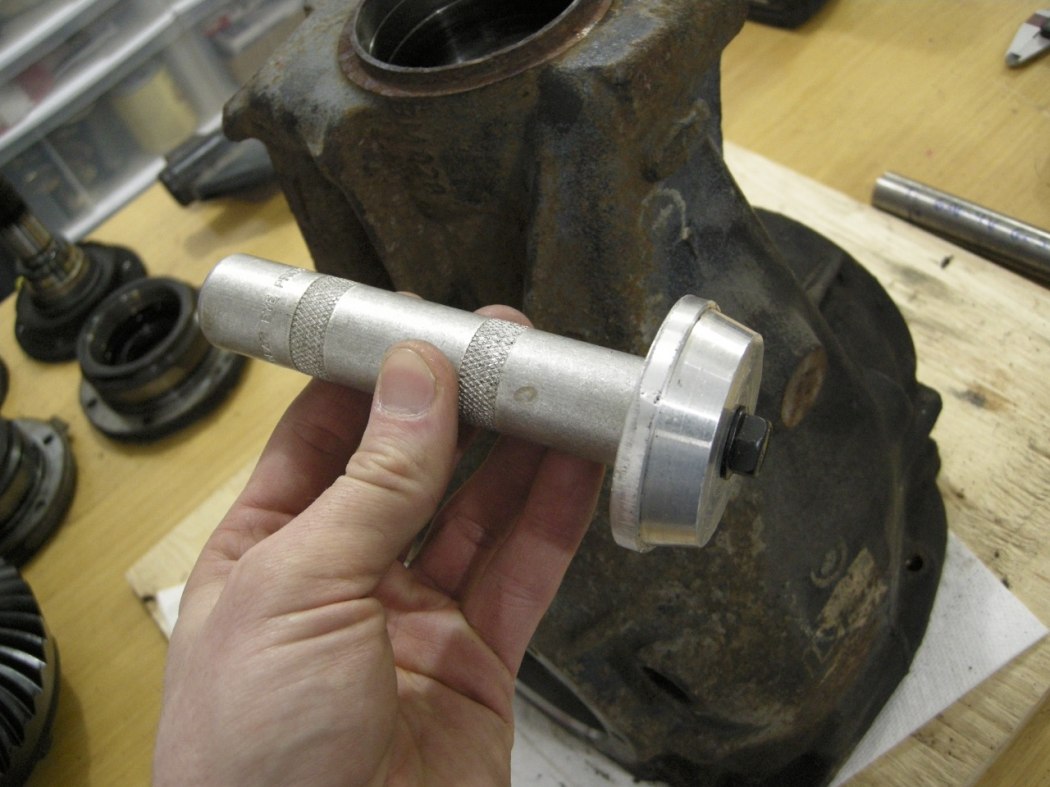
The outside Pinion Bearing is slightly small than the inside Pinion Bearing. I used an old Audi wheel bearing race that just fit through the inside bearing race to remove the outer (smaller) race from the inside - out. I hope that wasn’t too confusing.
This picture shows the small pinion bearing race removed and the 2 pieces I used to get it out - an old Audi wheel bearing inner race and a piece of hardware. These 2 pieces are placed against the Pinion bearing race from within the Diff.
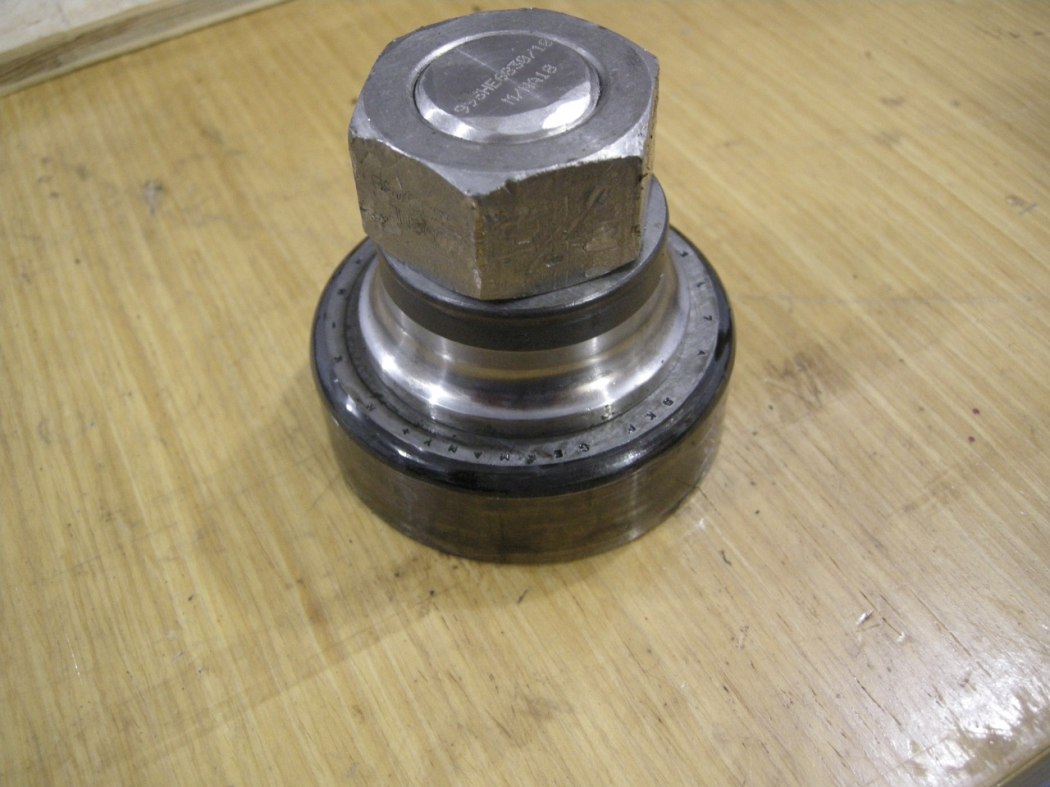
This picture shows the extension bar required to reach inside the diff case with the press.
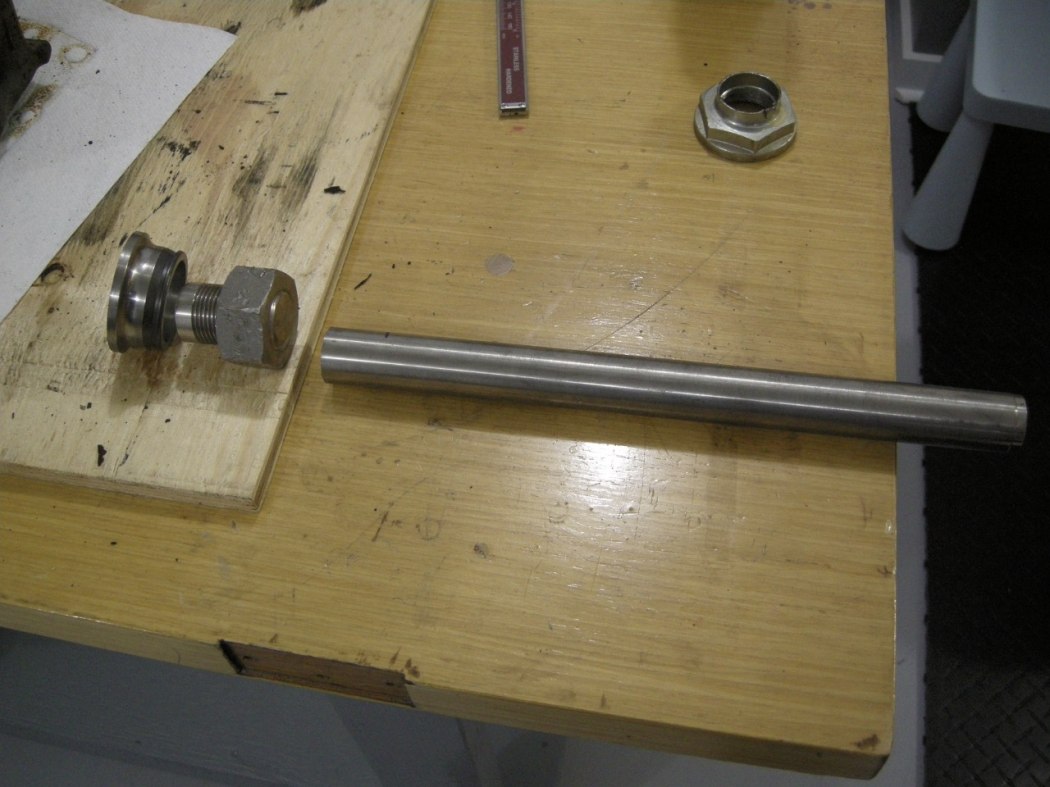
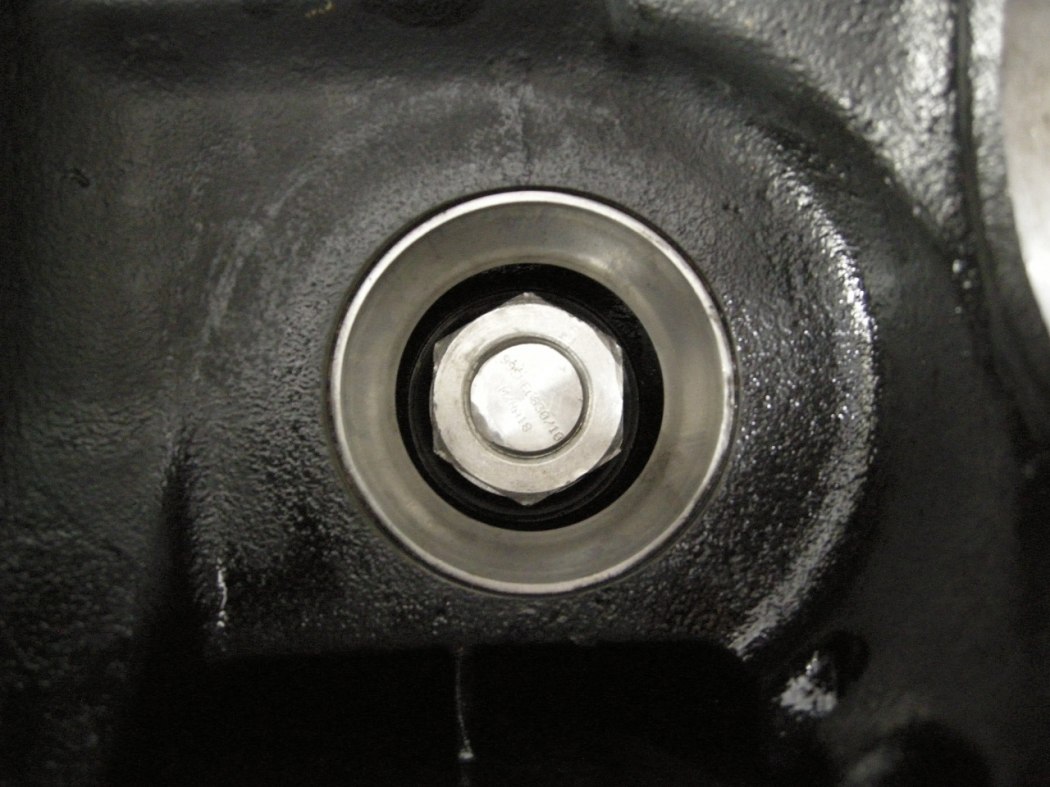
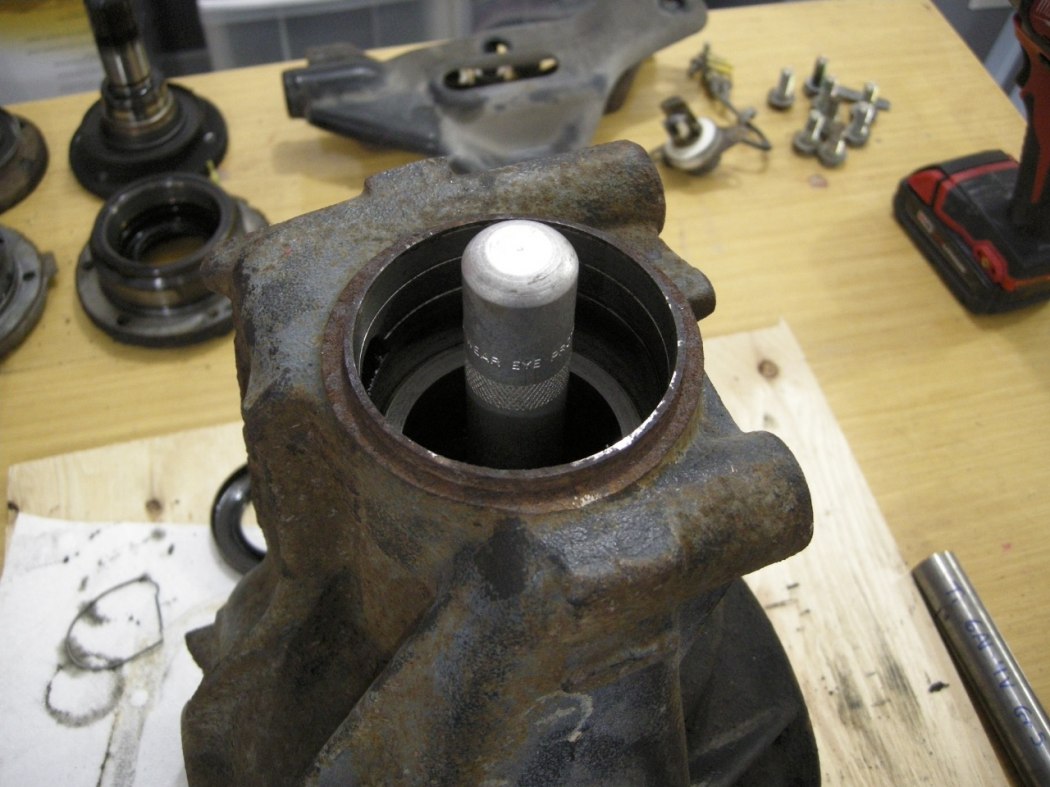
This picture shows the 2 pieces dropped in from inside the diff case, on top of the small pinion bearing race ready to press out.
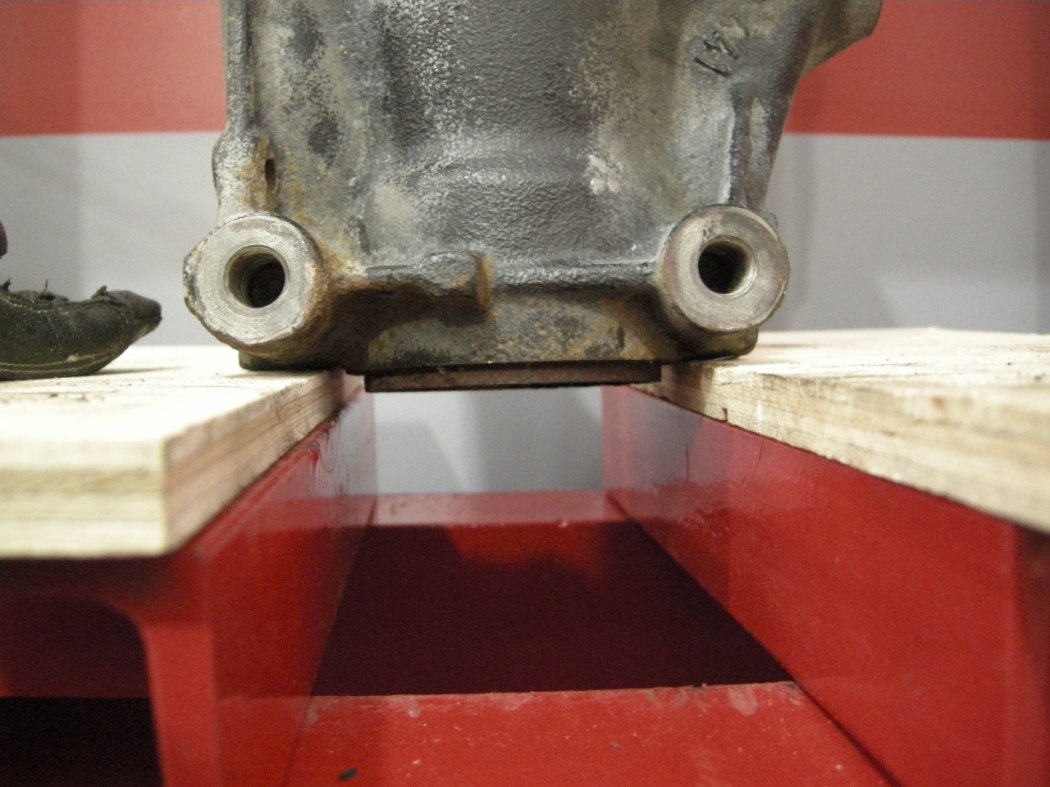
This picture shows the diff case supported in the press; the small pinion bearing race drops out the bottom.
Next is the large (inside) pinion bearing race.
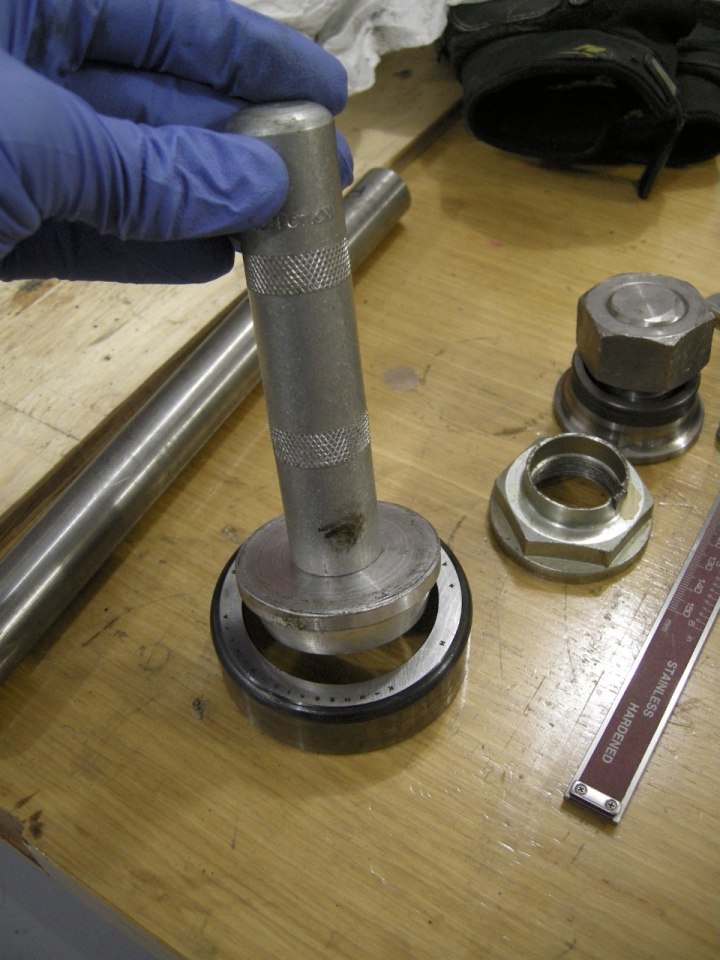
Drive it out with the press in the configuration shown. Fairly straight forward if you’ve made it this far.
Worn Parts:
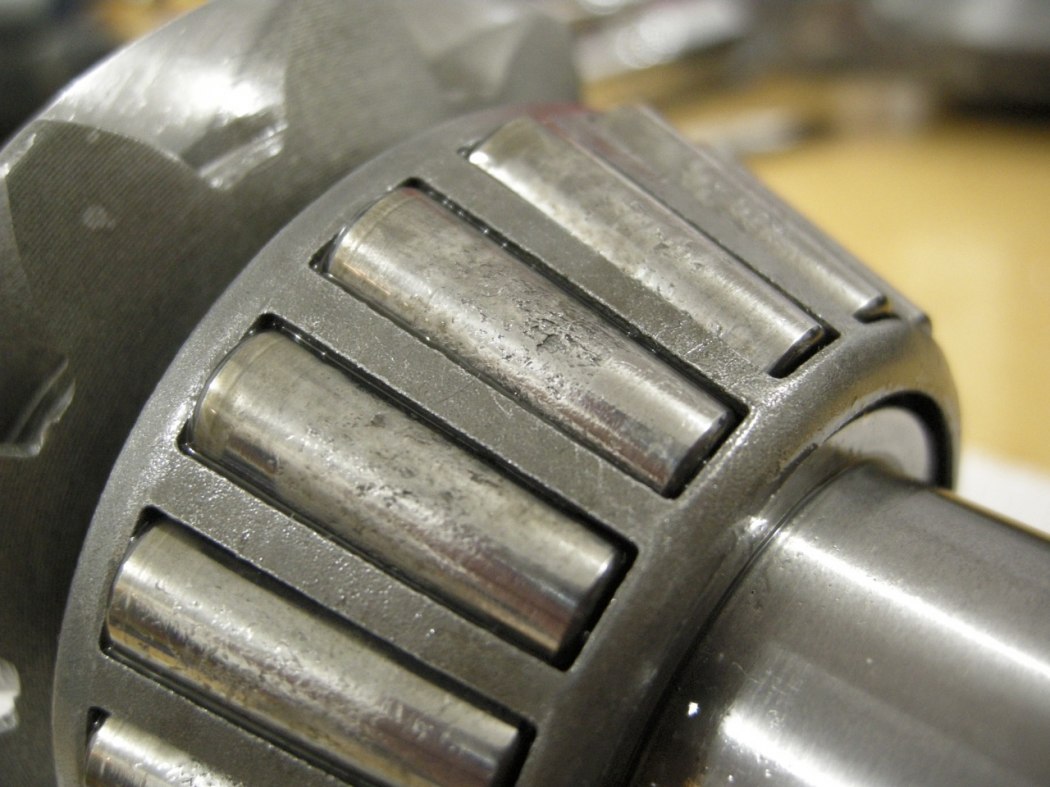
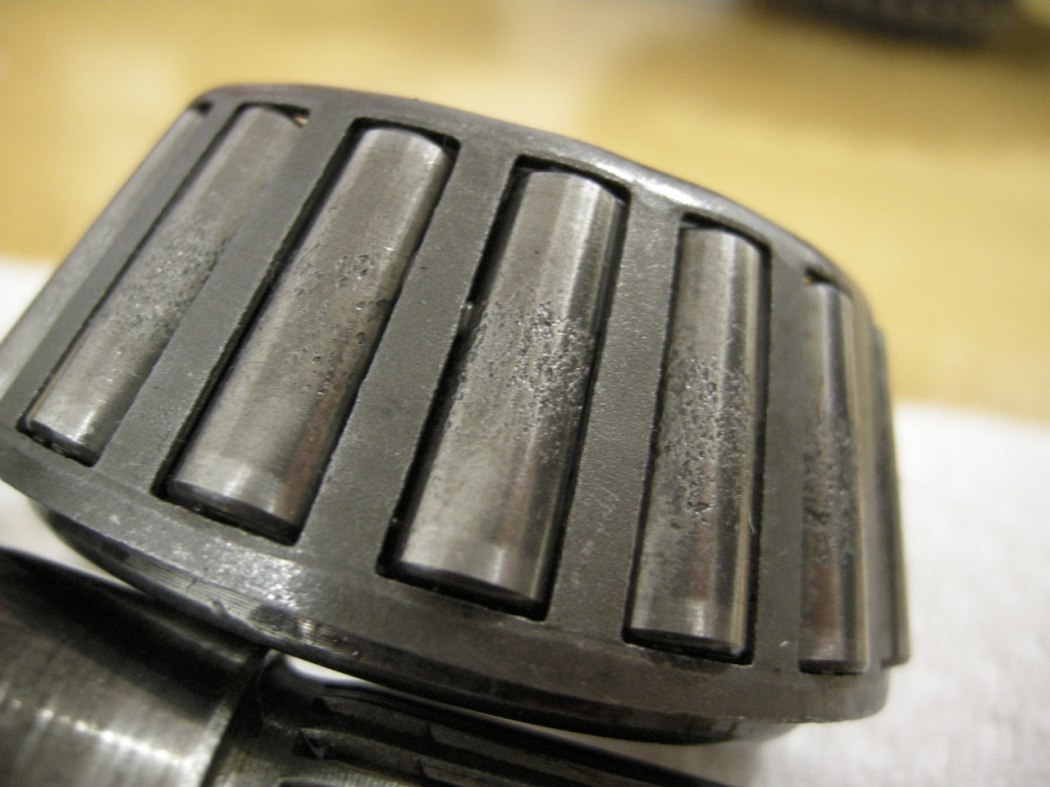
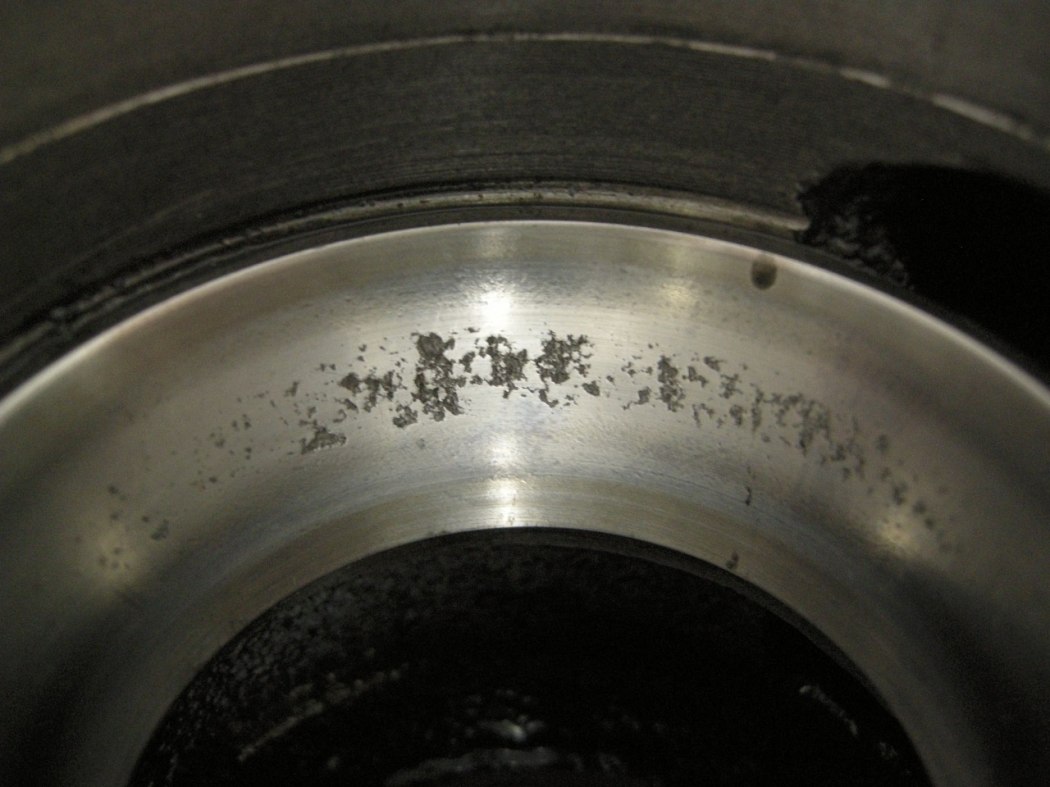
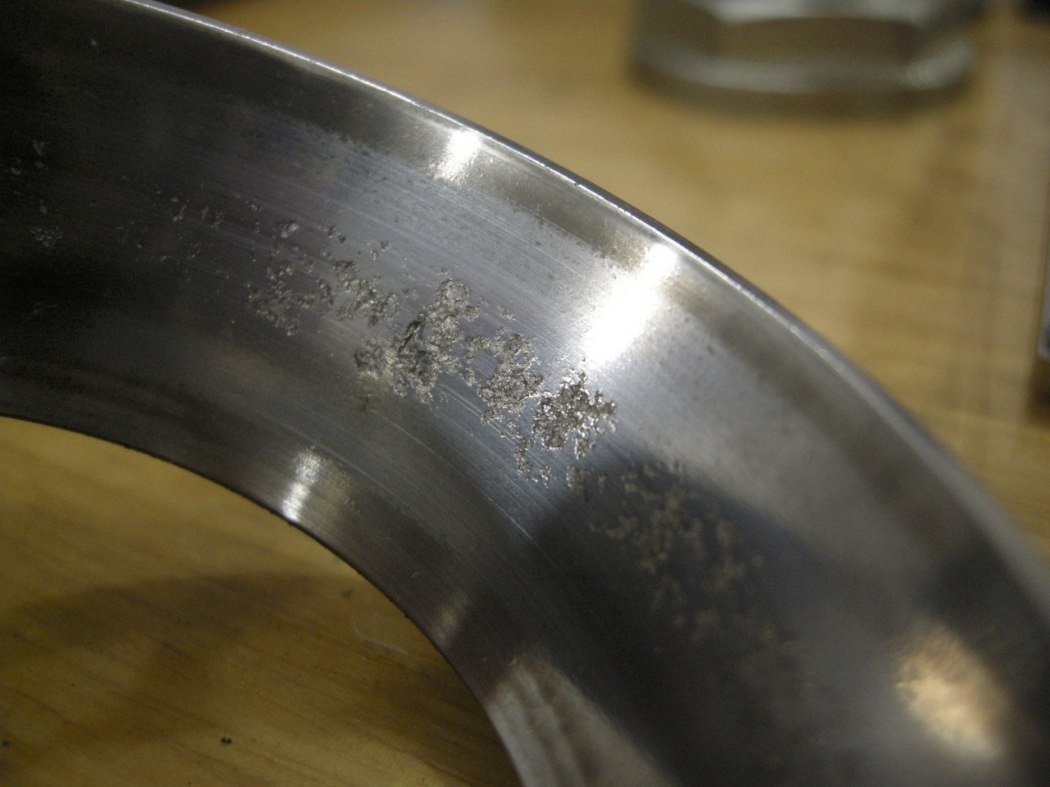
Take a look at your Pinion Bearing rollers and the outer races. Mine were very badly pitted and very noisy when spun in my hand. Definitely the smoking gun in my driveline noise issue.
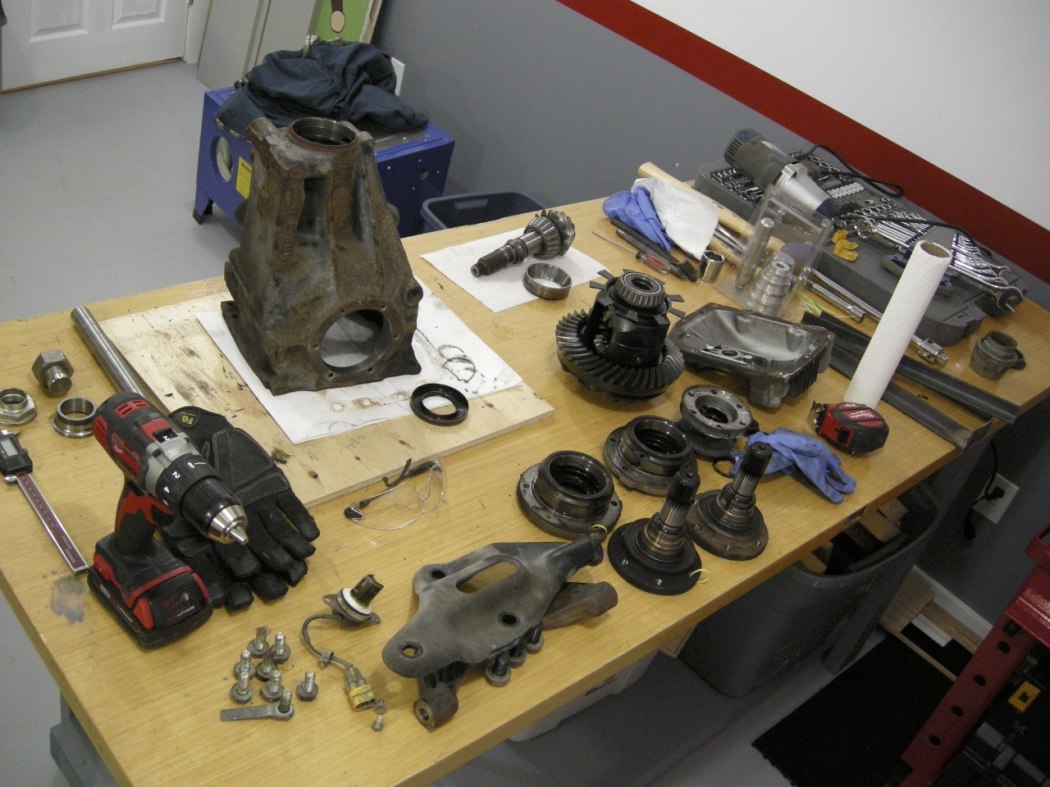
At this point we are almost completely disassembled... keep reading.
Large (inner) Pinion Bearing Removal:
Setup the Bearing Splitter as shown by Sarah.
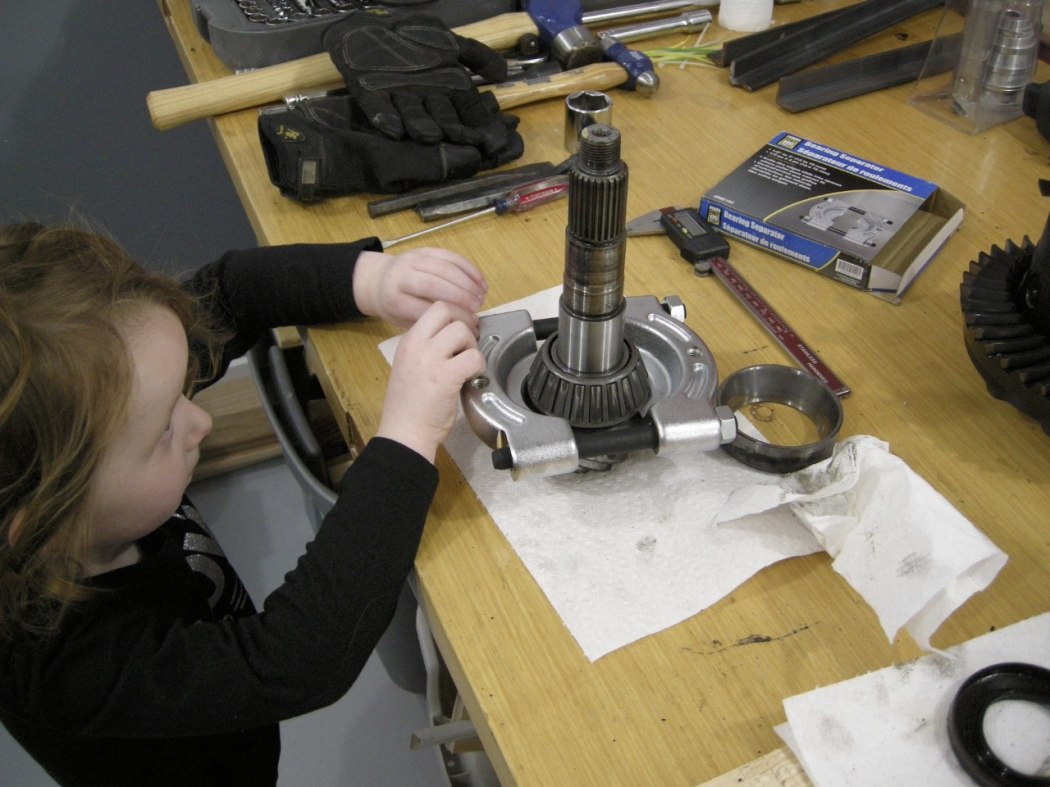
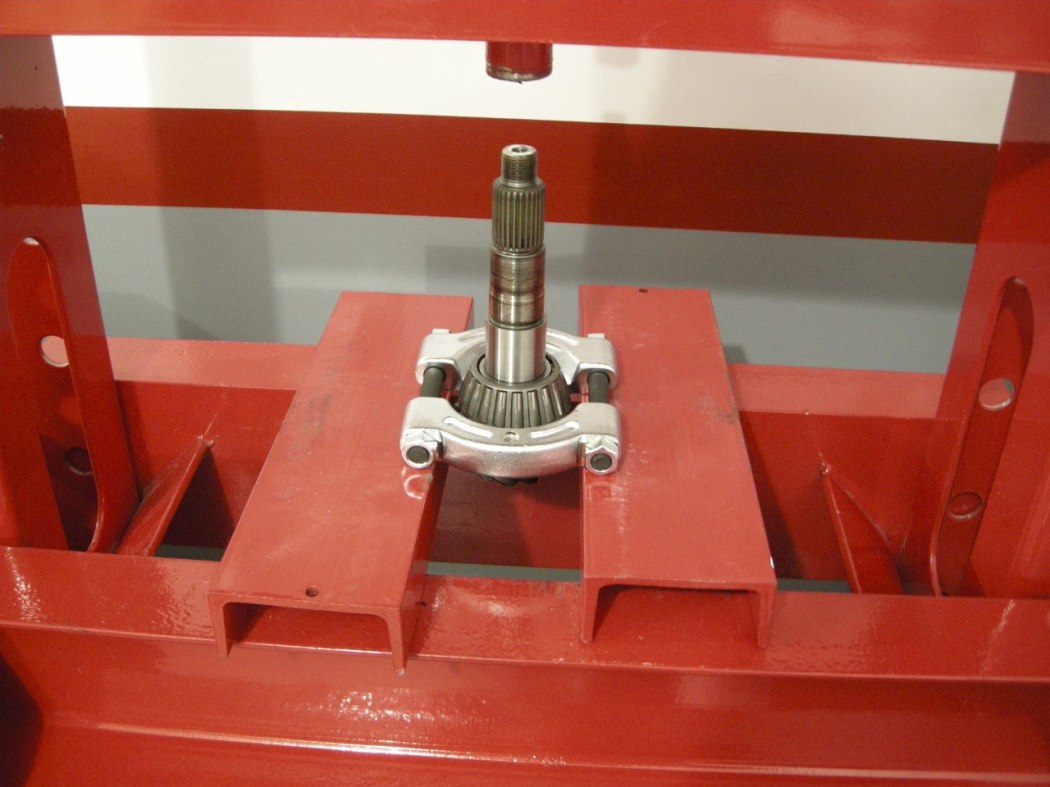
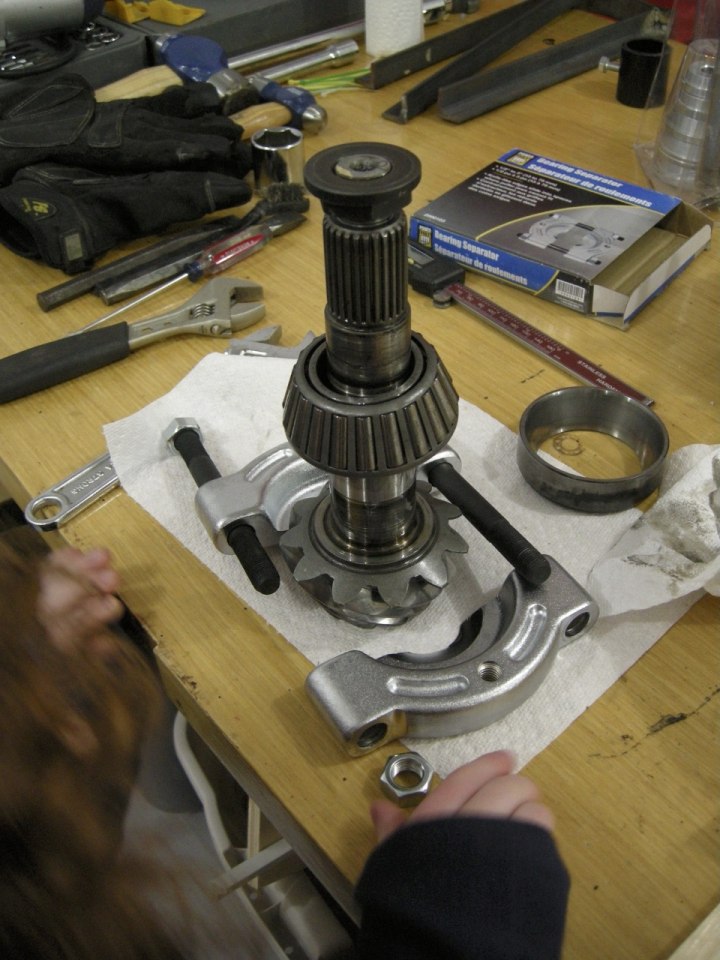
Drive the Large (inner) Pinion Bearing off the shaft with the press.
Carrier Bearing Removal:
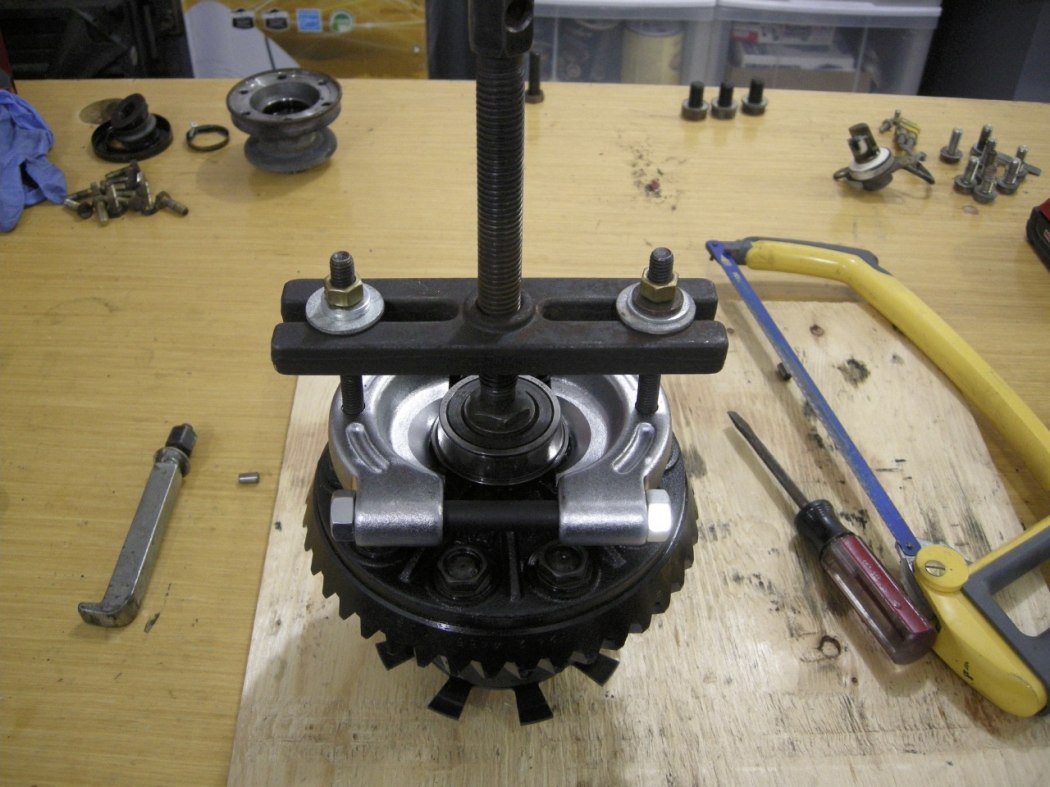
The Carrier bearings require the use of a bearing splitter for removal. I also used a large bolt to fill the space in the center, to serve as a platform for the puller.
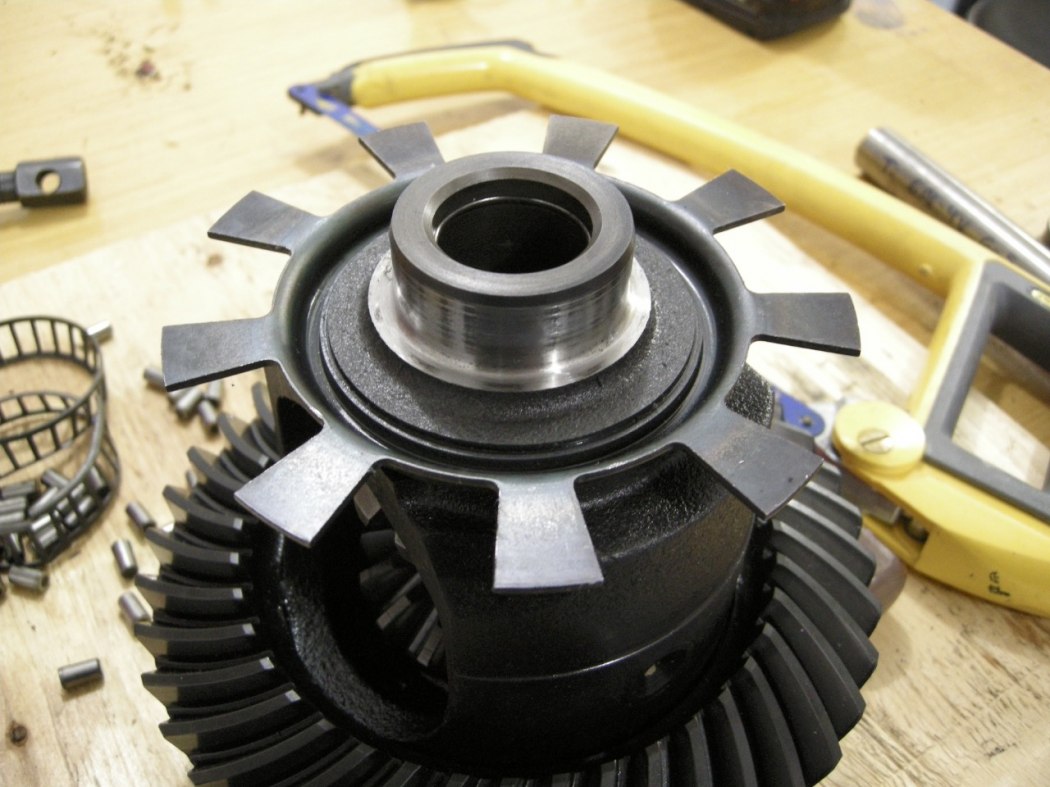
Start with the Bearing on the Ring Gear side. Cut through the roller cage and pry it off. This leaves the inner race on the Diff.
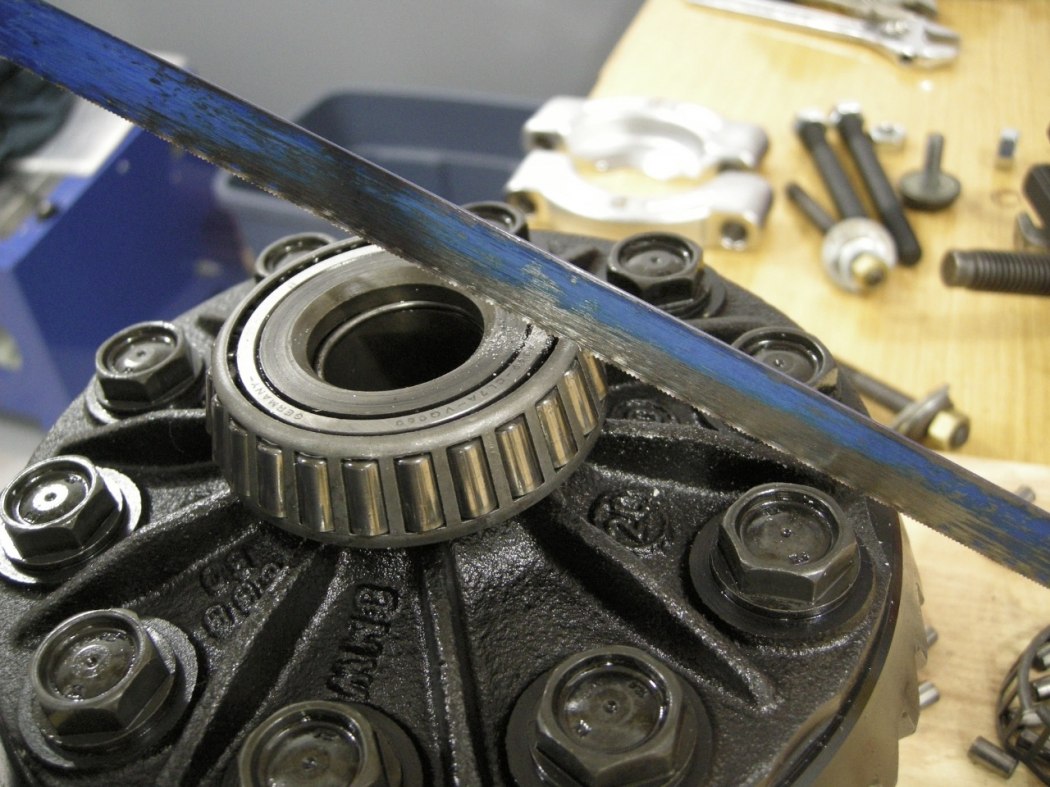
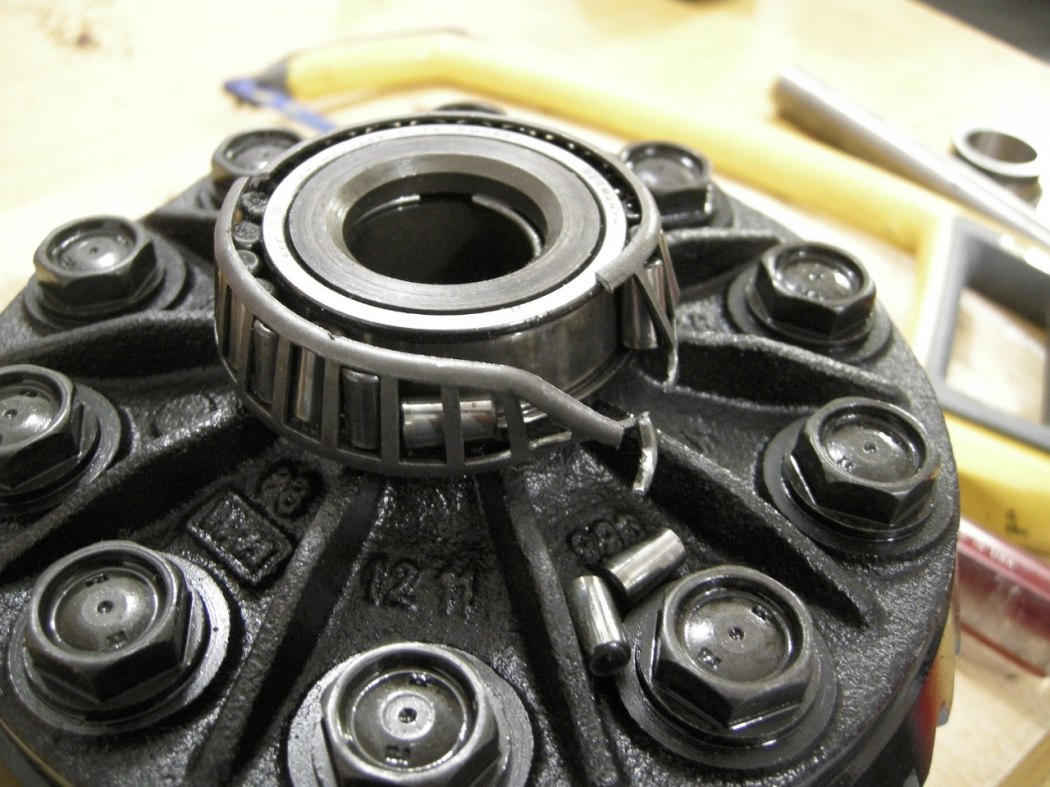
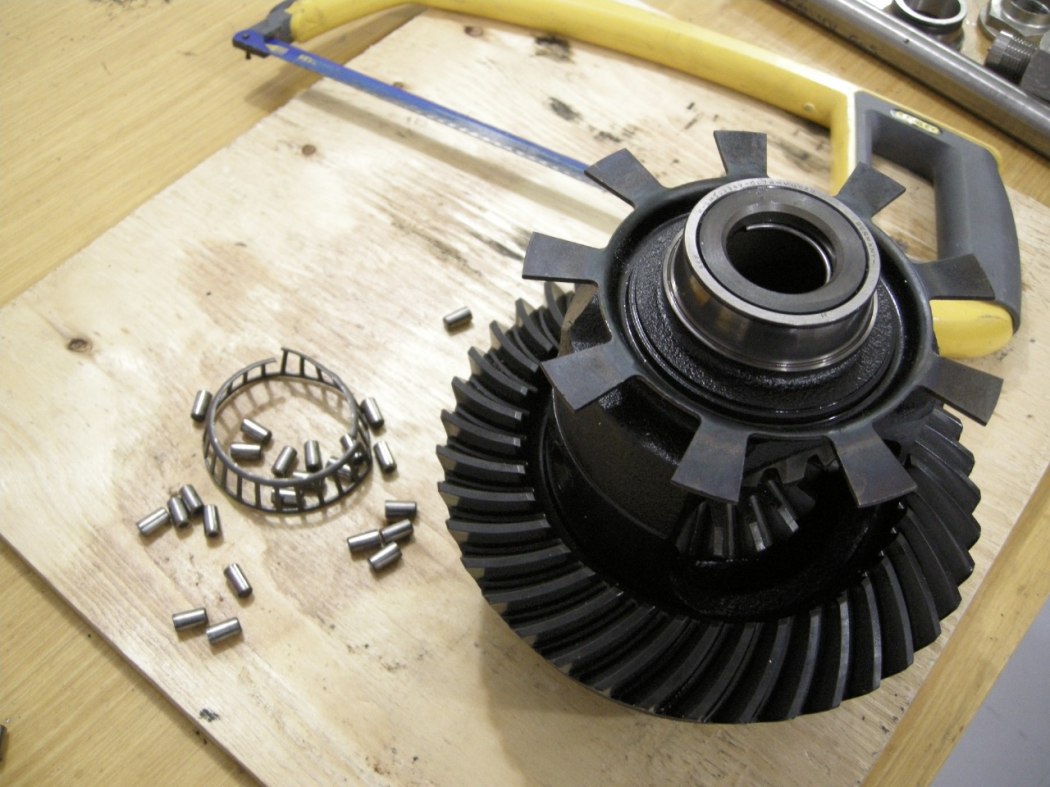
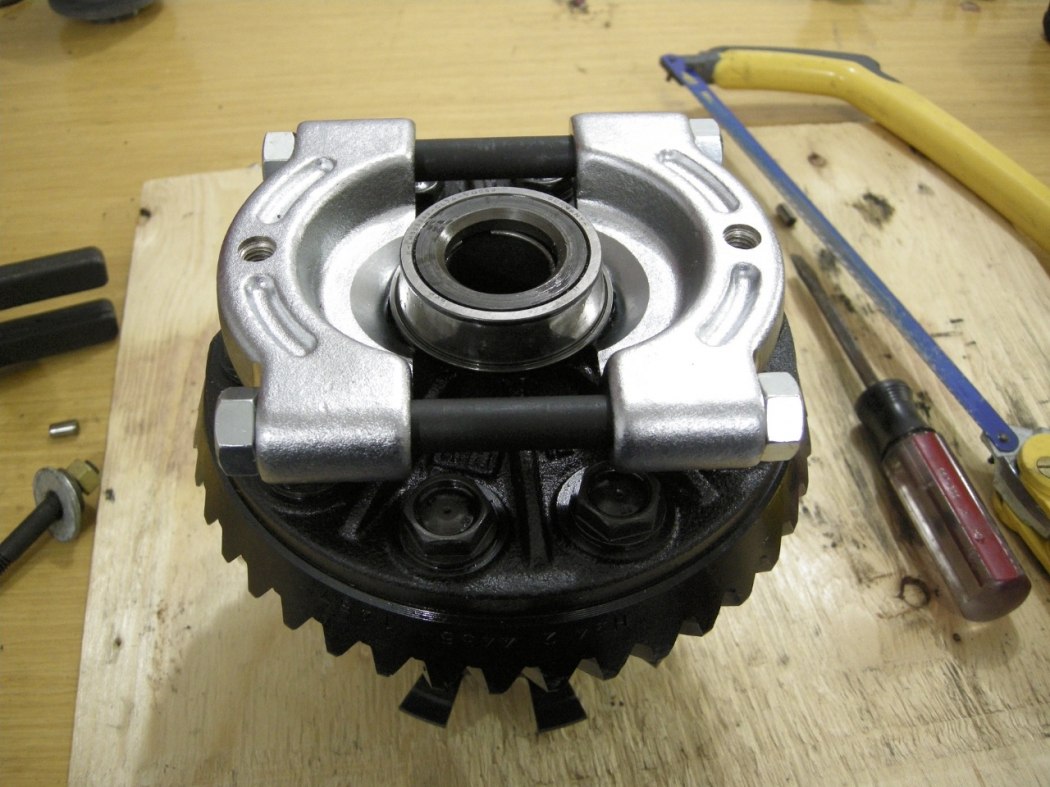
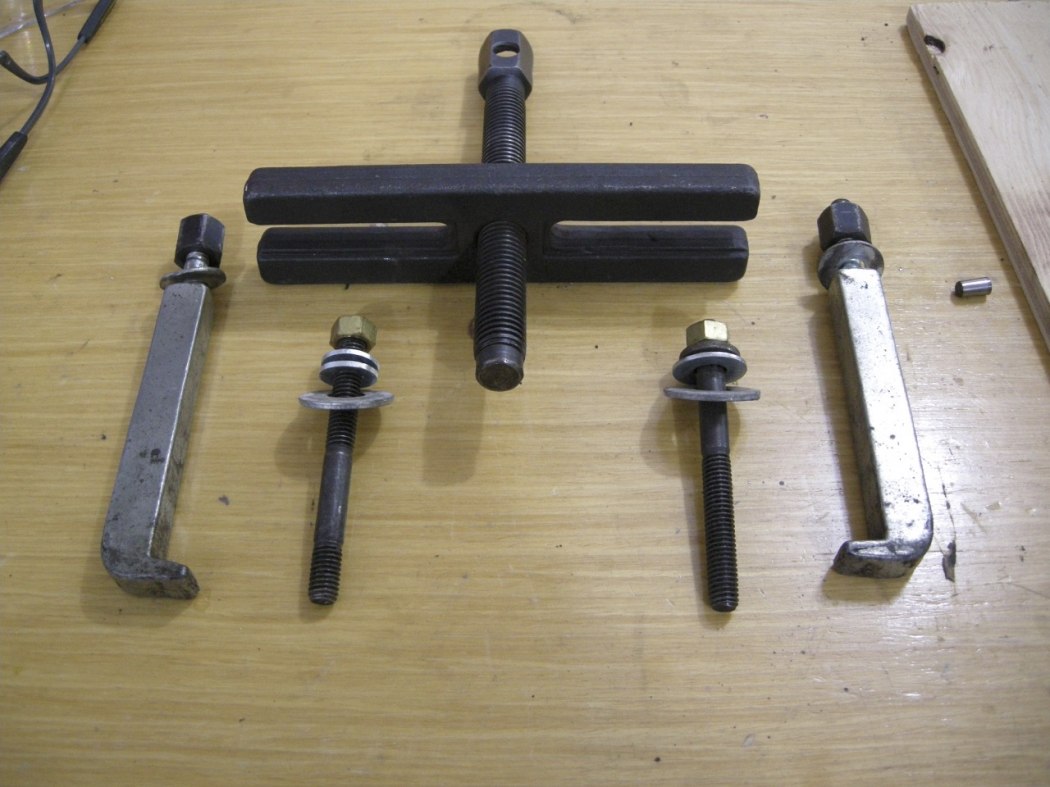
The press cannot be used for this operation because it is impossible to support the bearing splitter on the press plates. I converted a 2-jaw puller to interface with the bearing splitter, using some 3/8" studs and nuts. Start cranking and the bearing race will slip off.
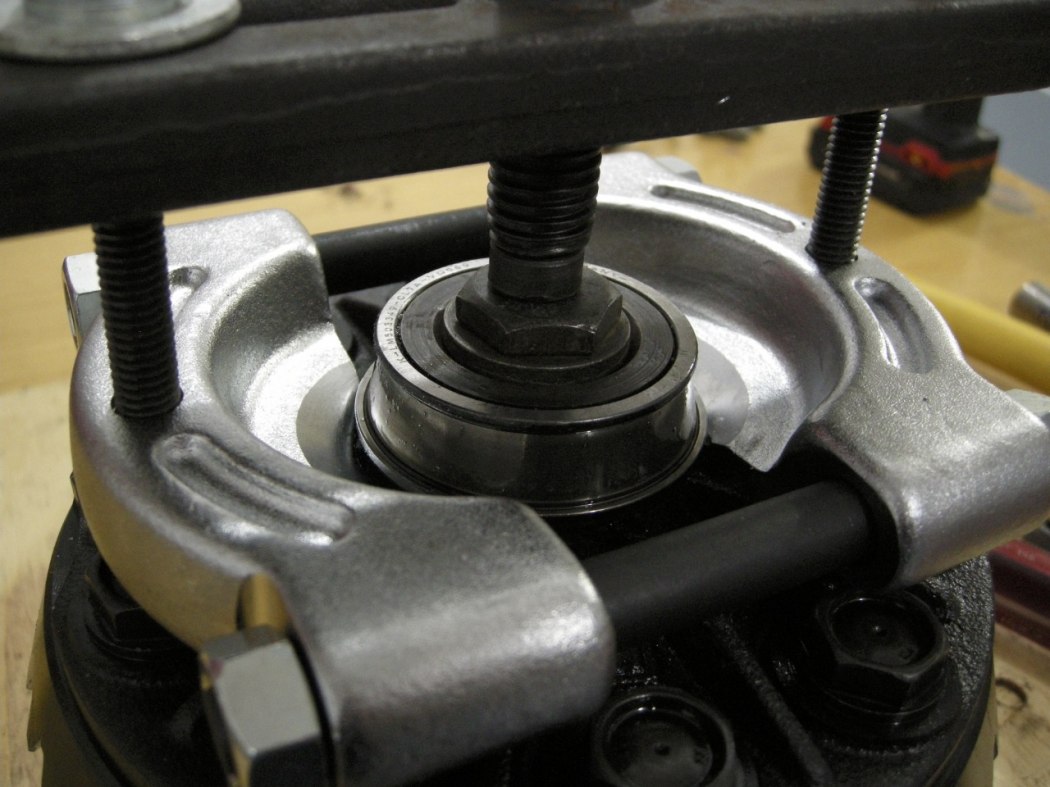
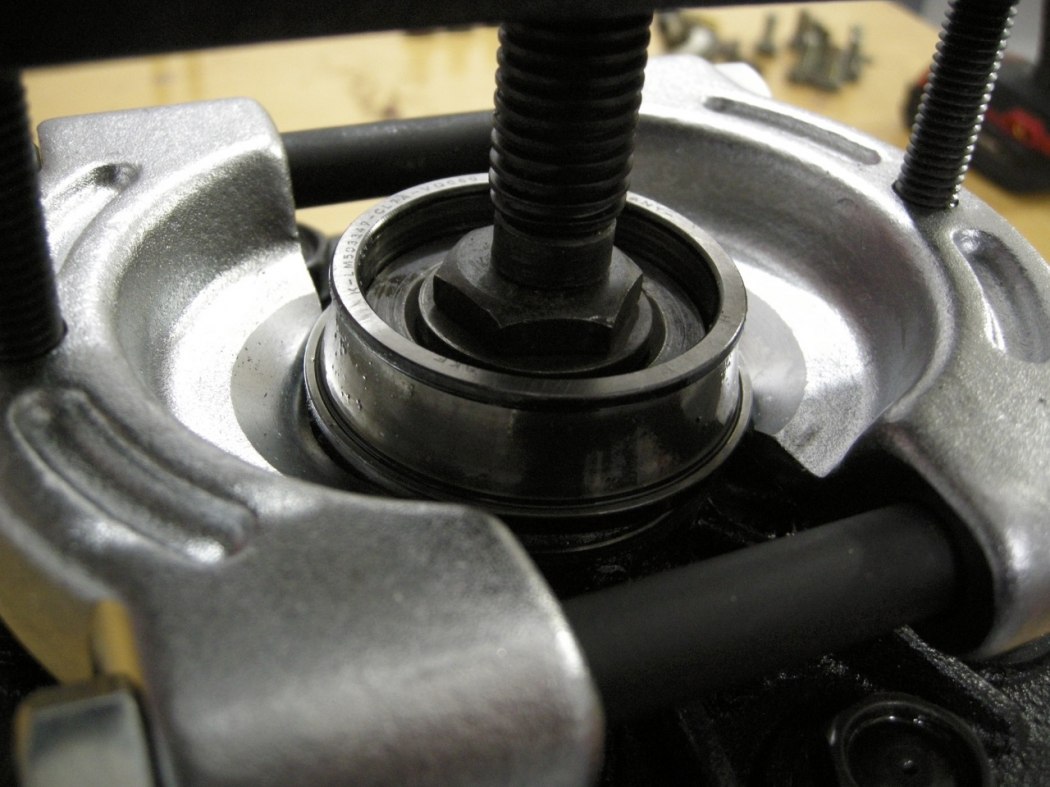
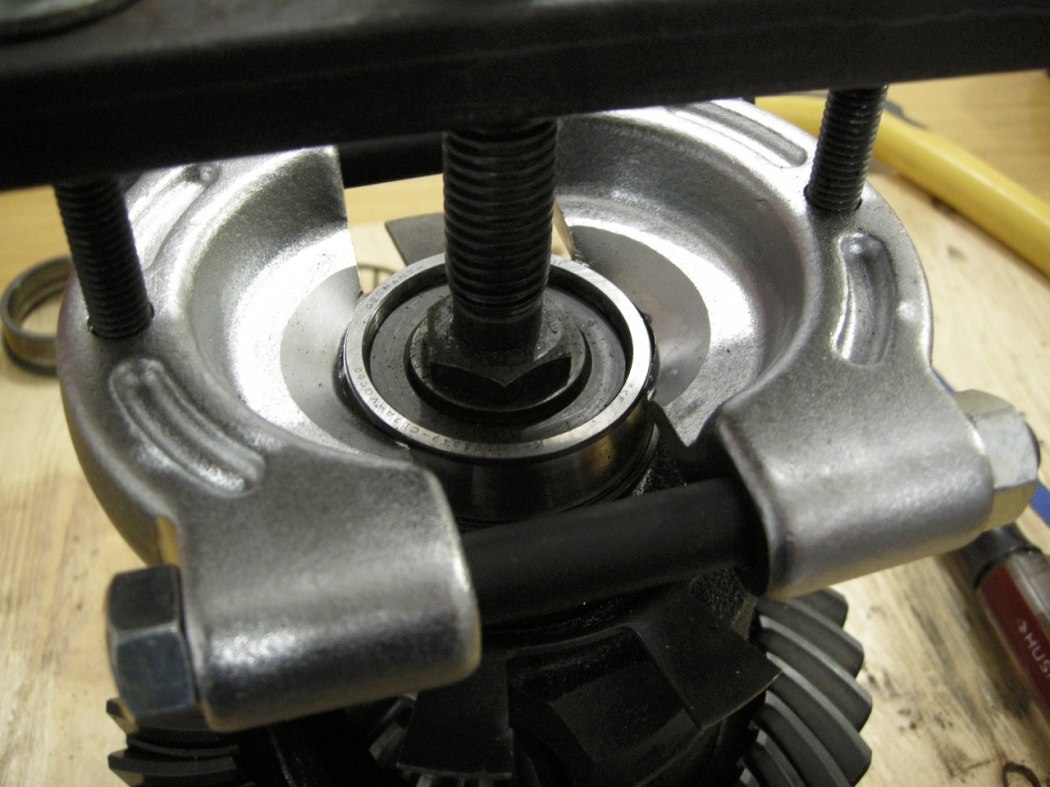
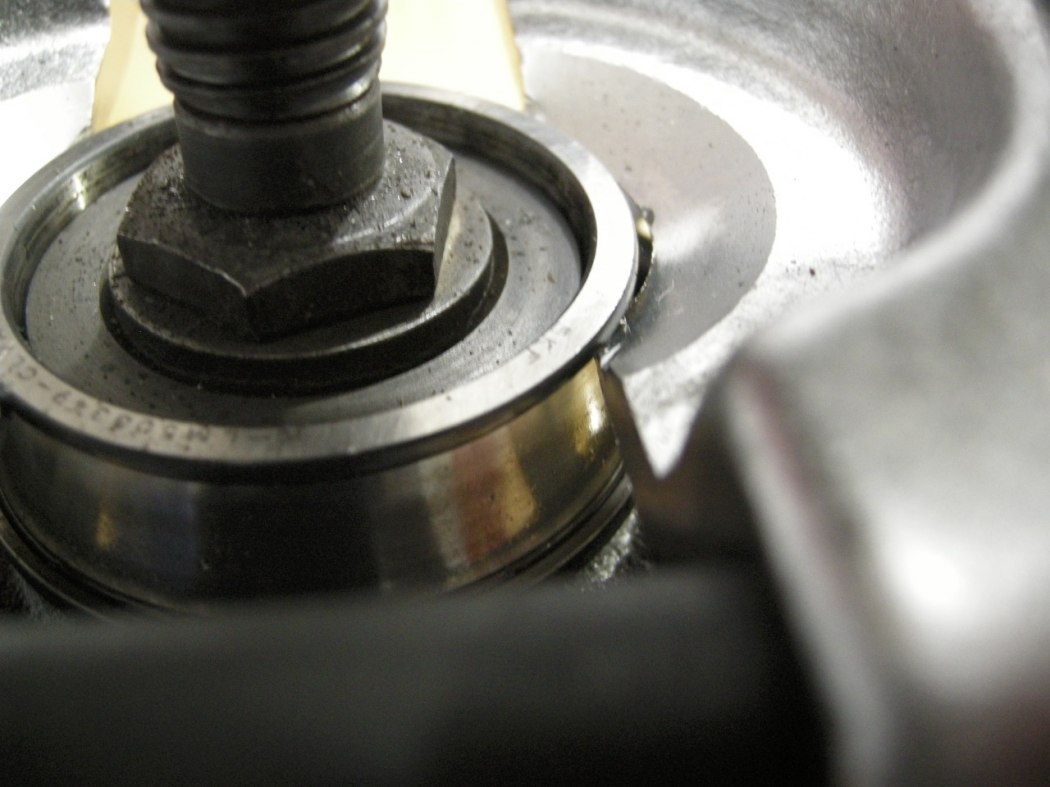
For the other side of the Diff with the speed sensor toothed ring, perform the same operation as the previous Carrier Bearing except the Bearing Splitter will engage with the top lip of the bearing race. There isn't much for the splitter to catch on so make sure the splitter is tightened up enough.
Bearing Cap Seals and Carrier Races:
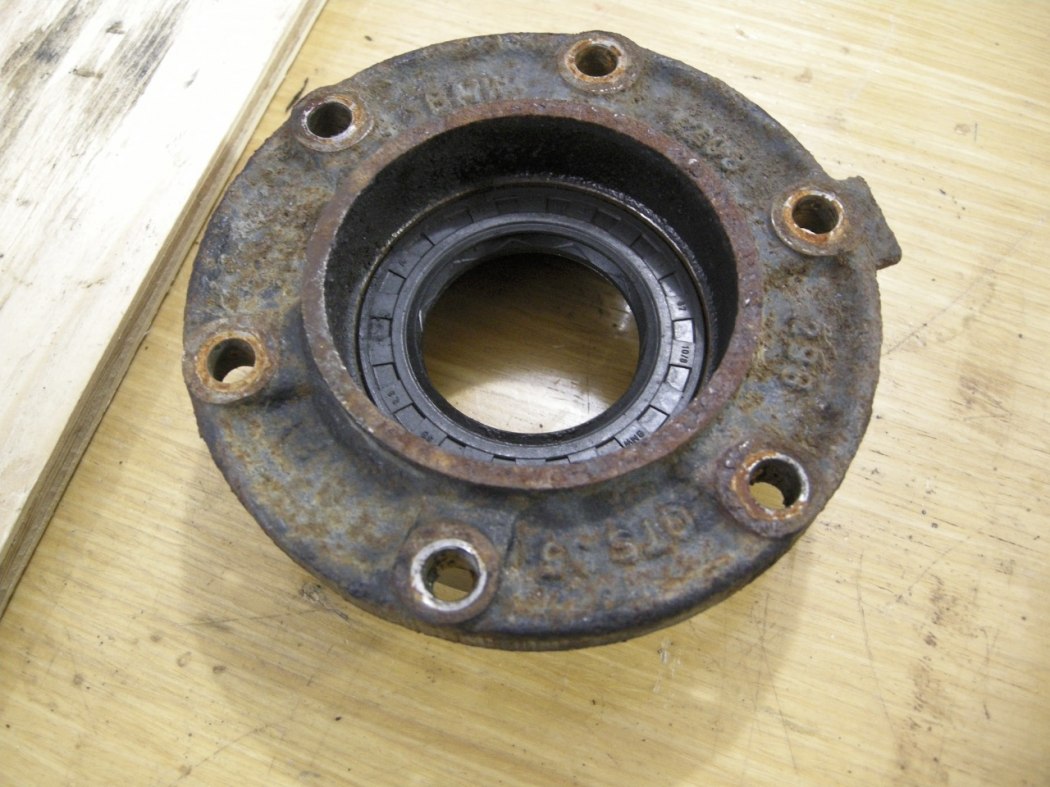
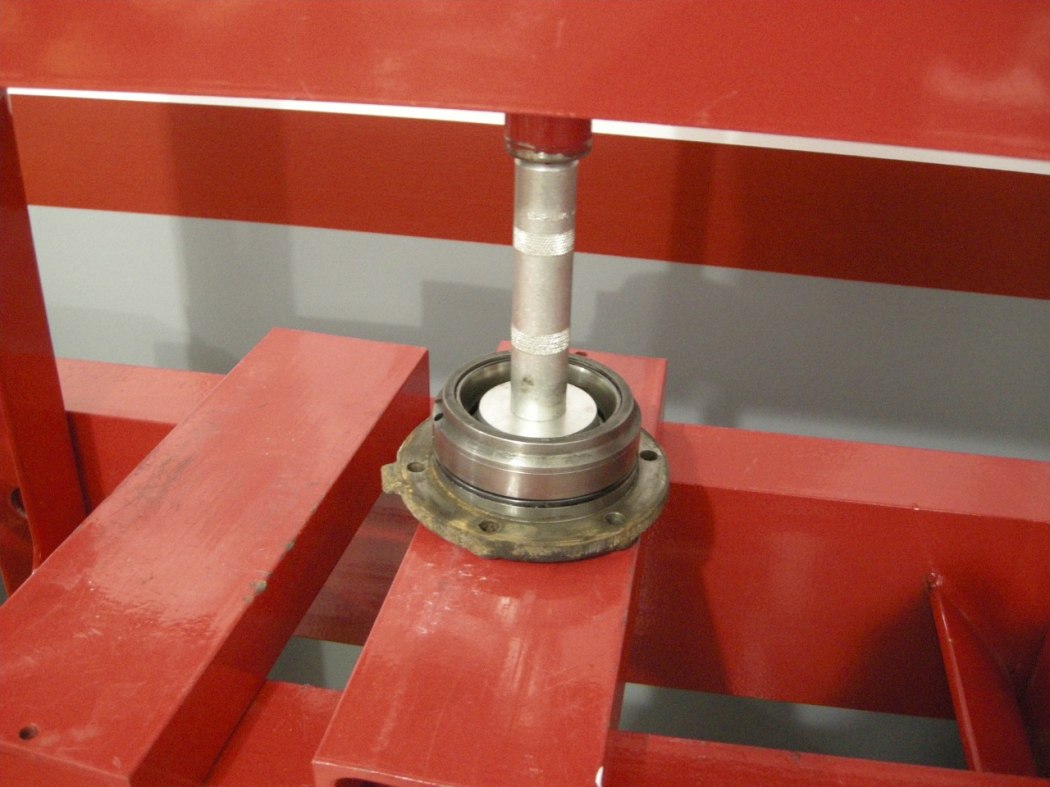
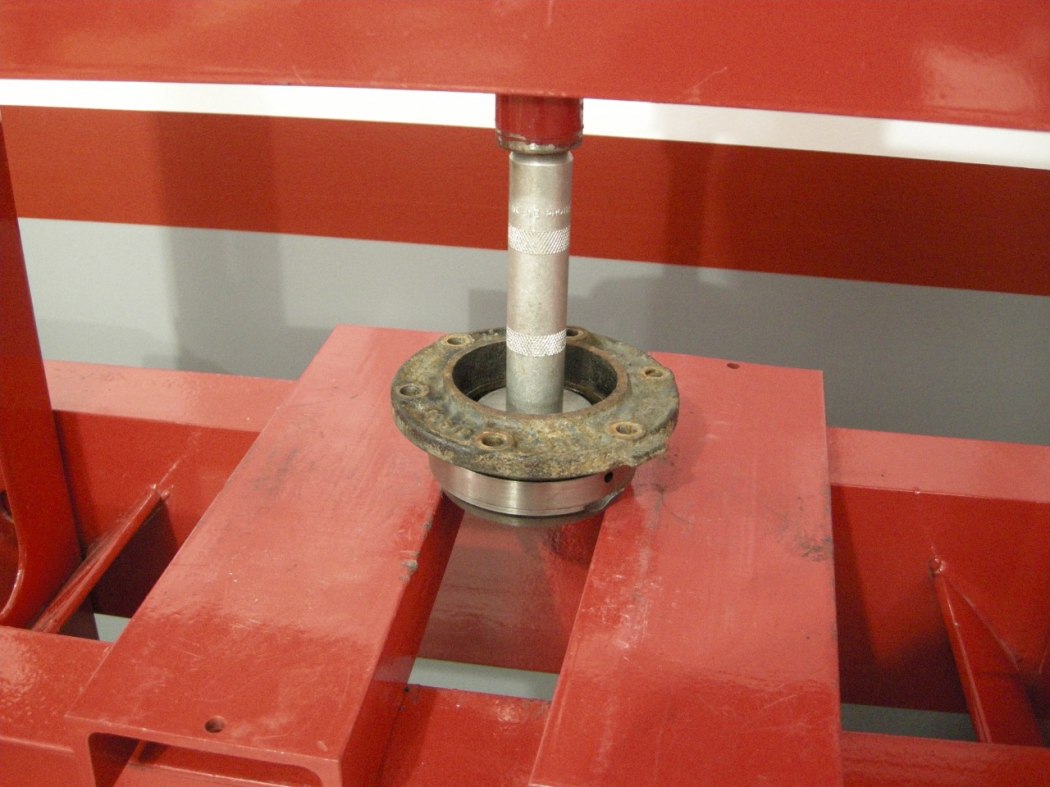
Last but not least, the Bearing Cap Seals and bearing races.
Simply drive the Seals out using the appropriate driver, and same for the bearing race.
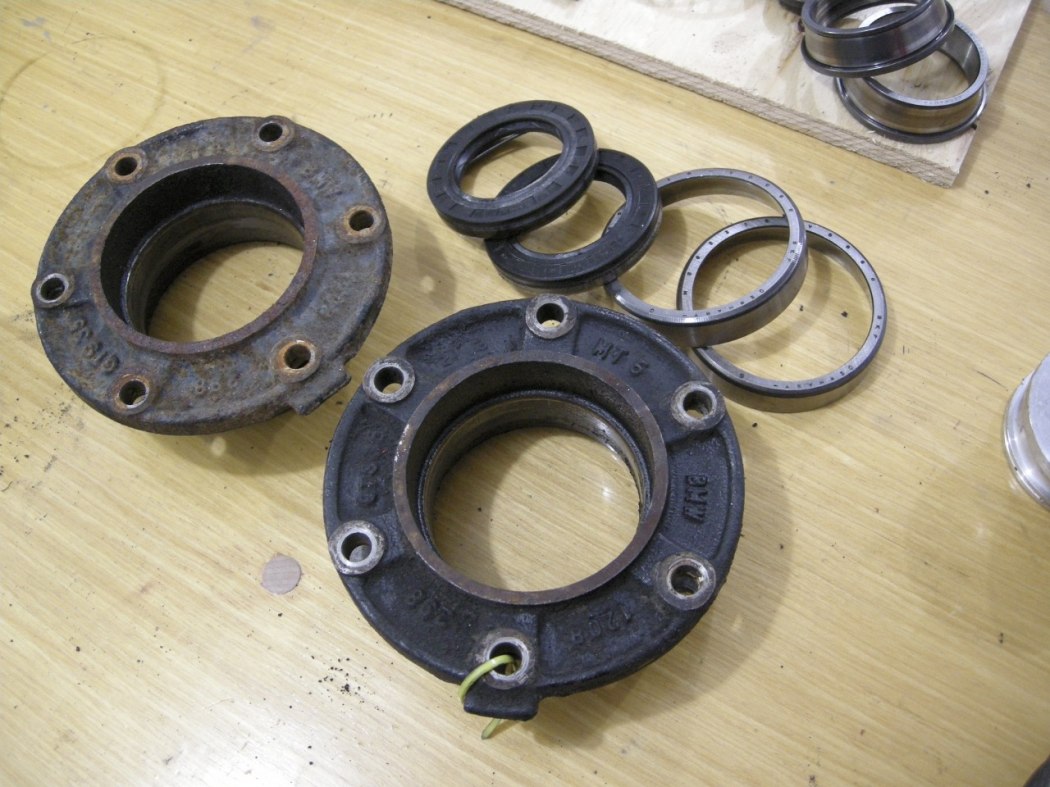
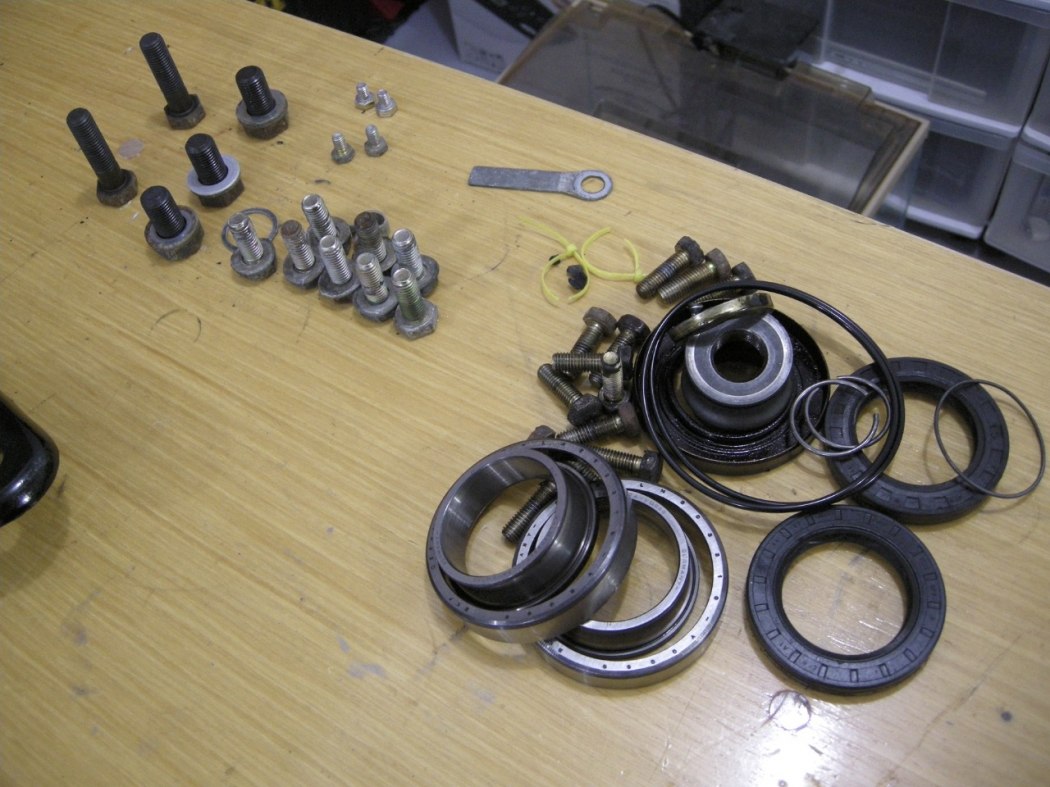
Half way point:
At this stage the diff is 100% disassembled. Consider how much time you've spent up until now and the pile of scrap parts can almost fit in one hand.
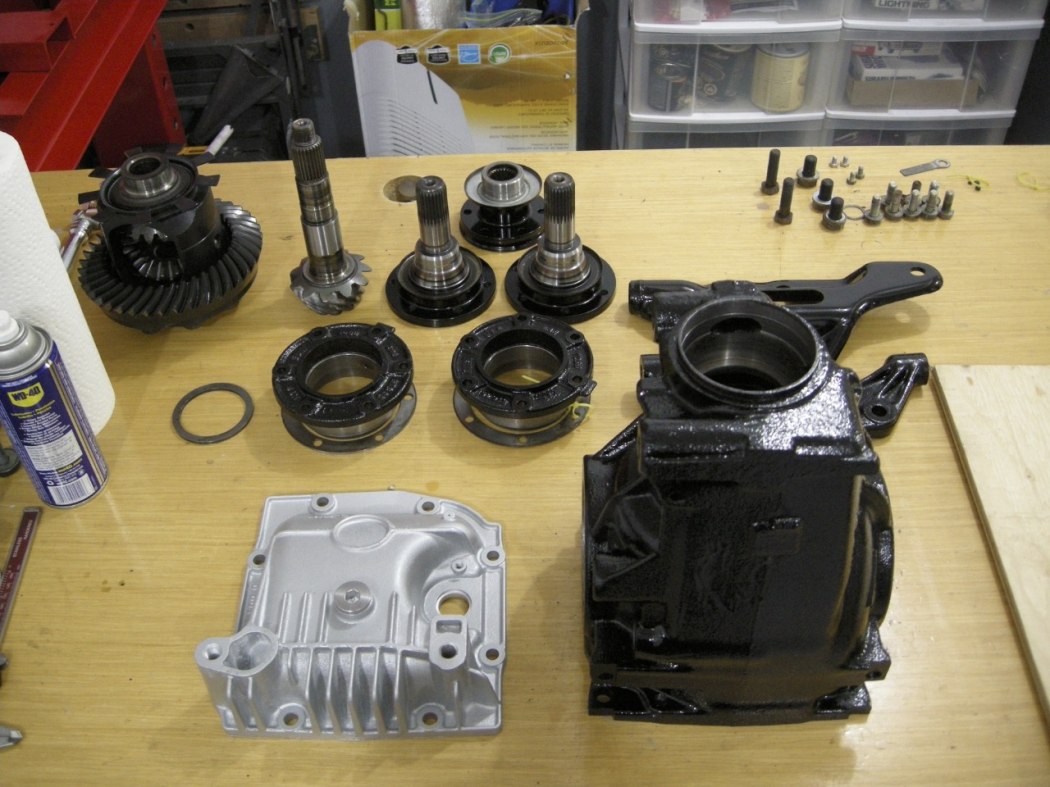
Clean clean clean and paint:
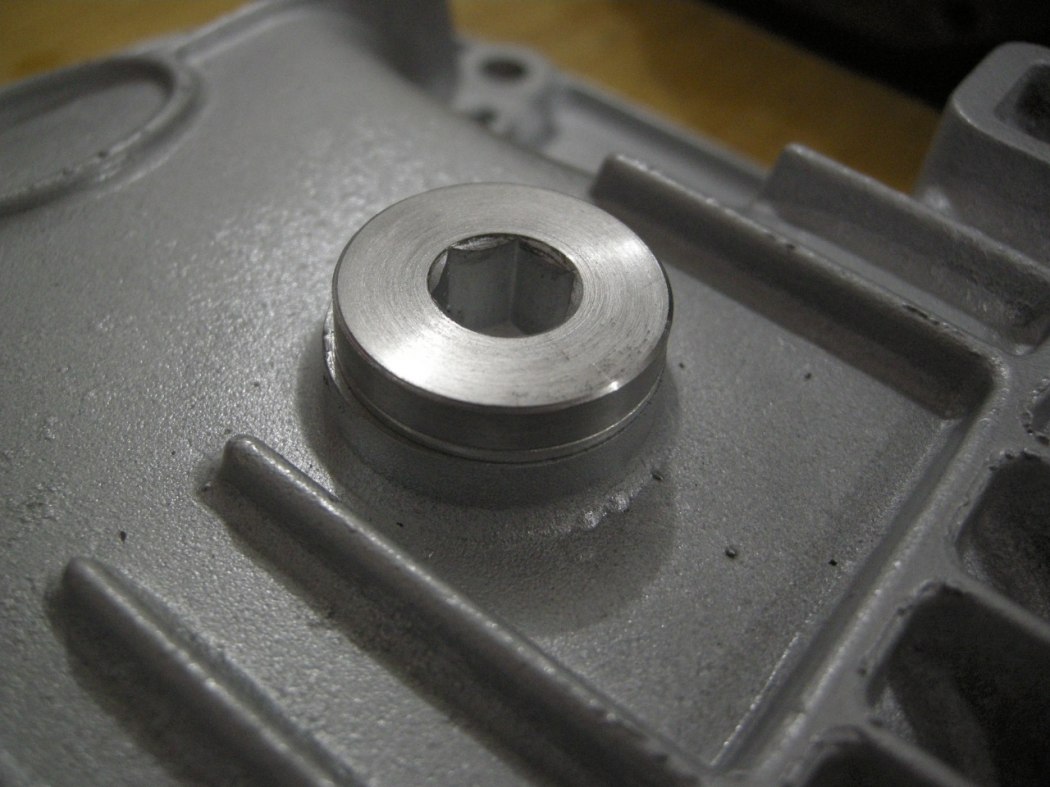
Now is the time to clean and paint everything. The amount of effort you exert here is up to you. I don't have an operational sand blaster so I stripped everything by hand. Took a bit of time but was worth it. I even turned the drain / fill plugs on the lathe to remove the surface rust. In the end I painted them silver to somewhat prevent them from rusting. Because I used a hacksaw to cut the Carrier Bearing cage, make sure to really flush out the diff of any metal particles. Same goes for the diff case. Flush everything thoroughly.
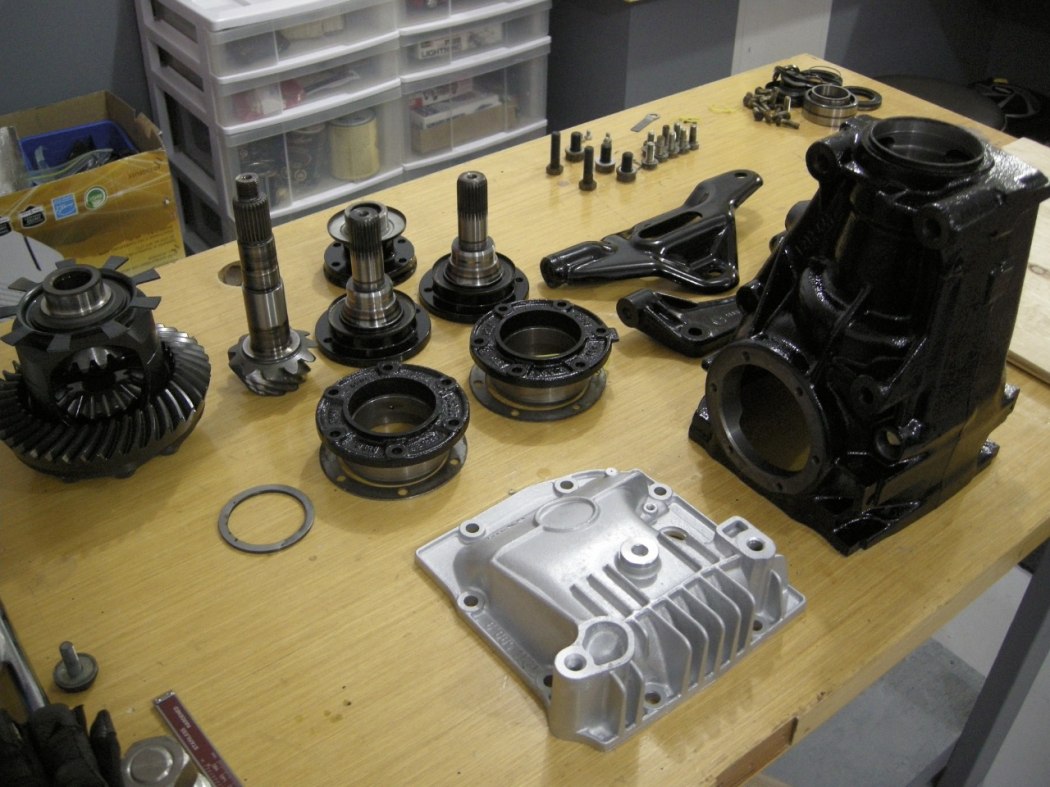
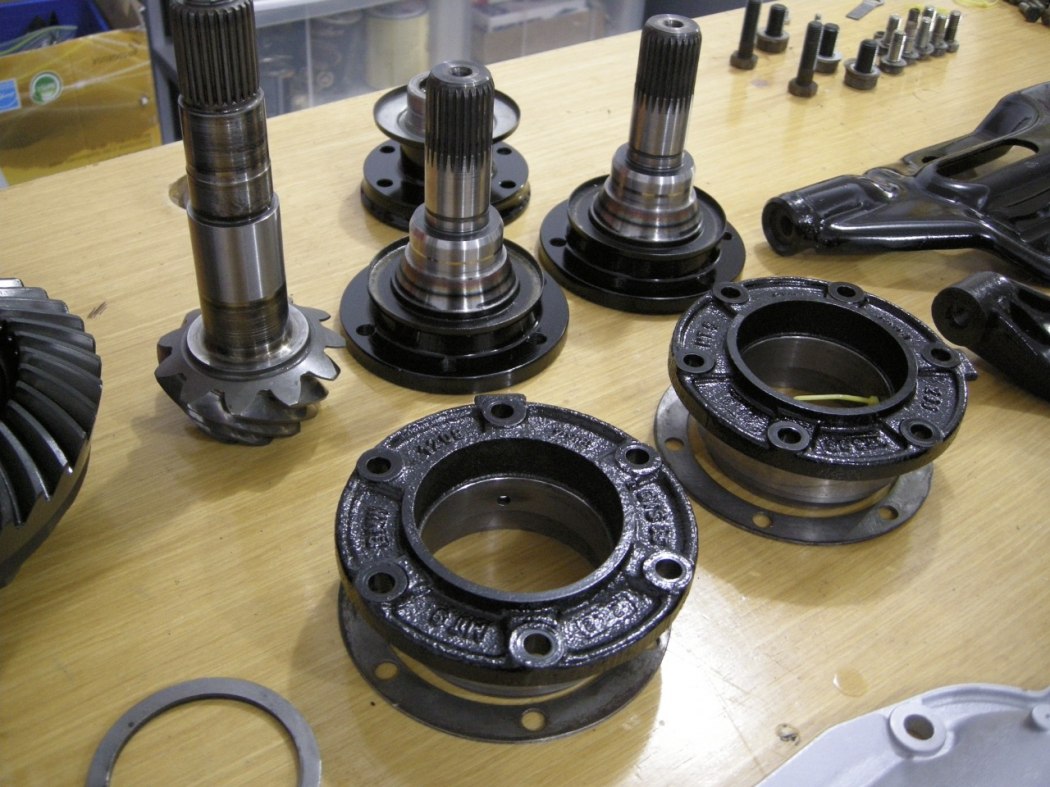
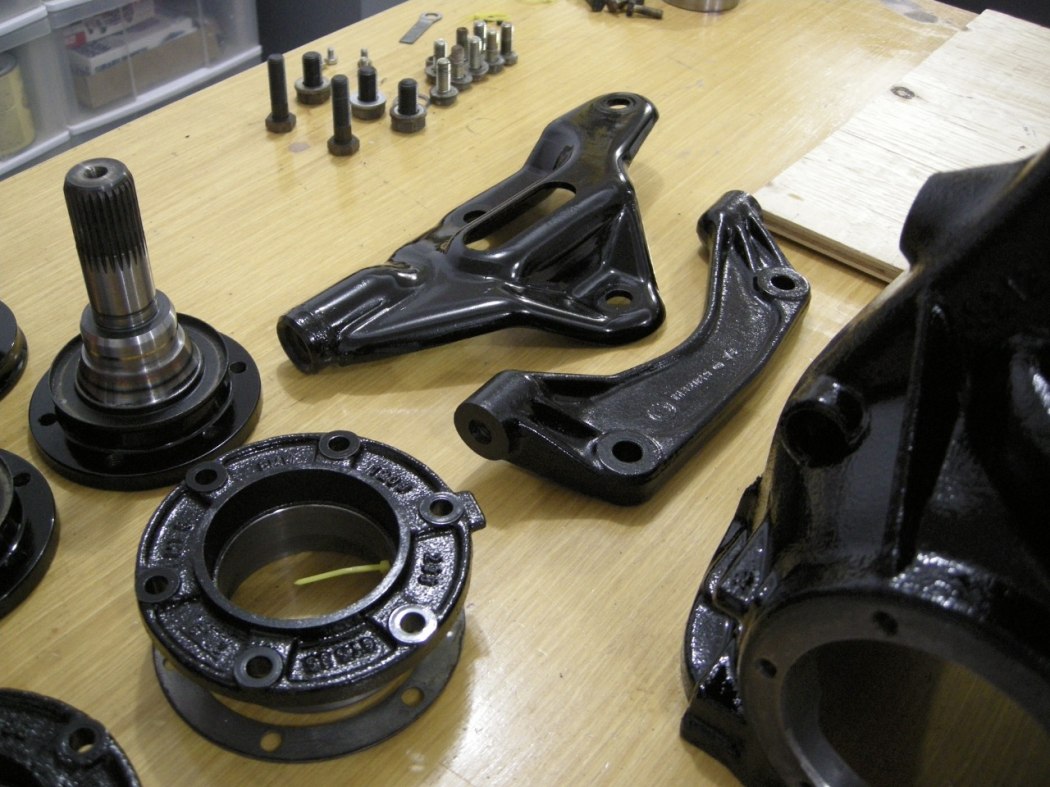
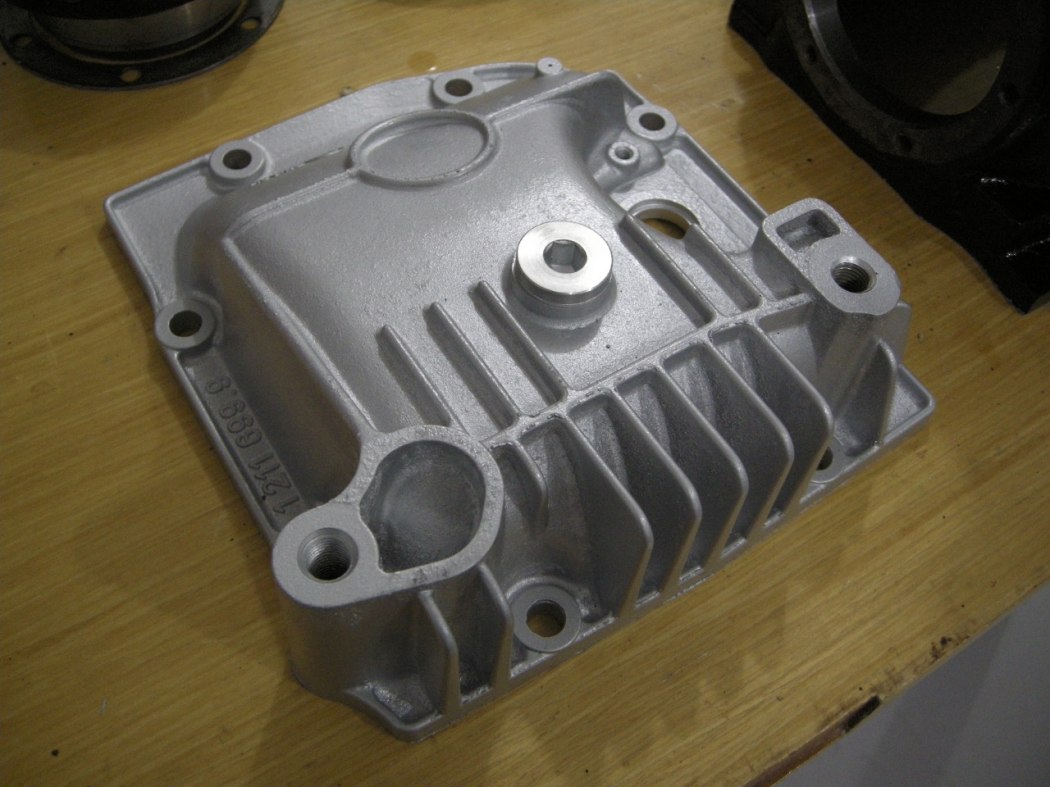
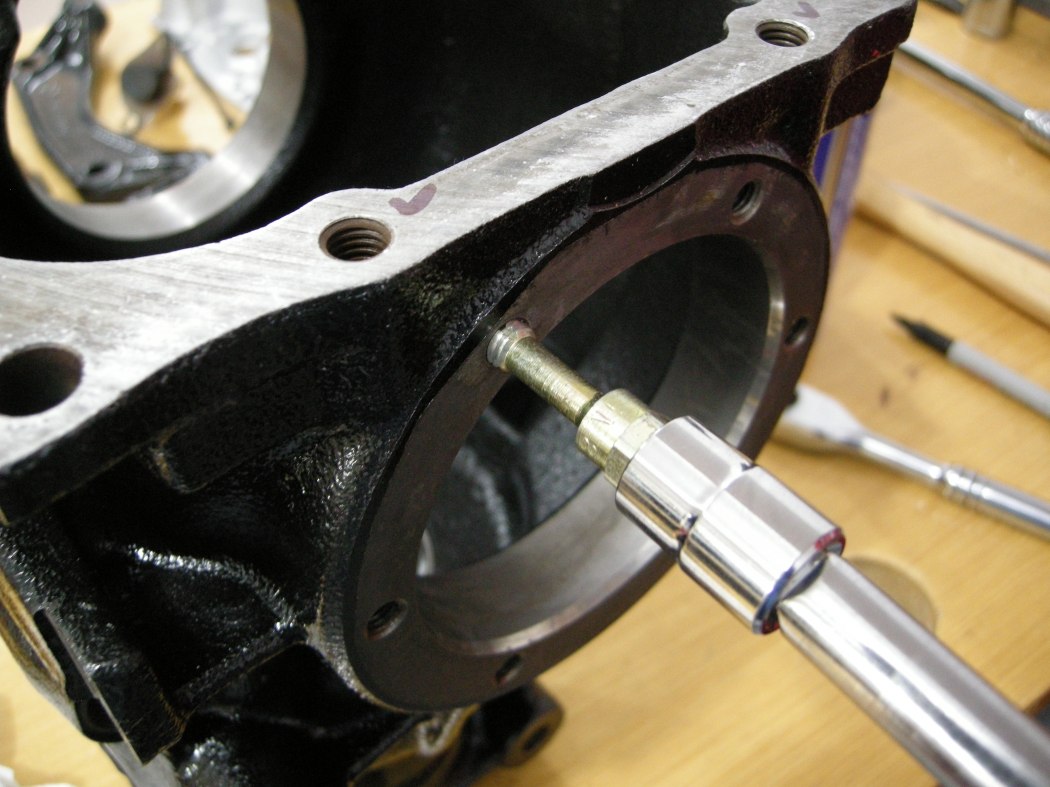
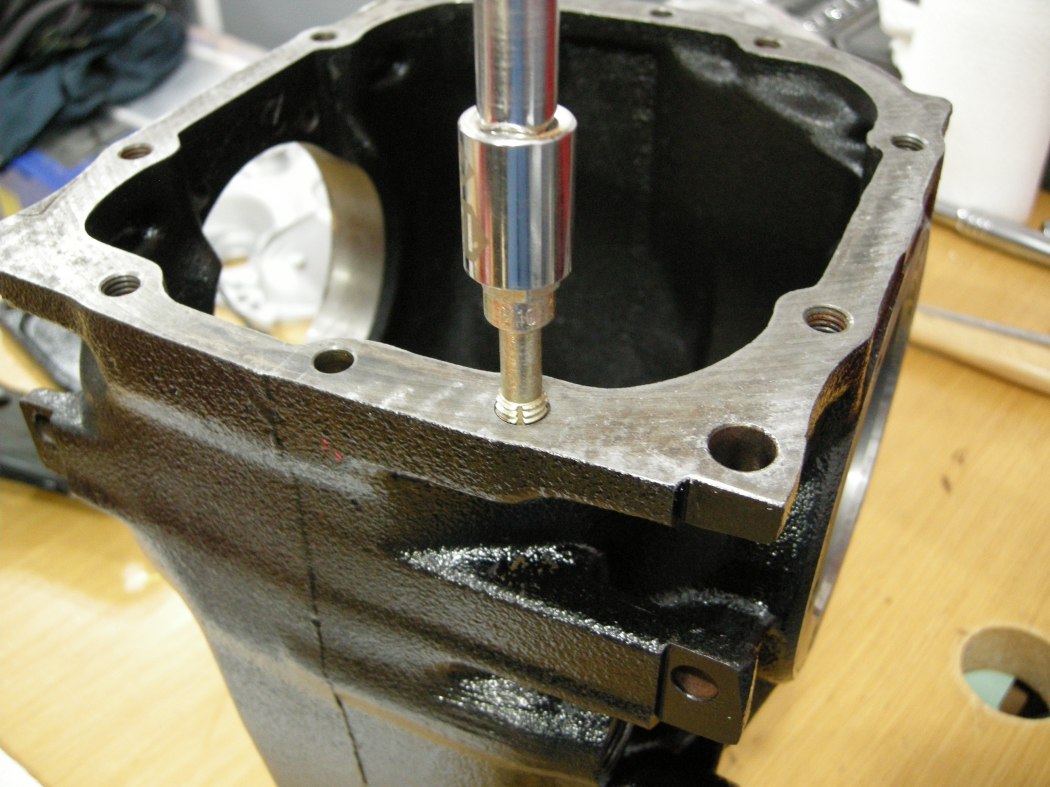
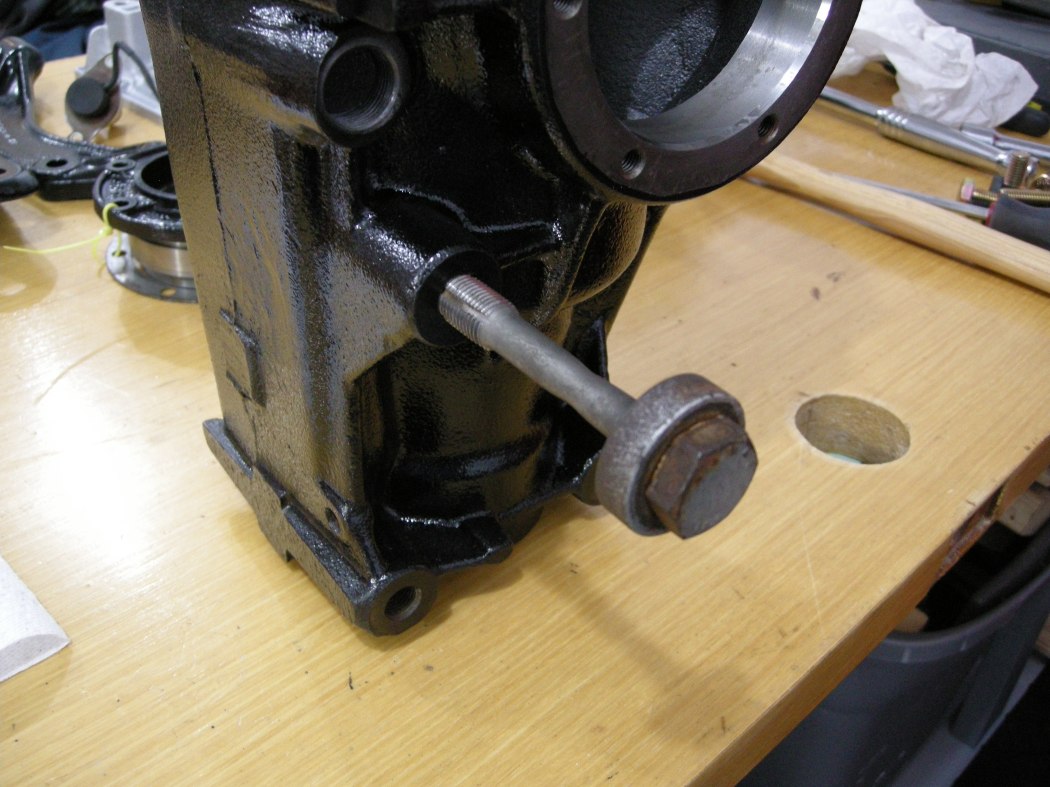
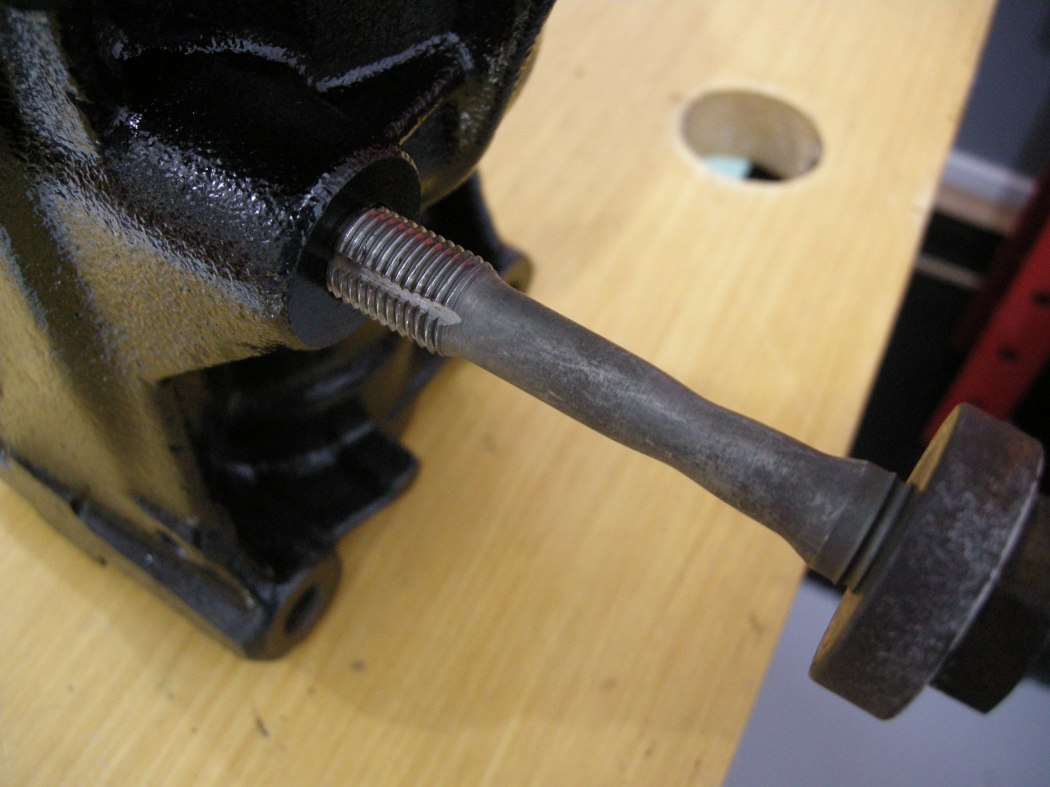
I chased all the treads to clean them up. This may be overkill to some but the devil is in the detail.
I had made an M14 thread chaser a while ago using an old axle bolt. Just cut some grooves in the thread with an angle grinder or Dremel. I have a few of these of different sizes.
Re-assembly:
Great service from Thayer Motorsport for some of the parts. I had overlooked the Pinion Nut and Securing Plate and Clay double checked to make sure I had these. I already ordered the Securing Plate from Pelican but figured a spare wouldn't hurt.. ended up needing it.
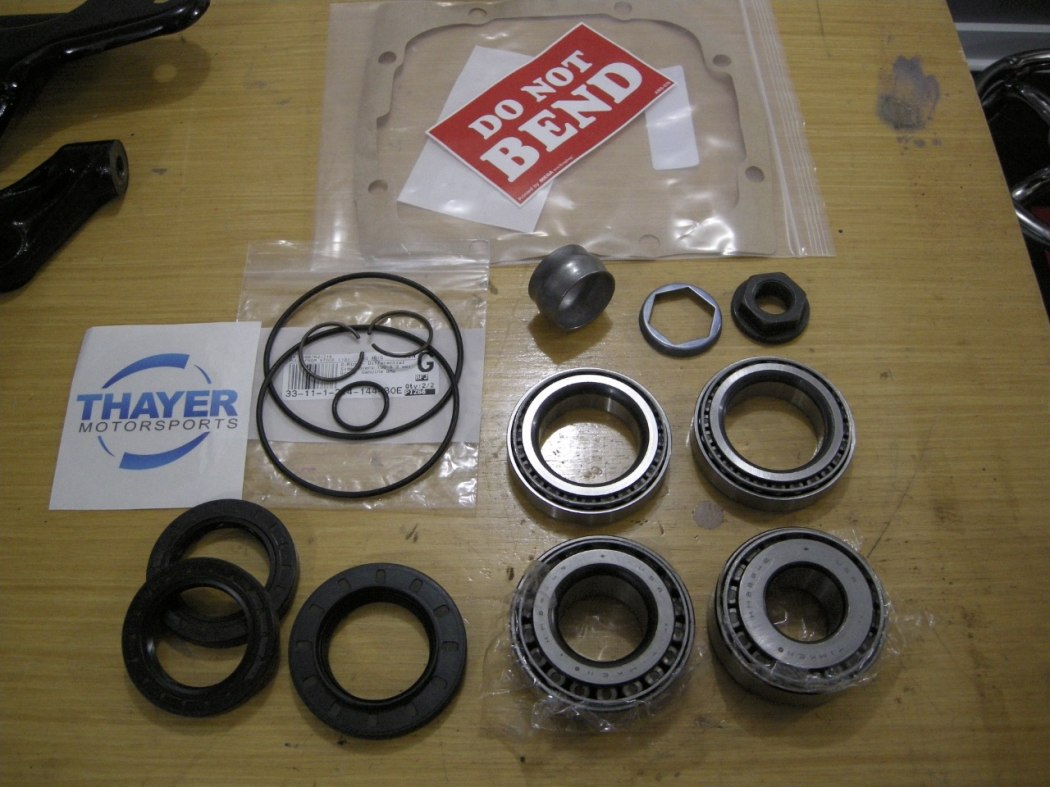
The final chapters below follow the "installation is the reverse of disassembly" mentality.
Bearing Caps:
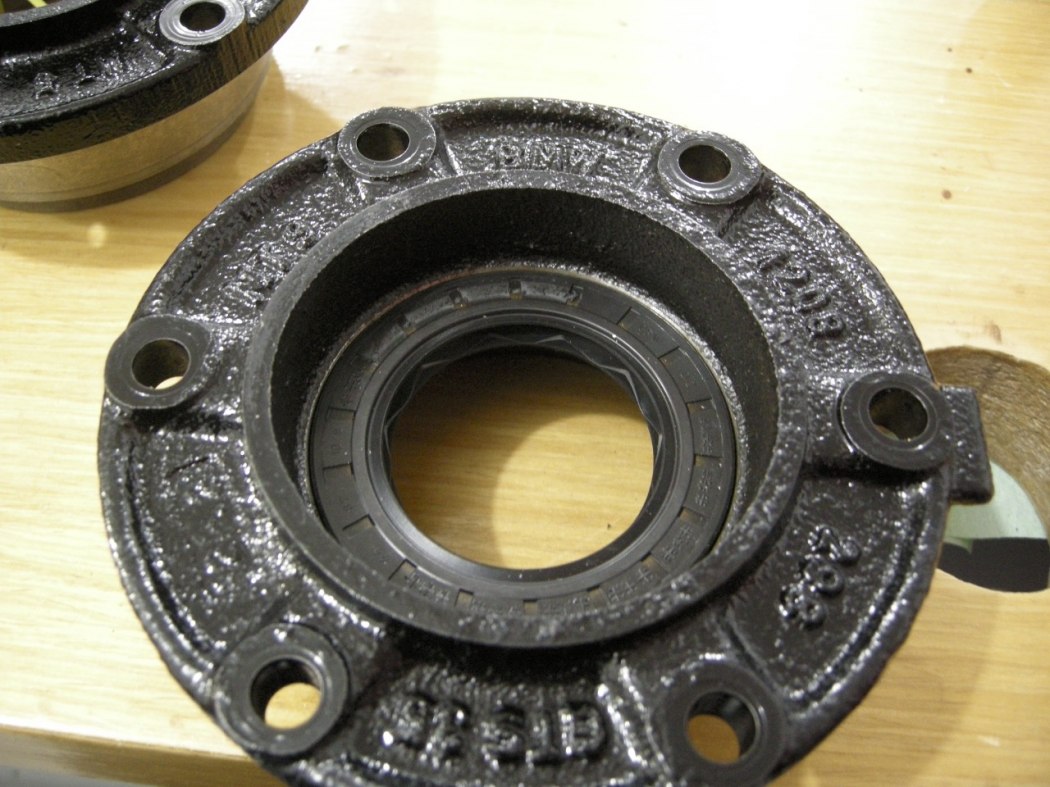
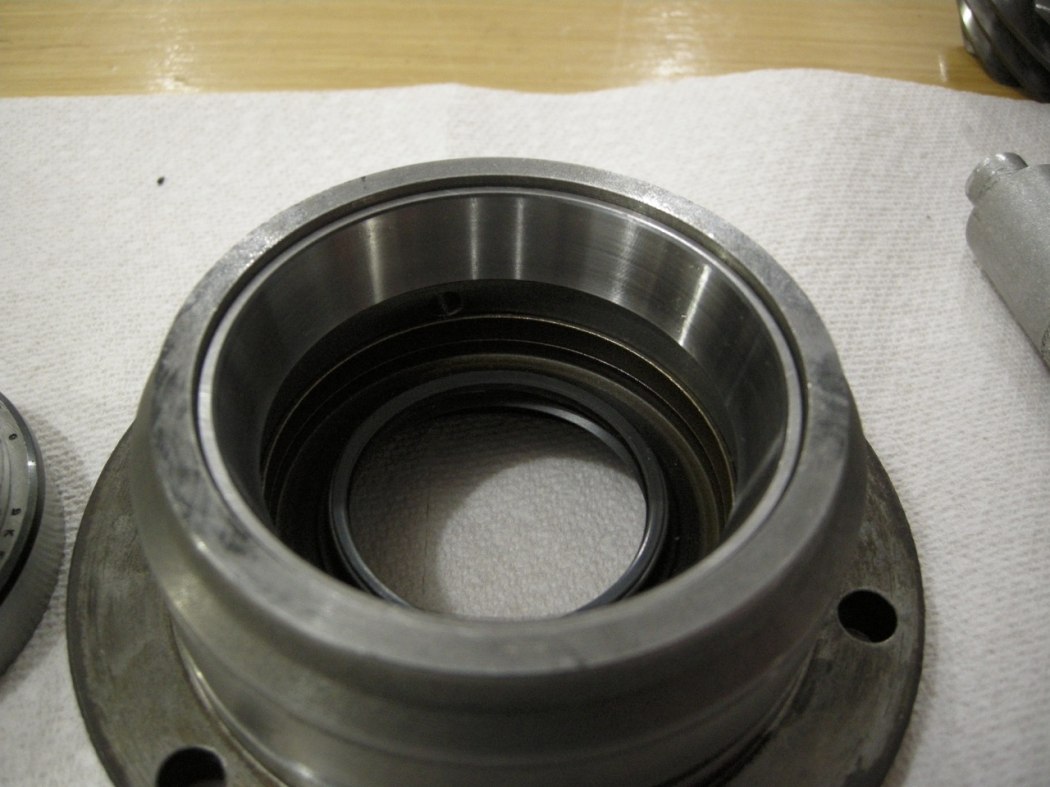
Starting with the Bearing Caps, press the new seals in to the same depth as the old ones. Use a light smear of oil on the outside of the seal.
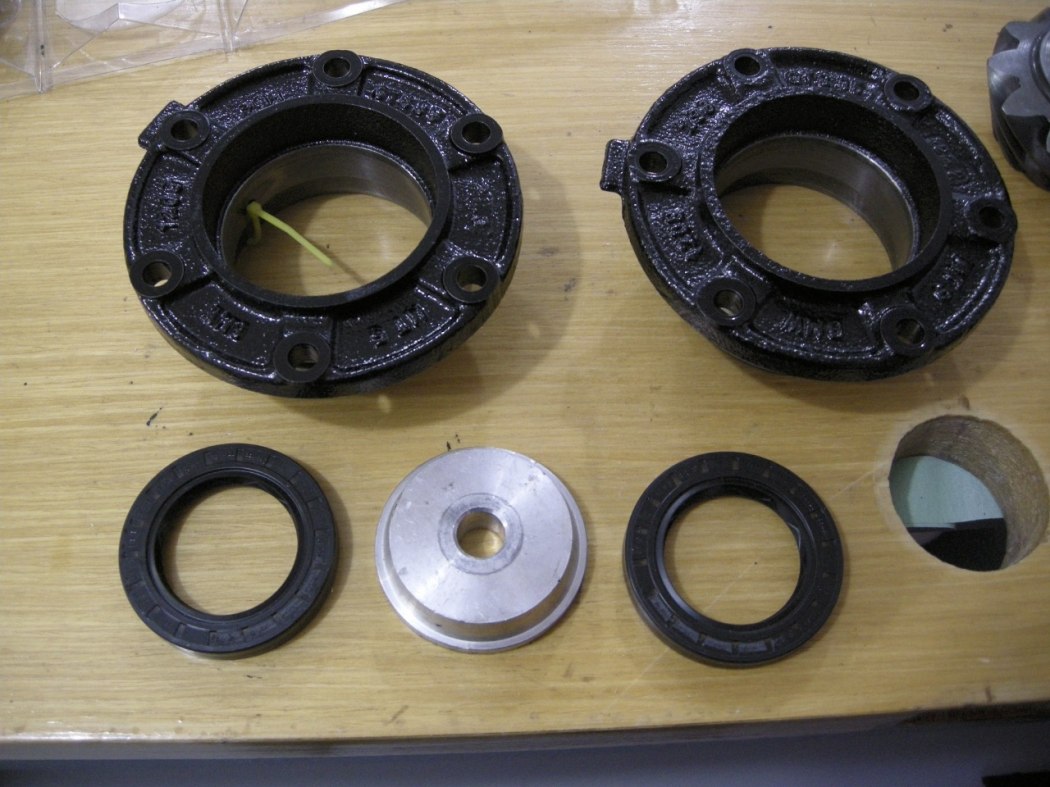
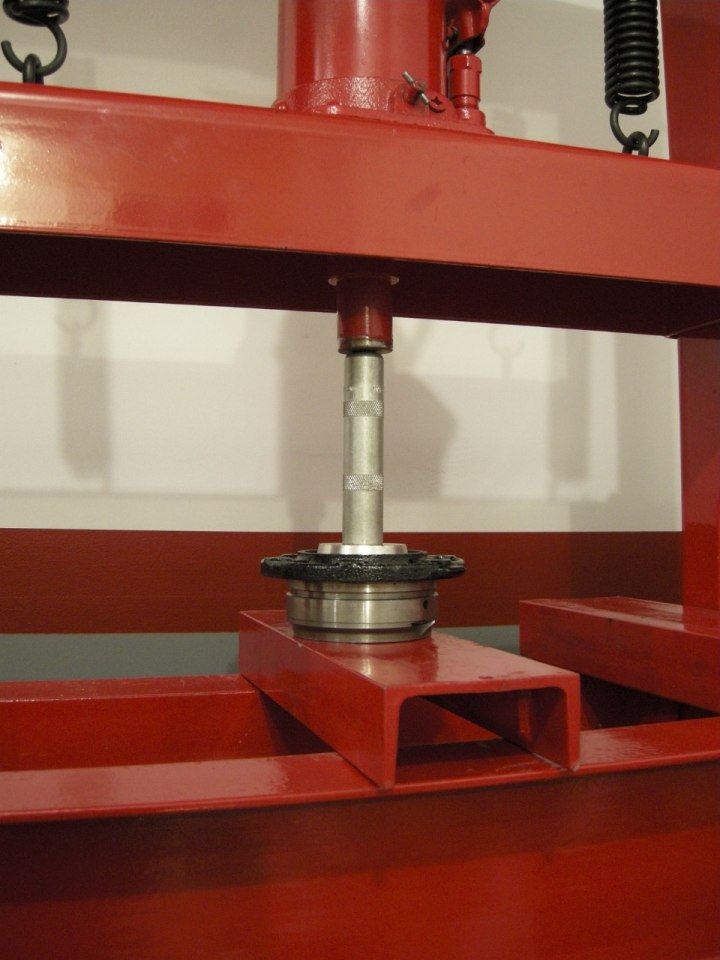
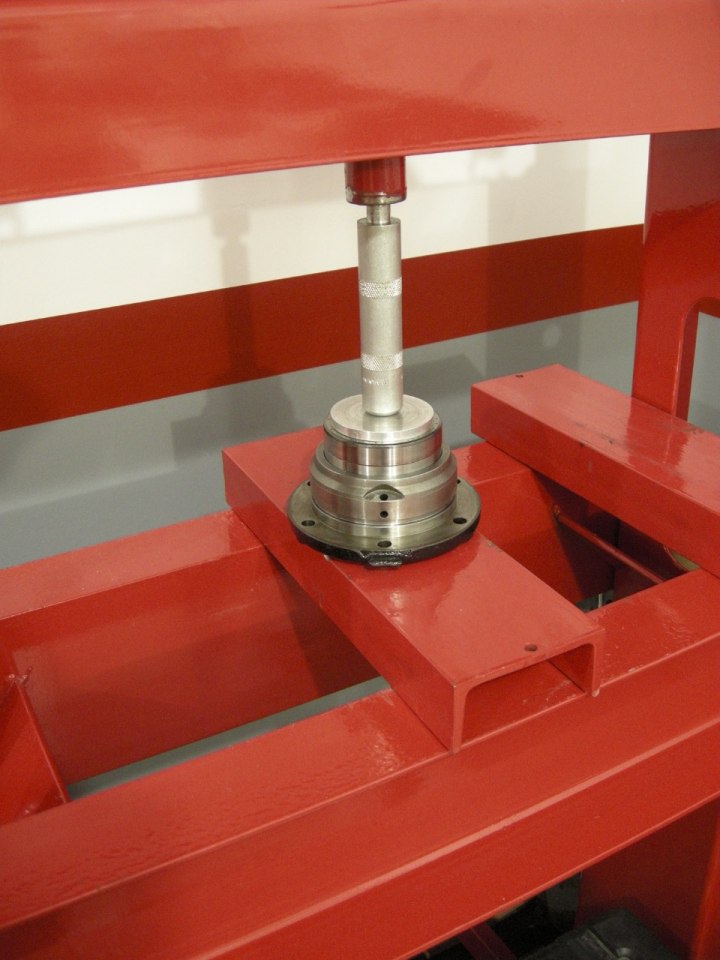
Flip the Caps over and drive in the Bearing races using one of the old races, as shown.
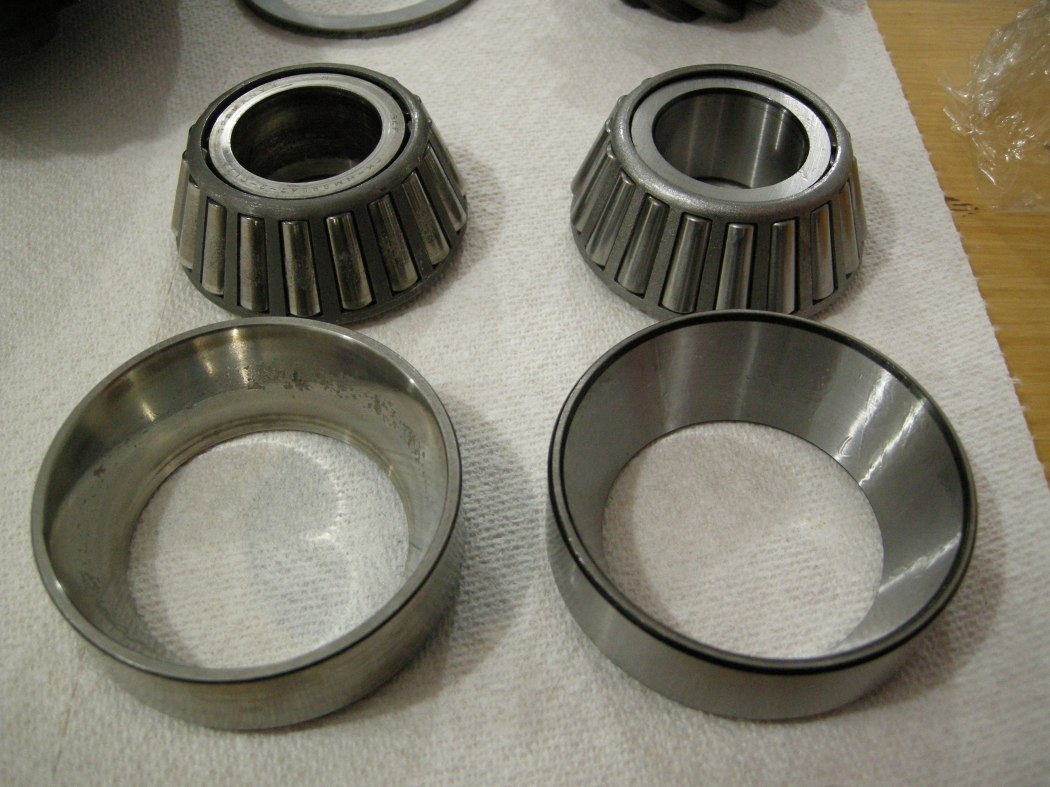
Pinion Bearing Races:
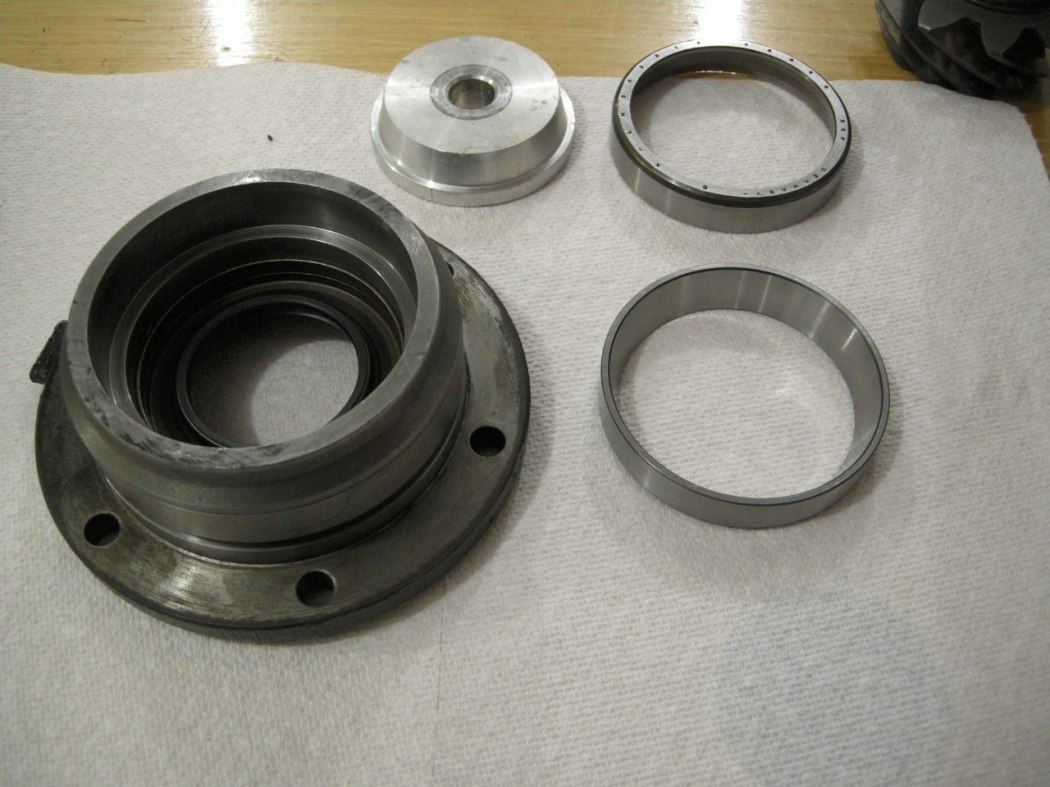
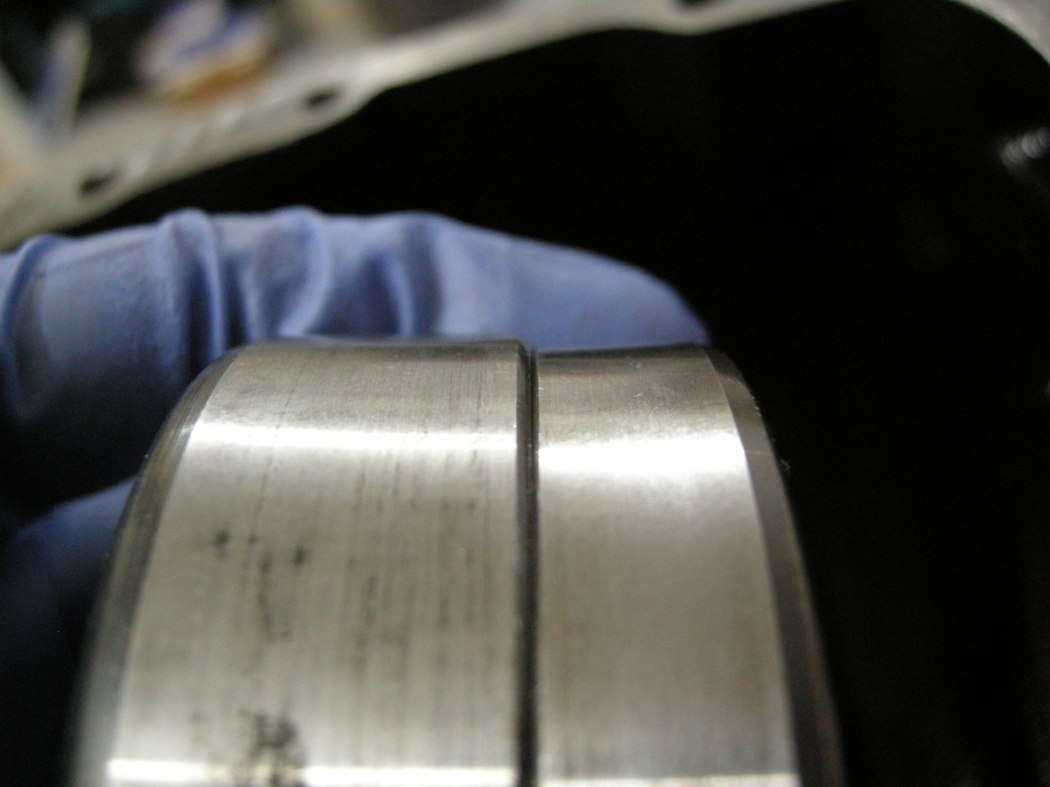
Old (left) vs new (right)
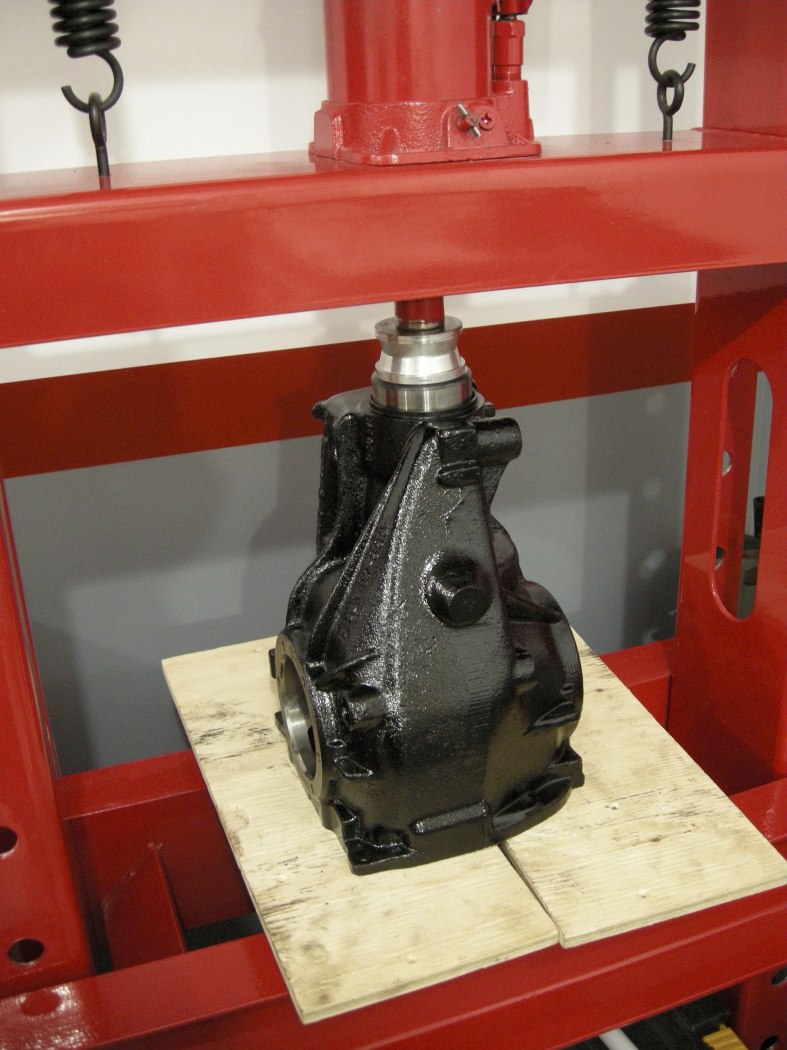
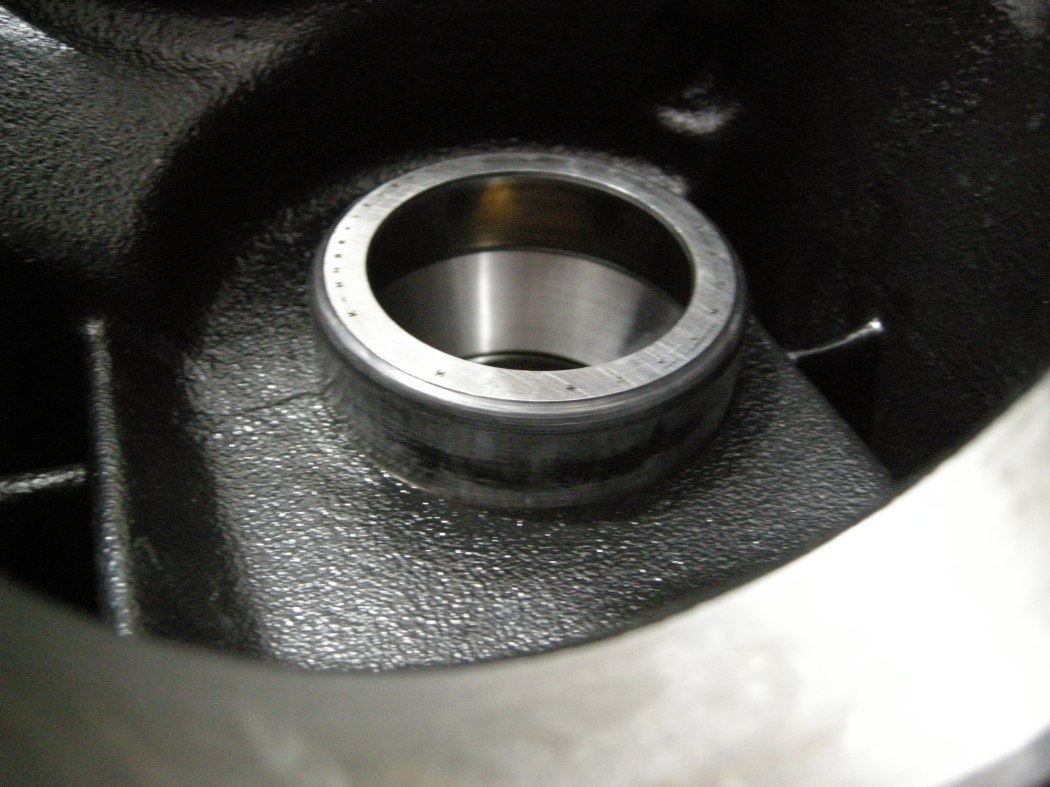
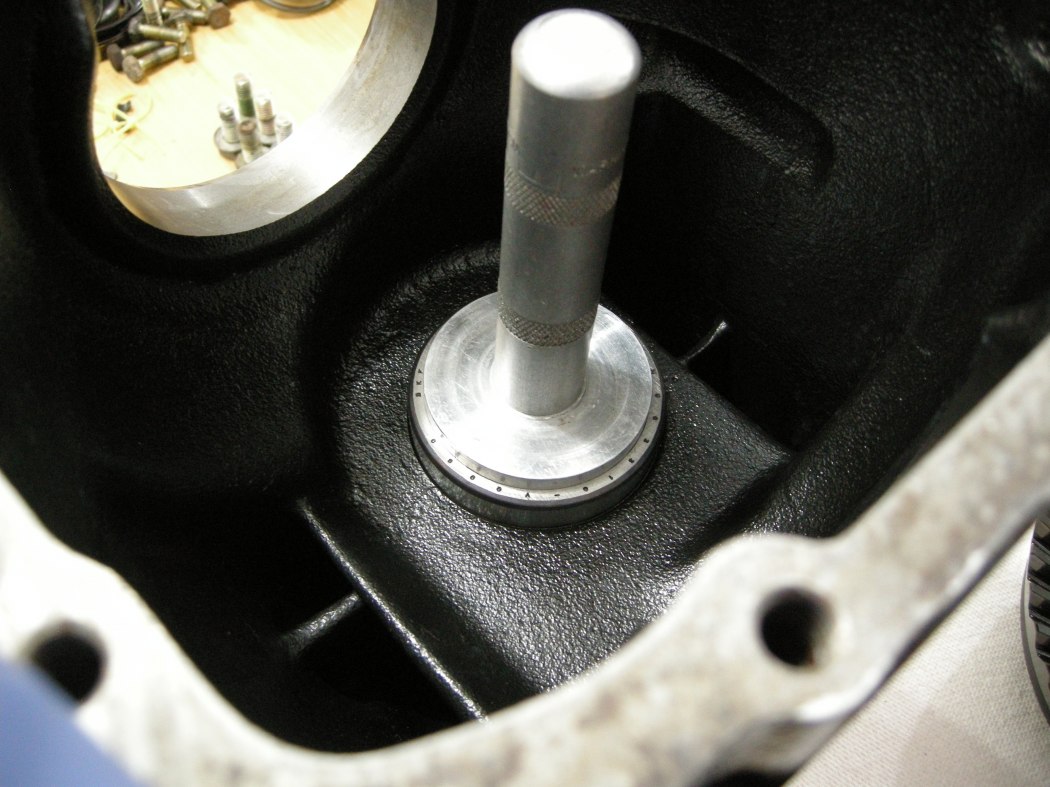
The Pinion Bearing Races are pressed into the Diff Case using the old races.
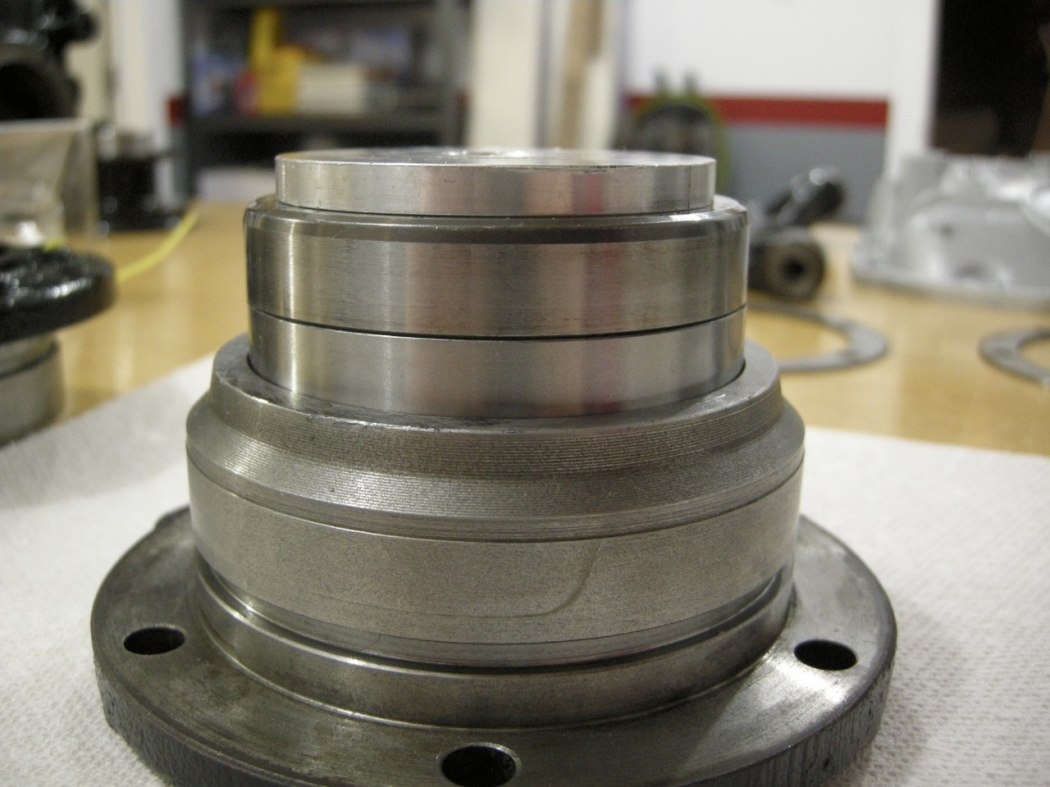
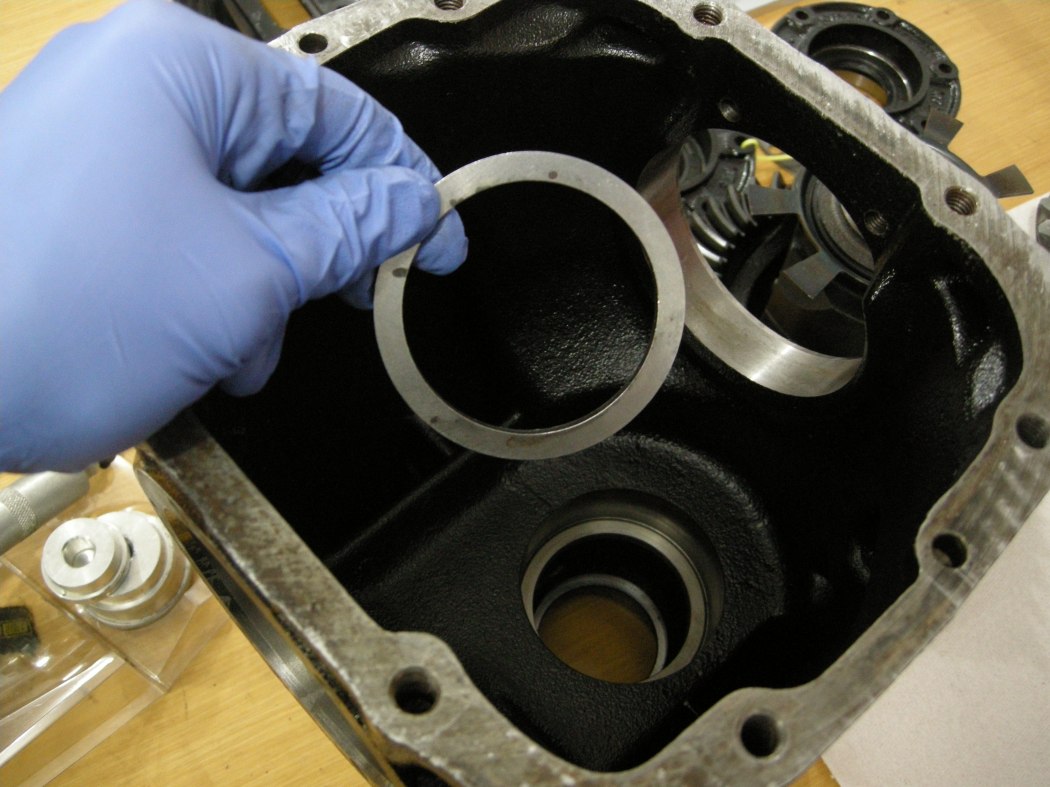
Special note for the Large Pinion race, there is a spacer that goes in first. Don't forget to drop this in. Also, I made the mistake of using the old bearing race for the Large Bearing, and it got stuck in the case! See picture. I had take a couple steps back to get it out. I ended up using one of the old Carrier Races to drive it in, which was a bit smaller.
Large Pinion Bearing:
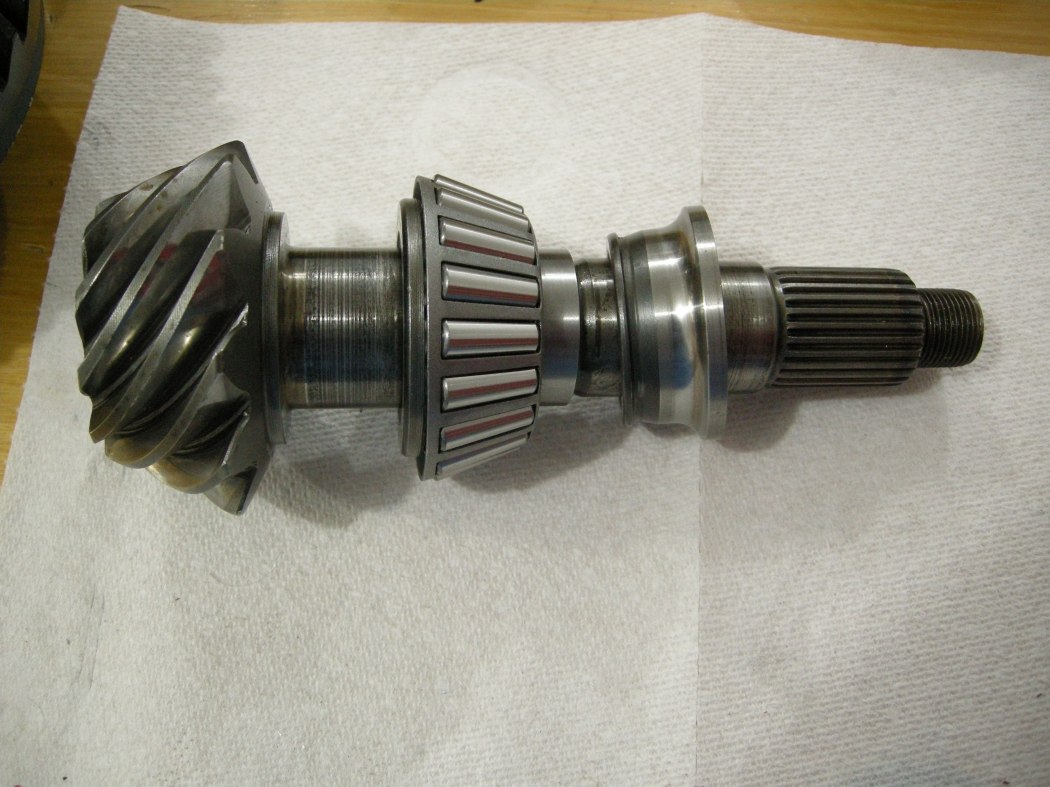
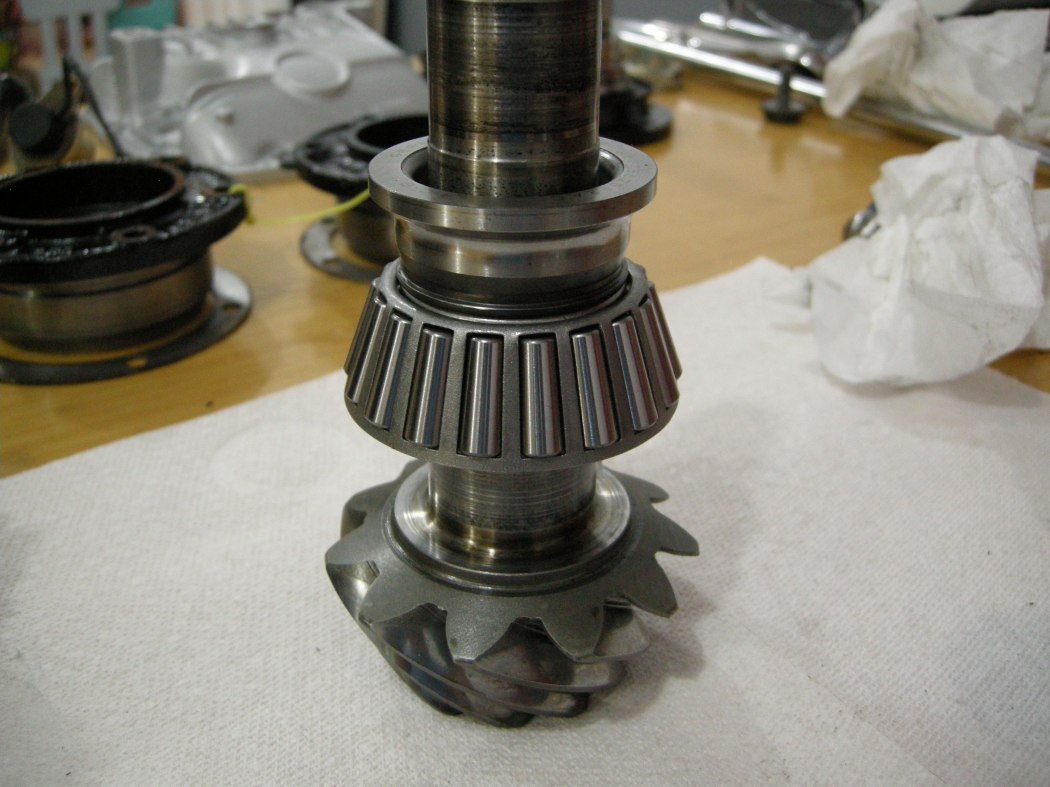
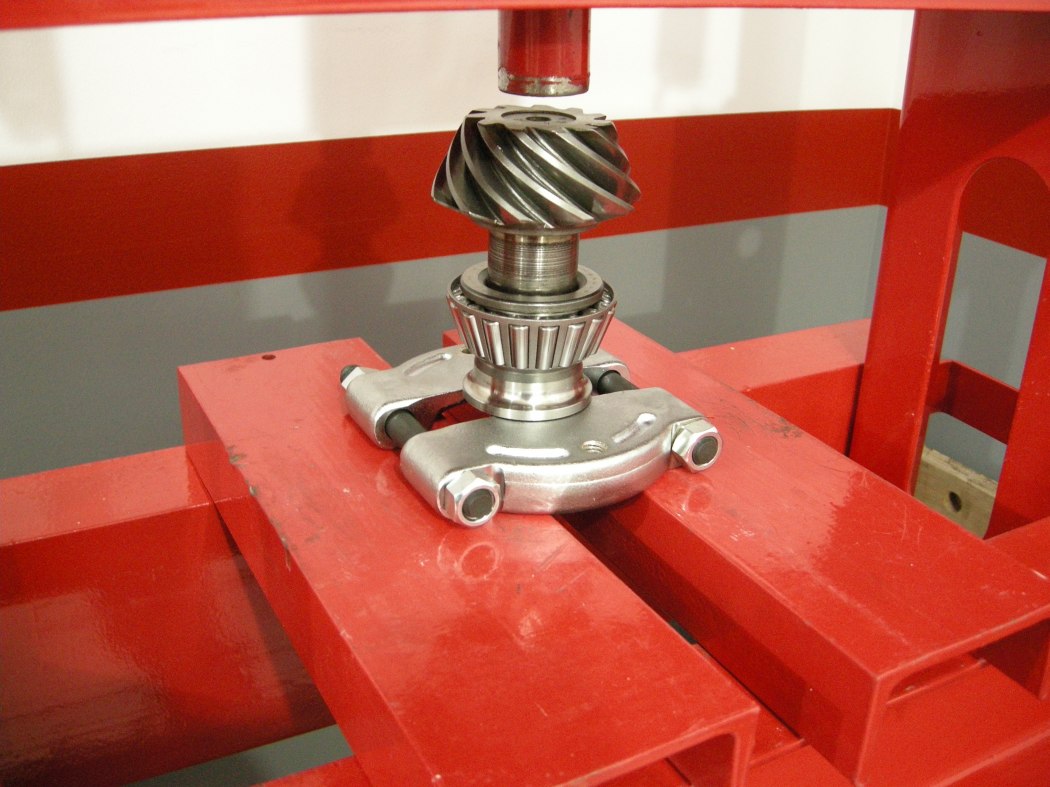
Press the Large Pinion Bearing on the Pinion shaft, using the old bearing or in my case, an Audi wheel bearing inner race, and the Bearing Splitter for support.
Carrier Bearings:
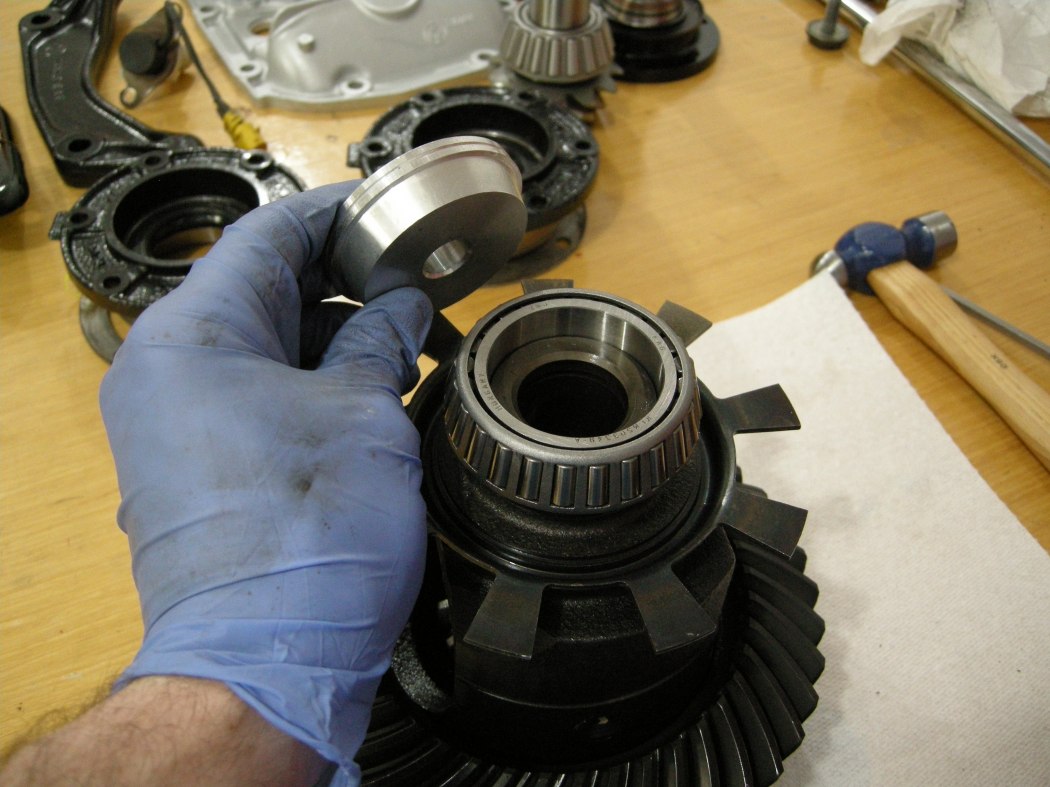
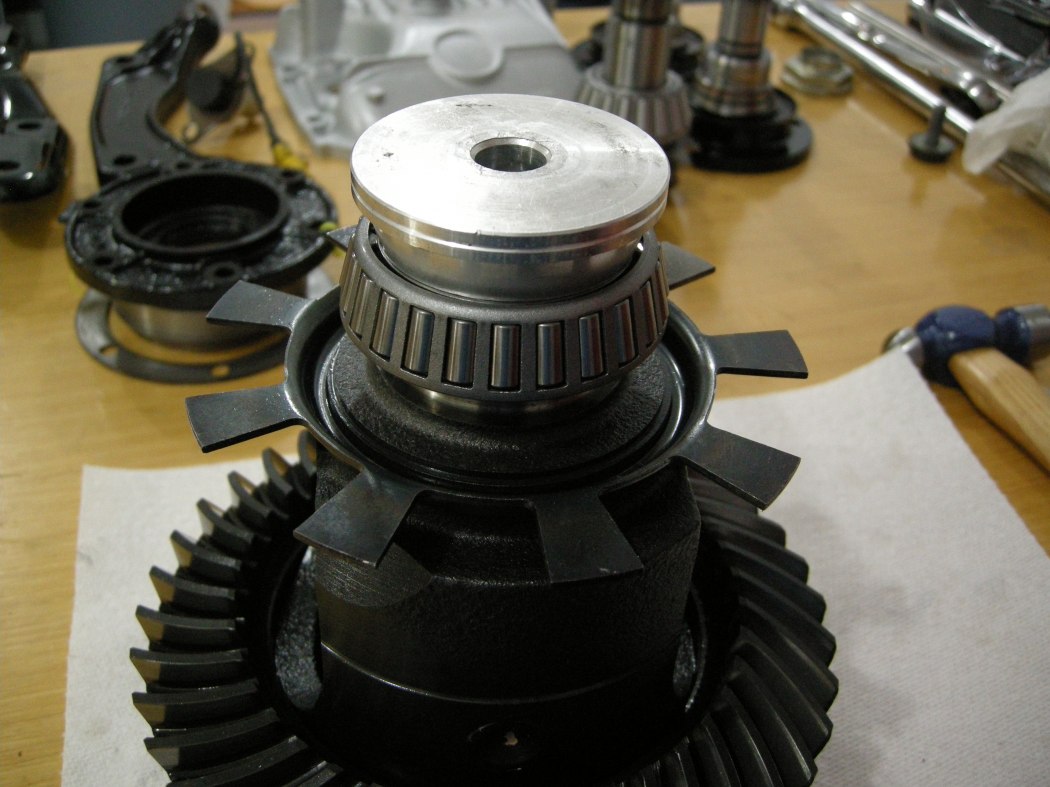
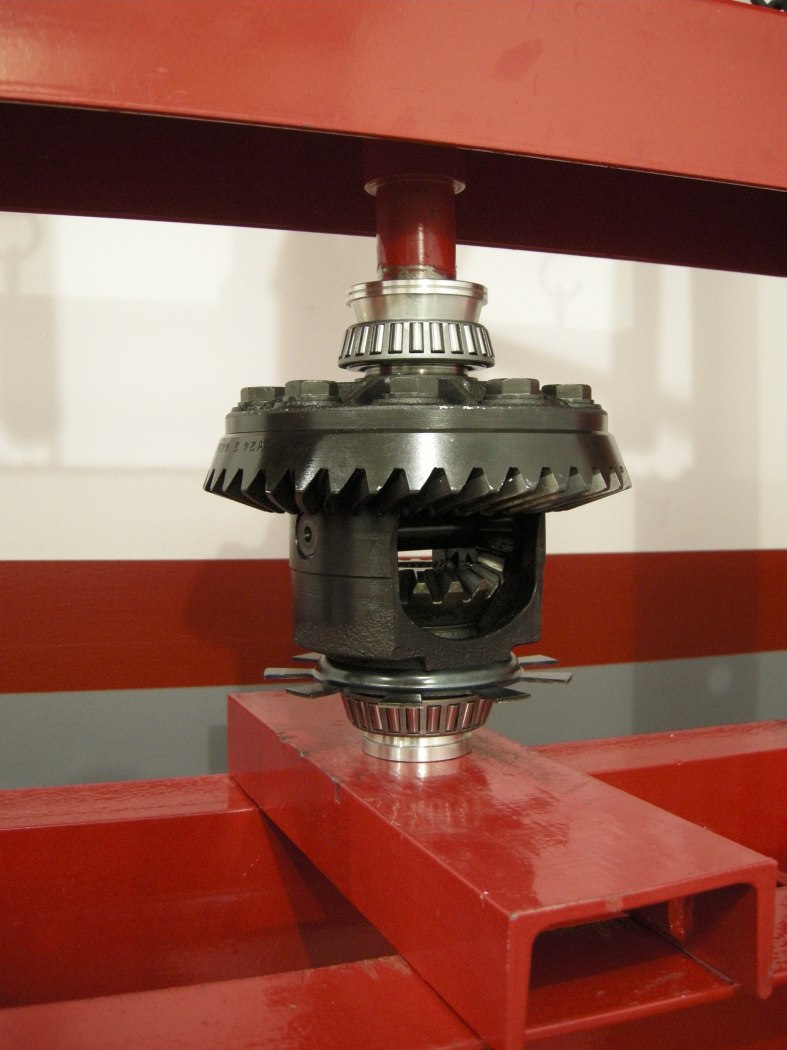
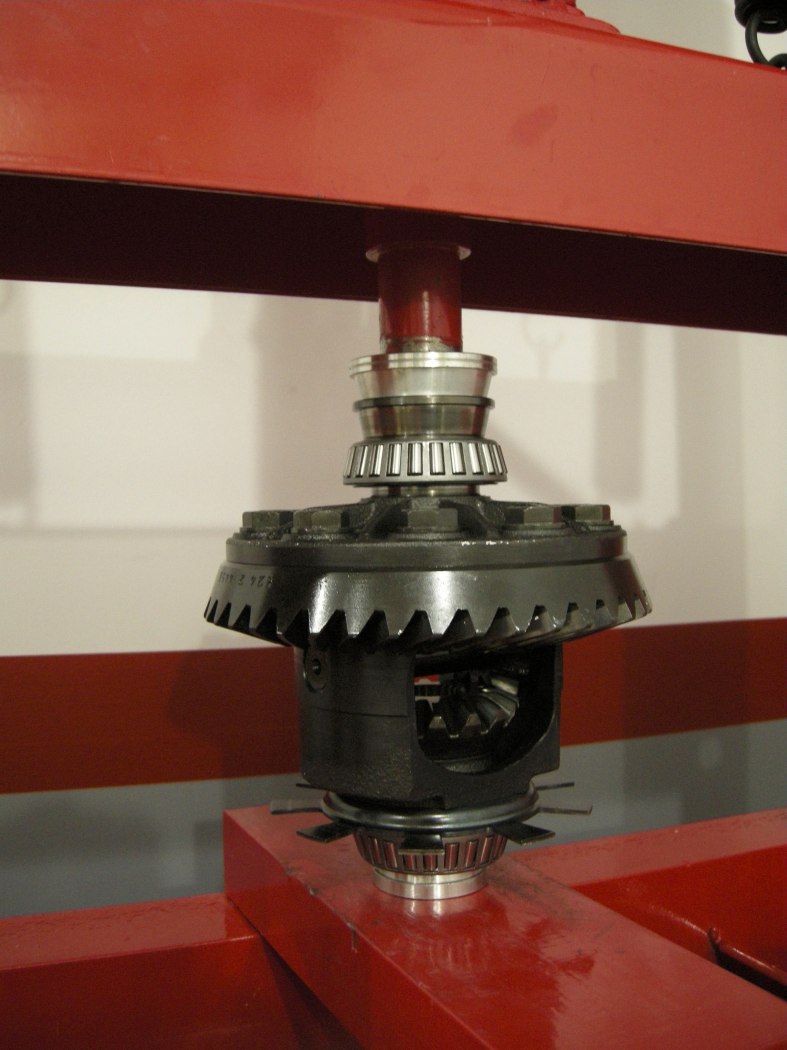
Press the Carrier Bearings on the Diff. Again, only apply force to the inside race, being careful not to touch the rollers or cage, which would damage the bearing.
I did these bearings in 2 steps, first with a seal driver to get it going on the press, then added the old bearing race for inside clearance. Doesn't matter which side you start with.
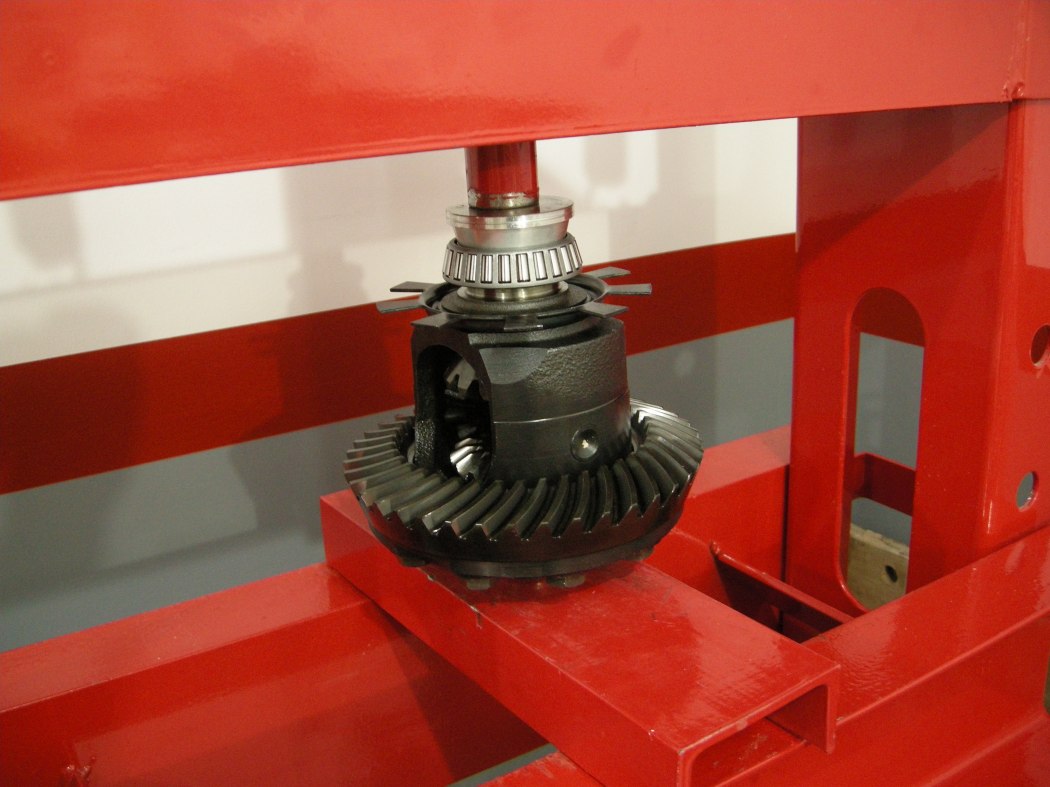
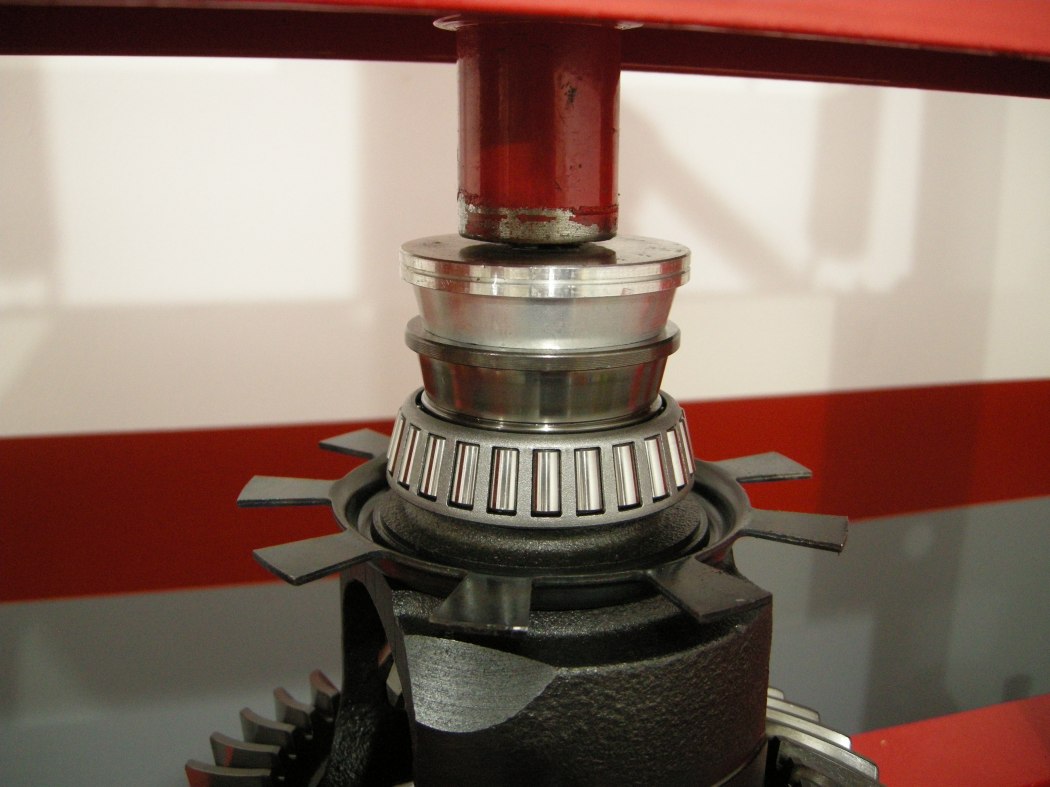
When you flip the Diff over for the other side, ensure it is supported properly underneath so that you don't damage the bearing you just installed.
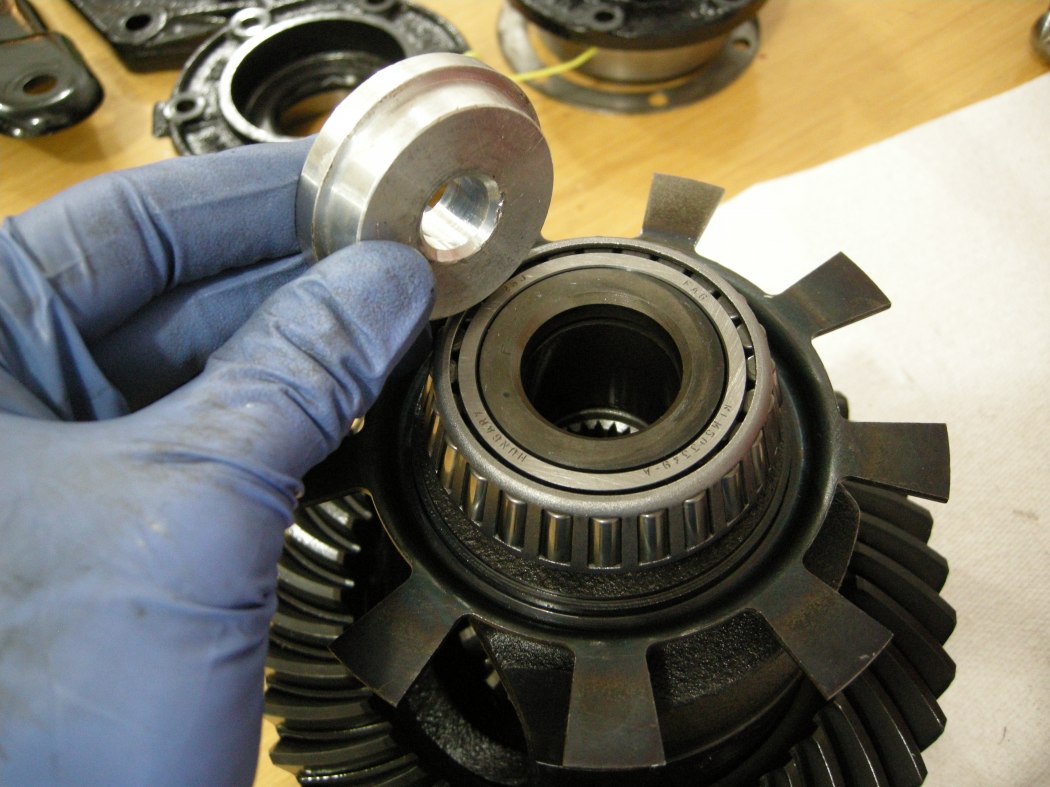
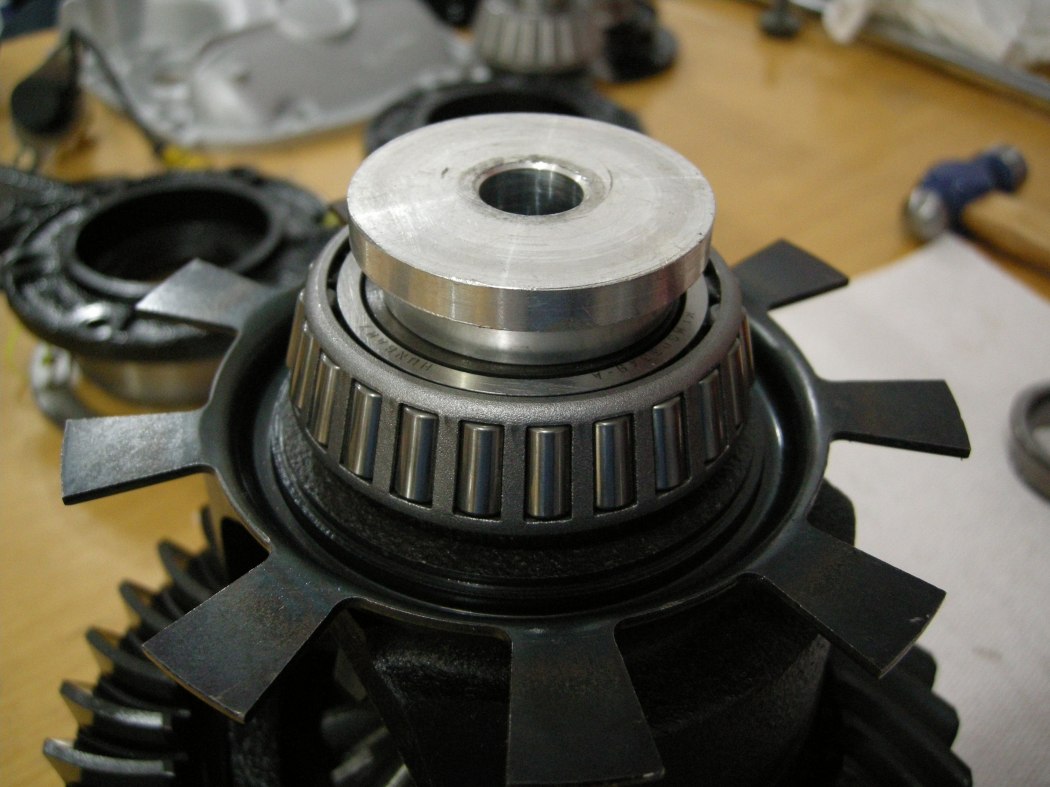
Same 2-step process as before. Not required but this is how I did it.
Small Pinion Bearing:
Now we're getting into the meat and potatoes.
This step involves pressing the Small (outside) Pinion Bearing onto the Pinion Shaft inside the Diff Case.
In this picture, ignore the 2 parts on the right. But don't forget the Crush Sleeve!!
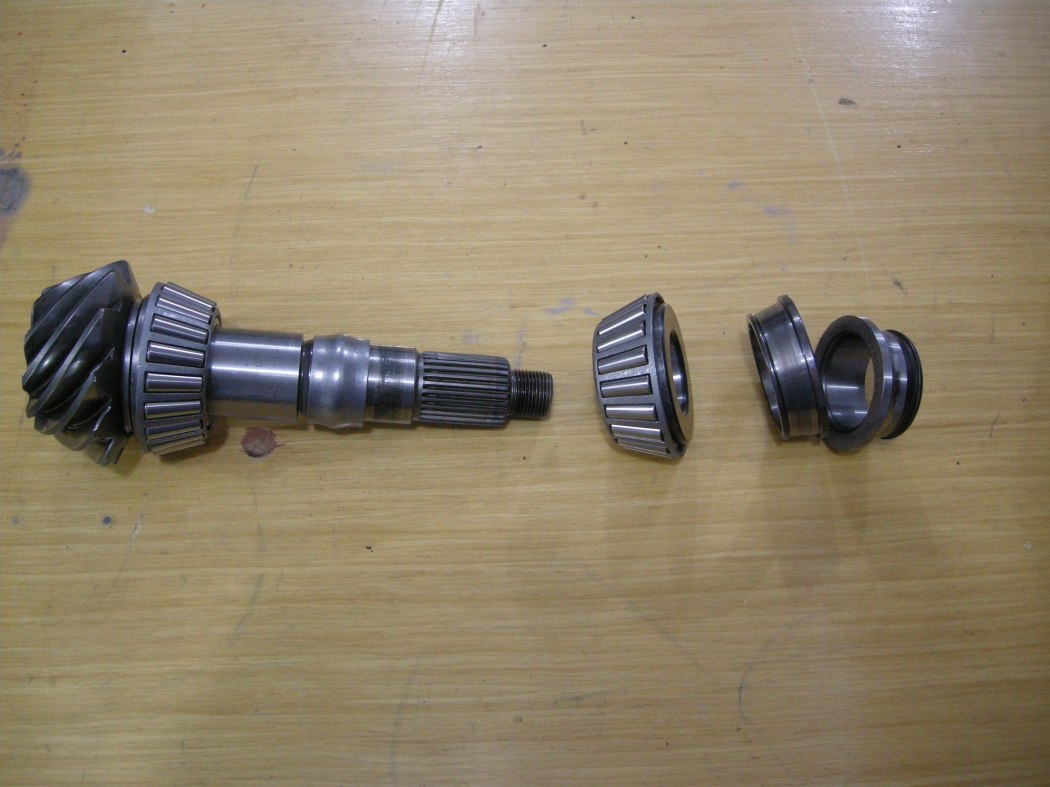
I pressed the Bearing on the Shaft in 2 steps, first with the bearing simply supported on the press plates to get it started.
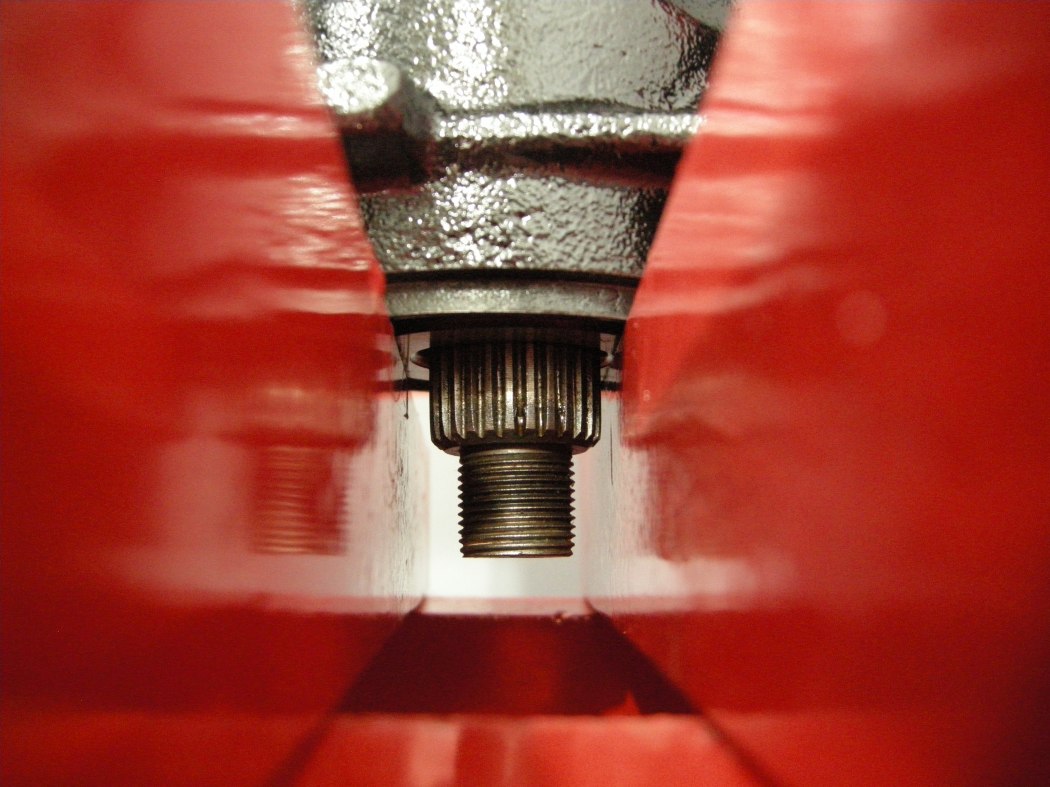
In hindsight I should have used an impact extension since they are tougher, or better yet, re-adjusted the press and used a proper piece of metal. As usual, always wear your goggles.
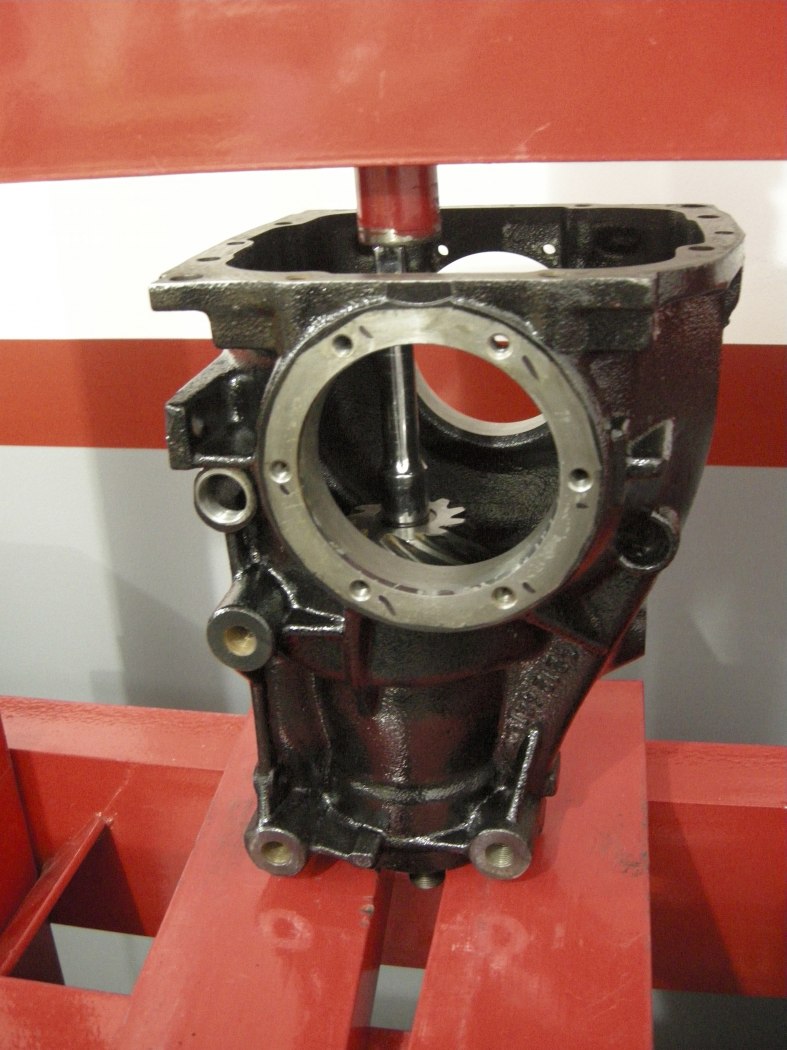
Then, I supported the bearing race using appropriately sized random parts.
Stop pressing the bearing once it hits the Crush Sleeve.
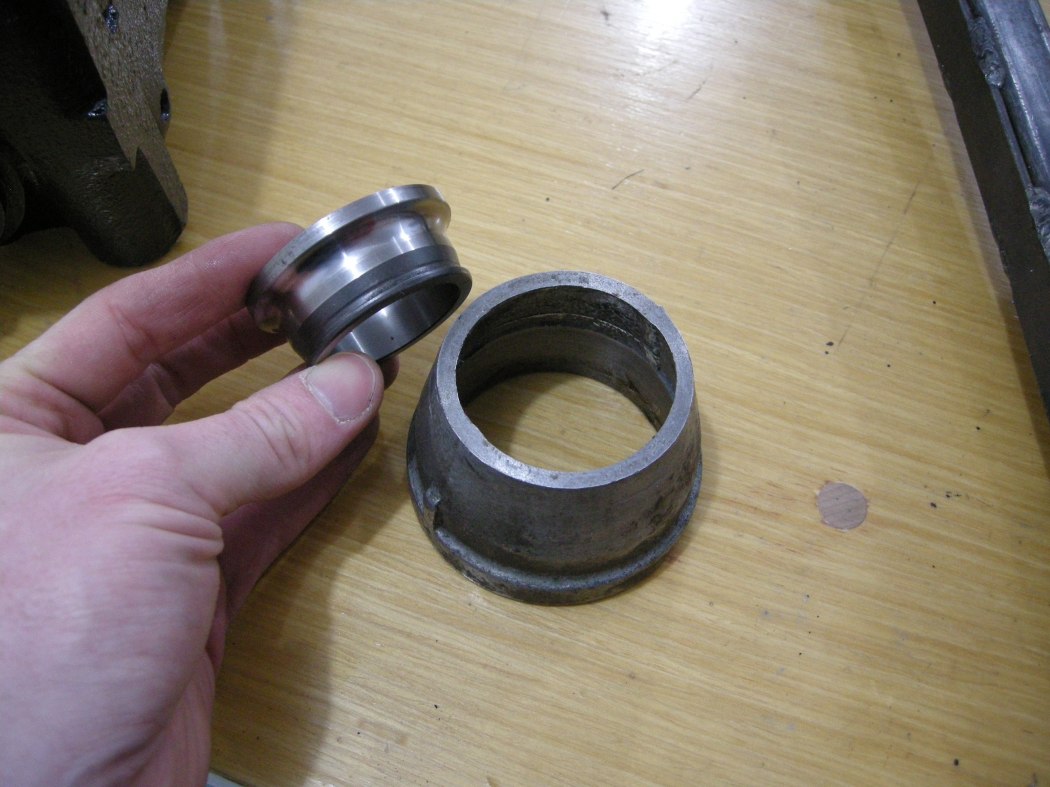
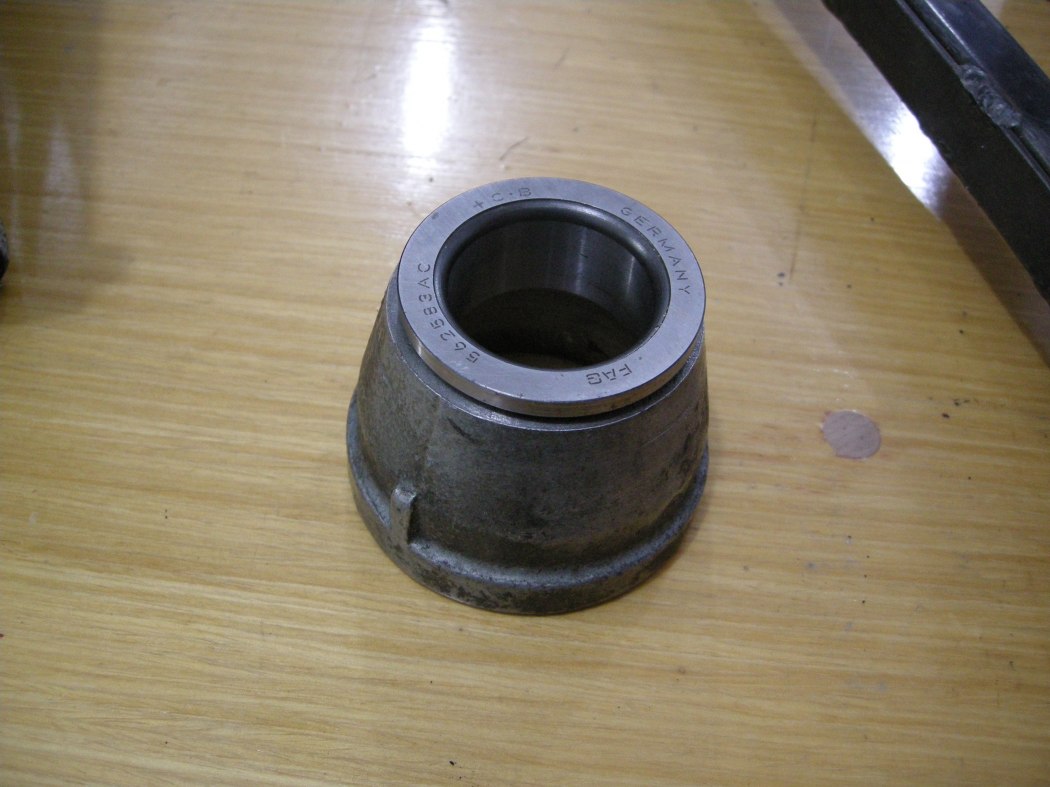
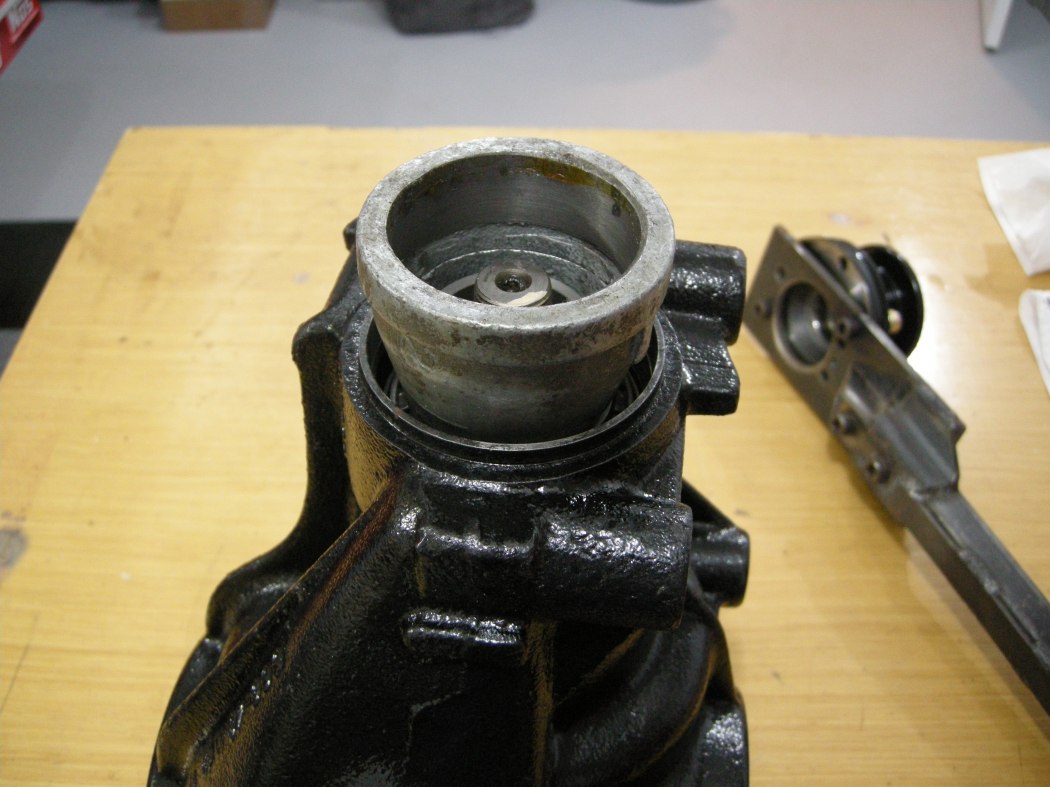
Pinion Seal:
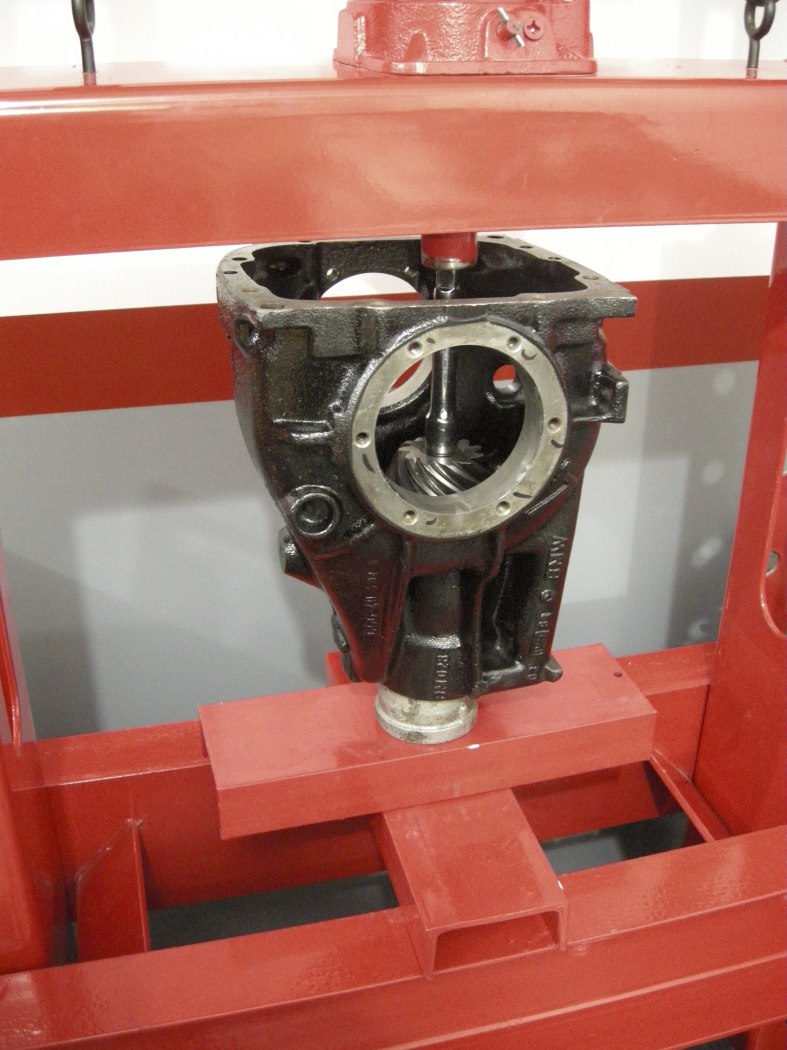
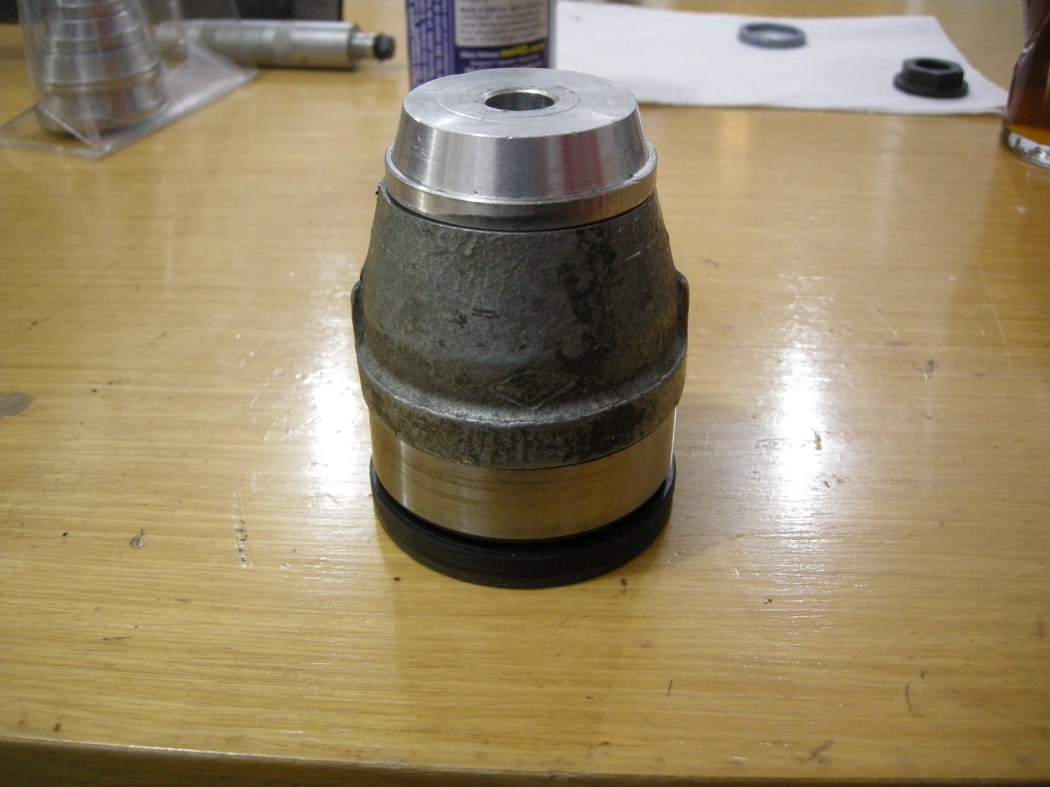
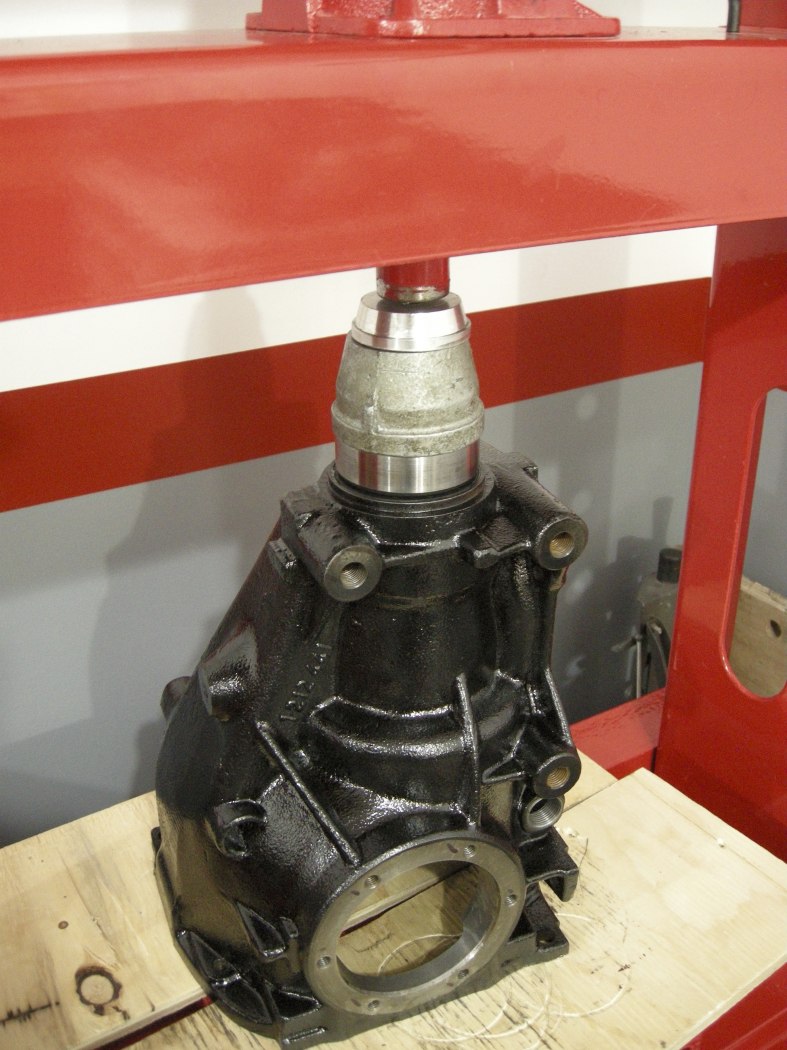
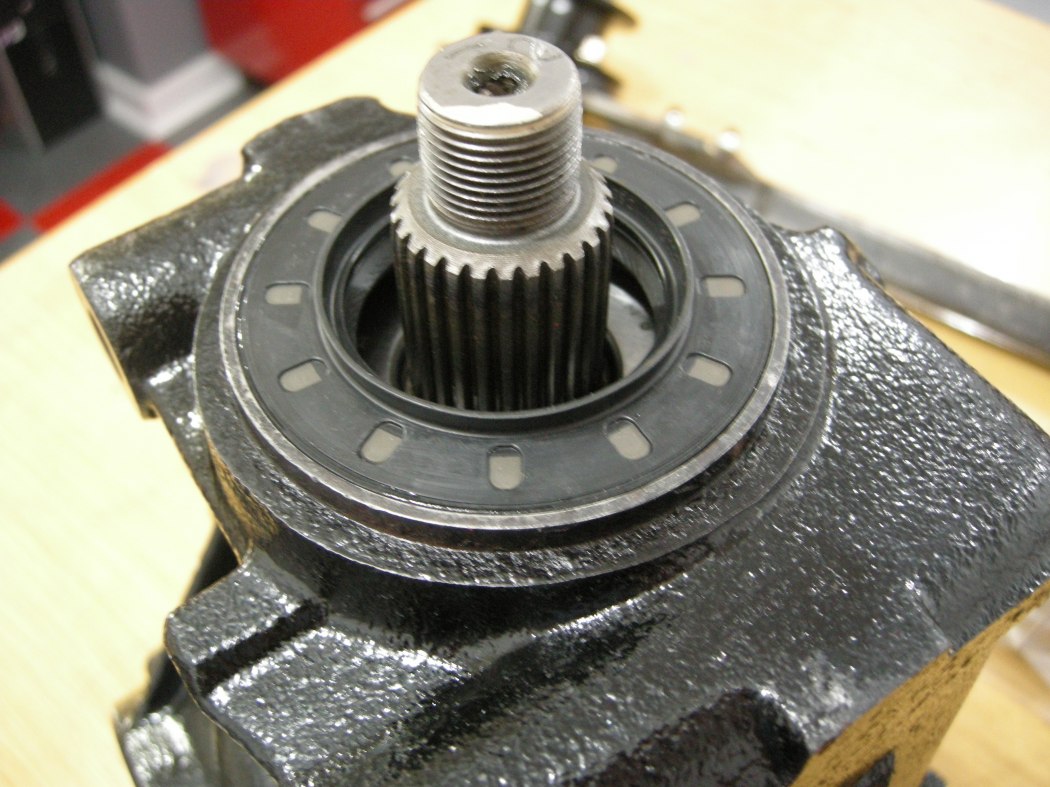
Drive the Pinion seal into the Diff Case using the old bearing race. I suppose these seals can be hammered on but I elected to use the press. It is much easier to control.
Use a bit of oil on the seal during this step.
Pinion Bearing Preload:
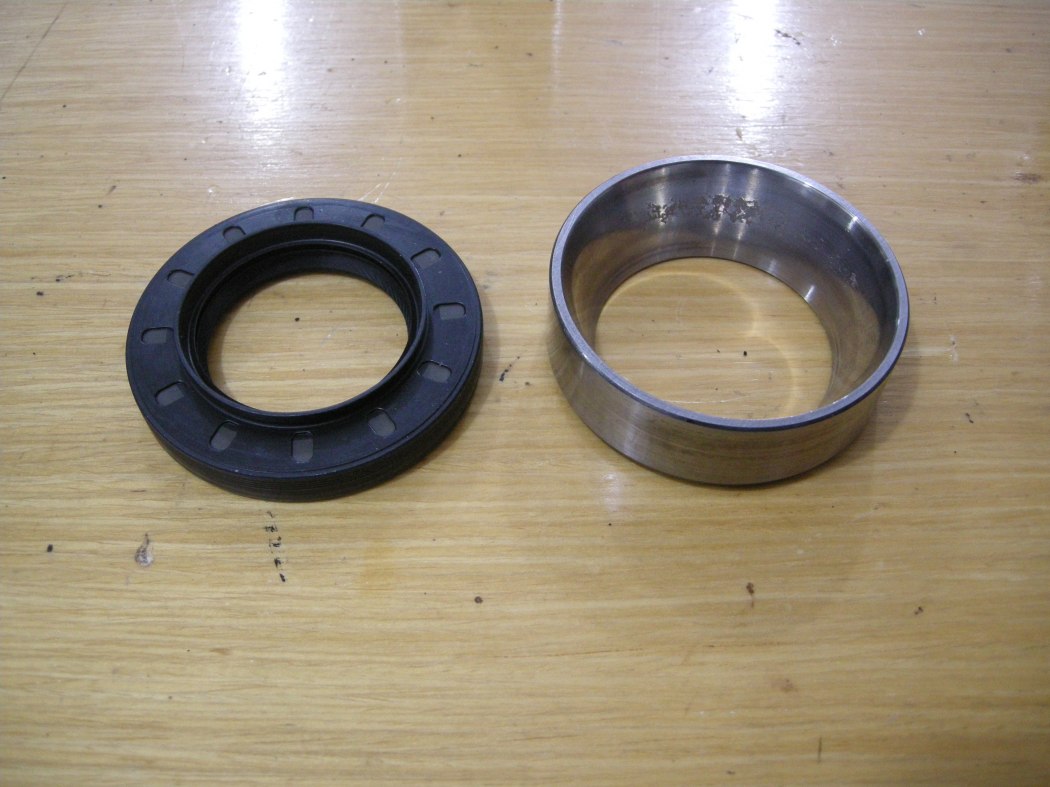
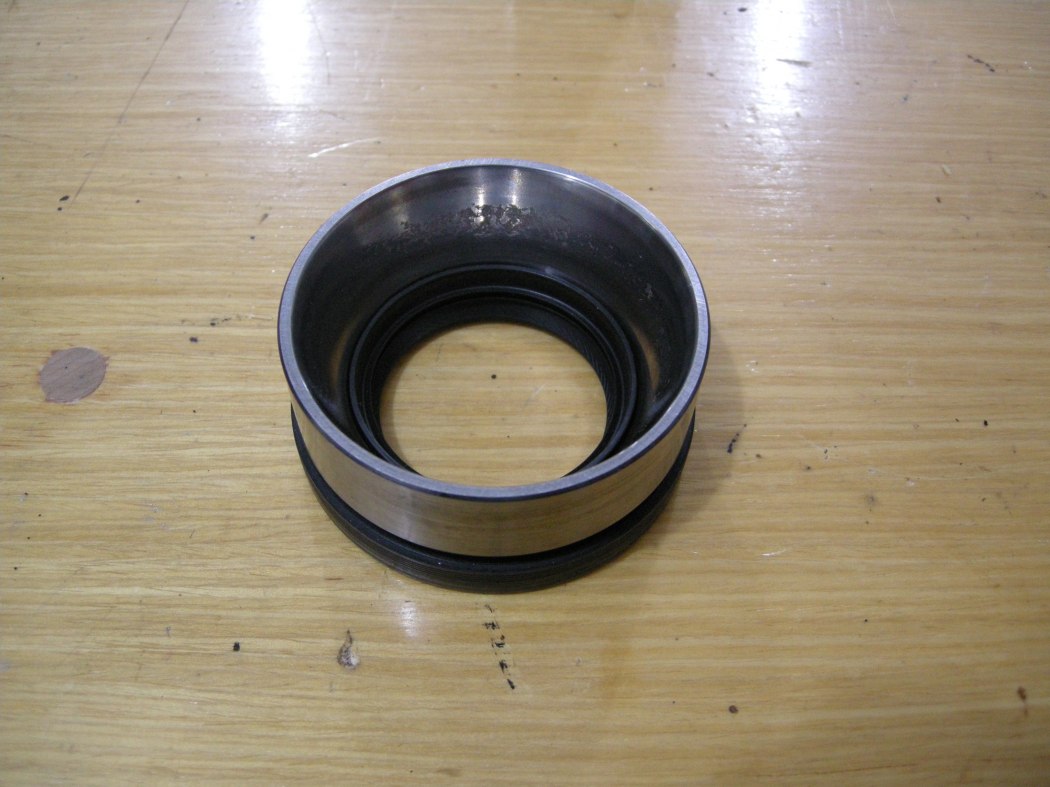
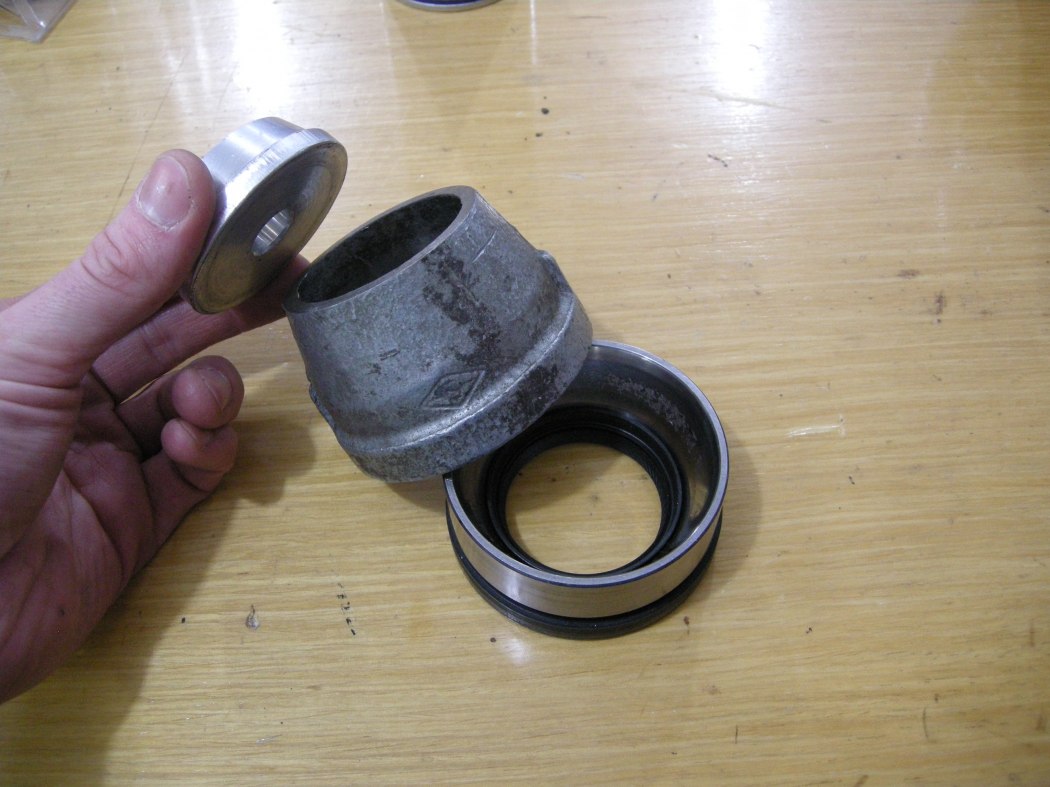
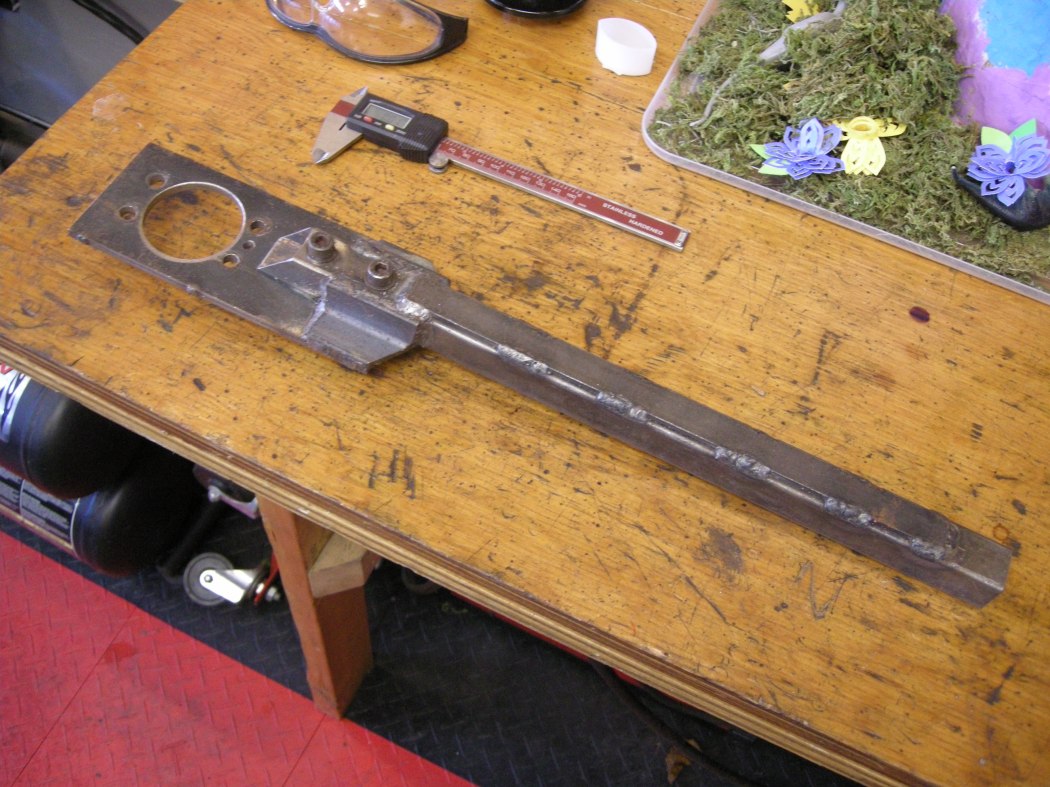
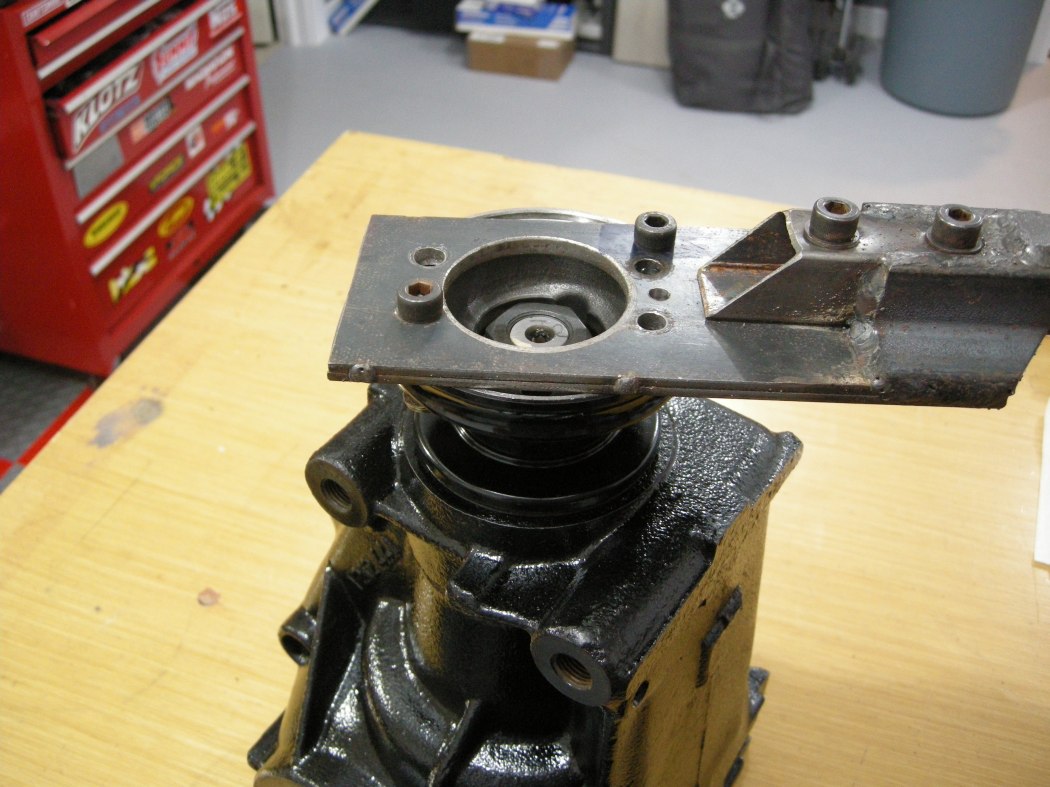
A Pinion Yoke holding tool is required to hold the Pinion while the preload is being set.
I modified my home brew crank lock tool by drilling an extra hole in it. If you don't have a something similar, you'll have to make something or buy a Pinion Yoke holding tool.
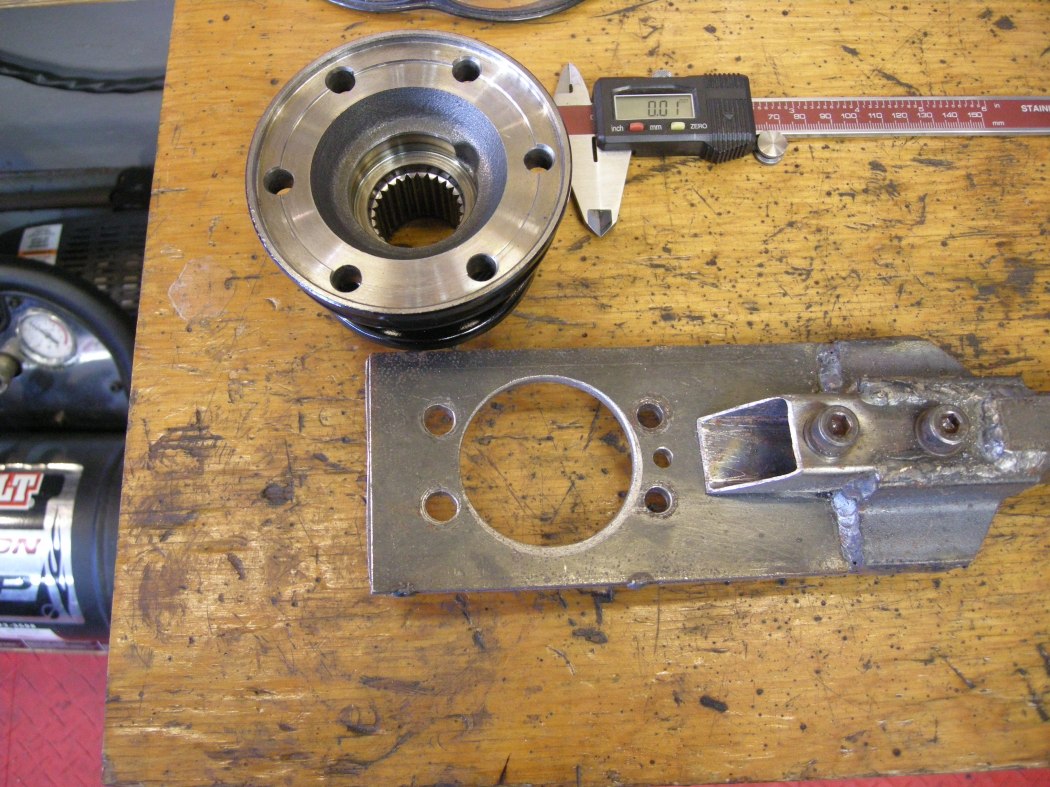
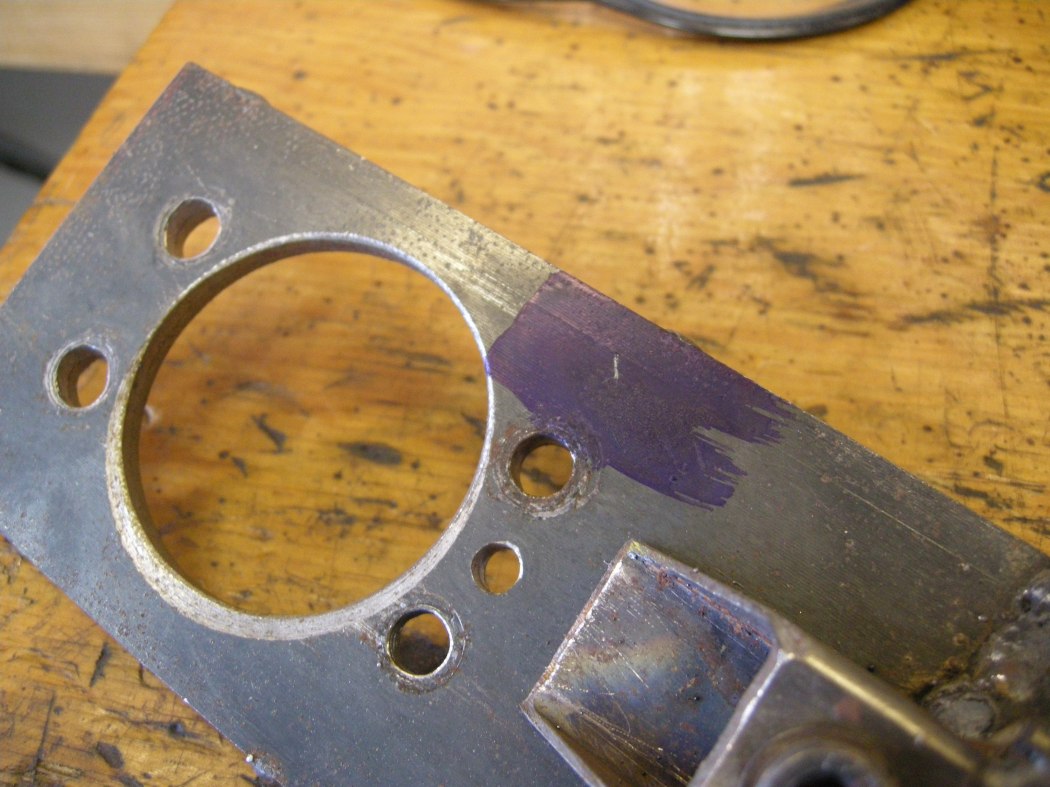
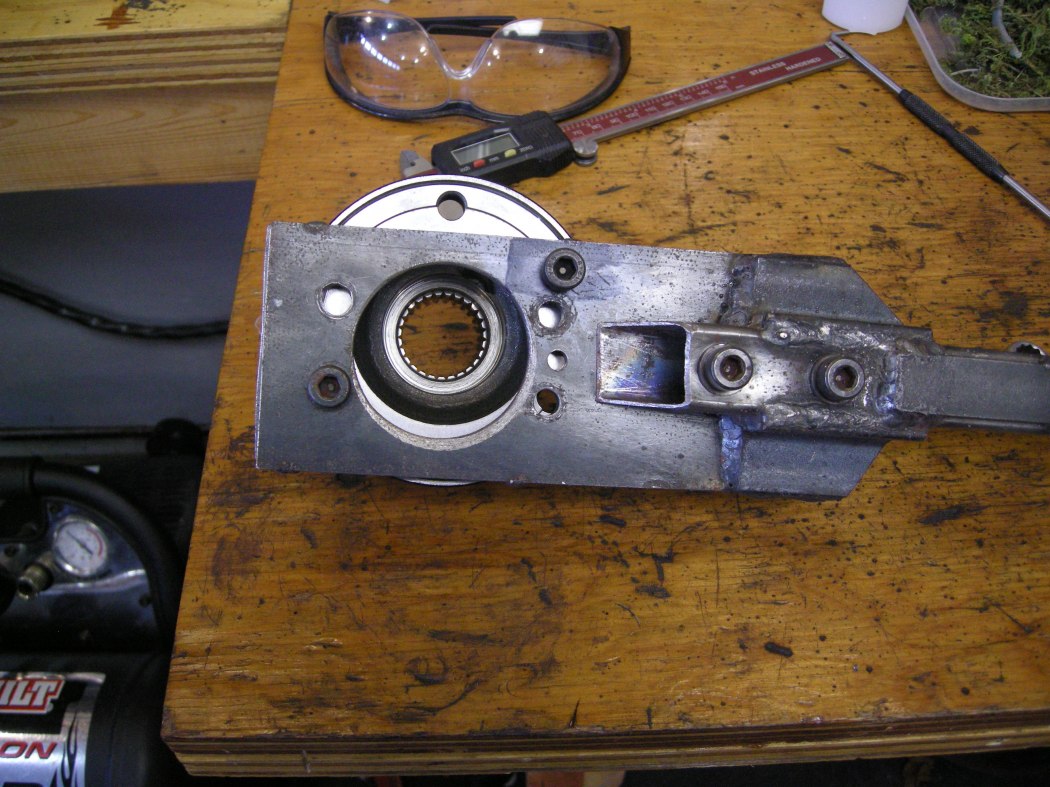
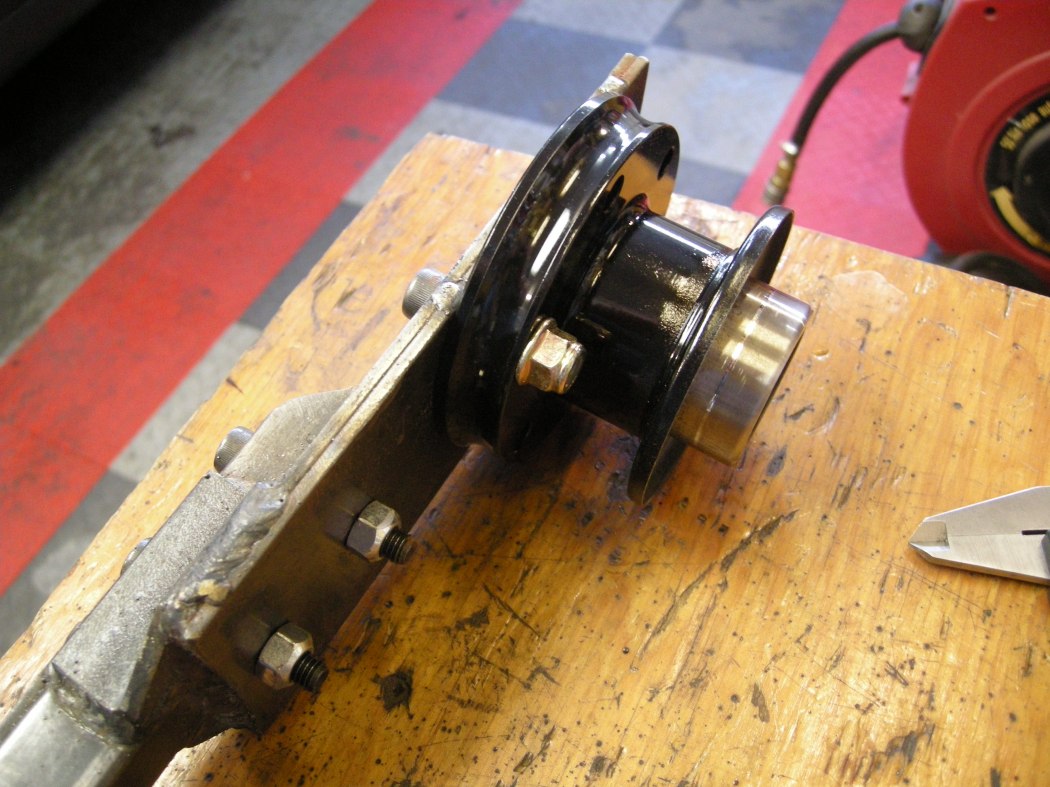
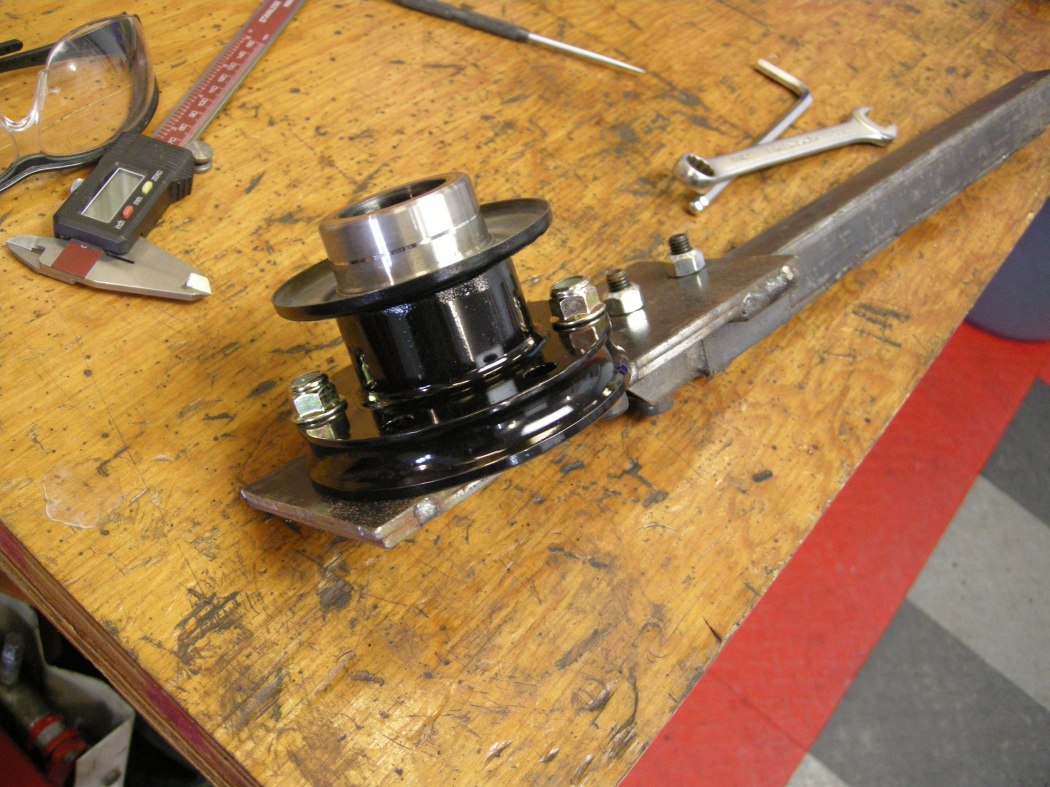
Lube the Pinion Yoke before installing it on the Shaft, where it will contact the lip of the seal.
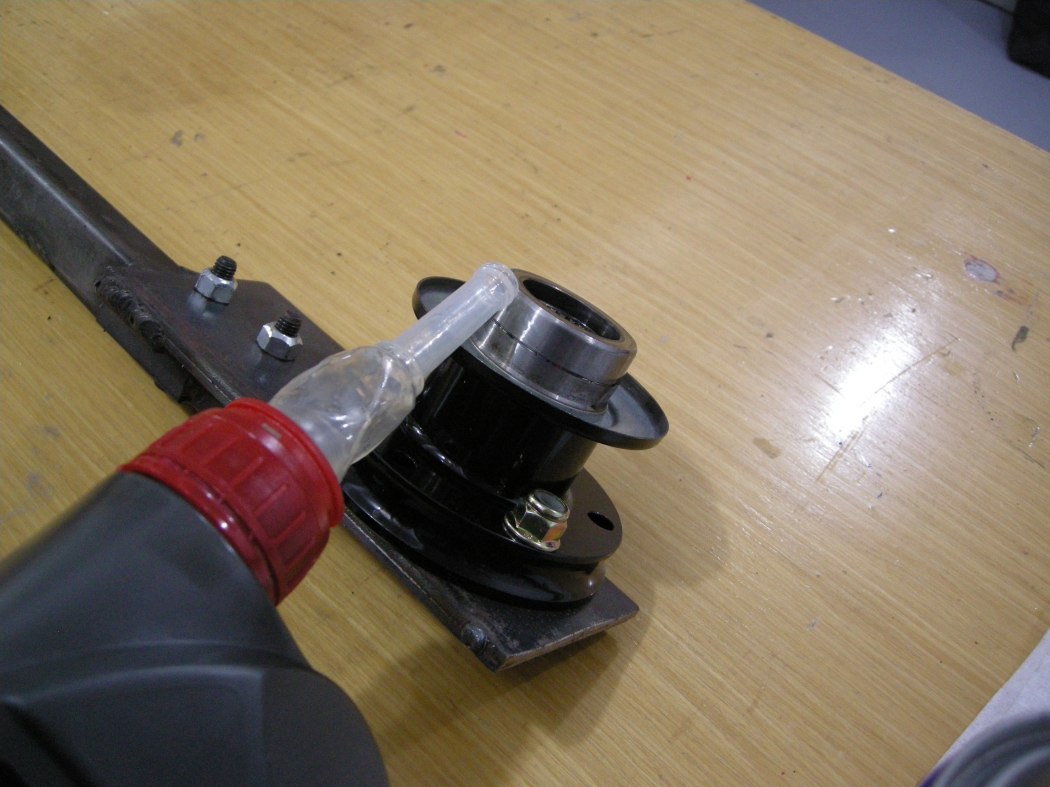
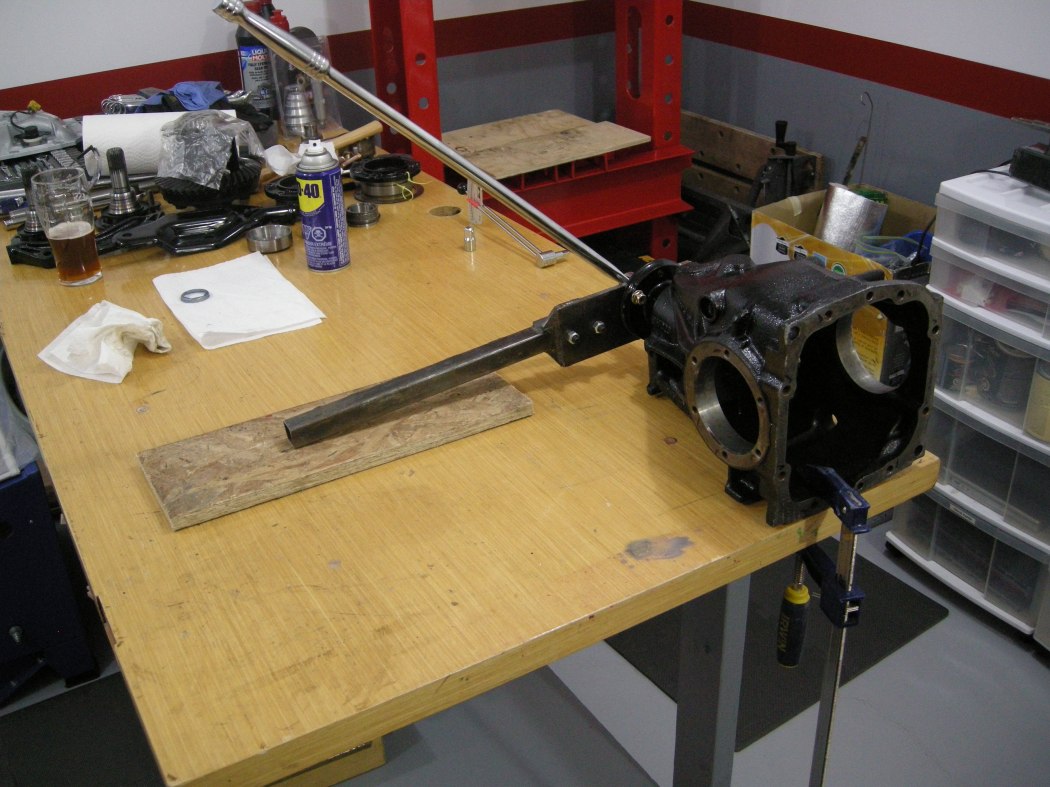
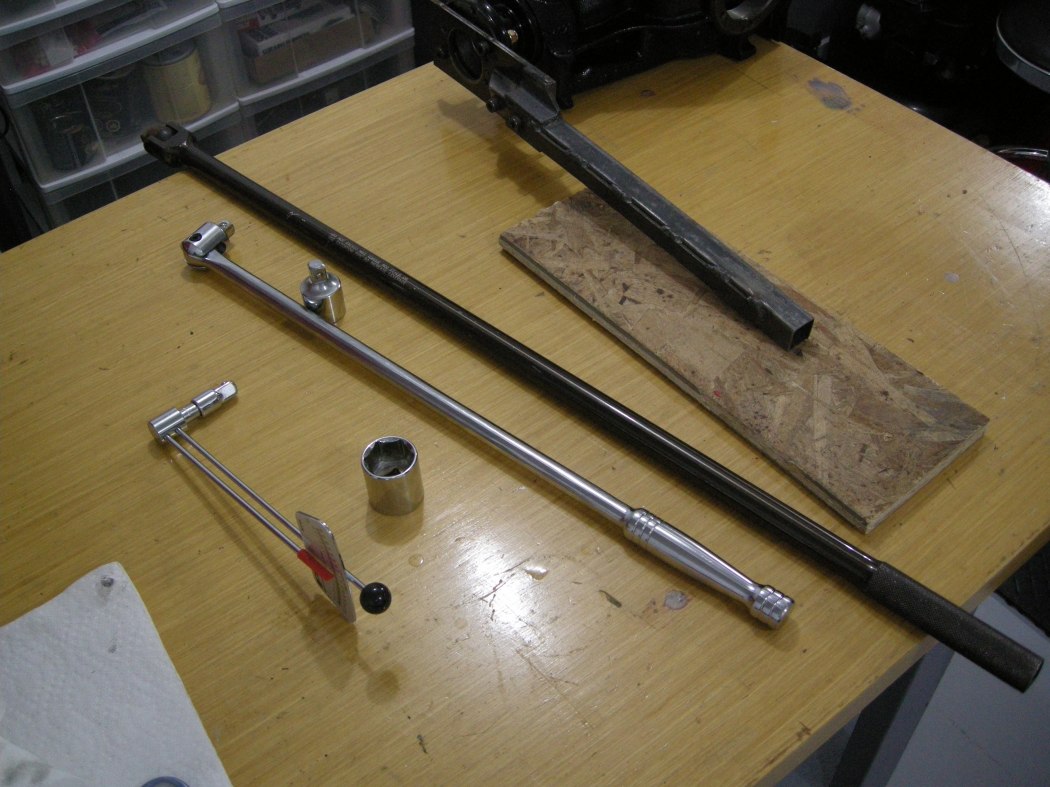
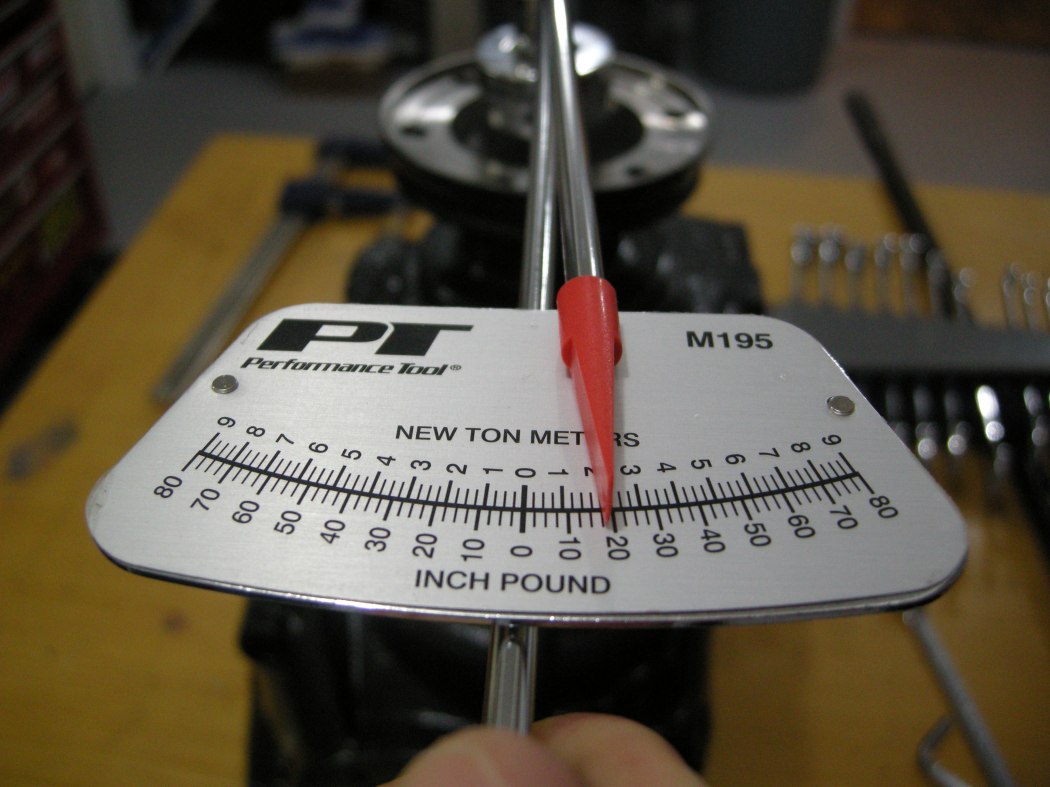
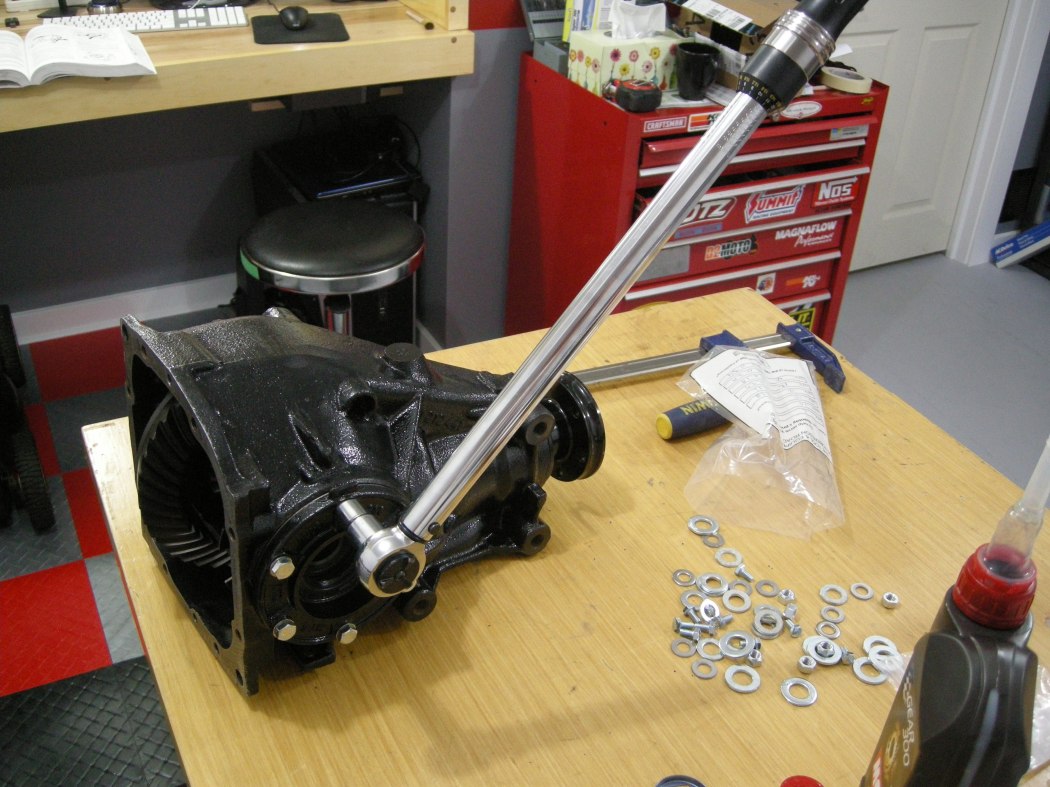
Start the Pinion Nut by hand then grab as big a breaker bar as can. When cranking down on the nut you are compressing the Crush Sleeve. Once the slop in the Pinion bearings is taken up, start taking torque measurements with your 1/4" Beam Torque Wrench. There are numbers all over the internet for bearing preload values, I aimed for 15-20 inlb of running torque. If you torque it too much you're starting all over with a new Crush Sleeve and potentially a new outer bearing, so the key here is to creep up on the final setting. Crank about 1/32 of a turn, check the torque, repeat, once you are close it's surprising how fast the torque jumps up.
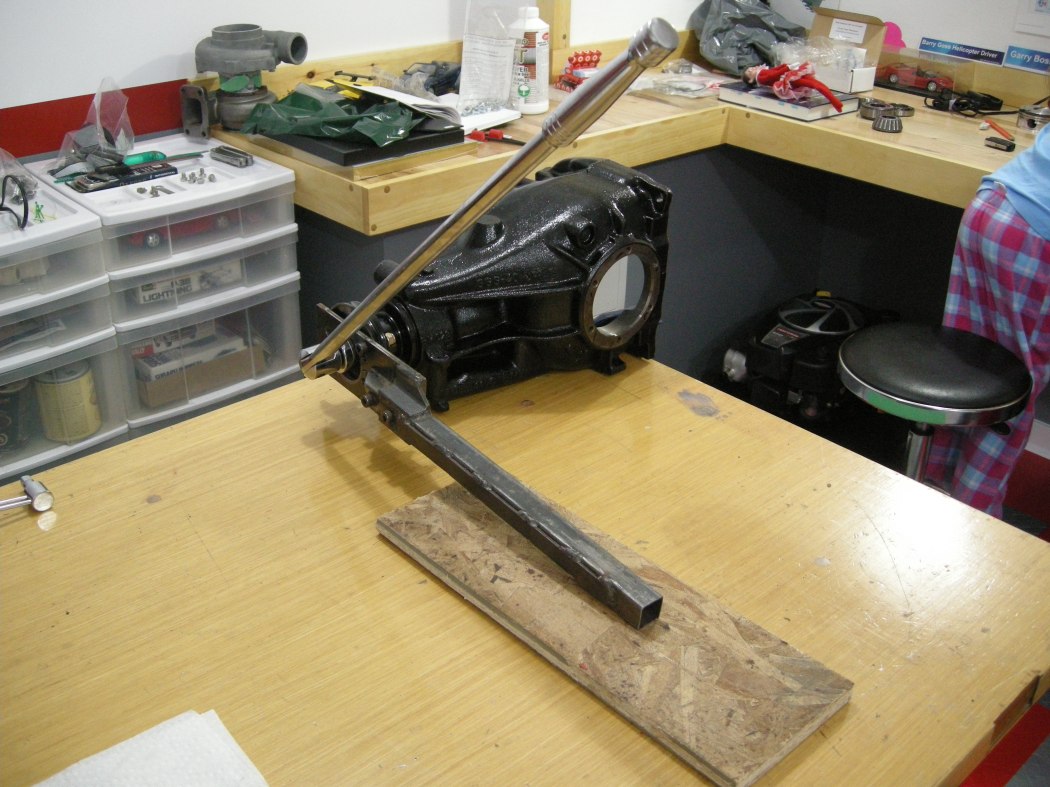
19 inlb of running torque. The initial torque required to start the Pinion moving is just higher than this.
Diff Installation:
If you haven't already, pop out the Lock Rings and install the new ones.
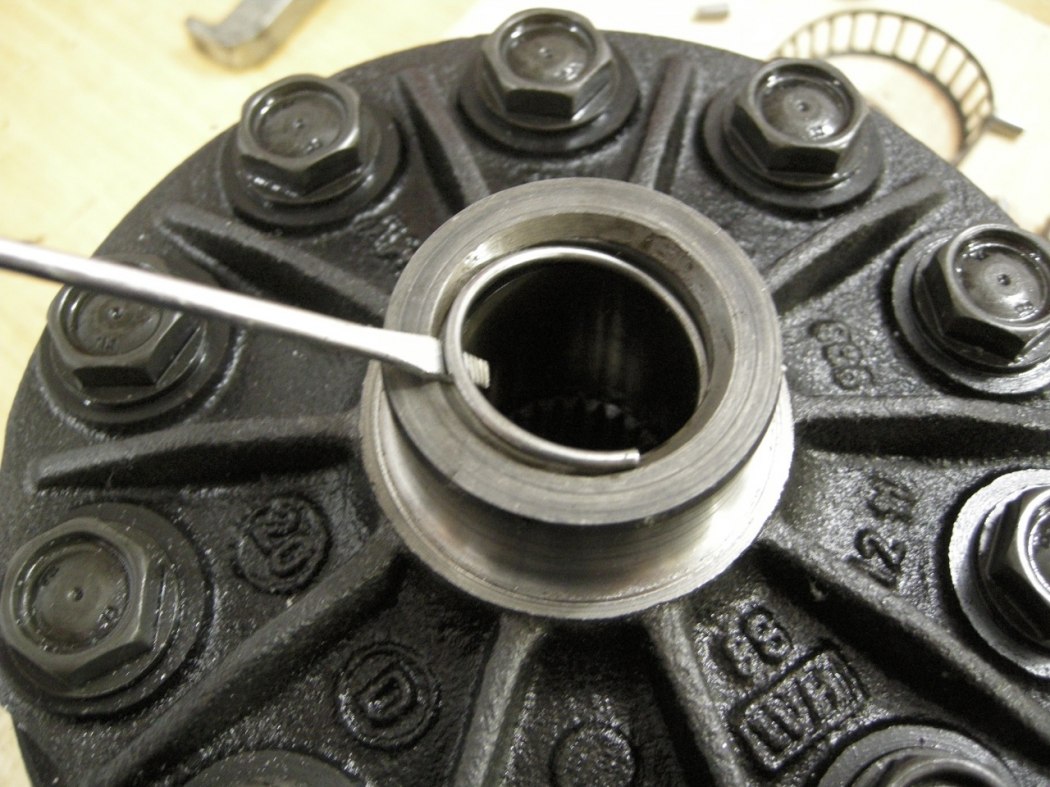
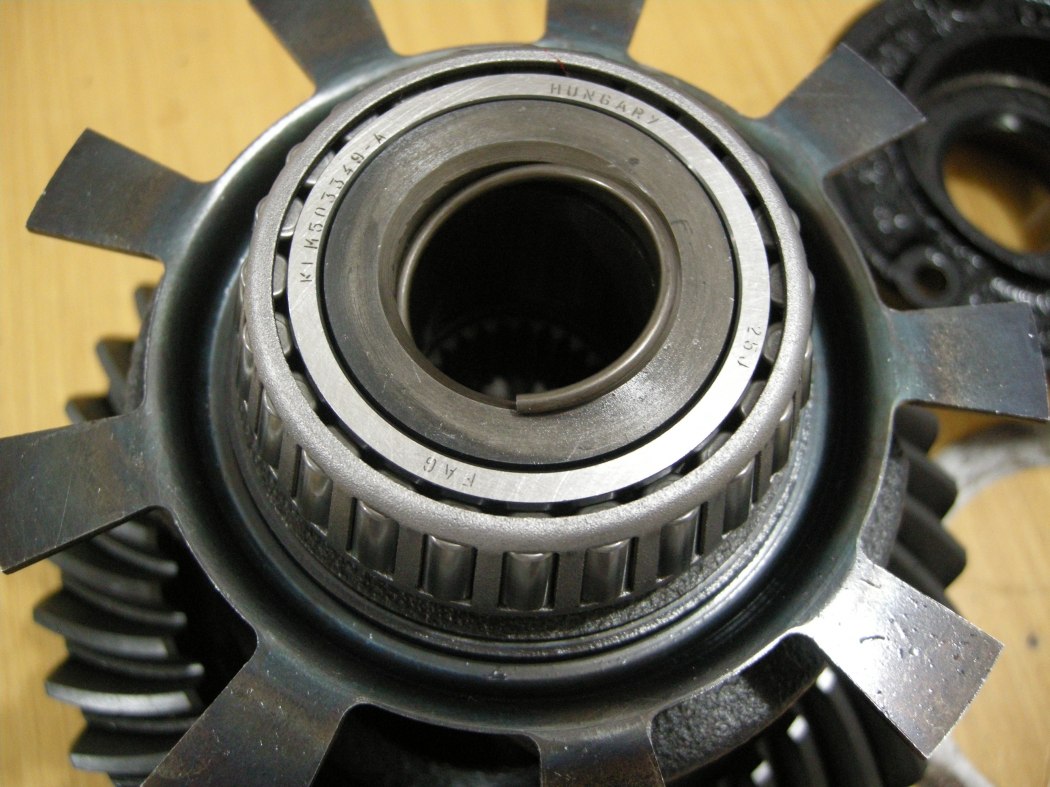
During these stages be extra vigilant about dirt and debris. Keep things as clean as possible. We aren't doing heart surgery but it's fun to pretend.
Drop the heart carefully into the Diff Case.
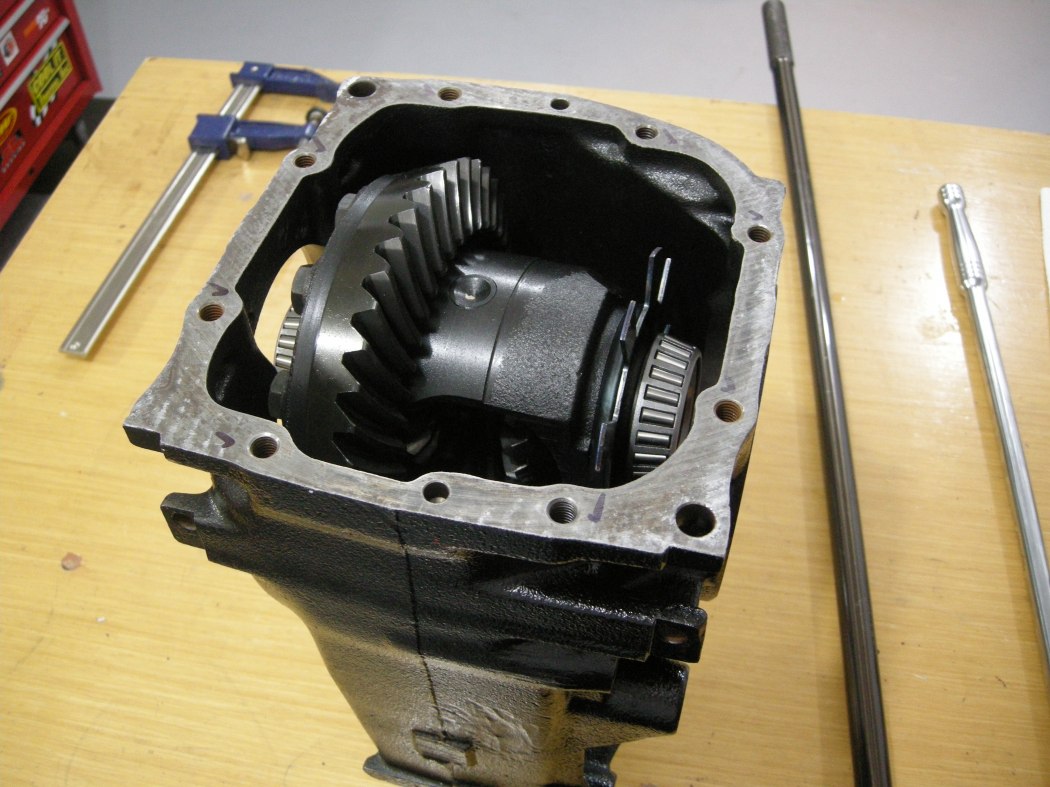
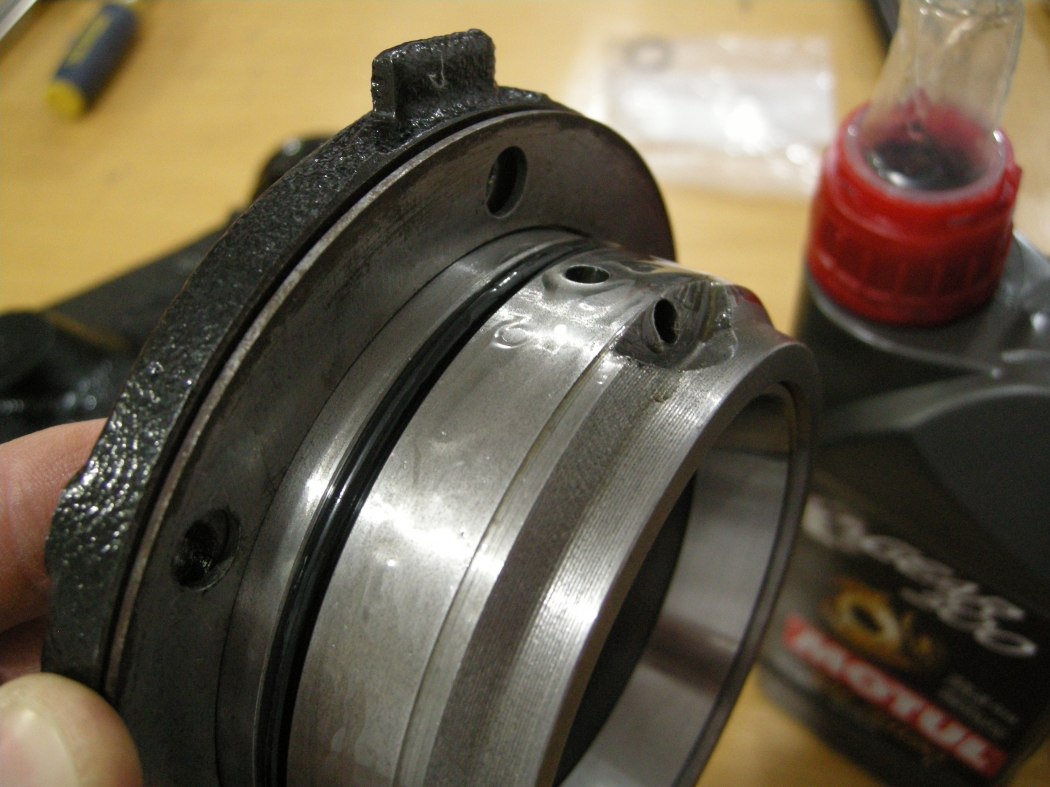
Replace the Bearing Cap o-rings, don't forget the shim that goes with the correct Bearing Cap, and add a bit of Diff Fluid to the o-ring before installation.
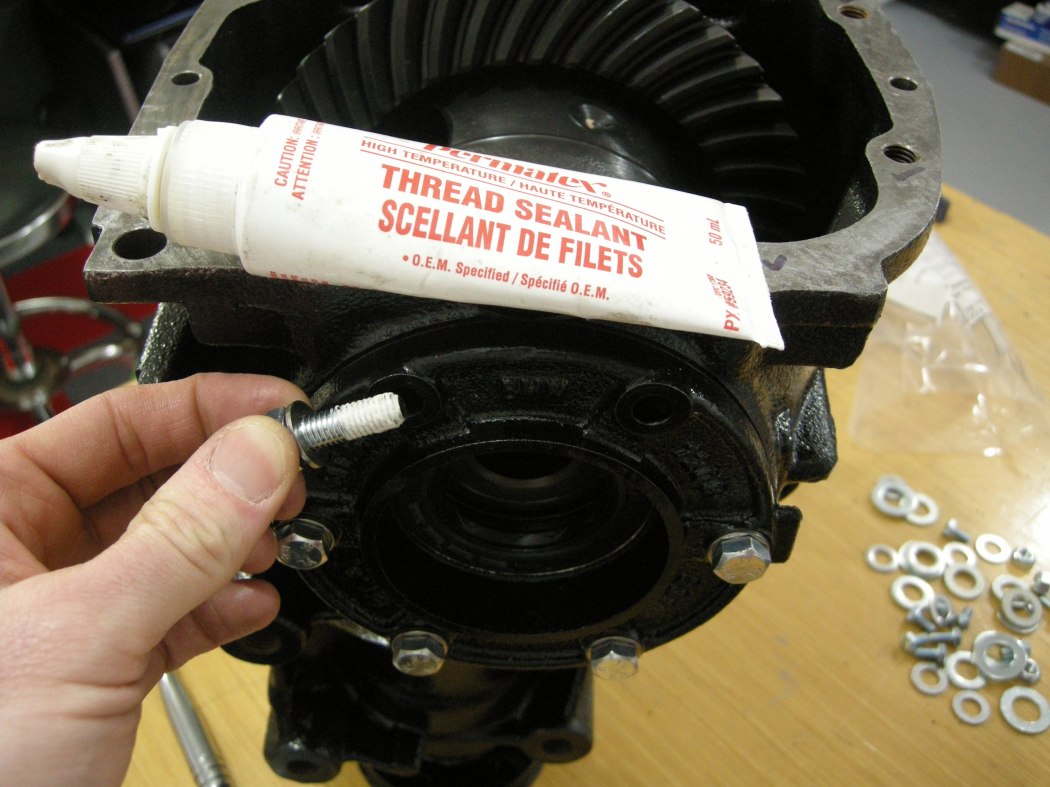
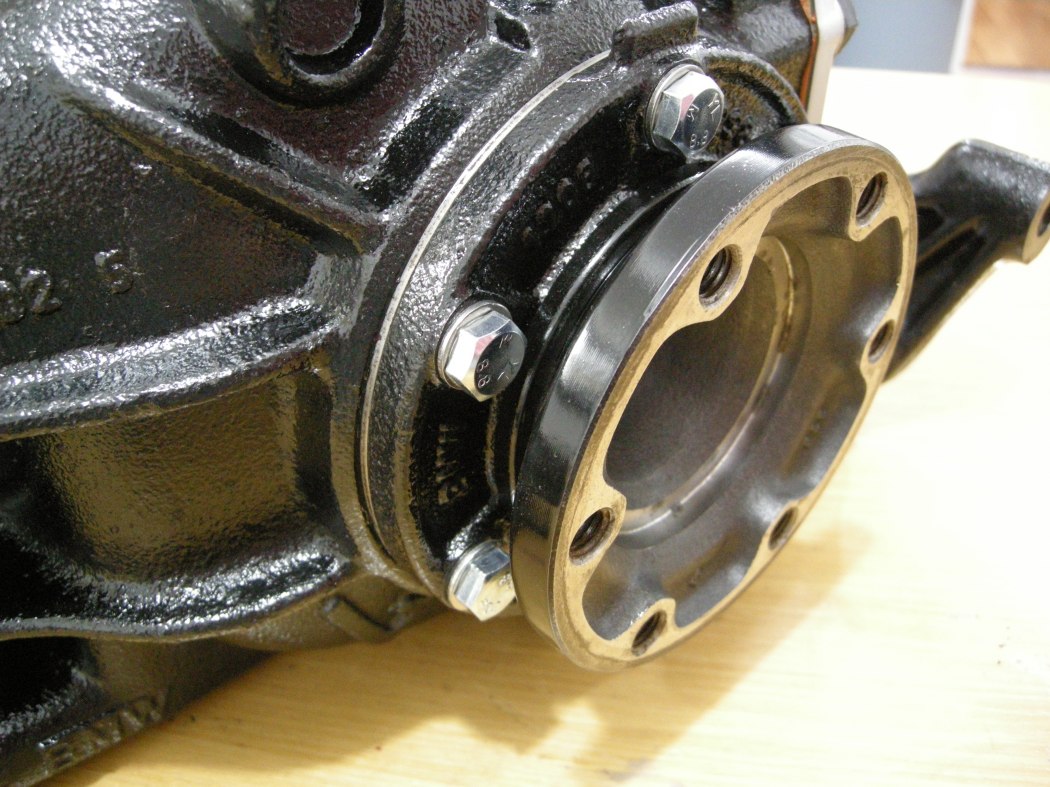
There are 2 Bearing Cap bolt holes on each side that penetrate into the Diff Case. I used sealant on these to prevent fluid getting through the threads. Torque all the Bearing Cap bolts in a progressive criss-cross pattern.
Bearing Cap Bolts:
12-off M8x25 - Gr 8.8 - 15 lb-ft
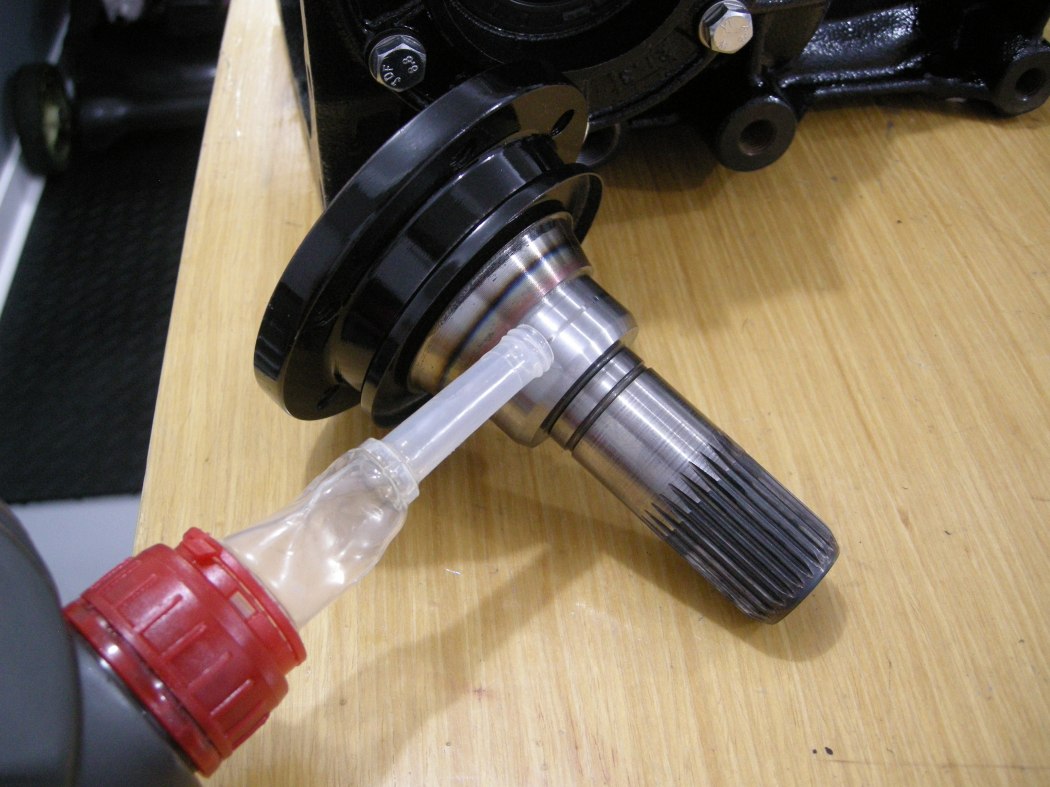
Lube the Output Flanges with Diff Fluid and slide these in.
Diff Cover and odds and ends:
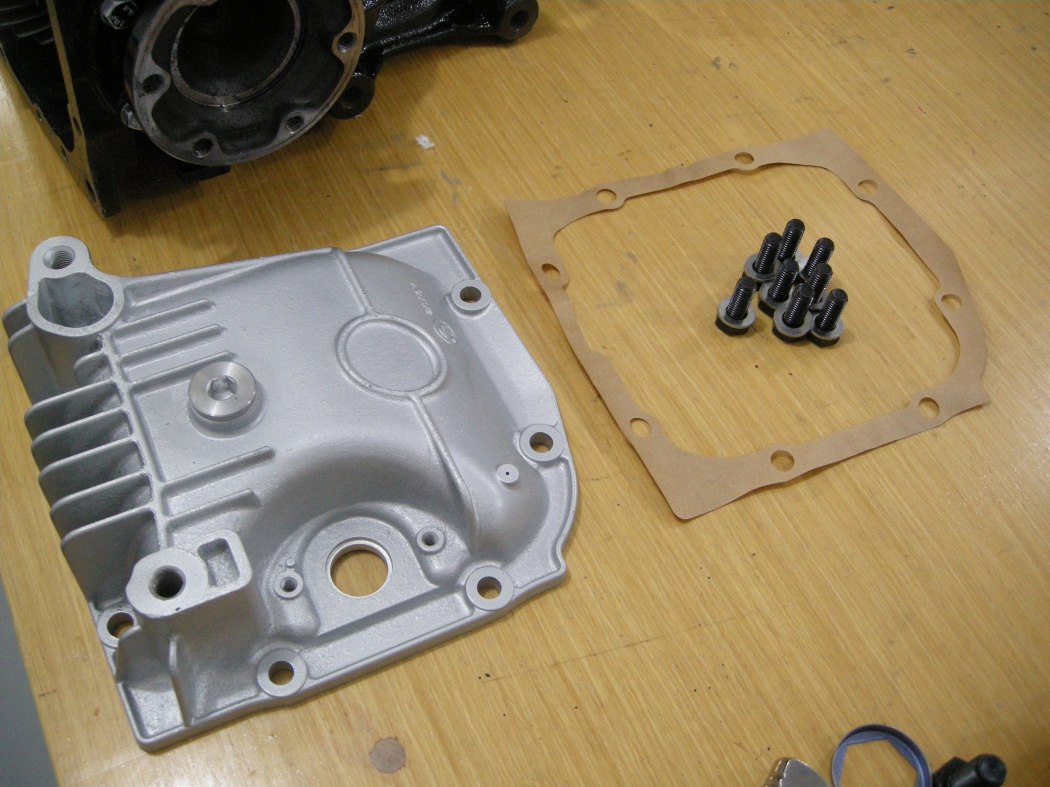
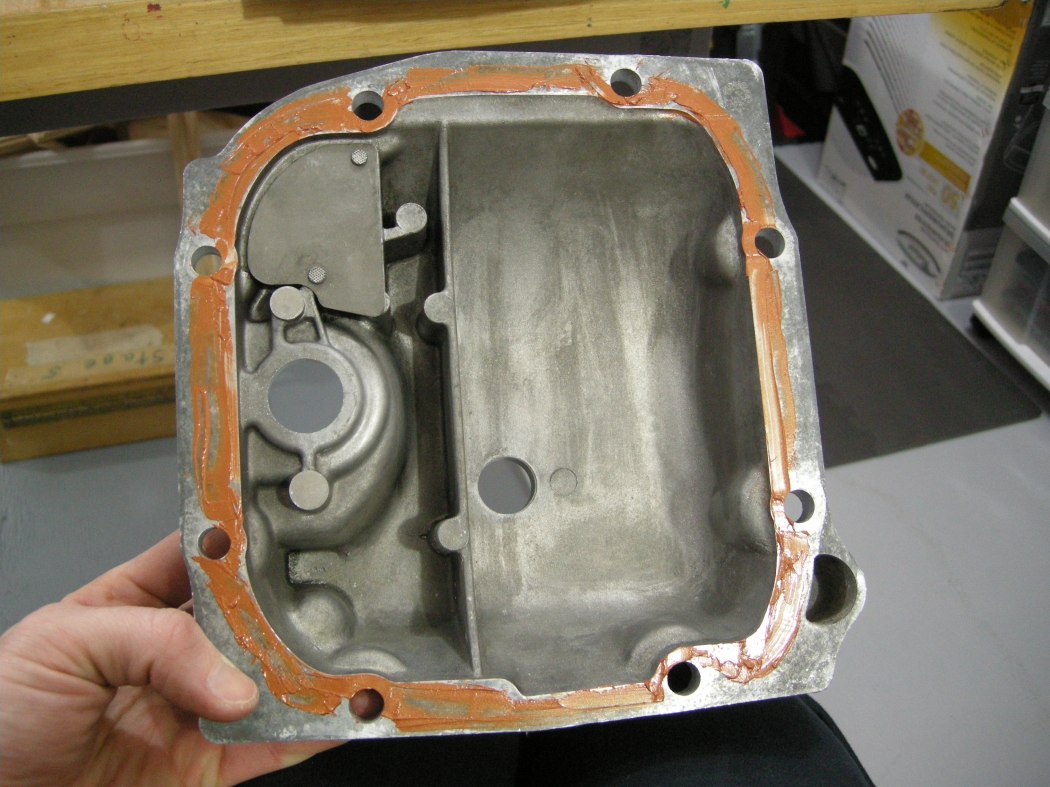
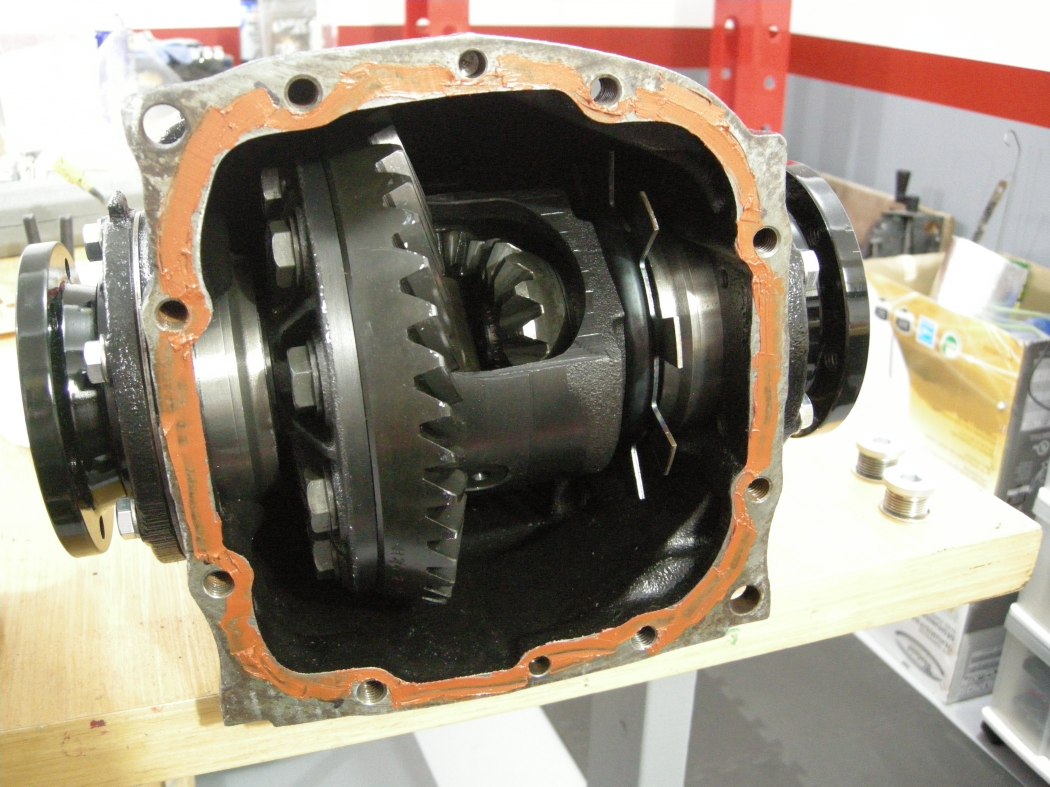
The OEM gasket for the Cover is paper, and it's up to you how you want to install this. From what I've read, it can be installed dry, with silicone sealant, with Dielectric Grease, etc, everything seems to work. I used some silicone sealant on both surfaces before putting the gasket on. Don't use too much or else it will squeeze into the Diff. As pictured there is too much, as I noticed some squeezed out the outside. In any case, make sure to let it completely dry before filling the Diff with fluid. Torque the fasteners in a progressive criss-cross pattern.
Diff Cover Bolts:
8-off M10x25 - Gr 8.8 - 30 lb-ft
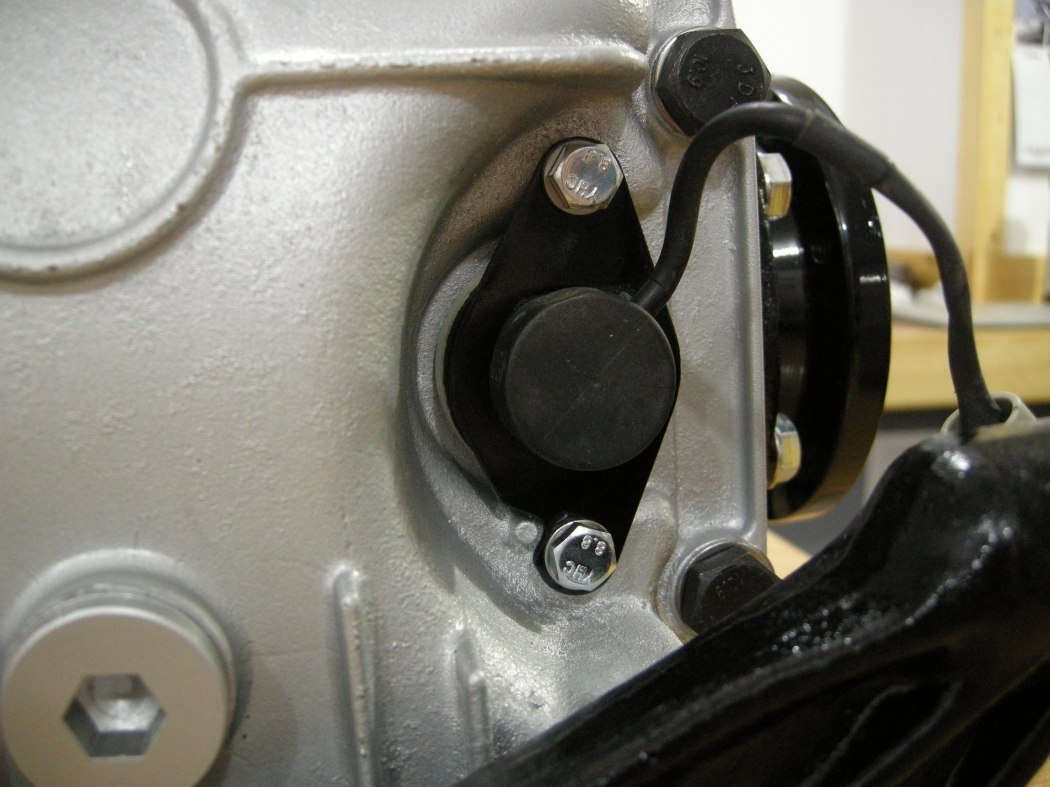
Install the Speed Sensor with new hardware and a new O-ring. I went to the hardware store with the old o-ring and found a near exact match from the bins. I should have written down the size. Anyone have it?
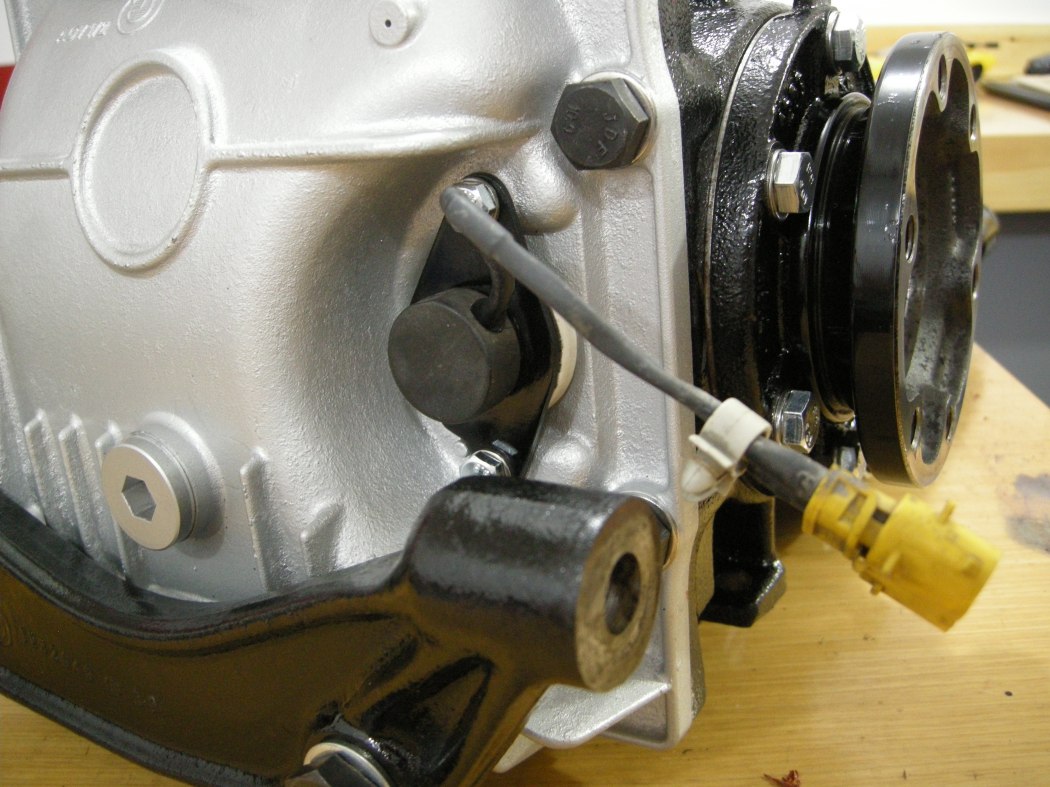
Tap in the new Pinion Nut Retaining Plate with a big socket. I fudged one up trying to tap it in with a flat blade screw driver and it deformed it making it useless. Luckily I had ordered a spare.
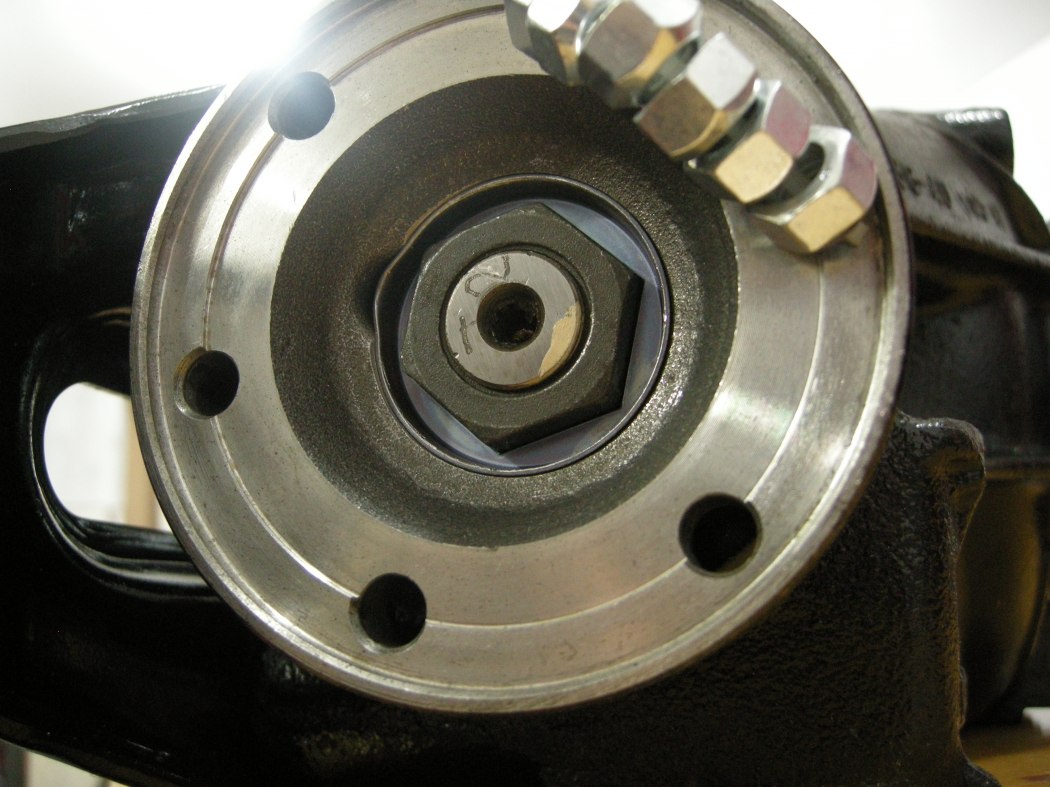
I machined the surfaces of the drain / fill plugs to clean them up, then hit them with rattle can silver.
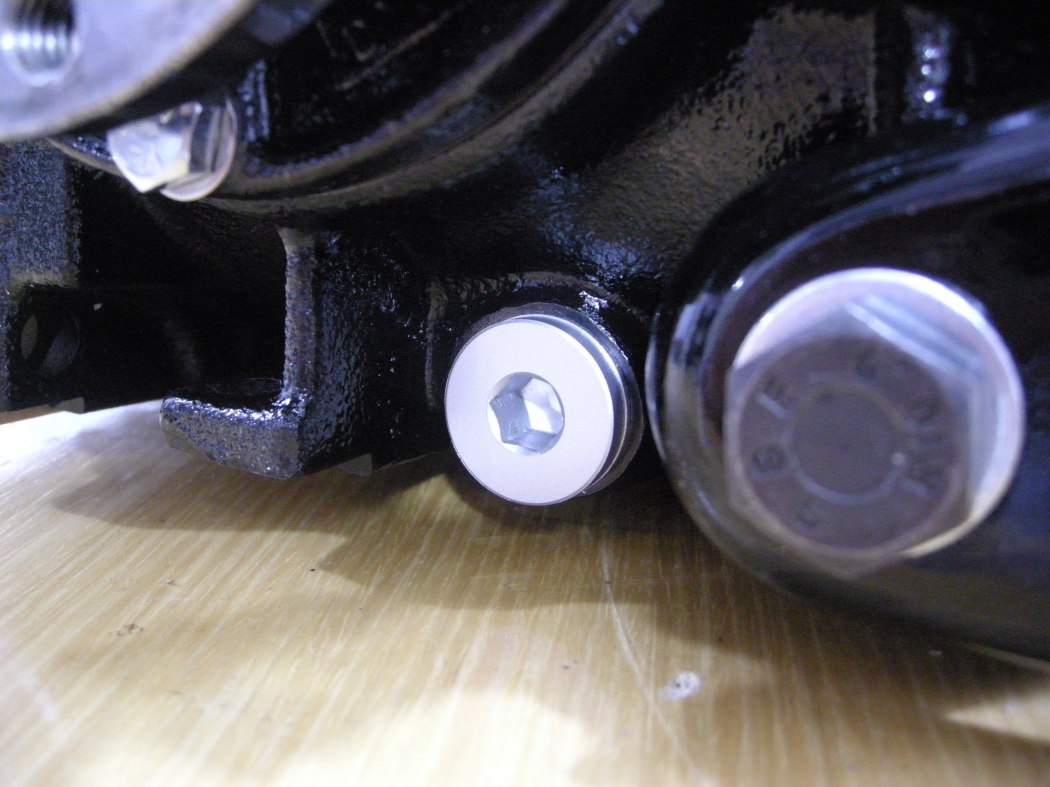
Add your favourite brand Diff Fluid in the 75W90 variety, and use new crush washers on the plugs.
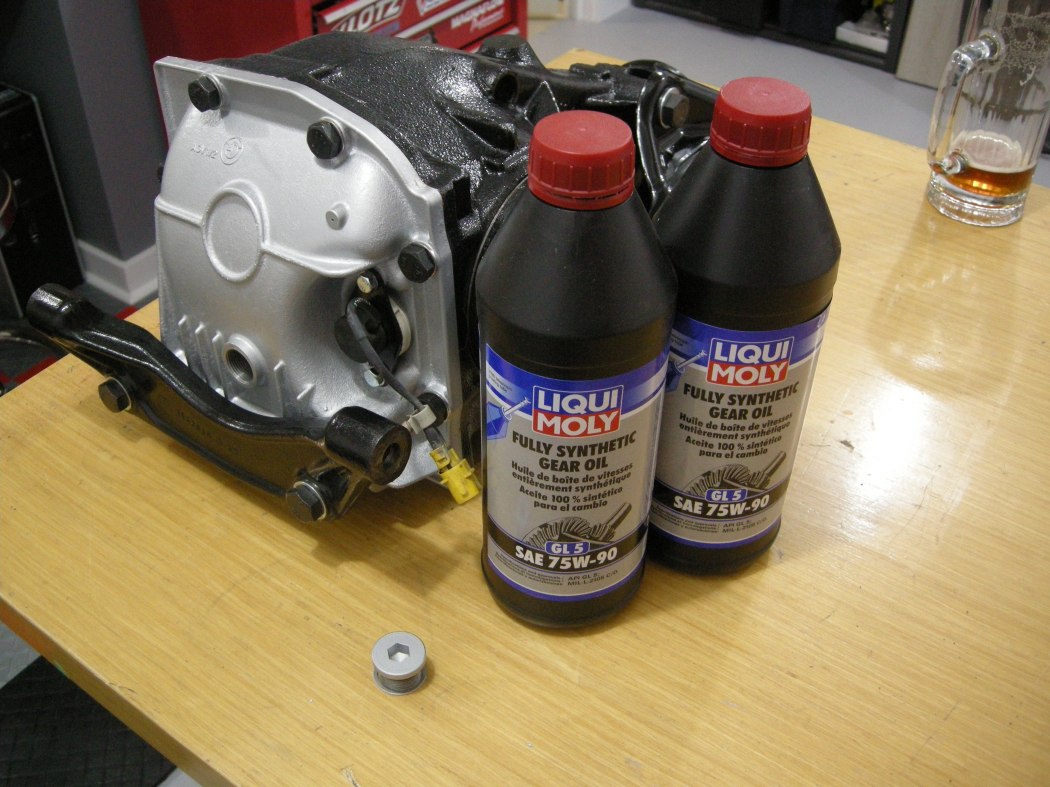
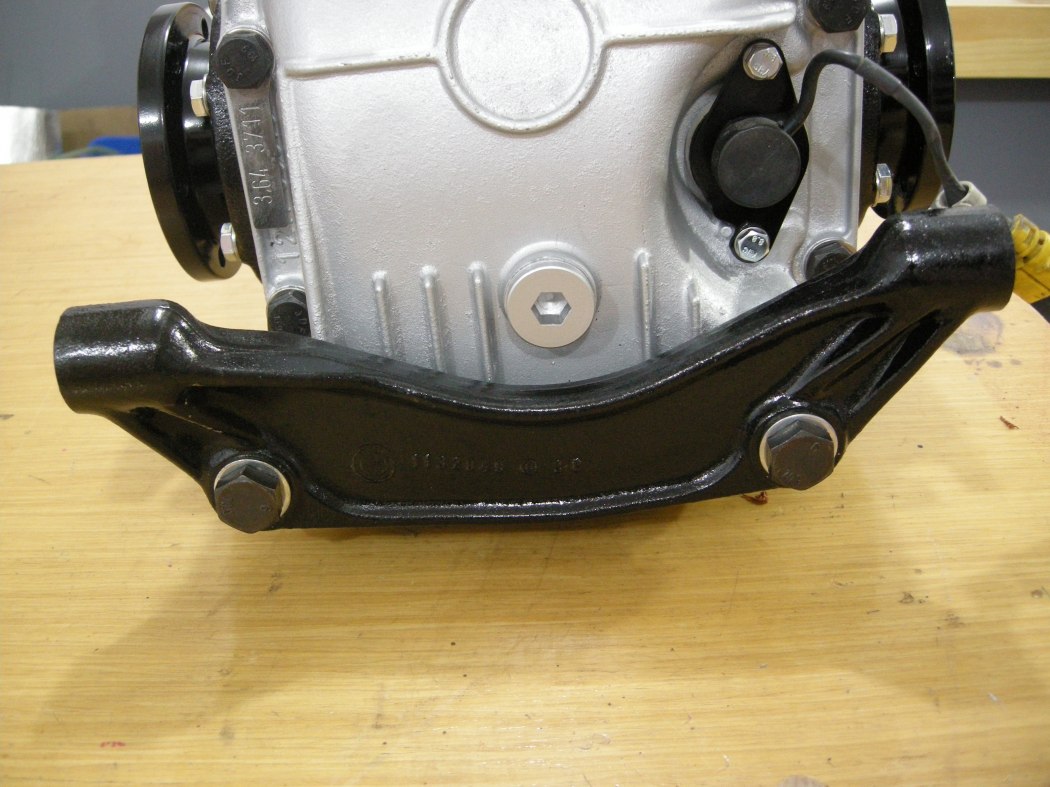
Install the mounting brackets with new hardware and you're all done.
Rear Horizontal Support Bracket
2-off M12 x 1.5 x 50 - Gr 10.9 - 100 lb-ft
Front Support Bracket
3-off M14 x 1.5 x 25 - Gr 10.9 - 150 lb-ft
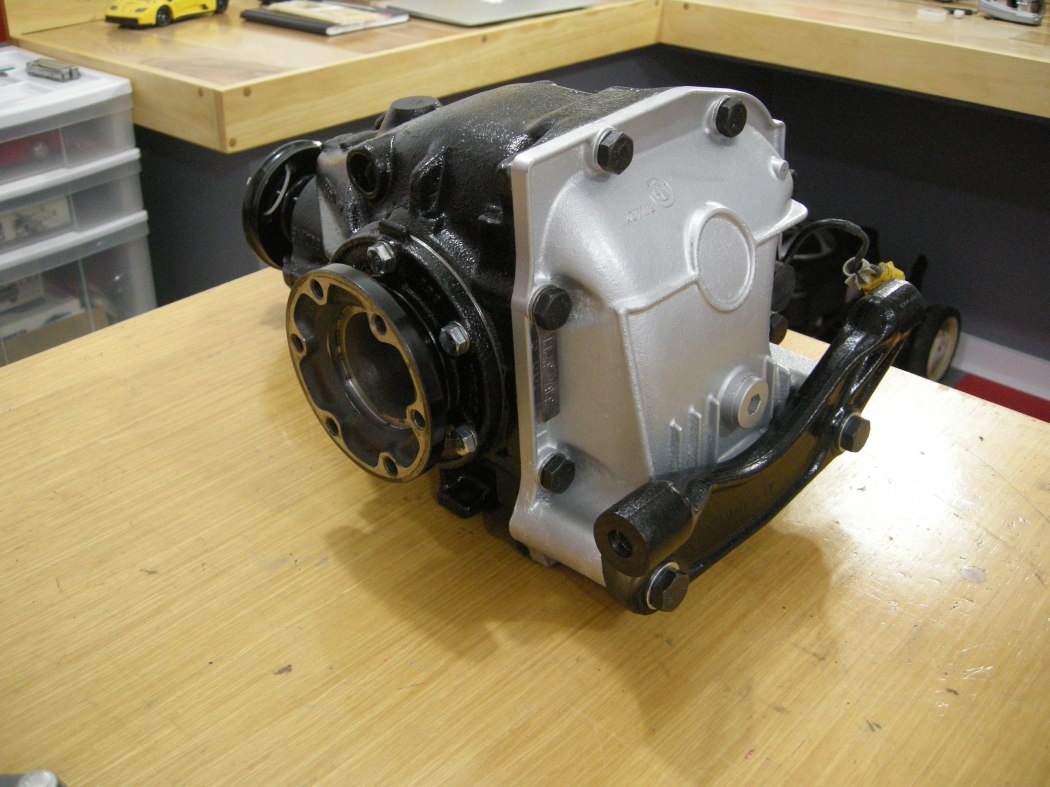
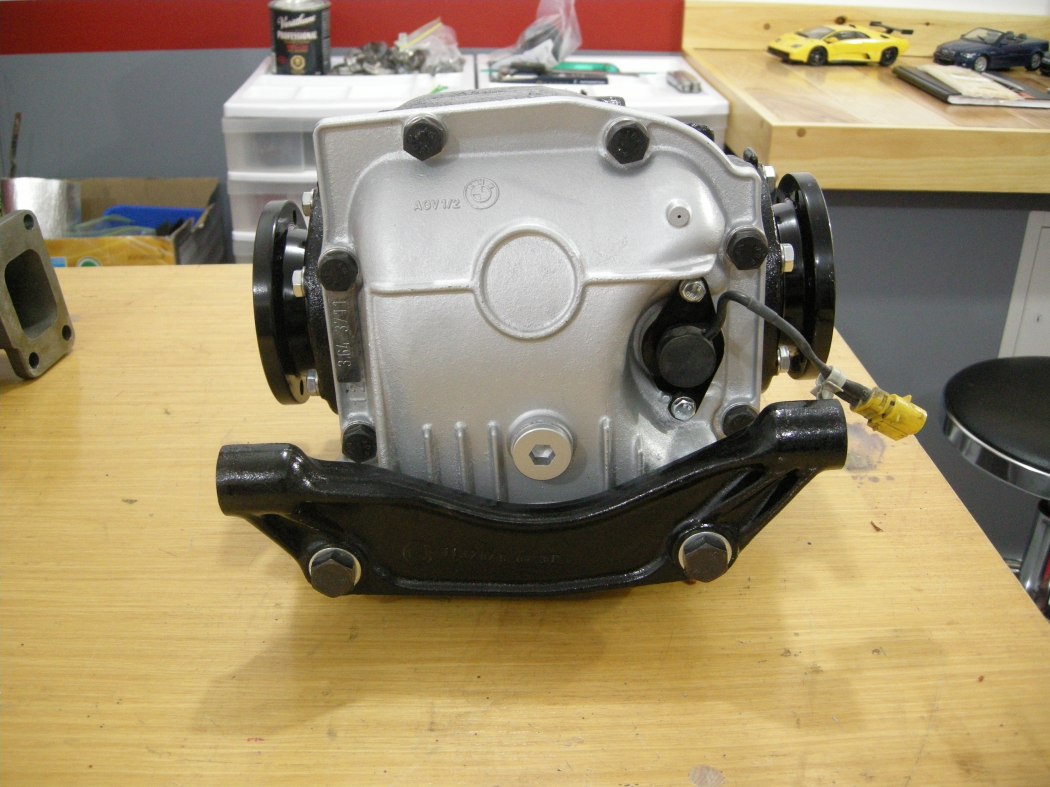
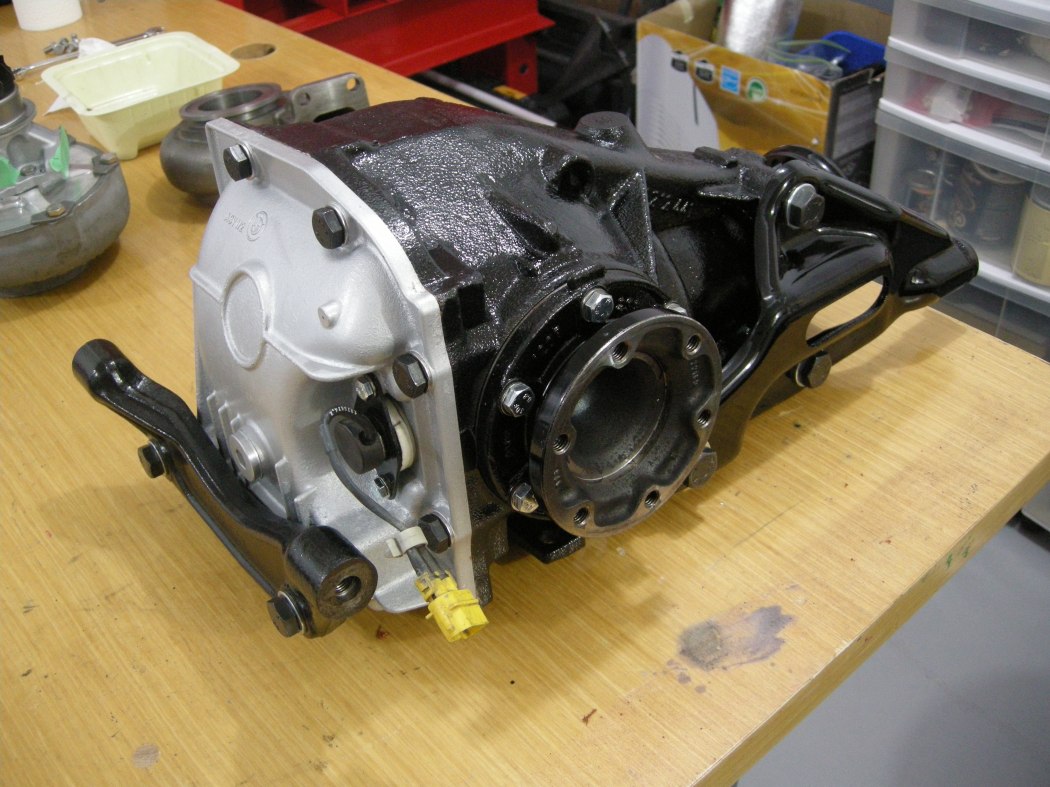
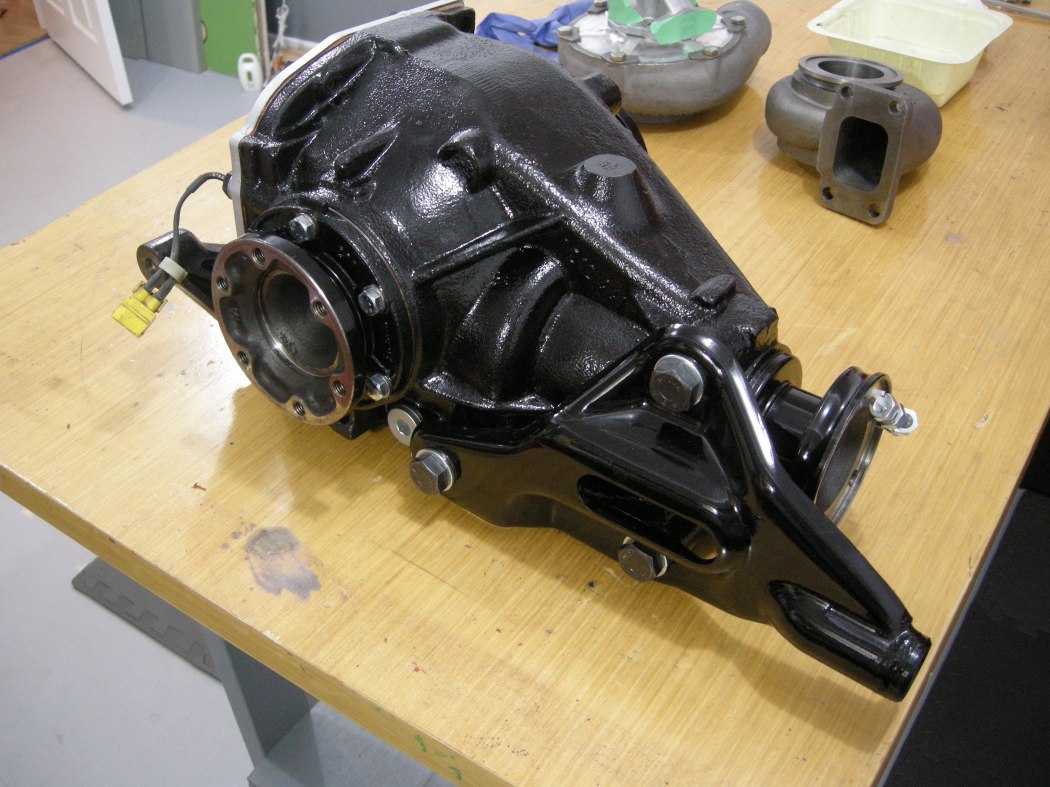
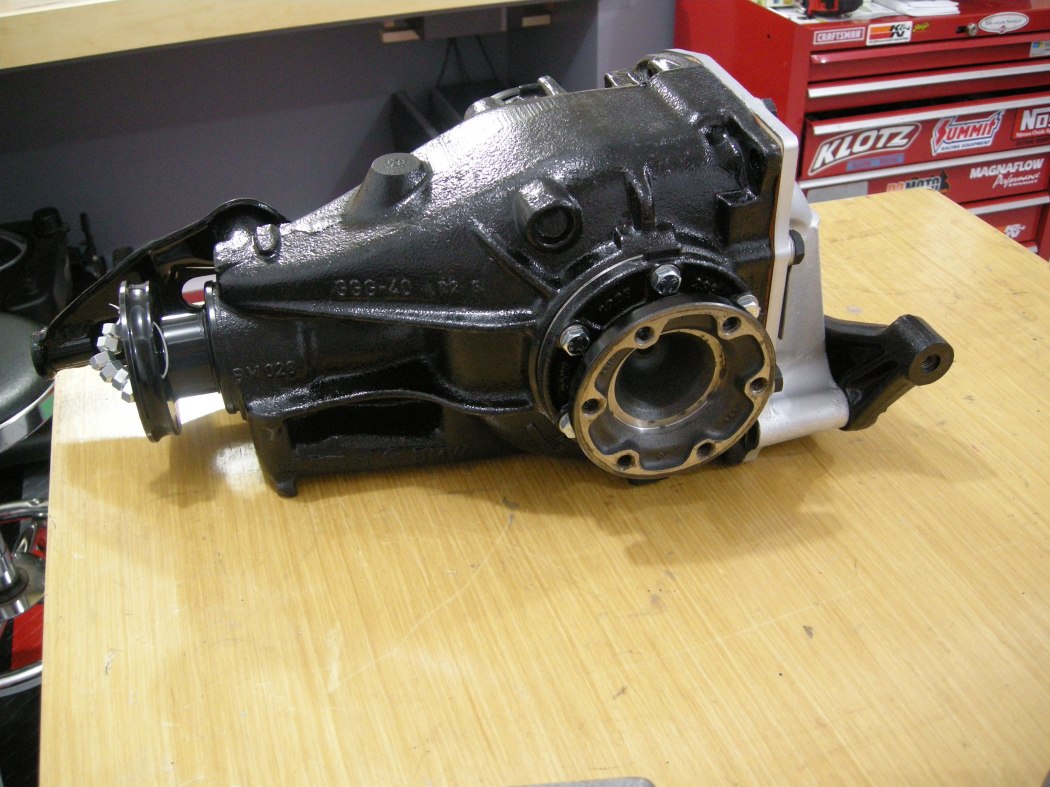
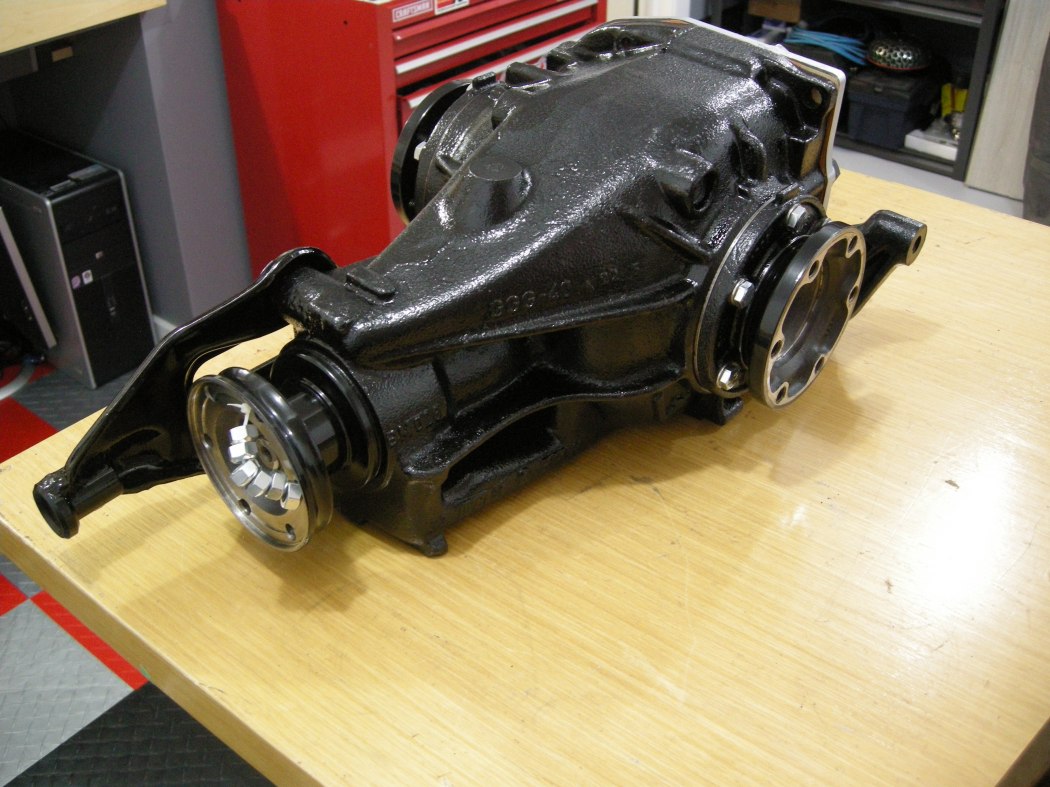
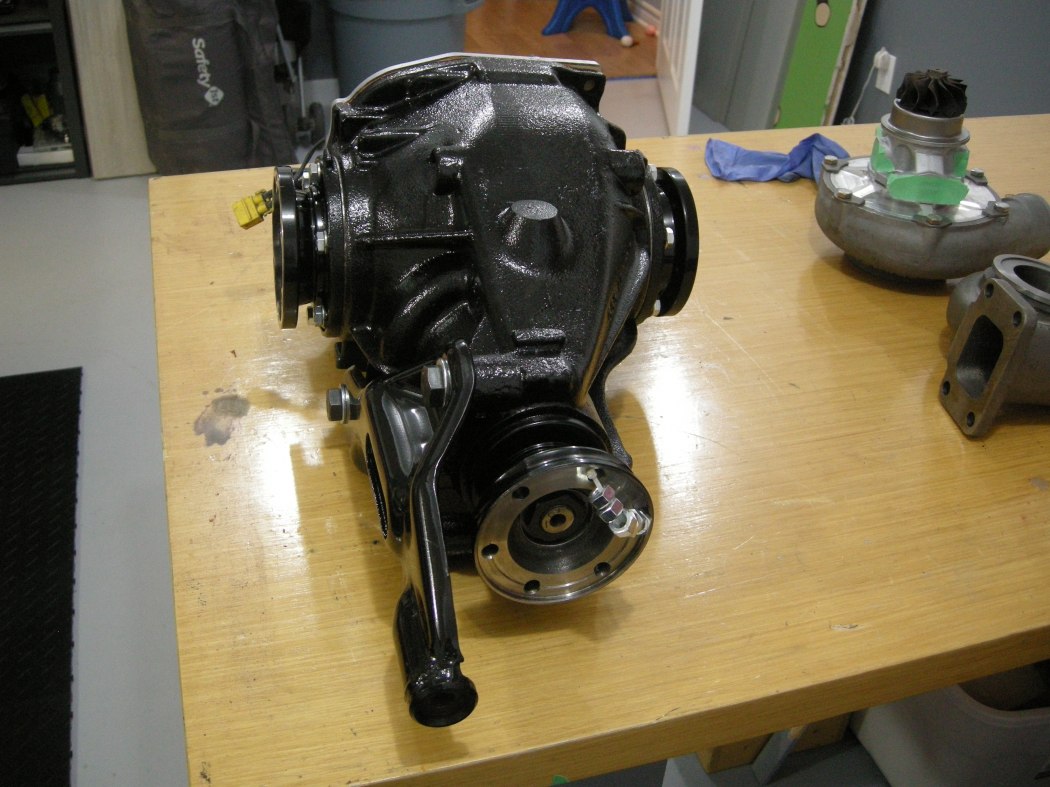
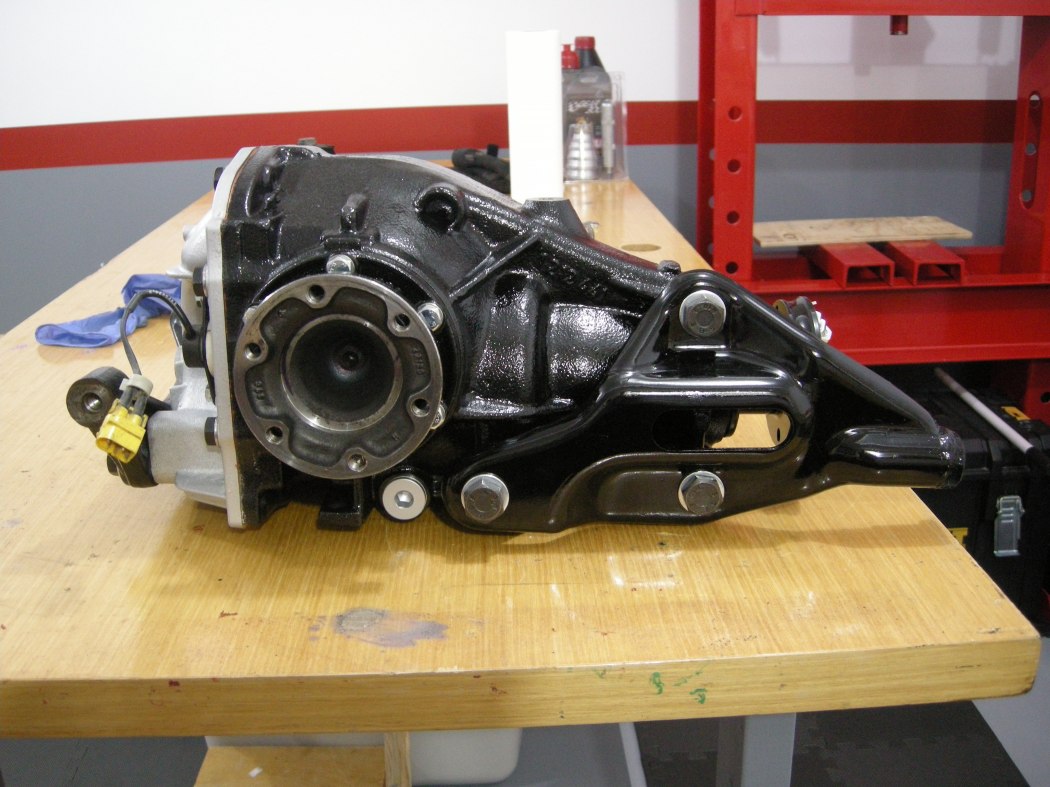
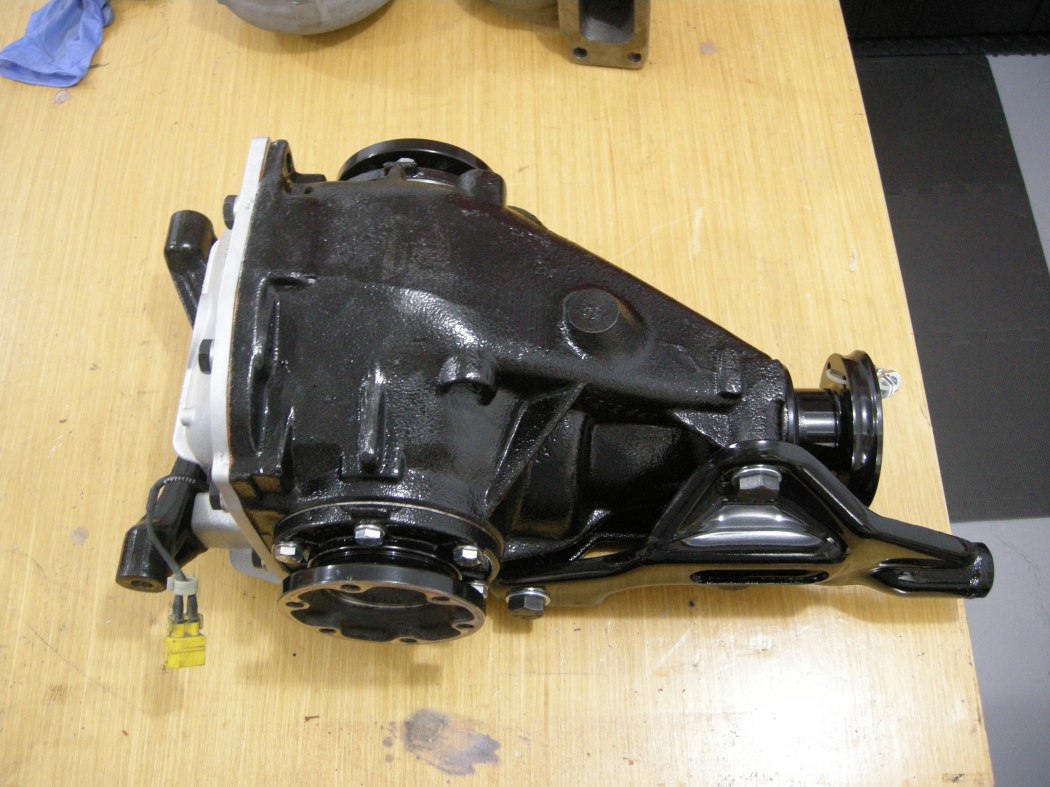
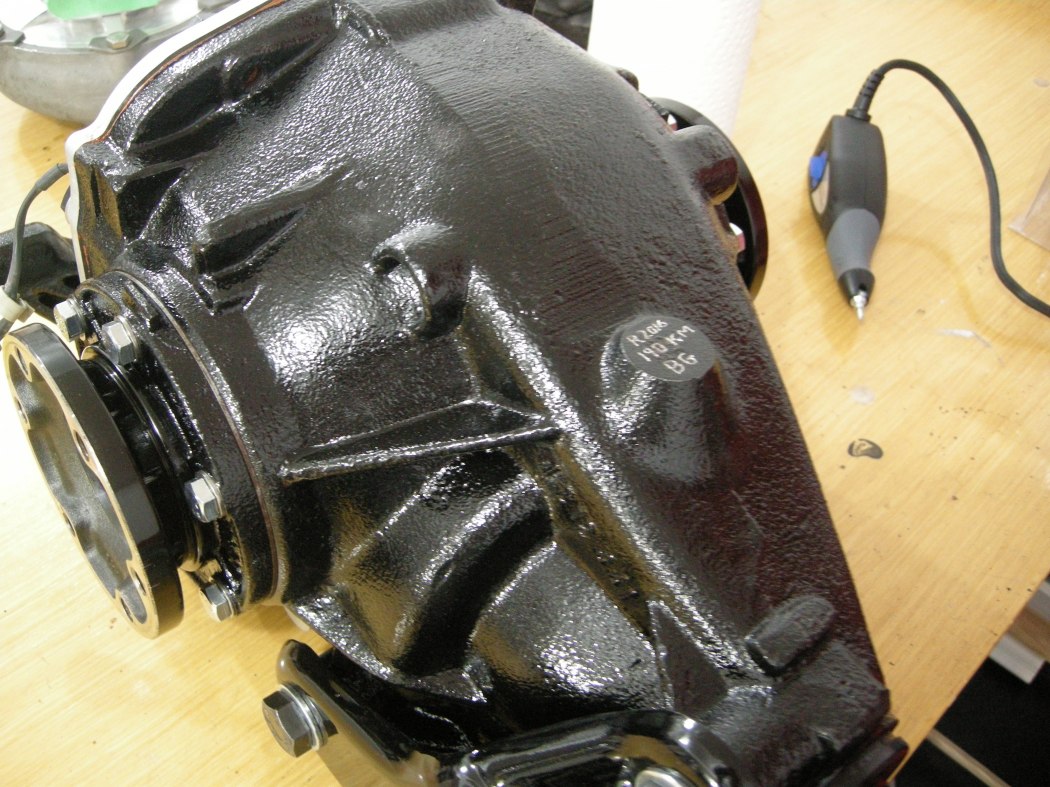
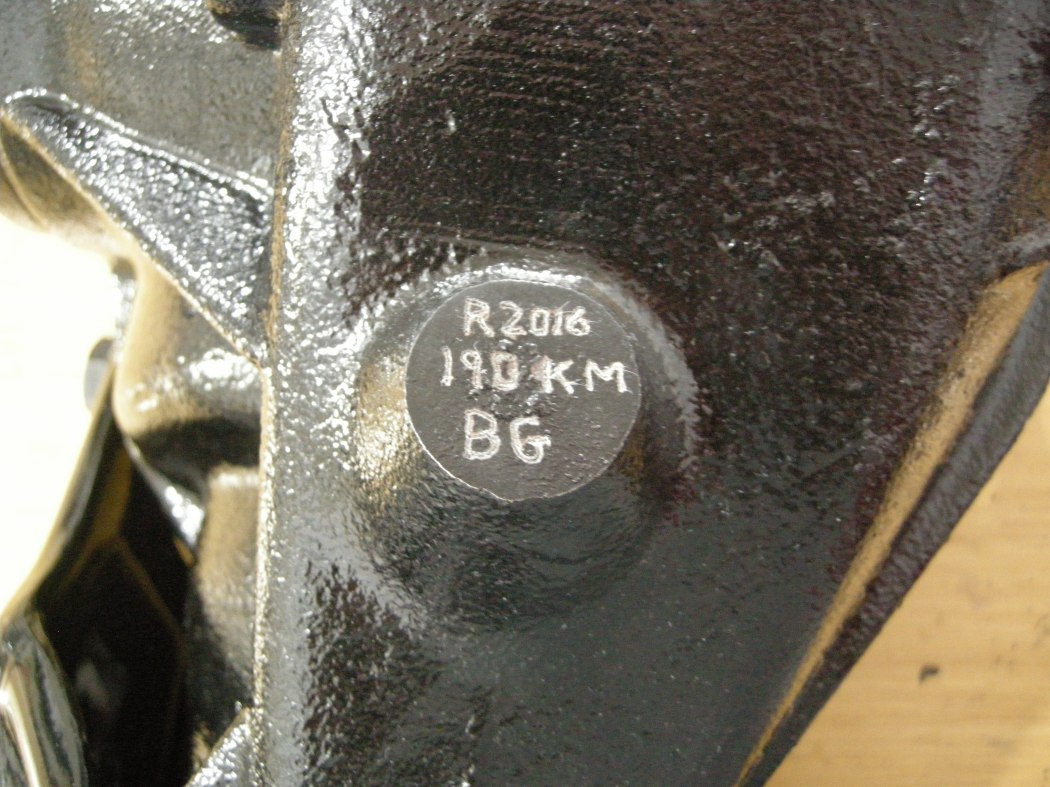
I engraved the mileage, year, and my initials on a flat spot to record the rebuild.
Hope this helps someone.
Barry
Problem: Cabin noise and/or vibration that is not affected by engine RPM or cornering, but is affected by vehicle speed.
Cause: Differential Pinion and/or Carrier Bearing failure
How to fix: Change the Diff Pinion and Carrier Bearings, see below.
Applicability: Generally this procedure can likely be applied to any rear differential, although the Pinion Bearing preload setting and fastener toque values may vary.
Tools required:
- Shop press
- Various sized mandrels. I used a variety of 'round' things from around the shop. This kit (or similar) came in handy:
OTC 4507 Bearing Race and Seal Driver (I bought my generic kit at Princess Auto (CDN) - try Harbour Freight in US)
https://www.amazon.ca/OTC-4507-Bearing- ... B000O824Y8
I have not included specific sizes in the procedure below since I simply don't know if all variants of BMW diffs use the exact same size bearings. Use good judgment here.
- Bearing splitter (1/2" - 3" size), example:
http://www.princessauto.com/en/detail/1 ... -p2990103e
- Impact gun
- 1/4" drive Beam Torque Wrench
- 3/8" drive Click-type torque wrench
- Large breaker bar
- Pinion Yoke Holding Tool
- Various typical shop supplies
Parts List:
Pelican Parts (USD):
33131213893 $20 Tapered Roller Bearing (carrier) (2 required)
23211490120 $3.25 Securing Plate (1 required, good to order a spare)
33107505602 $7.25 Shaft Seal (output) (2 required)
33111214144 $4.25 O-Ring (2 required)
33131207280 $0.50 Lock Ring (2 required)
33111211708 $5.50 Diff Cover Gasket
33121744368 $7.25 Crush Sleeve (1 required, good to order a spare. One came with the Pinion bearings from Thayer below)
Thayer Motorsports:
Pinion Brgs w/seal/crush collar $65.00
Pinion Nut (about $5.00)
Other Suppliers:
- Fasteners, see below.
- O-ring for the Speed Sensor, available from a hardware store. Here is the size:
w. 3/32"
ID. 1 5/16"
OD. 1 1/8"
Torque Values*: (unlubricated, no thread lock)
Bearing Cap Bolts:
12-off M8x25 - Gr 8.8 - 15 lb-ft*
Diff Cover Bolts:
8-off M10x25 - Gr 8.8 - 30 lb-ft*
Rear Horizontal Support Bracket
2-off M12 x 1.5 x 50 - Gr 10.9 - 100 lb-ft*
Front Support Bracket
3-off M14 x 1.5 x 25 - Gr 10.9 - 150 lb-ft*
* Not from BMW or Bentley, derived using best practice. Use at your own discretion.
Diagnosis:
For the past few years I've been noticing a cabin noise that sounded very similar to a wheel bearing on its way out, increasing slowly over time. A couple years ago I changed the front wheel bearings and while it got a bit better the noise was still there. At this point it's enough to vibrate the dash while driving a certain speeds and while it's still not 'loud', when the car stops rolling and things are quite you kind of feel like you just woke up from a Metallica concert the night before. Anyway, on a few occasion I've had the chance to isolate the noise to the diff. This past summer I had the axles out for a rebuild and was able to spin the diff alone and it was obvious this is where the sound was coming from.
Other details:
The diff is a BMW Medium188mm open type with a ratio of 3.64:1. It has roughly 190,000 KM on it and I would imagine it had its first oil change when I bought the car ~6 years ago (168,000 km). I just drained this 6 yr old fluid for the rebuild and even it came out black, obviously I should have done a better job flushing it 6 yrs ago. The outside of the diff was dirty but not really rusty.
For the most part the pictures do the talking. I assume anyone tackling this has enough experience to know the basics, i.e. pressing things in/out straight, how much force to use, what surfaces to apply pressure on and how to support properly. I have a bunch of random round parts, like old wheel bearing races and seal drivers, which made the job go smoothly. I've seen people use a slide hammer on some of the races, but with the right sized mandrels for the press the slide hammer isn't required.
References:
- While I found bits and pieces all over the net, I generally just dove in.
- This link has good tear down / rebuild documentation that I found:
https://www.bimmerforums.com/forum/show ... Pic-heavy)
- Forum member cek has successfully rebuilt / documented his diff rebuild here (wish I had seen this before starting mine!):
http://www.mye28.com/viewtopic.php?f=3&t=127886
- If you want to check / set gear backlash, there is a section in this link that covers it (courtesy of cek):
https://www.bmw2002faq.com/articles.htm ... -build-r74
Procedure:
I have not covered the diff removal from the car, I assume anyone tackling this project knows how to do this.


Disassembly:
The Output Drive Flanges simply pop out. Use a screw driver for leverage if they are a bit stubborn but they shouldn't be.

Tag one side with a zip tie or similar. This particular part could be installed on either side I believe, but it's better to be safe than sorry.

The Speed Sensor is easily removed by first removing the 2-off M6x10 screws. The sensor just pulls out, there is an o-ring that seals it to the diff cover. Notice the metal shaving that were attracted to the sensor.

The Bearing Caps are next, and using a flat blade screw driver for leverage helps here. Again, doesn't take much to pop these out. There is a specifically sized (thickness) shim under each bearing cap. Tag these so they go back on the same side. This is extremely important.
Also notice the witness patch from the OE assembly, where they used sealant on that (and another) particular threaded hole. These 4 holes (2 for each Bearing Cap) are through holes into the Diff Case.

Remove the 8-off M10x25 bolts holding the Diff Cover on and remove the Diff Cover. Notice the fluid level witness line left behind by the contaminated oil.


The Diff itself just drops out the back. Keep things organized and in tagged so that all pieces go back on the same side / where they belong. Nothing worse than getting it all back together and it's too tight or loose.

Pinion Removal:
The Pinion Nut is prevented from loosening by a Securing Plate. Drill a small hole in this, partially drive a sheet metal screw into it, and pry it out.


Then using an impact gun, zip the nut off. It helps to hold the Pinion gear on the inside of the Diff Case to prevent it from spinning. Because we're using an impact the Pinion gear does not need to be held very tight.

Jump on the press and drive out the Pinion. Now you can pry the Pinion Seal out with a seal pry bar or anything else. The Small (outside) Pinion Bearing will now be free and can be removed / discarded.


Pinion Bearing Race Removal:
The outside Pinion Bearing is slightly small than the inside Pinion Bearing. I used an old Audi wheel bearing race that just fit through the inside bearing race to remove the outer (smaller) race from the inside - out. I hope that wasn’t too confusing.
This picture shows the small pinion bearing race removed and the 2 pieces I used to get it out - an old Audi wheel bearing inner race and a piece of hardware. These 2 pieces are placed against the Pinion bearing race from within the Diff.


This picture shows the extension bar required to reach inside the diff case with the press.

This picture shows the 2 pieces dropped in from inside the diff case, on top of the small pinion bearing race ready to press out.

This picture shows the diff case supported in the press; the small pinion bearing race drops out the bottom.

Next is the large (inside) pinion bearing race.
Drive it out with the press in the configuration shown. Fairly straight forward if you’ve made it this far.


Worn Parts:
Take a look at your Pinion Bearing rollers and the outer races. Mine were very badly pitted and very noisy when spun in my hand. Definitely the smoking gun in my driveline noise issue.


At this point we are almost completely disassembled... keep reading.

Large (inner) Pinion Bearing Removal:
Setup the Bearing Splitter as shown by Sarah.

Drive the Large (inner) Pinion Bearing off the shaft with the press.


Carrier Bearing Removal:
The Carrier bearings require the use of a bearing splitter for removal. I also used a large bolt to fill the space in the center, to serve as a platform for the puller.
Start with the Bearing on the Ring Gear side. Cut through the roller cage and pry it off. This leaves the inner race on the Diff.


The press cannot be used for this operation because it is impossible to support the bearing splitter on the press plates. I converted a 2-jaw puller to interface with the bearing splitter, using some 3/8" studs and nuts. Start cranking and the bearing race will slip off.


For the other side of the Diff with the speed sensor toothed ring, perform the same operation as the previous Carrier Bearing except the Bearing Splitter will engage with the top lip of the bearing race. There isn't much for the splitter to catch on so make sure the splitter is tightened up enough.


Bearing Cap Seals and Carrier Races:
Last but not least, the Bearing Cap Seals and bearing races.
Simply drive the Seals out using the appropriate driver, and same for the bearing race.


Half way point:
At this stage the diff is 100% disassembled. Consider how much time you've spent up until now and the pile of scrap parts can almost fit in one hand.

Clean clean clean and paint:
Now is the time to clean and paint everything. The amount of effort you exert here is up to you. I don't have an operational sand blaster so I stripped everything by hand. Took a bit of time but was worth it. I even turned the drain / fill plugs on the lathe to remove the surface rust. In the end I painted them silver to somewhat prevent them from rusting. Because I used a hacksaw to cut the Carrier Bearing cage, make sure to really flush out the diff of any metal particles. Same goes for the diff case. Flush everything thoroughly.


I chased all the treads to clean them up. This may be overkill to some but the devil is in the detail.
I had made an M14 thread chaser a while ago using an old axle bolt. Just cut some grooves in the thread with an angle grinder or Dremel. I have a few of these of different sizes.


Re-assembly:
Great service from Thayer Motorsport for some of the parts. I had overlooked the Pinion Nut and Securing Plate and Clay double checked to make sure I had these. I already ordered the Securing Plate from Pelican but figured a spare wouldn't hurt.. ended up needing it.

The final chapters below follow the "installation is the reverse of disassembly" mentality.
Bearing Caps:
Starting with the Bearing Caps, press the new seals in to the same depth as the old ones. Use a light smear of oil on the outside of the seal.


Flip the Caps over and drive in the Bearing races using one of the old races, as shown.


Pinion Bearing Races:
Old (left) vs new (right)

The Pinion Bearing Races are pressed into the Diff Case using the old races.

Special note for the Large Pinion race, there is a spacer that goes in first. Don't forget to drop this in. Also, I made the mistake of using the old bearing race for the Large Bearing, and it got stuck in the case! See picture. I had take a couple steps back to get it out. I ended up using one of the old Carrier Races to drive it in, which was a bit smaller.


Large Pinion Bearing:
Press the Large Pinion Bearing on the Pinion shaft, using the old bearing or in my case, an Audi wheel bearing inner race, and the Bearing Splitter for support.


Carrier Bearings:
Press the Carrier Bearings on the Diff. Again, only apply force to the inside race, being careful not to touch the rollers or cage, which would damage the bearing.
I did these bearings in 2 steps, first with a seal driver to get it going on the press, then added the old bearing race for inside clearance. Doesn't matter which side you start with.


When you flip the Diff over for the other side, ensure it is supported properly underneath so that you don't damage the bearing you just installed.


Same 2-step process as before. Not required but this is how I did it.


Small Pinion Bearing:
Now we're getting into the meat and potatoes.
This step involves pressing the Small (outside) Pinion Bearing onto the Pinion Shaft inside the Diff Case.
In this picture, ignore the 2 parts on the right. But don't forget the Crush Sleeve!!

I pressed the Bearing on the Shaft in 2 steps, first with the bearing simply supported on the press plates to get it started.

In hindsight I should have used an impact extension since they are tougher, or better yet, re-adjusted the press and used a proper piece of metal. As usual, always wear your goggles.

Then, I supported the bearing race using appropriately sized random parts.
Stop pressing the bearing once it hits the Crush Sleeve.


Pinion Seal:
Drive the Pinion seal into the Diff Case using the old bearing race. I suppose these seals can be hammered on but I elected to use the press. It is much easier to control.
Use a bit of oil on the seal during this step.


Pinion Bearing Preload:
A Pinion Yoke holding tool is required to hold the Pinion while the preload is being set.
I modified my home brew crank lock tool by drilling an extra hole in it. If you don't have a something similar, you'll have to make something or buy a Pinion Yoke holding tool.


Lube the Pinion Yoke before installing it on the Shaft, where it will contact the lip of the seal.

Start the Pinion Nut by hand then grab as big a breaker bar as can. When cranking down on the nut you are compressing the Crush Sleeve. Once the slop in the Pinion bearings is taken up, start taking torque measurements with your 1/4" Beam Torque Wrench. There are numbers all over the internet for bearing preload values, I aimed for 15-20 inlb of running torque. If you torque it too much you're starting all over with a new Crush Sleeve and potentially a new outer bearing, so the key here is to creep up on the final setting. Crank about 1/32 of a turn, check the torque, repeat, once you are close it's surprising how fast the torque jumps up.


19 inlb of running torque. The initial torque required to start the Pinion moving is just higher than this.

Diff Installation:
If you haven't already, pop out the Lock Rings and install the new ones.


During these stages be extra vigilant about dirt and debris. Keep things as clean as possible. We aren't doing heart surgery but it's fun to pretend.
Drop the heart carefully into the Diff Case.

Replace the Bearing Cap o-rings, don't forget the shim that goes with the correct Bearing Cap, and add a bit of Diff Fluid to the o-ring before installation.
There are 2 Bearing Cap bolt holes on each side that penetrate into the Diff Case. I used sealant on these to prevent fluid getting through the threads. Torque all the Bearing Cap bolts in a progressive criss-cross pattern.
Bearing Cap Bolts:
12-off M8x25 - Gr 8.8 - 15 lb-ft


Lube the Output Flanges with Diff Fluid and slide these in.


Diff Cover and odds and ends:
The OEM gasket for the Cover is paper, and it's up to you how you want to install this. From what I've read, it can be installed dry, with silicone sealant, with Dielectric Grease, etc, everything seems to work. I used some silicone sealant on both surfaces before putting the gasket on. Don't use too much or else it will squeeze into the Diff. As pictured there is too much, as I noticed some squeezed out the outside. In any case, make sure to let it completely dry before filling the Diff with fluid. Torque the fasteners in a progressive criss-cross pattern.
Diff Cover Bolts:
8-off M10x25 - Gr 8.8 - 30 lb-ft


Install the Speed Sensor with new hardware and a new O-ring. I went to the hardware store with the old o-ring and found a near exact match from the bins. I should have written down the size. Anyone have it?


Tap in the new Pinion Nut Retaining Plate with a big socket. I fudged one up trying to tap it in with a flat blade screw driver and it deformed it making it useless. Luckily I had ordered a spare.

I machined the surfaces of the drain / fill plugs to clean them up, then hit them with rattle can silver.

Add your favourite brand Diff Fluid in the 75W90 variety, and use new crush washers on the plugs.


Install the mounting brackets with new hardware and you're all done.
Rear Horizontal Support Bracket
2-off M12 x 1.5 x 50 - Gr 10.9 - 100 lb-ft
Front Support Bracket
3-off M14 x 1.5 x 25 - Gr 10.9 - 150 lb-ft


I engraved the mileage, year, and my initials on a flat spot to record the rebuild.


Hope this helps someone.
Barry
