External links now open in a new browser tab - turn this off in your UCP - Read more here.

My E28 dashboard flocking adventure (lots of text with pics) FINISHED!

E28 technical advice asked and given! Troubleshooting, modifications and more.
Post Reply
SlickDizzy
Posts: 836
Joined: Apr 26, 2007 7:03 PM
Location: Milwaukee, WI
Contact:

My E28 dashboard flocking adventure (lots of text with pics) FINISHED!

Post by SlickDizzy »

Purists beware: this thread details a shitty E28 dashboard receiving a non-OE finish for installation in a Euro car. Scandalous! :shock:

My '85 Euro 535i's condition is somewhere in that awkward gulf between "rough" and "nice." It looks great from 20 feet and gets thumbs-up from passers-by in the know, but the flaws are apparent as you get up close and personal. As a Euro car, it's worth preserving and solid enough to enjoy as a driver and track car, but its past is checkered enough that it'll never deserve a true restoration. We'll call it "scruffy but decent."

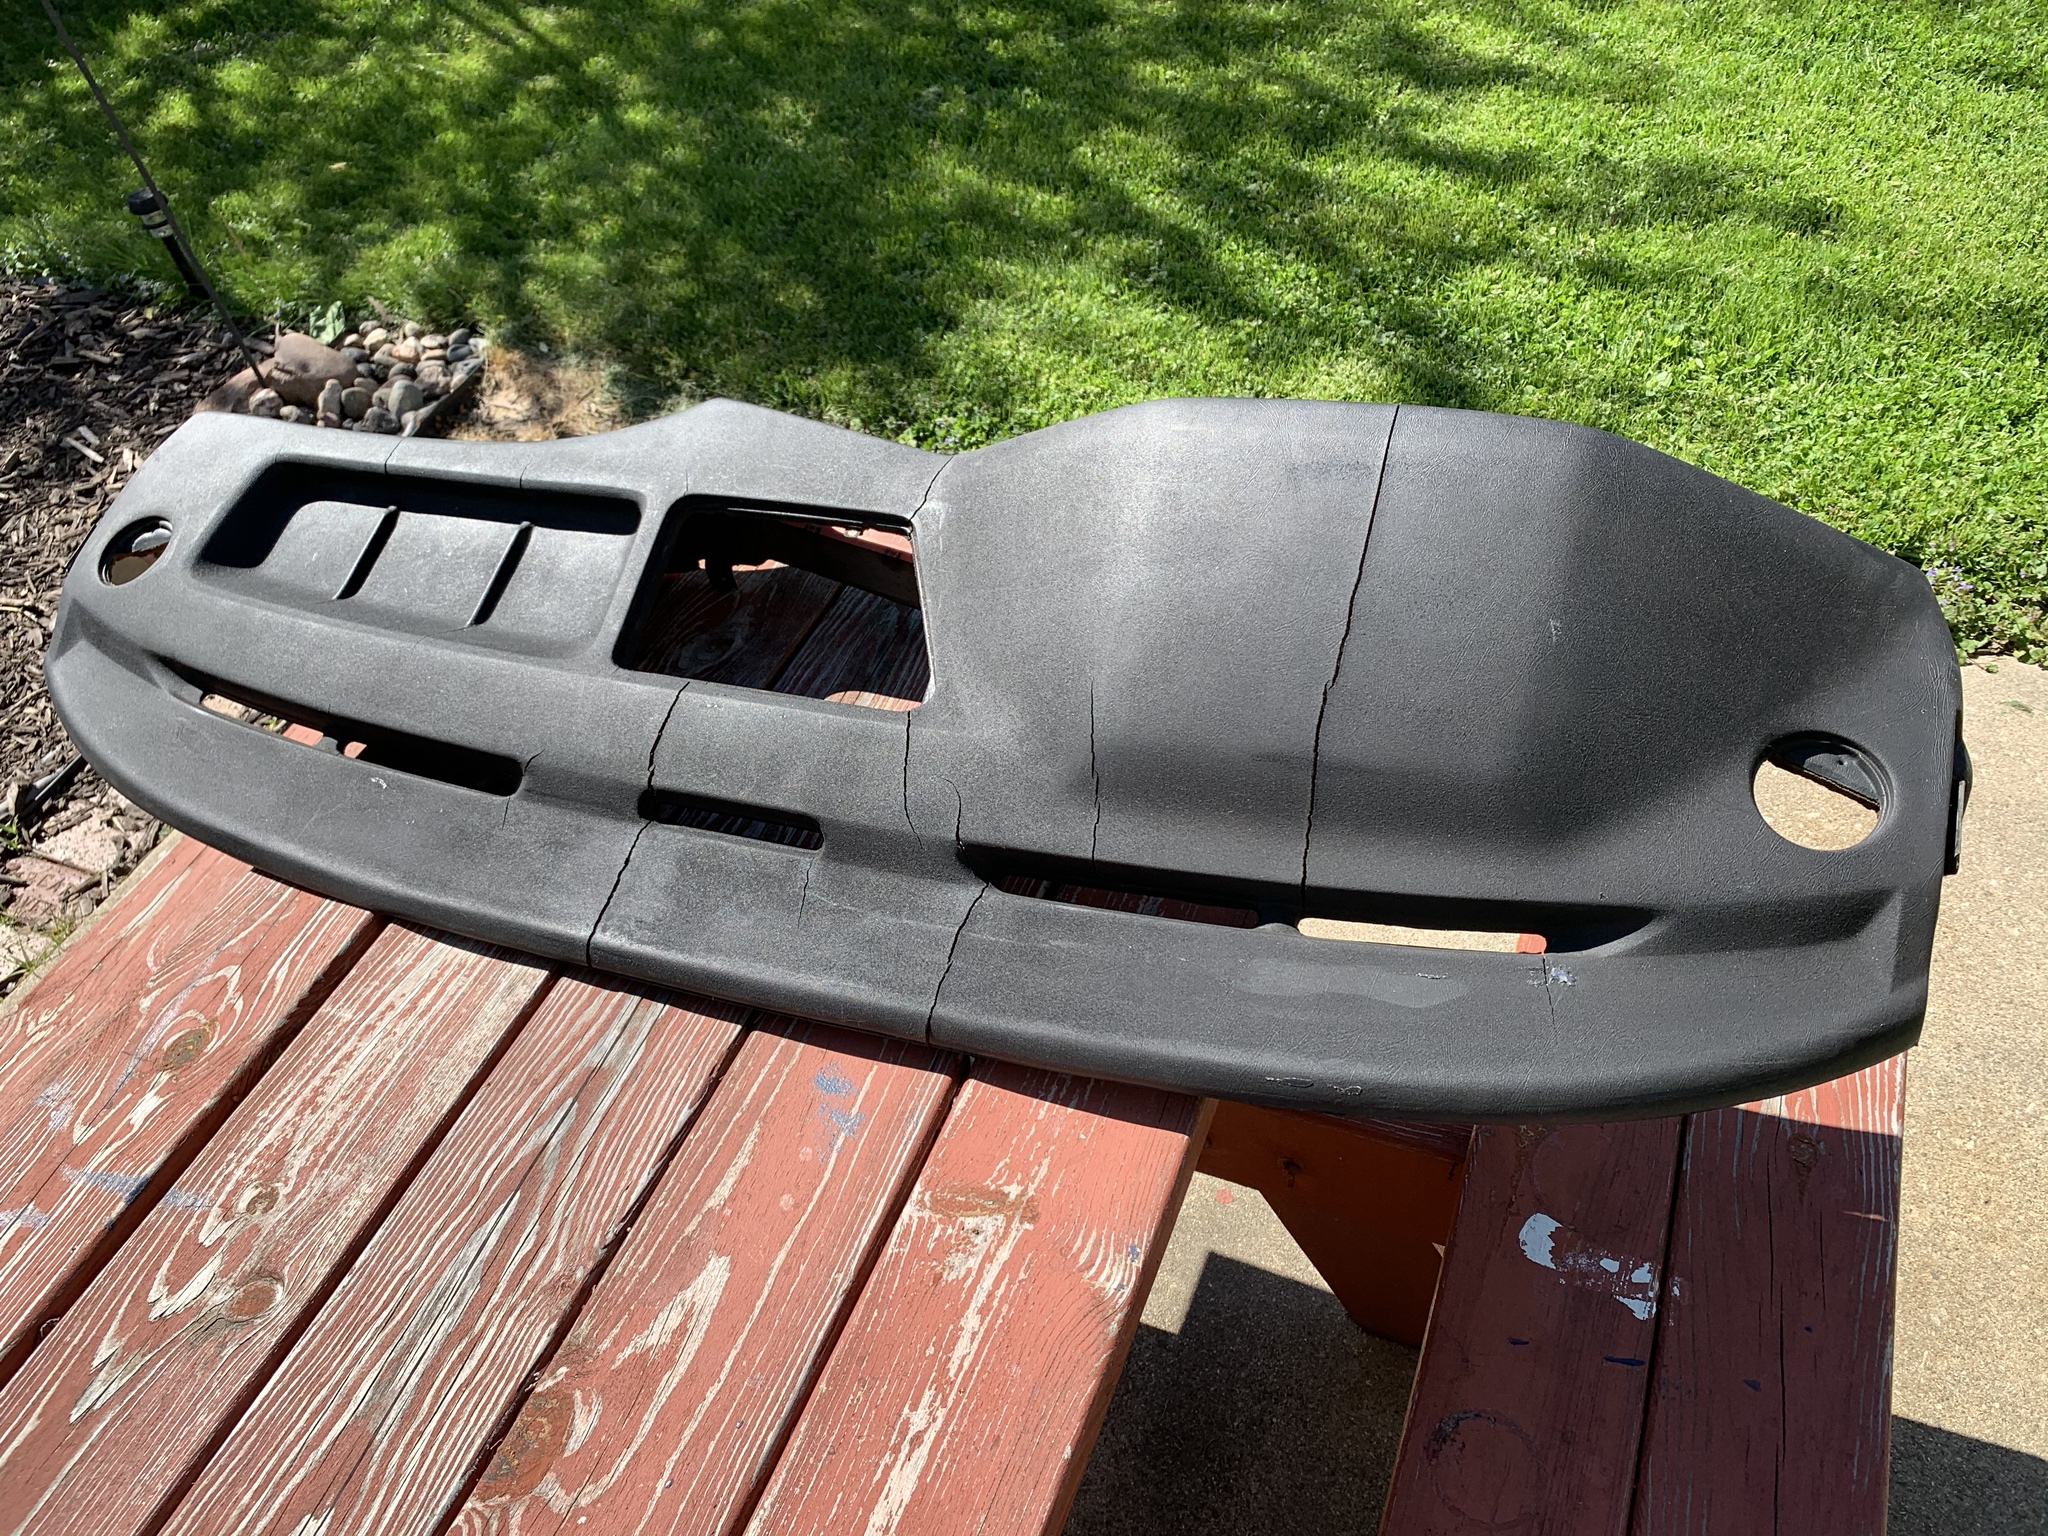
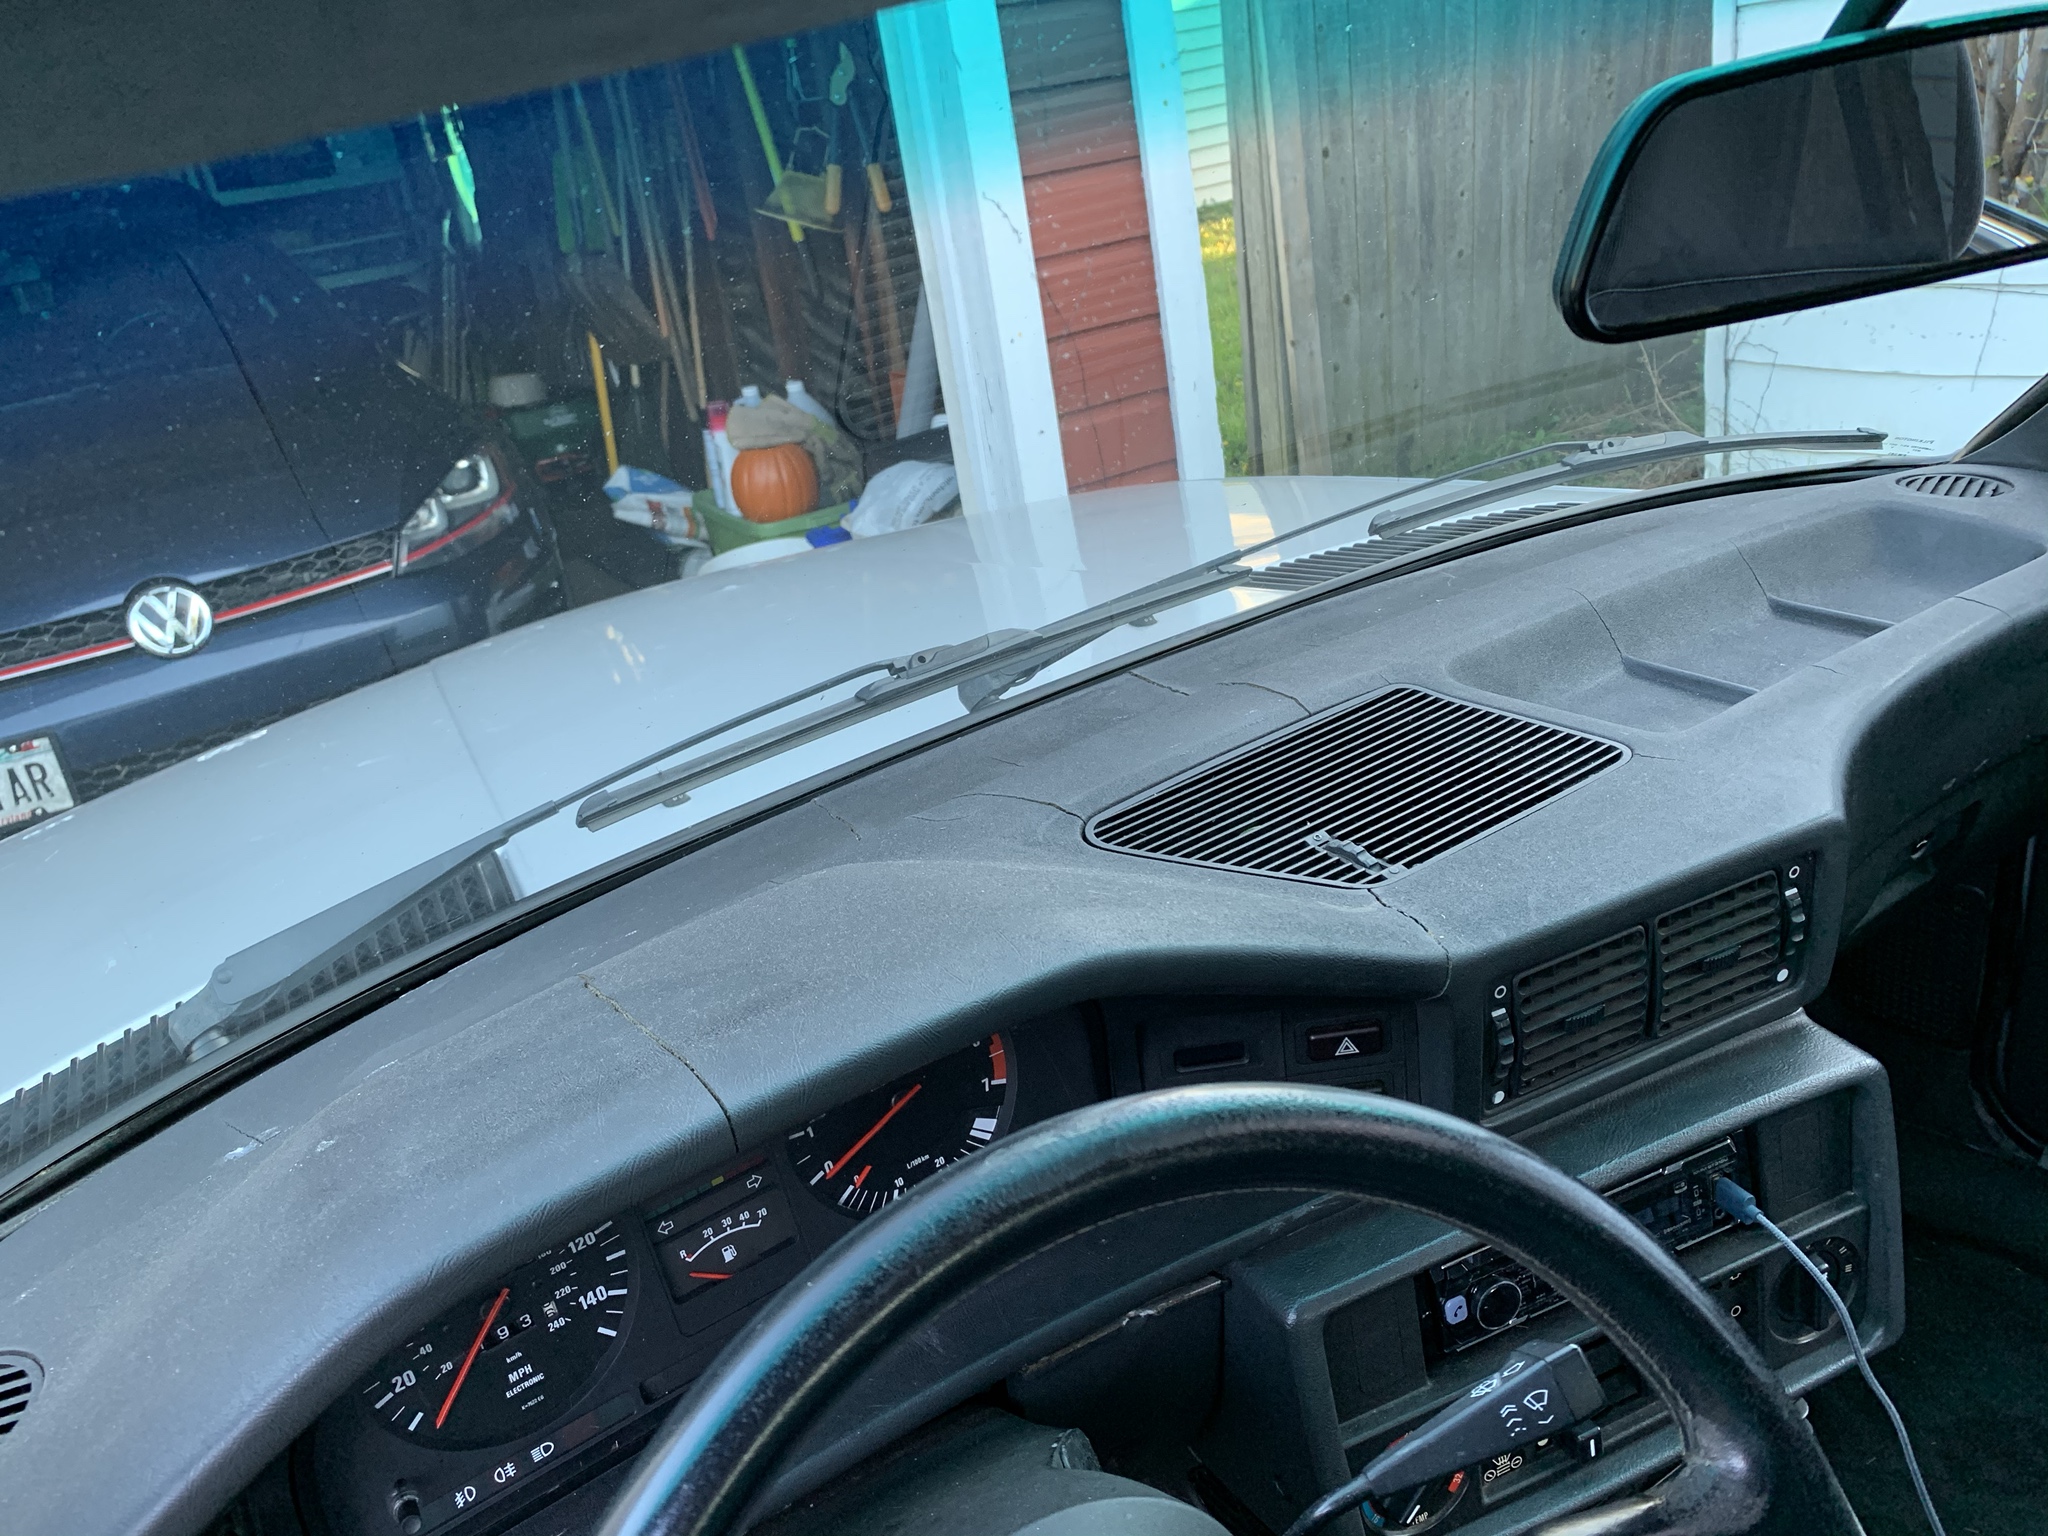
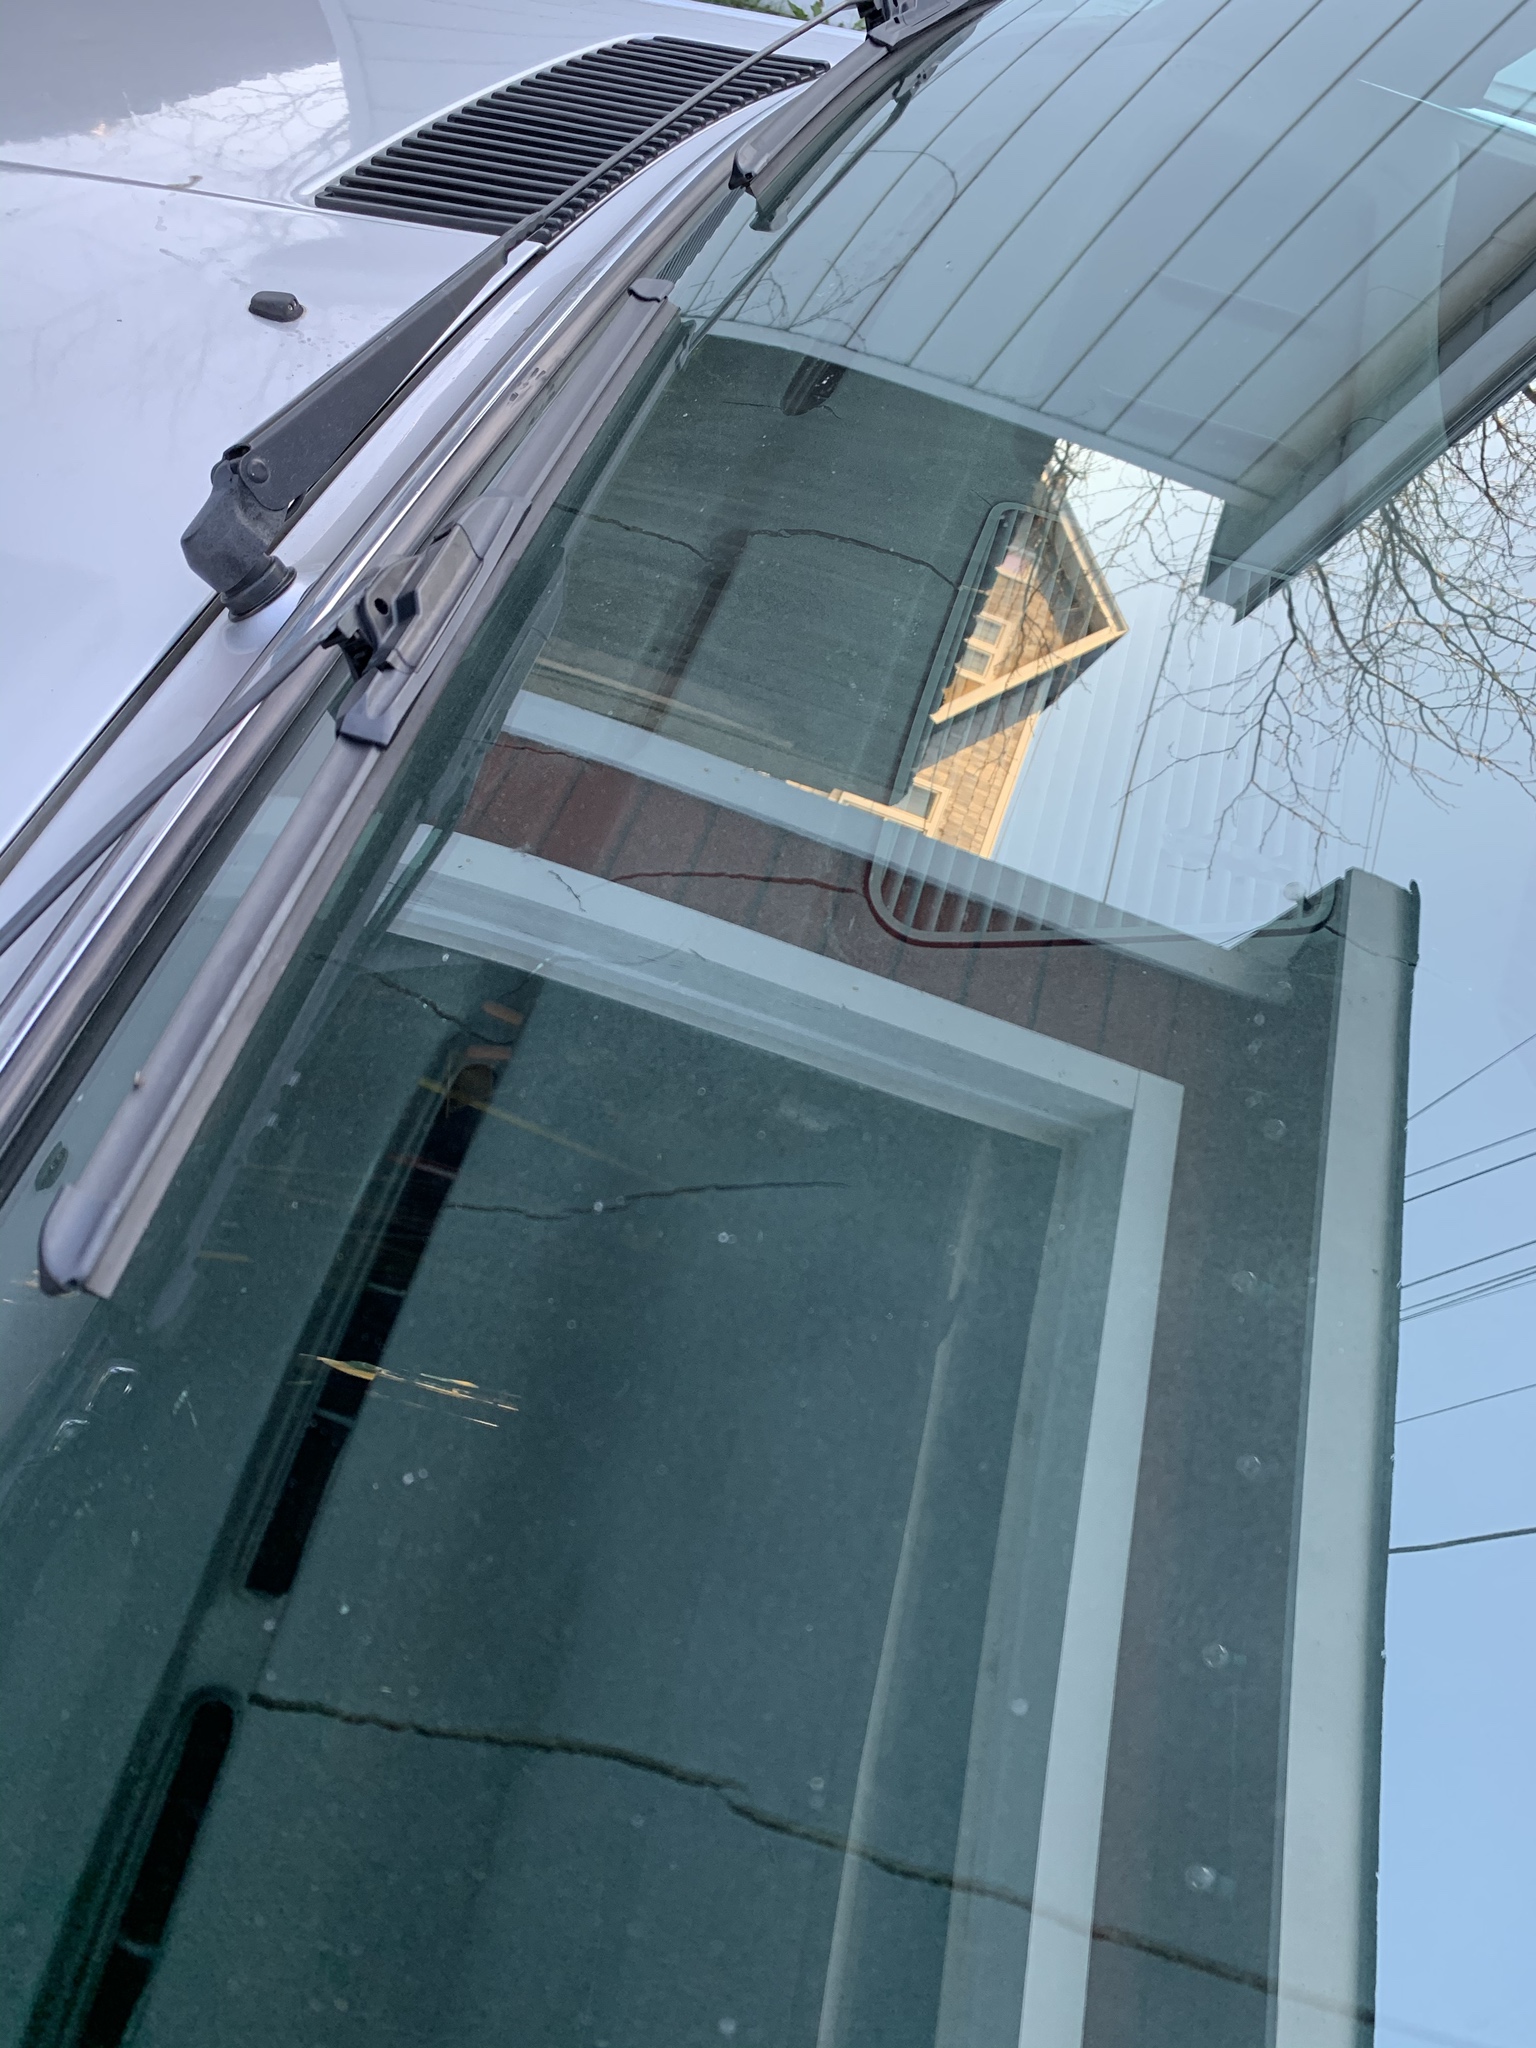
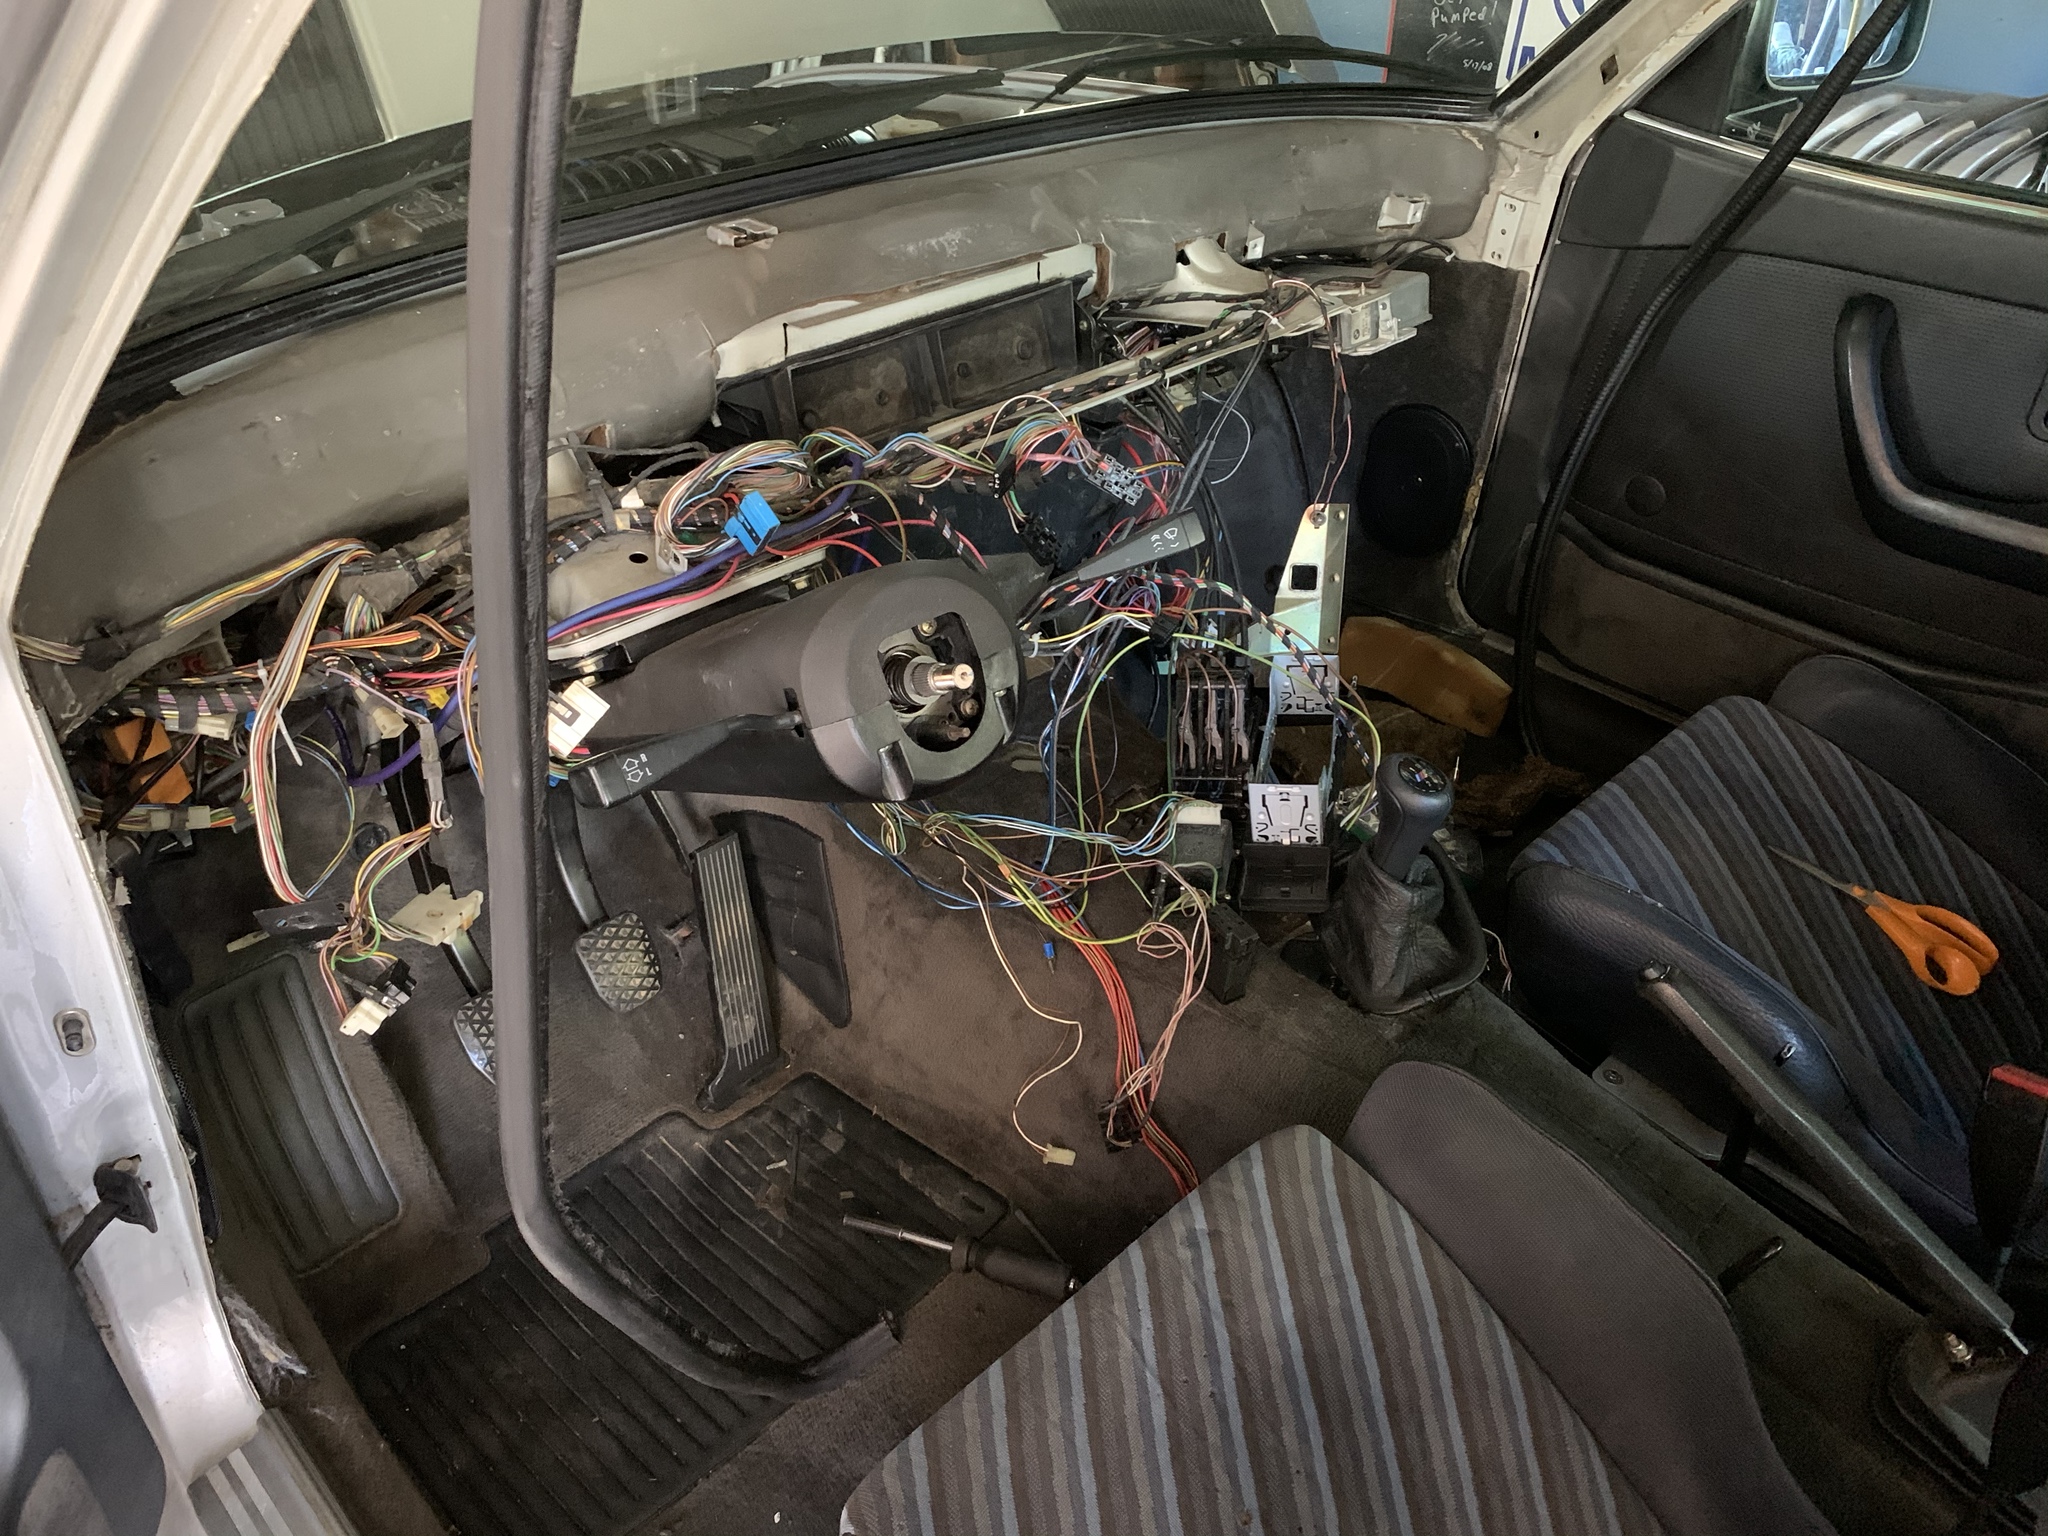
That said, one flaw that particularly bothered the nut behind the wheel (me) was the dashboard. Given that I stare right at the thing every time I drive the car, the sun-dried vinyl that had baked to a sand-like texture and numerous deep cracks really started getting to me, especially as the rest of the interior is quite presentable. Even by E28 standards (and I've had three), this dash was in rough shape. This car hailed from sunny South Carolina before my ownership which is likely where most of the damage originated.
Image
Image

When I bought the car it had a horrible Coverlay dash cap installed that was sun-warped, fit like crap, rattled, etc. So that was a no-go. The carpet dash covers always struck me as a little too "car show at the local Burger King" for my taste, so those were out too. I would have settled for a "decent" dashboard with less faded vinyl and fewer cracks, but they're tough to find; browsing the classifieds here, people seem to throw them away if they're in anything less than 9/10 condition, and the price is skyrocketing on solid dashboards.

After evaluating my options, and realizing that I had nothing to lose but $100 and my time, I decided to take a leap of faith and try flocking it. To those unfamiliar with the process, flocking involves covering your dashboard with colored adhesive, and then spraying it with fine nylon fibers to give a matte, "fuzzy" finish that can be vacuumed. It is typically done on race cars to reduce windshield glare, but is becoming more popular as a DIY project to improve nasty old dashboards for minimal cost.

I had done a bunch of research online and found a few E30s with flocked dashes that looked pretty good, but no E28s. So I ordered up a flocking kit and got to work pulling the dash. I ordered this kit; I ended up using all of the fibers to do my dash and trim parts, but didn't even open the second container of adhesive. Were I to do it all over again, I'd just get the basic kit, and an extra bag of fibers. (Note: if you can set up your work area to reclaim your overspray fibers efficiently, you could probably get away with a single bag. But more on that later.)

I settled on black fibers because I'm not a monster. I didn't mind they charcoal grey fibers either from what I'd seen online, but they were a little light for my taste. If you're all about that sTaNc3_lYf3 or d0rift0 or whatever, maybe you'll choose purple or orange or something else hideous, I don't know. It's your life. :dunno:
Image
Image

First things first: gotta fill those cracks. I did a bunch of research on what to use for this before I got started; the internet suggested everything from an expensive Bondo-like "padded dash filler" creme that got rather mediocre reviews, to baking soda and super glue (yes, really). Out of all the dash repair write-ups I could find online, the one that piqued my interest came from a GM G-body forum, of all places. The guy doing the repair used 3M Bumper Repair epoxy; he noted that it was an excellent choice as it retained flexibility after curing and didn't have a propensity for cracking. So I picked up three of the syringe kits from the local Advance Auto and got to work. (I later learned that you can buy it in bigger tubes and get more for your dollar, but oh well.)

I started by using a Dremel tool with a V-shaped bit to groove all of the cracks; this creates more surface area for the filler to grab, and eliminates the high spots around the crack. I also drilled the ends of each crack to eliminate any tension. Then I liberally applied the compound. I used all three syringes for my shitty dash and ended up grabbing a fourth for touch-ups; your mileage may vary.
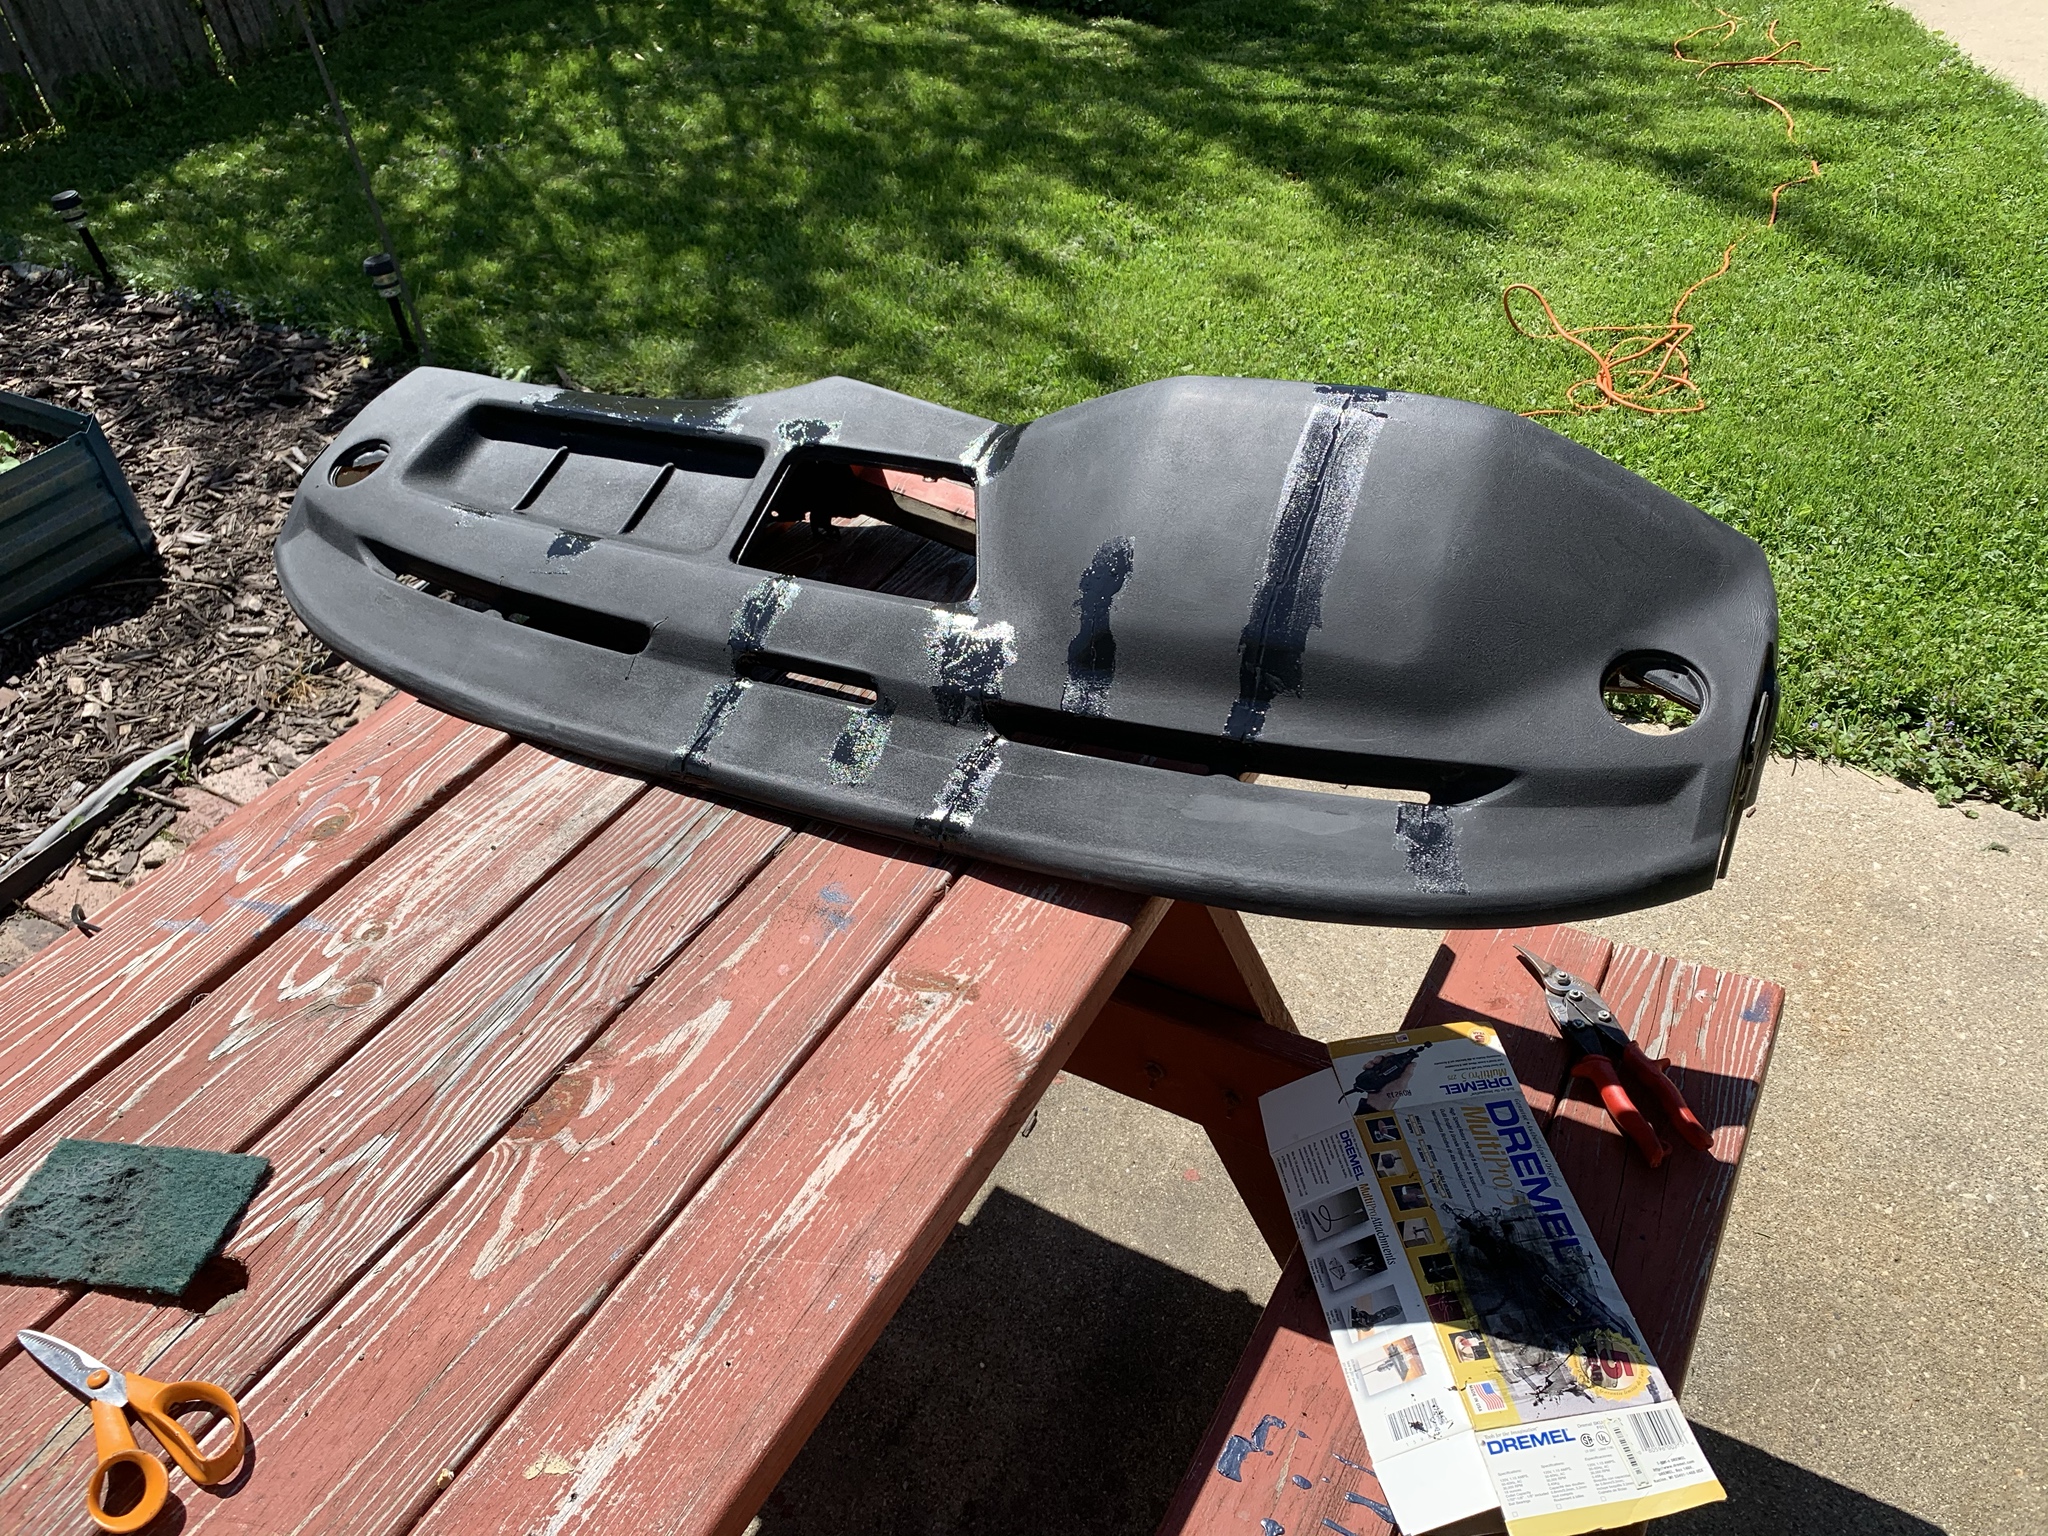
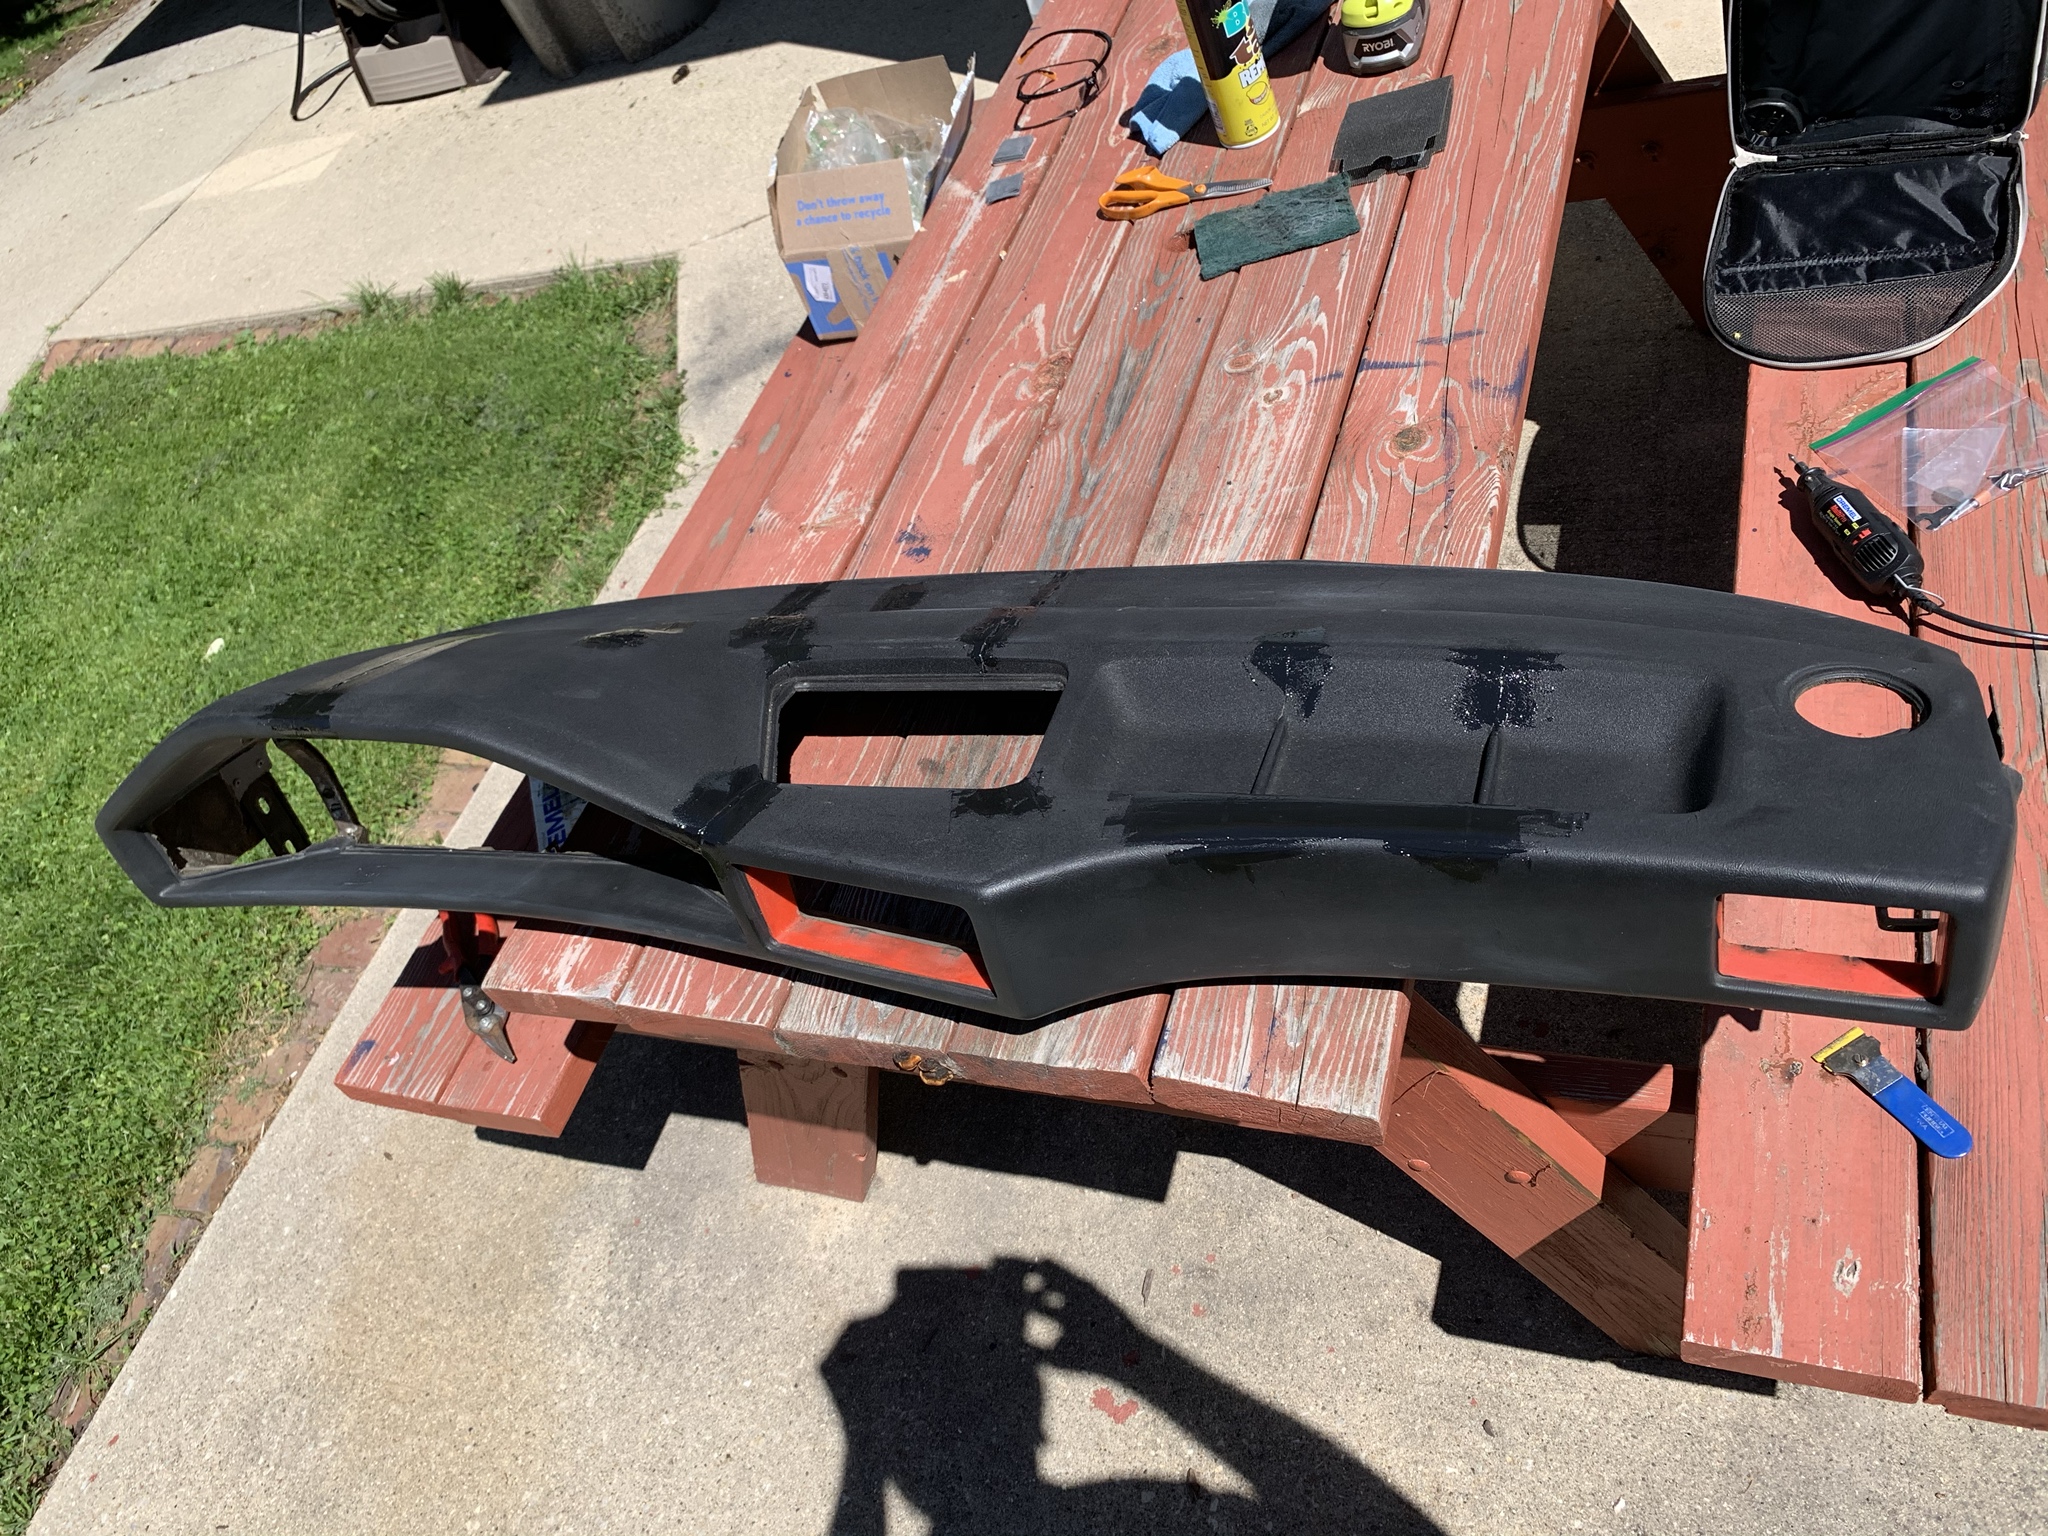
Image
Image

I let it cure for a few days, then went to town with the palm sander and some 120 grit (don't even waste your time trying to do it by hand). I was unsure how well the flocking would cover up imperfections, so I really went to town; it turned out that the flocking adhesive does a pretty good job of leveling out imperfections, though. I exhausted most of my effort on the spots visible from the driver's seat; a few areas around the vents were less-than-perfect, but after four hours of sanding, I was at the "good enough" stage.
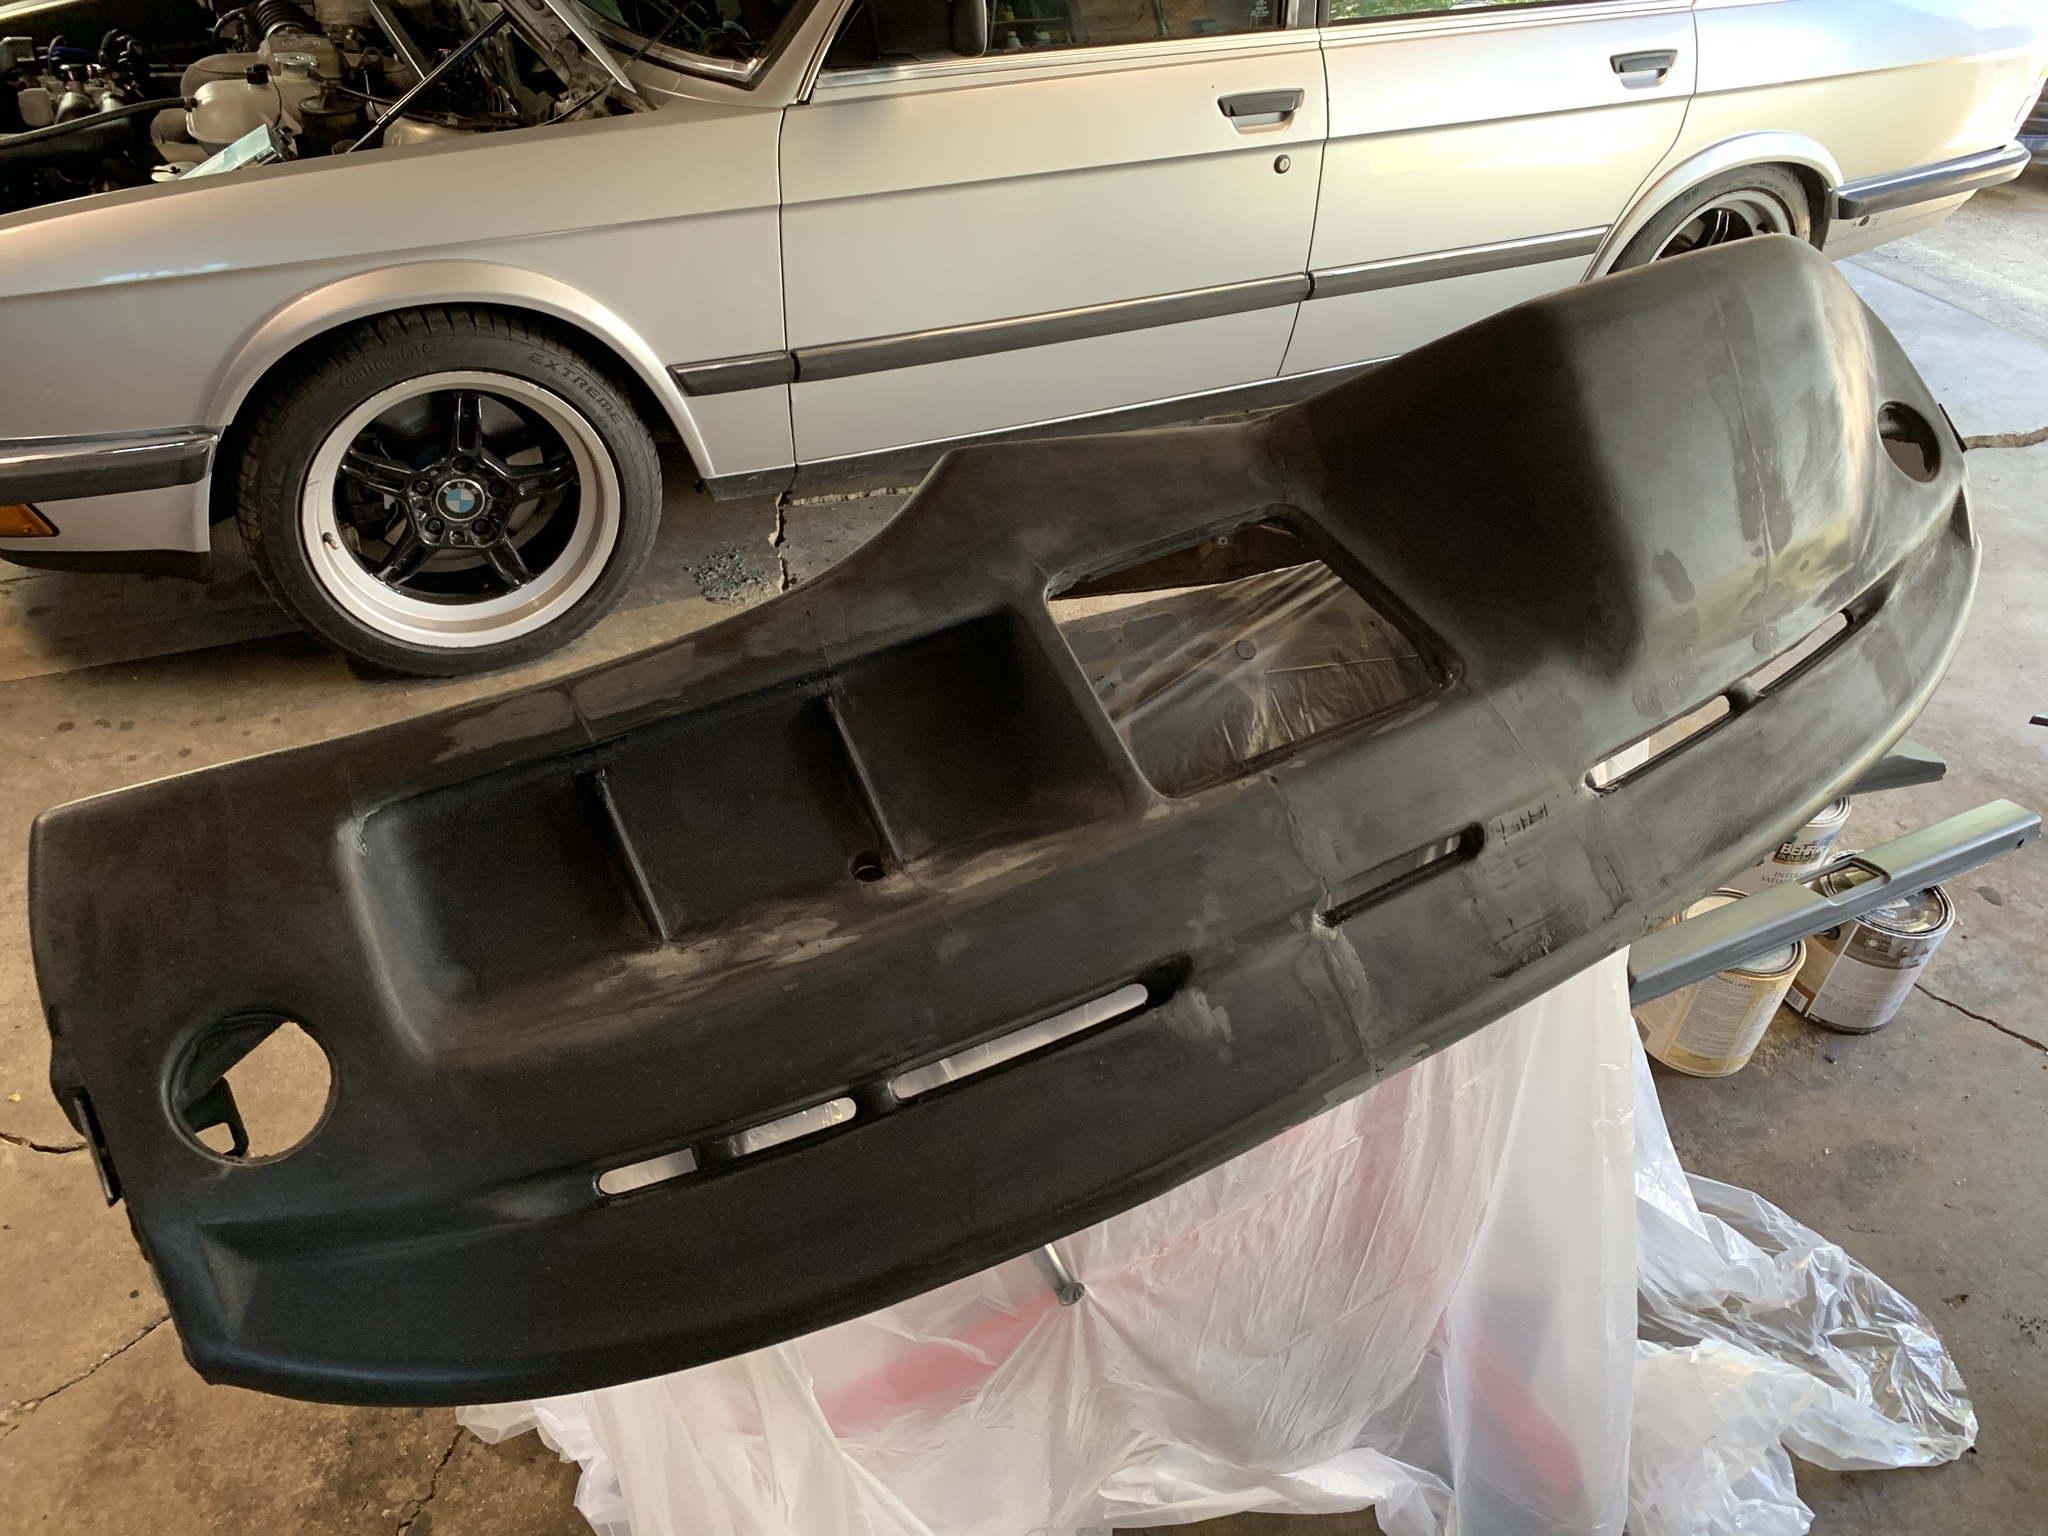
Image

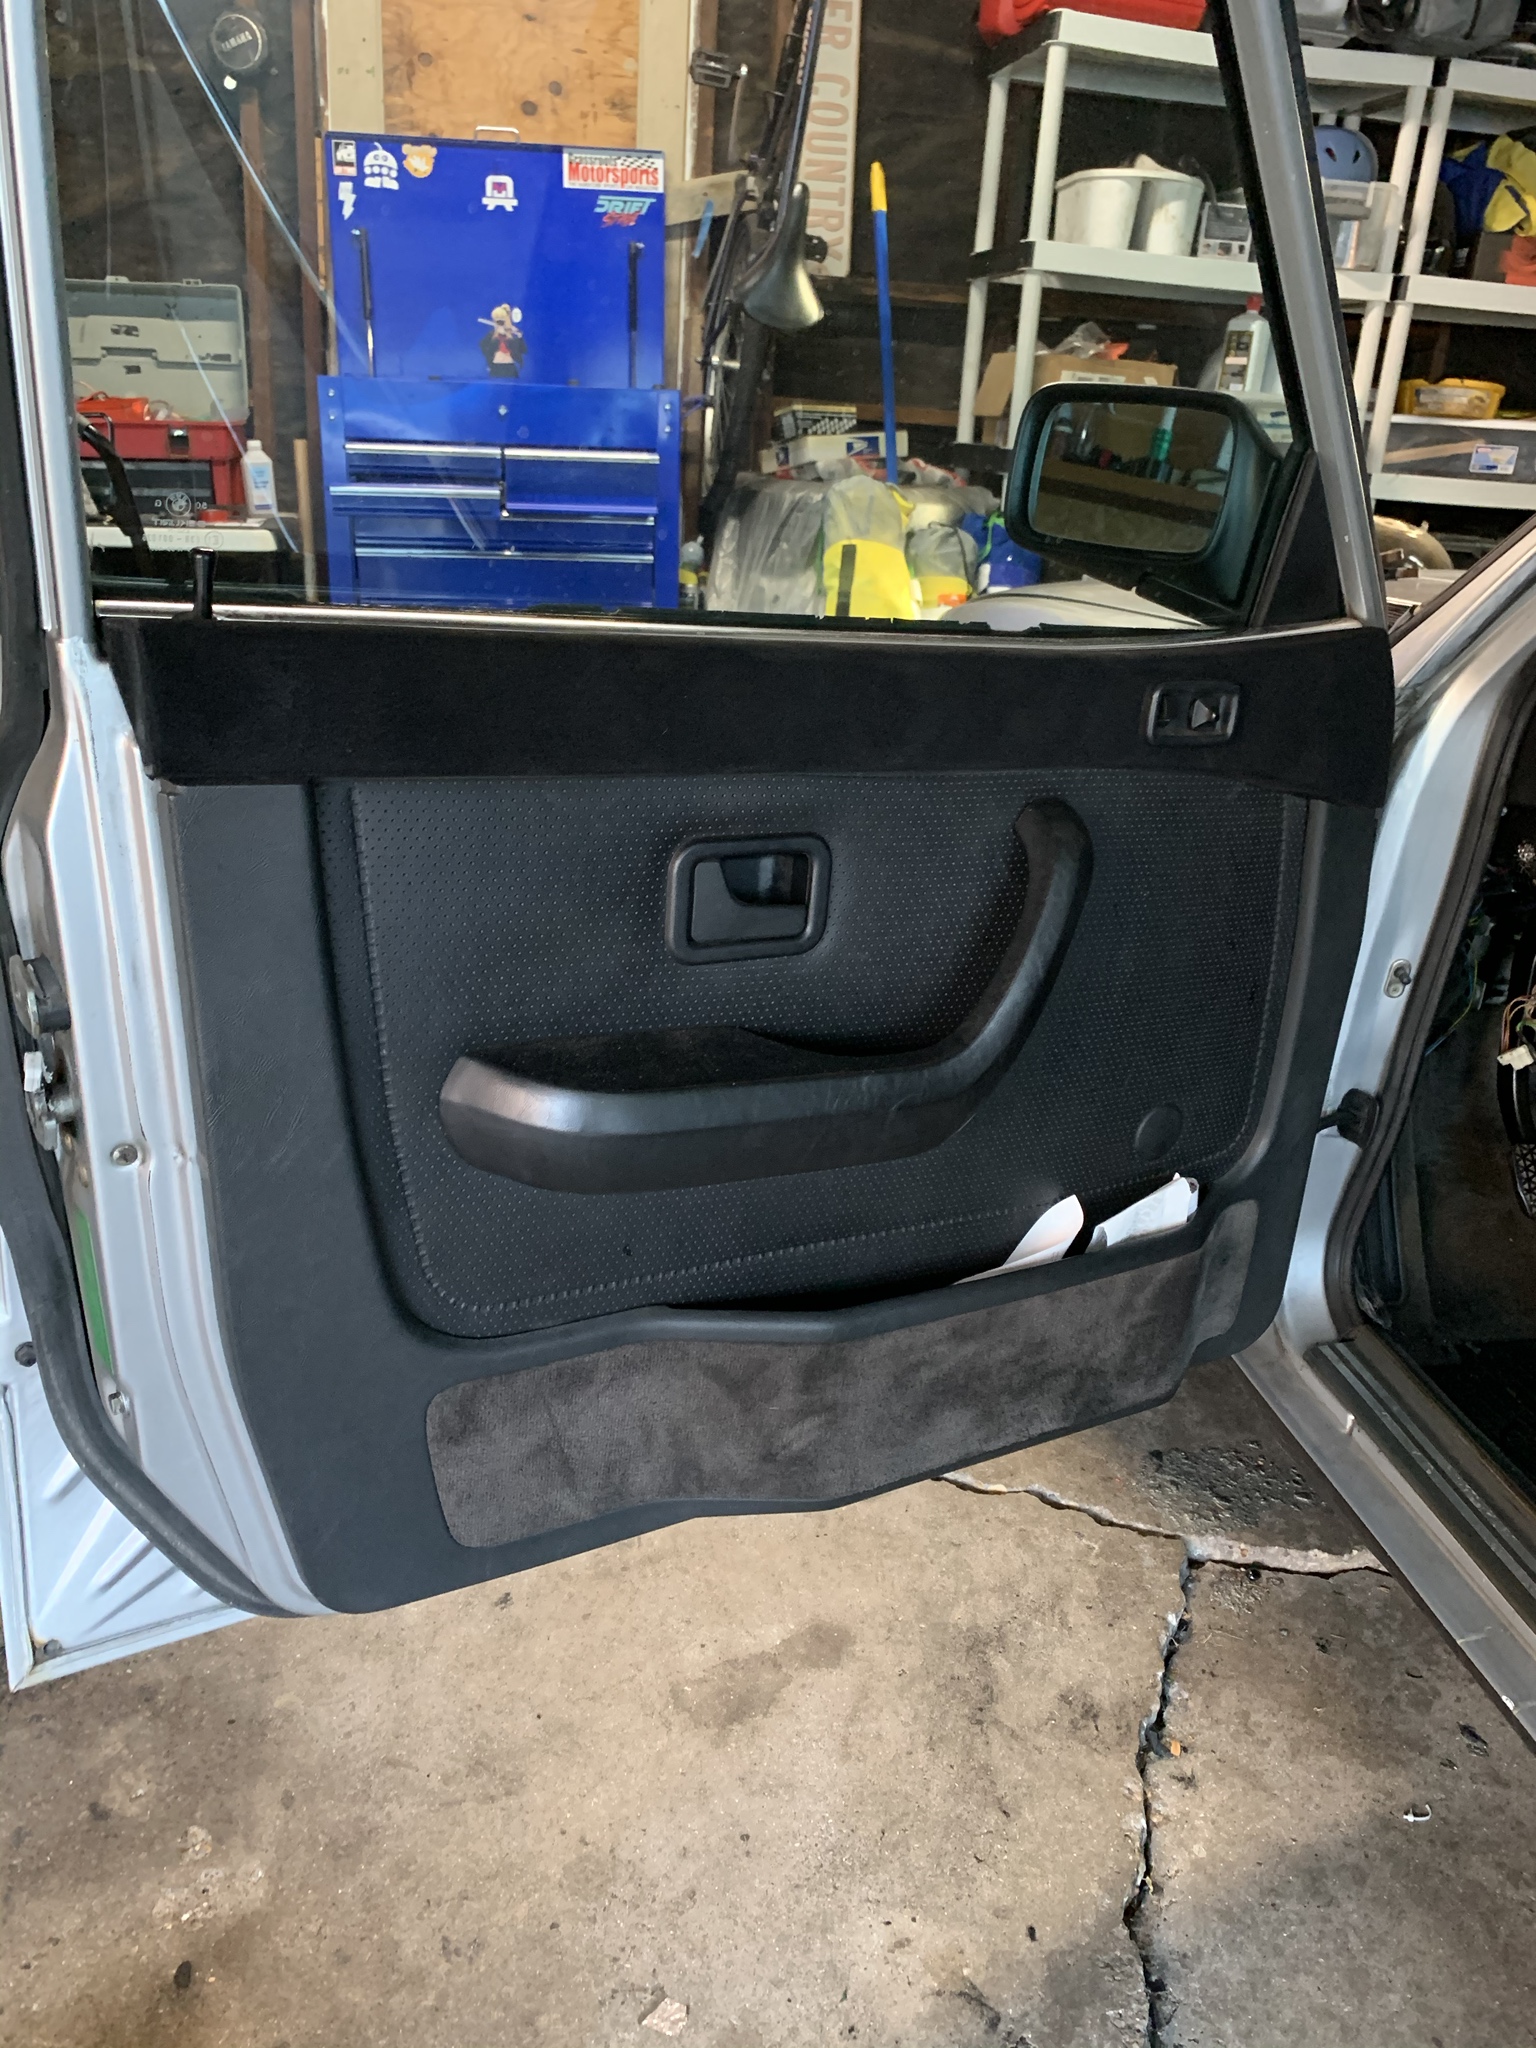
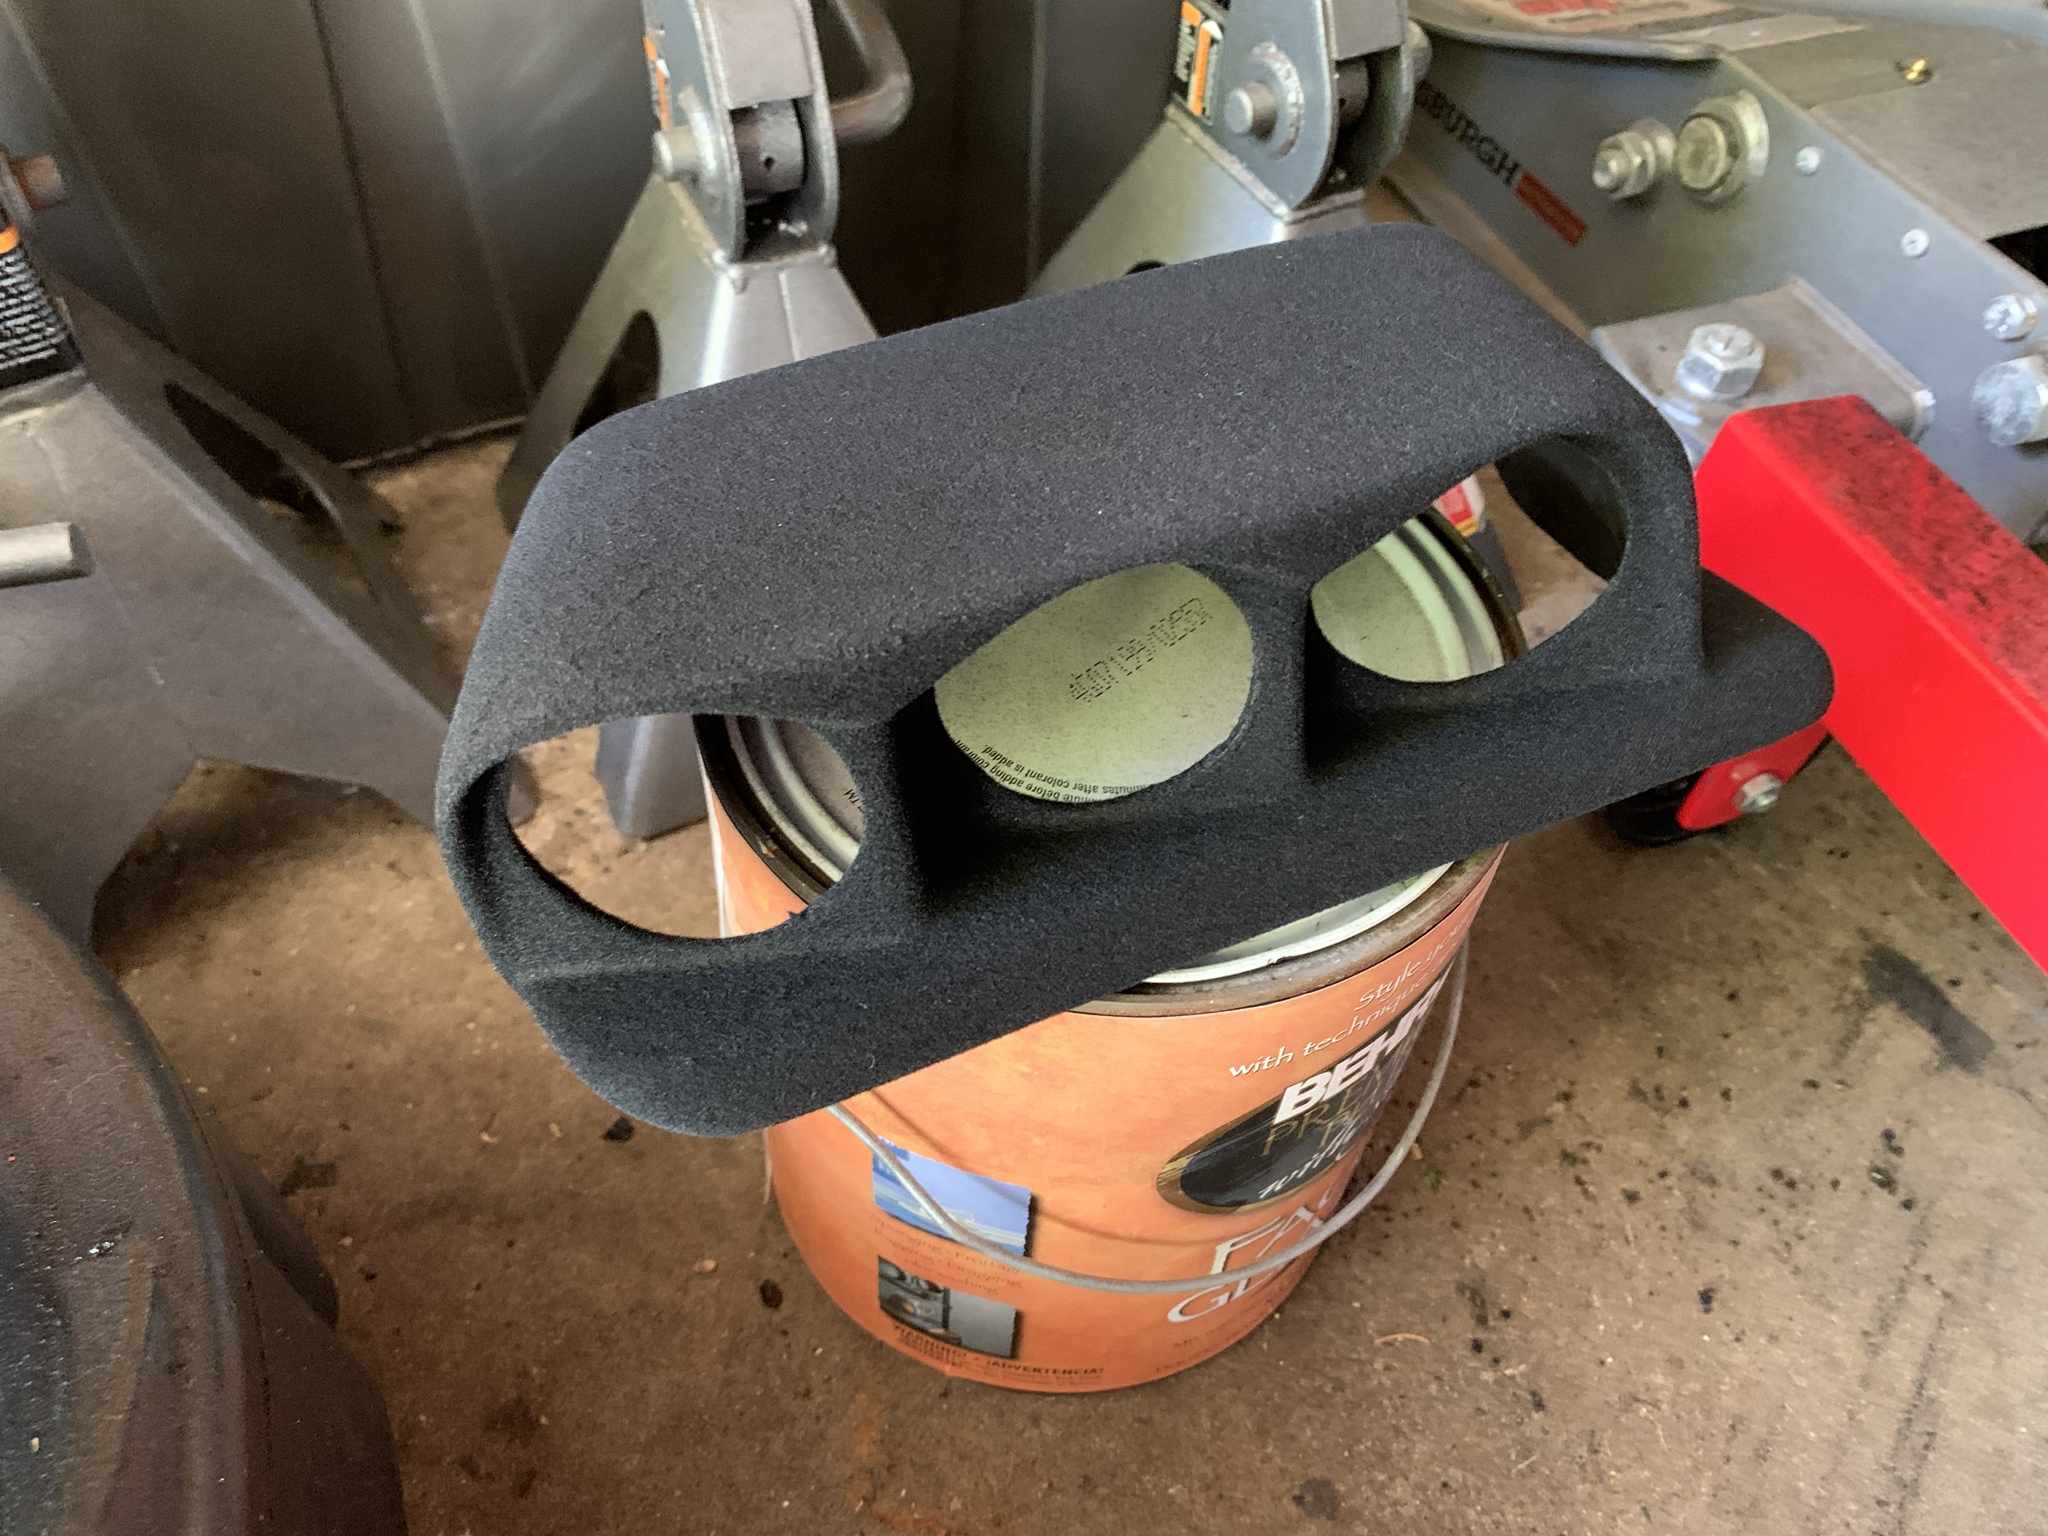
Then came the moment of truth: the flocking. I did the dash, along with my BMP Design gauge hood; I also did the upper door trims to add some visual consistency to the interior. This procedure is written up dozens of times all over the internet, so I'm not going to repeat it verbatim, but I'll share a few things I learned:

- Sorry for the lack of in-progress pics. The adhesive has a 10-15 minute working time, so once you start laying it down, you gotta BOOGIE or it'll cure before you get the fibers down.
- Unless you can set up a Dexter-like work space, you will end up with the fibers EVERYWHERE. Wear a mask, at minimum.
- Of the two bags of fibers I had, one of them pretty much ended up on the floor as overspray. It's hard to find a container big enough to catch excess when working on something as big as an E28 dash, but if you can, you can collect and re-use them as long as they're not contaminated.
- I didn’t even open the second can of glue, as noted earlier. One can is more than enough to do any work you would need to. You will definitely want at least two bags of fibers though.
- Work inside, in an enclosed area. If you try it outdoors, not only will the sun reduce the adhesive's already-very-fast cure time, but you will almost definitely end up with bugs and grass blades and shit in your flock.
- An extremely well-lit workspace is a big help; the adhesive is glossy and the fibers are not, so some good light can show you where more flock is required as you work on coating your parts.

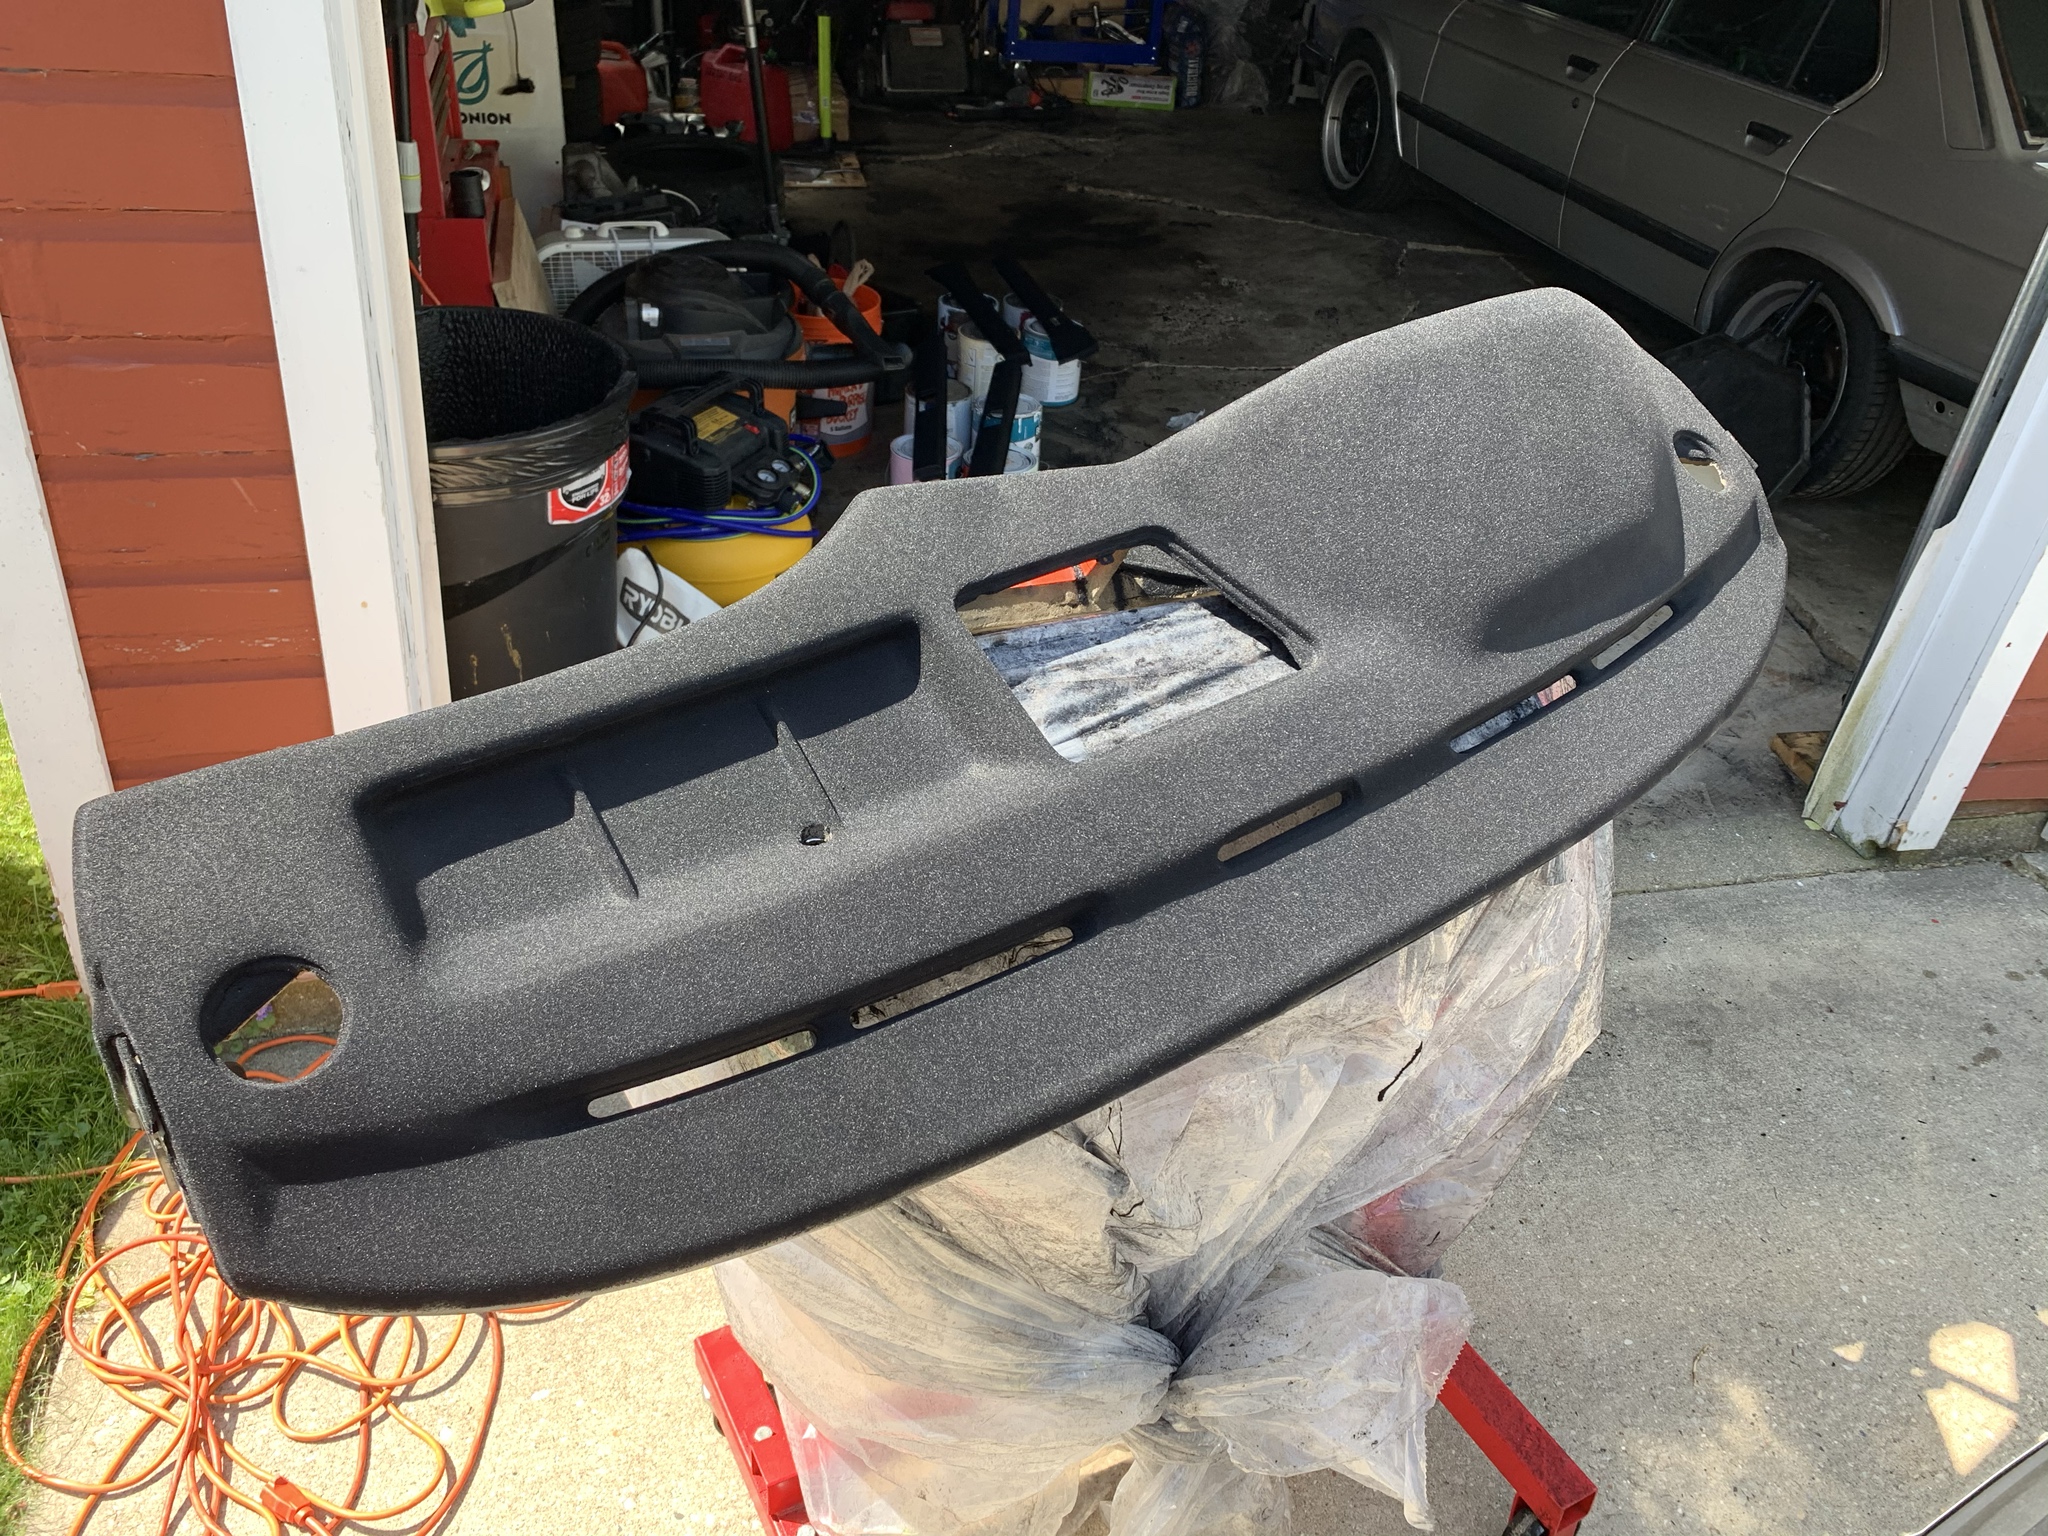
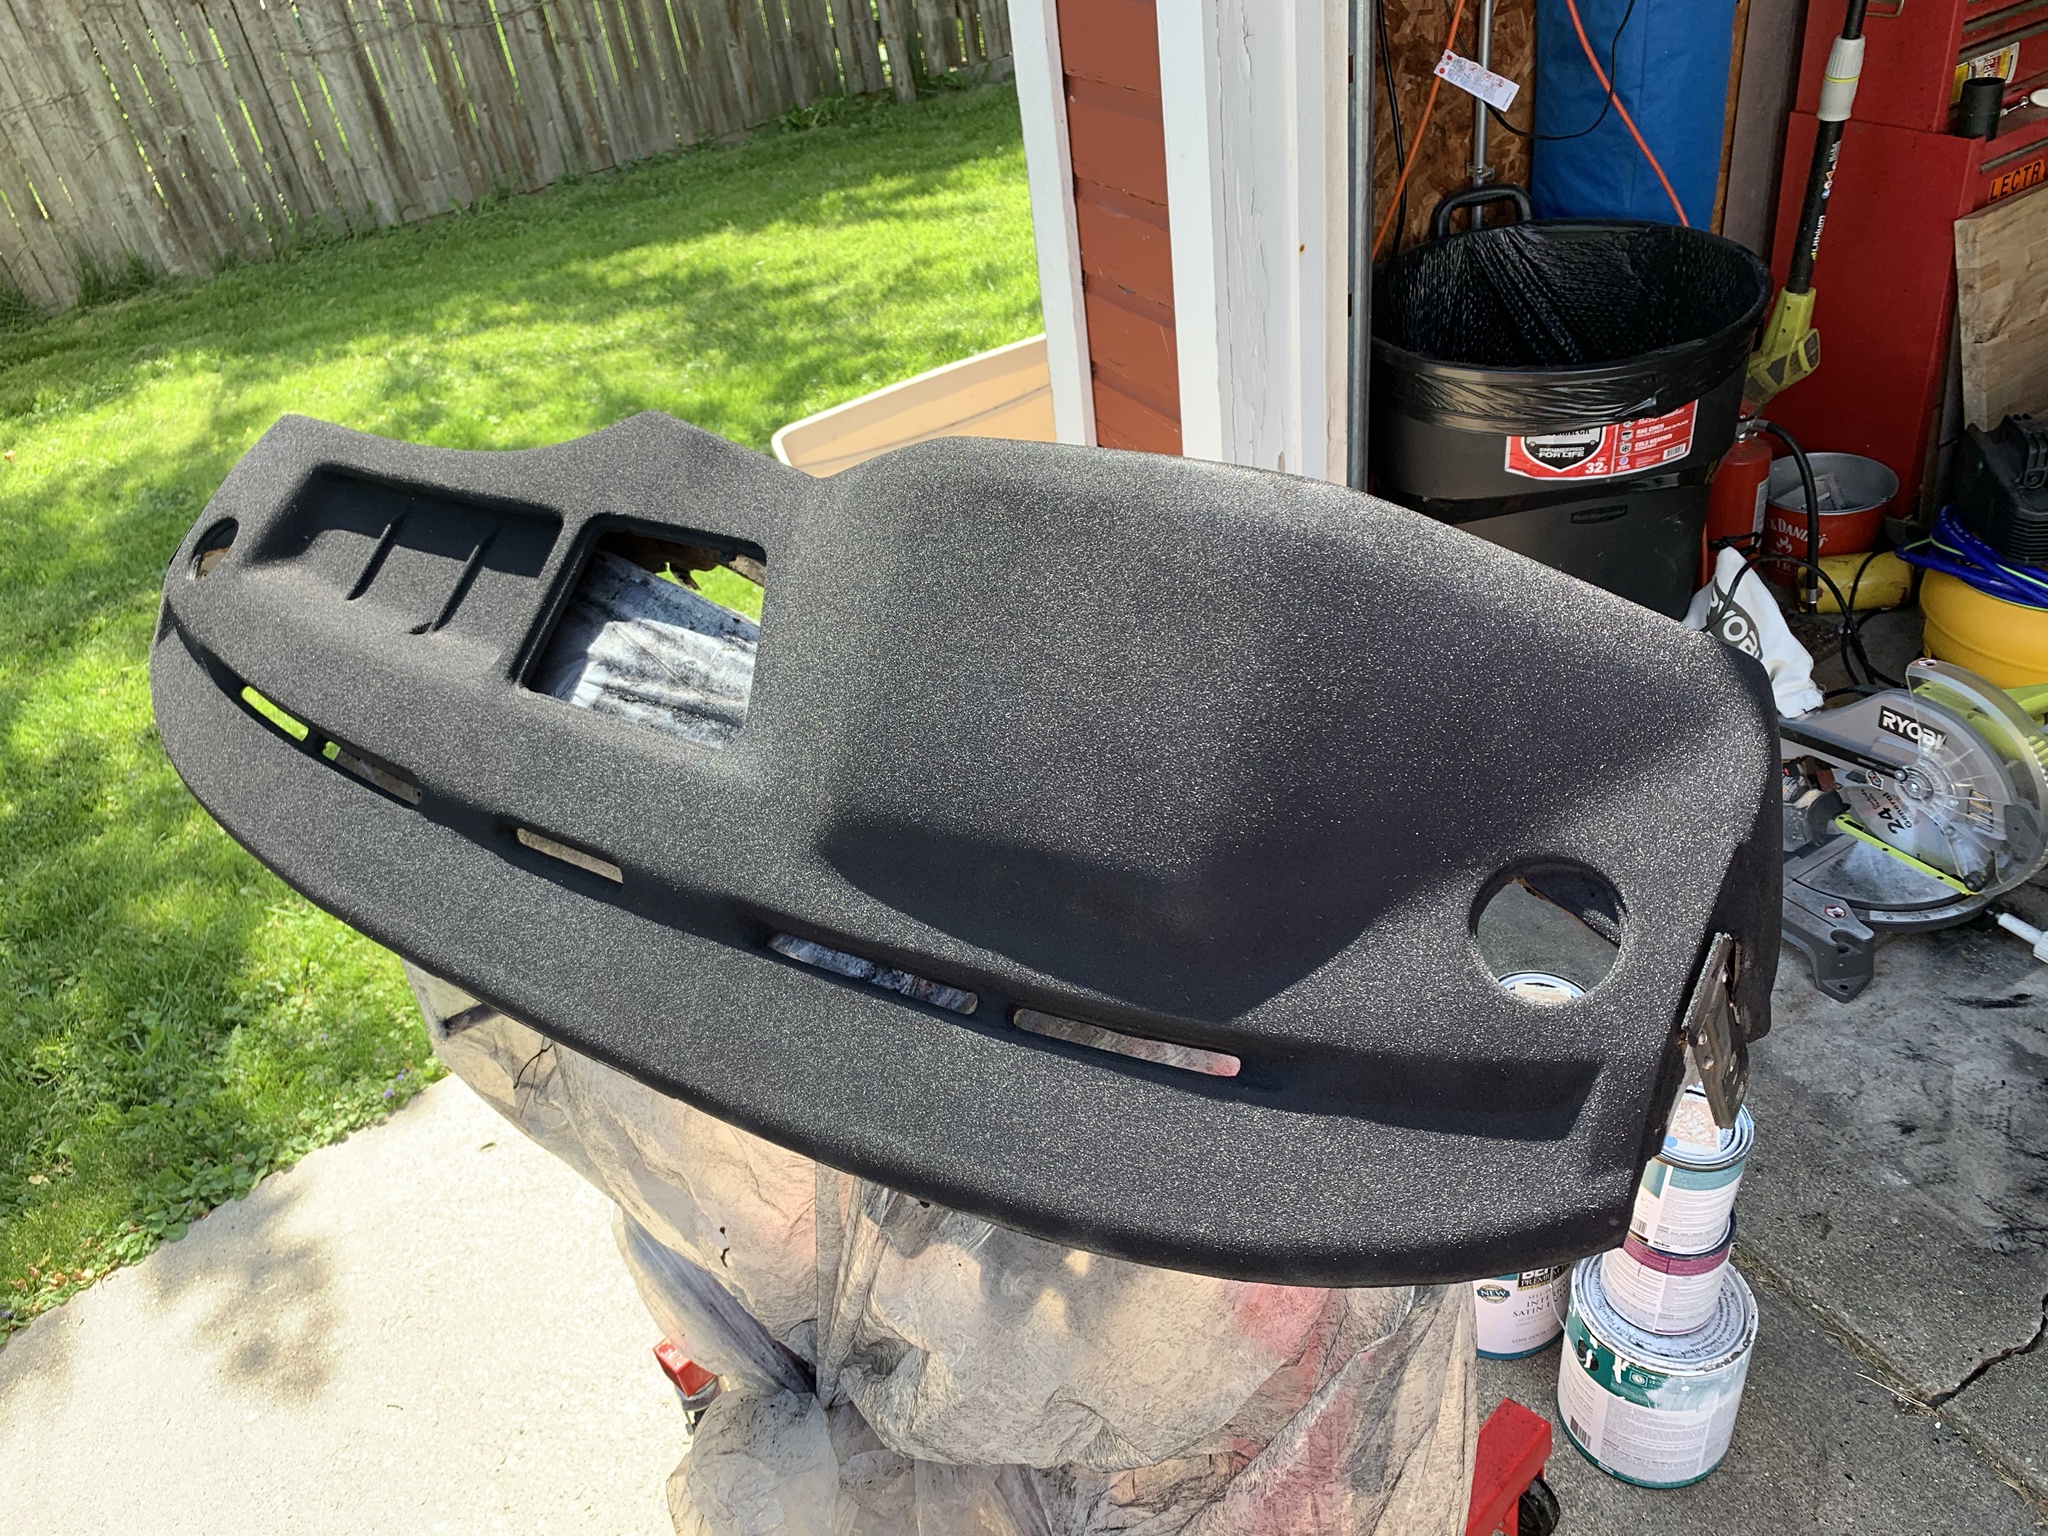
After about an hour of making a huge mess, I closed my garage and let everything sit overnight. The rule of thumb is 12-24 hours to set before you can touch or move the parts, and 72 hours-1 week before they're "ready" and can be vacuumed/hit with compressed air/installed.

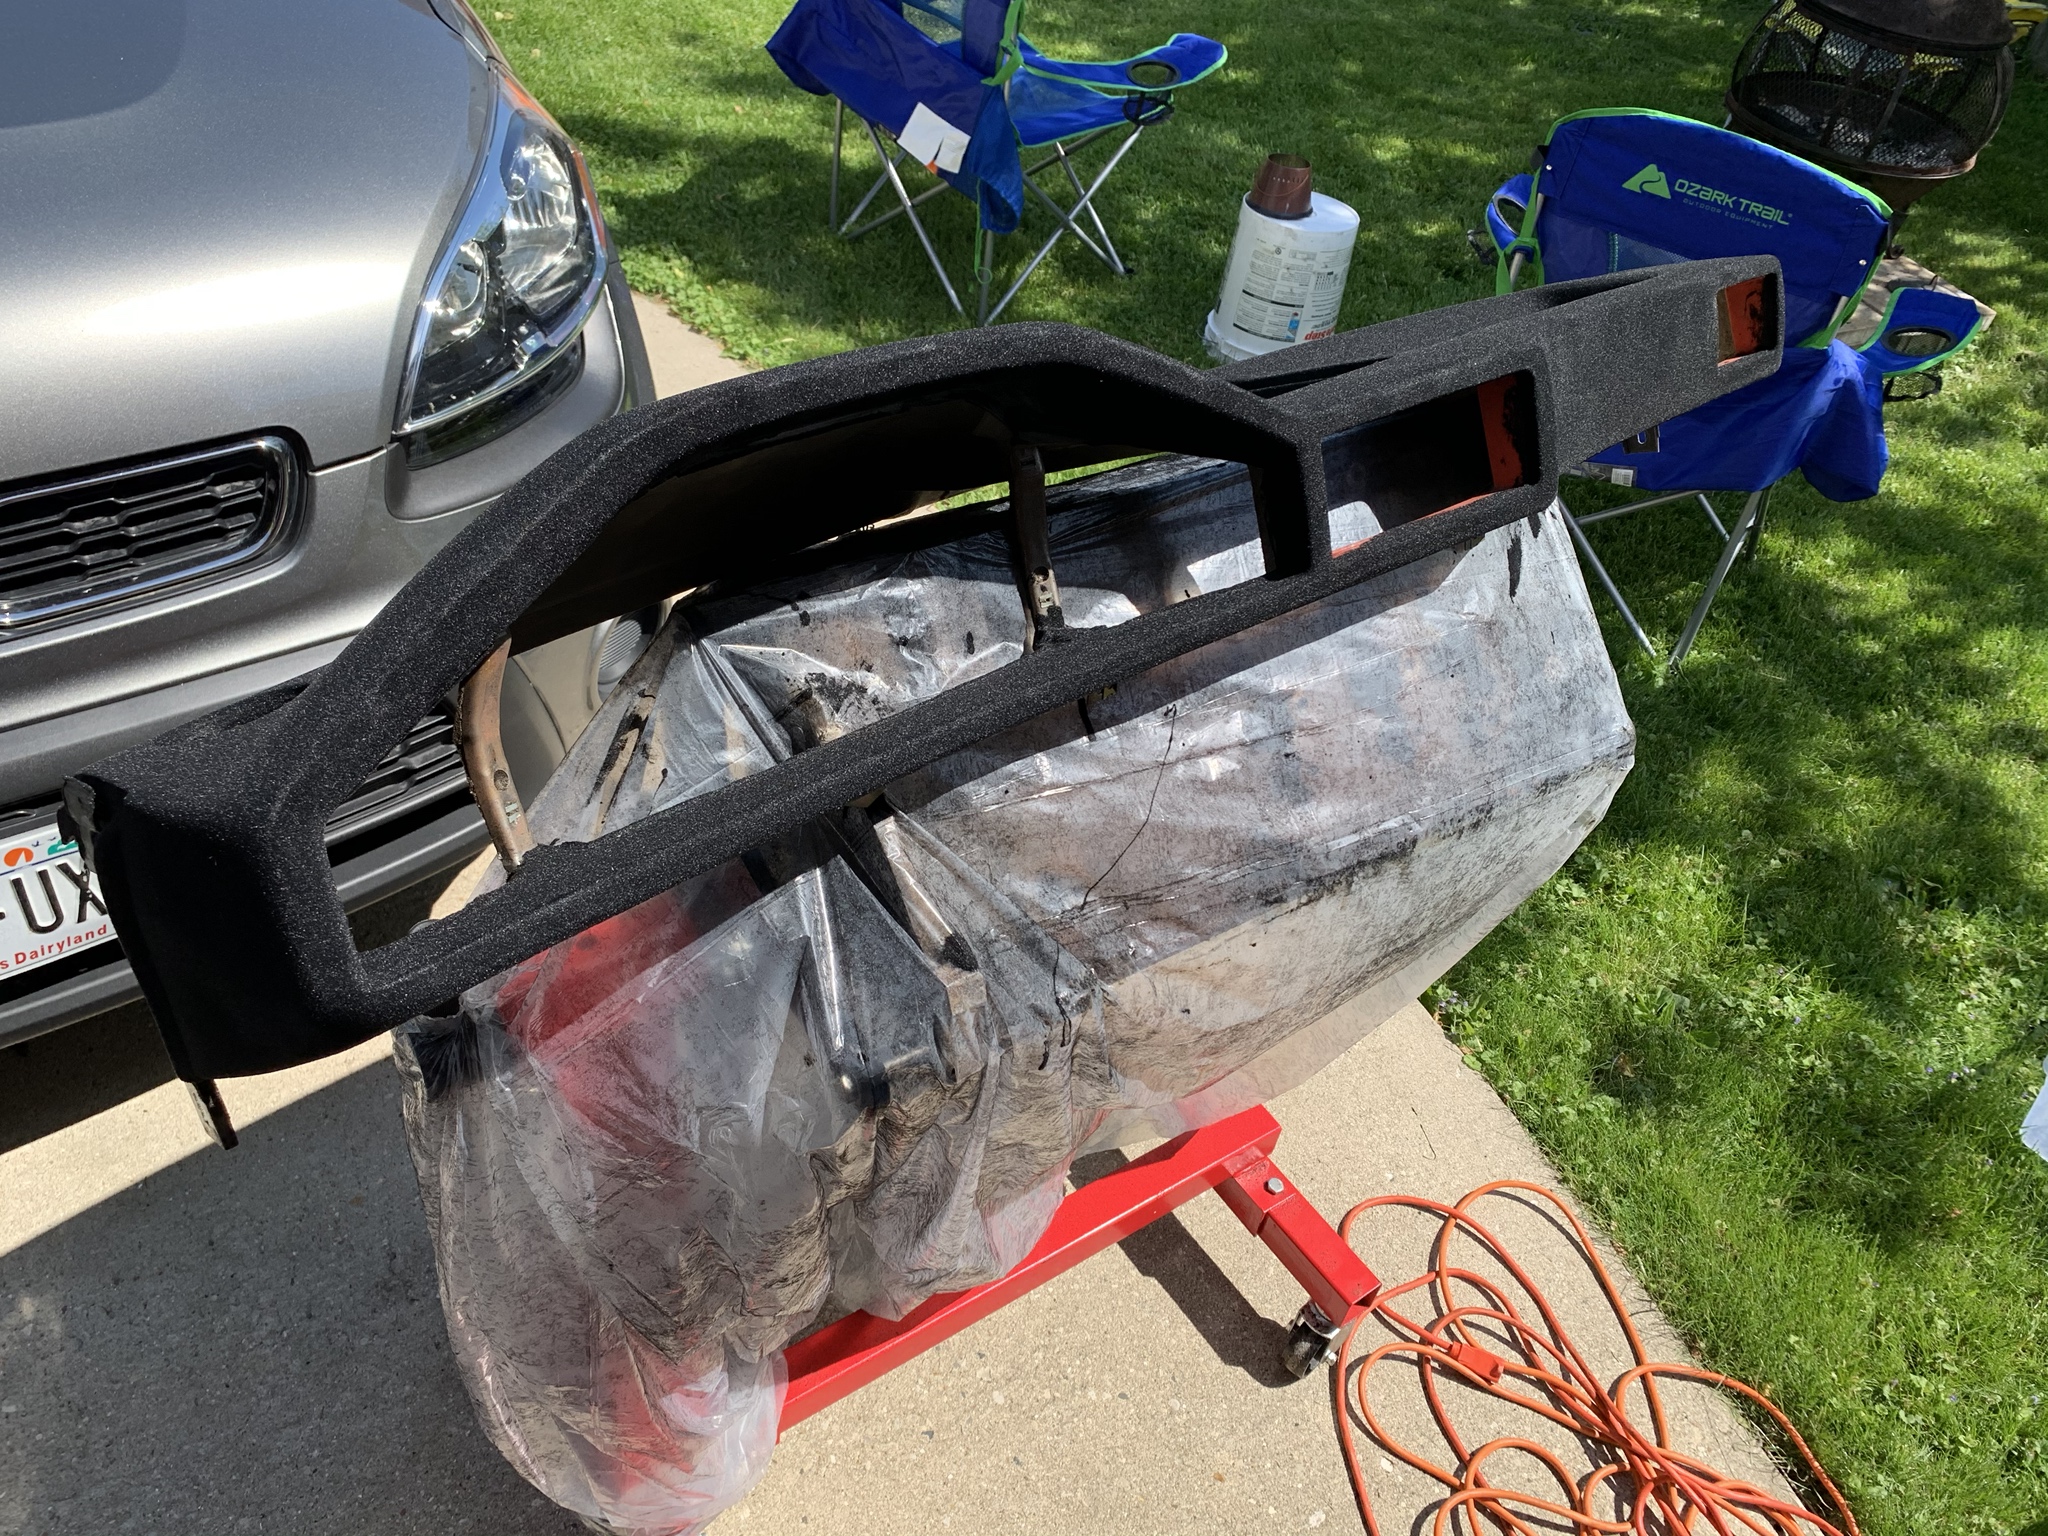
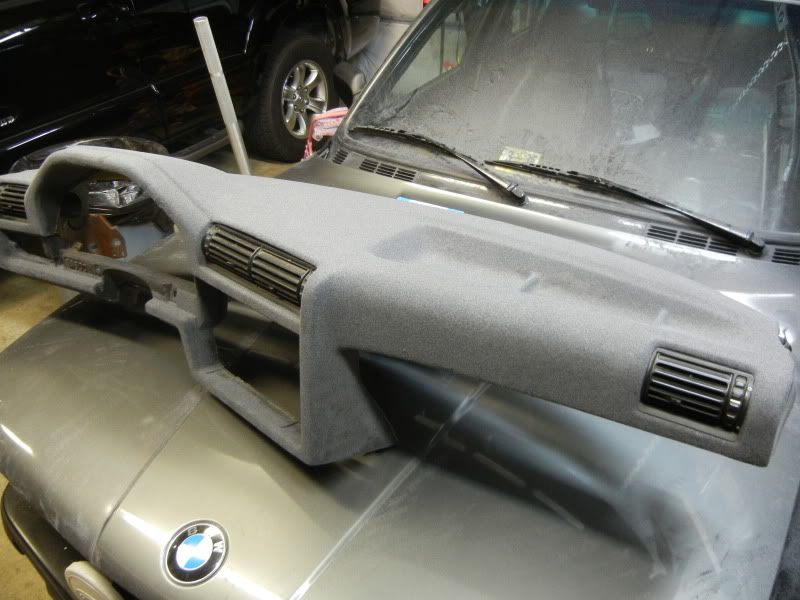
This morning (~18 hours later), I went out to do some cleanup. I couldn't resist rolling the dash out into the sun to see how it turned out:
Image
Image
Image

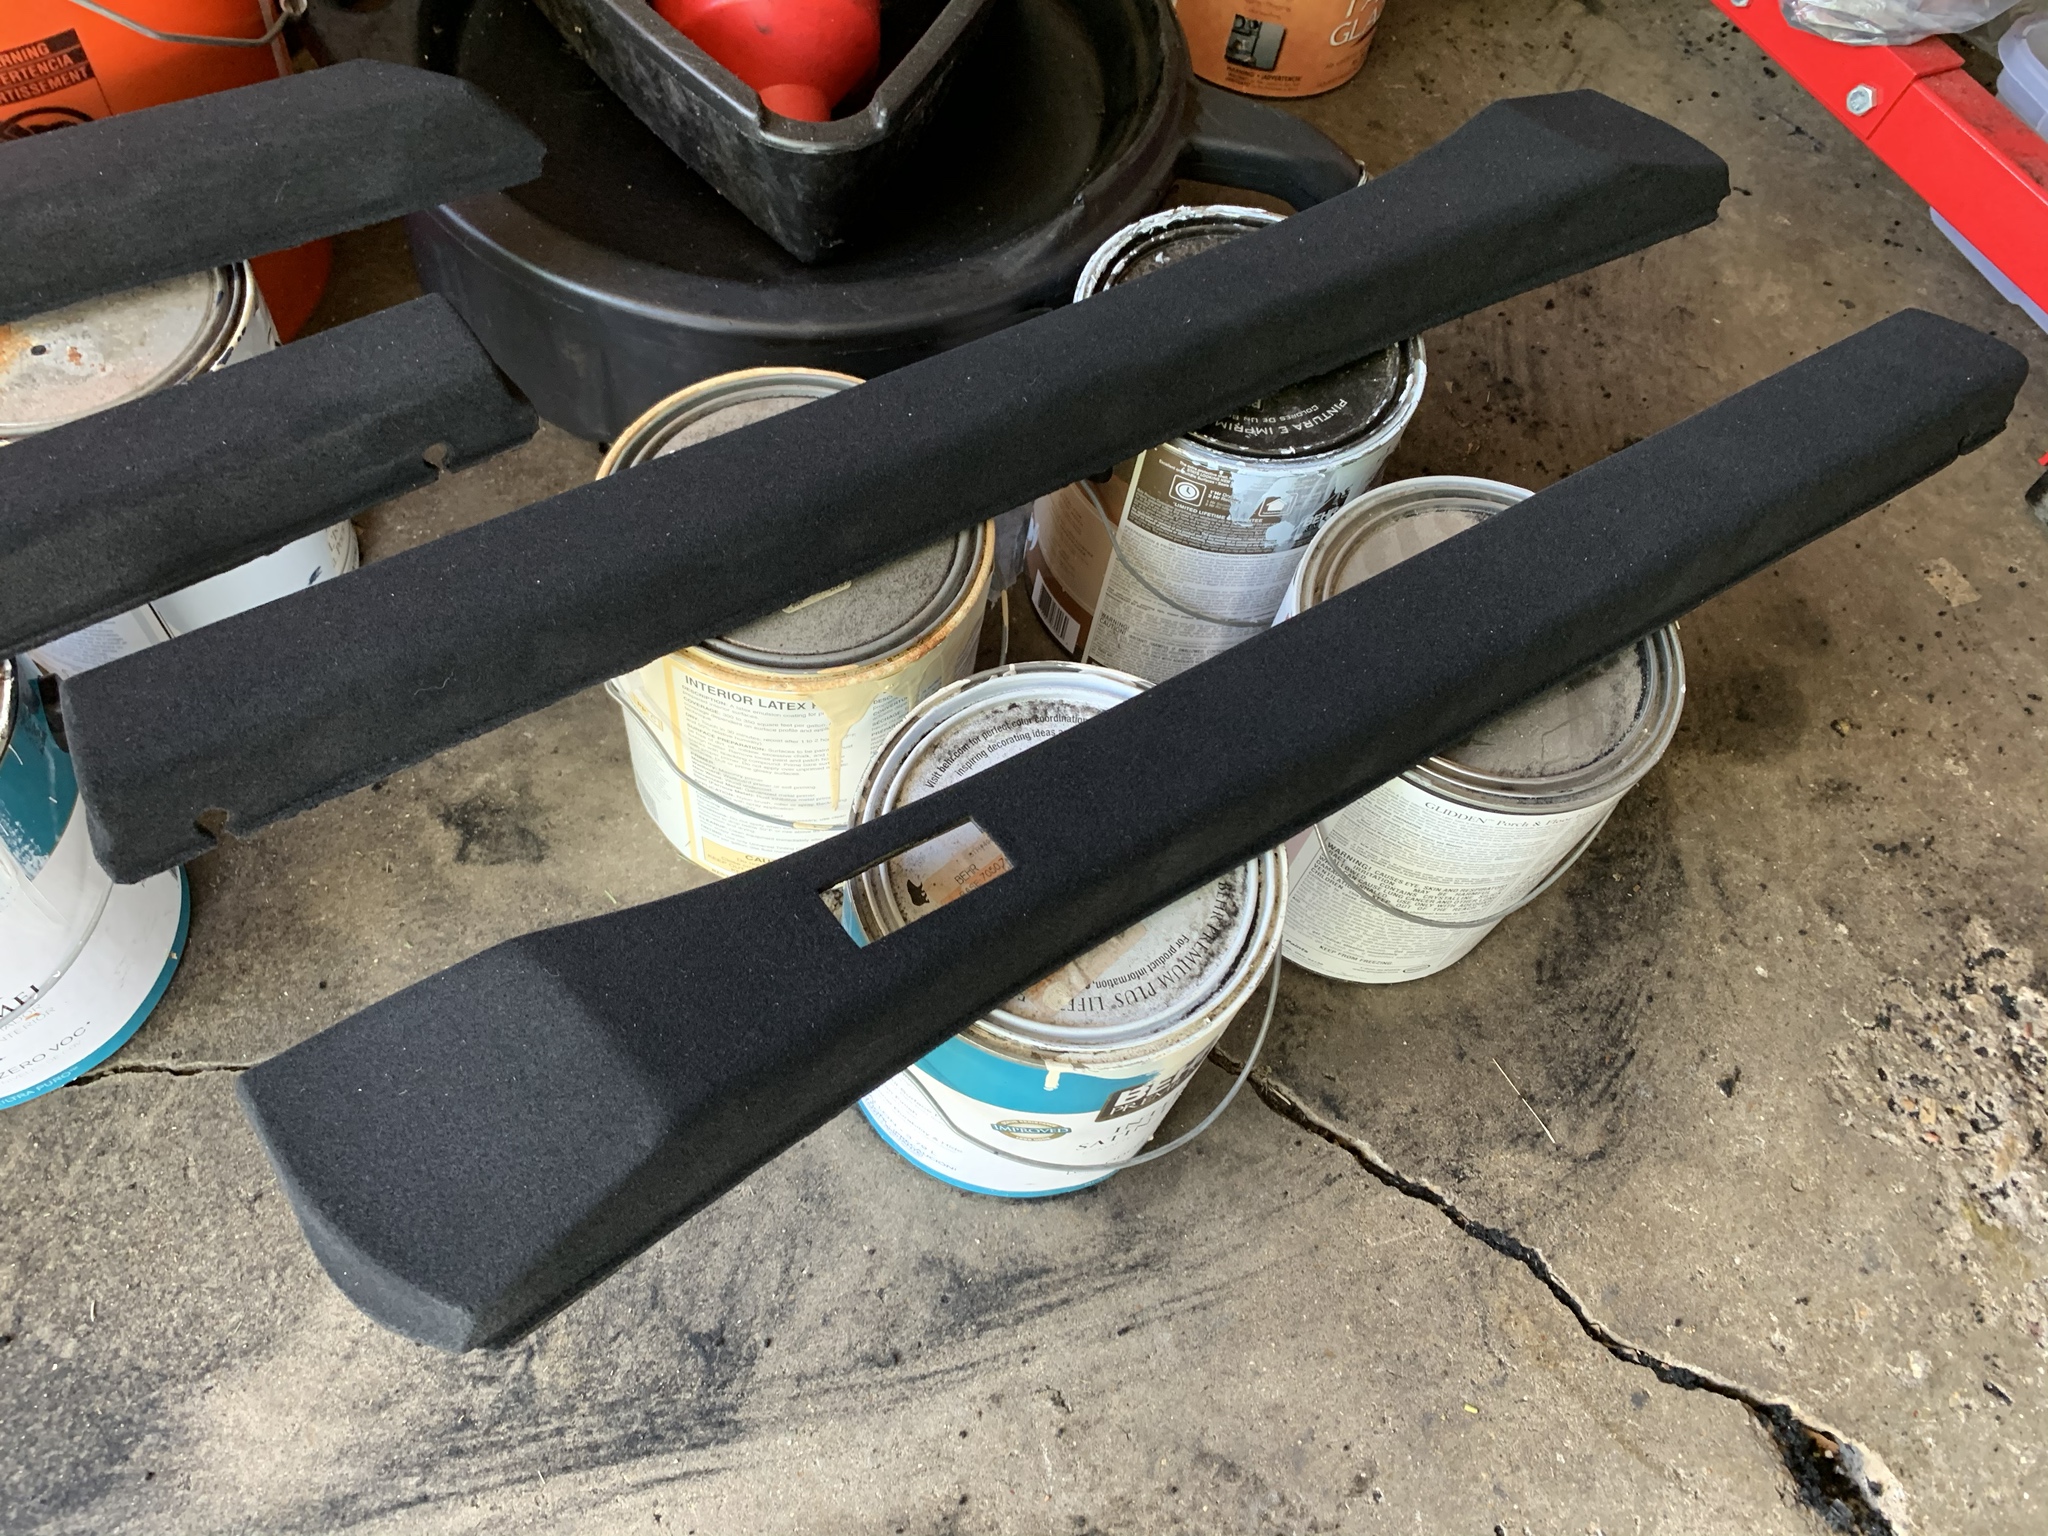
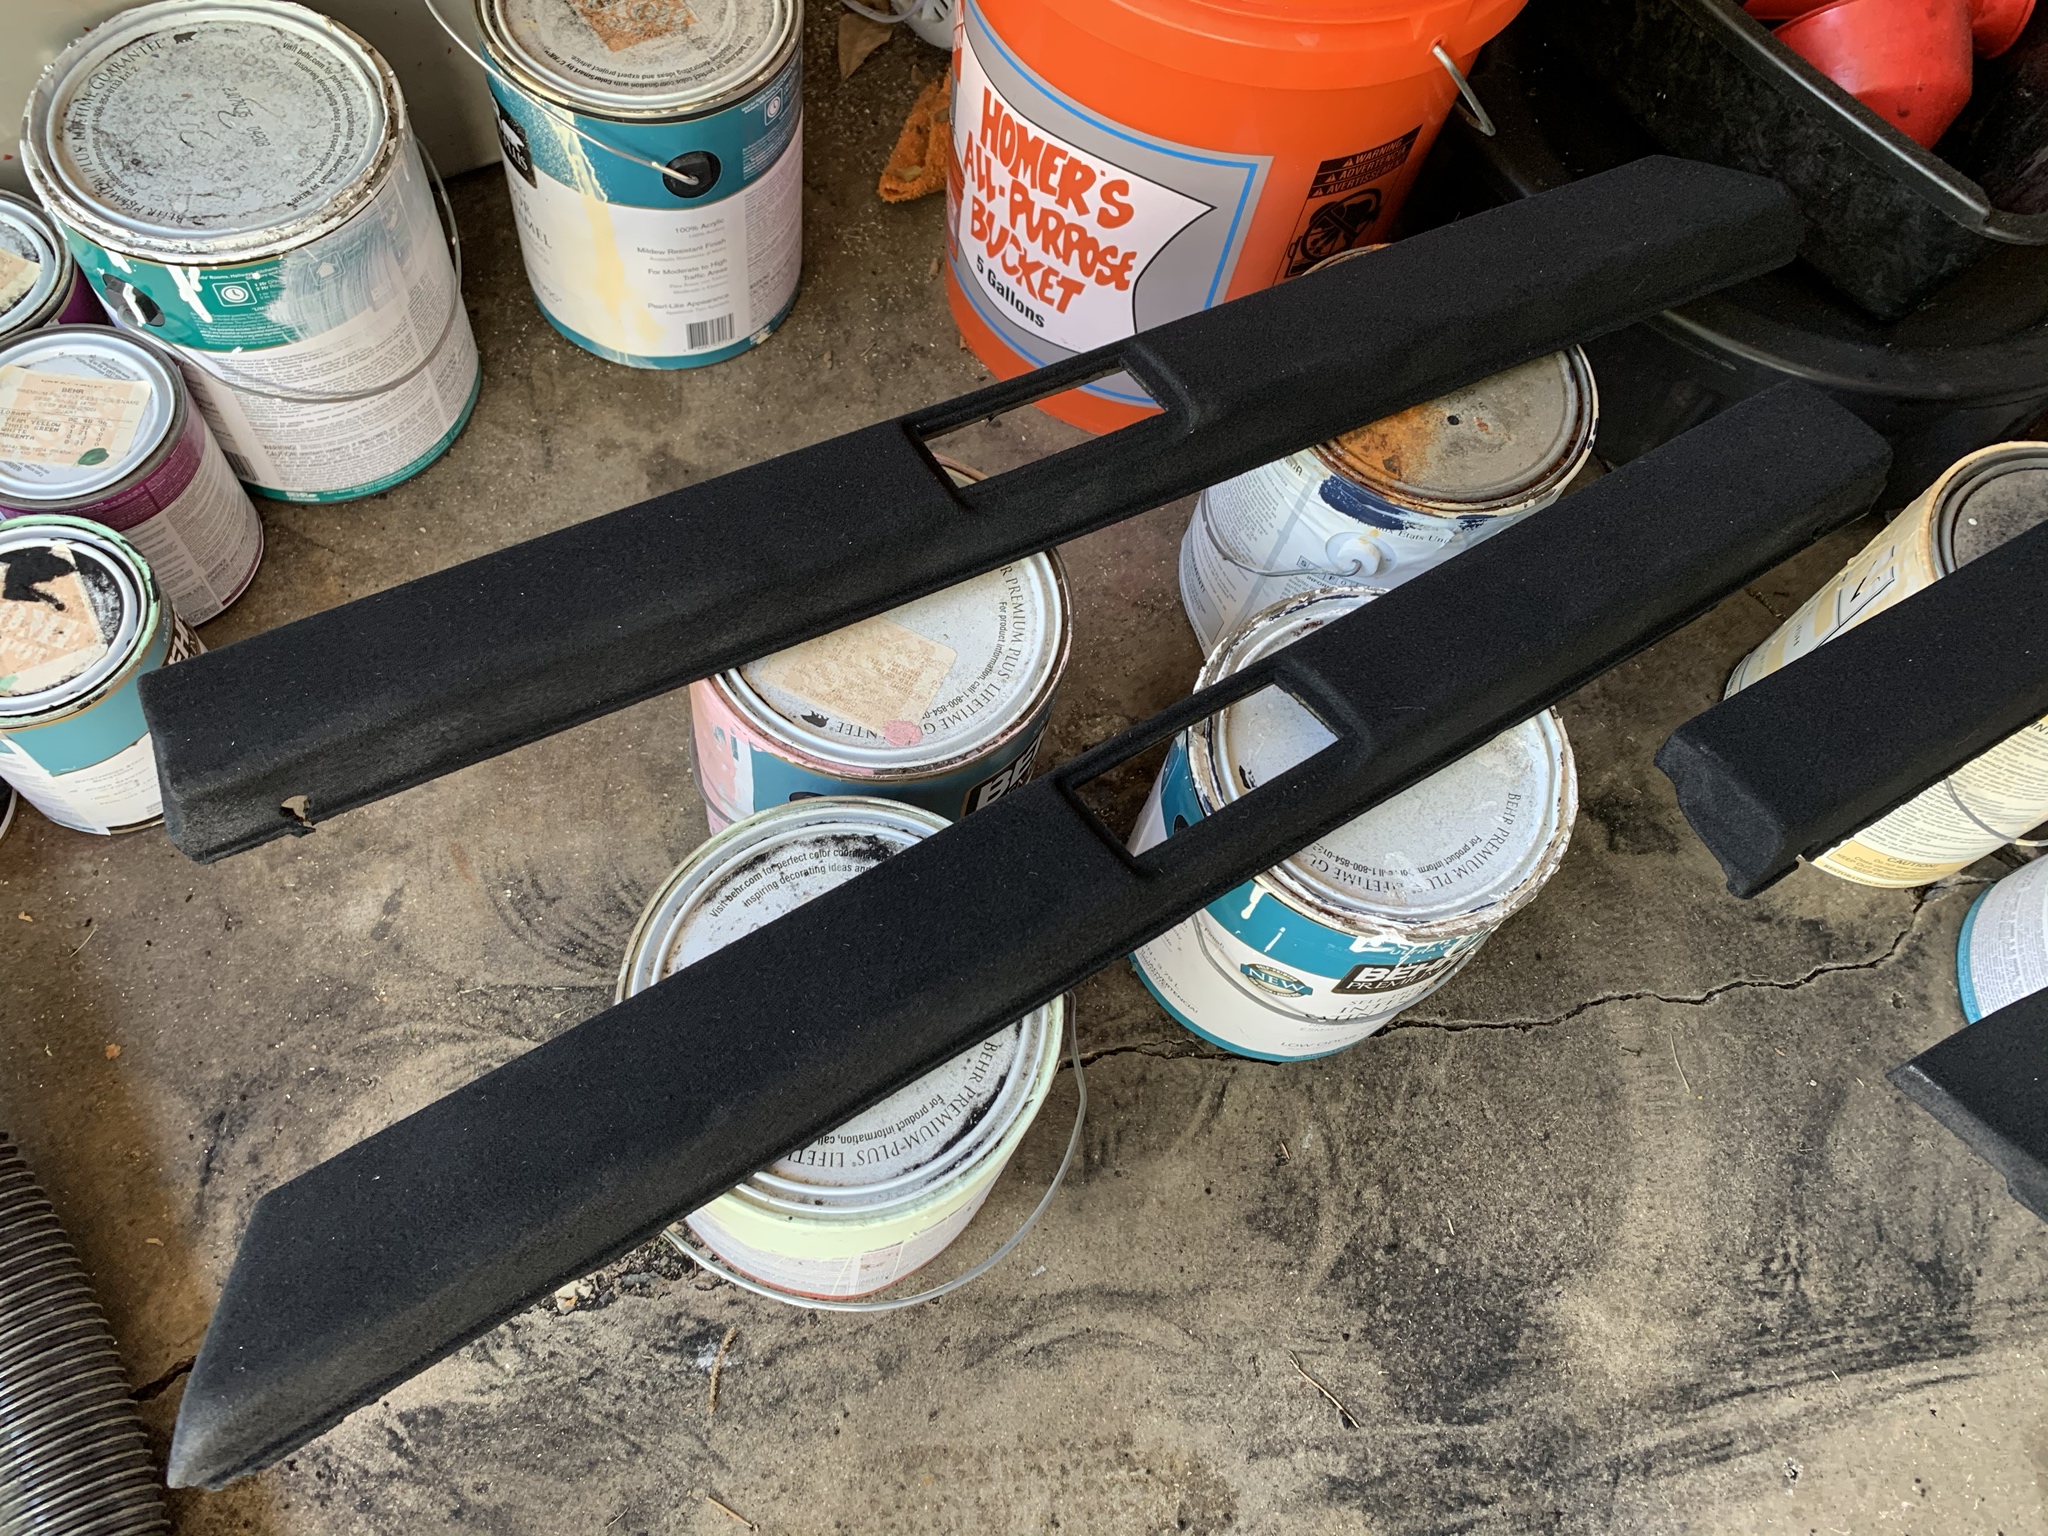
And for posterity, the other parts:
Image
Image
Image

So far, so good! Now I get to let the parts sit for the week to fully cure. Huzzah.

Check back this time next week to see what it all looks like in the car. :up:
Last edited by SlickDizzy on Jun 13, 2020 7:16 PM, edited 1 time in total.
spinedocab
Posts: 2600
Joined: Feb 12, 2006 12:00 PM
Location: Upper Bucks County, PA

Re: My E28 dashboard flocking adventure (lots of text with pics)

Post by spinedocab »

THAT... Looks outstanding.
Great writeup, good photo documentation, proper disclaimers. I love it.
I'm going to try that on at least one dash. Thank you.
Shawn D.
Beamter
Beamter
Posts: 22121
Joined: Feb 12, 2006 12:00 PM
Location: Alpharetta, GA
Contact:

Re: My E28 dashboard flocking adventure (lots of text with pics)

Post by Shawn D. »

That is awesome! Thank you for the writeup -- it'll be useful to many folks!
SlickDizzy
Posts: 836
Joined: Apr 26, 2007 7:03 PM
Location: Milwaukee, WI
Contact:

Re: My E28 dashboard flocking adventure (lots of text with pics)

Post by SlickDizzy »

For all the times this site has helped me with something on my own E28s, I'm just happy to share something that may be of use to others. Obviously this is not worth the effort if you've got a nice dash already, but for a hundred bucks and a few hours, it's a great way to make a crappy one presentable again.

I'm excited to get it back in the car; it kills me that I have to wait a week, but better safe than sorry.

Here's a finished example in an E30 race car, for reference. Unlike this example I'll be installing all of the OE vents, but it should look pretty slick with the BMP Design gauge pod.

Image
Mike W.
Posts: 27361
Joined: Feb 12, 2006 12:00 PM
Location: California Whine Country

Re: My E28 dashboard flocking adventure (lots of text with pics)

Post by Mike W. »

That doesn't look bad, actually it looks good. I wasn't familiar with the term flocking for dashes, so at first I was thinking Xmas trees and rolling my eyes mentally imagining something art car worthy. But I know the finish you're referring to and it does make sense. I've used caulking before on cracked dashes, which resulted in an improvement, but far less than stellar results and far inferior to your results. Only other thing is that's black? Looks gray from here, I'm almost afraid to wonder what gray looks like. Or does it in fact look black in the car?
SlickDizzy
Posts: 836
Joined: Apr 26, 2007 7:03 PM
Location: Milwaukee, WI
Contact:

Re: My E28 dashboard flocking adventure (lots of text with pics)

Post by SlickDizzy »

Mike W. wrote: Jun 07, 2020 9:29 PM That doesn't look bad, actually it looks good. I wasn't familiar with the term flocking for dashes, so at first I was thinking Xmas trees and rolling my eyes mentally imagining something art car worthy. But I know the finish you're referring to and it does make sense. I've used caulking before on cracked dashes, which resulted in an improvement, but far less than stellar results and far inferior to your results. Only other thing is that's black? Looks gray from here, I'm almost afraid to wonder what gray looks like. Or does it in fact look black in the car?
It looks darker in person; in direct sunlight it looks like more of a charcoal gray than a black, but in the shade it is assuredly black. May just be a trait of the flocking material (nylon). That said, the finish hasn't fully cured yet and I haven't done the final brush and vacuum they instruct you to do, so I'm not going to make a final judgment until the process is complete.

I will add, though: an acquaintance did his E30 dash in their "charcoal grey" color and it's a helluva lot lighter than what I'd call "charcoal". Definitely not a bad color for a medium grey interior, but too light for my taste.

Image
1986series6
Posts: 64
Joined: Jul 10, 2017 12:29 PM
Location: West Nyack NY

Re: My E28 dashboard flocking adventure (lots of text with pics)

Post by 1986series6 »

Can't believe we posted our flocking experience on the same day.

https://www.bimmerforums.com/forum/show ... t-to-Flock
SlickDizzy
Posts: 836
Joined: Apr 26, 2007 7:03 PM
Location: Milwaukee, WI
Contact:

Re: My E28 dashboard flocking adventure (lots of text with pics)

Post by SlickDizzy »

1986series6 wrote: Jun 08, 2020 1:50 PM Can't believe we posted our flocking experience on the same day.

https://www.bimmerforums.com/forum/show ... t-to-Flock
Yes, go figure! I was unfamiliar with that issue on the 6-series cluster but I agree that the flock really cleaned it up.
alkalineom3n
Posts: 48
Joined: Nov 15, 2013 4:33 PM
Location: Rochester NY
Contact:

Re: My E28 dashboard flocking adventure (lots of text with pics)

Post by alkalineom3n »

I've been deeply considering this for awhile as an easy decent way to salvage my cracked dash, and I think you just convinced me. Anxiously awaiting finished install pics!
e28Sean
Posts: 997
Joined: Nov 23, 2007 2:07 PM
Location: Greenville, SC
Contact:

Re: My E28 dashboard flocking adventure (lots of text with pics)

Post by e28Sean »

That looks amazing! I cannot wait to see it installed; It's clearly not an OE finish, but I don't think it will look out of place at all in an e28.

Nicely done!
demetk
Posts: 8431
Joined: Aug 09, 2007 8:58 AM
Location: CT, USA

Re: My E28 dashboard flocking adventure (lots of text with pics)

Post by demetk »

That looks really good. Thank you for writing this up.
- Unless you can set up a Dexter-like work space...

haha
SlickDizzy
Posts: 836
Joined: Apr 26, 2007 7:03 PM
Location: Milwaukee, WI
Contact:

Re: My E28 dashboard flocking adventure (lots of text with pics)

Post by SlickDizzy »

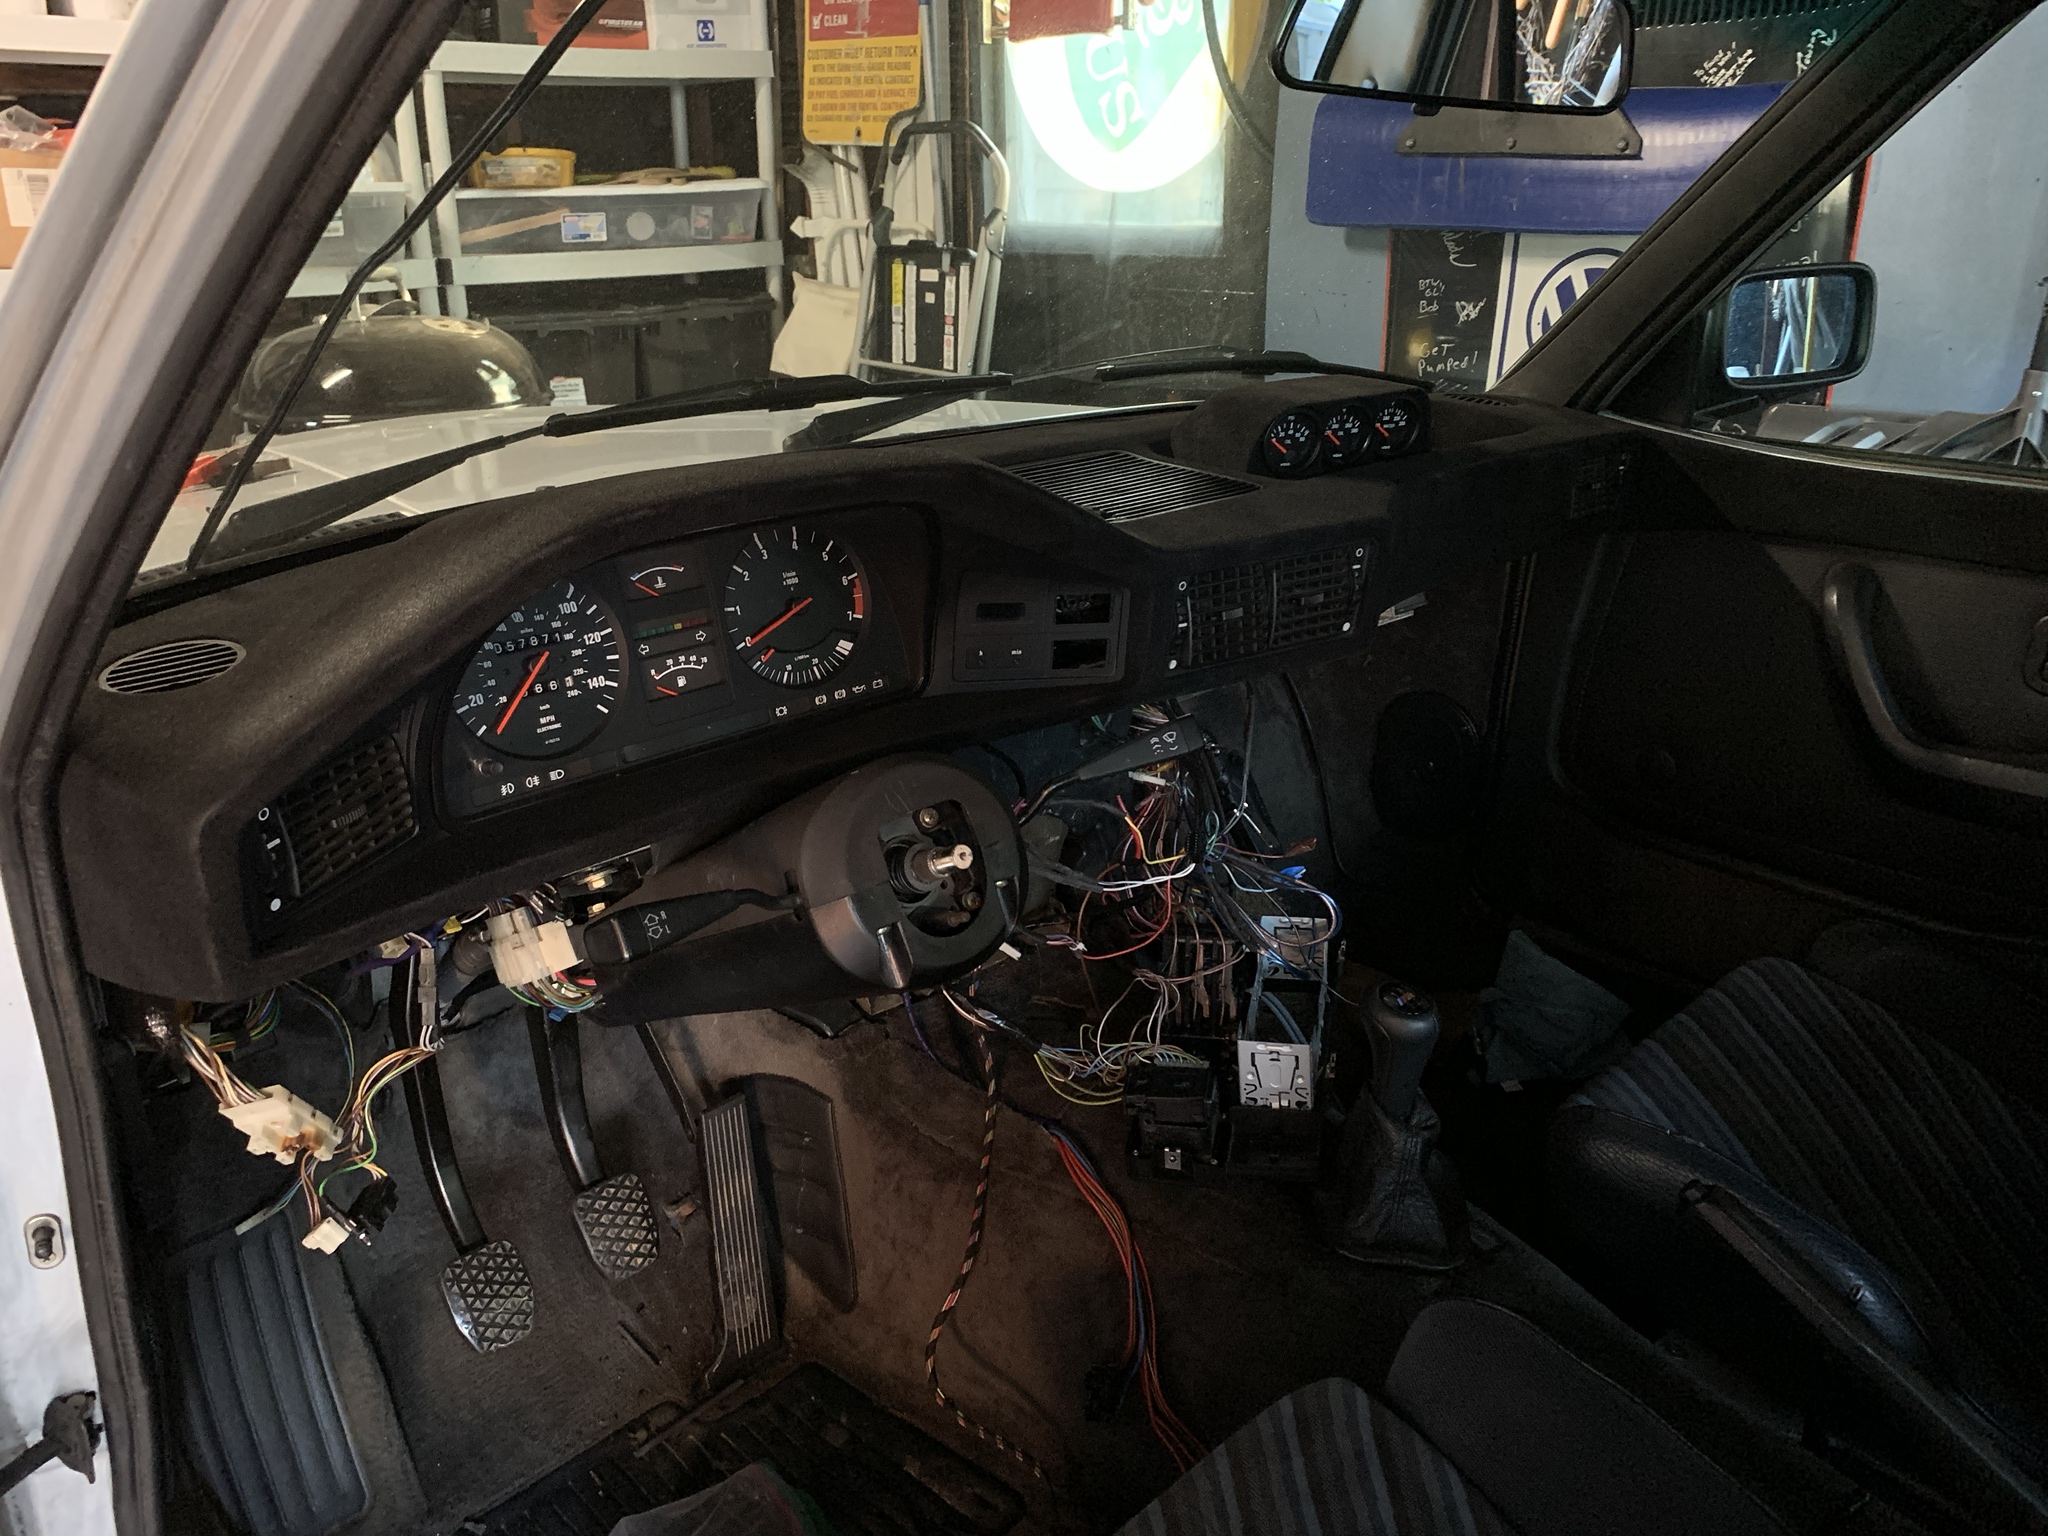
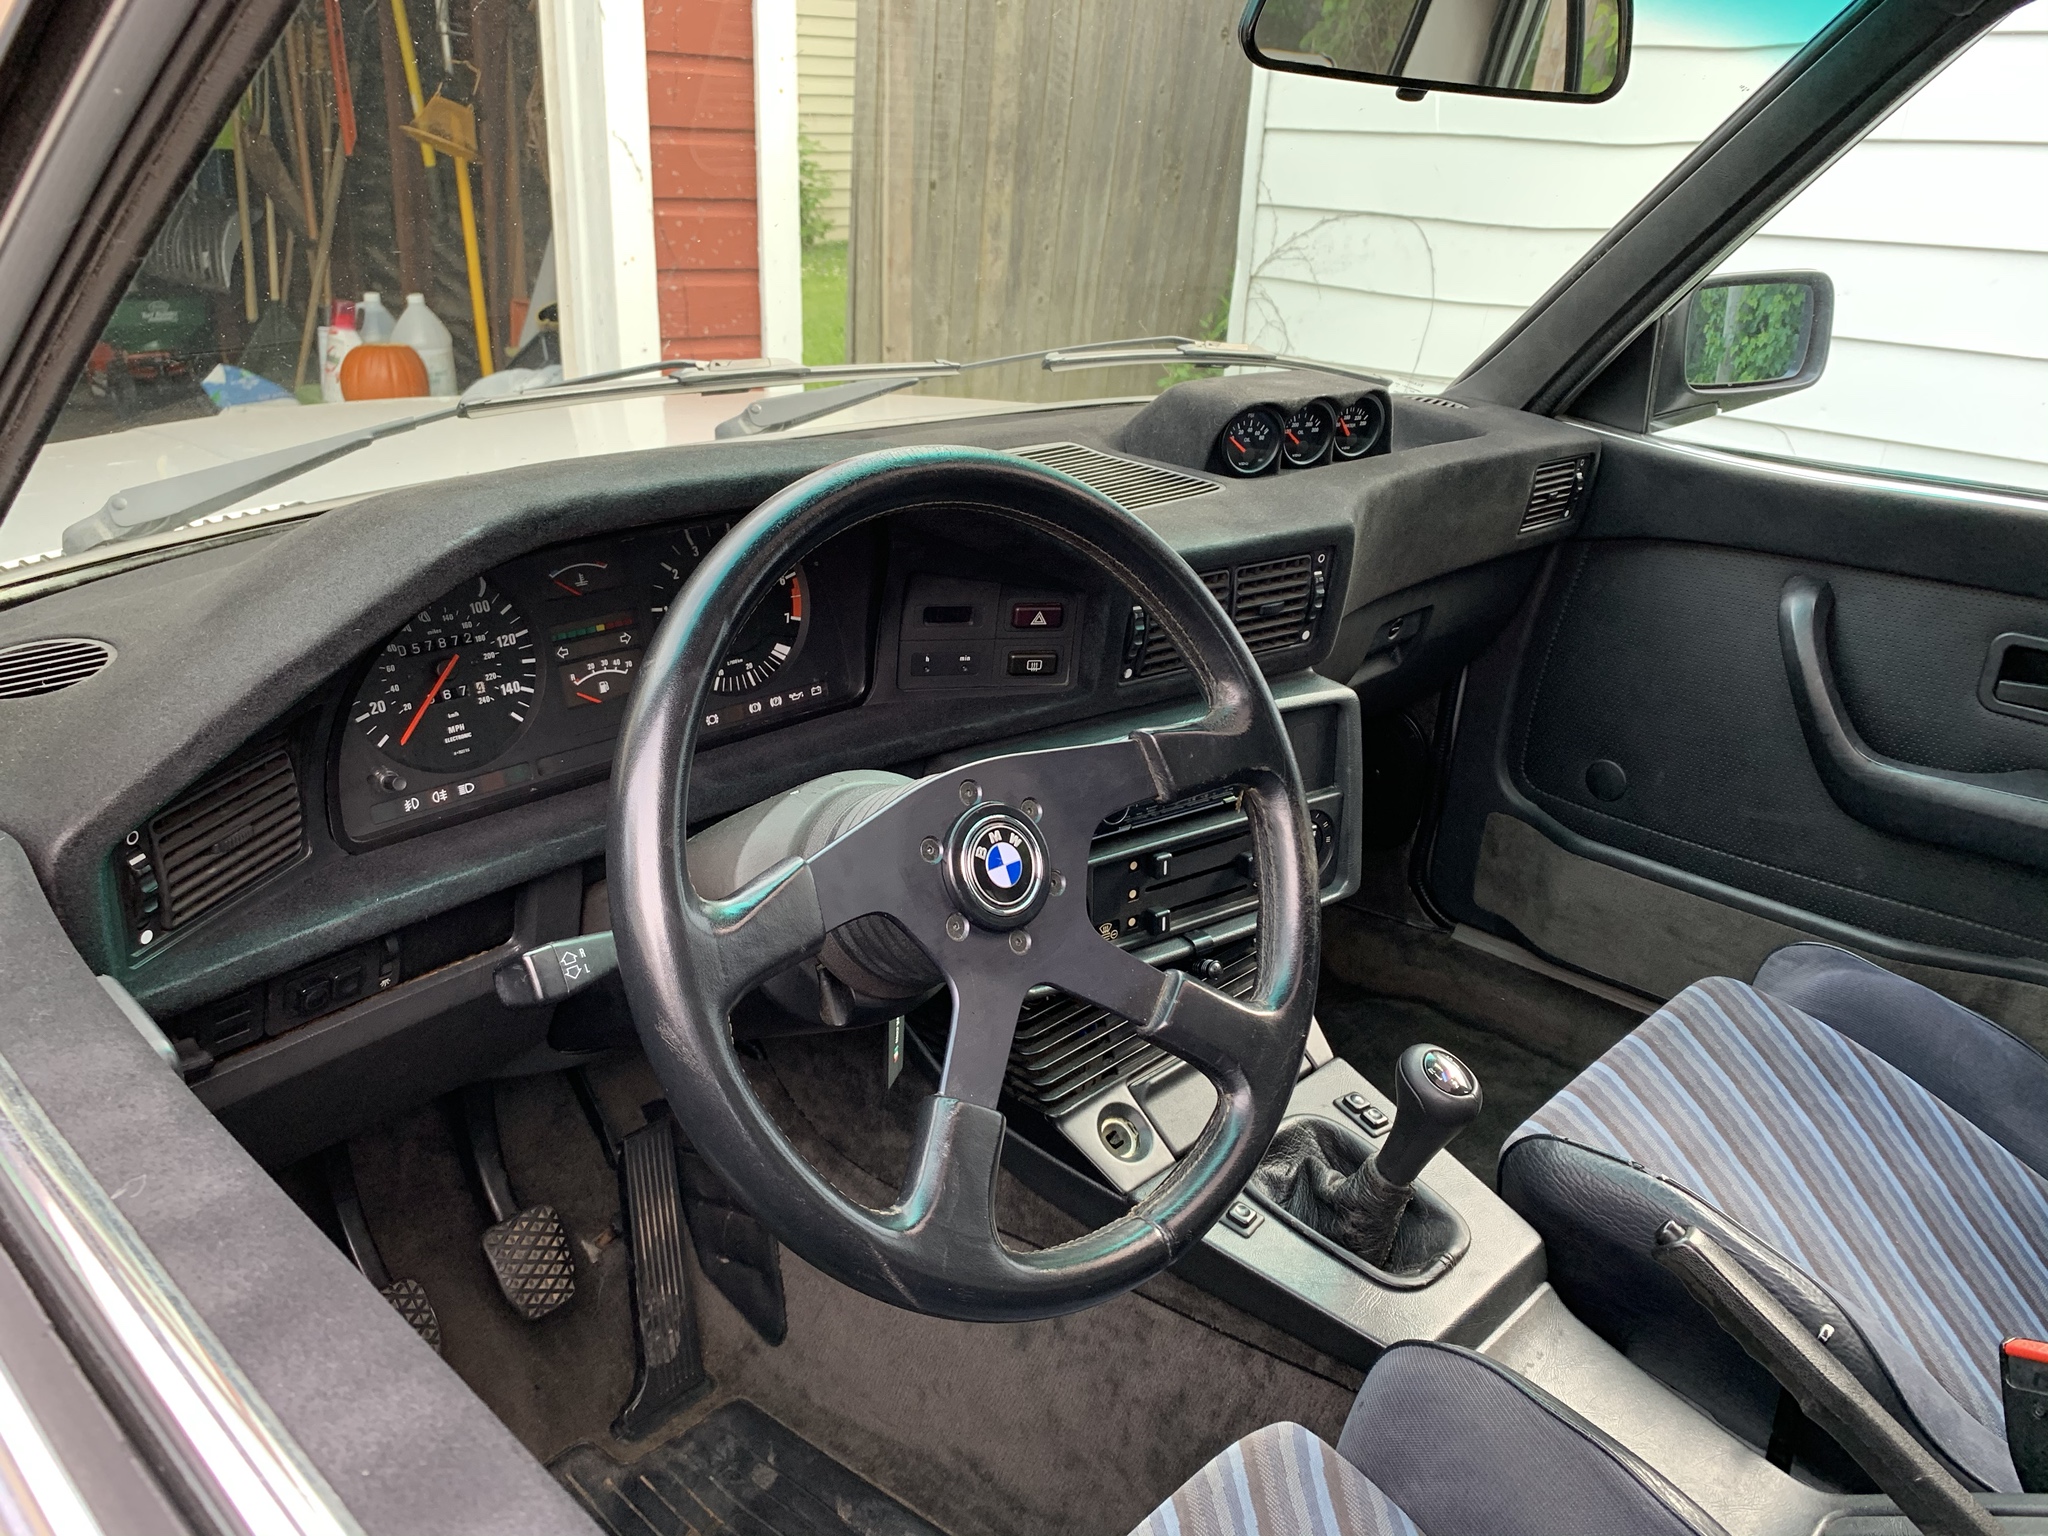
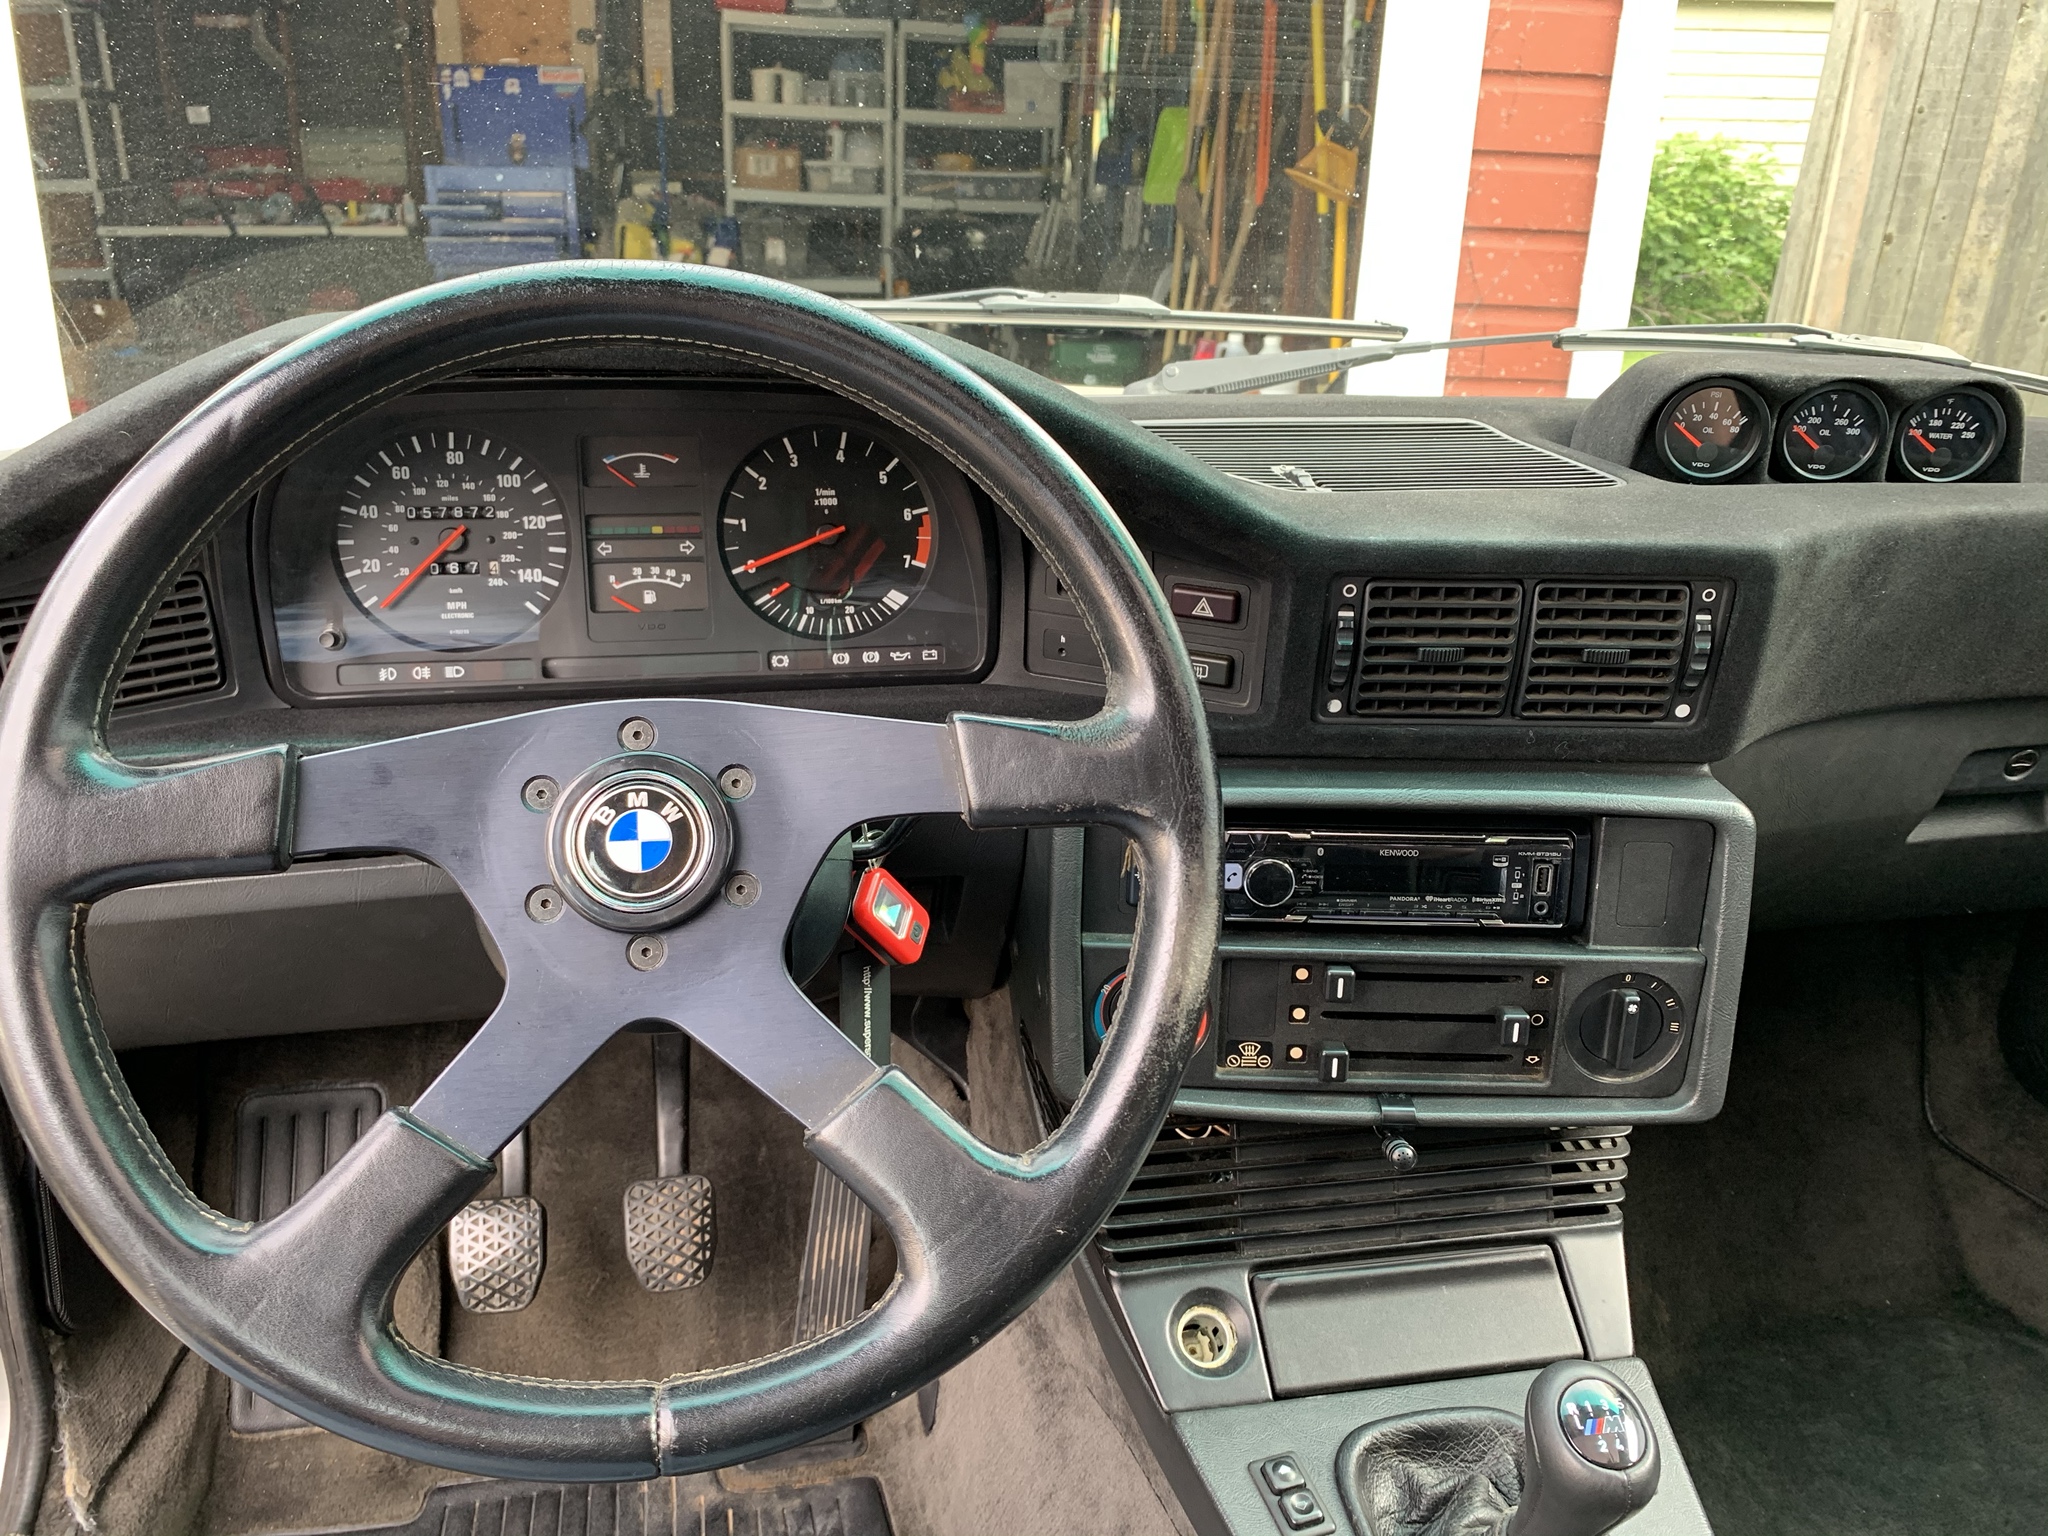
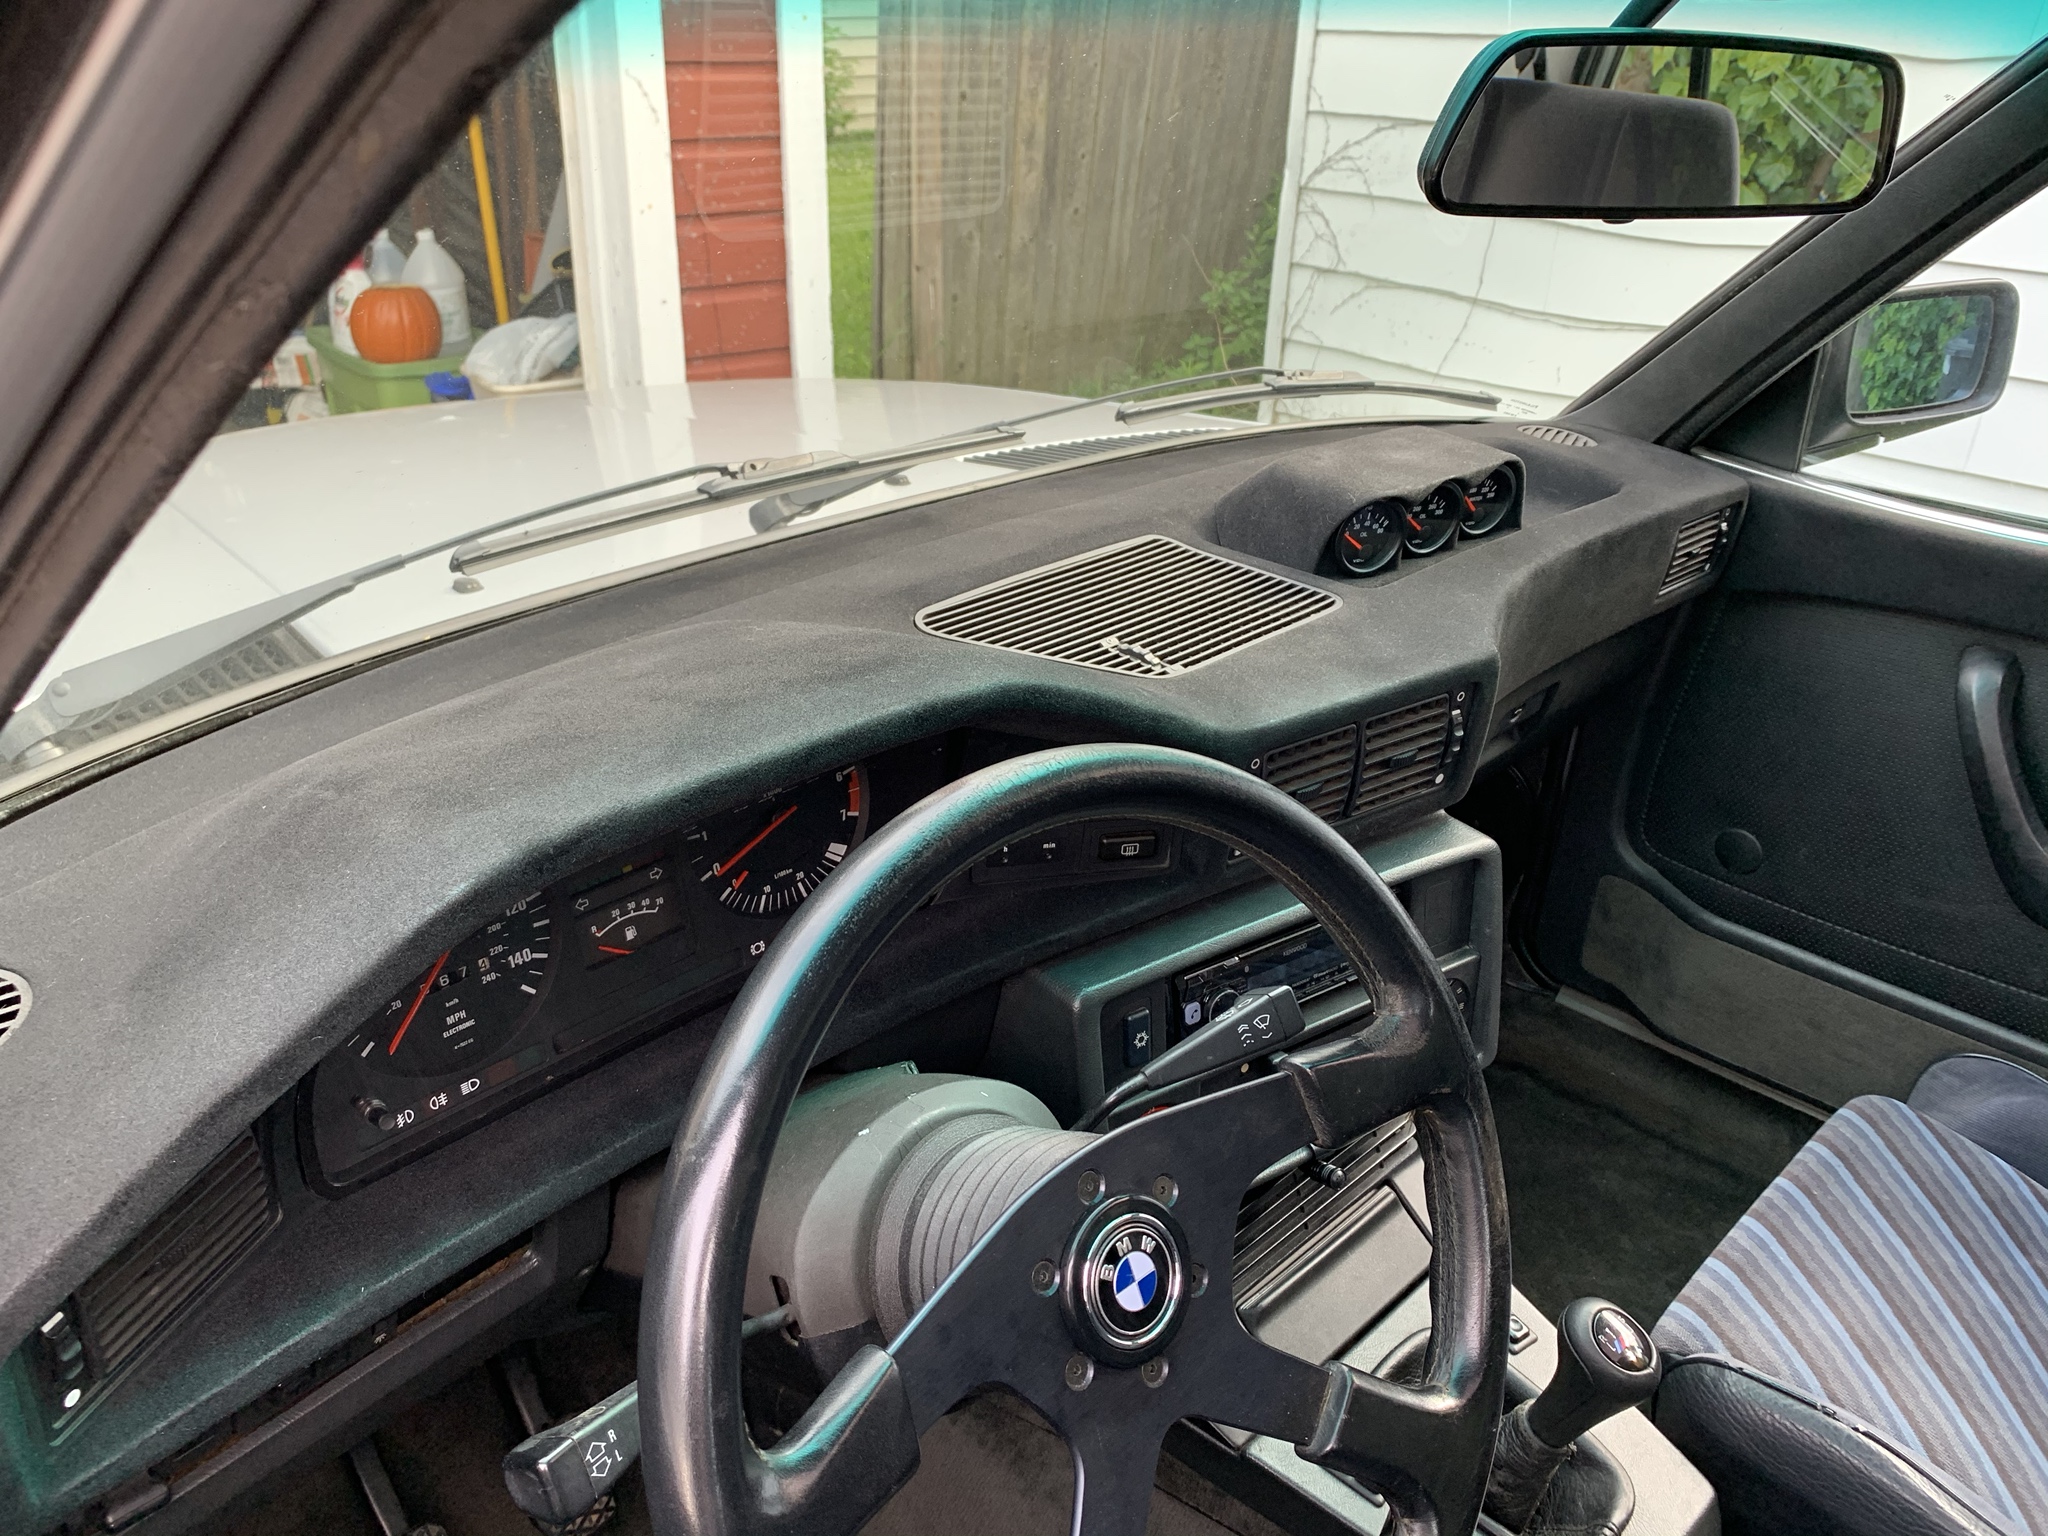
Flocked dash is in! I’m super happy with how it turned out.

It dried darker than the original pics. The final color is very close to the OE vinyl.

The finish has a suede-like feel and is surprisingly durable. As anyone who has ever installed an E28 dash knows, there is some man-handling involved, but the flock held up very well during the process.

As these kind of projects tend to go, I learned a lot and would feel more confident the next time around. I would definitely do it again to improve a dash in bad shape.

- My work space was not very well lit and as a result there are a few very small areas where the flock coat is a little thin (these spots look glossier than the rest of the dash). I may order a small bag of fibers and try to touch those up with a small paintbrush and some of the extra glue at some point.
- I think my paranoia about the working time of the glue led to me rushing excessively. I would set a visual timer next time to keep track of how much time I have.
- The brush they include with the kit SUCKS! I used a 4” roller to do the big areas, but used the brush for tough-to-reach spots; the whole time I was using it I was picking out loose bristles. I somehow missed one and ended up with a bristle under the finish on the gauge hood; luckily it’s not very noticeable. Buy a better brush.
- Weirdly, after completing all this work, my interior now rattles and squeaks less when I drive over bumps and potholes. Probably thanks to tightening up a lot of old bolts and screws that had never before been touched.

Image
Image
Image
Image
Image
e28Sean
Posts: 997
Joined: Nov 23, 2007 2:07 PM
Location: Greenville, SC
Contact:

Re: My E28 dashboard flocking adventure (lots of text with pics) FINISHED!

Post by e28Sean »

Looks great!
funkycharms
Posts: 97
Joined: Oct 31, 2013 1:43 PM
Location: SF Bay Area

Re: My E28 dashboard flocking adventure (lots of text with pics) FINISHED!

Post by funkycharms »

That looks pretty good, great job!
Post Reply