What did you do to your E28 today?
-
- Posts: 508
- Joined: Feb 12, 2006 12:00 PM
- Location: 12020
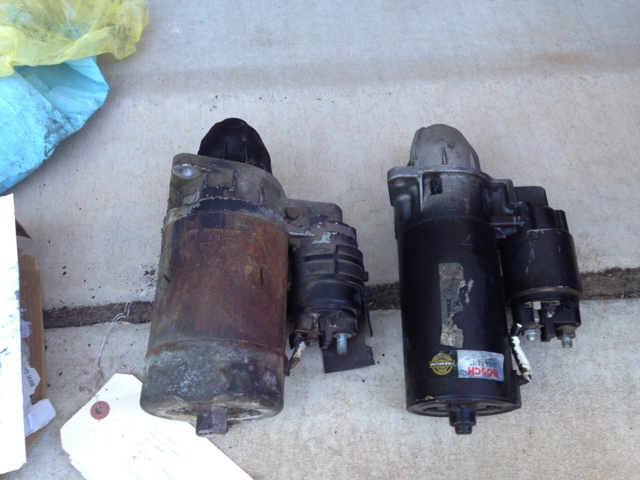
Bosch SR441X starter
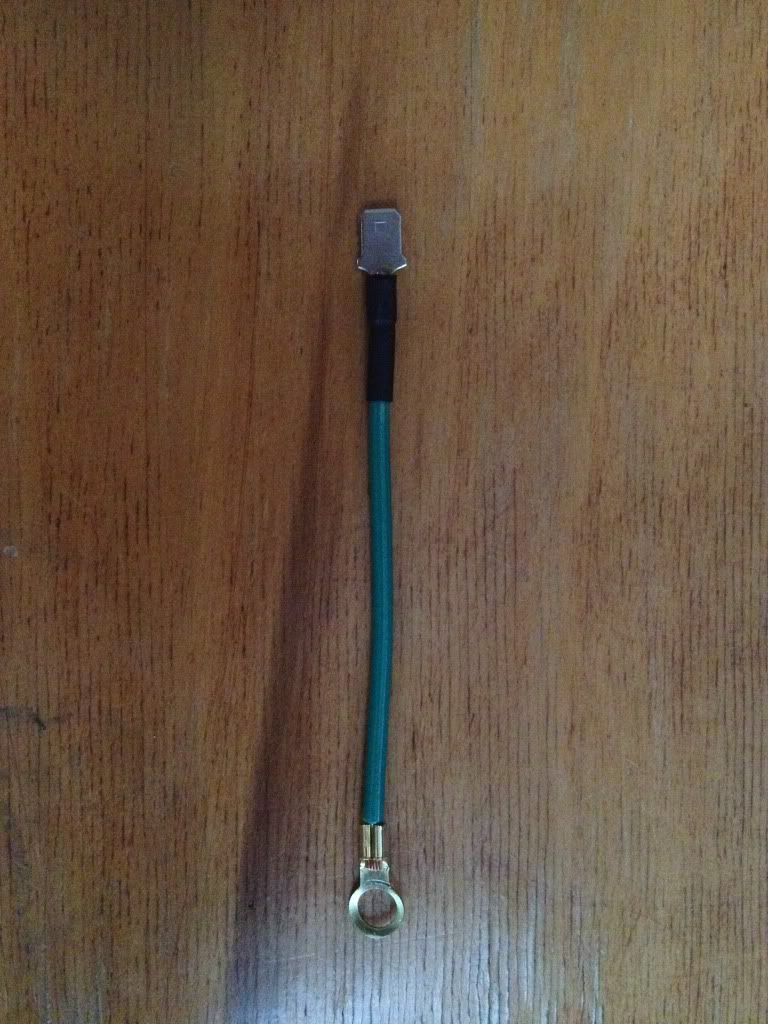
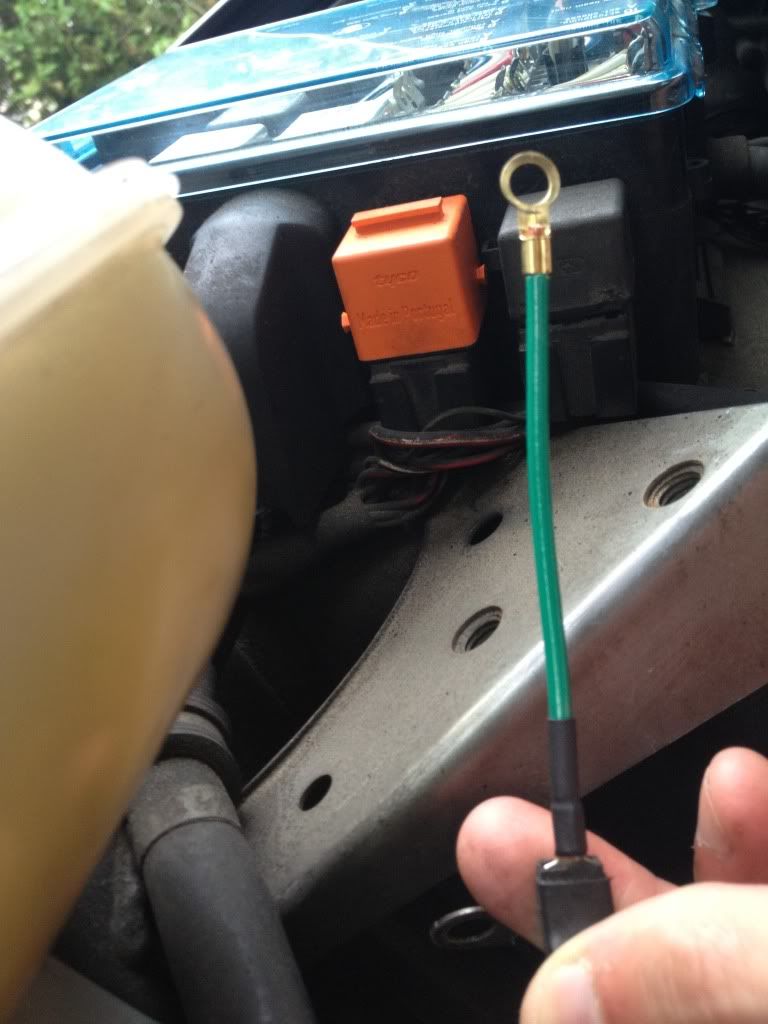
I thought I could see in some online photos that the electrical connections for the solenoid appeared different on the SR441X starter meant for M30B35 use than the M30B34 starter I removed. They were, so to make things easier in case the next owner chooses an original type starter I fabbed up a little pigtail to go from the wiring harness spade connector to the solenoid's terminal 50 (unmarked) stud via a ring terminal. Worked great, so does the new starter. I think I might celebrate, let the dog ride on the back seat while I head to the beer store for supplies...
Let's try links...
looks like I could have bought the starter more cheaply here: http://www.fcpeuro.com/products/bmw-sta ... tor-sr441x Anyone who removes the old starter will smile at how quickly and easily these smaller units go in, plus they make a more contemporary sound!
Let's try links...
looks like I could have bought the starter more cheaply here: http://www.fcpeuro.com/products/bmw-sta ... tor-sr441x Anyone who removes the old starter will smile at how quickly and easily these smaller units go in, plus they make a more contemporary sound!
That sucks.Karl Grau wrote:Took it in for its biannual smog test which it failed miserably. Just for extra fun they dinged the Euro headers as "Tampering" so it failed the visual too.
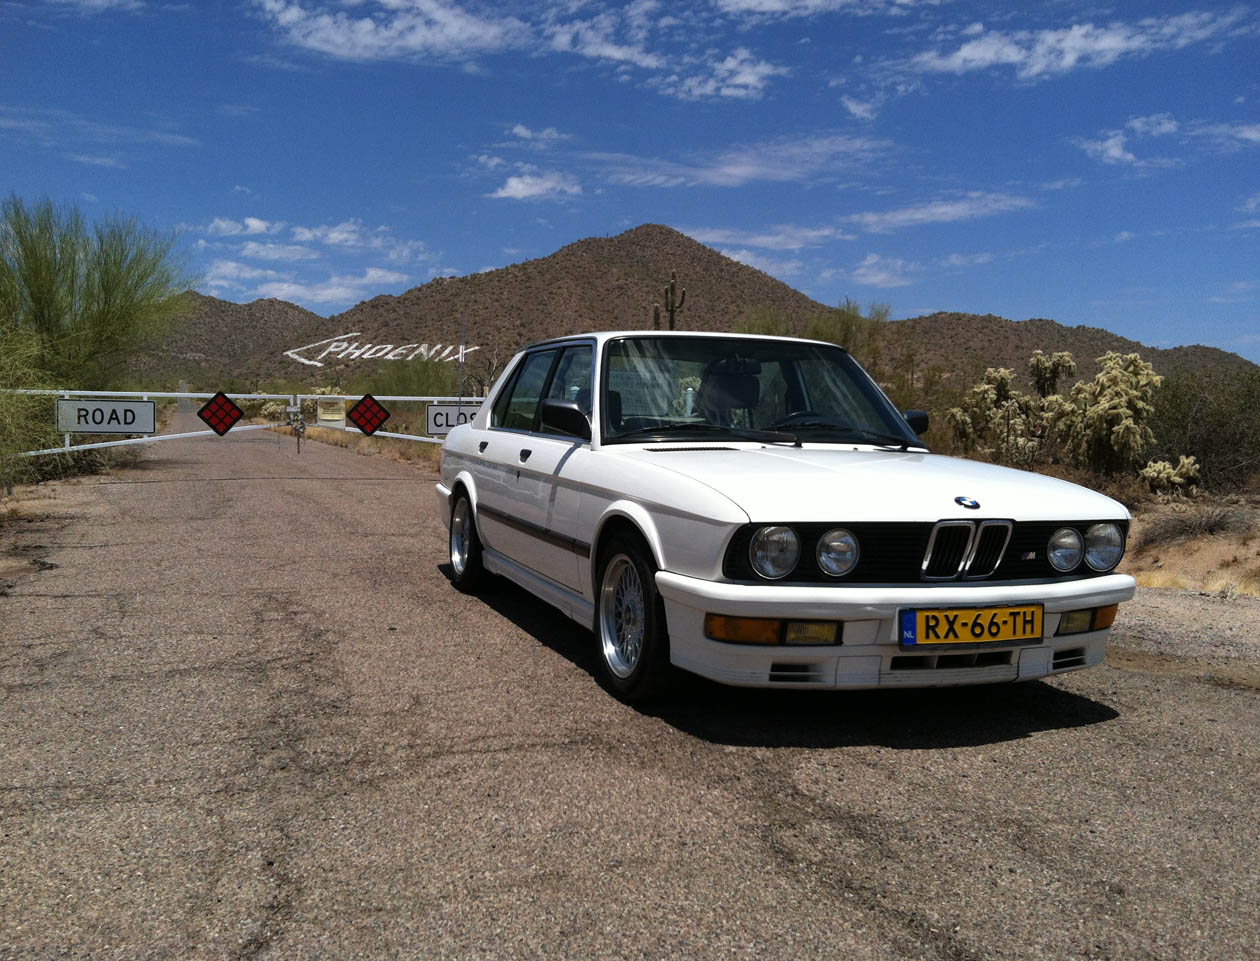
I love it when that happens.unt0uchable wrote:... my ratty old bone stock 535is got from some folks. Someone even took pictures of it.
Good times. I'm lovin my e28.
Beautiful Chris, car and pics.wkohler wrote:
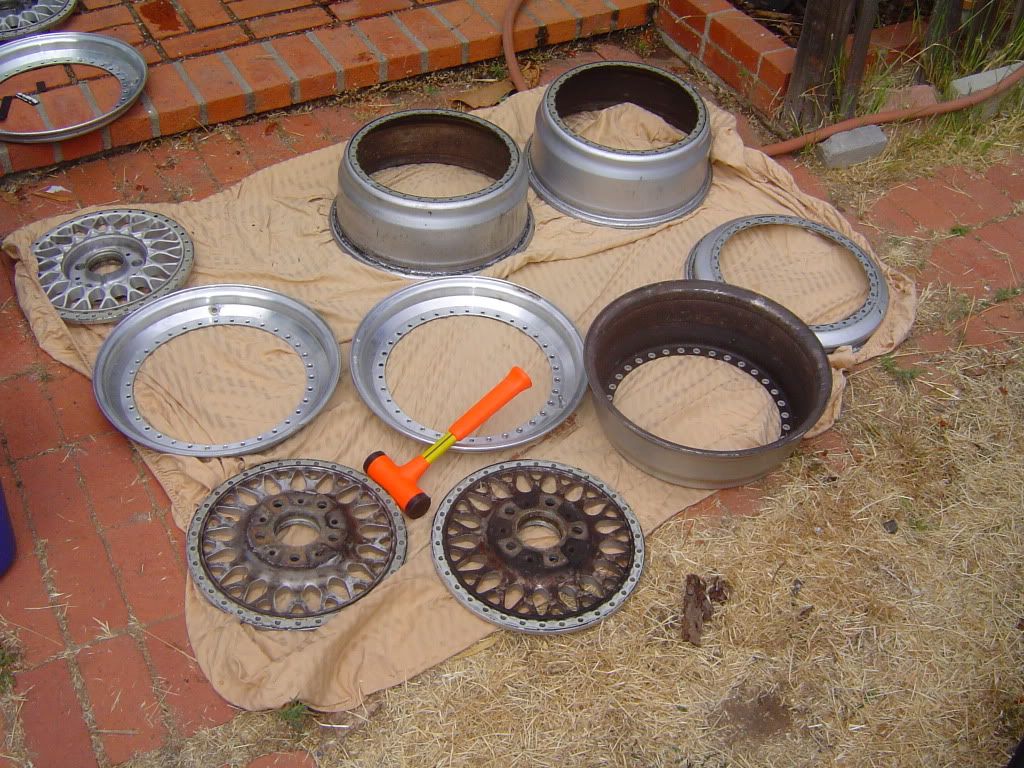
I separated the pieces of the other three BBS wheels.
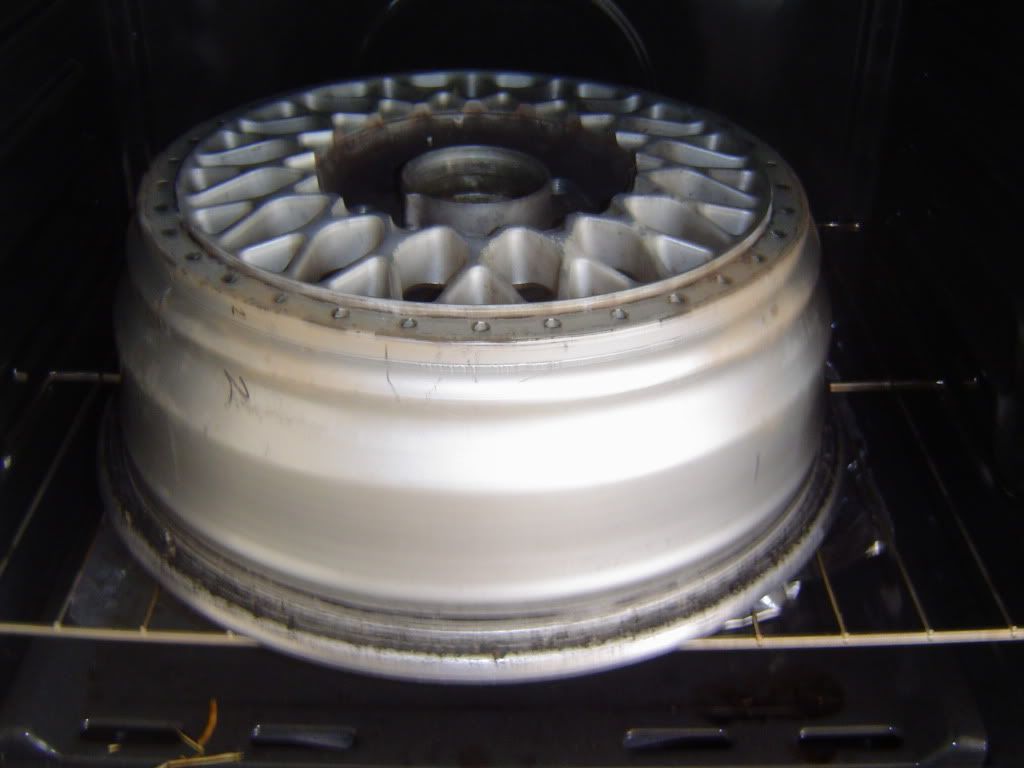
I had to put a stubborn one back in the oven for a little more heat.
Chucky's Pro-Tip #368: When removing filthy dirty wheels after their 5-10 minutes at 350°, do NOT use the novelty oven mitts that were given to you as a gift by the girl you were planning on sleeping with later on in the evening.
I had to put a stubborn one back in the oven for a little more heat.
Chucky's Pro-Tip #368: When removing filthy dirty wheels after their 5-10 minutes at 350°, do NOT use the novelty oven mitts that were given to you as a gift by the girl you were planning on sleeping with later on in the evening.
Yeah, I was hoping to get one more PASS out of he aftermarket Cat but I hadn't got my hopes up.1st 5er wrote:That sucks.Karl Grau wrote:Took it in for its biannual smog test which it failed miserably. Just for extra fun they dinged the Euro headers as "Tampering" so it failed the visual too.
Last edited by Karl Grau on Jul 08, 2012 6:20 AM, edited 1 time in total.
-
- Posts: 7392
- Joined: Feb 12, 2006 12:00 PM
- Location: North Central Florida, USA
- Contact:
Installed a very nice pre-owned pair of seat switches. Thanks to Yosemite Sam
Unfortunately, that still didn't solve the issue I'm having with the Fore-Aft & Up-Down functions on the P/Side Sport Seat. When I engage the switch, I can hear a solenoid or relay loading up (i.e., a "clink" sound) but there's no movement whatsoever (up/down or fore-aft). Suggestions would be greatly appreciated via PM, please.
Tim
FINALLY replaced the starter today. After a year of nursing it along, sometimes hitting the "flat spot" and not being able to start it, hesitation after turning the key. Wondering if it's going to start each and every time... Compounded by heat, which there is NONE of, here in yuma.
Also, i didn't do it when i had the intake off for my vacuum brake swap... Boy am i smart sometimes.
Still have to make a pigtail as outlined above. Also replaced positive and negative cables on battery. My positive had been position specific to work. The negative had maybe 5 or 6 wires left. Both pretty corroded.
For the top bolt, i ended up putting the toolbox closed-end 17 on it. Then getting my prybar with nail puller, and putting the shaft of the wrench in the nail puller slot, then hammering gently with THOR to get it loose. Easy. I'm always amazed at how far i can stick my arms under the intake if i'm motivated...
She starts up FIIIIINE.
-
- Posts: 183
- Joined: Feb 22, 2009 4:22 AM
- Location: Brisbane Australia
-
- Posts: 5616
- Joined: Sep 10, 2006 7:06 AM
- Location: Melbourne, Doooown Under
Replaced my in-line fuel pump. We are getting ready to do a trip to Monterey almost 1,000 miles round trip. I didn't want to take a chance with a fuel pump of unkown age; though it looked brand new when I removed it, so did the fuel lines and the rubber pump housing.
Next stop is new clutch hydraulics!
-
- Posts: 508
- Joined: Feb 12, 2006 12:00 PM
- Location: 12020
I used the toolbox 17 12-pointer as well, with additional piece of 1.5" tubing for leverage. Oh my car, with cruise control and automatic trans. I had to remove the upper intake manifold rear support in order to get in there to pull the top starter bolt. Lots of 1/16 of a turn strokes....ldsbeaker wrote:
FINALLY replaced the starter today.
For the top bolt, i ended up putting the toolbox closed-end 17 on it. Then getting my prybar with nail puller, and putting the shaft of the wrench in the nail puller slot, then hammering gently with THOR to get it loose. Easy. I'm always amazed at how far i can stick my arms under the intake if i'm motivated...
She starts up FIIIIINE.
It was such a nice day that we worked on the house a bit inside, then rode bikes over to the county fair to see some animals and watch my wife fling arrows from a bow, and early to beer. Perfect weather day here in N.Y. All we did on the car was add a bit of ATF, isolate a new squeak, and installed some clear white LED bombas in the overhead interior lenses (ducks and covers...)
-
- Posts: 26
- Joined: Jan 01, 2011 5:57 PM
- Location: Clemmons, NC
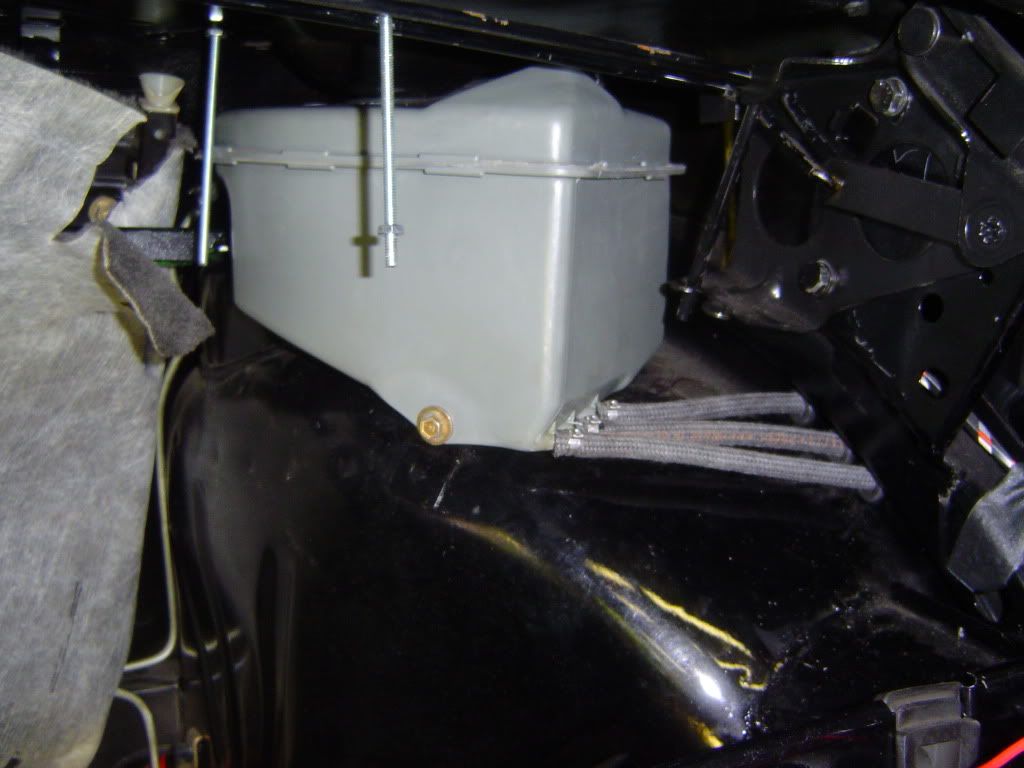
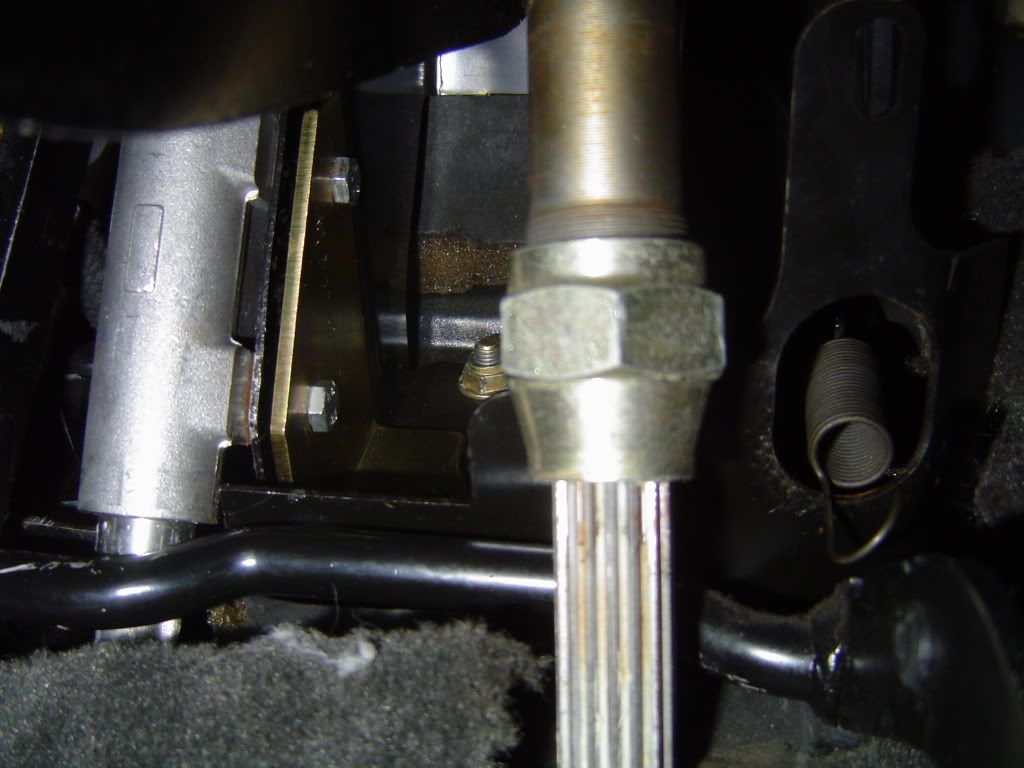
Last year when I was installing the rear strut brace, I snapped off one of the nipples on the charcoal tank. I jury rigged a fix but today I replaced it along with the hoses to the tank filler neck. I'm probably going to regret using Oetiker clamps though. I also installed the pedal bracket reinforcement and replaced the distributor cap and rotor. I spent about an hour and half trying to replace the hose from the brake reservoir to the clutch master cylinder with no success.
-
- Posts: 508
- Joined: Feb 12, 2006 12:00 PM
- Location: 12020
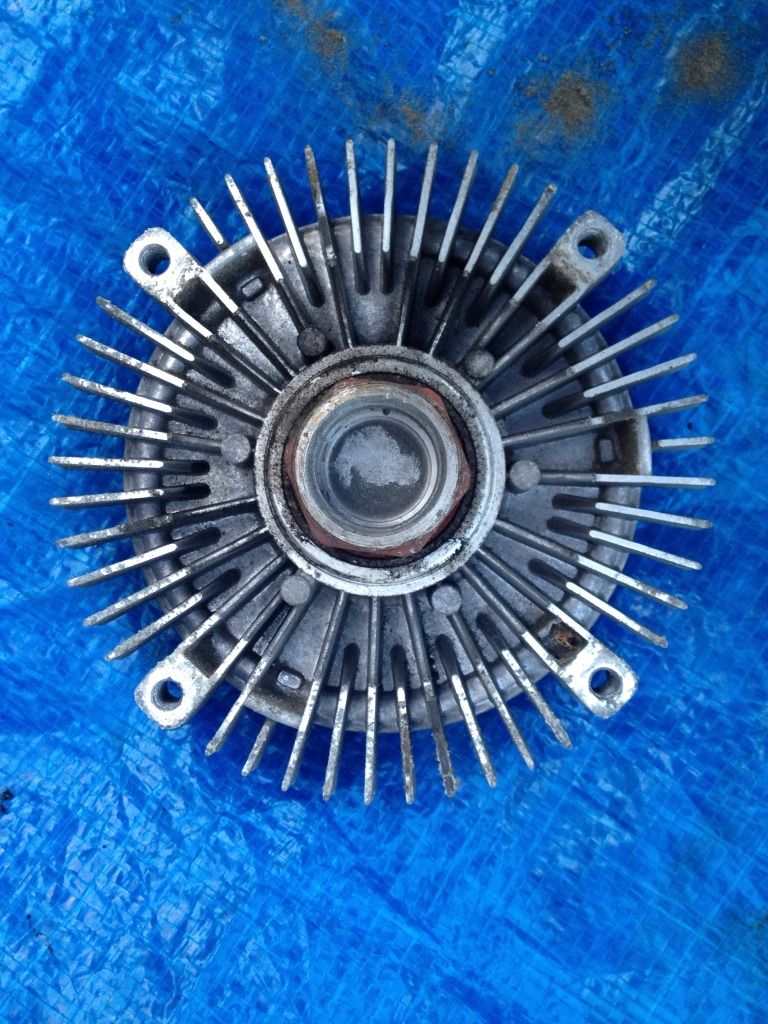
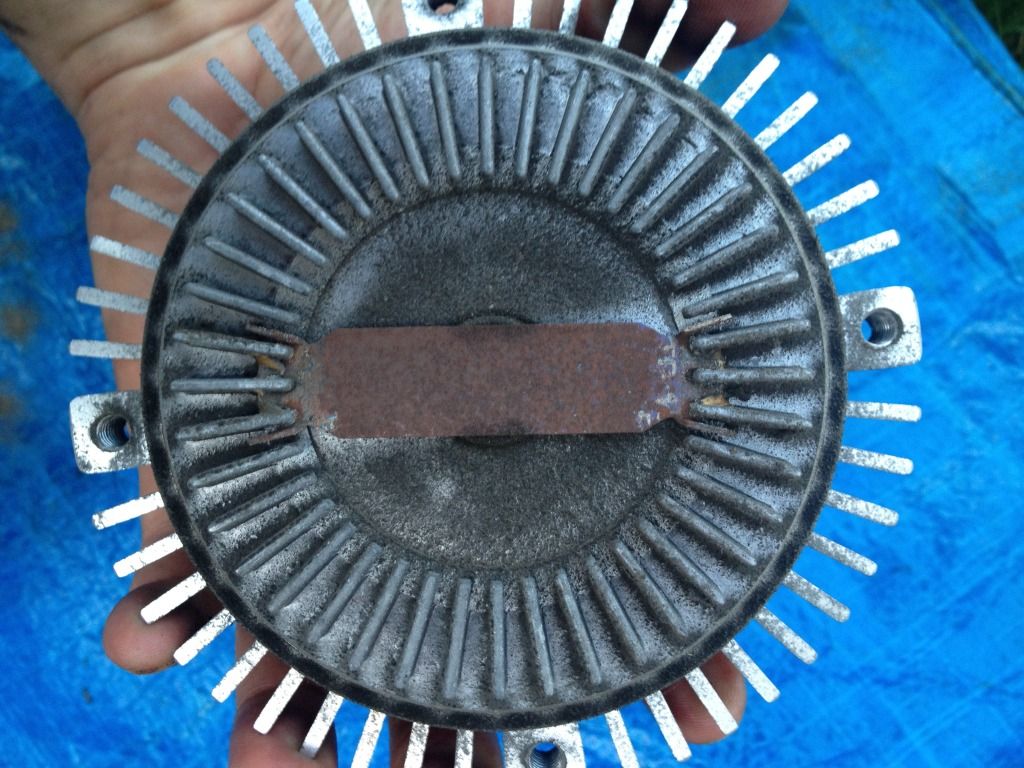
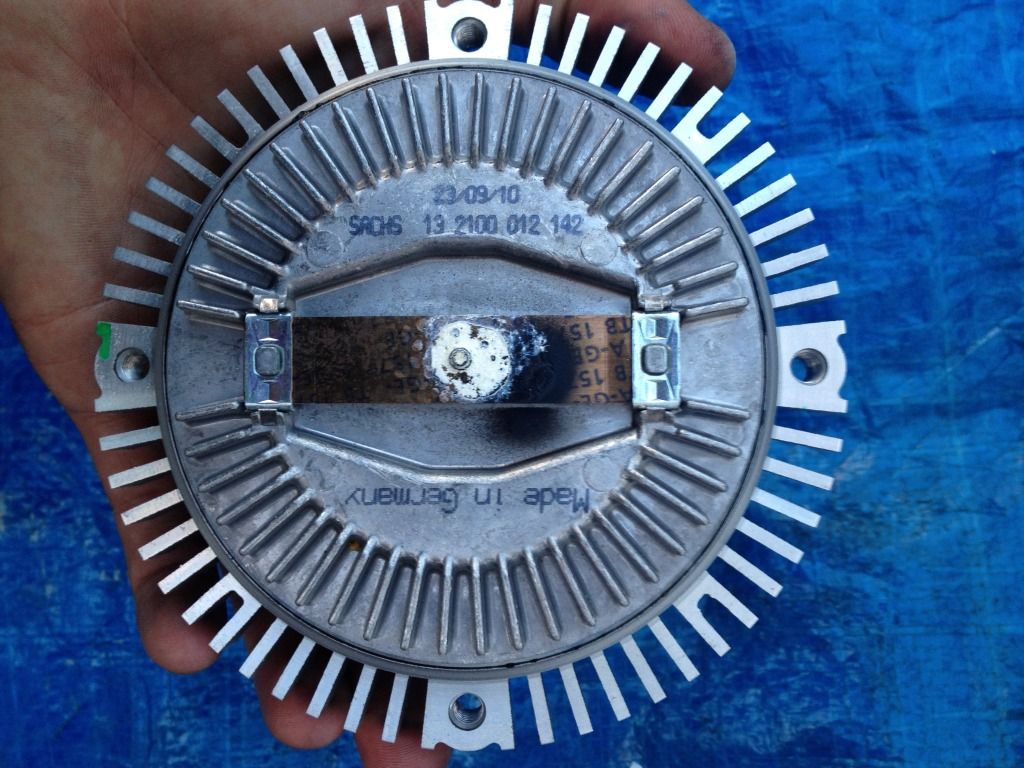
AFM to filter housing reservoir elbow had become separated due to loose clamp (glad I'm the mechanic to blame) so the oil was dirty. Fixed clamp, changed oil and filter, replaced fan clutch with new Sachs unit.
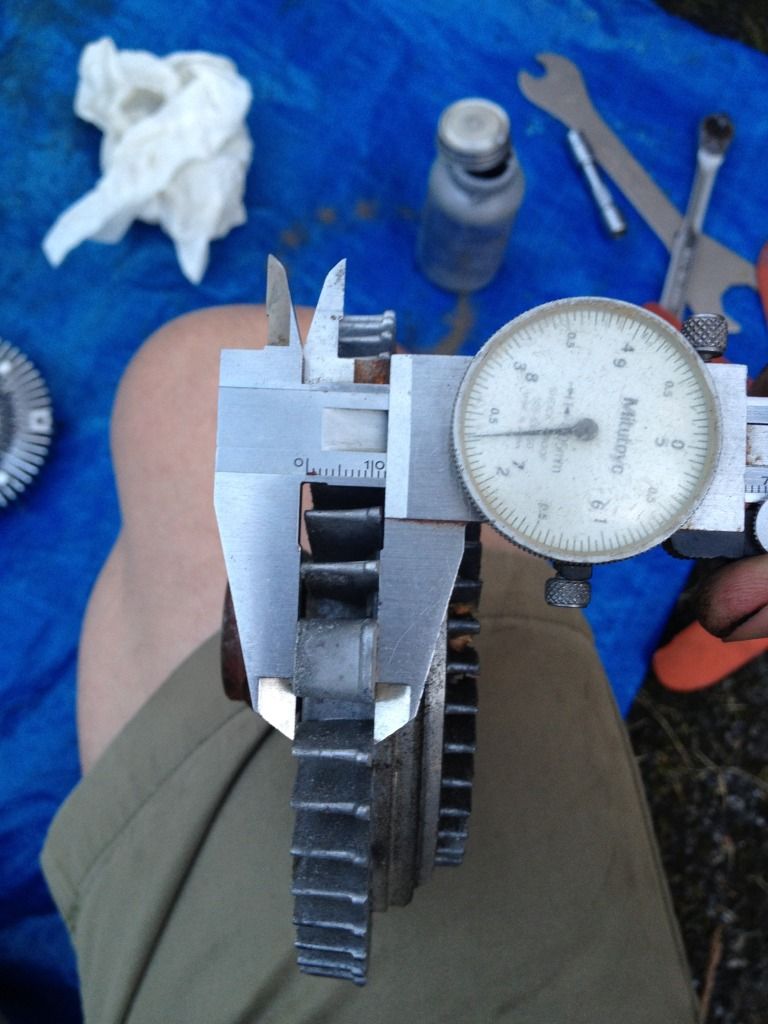
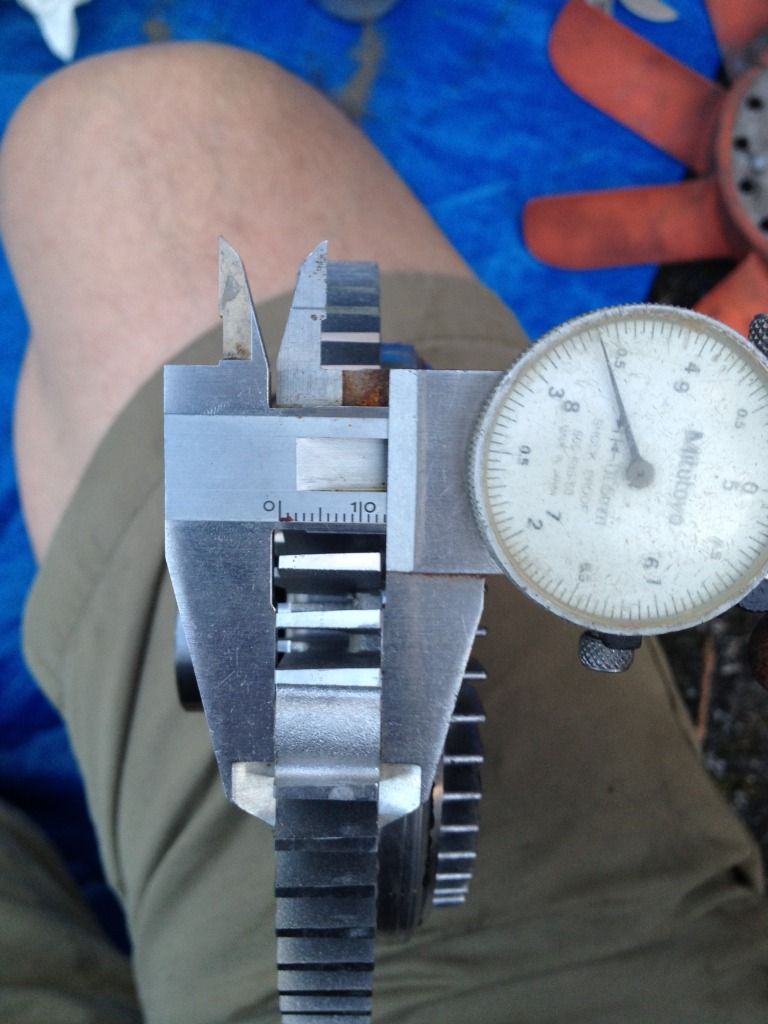
The old one was certainly not the Sachs, and although I don't know how they performed differently at 170 degrees and 2500rpm regarding slip torque, but at ambient 72 degrees and 5-20rpm they displayed substantially different breakfree and steady-slip torque values. If the photos appear correctly, one will be able to note the different fin pattern among the units and that the Sachs unit was 1mm thicker at the fan mounting position than the unit replaced. I suspect that after a year it can be difficult to determine which unit is the Sachs, so maybe these photos would help someone in the future looking at a used part...
Non-sachs unit, rear:
Sachs unit, rear:
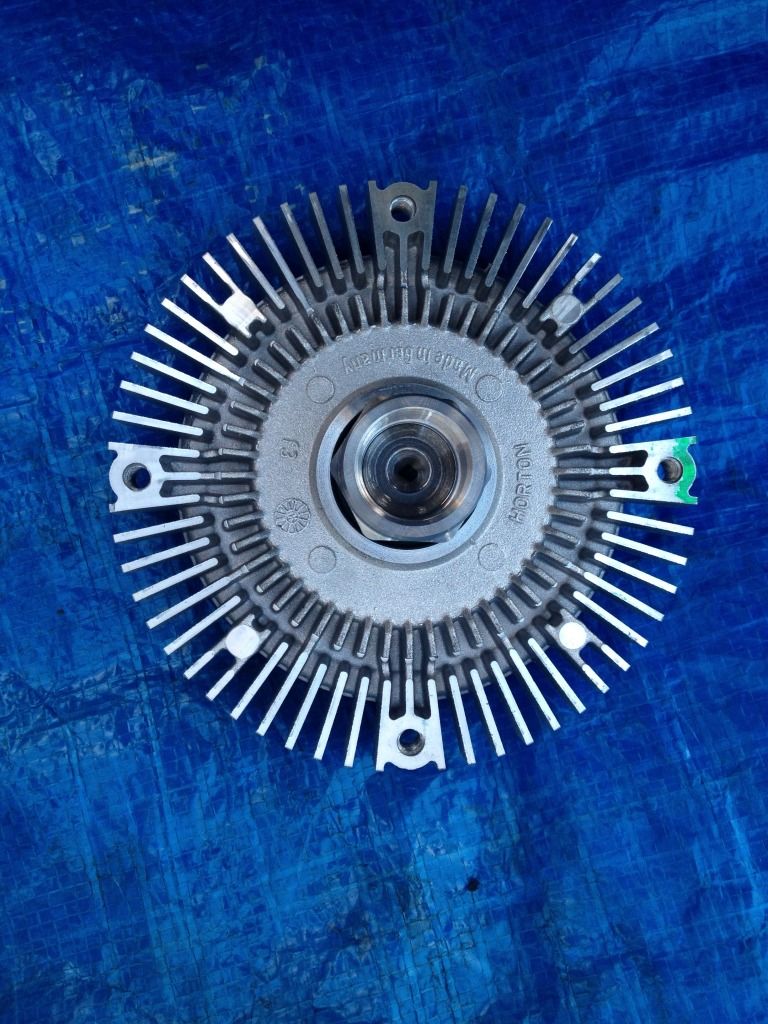
Non-sachs unit, front:
Sachs unit, front:
Non-sachs unit, side, thickness ~12mm:
Sachs unit, side, thickness ~13mm:
More fan noise is evident with the Sachs unit, but since it was 72 F or below after fitment, more cooling is expected at idle in summer traffic but not yet confirmed.
The anti-seize lubricant fitted to both the bolts attaching the fan to the clutch and the clutch to the WP certainly did their job nicely, what a breeze to R&R for some un-anodized machined and threaded aluminum in an area of salt spray blast and many heat cycles.
-
- Posts: 2265
- Joined: Jul 21, 2011 8:05 PM
- Location: Rochester Hills, Michigan
- Contact:
It rained fairly hard on Thursday and Friday of last week. I came out to my car only to nearly sit down in a lake of water on my drivers seat. With some quick searching, I found that there are drain holes in the sun roof. I managed to reem one hole out free and clear, but the driver side one I can't seem to get to the bottom of...might try to rig up a short drill bit to get to the bottom of this, literally. Oh yeah, also replaced the intake boot and elbow, along with some clamps and smaller hoses. Got my C pillar trim back on with new grommmets. She's lookin perty good again.
-
- Posts: 302
- Joined: Oct 24, 2010 11:41 PM
- Location: Everett, WA -- previously Victoria BC, Canada