E28 Alpina B7 Turbo/1 #0083
-
unt0uchable
- Posts: 2265
- Joined: Jul 21, 2011 8:05 PM
- Location: Rochester Hills, Michigan
- Contact:
-
hubble1953
- Posts: 857
- Joined: Dec 25, 2007 1:15 PM
- Location: Boise, Idaho
Nice project
Chris: Car is looking great. I need to find a painter like yours:)
jm
jm
-
Eddie in TO
- Posts: 1007
- Joined: Feb 12, 2006 12:00 PM
- Location: Toronto, Ontario, Canada
- Contact:
-
mooseheadm5
- Beamter

- Posts: 23035
- Joined: Apr 08, 2009 10:30 PM
- Location: Charlottesville, VA
- Contact:
All panels except the hood and sunroof are back on. Gaps are perfect and I am quite pleased. No photos of that since the whole car was masked off for the painting of the core support and the batt'ry tray. Should have something tomorrow. I've got to put the latch back in the trunk. All wiring is in the doors, but I didn't do that, so I will have to route the wiring where it needs to go. Really only an issue for the front doors, particularly the left. Hood will probably go on tomorrow as well, so in the afternoon time, perhaps I will get to see it and install a few things.
Headliner guy appears to be a flake, so we are going to look into other options. I've got one that is sewn, but no holes or anything. I have also harvested the c-pillar foam in excellent condition from a super-eta, so I will install that as well. The original was cut for the reading lights added long ago, with them also being the sole reason for replacement.
Thanks for the comments so far. I'm happy with the quality of the work and the attention paid to my project. Mike has answered all of my questions and has kept me in the loop with everything. He's gone over and above what I expected. The timing has been a bit of a nightmare over the last week as I've been very busy, as I'd have liked to help them assemble the car however possible. I was worried about the wiring and while I came up with a solution, I wasn't sure how to make it work and I was feeling a bit rushed, which impedes my thought process. Mike took it and ran with it and he came up with something using my plan that not only works, but looks nice, too.
So, hopefully I will have a visual update tomorrow evening. Thanks again.
Not a whole lot of photos today, but they're pretty exciting nonetheless.
I went over earlier than I was planning as I had to bring the headliners over and such since it sounds like headliner guy is coming through and should come by today or something.
So, the car was uncovered, which was great as I got to throw in the trunk latch and my c-pillar foam insulation. Then I installed the hood struts so they could install the hood.
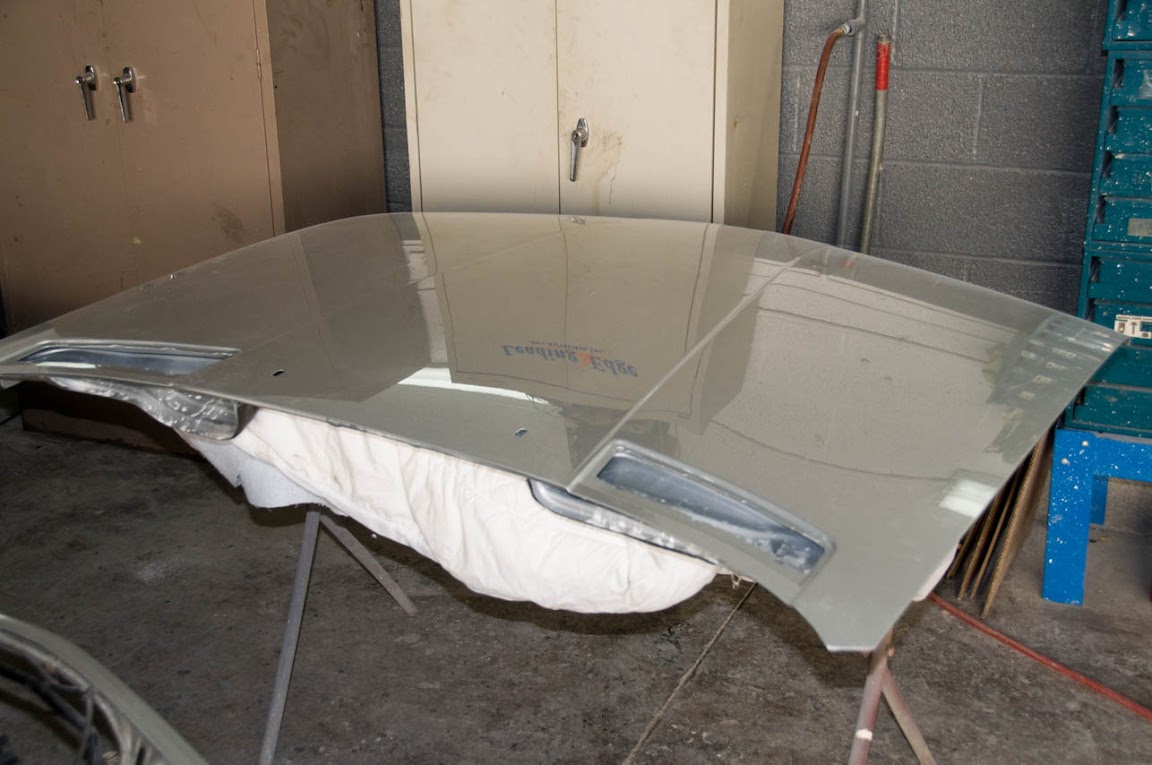
Hood is sitting in front of the car, ready to go into position. It will be aligned before the new latches are riveted into position. Also, the cowl vent insulation has been installed as everything else is self-adhesive, I can handle that.
Here's the car!
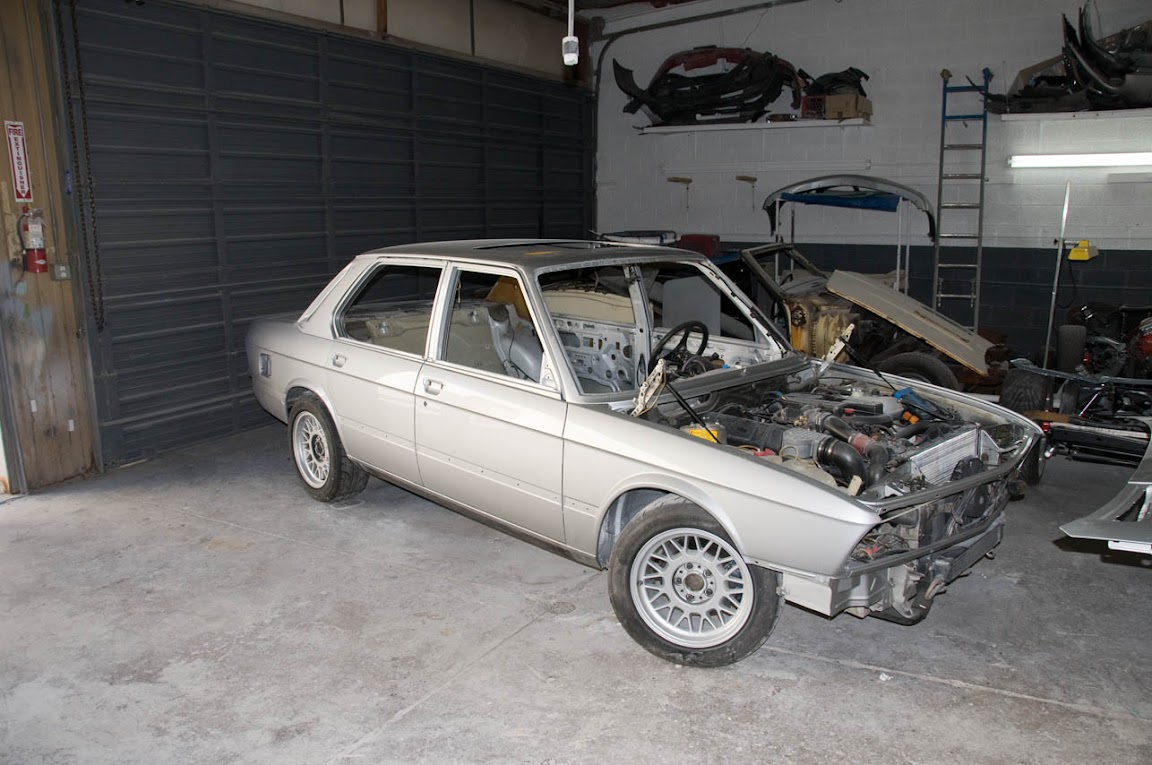
Perfectly even gap around all four doors and the fenders. Rear doors were installed first, then front, then the fenders.
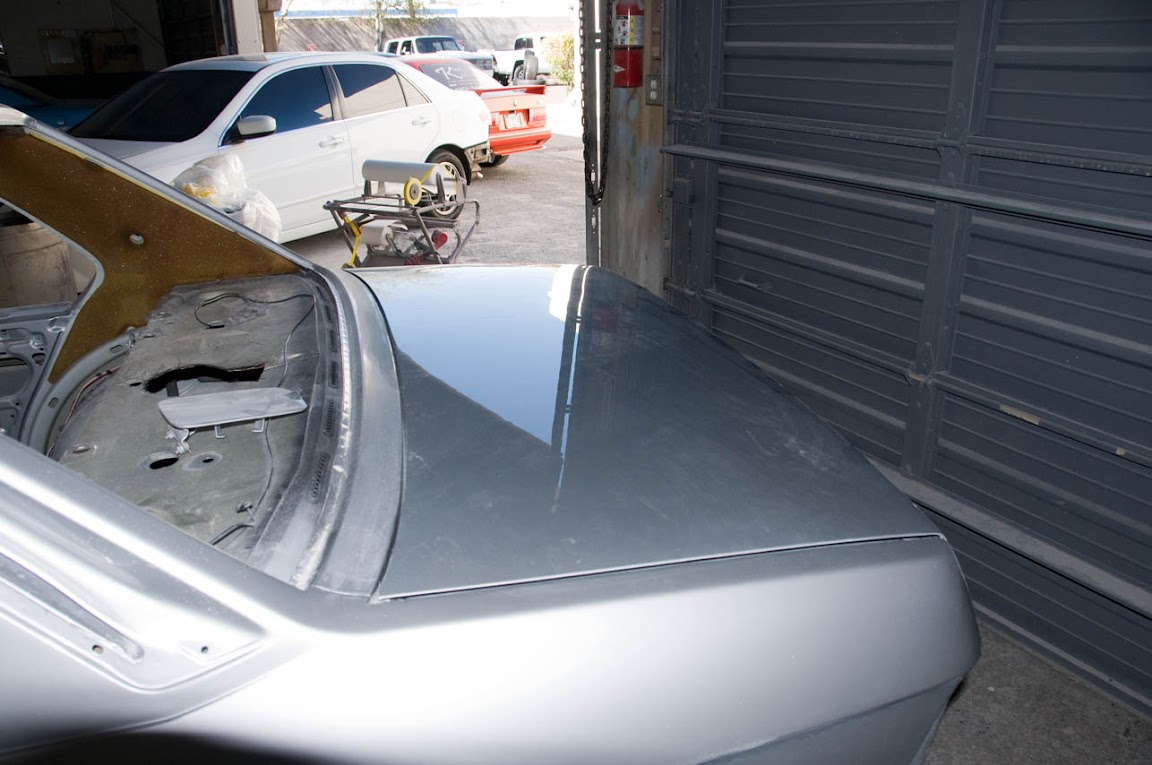
Trunklid is latched. The lock portion is not yet installed as the housing has to be painted.
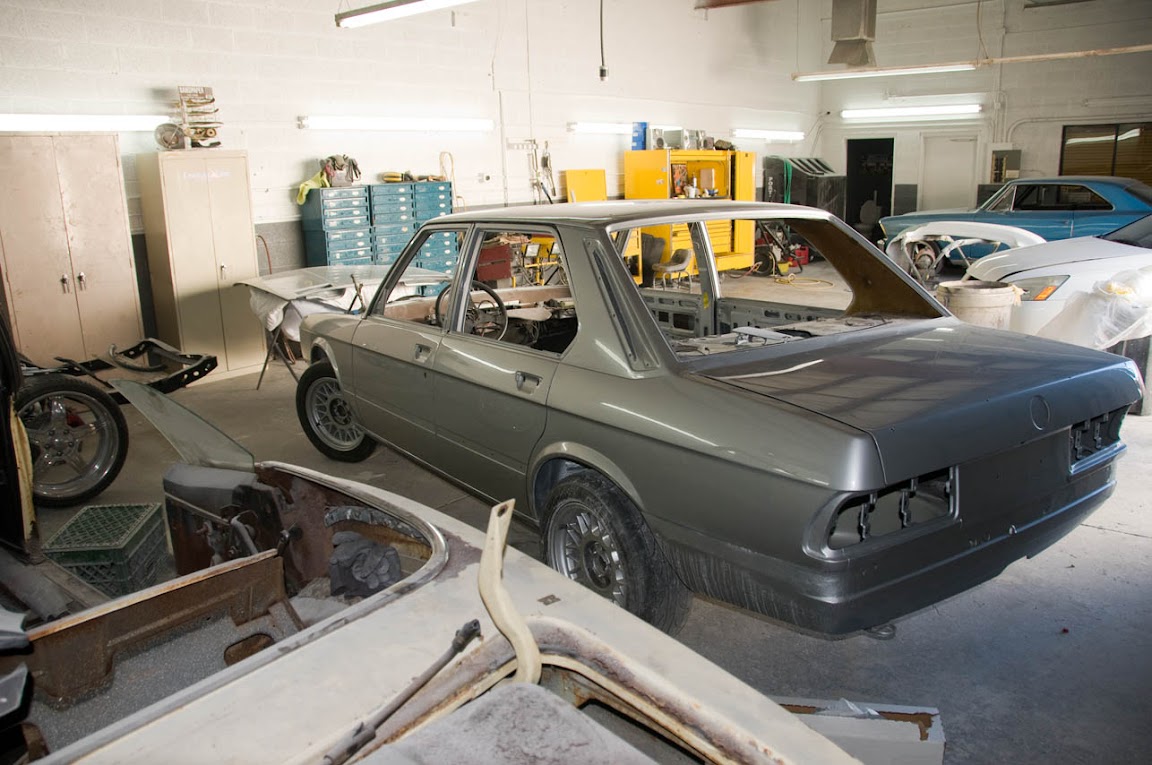
Here's a terrible shot of the left side. Not looking to win any awards with these photos. Was trying to stay out of their way today. Get a couple of things done quickly, a couple photos and out of their hair.
Here's a shot of the RF door with the seal and latches installed, etc. Right now, the doors are a little tough to close and the trunk sits a bit proud. I imagine once I put the seals on the body side after the headliner, they might get more difficult. We shall see.
That's all for now, I guess.
I went over earlier than I was planning as I had to bring the headliners over and such since it sounds like headliner guy is coming through and should come by today or something.
So, the car was uncovered, which was great as I got to throw in the trunk latch and my c-pillar foam insulation. Then I installed the hood struts so they could install the hood.

Hood is sitting in front of the car, ready to go into position. It will be aligned before the new latches are riveted into position. Also, the cowl vent insulation has been installed as everything else is self-adhesive, I can handle that.
Here's the car!

Perfectly even gap around all four doors and the fenders. Rear doors were installed first, then front, then the fenders.

Trunklid is latched. The lock portion is not yet installed as the housing has to be painted.

Here's a terrible shot of the left side. Not looking to win any awards with these photos. Was trying to stay out of their way today. Get a couple of things done quickly, a couple photos and out of their hair.
Here's a shot of the RF door with the seal and latches installed, etc. Right now, the doors are a little tough to close and the trunk sits a bit proud. I imagine once I put the seals on the body side after the headliner, they might get more difficult. We shall see.
That's all for now, I guess.
Chris,
You should really consider sending this restoration record to Alpina when you are done. I can't imagine they would be any less than delighted to see such effort made to save one of their iconic creations. They seem to care about their history as owners in Europe will ship their old cars back to the factory where Alpina will restore them to like new if requested.
You should really consider sending this restoration record to Alpina when you are done. I can't imagine they would be any less than delighted to see such effort made to save one of their iconic creations. They seem to care about their history as owners in Europe will ship their old cars back to the factory where Alpina will restore them to like new if requested.
Lovely pics!
With this speed, you're gonna finish your B7 before me
A friend of mine owns the B10Biturbo #003, the red Concorde E34. Alpina were delightet when he contacted them, and had some nice emails recieved.
But ofcourse, that car is THE one Alpina that have been most "official" of all Alpinas ever made...
Please let the pics coming all the way here, I enjoy those nice pictures...
-
unt0uchable
- Posts: 2265
- Joined: Jul 21, 2011 8:05 PM
- Location: Rochester Hills, Michigan
- Contact:
Looking fantastic, Chris!wkohler wrote:Right now, the doors are a little tough to close. I imagine once I put the seals on the body side after the headliner, they might get more difficult. We shall see.
You'll probably have to put up with giving the doors a good tug until the seals break in and conform properly. When I drove mine home, I used the normal amount of effort and figured I had closed the door all the way without a second thought. On the 10 I was thinking; "Wtf, for new seals should there be this much wind noise?" I hit some traffic and was able to slow down enough to open the door and close it harder this time to make sure it was closed all the way. Doh, sure enough!
Karl
Couple of "quick" jobs have been taking most of Mike's time lately, so not much has been done. The hood is installed though. Amazing what a difference that makes!
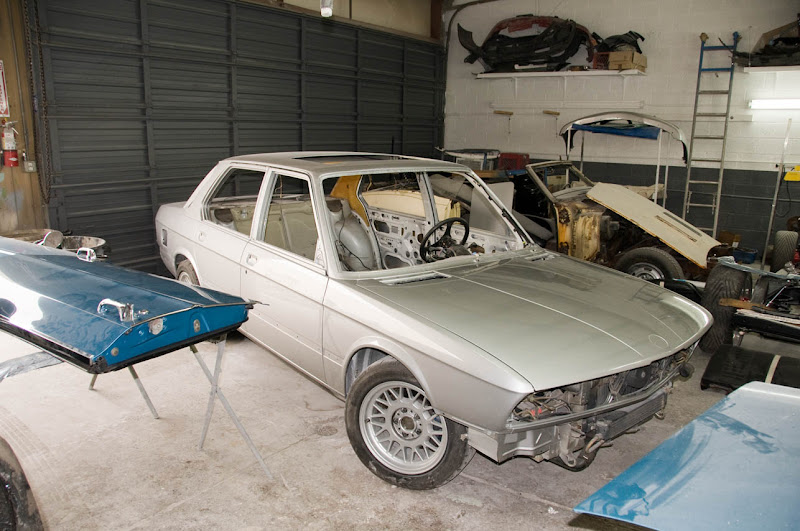
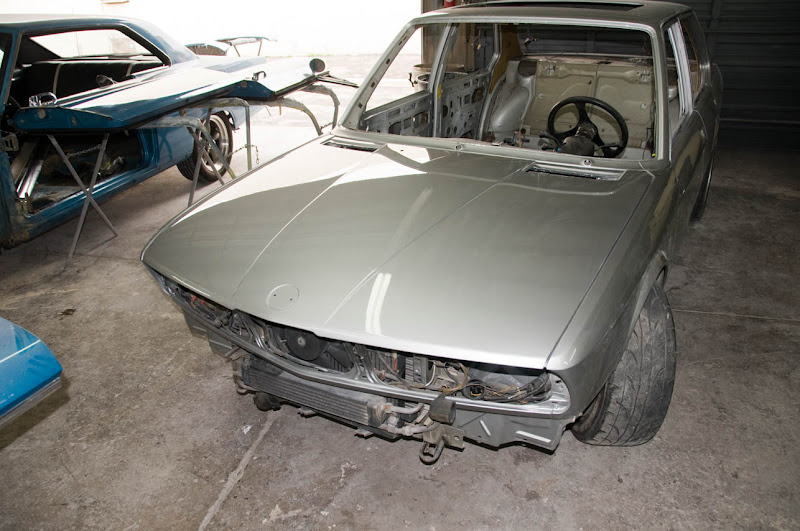
At this point, it's just installed. The cowl insulation is installed as well, but the latches haven't yet been riveted into their respective locations. Once that's done, the cable will be run through and that should hopefully all work well.
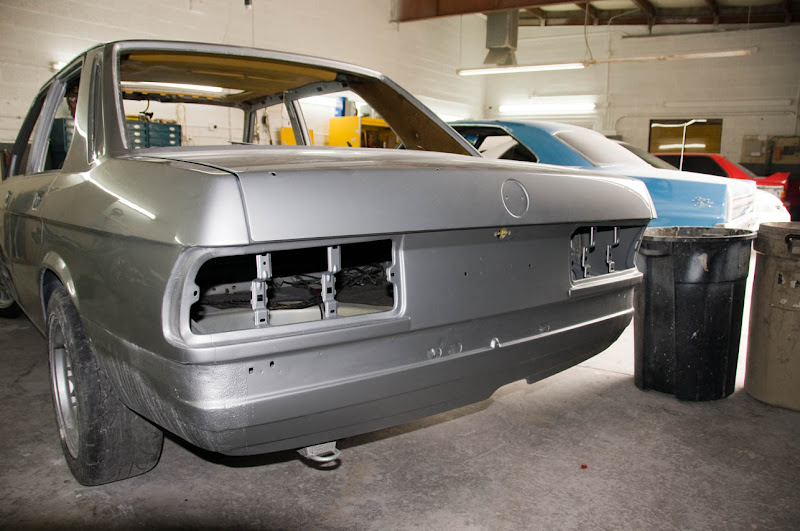
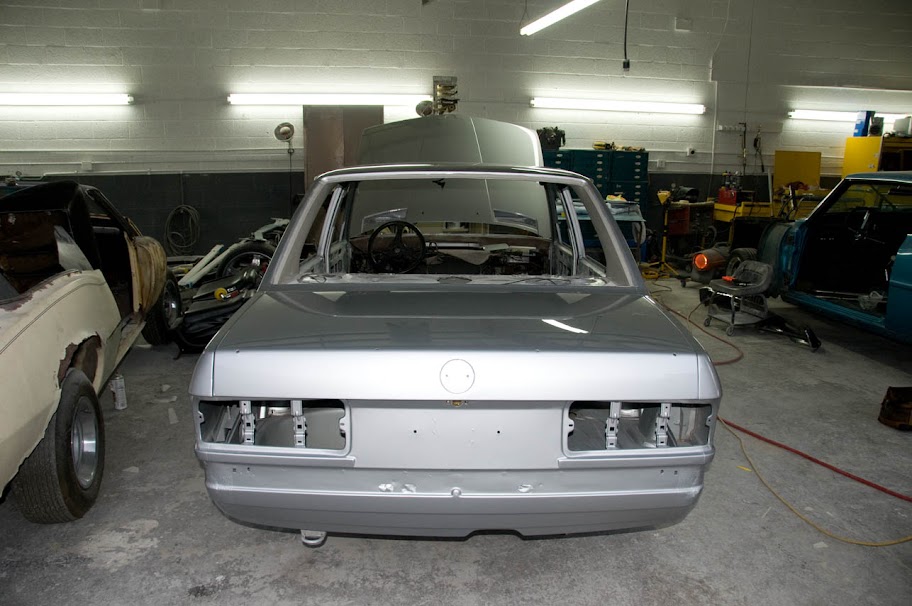
And another shot of the rear of the car, as I thought that would be nice.
The headliner guy now has both headliners. No real idea of when he's planning to do it. He's been working on a '40 Ford that has had some real issues, so I imagine he wants to finish that up. Fortunately for me, there's no rush on the car leaving since he's got all of this stands back and the panels are back on the car.


At this point, it's just installed. The cowl insulation is installed as well, but the latches haven't yet been riveted into their respective locations. Once that's done, the cable will be run through and that should hopefully all work well.
And another shot of the rear of the car, as I thought that would be nice.

The headliner guy now has both headliners. No real idea of when he's planning to do it. He's been working on a '40 Ford that has had some real issues, so I imagine he wants to finish that up. Fortunately for me, there's no rush on the car leaving since he's got all of this stands back and the panels are back on the car.
This is exactly why I am following this thread. I know you will meticulously restore this car by making sure that every detail is as correct as possible and not add any cheesy resto-mods or aftermarket parts. Great job on this.wkohler wrote:I'm trying to do this as as accurately as possible.
Best,
RCBMW
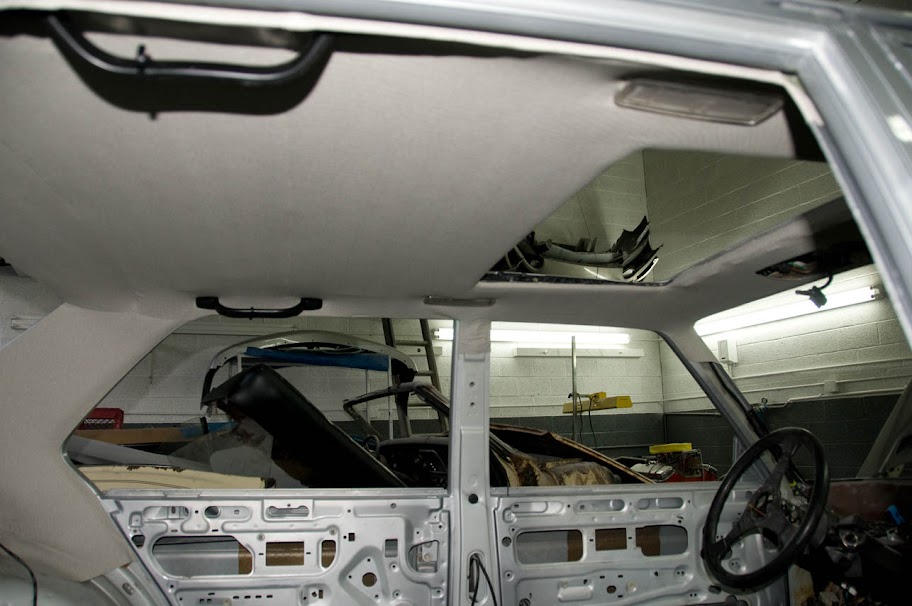
Mike called this morning and said the headliner guy, Sonny, had made plans to come by at 3pm today to install the headliner. Super. Of course, I was slightly put off thinking both what it was going to cost and how long it was going to take after hearing what LJ has been going through on his. I managed to get over there around 3:45 and he had half of it finished. The headliner was in, but the hole for the sunroof hadn't yet been made. I undid all of the sunroof mechanicals and showed him what went where. We worked on that part. Everything went pretty smoothly. Couple wrinkles in a couple spots, but looking at them, I suggested they would probably go away once the grab handles and the dome lights were installed. Sure enough, they did.
Since you cannot buy new Grau headliners, Jim's Auto Upholstery sewed this one up out of the correct material for another member. He changed directions on his car and went with an alcantara, so I got the distinct pleasure of purchasing this from him a couple years back. I was under the impression that Sonny had another job and did this stuff on the side after work. Come to find out after I asked him if he knew any local upholsterers I could have sew up a headliner so he could install in the future, he said he didn't know anyone locally that was any good. Oh. Few more questions like, "Do you only install headliners" and come to find out he has his own shop. Well, holy crap. $180 later and it's in. I will do a bit more trimming once I have the car back, but, it looks good.
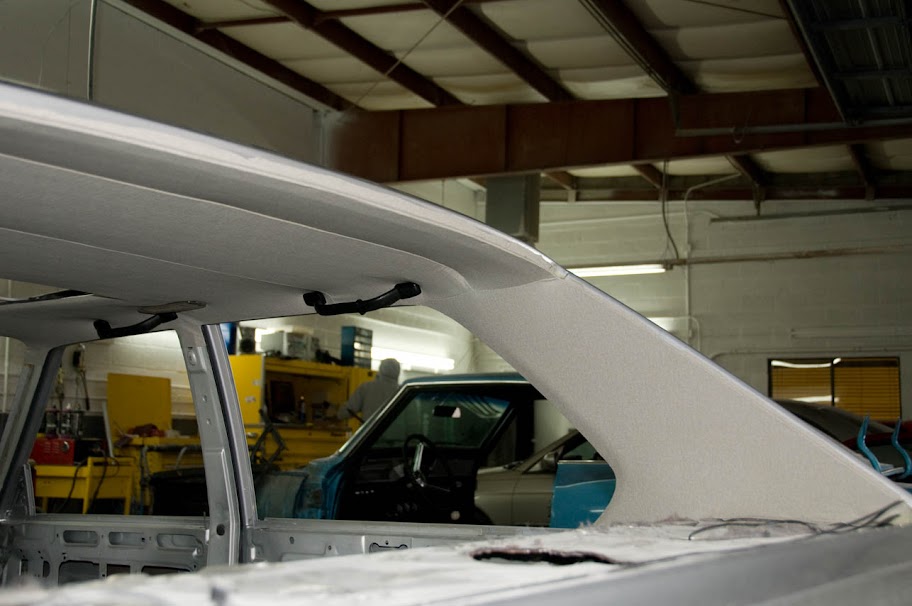
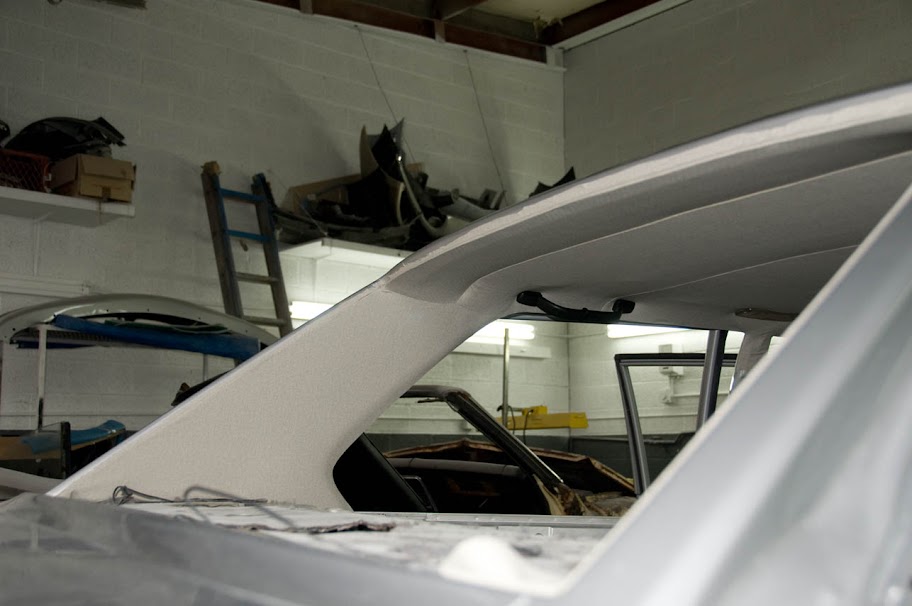
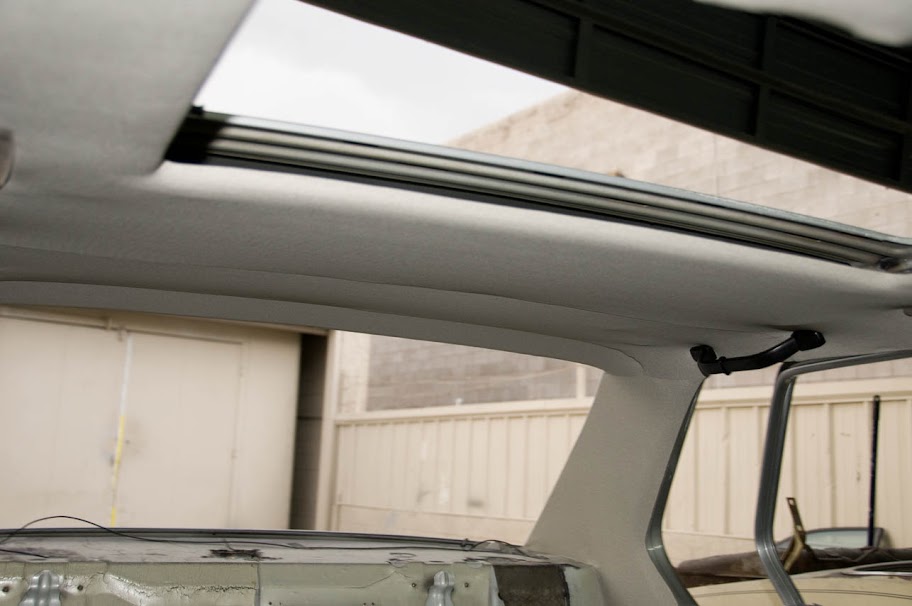
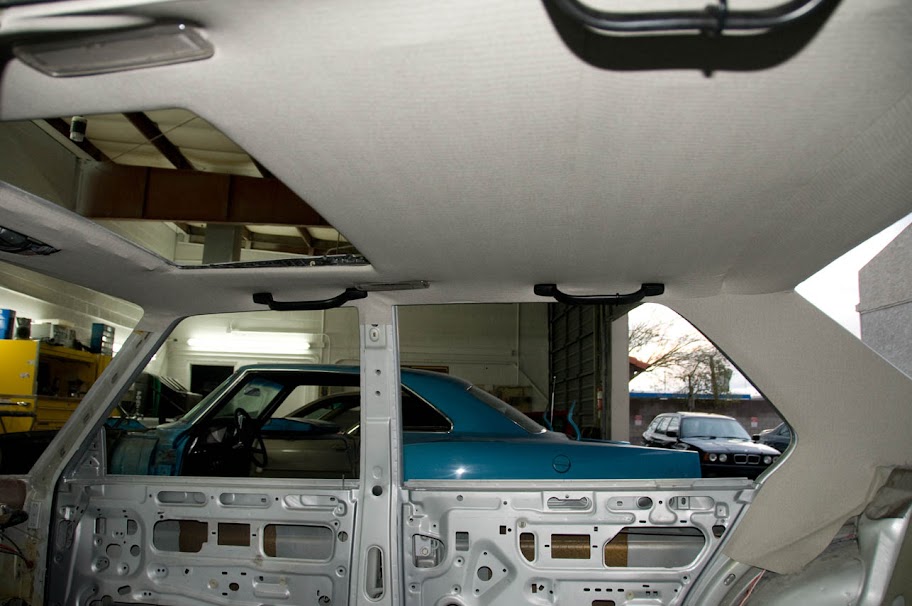
Once that was done, I got to rivet in my hood latches. I used steel rivets, just as the factory did. Definitely harder to install, but the idea is to hold them firmly to the core support. I guess you could get away with Aluminum assuming you use the gun properly, but steel are correct. I learned that from Devinder last year.
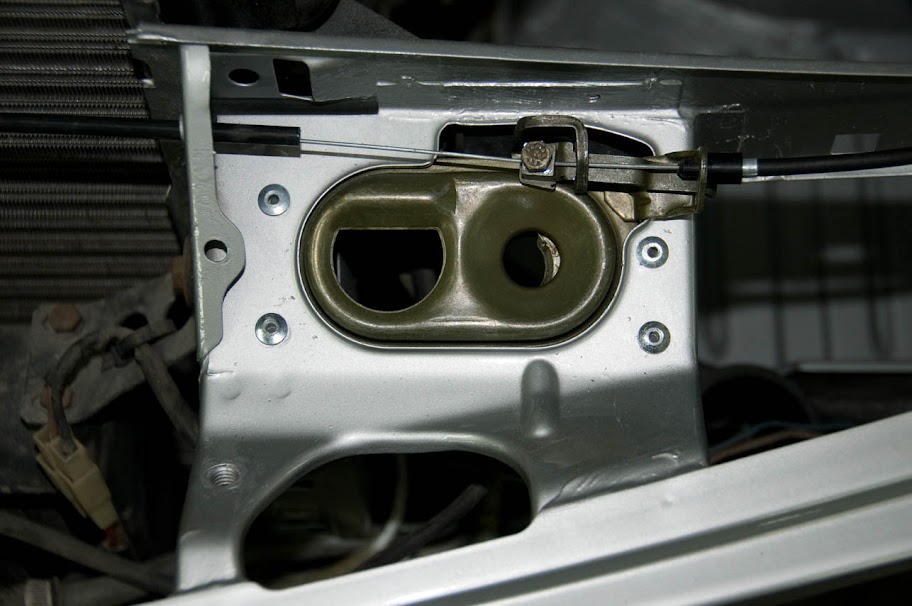
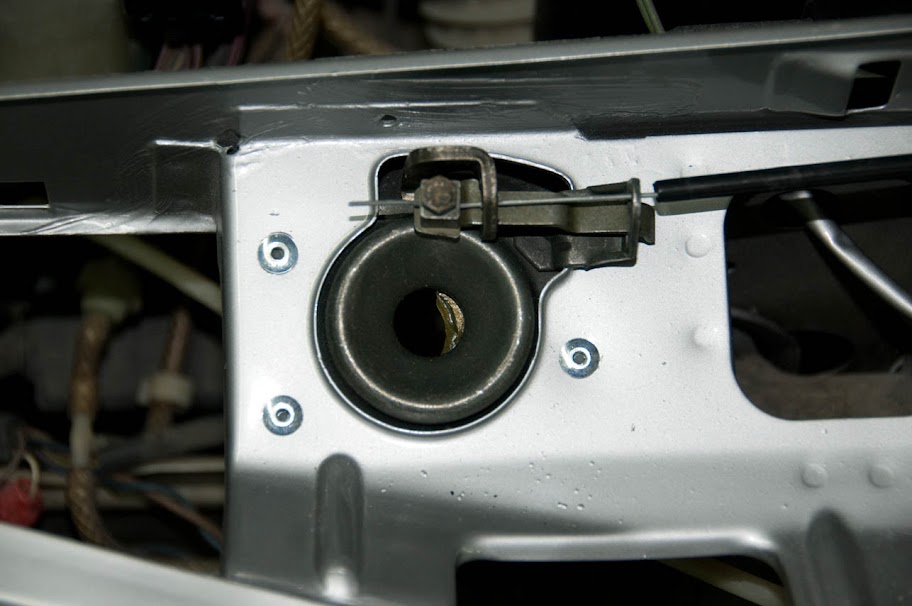
Now that the latches were in, it's time to run the new cable.
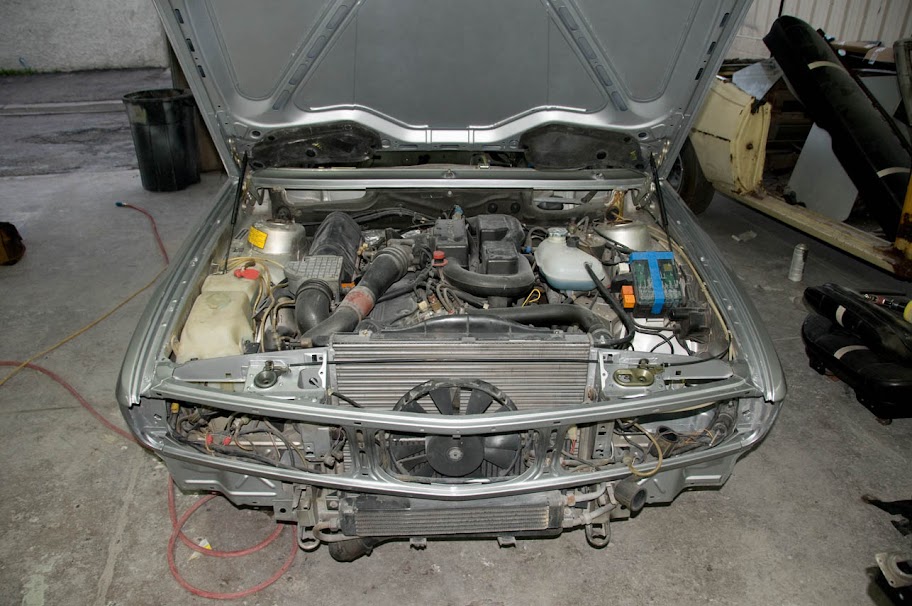
Mike will adjust the hood, etc.
This guy is back on too!
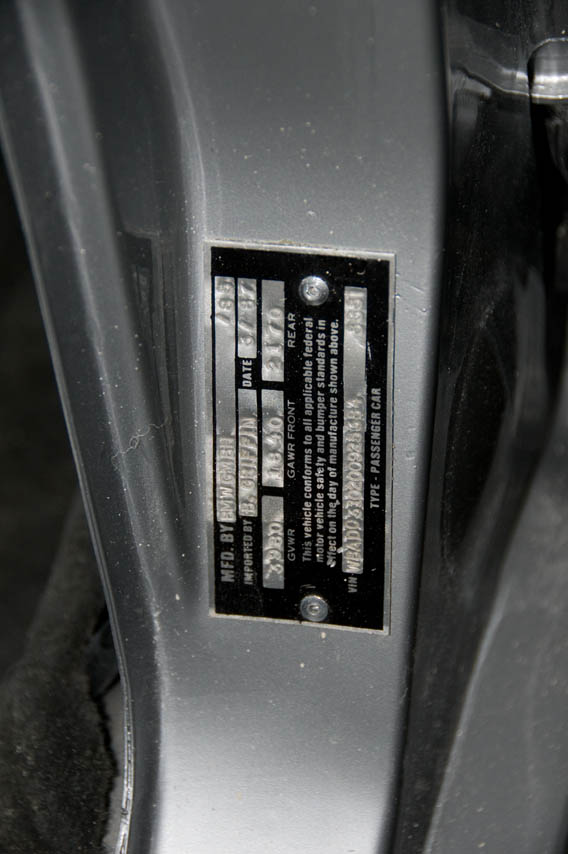
Glass should be going in tomorrow or Wednesday. I provided the new gaskets, aluminum trim and a lockstrip. I ordered two, but only seem to have gotten one. Oh well, I can do the rears later. Once that's done, Mike is going to do the texture on the rockers and paint the lower lip on the valance and the vertical supports behind the grilles black. He's painted the mirrors, rear door rear window guides, restored the rear spoiler (no photos, since it needs another coat) and the mirrors (they need another coat, too). There are also a couple of minor undulations and depressions here and there that he wants to have his PDR guy handle just to make it that much more straight.
The headliner was a big concern crossed off my list. So, once the glass is in and I "sign-off" on everything, it's time to bring it home.
Since you cannot buy new Grau headliners, Jim's Auto Upholstery sewed this one up out of the correct material for another member. He changed directions on his car and went with an alcantara, so I got the distinct pleasure of purchasing this from him a couple years back. I was under the impression that Sonny had another job and did this stuff on the side after work. Come to find out after I asked him if he knew any local upholsterers I could have sew up a headliner so he could install in the future, he said he didn't know anyone locally that was any good. Oh.


Once that was done, I got to rivet in my hood latches. I used steel rivets, just as the factory did. Definitely harder to install, but the idea is to hold them firmly to the core support. I guess you could get away with Aluminum assuming you use the gun properly, but steel are correct. I learned that from Devinder last year.


Now that the latches were in, it's time to run the new cable.

Mike will adjust the hood, etc.
This guy is back on too!

Glass should be going in tomorrow or Wednesday. I provided the new gaskets, aluminum trim and a lockstrip. I ordered two, but only seem to have gotten one. Oh well, I can do the rears later. Once that's done, Mike is going to do the texture on the rockers and paint the lower lip on the valance and the vertical supports behind the grilles black. He's painted the mirrors, rear door rear window guides, restored the rear spoiler (no photos, since it needs another coat) and the mirrors (they need another coat, too). There are also a couple of minor undulations and depressions here and there that he wants to have his PDR guy handle just to make it that much more straight.
The headliner was a big concern crossed off my list. So, once the glass is in and I "sign-off" on everything, it's time to bring it home.
-
Mark 88/M5 Houston
- Posts: 8548
- Joined: Feb 12, 2006 12:00 PM
- Location: Far North Houston
-
pleasefixitup
- Posts: 1856
- Joined: Nov 21, 2011 2:40 AM
- Location: Chicagoland, Illinois
-
Eddie in TO
- Posts: 1007
- Joined: Feb 12, 2006 12:00 PM
- Location: Toronto, Ontario, Canada
- Contact:


