Help installing windshield
Help installing windshield
Posting this here because I'm sure not everyone pays attention to my other threads in General/Eye Candy.
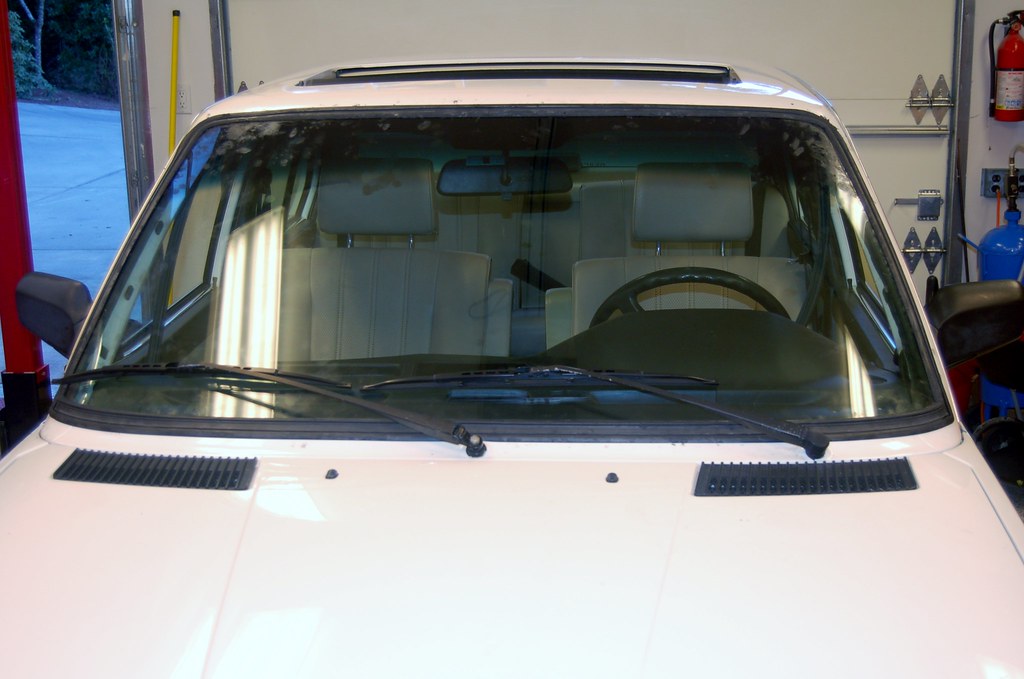
Today I'm going to install a windshield in my '87 528e. I feel like I need help/advice. Please chime in if you actually know what you are talking about and can offer something. Or, if you live near Seattle and can come by and help. I'll make it worth your while in the form of beer & food and a fun project :-).
http://www.mye28.com/viewtopic.php?p=1239176#1239176
Thanks.
-
mooseheadm5
- Beamter

- Posts: 23035
- Joined: Apr 08, 2009 10:30 PM
- Location: Charlottesville, VA
- Contact:
Thanks guys. Since you are replying here, and this is in Tech Talk, it makes sense for me to carry on here.
Here's my original post:
I've read every thread I could find on installing windshields, multiple times. I think I understand the theory. I have the entire day budgeted to try to apply said theory. I am not confident.
Here's the plan:
http://beranek.agrrmag.com/2013/01/rope ... tallation/
I especially appreciated this drawing which shows the theory of the rope method and what to call various things:

First posted by Kohler on another thread, this link has good pics for a Mustang:
http://www.route66restorations.com/1.html
I just test-fitted the gasket to the windshield, after carefully cleaning the edge of the windshield.
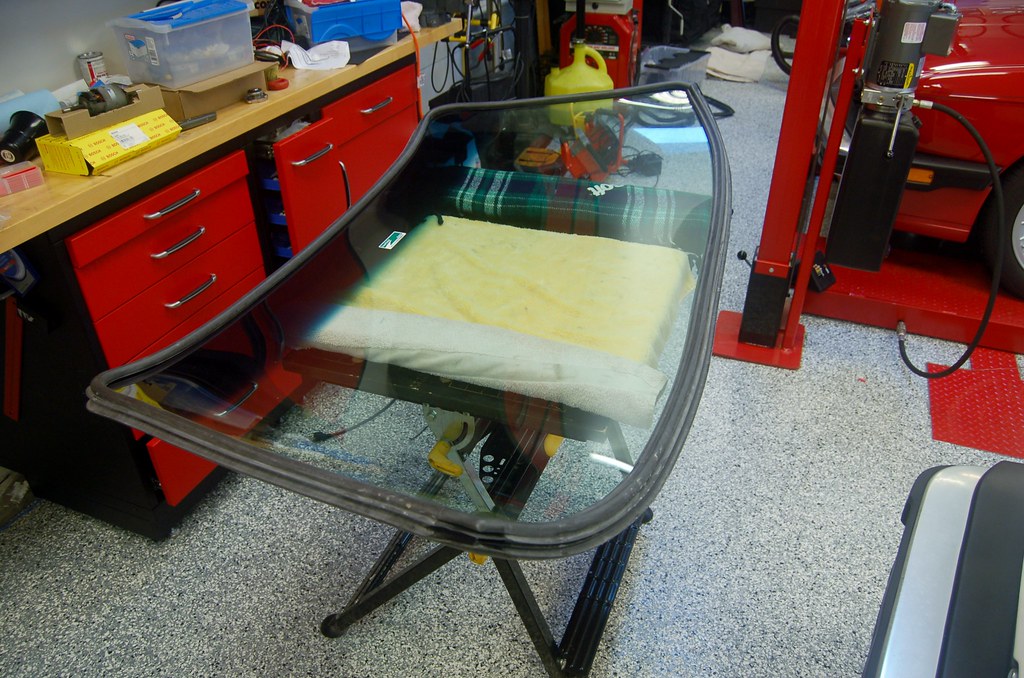
There are three places where I could put 3M glazing compound. I am not sure if I need to do it in all three or whatever.
One: In the glass to rubber channel:
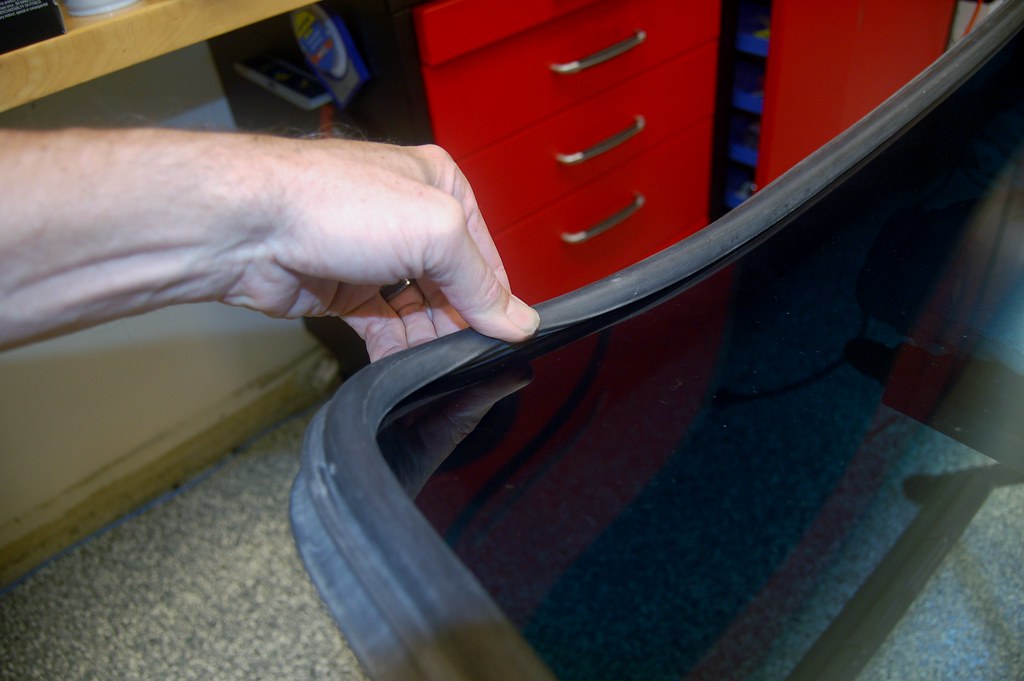
Two: In the gasket to pinchweld channel:
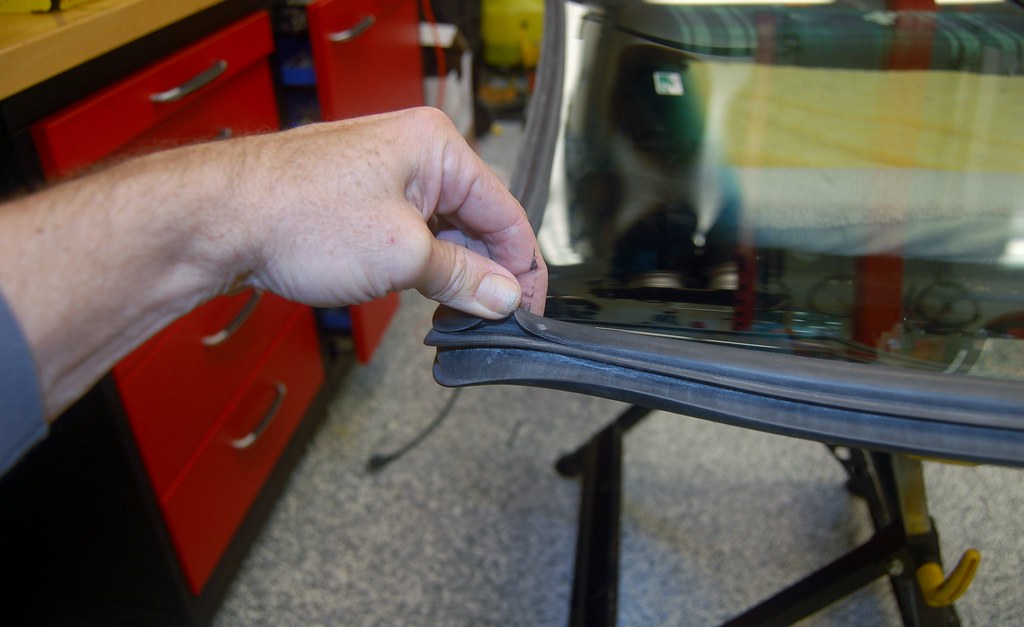
Three: between the windshield frame and the gasket.
What's the best practice here?
Here's my original post:
I've read every thread I could find on installing windshields, multiple times. I think I understand the theory. I have the entire day budgeted to try to apply said theory. I am not confident.
Here's the plan:
- Setup a suitable prop to hold the windshield face down so I can get the weatherstrip around it.
- Get the weatherstrip around the glass. Use a small amount of 3M Bedding & Glazing compound in between the glass and weatherstrip.
- Install the rope in the inside weatherstrip lip, taping the leads to the inside of the windshield.
- Apply the 3M stuff in the windshield channel, all the way around. ???
- Set the glass in place.
- Use the rope method to pull the inside lip around the window frame.
- Install upper lock strip, using lots of 'lube' and ensuring that it is 'pushing out' at the corners and not 'pulling in'. This, I understand is going to be a bitch.
- Install the lower lock strip using more 'lube'
- Get the corner clips in.
- Have a really good beer.
- Should I really put the 3M compound around the ENTIRE frame? Or just on the sides/corners?
- Will the rope method really work on our cars. I've found no threads indicating that it actually does, only suggestions to use it.
http://beranek.agrrmag.com/2013/01/rope ... tallation/
I especially appreciated this drawing which shows the theory of the rope method and what to call various things:

First posted by Kohler on another thread, this link has good pics for a Mustang:
http://www.route66restorations.com/1.html
I just test-fitted the gasket to the windshield, after carefully cleaning the edge of the windshield.

There are three places where I could put 3M glazing compound. I am not sure if I need to do it in all three or whatever.
One: In the glass to rubber channel:

Two: In the gasket to pinchweld channel:

Three: between the windshield frame and the gasket.
What's the best practice here?
Got the rope in.
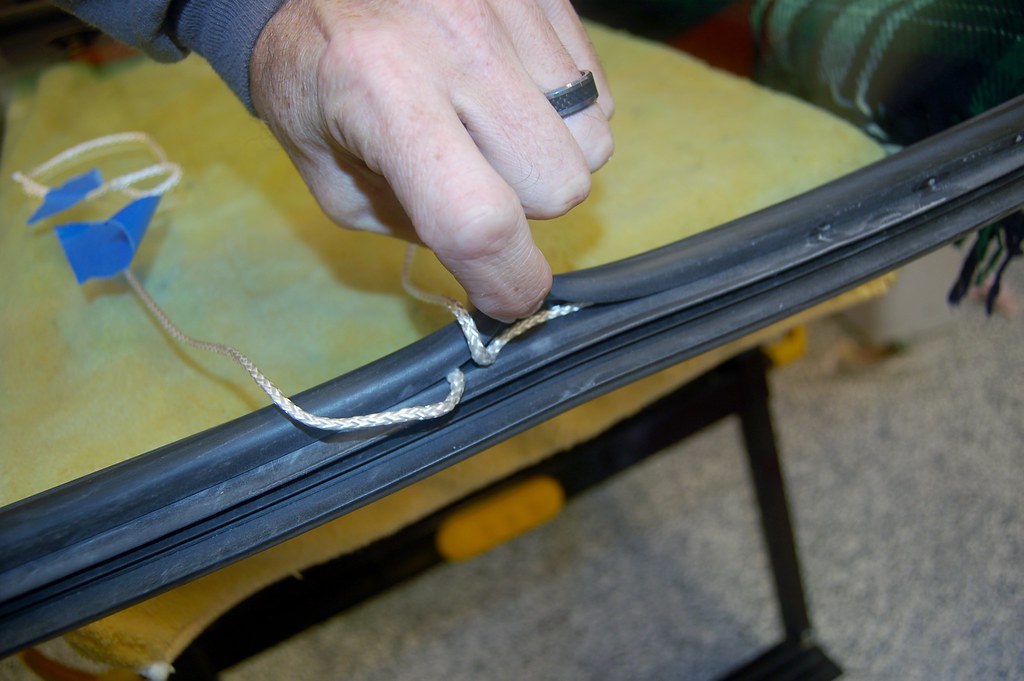
Reading some more and thinking about it, I have decided to put sealant only between the glass and the rubber and between the frame and rubber.
I decided that between the glass and rubber I just needed a very slight bead. I didn't want to over do it and have it seeping out. I figure the glass/rubber seal is likely to be naturally pretty good anyway.
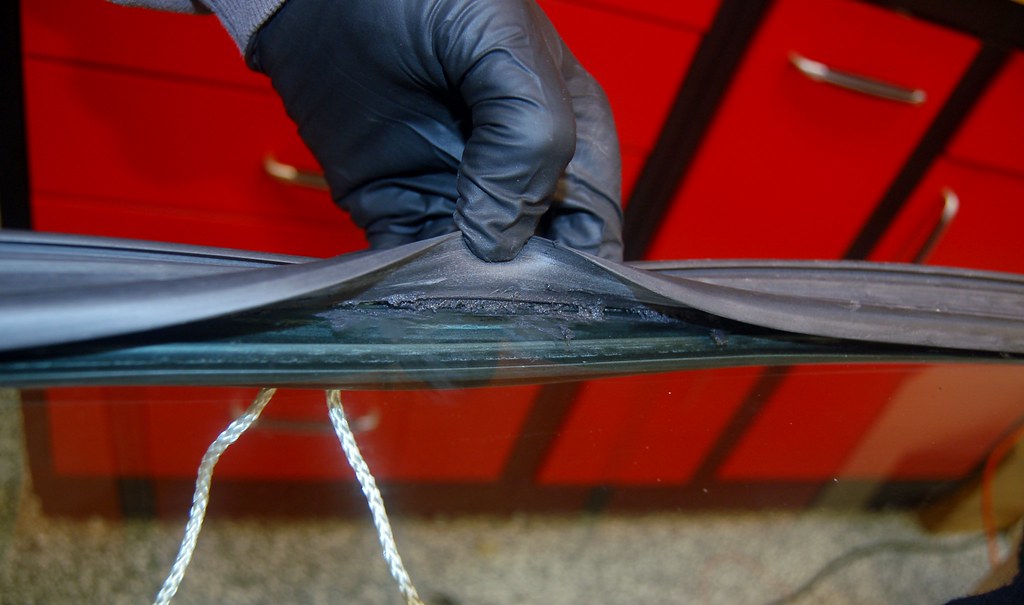
I'll put the sealant inbetween the gasket and frame after I've pulled the rope, but before I install the lock strips.
Obviously I'll need to put a LOT more in. You could drive an i3 through these gaps in the top corners.
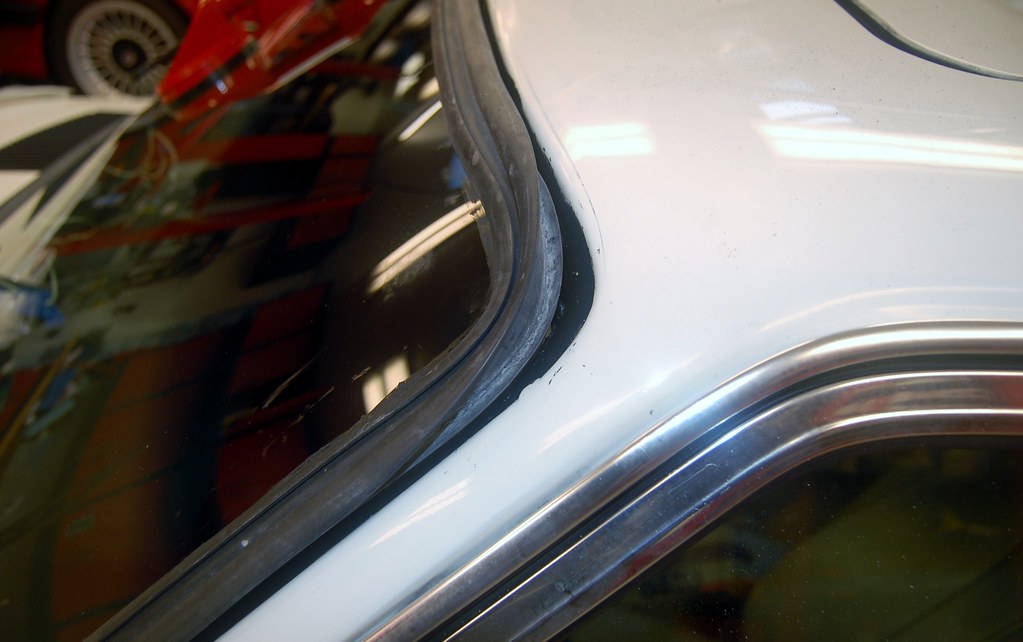
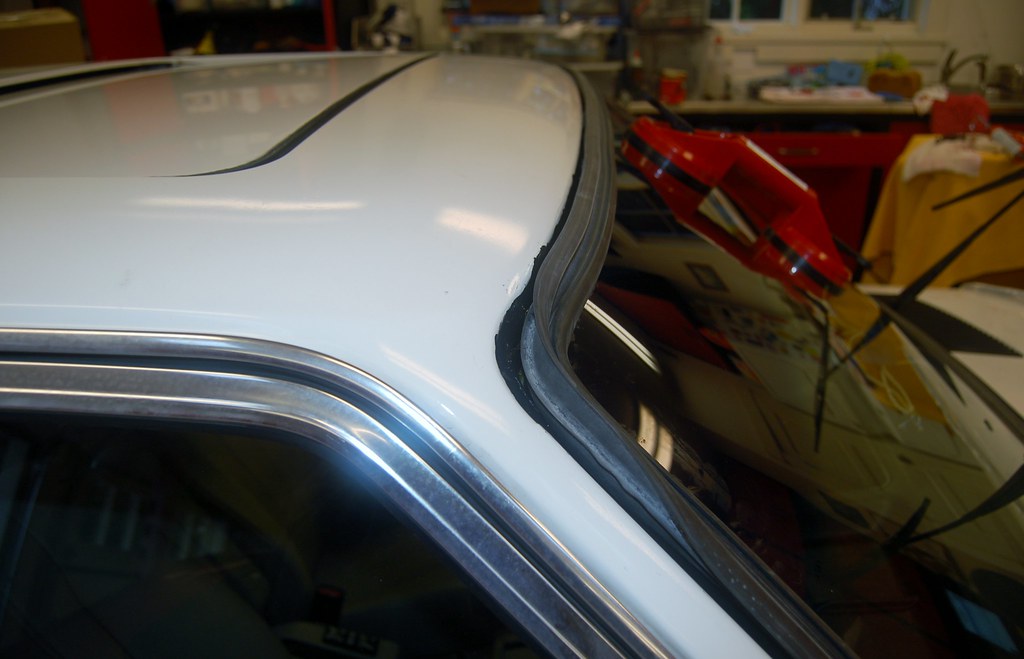
I suspect this aftermarket glass ("CLEARVIEW") is just not very good, and probably slightly too small. But it has no dings or cracks and I don't want to replace it.
I'm about ready to try to start pulling the rope. I'm worried about ensuring the glass is centered, and I don't really understand yet how to "start" the rope pull. I know I need my son up here to help push from the outside...
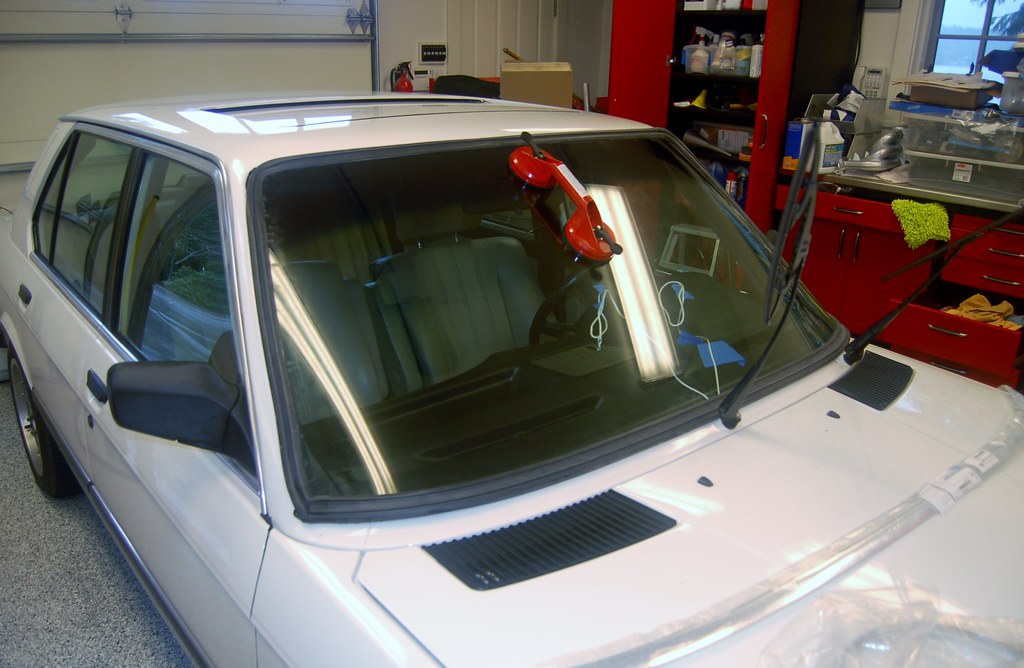

Reading some more and thinking about it, I have decided to put sealant only between the glass and the rubber and between the frame and rubber.
I decided that between the glass and rubber I just needed a very slight bead. I didn't want to over do it and have it seeping out. I figure the glass/rubber seal is likely to be naturally pretty good anyway.

I'll put the sealant inbetween the gasket and frame after I've pulled the rope, but before I install the lock strips.
Obviously I'll need to put a LOT more in. You could drive an i3 through these gaps in the top corners.


I suspect this aftermarket glass ("CLEARVIEW") is just not very good, and probably slightly too small. But it has no dings or cracks and I don't want to replace it.
I'm about ready to try to start pulling the rope. I'm worried about ensuring the glass is centered, and I don't really understand yet how to "start" the rope pull. I know I need my son up here to help push from the outside...

The top corners are where the aftermarket glass panes are ALWAYS wrong for some reason. Even the PPG panels are wrong. The gaps will get a little smaller with the lock strips in place. I fill any remaining gaps with black silicone.
Last edited by Jeremy on Mar 16, 2014 4:40 PM, edited 1 time in total.
I didn't realize how easy the A pillar trim came off. This should make pulling the rope easier... at least you can see the pinchweld with it off.
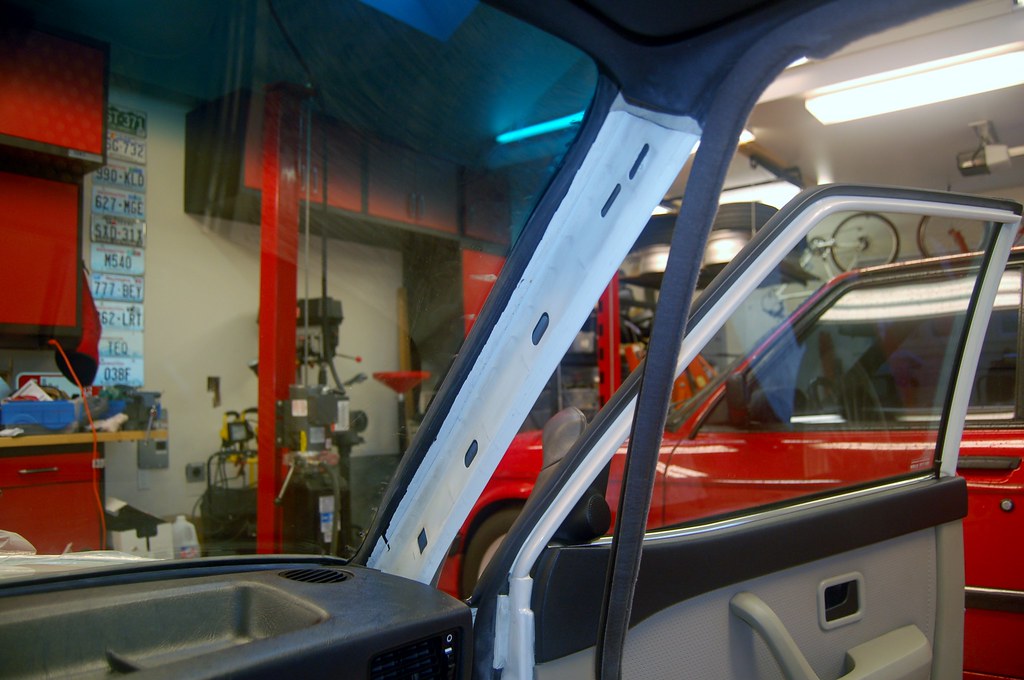
However, seeing the pinchweld in front of the dash, where the rope starts is not so easy from inside.
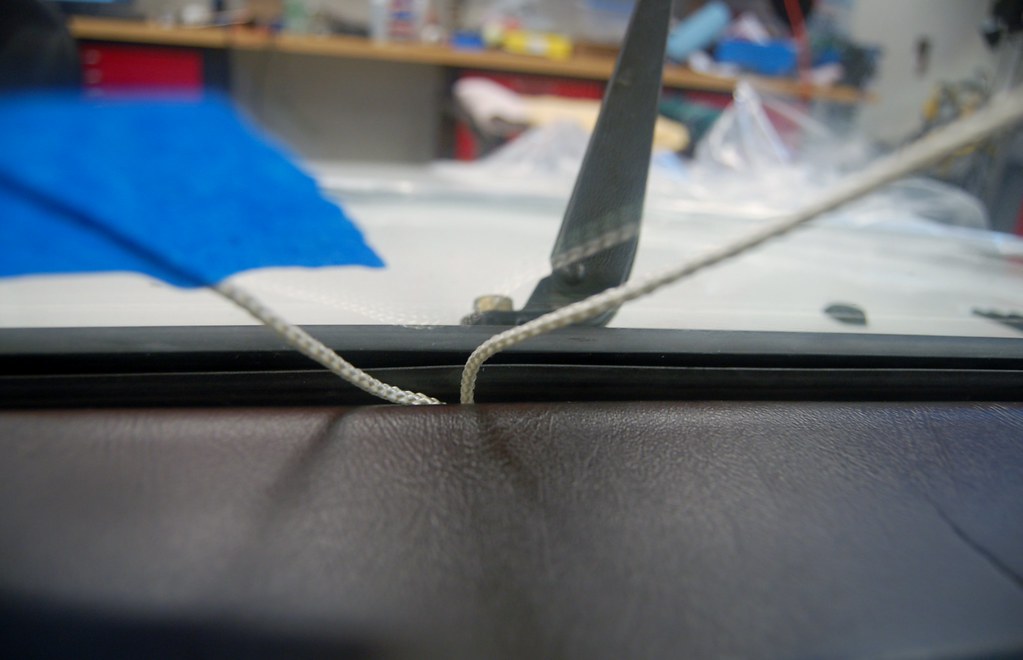
And removing the dash is obviously not an option.
From the outside it you can see, but I am not sure how to get it started...
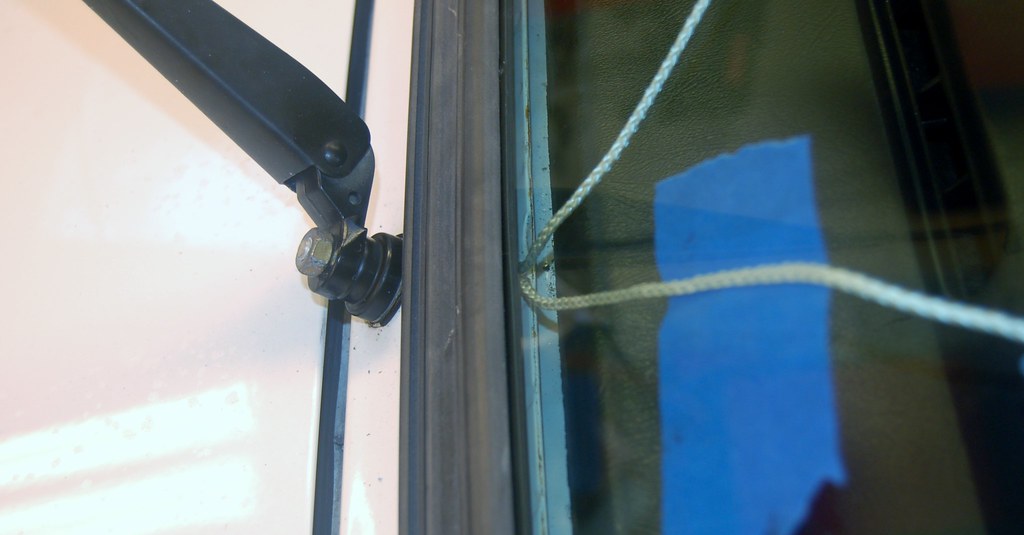

However, seeing the pinchweld in front of the dash, where the rope starts is not so easy from inside.

And removing the dash is obviously not an option.
From the outside it you can see, but I am not sure how to get it started...

No way starting at top will work. We've now tried different techniques a dozen times, resetting rope each time.
Giving up for now :'(
I really don't want to hire someone. Unless I have 100% confidence they're an e28 expert.
I may just buy a different brand of glass...likely be less than paying someone labor.
Giving up for now :'(
I really don't want to hire someone. Unless I have 100% confidence they're an e28 expert.
I may just buy a different brand of glass...likely be less than paying someone labor.
I have never done this myself. I have, however, watched on three separate occasions as so called automotive glass specialties companies struggled to get my windshield installed. Using many different types of tools, never any string.demetk wrote:Curious, what size rope are you using?
I too was wondering about the string size. Maybe going to a larger size? Or using the same size you are, cutting it and overlapping it at the corners so you could start and stop at a couple spots, and do the lower corners first.
-
Kyle in NO
- Posts: 17638
- Joined: Feb 12, 2006 12:00 PM
- Location: Nasty Orleans------> Batten-Rooehjch------>More Souther LA
I've installed 3 of these without much issue. May be worth noting that all were BMW glass, but the process is the same. I always install the gasket all the way around the pinch weld first, NOT on the glass. The sealer will keep it in place for the most part. Then I take the bottom of the glass and place it into its groove in the gasket, then roll the top top wards the roof and lay it on top the gasket. A little wiggling and manipulation will be needed at this point, to kinda seat it in the gasket. I them spray some foaming glass cleaner about 18" at a time where I am working along the edge of the glass. This lubes it temporarily and allows you to roll the edge of the gasket over and onto the glass, starting near the bottom corner on either side and working up towards the top center from both sides. I use a dull butter knife in between the glass and gasket to act similar to a lockstrips tool, as it slides along it rolls the gasket up and around the glass, gradually sucking the glass into place as you make your way around. After you are done, a couple firm pushes around the perimeter are all that is needed to fully seat it. Now you just have to install the lockstrips.
If you get stuck, I hear Kohler knows a guy...
If you get stuck, I hear Kohler knows a guy...
Gasket first is how my professional installer tried to install the windshield on the e28. Took him 2.5 hours the first day. Then he needed to come back and spend another 1.5 hours sealing it with urethane because it leaked like a sieve.
I did the e23 myself with the rope trick. Took me about 30 minutes. It still leaked because the glass had the same fitment problem around the top corners.
I cannot for the life of me remember the rope size I used.
I did the e23 myself with the rope trick. Took me about 30 minutes. It still leaked because the glass had the same fitment problem around the top corners.
I cannot for the life of me remember the rope size I used.
demetk wrote:Gasket first is how my professional installer tried to install the windshield on the e28. Took him 2.5 hours the first day. Then he needed to come back and spend another 1.5 hours sealing it with urethane because it leaked like a sieve.
This is somewhat disturbing. These guys were obviously traveling together posing as windshield installers.
They were in RI, MA and FL.
Maybe they're posing as Malaysian pilots now.
-
Das_Prachtstrasse
- Posts: 5616
- Joined: Sep 10, 2006 7:06 AM
- Location: Melbourne, Doooown Under
I too have used this method a few times on both e28's and e30's. As Kyle mentioned, I found the rope between the rubber and the glass, as apposed to between the rubber and the body worked the best. I had issues on an e30 screen with it pulling the headlining out if I secured the gasket to the screen first and pulled the rope from the interior, so revised my method by installing the rubber to the car first, and roping the screen in from outside the vehicle and it worked a treat. This way you can glue the headlining to the outside seam and sandwhich it in with the gasket. I used a small bead of mastic between the rubber and the body, and to prevent the top corners dropping and leaking with aftermarket glass (I have a PPG screen in my bronzit car), left a small gauge (can't remember what size) piece of rope in the bead. No leaks, no drooping corners and it sits flush.
Getting the screen in is only half the battle.. Just wait till you attempt the lower lockstrip corners. My windscreen fitter must have attended the same tradeschool as Kohlers. They're still not right, (although I did improved them 50% by spending enough time on them) and it pisses me off everytime I look at them, but I'm putting it down to the non-gen screen and lack of skill the fitter had. As I have one free windscreen per year cover in my insurance at no charge, I'll get a new genuine one this year and have someone with working eyes install the lockstrips.
Grab a set of these and you'll get the skinny lockstrip in no problem. The larger lower lockstrip is a bit of a bastard, but with lube and patience you'll get there. Join the local church and sacrifice your first born before attempting the corners, and you might be successful.

The lockstrip tool does make it much easier. It's totally doable without it, but it's way easier with it.
The lower lockstrip is difficult for windshield installers for some reason. I should take a picture of mine, the installer was so far off he didn't even get the corner in the gasket and just left it hanging out in space.
The lower lockstrip is difficult for windshield installers for some reason. I should take a picture of mine, the installer was so far off he didn't even get the corner in the gasket and just left it hanging out in space.
-
Das_Prachtstrasse
- Posts: 5616
- Joined: Sep 10, 2006 7:06 AM
- Location: Melbourne, Doooown Under
Jeremy wrote:The lockstrip tool does make it much easier. It's totally doable without it, but it's way easier with it.
The lower lockstrip is difficult for windshield installers for some reason. I should take a picture of mine, the installer was so far off he didn't even get the corner in the gasket and just left it hanging out in space.
Both of mine looked like that before I demanded he return and improve it. Turns out he'd left the plastic lockstrip too long and it wouldn't allow the cnr to sit down properly. The other issue is tht the new OEM lower strips have the wrong contour in them from factory, causing out wards pressure in the corners. Very difficult to amend this issue due to the anodized coatings suceptability to cracking. Better off pulling a good condition strip from the wreckers, or use your original one.
Not much I can ad to the advice above.
Been a few years since I did one, I had new BMW gasket & Black lockstrip & black M5 lower metal lockstrip & corners. My aftermarket pilkington windshield was about 1/4" narrower than stock, side to side. I did similar to Kyle & put gasket in first, then bottom of windshield in first, then up both sides, then across the top. I used windex as a lube. . Rope trick didn't work as well for me. Lower metal lockstrip across the bottom was a PITA, as my palm was sore when I was done. Then the 2nd hail storm came about 2 years to the day & took that one away. Bye Bye 83 528e. Oh, and as luck would have it, got a small rock chip within months of installing the new one following a truck on the freeway about 8 car lengths ahead. Both upper corners were pulled in a bit too.
Been a few years since I did one, I had new BMW gasket & Black lockstrip & black M5 lower metal lockstrip & corners. My aftermarket pilkington windshield was about 1/4" narrower than stock, side to side. I did similar to Kyle & put gasket in first, then bottom of windshield in first, then up both sides, then across the top. I used windex as a lube. . Rope trick didn't work as well for me. Lower metal lockstrip across the bottom was a PITA, as my palm was sore when I was done. Then the 2nd hail storm came about 2 years to the day & took that one away. Bye Bye 83 528e. Oh, and as luck would have it, got a small rock chip within months of installing the new one following a truck on the freeway about 8 car lengths ahead. Both upper corners were pulled in a bit too.
-
John in VA
- Posts: 5299
- Joined: Feb 12, 2006 12:00 PM
- Location: Leesburg, VA


