Noob M30B35 Build

E28 technical advice asked and given! Troubleshooting, modifications and more.
tig
Posts: 9322
Joined: Mar 18, 2013 6:25 PM
Location: Durango
Contact:

Re: Noob M30B35 Build. 2014-07-04: Will it start this weeken

Post by tig »

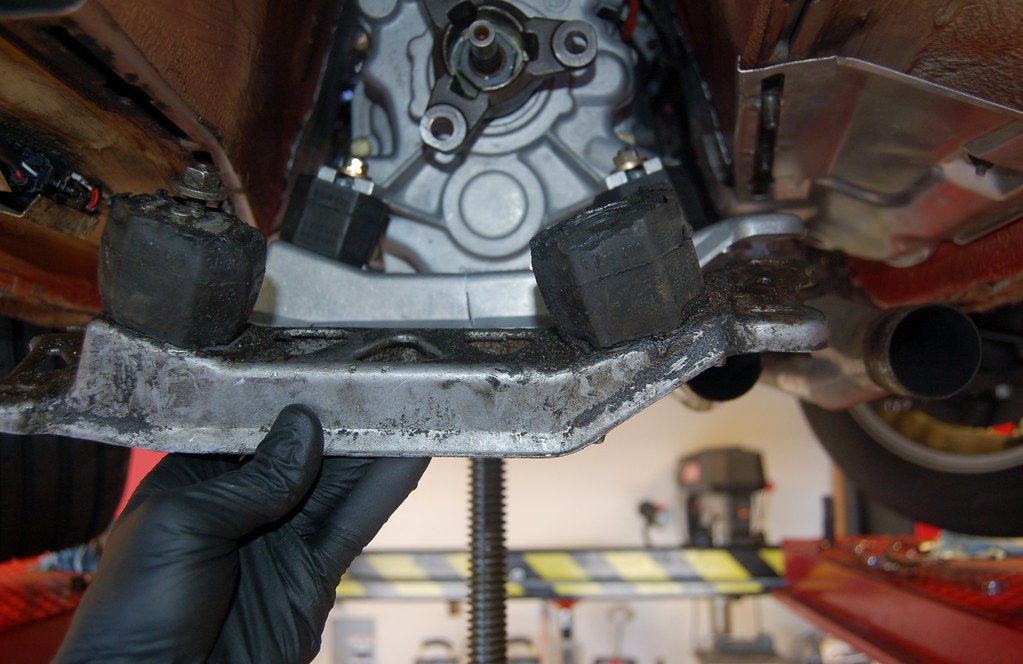
I just f**cked up big time.

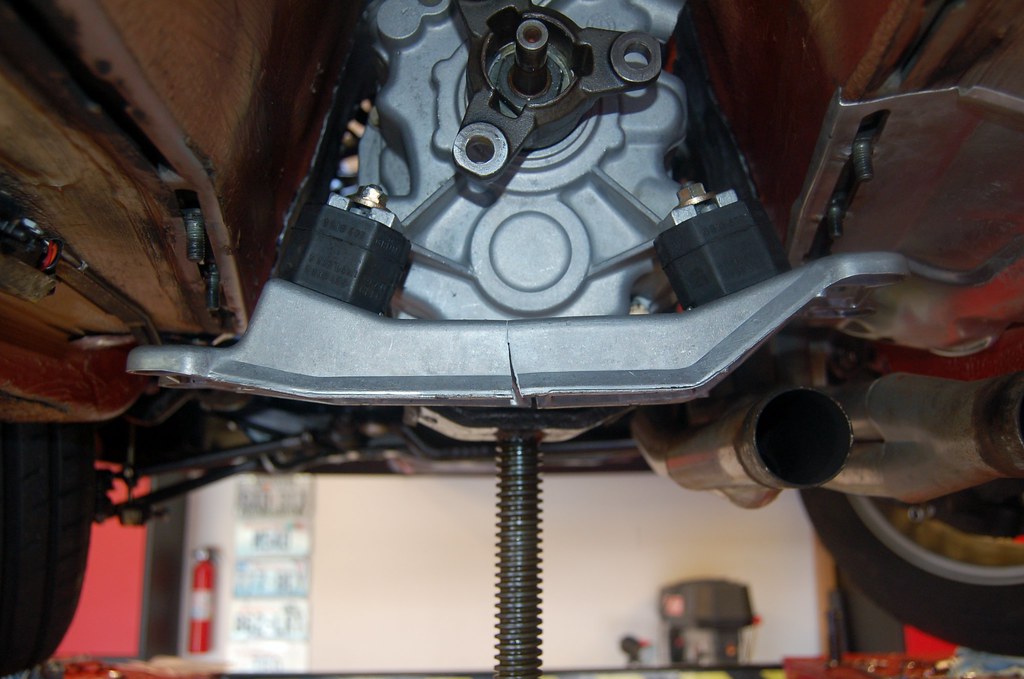
I was unbolting the header, because I won't be able to get to the upper transmission bolts with it in place.

I had dropped the transmission mount and it was resting on my tall jack, just enough so that the weight of the engine wasn't on the header.

I decided I needed to lower the lift about 6" so that I wouldn't have to be reaching so high to get the header bolts off.

Pop!
Image

F**ck.

Fortunately I had the jack on the cross member and not the transmission itself.

What an idiot.

WTB: One E28/535 transmission cross-member. Part # 23711128517. Will pay expedited shipping.
tig
Posts: 9322
Joined: Mar 18, 2013 6:25 PM
Location: Durango
Contact:

Re: Noob M30B35 Build. 2014-07-04: Will it start this weeken

Post by tig »

Ah. But there IS a God.

Didn't my 5-Speed kit for Maytag come with a cross-member? Is it the same one?

Yup.

Image

Still need another one though.

Whew.
tig
Posts: 9322
Joined: Mar 18, 2013 6:25 PM
Location: Durango
Contact:

Re: Noob M30B35 Build. 2014-07-04: Will it start this weeken

Post by tig »

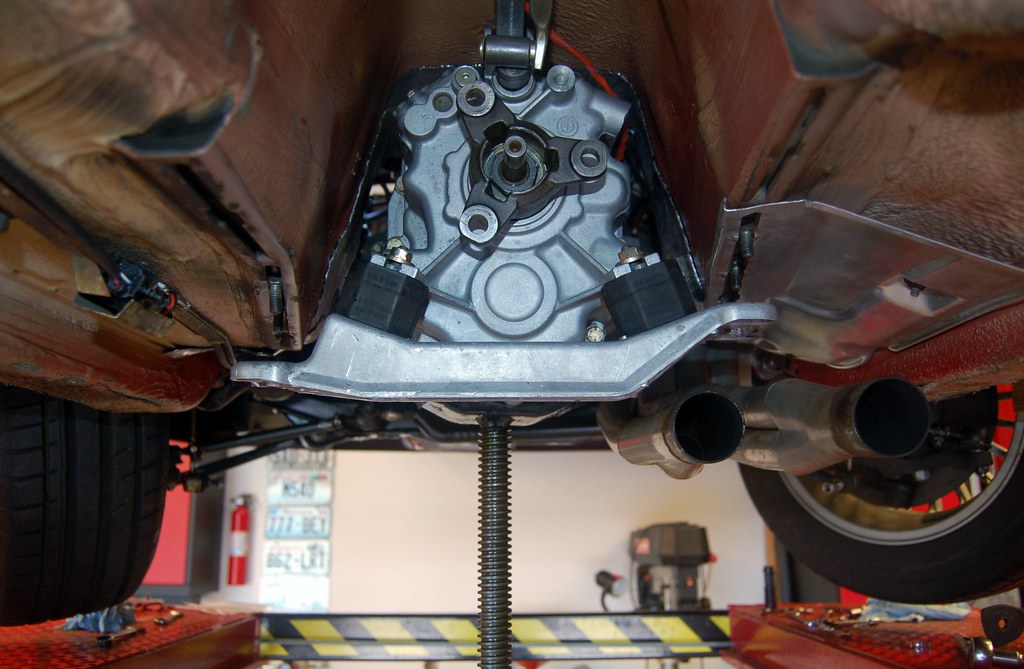
What broken transmission mount?

Image

Back to our regularly scheduled program...
wkohler
Posts: 50924
Joined: Oct 05, 2006 11:04 PM
Location: Phönix, Arizona, USA
Contact:

Re: Noob M30B35 Build. 2014-07-04: Will it start this weeken

Post by wkohler »

Whew. Sucks you have to go through all of this again but like you said, better to catch it now.

Funny story about the crossmember. A member here (for a short time) used that to jack the whole car up. Didn't work out for him.

Glad you had another one.
BuzzBomb
Posts: 1672
Joined: Aug 21, 2011 12:14 AM
Location: SoCal

Re: Noob M30B35 Build. 2014-07-04: Will it start this weeken

Post by BuzzBomb »

Something to consider before removing the trans. Take the crossmember back off, and raise the tail. I was able to replace the gasket in mine once by tilting forward instead if back. You might have to work mostly by feel, but you should have enough room between the head and firewall by tilting forward and using a ratchet wrench.
tig
Posts: 9322
Joined: Mar 18, 2013 6:25 PM
Location: Durango
Contact:

Re: Noob M30B35 Build. 2014-07-04: Will it start this weeken

Post by tig »

BuzzBomb wrote:Something to consider before removing the trans. Take the crossmember back off, and raise the tail. I was able to replace the gasket in mine once by tilting forward instead if back. You might have to work mostly by feel, but you should have enough room between the head and firewall by tilting forward and using a ratchet wrench.
With the transmission on, the engine just wont tilt far enough forward for this. I've got one last f**cking allen bolt to get off and then I'm done.

Any issue with me putting standard bolts in place of the two allen head bolts that normally go at the top? Why the frak would BMW put allan bolts there?
tig
Posts: 9322
Joined: Mar 18, 2013 6:25 PM
Location: Durango
Contact:

Re: Noob M30B35 Build. 2014-07-04: Will it start this weeken

Post by tig »

Taking a break from removing the headers (yes, I had to remove them too) and transmission. Checking my list...
  1. Mount the B35 coil (DONE).
  2. Put new coolant overflow tank in and connect (DONE).
  3. Tighten belts (DONE).
  4. Attach fuel hose from tank to rail (DONE).
  5. Connect new grounds for wiring harness on RHS (DONE).
  6. Put new wiper tank in and connect (DONE).
  7. B35 bellhousing has hole w/ plastic cap. Plastic cap wants to fall out. Buy cap at Ace hardware that fits! (DONE)
  8. Install short-shift kit. (DONE)
  9. Install lightened & balanced flywheel and new clutch. (DONE)
  10. Have beer. Watch Sounders game. (DONE)
  11. Put radiator back in. (DONE)
  12. Final attach AFR (waiting for the UPS man for some brass fittings). (DONE)
  13. Splice in new O2 sensor using connector bimmerguy got me (DONE)
  14. Re-do (+) battery connections. Charge battery. (DONE)
  15. Shift knob, etc... (DONE)
  16. Fill coolant. (DONE)
  17. Fill break-in oil; manually turn crank? (DONE)
  18. Install plugs. (DONE)
  19. Put air filter housing in. (DONE)
  20. Put in 179 ECU and plug it in. (DONE)
  21. Fill brake fluid; bleed. (DONE, sort-of)
  22. Fill PS fluid. (DONE)
  23. Finish removing transmission.
  24. Figure out why gooseneck is leaking.
  25. Reattach strut bar, etc... AGAIN.
  26. Attach transmission. AGAIN.
  27. Attach headers. AGAIN.
  28. Install rebuilt driveshaft.
  29. Reinstall exhaust. (once the car is drivable I'm taking it into a shop and having the exhaust rebuilt)
  30. Drop in the new in-tank fuel pump.
  31. Remember to tighten steering column nut (I have a piece of tape on the dashboard where I wrote "don't forget steering nut!").
  32. Cross fingers and start it up. 20 minutes, then re-torque head bolts.
  33. Have beer.
Question about clutch/brake fluid:

Before the water leak, I filled brake fluid and bled the brakes. Then I bled the clutch master. Clutch pedal still goes all the way to the floor. What am I missing?
tig
Posts: 9322
Joined: Mar 18, 2013 6:25 PM
Location: Durango
Contact:

Re: Noob M30B35 Build. 2014-07-04: Will it start this weeken

Post by tig »

Got the tranny off. Got the gooseneck off.

I know what I did wrong.

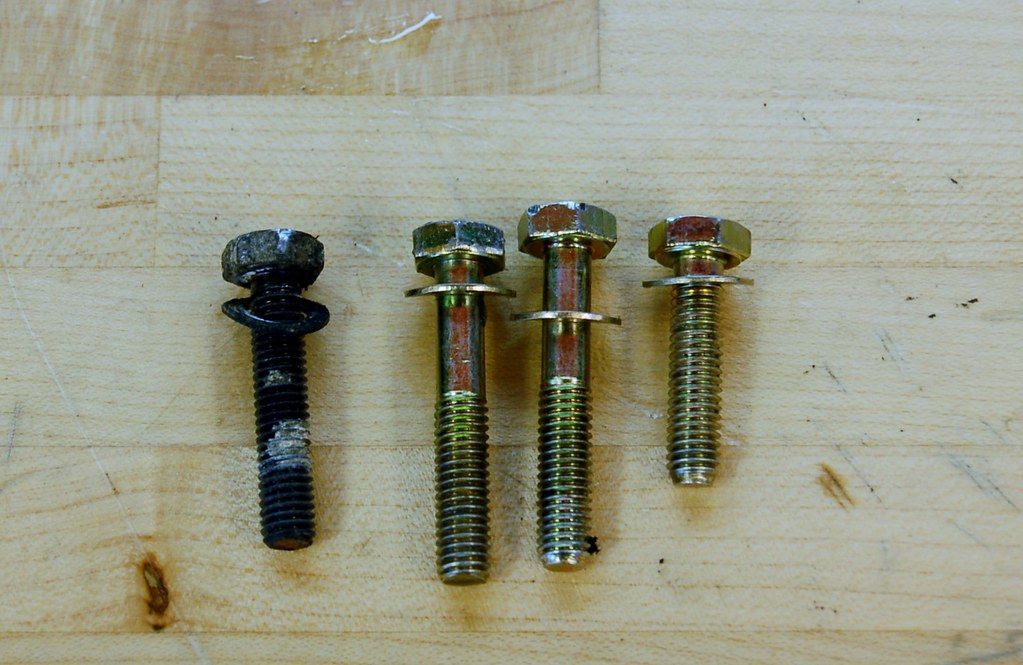
The three bolts on the right are the ones I used to secure the gooseneck.

The bolt on the left is off of the gooseneck on Vlad's old engine.

I remember when I put it on that I wasn't sure if I was measuring the bolts correctly. Not sure why I used different length bolts. However, the longer ones are clearly too long and were bottoming out. The shorter one was probably fine, but is too short.

Image

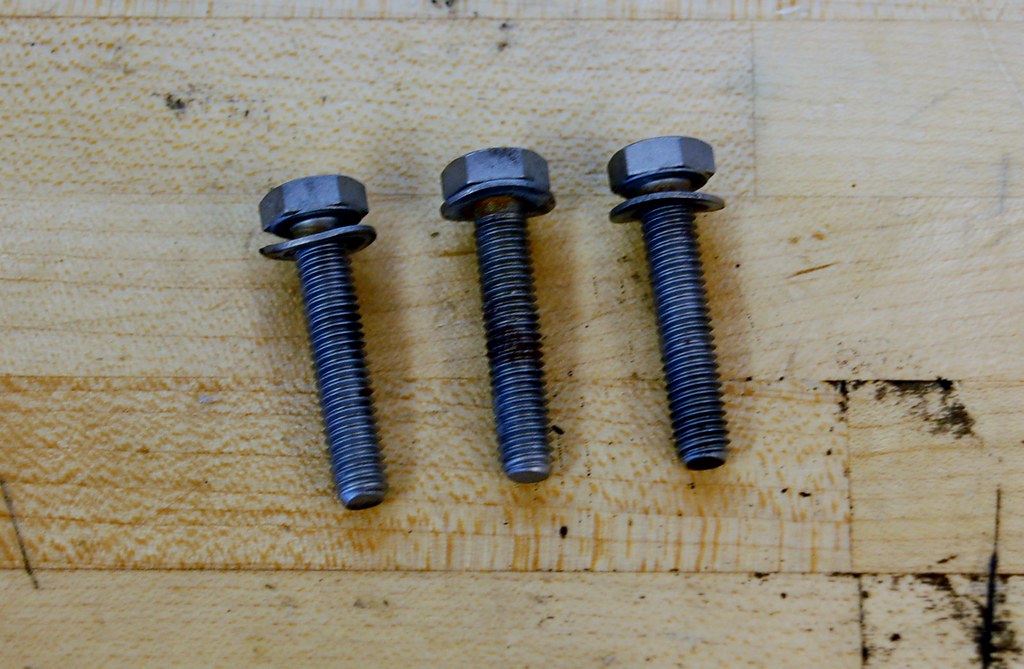
I found the 3 30mm bolts that came off of the donor B34. The goosneck didn't come off that head until after I had all my fastners coated, which was why they weren't in the pile when I put the new gooseneck on the B35 head...and why I didn't use the right lengths.

Image

Ooops.
wkohler
Posts: 50924
Joined: Oct 05, 2006 11:04 PM
Location: Phönix, Arizona, USA
Contact:

Re: Noob M30B35 Build. 2014-07-04: Will it start this weeken

Post by wkohler »

Well, thank God it has a reasonable explanation for the failure. Good luck putting everything back together. You will get this thing fired up for realz soon enough. Go get 'em Tigre.
davintosh
Posts: 13952
Joined: Jan 28, 2009 1:05 AM
Location: Sioux Falls, SD
Contact:

Re: Noob M30B35 Build. 2014-07-04: Will it start this weeken

Post by davintosh »

:popcorn:
Mike W.
Posts: 27230
Joined: Feb 12, 2006 12:00 PM
Location: California Whine Country

Re: Noob M30B35 Build. 2014-07-04: Will it start this weeken

Post by Mike W. »

Granted you hopefully won't be pulling it off again, but I don't see any antisieze on the new bolts that were on there... Good work practices, do all the right stuff even where you don't ever expect to ever be again.
dsmith
Posts: 2362
Joined: Jan 20, 2012 12:52 AM
Location: Charleston, SC

Re: Noob M30B35 Build. 2014-07-04: Will it start this weeken

Post by dsmith »

If that's the worst of it, I would consider the swap a successful project. I don't see any #3 oozing out from that gasket...
tig
Posts: 9322
Joined: Mar 18, 2013 6:25 PM
Location: Durango
Contact:

Re: Noob M30B35 Build. 2014-07-04: Will it start this weeken

Post by tig »

cek wrote: Any issue with me putting standard bolts in place of the two allen head bolts that normally go at the top? Why the frak would BMW put allan bolts there?

Before the water leak, I filled brake fluid and bled the brakes. Then I bled the clutch master. Clutch pedal still goes all the way to the floor. What am I missing?
Help.
wkohler
Posts: 50924
Joined: Oct 05, 2006 11:04 PM
Location: Phönix, Arizona, USA
Contact:

Re: Noob M30B35 Build. 2014-07-04: Will it start this weeken

Post by wkohler »

I typed out a post earlier on the bolts and I guess it didn't come in.

BMW did not put the internal hex bolts on that transmission. They use E-Torx bolts which kick ass (in apparently my solitary opinion). They use two different sizes of them and if you look at the bolt, I'm not sure how you could screw it up. You're sure to get a positive feel from those and I have never had a problem. Standard hex bolts are less-than-desirable in my opinion. With the gunk and crud that builds up on normal cars and the size of the bolt heads, it can be tough to get solid placement on a standard hex head.

The allens suck for axle bolts, but if you strip one out, you can at least get to it. I stripped a pressure plate allen out on Friday. I got all of them no problem but one. I don't know what I'd do if I stripped one of the top ones on a tranny. Kill myself maybe.

How did you bleed the clutch? It can take some doing. I have a pressure bleeder but I still like to use the oil can pumping fluid through the bleeder on the slave. Just don't overfill the reservoir. I did it this way on my last two and had a perfect pedal from the get-go. Sometimes with the pressure bleeder, the pedal can fall to the floor within the first couple days and it's fine once you pull it back up or pump it a couple times. Basically get a "piston oiler," and a length of vinyl tubing that fits over the bleeder and the nipple on the oiler and you're good to go.

Good luck. Oh and a big TIMES TWO on the anti-seize for any of the bolts that are around coolant.
unt0uchable
Posts: 2265
Joined: Jul 21, 2011 8:05 PM
Location: Rochester Hills, Michigan
Contact:

Re: Noob M30B35 Build. 2014-07-04: Will it start this weeken

Post by unt0uchable »

This thread just keeps on winning. Looking forward to the first start!!! :up: Keep up the great work. These details will surely help at least one person in the future. :D
tig
Posts: 9322
Joined: Mar 18, 2013 6:25 PM
Location: Durango
Contact:

Re: Noob M30B35 Build. 2014-07-04: Will it start this weeken

Post by tig »

Thanks Chris. I don't have any more torq bolts, but I do have a lot of M8x35 hex bolts so I'm going to use those instead of the Allens.

On the pumping fluid back in through the slave bleeder: If you do that, does the fluid then push up through the master and then to the reservoir? IOW, leave the cap of the reservoir off?

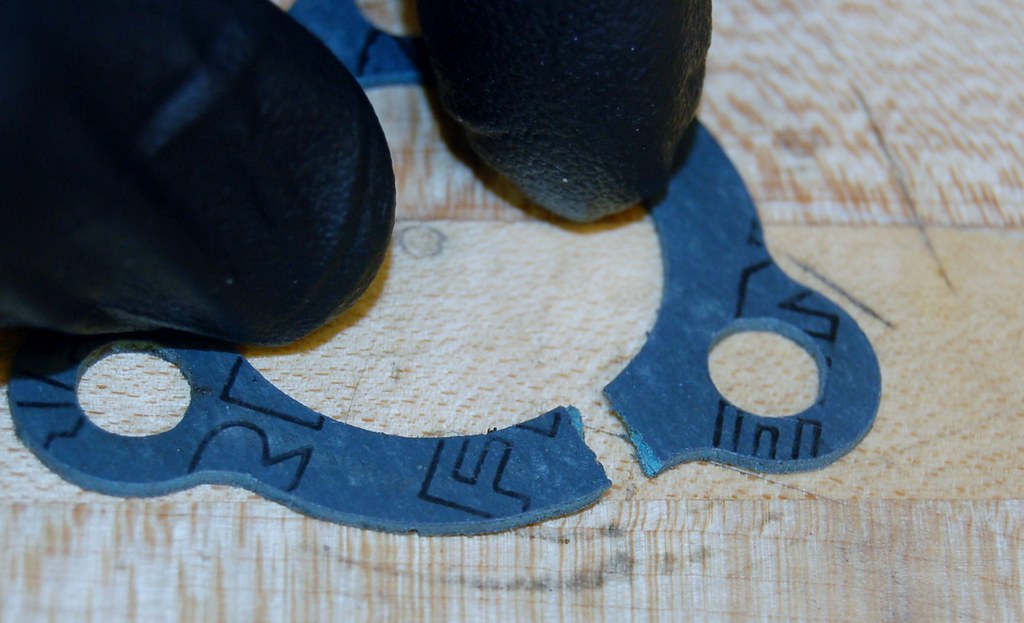
I suppose this contributed. It may have ripped when I removed it though. Either way, I guess I also didn't put any #3 on like I did all other water seals. Note I *did* put anti-seize on all water bolts...except, apparently these. As I said, these were the first bolts to go on the motor.

Image

I either need to depend on gasket maker or wait until I can get a replacement...which means this is going to be one expensive gasket given shipping.
tig
Posts: 9322
Joined: Mar 18, 2013 6:25 PM
Location: Durango
Contact:

Re: Noob M30B35 Build. 2014-07-04: Will it start this weeken

Post by tig »

BMW of Seattle will have the gasket by 11am tomorrow. Also 2 M8x35 Torq bolts.

Yay me.
tig
Posts: 9322
Joined: Mar 18, 2013 6:25 PM
Location: Durango
Contact:

Re: Noob M30B35 Build. 2014-07-04: Will it start this weeken

Post by tig »

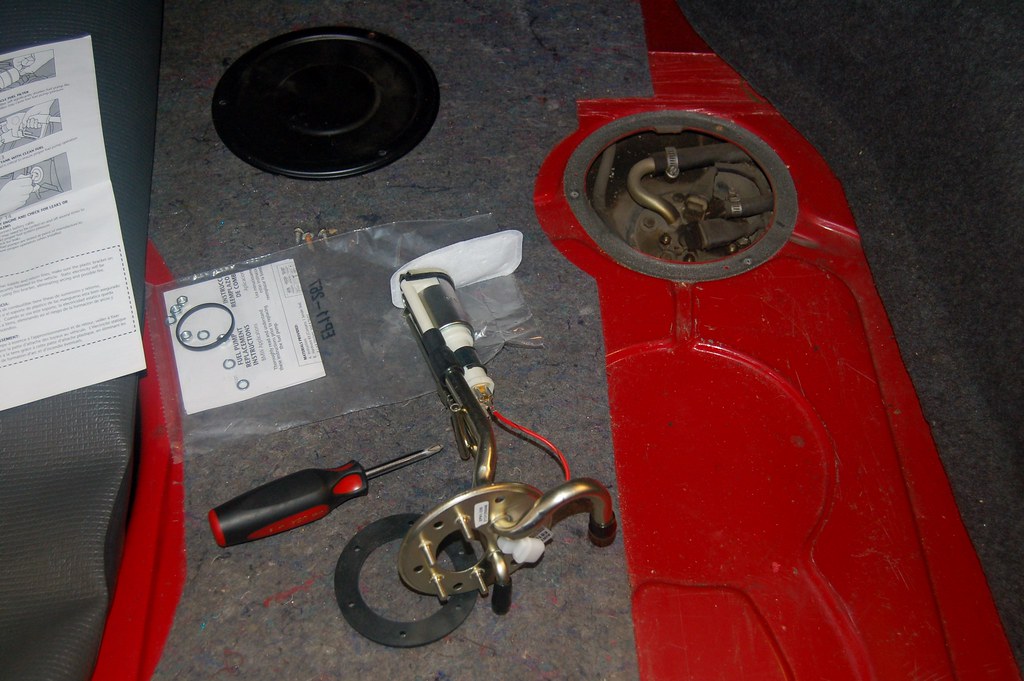
This morning I decided to tackle the in-tank fuel pump.

Image

I assumed it would be straight forward.

I was wrong.

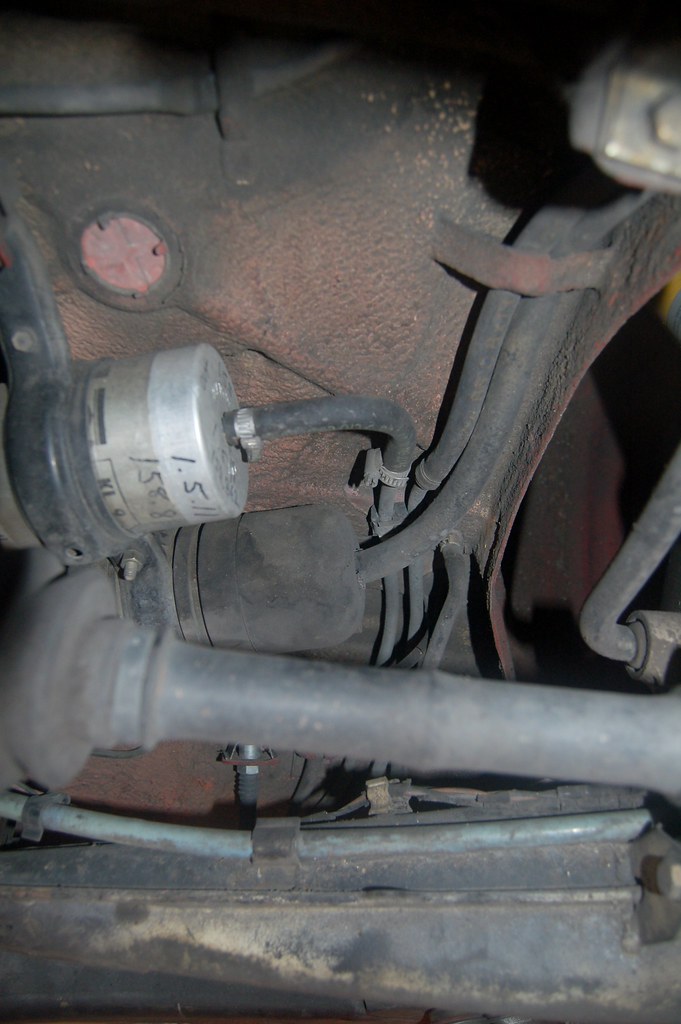
Image

In order to get the hoses off I need to drop the tank. The hoses need to be replaced too. While in there, I probably should replace the main pump too. My tank has a big dent in it. Probably needs cleaning. Spence is pulling me an unbent tank from a parts car real soon now.

In other words, I'm giving up for now and will tackle all of that some time down the road.

Note the only reason this was on the list was i knew it had never been replaced and figured with the new engine...
kzolee
Posts: 346
Joined: Jan 12, 2011 5:10 AM
Location: Hungary
Contact:

Re: Noob M30B35 Build. 2014-07-04: Will it start this weeken

Post by kzolee »

cek wrote: In order to get the hoses off I need to drop the tank.
I changed the fuel hoses without dropping the tank...

Why You want to change the fuel pump? :roll: If You change the fuel hoses, take a look at the main filter. Maybe it needs to be replaced.

Pro tip: wear protective goggles. Not like me... :brickwall:
tig
Posts: 9322
Joined: Mar 18, 2013 6:25 PM
Location: Durango
Contact:

Re: Noob M30B35 Build. 2014-07-04: Will it start this weeken

Post by tig »

kzolee wrote:
cek wrote: In order to get the hoses off I need to drop the tank.
I changed the fuel hoses without dropping the tank...

Why You want to change the fuel pump? :roll: If You change the fuel hoses, take a look at the main filter. Maybe it needs to be replaced.

Pro tip: wear protective goggles. Not like me... :brickwall:
I could sorta see how you could snake new hoses through. Still don't think it's worth doing now given I want to replace my tank anyway.
vinceg101
Posts: 4896
Joined: Jun 20, 2007 2:40 AM
Location: Los Angeles, CA

Re: Noob M30B35 Build. 2014-07-04: Will it start this weeken

Post by vinceg101 »

cek wrote:
kzolee wrote:
cek wrote: In order to get the hoses off I need to drop the tank.
I changed the fuel hoses without dropping the tank...

Why You want to change the fuel pump? :roll: If You change the fuel hoses, take a look at the main filter. Maybe it needs to be replaced.

Pro tip: wear protective goggles. Not like me... :brickwall:
I could sorta see how you could snake new hoses through. Still don't think it's worth doing now given I want to replace my tank anyway.
x2 on not needing to drop the tank entirely; all you have to do is loosen the tank mounting bolts on the right side and front. It will provide enough clearance to snake the fuel hose through.
But as you say, if you're dropping the tank anyway...
LeiseyJr
Posts: 1527
Joined: Dec 22, 2013 10:11 PM
Location: Houston,Tx

Re: Noob M30B35 Build. 2014-07-04: Will it start this weeken

Post by LeiseyJr »

I would recommend you drop the tank. Its not needed but since the car is apart Anyway I would just replace all the hoses, clean/paint the tank like I did on mine. Its really not that difficult of a job. Just get it done now so you wont have to worry about it later. We cleaned my tank with a bunch of B-12 carb cleaner and sprayed it with some Rustoleum flat black. The hoses go to the expansion tank can be a bitch and the rubber piece that goes around the filler neck.
tig
Posts: 9322
Joined: Mar 18, 2013 6:25 PM
Location: Durango
Contact:

Re: Noob M30B35 Build. 2014-07-07: I Effed up. Twice.

Post by tig »

Updated To-Do List:
  1. Mount the B35 coil (DONE).
  2. Put new coolant overflow tank in and connect (DONE).
  3. Tighten belts (DONE).
  4. Attach fuel hose from tank to rail (DONE).
  5. Connect new grounds for wiring harness on RHS (DONE).
  6. Put new wiper tank in and connect (DONE).
  7. B35 bellhousing has hole w/ plastic cap. Plastic cap wants to fall out. Buy cap at Ace hardware that fits! (DONE)
  8. Install short-shift kit. (DONE)
  9. Install lightened & balanced flywheel and new clutch. (DONE)
  10. Have beer. Watch Sounders game. (DONE)
  11. Put radiator back in. (DONE)
  12. Final attach AFR (waiting for the UPS man for some brass fittings). (DONE)
  13. Splice in new O2 sensor using connector bimmerguy got me (DONE)
  14. Re-do (+) battery connections. Charge battery. (DONE)
  15. Shift knob, etc... (DONE)
  16. Fill coolant. (DONE)
  17. Fill break-in oil; manually turn crank? (DONE)
  18. Install plugs. (DONE)
  19. Put air filter housing in. (DONE)
  20. Put in 179 ECU and plug it in. (DONE)
  21. Fill brake fluid; bleed. (DONE, sort-of)
  22. Fill PS fluid. (DONE)
  23. Finish removing transmission. (DONE)
  24. Figure out why gooseneck is leaking. (DONE)
  25. Install new gasket (Ordered, will be her tomorrow)
  26. Attach transmission. AGAIN.
  27. UUC is sending me a replacement part for the short-shift kit; what they sent me would work, but it was clearly defective. Should be here tomorrow.
  28. Attach headers. AGAIN.
  29. Reattach strut bar, etc... AGAIN.
  30. Install rebuilt driveshaft.
  31. Reinstall exhaust. (once the car is drivable I'm taking it into a shop and having the exhaust rebuilt)
  32. Bleed clutch master (need to buy one of those oil can pump thingies).
  33. Remember to tighten steering column nut (I have a piece of tape on the dashboard where I wrote "don't forget steering nut!").
  34. Cross fingers and start it up. 20 minutes, then re-torque head bolts.
  35. Have beer.
wkohler
Posts: 50924
Joined: Oct 05, 2006 11:04 PM
Location: Phönix, Arizona, USA
Contact:

Re: Noob M30B35 Build. 2014-07-07: I Effed up. Twice.

Post by wkohler »

I'd have dropped the tank while everything was apart. All new hoses new pumps and filter. No easier time than when there is no exhaust. Get the tank cleaned out and refinished too.
tig
Posts: 9322
Joined: Mar 18, 2013 6:25 PM
Location: Durango
Contact:

Re: Noob M30B35 Build. 2014-07-07: I Effed up. Twice.

Post by tig »

wkohler wrote:I'd have dropped the tank while everything was apart. All new hoses new pumps and filter. No easier time than when there is no exhaust. Get the tank cleaned out and refinished too.
It may still happen if other parts don't get here. Filter is newish.

Exhaust will come out soonish anyway, as I'm going to have it modified.
ldsbeaker
Posts: 6131
Joined: Mar 25, 2007 10:14 PM
Location: Slicktop City, AZ
Contact:

Re: Noob M30B35 Build. 2014-07-07: I Effed up. Twice.

Post by ldsbeaker »

I was able to replace all of the hoses with the tank in place. Very fiddly, and now that you mention it... Yeah, it would be SO much easier with the tank either completely removed or loosened just a little... :oops:
tig
Posts: 9322
Joined: Mar 18, 2013 6:25 PM
Location: Durango
Contact:

Re: Noob M30B35 Build. 2014-07-04: Will it start this weeken

Post by tig »

cek wrote: On the pumping fluid back in through the slave bleeder: If you do that, does the fluid then push up through the master and then to the reservoir? IOW, leave the cap of the reservoir off?
I had a few minutes this morning. I used my new trusty oil can and a length of hose connected to to the slave bleeder. I opened the cap of the reservoir. I pumped. I'm not sure it's doing anything. I didn't want to over-do it and ran out of time.

But I still feel like I'm missing something in the technique here. Clutch pedal still goes to floor with almost no resistance.
trevmmeister
Posts: 847
Joined: Mar 02, 2014 9:20 PM
Location: Newnan, GA

Re: Noob M30B35 Build. 2014-07-07: I Effed up. Twice.

Post by trevmmeister »

master cyl/pedal pulled all the way up, nipple on slave cyl opened up, cap off reso, just pump until bubbles come up. easier with two people, 1 under car making sure nipple stays open and hose stays attached, the other pumping and watching for bubbles.

one of the few things I know exactly how to do, have replaced master cyl 6 times in the past two years. kept replacing them until finally realized slave was the problem. -.-

pull some fluid out of the resovoir first so there is room for the fluid
wkohler
Posts: 50924
Joined: Oct 05, 2006 11:04 PM
Location: Phönix, Arizona, USA
Contact:

Re: Noob M30B35 Build. 2014-07-07: I Effed up. Twice.

Post by wkohler »

http://www.mye28.com/viewtopic.php?t=100245

There's a video here that should help you out.
tig
Posts: 9322
Joined: Mar 18, 2013 6:25 PM
Location: Durango
Contact:

Re: Noob M30B35 Build. 2014-07-07: I Effed up. Twice.

Post by tig »

Thanks Chris. Video was helpful.

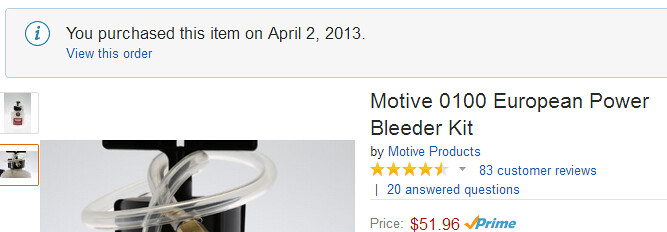
I'm thinking to myself "Wow, a pressure bleeder like the Motive would be nice to own." Only $50? I'll go check Amazon.

I see this:

Image

Uh, where the Eff did I put it?
Post Reply