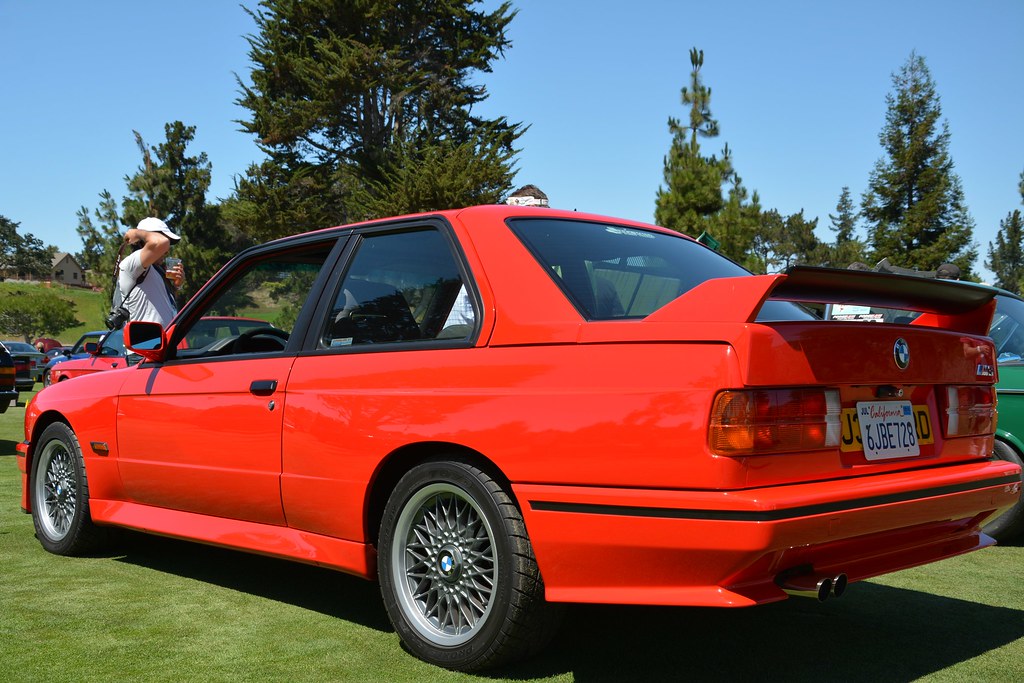
My E28 M5 journey
Re: My E28 M5 journey
30 Aug 2013 (written then, happened sometime before 16 Aug):
The last few weeks have been a whirlwind of events and activities, I'll try an recap most of them! Be prepared, there will be lots of pictures...
As stated a few posts up, there was quite a bit of little maintenance that I had been putting off over the last year. That includes paint upkeep, it had been almost 2 years since the M5 got a coat of wax!:hitler:
Before leaving Colorado Springs, I decided to dismantle the car. There were a few items I had wanted to fix, and a few items that needed to be fixed.
Wants:
- Remove the ugly JVC stereo
- Repair and repaint the front valance
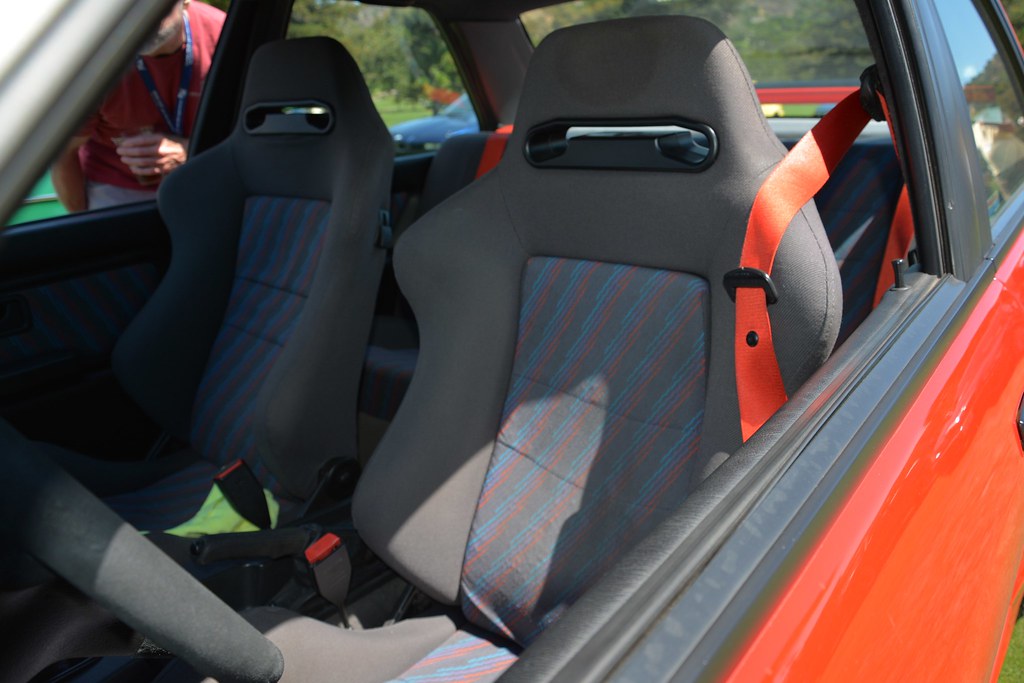
- Clean and Condition the leather
- Find the source of a front end clunk.
Needs:
- Replace the upper/lower control arms yet again
- Replace the brake rotors/pads
- Clay/polish/wax the exterior
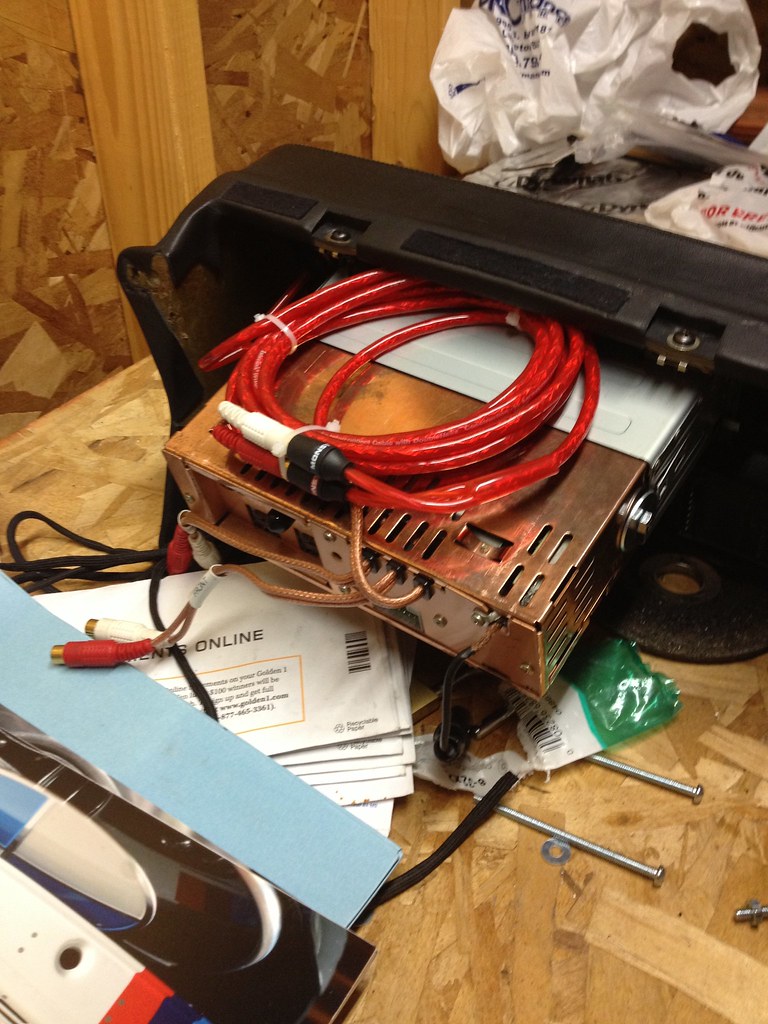
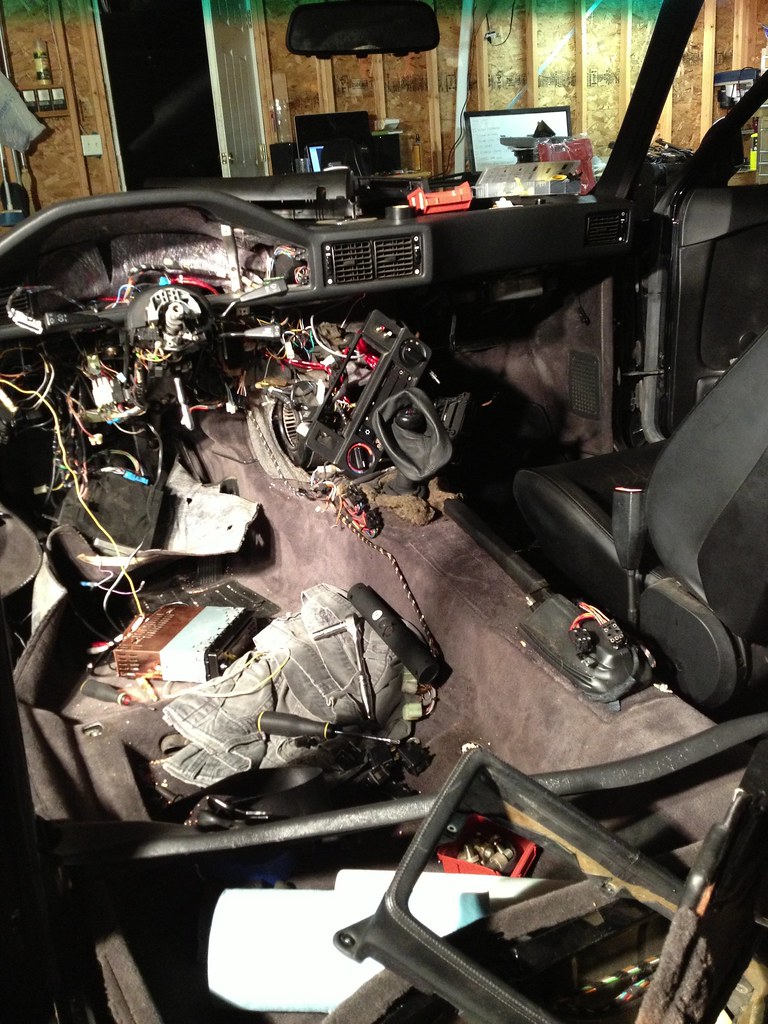
So with those goals in mind I started with the least important first, remove the ugly deck! It quickly spiraled into a deck/amp install and possibly a sub under the seat.
Old deck:
3A8A92FA-03B8-4169-80B2-DD20B0C643D0-1133-000001DDED35C6A8 by ericandshovin, on Flickr
Mid way.
IMG_2600 by ericandshovin, on Flickr
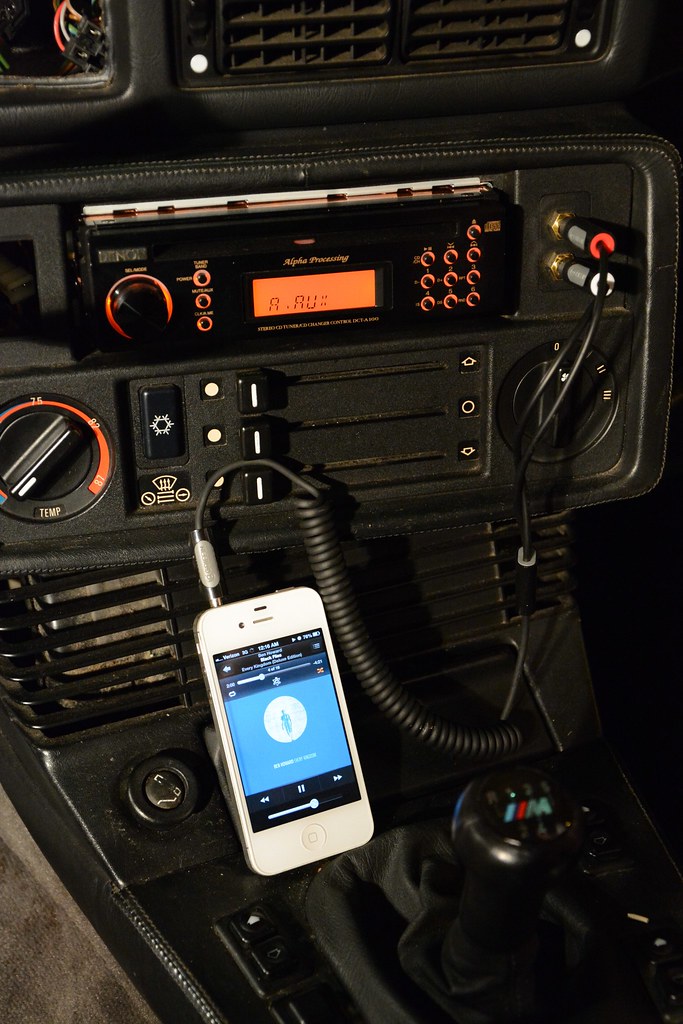
The new stereo is a Denon DCT-A100. A pretty sweet deck built for the Japan market. I looked for a black Denon deck for a long time as I liked the period correct look, and the amber illumination was a must!
IMG_2605 by ericandshovin, on Flickr
Unfortunate for a quick install, the deck has no power, so an amp is required. My time constraints made this a little more difficult, but in the long run I'm much more happy with installing some goodies that have been collecting dust in my toolbox for years. Oh yeah, the amp is a Brax x2400.2 http://www.crutchfield.com/p_875X24002S ... 745&awdv=c
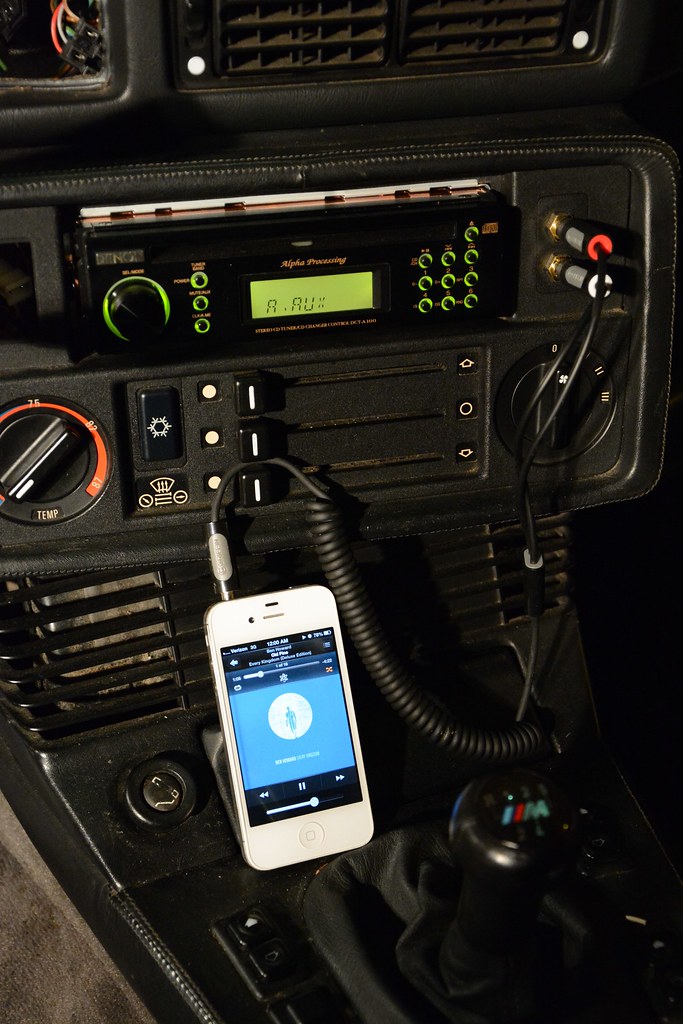
First test fit/power up/sound check
Green:
DSC_6821 by ericandshovin, on Flickr
Amber:
DSC_6822 by ericandshovin, on Flickr
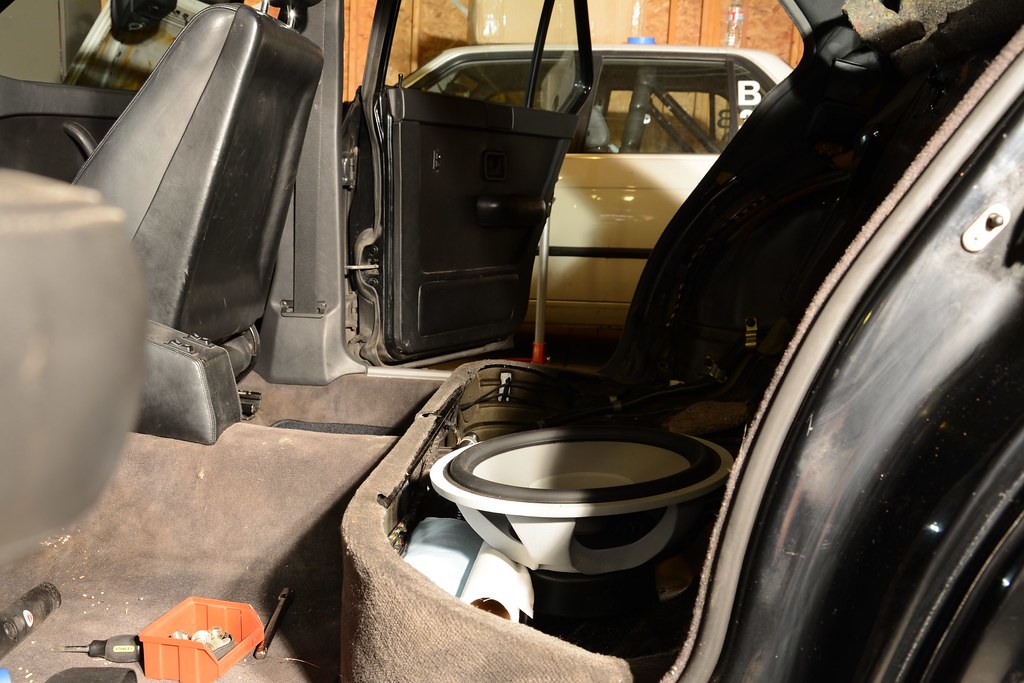
I had to remove the rear seat to run the RCA cables to the trunk area, so I contemplated doing a sub enclosure using the two brand new Alumapro Alchemy 12's I've been keeping for a good project.
DSC_6796 by ericandshovin, on Flickr
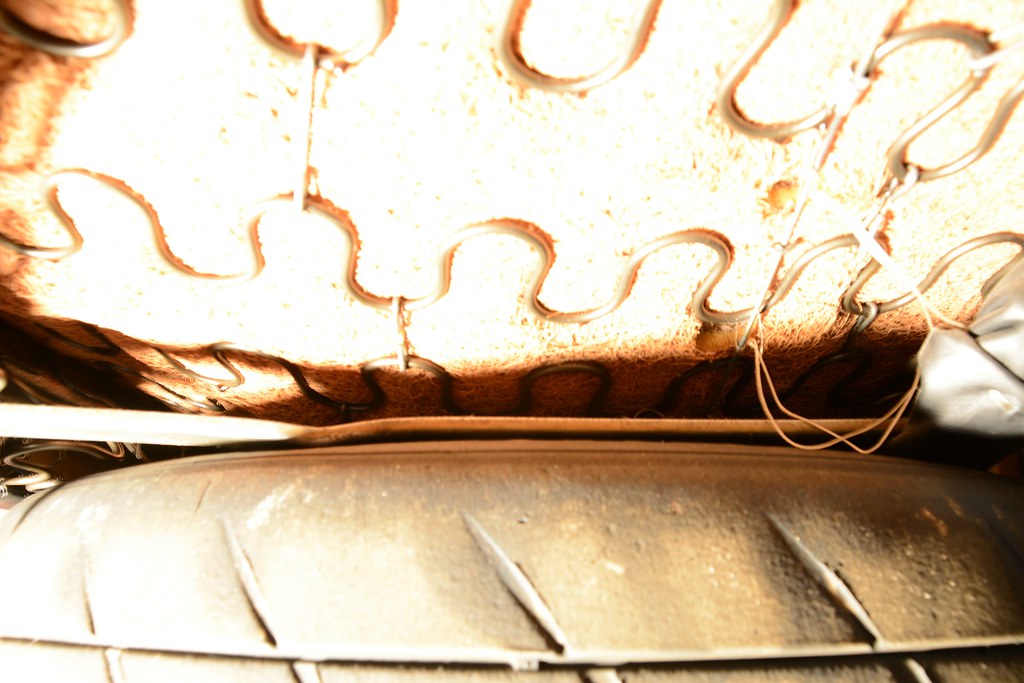
I believe this will work with just one on the drivers side as the floor on the passenger side is different to fit the fuel pump/filter, however the support bar that runs front to back on the rear seat bottom will need to be removed. I was thinking that removing a section of the bar and welding in a speaker grill would keep the support the bar provides and also protect the speaker from larger bottoms. Below is a picture of what the underside of an E28 seat cushion looks like with a adult sitting on it. You can see the support bar resting on the tires with my hefty self sitting on the seat cushion. I don't expect many people to sit in the rear of the car, so I'm not too worried about damage especially if a grill covers the sub.
DSC_6801 by ericandshovin, on Flickr
The sub sits above the pocket a bit. A shallow sub would be great in this application!
DSC_6806 by ericandshovin, on Flickr
The last time I really fiddle-fadled with a stereo was almost a decade ago, so I wanted to really do it correctly. Instead of just stuffing the RCA cables down the side of the carpet, I pulled it back a good ways and tucked the cables in with the OE wiring. Being a bit rusty, I forgot to run the remote turn on wire with the RCA's. Dang.
Those speaker cables are from the old stereo and were removed shortly after this picture was taken.
DSC_6809 by ericandshovin, on Flickr
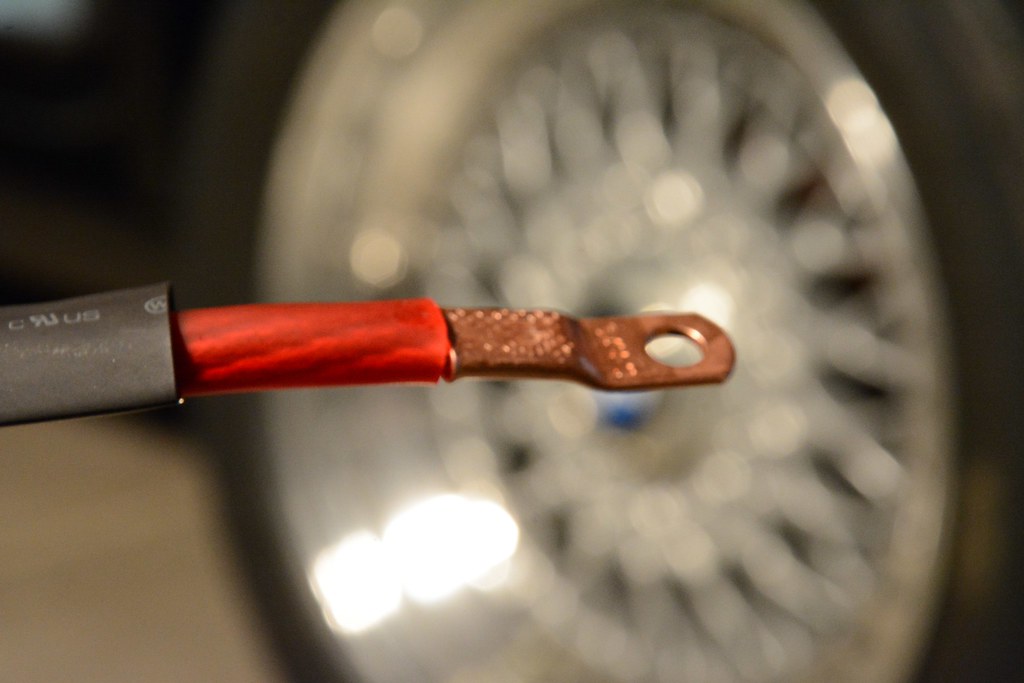
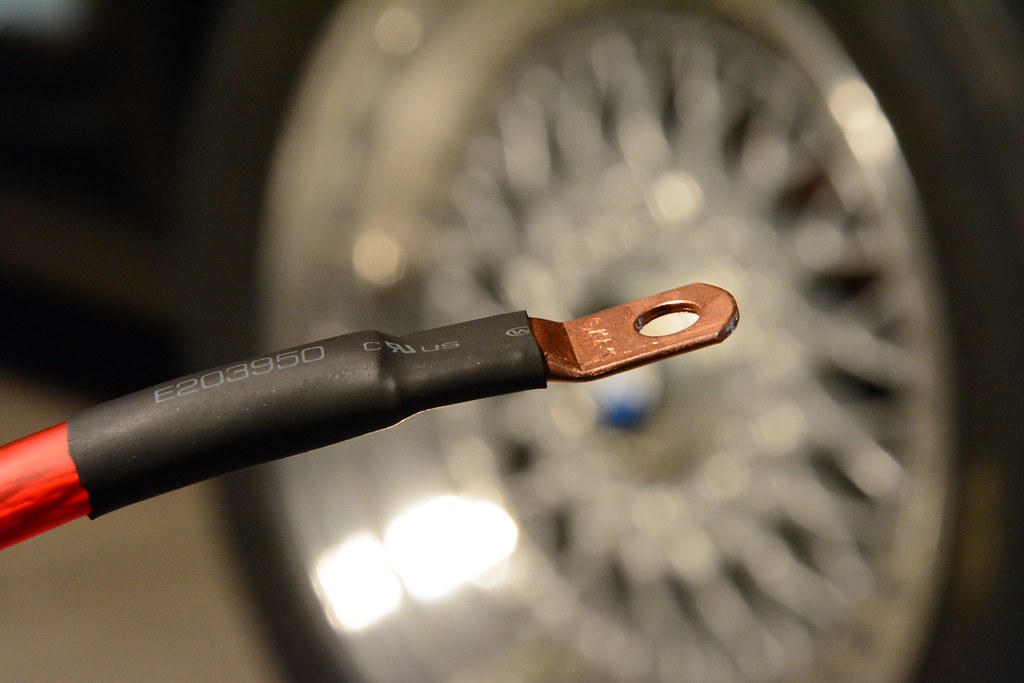
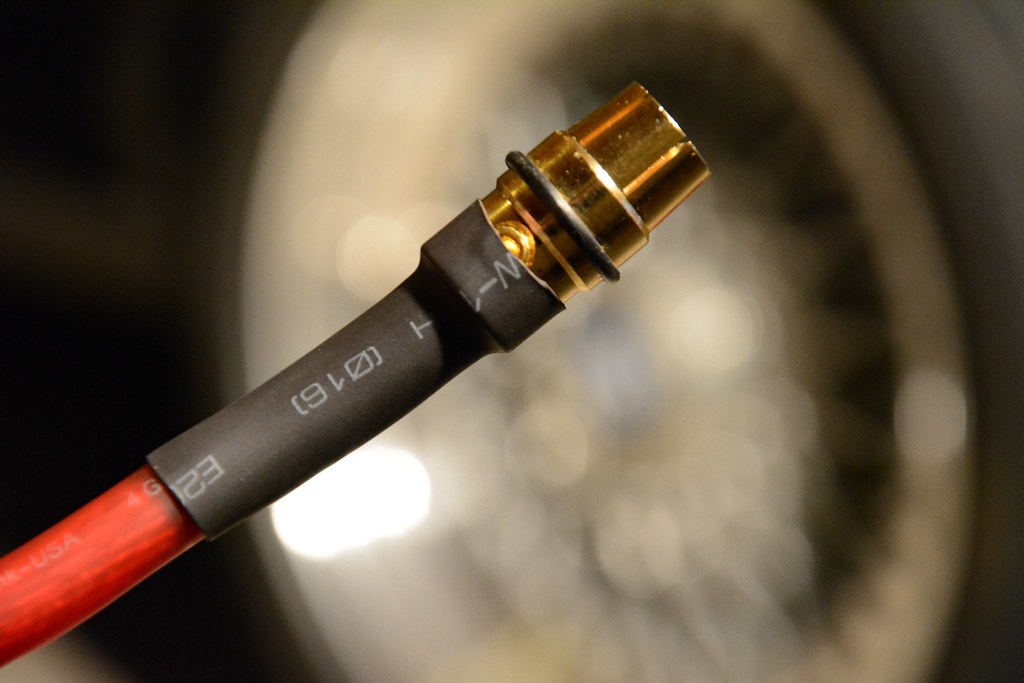
Moving on. Power cable routing... I got a bit OCD with the heat shrink.
DSC_6823 by ericandshovin, on Flickr
DSC_6824 by ericandshovin, on Flickr
DSC_6825 by ericandshovin, on Flickr
Even the deck got it's own 12v source & ground instead of tieing into the factory harness. In fact all that was used for the factory harness is ACC, illumination, and antenna power.
DSC_6815 by ericandshovin, on Flickr
I had to make the 12v constant about 18 inches longer than the wire supplied by Denon, these heat shrink butt connectors are definitely trick!
DSC_6816 by ericandshovin, on Flickr
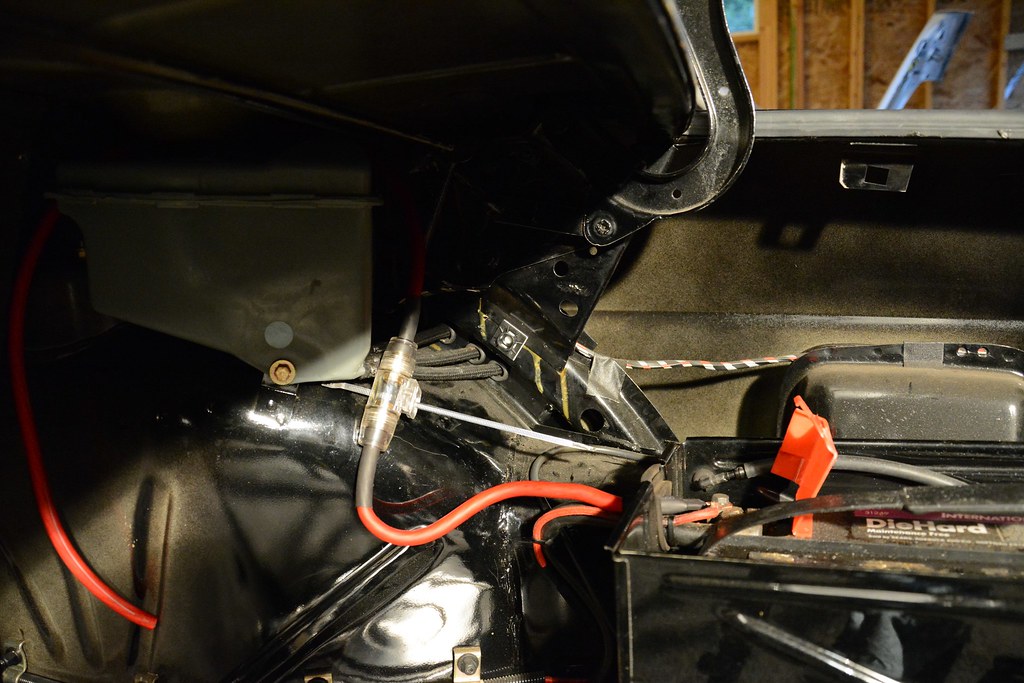
the M5 battery tray in the trunk makes running the power cable much cheaper & much easier! I've luckily never owned a car worthy of a stereo upgrade that had the battery in the engine compartment.
DSC_6826 by ericandshovin, on Flickr
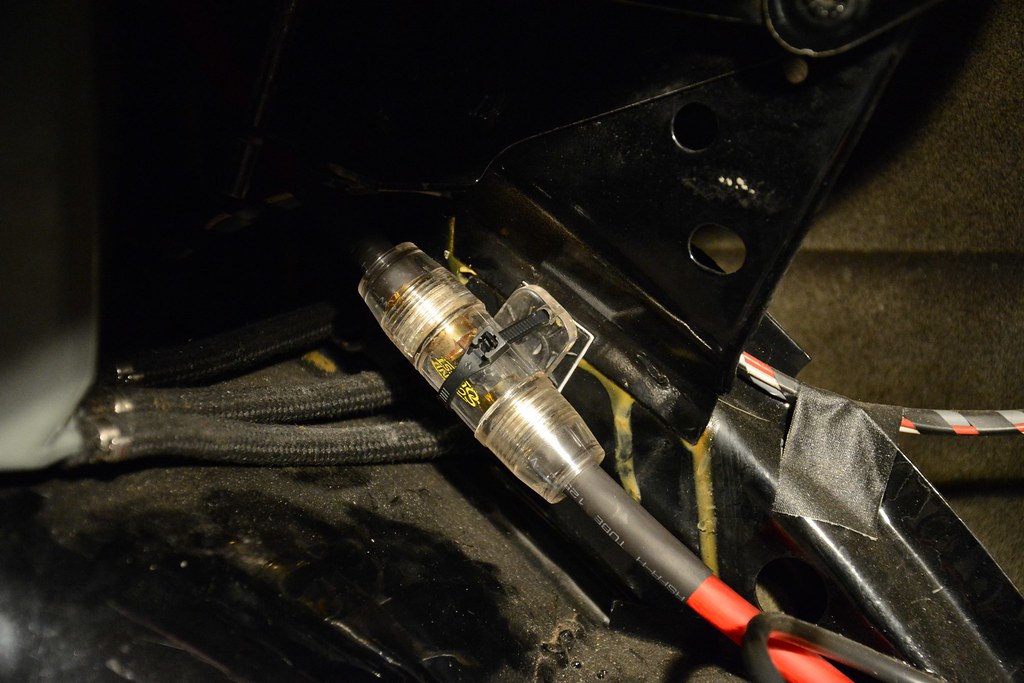
I decided to attach the glass fuse holder to the support structure for the trunk hinge. This will all be 100% covered up by the unique M5 trunk panels.
DSC_6828 by ericandshovin, on Flickr
attached:
DSC_6829 by ericandshovin, on Flickr
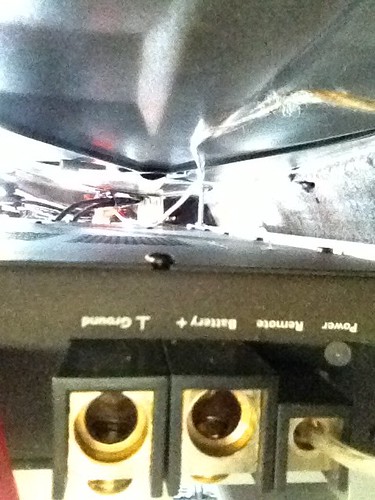
The ground cable is done up much the same as the power cable, I must have forgotten to snap a few pictures of it, but you get the idea. Ground was run to a factory ground in the trunk area and is a very solid. I also didn't get very good pictures of the completed amp install (I'll update the thread later) but it's basically installed on the underside of the rear parcel shelf. 4 rivnuts and a few 2 inch long bolts give it enough stand off to clear the trunk springs. My Iphone came in great help as I was laying in the trunk I realized that I wasn't sure which slot on the amp was for ground and which for 12v power... a mistake I didn't want to make! So I put the phone in selfie mode and snapped this photo!
IMG_2650 by ericandshovin, on Flickr
This is a good arm work out after an hour or so!
IMG_2651 by ericandshovin, on Flickr
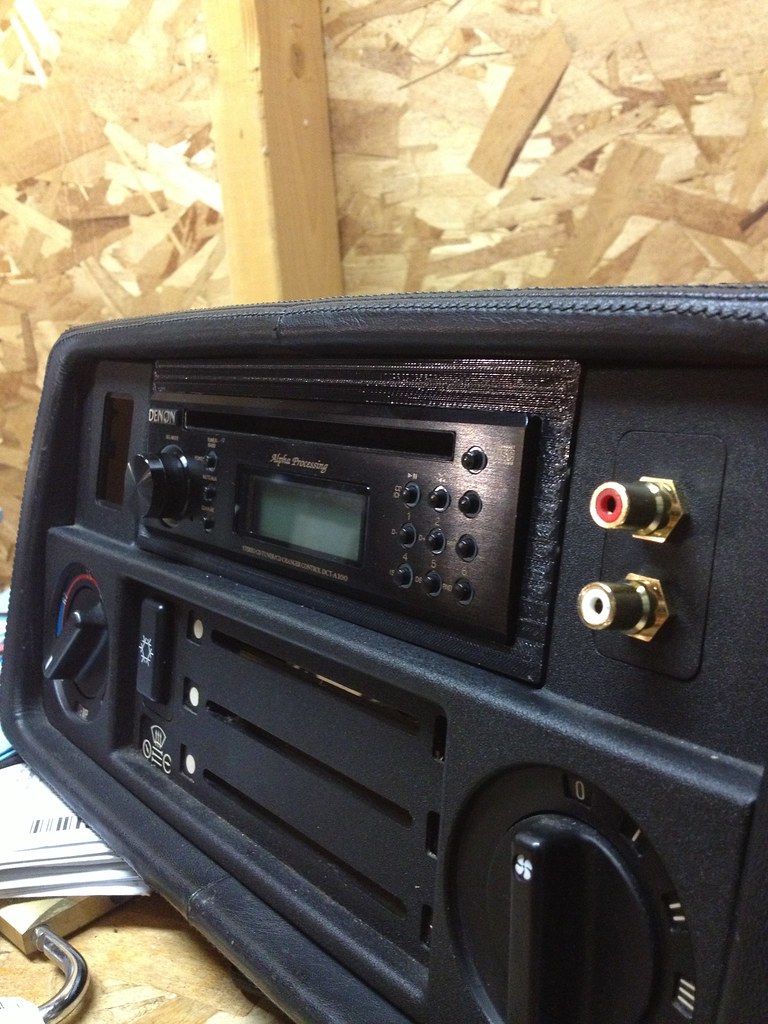
With the amp done, all I had left to do was put the dash back together. My friend Greg who is doing a ridiculous rebuild on his 1993 M5 (http://www.m5board.com/vbulletin/e34-m5 ... d.html)was very kind, and 3D printed a trim ring for my deck in a very very short time. We are talking about CNC machining a piece of aluminum, then anodizing it to match the deck next round.:eeek:
IMG_2662 by ericandshovin, on Flickr
Because the stereo is from Japan and used, it did not come with a cage so I had to bolt it to the cage from the side. This means that if I ever want to remove the stereo again, I have to pull the entire center console out... quite a bit more complicated than an E30 center console too!
IMG_2663 by ericandshovin, on Flickr
Also found a nice space to tuck the aux imput cables out of the way. There isn't much space between the deck and the hvac guts, so this was very helpful.
IMG_2659 by ericandshovin, on Flickr
All back together and everything working the night before leaving for CA!
IMG_2665 by ericandshovin, on Flickr
Future stereo plans include something for the front stage that compliments the quality of the deck and amp. Factory is a 4x6 plate with a 4" round, I'd really like to do something a bit larger, but I really don't want to cut up the car and kick panels usually don't look that great. Also figuring out what to do with a sub, either using the alumapro, or getting 1 or 2 shallow mount subs for under the seat. The goal is as OEM looking as possible, and using as little trunk space as possible. The final move is do move the amp to the back wall of the trunk so it can be shown off a bit.
Up next... cleaning for a concourse.:wtf:
Re: My E28 M5 journey
12-20 Aug 2013:
Cleaning cleaning cleaning...
IMG_2632 by ericandshovin, on Flickr
I felt I had neglected the M5 for a bit of time, using the do-it-yourself carwash instead of hand washing with the 2 bucket method, not waxing it for far to long, leaving it outside last winter while the E30 was broken in the garage, etc, etc. Like I said earlier, I went way to long without waxing the car, and it was starting to show. As stated below, it was easily noticeable that the paint looked different in areas, this was nothing other than lack of care on my end.
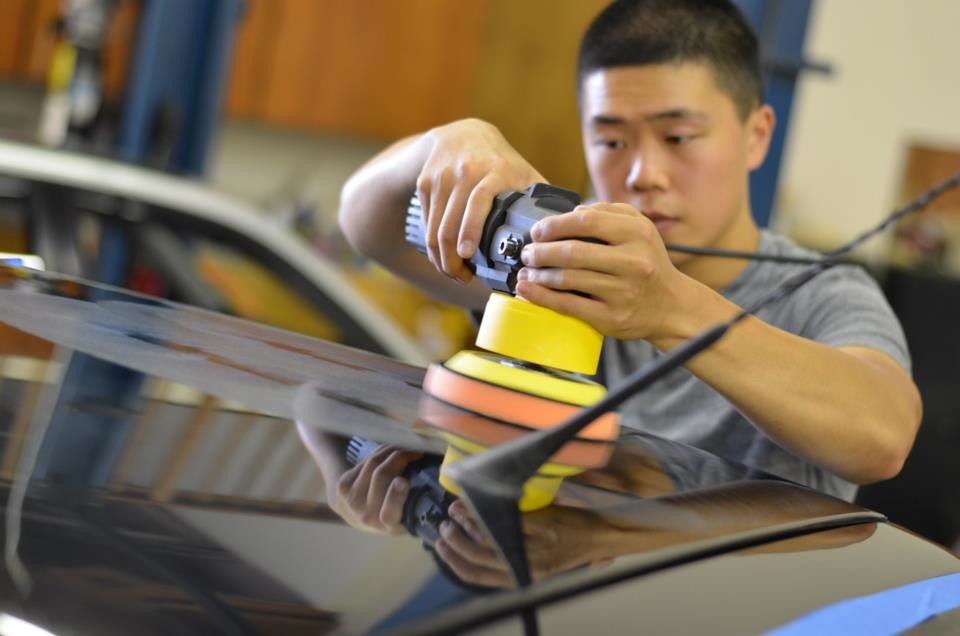
I made arrangements with my good friend Rich to do some paint correction when I got out to CA. We were both stationed in Germany together and he used to use my garage to detail cars on the weekend. If your in the San Jose/bay area, definitely check him out! https://www.facebook.com/pages/Lees-Per ... 5648228002
418666_4452978480374_1465982421_n by ericandshovin, on Flickr
Before the drive out to CA though, I figured I could scrub down all the leather on my own. Most of the interior was out due to the stereo ambitions Anyway, so cleaning all the nooks was far easier while out of the car.
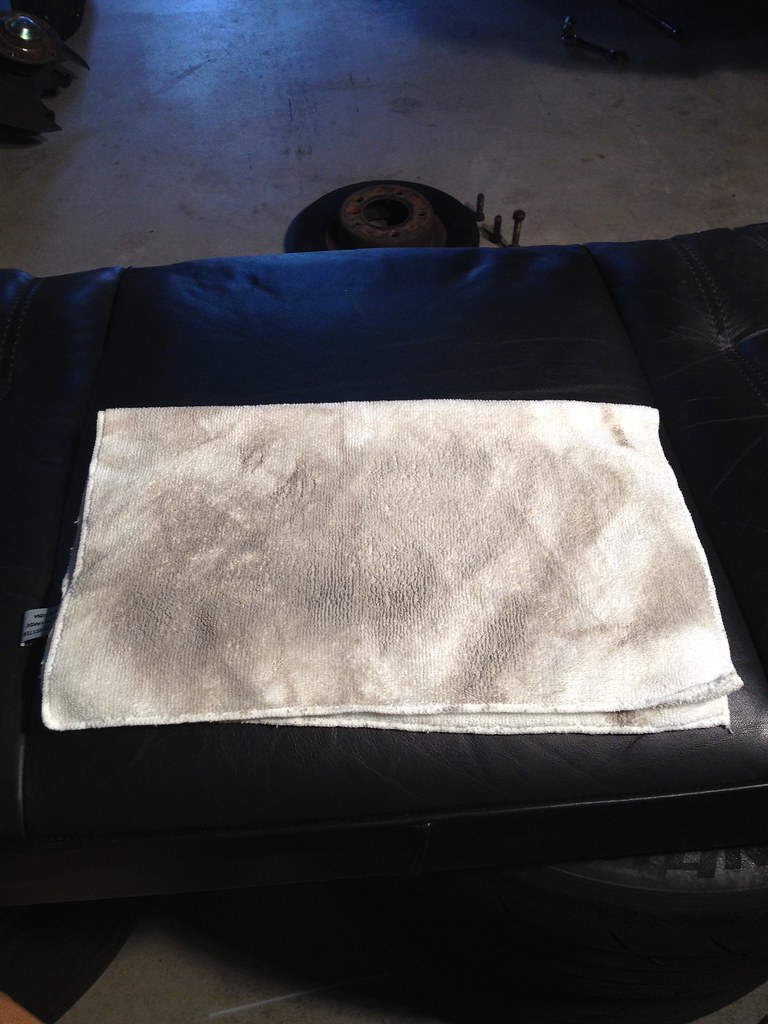
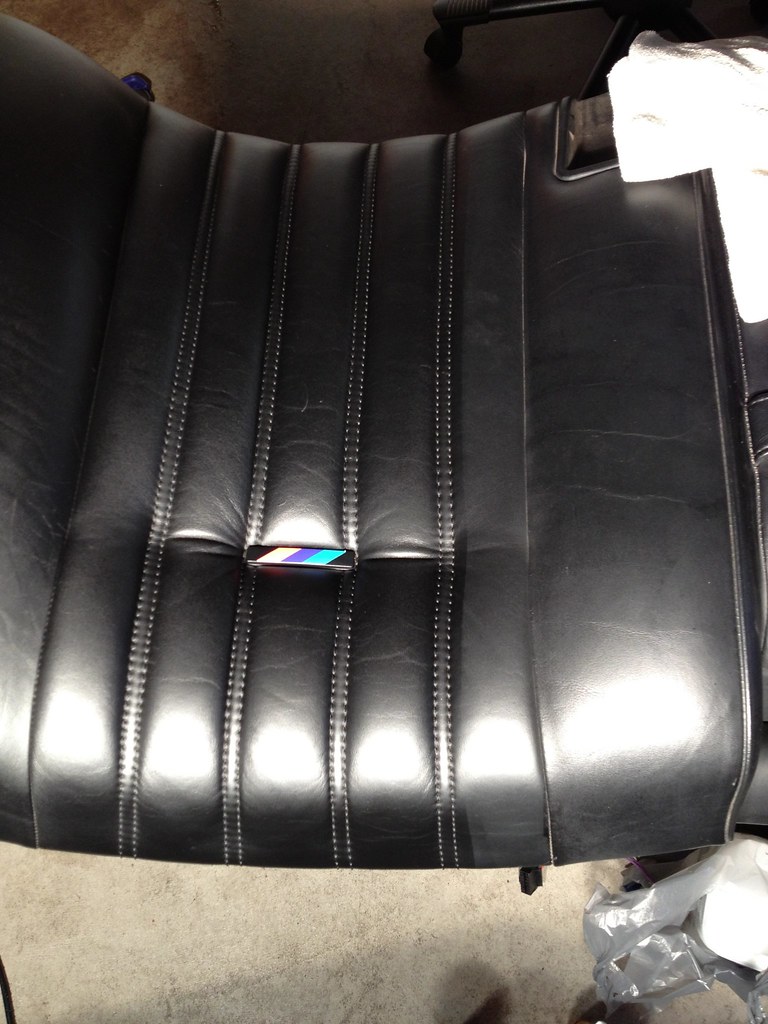
I used Fiebing's saddle soap to clean the leather, and Lexol conditioner to rehydrate the hide. I got decent results, but next time I'm going to try Color-Plus products. On a side note, the Fiebings spray bottle is by far the best spray bottle I've ever used!
IMG_2636 by ericandshovin, on Flickr
Here is a before after with the cleaner/conditioner. Untouched is on the right
IMG_2634 by ericandshovin, on Flickr
By the way, there is A LOT of leather in the E28 M5, a lot more than I had realized. Everything below the dahsboard is leather, door cards and of course the seats. I used the entire bottle of Fiebings Saddle Soap on just the one interior!
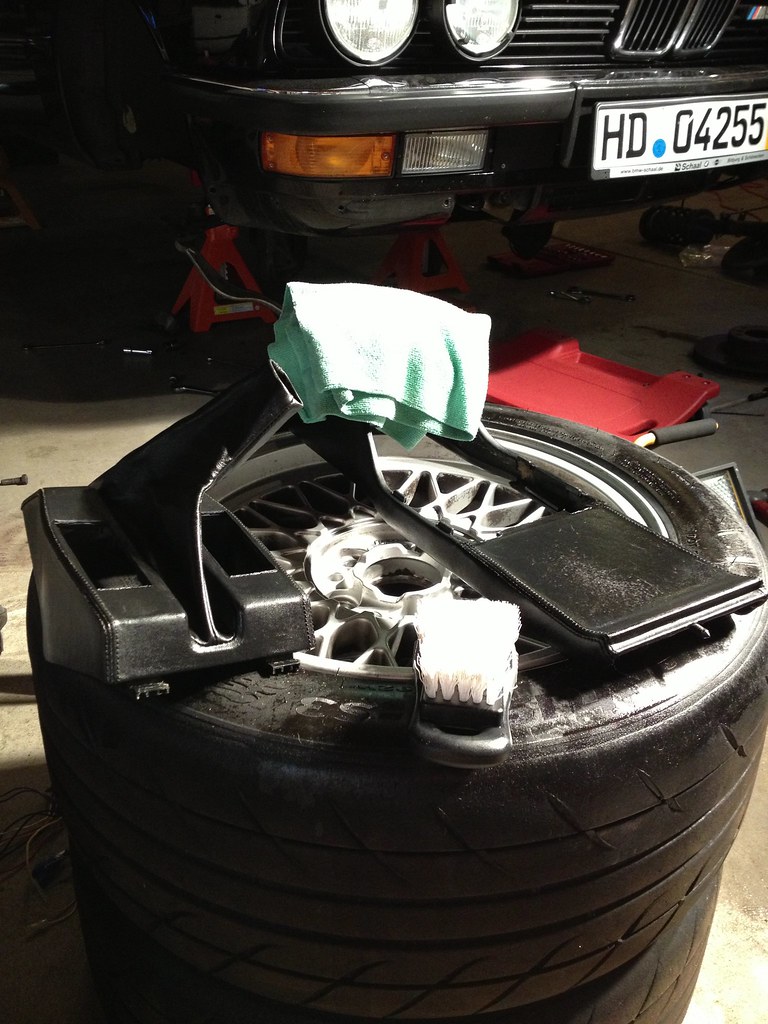
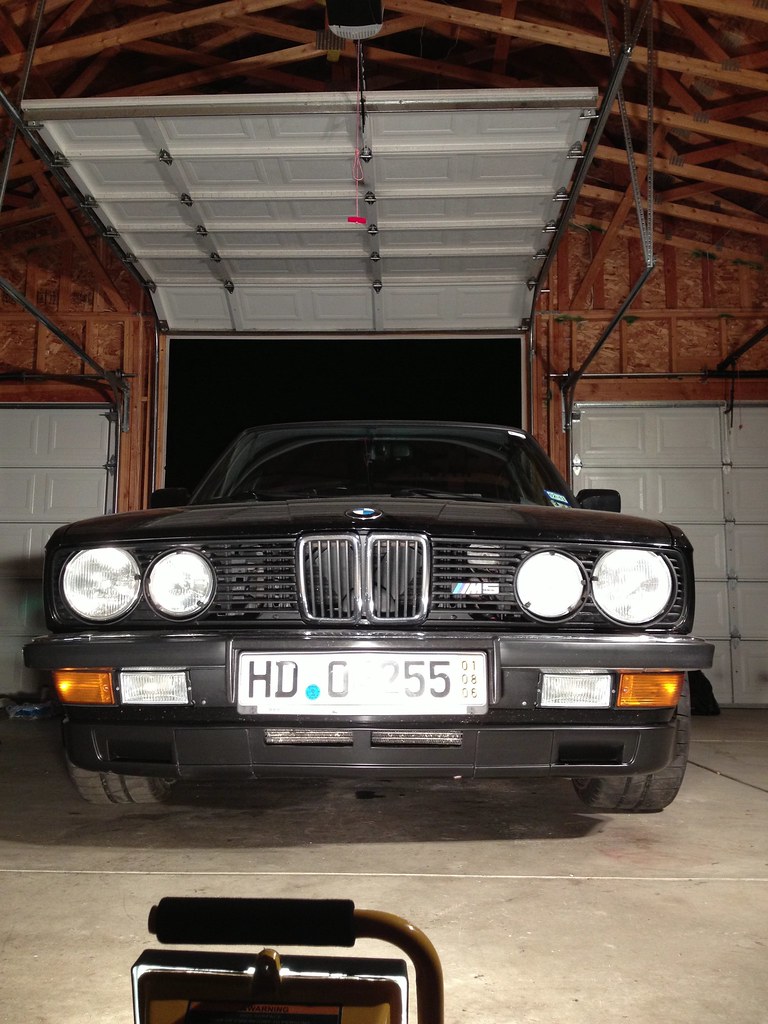
Also in the mix of it all I removed the lower M5 front spoiler and plasti-dipped it. A previous owner had painted the lower chin spoiler jet black to match the rest of the car instead of the correct flat black. Actually the spoiler should be an unpainted flat black plastic, but since the black plastic M5 tow hooks are NLA, white plastic 535 ones were used and thus the entire spoiler assembly was painted jet black to be consistent in color. Fast forward a few years and the spoiler hand a few scrapes on the bottom due to low clearance situations, and the tow hook covers had become an unmatching flat black & horribly pitted from road debris.
So I sanded the chin spoiler down in the areas with scratches, then cleaned and a can of plasti-dip applied. To me it looks like the OE color the spoiler should be, so I'm quite happy with the outcome!
IMG_2656 by ericandshovin, on Flickr
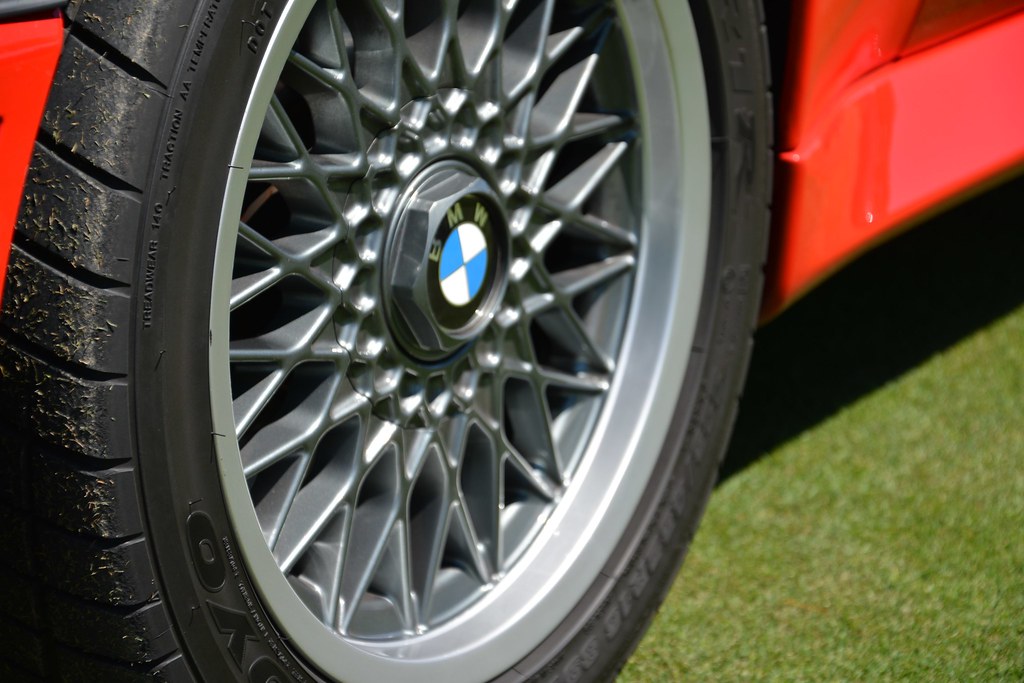
My while-you-are-in-there syndrome was in pretty good check, limited only to re-dying the rear parcel shelf from faded hue of blue back to black, and having the BBS RS hex caps polished by a local guy.
IMG_2648 by ericandshovin, on Flickr
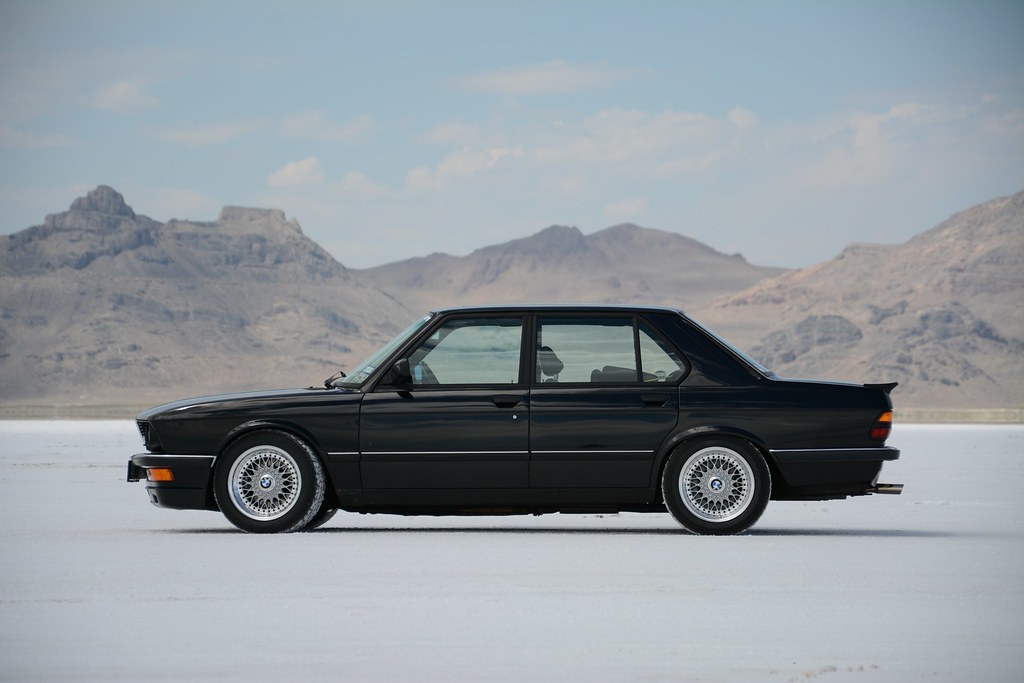
On the way out to CA, I took a moment to stop at the Bonneville Salt Flats. The shear expansiveness of the salt flats is mind blowing, definitely something any automotive enthusiast should check out. These photo's btw are straight off the camera, my old version of photoshop does not play nice with my new nikon.:dontknow:
DSC_6861 by ericandshovin, on Flickr
Once I got to CA, Rich worked his magic and I tried to help out too!
IMG_2706 by ericandshovin, on Flickr
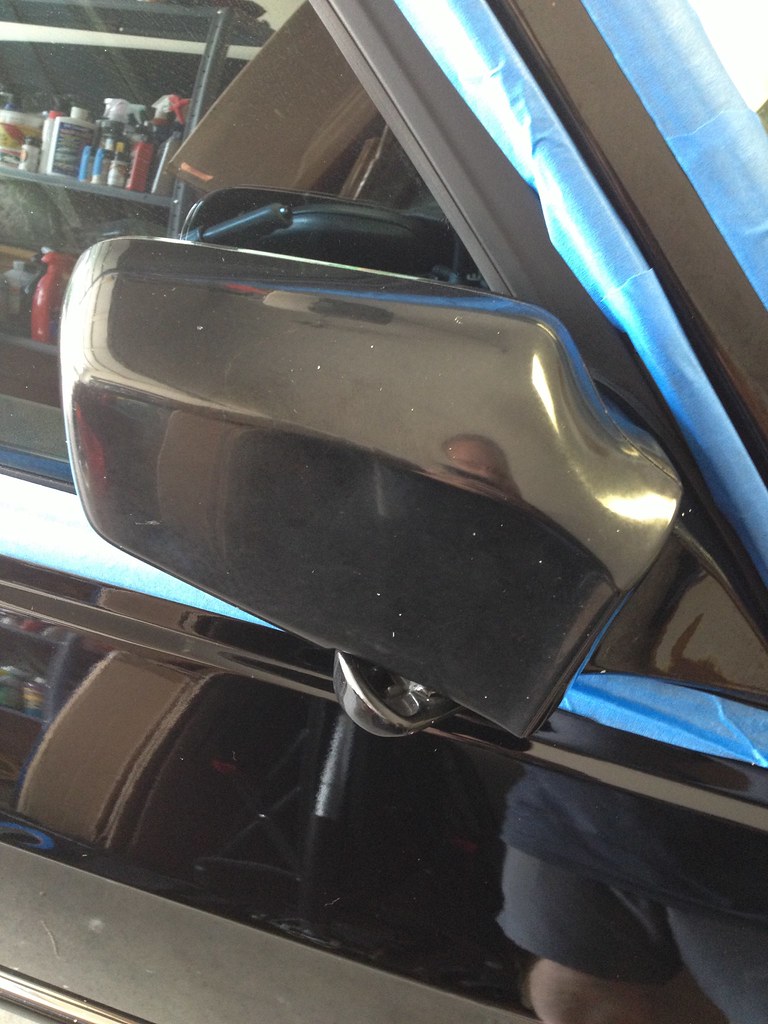
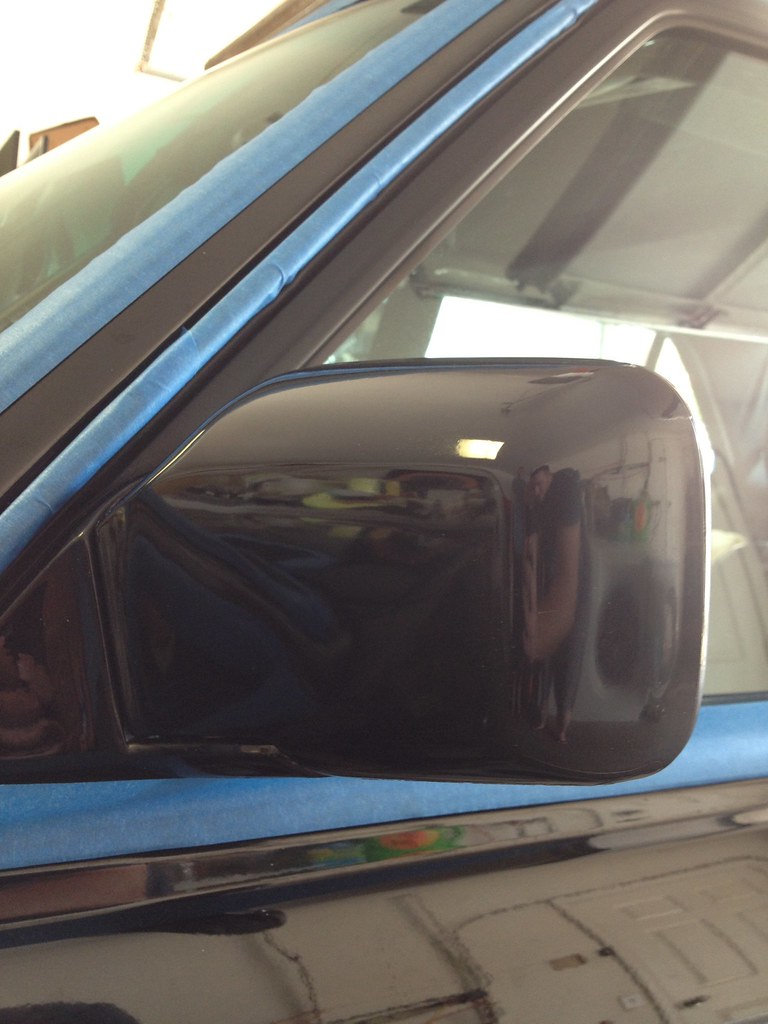
We spent a good 12 hours on the car, and it really shined up nicely. The right rear door that was dull a noticeably different shade of black wasn't the only spot that really came around. The mirrors were soo dull that I thought they were just black plastic, like a 325e! Rich brought those back to life, and to think that I was considering having them repainted! The back of the trunk lid (part with the badge) was also badly oxidized and shined up very nicely.
Mirror before:
IMG_2710 by ericandshovin, on Flickr
Mirror after:
IMG_2709 by ericandshovin, on Flickr
From San Jose, I tip-toed the M5 down to Monterey and tried to touch as little as I could! The M5 was looking great and I didn't want to accidentally put a last minute scratch or ding in the paint.
Tuesday morning rolled around, and I headed over to the swanky Corral de Tierra Country Club and preceded to be directed past all the great looking BMW's in the parking lot, and onto the golf course greens! I'm not sure if any of you are aware of this phenomenon, I surely wasn't, but a car parked on a green is 67% nicer looking than when parked in a parking lot.
DSC_6895 by ericandshovin, on Flickr
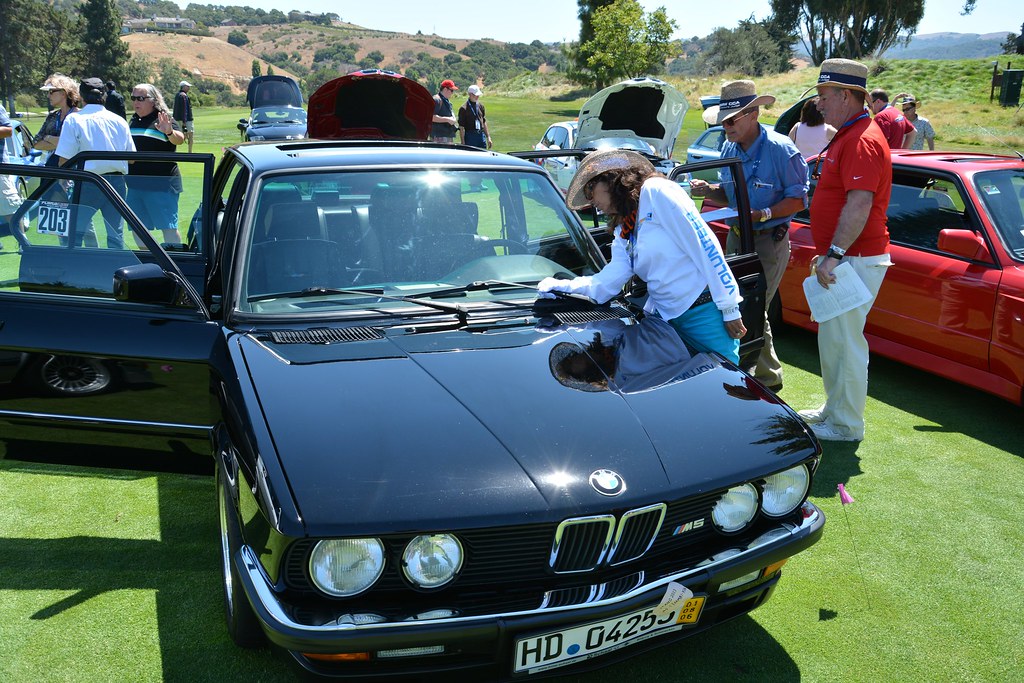
Having never before participated in a legit Concours, I was a bit unprepared at the level of cleanliness expected by the judges. Here is a snap of one of the judges checking UNDERNEATH my wiper arm... who does that???
DSC_6889 by ericandshovin, on Flickr
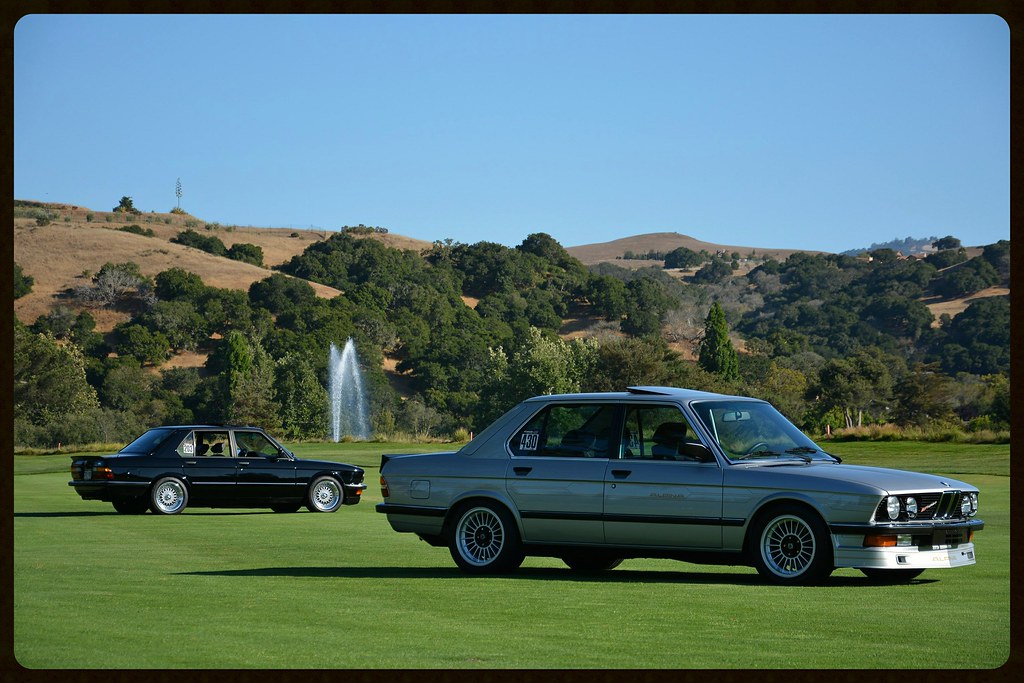
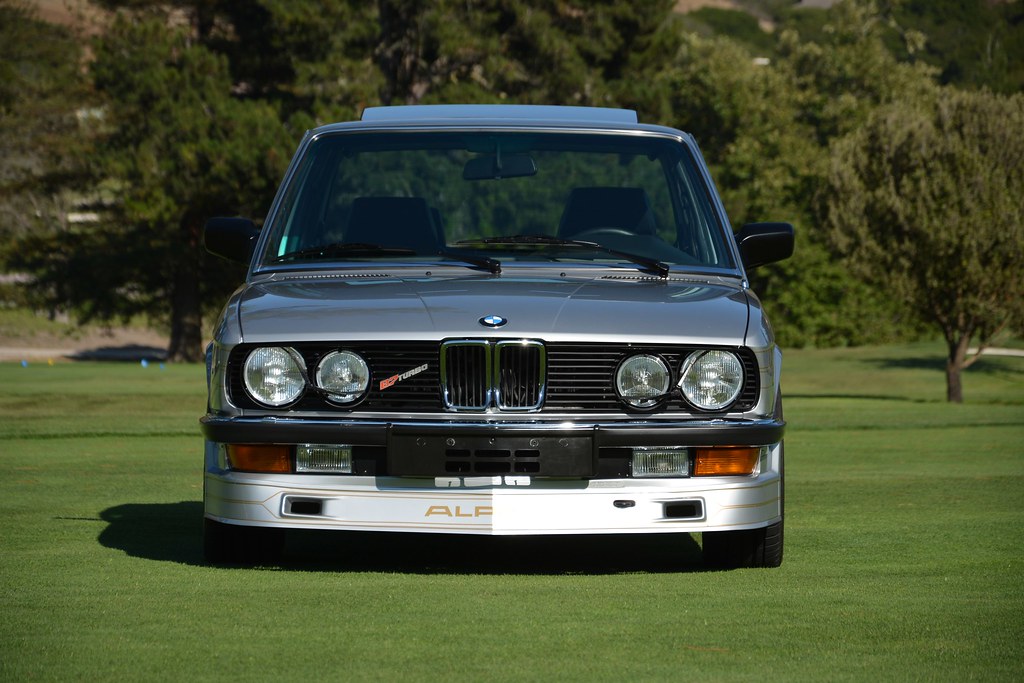
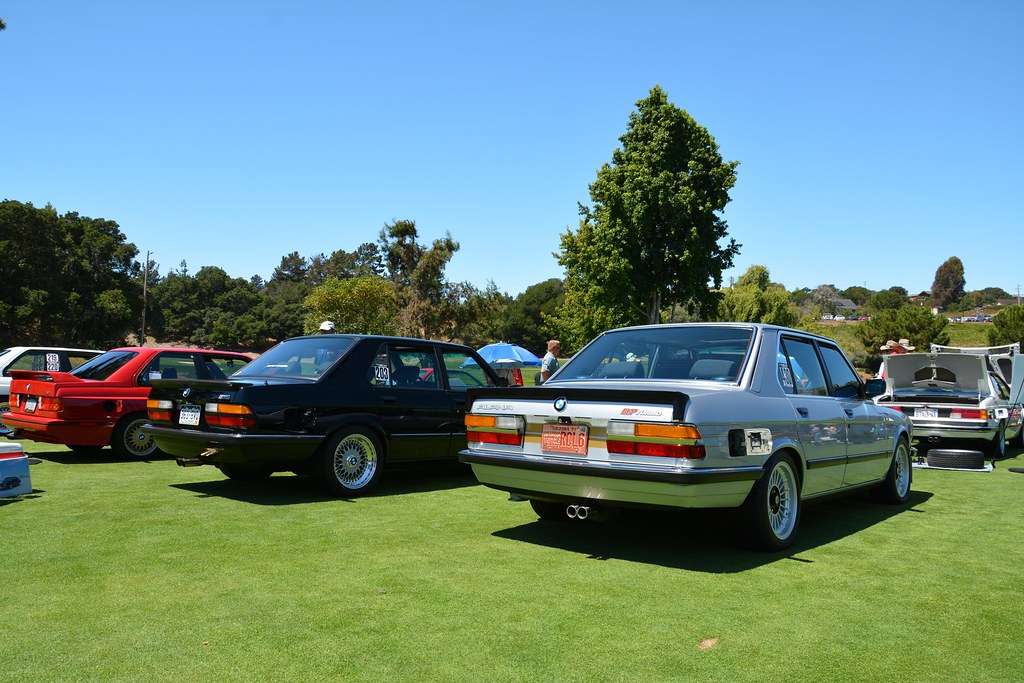
I was fortunate (or unfortunate as I was judged after him) to park next to Chris Kohler's incredibly nice Alpina B7. Chris is a cool dude that knows just about everything possible about E28's and is a joy to chat with.
DSC_6885 by ericandshovin, on Flickr
After the judging was done, I meandered through the other cars completely exhausted from the nutty amount of toothpick cleaning I had just done for the past few hours. Quite a few cool cars were in the display only area, and to be honest were far nicer than many of the concours cars... mine included.
For instance this Sport Evo. Yes. Sport Evo!
DSC_6917 by ericandshovin, on Flickr
DSC_6918 by ericandshovin, on Flickr
DSC_6922 by ericandshovin, on Flickr
DSC_6920 by ericandshovin, on Flickr
As I was admiring the Bavarian Iron, I heard my name and another name being announced on the loud speaker. Once I made my way up to the announcer tent, I was told that our class had a tie and I had to remove my license plate to check the cleanliness behind the plate. WTF?
Myself and a 635csi owner then preceded to remove our plates under close supervision of a few judges who were making sure we didn't sneak a quick wipe down before inspection. I had to break out the red handled screw driver out of my tool kit in the trunk so I didn't watch the 6er driver remove his plate, but apparently a cloud of dust wafted the air as he removed his plate; presumably for the first time in years. By this time a large crowd had gathered (ok 10 bystanders) and a gasp of oooh's and aaaah's fell over the crowd as my plate was removed. The nice lady judge with white gloves then ran her finger across the rear panel and gave the Obama not bad face as she looked at a totally white glove.
Now I'm not OCD and clean behind my license plate on purpose, I just got lucky! Only a day before did I remove it to give the polisher better access to the paint seen on either side of the license plate. Since there it was easier to run the polisher over the whole panel, I cleaned it out of shear laziness over being detail oriented!
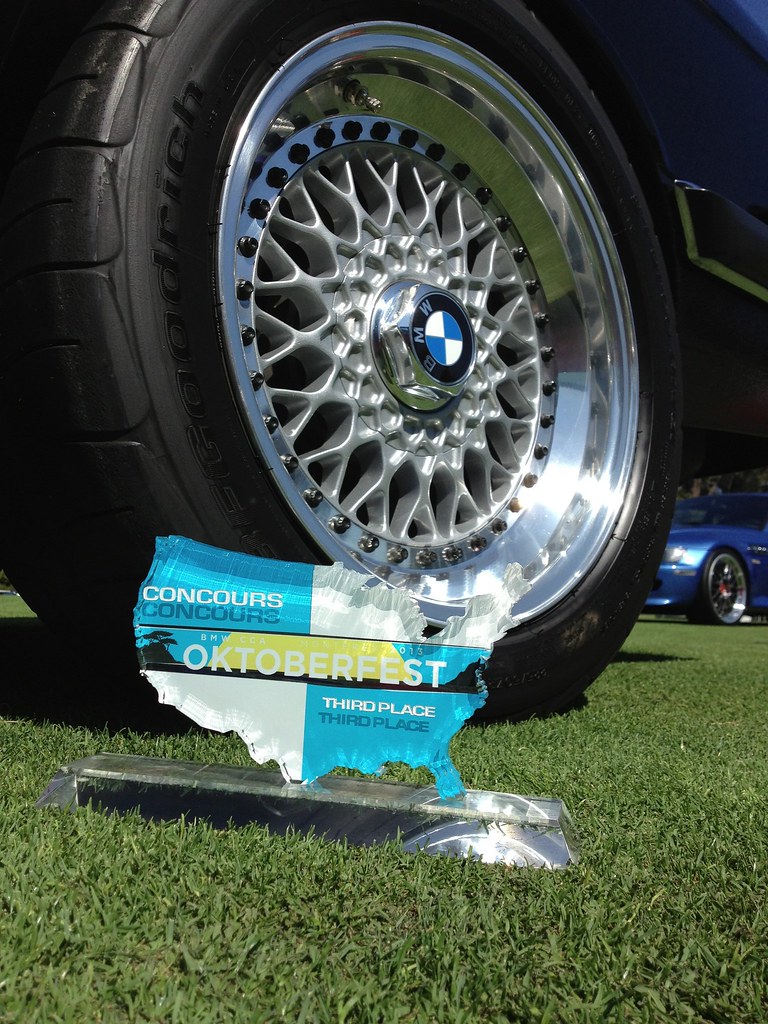
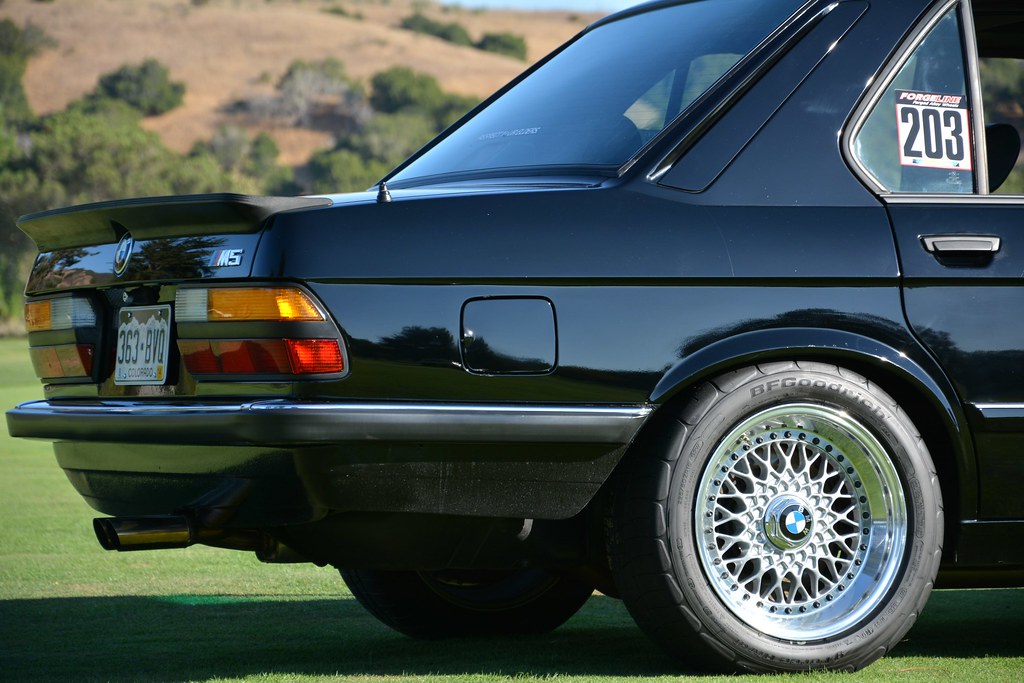
The result? Squeaked a 3rd in class finish, not to bad for my first try at a car show of this level!
IMG_2717 by ericandshovin, on Flickr
After the awards ceremony we had dinner at the swanky clubs restaurant, and I grabbed a few pics of the M5 and the B7 before heading back to the Hyatt for a top secret exclusive meeting.
B7 & M5 by ericandshovin, on Flickr
DSC_6944 by ericandshovin, on Flickr
DSC_6961 by ericandshovin, on Flickr
DSC_6972 by ericandshovin, on Flickr
BMW made a big hoopla about inviting Oktoberfest attendees to an ultra exclusive unavailing of a new car. I'm not even sure they said it was going to be a car unvail, but BMW is a car company so I could have made an assumption there. Anyway we had to be at the hotel at 6pm sharp where I and about 499 other "exclusive" attendees were bussed over in 30 passenger airport shuttles to a warehouse. Said warehouse was fitted with all the right PR stuff; Previous generations of the model being unveiled, hot local waitresses hopping to become models offering oddly named food on a platter, way to loud DJ complete with flashing lights, and a wet bar. If I knew I didn't have to drive later I would have taken full advantage of the bar to hopefully block out some of the cliche, but unfortunately I limited myself to just one. Bummer.
After some BMW execs made a few comments, and they described a brief history of each car (Really necessary? I'm sure every BMW CCA member knows about the M3 by now), the pulled the satin cover off the new baby puke yellow M4 concept car. Yes, the one that was Debuted just a few days earlier at pebble beach and the one that will debut again at the Detroit Motor Show in a few months. I won't complain about how huge it is, how the name is an abomination of the M3's heritage, or how silly it is to debut a car more than once in todays world with such fast global information sharing. I just think it's ugly.
DSC_6979 by ericandshovin, on Flickr
The afternoon of Concours, and evening of noise just reaffirmed in my mind what I've known for so long. I like the old stuff. The right stuff.
Next up, photo dump of stuff I found interesting at the Concours.
Cleaning cleaning cleaning...
IMG_2632 by ericandshovin, on Flickr
I felt I had neglected the M5 for a bit of time, using the do-it-yourself carwash instead of hand washing with the 2 bucket method, not waxing it for far to long, leaving it outside last winter while the E30 was broken in the garage, etc, etc. Like I said earlier, I went way to long without waxing the car, and it was starting to show. As stated below, it was easily noticeable that the paint looked different in areas, this was nothing other than lack of care on my end.
I now have a solid answer for you. The rear firewall and quarter pannels and c-pillar are two stage along with both front fenders, passenger front door and front valance. The hood, roof, trunk and remaining doors are all original paint.i'm curious about your rear passenger door -- is it single-stage schwarz or some other color?
I made arrangements with my good friend Rich to do some paint correction when I got out to CA. We were both stationed in Germany together and he used to use my garage to detail cars on the weekend. If your in the San Jose/bay area, definitely check him out! https://www.facebook.com/pages/Lees-Per ... 5648228002
418666_4452978480374_1465982421_n by ericandshovin, on Flickr
Before the drive out to CA though, I figured I could scrub down all the leather on my own. Most of the interior was out due to the stereo ambitions Anyway, so cleaning all the nooks was far easier while out of the car.
I used Fiebing's saddle soap to clean the leather, and Lexol conditioner to rehydrate the hide. I got decent results, but next time I'm going to try Color-Plus products. On a side note, the Fiebings spray bottle is by far the best spray bottle I've ever used!
IMG_2636 by ericandshovin, on Flickr
Here is a before after with the cleaner/conditioner. Untouched is on the right
IMG_2634 by ericandshovin, on Flickr
By the way, there is A LOT of leather in the E28 M5, a lot more than I had realized. Everything below the dahsboard is leather, door cards and of course the seats. I used the entire bottle of Fiebings Saddle Soap on just the one interior!
Also in the mix of it all I removed the lower M5 front spoiler and plasti-dipped it. A previous owner had painted the lower chin spoiler jet black to match the rest of the car instead of the correct flat black. Actually the spoiler should be an unpainted flat black plastic, but since the black plastic M5 tow hooks are NLA, white plastic 535 ones were used and thus the entire spoiler assembly was painted jet black to be consistent in color. Fast forward a few years and the spoiler hand a few scrapes on the bottom due to low clearance situations, and the tow hook covers had become an unmatching flat black & horribly pitted from road debris.
So I sanded the chin spoiler down in the areas with scratches, then cleaned and a can of plasti-dip applied. To me it looks like the OE color the spoiler should be, so I'm quite happy with the outcome!
IMG_2656 by ericandshovin, on Flickr
My while-you-are-in-there syndrome was in pretty good check, limited only to re-dying the rear parcel shelf from faded hue of blue back to black, and having the BBS RS hex caps polished by a local guy.
IMG_2648 by ericandshovin, on Flickr
On the way out to CA, I took a moment to stop at the Bonneville Salt Flats. The shear expansiveness of the salt flats is mind blowing, definitely something any automotive enthusiast should check out. These photo's btw are straight off the camera, my old version of photoshop does not play nice with my new nikon.:dontknow:
DSC_6861 by ericandshovin, on Flickr
Once I got to CA, Rich worked his magic and I tried to help out too!
IMG_2706 by ericandshovin, on Flickr
We spent a good 12 hours on the car, and it really shined up nicely. The right rear door that was dull a noticeably different shade of black wasn't the only spot that really came around. The mirrors were soo dull that I thought they were just black plastic, like a 325e! Rich brought those back to life, and to think that I was considering having them repainted! The back of the trunk lid (part with the badge) was also badly oxidized and shined up very nicely.
Mirror before:
IMG_2710 by ericandshovin, on Flickr
Mirror after:
IMG_2709 by ericandshovin, on Flickr
From San Jose, I tip-toed the M5 down to Monterey and tried to touch as little as I could! The M5 was looking great and I didn't want to accidentally put a last minute scratch or ding in the paint.
Tuesday morning rolled around, and I headed over to the swanky Corral de Tierra Country Club and preceded to be directed past all the great looking BMW's in the parking lot, and onto the golf course greens! I'm not sure if any of you are aware of this phenomenon, I surely wasn't, but a car parked on a green is 67% nicer looking than when parked in a parking lot.
DSC_6895 by ericandshovin, on Flickr
Having never before participated in a legit Concours, I was a bit unprepared at the level of cleanliness expected by the judges. Here is a snap of one of the judges checking UNDERNEATH my wiper arm... who does that???
DSC_6889 by ericandshovin, on Flickr
I was fortunate (or unfortunate as I was judged after him) to park next to Chris Kohler's incredibly nice Alpina B7. Chris is a cool dude that knows just about everything possible about E28's and is a joy to chat with.
DSC_6885 by ericandshovin, on Flickr
After the judging was done, I meandered through the other cars completely exhausted from the nutty amount of toothpick cleaning I had just done for the past few hours. Quite a few cool cars were in the display only area, and to be honest were far nicer than many of the concours cars... mine included.
For instance this Sport Evo. Yes. Sport Evo!
DSC_6917 by ericandshovin, on Flickr
DSC_6918 by ericandshovin, on Flickr
DSC_6922 by ericandshovin, on Flickr
DSC_6920 by ericandshovin, on Flickr
As I was admiring the Bavarian Iron, I heard my name and another name being announced on the loud speaker. Once I made my way up to the announcer tent, I was told that our class had a tie and I had to remove my license plate to check the cleanliness behind the plate. WTF?
Myself and a 635csi owner then preceded to remove our plates under close supervision of a few judges who were making sure we didn't sneak a quick wipe down before inspection. I had to break out the red handled screw driver out of my tool kit in the trunk so I didn't watch the 6er driver remove his plate, but apparently a cloud of dust wafted the air as he removed his plate; presumably for the first time in years. By this time a large crowd had gathered (ok 10 bystanders) and a gasp of oooh's and aaaah's fell over the crowd as my plate was removed. The nice lady judge with white gloves then ran her finger across the rear panel and gave the Obama not bad face as she looked at a totally white glove.
Now I'm not OCD and clean behind my license plate on purpose, I just got lucky! Only a day before did I remove it to give the polisher better access to the paint seen on either side of the license plate. Since there it was easier to run the polisher over the whole panel, I cleaned it out of shear laziness over being detail oriented!
The result? Squeaked a 3rd in class finish, not to bad for my first try at a car show of this level!
IMG_2717 by ericandshovin, on Flickr
After the awards ceremony we had dinner at the swanky clubs restaurant, and I grabbed a few pics of the M5 and the B7 before heading back to the Hyatt for a top secret exclusive meeting.
B7 & M5 by ericandshovin, on Flickr
DSC_6944 by ericandshovin, on Flickr
DSC_6961 by ericandshovin, on Flickr
DSC_6972 by ericandshovin, on Flickr
BMW made a big hoopla about inviting Oktoberfest attendees to an ultra exclusive unavailing of a new car. I'm not even sure they said it was going to be a car unvail, but BMW is a car company so I could have made an assumption there. Anyway we had to be at the hotel at 6pm sharp where I and about 499 other "exclusive" attendees were bussed over in 30 passenger airport shuttles to a warehouse. Said warehouse was fitted with all the right PR stuff; Previous generations of the model being unveiled, hot local waitresses hopping to become models offering oddly named food on a platter, way to loud DJ complete with flashing lights, and a wet bar. If I knew I didn't have to drive later I would have taken full advantage of the bar to hopefully block out some of the cliche, but unfortunately I limited myself to just one. Bummer.
After some BMW execs made a few comments, and they described a brief history of each car (Really necessary? I'm sure every BMW CCA member knows about the M3 by now), the pulled the satin cover off the new baby puke yellow M4 concept car. Yes, the one that was Debuted just a few days earlier at pebble beach and the one that will debut again at the Detroit Motor Show in a few months. I won't complain about how huge it is, how the name is an abomination of the M3's heritage, or how silly it is to debut a car more than once in todays world with such fast global information sharing. I just think it's ugly.
DSC_6979 by ericandshovin, on Flickr
The afternoon of Concours, and evening of noise just reaffirmed in my mind what I've known for so long. I like the old stuff. The right stuff.
Next up, photo dump of stuff I found interesting at the Concours.
Re: My E28 M5 journey
I didn't take too many photo's at the Concours, just ones that really caught my eye. To be honest, in everyday life every car on the green would be photo worthy, but these were the ones that stood out to me.
E31 on turbines.
DSC_6914 by ericandshovin, on Flickr
If BMW ever made a 4 door E46 M3, it'd look like this. Nice.
DSC_6915 by ericandshovin, on Flickr
This 535 was unbelievable! I'm not sure I'd do bronzit wheels on a bronzit car, but the car as a whole was beautiful. I believe he won best novice (novice means you've never won at a BMW CCA event, not new to Concours) and the Concours Modified category.
DSC_6900 by ericandshovin, on Flickr
even the engine bay was spotless!
DSC_6901 by ericandshovin, on Flickr
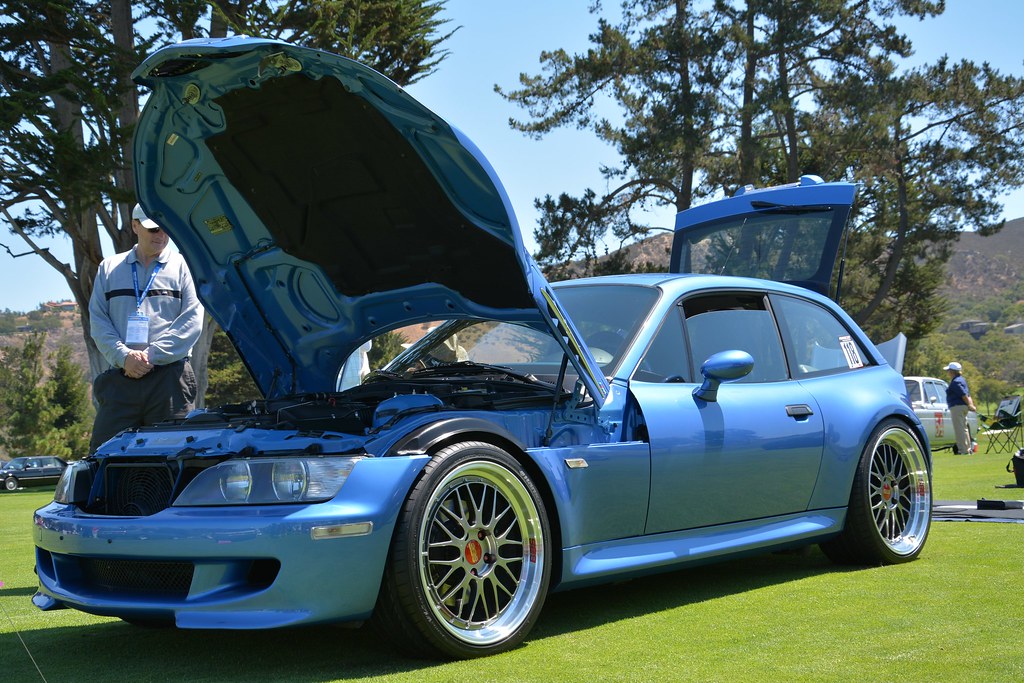
Who doesn't love an Estoril Blue MCoupe?
DSC_6881 by ericandshovin, on Flickr
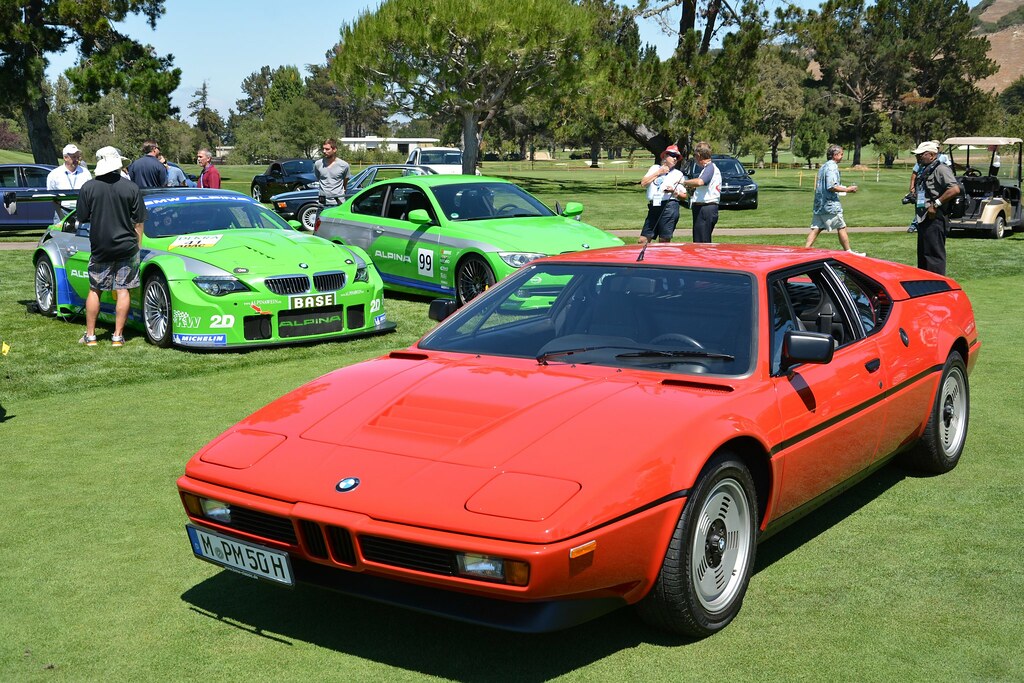
The M1 with the Alpina cars lurking behind
DSC_6905 by ericandshovin, on Flickr
This DTM replica was nicely done, but I think it'd be cool if BMW NA took down it's real 92' car off that ramp in it's museum and showed it off at events like the M1 and CSL. the 2002 race car was neat as well, but I don't think it was ever raced in that livery.
DSC_6903 by ericandshovin, on Flickr
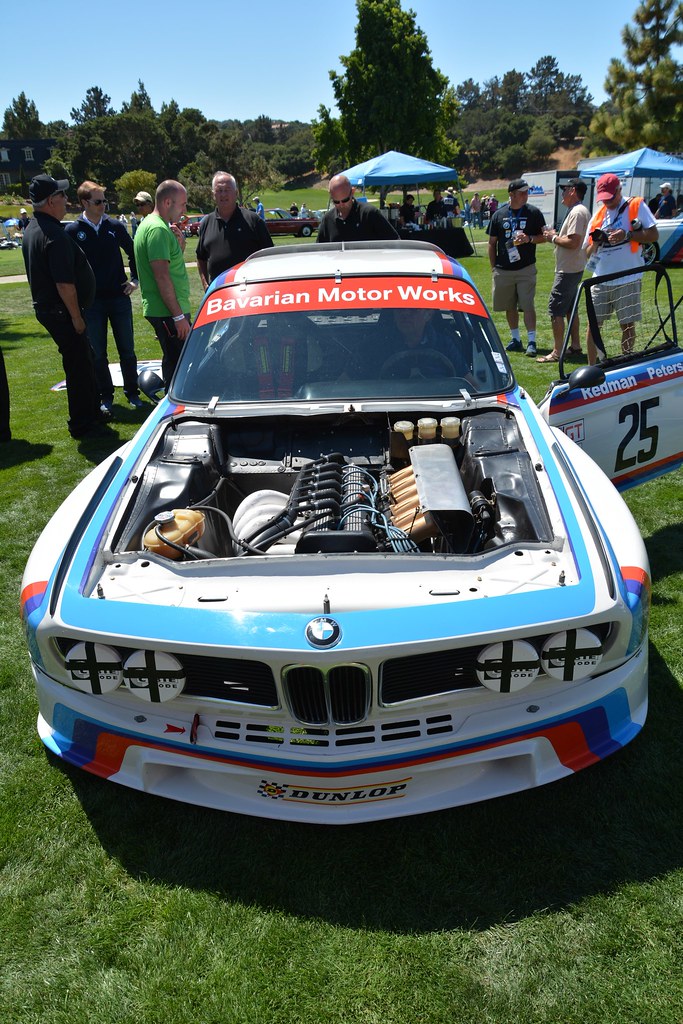
Finally, my favorite BMW race car. If I was the CEO of BMWNA you'd be damn sure I'd drive this thing too (thats Ludwig Willisch behind the wheel)!
DSC_6907 by ericandshovin, on Flickr
Awesome engine bay
DSC_6909 by ericandshovin, on Flickr
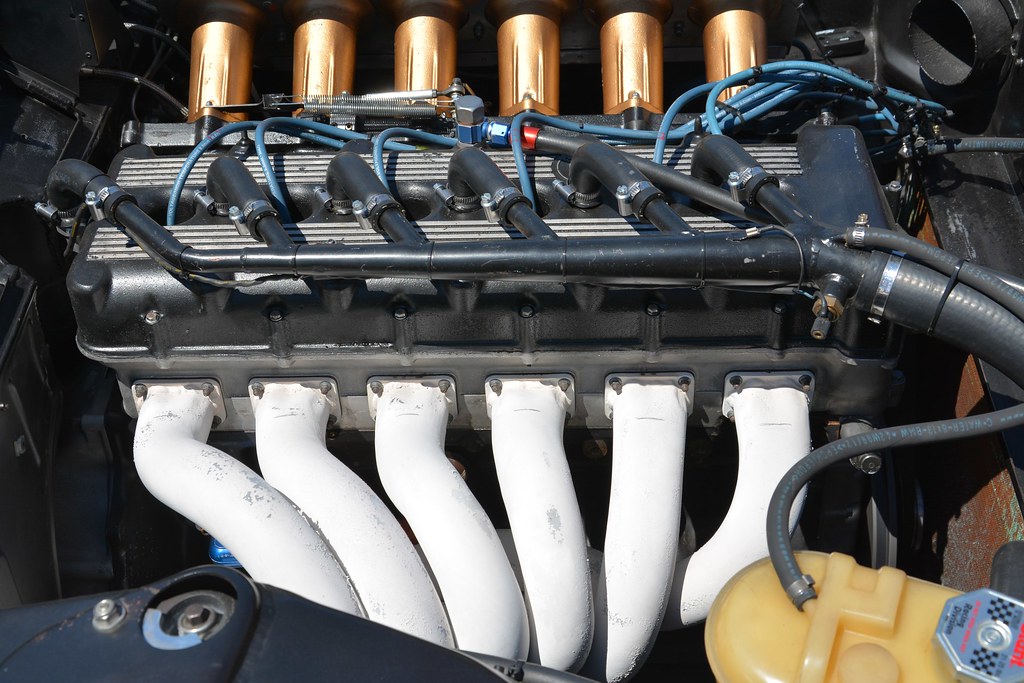
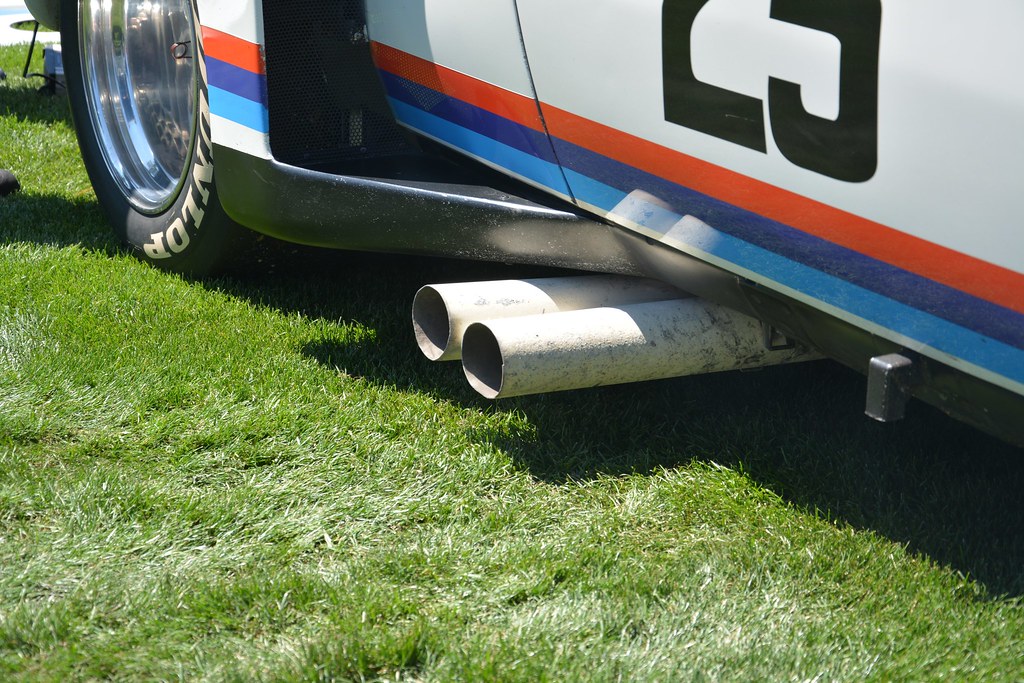
Absolutely love these pipes! If BMW could have offered rides at Laguna Seca in this car, I would have definitely forked over the mandatory donation to do a few hot laps in it!
DSC_6908 by ericandshovin, on Flickr
Next up, TSD rally & autocross.
Re: My E28 M5 journey
21 Aug 2013
Unfortunately I have no update for the TSD Rally. Jim Bair and I were planning on running the TSD rally together, but about a mile from the launch point of the rally, the M5 decided to quit. A very expensive tow and some stern words from the CHP officer who happened to stop by resulted in a return to the hotel.
IMG_2721 by ericandshovin, on Flickr
Luckily, Jim is incredibly nice man, who know's a good amount about old BMW's. His M6 and M535 are time capsules and kept in exceptionally clean shape. About 2 hours of fiddling with fuel pumps, relays, fuses, caps, plugs, etc. I clunked my knuckle against the ECU out of frustration... And the car came to life!
Great, we know the problem, but now how to fix ECU solder joints again? Google and a half dozen phone calls returned one guy in the entire Monterey peninsula who still works on electronics. I rang him up, told him my sob story and in no time we had the ECU dropped off at his place with a guarantee of it being done in a few hours. To waste a bit of time we had a bit of clam chowder on the pier, and had a look at all the million dollar machines being loaded up after auction week.
IMG_2723 by ericandshovin, on Flickr
IMG_2726 by ericandshovin, on Flickr
IMG_2722 by ericandshovin, on Flickr
Re: My E28 M5 journey
22 Aug 2013
Autocross:
go pro shot by ericandshovin, on Flickr
I don't think I compiled a video of the auto-x course, but it was tiny! The San Diego chapter did a good job putting on the event and working with the small paddock of Laguna Seca as the course site. Not sure who's desk it lands on, but there were a few last minute schedule changes that were not well advertised and caused two issues for the Thursday participants (non M3 cars). 1. Some people showed up at the wrong time not knowing the day was split into two heats. 2. Because the day was split in two, not very many runs were part of the competition. In the end, it's a fun, friendly event and those things shouldn't matter... except FTD (Fastest Time of the Day) wins a set of Bridgestone tires! That's my version of black gold, and I had gold rush fever!
Unfortunately for the M5, a tiny tight course is not it's strong suit, and a little MINI on Hoosiers cleaned up the competition pretty easily. I finished first in my class and I think 5th overall after both morning and afternoon runs were tallied up. Here are the results after just the morning runs.
IMG_2733 by ericandshovin, on Flickr
There are a few snippets of the M5 in action on BMWCCA's video! http://vimeo.com/79344049
Re: My E28 M5 journey
23-24 Aug 2013:
HPDE @ Laguna Seca.
I must be honest, the deep clean the M5 received, the day on the golf course, the auto-x were all fun, but the reason I drove 1,300 miles was really only for one reason... Mazda Raceway Laguna Seca.
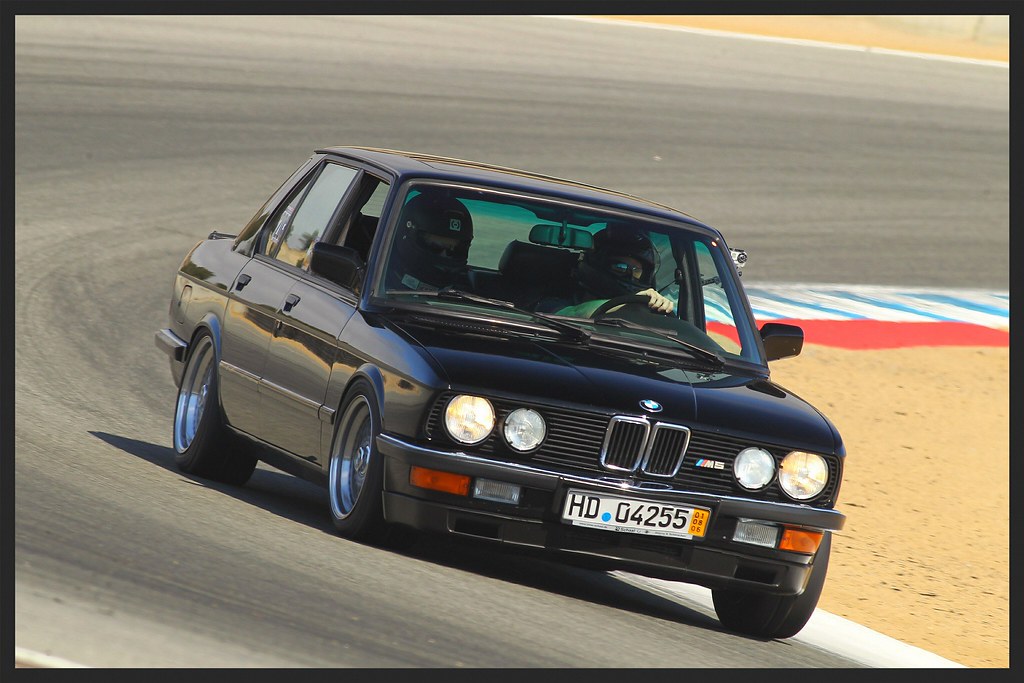
The M5 was an HPDE champ, and hunting down E46 M3's and even closing the gap on E90 M3's was a blast. I'm probably making every driving instructor reading this cringe reading that last sentence, but honestly, the capability of this old car is truly astonishing! I learned a ton in the two days of instruction and the M5 never missed a beat.
Looked pretty good too.
A64F5571 by ericandshovin, on Flickr
A64F6785 by ericandshovin, on Flickr
A64F0382 by ericandshovin, on Flickr
A64F3067 by ericandshovin, on Flickr
And a vid! http://youtu.be/ycl8RIaJB7U
https://www.youtube.com/watch?v=ycl8RIa ... gwUivzMeKw
Re: My E28 M5 journey
17 Nov 2013:
Gentleman Drivers,
Recently I installed a Miller 3rd gen MAF & WAR chip combo in my E28 M5. I thought I'd describe the install and a few bumps I found along the road. Miller's instruction manual is good, but little bit dated now and some of the installation is different than described.
I'll break up the install into a few different categories since the installation covers a few different areas of the car.
-MAF Installation
-WAR chip Installation
-Wiring modification
-Programing the WAR chip
-Things I didn't know before the project began
-Initial impressions
Below is what Arrived after a decent wait (ordered in August, arrived in early November) as Miller apparently is having a hard time with production keeping up with demand. I think there are worse situations in this world than too much demand!
-Miller WAR chip (quality piece!)
-Millers custom 4" MAF that plugs straight into the old AFM plug.
-4" to 3" silicone reducer made specifically for the gap between the MAF air plenum.
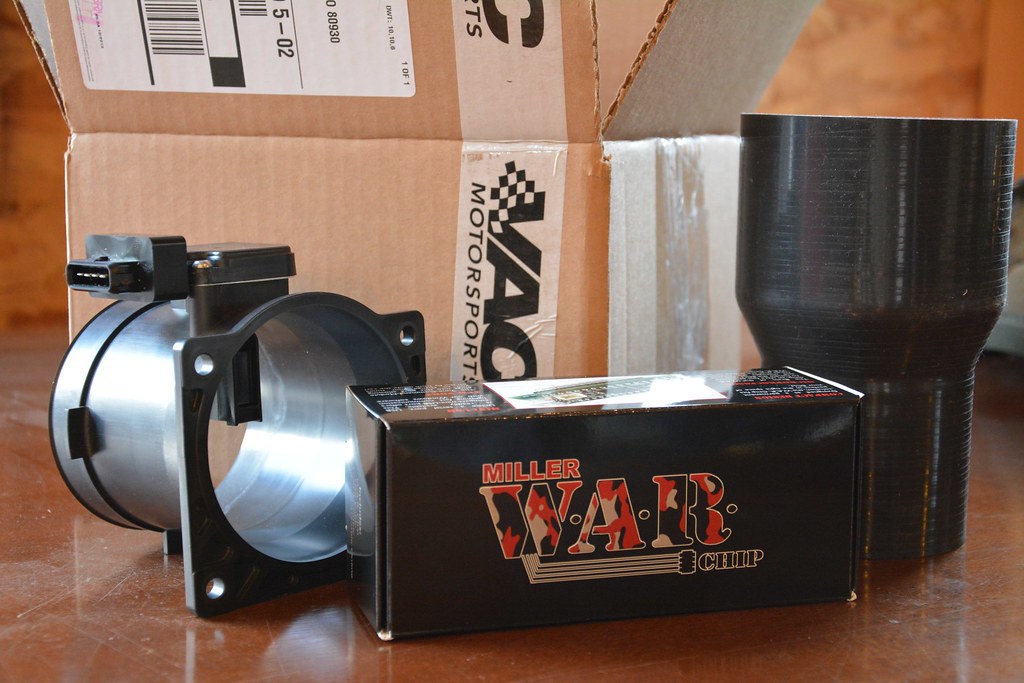
DSC_7534 by ericandshovin, on Flickr
The old bits before the tools come out.
DSC_7535 by ericandshovin, on Flickr
MAF Installation:
Removing the airbox and AFM is quite simple. Undo two hose clamps, remove the plug connecting the AFM to the engine harness, and undo a 10mm nut on the right side of the airbox. The most difficult part of removing the airbo/AFM is the coolant return lines get in the way a bit. You can wiggle around them, or just remove the hose connected to the coolant reservoir to gain more access. I am terrible at installing those push lock hose clamps, therefore I elected to wiggle the whole assembly around the small coolant lines.
Once you remove the airbox & open it up, you can see exactly what the S38 breathes through in stock form.
DSC_7540 by ericandshovin, on Flickr
I didn't want to just go buck-wild with a grinder, so I made a little template using a sharpie and an old document envelope to trace out the MAF. This type of cardboard is thin enough to easily cut, but stiff enough to keep it's form. Cereal boxes work well for templates too.
IMG_3506 by ericandshovin, on Flickr
Cut out with a razor blade, and compared to the AFM's gasket.
DSC_7541 by ericandshovin, on Flickr
Comparing the template to the original opening it becomes clear that the new MAF is significantly larger than the OE AFM. The internet can argue until it's blue in the face whether or not the S38 should have a 4" MAF or a smaller one. I'm not an engineer and have not studied fluid dynamics so I'll reserve judgment.
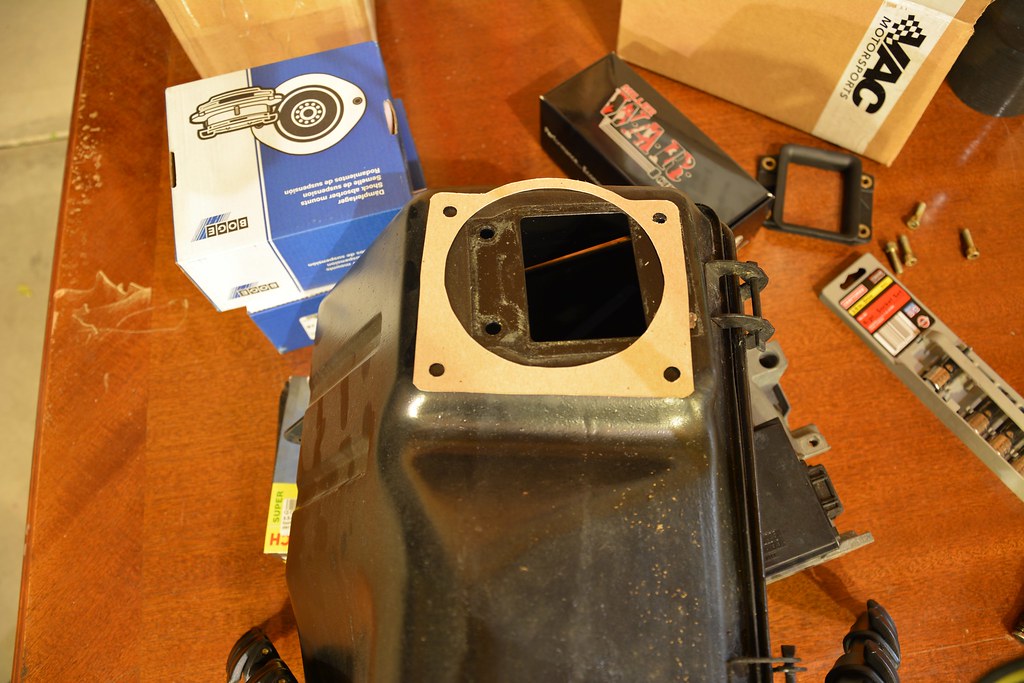
DSC_7542 by ericandshovin, on Flickr
After the initial cut using a dremel, I was a bit conservative, so a little bit more needed to be trimmed. To cut the metal I used the cutoff wheel to remove a bulk of the metal, and the "561 Multipurpose Cutting Tool" to trim it down to size making sure I kept my fingers well clear of the spinning digit shredder.
DSC_7544 by ericandshovin, on Flickr
Once the big hole was cut, I drilled 3 new holes for the bolts to secure the MAF to the airbox, and made a quick trip to Lowe's to grab some new M6 nuts and bolts that were the correct length. Lowes/Home Depot's metric selection is usually quite terrible, but in this instance they had some nice black bolts with washers already attached in the "automotive" drawer. To me, this makes the install look more OEM and draw less attention.
To seal the MAF to the airbox, I used a bit of black permatex gasket maker and bolted it all together letting it sit overnight. I have a 1 year old and a 4 year old so my garage time is usually pretty limited.
IMG_3258 by ericandshovin, on Flickr
The next afternoon I put a new BMW air filter in the airbox and got to work sticking it all back together. The neat-o silicone tube is much much stiffer than the rubber boot it replaces, so putting the airbox + MAF + tube was nearly impossible. I found that if you shoved the 4" side as far up the MAF as possible (past the moulded in stops) it helped tremendously. To get the 3" side onto the air plenum I did my best shoving & twisting the tube onto the intake opening until most of it was on. Then I pulled out my harbor freight dental pics and started pulling and prodding the last bit of the silicone tube onto the air plenum. It was not simple since the silicone is so stiff, but with a bit of determination, It finally slipped on.
I was a bit short on pictures for the installation, but here is the finished product. Also, notice the coolant temp sensor hanging off the side of the radiator. If you get too rough with wedging the airbox back in it's spot, this can crack the radiator resulting in an expensive mistake.
DSC_7598 by ericandshovin, on Flickr
Now the astute reader might notice that the plug for the MAF is on the opposite side compared to the AFM plug. As you can see below, there is not enough cable to easily connect the MAF to the factory harness. Pulled very tight it will physically connect, but I do not trust it as a long term solution.
DSC_7600 by ericandshovin, on Flickr
So a trip to the U-Pull-N-Pay junkyard was in order, and I came up with these guys from a donor E30 325iC. The pin layout for the AFM on the M20/M30/S14/S38 is all the same, so a few snips, a couple of screws removed and my extension cable idea was becoming a reality. As a side note, I found it sad that there was only 1 80's vintage BMW in the lot. 5 years ago old BMW's in yards was much more popular.
DSC_7546 by ericandshovin, on Flickr
A bit more of Dremel "561 Multi Cutting Tool" trimmed down the AFM side connector, a terrible attempt at soldering, and some harbor freight heat shrink resulted in this little beauty.
DSC_7603 by ericandshovin, on Flickr
And here is the final product tucked in nice an happy.
DSC_7604 by ericandshovin, on Flickr
WAR Chip Installation
Moving on to replacing the factory 28 pin e-prom that controls fuel & timing tables with the sophisticated WAR processor. This process is no harder than replacing the factory chip with a Mark D or Conforti chip, but it does have a few extra steps that isn't needed with a conventional chip replacement .
The WAR chip is not specific to the S38 or any other engine like a normal performance chip would be. To make the chip unique to your motor, you must load tunes onto it using the supplied USB cable and software provided by Miller (more on that later). You can load the tunes either before or after the chip is installed in the ECU.
Pulling the ECU is pretty straight forward. Open the glove box, remove the leather flap to expose the ECU. Remove the four 10mm bolts holding the ECU to the dash, and disconnect the wire harness by pushing on the silver metal tab on the firewall side of the ECU (grab a flashlight if you cannot feel it).
Once the ECU is out of the car, use a small flat head screw driver to pry the 10 tabs up.
DSC_7569 by ericandshovin, on Flickr
Once I get them up a bit, I use a set of needle nose pliers to pull them straight up. You can accomplish the same results with just the screwdriver, but this is easier. Caution that the tabs aren't bent too far back as they can break easily.
DSC_7570 by ericandshovin, on Flickr
The circuit board is visible once the cover is removed and you can see that it is actually two separate boards with a bit of ribbon cabling connecting the two. The chip is on the top board, so separating the boards is the next step. No need to remove any screws, just pop the little plastic stanchions on either side of the ribbon cable. Place your fingers on either side of the stanchion and gently apply pressure up and down evenly until it pops, then move to the next one. Being delicate here is important since these parts are NLA.
Before:
DSC_7575 by ericandshovin, on Flickr
After:
DSC_7576 by ericandshovin, on Flickr
Next, you need to depress the two tabs holding the circuit board up against the black plastic connector housing. Here you can see the tabs after the circuit board has been removed.
DSC_7578 by ericandshovin, on Flickr
These are the tabs before removing the circuit board. To release them, use your flathead screwdriver and depress one while simultaneously gently prying the edge of the circuit board away from the black plastic connector housing. This is where a third hand comes in handy.... While maintaining enough pressure to prevent the tab from snapping back into it's place, depress the other tab and gently pry the other side of the circuit board.
DSC_7595 by ericandshovin, on Flickr
Once both tabs have been depressed pull the circuit board away from the black plastic connector housing to reveal the guts of your ECU! As you can see my car was already running the Jim Conforti/Turner Performance chip. A solid upgrade in it's own right and much better than the Dinan chip that was previously in the car.
DSC_7579 by ericandshovin, on Flickr
Gently pry the chip out of it's socket taking care not to bend any pins. Then place the Miller WAR chip in the old chips place. There is a 1/2 circle notch on the WAR chip that needs to be lined up with the 1/2 circle detent on 28 pin receptacle. Both the notch and the detent are visible in the picture below
DSC_7585 by ericandshovin, on Flickr
Now your war chip is installed! At this point you can either button everything back up (basic reverse of disassembly) and the WAR chip will function like the chip you just replaced running solely on the default map (we'll get into that later) or you can hook up the cables to truly get the maximum potential out of the WAR chip.
DSC_7586 by ericandshovin, on Flickr
Two cables accompany the WAR chip. A USB cable that allows you to hook a Windows XP laptop up to the chip and a TCM (Tune-Control-Module) knob that allows you to select 4 different tunes. Plug the cables into the designated ports on the WAR chip as shown below.
MINI USB:
DSC_7587 by ericandshovin, on Flickr
TCM:
DSC_7588 by ericandshovin, on Flickr
Together (playing around with my 50mm 1.4 lens...)
DSC_7589 by ericandshovin, on Flickr
However these cables do no good if they are not accessible. To be able to actually use them, you need to drill a hole in the side of the metal ECU case. Another trip to Lowe's netted these nice rubber grommets to keep the wiring from chaffing on the metal case. Miller sells a grommet for about a buck which is probably a better piece than my Lowe's one.
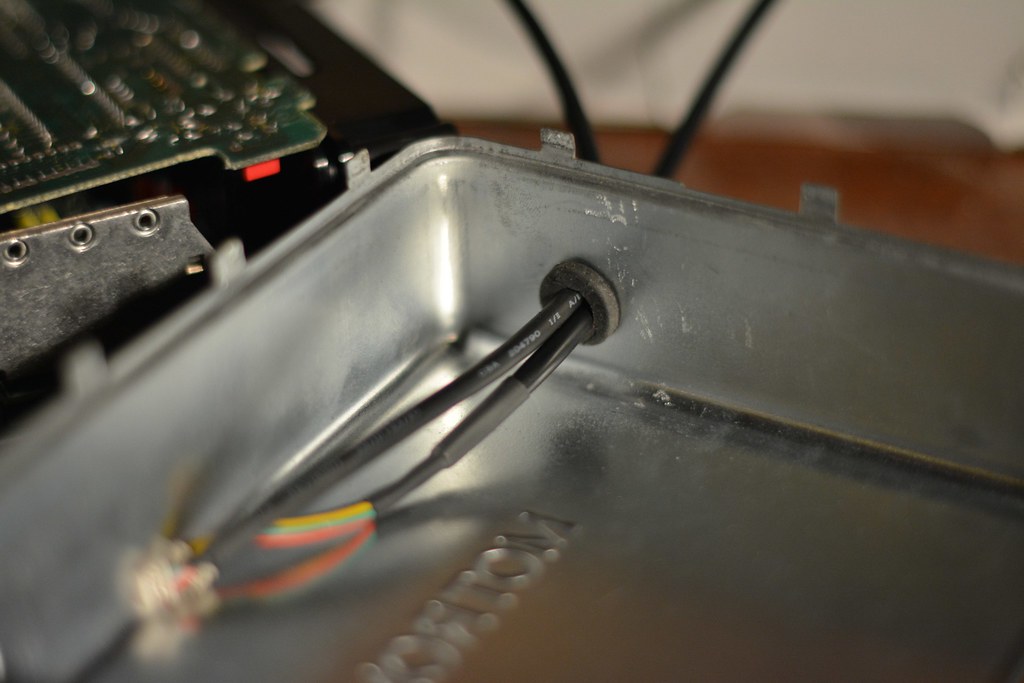
DSC_7592 by ericandshovin, on Flickr
I chose to drill the hole in the back of the case as that seamed like a less congested area of the circuit boards. Routing the wires in the most direct configuration didn't look that good to me as it would be resting on different components that more than likely get quite hot. Once I drilled out the hole to the appropriate size, installation of the circuit board and case was a simple reversal of disassembly. The extra wiring made it slightly more cumbersome but not difficult.
Wiring modification
The final piece of the puzzle before you can put it all back together involves a bit of soldering. It is not difficult, but does require permanent modification to the wire harness. Take your time reading Miller instruction manual and double checking that you are cutting/modifying the correct wires!
The large connector that the ECU plugs into needs to be modified a little bit to ensure the MAF talks to the ECU correctly. Millers directions work well here, but their pictures are from a different car.
To remove the cover and expose the wire harness, first remove the small screw at the end of the harness, then clip the zip ties at the back of the harness where the plastic cover meets the factory electrical tape. 223,000 miles of use made my tape a bit stubborn and I had to persuade it with a box cutter to free up the plastic cover.
Once the cover is free you need to slide it away from the harness and the pin-out area. I put my flathead screwdriver in the gap between the pin-out and the cover and pry'd it apart a little bit. Below you can see the opening that is created as the cover starts to slide.
DSC_7555 by ericandshovin, on Flickr
Slowly work the cover off until it slides completely off.
Once you have removed the cover you need to locate two cables. One is located at pin 9 and the other is pin 35. Miller specifies multiple times that the wire color is often what they described, but not always. My S38 powered M5 was exactly as they described.
Pin 9 is usually a grey/white wire
DSC_7558 by ericandshovin, on Flickr
And pin 35 is red/blue (note, another wire nearby looks similar but is blue/red so ensure you get the correct one!).
DSC_7568 by ericandshovin, on Flickr
After you locate the wires highlighted above, cut the wire that belongs to pin 9 and connect it to the wire that belongs to pin 35. I used a t-joint and a crimp connector to make the wiring modification because I plan to dyno tune the car in a month or so. During the dyno session I plan on reverting the car back to stock to see if there is a measurable difference between stock/Miller MAF/custom dyno tuned Miller MAF.
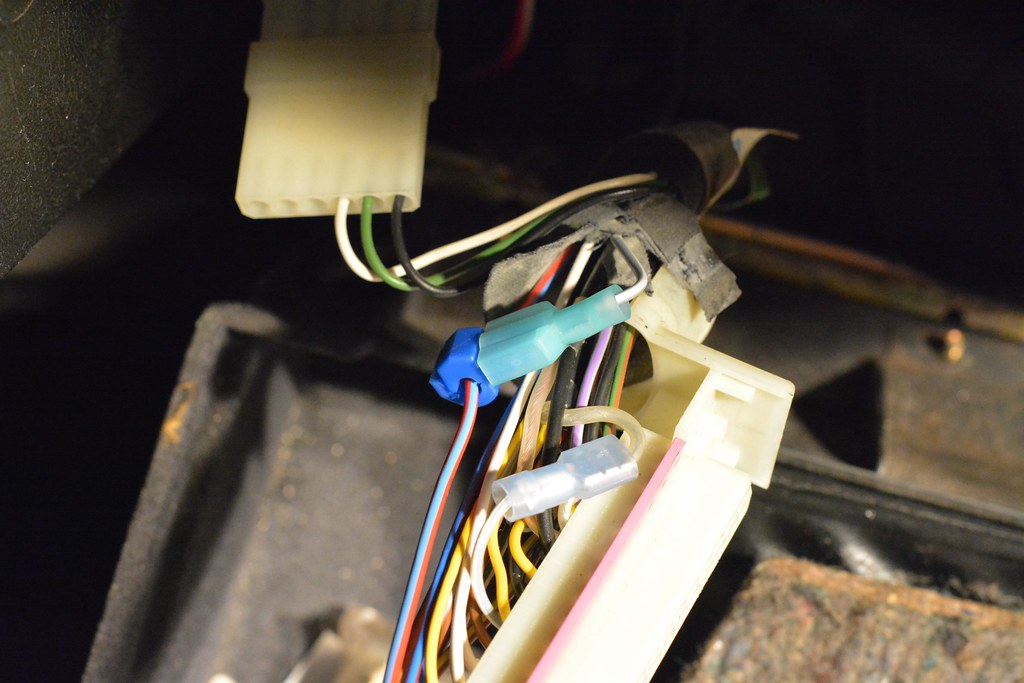
DSC_7567 by ericandshovin, on Flickr
The above method works, but is FAR to bulky to allow the plastic cover be re-installed and I will be soldering this connection together after the dyno session has happened.
Once you have finished the solder job and taped up the new joint, put everything back the way you found it ensuring none of the wiring becomes pinched as you put the cover back on. Reconnect and reinstall the ECU as this part is finished!
[b]Programing the WAR chip[/b]
I am not a huge computer person. Not to say that my googlefu isn't impressive, I'm just not that great with software anomaly resolutions. Once I acquired a laptop and installing the appropriate programs, I was able to pull up Millers software program and create my own chip.
I set the ECU type to the S38's 079, and loaded 4 tunes. Miller has a few video's tutorials that explain how to program the chip as well as how to modify it. I'd highly recommend you watch their vids as it really helps out!
Things I didn't know before the project began
I thought I had done my due diligence before beginning this project, and although I read the S38/M88 installation instructions on Millers site & many articles on forums; I still found a few things that bothered me a little bit with the kit.
-Miller states, "You may need to trim the opening to get the full 4” benefits."
--Trimming is an understatement! So much of the airbox was cut away, I will no longer be able to use it if I wanted to revert back to the stock AFM. If for some reason I ever want to go back to stock, I will need to purchase another airbox.
-Millers MAF instructions show an older (I'm assuming GEN II) normal looking chip in their S38 instruction manual. You must read the Miller WAR instructions for WAR specific instructions.
--It would have been nice if the MAF installation guide reference the WAR instruction PDF for the users that are installing the WAR chip instead of the regular GEN III chip. I thought I had read up on everything pertinent, but I missed a pretty big chunk of useful information!
-Handy links that I wish I had found earlier
S38 MAF install: https://www.millerperformancecars.com/f ... GENIII.pdf
-WAR chip install: https://www.millerperformancecars.com/f ... Manual.pdf
-Software tutorials (very helpful to me): http://forums.millerperformancecars.com ... topic=48.0
-Windows XP computer (laptop) required.
--Since I did not read the WAR instruction PDF until day 3 (kids take up a lot of time) I did not know that only XP computers could be used with Millers proprietary software. I've been virus free on a macbook for the last 4 years, so I was a bit bummed that I'd need to start hunting down an old laptop on craigslist instead of testing out the M5 later that evening. Luckily a co-worker had an old laptop that soon became mine for a delightful $15.
-Java is required
-- If you have recently acquired a co-workers laptop, make sure you have Java installed. Millers software does not work without it...
-MAF plug wrong side.
--I'm sure Miller uses the same MAF for multiple applications, but having to make an extension plug is a bit annoying. An E30 M3 friend of mine says he needed to make the same thing for his install.
Initial impressions
I've driven the car exactly twice since installing the MAF and the car feels pretty good. I don't notice a gigantic increase in power over the AFM/Jim C combo but throttle response does feel quicker. This could be all in my head too, but RPM's seam to fall quicker when lifting.
Currently it's cold here in Colorado, and the car starts and idles nicely with no indication that your running anything other than OEM components. A few of the tunes I have tried out had problems with very small throttle inputs. An example is driving at 50mph with the cruise control on and the grade of the road increases slightly. The car stumbles for a bit before regaining composure. Or at idle, a blip of the throttle causes the RPM to drop and engine stumbles. One of the tunes runs fine, and I haven't messed with the others since.
I'll continue to add to this review as I drive the car more, hopefully with a bit of track time later this month, and a dyno session before the year is over.
Re: My E28 M5 journey
Reading back through old threads, I now realize that I never posted my Dyno results! I wrote this little article for our local chapters newsletter. Either I never finished it, or it got lost in an editor shuffle... not sure which, but none the less, it's cheesy and your free to read it or scroll to the dyne plot at the bottom!
Making old new again.
New is nice. New food is almost always better than left overs (except spaghetti for some reason). New clothes get worn while the old duds sink to the bottom of the dresser. My newish MacBook is ages better than the 10 year old laptop it replaced. So why then do new cars come and go in my life but old ones seem to stick around for the long haul? I've wondered this many many times in years past. Our MINI Clubman was fantastic, doing everything our growing family could possibly need from it. The GTi before it was also lovely. The F11 530d I drove extensively in europe was exquisite... nothing better than cruising at 220kph with the fuel economy of a Prius.
My 1988 M5 turned 26 in November, hardly new, and if you measure car years similar to cat years, this old girl should be in the golden age of her life. I don't drive the M5 every day, but every time I sink behind the wheel, my bond with the Garching creation grows deeper. This summer I was lucky enough to take the M5 to Monterey for the 45th annual BMW CCA Oktoberfest, and one of the many great things to happen at this event was experiencing the M5's powerplant at sea level. Oh. My. Goodness. Experts say your loos 3% for every 1,000 feet of altitude. The seat of my pants tell me that the S38B35 is much more responsive and lively at 10 feet above sea level than Colorado Springs 6,035 feet above sea level.
Since returning to the mountains, I've been craving the power I felt ripping around Laguna Seca and carving a few lonely backroads in the coastal mountains. To do this, I decided to add some new technology by way of Miller Performances MAF conversion and custom dyno tune from MAC Autosport in Parker CO. The M5 and most BMW's built in the 80's came with an air flow meter (AFM). This is basically a barn door that is spring loaded shut. Engine vacuum sucks the door open and a potentiometer at the top of the door measures how much the door has moved. The more it opens, the more fuel is given. The boy at Miller take the AFM and chuck it in the trash, replacing it with a giant 4" mass airflow meter (MAF), and a new eprom called the W.A.R. chip. Most cars up to 1996 can benefit from the W.A.R. chip custom tuning ability.
The MAF/W.A.R. chip install was pretty straightforward. only a bit of airbox trimming and 1 wire rerouting were needed. After installing the Miller setup, I honestly didn't feel much performance difference over the factory AFM with a Jim Conforti chip installed. The motor ran well, but still felt a bit lethargic and lazy. Luckily the front range is blessed to have a great tuner in their backyard. MAC Autosport has a AWD Dynojet dynamometer able to handle anything under 1800hp and their tuner, Nick, is a bit of a BMW gear-head. He currently owns a 400 something horsepower turbocharged E34 535i and another turbocharged S50 swapped E30 that is even more ridiculous!
One run on the Dyno showed that the Miller supplied tune was very rich which was affecting a smooth power band. Still the S38 lay'd down a respectable 220whp & 215 torque. Nick quickly got to work adjust parameters in both the fuel & timing cells. Soon the M5 was consistently making around 227whp but was making an odd fuel dump blip at 5,500rpm. They dyno plot showed at 10whp drop at this rpm when the air fuel ratio dipped. A bit more fine tuning smoothed out the rich fuel problem and netted an extra few ponies. The M5 was now making 234whp and 226 torque.
Nick explained that the older generations of 8-bit fuel injection are much more difficult to tune than current 32-bit technology. I relate this to playing Mario Bro's on Nintendo vs. Call of Duty on PS3. He is able to reflash the E46 M3's Seimens MSS54 ECU and has seen 16whp gains! This is more than plug & play flash's most popular companies are offering and if it's anything like my M5's gains, the area under the curve gets a big boost.
Our final step was to see what the motor makes completely stock. For this I borrowed a factory airbox, AFM and ECU from club member Tom Schultz. His E28 M5 is tucked away for the winter, so this was a perfect time to do a baseline run using his parts! Completely stock, the M5 made 211rwhp & 209 torque. For rear wheel drive cars, Nick uses a 19% drivetrain and altitude loss to convert the rear wheel horsepower numbers to crank horsepower. Factoring in the drivetrain loss, my 222,332mi M5 made 252hp, only 4hp shy of factory specifications! With the new technology and wizardry of MAC Autosport, my M5 now runs a healthy 278hp!
Screen Shot 2014-12-28 at 6.48.07 AM by ericandshovin, on Flickr
and a vid! http://youtu.be/TZGS78l6Xwo
Re: My E28 M5 journey
07 March 2014
The M5's little brother came to live with him.
DSC_8437 by ericandshovin, on Flickr
I'll save you the gushing E30 M3 lust novel but if your interested, have a read here: http://cloudbaseimaging.blogspot.com/20 ... -trip.html
The M5's little brother came to live with him.
DSC_8437 by ericandshovin, on Flickr
I'll save you the gushing E30 M3 lust novel but if your interested, have a read here: http://cloudbaseimaging.blogspot.com/20 ... -trip.html
Re: My E28 M5 journey
23 Dec 2014
The M5 has received a bit of updating lately, back on the jacks she goes!
During my last big wrenching session before heading out to Oktoberfest in Monterey I didn't think I had time to do the stereo as well as the front suspension and the rear suspension. I'm glad I didn't dig into the rear suspension because it's a bit of a bigger job than I anticipated!
As mentioned in previous posts, the M5 performed superbly. Laguna Seca lives up to it's reputation, and the old E28 was a blast on track.
IMG_7644 by ericandshovin, on Flickr
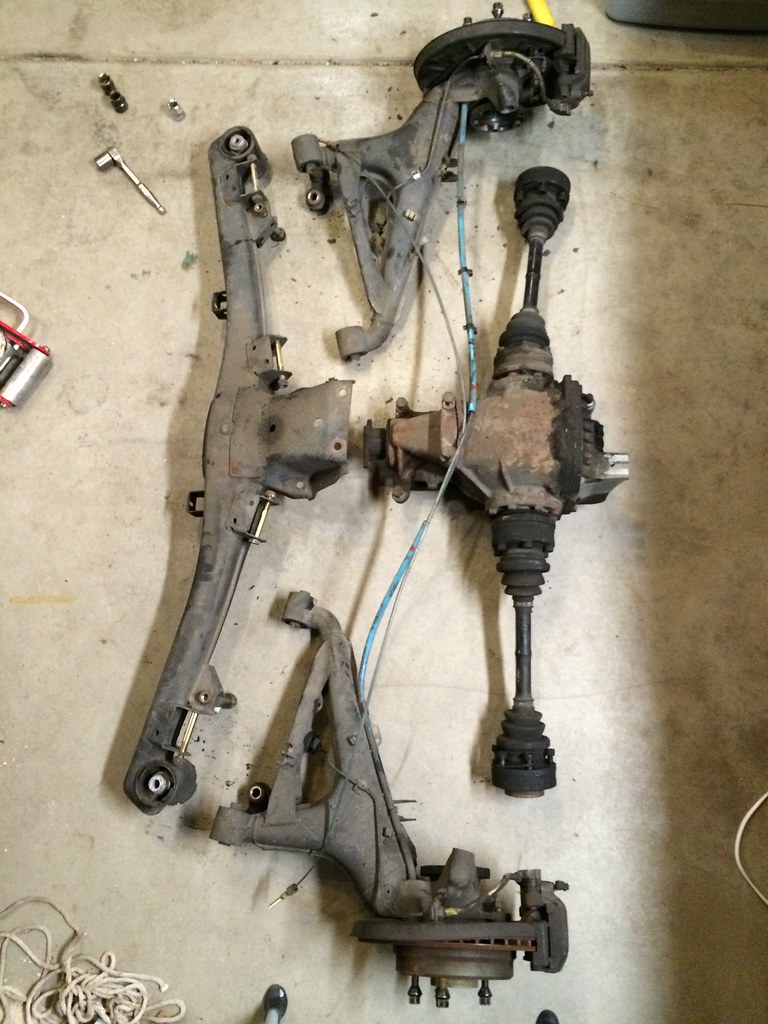
So now it's time to crack into the rear... The whole rear assembly came down one evening with my brother-in-law's help. The e-brake lines were fuzed to the channels's the lead into the car and were the only major hick-up, other than trying to muscle this monster of a subframe out from under the car!
IMG_7637 by ericandshovin, on Flickr
The goal for removing the subframe was to replace:
- Subframe bushings with new OEM bushings
- Dogbones with new
- Rear Diff mount with new
- Roll bar bushings and end links with new bits
- Trailing arm bushings with AKG units. If I had known before purchasing the AKG ones, I would have bought E34 M5 bushings. Bummer.
I also wanted to fix the front seat frame, and try to diagnose the clunk on the front end that I'd been hearing for a while.
The subframe itself was separated and taken to the auto hobby shop on Ft. Carson to press out the old bushings and press in the new rubber. Being in the military definitely have a few perks!
IMG_7642 by ericandshovin, on Flickr
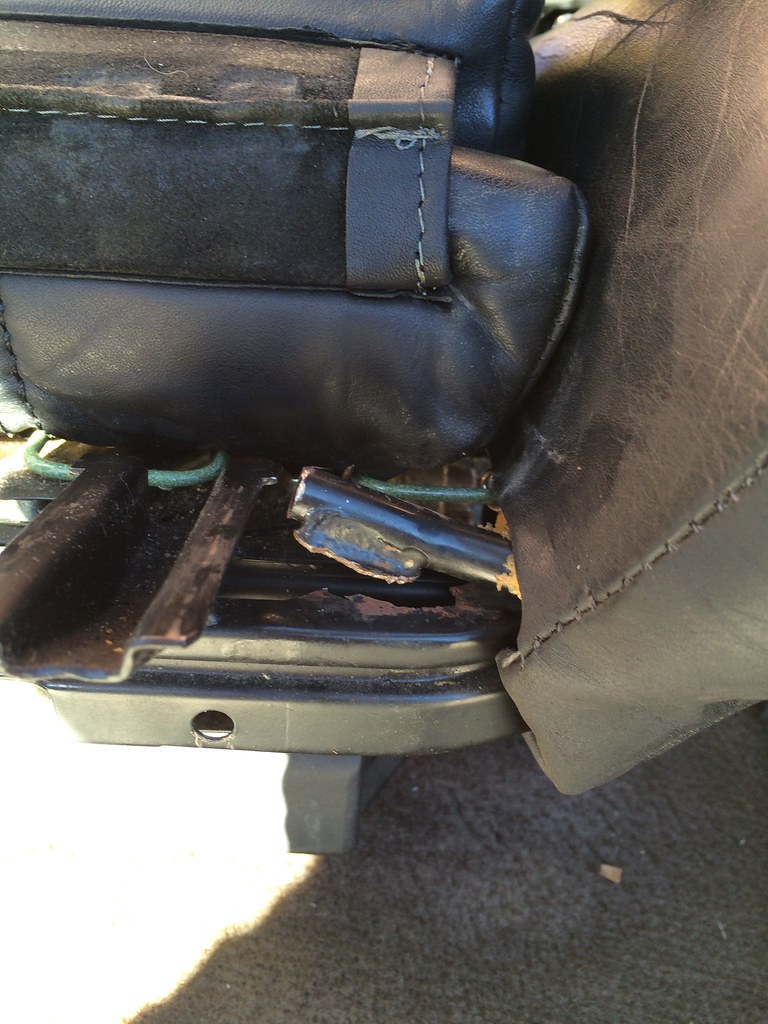
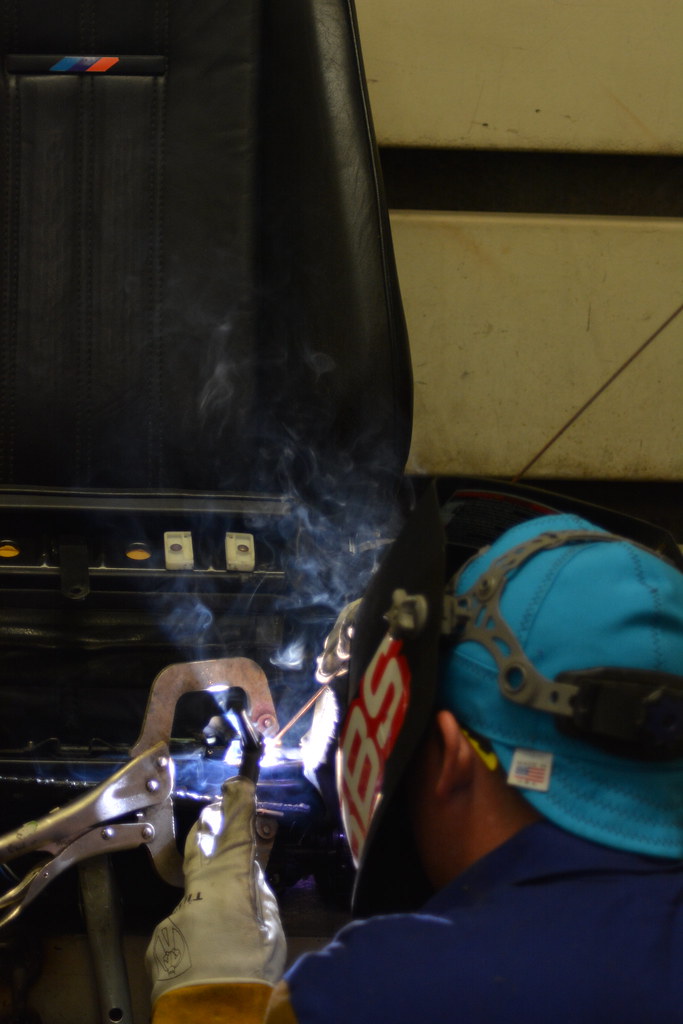
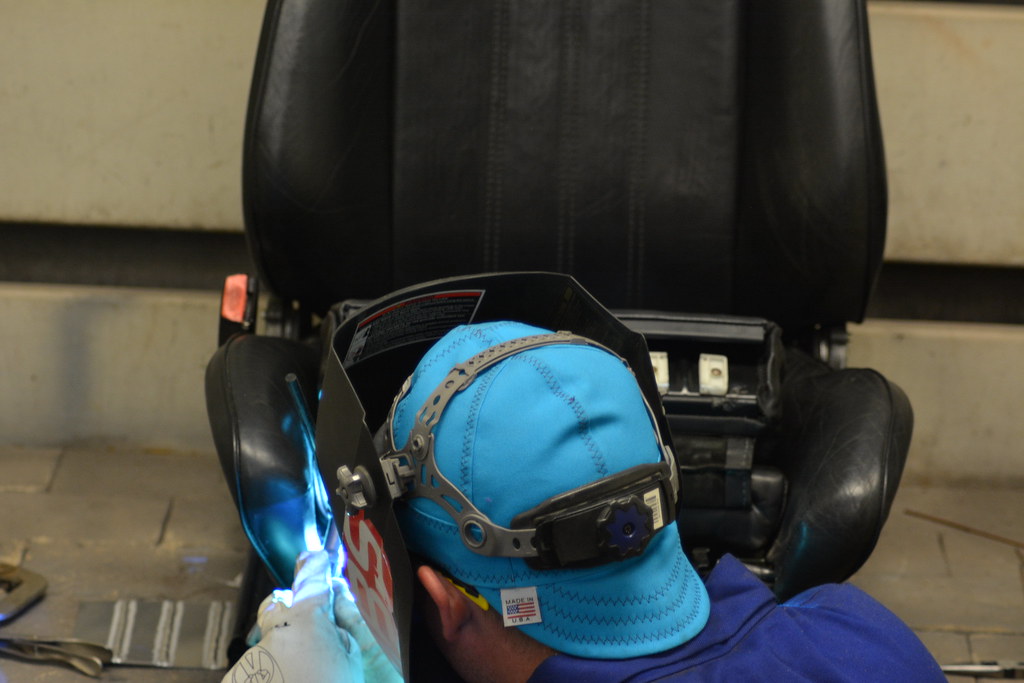
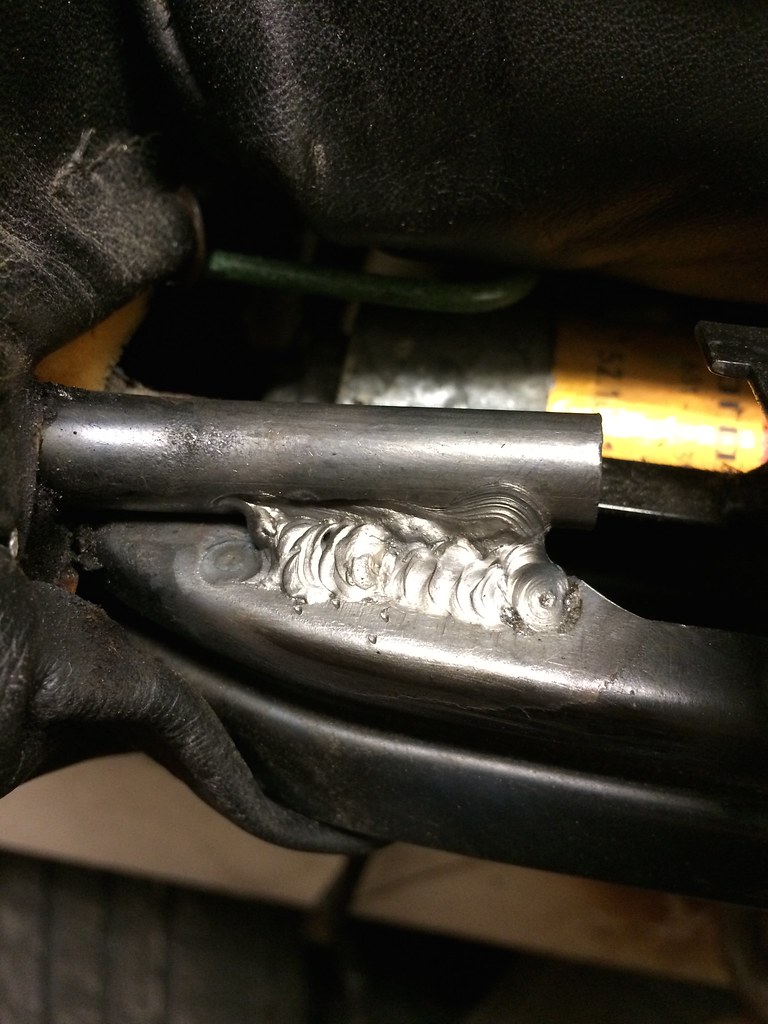
While at the hobby shop, I also welded the seat frame. I d0n't think E30 sport seats have the same problem as the E28 seats, I hadn't heard about it until doing a bit of interneting one day. The rod that provides support for the side bolster is welded from the factory to the base frame. This is great in theory, but the base metal is too thin, and the rod eventually tears the base metal apart from the weight of the driver pressing against the bolster over and over again. for the MIG would probably have been a better choice over TIG as the torch heat started burning the foam, but I wanted the practice on the more difficult discipline.
Broken:
IMG_7706 by ericandshovin, on Flickr
fixing:
DSC_3779 by ericandshovin, on Flickr
DSC_3839 by ericandshovin, on Flickr
Fixed!
IMG_7707 by ericandshovin, on Flickr
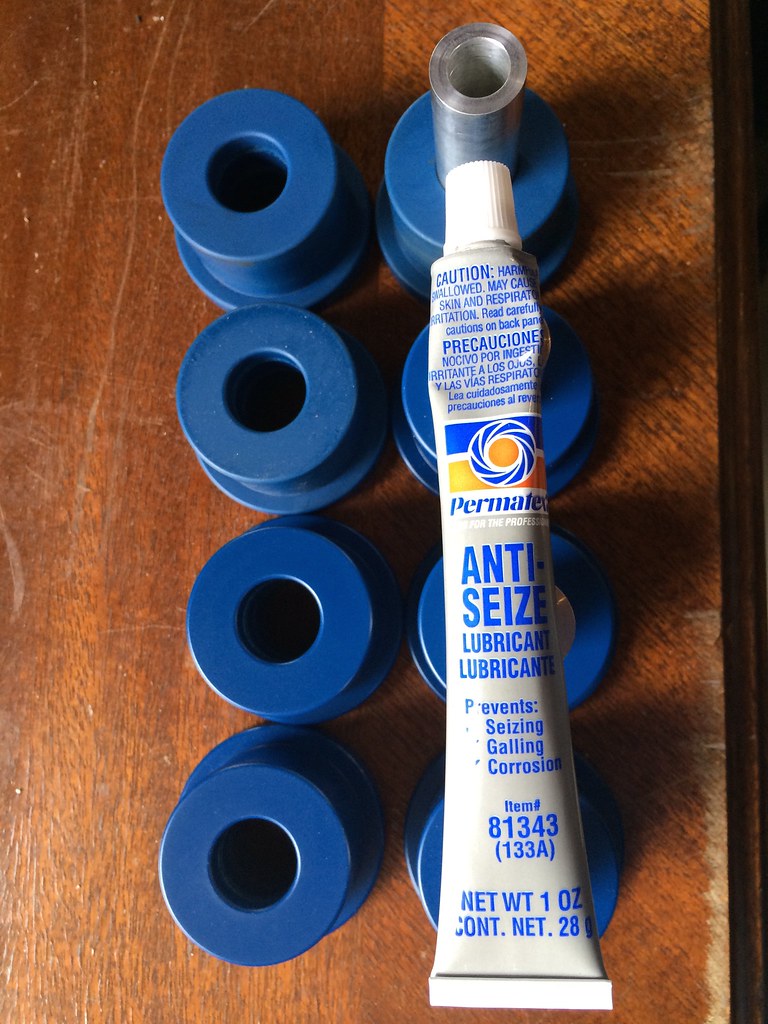
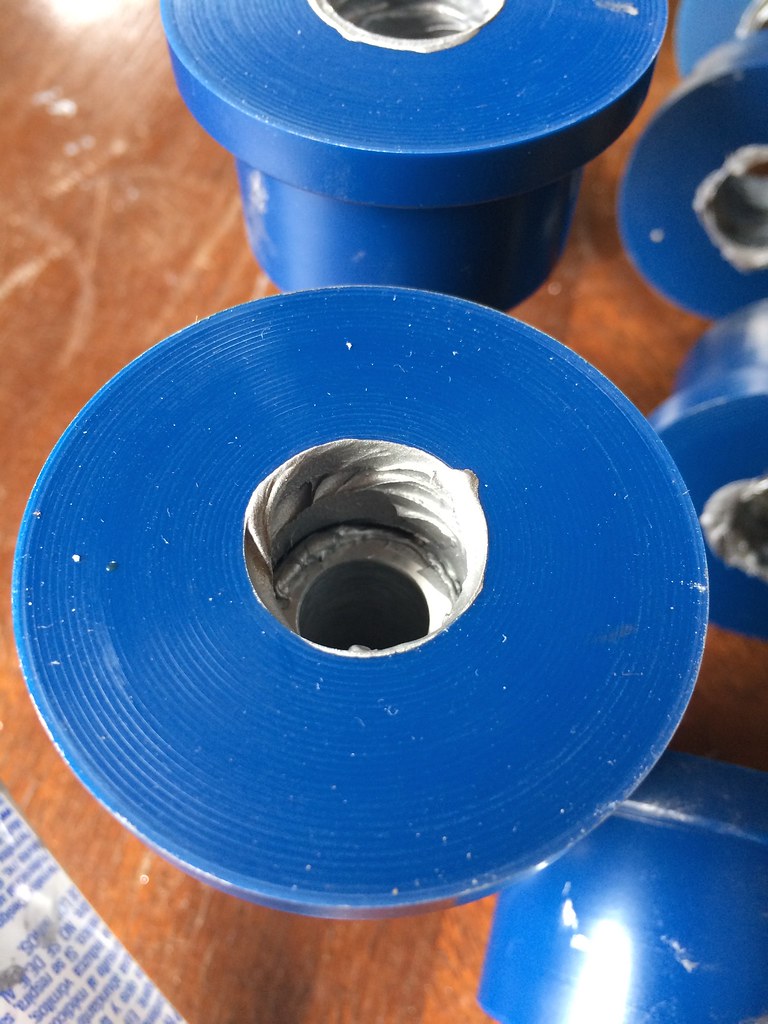
On to the RTAB's by AKG. A common complaint about poly bushings is the squeeking after a bit of use. AKG uses internal "grease grooves" to keep the bushings lubed and quiet. A phone call to AKG revealed that normal old grease is all that's needed, or anti-seize if you want to go a bit better.
Anti-seize it is!
IMG_8040 by ericandshovin, on Flickr
Grease grooves:
IMG_8041 by ericandshovin, on Flickr
Grease grooves greased:
IMG_8042 by ericandshovin, on Flickr
I didn't take any pictures of marrying the trailing arms to the subframe mainly due to the anti-seize being nasty stuff that gets everywhere, but I do have some other random pictures from this evening's endeavor.
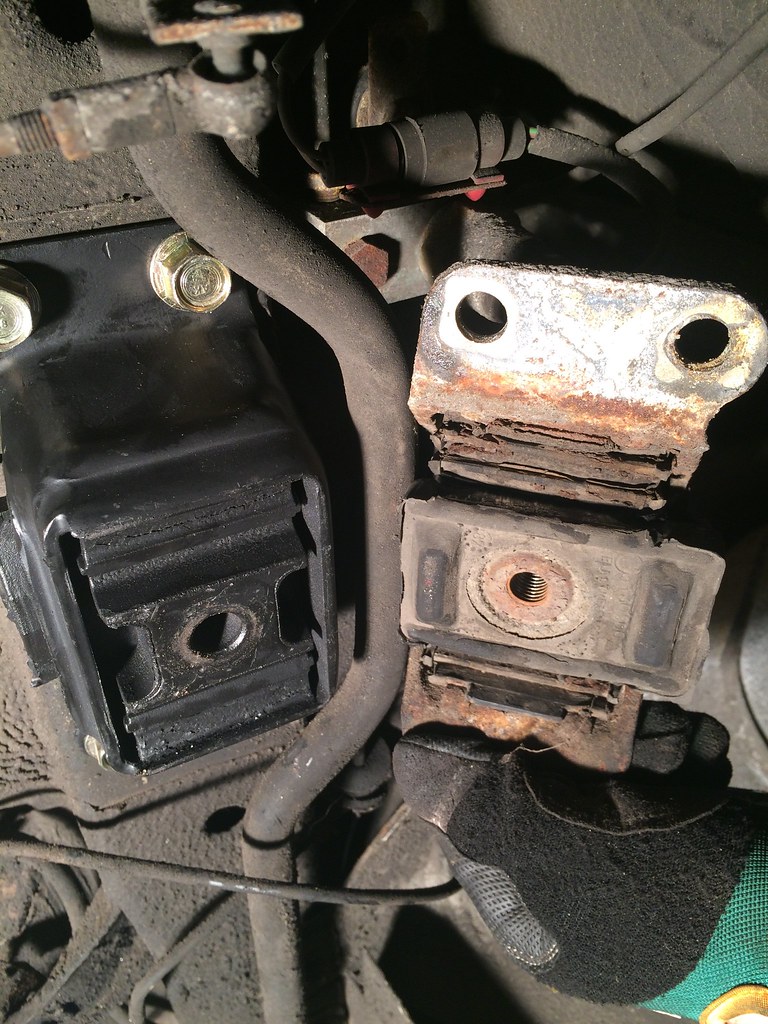
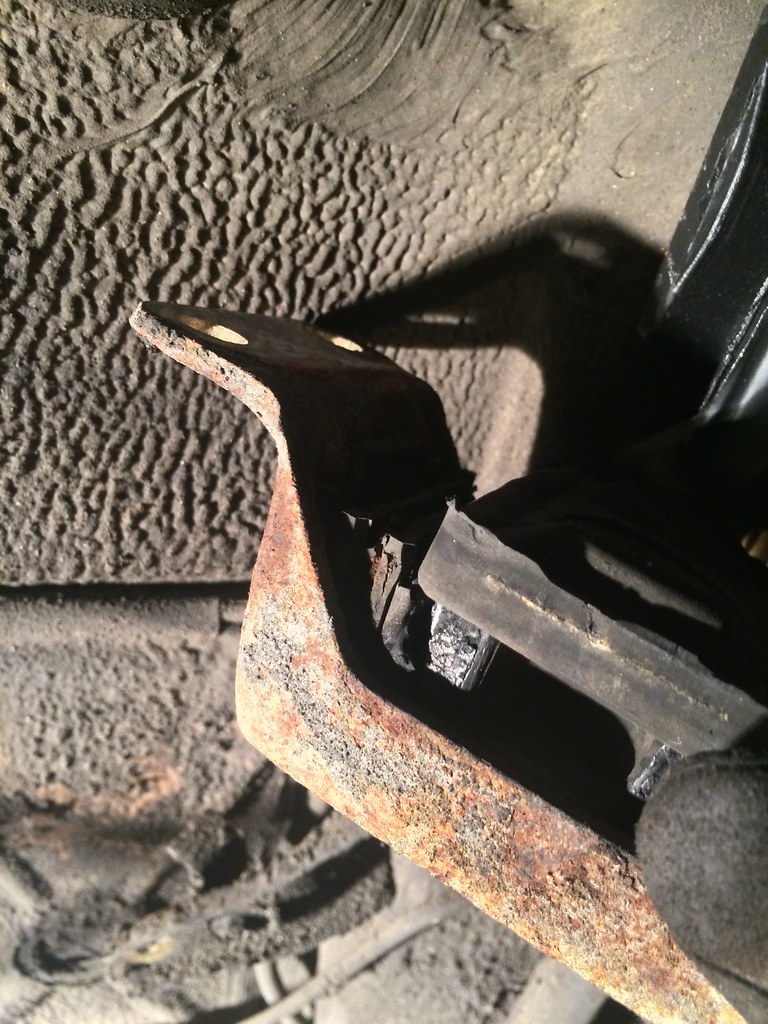
Rear diff bushing replaced. The old one's rubber was quite cracked and rotted.
IMG_8587 by ericandshovin, on Flickr
Cracks:
IMG_8566 by ericandshovin, on Flickr
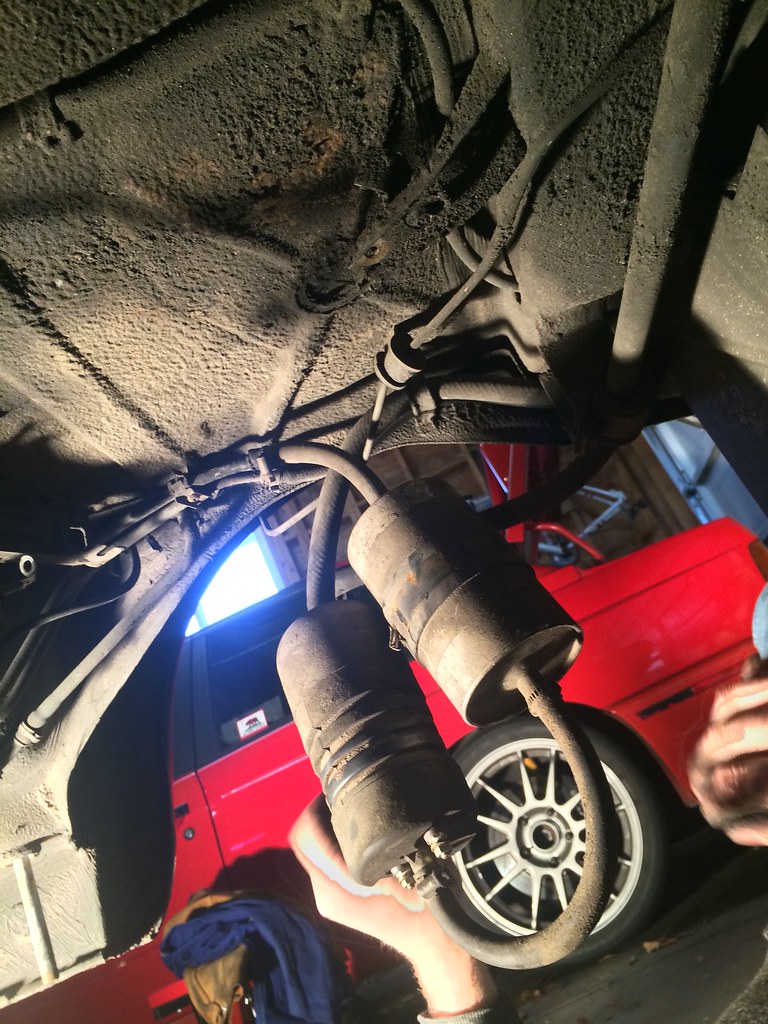
One of those "while your in there" items was to replace the fuel filter. This thing would be a knuckle busting cuss fest if the subframe was installed, I'm definitely glad we decided to replace it now!
IMG_8573 by ericandshovin, on Flickr
Replacing the sway bar end links, and bushings... This took quite a bit of muscle! Yes, I know my work bench is terribly messy.
IMG_8590 by ericandshovin, on Flickr
On to the front.
In my ownership, I've noticed a clunk up front that is hard to pinpoint. From the drivers side it felt like it was coming from the passenger strut. From the passenger seat the clunk felt more central. I replaced every single suspension piece besides the shocks and top mounts, the springs, and the steering arm that connects the rolling ball steering box to the lateral link. Be glad the E30 has rack and pinion, so much easier!
When I pulled the struts off the top mounts look to be in pretty good shape, I have new ones ready to go in, but these looked really usable. In an effort to eliminate the clunk, I decided to drop the subframe to replace the steering arm. Instead of a bad steering arm, I found a different surprise!
IMG_8537 by ericandshovin, on Flickr
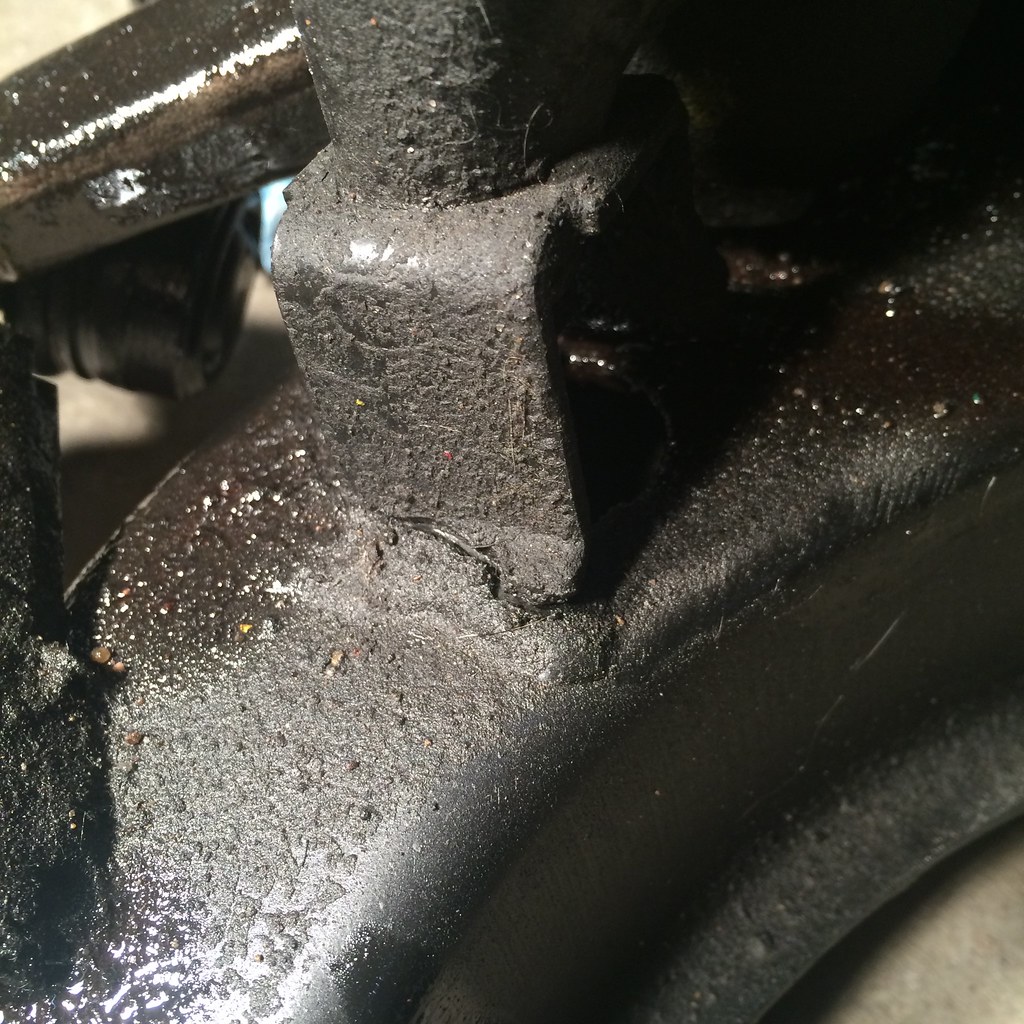
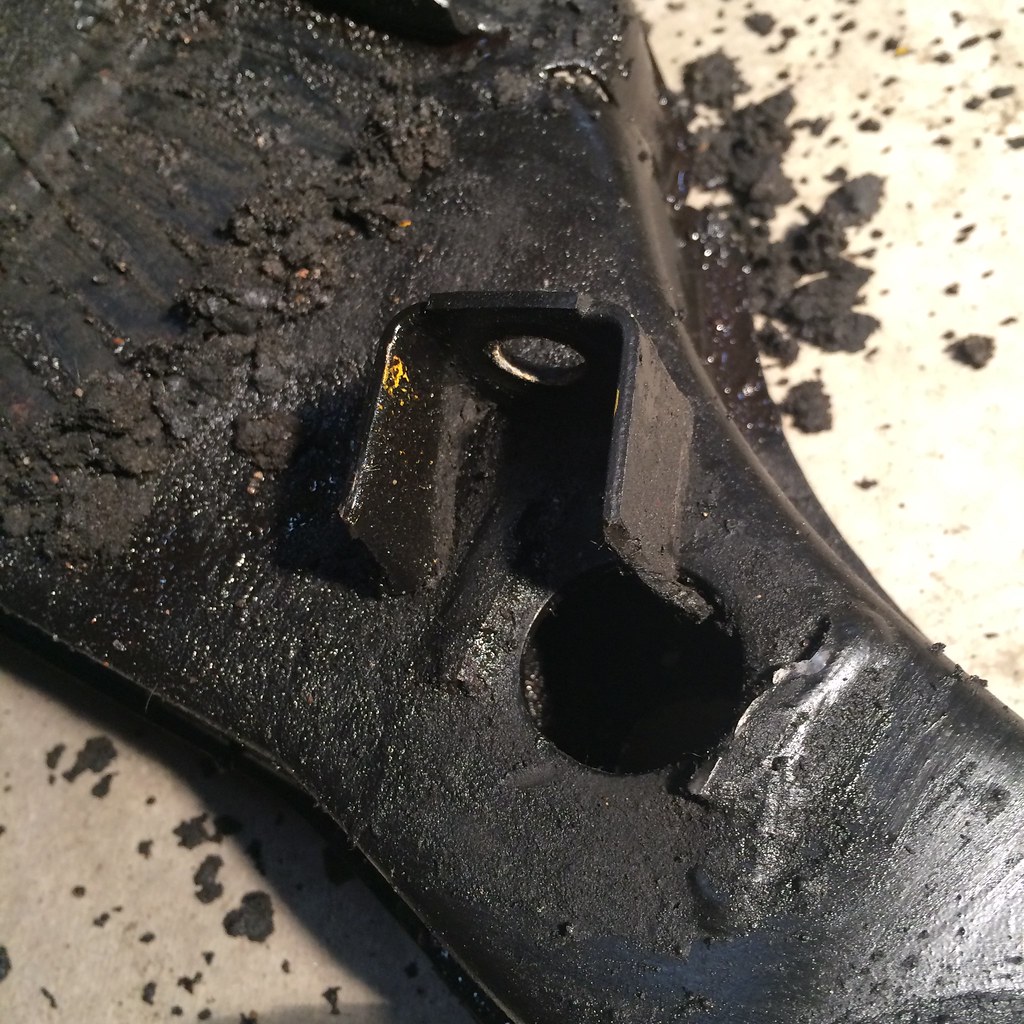
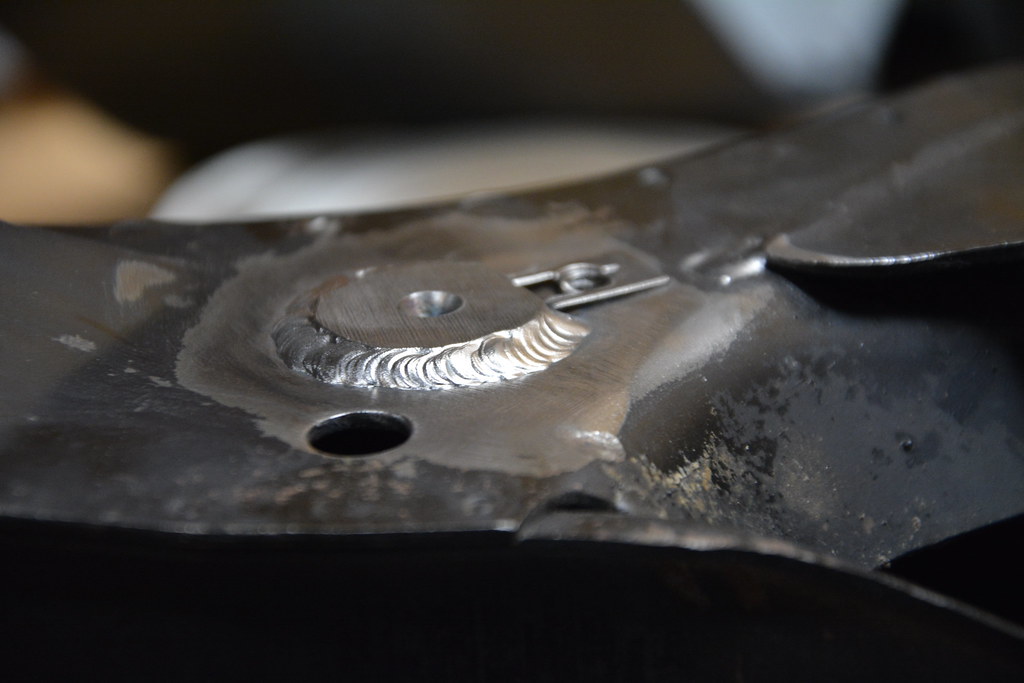
A bit more interneting revealed this to be a common failure on the E28/E24 chassis. Many times the weld just cracks on one side, but mine was completely cracked through on both sides.
IMG_8540 by ericandshovin, on Flickr
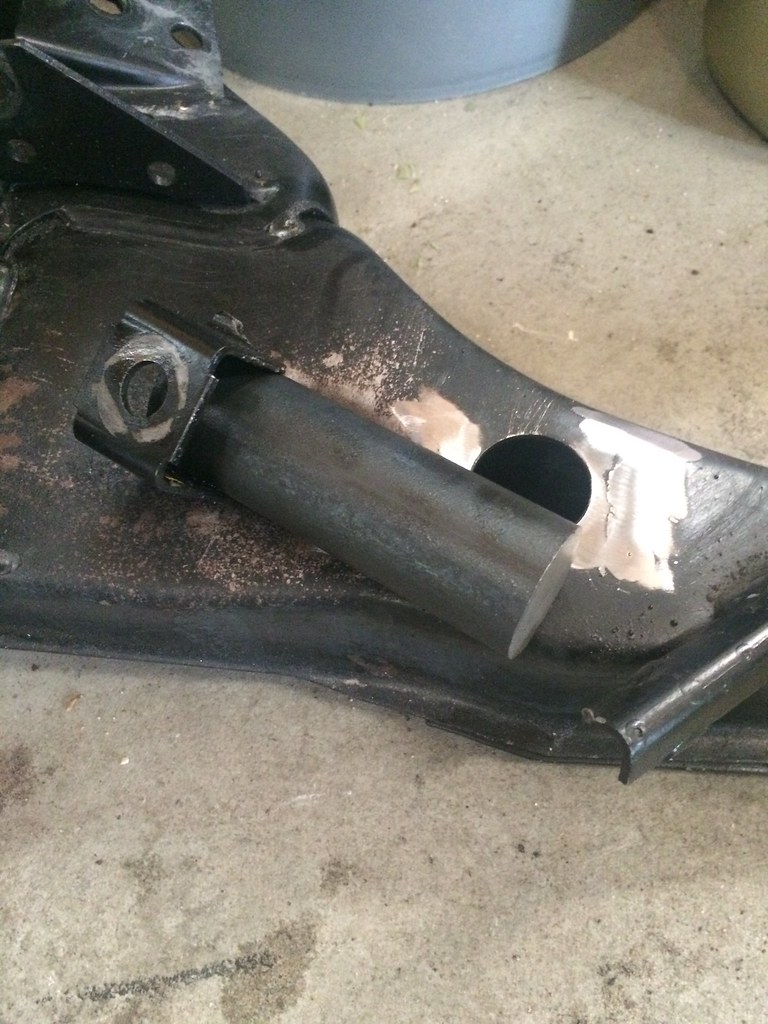
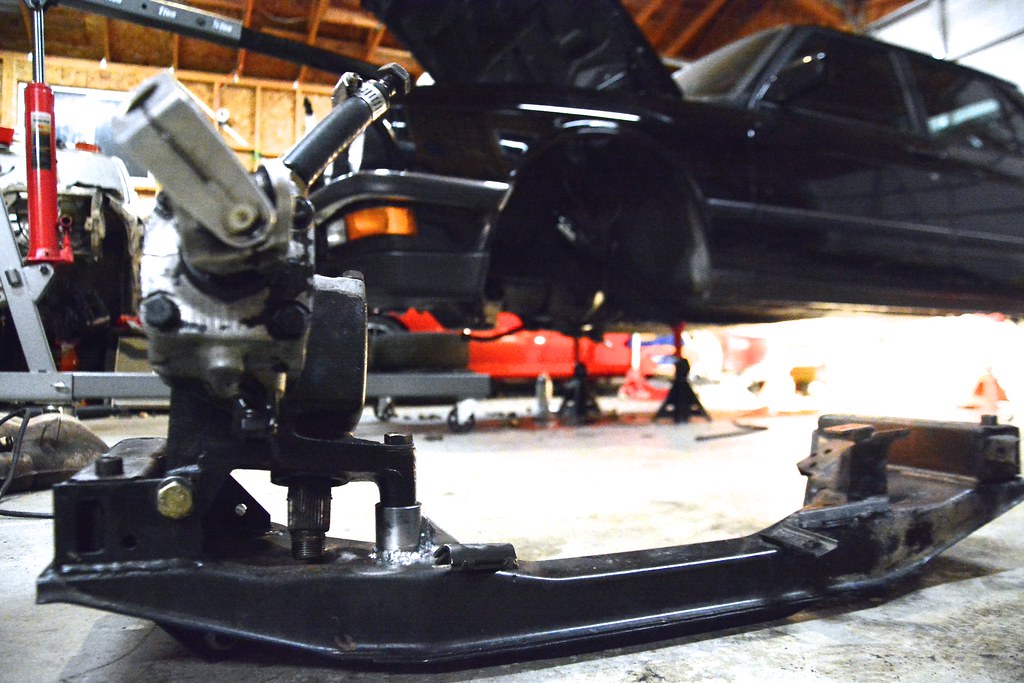
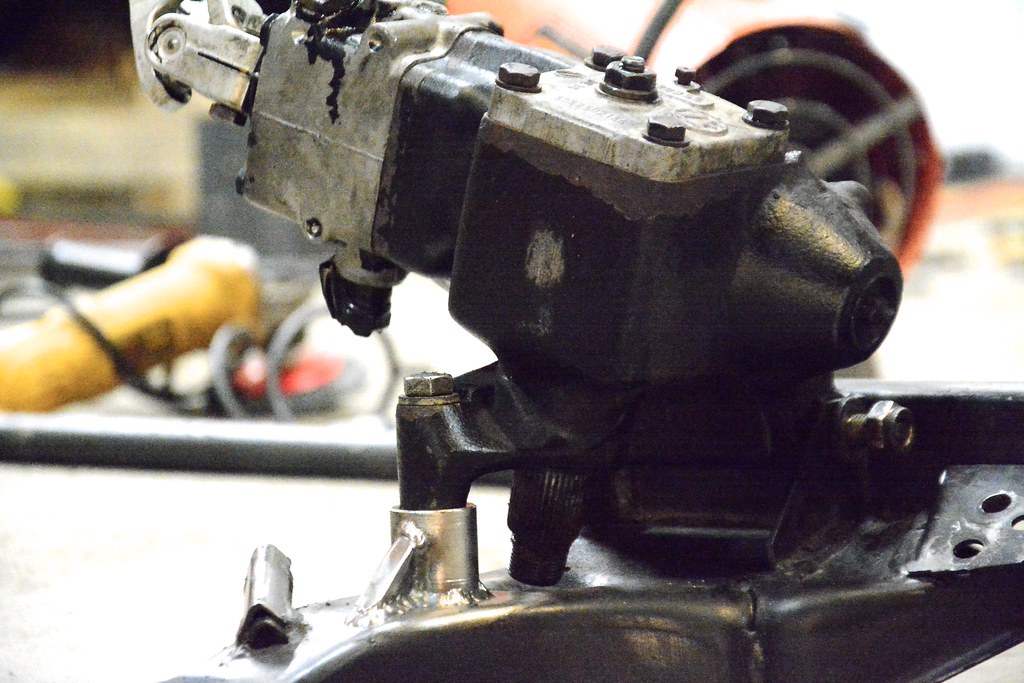
BMW usually does an excellent job playing into the German over-engineered stereotype, but this mount is just dumb. On the left of the steering box is a horizontal through bolt that runs front to back. on the right of the steering box is this mount that bolts vertically to the frame. Any time a load is placed on the steering box (any time your not parked) the steering box is rotating on the horizontal bolt, and pulling or pushing on the vertical bolt. Make sense?
What to do, what to do...
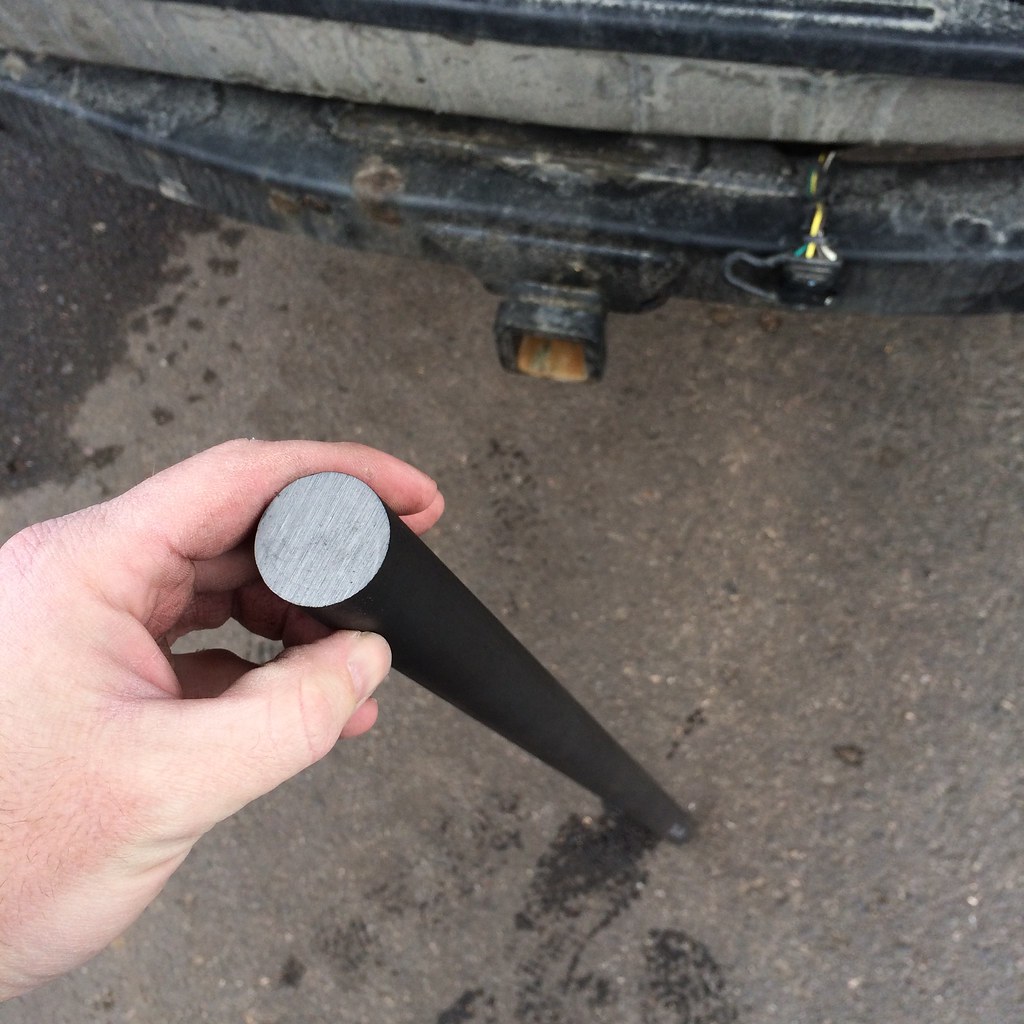
Luckily BMW provided nice access holes in the subframe to get to the nut on the bottom of my broken steering box mount. I decided to use my newly acquired welding skills to make something better utilizing those access holes. So I bought a rod.
IMG_8546 by ericandshovin, on Flickr
Ground off the old, failed welds
IMG_8560 by ericandshovin, on Flickr
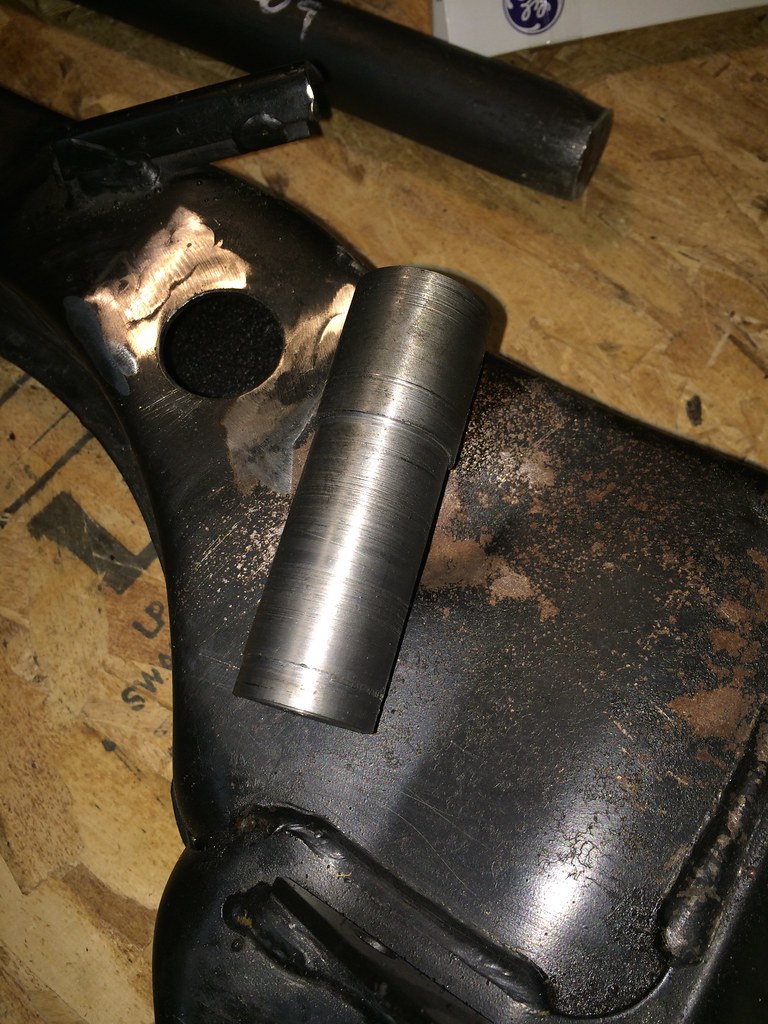
Cut the rod to size.
IMG_8588 by ericandshovin, on Flickr
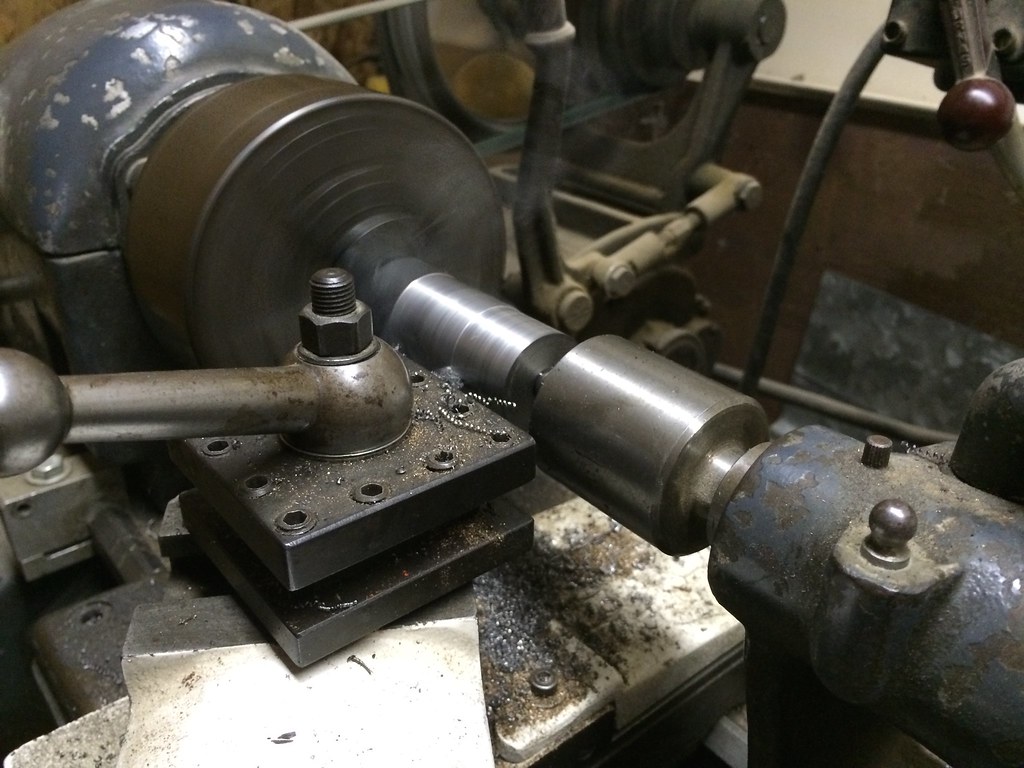
Had the help of a co-worker who turned the rod.
IMG_8594 by ericandshovin, on Flickr
And here is the finished product. Another trip to Ft. Carson is in order to weld these guys together.
IMG_8597 by ericandshovin, on Flickr
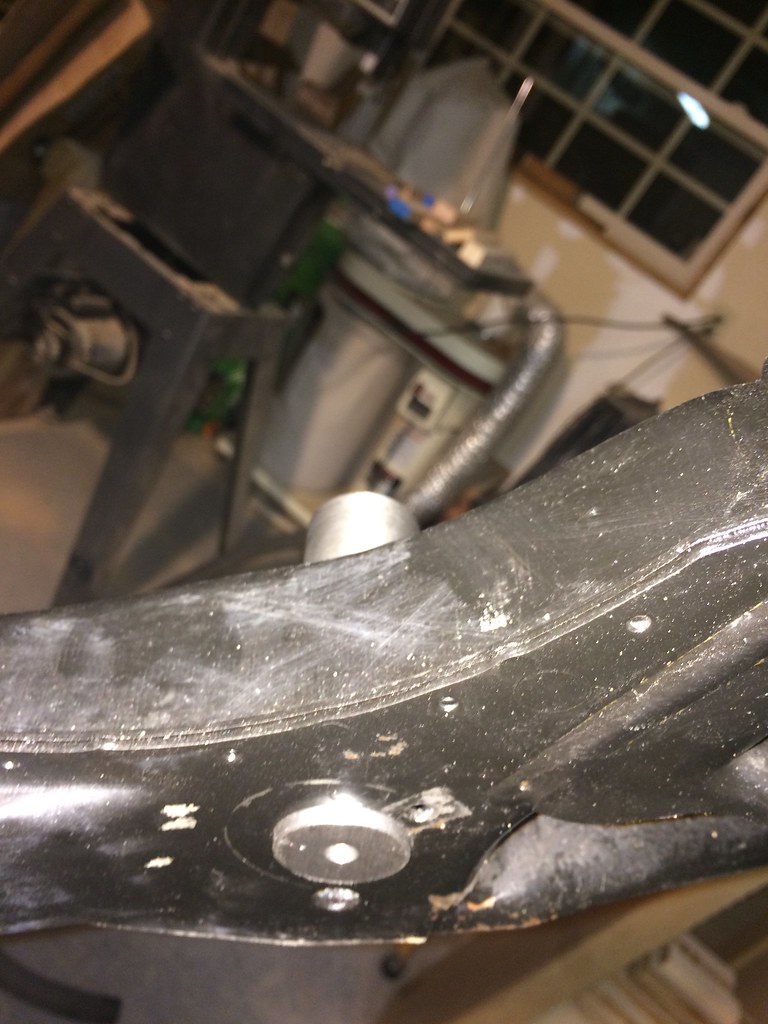
Test fit.
IMG_8599 by ericandshovin, on Flickr
As you might have guessed, it has been quite a productive couple of days! :fire hop:
IMG_8601 by ericandshovin, on Flickr
Thanks for reading!
Re: My E28 M5 journey
24 Dec 2014
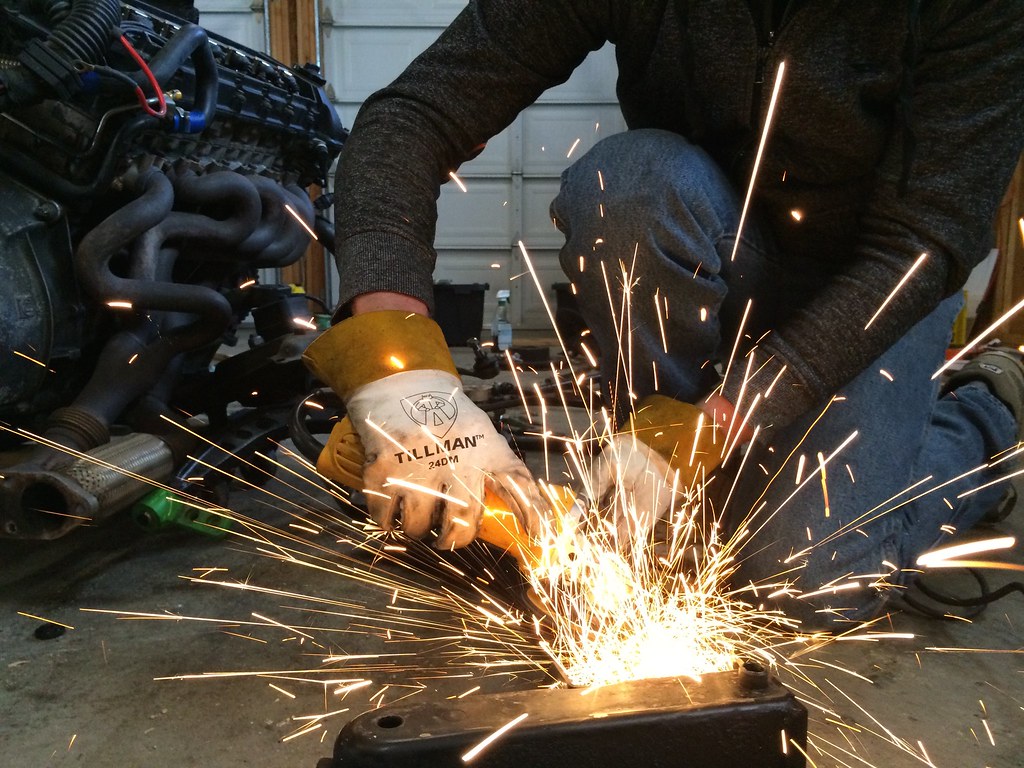
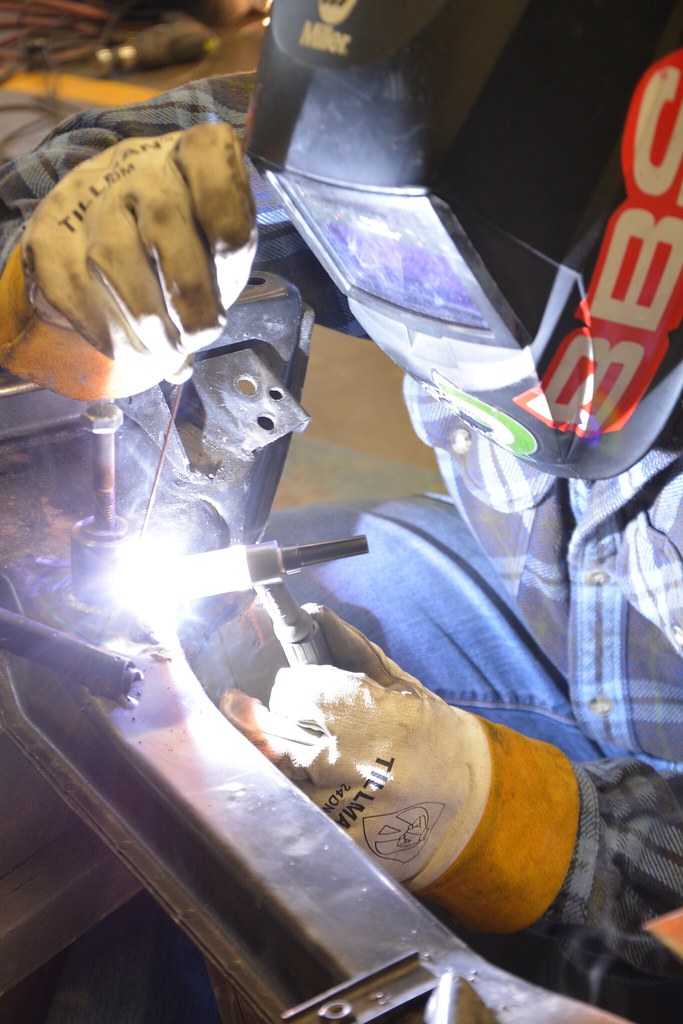
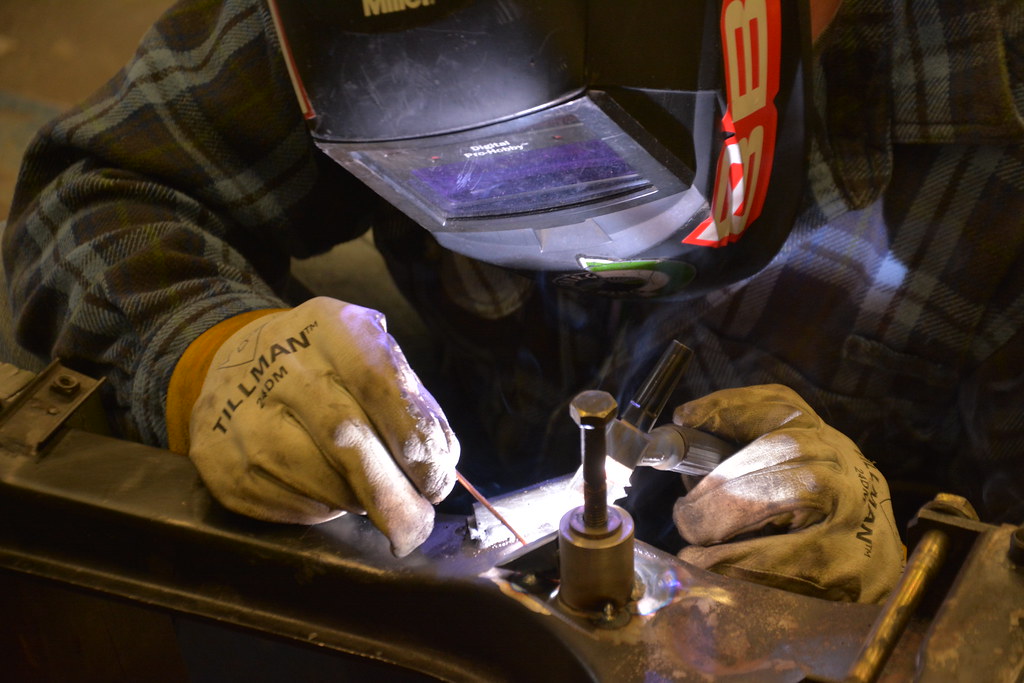
Today I had the chance to weld the dowel to the subframe. I made a little triangle for more support real quick too. Not super happy with the welds. I had to use a ton of current to penetrate the thick dowel, and the rod I had on hand was too thin and just burned up before I could dip it in the puddle. Turned into a bit of a fight with the weld puddle :hitler:
lighting up
DSC_4381 by ericandshovin, on Flickr
DSC_4357 by ericandshovin, on Flickr
DSC_4332 by ericandshovin, on Flickr
bottom finished.
Untitled by ericandshovin, on Flickr
Re: My E28 M5 journey
25 Dec 2014
Cleaned up the welded area with a wire wheel just now, and did a quick test fit.
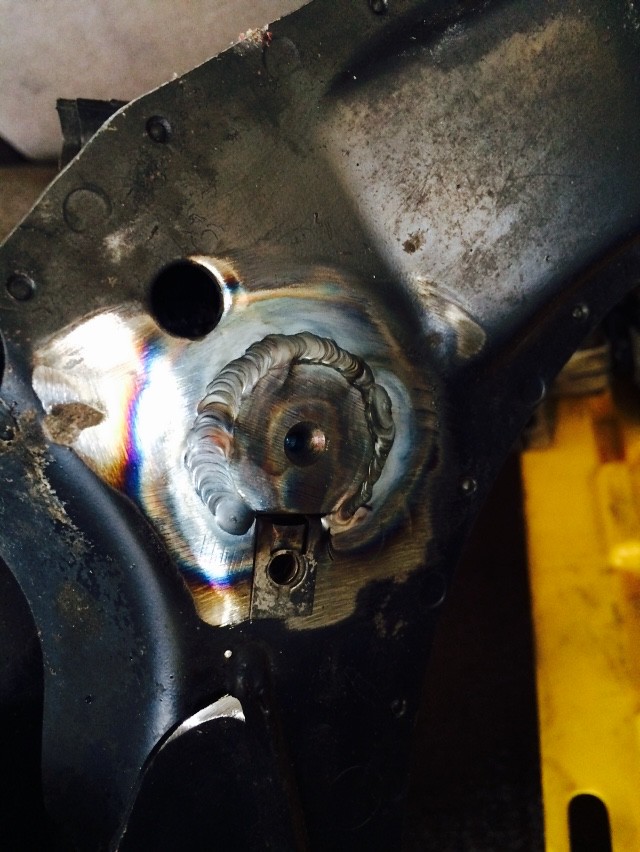
Here is the bottom of the subframe. Note the tinnerman nut can never be removed, but I still have it in place so the splash guard can be re-mounted. This was probably my best weld, even for the small bit I did with my non dominant hand.
DSC_4421 by ericandshovin, on Flickr
Here is the business end.
DSC_4427 by ericandshovin, on Flickr
I could make a ton of excuses for the ugly welds... Not enough current to penetrate the thick dowel. Using filler rod that was too thin so it burned up before laying in the weld puddle. Using filler rod for acetylene torch instead of proper rod. No experience welding hot rolled steel. Shitloads of smoke from oil/gunk/road grime inside the hollow subframe pouring out of every nook & cranny. Being rushed for time...yada yada. I know I have the ability to lay some decent bead, here is a pic of aluminum vertical up I did earlier this year. Truth is, I just need more experience to deal with all these different variables!
Test fit... Fits perfect! This is also a good visual of what I was explaining a few posts above about the load placement on the two mounting points. I'm pretty sure my new mount will have less side to side flex compared to the OE mount.
DSC_4443 by ericandshovin, on Flickr
From another angle.
DSC_4450 by ericandshovin, on Flickr
Re: My E28 M5 journey
Great stuff.
What was the outcome on those wheels?
Re: My E28 M5 journey
I was wondering about that Dyno sheet!
Re: My E28 M5 journey
Nice car, but you already knew that.
Re: My E28 M5 journey
I always like black on black M5s. And yours is exceptionally gas ass.
Re: My E28 M5 journey
Inspirational. Thank you!
Re: My E28 M5 journey
Just curious, is there a reason you wouldn't have used the mwrench fixture to repair the steering box?
http://www.mwrench.com/download/steeringfix.pdf
Re: My E28 M5 journey
I made mine in 2 days (1 day turning, 1 day welding) with a co-workers help who owns a lathe with an investment of less than $5 and 3 hours of time.WilNJ wrote:Just curious, is there a reason you wouldn't have used the mwrench fixture to repair the steering box?
http://www.mwrench.com/download/steeringfix.pdf
Re: My E28 M5 journey
Very nice thread and thanks for explaining things in detail with pics. I'd love to take on Leguna Seca. I can't wait for my garage to be built so I can get my hands dirty on my bmws too. Very inspirational thread for sure.
Re: My E28 M5 journey
Thanks Bank! You know, I was heavily considering your car back in 2010 when I seriously thinking an E28 M5 could be a possible car to own when I came back stateside. What ultimately deterred me from your car was how heavily track prepped it was, and I already had a track ready E30. Then this M5 popped up and I figured I could have a nice drivers car + my track E30 would be a better scenario than trying to make a second track car into a nice driver.igotbank wrote:Very nice thread and thanks for explaining things in detail with pics. I'd love to take on Leguna Seca. I can't wait for my garage to be built so I can get my hands dirty on my bmws too. Very inspirational thread for sure.
I see your sig... B36 cams, euro header, VSR cats, Stebro exhaust, miller MAF.... I'm 2 for 5 on that setup, and it is exactly what I want to do! What does it sound like? Were the cams and header worth the trouble? What is left of that E34 M5 your parting?
With winter here, I've been too chicken to lay on a cold cement floor, but it was in the 50's yesterday, so I put a fresh coat of paint on the subframe...
Untitled by ericandshovin, on Flickr
Re: My E28 M5 journey
Thanks Bank! You know, I was heavily considering your car back in 2010 when I seriously thinking an E28 M5 could be a possible car to own when I came back stateside. What ultimately deterred me from your car was how heavily track prepped it was, and I already had a track ready E30. Then this M5 popped up and I figured I could have a nice drivers car + my track E30 would be a better scenario than trying to make a second track car into a nice driver.
I see your sig... B36 cams, euro header, VSR cats, Stebro exhaust, miller MAF.... I'm 2 for 5 on that setup, and it is exactly what I want to do! What does it sound like? Were the cams and header worth the trouble? What is left of that E34 M5 your parting?
s14- I totally get where you're coming from. my old track car was definitely tracked prepped interior wise. Plus you have a beautiful driver you can make your own and it's a true black on black example too. So I'd say you definitely won in that aspect. Also the stebro sounds like garbage and you should sell it to me asap lol. I'm very happy with the sound of mine. it's throaty on wot and has a nice lowish rumble that sets off car alarms lol. No drone either and its rumble is very distinctive. its much more ear pleasing that a fart can but not as aggressive as a v8 exhaust note. the b36 cams are a must too. I have the dinan cam gear also. the power band is broader than stock too. I also have the JB racing flywheel. the headers were added more for eye candy than functionality. I believe im only seeing 1-3hp gain if any. it does look nice when the hood is open lol. now onto the miller setup...Its great but the m5 is running rich. ive been noticing carbon and gas droplets upon cold start up. I freaked out thinking oil was mixing. did a tune up and as of October 2014 I still had the carbon and gas droplets. I sent an email to miller thinking that I may need an upgraded tune but haven't heard back from them. that was before thanksgiving. Anyway keep updating this great thread and continue enjoying your m5. as for my parts e34 m I have everything minus the hood, altenator, bumpers, front seats, gas tank and door sills.
Re: My E28 M5 journey
Did you do just one, or both B36 cams? I've been told only the intake cam is really needed, not both...
I played with all the tunes on millers site, and they were OK, but with the actual dyne tune, the car really feels better! I'd seriously consider having the car turned. Nick, the tuner, said a good chunk of power is left on the table with the headers and cams. The exhaust would start glowing cherry red during a pull. A bit better excavation would really help to get rid of that flat spot the dyno sheet shows at the top end.
Re: My E28 M5 journey
I had both canes replaced with b36 cams. I highly recommend the swap. It really wakes ups the b36 and it's reliable power. While you're in there upgrade the crank hub with the frank fahey one too. Are you keeping your stock Pistons or upgrading? I have stock pistons because at the time my budget wouldn't allow it. I was more concerned with the timing chain guides and whatnot. My biggest issue with a dyno tune is I can't find anyone near me that is OBD 1 compatible. They actually turn me away when I inquire about tunes.
Re: My E28 M5 journey
Have a spare set from that e34 your parting???