Project evil e30: m30 build up

Discussion pertaining to positive pressure E28s.
Post Reply
terrybpp
Posts: 25
Joined: Feb 12, 2006 12:00 PM

Project evil e30: m30 build up

Post by terrybpp »

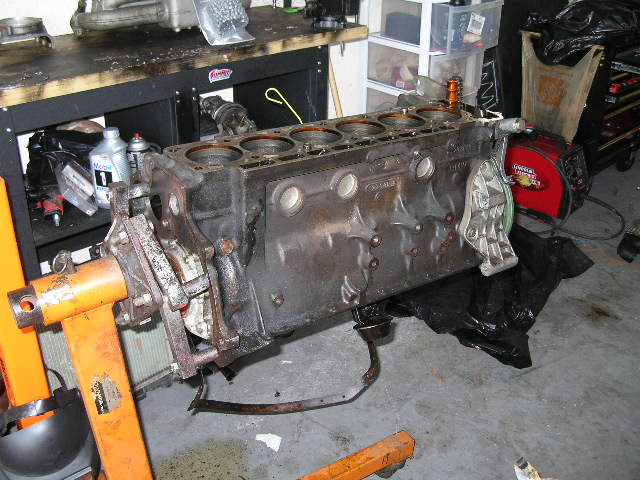
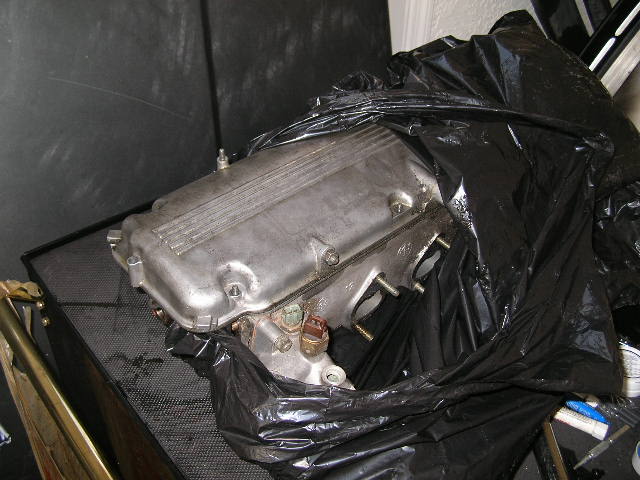
My recent decision to swap a 85' m30 into my previously m10 turbo equppied e30 has started taking shape. After picking up the m30 2 weeks ago I have been gathering parts and info as to what I should rebuild to make this motor hold up to 15-20 psi from a HX45W Holset turbo. Hopefully reaching my 300-400 hp. Come to find out, not much.

Image

The rods, pistons, and crank are all forged. 8:1 compression and all around solid as a rock. So I have decided to do a stock bottom rebuild and just use ARP head studs and a MLS head gasket.

The head was rebuilt buy the previous owner with bigger valve, 288 Shrick cam, and opened up intake ports. So no need to mess with that.
Image

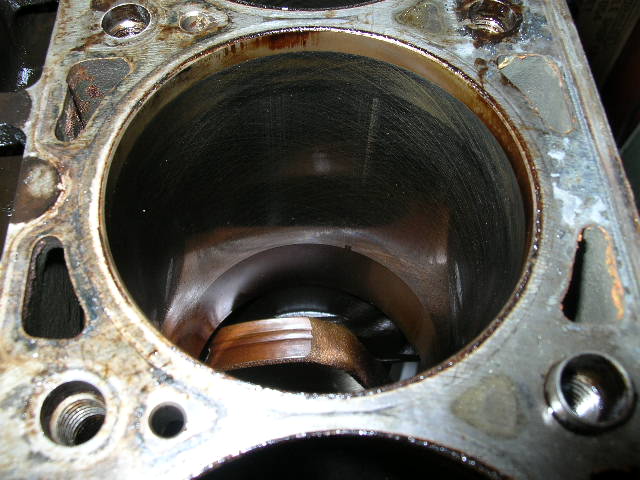
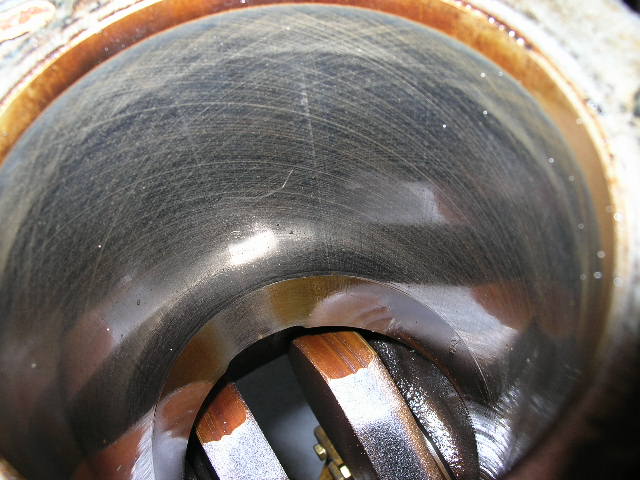
After picking up the engine and disassembling it I found all the internals to be in excellent specs. Only thing missing was a good crosshatch on the piston walls. Which concurs with the PO's assement as to why the motor was using too much oil (See previous thread). So I needed to have the cylinders honed.


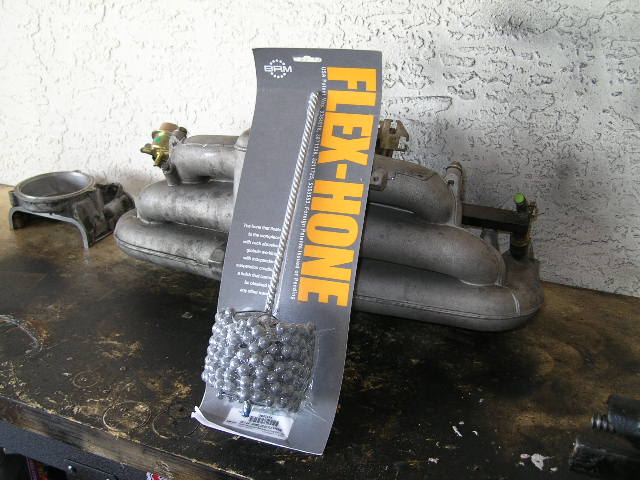
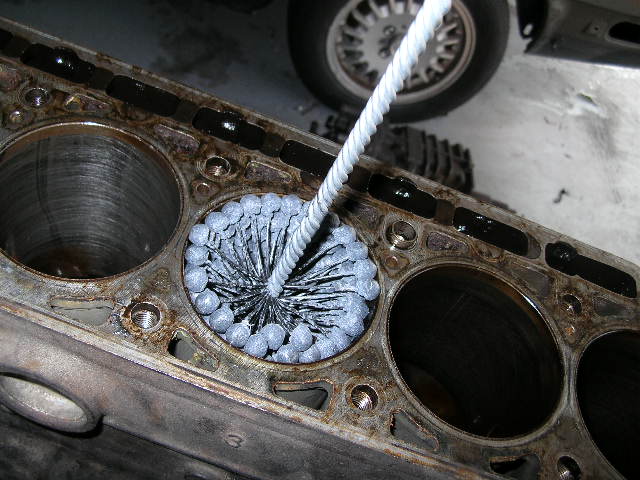
Being the DIYer that I am I decided to read up on the process and ask a few questions around here (thanks guys). I found that a Flex hone aka. dingleberry or grape hone was the best way to do it. So I bought a new one off ebay for $40 (the machine shop wanted $75 plus I had to pull the crank out). Here's a play by play:

Still a pattern on the original cross hatch but not texture to it:
Image

Image

95mm (3 3/4") 220 grit Flex hone:
Image

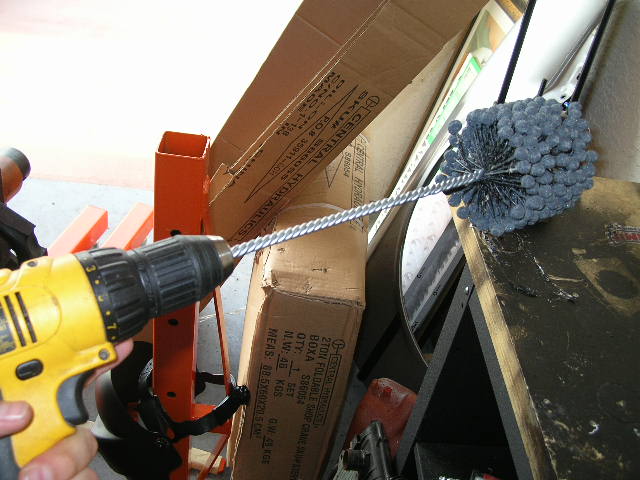
Hone on drill:
Image

The advice give to me was insert the hone in the cylinder and then make three pass throught the cylinder. I also cut out a piece of card board to lay down in the cylinder bottom to protect the crank. Worked alot better than the garbage bag I used on the first cylinder, lol.

I used standard motor oil to lubricate the cylinders. Some say use ATF, some motor oil. Never use WD-40 because it has a cleaning agent that can harm your cylinder walls.
Image

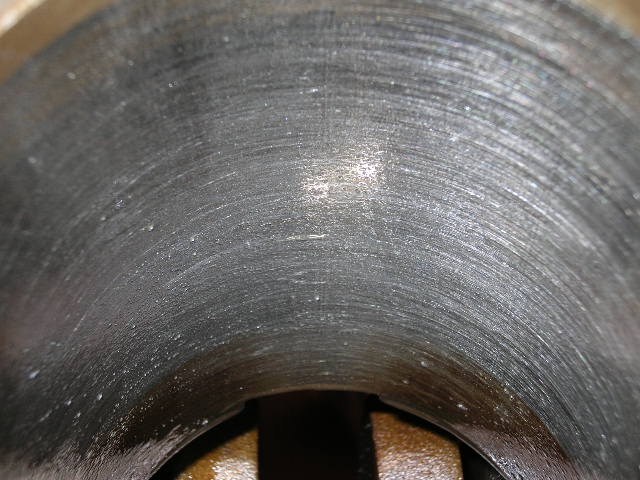
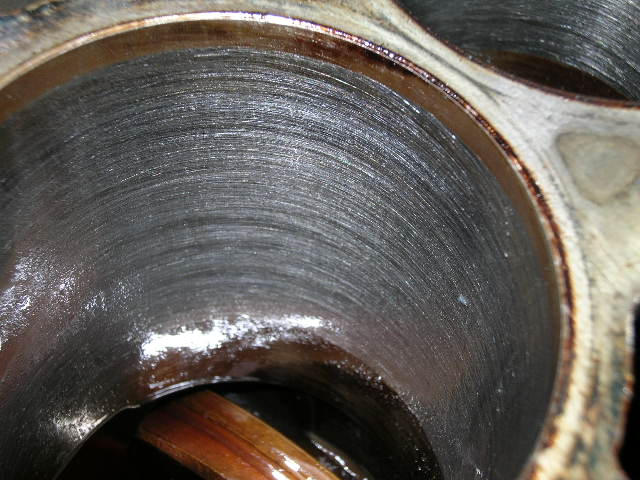
After 3 passes on each cylinder this was the final product. Not a perfect 60 degree hatch like recommend but it should do fine:
Image

Image

Then came a major was down with soft soap and water. Some of the honing stone had broken apart and left grit in the cyndlers and down on the crank. Took about 1hr to clean and dry. Then I relubed the motor making sure the no parts that would rust.

Now I'm waiting for my new connecting rod bearings, piston rings, head studs, and gaskets.

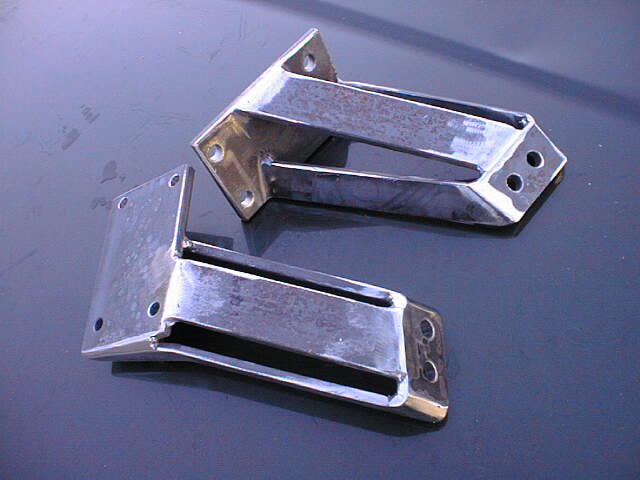
I also order the m30-e30 motor mounts from e30.de. Not the cheapest part but will most likely save me some fitting and aligning troubles in the future.
Image
Skeen
Posts: 2208
Joined: Feb 12, 2006 12:00 PM
Location: Charlotte, NC
Contact:

Post by Skeen »

Sweet...continue to keep us posted. That motor (besides the cam and head work) is exactly what I've done with mine.
jimbixjr
Posts: 77
Joined: Feb 12, 2006 12:00 PM
Location: Blairsville, PA/Mt. Holly, VT

Post by jimbixjr »

I cant wait for more updates so I can have an easier time with my project. Thanks!!! :alright:
altus22
Posts: 621
Joined: Feb 12, 2006 12:00 PM
Location: Norfolk, VA

Post by altus22 »

Looks nice. So you're not going to replace the main bearings? Are you going to rebush the small ends of the rods or get new piston pins? Since you took out the pistons, are you replacing the rings? I'm asking because in May I'll be freshening a b34. I'd like to do it right and do a complete rebuild, but would rather do that when I go to twin turbos.
Bill in MN
Posts: 1718
Joined: Feb 12, 2006 12:00 PM
Location: The Boonies, Mn
Contact:

Post by Bill in MN »

Check your crank for trueness. I had two candidates up for the job in my new motor and both were out of whack, one by 2 thou, one by 3. Oversized bearings are easily had through various sources.
terrybpp
Posts: 25
Joined: Feb 12, 2006 12:00 PM

Post by terrybpp »

I guess I should have give more background on the engine. The PO had rebuilt the motor a few months ago but, under advise from his mechanic, chose not to hone the cylinders. He assumed the rings would still seat properly. They didnt. So instead of rebuilding the motor again he chose to install a B35 into his 535. His loss my gain.

Every piece in the motor is new so I couldn't justify pulling the crank since I knew the bearing were new. Techincally not the perfect way to rebuild but Im comfortable with it.
terrybpp
Posts: 25
Joined: Feb 12, 2006 12:00 PM

Post by terrybpp »

Ford EDIS-6 wheel and VR sensor install:


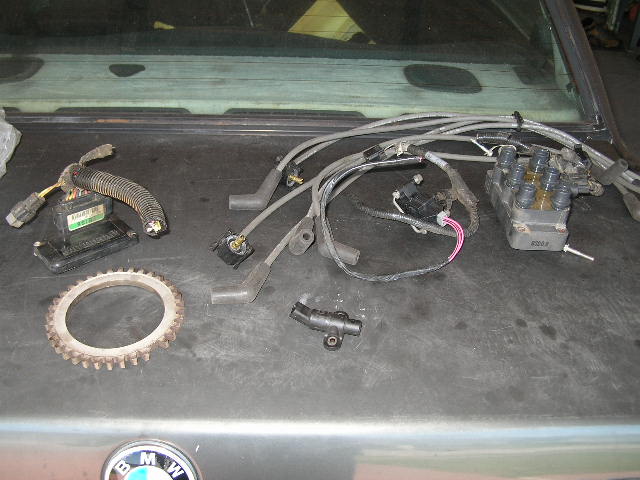
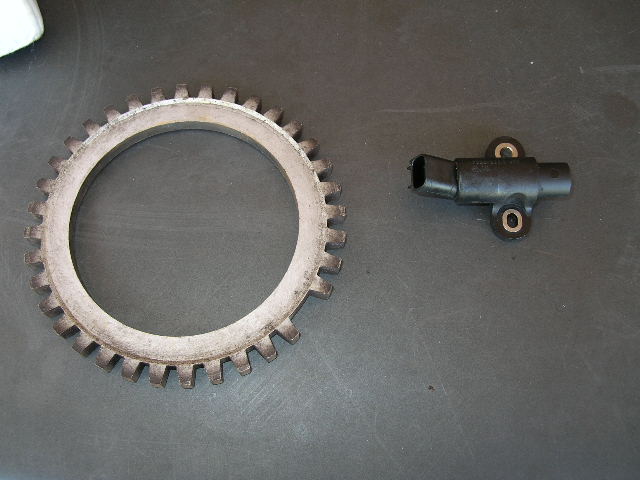
Here is the whole EDIS-6 system. It consists of a 6 plug coil pack, VR sensor, plug wires, 36-1 toothed wheel, and EDIS module. I got the whole setup on ebay but the parts can be found on any 4.0 Ford explorer or ranger.

Image

36-1 toothed wheel & VR sensor:

Image

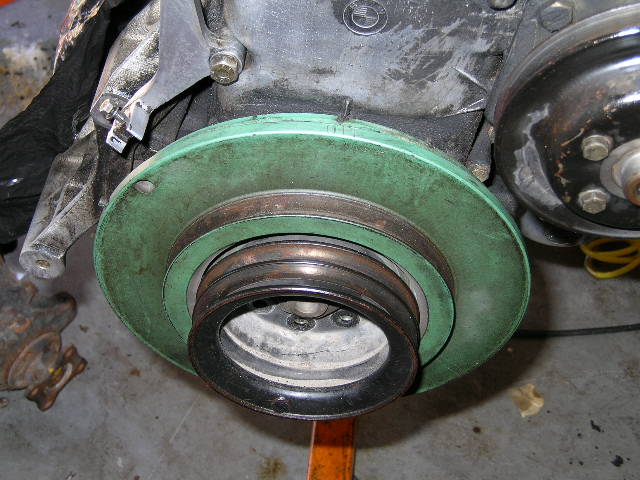
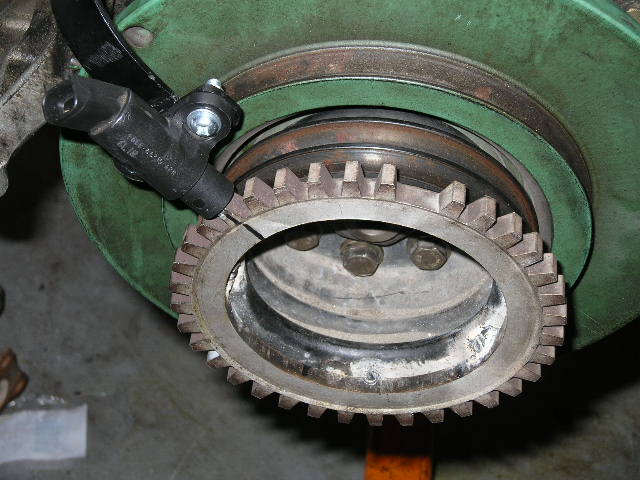
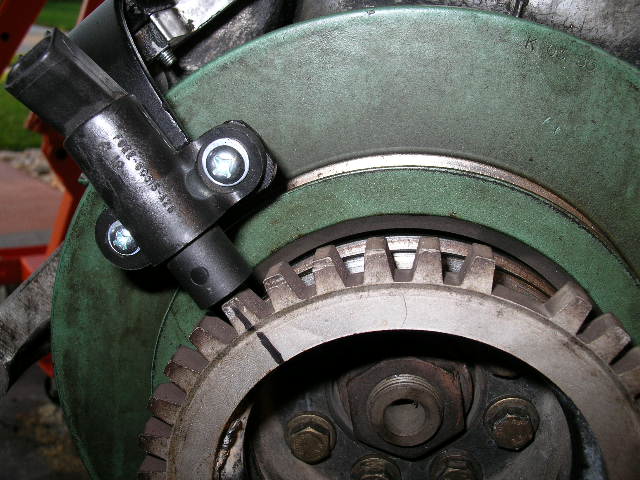
The 36-1 wheel needs to mounted on the crank so that the VR sensor is 6 teeth behind the missing tooth at TDC.

Image

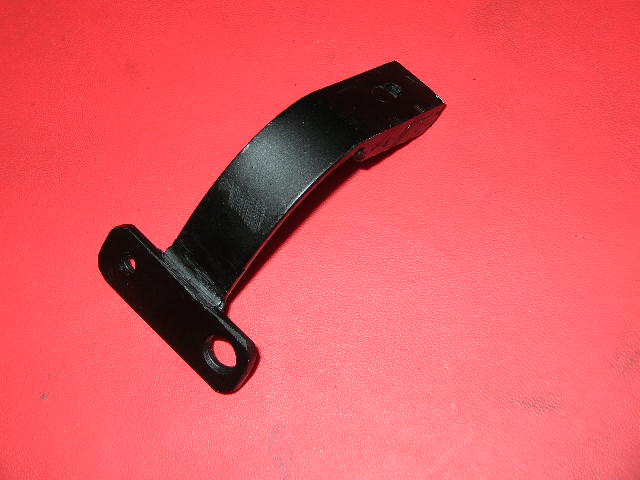
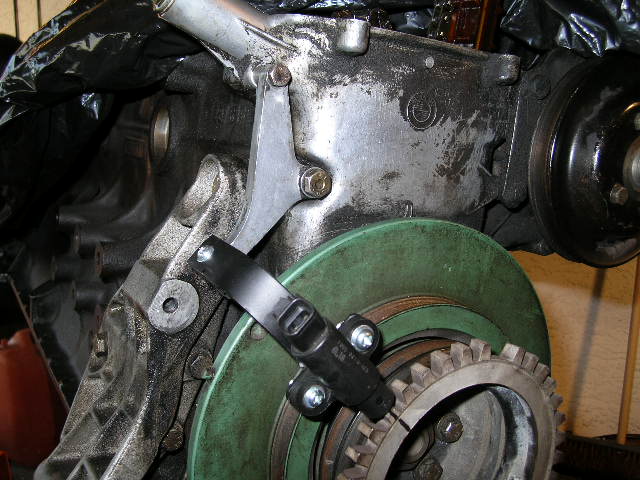
I made a nice little bracket to hold the VR sensor so that it would me 1 mm away from the toothed wheel and also clear the vibration dampener and all the accesory belts.

Image

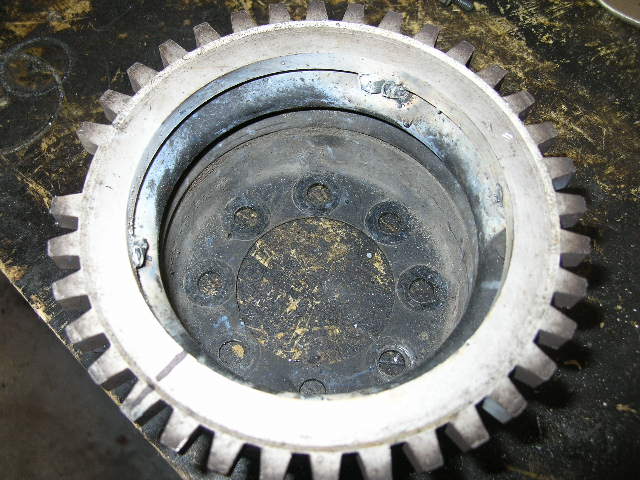
After carefully aligning the toothed wheel with the pulley and the VR sensor I welded the two together. Remember, measure 50 times, weld once.:D

Image

Then I reattached the pulley and aligned the toothed with the sensor. This took some time to get perfect. Note: due to the heat from welding, one of my pulley holes would no longer line up so I drilled it so I could install the bolt.

Image

Image

Image

I'll grind down those big ole welds and shoot it with some black paint when I start detailing the engine.

Next update will be installing the e34 oil pan and pump to clear the steering rack of the e30.:D
Skeen
Posts: 2208
Joined: Feb 12, 2006 12:00 PM
Location: Charlotte, NC
Contact:

Post by Skeen »

Looks kinda like my setup!

I'll bet the hole on your pulley didn't actually change any after welding. There's only one way the pulley can go on (but a few other orientations are really close).
Duke
Posts: 9986
Joined: Feb 12, 2006 12:00 PM
Location: Ormond Beach, FL

Post by Duke »

You are going to have problems with the bracket that holds the magnetic sensor. Because you have only one mounting point and it’s a screw, it will work loose and you will have a bad signal or the sensor will come in contact with the teeth and will be damaged. You need two mounting points with bolts, not screws.

Also worried about your honing too, you are running a big gamble with the hack method you used. Pull the crank and do it right or you will be pulling the engine due to the rings not seating, tearing it apart and then having it honed correctly because you wanted to save very little money now. Pay $ now or pay $$$$ later. What is your time worth?

With that, good luck with the project
terrybpp
Posts: 25
Joined: Feb 12, 2006 12:00 PM

Post by terrybpp »

Thanks for the advice Duke.

I am only using the screws temporaryly, they will be changed to allen heads. I think I'm going to add another bolt into the bracket to help secure it and possiblely another bracket arm to make sure the sensor is stablized.
terrybpp
Posts: 25
Joined: Feb 12, 2006 12:00 PM

Post by terrybpp »

Skeen wrote:Looks kinda like my setup!

I'll bet the hole on your pulley didn't actually change any after welding. There's only one way the pulley can go on (but a few other orientations are really close).
Can't be the orientation. I marked it on before I pulled it off.
jjdickm
Posts: 6
Joined: May 05, 2006 11:40 AM
Location: tempe

Post by jjdickm »

whats the advantage with this setup edis? im building a turbo m30 but first rebuilding it but was just curious if that was a better secondary setup?
M635CSi
Posts: 1587
Joined: Apr 09, 2006 6:25 PM
Location: .From Sea to Shining Sea

Post by M635CSi »

jjdickm wrote:whats the advantage with this setup edis? im building a turbo m30 but first rebuilding it but was just curious if that was a better secondary setup?
Don't waste your time or money unless you're going over 15 or 20 lbs of boost.

The advantage of Electronic Distributorless Ignition Systems (EDIS) is primarily to increase reliability by geting rid of the distributor, rotor and cap. The better systems get rid of the ignition wires as well. An EDIS is better suited to lean fuel mixtures (something you should avoid on your turbo) because lean mixtures require more voltage to fire efficiently.

EDIS 6 cylinder systems use either three ignition coils or six ignition coils. The three coil units fire on two sets of cylinders, the primary and the waste spark (two cylinders share one coil). The six coil units have one coil for each cylinder and don't fire waste sparks (on another cylinder).

EDIS also allows more time (degrees of crankshaft rotation) for coil saturation which makes (kinda, sorta) a stronger spark. I say "kinda, sorta" because if you're getting enough, more has no value.

Once the stock ignition system provides enough capacity to fire the plugs (which it does) the voltage drops and the ignition has done its job.

If the stock ignition is enough (which it is), then the aftermarket gazillion volt, multi coil, multi spark, multi bling ignition system isn't going to make any difference to the engine's power output. .

As cylinder pressures increase, so to does the required voltage to collapse the electrical insulation and fire the plug. The stock BMW ignition has the required capacity and will probably be more reliable than anything you can bolt on that you (or Ford) has designed…
Jimmie G
Posts: 452
Joined: Feb 12, 2006 12:00 PM

Post by Jimmie G »

I agree with duke you need to re hone try it on a slow speed with faster up and down stokes should do the job.

Jimbeaux
jjdickm
Posts: 6
Joined: May 05, 2006 11:40 AM
Location: tempe

Post by jjdickm »

I do want to be runinng with that kind of boost. I will look more into it.
Post Reply