e34 M30B35 turbo build
I hope this is welcome over here with ya'll... it is a BMW ... it's heart is an M30 ... and it's going turbo I figured I'd bring my junk over here because of the wealth of M30 wisdom. I am an unashamed M30 lover and my HG finally went in my 300k mile e34 535is, I forfeited the rebuild stock path and I drank the boost cool-aid.
I started a thread already for a simple mild N/A build, but that is now not the path I am taking. So here we go gents...
Goal is a healthy 350- knocking on 400 whp... really the goal is to get motor in car and running with boost and learn a lot along the way
Car
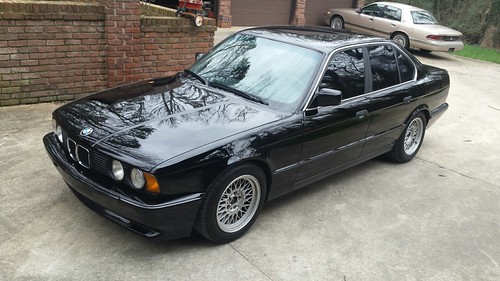
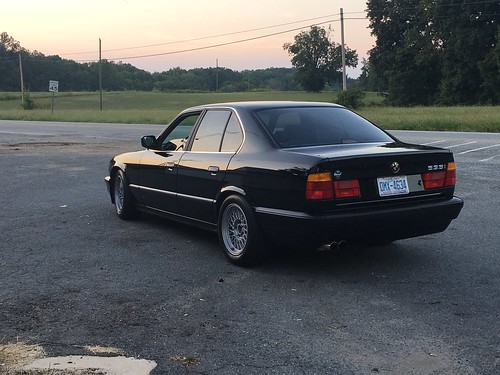
-1990 535is 5-speed (290K miles...blown HG on motor that's in the car)
-3.46 lsd, single mass flywheel, billy sports + h&r'S
IMG_0764
PhotoGrid_1453295381489
Engine
-M30b35 pulled from an 88' e34 635is (<100k miles)
Plans: ( I have 3 spare long blocks, so I want to go ahead and use a stock one, good low mileage motor, and get it in car and making boost/learn about it, tune it, and then have two other long blocks to prep when I am itching for more HP lol, or I blow this stock motor )
-Bottom end-leave stock (inspect and leave alone)
-Head leave stock... maybe 284 cam/HD roackers/springs... but right now I'm planning on staying stock (refresh/valve seals/inspect cam/resurface)
-ARP's
-Either MLS, or stock... (waiting to find quote on machine shop cost for block/head RA requirements)
-Good N Tight/RapidSpool Industries Turbo Manifold
-EV14 62# Injectors
-Walbro 255
- BW SX366 .88 ar / BW S362SX-E .88 ar...or even maybe HX40/50 depending on funds
- Clutch ...I am uncertain at the moment... input/wisdom welcome!
- FM Intercooler of some sort, car has aftermarket cheap fiberglass from bumper on it now that I am not afraid to chop up
Engine management... some specifics I am still gathering
-MS pnp (V2)
-Innovate MTX-L wideband O2 sensor
-Aeromotive 13129 FPR
-GM IAT sensor
Progress so far
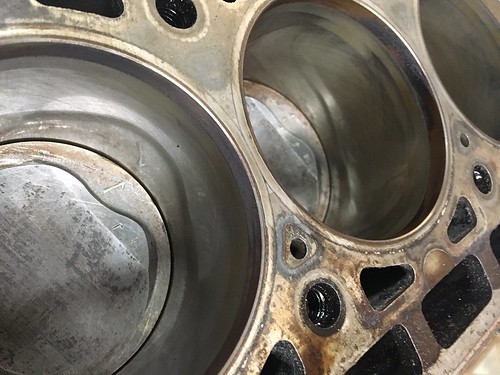
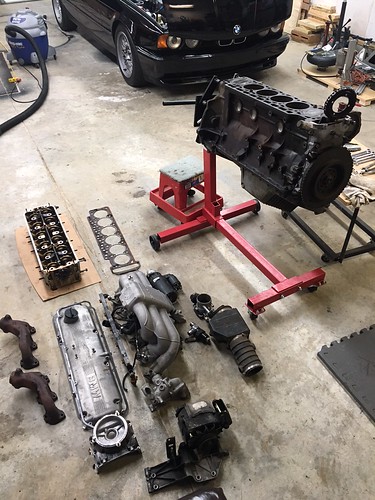
Tearing into M30 out of the 635is...
IMG_1920
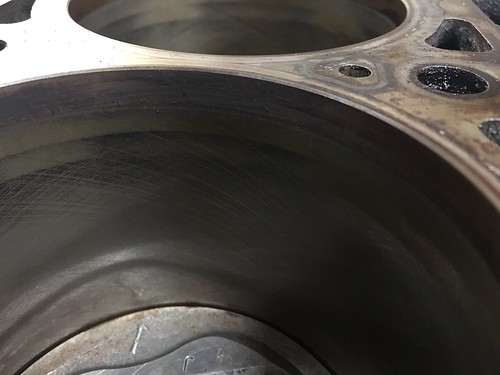
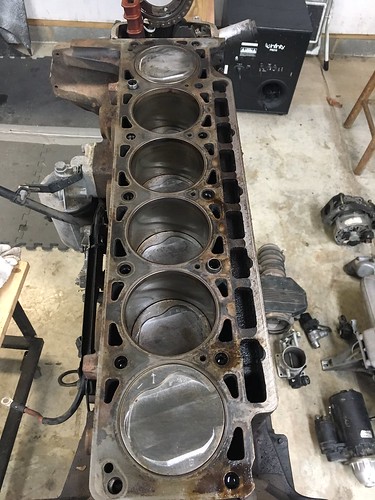
Cyl walls look pretty good, no lip at top...
IMG_1923
IMG_1921
IMG_1922
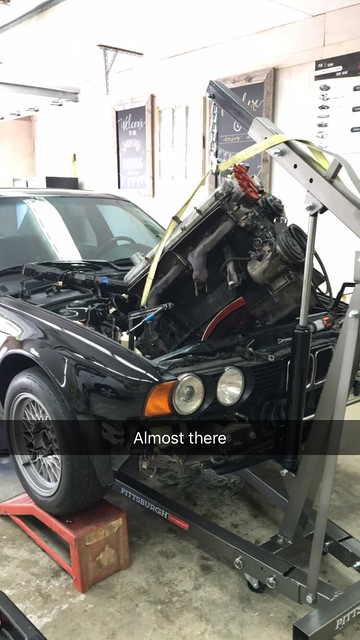
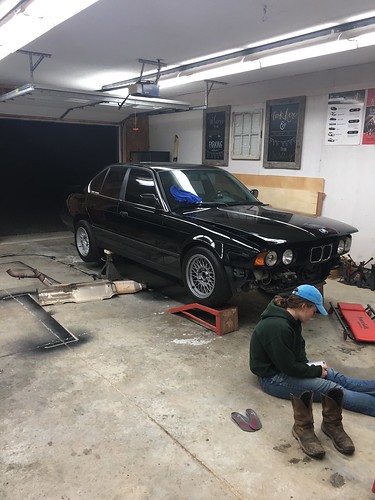
Getting ready to pull motor/engine that's in car
IMG_1942
Re: e34 M30B35 turbo build
Curious what single mass flywheel you're currently running? I assume you have the stock 535i clutch setup as well currently?
Re: e34 M30B35 turbo build
e28 M5 flywheel .. I believe it is ~16-17 pounds and an M5 clutch with about 90k miles on it.alice_k wrote:Curious what single mass flywheel you're currently running? I assume you have the stock 535i clutch setup as well currently?
-
- Posts: 557
- Joined: Nov 03, 2014 1:00 PM
- Location: Lehigh Valley, PA
Re: e34 M30B35 turbo build
spaze34 wrote:e28 M5 flywheel .. I believe it is ~16-17 pounds and an M5 clutch with about 90k miles on it.alice_k wrote:Curious what single mass flywheel you're currently running? I assume you have the stock 535i clutch setup as well currently?
Resurface the flywheel and get a clutchmasters FX-300. I bought mine from Todd @ TCD, been very happy with it so far. sicstang03 also runs the same clutch.
Re: e34 M30B35 turbo build
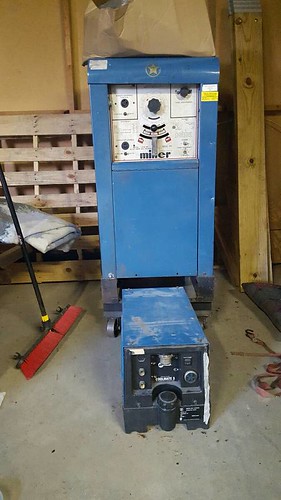
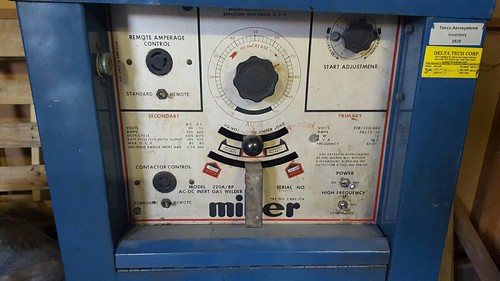
While awaiting on machine shop for the head... I decided on finally pulling the trigger and getting a TIG welder set up at the house. I have always wanted a set up so I could do everything I need as far as fabrication in the garage.
Still need to run service to the corner of the shop where this baby will rest... 100amp haha... this sucker is a tank, single phase! Also waiting until my brother can drive his tractor over to get it off the trailer... this sucker is 850lbs hahahaa
Miller 320 a/bp ...came with two pedals, Miller Coolmate 3, sheathed torch ...have to get a bottle though
00W0W_4QWDPM1a2fX_1200x900
00M0M_93694W2S9gY_1200x900
Re: e34 M30B35 turbo build
daaang how much was that thing?
Also. any progress?
Also. any progress?
Re: e34 M30B35 turbo build
Shadow wrote:daaang how much was that thing?
Also. any progress?
It was only $400... no one really desires these old massive transformer welders since the new inverter technology has been developed for years... but these old machines weld very well and nearly last forever. Plus I like old stuff!
Progress with the car...
Head is at race shop getting the works...
Cleaned, stripped, inspected.
Valve job, little intake and exhaust runner work
Minor set back....I had one intake valve that had some pitting on the sealing edge so I am ordering a valve.
Also, I am sending my cam out to Shant at BimmerHeads to regrind to a 284 profile. This will take a couple weeks to get across the states and back to my engine guy. All the work done on the head is being done by Kendal at G Engineering in Mooresville, NC... he is super knowledgeable and mainly does race work for circle track racing so he is very good. Excited to make some progress but I want to get the head 100% before moving forward.
Re: e34 M30B35 turbo build
This looks like it will be fun! Sub'd
Re: e34 M30B35 turbo build
Well, since you are wondering, I started this thread to document what I am doing for myself, and anyone who is curious. It wasn't to listen to people who don't seem to be reading what I'm posting, but just want listen to themselves talk about how their way is the best way and if you don't do it that way it's not gonna work. I have seen people flipping manifolds upside down for msnifo
-
- Posts: 161
- Joined: Aug 01, 2012 2:07 PM
- Location: Rockville, MD
Re: e34 M30B35 turbo build
.88A/R on BW S3xx with open collector will be very laggy.
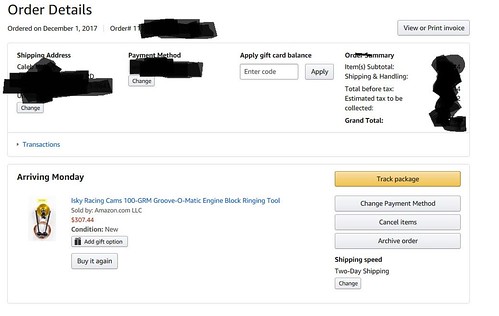
Since you have couple blocks its a good idea to spend some $$$ and get the Isky groove o matic o-ring tool and try it on your blocks.
i would use that + Elring/ARP
Since you have couple blocks its a good idea to spend some $$$ and get the Isky groove o matic o-ring tool and try it on your blocks.
i would use that + Elring/ARP
Re: e34 M30B35 turbo build
Say what? I'm confused hahaVegasMark wrote:Well, since you are wondering, I started this thread to document what I am doing for myself, and anyone who is curious. It wasn't to listen to people who don't seem to be reading what I'm posting, but just want listen to themselves talk about how their way is the best way and if you don't do it that way it's not gonna work. I have seen people flipping manifolds upside down for msnifo
Turbo sizing question...smhheidari wrote:.88A/R on BW S3xx with open collector will be very laggy.
Since you have couple blocks its a good idea to spend some $$$ and get the Isky groove o matic o-ring tool and try it on your blocks.
i would use that + Elring/ARP
So the S362SX-E 62/68 with .88A/R would be laggy or more annoying laggy than useful? I am okay with a bit of lag but I do not want to size the snail way too big. I just do not want to have to purchase another turbo in the future if I am looking for more., I am all ears... throw some knowledge bombs at me about this!
Would a Borg Warner S257SX-E 57/61 in T4 housing and .83A/R be a better choice?
Ringed block/ Head Gasket Question...
About the head gasket... I already have ARP head stud kit, but I have yet to purchase a head gasket and I keep mulling over what I want to do as far as MLS, or stock + ringed block. I just don't know about ringing my own block! Haha, talk me into this!
Re: e34 M30B35 turbo build
So progress is going pretty slow... the wife and I are going on a mission trip to Kenya in July so we have been preparing quite a lot for that.... anywho, here is SOME progress haha
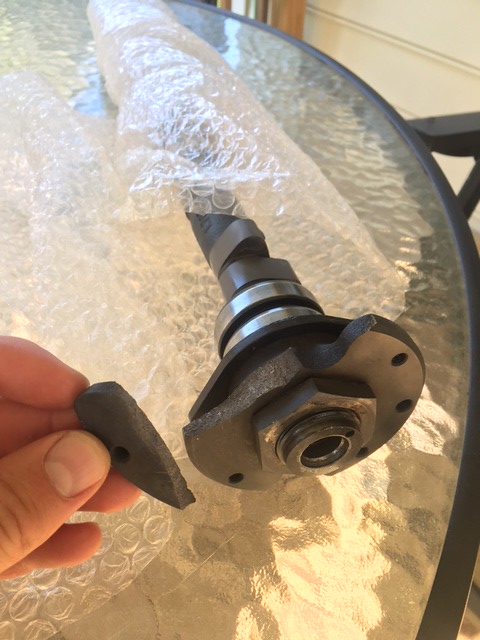
Finally received my 284 regrind from Shant at BimmerHeads... shipping across the country waiting on a grind batch to go in and then shipping back took a about 2 months. I received my cam but the cam gear flange is trashed from I guess handling while being shipped back.
I have another flange but it is in the motor that is in the car, so I will now have to pull the motor before buttoning up my top end, unless any of you nice fellers have a spare flange laying around haha
[
Re: e34 M30B35 turbo build
This is a good reference for turbo sizing.
http://www.r3vlimited.com/board/showthread.php?t=399047
The BW S257SX-E would be a good choice but I'd probably go smaller than .84 A/R since it is a T4. Have you done the calculations for individual turbo sizing for your motor? Helps you to see pluses ad minuses of each, especially if you anticipate growth down the line...
-
- Beamter
- Posts: 23035
- Joined: Apr 08, 2009 10:30 PM
- Location: Charlottesville, VA
- Contact:
Re: e34 M30B35 turbo build
For that level of power I have a CompTurbo setup if you are interested.
Re: e34 M30B35 turbo build
What are the components /specifics of this setup...is this a used set up? Thanks!mooseheadm5 wrote:For that level of power I have a CompTurbo setup if you are interested.
-
- Beamter
- Posts: 23035
- Joined: Apr 08, 2009 10:30 PM
- Location: Charlottesville, VA
- Contact:
Re: e34 M30B35 turbo build
I sent you a PM.
Re: e34 M30B35 turbo build
Finally had a clear free Saturday to pull motor that's in the car
[
There she is setting with her heart pulled out
[
[
Next step will be tearing down the head on this motor to get cam gear flange to the shop so that I can get my new head all buttoned up and ready to drop into my other long block.
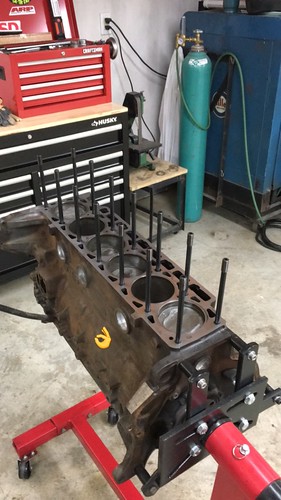
I have made a decision to buy the Isky Groove Tool and run copper/stainless wire +ARP's + stock elring HG... after hearing many occurrences of MLS head gasket weeping, and having problems along with the high cost of a single MLS, I think ringing is the way to go.
http://iskycams.com/cart/index.php?main ... e8gkfj3p46
Cheers!
[
There she is setting with her heart pulled out
[
[
Next step will be tearing down the head on this motor to get cam gear flange to the shop so that I can get my new head all buttoned up and ready to drop into my other long block.
I have made a decision to buy the Isky Groove Tool and run copper/stainless wire +ARP's + stock elring HG... after hearing many occurrences of MLS head gasket weeping, and having problems along with the high cost of a single MLS, I think ringing is the way to go.
http://iskycams.com/cart/index.php?main ... e8gkfj3p46
Cheers!
Re: e34 M30B35 turbo build
MLS is super reliable on the m30. Never had a weeping failure.spaze34 wrote:
I have made a decision to buy the Isky Groove Tool and run copper/stainless wire +ARP's + stock elring HG... after hearing many occurrences of MLS head gasket weeping, and having problems along with the high cost of a single MLS, I think ringing is the way to go.
Cheers!
Re: e34 M30B35 turbo build
Todd ,T_C_D wrote:MLS is super reliable on the m30. Never had a weeping failure.spaze34 wrote:
I have made a decision to buy the Isky Groove Tool and run copper/stainless wire +ARP's + stock elring HG... after hearing many occurrences of MLS head gasket weeping, and having problems along with the high cost of a single MLS, I think ringing is the way to go.
Cheers!
Thank you for your input. What process do you recommend for the application of an MLS for an M30?
i.e...
1- Both surfaces treated to proper roughness spec
2- Delaminate MLS gasket spraying each with copper spray
3- Follow ARP torque sequence specs, or another "stepped" torque sequence for clamping head to block.
The one occurrence of MLS problem that I can give proof of besides simply word of mouth was RagtopE30 from over at R3Vlimited, talked with him at The Vintage ---> http://www.r3vlimited.com/board/showthr ... 09&page=34
I appreciate your wisdom Todd, wish I had the money saved at the moment to drop on one of your kits... but the "buy a little as I go method" is working better at the moment...such is life haha
Update
I am finally able to get some time in the shop again...this year has been busy with a mission trip to Kenya and business trip to Nagoya... the car has been torn down almost a year now and hopefully I can make some decent progress this winter.
Started inspecting the bottom end on one of my short blocks I was wanting to use... ~100,000 mile motor maybe more ?
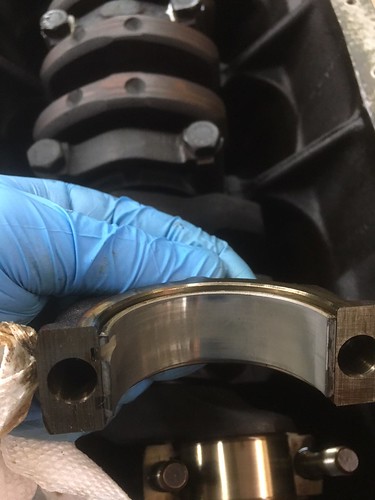
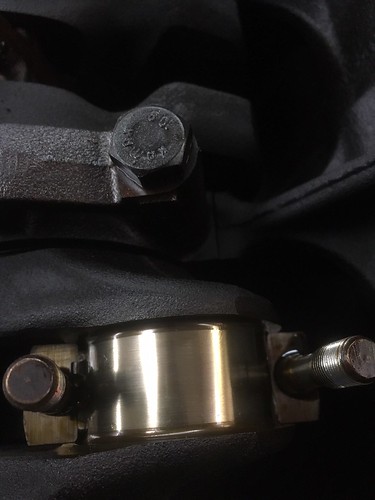
In my opinion the bottom end looks good enough to polish crank and stick new bearings in + Plastigauge everything
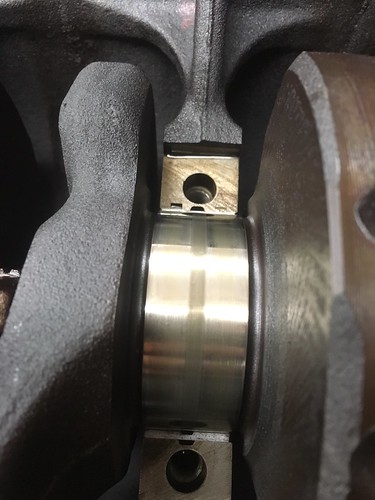
Some of the main's.....
IMG_6001
Center Main crank journal...
IMG_6006
#1 connecting rod ....
IMG_6105 by
#1 connecting rod journal...
IMG_6106
-------------------------------------------------------------------------------------------------------------------------------------
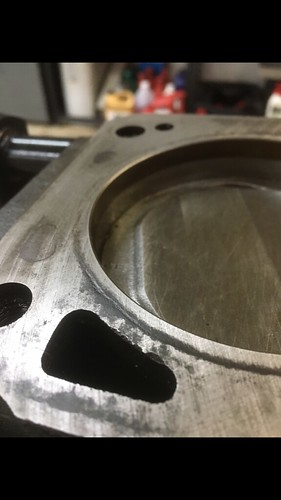
I also started prepping the deck for MLS ... made a pass with 400 and noticed on Cyl. #6 , there is some rust + pitting where the HG fire ring looks to have rusted. Feeling it, it feels like it is at least 0.005" deep... no way I can polish the deck and get this out. :/
IMG_6108
Pitted fire ring on #6...
I need some wisdom from ya'll.... should I back up and punt, go ahead and do a full rebuild... or throw a stock HG + ARP's and get it in the car??
Re: e34 M30B35 turbo build
Since the deck condition of my spare short block pushed me into a corner... I just went ahead and got the Isky Groove-o-matic
zz
zz
Re: e34 M30B35 turbo build
Good choice... It would seem like imminent failure if the head reinstalled with a block like that...
Did you end up buying a TCD Comp turbo or something else?
Re: e34 M30B35 turbo build
I will post pictures of the ringing process. I figured using copper ring + elring HG would be safe.tschultz wrote:Good choice... It would seem like imminent failure if the head reinstalled with a block like that...
Did you end up buying a TCD Comp turbo or something else?
I have not pulled the trigger on a turbo yet, all of my funds at the moment are going into getting this block all buttoned up with RSI (good&tight) t4 manifold and flipped throttle body intake... in the car and running on MS2pnp. I have to install my new fuel pump and still need to get injectors.
Re: e34 M30B35 turbo build
I had some time in the shop this past weekend and made some decent progress.
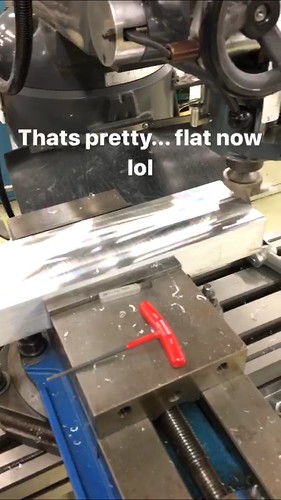
I was able to get the deck wet sanded with a chunk of 6061 stock that I fly cut on the Bridgeport...
Image-1 by
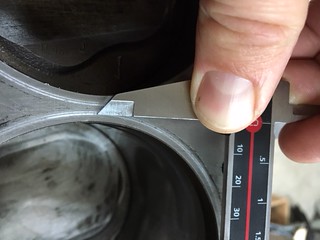
Taped 400 wet sand paper and lubed with WD-40, let the weight of the block do the work, linear motions only. I don't have an immediate before and after but you can see in the pictures where I am O-ringing that the deck looks much better... plenty good enough for stock Elring HG. I used one of our flatness Go-gages at work and feeler gage set. The deck was only out +/- 0.002" at worst end.
Before
IMG_6108 by
After.... (go to last few picture of O-ringing below)
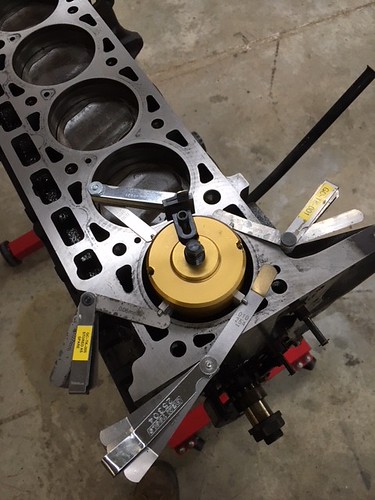
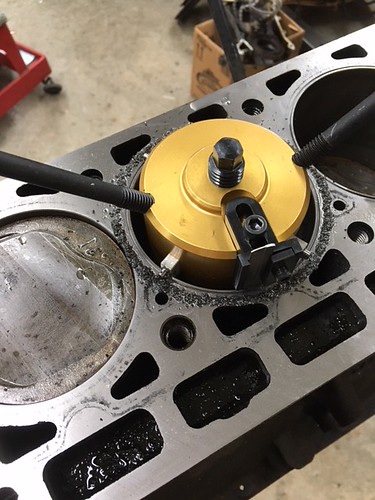
Using the Isky tool for the O-ringing process. It is very straight forward.
1- Tool centers itself within bore.
2- Use Feeler gages to set depth of cut. You do this by places feeler gages under the 4 pins that ride on top of deck, and drop carbide cutter until it touches surface of deck. Then remove feeler gages and the cutter will engage into the deck cutting until the pin contact the surface of the deck...(the depth you set).
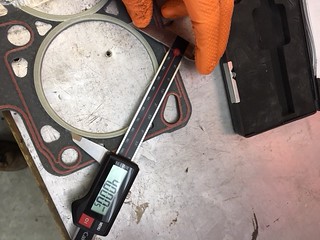
3- Use calipers to measure min and max diameter of HG, place groove in deck within those limits in order for O-ring to 'bite' into the fire ring of the HG.
4- Rotate by hand and keep lubricated, checking measurements often.
5- Rinse and repeat for each Cyl. Bore.
Setting Depth of groove with 4 sets of feeler gages ... I set this to 0.030" ... I am using 0.041" stainless wire and it is recommended that ~0.0010" protrude from deck.
IMG_6186 by
Measuring the Min and Max diameters of Elring HG... to set the diameter of the groove...
IMG_6180 by
Measuring a test "scratch" I did just to double check before I made cut
IMG_6184 by
During the process of cutting groove
IMG_6187 by
Finished up.... (I will snap some picture of the stainless wire close-up later, I didn't take any during the process)
IMG_6191 by
Re: e34 M30B35 turbo build
Interesting project. Looking forward to next update.
Re: e34 M30B35 turbo build
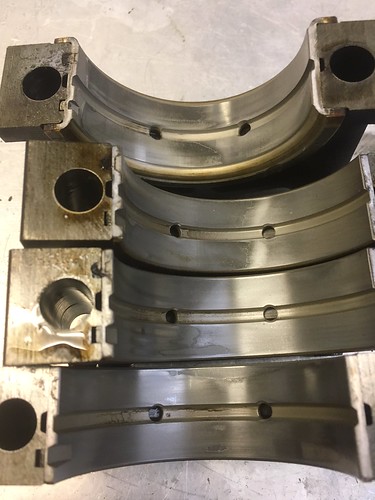
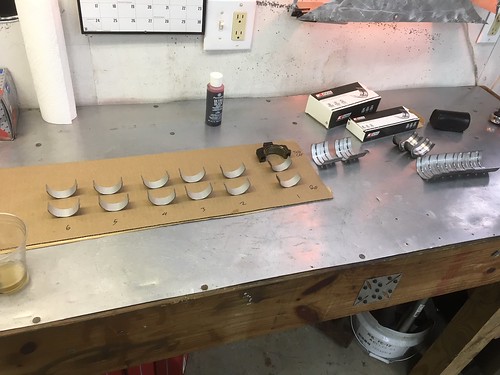
So I received my King Bearings finally... I inspected them and started getting bench/shopcleaned up to prepare for plastigage and main/rod bearing installation.
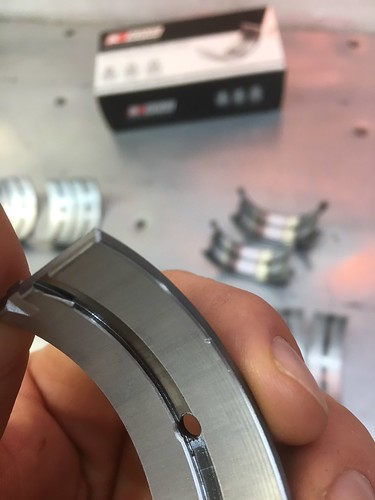
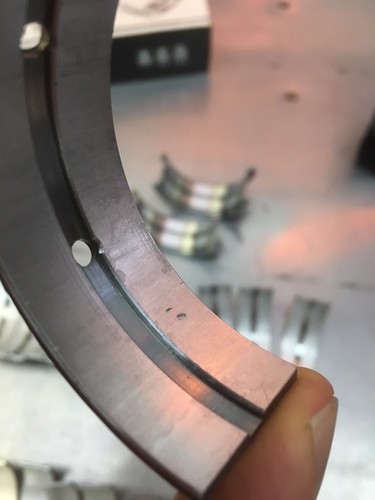
4 of my 12 mains from KING bearings had imperfections and knicks -_- ... so I will NOT be installing these.... I will be ordering some Glycol bearings from Ireland engineering
Imperfections in the KING bearings (new,,, fresh out of box -_-)
IMG_6784
IMG_6783
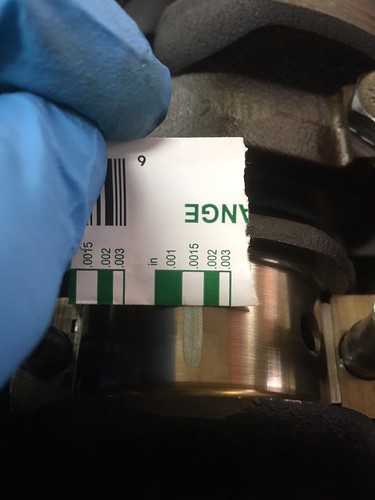
All of the rod bearings looked good after inspection so I went ahead and plastigaged' all of them and got them in...
IMG_6785
Plasti-gaged' every rod'
IMG_6788
IMG_6790
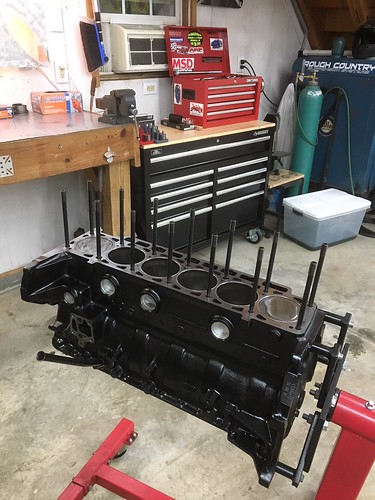
So... while waiting on my new set of main bearings I went ahead and painted the block and got her all prepped for assembly
IMG_6781
Re: e34 M30B35 turbo build
Looking fwd to progress
Re: e34 M30B35 turbo build
I put an S366 on my car recently and it is definitely laggy. came from a comp T04e 61mm which spooled quickly. I too was looking for more and I probably went too big. I will say once the car builds boost its like a freight train but just depends what you are looking for. keep up the good work!
Re: e34 M30B35 turbo build
still alive?