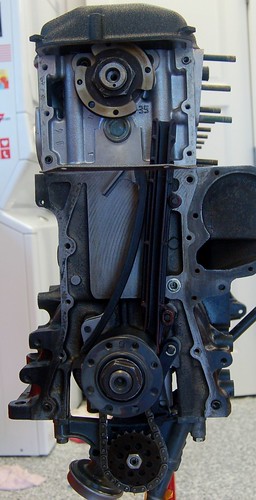
Noob M30B35 Build
-
trevmmeister
- Posts: 847
- Joined: Mar 02, 2014 9:20 PM
- Location: Newnan, GA
Re: Noob M30B35 Build
Hm, must have been another thread I was thinking of. Anyway, the B34 look isnt bad, but with a cover that nice, i would want to flash it every time the hood was up. Just a personal preference.
Going FI one day, or just sticking to high comp? (Been a minute since I followed up this thread, i might have missed a few updates on your plans)
Going FI one day, or just sticking to high comp? (Been a minute since I followed up this thread, i might have missed a few updates on your plans)
Re: Noob M30B35 Build
This engine will never be FI.trevmmeister wrote:Hm, must have been another thread I was thinking of. Anyway, the B34 look isnt bad, but with a cover that nice, i would want to flash it every time the hood was up. Just a personal preference.
Going FI one day, or just sticking to high comp? (Been a minute since I followed up this thread, i might have missed a few updates on your plans)
I will need to substantially modify that 924 Turbo air filter assembly to make it fit. There's really no reason to do it other than I think it would an interesting project and create something unique.
Re: Noob M30B35 Build. 2014-10-13: Fixed Fuel Problem
cek wrote:Super helpful!12valves wrote:Vacuum advance refers to the timing at part throttle, which is generally more advanced than at WOT. At part throttle there is a certain amount of vacuum in the intake, while at WOT there is essentially none. Cars that didn't get computer-controlled ignition timing often had a vacuum hose running to the distributor, so the vacuum would actuate a lever in the distributor resulting in more spark advance.What does a motor "wants more vacuum advance" mean?So for example, on this map they didn't bother to tune for part-throttle conditions at all. The downside to this would be subpar fuel mileage and throttle response.
On our cars WOT is determined by the TPS, right? I mean you are either at WOT with the throttle or not, right?
FWIW, my throttle response has always felt fine (and still does with this latest tune) across the range.
However my fuel mileage has suckaged. I'm getting about 16mpg... I expected better with this motor.
This is my original tune from Miller. The car pulls hard and feels good but is very rich and is no where near optimal with this tune. I have been able to get it close but not where it needs to be. After looking at the other tunes, I can see why.
I am going to tune this month and going to try to start with a good base and go from there. My engine is Paul Burke 10.5:1 pistons, N31 cam, 24lbs injectors, ported b35 head and intake. Bav auto style headers, no cat, IE exhaust
Any input would be appreciated ... Sorry about the highjack CEK
Re: Noob M30B35 Build. 2014-10-13: Fixed Fuel Problem
Email me and I'll send you my tune. Super happy with it as it is right now.shwaa wrote:
Any input would be appreciated ... Sorry about the highjack CEK
Re: Noob M30B35 Build. 2014-10-13: Fixed Fuel Problem
Done ... Thank you very much.cek wrote:
Email me and I'll send you my tune. Super happy with it as it is right now.
Re:
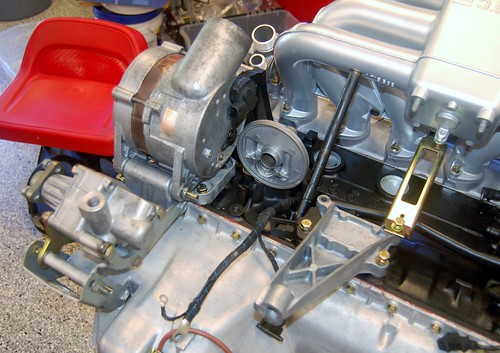
Bear with me. I am trying to re-create the "tube of wires and connector " because they got fragged pretty badly on my e34 (m30b35). So far I have used 2gauge wire from the starter to the alternator and plan on re-creating the connector wire with correct gauge wire. What is currently stumping me is the wire that seems to be coming from the wire that goes from the starter to the alternator or visa versa. Is it a ground, for the tube, or is it a ground for that "connector" from starter to alternator ?
Wires in question are bottom of page just left of center.
Any help would be appreciated.
Re: Noob M30B35 Build
another pic showing which wire im talking about... its the one to the left.
Re: Noob M30B35 Build
Someone was asking about crank nuts on Facebook and someone else asserted they didn't think a crank nut could fly off on it's own if not tightened correctly. I went to find my posts where I talked about my own personal near-catesrophic disaster regarding this and realized that I never actually posted it to this thread. I get feedback from people all the time that this thread has been helpful to them, so I want it to be complete.
So, here's what happened (copied from Vlad's thread):
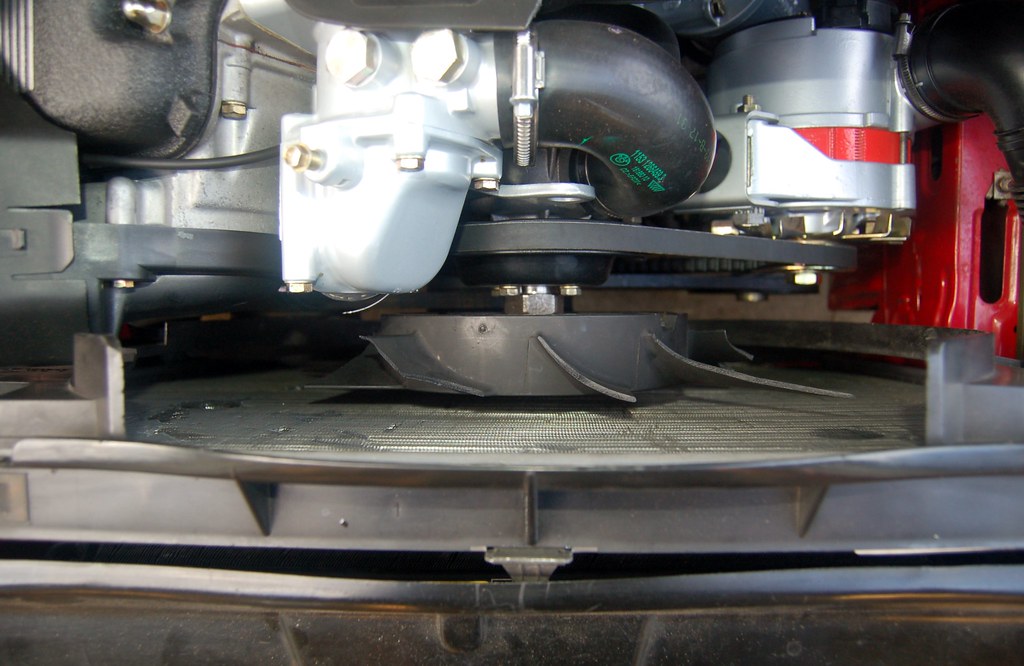
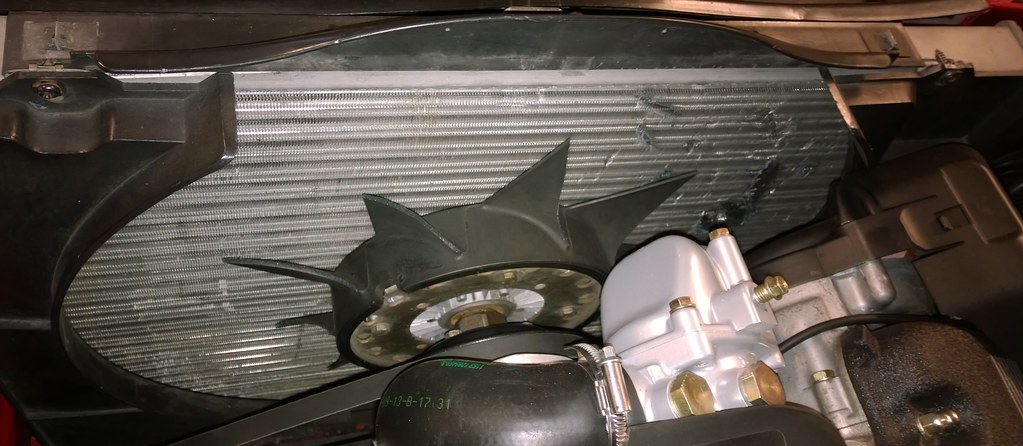
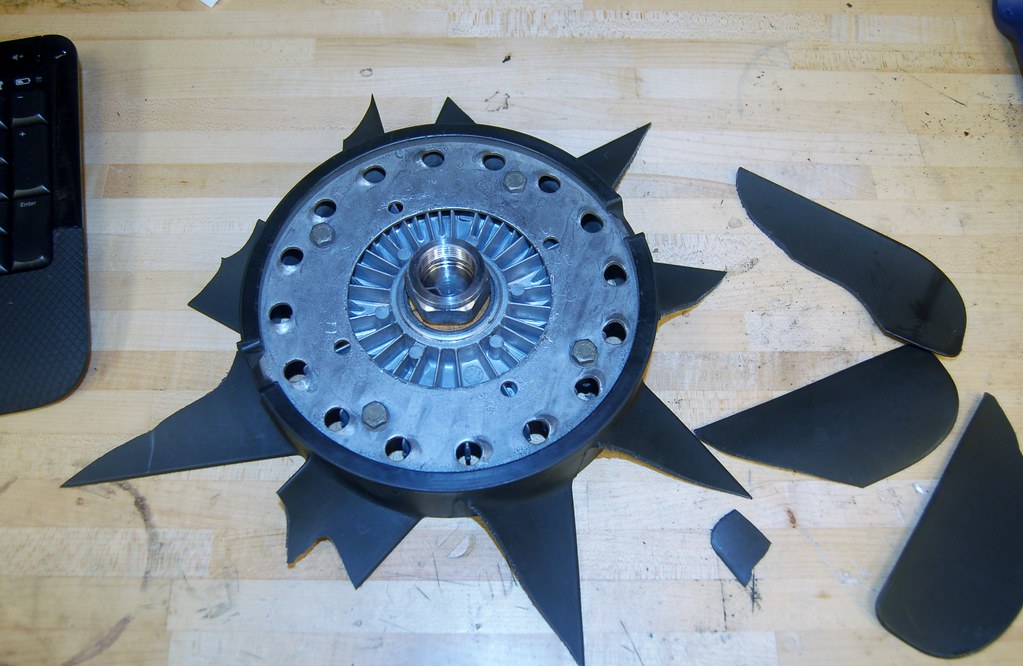
Seems to be a lack of blades. I only count the tips of 4 blades present. I found one down by the battery. Hmmm... I wonder where the other 5 went?
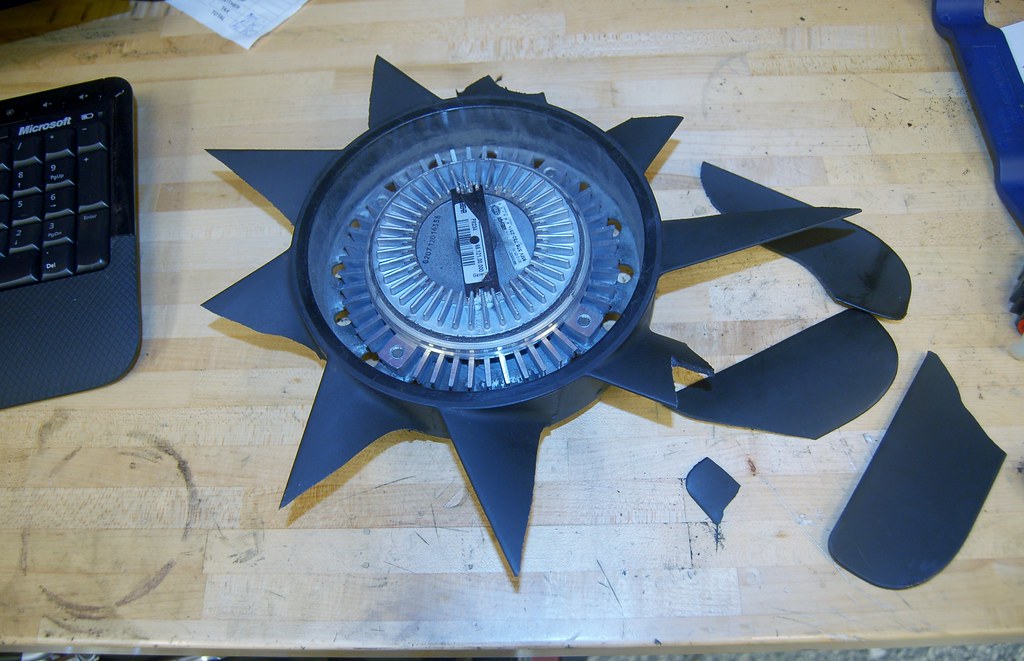
So, here's what happened (copied from Vlad's thread):
Ok, got a chance to look at the car. No dead animals or evidence of animal dismemberment apparent.

Seems to be a lack of blades. I only count the tips of 4 blades present. I found one down by the battery. Hmmm... I wonder where the other 5 went?


After moving the car I found one more blade and...
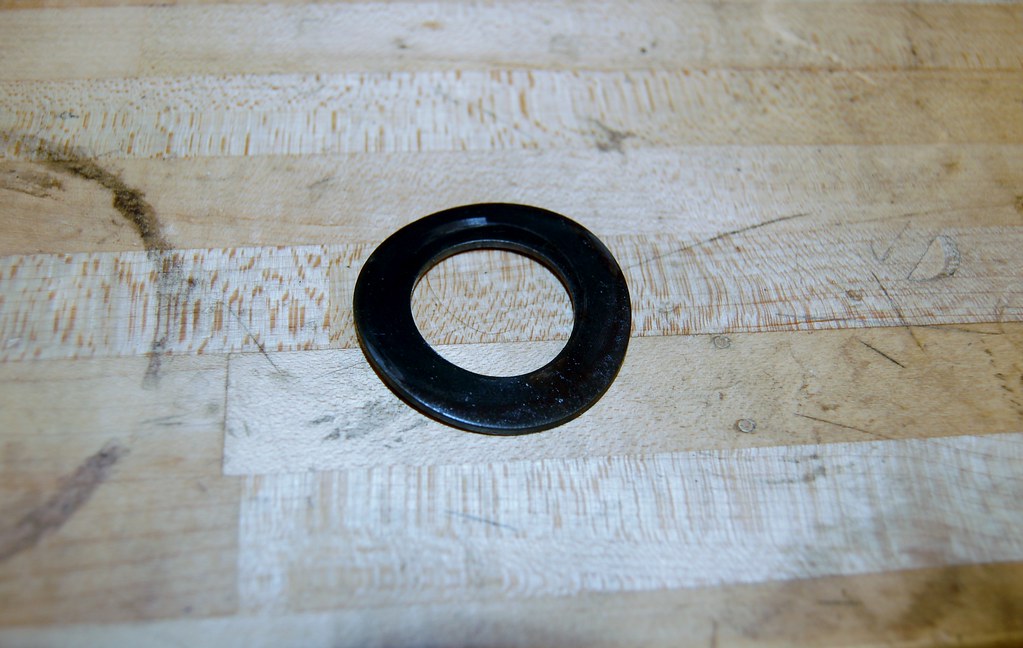
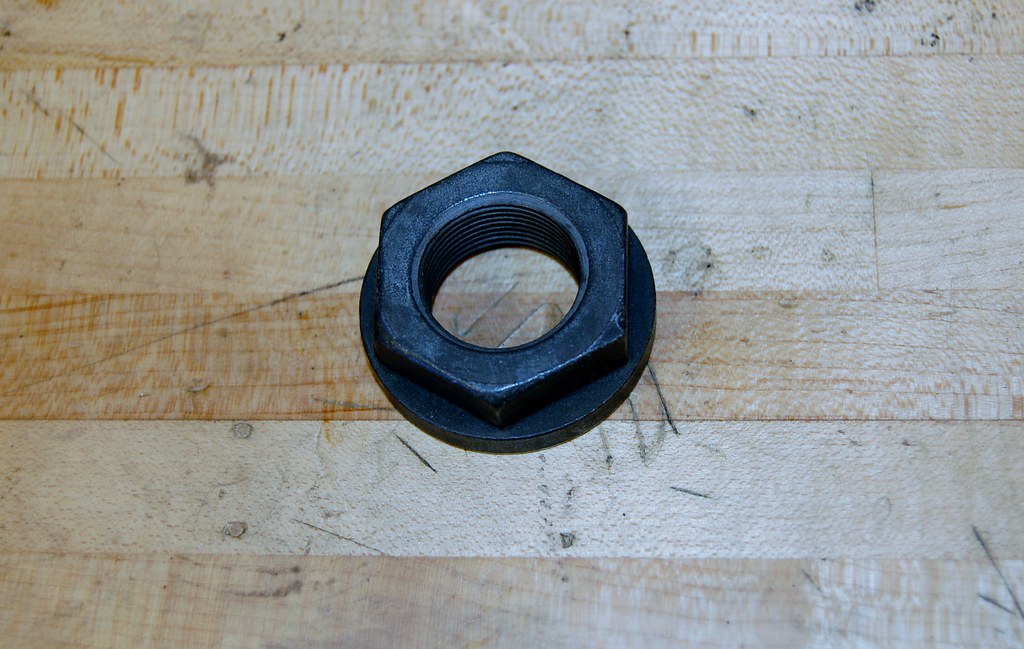
This washer.
OMFG.
You know what this means, right?
That I'm a hack mechanic who should't be building engines?
It also explains the oil leaking into the crank pulley. I sure hope that driving several thousand miles without a tight crank nut (which is nowhere to be found) didn't do any damage.
Kyle in NO wrote:Dig the sheared piece out of the crank snout with a pick and install a new key. They are cheap.cek wrote:CJ asks "if the woodruff key is sheared, what do we do? Crush the car?"Kyle in NO wrote:If the woodruff key isn't sheared, you should be fine.
Oh, and don't touch my engine.
http://www.autohausaz.com/search/produc ... 7119951485
cek wrote:Oh, I tightened it. I did it on the stand though and just to about 200lbs. It's supposed to be 325. I also didn't put locktite on it.demetk wrote:Holy crap. You mean you never tightened that nut? Don't you have a checklist or something?cek wrote:It also explains the oil leaking into the crank pulley. I sure hope that driving several thousand miles without a tight crank nut (which is nowhere to be found) didn't do any damage.
Me, I don't do checklists but whenever I install something I make sure to finish that particular process. Less chance of forgetting something.
I'm not the first to do this, which sorta makes me feel better.
cek wrote:Or, my memory is wrong and I actually failed to tighten it. Someone above asked "don't you have a checklist? you fucking idiot!"jodystevens wrote:200ft/lb and it still came loose
No and yes.
Next time I will.
cek wrote:Thank you Blunt:
Thank you Strictly BMW:
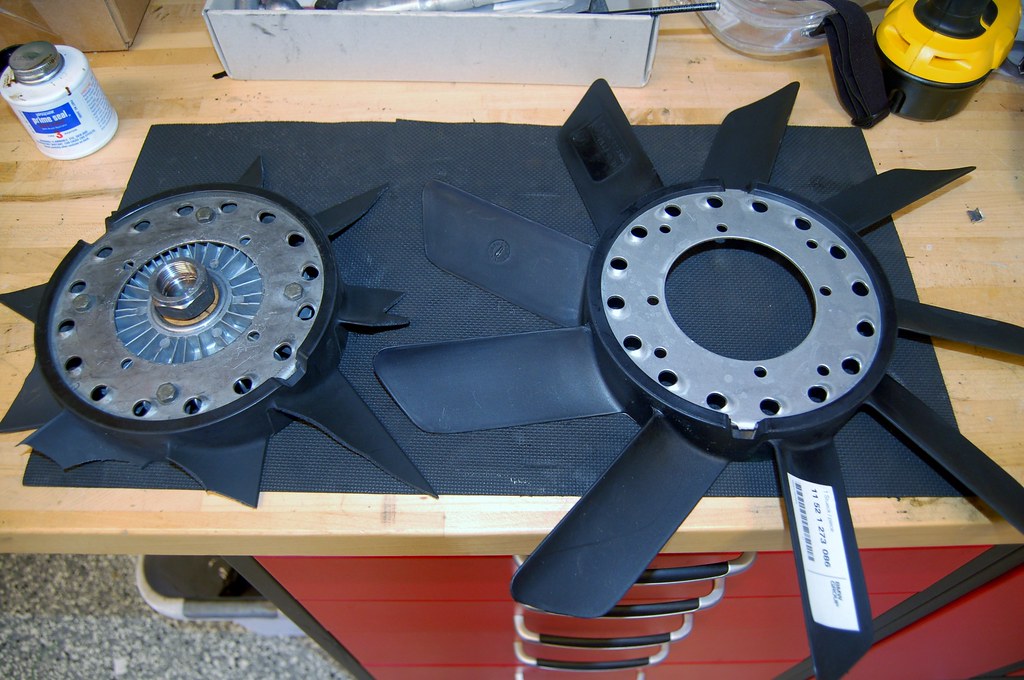
But, as it turns out I probably didn't need that nut because, I just happened to see this:
I just assumed it had previously fallen out and was lost. But now it's clear that it was the nut that destroyed the fan, not just the washer. I'm glad it didn't dent the underside of the hood!
Regardless, I'm using the new one. I actually should have another used one somewhere (two donor motors) but I can't find it among all my parts.
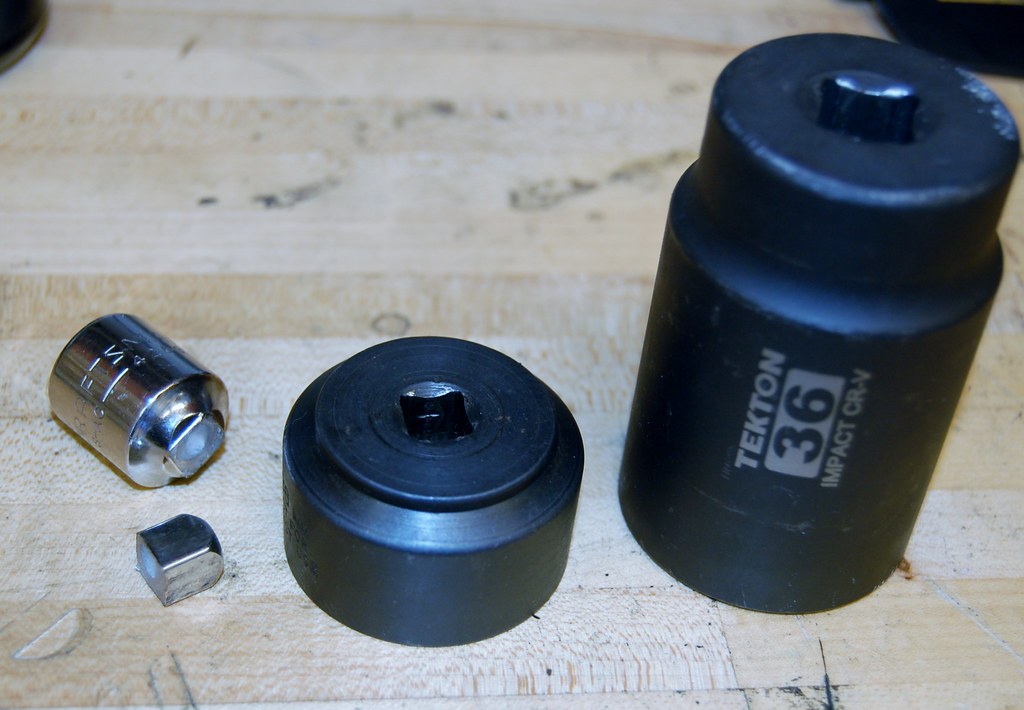
I have now convinced myself that I never REALLY torqued this nut down. I would have remembered having to use something to prevent the engine from turning, because that much torque turns the motor even if the motor is in gear and the brakes are on. It is also enough to break the 3/8" to 1/2" socket adapter I have. I tried using the shorter 3/8" socket today because the longer one won't fit with the radiator in.
For now I got to 180ft/lbs before the adapter broke. I won't be driving the car before Tuesday and I've ordered a shorter 36mm socket from Amazon that will allow the torque wrench in there.
cek wrote:Ah, yes. I got the right socket and torqued the nut to 325ftlbs.
I have been driving Vlad this week. His PO is in town, and we're trying to get together so he can see what I've done to his baby.
I have not have not had a chance to put him up on the lift to double check, but I'm confident its still leaking at the rear. But now I don't think I'll have to pull the engine, just the transmission.
Re: Noob M30B35 Build
And, for the record, the engine now has 11,256 miles on it since I put it in and is running flawlessly. No leaks either.
If it esploded tomorrow I'd still be pretty damn proud of myself.
If it esploded tomorrow I'd still be pretty damn proud of myself.
Re: Noob M30B35 Build
Nice work. I have a similar engine I built but with the N21 cam, electric only fan, and megasquirt tuning in slow progress. How do you like that cam? FWIW I torqued the crank nut to like 270 ft lbs. If I recall correctly for whatever reason Paul Burke recommended and I haven't had an issue with it.
Re: Noob M30B35 Build
The engine is awesome. So torquey and smooth. Sounds great too. Really glad i went with the N21 cam. Just enough 'lope' at idle without being annoying for a daily driver. I spend a fair amount of time stopped some days during my commute.foolish wrote:Nice work. I have a similar engine I built but with the N21 cam, electric only fan, and megasquirt tuning in slow progress. How do you like that cam? FWIW I torqued the crank nut to like 270 ft lbs. If I recall correctly for whatever reason Paul Burke recommended and I haven't had an issue with it.
Re: Noob M30B35 Build
It's been exactly 3 years (and just shy of 19k miles) since first start. My wife had posted this video on Facebook and it popped up today reminding me of the event.
https://youtu.be/kD7mkVpJHA0
I was clearly excited that the damn thing started on the first attempt.
I'm clearly still excited that it has still not esploded on me.
https://youtu.be/kD7mkVpJHA0
I was clearly excited that the damn thing started on the first attempt.
I'm clearly still excited that it has still not esploded on me.
Re: Noob M30B35 Build
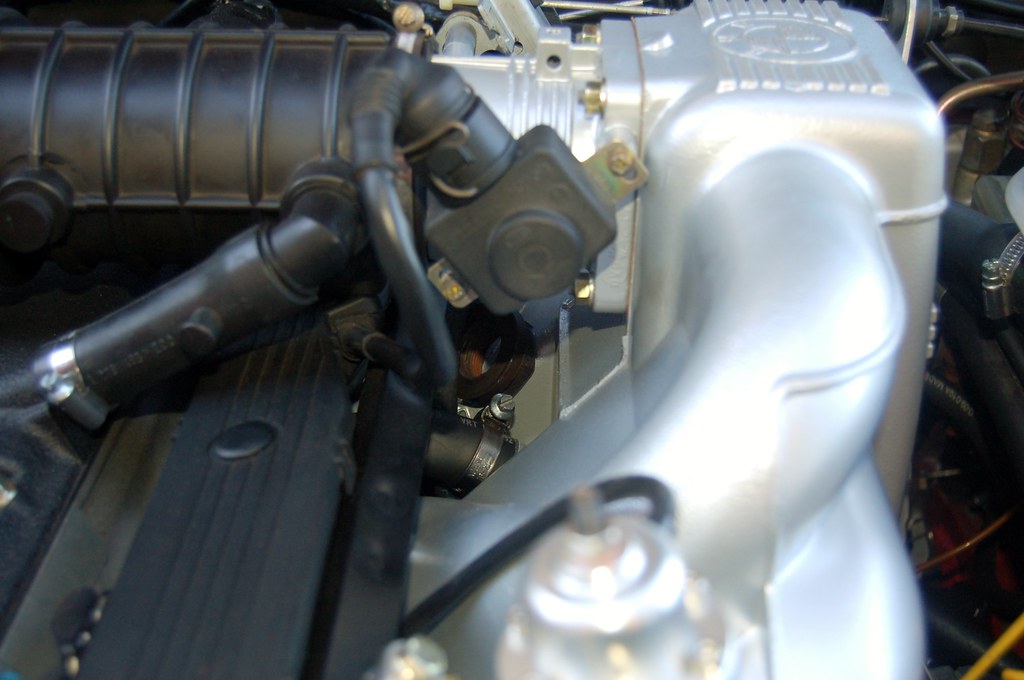
Maybe I missed it, but I'm curious about the throttle body assembly after the powder coat. Did you have any pics that documented this process? Maybe just link to what you used to re assemble yours? I want to PC mine also.
Also, a genuine thank you to you for your documentation, it's been so incredibly helpful on my own b35 stuff. You've provided a great resource here.
Also, a genuine thank you to you for your documentation, it's been so incredibly helpful on my own b35 stuff. You've provided a great resource here.
-
harrypalmer
- Posts: 669
- Joined: Jul 25, 2012 12:10 AM
- Location: Denver, Colorado
Re: Noob M30B35 Build
cek wrote:It's been exactly 3 years (and just shy of 19k miles) since first start. My wife had posted this video on Facebook and it popped up today reminding me of the event.
https://youtu.be/kD7mkVpJHA0
I was clearly excited that the damn thing started on the first attempt.
I'm clearly still excited that it has still not esploded on me.
Re: Noob M30B35 Build
I just disassembled it and put it back together in reverse order. It's not hard, or I would have gotten it wrong, which I didn't.jhall wrote:Maybe I missed it, but I'm curious about the throttle body assembly after the powder coat. Did you have any pics that documented this process? Maybe just link to what you used to re assemble yours? I want to PC mine also.
Also, a genuine thank you to you for your documentation, it's been so incredibly helpful on my own b35 stuff. You've provided a great resource here.
Re: Noob M30B35 Build
cek wrote:
I just disassembled it and put it back together in reverse order. It's not hard, or I would have gotten it wrong, which I didn't.
Fair enough, though one more dumb question. Did you remove the throttle plate?
If you mask well it shouldn't be necessary, but if there's any plastic seals hidden in there they could get turned into liquid during the bake.
Re: Noob M30B35 Build
Yes, I did. There was no plastic left when I was done disassembling it.jhall wrote:cek wrote:
I just disassembled it and put it back together in reverse order. It's not hard, or I would have gotten it wrong, which I didn't.
Fair enough, though one more dumb question. Did you remove the throttle plate?
If you mask well it shouldn't be necessary, but if there's any plastic seals hidden in there they could get turned into liquid during the bake.
Re:
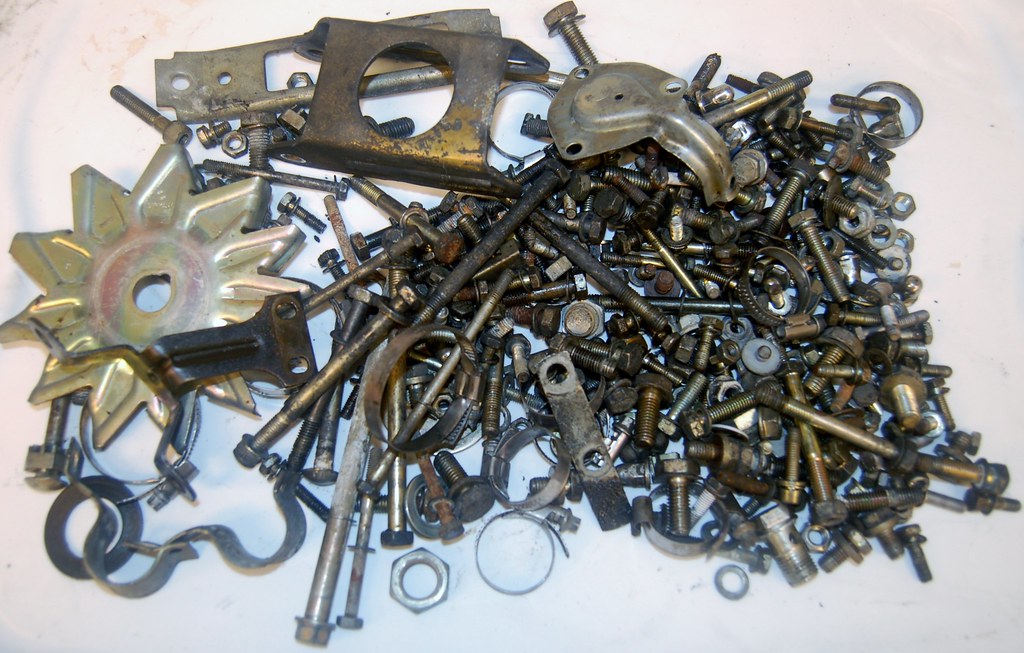
Everything will be yellow/zinc.
This is actually everything from the B35 and B34 donor motors. For this amount of stuff the place I'm using charges the same so might as well. Before tossing it all together I carefully took pictures of each of my labeled zip-locks with the fasteners that went together all neatly laid out.
For example:
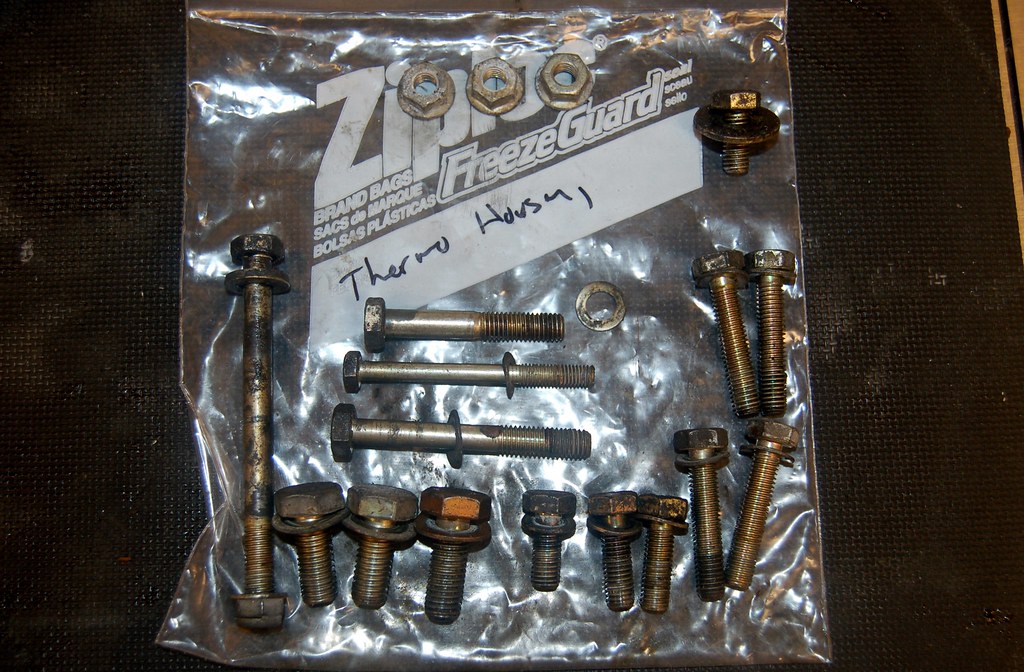
It'll still be a challenge figuring out what each fastener is for, but at least I'll have a reasonable reference.[/quote]
Hi man i want to know. Do you still remaining photos of every labeled zip-locks with the fasteners? I am also restoring my m30b34. And i want to know where i must use zip-locks with the fasteners. Can u send to my email all photos? (sabir.mammadov@icloud.com)
Re: Noob M30B35 Build
I gave up. I put all the fasteners in a box together and had them plated. Then I just searched for the right fastener using RealOEM as I assembled things. I never looked a those photos again. Worked fine.
Re: Noob M30B35 Build
I now have 21,500 miles on the motor. Almost everything on the motor (sensors, belts, etc...) were new when installed. Since new I've performed the following maintenance:
When I do the oil service sometime in January I'll run down the Inspection II list and do all the inspecting required.
But JUST FOR THE ENGINE, what should I proactively replace at this point in time/mileage?
Inspection II says "replace plugs". But my plugs look fine. Should I really bother replacing them?
What else?
- Oil, Oil Filter, Air Filter change (twice)
- Flushed coolant
- Adjusted Valves
- Replaced oil pressure switch
When I do the oil service sometime in January I'll run down the Inspection II list and do all the inspecting required.
But JUST FOR THE ENGINE, what should I proactively replace at this point in time/mileage?
Inspection II says "replace plugs". But my plugs look fine. Should I really bother replacing them?
What else?
-
athayer187
- Posts: 1623
- Joined: May 10, 2006 11:27 AM
- Location: Cheshire, CT
Re: Noob M30B35 Build
If it were my motor, I'd do the following:
- Check the plugs (sounds like you have) - no need to prophylactically replace
- Check the valve clearances
- Change the oil
- Check/change the coolant (I do this on new-ish motors just to make sure there's no garbage in there from the cleaning/reassembly process)
- Drive the crap out of it
- Check the plugs (sounds like you have) - no need to prophylactically replace
- Check the valve clearances
- Change the oil
- Check/change the coolant (I do this on new-ish motors just to make sure there's no garbage in there from the cleaning/reassembly process)
- Drive the crap out of it
Re: Noob M30B35 Build
All of these have been done (esp. the last). Thanks.athayer187 wrote:If it were my motor, I'd do the following:
- Check the plugs (sounds like you have) - no need to prophylactically replace
- Check the valve clearances
- Change the oil
- Check/change the coolant (I do this on new-ish motors just to make sure there's no garbage in there from the cleaning/reassembly process)
- Drive the crap out of it
Re: Noob M30B35 Build
Hi Charlie - I sent you an email but realize I didn't give you my address (tj85e28@gmail.com). My question has to do with the guide rail (driver's side). I'm in the middle of replacing my head and so have the upper timing cover off. Peering down the cover it appears my rail is intact however it appears loose -- about 1/8" of play front to back and slightly more than that side to side. Did the guides you removed from any of your donor engines appear loose? Did the new one you installed fit snug? I'm wondering if over time the mounting holes become larger thru vibration and so appear loose with the accumulation of miles. I welcome anyone's feedback...
Re: Noob M30B35 Build
I don't recall how much play mine had, nor do I know how much there's supposed to be. Sorry!tjsbrick wrote:Hi Charlie - I sent you an email but realize I didn't give you my address (tj85e28@gmail.com). My question has to do with the guide rail (driver's side). I'm in the middle of replacing my head and so have the upper timing cover off. Peering down the cover it appears my rail is intact however it appears loose -- about 1/8" of play front to back and slightly more than that side to side. Did the guides you removed from any of your donor engines appear loose? Did the new one you installed fit snug? I'm wondering if over time the mounting holes become larger thru vibration and so appear loose with the accumulation of miles. I welcome anyone's feedback...
Re: Noob M30B35 Build
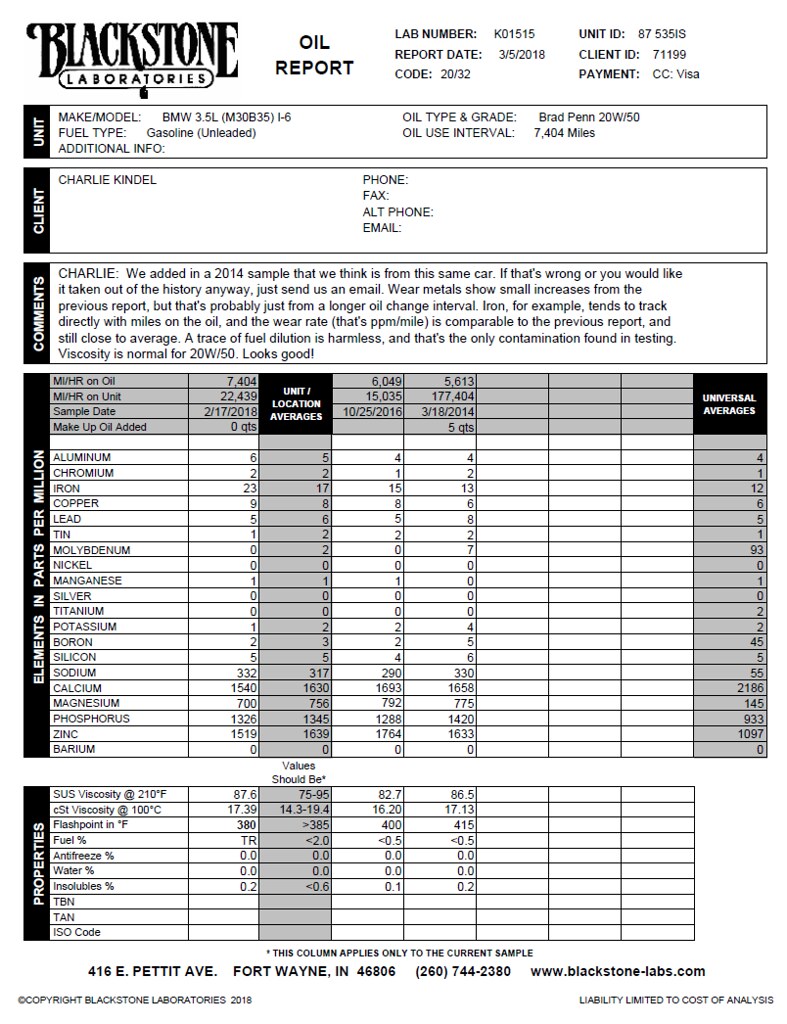
I use that oil ^^ in three BMW's and my runabout. Nice to see it is good shape after 7,000+ mile ODI.
Re:
I’m rebuilding my engine now. Did you get an answer to your question? From my research, it looks right. But I also want to make sure before in bolt everything down.
Thanks
Re: Re:
Nope. Crank dowel pin is at 11 o'clock and bolt holes are at 12 & 6 o'clock.Smileyboy wrote:I’m rebuilding my engine now. Did you get an answer to your question? From my research, it looks right. But I also want to make sure before in bolt everything down.
Thanks
Re: Re:
Camshaft bolt holes?demetk wrote:Nope. Crank dowel pin is at 11 o'clock and bolt holes are at 12 & 6 o'clock.Smileyboy wrote:I’m rebuilding my engine now. Did you get an answer to your question? From my research, it looks right. But I also want to make sure before in bolt everything down.
Thanks


