535is Homebrew Turbo (ex 633 Callaway) - 2024 Update
Re: 633CSi Turbo - Not Really Callaway Anymore - 1/14/2018
Thanks for sharing in great detail. Interesting read.
Re: 633CSi Turbo - Not Really Callaway Anymore - 1/14/2018
Fuck yea. Nice work!
Re: 633CSi Turbo - Not Really Callaway Anymore - 3/18/18 Upd
Thanks for the comments guys!
Still tuning my megasquirt stuff but I am going slow because of wanting to test cold starts and hot days to compare the tune.
Last night I removed some timing which seemed to help my idle so instead of 16* advance, I lowered it to 13.5* and I idle around 950rpm. This gives me a MAP of about 28-31 warm, although I still have some slight surging that I haven't figured out. My AFR will fluctuate on a somewhat regular basis, say from target 13.5 up and down in the region until randomly jumping up to 14.8 or so. The engine sounds like it is missing when it does this, but I need to check spark plugs again (A couple of weeks back I regapped plugs and found cylinder #5 with an electrode almost all the way worn down).
Hoping to continue messing with it before sharing screenshots-- it's a little difficult to tell what is really the root cause.
I also bumped up boost via my manual boost controller to about 10psi/150kPa. Trying to tune the entire VE map for use at the track... I just want it to be tuned for all regions. I believe I had some detonation yesterday in 80F temps, so I backed down to about 17* advance at 150kPa.
I have also adjusted my MAT curve and it is looking similar to the default MS2. Will share more soon. Aiming for a track day in about 4 weeks.
Re: 633CSi Turbo - Not Really Callaway Anymore - 3/18/18 Upd
I have adjusted my tune file for a smoother idle because at 16* idle advance, the engine didn't run smoothly. Right now at 12* advance, it seems much more happy. Here is my .MSQ if anybody is interested in looking.
MSQ as of 4/5/2018: https://files.fm/u/bj3egw2k
The MAT and BARO correction seems to be working pretty well.
I tuned MAT with a scaled version of the default curve and decided to zero it out at about 80* F. So far it seems to work pretty good, I have been trying to drive it in cold mornings (30F) and warm afternoons (65+F). It turns out that in the cold with the scaled down curve, I would run slightly lean and then slightly rich in the afternoons. At least now the MAT curve was affecting my mixture, unlike last year.
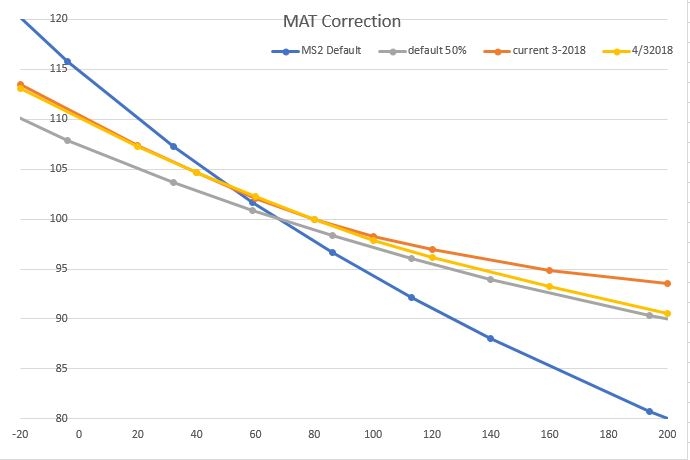
BARO curve I still need to test further but within 80-85kPA connected together with MAT, they seem to work pretty good so far.

Lastly, AFR and VE tables.

I'm not ready to share my ignition map, but I found removing timing from 30-40kPa region really helped to smooth out the off pedal jerkiness I had been having. I'll need to continue tuning this, but comments are welcome.
MSQ as of 4/5/2018: https://files.fm/u/bj3egw2k
The MAT and BARO correction seems to be working pretty well.
I tuned MAT with a scaled version of the default curve and decided to zero it out at about 80* F. So far it seems to work pretty good, I have been trying to drive it in cold mornings (30F) and warm afternoons (65+F). It turns out that in the cold with the scaled down curve, I would run slightly lean and then slightly rich in the afternoons. At least now the MAT curve was affecting my mixture, unlike last year.
BARO curve I still need to test further but within 80-85kPA connected together with MAT, they seem to work pretty good so far.
Lastly, AFR and VE tables.
I'm not ready to share my ignition map, but I found removing timing from 30-40kPa region really helped to smooth out the off pedal jerkiness I had been having. I'll need to continue tuning this, but comments are welcome.
Re: 633CSi Turbo - Unexpected Twist - 5/3/18 Update
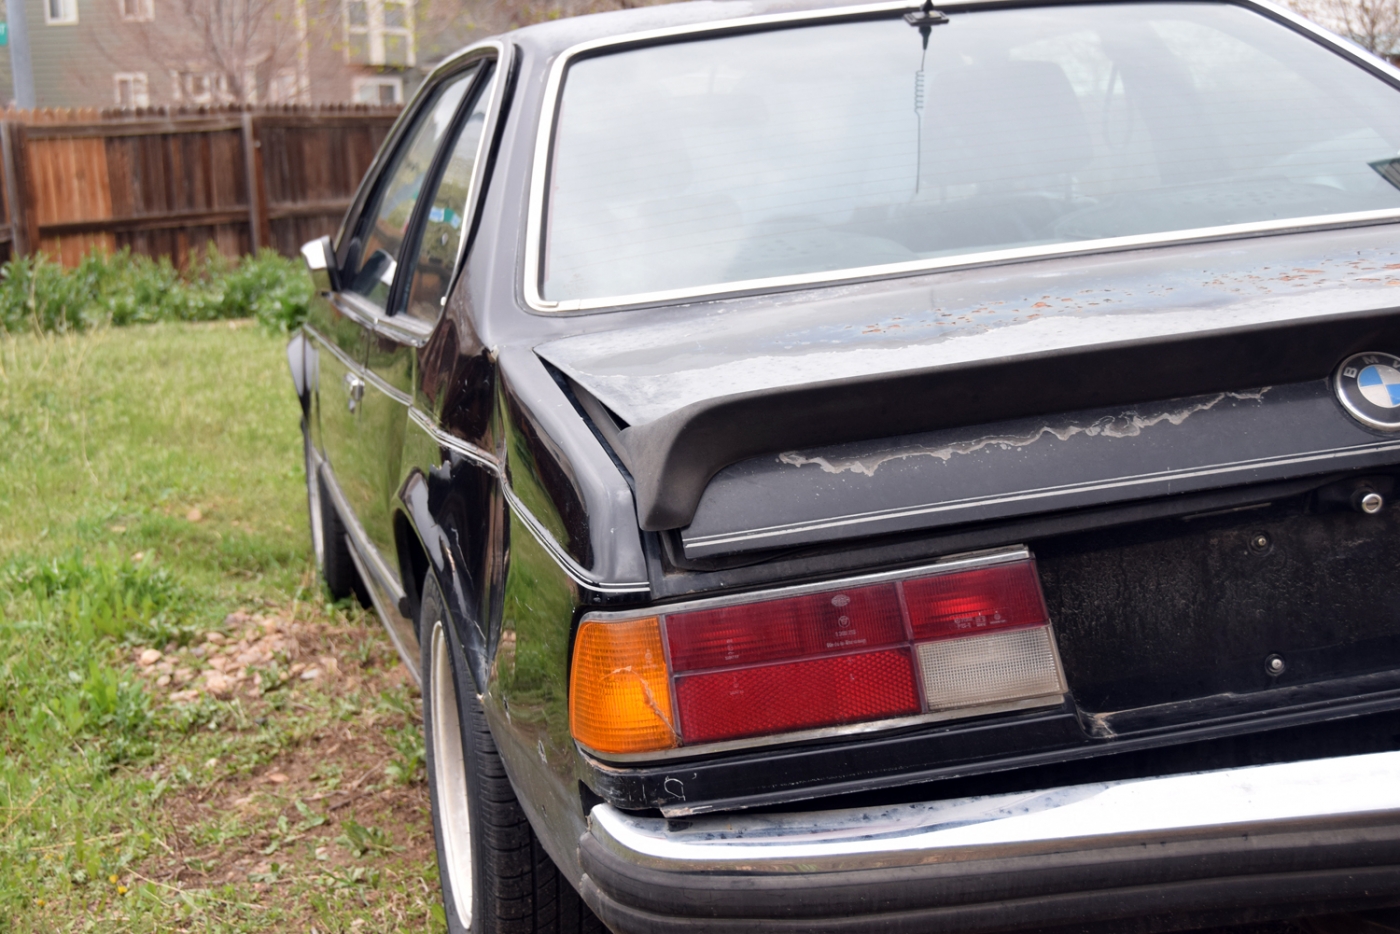
So some bad news: The delayed update is coming through because as I was tuning the MAT correction curve and general driveability, this happened.
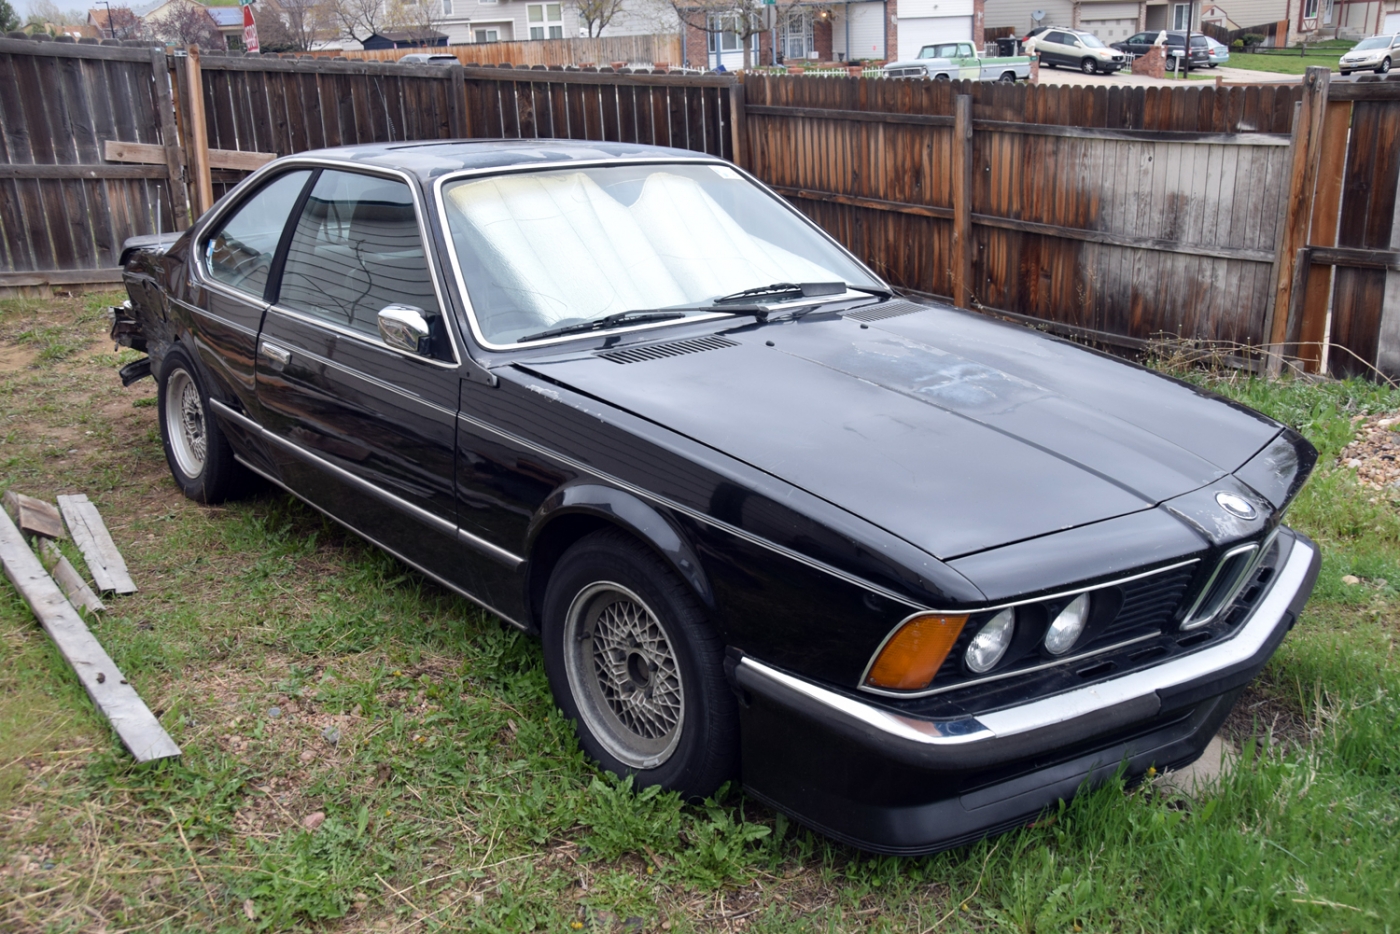
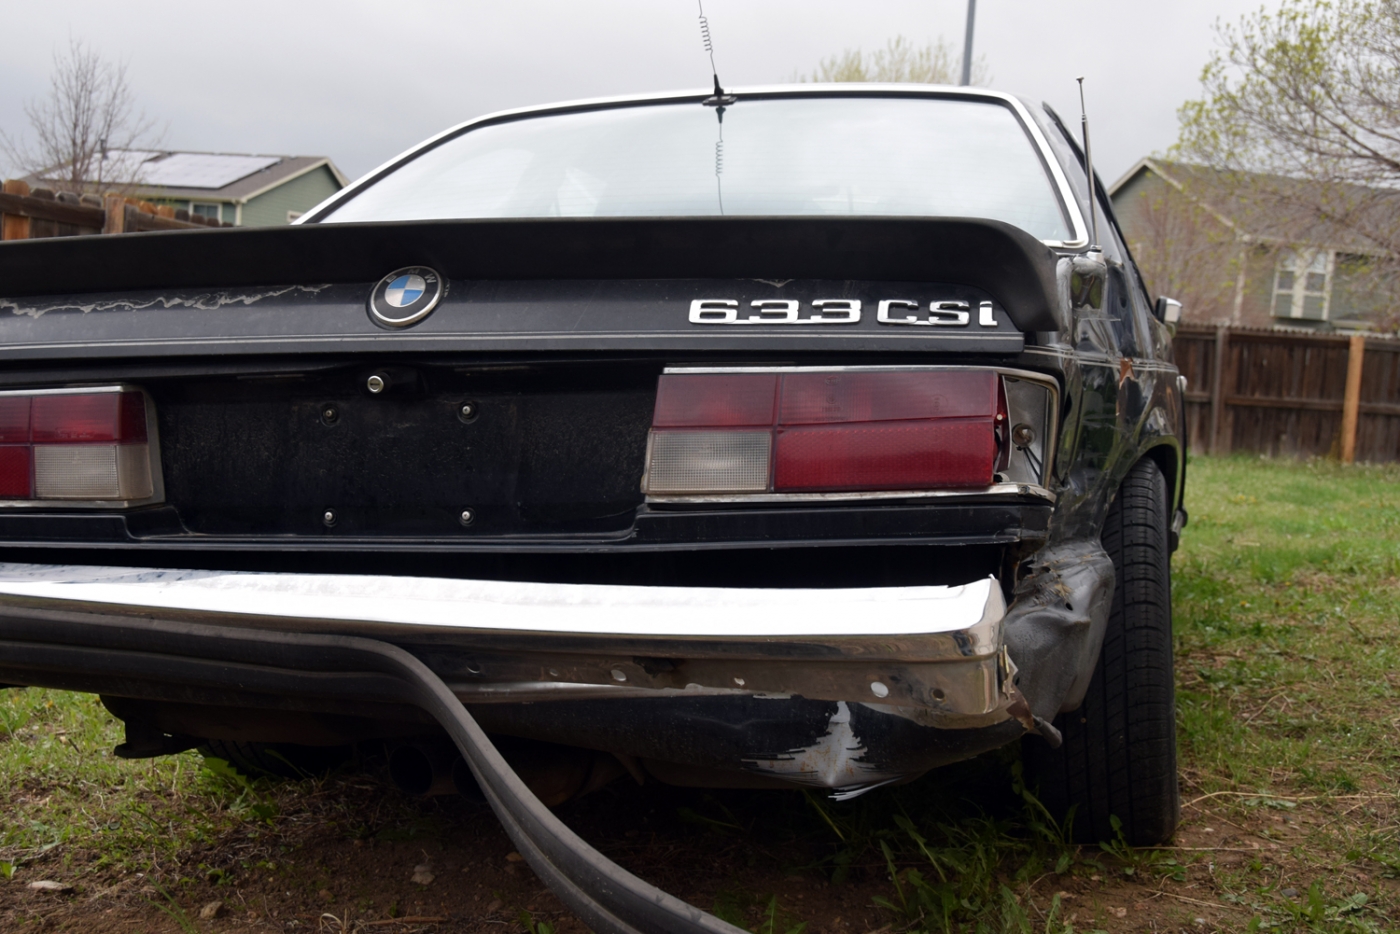
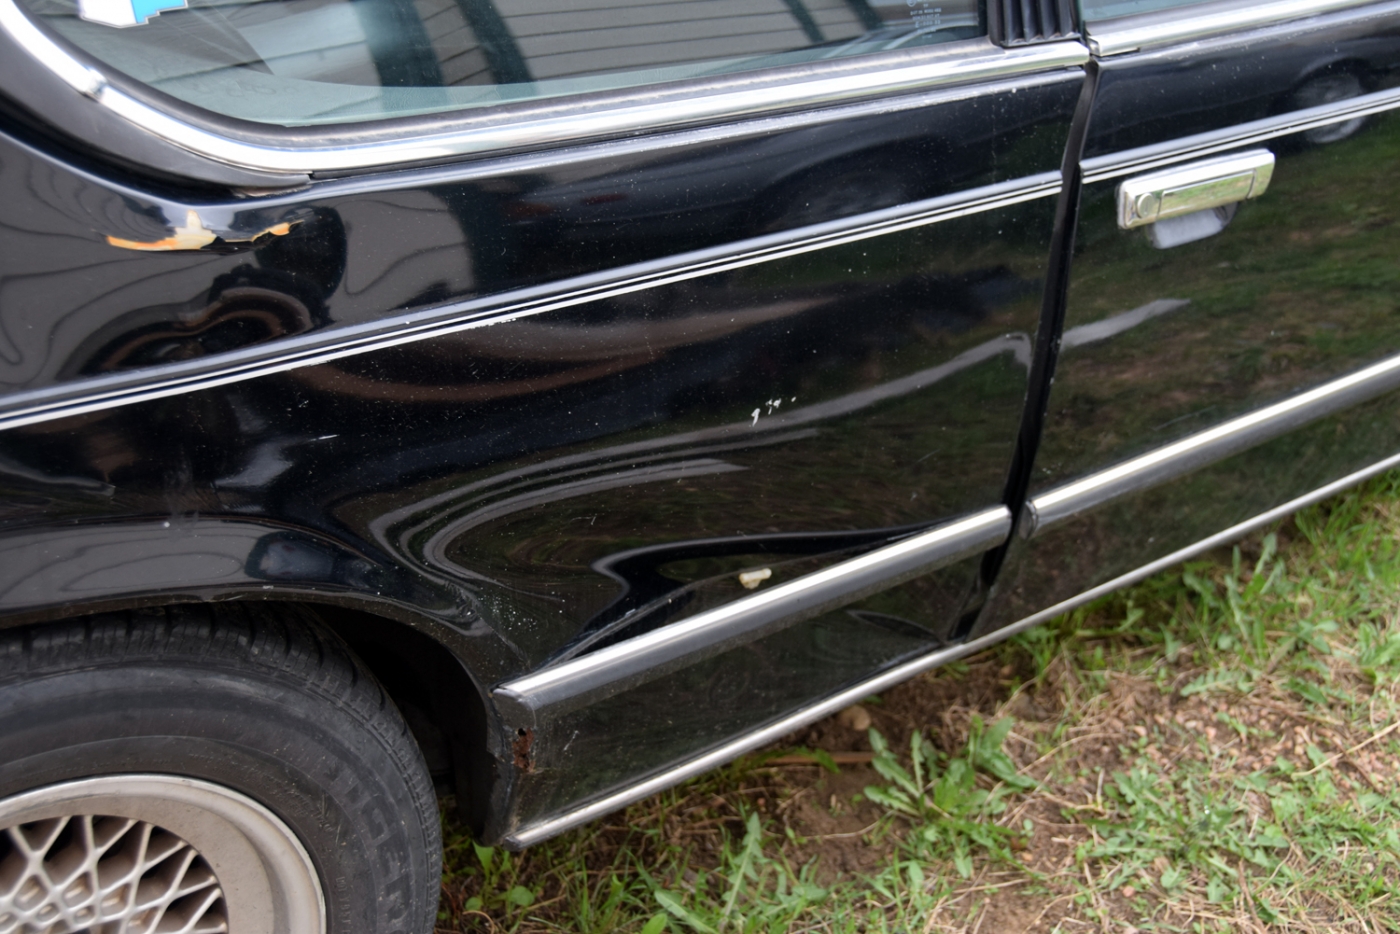
You can probably guess by the nature of the hit that the car won't be fixable and the cause of the collision may put me at fault. I was making a left turn and apparently did not see an incoming tuck. He didn't seem to see me either as he didn't hit the brakes or swerve in any capacity. This is my first major accident...
My wife and I were both fine and the car was still driveable minus some extra wind noise and tire rubbing on the way back home.
I carry liability only, not comprehensive insurance, so I am on the hook for the repair. Which is fair-- if I was at fault I wanted to have to deal with the repairs (and save some $$ in the mean time).
I was really bummed bout it and was just getting it drivable to the point that I wanted to consider a repaint or other
After thinking about it, I have come to terms with the situation and the positives being that we were not injured, the expensive parts on the car are all fine, mechanically almost everything except the rear bumper and maybe gas tank will be usable in a new chassis.
Speaking of a new chassis, this car literally fell into my lap just before the accident. I had saved it from sure death being parted out and am slowly bringing it back:

Did some searching on the previous owner to who I bought it from and found that this was Andy's car (Andy535iyes) from about 2008. It doesn't look like much maintenance has been performed since then, but here is the FS thread and a photo a decade ago.
http://www.mye28.com/viewtopic.php?t=54137
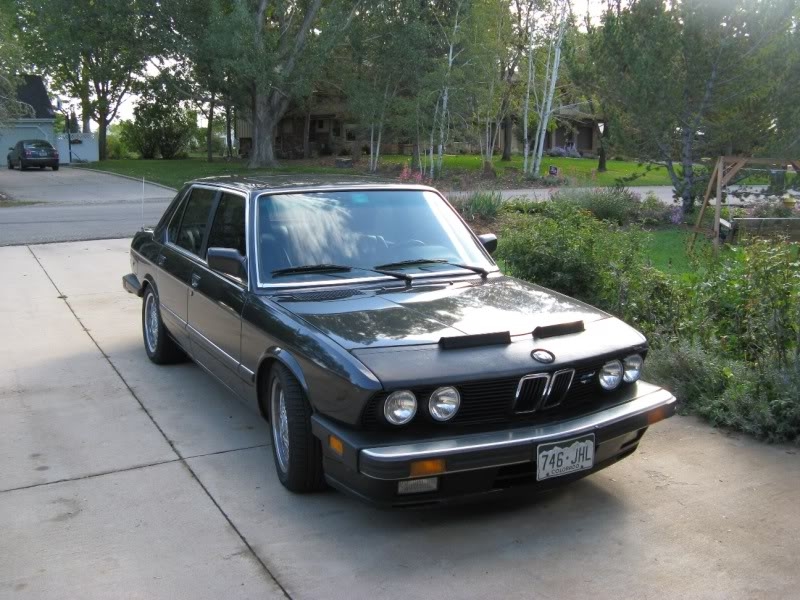
Come to find out it doesn't have all the parts, but does have larger sway bars, larger e34 brakes, rear camber adjustment, good Bilstein's and Bav Auto springs, 3/46LSD and a rust free body
Reinstalled a couple doors for the tow home

Put some wheels on it and took a short test drive.
After getting it running, the car actually drove down the road which a horrible death wobble and rear diff mount clink. Overall the exhaust on it actually sounds good and through the turns it was very stable and handled really nice. So after that first test drive I started feeling confident that this car could be a good chassis.

I have been working on reinstalling small misc items such as turn signal switch, steering wheel, seat belt receptacles, wiper stalk, headlight switch, and various sensors and engine parts that had been removed. The other issue was wires cut on 3 of the 4 doors I have to get the C400 connector by the driver's speaker well and get them soldered together and hope the locks and windows work. I'm hoping I can get it all working.
Got the car running and driving and put some front seats in it and played with the alignment a little bit by visual inspection.
But onto some pictures of the new subject. The style 33 wheels on there were worn and didn't have centering rings. I'm not sure that I like them anyway, maybe I'll try them later.
Oh yeah, the pink tape was used to hold the door on when towing it. My wife likes it so it has remained for a little while.
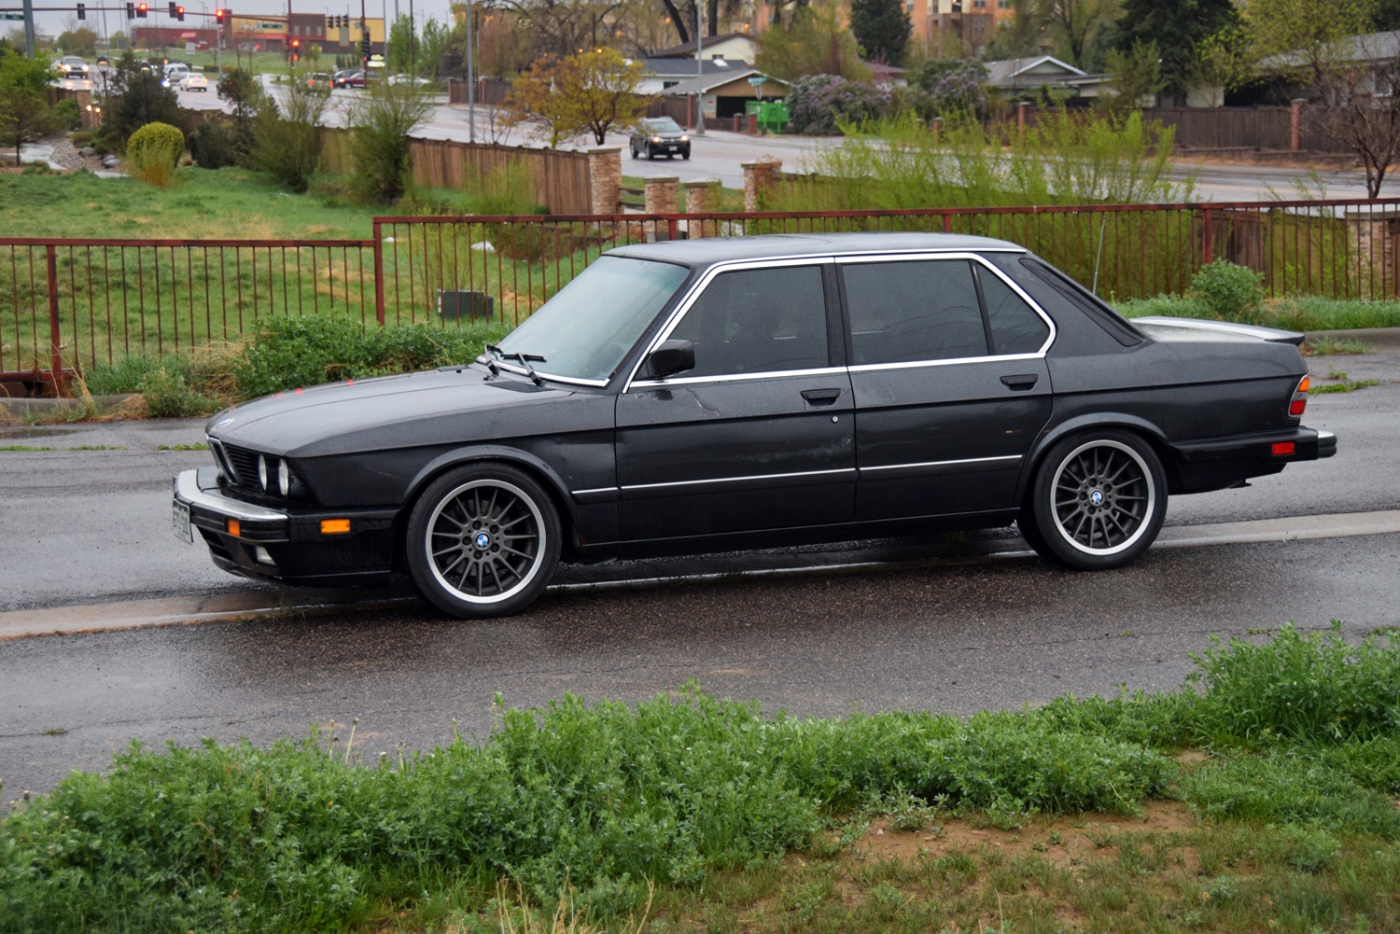
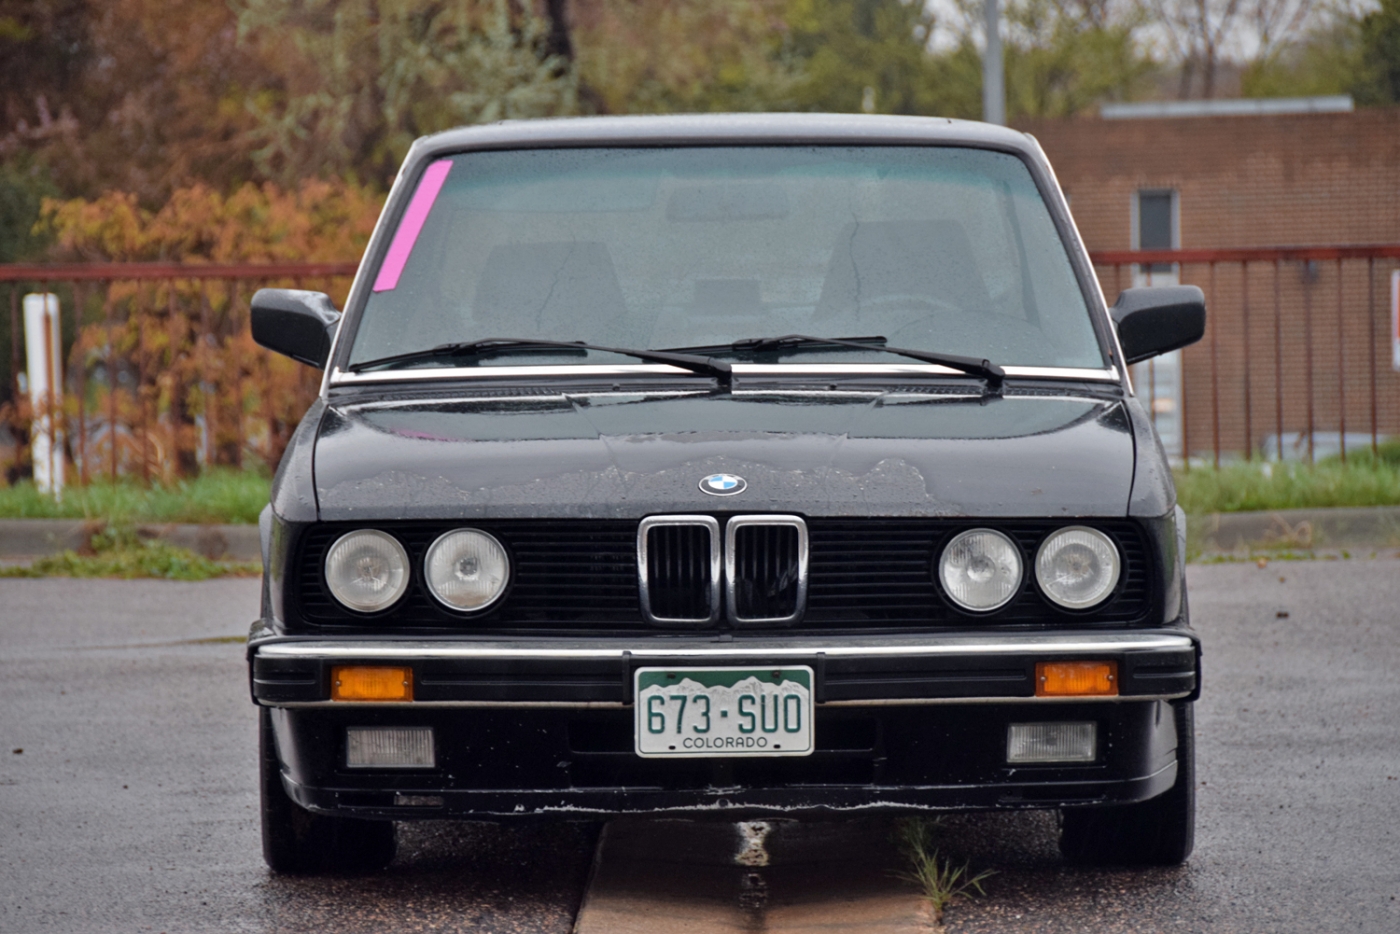
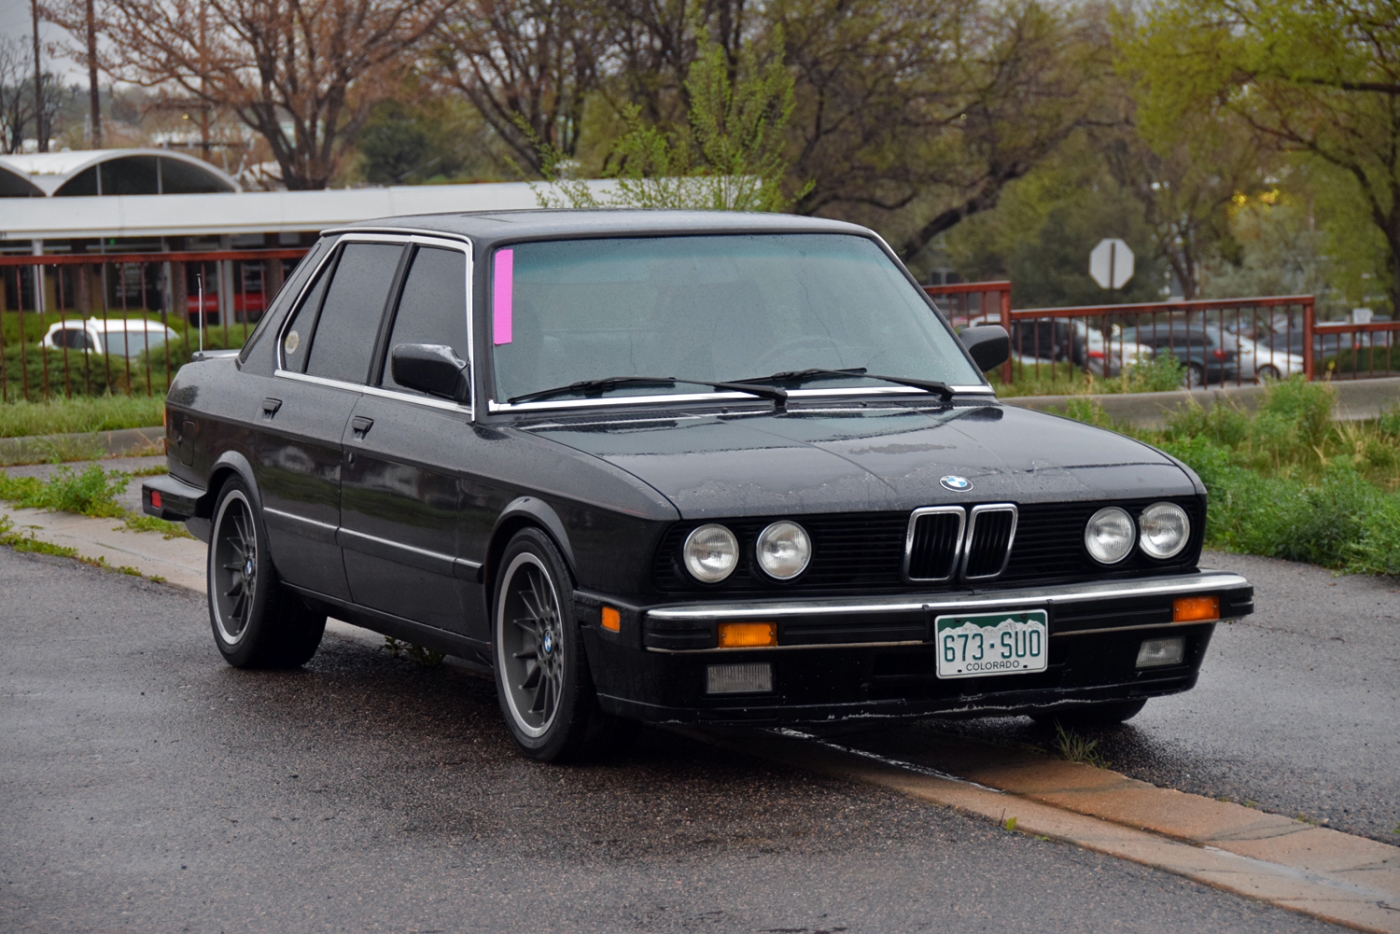
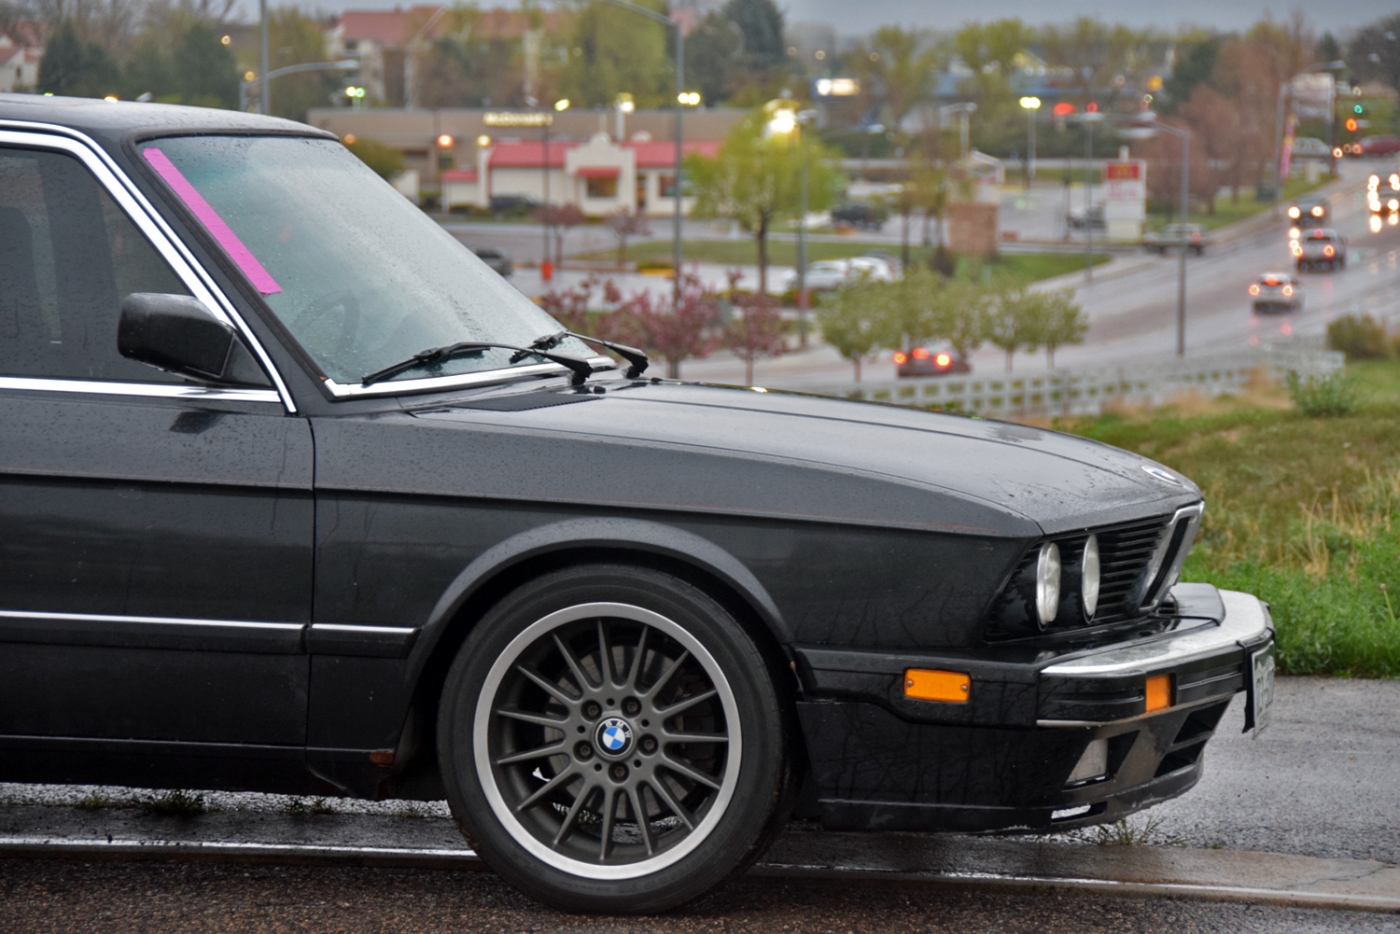
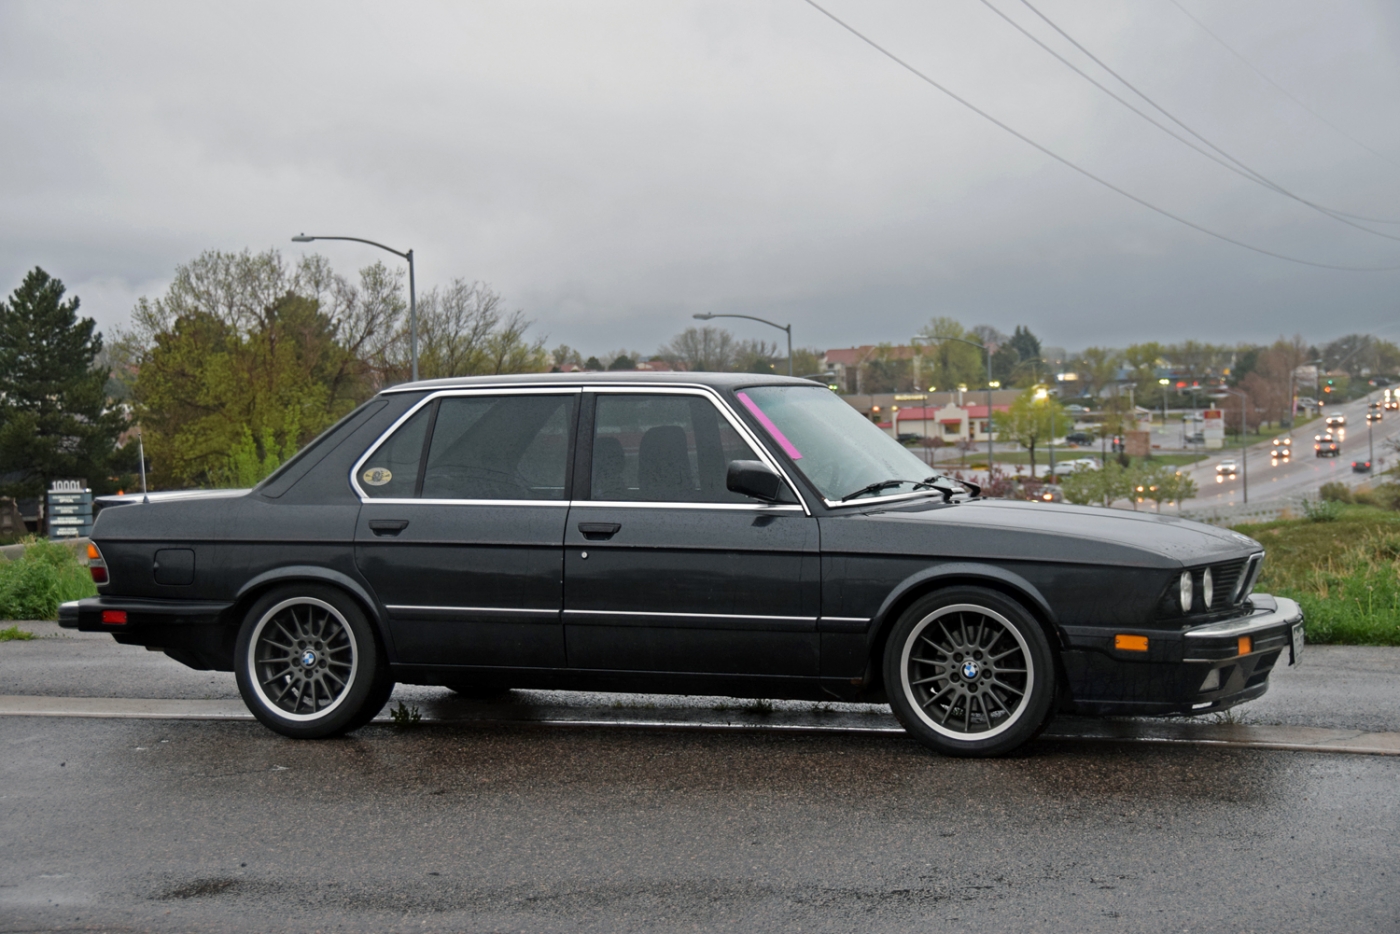
He's got a little name tag, so he's known as Burt now...
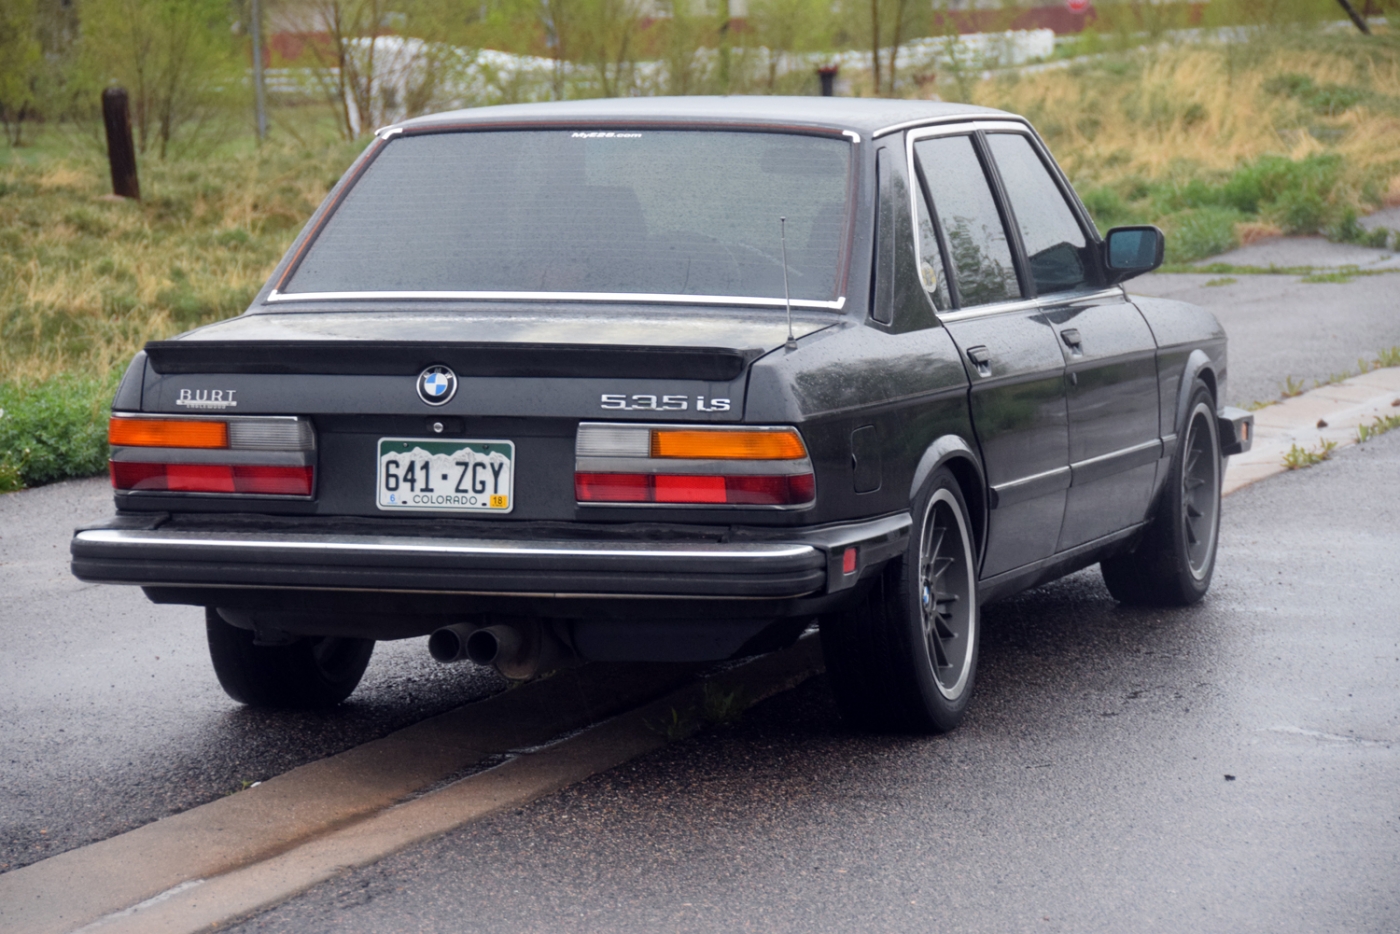
I spy a lot more negative rear camber than what I'm used to with a lowered e28.
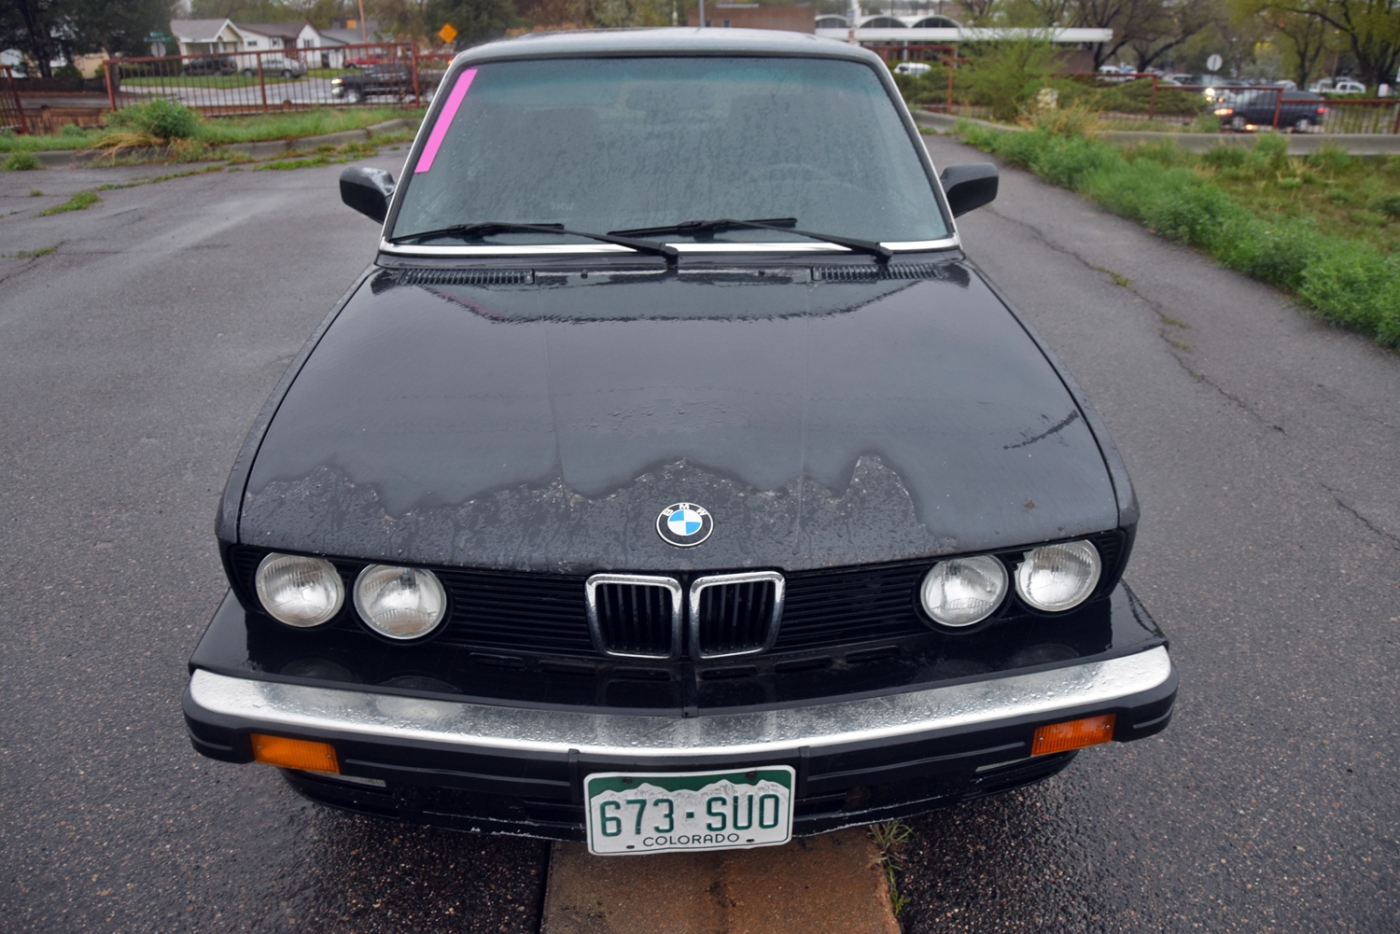
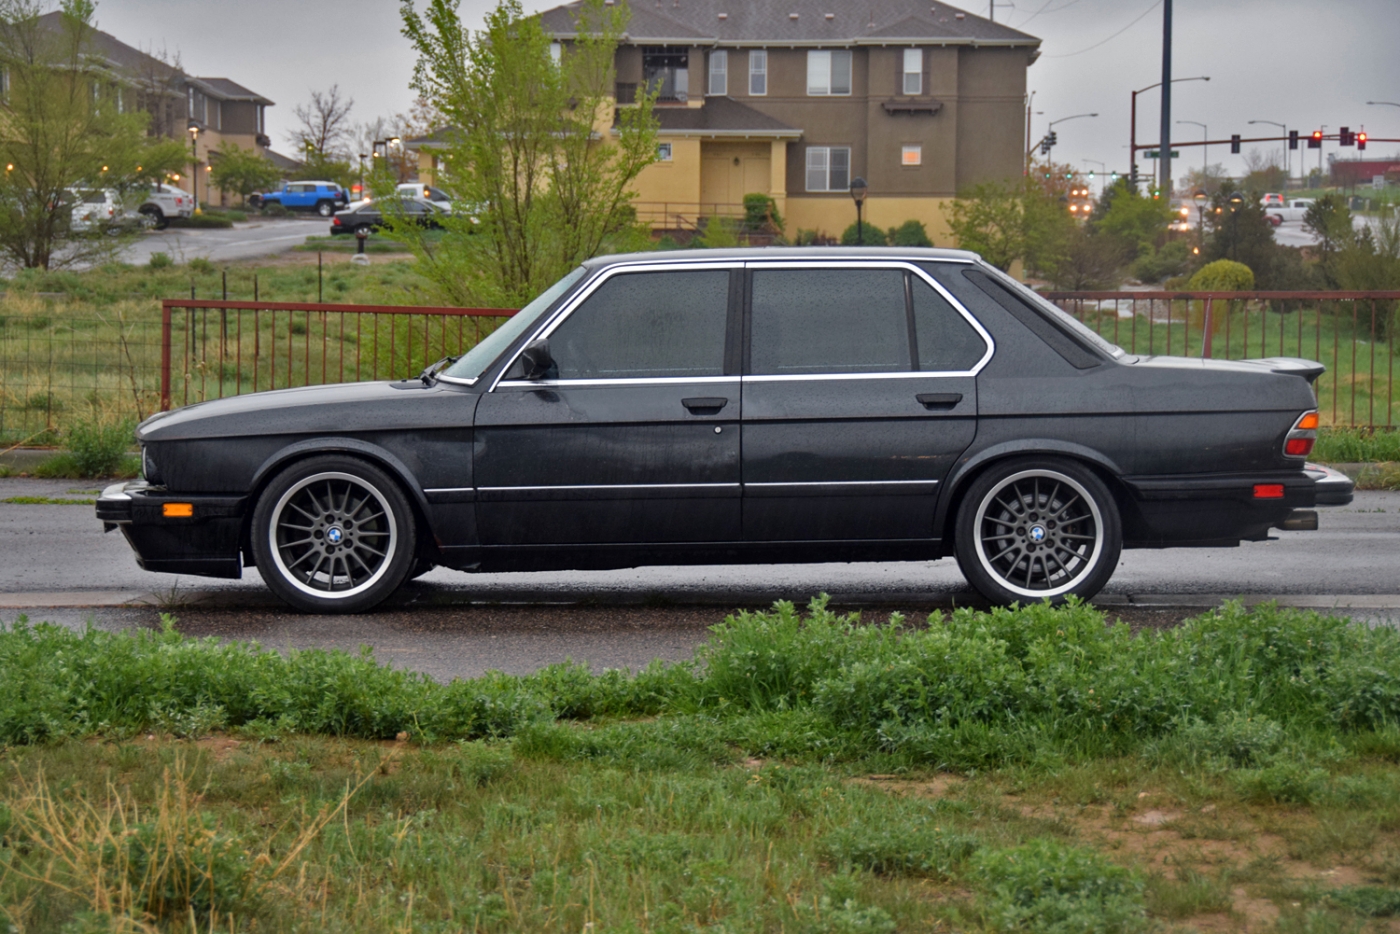
The plan is to swap the good parts from the 633 into the 535is and use it as my track car now. The small dents on the driver's side are the worst of it, but this car seems to follow the theme of the 633-- a little rough around the edges but overall a solid base.I prefer the mechanical over the visual and I can fix the paint in the future still also.
The logistics are difficult to arrange for two chassis and two engine pulls so I am trying to figure out when or how I could make that work, and then leave the NA engine out of a car (or maybe put it back int he 633 so it can move and drive??).
I decided to get a start on fitting my 16x8 ET11 BBS RS211's or Rial mesh wheels and roll the fenders. I also figure I can fit BBS RK 17x8.5 et15 for light weight 17's if I want, or race slicks on naked m system wheels. The rears didn't fit on my 535i but did on my M5, so I decided to roll the fenders. Using a friends tool and advice, I worked on it last night.
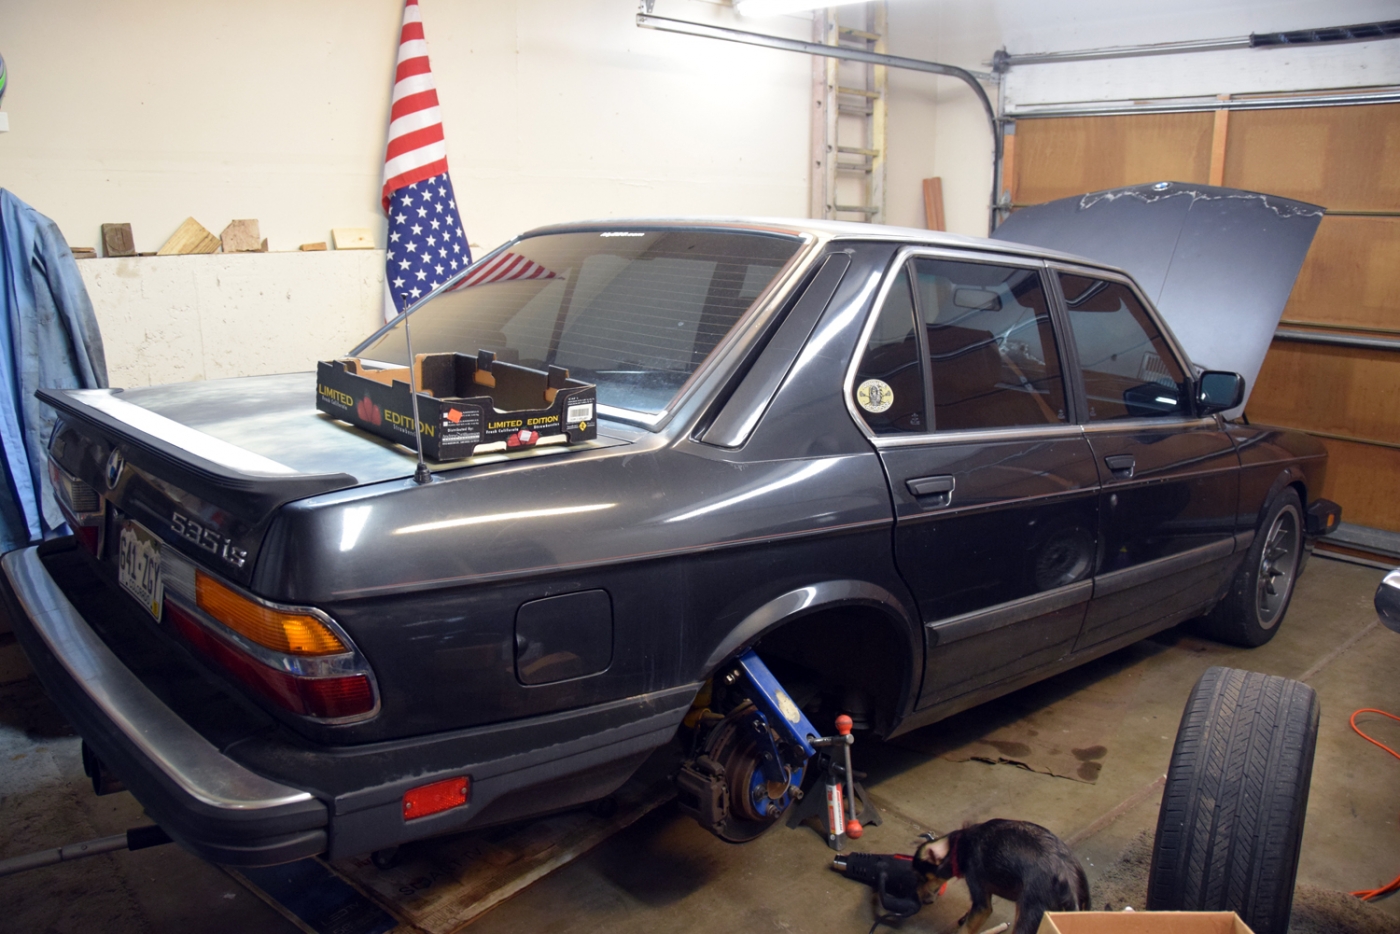
I used a heat gun to try to keep the paint pliable and heat the metal to ~130F then the Eastwood rolling tool with just a slight angle and slight pressure. The key was to be patient and work in small increments(and it really worked my arms as the rear diff locked up really well with the other side).
Here's where we started and based on experience with other wheels that fit, I needed about 9-10mm clearance to avoid rubbing when loaded. Mainly in hard cornering, we don't want a sharp edge to slice the edge of the tire. The E24 has a lot more clearance here than E28.
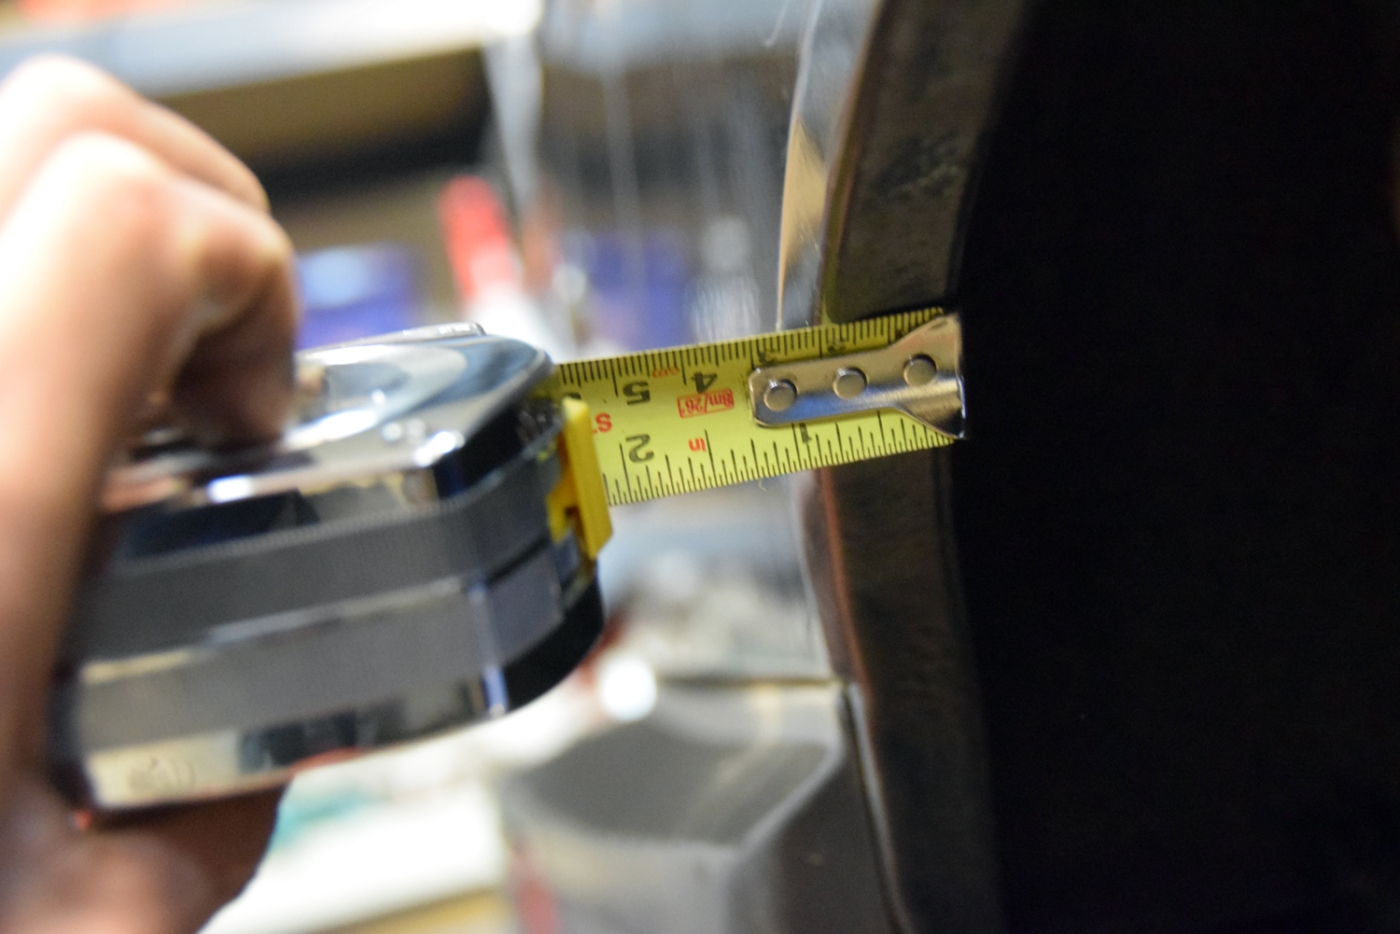
Rear clearance (with RS211) at normal ride height after settling:
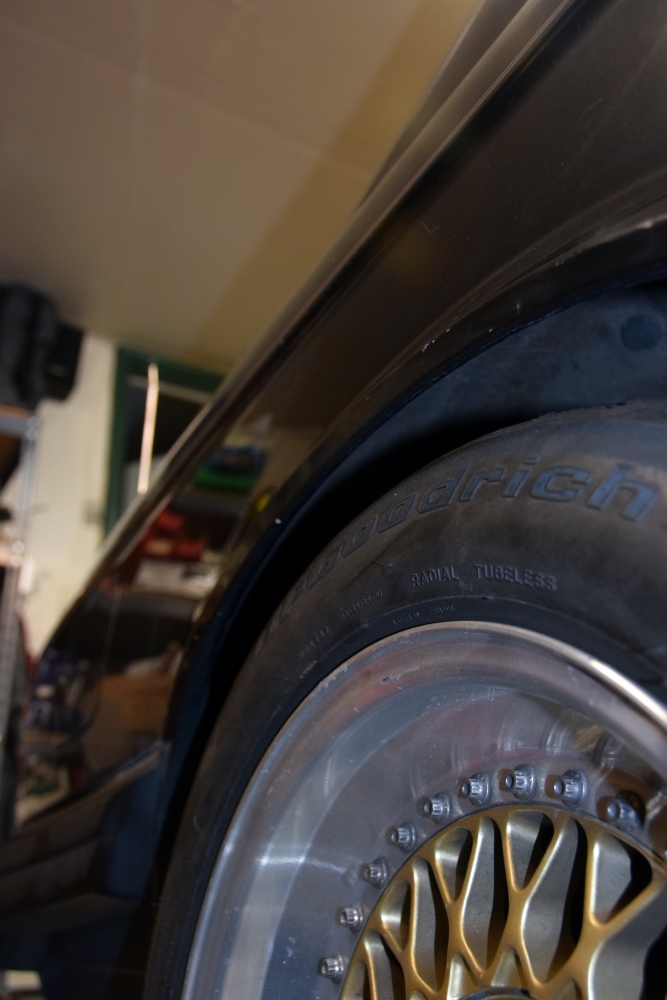
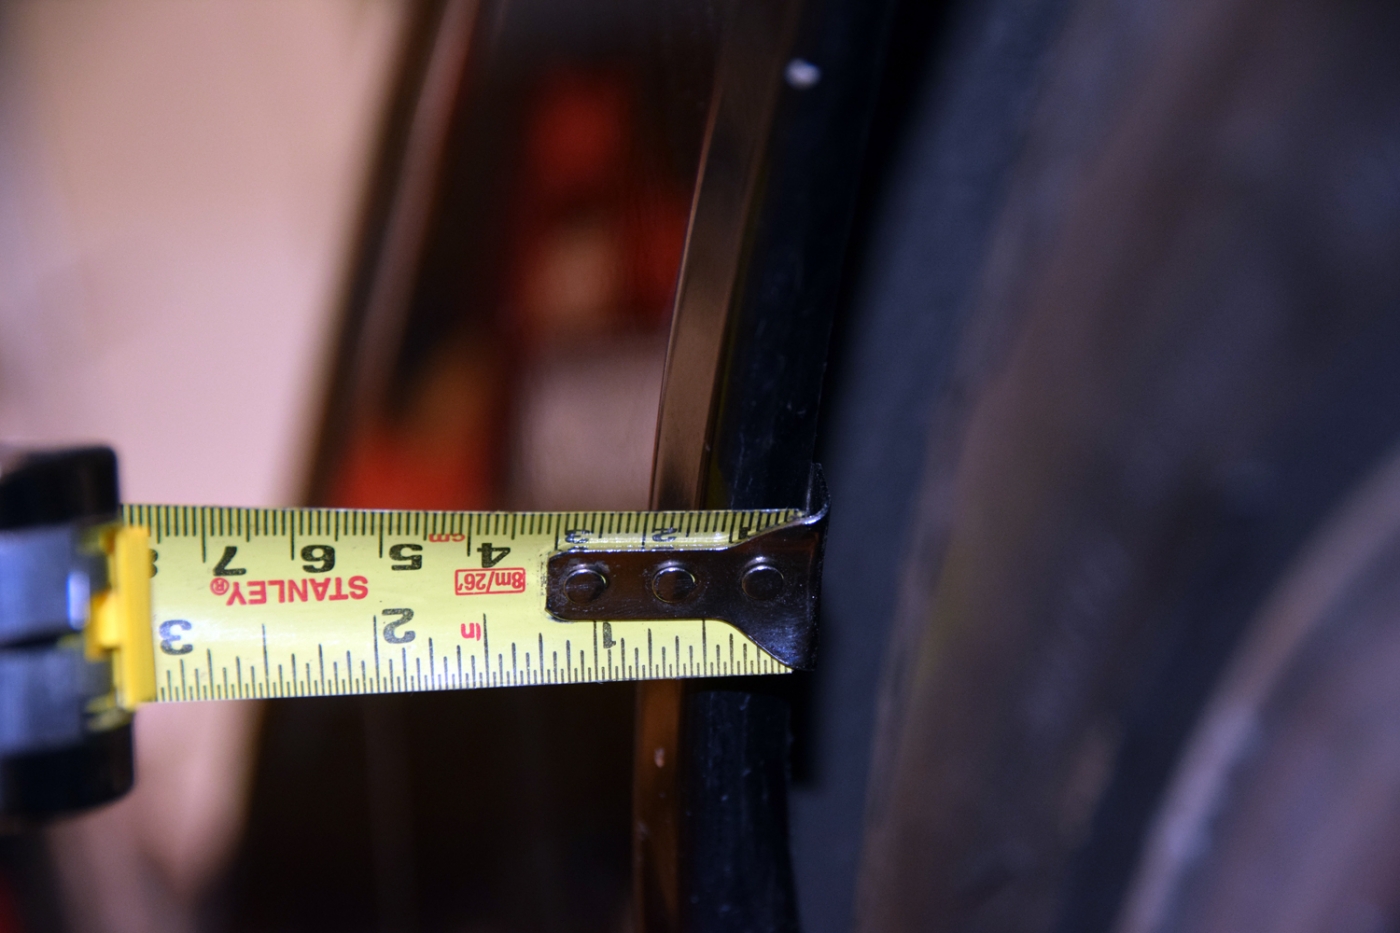
It looks like I gained about 6-7mm, but the fender lip is also up and out the way so I think it will give me the clearance I need in hard corners. The photos above you can see there is more than 1/2" of room from the fender to the tire.
So overall it will be a big project the put the turbo engine and other parts in this car, but I think it is the next step for this project. I thought about other E24's for a replacement but there haven't been many rust free ones around. I looked at two and it just seemed like a lot of work with rust or just the other work required to get a bare chassis to where I would want it. Plus this car is part way to my goal of a track car with welded in sway bar mounts, rear camber adjustment, a lighter/better balanced weight distribution, and satisfies in the looks department with the color and sports spoiler package.


You can probably guess by the nature of the hit that the car won't be fixable and the cause of the collision may put me at fault. I was making a left turn and apparently did not see an incoming tuck. He didn't seem to see me either as he didn't hit the brakes or swerve in any capacity. This is my first major accident...
My wife and I were both fine and the car was still driveable minus some extra wind noise and tire rubbing on the way back home.

I carry liability only, not comprehensive insurance, so I am on the hook for the repair. Which is fair-- if I was at fault I wanted to have to deal with the repairs (and save some $$ in the mean time).
I was really bummed bout it and was just getting it drivable to the point that I wanted to consider a repaint or other
After thinking about it, I have come to terms with the situation and the positives being that we were not injured, the expensive parts on the car are all fine, mechanically almost everything except the rear bumper and maybe gas tank will be usable in a new chassis.
Speaking of a new chassis, this car literally fell into my lap just before the accident. I had saved it from sure death being parted out and am slowly bringing it back:

Did some searching on the previous owner to who I bought it from and found that this was Andy's car (Andy535iyes) from about 2008. It doesn't look like much maintenance has been performed since then, but here is the FS thread and a photo a decade ago.
http://www.mye28.com/viewtopic.php?t=54137

Come to find out it doesn't have all the parts, but does have larger sway bars, larger e34 brakes, rear camber adjustment, good Bilstein's and Bav Auto springs, 3/46LSD and a rust free body
Reinstalled a couple doors for the tow home

Put some wheels on it and took a short test drive.
After getting it running, the car actually drove down the road which a horrible death wobble and rear diff mount clink. Overall the exhaust on it actually sounds good and through the turns it was very stable and handled really nice. So after that first test drive I started feeling confident that this car could be a good chassis.

I have been working on reinstalling small misc items such as turn signal switch, steering wheel, seat belt receptacles, wiper stalk, headlight switch, and various sensors and engine parts that had been removed. The other issue was wires cut on 3 of the 4 doors
Got the car running and driving and put some front seats in it and played with the alignment a little bit by visual inspection.
But onto some pictures of the new subject. The style 33 wheels on there were worn and didn't have centering rings. I'm not sure that I like them anyway, maybe I'll try them later.
Oh yeah, the pink tape was used to hold the door on when towing it. My wife likes it so it has remained for a little while.


He's got a little name tag, so he's known as Burt now...

I spy a lot more negative rear camber than what I'm used to with a lowered e28.


The plan is to swap the good parts from the 633 into the 535is and use it as my track car now. The small dents on the driver's side are the worst of it, but this car seems to follow the theme of the 633-- a little rough around the edges but overall a solid base.I prefer the mechanical over the visual and I can fix the paint in the future still also.
The logistics are difficult to arrange for two chassis and two engine pulls so I am trying to figure out when or how I could make that work, and then leave the NA engine out of a car (or maybe put it back int he 633 so it can move and drive??).
I decided to get a start on fitting my 16x8 ET11 BBS RS211's or Rial mesh wheels and roll the fenders. I also figure I can fit BBS RK 17x8.5 et15 for light weight 17's if I want, or race slicks on naked m system wheels. The rears didn't fit on my 535i but did on my M5, so I decided to roll the fenders. Using a friends tool and advice, I worked on it last night.

I used a heat gun to try to keep the paint pliable and heat the metal to ~130F then the Eastwood rolling tool with just a slight angle and slight pressure. The key was to be patient and work in small increments(and it really worked my arms as the rear diff locked up really well with the other side).
Here's where we started and based on experience with other wheels that fit, I needed about 9-10mm clearance to avoid rubbing when loaded. Mainly in hard cornering, we don't want a sharp edge to slice the edge of the tire. The E24 has a lot more clearance here than E28.

Rear clearance (with RS211) at normal ride height after settling:


It looks like I gained about 6-7mm, but the fender lip is also up and out the way so I think it will give me the clearance I need in hard corners. The photos above you can see there is more than 1/2" of room from the fender to the tire.
So overall it will be a big project the put the turbo engine and other parts in this car, but I think it is the next step for this project. I thought about other E24's for a replacement but there haven't been many rust free ones around. I looked at two and it just seemed like a lot of work with rust or just the other work required to get a bare chassis to where I would want it. Plus this car is part way to my goal of a track car with welded in sway bar mounts, rear camber adjustment, a lighter/better balanced weight distribution, and satisfies in the looks department with the color and sports spoiler package.
Re: 633CSi Turbo - Unexpected Twist - 5/3/18 Update
Glad you are both OK!
-
Nebraska_e28
- Beamter

- Posts: 9056
- Joined: Apr 13, 2006 11:18 PM
- Location: Council Bluffs, IA
- Contact:
Re: 633CSi Turbo - Unexpected Twist - 5/3/18 Update
Glad you're safe on the bright side! On the underlying bright side, you can xfer mechanics to another chassis & keep it moving.
-
marc79euro645
- Posts: 513
- Joined: Dec 08, 2008 11:33 PM
Re: 633CSi Turbo - Unexpected Twist - 5/3/18 Update
Glad your ok! That looks like it might pound out. I'm not kidding, check out utube vids, it's amazing what you can do with a few basic tools. Keep the e24.
Re: 633CSi Turbo - Unexpected Twist - 5/3/18 Update
That sucks. But yeah why not beat it straight, roll cage and track it?
Re: 633CSi Turbo - Unexpected Twist - 5/3/18 Update
Glad you and your wife were not hurt!
Burt is a good name.
Carry on. Subscribed regardless.
Burt is a good name.
Carry on. Subscribed regardless.
Re: 633CSi Turbo - Unexpected Twist - 5/3/18 Update
That sucks. I'm really sorry. At least no one was injured and the drivetrain is salvageable.
Re: 633CSi Turbo - Unexpected Twist - 5/3/18 Update
Thanks for the thoughts guys.
The PO had been having issues with driveability and I think i sorted some of it out last night. The night I took the pictures from above, the car suddenly wouldn't rev freely. There is a fuel pressure gauge and it had good pressure.
I messed with the CTS (a new one I instakled) and that seemed to change the running characteristics. Then, the engine was revving up to 1800rpm in idle. I found that the TPS and throttle was adjusted too far in (probably to compensate for a bad CTS).
In the mean time I'll be carrying the spare ECU in the car as the funky running symptoms came up when there was a significant amount of moisture in the air. I suspect the ECU could need solder joints reflowed, but will find out soon.
I installed some new lower control arms that I had, just to replace the bad ball joints and try to eliminate the death wobble that the car had. We will see if it makes a difference.
Lastly, I 'm trying to work out the logistics of transplanting the engine from the 633. I may be able to do it in June if I find a place that will allow me to do it. I don't have a hoist, engine stand or load leveler at my house. Otherwise I could maybe consider it here.
Re: 633CSi Turbo - Unexpected Twist - 5/3/18 Update
I have a plan to do the engine swap into the 535is on about June 21, so I am trying to get items together to swap engines in the 633 and 535is. Getting intercooler fitment may take a bit extra time, but I'll deal with that once the engine is in the car.
I soldered the wiring for the doors and windows and now have operational windows. The power locks now also work but lock and unlock automatically after I try it with the key. It seems to work pretty good from the drivers door, but has issues when I try from the trunk. Gotta figure that out along with a battery drain that is on fuse 5. I'm going to try a keyless entry system to see if that helps any.
Replacing upper and lower control arms and hopefully will be able to eliminate any sort of steering shimmy.
I pulled the fixed camber plates from the 633 and then went to install them in the 535is and had issues with fitment. It seems like the Bav Auto Springs and spring pad won't allow me to fit the fixed camber plates into the strut towers on the chassis. I'm trying to figure out exactly how I want to get it fixed. Maybe just pull the Eibach's of my 633? Oval out some used strut mounts? The Bav Auto spring was upside down, so maybe that was part of the problem also.
Anyway, hoping to get some more photos and detail on the next update.
Once I get these parts swapped, I'll get it aligned.
Re: 633CSi Turbo - Unexpected Twist - 5/3/18 Update
Control arms are in and here are some pictures of the above. I tried swapping my camber plates and don't see what else I can do as I am about 1" off, the strut mount needs to rotate inwards, but can't because the spring is hitting the tower...
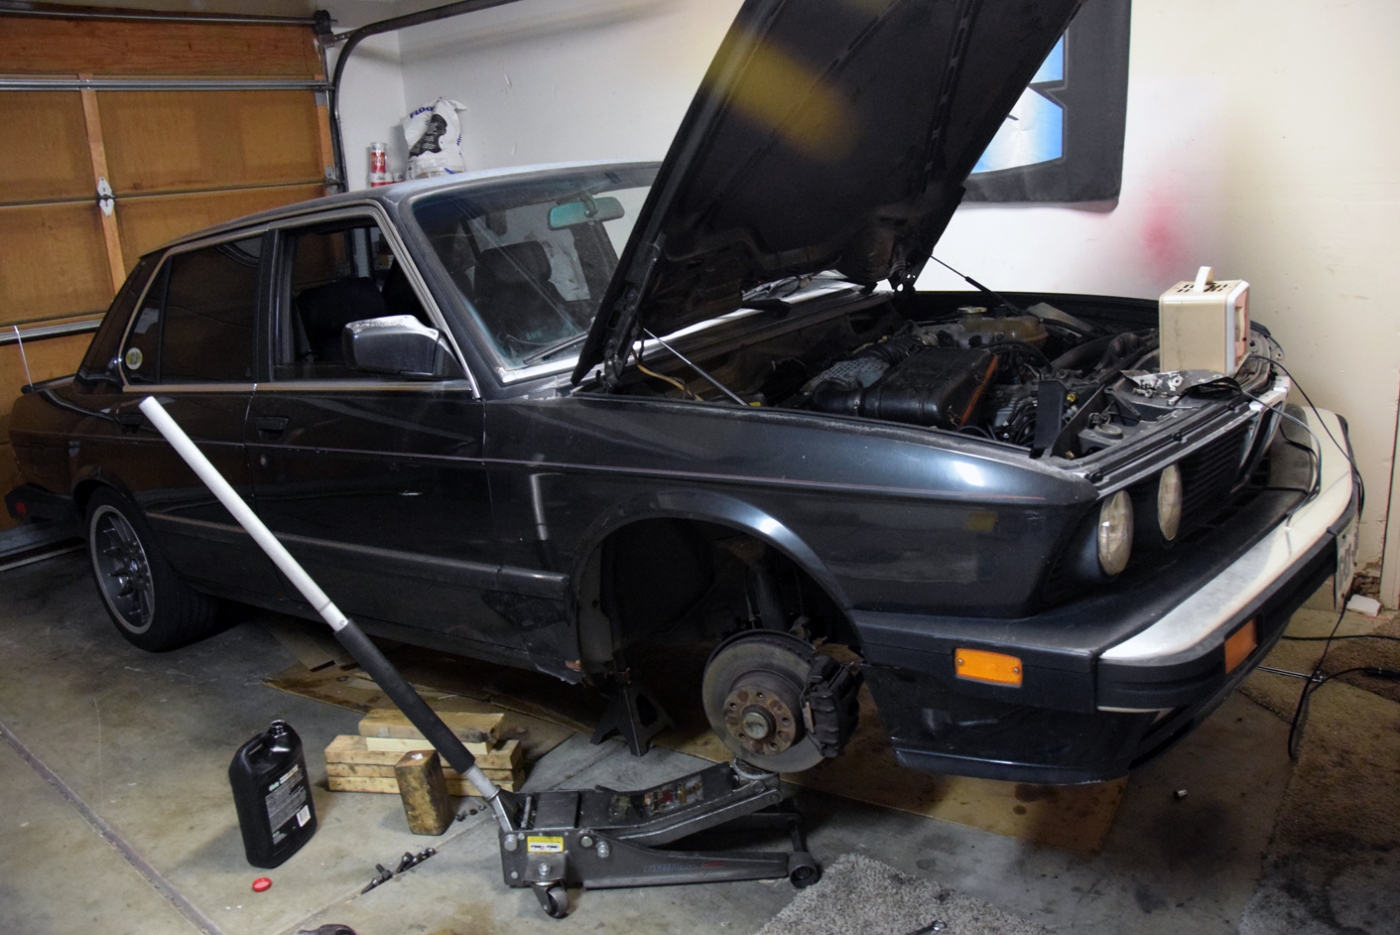
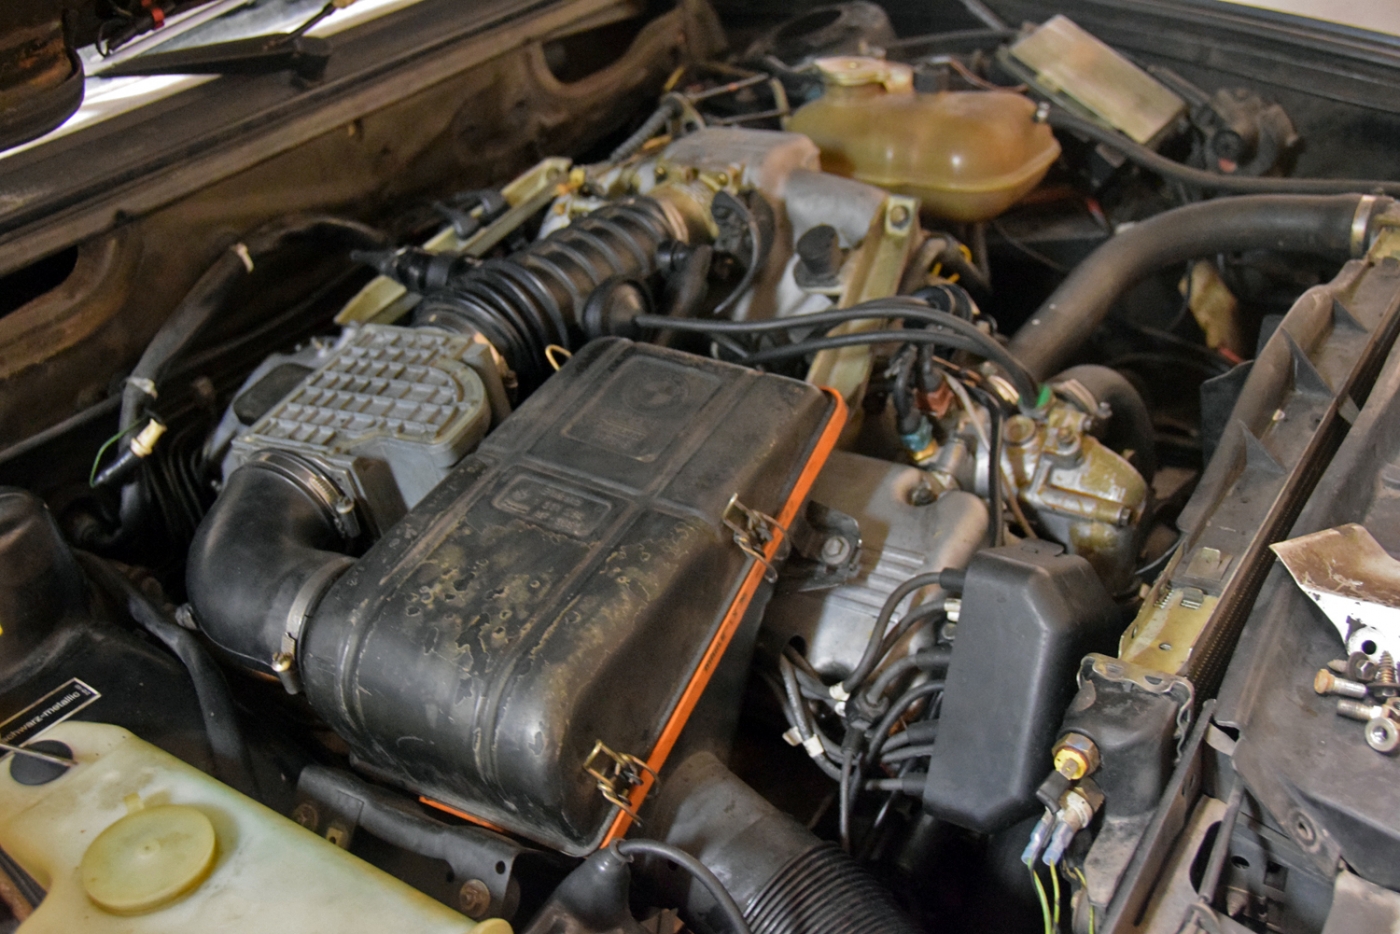
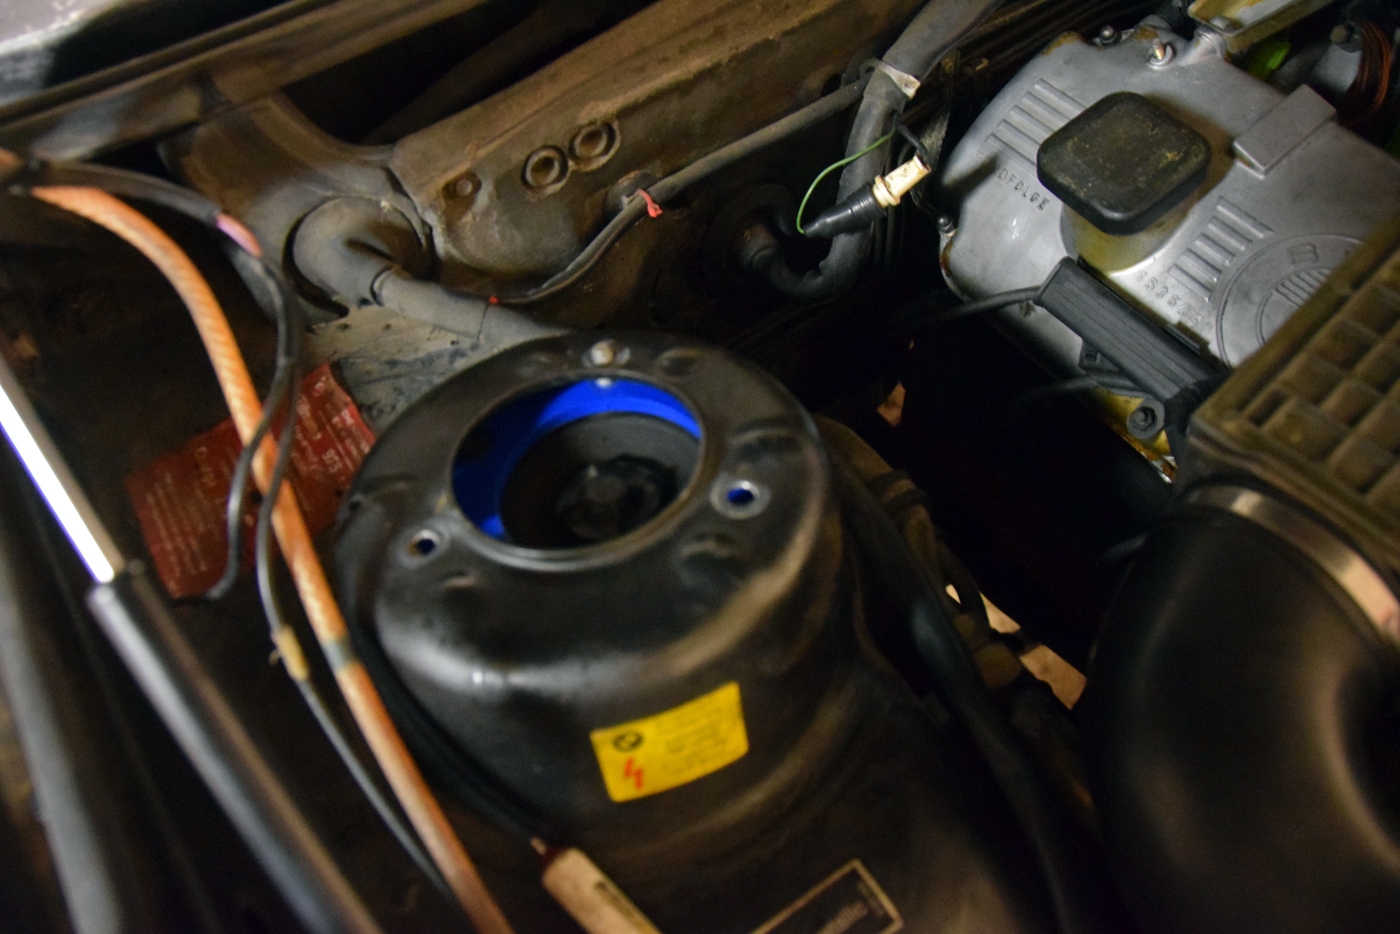
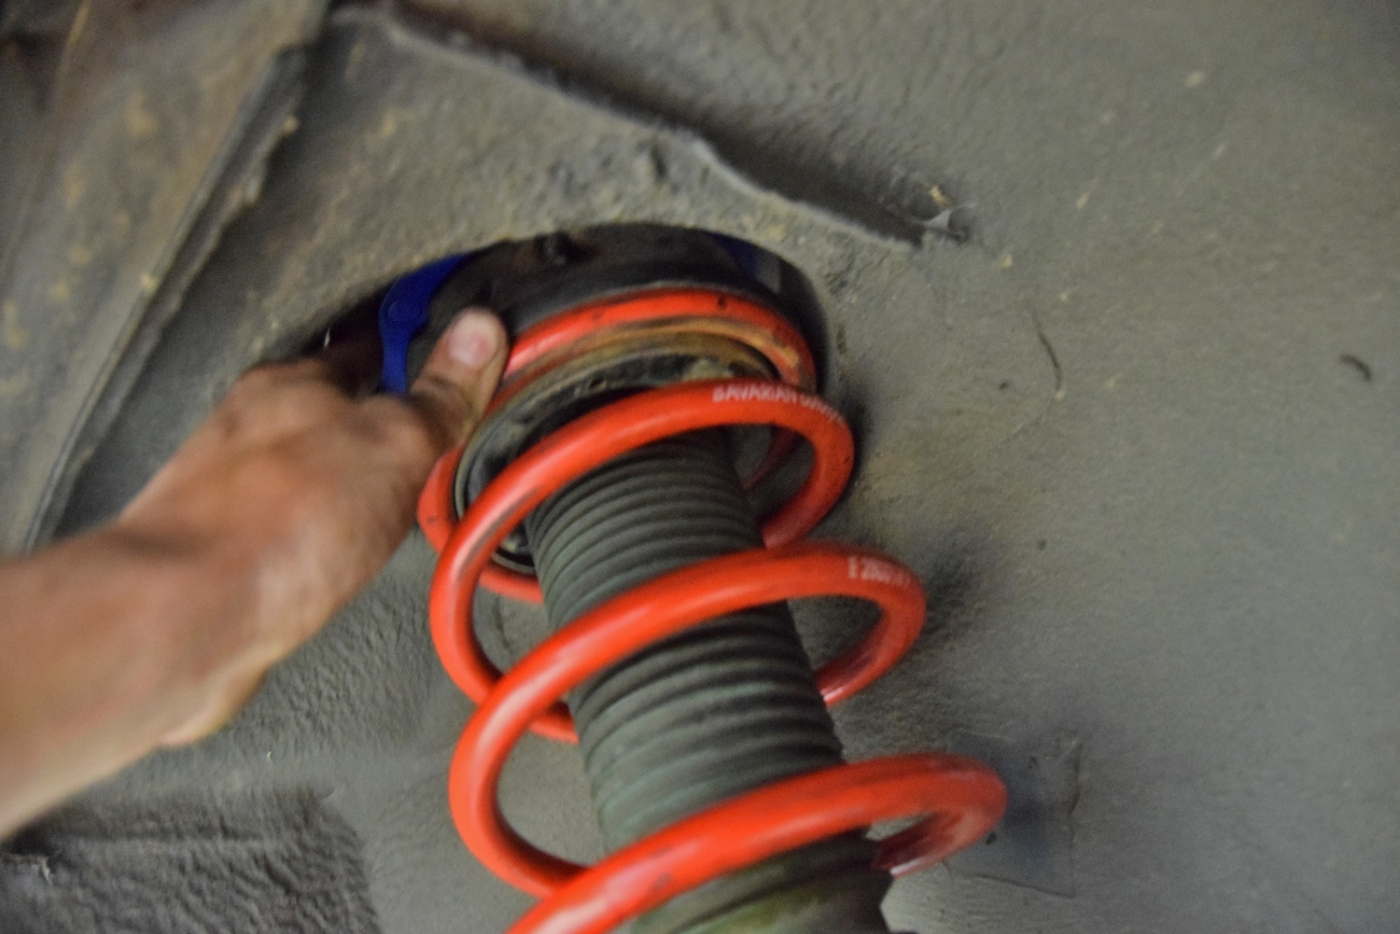
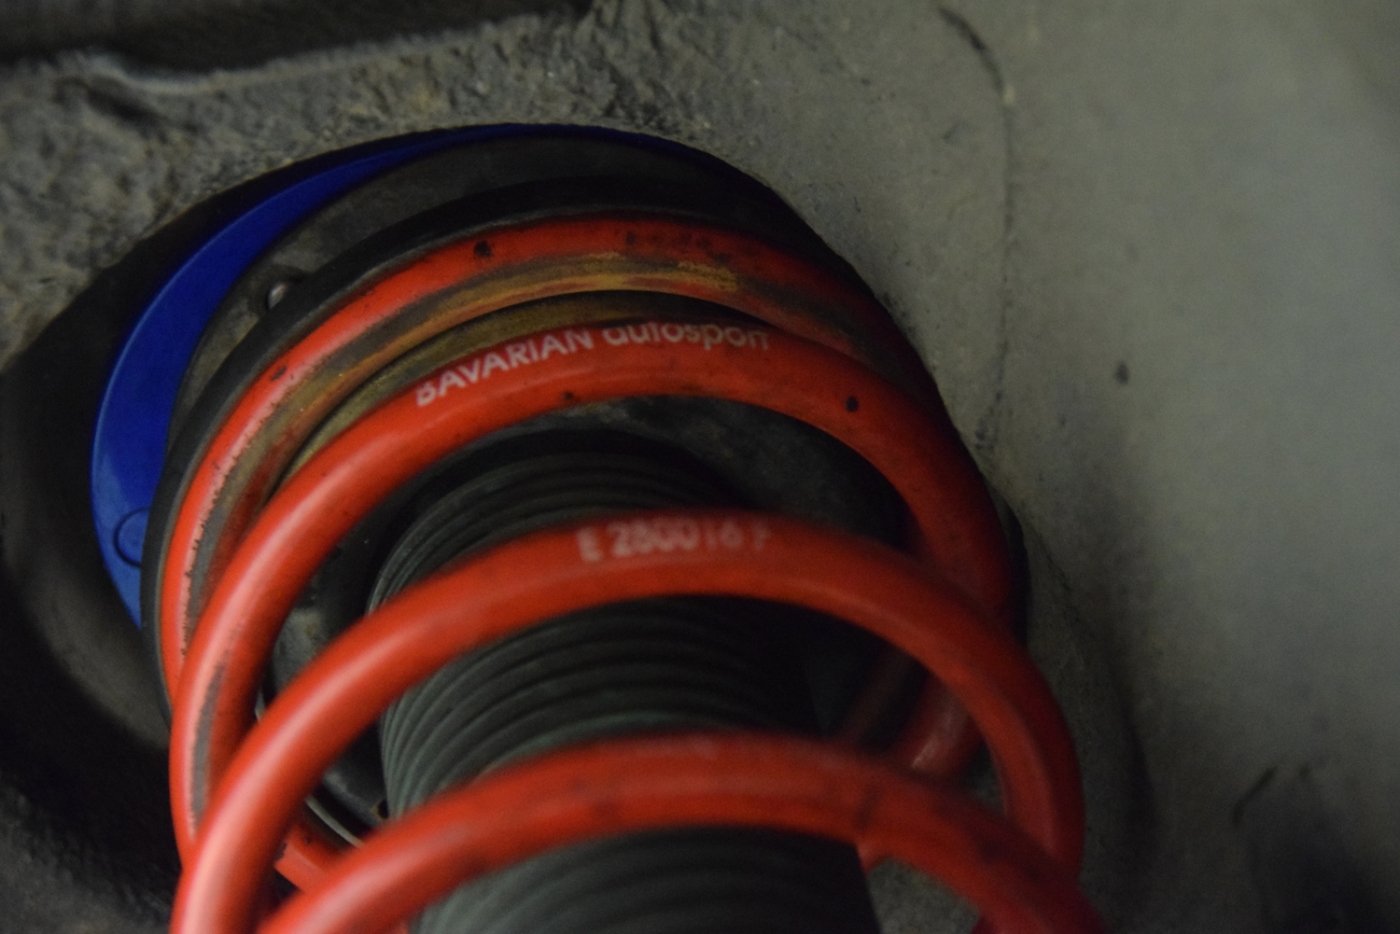
I'm wondering if it would be silly to oval the strut mount holes to get the clearance I need and space everything out just a bit away from the body's tower.


I'm wondering if it would be silly to oval the strut mount holes to get the clearance I need and space everything out just a bit away from the body's tower.
Re: 633CSi Turbo - Unexpected Twist - 5/3/18 Update
I had a chance to spend a bunch of time fiddling with the camber plates and trying to identify if there would be a way to make them fit. Basically I installed and removed the strut assembly probably 5 times on each side, and I found that the trick is to orient the springs slightly off the base perch location so that the spring pad and cup are both in a position that will give the least amount of stack height on the inboard side of the car and strut tower.
I decided since I had it all apart I would switch from the Bav Auto springs that came on the car to my Eibach's which have a better reputation in general. The rears I would swap as an assembly because they are Dinan valved shocks which are way better than the stock Bilstein's. Those are some of the first parts I bought for my '85 535i back in 2010 and they are still going strong being placed into the 3rd car in my ownership.
I should have taken a picture of this but I didn't because I was in a rush to get the Bav Auto's back on the 633 struts. But we have new upper and lower control arms, along with new sway bar end links. Alignment coming soon. I had a new center link but the steering parts didn't seem to have any slop.
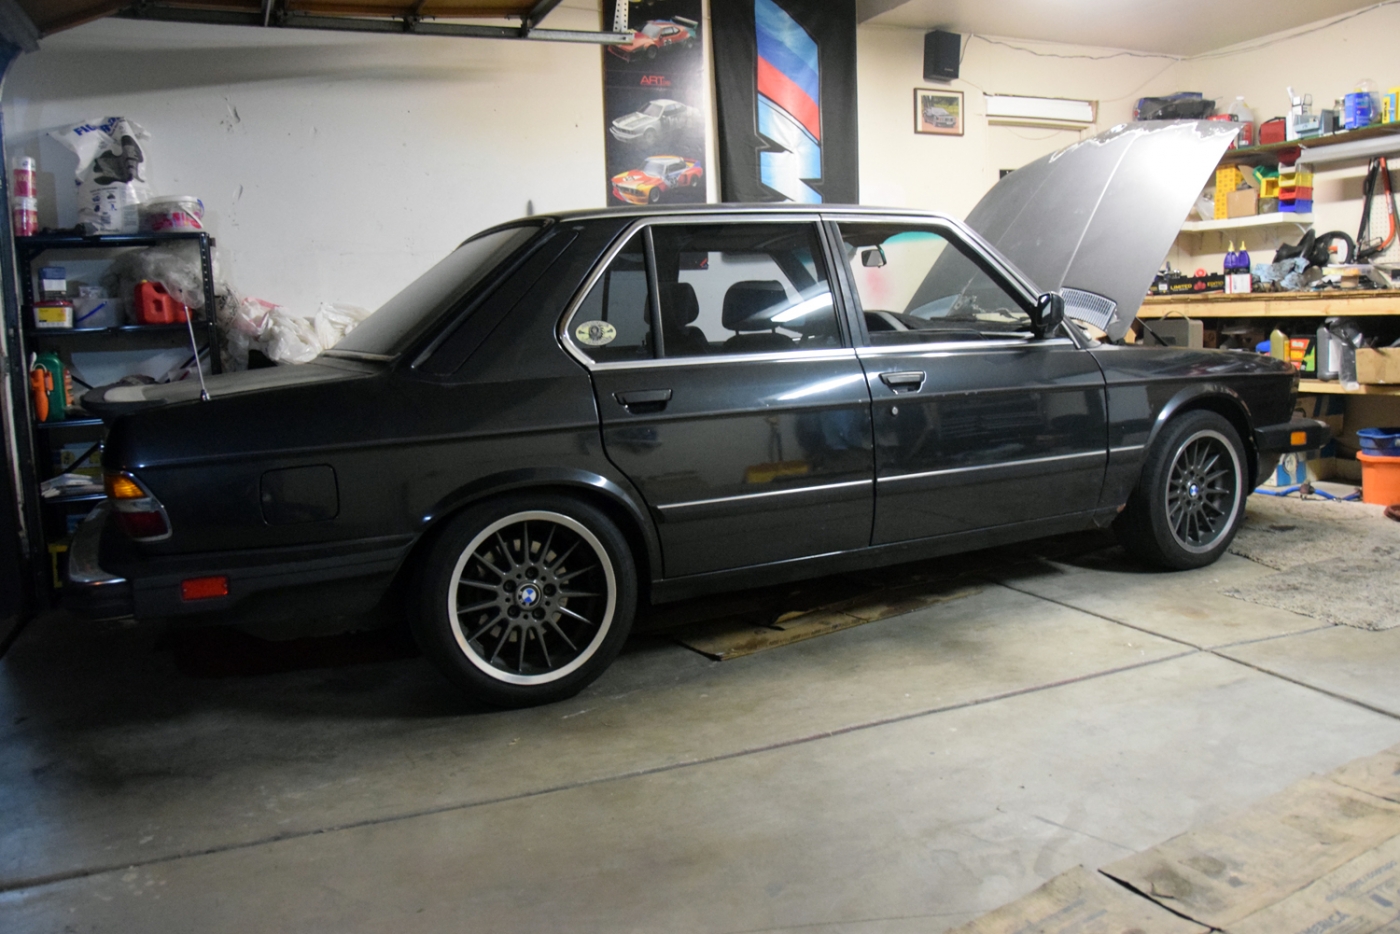
The donor getting acquainted with the subject.
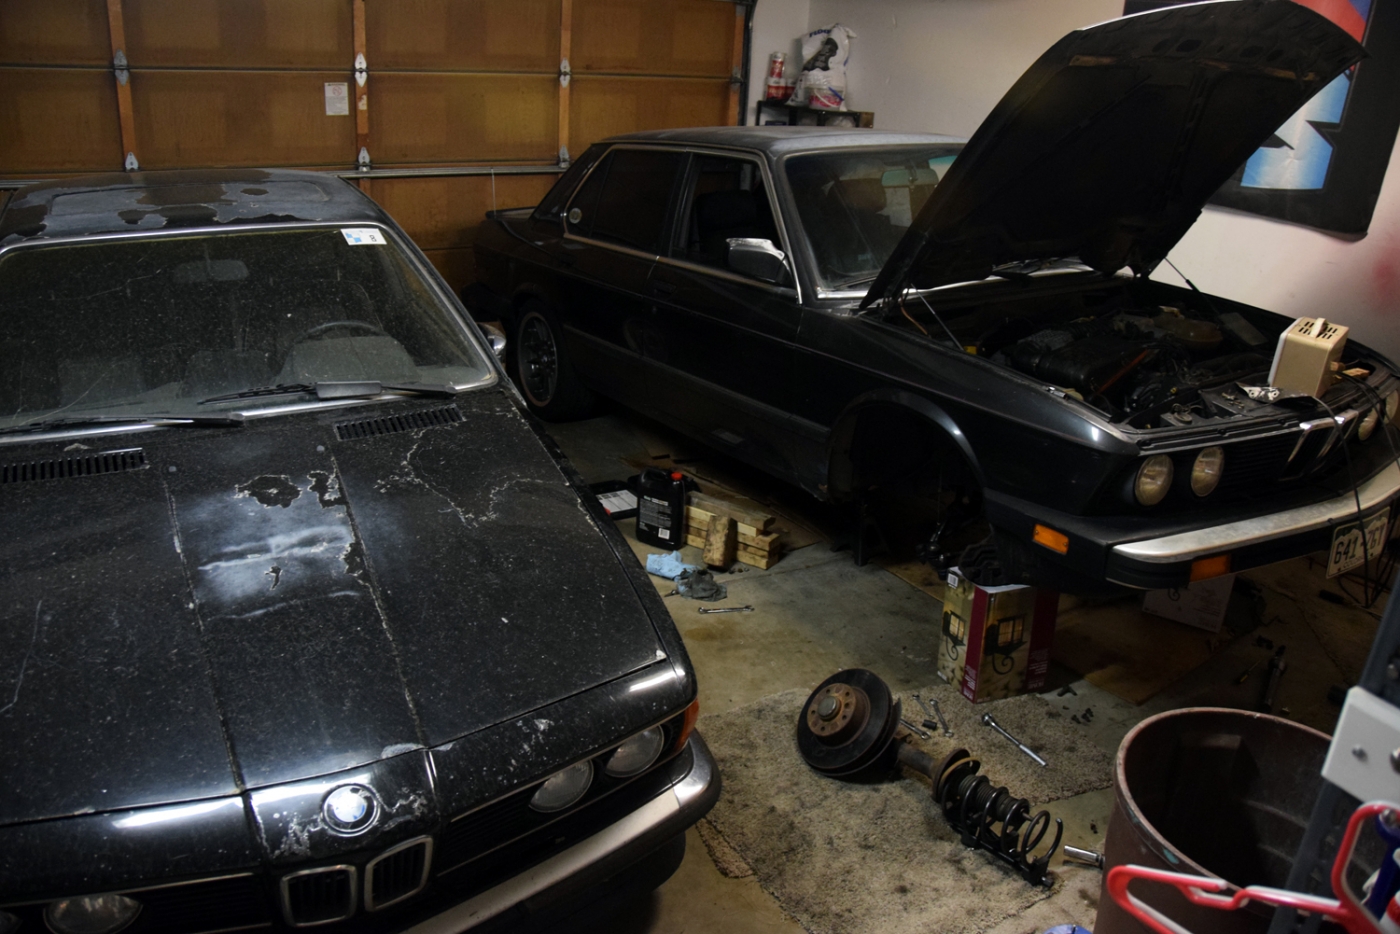
This spring setup seems to sit different than on the e24.. appearing lower in the rear and taller in the front. But I do have the camber plates installed here with eibach/bilstein combo. I also have the rear strut brace (Mason) installed.
Also notice the front windows are down. I got them all working with my solder and heat shrink job. Andy in Ohio got me the connector I needed and some misc hardware.
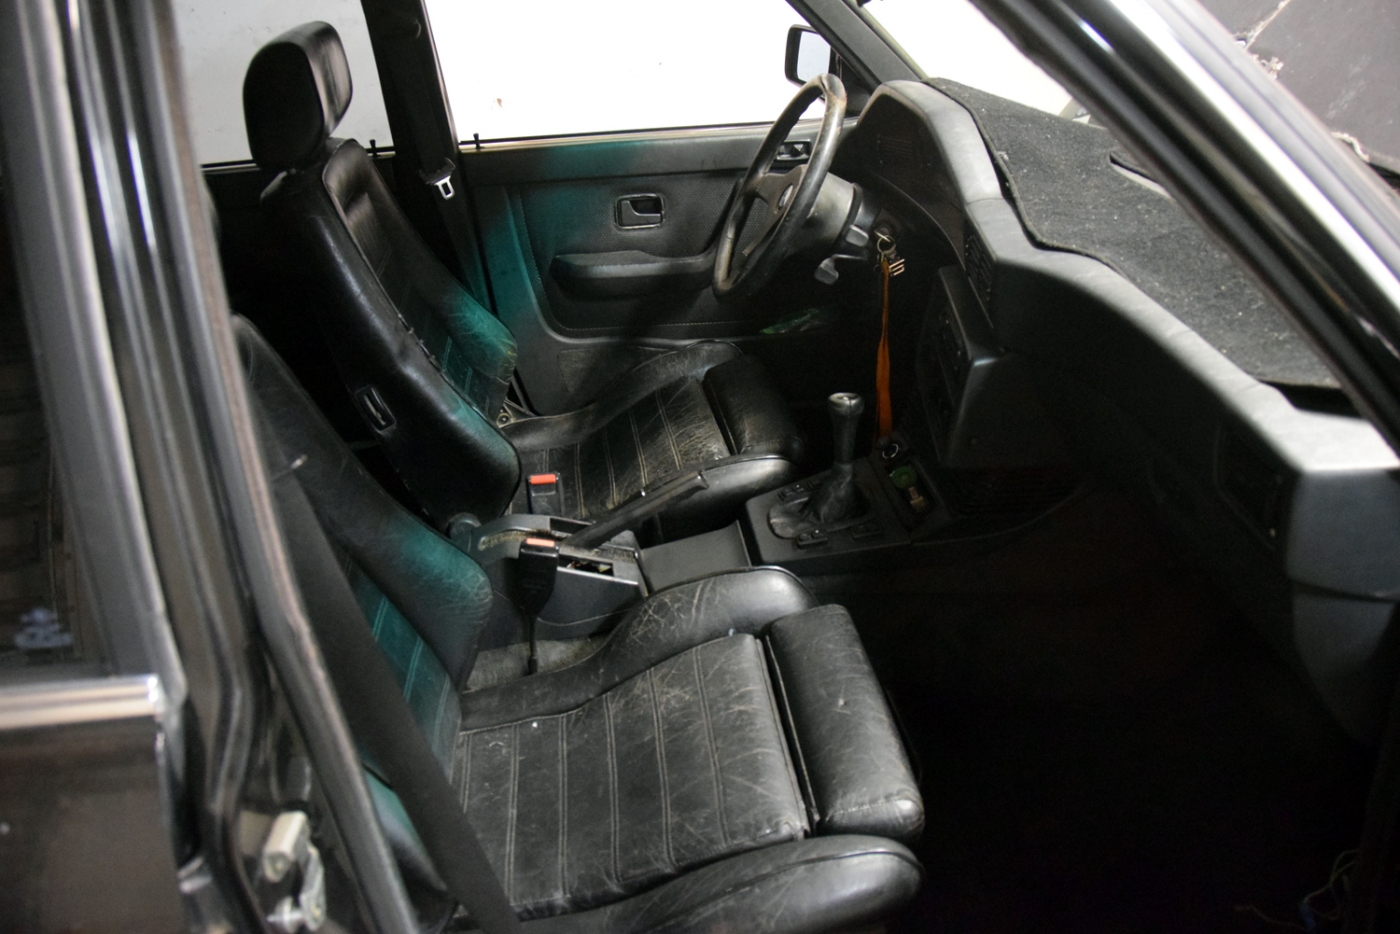
And the Recaro seats from an E24. The tilt doesn't seem to function so I thought they would fit in the E28 just fine. The M Tech steering wheel needs to be recovered, but so does the wheel that came with the car.
I installed a Keyless entryfrom amazon on this car and Franklin, my wife's 535i. It flashes the turn signals which is pretty neat. Range is reasonable and it was less than $20 shipped.
Hoped to get the car driving but a Lemons team with e28 needed the coolant expansion tank, so I shared the one from Burt and subsequently couldn't take it around the block like I wanted after getting the suspension on. Oh well, maybe later this week.
Preparing for engine swap in 2 weeks, more photos and detail to come. Will be R&R swap with both cars when I do it. Hoping I can do both in 2 days and have them running before reworking intercooler piping for the E28 engine bay.
I decided since I had it all apart I would switch from the Bav Auto springs that came on the car to my Eibach's which have a better reputation in general. The rears I would swap as an assembly because they are Dinan valved shocks which are way better than the stock Bilstein's. Those are some of the first parts I bought for my '85 535i back in 2010 and they are still going strong being placed into the 3rd car in my ownership.
I should have taken a picture of this but I didn't because I was in a rush to get the Bav Auto's back on the 633 struts. But we have new upper and lower control arms, along with new sway bar end links. Alignment coming soon. I had a new center link but the steering parts didn't seem to have any slop.
The donor getting acquainted with the subject.

This spring setup seems to sit different than on the e24.. appearing lower in the rear and taller in the front. But I do have the camber plates installed here with eibach/bilstein combo. I also have the rear strut brace (Mason) installed.
Also notice the front windows are down. I got them all working with my solder and heat shrink job. Andy in Ohio got me the connector I needed and some misc hardware.

And the Recaro seats from an E24. The tilt doesn't seem to function so I thought they would fit in the E28 just fine. The M Tech steering wheel needs to be recovered, but so does the wheel that came with the car.

I installed a Keyless entryfrom amazon on this car and Franklin, my wife's 535i. It flashes the turn signals which is pretty neat. Range is reasonable and it was less than $20 shipped.
Hoped to get the car driving but a Lemons team with e28 needed the coolant expansion tank, so I shared the one from Burt and subsequently couldn't take it around the block like I wanted after getting the suspension on. Oh well, maybe later this week.
Preparing for engine swap in 2 weeks, more photos and detail to come. Will be R&R swap with both cars when I do it. Hoping I can do both in 2 days and have them running before reworking intercooler piping for the E28 engine bay.
Last edited by tschultz on Jun 09, 2018 12:59 PM, edited 2 times in total.
Re: 633CSi Turbo - Unexpected Twist - 5/3/18 Update
Great thread... Keeps on delivering.
Re: 633CSi Callaway: Now 535is Turbo - 6/23/18 Update
The last few weeks I started a house painting project (exterior) and have been busy. I'm not done with that but I did mess with the 535is. As I described, I was able to swap shocks and springs along with camber plates. I tried to drive the car a bit and found that it will stall out when the engine starts to get warm. I think one of the crank sensors is starting to fail as I replaced the coil, fuel pump (put in my Walbro external), fuel filter and still ended up getting the problem. I notice that if I kept the heat on high, it would take longer to happen. So I have some of those parts already on the 535is before starting this swap.
So I was able to arrange the shop space and got the cars over there earlier this Wednesday. I took off work Thursday and Friday and got there at about 6:30am to get started. My goal, which I thought might be possible, was to exchange the engines between the two cars by the end of Friday. I had access to two lifts, but one was really an alignment rack that didn't let me get the wheels off the ground (and didn't have functioning lifting jacks in the center, so they really were just in the way). Still, I knew it would be cheaper than renting two lifts for $40 per hour each.
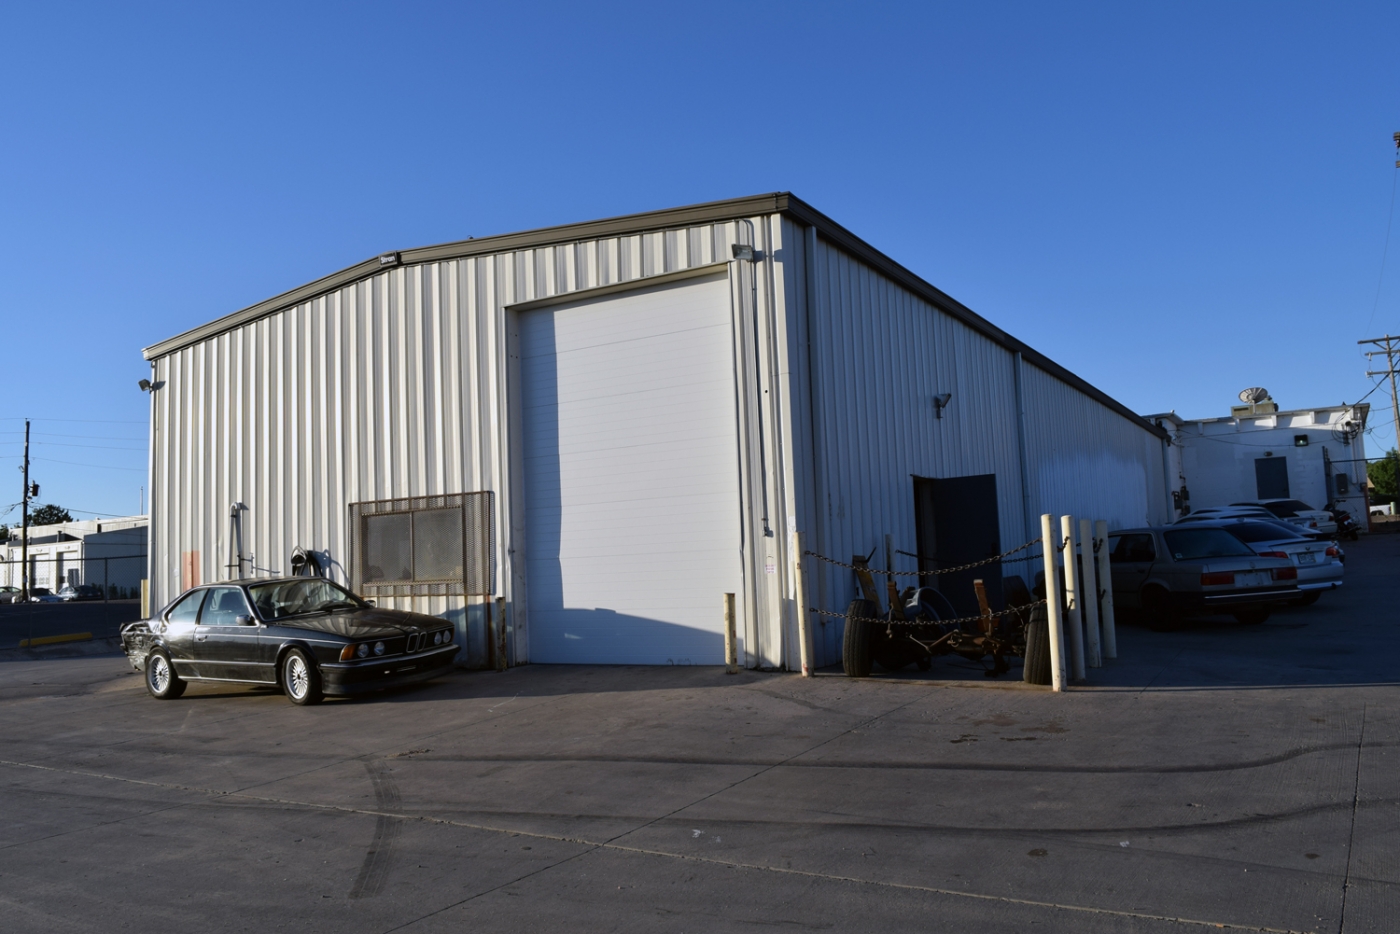
Lucky for me, we are right at the longest daylight days of the year, so it was going to be light when I got up in the morning and I could work pretty much as long as I wanted to finish. Arriving at about 6:15, about my normal office job time. These guys who rent the space have a lot of BMW projects.
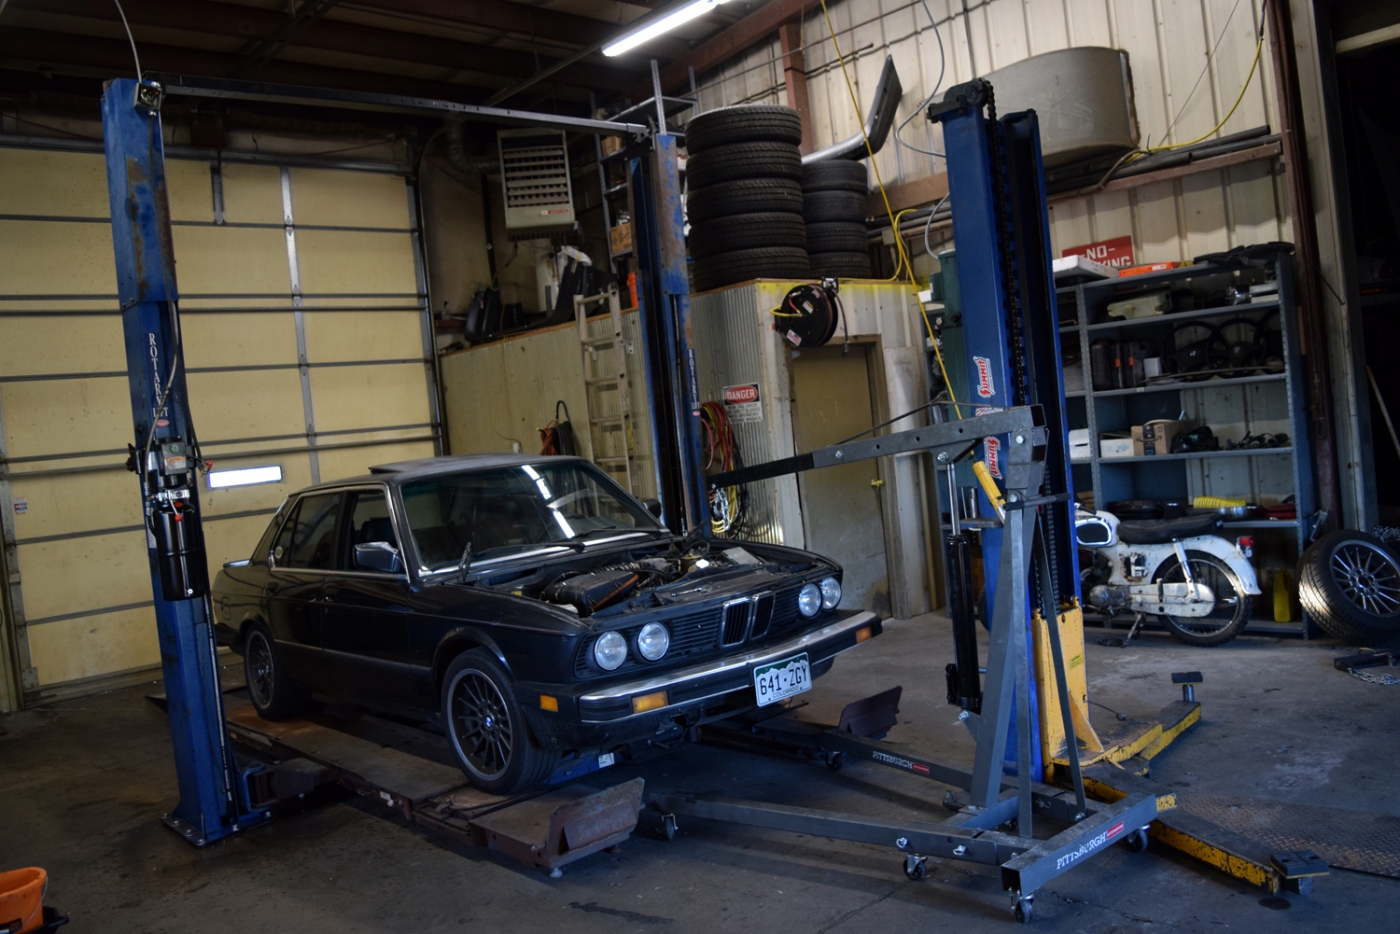
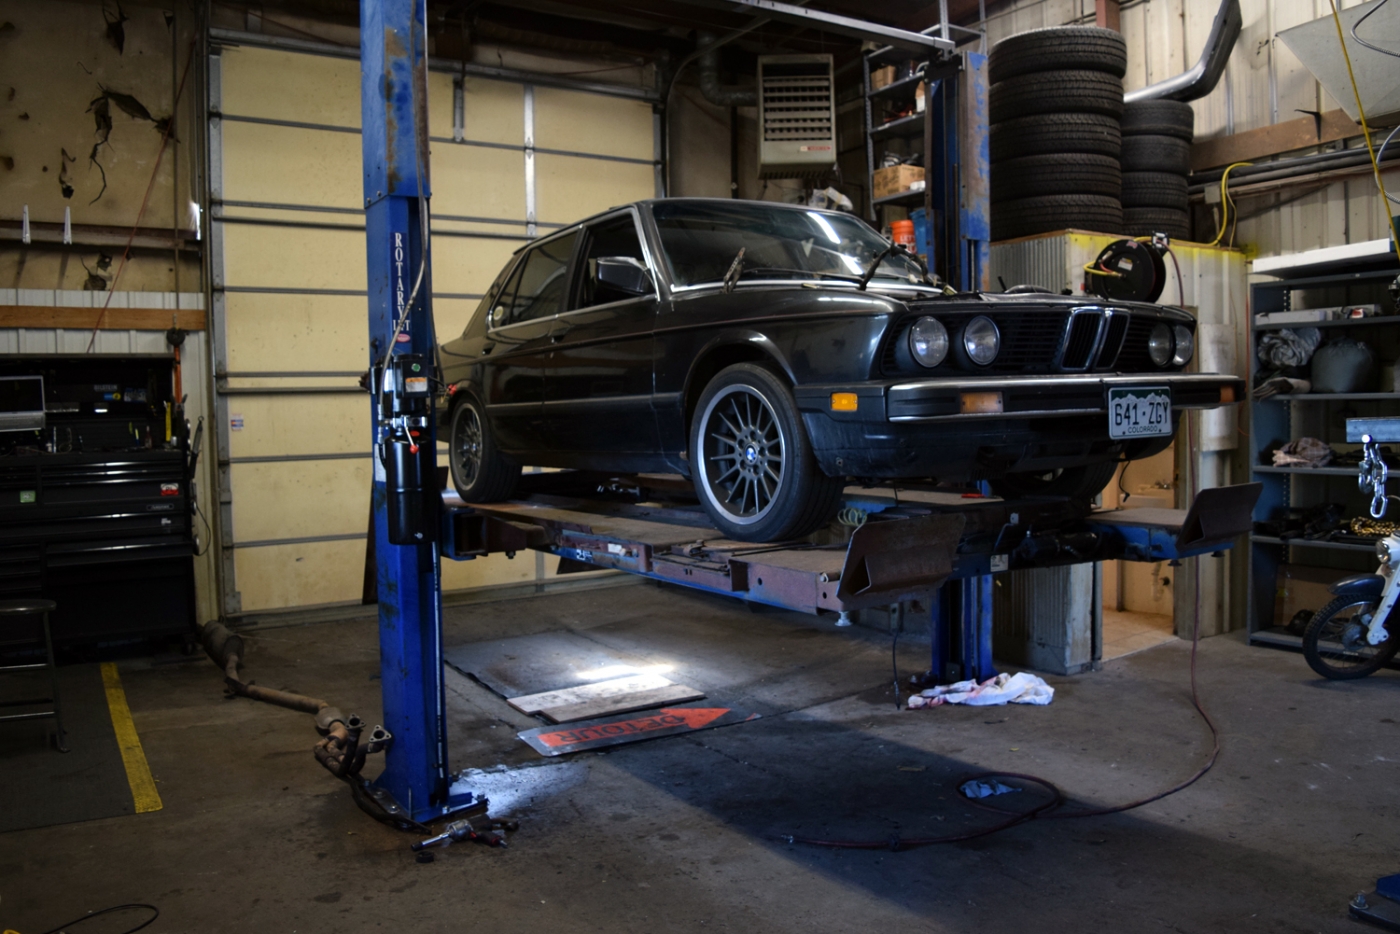
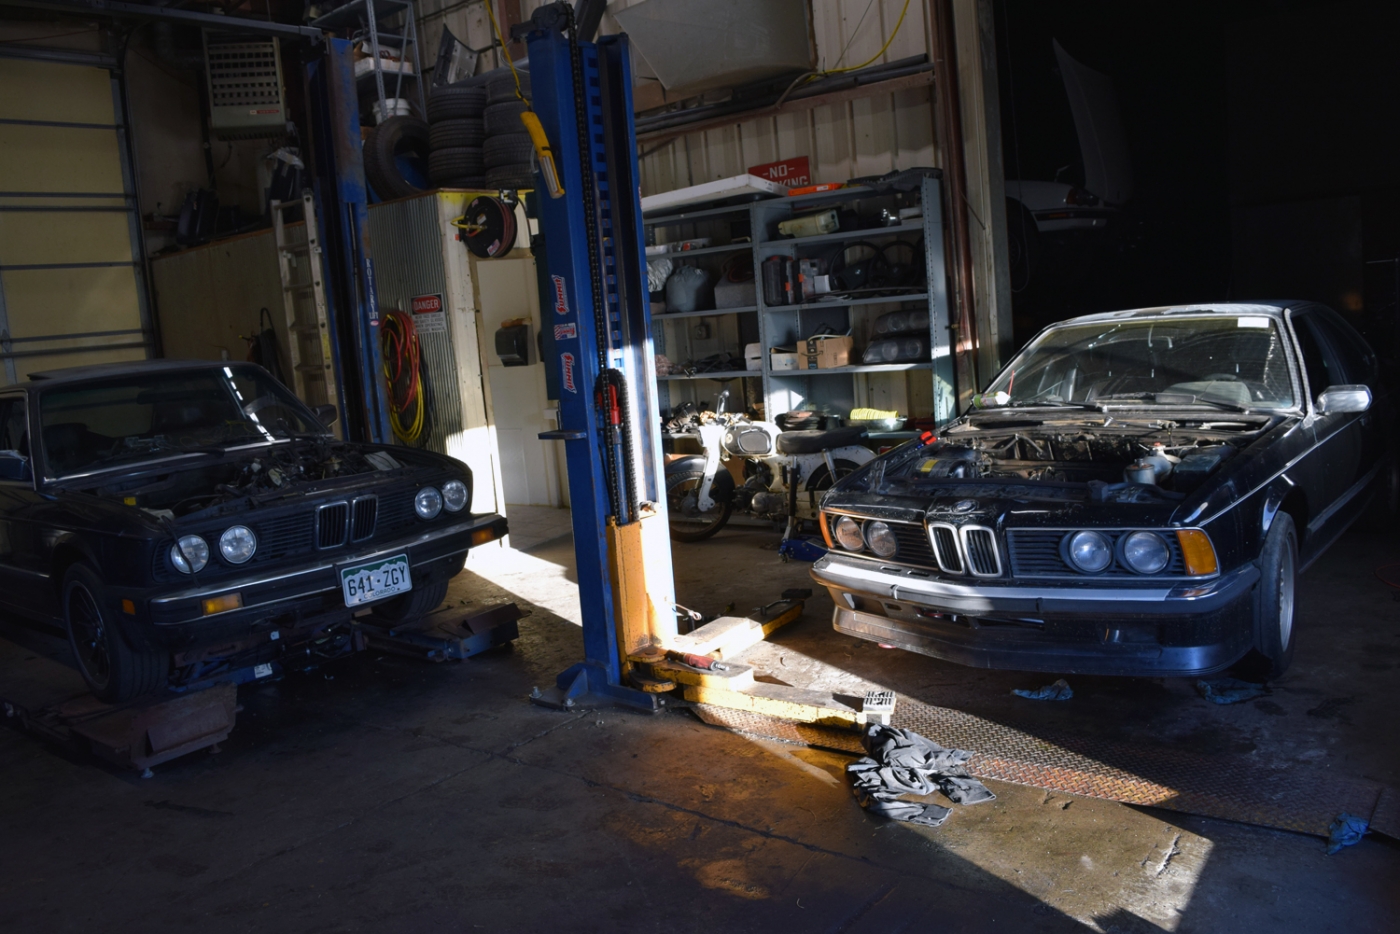
Being a one man crew and having some the swap before, I knew it would take a while. Luckily I did get help removing the hood from the 535is the night before. My subject as we started.
It was an exercise in futility getting the one piece exhaust off by myself with the alignment rack. But I did get it.
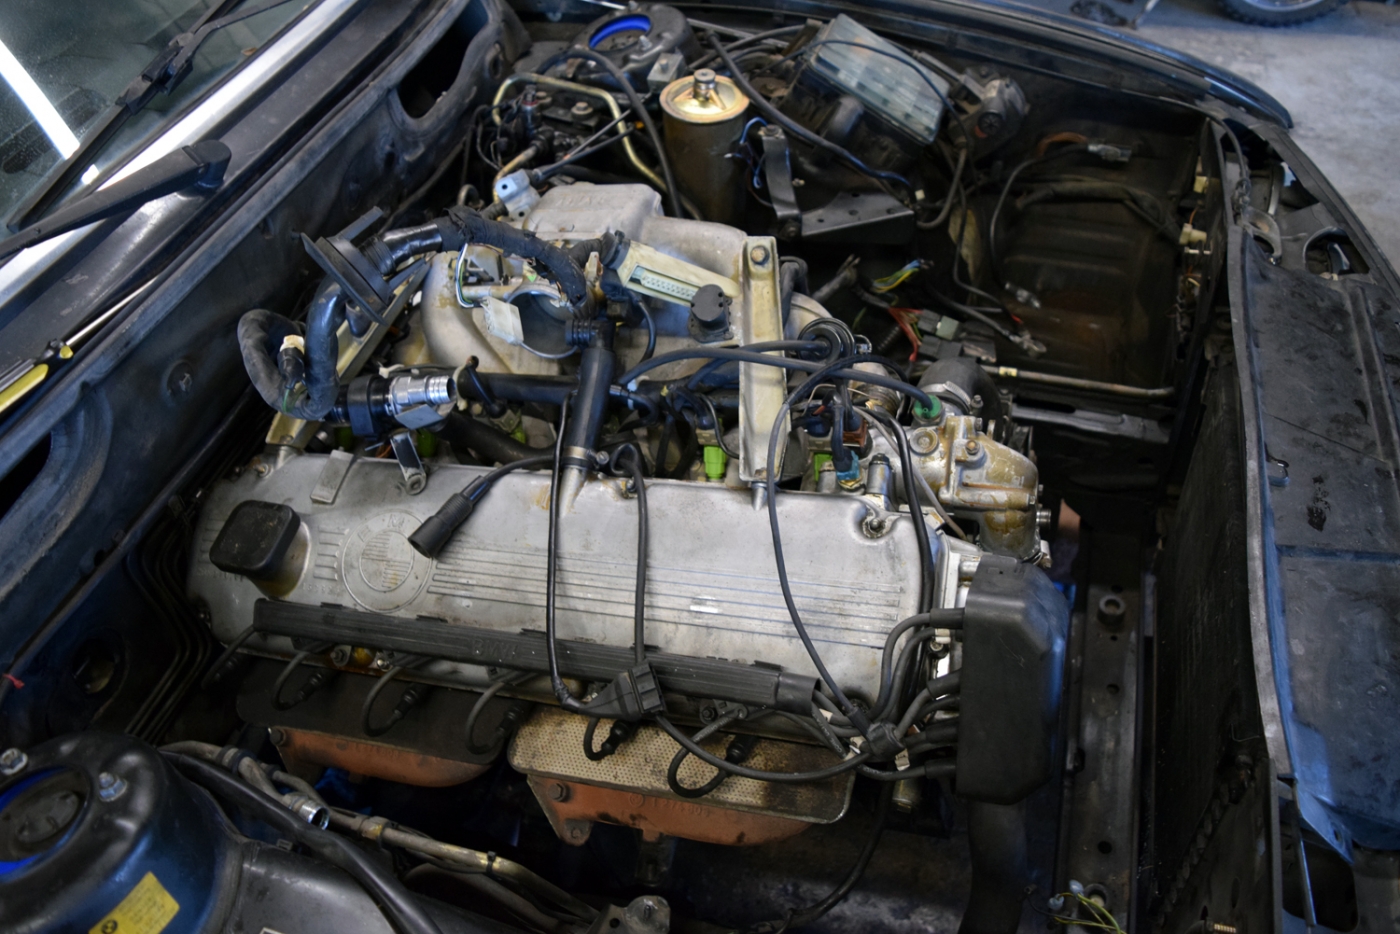
Getting the engine ready for removal. We are close here.
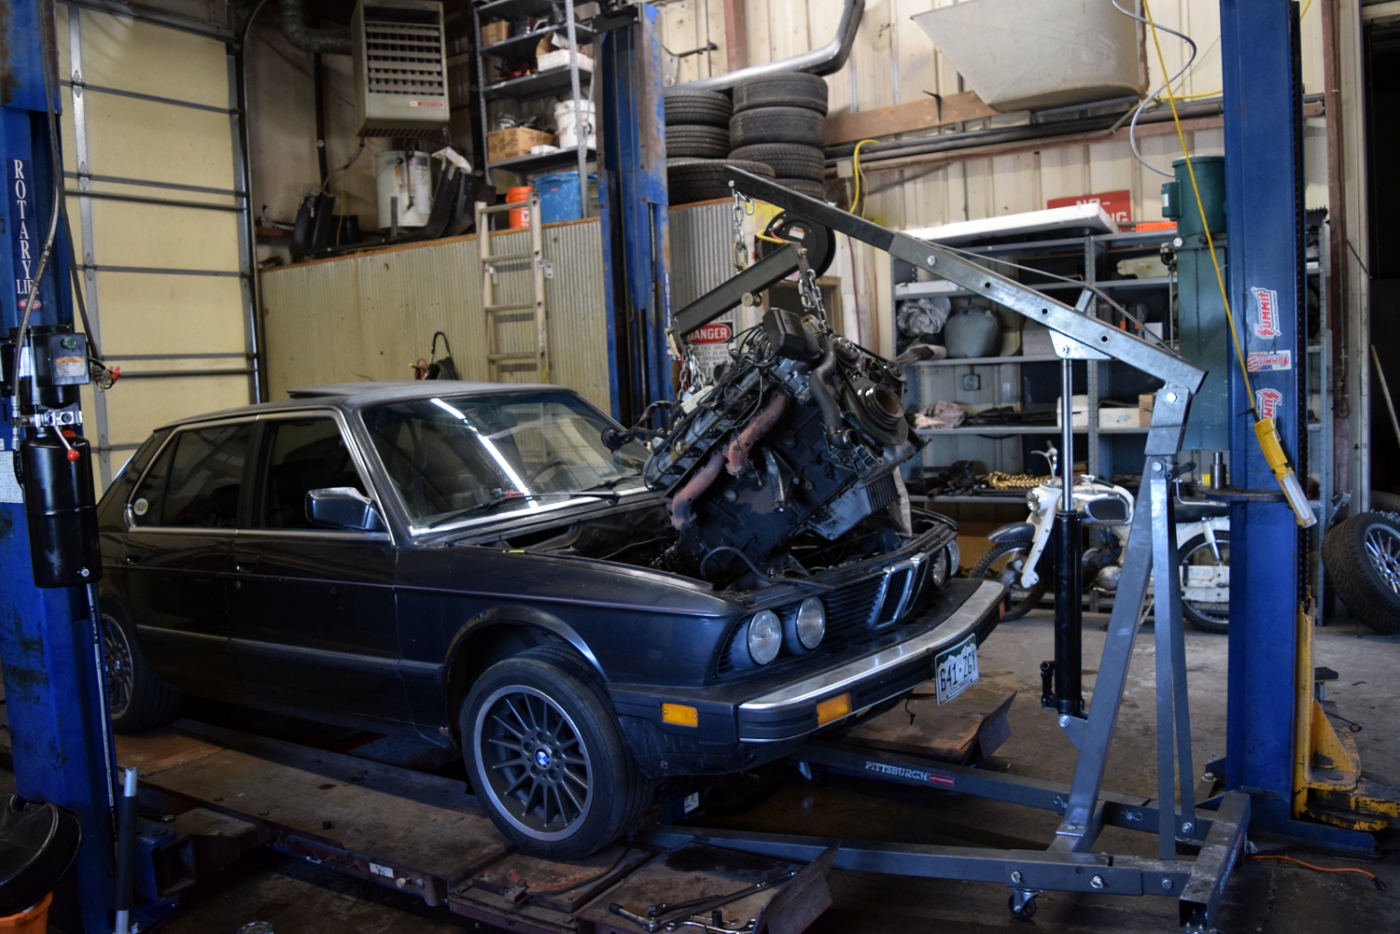
The hoist just fit inside the footprint of the lift. Here's me pulling it out; load leveler is key of course. It took me about 6 hours to get t this point. I'm not sure what the book time is on engine removal but I was pretty happy with this having taken so much time on getting the exhaust out.
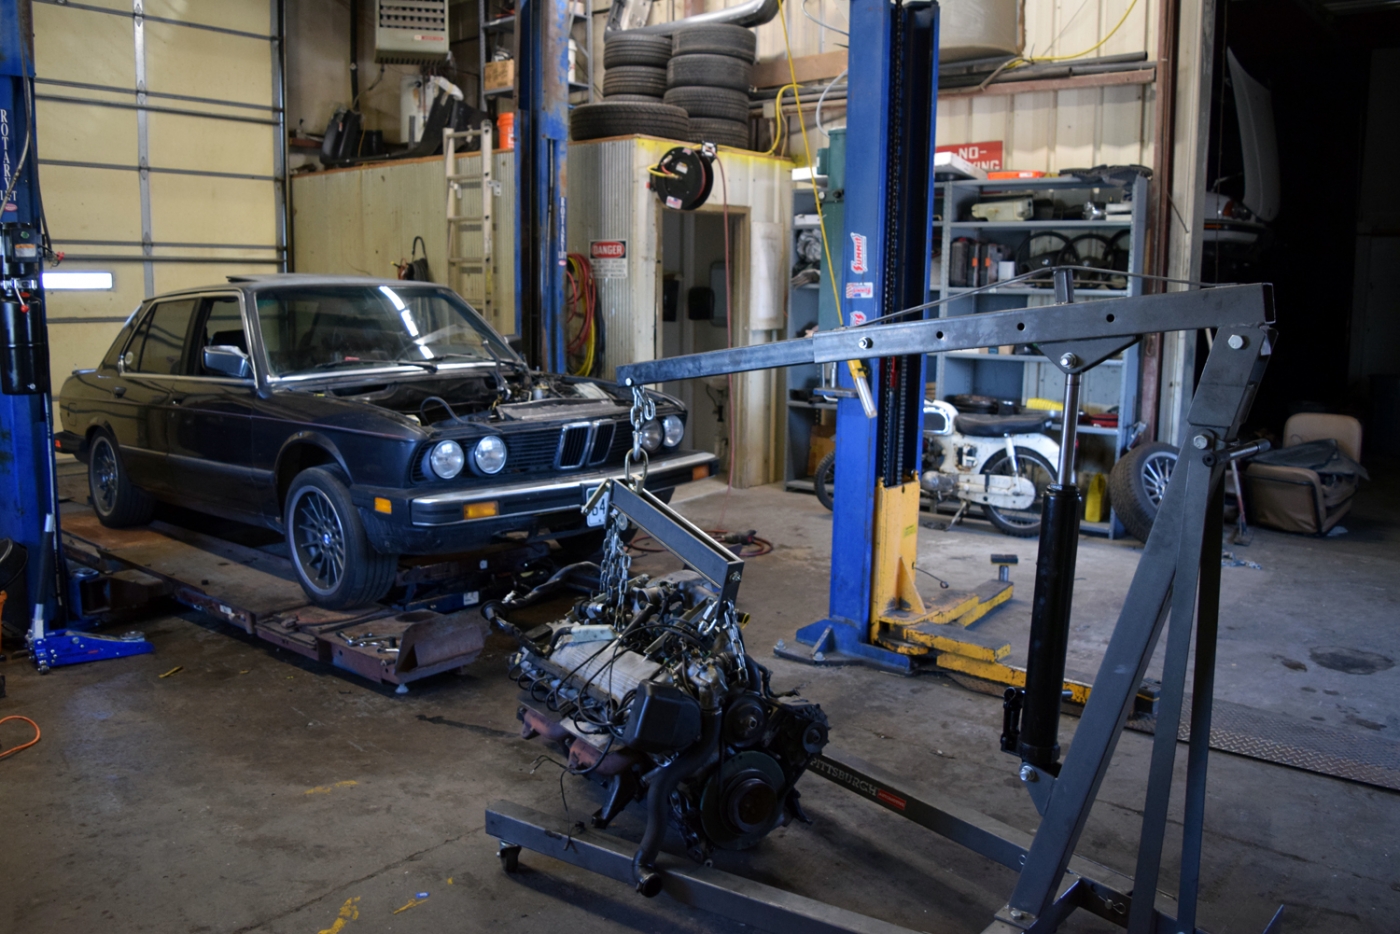
So in comes #2 to begin the work.
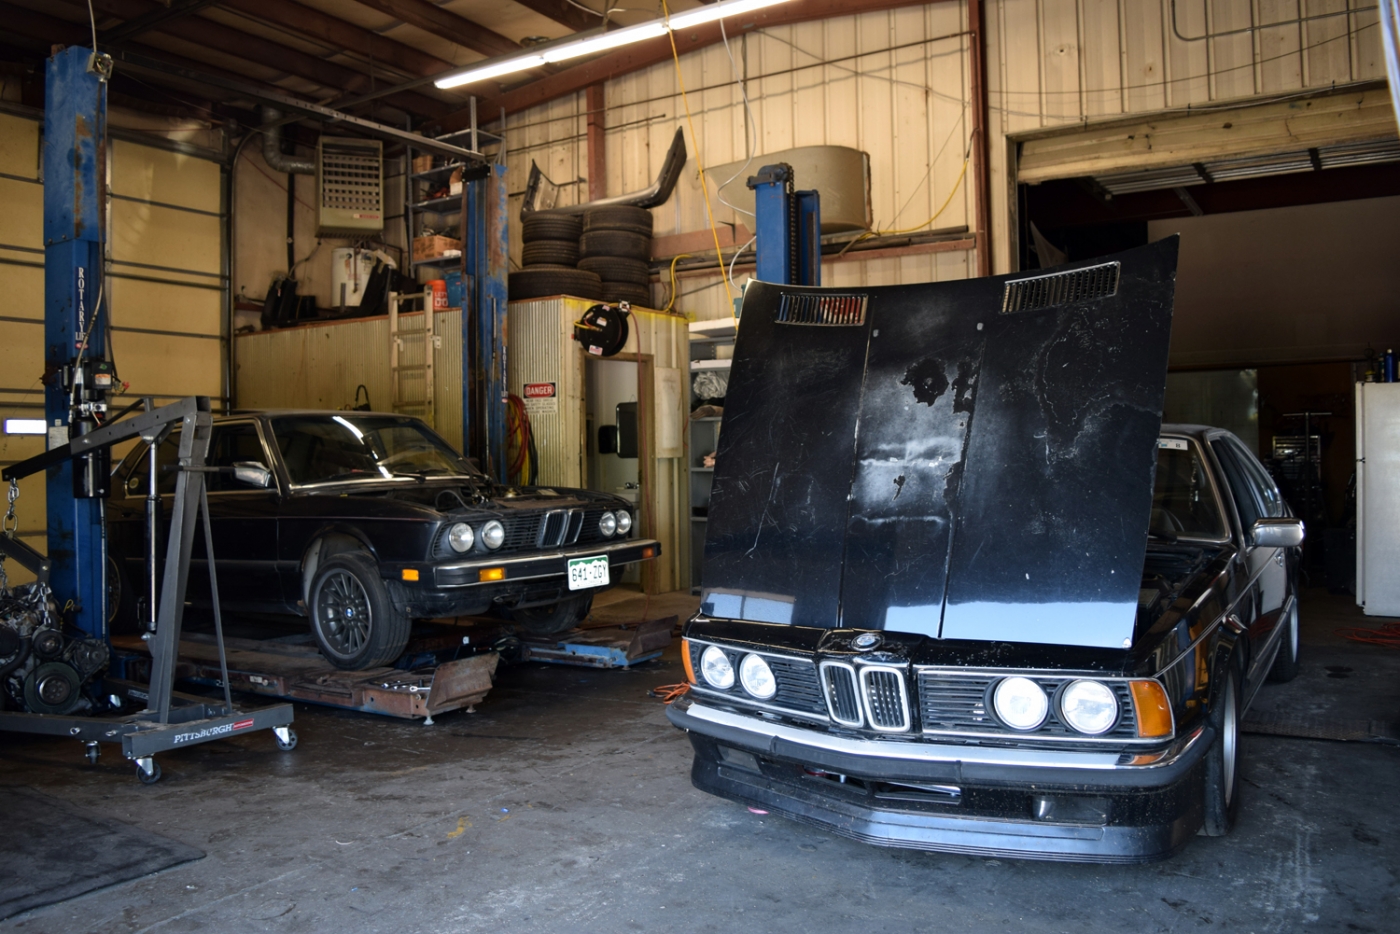
The guy renting the space was able to come to the shop and help get the hood off the 633. He suggested that we lift it from the front so that he could park his car inside the shop and work while I worked. So I did that, but still had to jack up the rear to twist the driveshaft and get the hardware off. But this was working under the turbo. Getting the vband and exhaust was quick! But it did take some time to get the downpipe off...
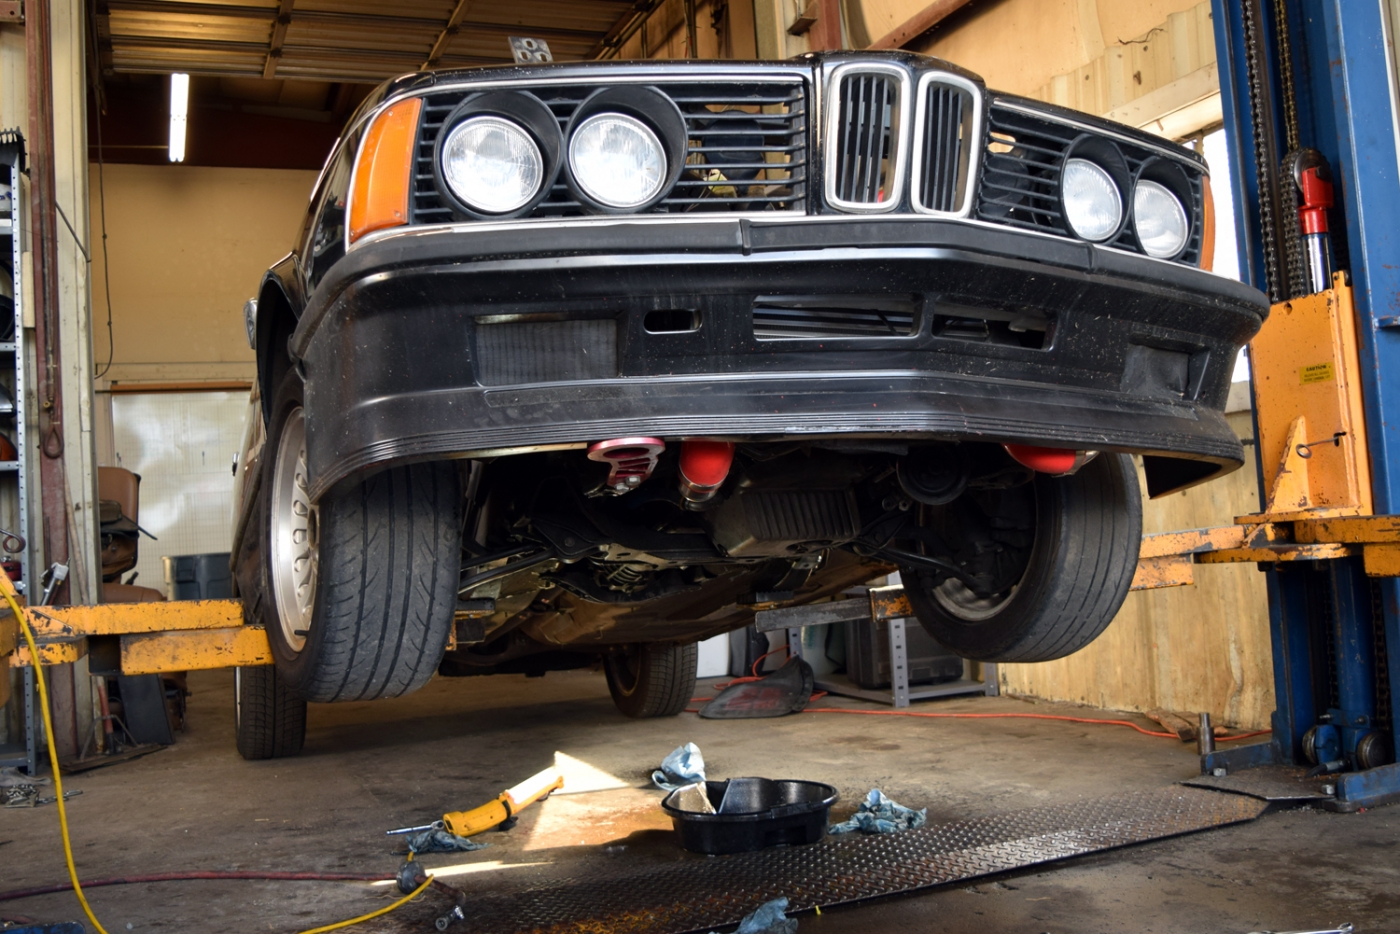
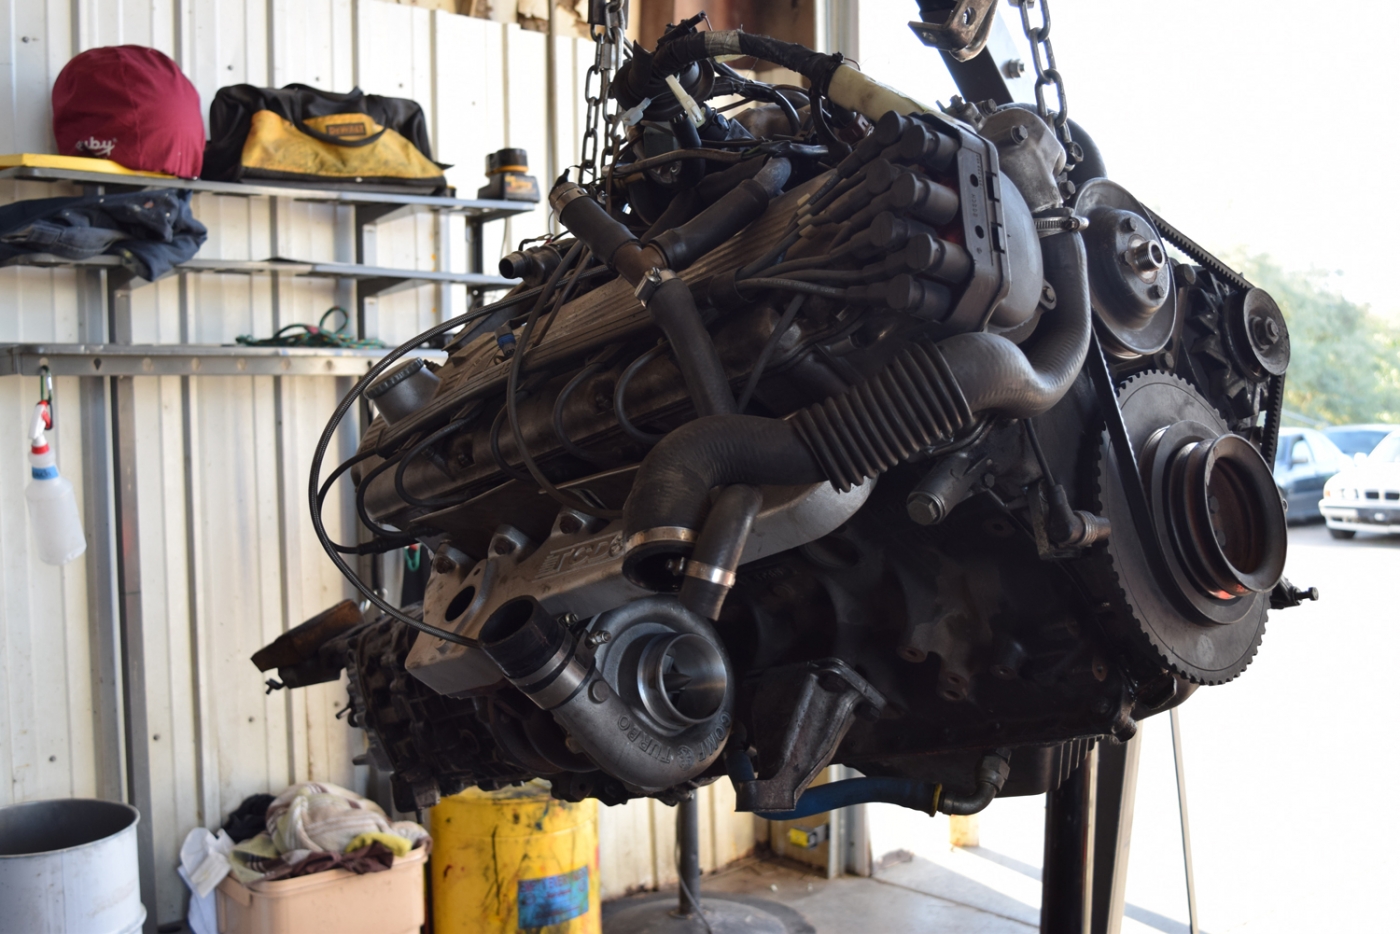
He helped me for the actual pull and we were able to get the engine out with the turbo and manifold installed. At this point, we dropped the 633 and rolled it back so that the hoist would have clearance to roll into the front of the rack. I had planned this out a bit and it worked as expected, with just enough room.
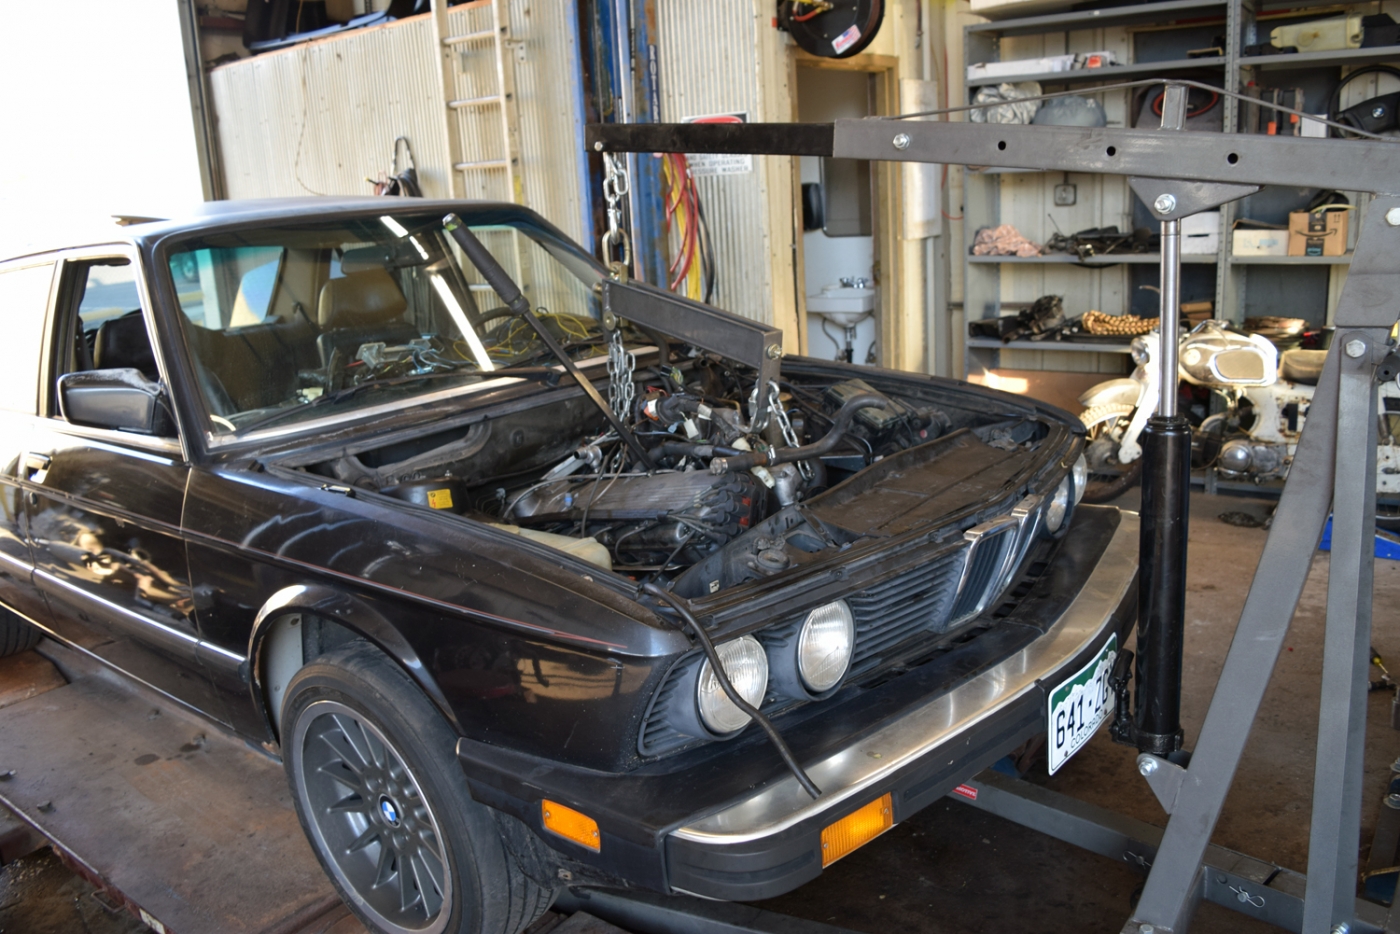
I also got some help getting the engine in place in Burt. This took a while since the natural engine balance was a little off with the turbo and manifold. Weight was balancing the motor mount on the passenger side lower to the ground. But we got it.
This was where I ended for the night, which was probably after about 13 hours. I was happy with what I got done and how fast I got it done. It meant I might be on track to finish by Friday night.
See you guys tomorrow!
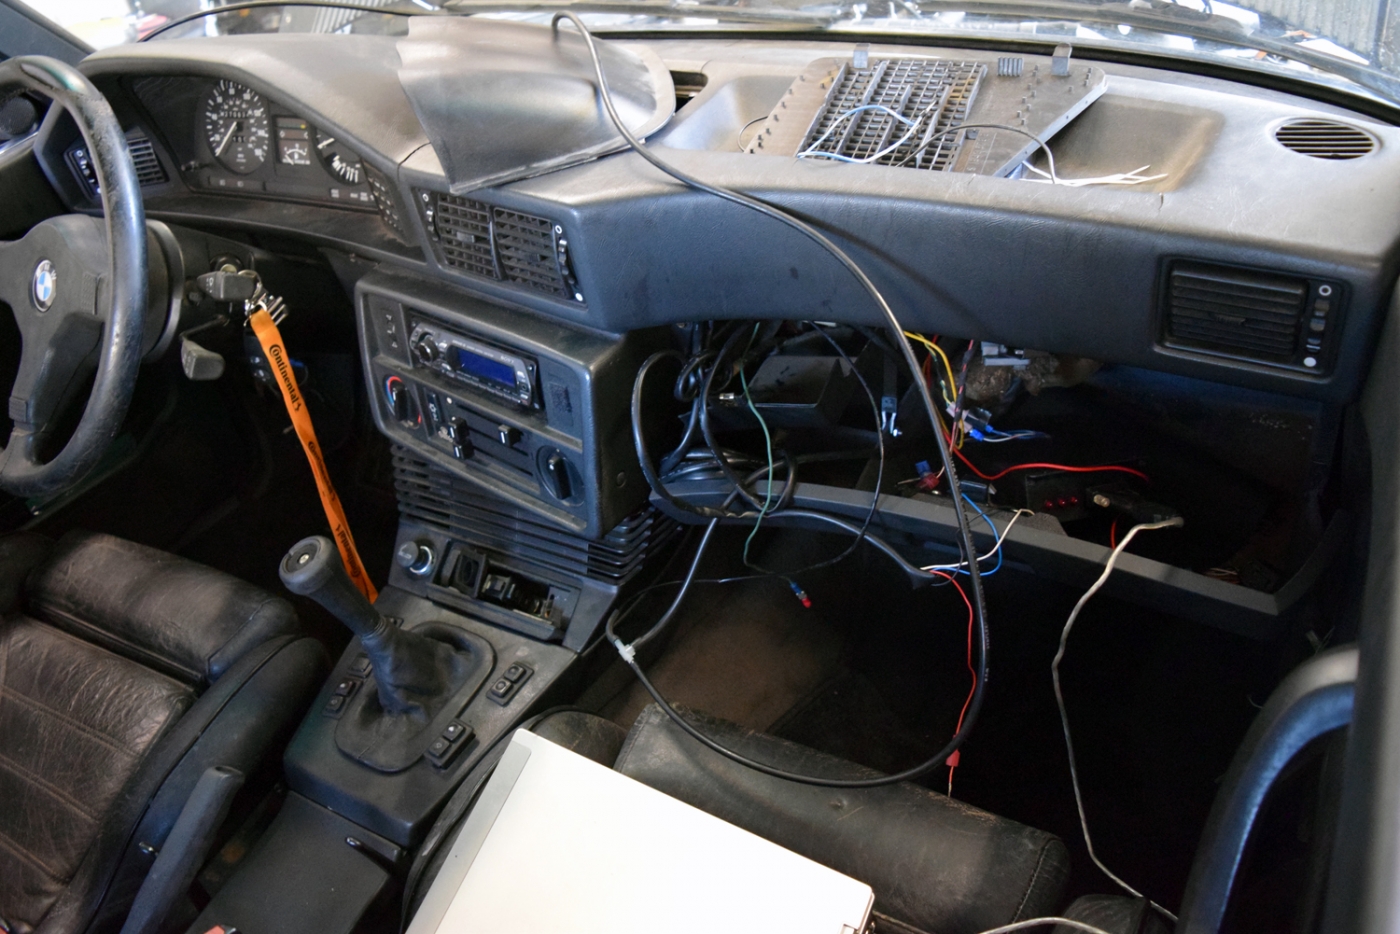
It was a long day and I ended up getting back to the shop at about 6:45 the next morning. I started reassembling Burt with the turbo motor and had to play with the gauges. I don't have a ton of photos, but it was reinstalling the driveshaft and turbo down pipe. I couldn't get the exhaust on due to the rack, so I focused on other tasks. I just got the gauges close so that AFR would work on my drive home. I didn't bother messing with getting everything finished and working just yet. It is a bit of a mess of wires. But I did wire them with the intention of mounting above the center vent blank plate.
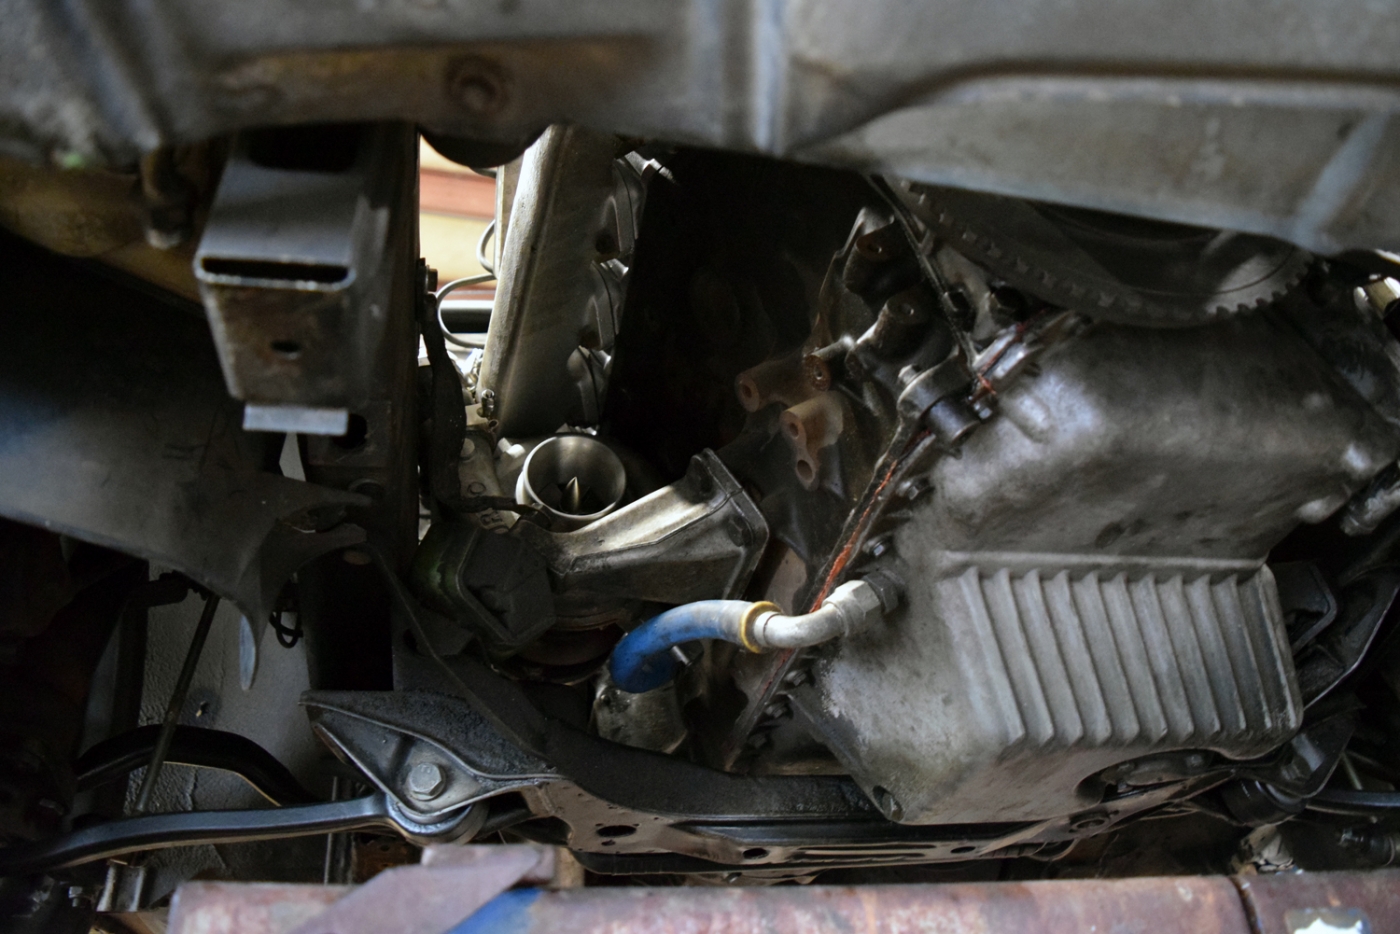
Here's a picture of my oil drain as people always wonder how this ends up with the bottom mount. I didn't touch any of this during the swap. Last time I did, but it is actually doable without removing the turbo manifold.
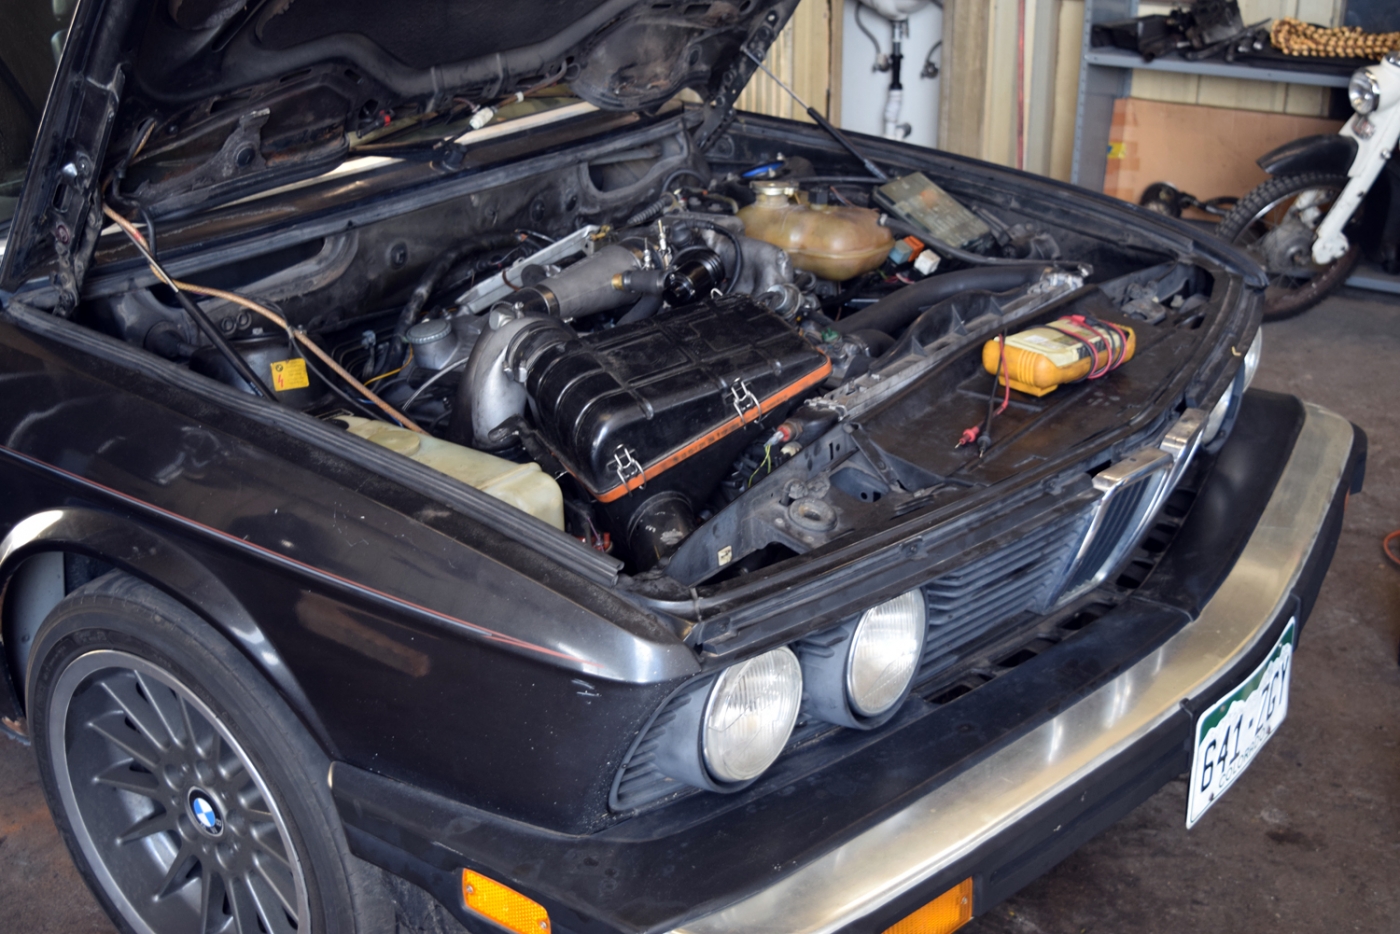
I reinstalled the turbo parts without intercooler because my E24 setup wouldn't fit. To save time, I got my callaway intake pipe installed and ran non-intercooled to drive home. The car started up just fine, but I did have to reconnect the starter wiring. Ralph was able to help me install the hood at this point. And here is Burt the now turbo 535is.
It being about 1:30pm, it meant that I was almost a bit behind schedule. I had to get going on the 633 engine install. So Burt got to watch front row as his engine got dropped into the 633. I did this pretty much all myself as Ralph was working on his own projects.
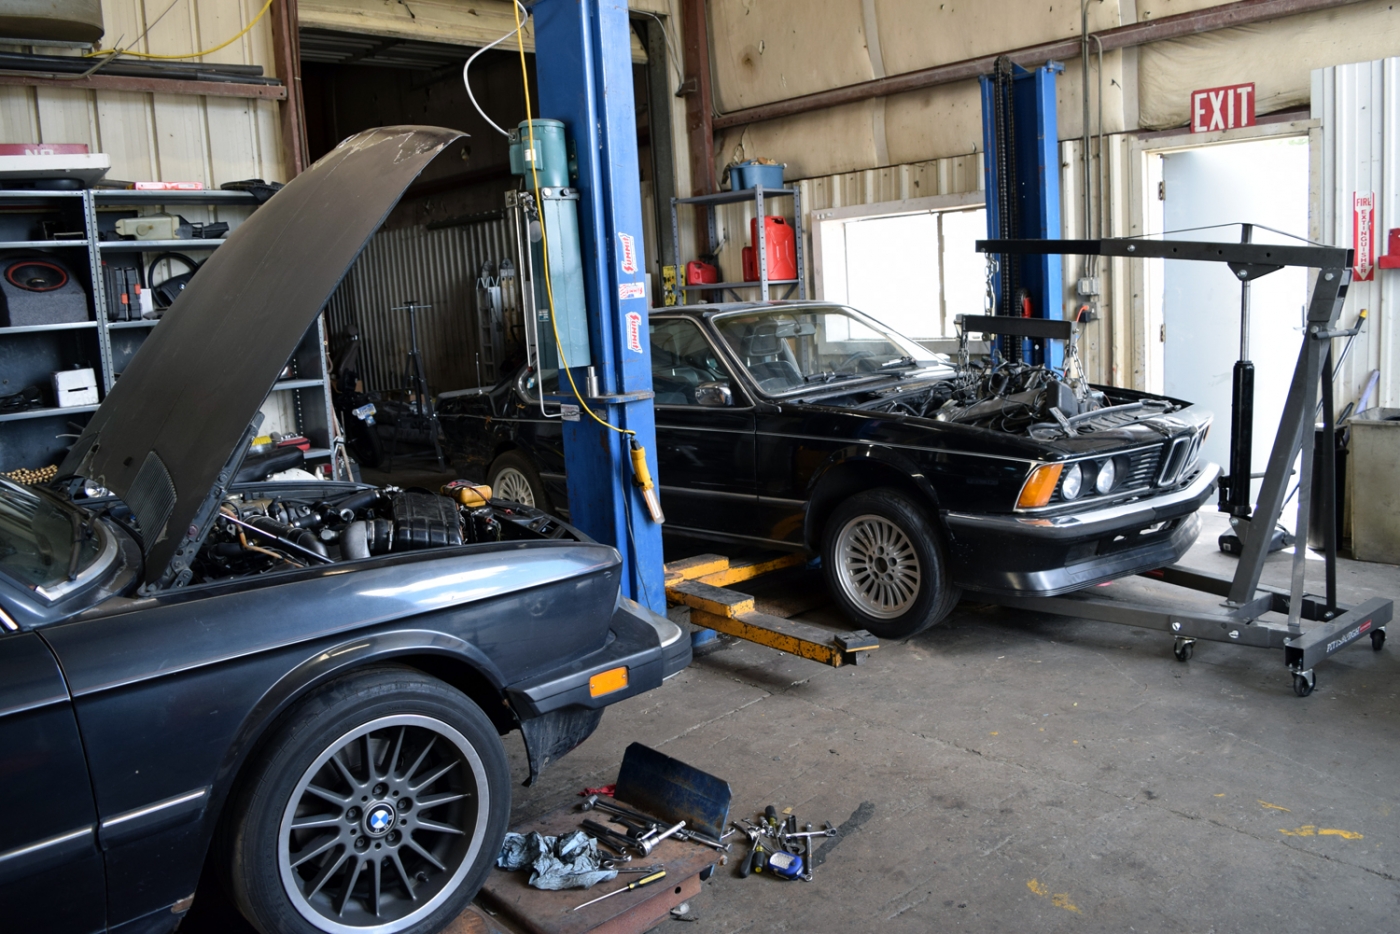
So I put my head down to get the rest of it back together and running. He did help me put the hood on the 633 before he left for the day At one point we also moved Burt in front of the 633 so that I could install the exhaust.
The parts all swapped over without a hitch. Even the 265/6 and sheetmetal console into the '88 535is. I had been worried about the shifter.
I ended up getting it all back together and ready to start at 7:00pm. It cranked and cranked and wouldn't start. After some investigation, I found a power wire to the main relay had broken. So once I rigged something up, the car started up. At this point, I knew I could wrap up and get both cars home. So at about 7:45pm I drove Burt home.
It turned out to be about 26 hours working for me to do the two engine swaps, which I think is pretty darn good considering one was turbo. I would be interested to know what the E28 engine R&R 'book time' is. I wasn't trying to slap it together, but I did want to get it out of his space sooner than later. My wife also wanted my time on the weekend, so I wanted to finish ASAP.
The hood wouldn't close with my non-intercooled setup, but here was Friday evening
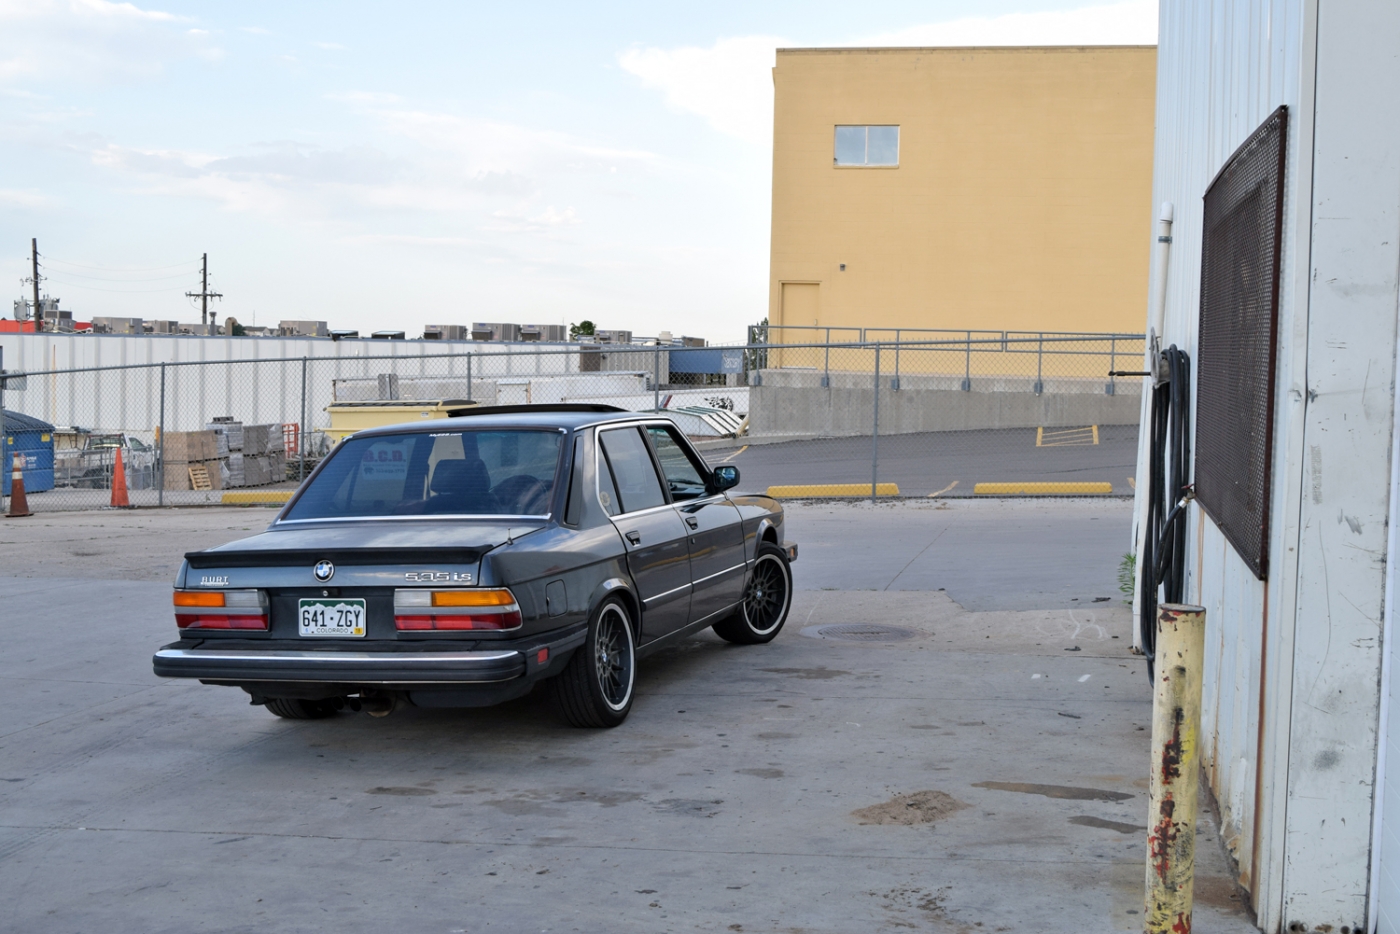
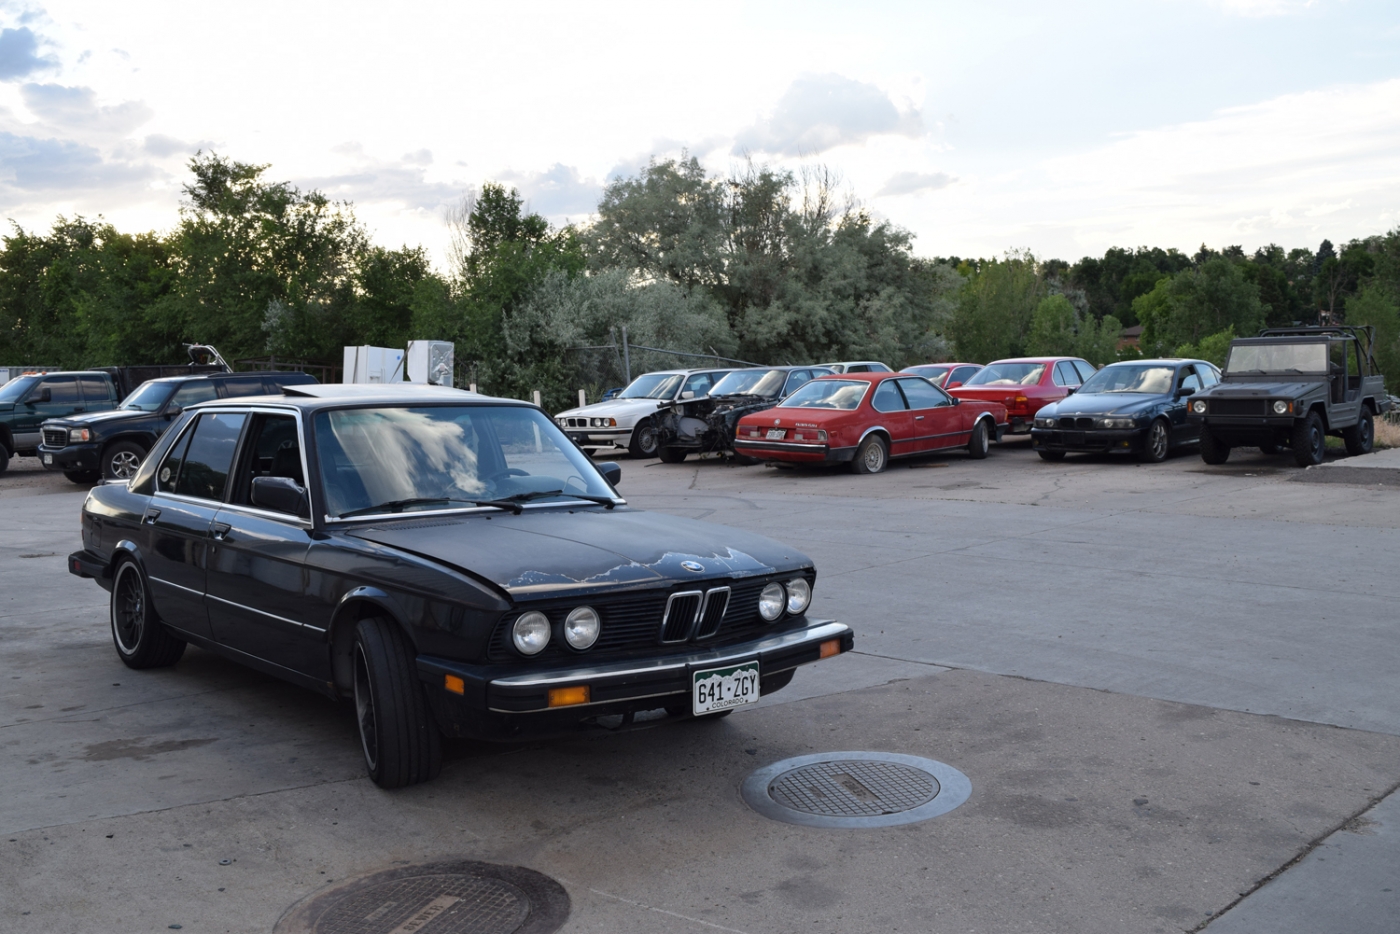
So now that that car is home, it seems like a have an even longer list of things to do just to get it on the road and driving again:
-Reinstall front sway bar ( I took it off in advance)
-Mount gauge pod
-Finish wiring gauges/gauge lights
-Mount intercooler and map out IC piping
-Order piping and couplers to install intercooler
-Reinstall front 535is spoiler. Spray paint it maybe?
-find source of battery drain
-Bring car in for an alignment
-finish aligning doors?
-continue working through Megasquirt tuning
More updates to come
So I was able to arrange the shop space and got the cars over there earlier this Wednesday. I took off work Thursday and Friday and got there at about 6:30am to get started. My goal, which I thought might be possible, was to exchange the engines between the two cars by the end of Friday. I had access to two lifts, but one was really an alignment rack that didn't let me get the wheels off the ground (and didn't have functioning lifting jacks in the center, so they really were just in the way). Still, I knew it would be cheaper than renting two lifts for $40 per hour each.
Lucky for me, we are right at the longest daylight days of the year, so it was going to be light when I got up in the morning and I could work pretty much as long as I wanted to finish. Arriving at about 6:15, about my normal office job time. These guys who rent the space have a lot of BMW projects.

Being a one man crew and having some the swap before, I knew it would take a while. Luckily I did get help removing the hood from the 535is the night before. My subject as we started.

It was an exercise in futility getting the one piece exhaust off by myself with the alignment rack. But I did get it.

Getting the engine ready for removal. We are close here.

The hoist just fit inside the footprint of the lift. Here's me pulling it out; load leveler is key of course. It took me about 6 hours to get t this point. I'm not sure what the book time is on engine removal but I was pretty happy with this having taken so much time on getting the exhaust out.


So in comes #2 to begin the work.

The guy renting the space was able to come to the shop and help get the hood off the 633. He suggested that we lift it from the front so that he could park his car inside the shop and work while I worked. So I did that, but still had to jack up the rear to twist the driveshaft and get the hardware off. But this was working under the turbo. Getting the vband and exhaust was quick! But it did take some time to get the downpipe off...

He helped me for the actual pull and we were able to get the engine out with the turbo and manifold installed. At this point, we dropped the 633 and rolled it back so that the hoist would have clearance to roll into the front of the rack. I had planned this out a bit and it worked as expected, with just enough room.

I also got some help getting the engine in place in Burt. This took a while since the natural engine balance was a little off with the turbo and manifold. Weight was balancing the motor mount on the passenger side lower to the ground. But we got it.

This was where I ended for the night, which was probably after about 13 hours. I was happy with what I got done and how fast I got it done. It meant I might be on track to finish by Friday night.
See you guys tomorrow!

It was a long day and I ended up getting back to the shop at about 6:45 the next morning. I started reassembling Burt with the turbo motor and had to play with the gauges. I don't have a ton of photos, but it was reinstalling the driveshaft and turbo down pipe. I couldn't get the exhaust on due to the rack, so I focused on other tasks. I just got the gauges close so that AFR would work on my drive home. I didn't bother messing with getting everything finished and working just yet. It is a bit of a mess of wires. But I did wire them with the intention of mounting above the center vent blank plate.

Here's a picture of my oil drain as people always wonder how this ends up with the bottom mount. I didn't touch any of this during the swap. Last time I did, but it is actually doable without removing the turbo manifold.

I reinstalled the turbo parts without intercooler because my E24 setup wouldn't fit. To save time, I got my callaway intake pipe installed and ran non-intercooled to drive home. The car started up just fine, but I did have to reconnect the starter wiring. Ralph was able to help me install the hood at this point. And here is Burt the now turbo 535is.

It being about 1:30pm, it meant that I was almost a bit behind schedule. I had to get going on the 633 engine install. So Burt got to watch front row as his engine got dropped into the 633. I did this pretty much all myself as Ralph was working on his own projects.

So I put my head down to get the rest of it back together and running. He did help me put the hood on the 633 before he left for the day At one point we also moved Burt in front of the 633 so that I could install the exhaust.
The parts all swapped over without a hitch. Even the 265/6 and sheetmetal console into the '88 535is. I had been worried about the shifter.
I ended up getting it all back together and ready to start at 7:00pm. It cranked and cranked and wouldn't start. After some investigation, I found a power wire to the main relay had broken. So once I rigged something up, the car started up. At this point, I knew I could wrap up and get both cars home. So at about 7:45pm I drove Burt home.
It turned out to be about 26 hours working for me to do the two engine swaps, which I think is pretty darn good considering one was turbo. I would be interested to know what the E28 engine R&R 'book time' is. I wasn't trying to slap it together, but I did want to get it out of his space sooner than later. My wife also wanted my time on the weekend, so I wanted to finish ASAP.
The hood wouldn't close with my non-intercooled setup, but here was Friday evening


So now that that car is home, it seems like a have an even longer list of things to do just to get it on the road and driving again:
-Reinstall front sway bar ( I took it off in advance)
-Mount gauge pod
-Finish wiring gauges/gauge lights
-Mount intercooler and map out IC piping
-Order piping and couplers to install intercooler
-Reinstall front 535is spoiler. Spray paint it maybe?
-find source of battery drain
-Bring car in for an alignment
-finish aligning doors?
-continue working through Megasquirt tuning
More updates to come
Re: 633CSi Callaway: Now 535is Turbo - 6/23/18 Update
Wow, that's a crazy amount of work in a weekend. It took me 3 months. 
Re: 633CSi Callaway: Now 535is Turbo - 6/23/18 Update
Good progress. Thanks for sharing your journey.
What are you going to do with your e24?
What are you going to do with your e24?
Re: 633CSi Callaway: Now 535is Turbo - 6/23/18 Update
The major thing for me was to have that car mobile so that I could move it. So I put it back together and have a running driving car right now until I decide where i want to part it out at. Ultimately I think that is what will happen with this one... I'm not sure anybody would want the shell.
Instead i may use the rust free parts as a donor for my euro spec 635 if I was interested in going that deep into repairs. In the mean time, I'm going to hold onto it until it makes sense to start parting it.
Instead i may use the rust free parts as a donor for my euro spec 635 if I was interested in going that deep into repairs. In the mean time, I'm going to hold onto it until it makes sense to start parting it.
-
Nebraska_e28
- Beamter

- Posts: 9056
- Joined: Apr 13, 2006 11:18 PM
- Location: Council Bluffs, IA
- Contact:
Re: 633CSi Callaway: Now 535is Turbo - 6/23/18 Update
Ton of work! Been down that road a few times & am no longer a fan. Plans for IC configuration/location?
Re: 633CSi Callaway: Now 535is Turbo - 6/23/18 Update
Yeah I would mainly part it for spares for myself.. but not in a rush at the moment either.
For the intercooler, I am wondering if I can do a similar setup to what I had in the 633 with it sitting in front of the radiator. I will have to slightly adjust the piping, but it was a clean setup and got pretty good airflow. To make it work and not hack any body parts up, I'll be trying to remove the front valance to make it fit. I would be running just the 535is front spoiler at that point.
For the intercooler, I am wondering if I can do a similar setup to what I had in the 633 with it sitting in front of the radiator. I will have to slightly adjust the piping, but it was a clean setup and got pretty good airflow. To make it work and not hack any body parts up, I'll be trying to remove the front valance to make it fit. I would be running just the 535is front spoiler at that point.
Re: 633CSi Callaway: Now 535is Turbo - 6/23/18 Update
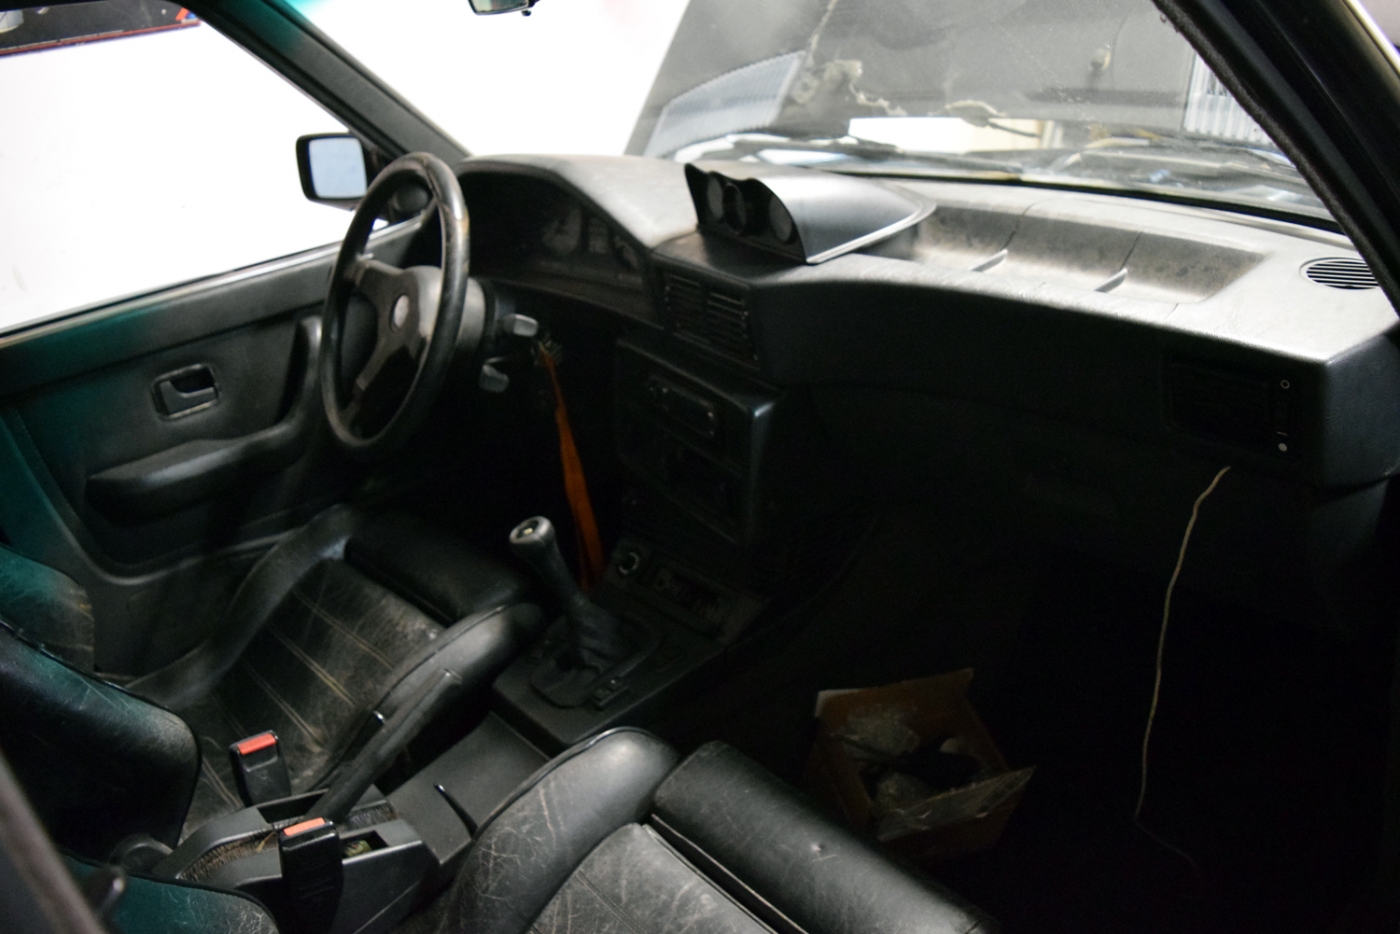
I was able to get some more items done on the car. First was to get the wiring a bit cleaner and see what ideas I had about the gauge pod. I wired in the lighting and decided to see if I could get the wiring through the blank plate of the HVAC. By filing out one of the ribs of the blank plate and making the opening just a bit bigger, I was able to get all of the connectors through. I also can remove all the gauges and move them later without anybody really noticing.
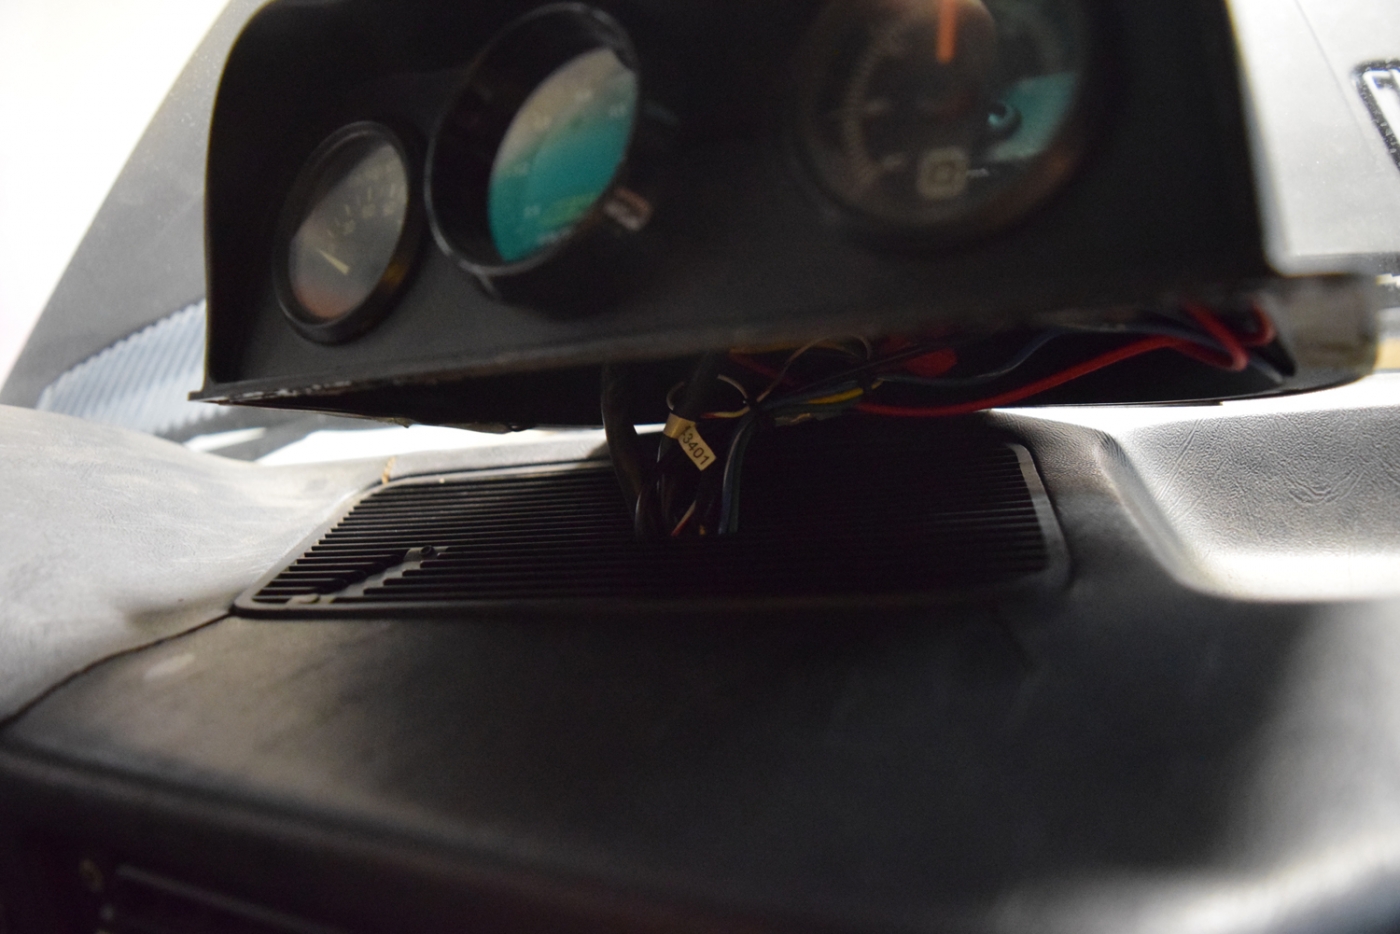
I'll have to figure out where I want to mount it to be solid, but for now it is just setting in place until I decide angle/position and method of mounting.
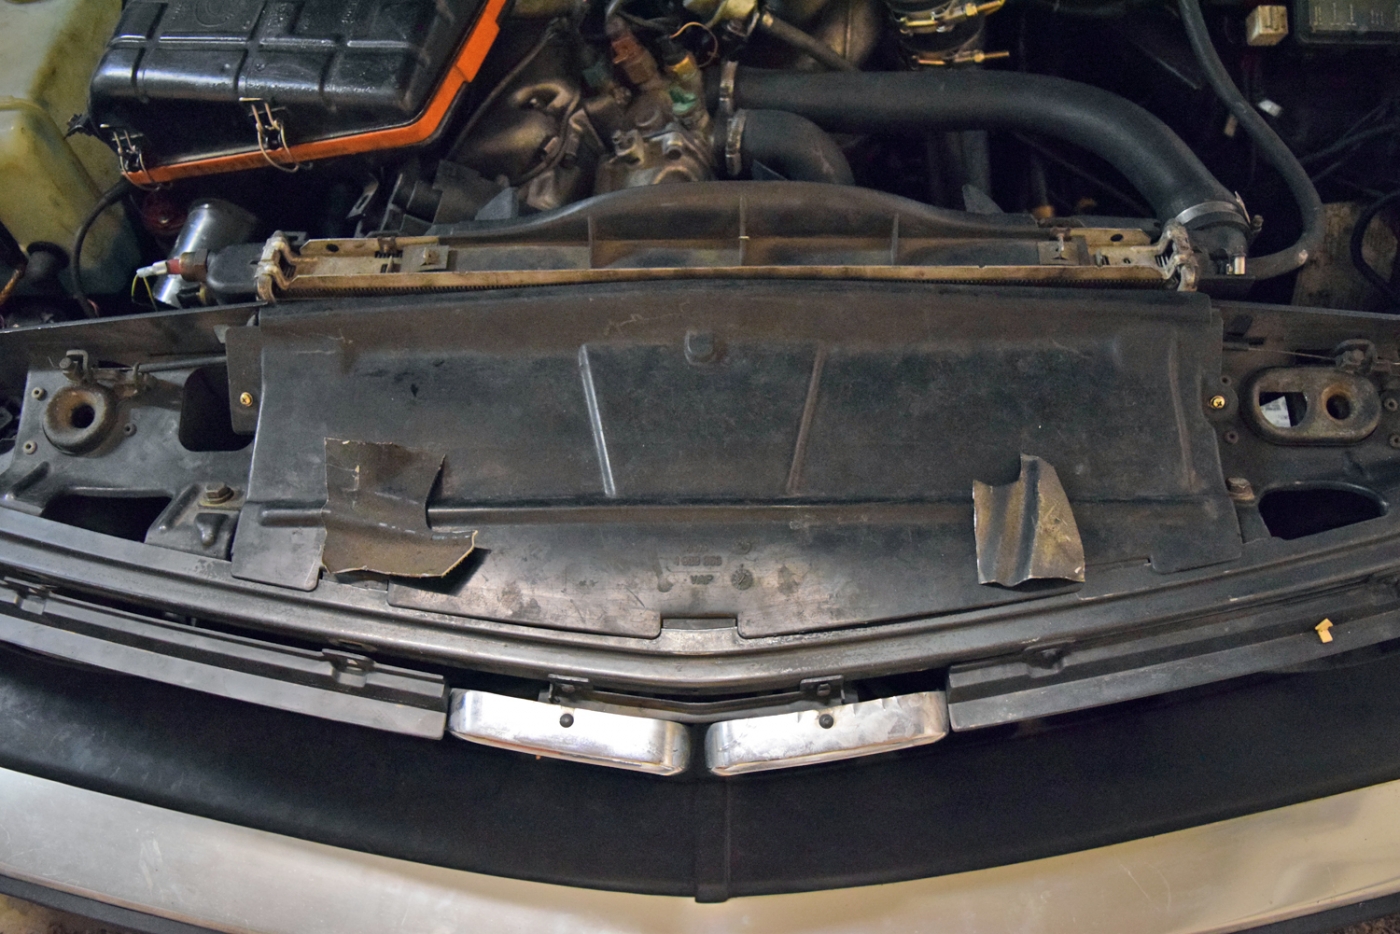
Next up, I removed the front valance and remaining AC bits. I was able to get the intercooler setup in place. It may not be finished yet, but I am hoping I can just tweak what I have currently. I cut very little from the valance near the tow hooks to put the intercooler in front of the radiator and inside the valance. The intent is that I could install euro bumpers and leave the piping and intercooler as is. An air dam would cover the cuts I have made in the valance. I did NOT want to cut out any of the nose or hack into the headlight parts. I wanted oem functionality.
This is what i cut from the valance.
Here's the intercooler placement. What I don't like is at the moment the pipes hang too low. I'm going to see if I can bring everything up another inch or two, but I wasn't having a lot of luck when I tried the first time. I just had to make sure it would even be remotely close. The IS spoiler will give OK airflow here...
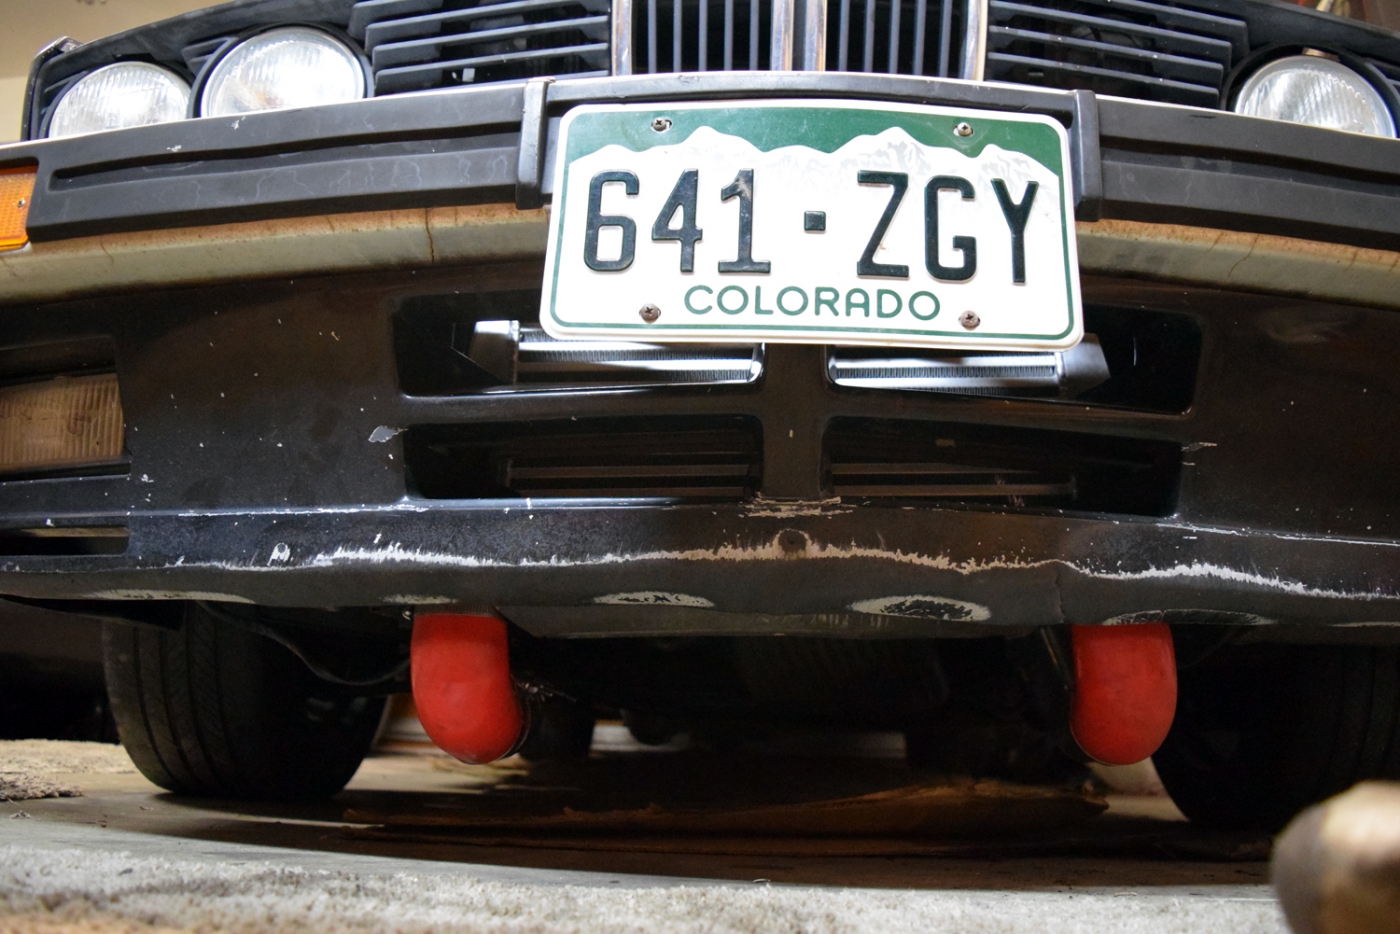
The inlet/hot side is pretty much the same as I laid out in the 633. The cold side is somewhat different. Instead of bending 180* up and into the headlight compartment, I had to go under the power steering pump.
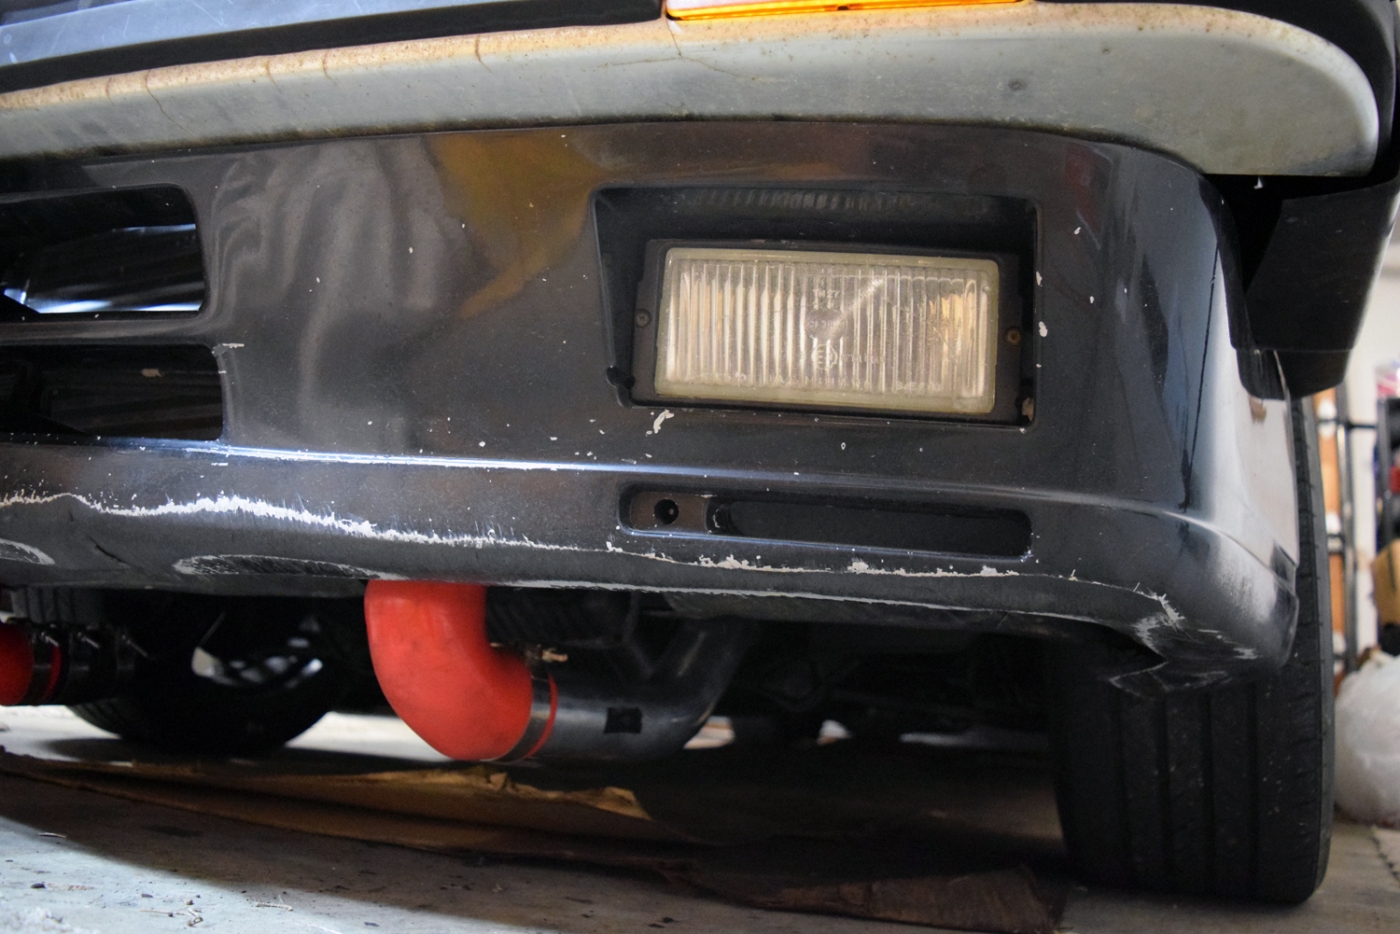
It turns up with an elbow at the engine mount to shoot up here.
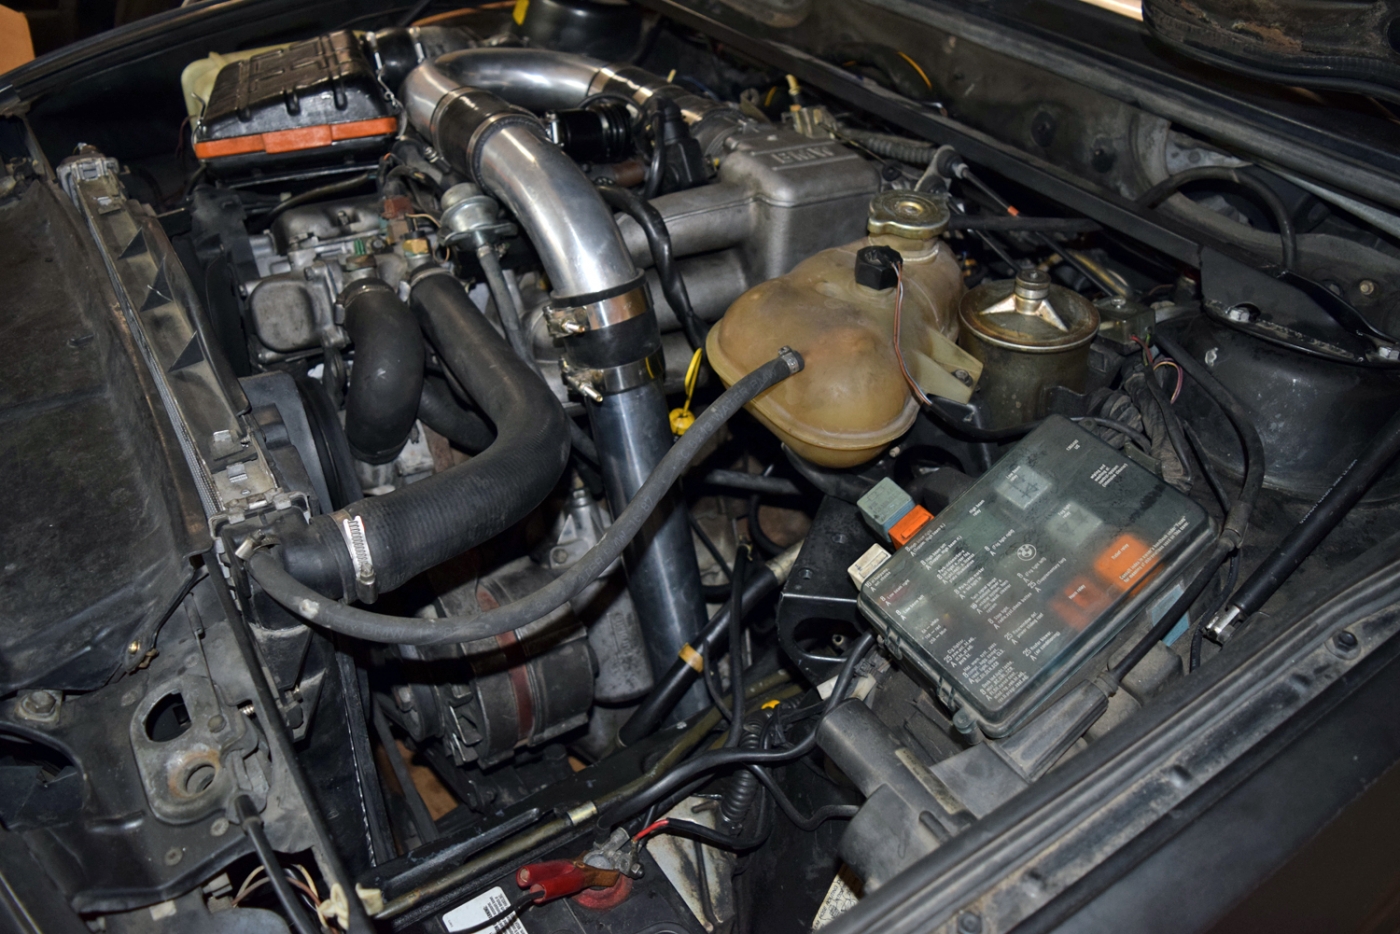
I can now get the hood closed too. It is tighter space wise than the e24 up front near my air box.
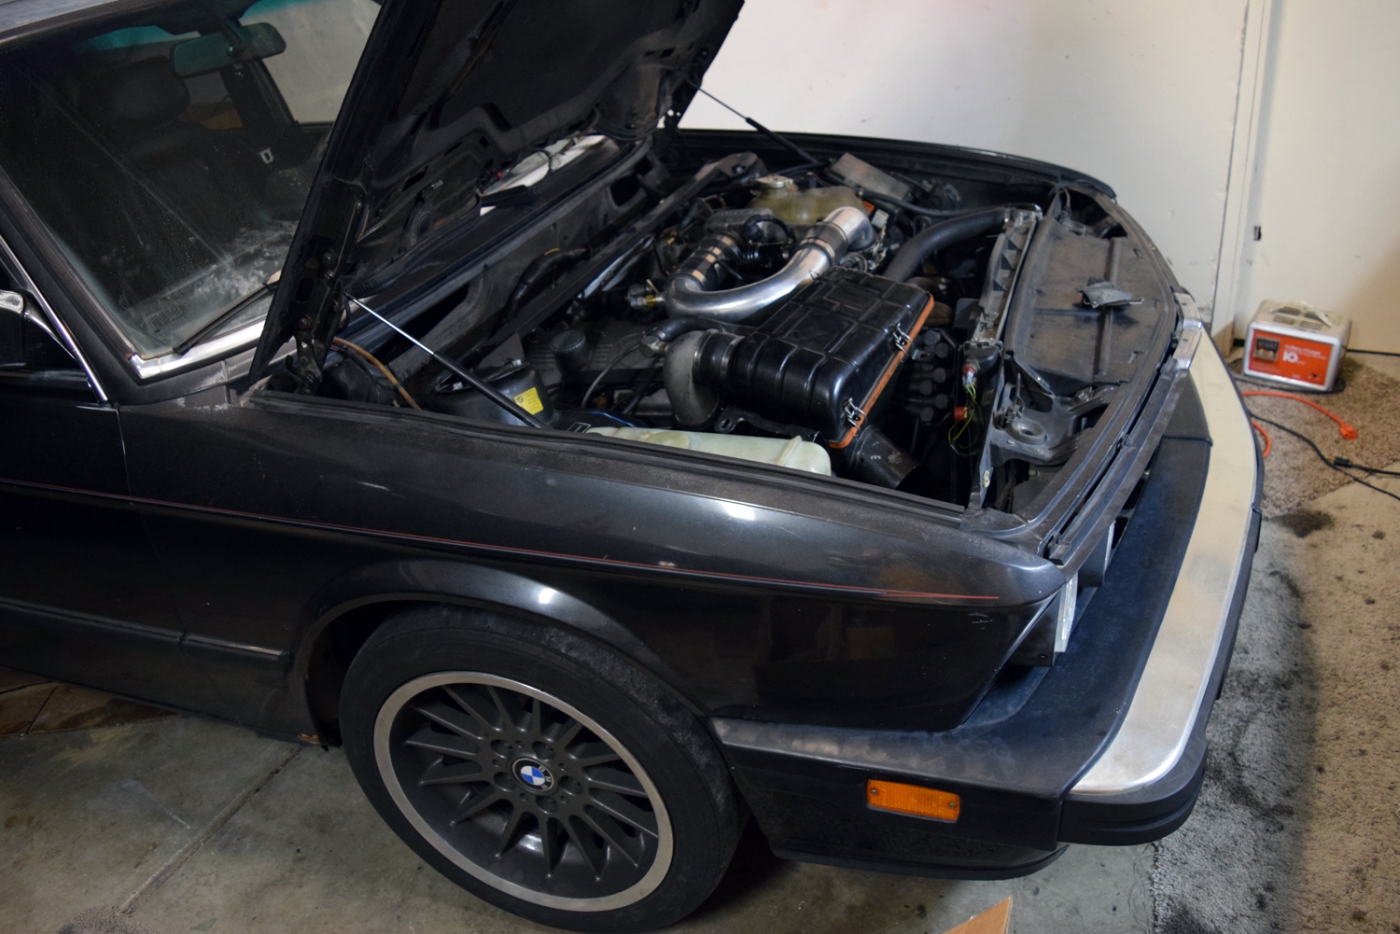
Replaced a tire rod and hoping to get an alignment today. Also seemed like my alternator had starting failing so I will determine later today if that is resolved or not.
Unfortunately while under there, it seems I have an oil leak from the passenger rear of the engine. Maybe the duck gasket on the back of the head? Seems to drip onto the turbo down pipe and when parked.
 I'll have to re-check the valve cover just in case.

I'll have to figure out where I want to mount it to be solid, but for now it is just setting in place until I decide angle/position and method of mounting.

Next up, I removed the front valance and remaining AC bits. I was able to get the intercooler setup in place. It may not be finished yet, but I am hoping I can just tweak what I have currently. I cut very little from the valance near the tow hooks to put the intercooler in front of the radiator and inside the valance. The intent is that I could install euro bumpers and leave the piping and intercooler as is. An air dam would cover the cuts I have made in the valance. I did NOT want to cut out any of the nose or hack into the headlight parts. I wanted oem functionality.
This is what i cut from the valance.

Here's the intercooler placement. What I don't like is at the moment the pipes hang too low. I'm going to see if I can bring everything up another inch or two, but I wasn't having a lot of luck when I tried the first time. I just had to make sure it would even be remotely close. The IS spoiler will give OK airflow here...

The inlet/hot side is pretty much the same as I laid out in the 633. The cold side is somewhat different. Instead of bending 180* up and into the headlight compartment, I had to go under the power steering pump.

It turns up with an elbow at the engine mount to shoot up here.

I can now get the hood closed too. It is tighter space wise than the e24 up front near my air box.

Replaced a tire rod and hoping to get an alignment today. Also seemed like my alternator had starting failing so I will determine later today if that is resolved or not.
Unfortunately while under there, it seems I have an oil leak from the passenger rear of the engine. Maybe the duck gasket on the back of the head? Seems to drip onto the turbo down pipe and when parked.
Last edited by tschultz on Jul 02, 2018 11:55 AM, edited 1 time in total.
Re: 633CSi Callaway: Now 535is Turbo - 6/23/18 Update
Tom,
Per the BMW KSD online manual, R&R on a US-configured 535i is 62 time units. 1 time unit = 8 minutes, so 496 minutes or ~8.26 hours. This assumes you have all the needed tools, lifts, jigs, whatever.
So with R&R on 2 cars, figure something on the order of 17 hours give or take. FWIW, BMW says the time allowances in the KSD do not include any unexpected problems, but are sufficient to allow a shop with a newbie mechanic to complete a given task without time overruns--think changing front brake pads, for example.
A lot of shops--dealer and indie--use the KSD numbers as a basis for flat-rate on a lot of the work they do.
HTH
Re: 633CSi Callaway: Now 535is Turbo - 6/23/18 Update
Thanks Ken, that is interesting! I wonder if that includes things like exhaust removal as well. Probably so.
In other news I went in for alignment but found that my tie rod had a bad joint so I'll have to get back there soon.
I also found that the oil leak was my valve cover ground nut being loose. Glad that was all.
Next up, I'm going to keep working on improving my intercooler placement and then continue tuning and and maybe post some videos. Getting the car ready for D4C this august!
