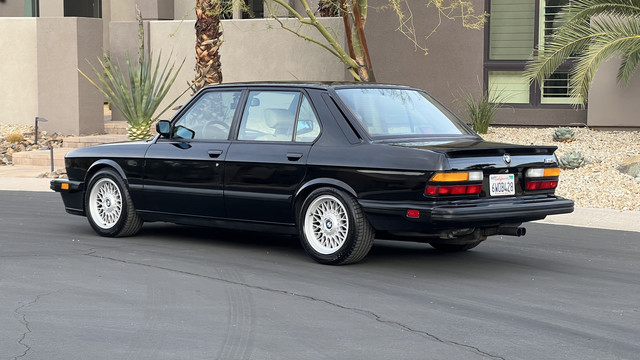
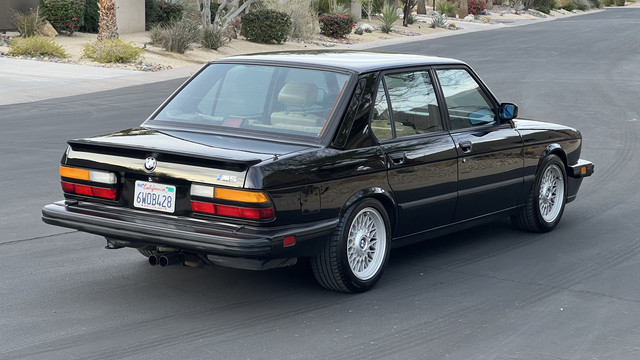
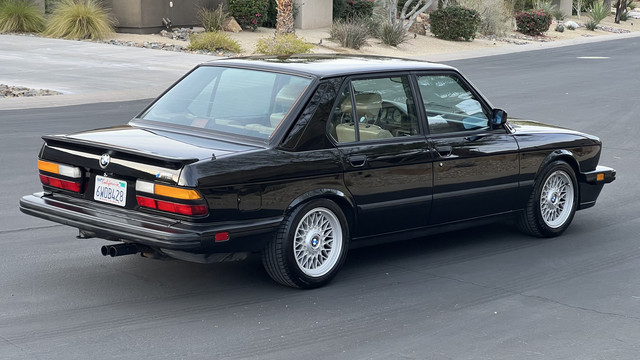
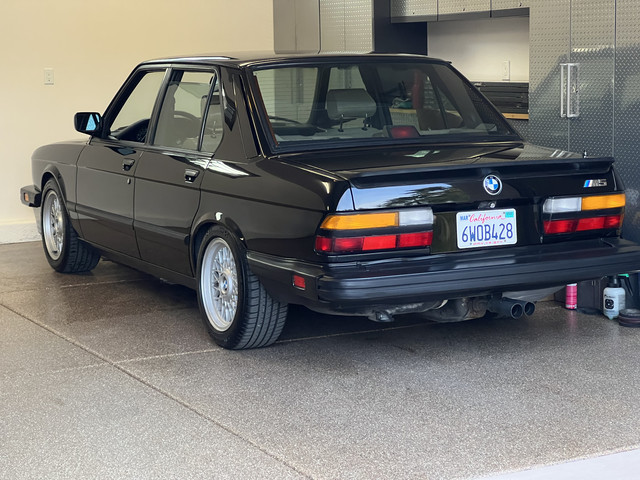
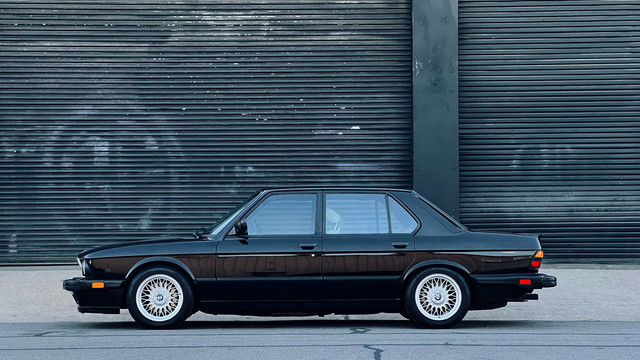
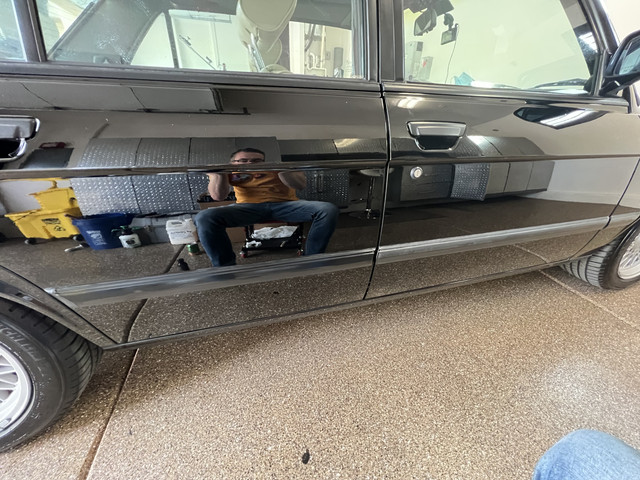
14 hour paint correction and detail on my 1988 BMW M5
-
- Posts: 344
- Joined: Nov 05, 2011 11:30 PM
- Location: San Diego, CA
14 hour paint correction and detail on my 1988 BMW M5
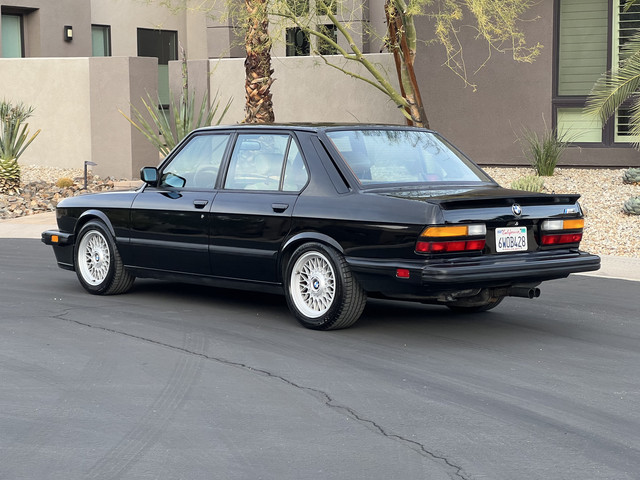
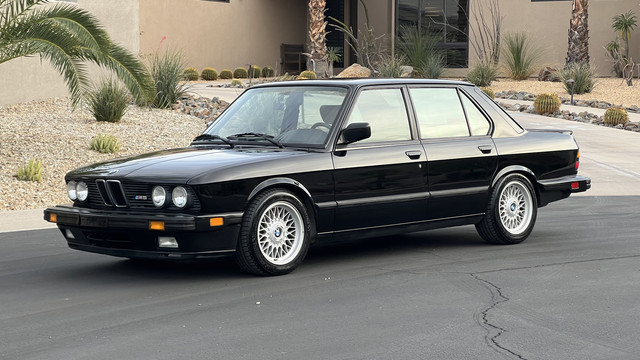
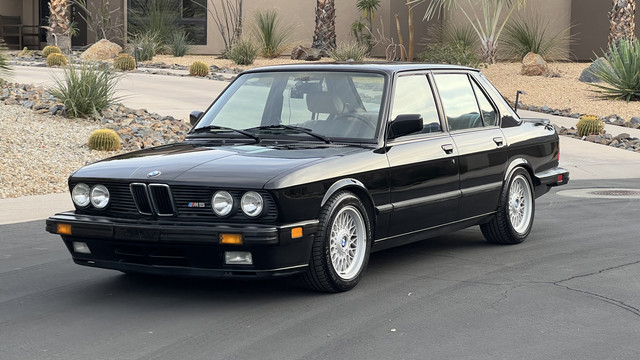
So after recently acquiring a 1988 BMW M5 from a local San Diego seller, the first project I did on it was paint correction and protection - to remove all swirl marks and major paint defects. The car's paint and body panel condition was already pretty good - no accidents and all VIN tags intact. Here's my first post on the car purchase: https://www.mye28.com/viewtopic.php?f=5&t=157648
After washing the car, I clay bar'ed the paint to clean it up from contaminants before the paint correction phase. I used my Rupes LHR15 buffer (in my opinion, the best buffer I own) with a 5" disc and Meguiar's microfiber cutting pads for the compounding phase (Meguiar's DMC5) and Meguiar's microfiber DMF5 polishing pads for the finer polish phase. I used Meguiar's 105 for the compound and then Meguiar's 205 for the finer polish phase. I ended up switching to the Rupes compound and polish equivalents because the Meguiar's, although much cheaper than Rupes compounds and polishes, weren't performing as well on this single stage paint. The Rupes compounds and polishes are far superior and I typically save those for high end cars that I do for friends.
What really took me by surprise was how difficult it is to remove compound from the M5's single stage black paint. It's incredibly labor intensive. I used to own an auto detailing business from age 16-21 and I mainly dealt with paint that had a base coat and clear coat - far easier to work with than single stage. I ended up having to use a 50/50 isopropyl alcohol/water solution to get the paint clean of the compound and paint cutting residue along with going through a ton of microfiber towels. You'll immediately see your white cutting pads choke up with black paint residue and you'll have to blow out the residue with compressed air, which I had to do after just a small 2 square foot patch of compounding. If you don't keep your pads clean of residue, their ability to cut and polish will become nearly nonexistent. In my years of experience in correcting clear coat paint, you only need to blow out your buffing pads about 6 times per cutting phase. In a single stage car like the M5, you have to blow them out after one small section of cutting. I ended up changing the pads 4 times per stage. I went through 8 pads!
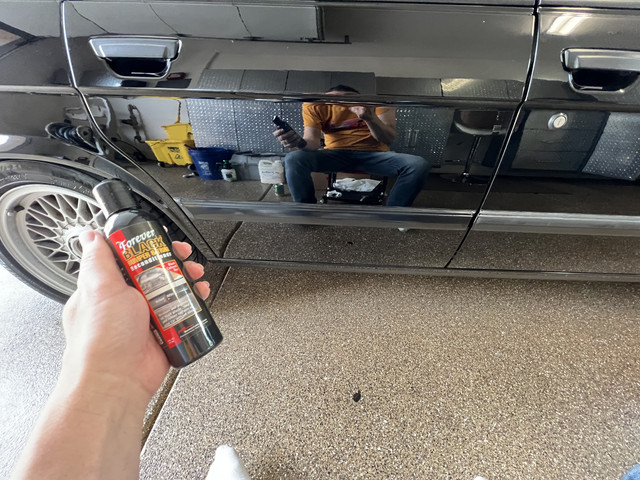
Since I'm a bit old skool and believe paint sealants and good quality carnauba wax reveal a much more deep and glossy shine than ceramic coatings, I added a layer of Jescar Power Lock Plus polymer paint sealant, let it cure overnight, then added a layer of carnauba wax.
I also dyed much of the rubber with black rubber dye. Since the side door molding rubber is a bit old and porous, I have to go over it 2 or 3 more times, but it still turned out great!
One thing to note is that most E28 M5s have cracked paint on the hood due to years of heat. These are commonly called "crows feet" and primarily affect cars with single stage paint. This cannot be removed. I thought about trying to wetsand them out, then compound and polish, but I don't want to remove any more paint layer than I should. I'm going to leave it as is as I think the patina is kinda cool.
So here it is, 192,000 miles and 35 year old paint!
PS, I already ordered Euro headlights and bumpers, which is why I decided to not dye the front grill with the black rubber dye.
Video:
https://youtu.be/lLkK3ao3_fc
Last edited by 524tdAviator on Jan 16, 2022 1:52 PM, edited 1 time in total.
-
- Posts: 107
- Joined: Feb 09, 2019 11:15 AM
- Location: houston
Re: 14 hour paint correction and detail on my 1988 BMW M5
OK 524, my car is in Santa Fe, NM, when are you coming to give mine the exact treatment? Excellent work and write-up.
jeff
jeff
Re: 14 hour paint correction and detail on my 1988 BMW M5
I have been reading about Jescar products on a few car care forums. I may have to deliver my M535i to you. Soon. (SD is a relatively short trip from LA, there are people for me to see down there...)
-
- Posts: 344
- Joined: Nov 05, 2011 11:30 PM
- Location: San Diego, CA
Re: 14 hour paint correction and detail on my 1988 BMW M5
YouTube link reuploaded above. YT didn't like my commercial music and potential copyright infringement.
-
- Posts: 344
- Joined: Nov 05, 2011 11:30 PM
- Location: San Diego, CA
Re: 14 hour paint correction and detail on my 1988 BMW M5
Jescar stuff is pretty good. I also love Klasse paint sealants. I've used those for years with durable paint protection and water beading results.vinceg101 wrote: Jan 16, 2022 12:33 PM
I have been reading about Jescar products on a few car care forums. I may have to deliver my M535i to you. Soon. (SD is a relatively short trip from LA, there are people for me to see down there...)
Re: 14 hour paint correction and detail on my 1988 BMW M5
I used Klasse on my single stage Schwartz '88 535i in the past. I loved their All-in-One and got great results.524tdAviator wrote: Jan 16, 2022 2:15 PMJescar stuff is pretty good. I also love Klasse paint sealants. I've used those for years with durable paint protection and water beading results.
I've been using Menzerna Micro Polish 85RD for a while on my Artktisblau Metallic (2 stage) and while good for final stage or light once-over for swirls and micro stuff (e.g. cover covers, spray & wipes, etc.), sometimes I need something slightly more aggressive (the 85RD is on the least aggressive side of the cut scale). I did try Meguairs Correction Compound D300 but didn't see a whole lot of results (but maybe that was me).
I have also used a hand glaze at the same time (P21S Paintwork Cleanser) for some troublesome spots. I do have a few spots that need some remedial and concentrated attention and are, admittedly, beyond my skill level (nothing that a professional can't handle, though).
I too am old school and just cover it all with a solid coat of Carnauba (usually P21S Concours but I did switch up to their 100% Carnauba). And then a covering of detail spray wax (I just starting using Poorboys World QD+ Quick Detailer Plus and LOVE the results I got).
I haven't got on the whole ceramic coating bandwagon yet despite everyone telling me to do so for years now.
-
- Posts: 1494
- Joined: May 16, 2010 1:37 AM
- Location: Portland, Oregon, USA
Re: 14 hour paint correction and detail on my 1988 BMW M5
goddamn, that's a sharp looking car. well done. the US spec M5 always looked so great, just the way they were, right out of the catalogue. thanks for sharing.
-
- Posts: 147
- Joined: Jan 05, 2021 7:32 PM
- Location: Westchester Co NY
Re: 14 hour paint correction and detail on my 1988 BMW M5
Great pics and love the write up. Ours has some paint edge burn through from previous owner details. We also have the crows feet on the hood. Was your hood insulation removed?
I’ve been using ceramic/si products on my other cars for years. You can’t beat the ease of use and durability but there is something about the look and feel of carnuba on single stage.
-
- Posts: 344
- Joined: Nov 05, 2011 11:30 PM
- Location: San Diego, CA
Re: 14 hour paint correction and detail on my 1988 BMW M5
Thanks! Mine has some paint edge burn too from a previous detailer - on the roof gutter corner and a tiny spot on the spoiler corner.Fanclutchnut wrote: Jan 17, 2022 7:55 AM Great pics and love the write up. Ours has some paint edge burn through from previous owner details. We also have the crows feet on the hood. Was your hood insulation removed?
I’ve been using ceramic/si products on my other cars for years. You can’t beat the ease of use and durability but there is something about the look and feel of carnuba on single stage.
My hood insulation is still intact. I have some crows feet on trunk too, but not as bad as the hood. For some reason there's none on the roof.
Re: 14 hour paint correction and detail on my 1988 BMW M5
That looks amazing. I need to do that on my M5. Are you going to do a how to clinic?
Re: 14 hour paint correction and detail on my 1988 BMW M5
Beautifully done. Love the stock look … all the way to the tail pipes!
-
- Posts: 344
- Joined: Nov 05, 2011 11:30 PM
- Location: San Diego, CA
Re: 14 hour paint correction and detail on my 1988 BMW M5
Thanks! I could do a how to guide in the future, but to be honest there are some great YouTube videos that could probably do better.Ricky535 wrote: Jan 18, 2022 8:39 PM That looks amazing. I need to do that on my M5. Are you going to do a how to clinic?
Thanks! It's getting Euro bumpers and a Billy Boat exhaust. It'll be "mostly" stock.VZehn wrote: Jan 24, 2022 10:02 PM Beautifully done. Love the stock look … all the way to the tail pipes!