Cracked sport seat hinge gearbox - first prototype ready
Re: Cracked sport seat hinge gearbox - first prototype ready
Thanks for all the good feedback. I'm glad stuff like this is appreciated!
Only because of the interest and amount of parts that we got it was possible to produce these goodies for a reasonable price.
I'm always up for new solutions on stuff like that.
I'm about to close out on the orders tomorrow, by next week I will have a anodized sample for pictures.
If something similar ever comes to somebody's mind, I can see if we can realize it again.
I will have a couple samples with me at the vintage!
Re: Cracked sport seat hinge gearbox - first prototype ready
All the plates have been sent out two their new owners. Again, I'm sorry for the delay caused by the plating process.
I hope everybody is happy with the outcome. Let me know if you have any issues mounting them.
Thanks again everybody for making this happen, without I would still be sitting sideways in 2 of my seats.
Here are the instructions. I tried to cover it in a video, but it didn't work the way I wanted int to. I think the pictures are easier to follow.
Please remember that these are tips from my side, I will not be responsible for any damages caused during the steps of this manual or afterwards.
You need:
17mm
7mm
6mm
4mm
3mm Allen
Flat head screwdriver
Knive
Plenty of rags
Cold Beer
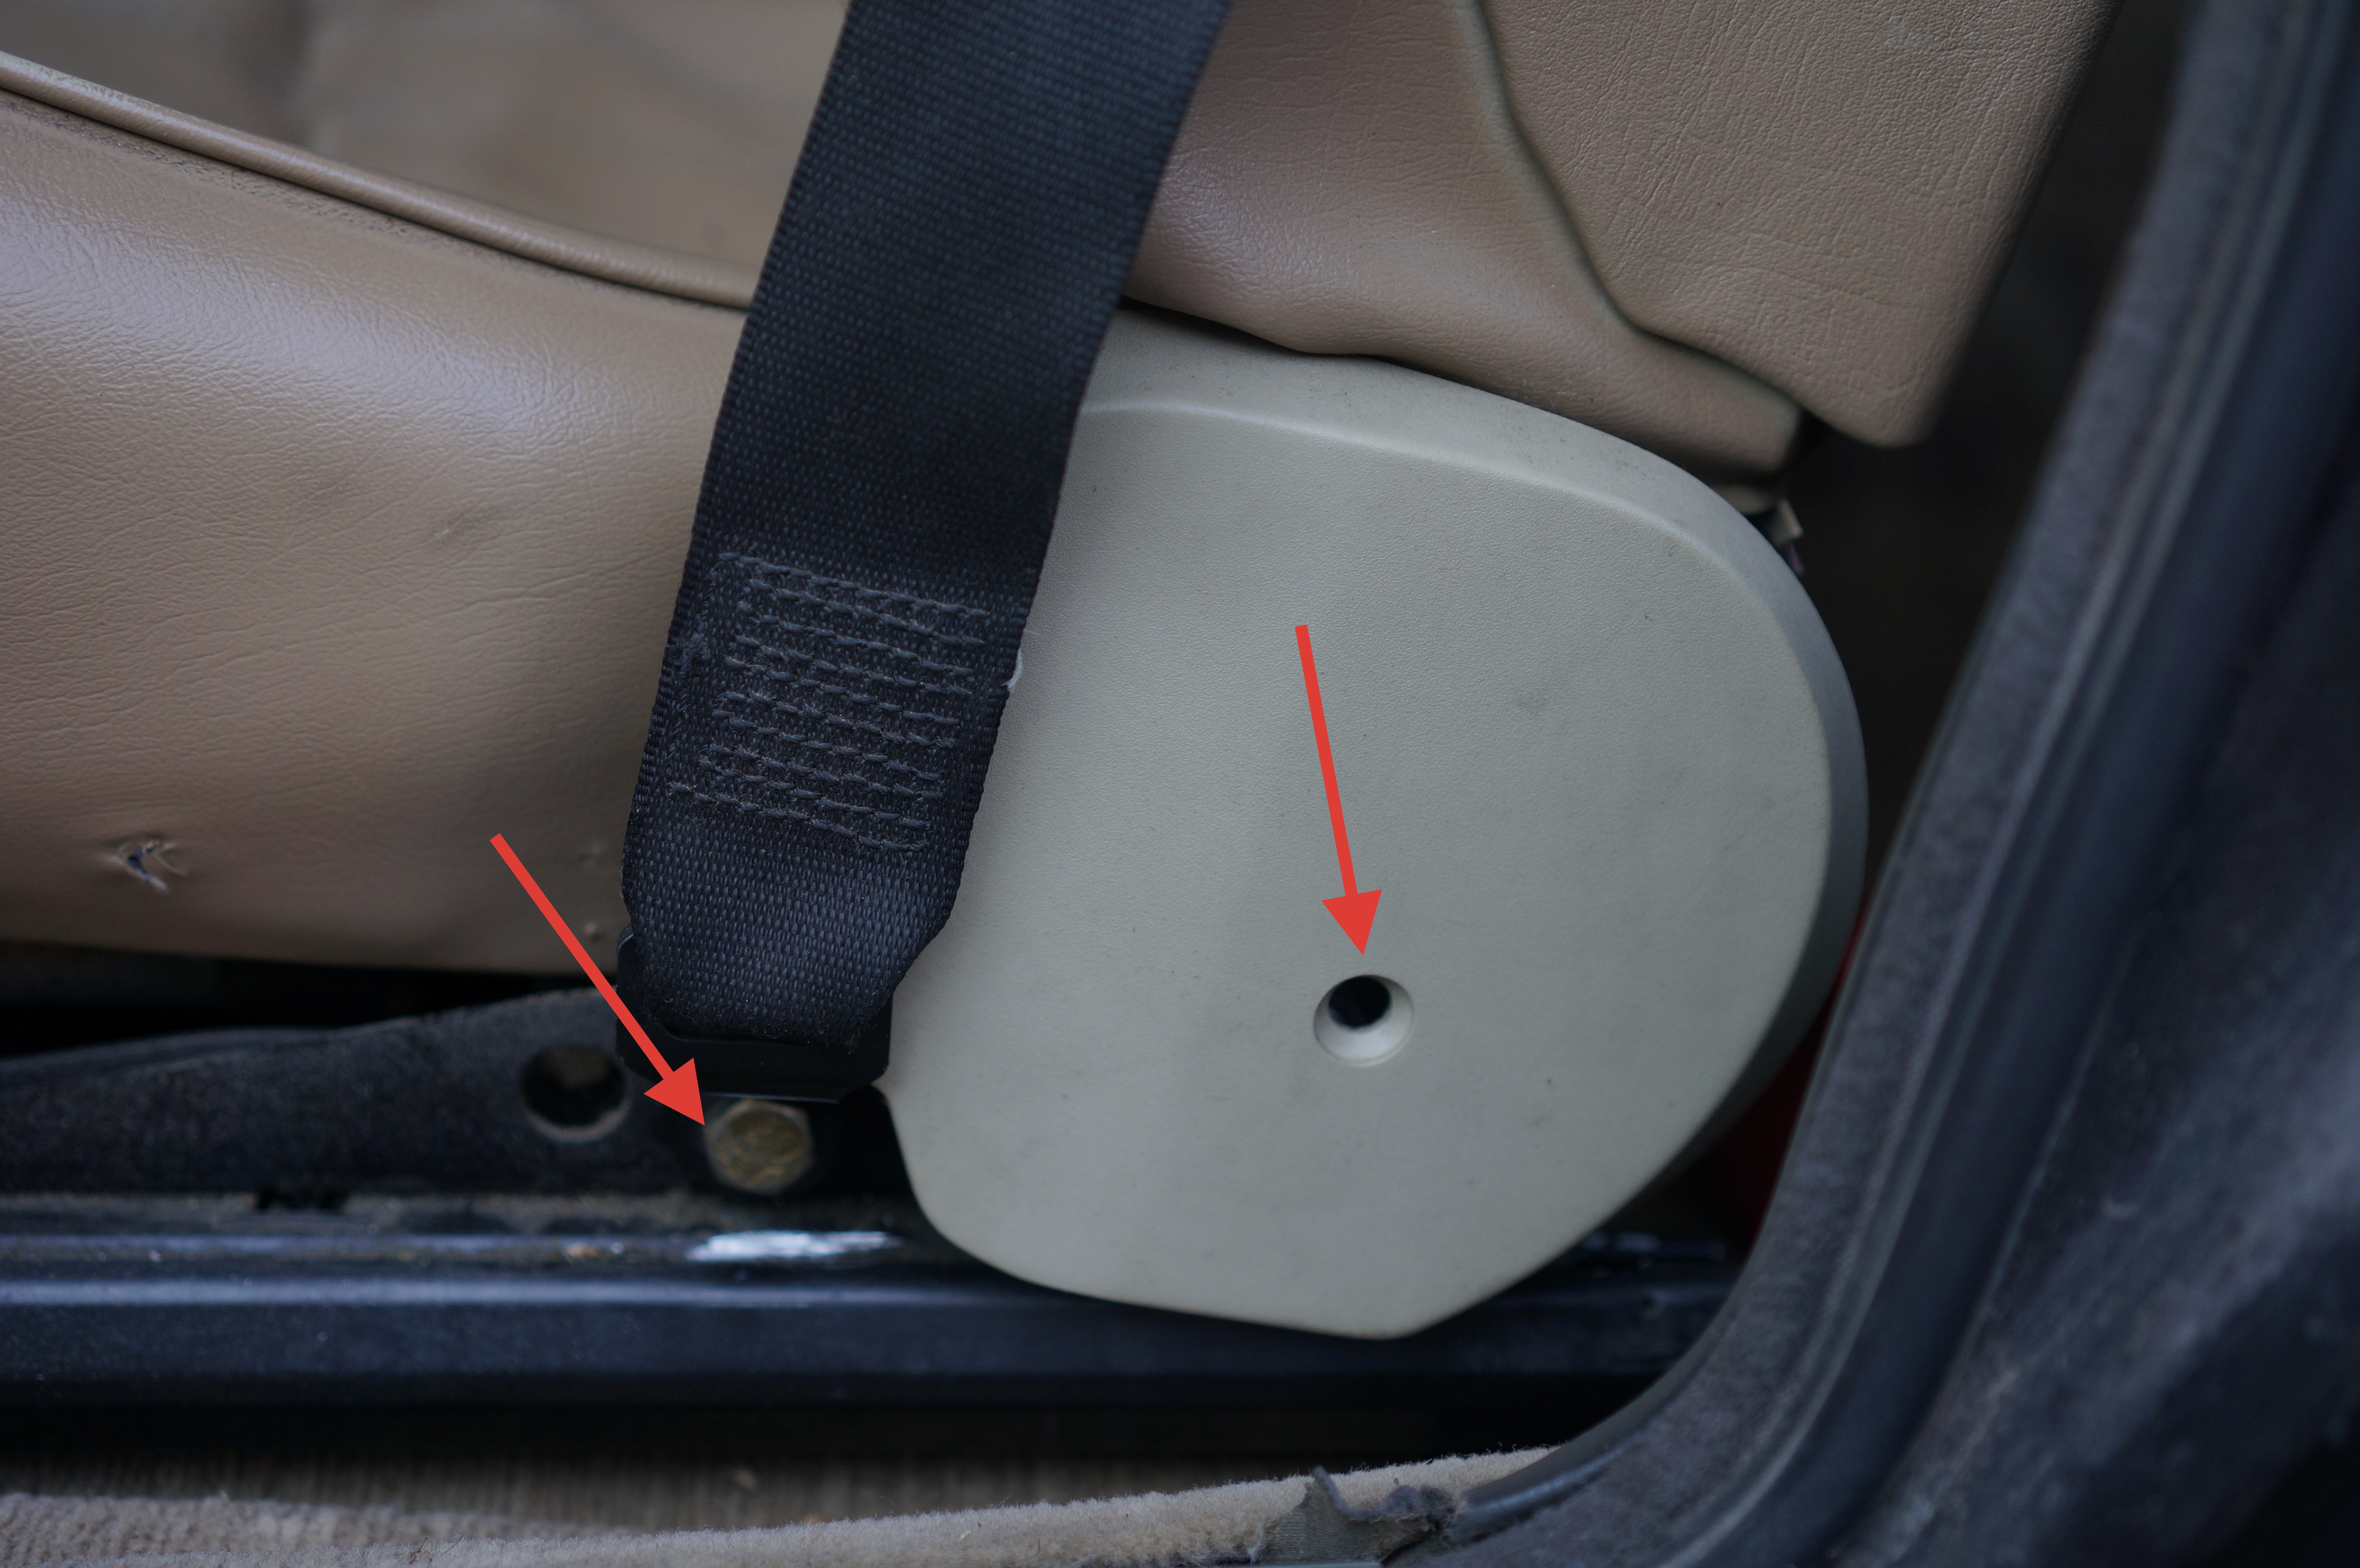
Bring seat in a position where you can easily reach all the bolts.
Remove seat belt.
Remove plastic cover nut (that is missing in all of my cars ).
).
Pull off cover
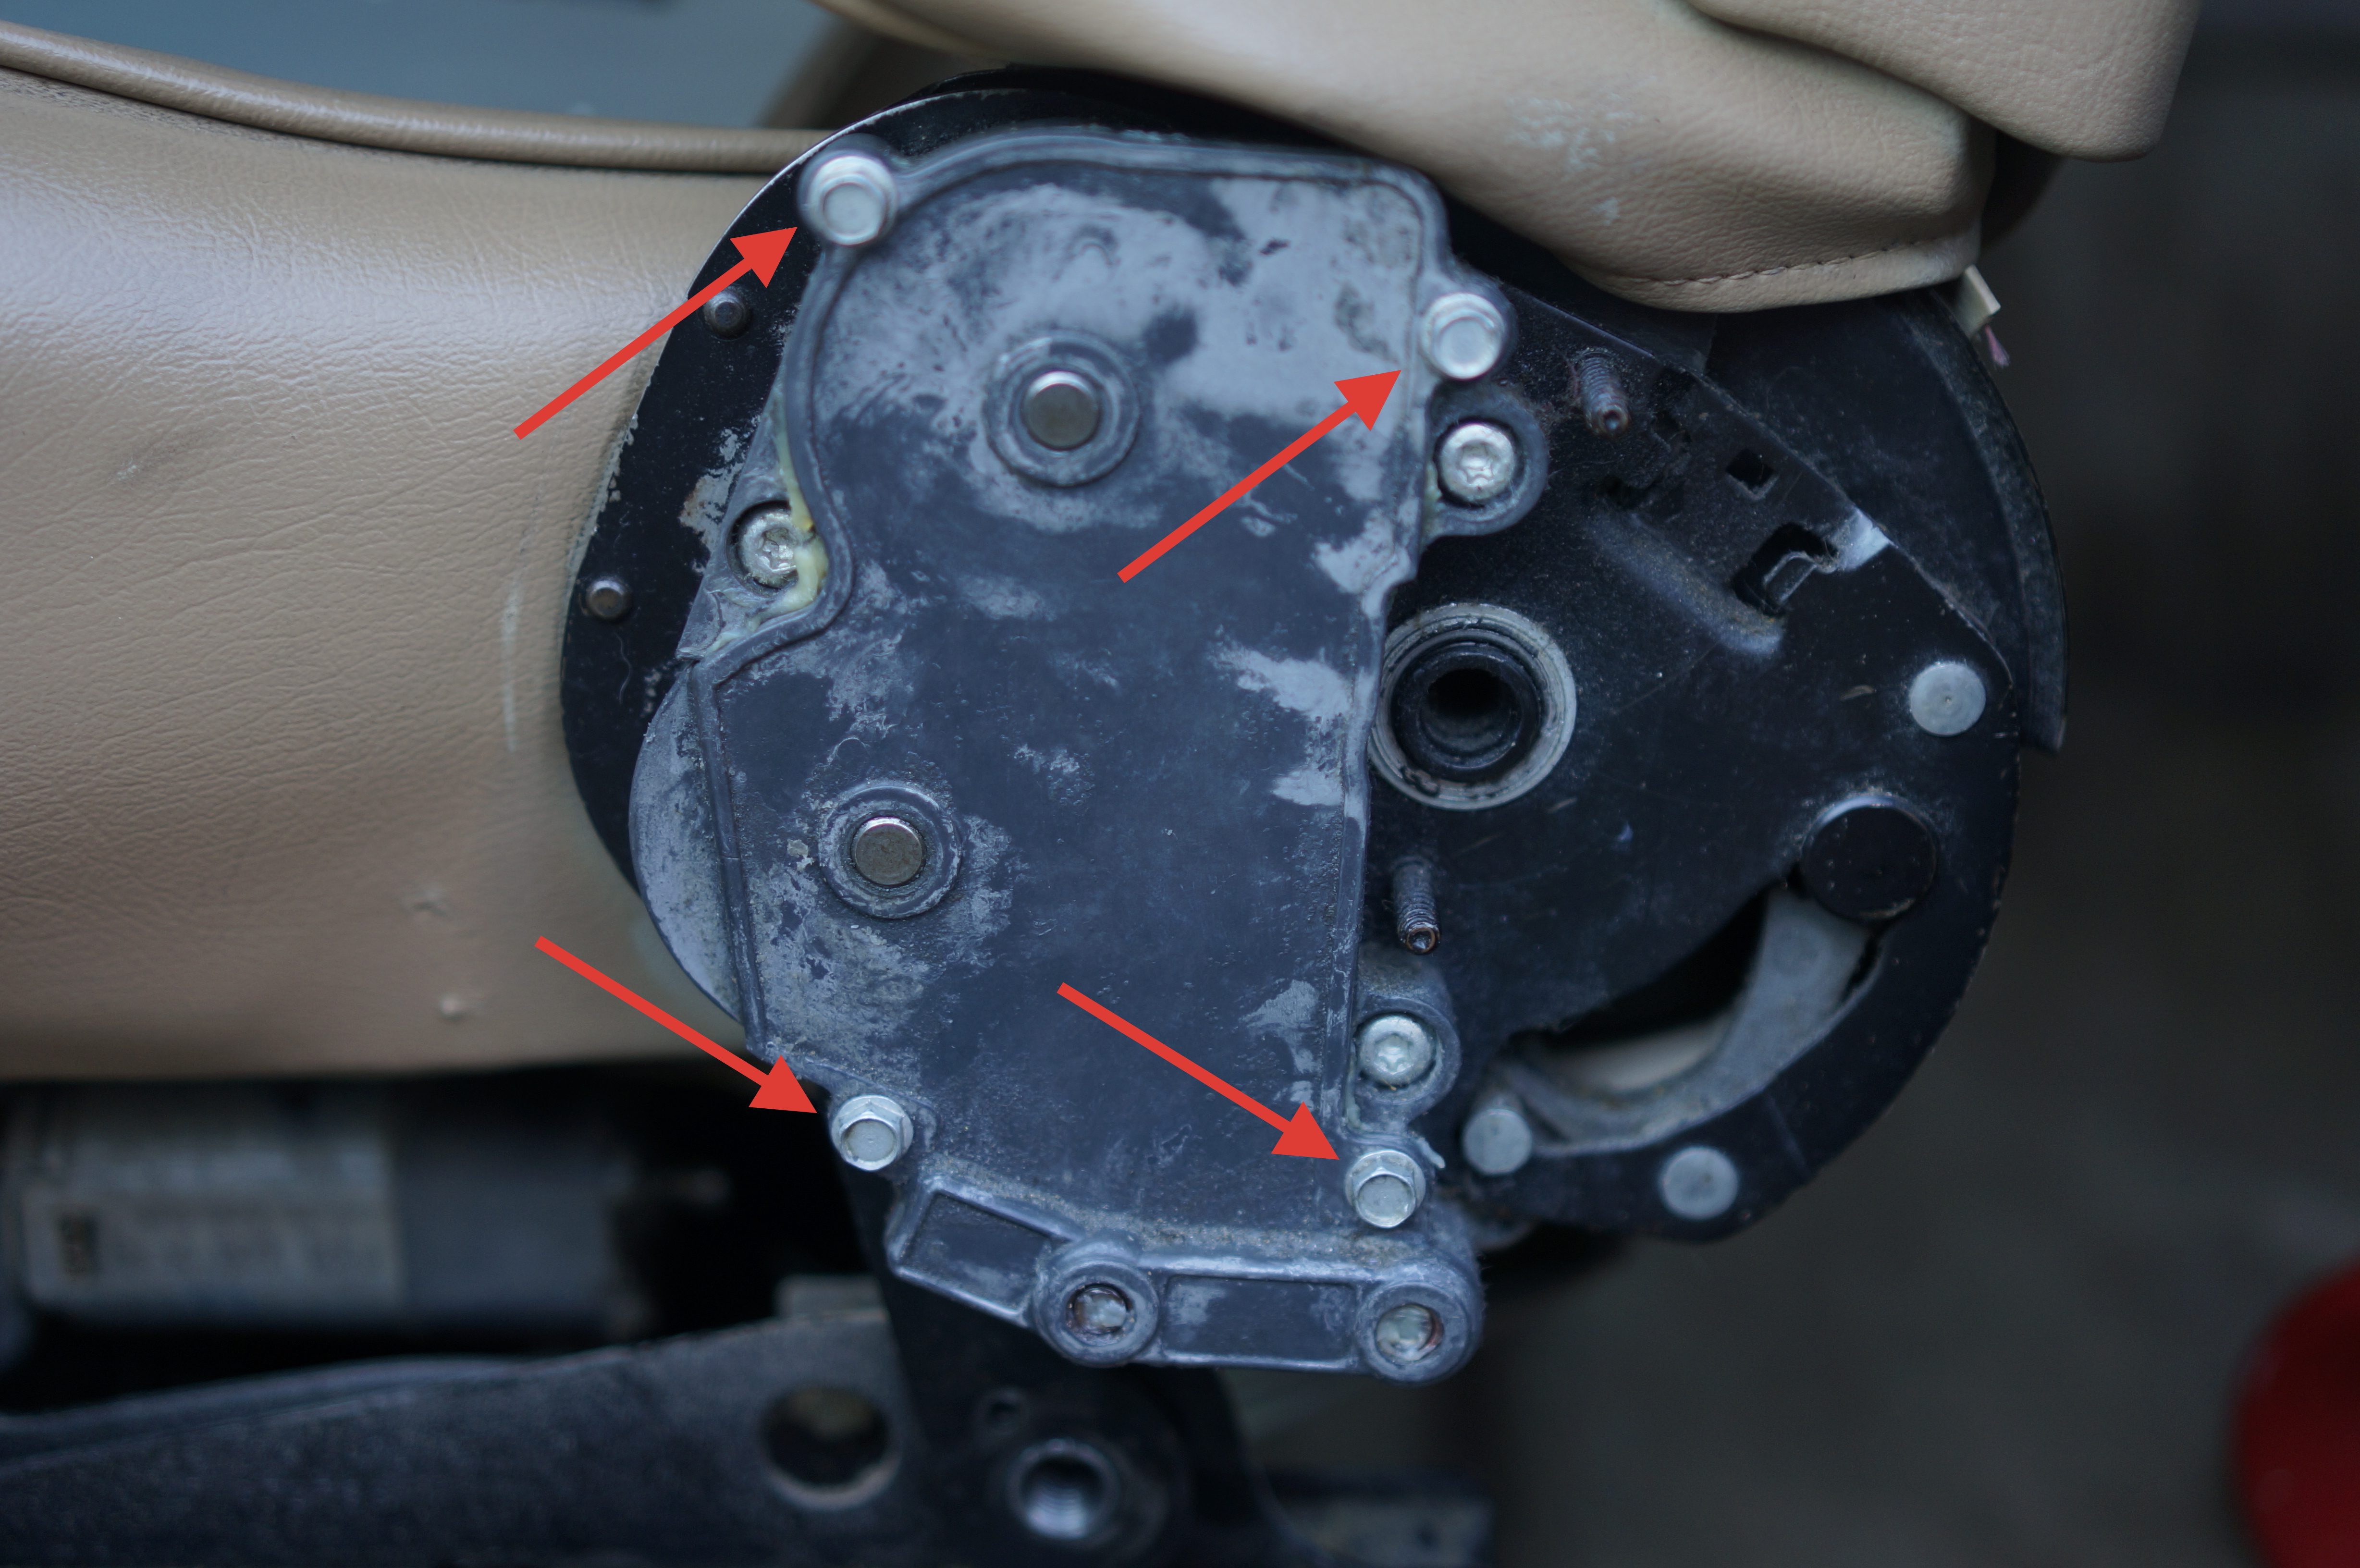
Remove 4x7mm Hex screws
Carefully pry work your way around the front cover with a small flat head screwdriver, do not lever to hard one one side, or you will break the plate in half
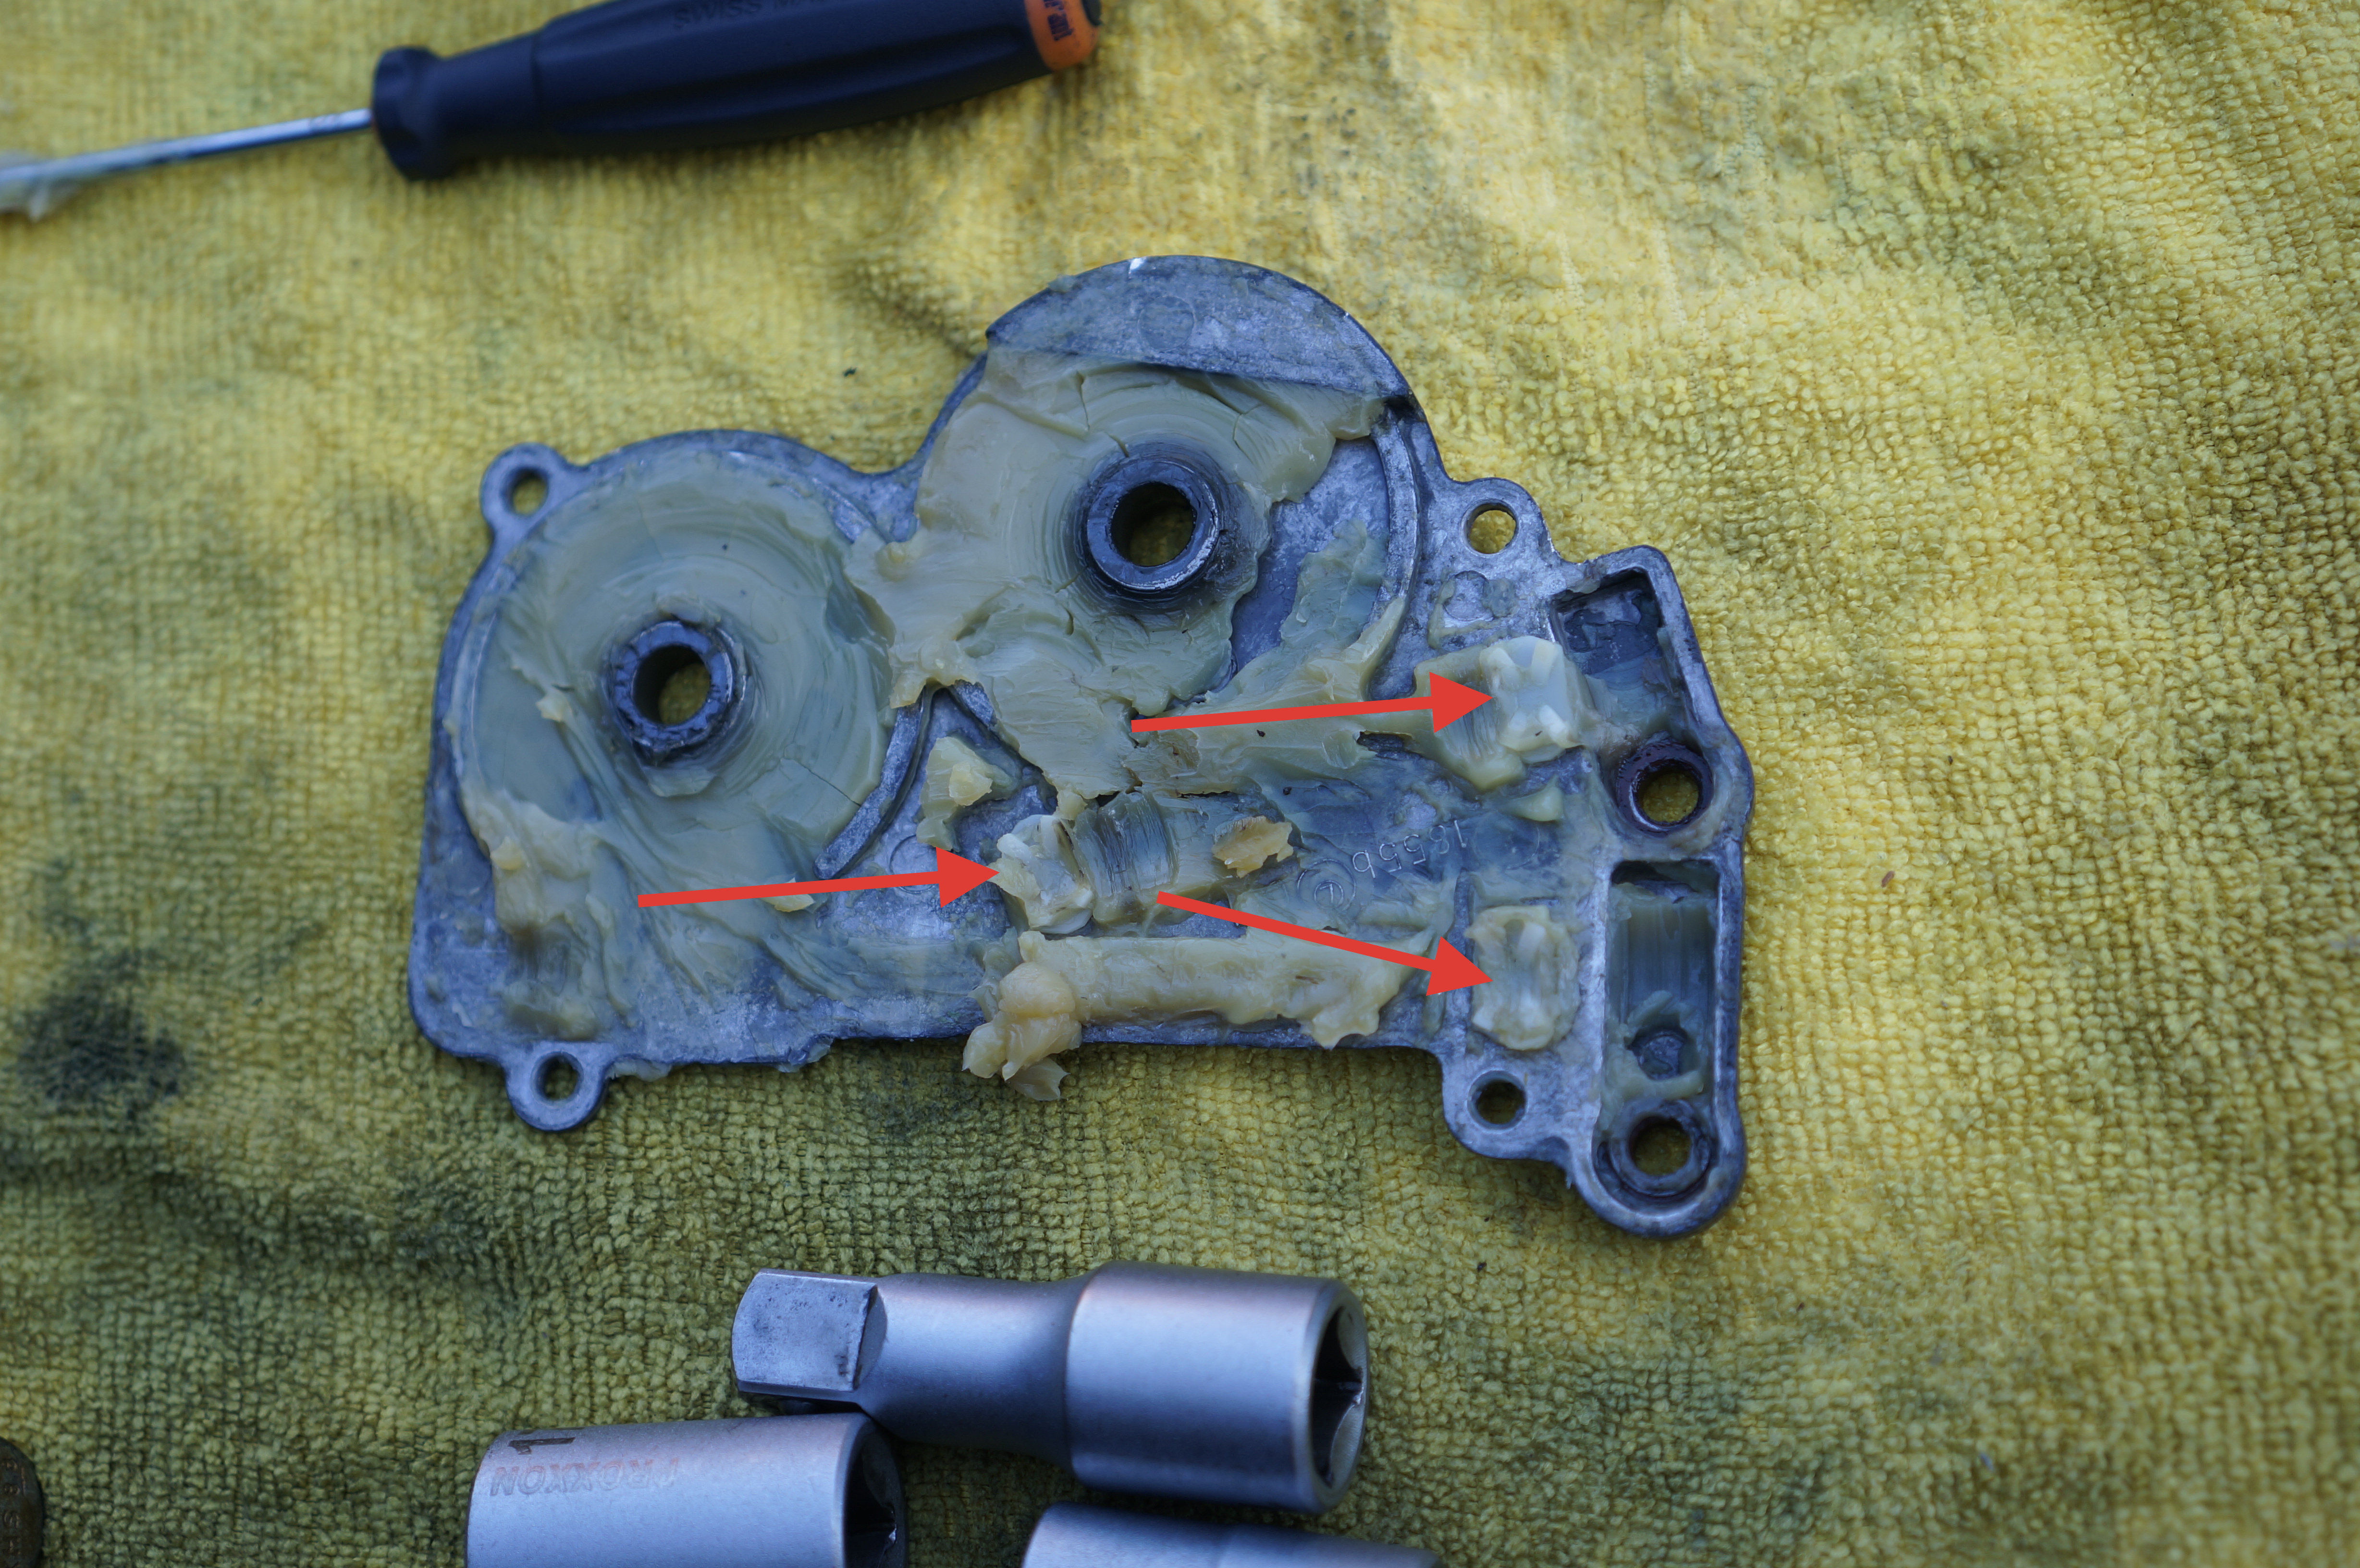

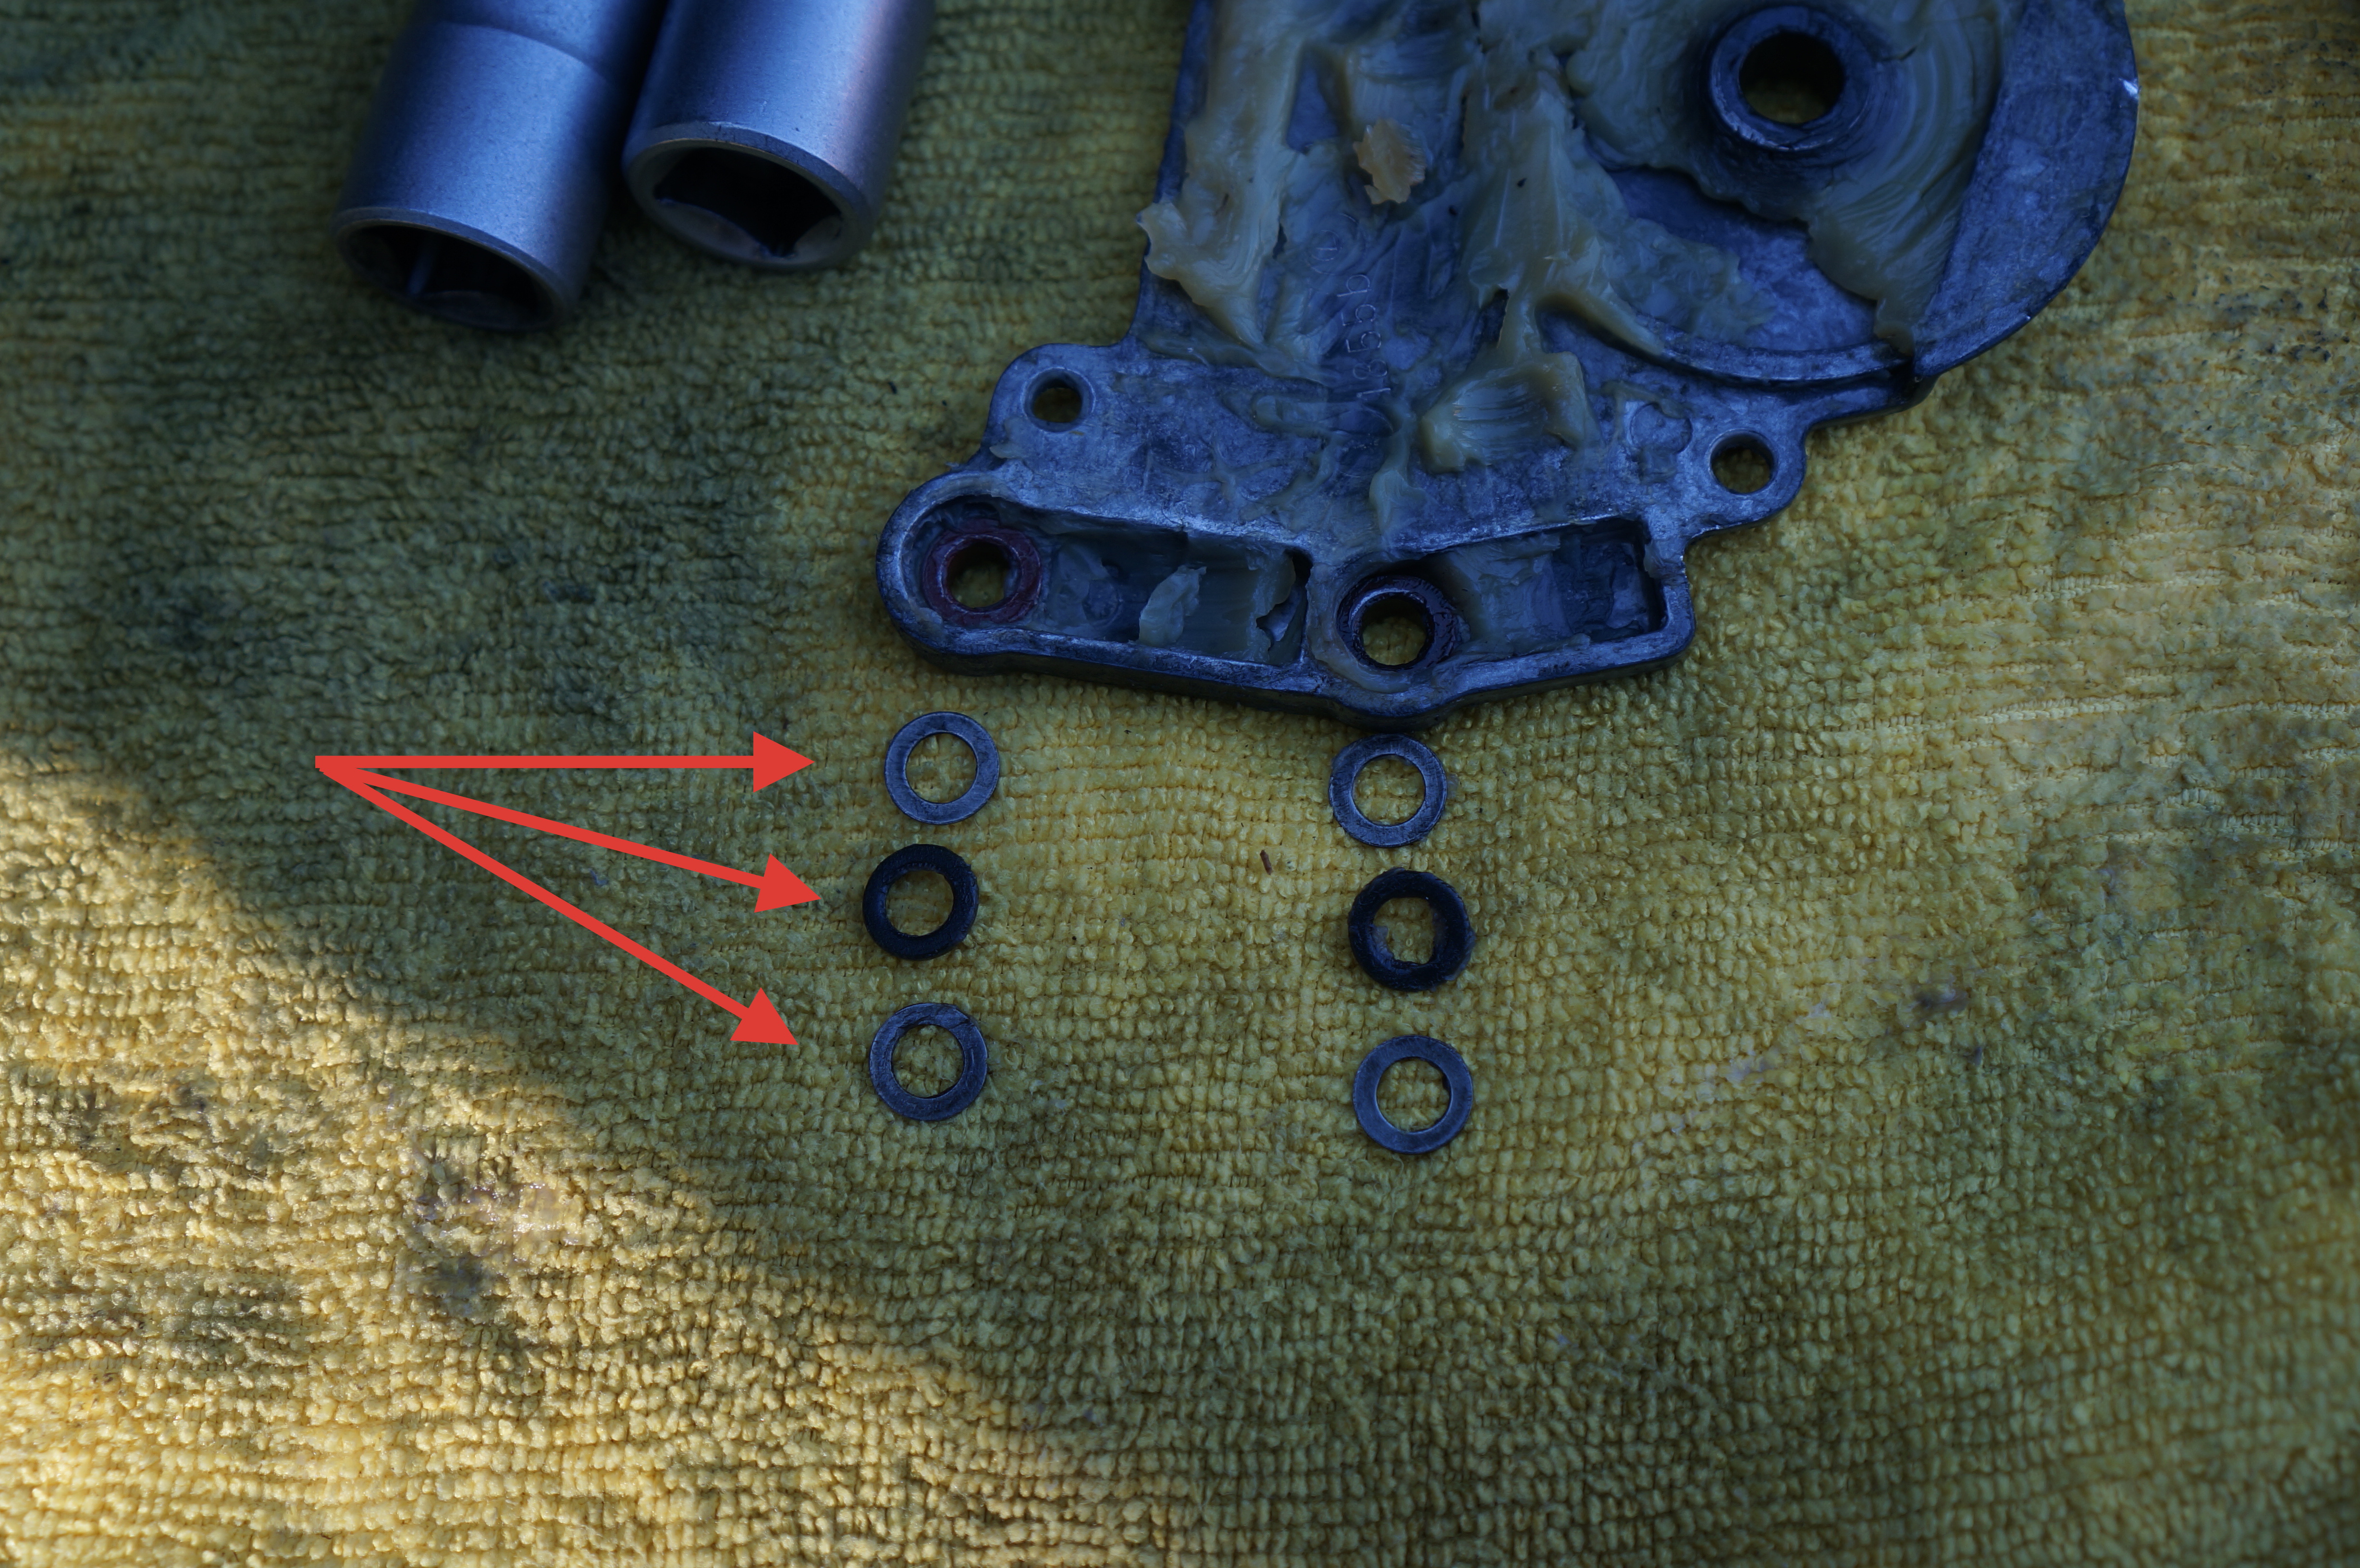
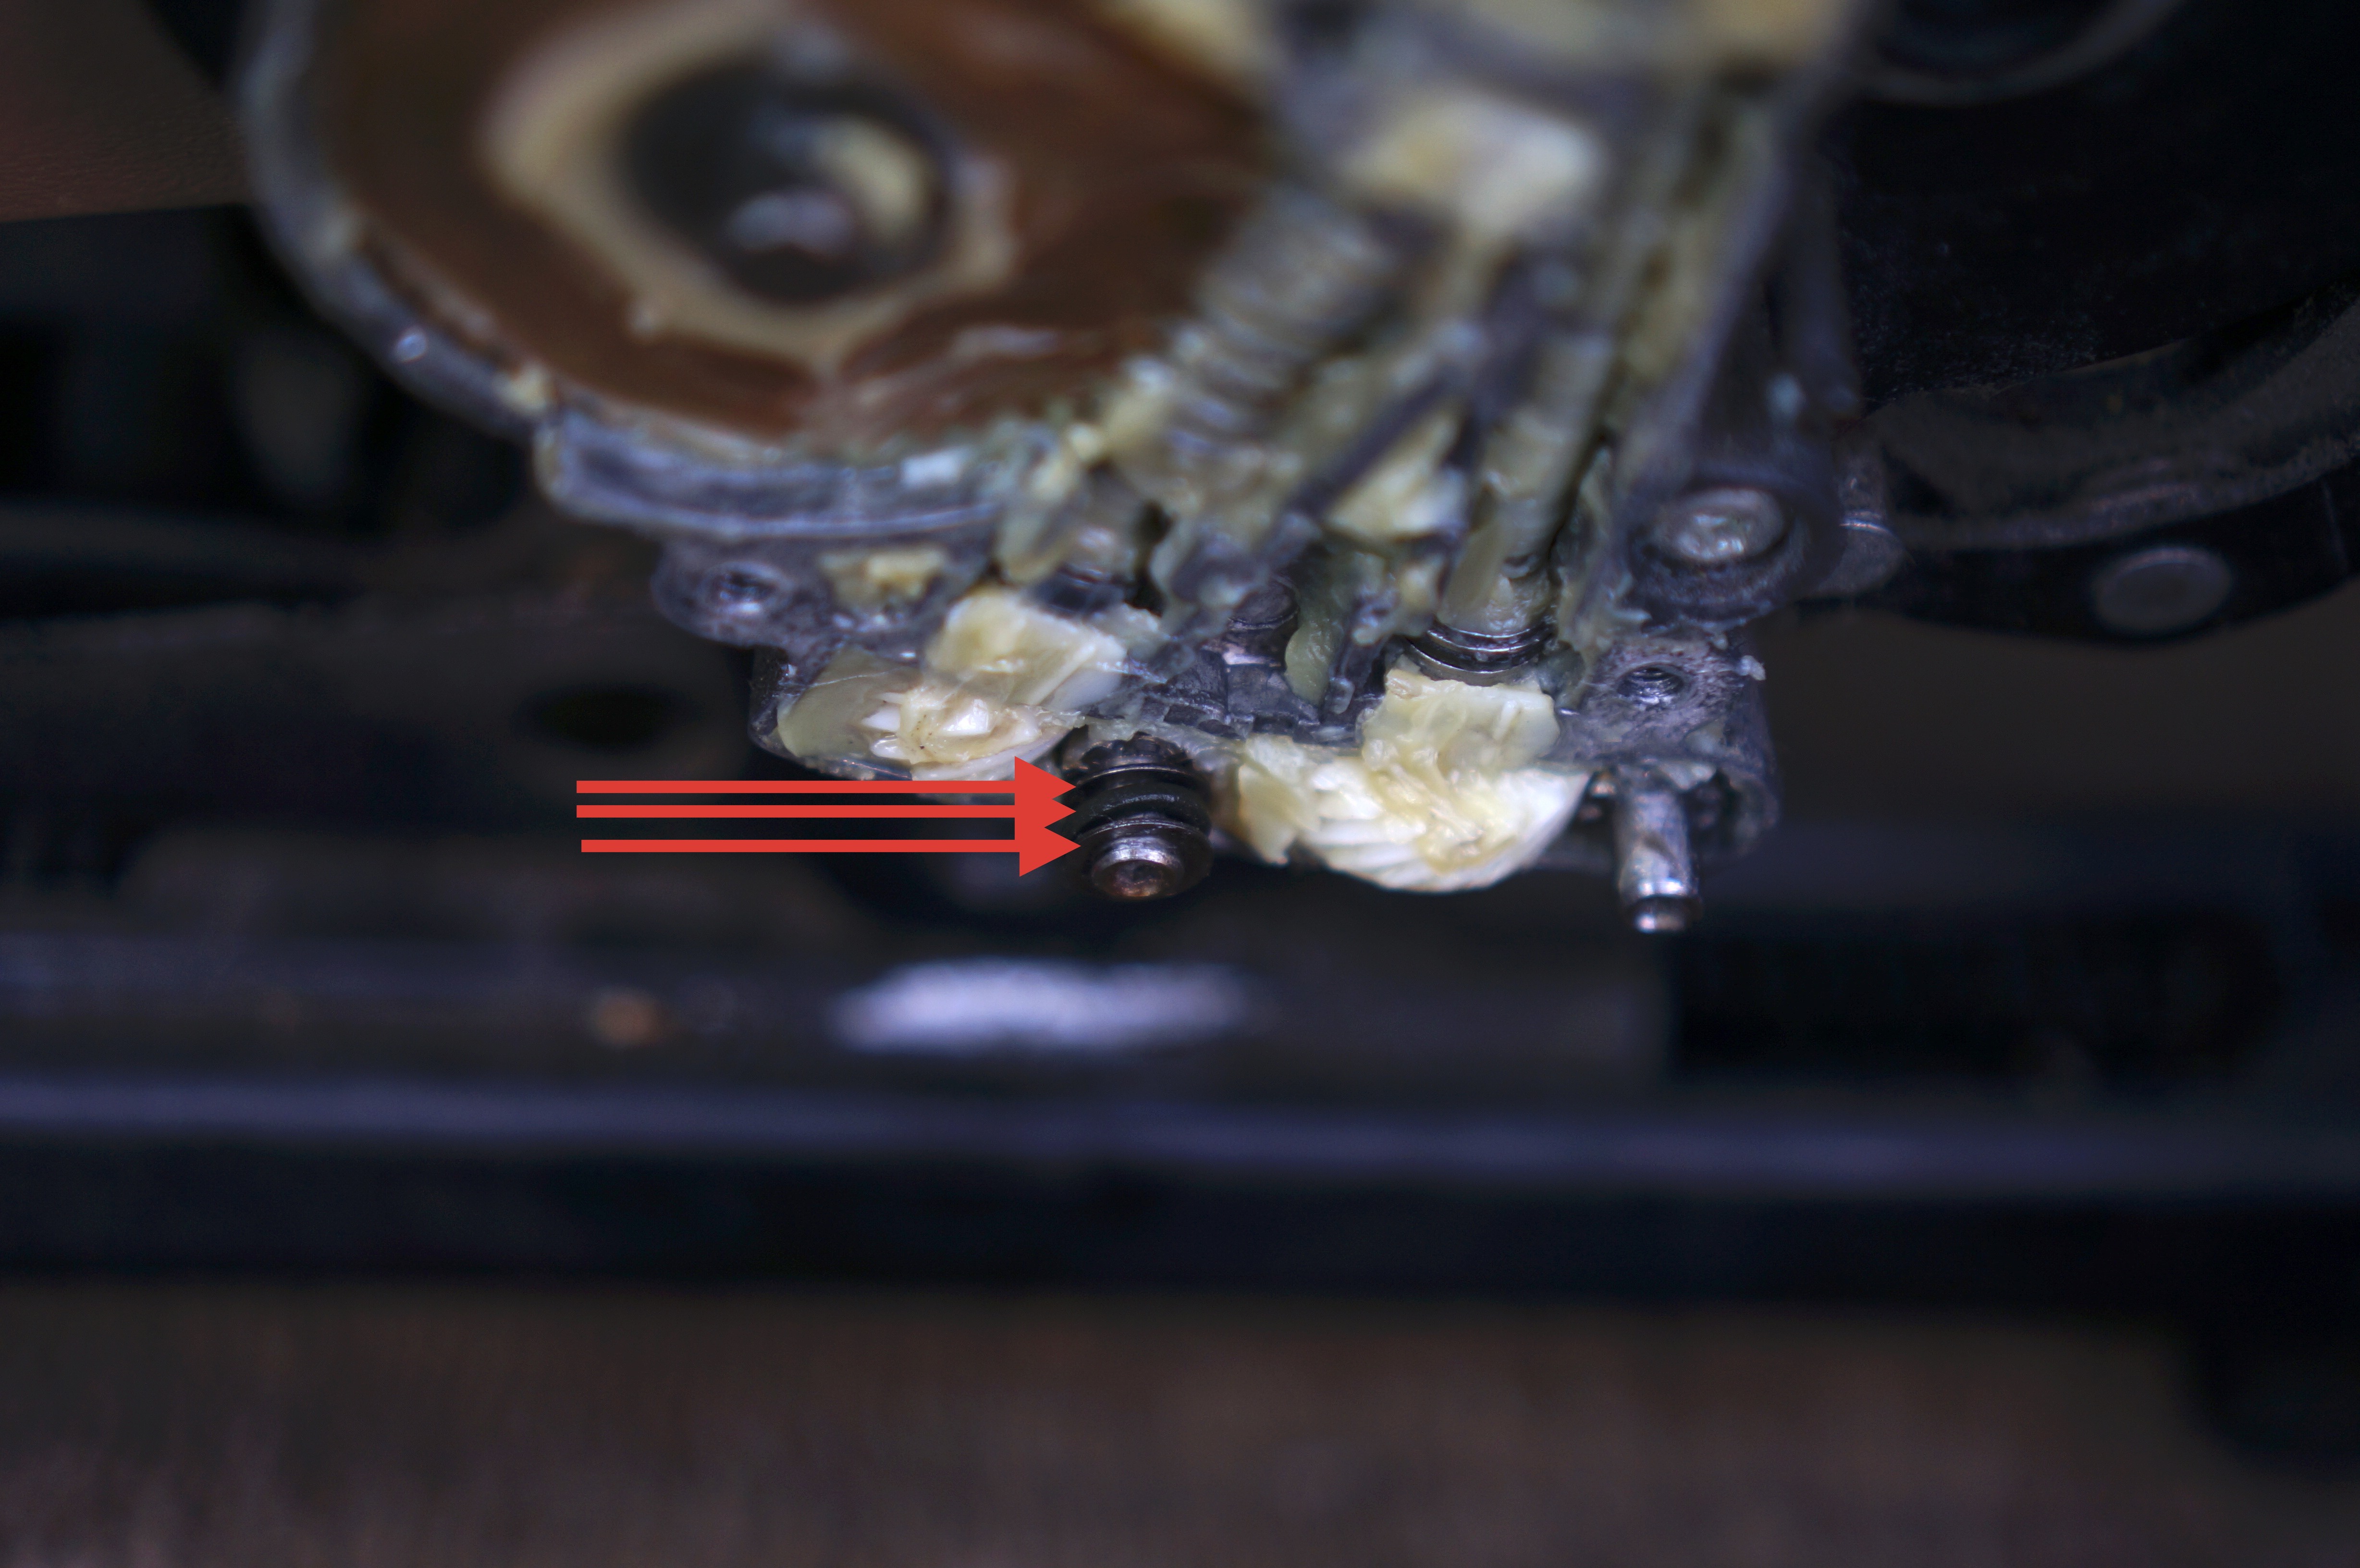
Be careful not to loose any of the 4 plastic guides or the washer setup, take them off the plate, clean and place in their position. The grease will hold them.
The washers go on the worm gears in the bottom. Order: metal, rubber, metal.
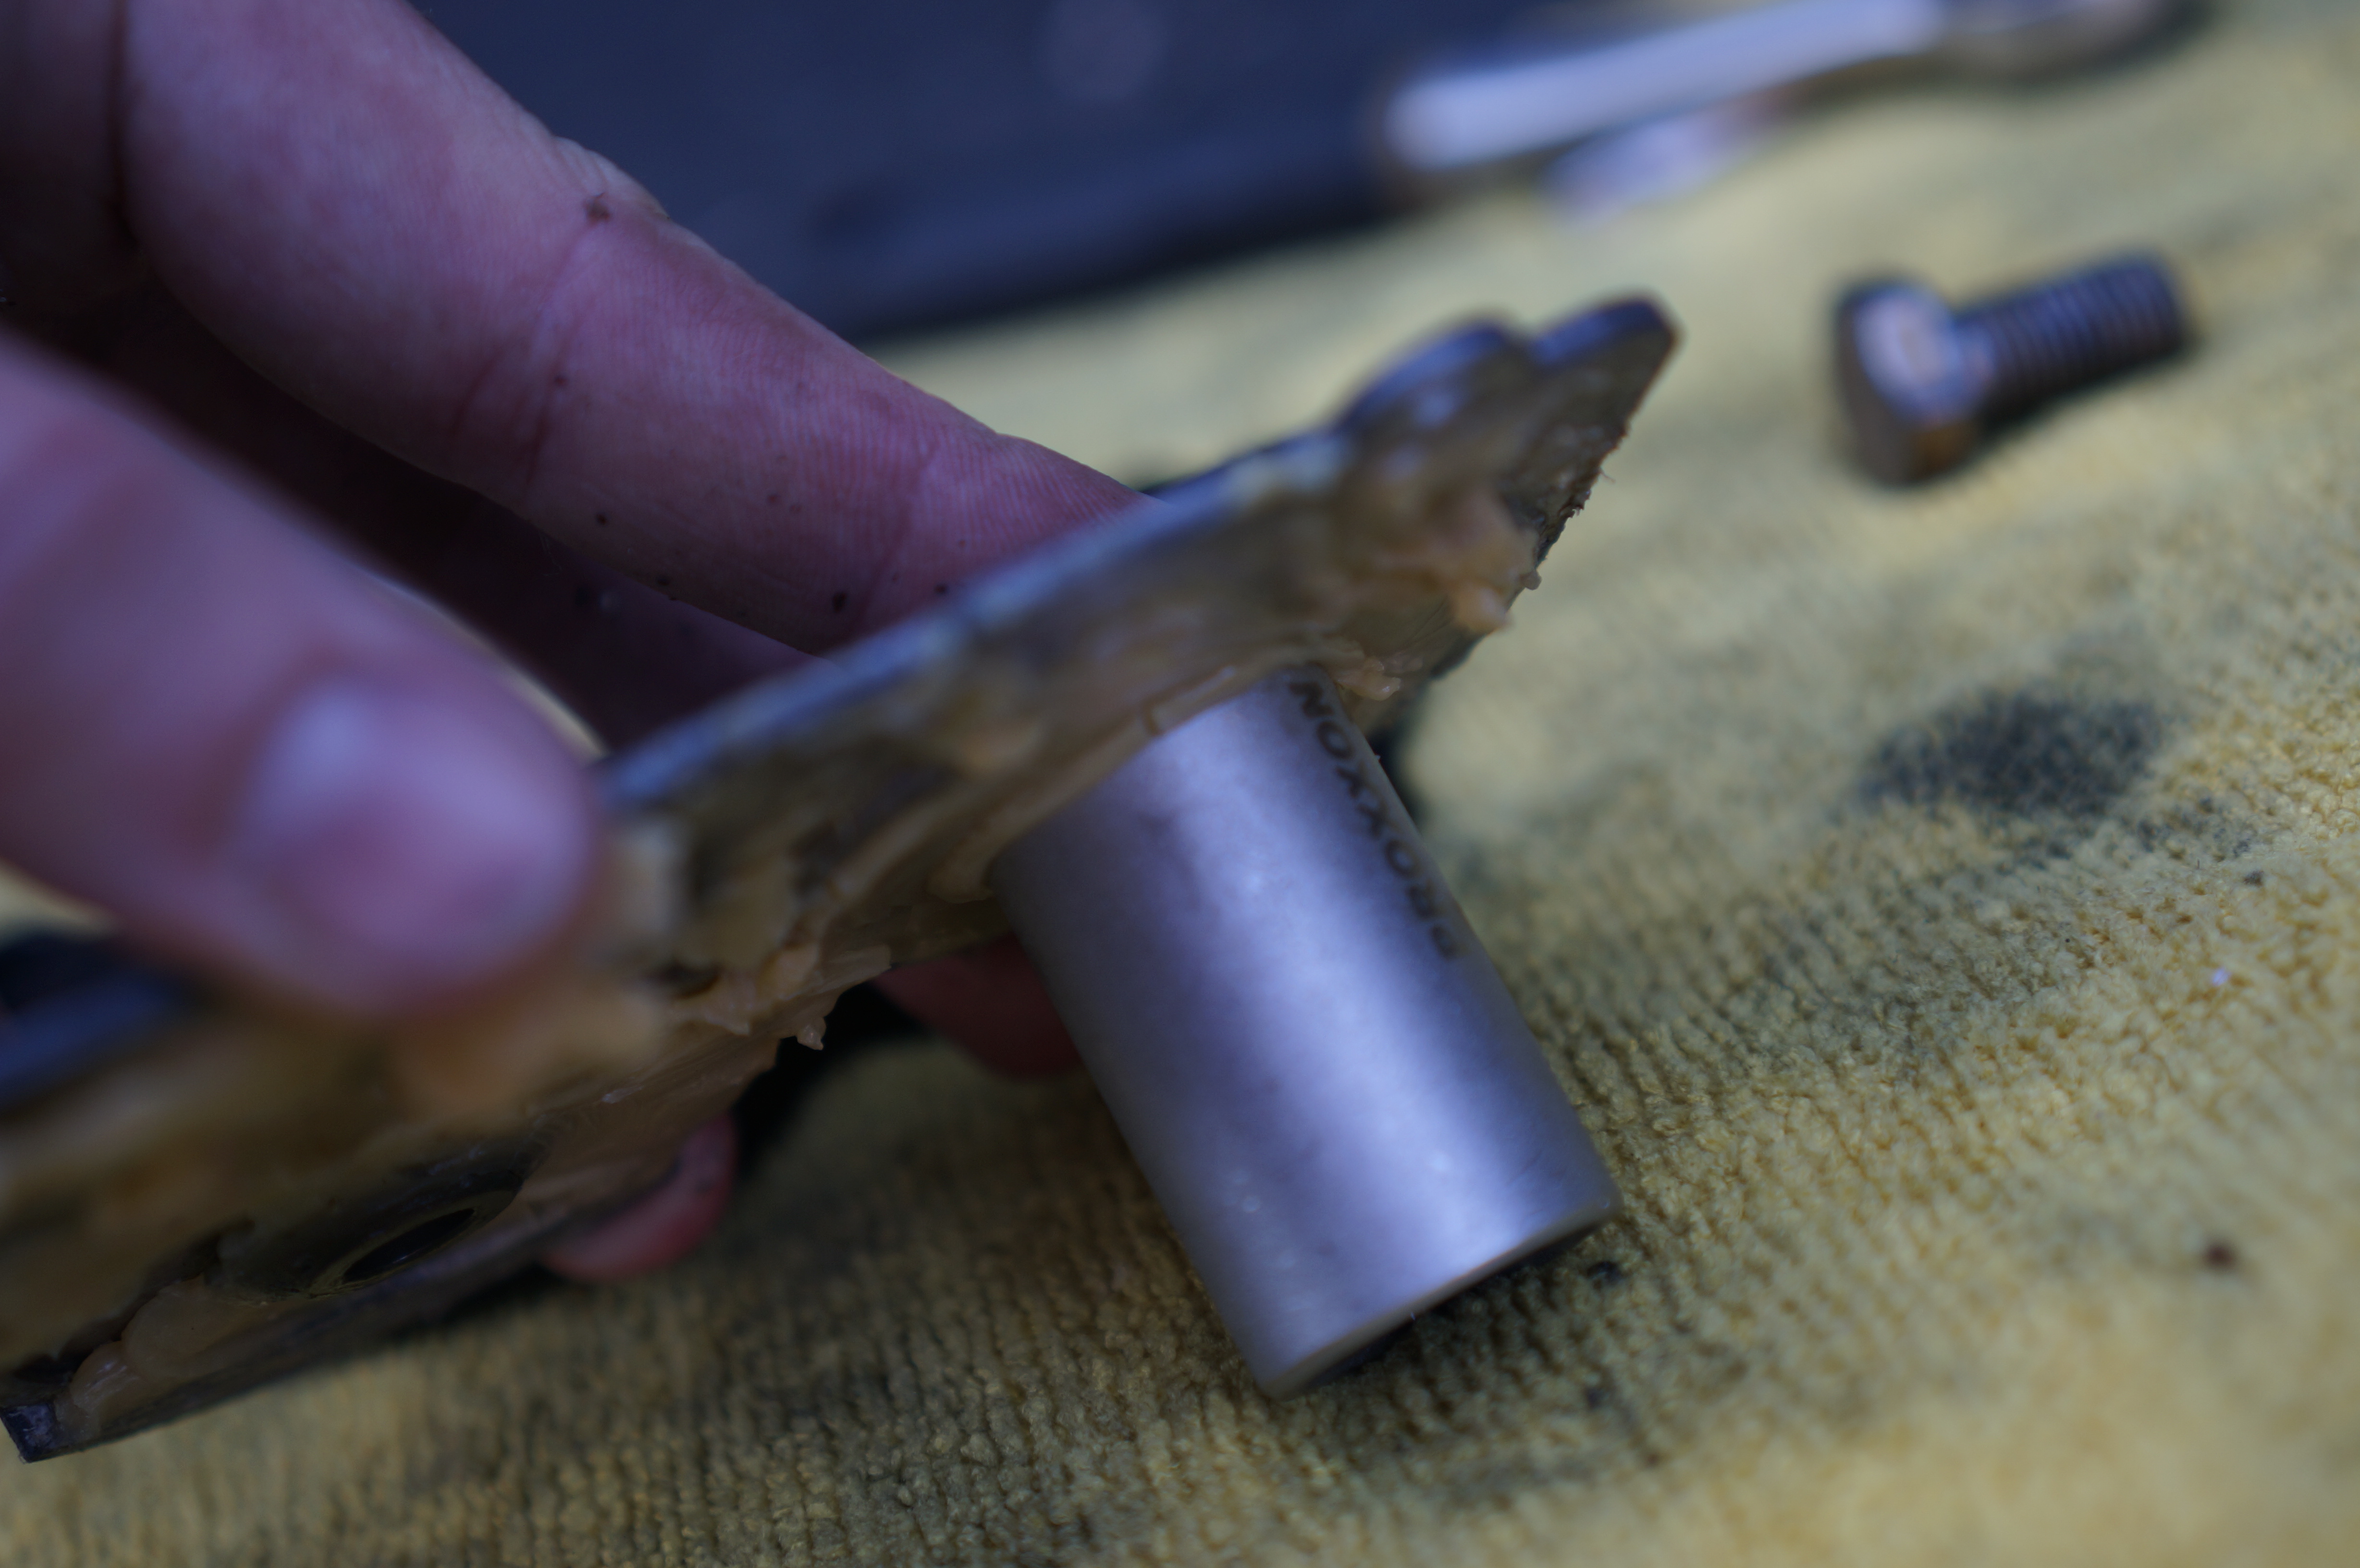
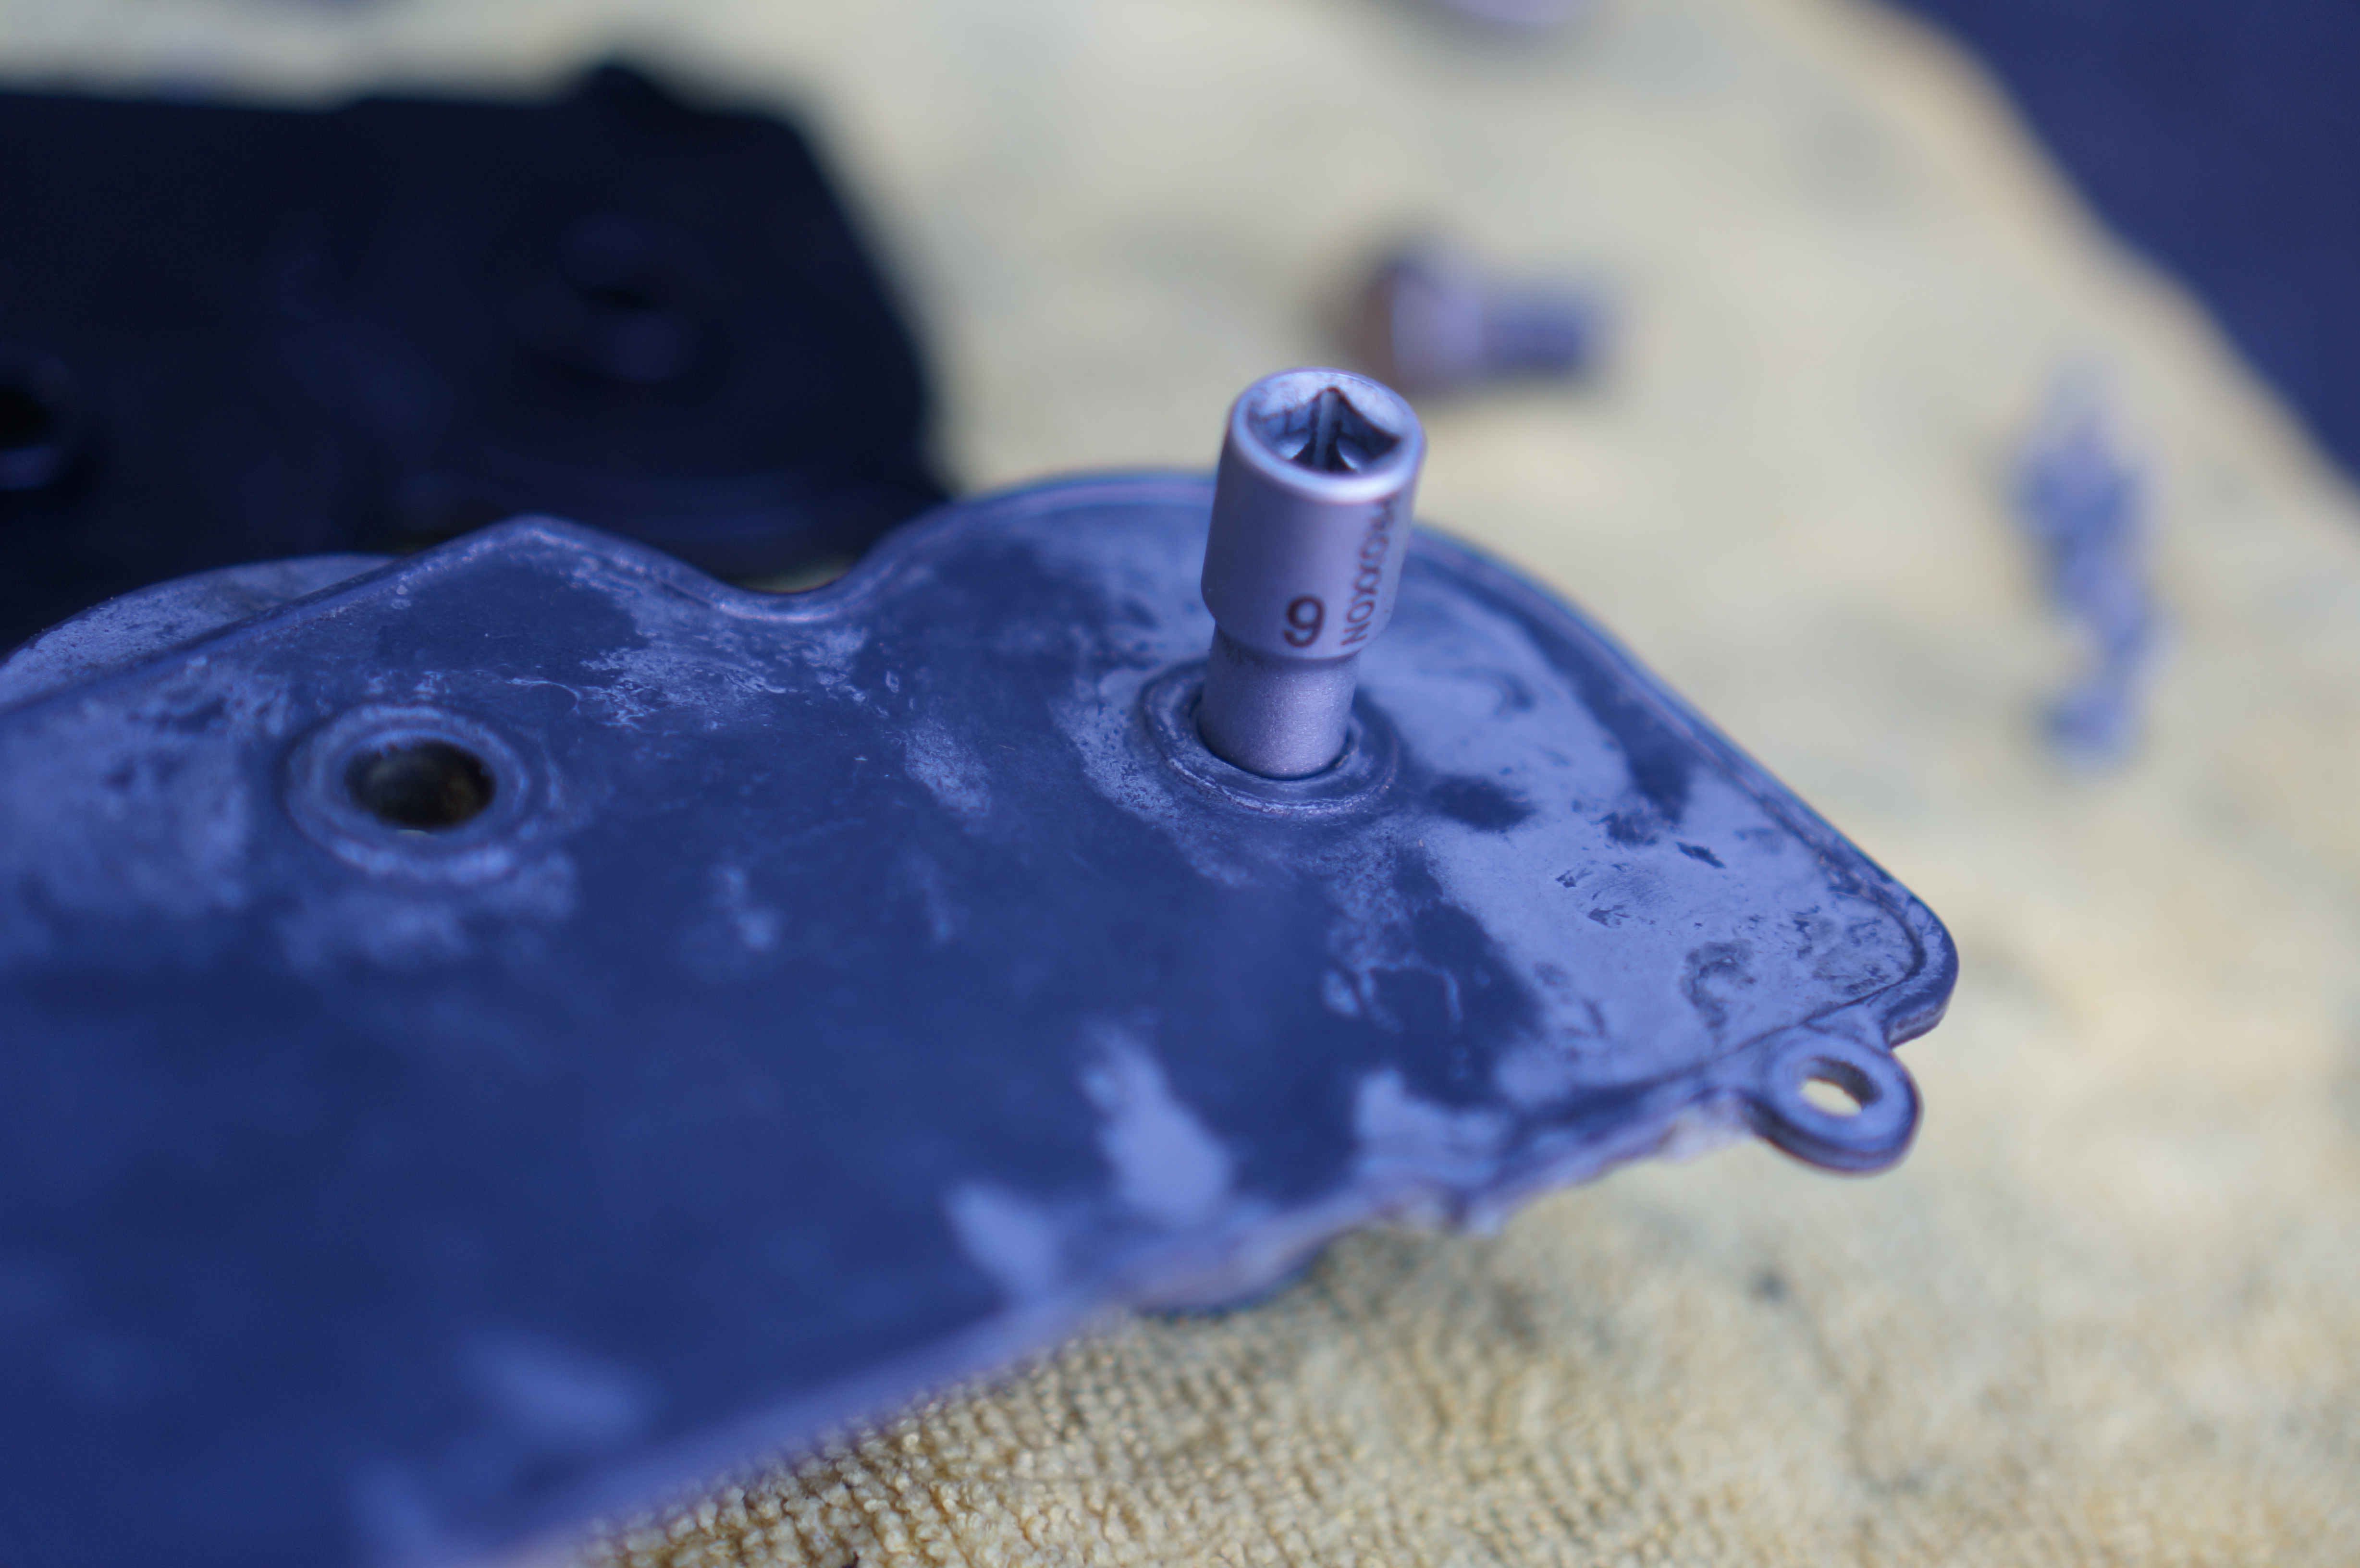

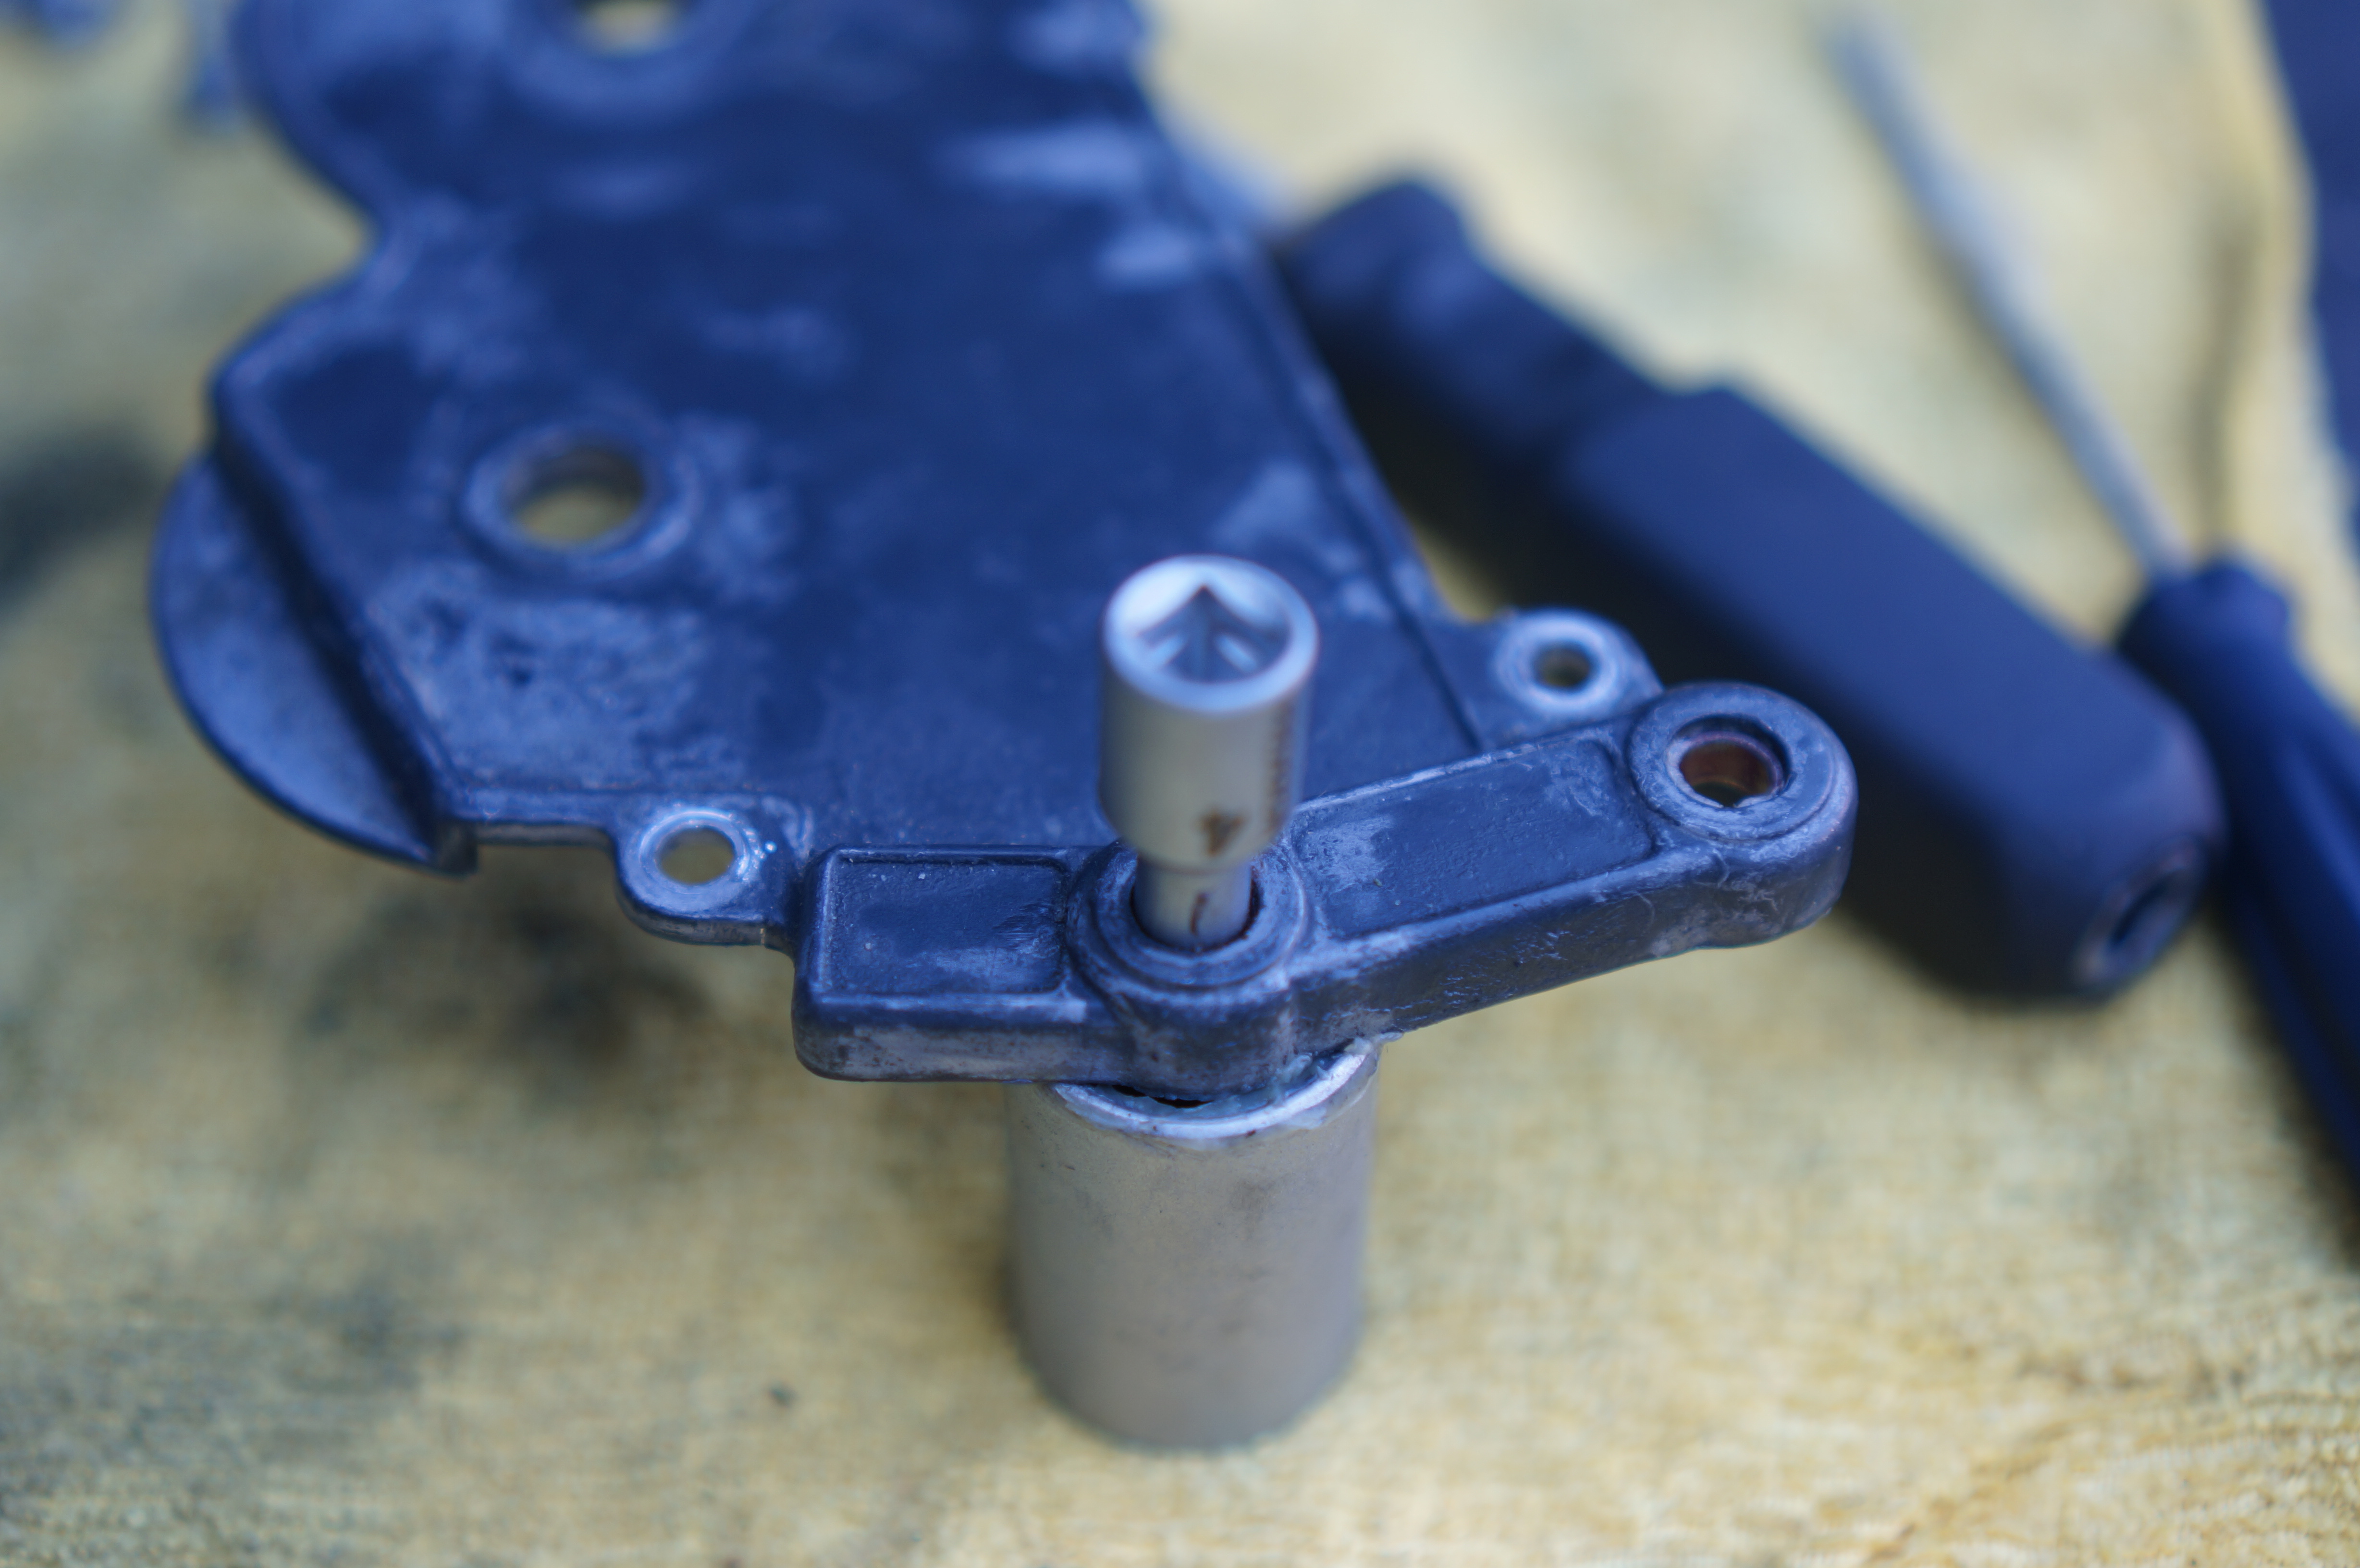

Time to Press out the bushings:
Place the 17mm socket under one of the big bushings to support, use a 6mm socket from the top. A couple of gentle hits with a plastic mallet should break them loose.
Repeat for second bushing.
Place the socket below the red plastic bushing in the bottom of the plate. Using a 4mm socket, repeat as before. These usually can be pressed out by hand.
Take the new aluminium covers, place them on a soft surface (rag).
Start with the two big bushings, gently tapping them in with a plastic mallet. Make sure they stay straight. It takes a little bit of force, to get them back in.
Press the two red bushings in by hand.


Time to get the leftover grease of the old plate. The grease should be in great shape, I decide not to replace it. If you do so, please remember to take a grease with a really high drip point. It gets hot in these cars in summer and the last thing you want is grease dripping on your nice carpet.
Place the leftover grease around the seat gears, don’t forget the two little plastic gears in the bottom.
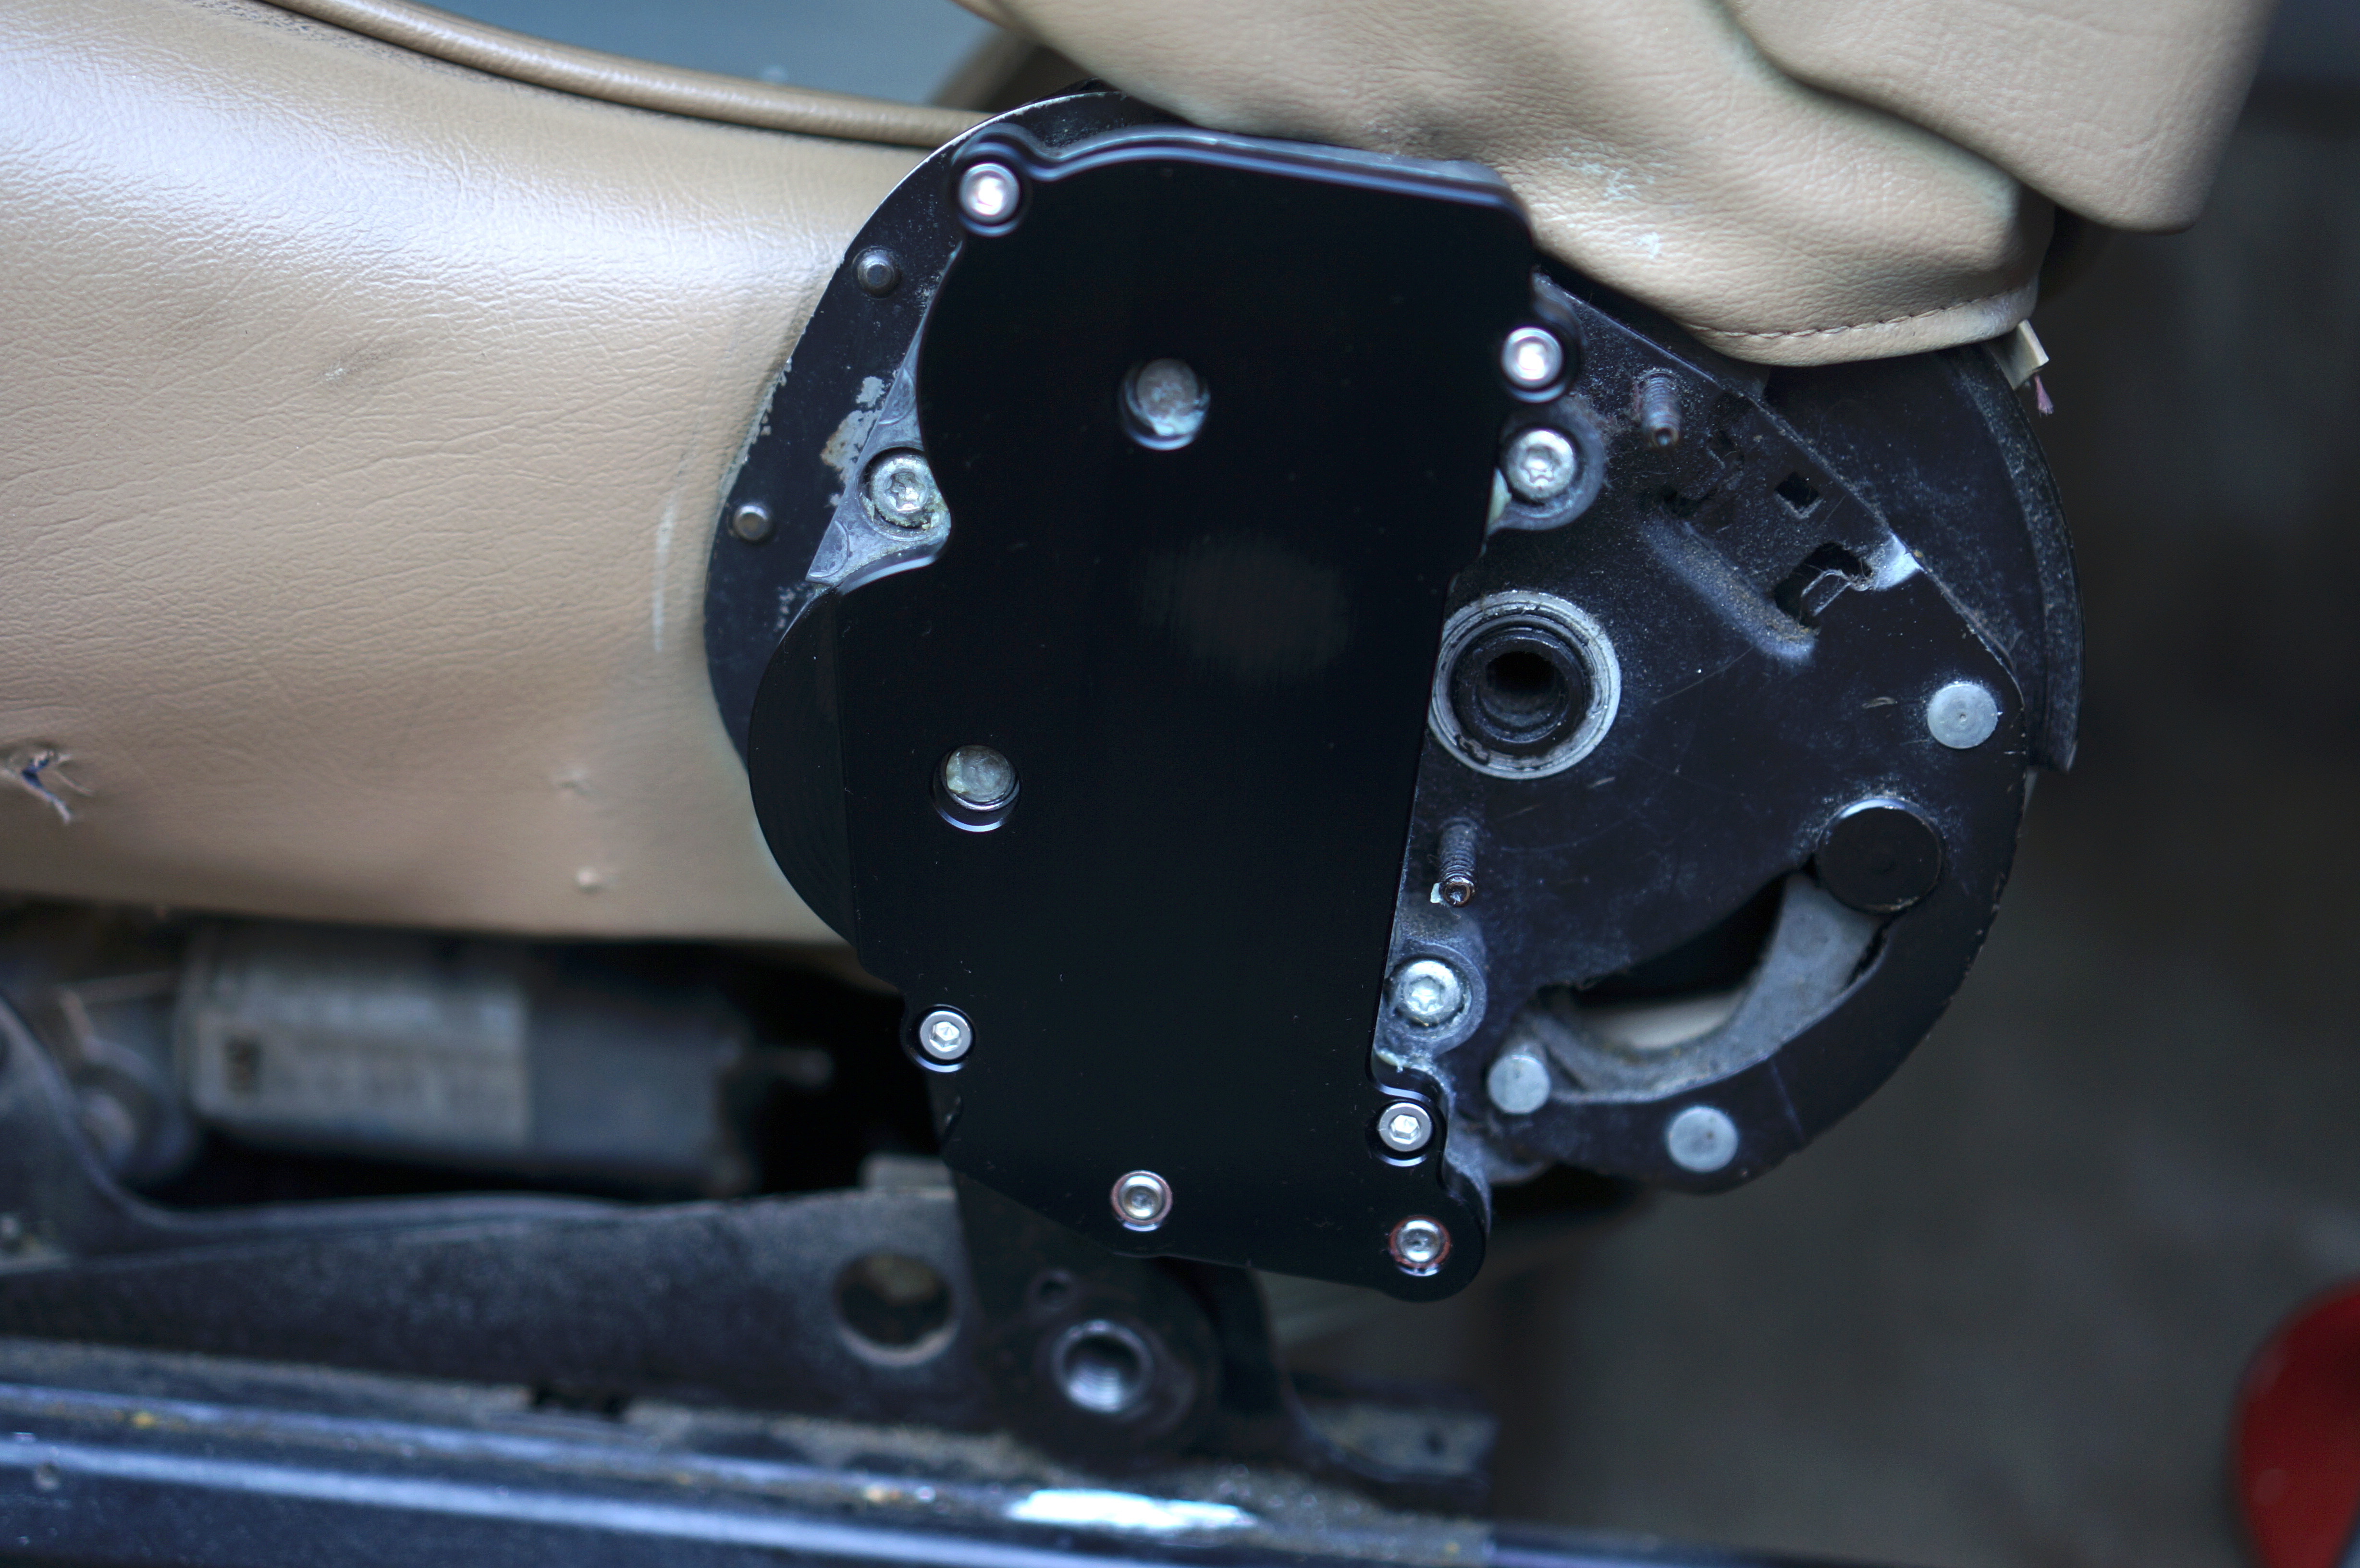
Place the new plate on the gearbox, make sure all the plastic pieces and washers from the beginning are still in place. Make sure you align all the 4 shafts that go into the bushings. Press it onto the shafts by hand. You might not be able to fully seat the front plate. No worries, the bolts will take care of this in the next steps.
Take 4 of the M4 stainless bolts out of the bag, place them in the holes and use a 3mm allen to tighten them down. As usual, don’t tighten one screw down all the way, as the plate needs to be seated. Work your way around the plates a couple of times.
Wipe out the leftover grease out of the busing holes.


Now it’s time to modify the plastic cover, probably the “scariest” step of all. Place the plastic cover on a soft rag.
Take a thin blade and slowly cut your way through the three main “ribs” of the back side. Do this in multiple slow steps, not to break the plastic cover. I modified all 12 of my covers without breaking one.
Place the modified plastic cover over the plate, make sure to align the top threaded bolt with the “guiding rod” on the back of the plate. Tighten down the nut.
Mount the seatbelt back to the seat, make sure to align the little tab with the hole in the seat.
Tigthen the bolt to spec with NM. Remember, the seatbelt is safety critical, you don’t want to realize in a crash that the bolt was not tight to too tight and the seatbelt comes loose.
Repeat 4 more times for the remaining covers.
Open Cold beer and enjoy it in your car seats.
I hope everybody is happy with the outcome. Let me know if you have any issues mounting them.
Thanks again everybody for making this happen, without I would still be sitting sideways in 2 of my seats.
Here are the instructions. I tried to cover it in a video, but it didn't work the way I wanted int to. I think the pictures are easier to follow.
Please remember that these are tips from my side, I will not be responsible for any damages caused during the steps of this manual or afterwards.
You need:
17mm
7mm
6mm
4mm
3mm Allen
Flat head screwdriver
Knive
Plenty of rags
Cold Beer

Bring seat in a position where you can easily reach all the bolts.
Remove seat belt.
Remove plastic cover nut (that is missing in all of my cars
Pull off cover

Remove 4x7mm Hex screws
Carefully pry work your way around the front cover with a small flat head screwdriver, do not lever to hard one one side, or you will break the plate in half


Be careful not to loose any of the 4 plastic guides or the washer setup, take them off the plate, clean and place in their position. The grease will hold them.
The washers go on the worm gears in the bottom. Order: metal, rubber, metal.


Time to Press out the bushings:
Place the 17mm socket under one of the big bushings to support, use a 6mm socket from the top. A couple of gentle hits with a plastic mallet should break them loose.
Repeat for second bushing.
Place the socket below the red plastic bushing in the bottom of the plate. Using a 4mm socket, repeat as before. These usually can be pressed out by hand.
Take the new aluminium covers, place them on a soft surface (rag).
Start with the two big bushings, gently tapping them in with a plastic mallet. Make sure they stay straight. It takes a little bit of force, to get them back in.
Press the two red bushings in by hand.


Time to get the leftover grease of the old plate. The grease should be in great shape, I decide not to replace it. If you do so, please remember to take a grease with a really high drip point. It gets hot in these cars in summer and the last thing you want is grease dripping on your nice carpet.
Place the leftover grease around the seat gears, don’t forget the two little plastic gears in the bottom.

Place the new plate on the gearbox, make sure all the plastic pieces and washers from the beginning are still in place. Make sure you align all the 4 shafts that go into the bushings. Press it onto the shafts by hand. You might not be able to fully seat the front plate. No worries, the bolts will take care of this in the next steps.
Take 4 of the M4 stainless bolts out of the bag, place them in the holes and use a 3mm allen to tighten them down. As usual, don’t tighten one screw down all the way, as the plate needs to be seated. Work your way around the plates a couple of times.
Wipe out the leftover grease out of the busing holes.


Now it’s time to modify the plastic cover, probably the “scariest” step of all. Place the plastic cover on a soft rag.
Take a thin blade and slowly cut your way through the three main “ribs” of the back side. Do this in multiple slow steps, not to break the plastic cover. I modified all 12 of my covers without breaking one.
Place the modified plastic cover over the plate, make sure to align the top threaded bolt with the “guiding rod” on the back of the plate. Tighten down the nut.
Mount the seatbelt back to the seat, make sure to align the little tab with the hole in the seat.
Tigthen the bolt to spec with NM. Remember, the seatbelt is safety critical, you don’t want to realize in a crash that the bolt was not tight to too tight and the seatbelt comes loose.
Repeat 4 more times for the remaining covers.
Open Cold beer and enjoy it in your car seats.
-
dan101smith
- Posts: 247
- Joined: May 16, 2007 9:38 AM
- Location: United Kingdom
Re: Cracked sport seat hinge gearbox - first prototype ready
Having almost rocked myself to sleep on the drive to Le Mans today, please let me know if you're doing another run as I'd like to order. Thanks!
Re: Cracked sport seat hinge gearbox - first prototype ready
I have already arranged getting a second batch made, but we have not timed it yet.
Before we do that I would like to have more feedback of the first round buyers.
Before we do that I would like to have more feedback of the first round buyers.
Re: Cracked sport seat hinge gearbox - first prototype ready
Since I keep getting requests for these from time to time...
I won't have the time to organize another group sale.
If anybody wants to take the lead and organize a larger batch, I can still have these made at a minimum order quantity of 20 plates (10 left, 10 right). Price will be $100 a plate with about 3-4 months lead time.
I won't have the time to organize another group sale.
If anybody wants to take the lead and organize a larger batch, I can still have these made at a minimum order quantity of 20 plates (10 left, 10 right). Price will be $100 a plate with about 3-4 months lead time.
Re: Cracked sport seat hinge gearbox - first prototype ready
I would be very, very interested (in a few sets) should anyone else take the over and move forward with a group buy.
Re: Cracked sport seat hinge gearbox - first prototype ready
Let's give this a month or two and we see how it goes.
Re: Cracked sport seat hinge gearbox - first prototype ready
I’d be in for a set (whatever I need for both front seats).
To be clear, this fixes the “rocking” that affects (plagues?) our cars, correct?
Btw, the “how to” by BenGerman is excellent! Very clear and well written. Thank you for all your efforts.
Thanks.
To be clear, this fixes the “rocking” that affects (plagues?) our cars, correct?
Btw, the “how to” by BenGerman is excellent! Very clear and well written. Thank you for all your efforts.
Thanks.
Re: Cracked sport seat hinge gearbox - first prototype ready
In for 2 sets as well if it happens.
Re: Cracked sport seat hinge gearbox - first prototype ready
Might be worth sharing in the Facebook groups and on Bigcoupe?
The E24 has the same issue.
The E24 has the same issue.
Re: Cracked sport seat hinge gearbox - first prototype ready
I'm in for a set too, if/when it becomes available.
Re: Cracked sport seat hinge gearbox - first prototype ready
I would be in for a set for both front seats also.
Re: Cracked sport seat hinge gearbox - first prototype ready
Is the rocking the entire seat assembly or just the back to the seat cushion?
Re: Cracked sport seat hinge gearbox - first prototype ready
It could be a combination of things but the most common cause is cracked motor casings.Mike W. wrote: Feb 05, 2022 8:11 PM Is the rocking the entire seat assembly or just the back to the seat cushion?
Re: Cracked sport seat hinge gearbox - first prototype ready
Count me in for a set. Thanks!
Re: Cracked sport seat hinge gearbox - first prototype ready
Interested in two sets, if this happens
Re: Cracked sport seat hinge gearbox - first prototype ready
Alright, let’s do this.
Closing date for orders is 3/15/22. Write me a PN with:
Your Name
Your address
How many left and right pieces you want
Closing date for orders is 3/15/22. Write me a PN with:
Your Name
Your address
How many left and right pieces you want
Re: Cracked sport seat hinge gearbox - first prototype ready
Sent PM. Thank you!
Re: Cracked sport seat hinge gearbox - first prototype ready
Anybody else? Haven’t received a PM from everybody that was interested yet.
-
Chimi-Changa
- Posts: 1652
- Joined: Nov 08, 2011 11:02 PM
- Location: Westboro, MA
Re: Cracked sport seat hinge gearbox - first prototype ready
Let me know when you make manual sport seat parts! ( You know how my seats are...) 
Northeast OH?
Northeast OH?
Re: Cracked sport seat hinge gearbox - first prototype ready
I would like a set for my drivers seat . Tried sending you a message Ben but I couldn’t get it to work, maybe because I’m in my phone
Re: Cracked sport seat hinge gearbox - first prototype ready
Sent one earlier!
Re: Cracked sport seat hinge gearbox - first prototype ready
Got some PMs. Will Follow up in a few days with details.
Re: Cracked sport seat hinge gearbox - first prototype ready
Keeping you on top of things.
Re: Cracked sport seat hinge gearbox - first prototype ready
Time window is closing. Anybody interested should order now.
Re: Cracked sport seat hinge gearbox - first prototype ready
money sent, thank you
Re: Cracked sport seat hinge gearbox - first prototype ready
Money sent and sent address via PM.
Thank you.
Thank you.
Re: Cracked sport seat hinge gearbox - first prototype ready
I sent a PM on the 15th, hope you got it.
Re: Cracked sport seat hinge gearbox - first prototype ready
Still have a couple payments pending. Will pull the trigger with the shop soon.
Re: Cracked sport seat hinge gearbox - first prototype ready
Last call tomorrow until 18:00 EST.
Still a bunch of orders open…
This will be the last chance to get one of these sets.
Still a bunch of orders open…
This will be the last chance to get one of these sets.
Re: Cracked sport seat hinge gearbox - first prototype ready
Orders closed. Will update with a production schedule once I get it.
Re: Cracked sport seat hinge gearbox - first prototype ready
Thank you for the update!BenGerman wrote: Apr 17, 2022 9:02 PM Orders closed. Will update with a production schedule once I get it.
Re: Cracked sport seat hinge gearbox - first prototype ready
Any updates? Thanks in advance.
Re: Cracked sport seat hinge gearbox - first prototype ready
They are all shipped and everybody should have the tracking number in their inbox. Enjoy!
Re: Cracked sport seat hinge gearbox - first prototype ready
Mine arrived, end of box was ripped open but thankfully all 4 were still inside!
thank you for making this happen.
thank you for making this happen.
Re: Cracked sport seat hinge gearbox - first prototype ready
Mine arrived safe and sound! They look great.
Thank you, BenGerman, for making this happen.
Cheers!
Thank you, BenGerman, for making this happen.
Cheers!

