My 535is Turbo Buildup Thread! - update 11/26//09

Discussion pertaining to positive pressure E28s.
Brad D.
Beamter
Beamter
Posts: 10735
Joined: Feb 12, 2006 12:00 PM
Location: San Antonio, TX
Contact:

Post by Brad D. »

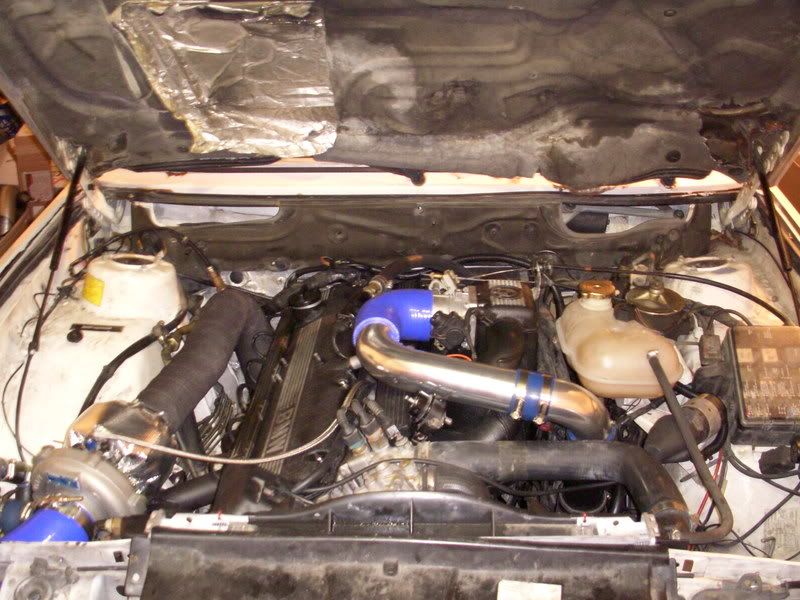
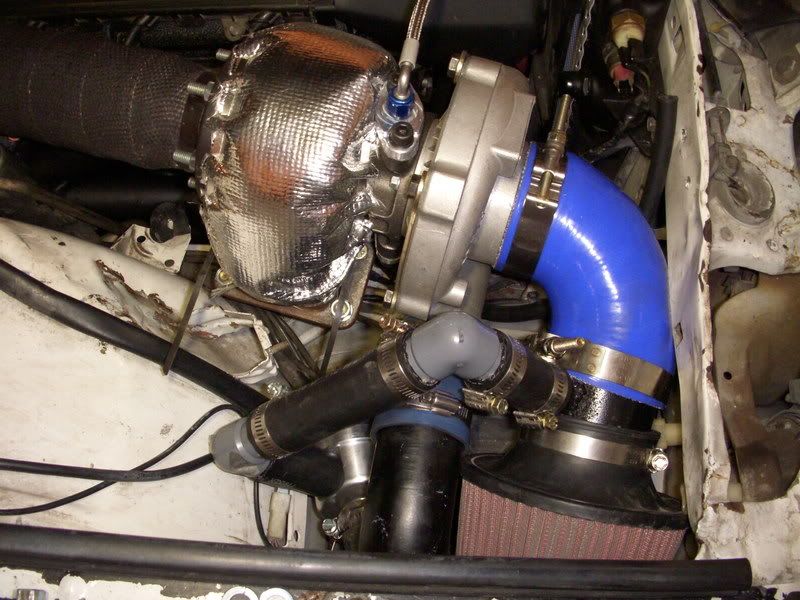
Well, I got more done this weekend. Had fun putting in new parts. The exhaust is installed and looks great. I've almost wrapped up everything under the hood. Only a few clamps here and there, a little wiring and some extra heat wrap on the exhaust side.

Intake and BPV installed.
Image

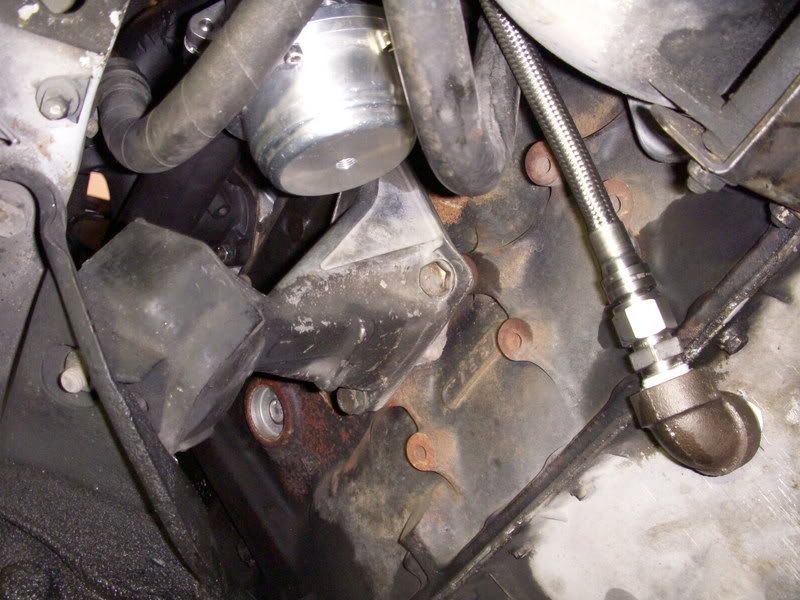
Wastegate installed. You can also see the oil return line mounted up.
Image

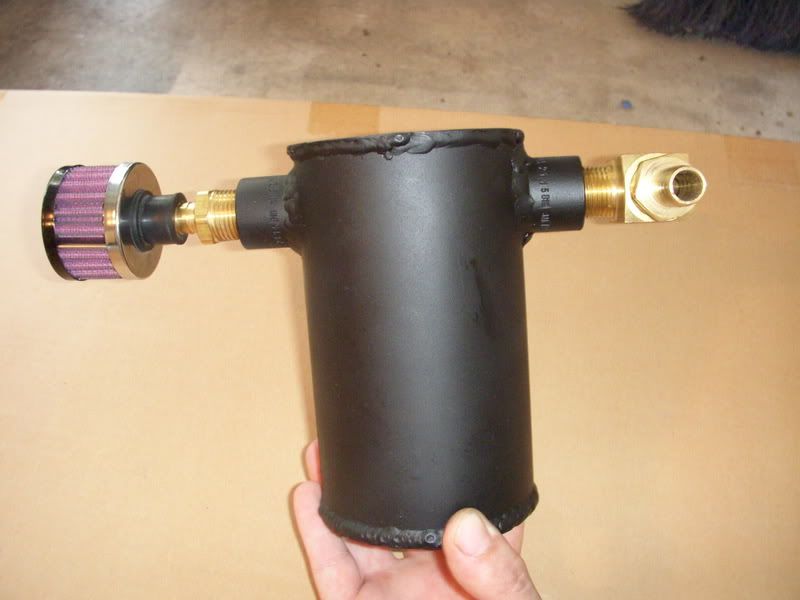
Custom catch can I made up - its baffled inside and is packed with stainless coily cleaning pads. It has a drain on the bottom. Now I just need to make a mount for it.
Image

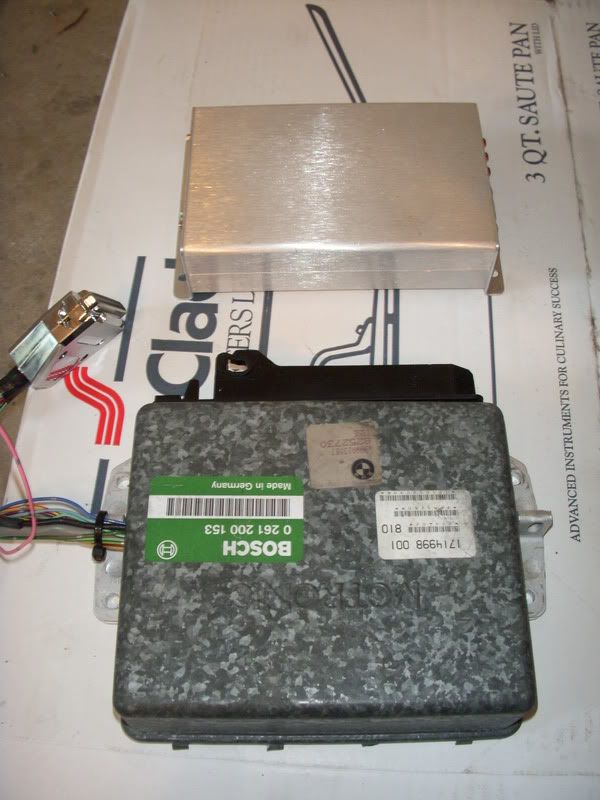
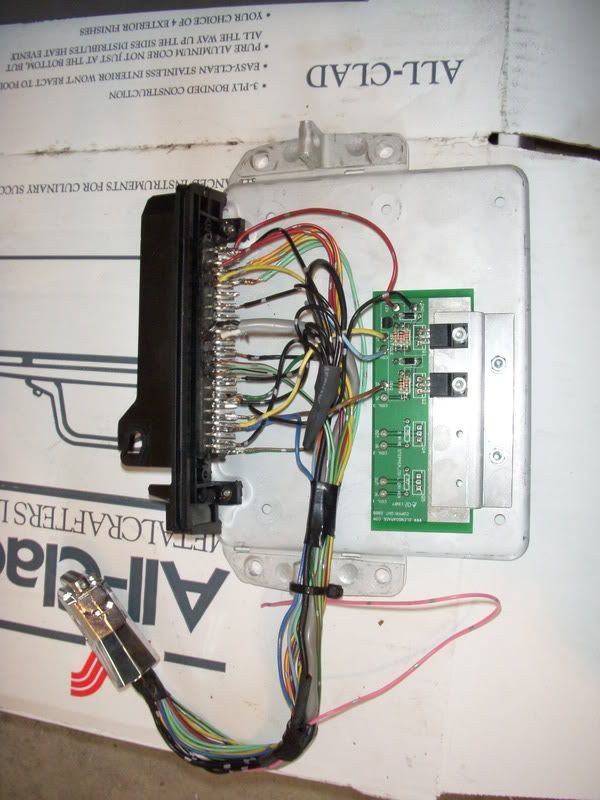
Megasquirt and my adapter box. It has the Glen's Garage idle board inside it. The pink wire is for my WB o2 input.
Image
Image

Injectors are in and all of the IC piping back on.
Image
Jays535is
Posts: 1193
Joined: Mar 20, 2007 5:28 PM
Location: Spokane

Post by Jays535is »

Nice! On your BPV install are those 1" sprinkler 90* elbows?
Brad D.
Beamter
Beamter
Posts: 10735
Joined: Feb 12, 2006 12:00 PM
Location: San Antonio, TX
Contact:

Post by Brad D. »

Jays535is wrote:Nice! On your BPV install are those 1" sprinkler 90* elbows?
Ya, I want to find some in brass, but I may just wrap these in the thermal wrap I have and see how they fare.
Jays535is
Posts: 1193
Joined: Mar 20, 2007 5:28 PM
Location: Spokane

Post by Jays535is »

Big Bronze Rim wrote:
Jays535is wrote:Nice! On your BPV install are those 1" sprinkler 90* elbows?
Ya, I want to find some in brass, but I may just wrap these in the thermal wrap I have and see how they fare.
I used the same thing (pics in thread). I also thought about doing the whole brass thing, but I think they should hold up pretty good.
bimmerboy
Posts: 390
Joined: Oct 18, 2006 7:06 PM
Location: United States

Post by bimmerboy »

What volvo was the BOV from? Sweet project !
Brad D.
Beamter
Beamter
Posts: 10735
Joined: Feb 12, 2006 12:00 PM
Location: San Antonio, TX
Contact:

Post by Brad D. »

Only the pipe and the connector were from a Volvo (740 turbo IIRC). I have a giant box of hoses, pipes, brackets and random crap I have collected over the years. I have the valve from the Volvo somewhere and it probably would have worked but it was kind of large.The BPV im using is a new billet aluminum Bosch replacement.
Pat P
Posts: 91
Joined: Sep 10, 2006 5:04 PM
Location: closer than you think

Post by Pat P »

this is a very nice Diy project.... :alright:
Brad D.
Beamter
Beamter
Posts: 10735
Joined: Feb 12, 2006 12:00 PM
Location: San Antonio, TX
Contact:

Post by Brad D. »

A few little update pics:
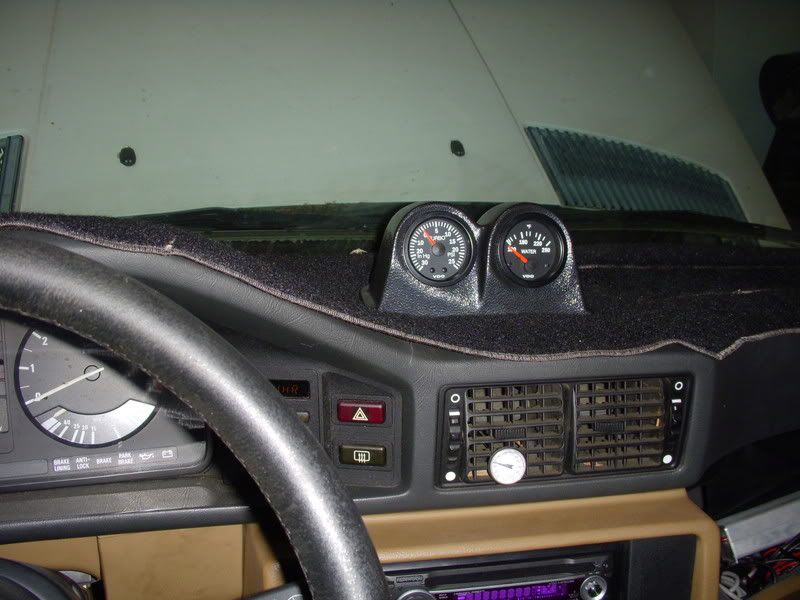
Gauge pod install. I think I am going to swap out the water temp for oil pressure, I just had the temp gauge when my stock gauge stopped working but its all good now. For now though it will work.
Image

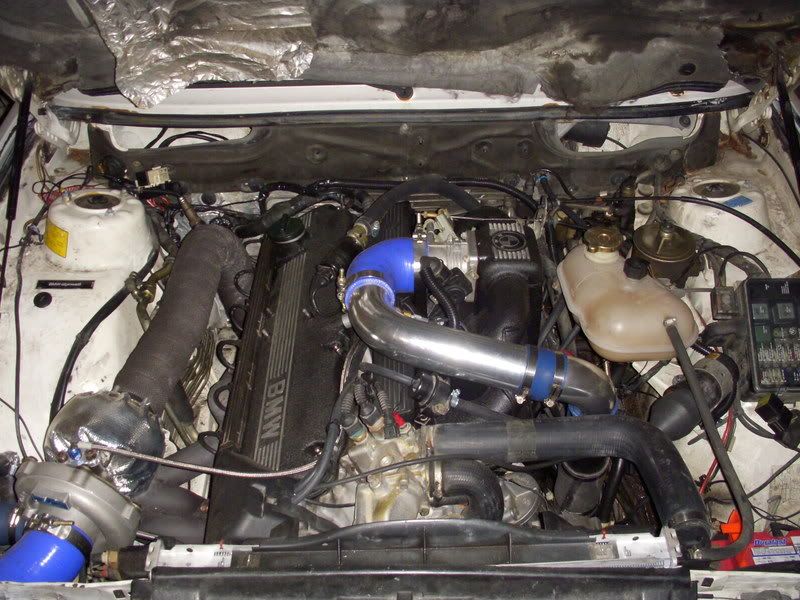
Updated engine bay pics from this evening. Still need to do a bit of cleaning though and add the rest of my thermal wrap on the wiring harness now that all of the MS stuff is working.
Image

The car is running and driving however, my cheapo laptop died so I haven't been able to drive the car since last week. Fortunately today I was able to borrow a laptop for a while so I should be able to get some more tuning done this weekend. Closed loop idle is nice and I have some of the low kPa/low rpm map sorted out. Megalogviewer is awesome!
Badger
Posts: 623
Joined: Feb 12, 2006 12:00 PM
Location: Whately, MA

Post by Badger »

What did you use for the merge collector, where the 2 exhaust tubes and 1 wastegate tube connect to the turbo? I am super interested in trying this as a manifold instead of dropping $700 for a tcd or $1,300 for a 666. At least for now untill i want bigger hp.
thx
Brad D.
Beamter
Beamter
Posts: 10735
Joined: Feb 12, 2006 12:00 PM
Location: San Antonio, TX
Contact:

Post by Brad D. »

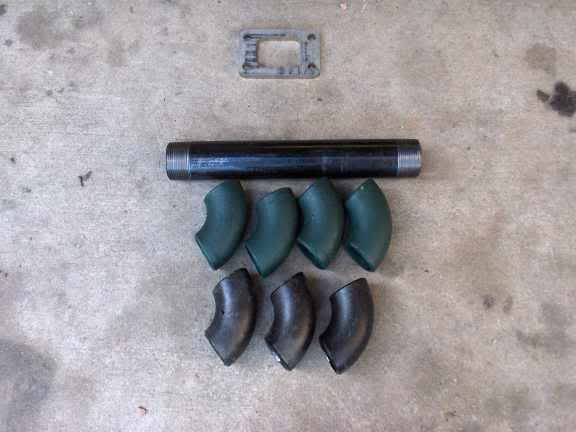
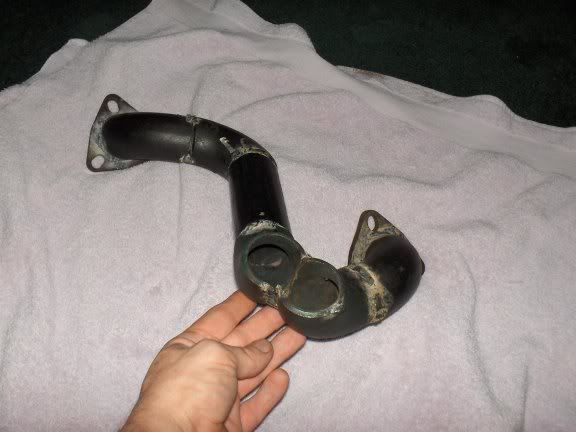
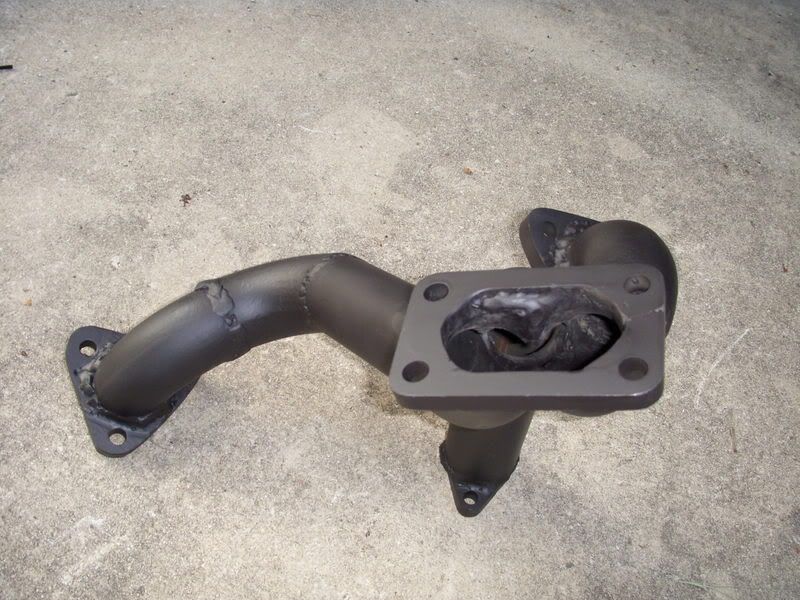
The manifold adapter was made out of Sch40 1.5"ID mild steel weld-els.
Image
The actual collector were just weld els carefully cut and the wastegate was added after it was completed but torching out a hole.
Image
Here is another angle of the completed adapter.
Image
Badger
Posts: 623
Joined: Feb 12, 2006 12:00 PM
Location: Whately, MA

Post by Badger »

sweet thx for the pics, much appreciated

badger
babisbabou
Posts: 365
Joined: Jul 15, 2006 6:43 AM
Location: Greece.athens

Post by babisbabou »

Well done, topic ownes! pics+details ;)

I wish you well :D
babisbabou
Posts: 365
Joined: Jul 15, 2006 6:43 AM
Location: Greece.athens

Post by babisbabou »

Some detail on how you feed oil to the turbo will be really appreciated,
etc you drilled the aluminum part where the oil filter is?

Happy new year to all i wish you happiness and health!
Brad D.
Beamter
Beamter
Posts: 10735
Joined: Feb 12, 2006 12:00 PM
Location: San Antonio, TX
Contact:

Post by Brad D. »

I drilled and tapped the oil filter housing as outlined in Shawn D.'ssender install page. I just used a 1/8 npt to -4 AN adapter and ordered a set of oil inlet and outlet flanges for the turbo. It made for a clean and simple install. I think the only pic I have is the one I posted above in this thread. The turbo drain on the other hand is a little more elaborate.
babisbabou
Posts: 365
Joined: Jul 15, 2006 6:43 AM
Location: Greece.athens

Post by babisbabou »

Big Bronze Rim wrote:I drilled and tapped the oil filter housing as outlined in Shawn D.'ssender install page. I just used a 1/8 npt to -4 AN adapter and ordered a set of oil inlet and outlet flanges for the turbo. It made for a clean and simple install. I think the only pic I have is the one I posted above in this thread. The turbo drain on the other hand is a little more elaborate.
Thank you very match m8 for the guide i appreciate it ;)
turbodan
Posts: 9217
Joined: Jan 09, 2007 10:19 PM

Post by turbodan »

Well done. The plumbing looks quite clean.
Brad D.
Beamter
Beamter
Posts: 10735
Joined: Feb 12, 2006 12:00 PM
Location: San Antonio, TX
Contact:

Post by Brad D. »

turbodan wrote:Well done. The plumbing looks quite clean.
Thanks, it turned out pretty well.
A little update - after acquiring another laptop for tuning I have been plagued with a major misfire issue that basically makes the car undriveable. As of tonight I figured out what the problem was. For anyone who cares or for future reference for those building their own MS2/extra setup.
The problem -
I have been getting severe ignition breakup and replaced my coil. Well, it seems as though that was not the issue. I am beginning to think it is something internal to MS itself. I am running a 330ohm pull up resistor on the ignition driver, dwell is set at 2.1 sec.The car starts and idles great but if revved up to any rpm and allowed to sit there it begins to break up and misfires terribly, even revving the engine with no load. While this is occuring the VB921 is getting extremely hot (~130F). If allowed to return to idle and cool off, it will idle fine but any constant rpm or significant load and it repeats the misfire all over. I am not sure if it is a hardware problem on the board(incorrect pull up ckt, bad vb921, etc), or something else. I should also note that my tach, driven off JS11 has gotten very jumpy also.
Also, can a vb921 be dying, but still run the car at idle?
The solution -
I think have solved my problem and I do feel like somewhat of a doofus. I wired my ignition driver as per the MS2 manual here in the internal board wiring section, only I used a 330ohm resistor. However, I seemed to have missed one seemingly critical piece of information - D14 needs to be set as spark output A in Megatune if using this ignition configuration. I had mine set to js10 and removed its jumper and once switched to D14 all of my issues have seemingly gone away. Also, the vb921 stays cool to the touch during operation with no ignition breakup at all. I haven't driven the car around other than in and out of the garage, but I could not reproduce the symptoms that I have been having just free revving in the driveway. I really do hope this is the end of one problem so I can get on with the whole process of actually tuning the car!
M. Holtmeier
Posts: 3025
Joined: Mar 11, 2007 3:06 AM
Location: Dallas, Texas

Post by M. Holtmeier »

Glad to hear you got it!
I had a feeling it was a software setting that only you could catch from your hardware configuration. I accidentally hit the close button on a rev limit screen instead of "x"-ing out and it defaulted to -10 degrees timing above 100 rpm. Took me half an hour to figure out why car wouldn't start. :roll:

Looking forward to seeing maybe a dyno sheet or video of it in action!
Brad D.
Beamter
Beamter
Posts: 10735
Joined: Feb 12, 2006 12:00 PM
Location: San Antonio, TX
Contact:

Post by Brad D. »

grsmonkey wrote:Glad to hear you got it!
I had a feeling it was a software setting that only you could catch from your hardware configuration. I accidentally hit the close button on a rev limit screen instead of "x"-ing out and it defaulted to -10 degrees timing above 100 rpm. Took me half an hour to figure out why car wouldn't start. :roll:

Looking forward to seeing maybe a dyno sheet or video of it in action!
Man, it usually is the simple little things that make you chase your tail. However, I will say that through diagnosing these problems I have become very familiar with the internal workings of MS and am better for it. I am looking forward to actualyl starting the tuning process and getting the car on my friends Dyno Dynamics dyno and do some steady state tuning once I have decent, safe base tune. Should be fun!
GregATL
Posts: 792
Joined: Feb 12, 2006 12:00 PM
Location: Appomattox Va

Post by GregATL »

Looks great. I am curious to know how it runs once you have it sorted out. Thanks for sharing so much information about your buildup.
Brad D.
Beamter
Beamter
Posts: 10735
Joined: Feb 12, 2006 12:00 PM
Location: San Antonio, TX
Contact:

Post by Brad D. »

Well, I actually got to drive the car for about an hour tonight and I have the <90kpa region reasonably sorted out. The car runs very well and is super smooth with the exception of acceleration enrichment which is currently "disabled" for early tuning purposes. I forayed into a bit of boost and saw about 5 psi by 3200rpm with only 50% throttle and it felt great. I have my AFRs in this region around 12.3:1 which is good. I haven't even gone to WOT so I can't imagine how fast this thing is going to be when it is totally sorted. I am so excited now that I am past the initial gremlins which caused me so much grief. It feels good to finally drive my creation. :banana:
GregATL
Posts: 792
Joined: Feb 12, 2006 12:00 PM
Location: Appomattox Va

Post by GregATL »

Awesome news. You have done a fine job on that car. I am excited for you. Feeling a sense of accomplishment yet? I love a good home brew turbo setup. One of these days I'll get to do one myself. Not unhappy with the TCD kit at all just like to fab stuff.
Brad D.
Beamter
Beamter
Posts: 10735
Joined: Feb 12, 2006 12:00 PM
Location: San Antonio, TX
Contact:

Post by Brad D. »

Thanks for the kind words, and yes, I definitely feel a sense of accomplishment. It has a been a learning experience just getting to this point. I think that is one of the best parts about this whole DIY project is that my knowledge and fab skills have improved immensely. Im sure there are more gremlins to be dealt with but at this point I'm sure I can deal with whatever I'm dealt.
Brad D.
Beamter
Beamter
Posts: 10735
Joined: Feb 12, 2006 12:00 PM
Location: San Antonio, TX
Contact:

Post by Brad D. »

Well, the last two days, I have driven the car to work and back, which is about a 30 mile round trip and the car has run very well. I pretty much have the vacuum area of the VE table pretty well tuned. I still need to tweek the closed loop idle as its not quite right but overall its pretty good. Now I can start bringing in some o2 feedback to tune for cruise economy. I have begun to slowly creep into boost to make sure my AFRs are transitioning nicely rich and its looking good. I still havent gotten to full boost (7psi WG spring for now) but I will in time. Once I get more boost tuning done, I will implement some form of boost control so I get faster spoolup w/o the wastegate cracking early like it does on just the spring. Man this stuff is a whole lot of fun. Being someone who can't leave anything well enough alone, Megasquirt is great I can tweek and tune until my heart is content.
Sir Young
Posts: 28
Joined: Jul 05, 2007 3:12 AM
Location: So Cal
Contact:

Post by Sir Young »

Looks like you did fantastic work. Do mine next? :laugh:
InkaCola
Posts: 757
Joined: Feb 20, 2007 1:24 PM
Location: Cordova-TN

Post by InkaCola »

Pat P wrote:this is a very nice Diy project.... :alright:
you yourself sir have a very nice turbo m30.
Brad D.
Beamter
Beamter
Posts: 10735
Joined: Feb 12, 2006 12:00 PM
Location: San Antonio, TX
Contact:

Post by Brad D. »

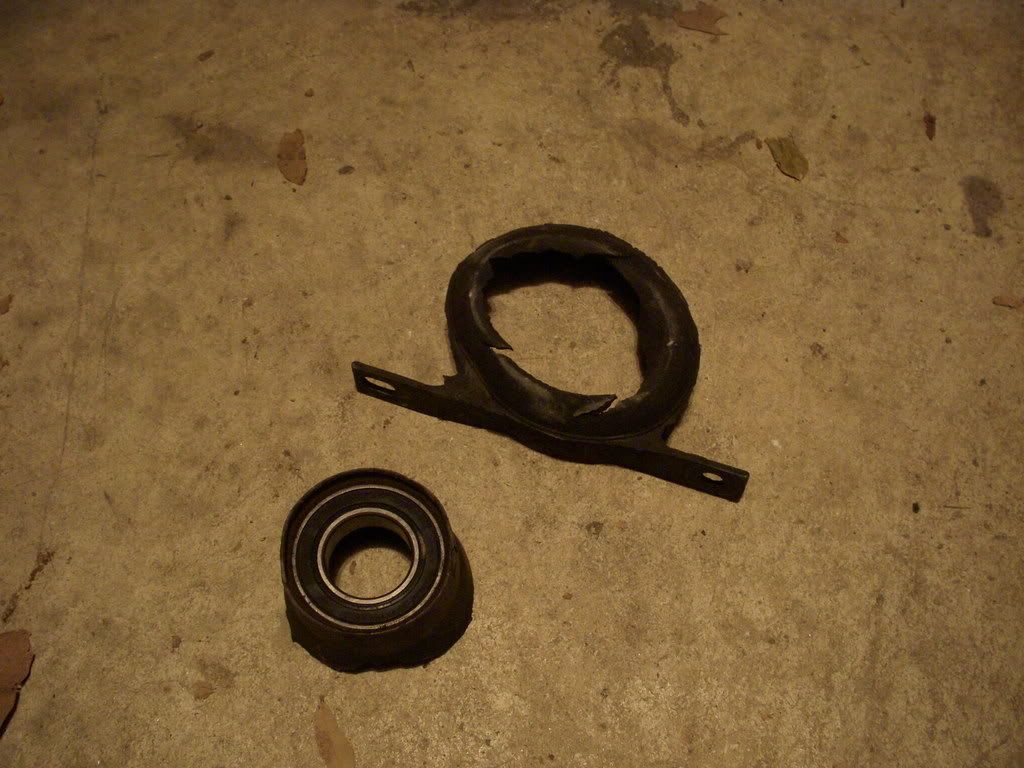
Man, the car runs great and the wastegate spring holds a solid 5psi all the way to redline. AFR is a nice 12.2:1 under boost. The car feels so much faster, easily faster than the e28 m5s I have driven. I have been made a believer in the turbo big six - it's so much fun. However, I did have a bit of a setback. When I first got the car running I thaught I head the occasional thumping from a dying center bearing. Well, all the boost didn't help and I promptly finished it off. Here is a little sampling of the destruction.
Image
Once I had that sorted out it was time for more boost. I then kept blowing off IC piping so I decided to bead roll all of my piping. No more popped hoses. I think this turbo is going to systematically find all of the cars shortcomings and make them glaringly obvious, but this typically leads to cool upgrades so I'm not complaining. 8)
M. Holtmeier
Posts: 3025
Joined: Mar 11, 2007 3:06 AM
Location: Dallas, Texas

Post by M. Holtmeier »

That's exactly what happened to my center bearing. Little did I know I had weak motor mounts that gave out, I think that contributed to a lot of my driveline problems. I have since replaced the bearing, filled 1/2 way with poly,along with all the other poly filled bushings.

It's soooo fun to tear stuff up though, isn't it? 8) :haul:
Nebraska_e28
Beamter
Beamter
Posts: 9058
Joined: Apr 13, 2006 11:18 PM
Location: Council Bluffs, IA
Contact:

Post by Nebraska_e28 »

Check w/member TT about about a Beyer DS. I've heard good things about them.
Brad D.
Beamter
Beamter
Posts: 10735
Joined: Feb 12, 2006 12:00 PM
Location: San Antonio, TX
Contact:

Post by Brad D. »

grsmonkey wrote:That's exactly what happened to my center bearing. Little did I know I had weak motor mounts that gave out, I think that contributed to a lot of my driveline problems. I have since replaced the bearing, filled 1/2 way with poly,along with all the other poly filled bushings.

It's soooo fun to tear stuff up though, isn't it? 8) :haul:
Heck yes it's fun to tear stuff up! I have two new motor mounts that I ordered with the center bearing that I need to poly fill and install along with ploy filling my fairly new diff mount before I kill it too.
Post Reply