Pedal Brakcet Reinforcement
-
Slow_Ballin'
- Posts: 1425
- Joined: Nov 15, 2010 12:37 AM
- Location: Sacramento
Pedal Brakcet Reinforcement
So me pedal box is shot and I have the funds to get it replaced. I am gonna be buying an OEM replacement but I dont wanna replace it ever again. So I am gonna have it reinforced before installation.
What are the key/crucial places to reinforce so that the pedal box can last longer? What are the normal areas that are stressed and tend to break?
If anyone has welded one up before and has some pictures of a beefed up/reinforced unit?
Thanks everyone! I will post up pictures of mine this week once it is all welded up.
-
tangerineman91
- Posts: 362
- Joined: Mar 28, 2010 1:38 AM
- Location: Chattanooga, TN
-
Slow_Ballin'
- Posts: 1425
- Joined: Nov 15, 2010 12:37 AM
- Location: Sacramento
Check out this thread.
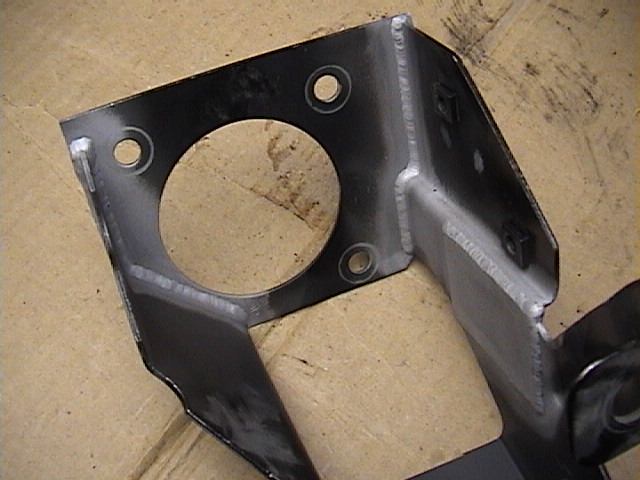
The second photo in the response shows the bracket upside down. You see the rectangular patch in that photo? That's where the usual failure is. The failure is usually a straight fracture crack running along the top edge (in that photo) of the patch. It starts at the upper right corner and runs to the left, until it gets to the plate that mounts to the firewall.
When I replaced the bracket, I had the new one reinforced. I asked the welder to thicken the edge of the sheet metal about a 3/4" inch in either direction of where the crack starts. Basically, reinforcing the metal at those tight radii.
-
Slow_Ballin'
- Posts: 1425
- Joined: Nov 15, 2010 12:37 AM
- Location: Sacramento
-
Blue Shadow
- Posts: 10294
- Joined: Feb 12, 2006 12:00 PM
- Location: SE PA
Now maybe you and I will not be the only ones to know this thread exists.RonW wrote:Check out this thread.

Thanks for posting this thread picture again.
Is that reinforcement patch to "thicken the edge of the sheet metal" a similar gauge of sheetmetal welded to the bracket?
More importantly how has this worked for you guys? No more cracks and failed clutch cylinders?
-
Blue Shadow
- Posts: 10294
- Joined: Feb 12, 2006 12:00 PM
- Location: SE PA
Re: Ron W?
My experience is that the bracket splits as I described in my earlier post. It broke in my 535is that has only 100k miles. It broke (more than once) in the 535i with over 400k. Here's hoping the reinforced brackets last longer. Once they break they shorten the life of the clutch master cylinder, and can also cause the over-center helper spring assembly to break. (That happened to me too. Replacement was not fun.)Mab1957 wrote:Ron W
What has your experience been?
-
Slow_Ballin'
- Posts: 1425
- Joined: Nov 15, 2010 12:37 AM
- Location: Sacramento
Replacement pedal bracket different than original
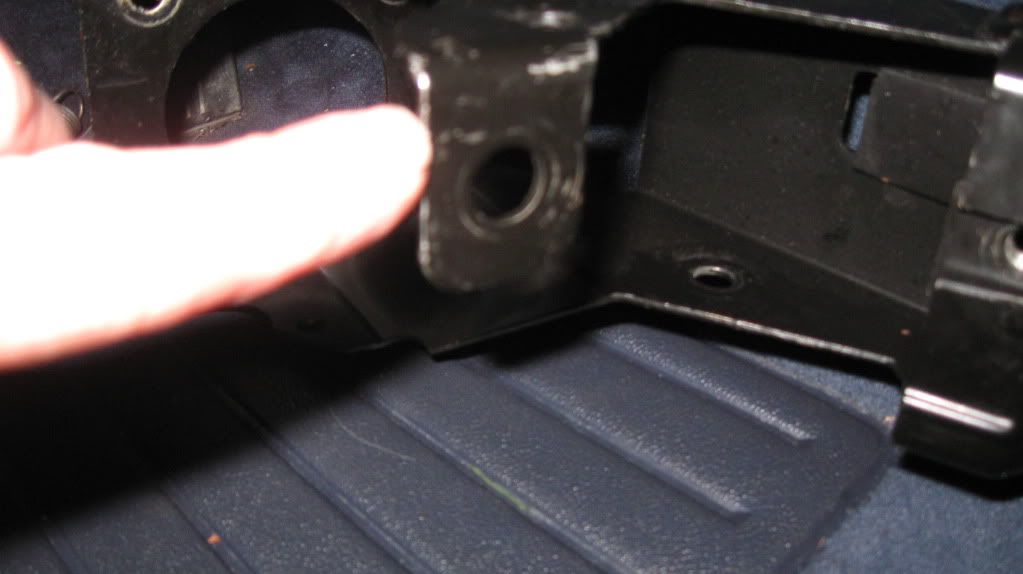
Replacement pedal bracket is punched with a square hole instead of round hole where the electric switch mounts at the clutch pedal. Anyone else run into this, and if so how did you mount the switch?
new
original
My old bracket was cracked about 11/4 inches along the break in the clutch master cylinder side.
new

original

My old bracket was cracked about 11/4 inches along the break in the clutch master cylinder side.
Re: Replacement pedal bracket different than original
Washers. Actually it was that way when I bought mine, when it was time to replace it I didn't realize it was as cheap as it was and I got a used one out of an eta that was an exact replacement. Regardless, fender washers is the answer.Mab1957 wrote:Replacement pedal bracket is punched with a square hole instead of round hole where the electric switch mounts at the clutch pedal. Anyone else run into this, and if so how did you mount the switch?
-
Slow_Ballin'
- Posts: 1425
- Joined: Nov 15, 2010 12:37 AM
- Location: Sacramento
Re: Replacement pedal bracket different than original
Will do! Thanks, MikeMike W. wrote:Washers. Actually it was that way when I bought mine, when it was time to replace it I didn't realize it was as cheap as it was and I got a used one out of an eta that was an exact replacement. Regardless, fender washers is the answer.Mab1957 wrote:Replacement pedal bracket is punched with a square hole instead of round hole where the electric switch mounts at the clutch pedal. Anyone else run into this, and if so how did you mount the switch?
Slow Ballin' - Glad you found someone to do it for you. On the road again
Aargh
Was bleeding the clutch and the overspring pushrod broke!! Aaargh 

Looking for another one now - BRIAN help!

Hope to be able to still bleed it all down and slip in the replacement afterward. Wow it is hard to work up in there!
Anybody got any helpful tips, or one of these assemblies in the DC Metro area I can come get now????
Looking for another one now - BRIAN help!

Hope to be able to still bleed it all down and slip in the replacement afterward. Wow it is hard to work up in there!
Anybody got any helpful tips, or one of these assemblies in the DC Metro area I can come get now????
We used the new pressure bleeder ($55 BavAuto) to ensure the Master and Slave bled properly. Pedal firmed up and continues to work nicely. Finished about midnight prior to our Thursday morning departure for The Vintage. After 3 weeks we're still functioning properly but I do need to adjust the brake pedal switch as the lights stay on sometimes.
Re: Aargh
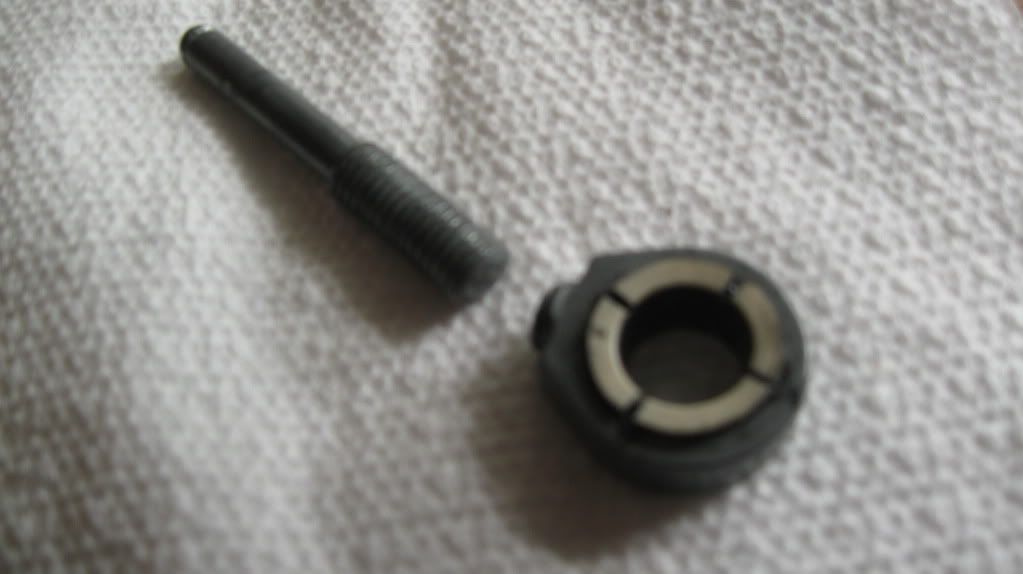
Late-- but that unit is not broke, if you didn't lose the tiny circlip that holds the plastic seat (shown in pic) at the end of the stud (also shown, circlip grove at top) you can repair it in a few minutes.Mab1957 wrote:Was bleeding the clutch and the overspring pushrod broke!! Aaargh

Looking for another one now - BRIAN help!
Hope to be able to still bleed it all down and slip in the replacement afterward. Wow it is hard to work up in there!
Anybody got any helpful tips, or one of these assemblies in the DC Metro area I can come get now????
Re: Aargh
In response to the helpful tip request: I know you've completed your install Matt, but thought I'd add this for future seekers.Mab1957 wrote:Was bleeding the clutch and the overspring pushrod broke!! Aaargh

Hope to be able to still bleed it all down and slip in the replacement afterward. Wow it is hard to work up in there!
Anybody got any helpful tips...
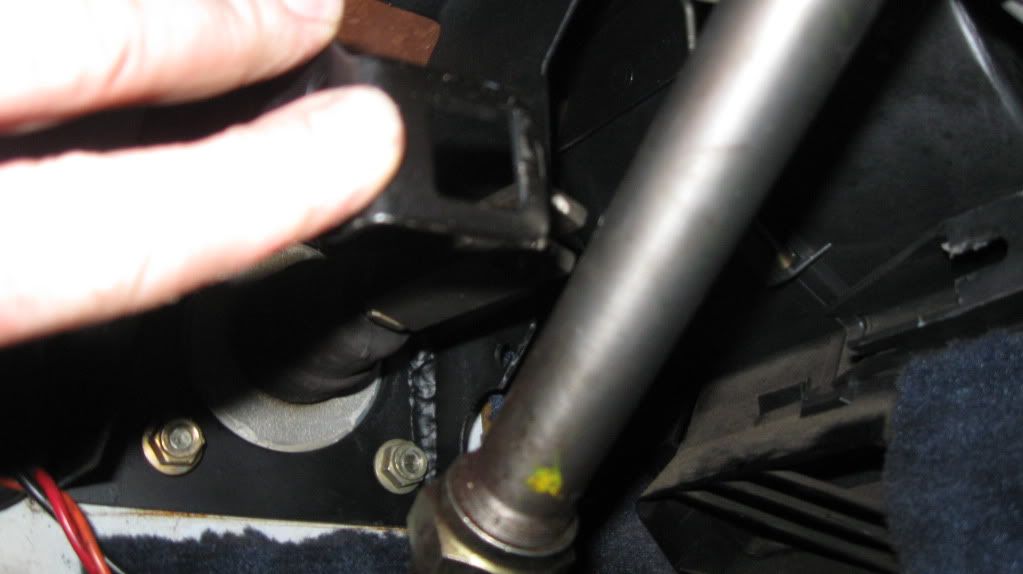
With the MC body bolted to the bracket and its' push-rod still unattached, raise the pedal as high as you can.
To raise the pedal you must also unbolt and remove the small bracket that holds the cruise control clutch release switch.
Unbolt the broken over-under spring from the mount, and bolt on the new one*.
Be sure the fins on the spring side are perpendicular to the mounting bolt hole so they will sit solidly in the bracket groove.
Now lower the pedal placing the fins in the groove and bolt the MC plunger to it's respective mounting tab*.
* Both the MC and Spring bolt to the right sides of their clutch pedal tabs.
U R done!
The missing circlip isn't the problem represented in that pic.nnarth212 wrote:Late-- but that unit is not broke, if you didn't lose the tiny circlip that holds the plastic seat (shown in pic) at the end of the stud (also shown, circlip grove at top) you can repair it in a few minutes.Mab1957 wrote:Was bleeding the clutch and the overspring pushrod broke!! Aaargh

Looking for another one now - BRIAN help!
Hope to be able to still bleed it all down and slip in the replacement afterward. Wow it is hard to work up in there!
Anybody got any helpful tips, or one of these assemblies in the DC Metro area I can come get now????
-
hinterländer
- Posts: 79
- Joined: Mar 02, 2011 3:16 PM
Re: Aargh
IDK if by BRIAN you meant me (probably not!), but when mine broke I made one out of tool steel; didn't care for a precision cast component there. I had access to machine tools at the time, but I don't right now. You could really use any kind of steel you want, I just had some tool steel just the right size to make mine from. It's not tremendously difficult to install/remove so you could replace with stock if you need to get back on the road right away, but I like not having to worry about this part anymore. I don't think it would be very expensive if you know a machinist with time on his hands.Mab1957 wrote:Was bleeding the clutch and the overspring pushrod broke!! Aaargh

Looking for another one now - BRIAN help!
[img]picture%20of%20over-center%20pushrod[/img]
Hope to be able to still bleed it all down and slip in the replacement afterward. Wow it is hard to work up in there!
Anybody got any helpful tips, or one of these assemblies in the DC Metro area I can come get now????
Hope this helps!
-
Bimmerguy2002
- Posts: 11941
- Joined: Oct 03, 2007 3:04 PM
- Location: Lodi, California

