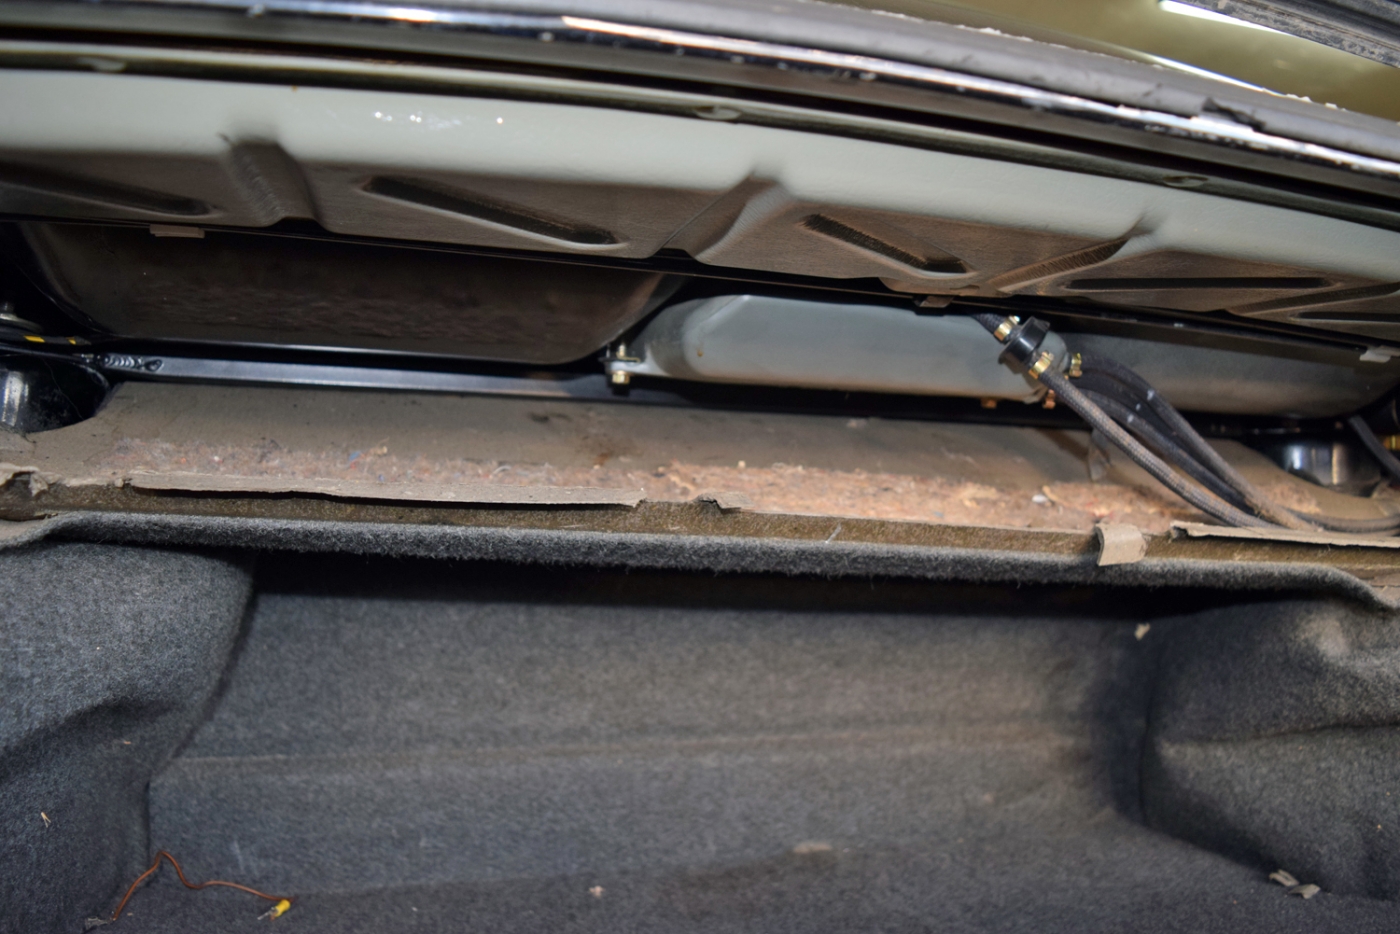
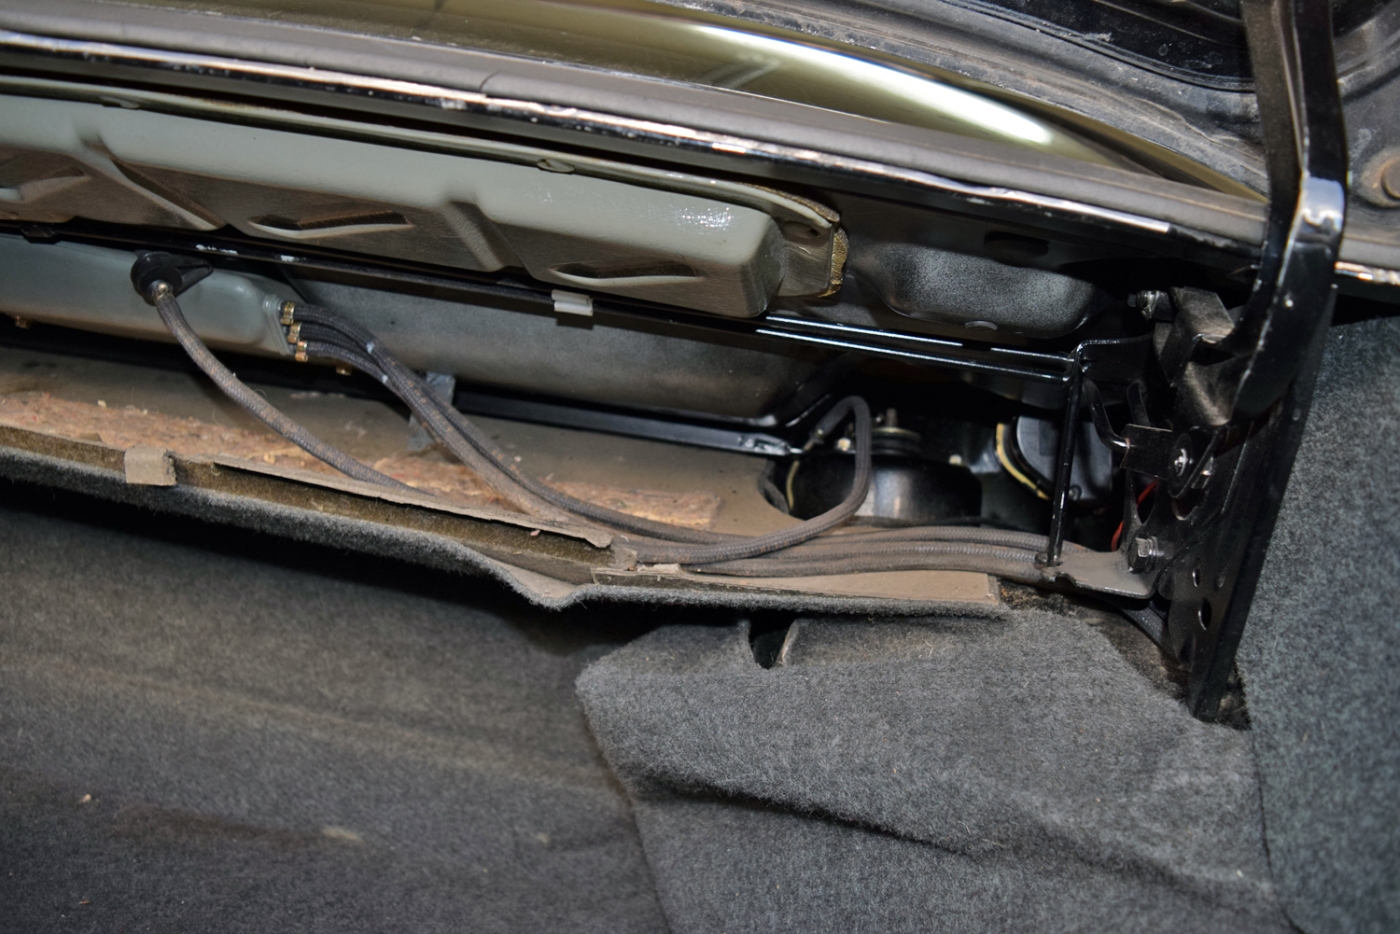
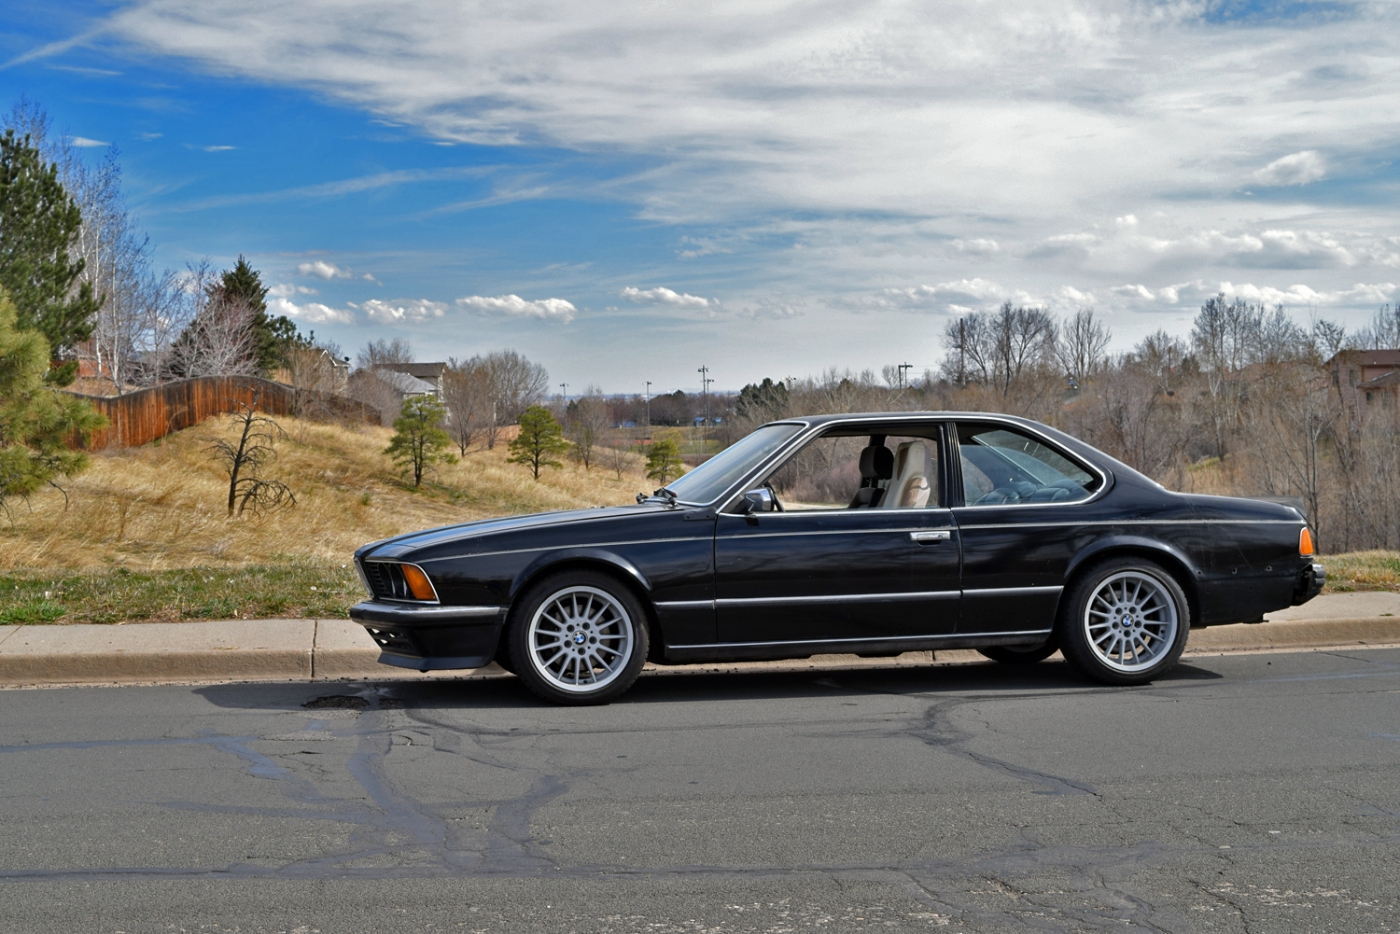
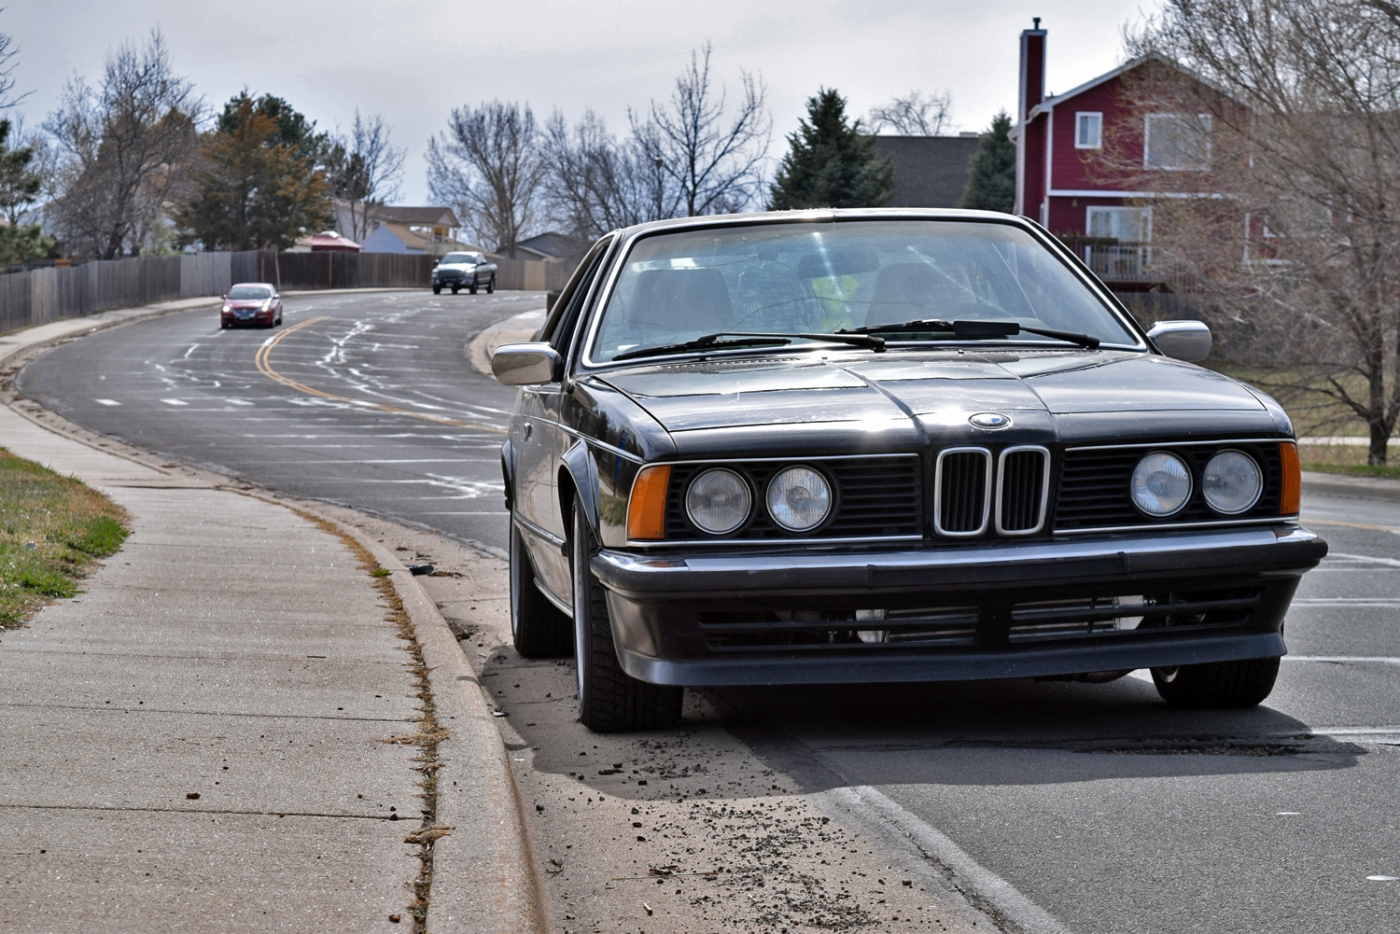
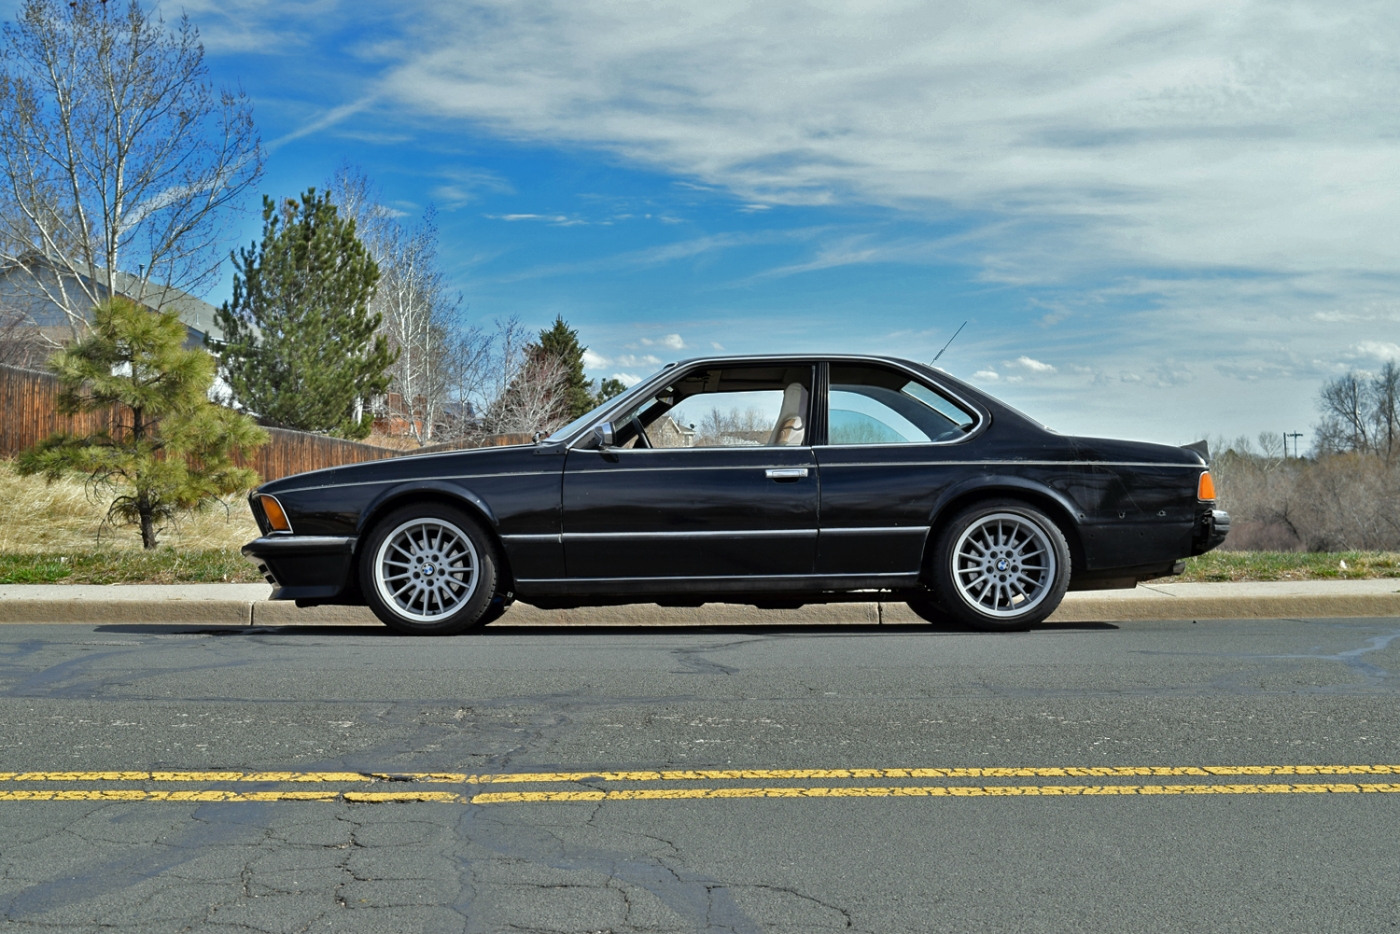
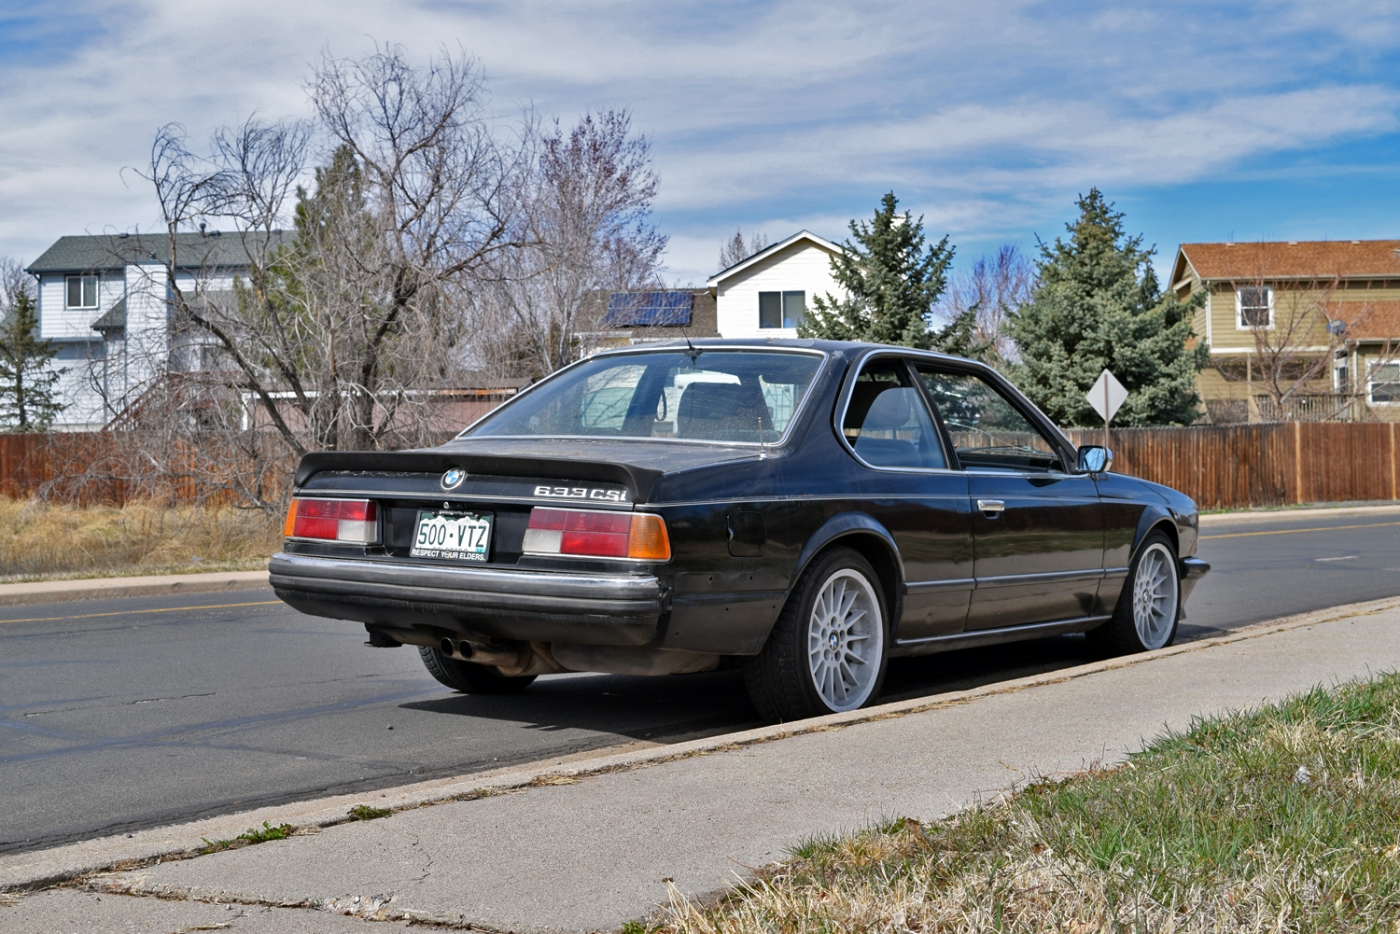
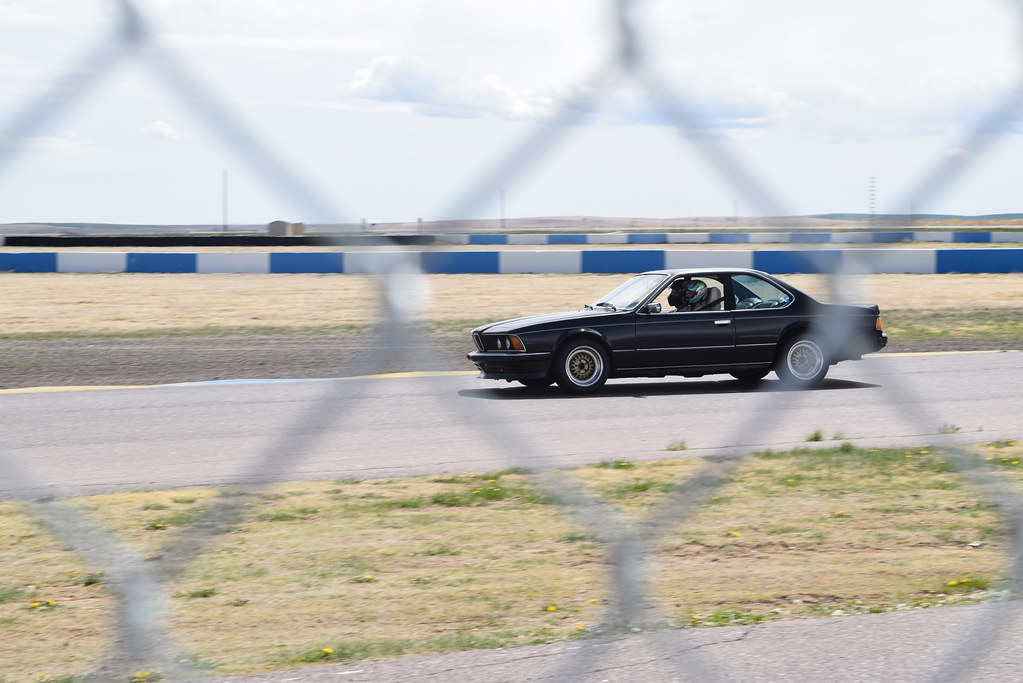
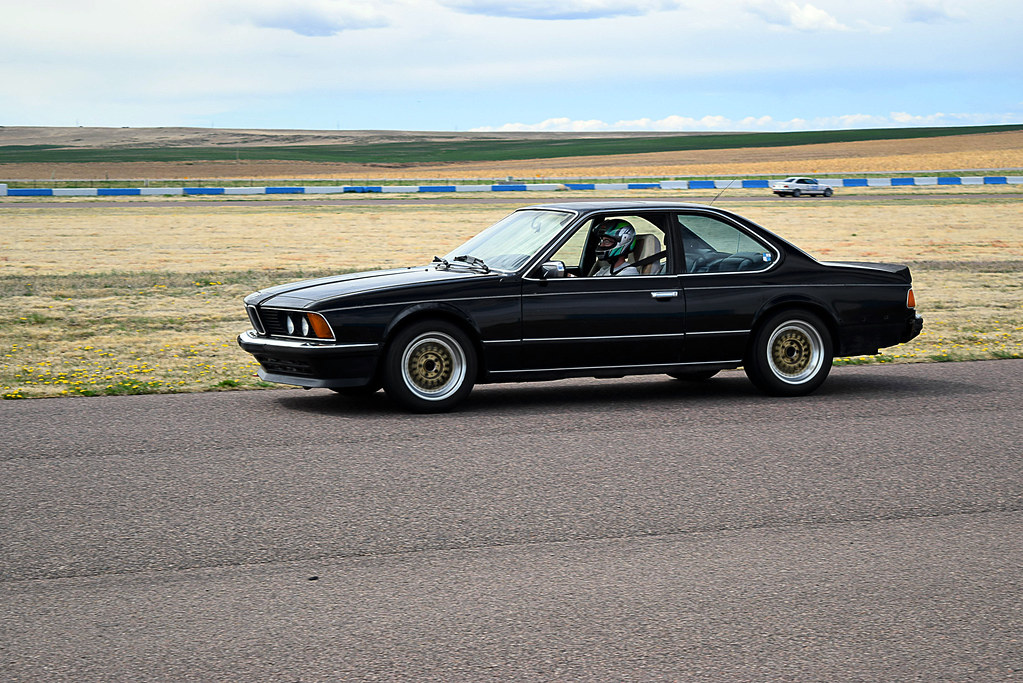
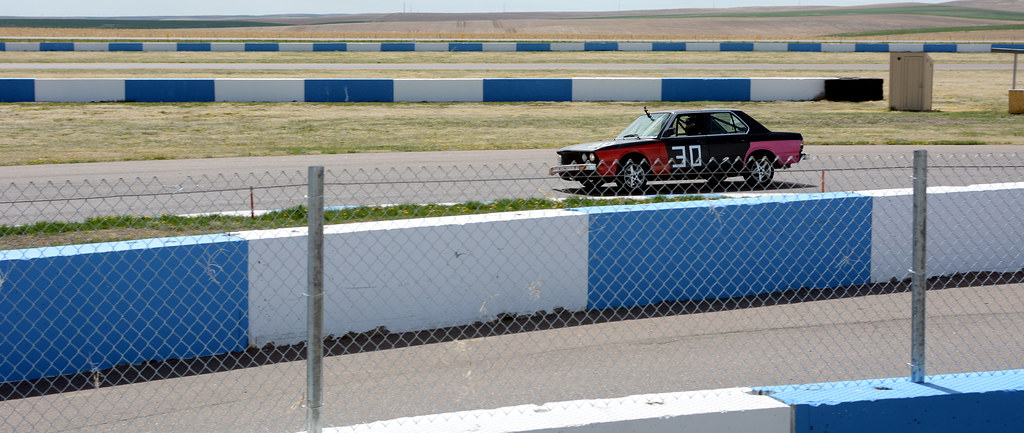
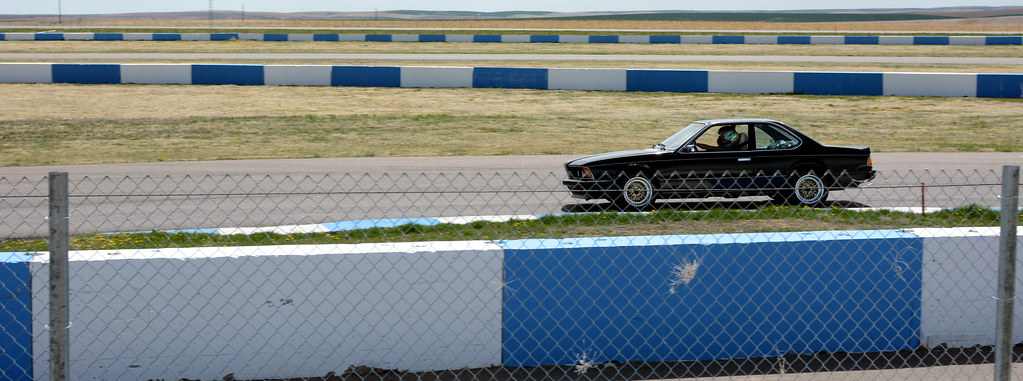
Page 5 of 14

Re: Callaway 633CSi - 10/28 - Video at the track!

Posted: Dec 21, 2015 4:32 PM
by Ken H.
The lurkers are sharking. Shovel yuhr freaking sydewaulk. :thanks:


:up:

Re: Callaway 633CSi - 10/28 - Video at the track!

Posted: Feb 25, 2016 11:02 AM
by tschultz
Ken H. wrote:The lurkers are sharking. Shovel yuhr freaking sydewaulk. :thanks:

:up:
No need to shovel the driveway when I don't use the garage for my winter car :rofl:

I made a bunch of headway now that things have slowed down a little bit since getting married and finishing another stage of home updates earlier in the month.

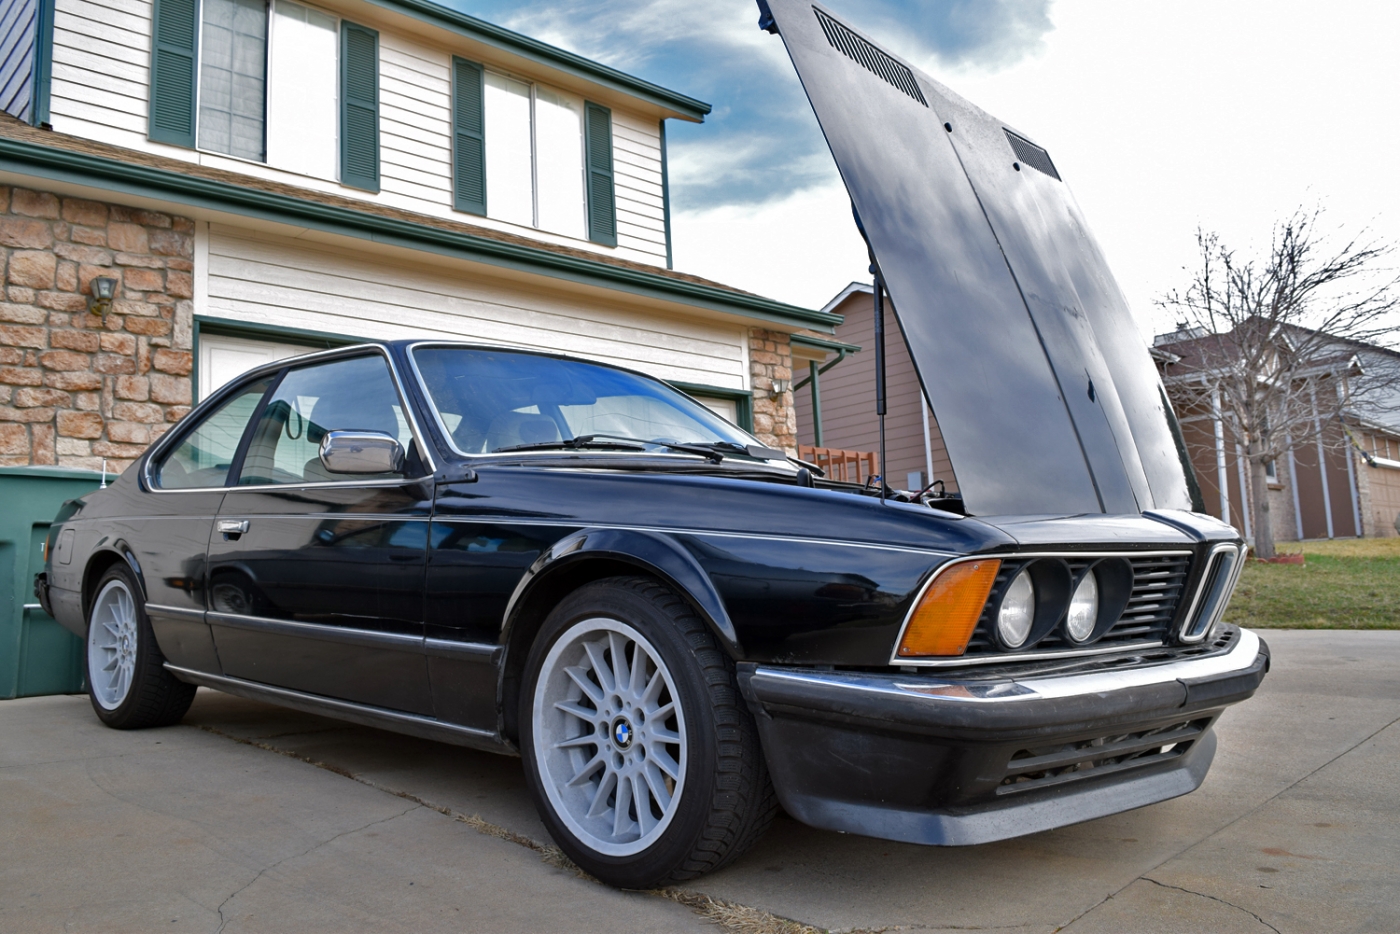
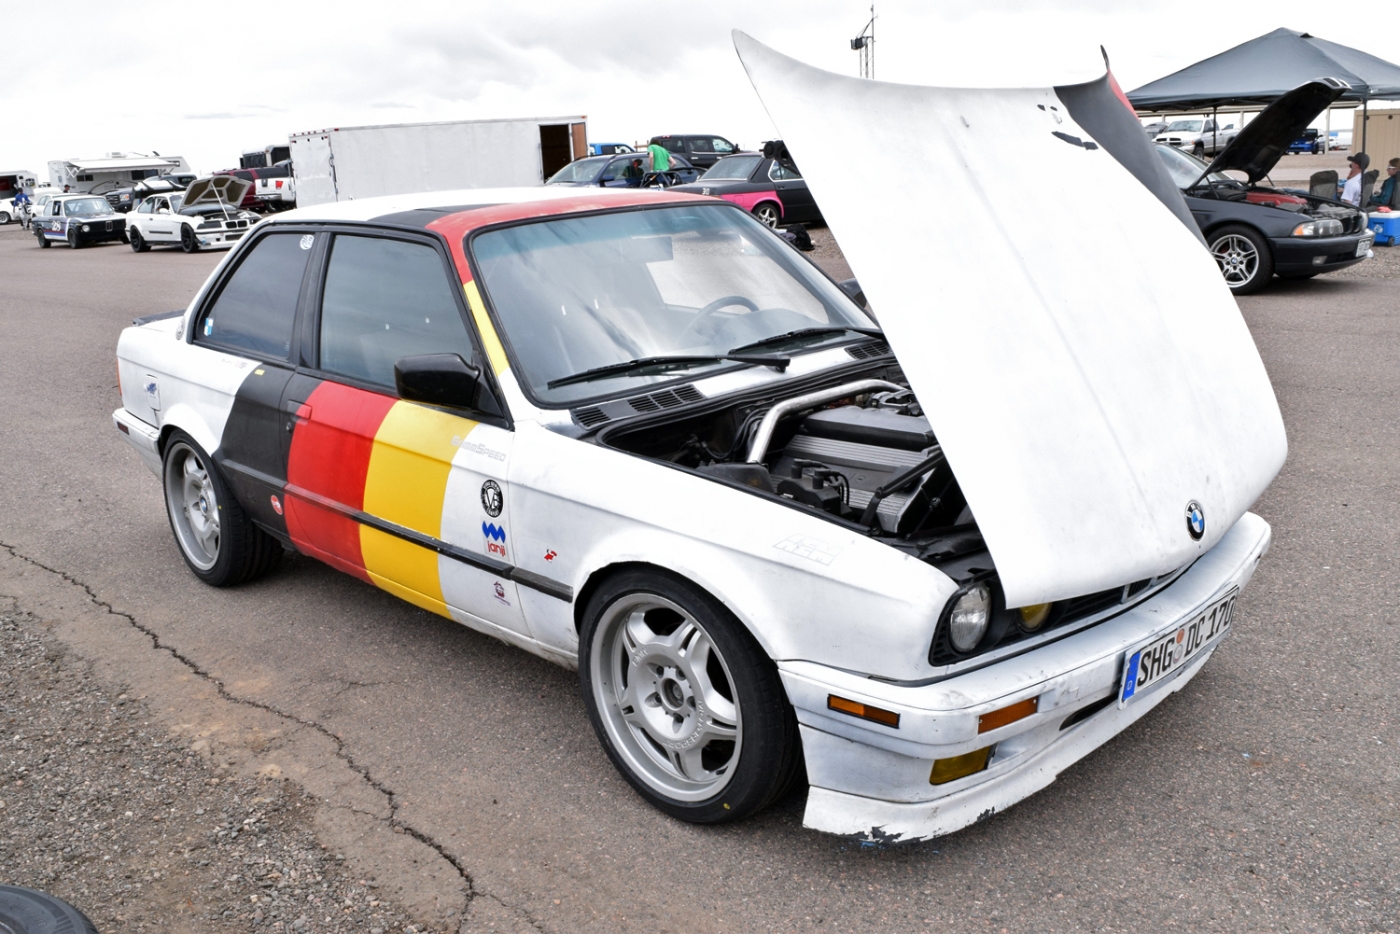
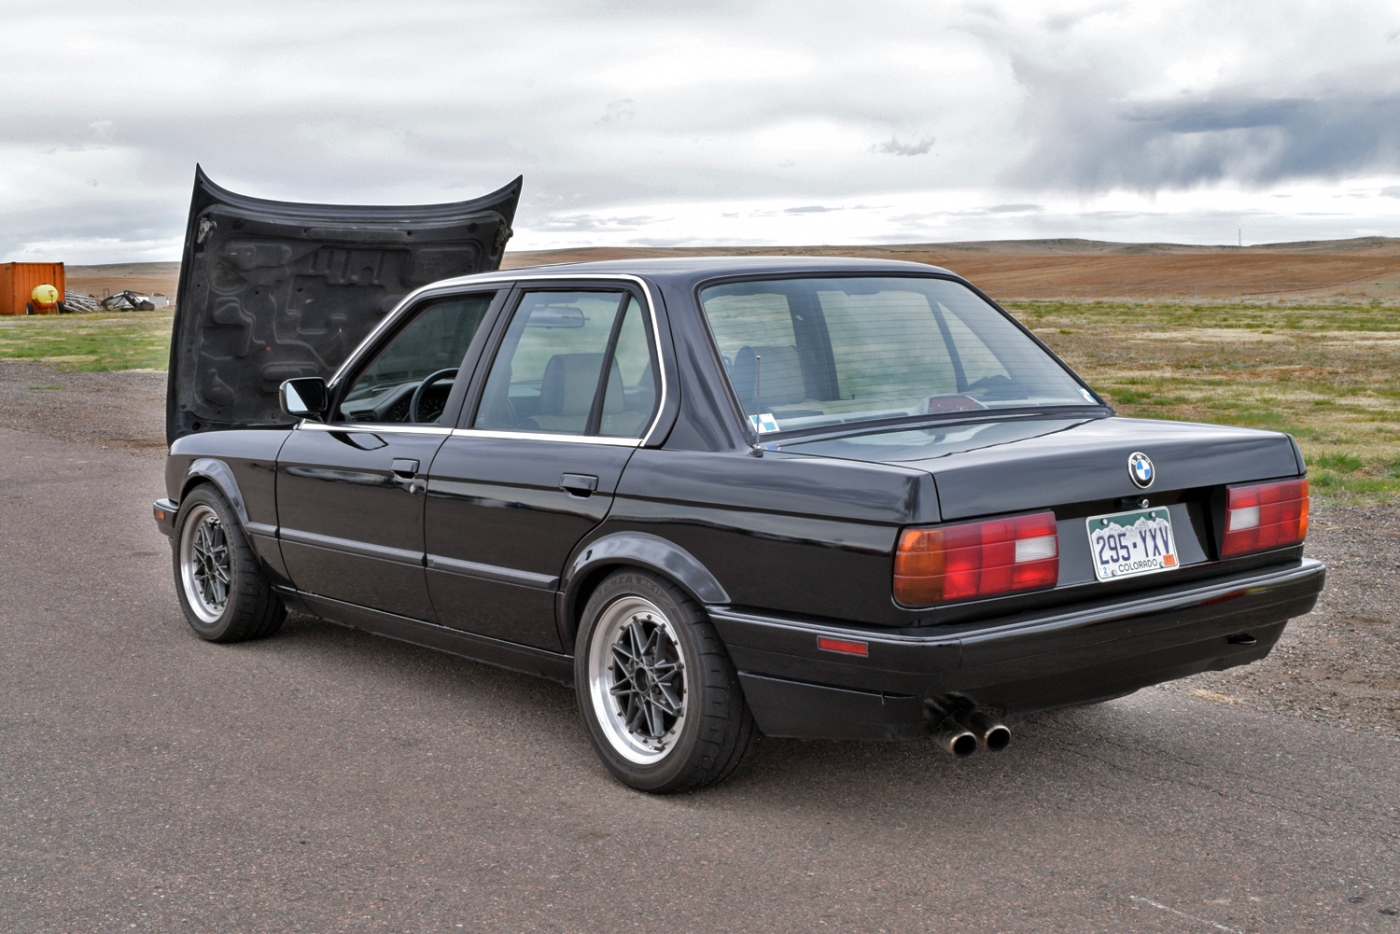
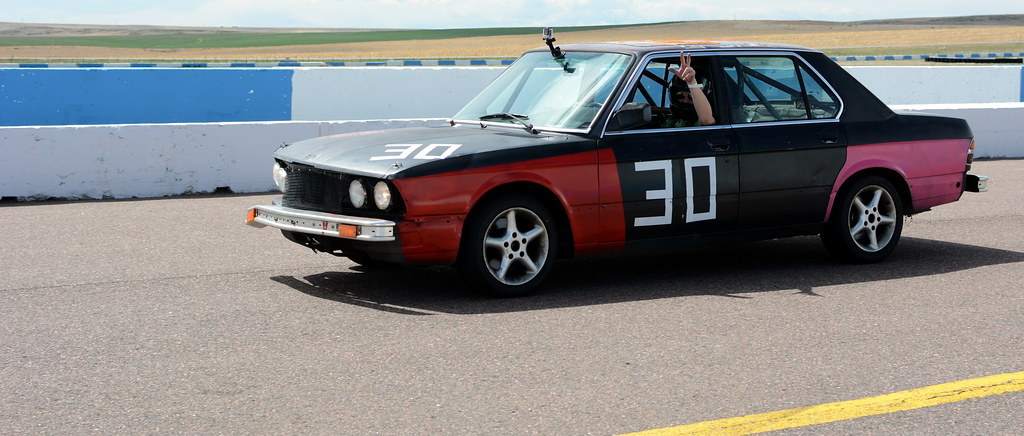
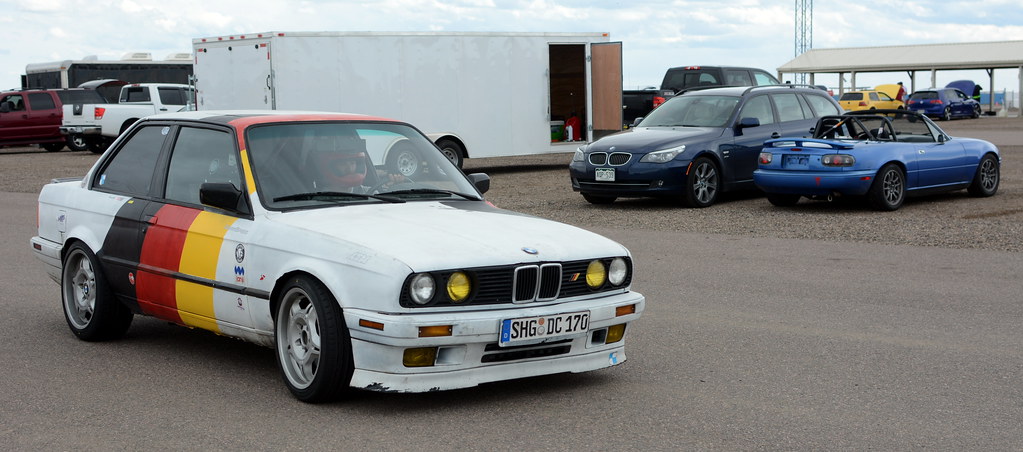
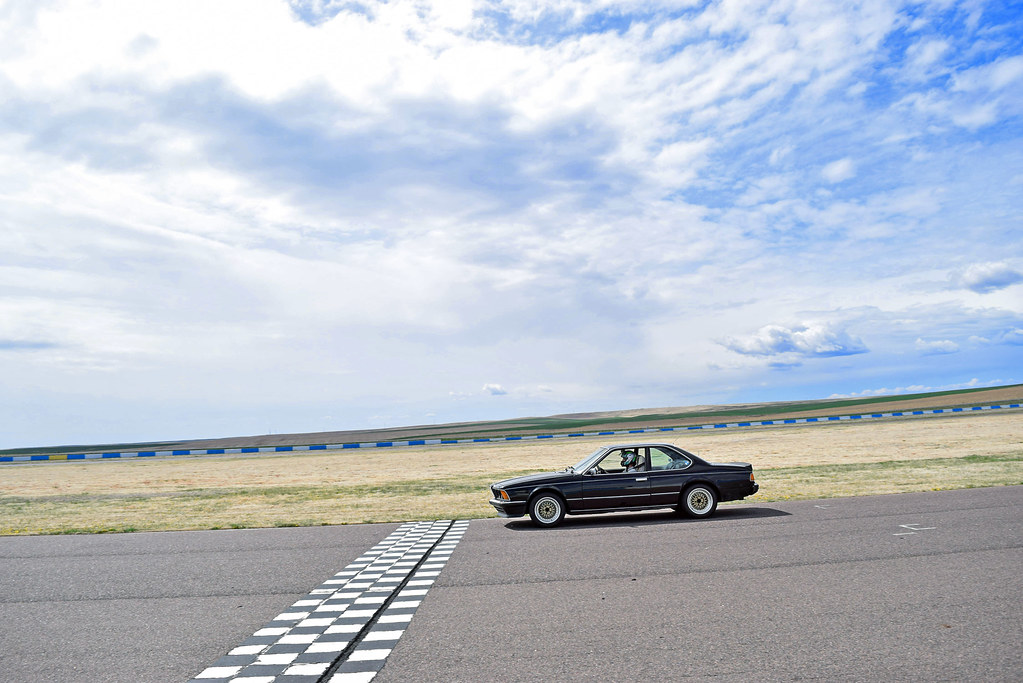
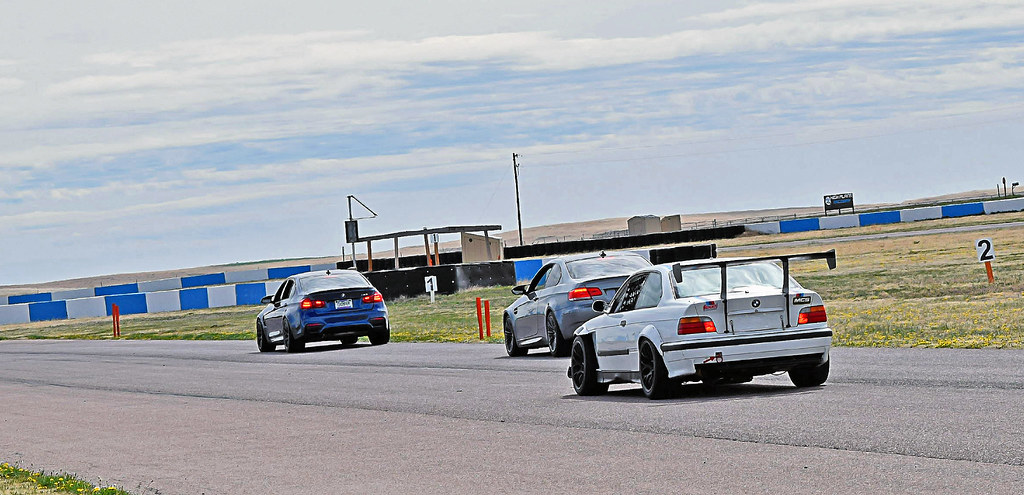
I recruited my brother to help me with my turbo swap since he was itching to get out of the house, so this past Saturday we went on a drive with some other BMW's. I took the euro 635 and had a blast. He was in the 318is with german stripes:

Image

Image

Image

Image


Anyway, we came back to my house after so that on Sunday we could start on my project. I have had this TCD turbo from Todd since summer of 2105 when he got me a great price on one. Considering he indicated that it would fit on the manifold and have clearance to the block, I decided to spring for it, although at the time I was still just getting the car running with the Rotomaster. It's been sitting patiently waiting ever since as I have slowly worked out the kinks in the car. The 633 has been reliable for me and is to the point that I have the basic turbo system operating reliably. This was confirmed when taking it out to a local lapping day. The only issue was a coupling popping off the Callaway manifold. I attribute that to the crapy hose clamps, but knew eventually I would upgrade.

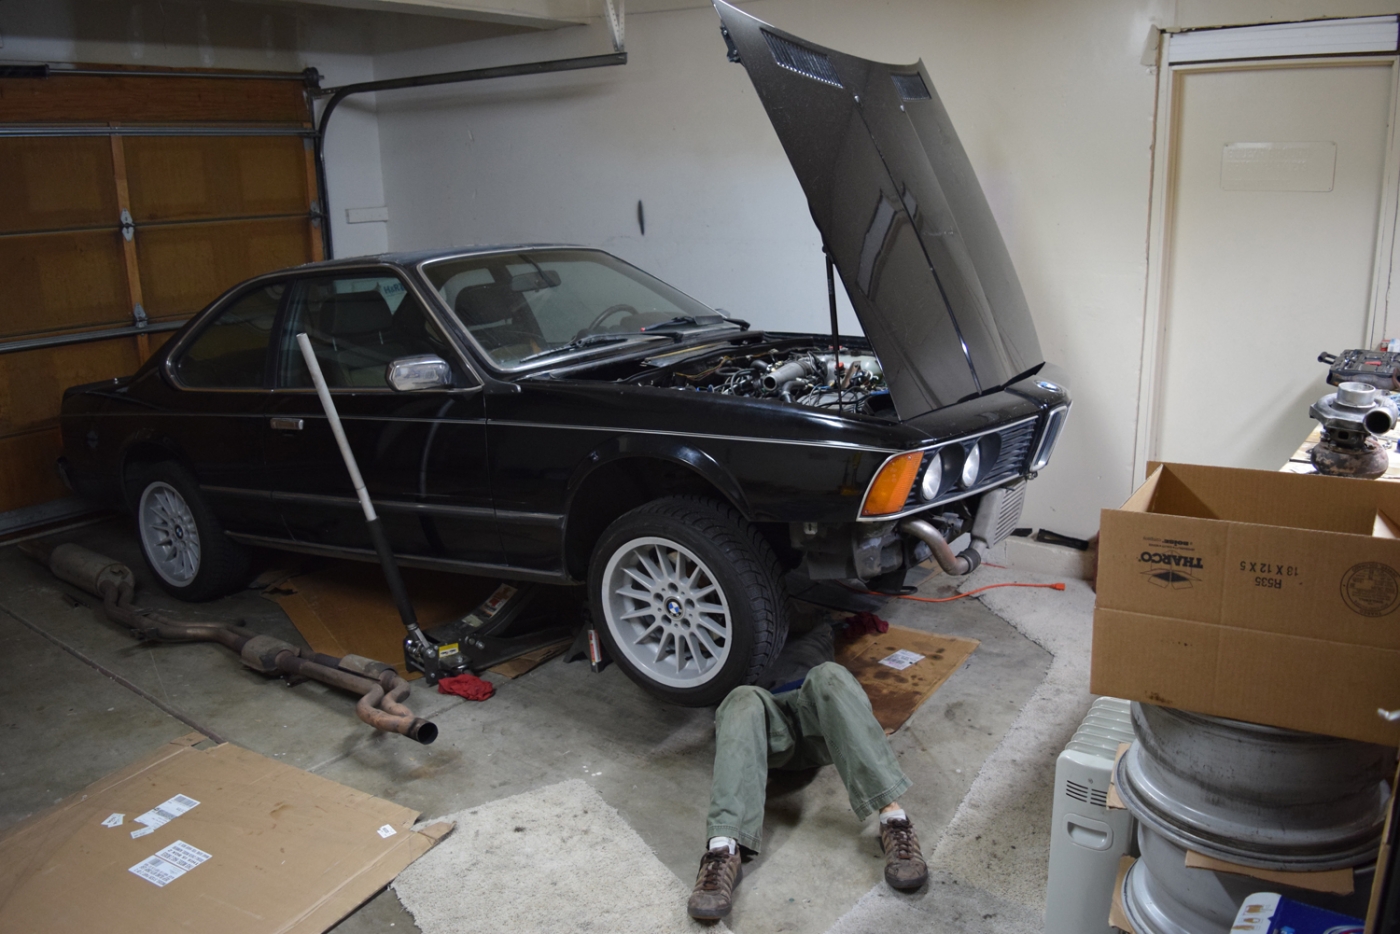
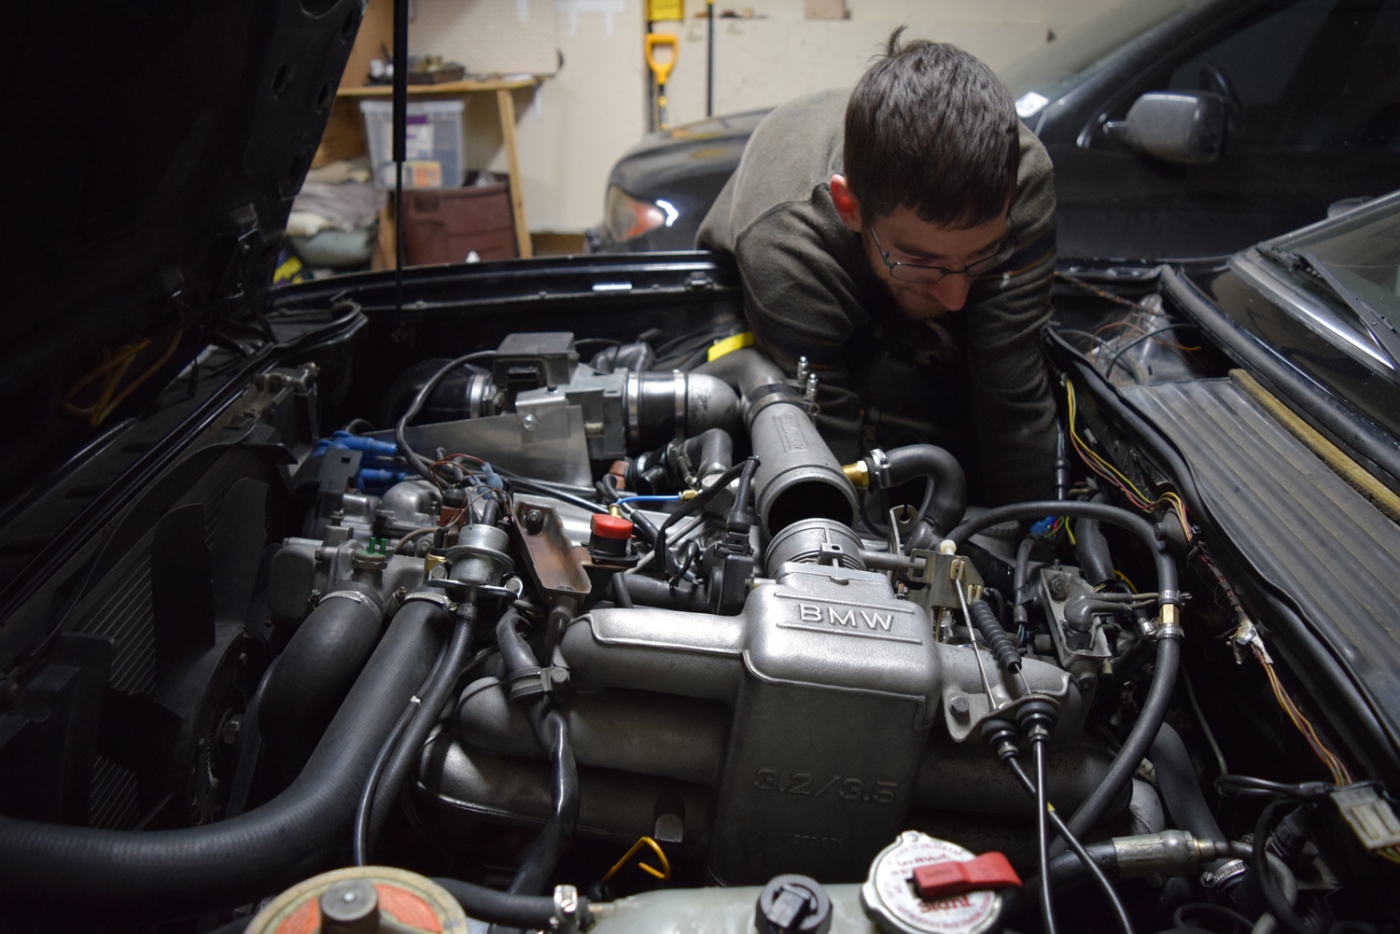
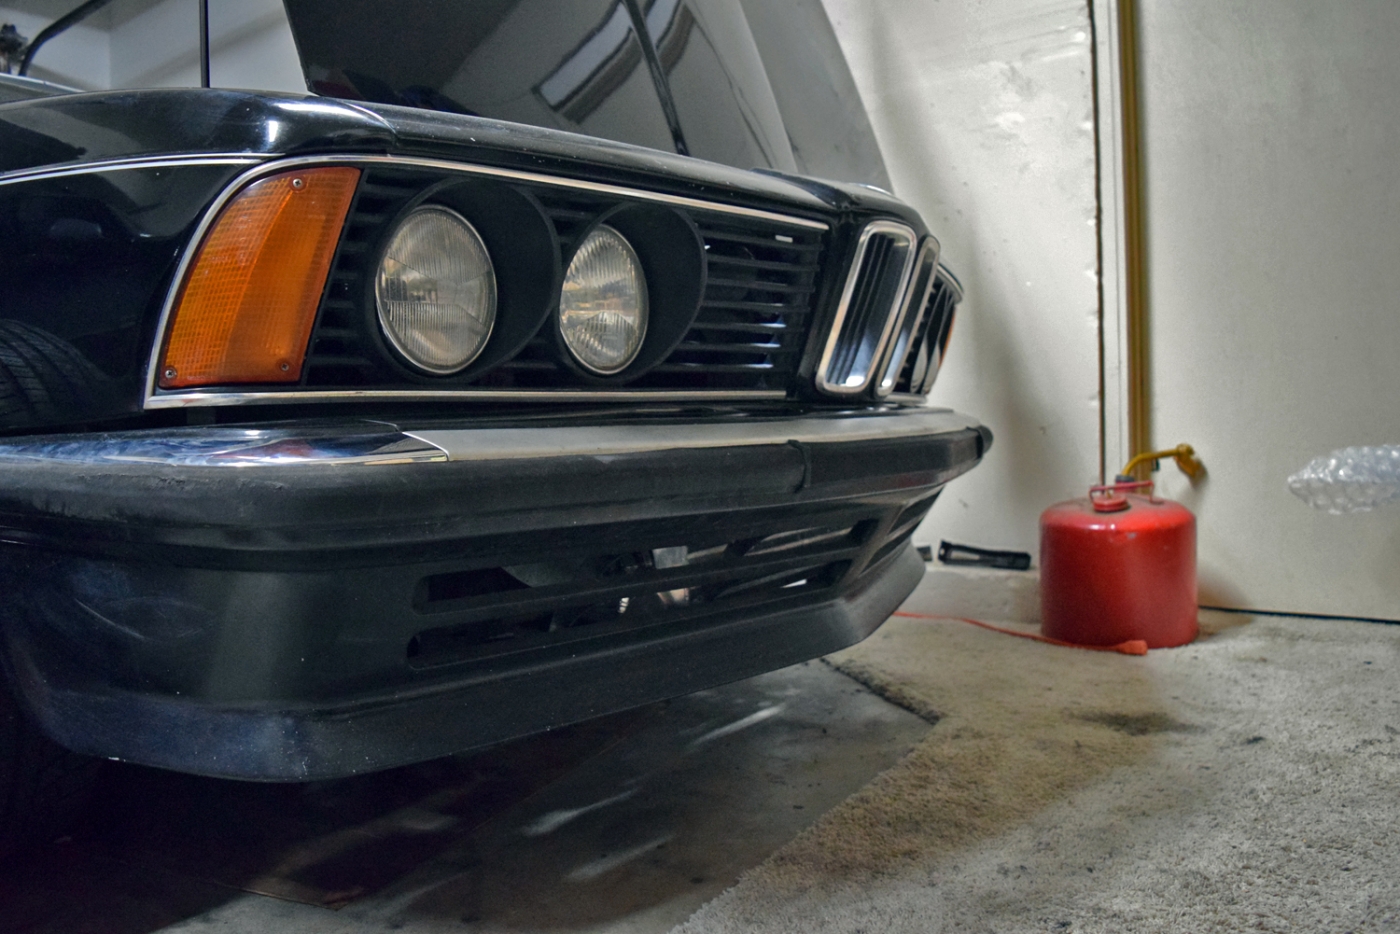
Onto the main content: I had prepared for the swap by pulling off the front spoiler- here's how the car sat when getting started:

Image

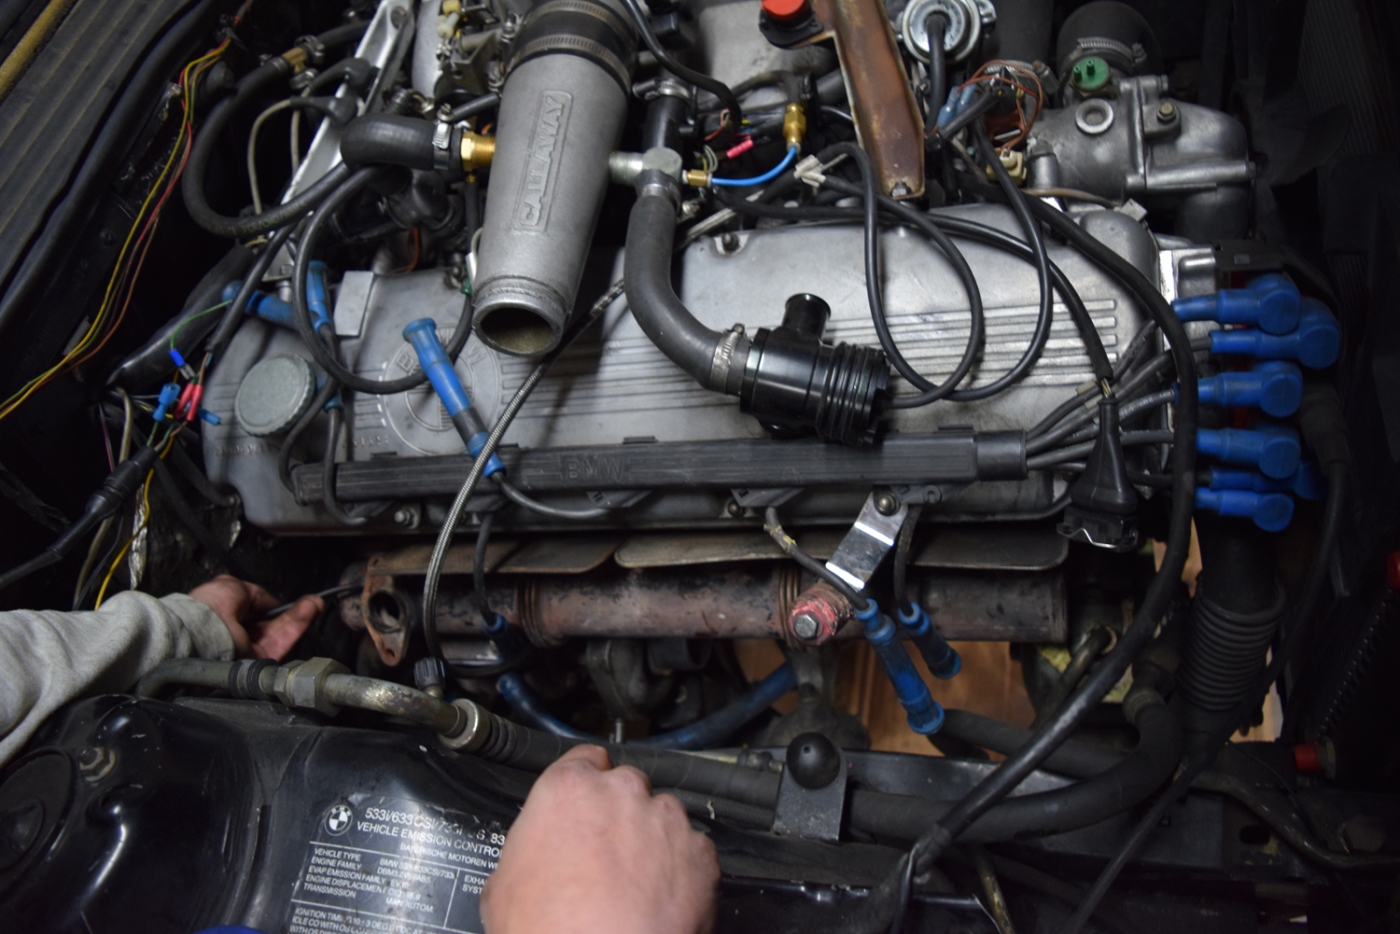
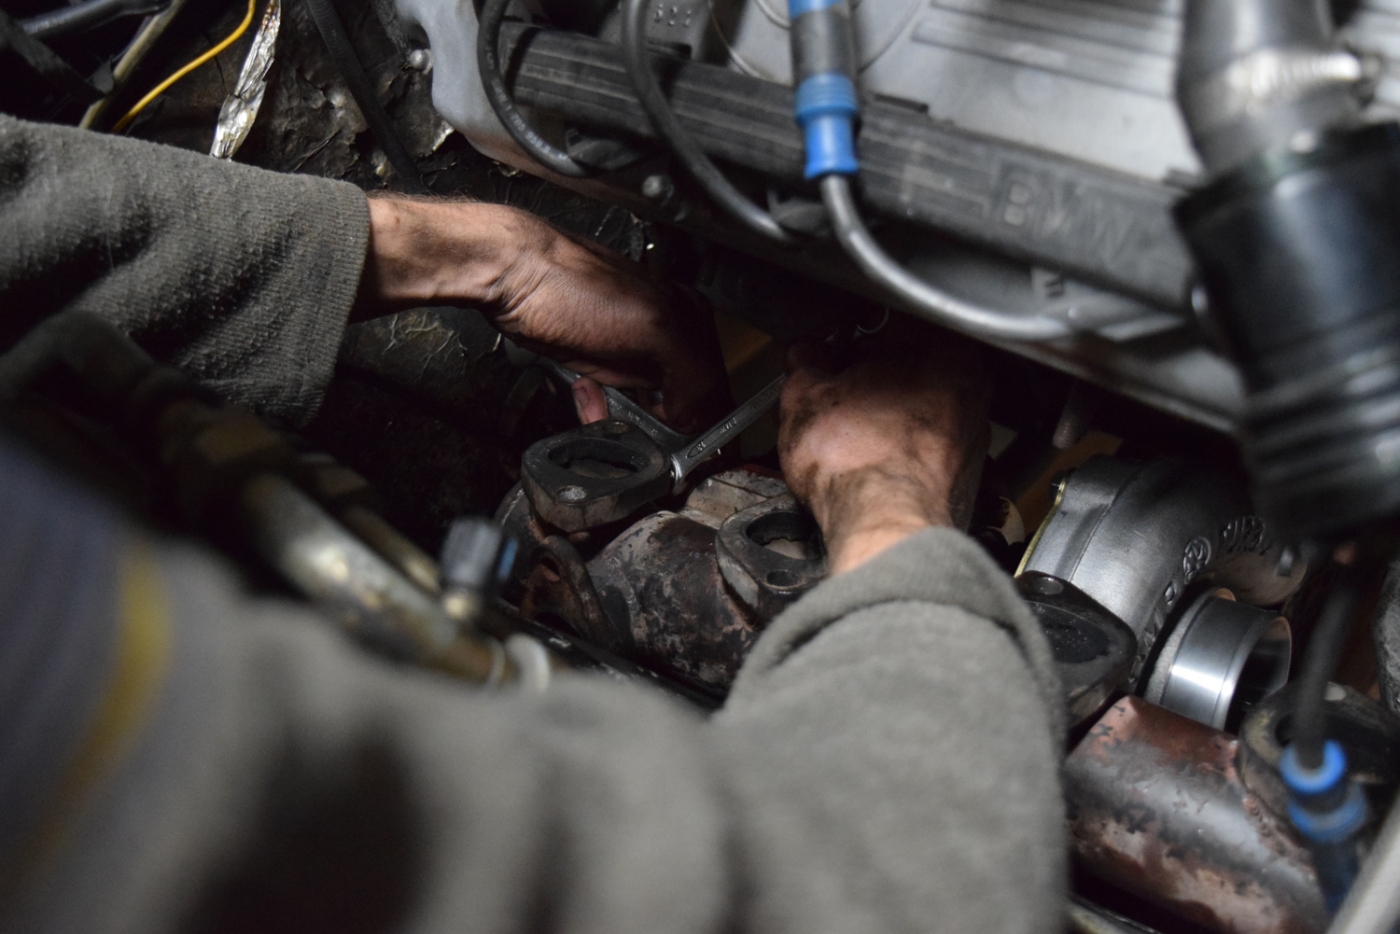
Then we took off the AFM and piping for access. The oil return line came off, the wastegate came off, and we could start removing the 12mm exhaust nuts.

Image

I had not been looking forward to this, but the nuts were all reasonably accessible, with the slowest one being #6 on the lower side. The advantage of doing this from when I did it last year was that it had been off about 3000 miles prior, and the engine was now secured to the chassis. The last time I did this, we had it on a dolly and could not get underneath to access the lower nuts, for safety reasons and clearance issues to the ground. Of course when on a dolly, it would also want to rock, so we couldn't really loosen the nuts the best.

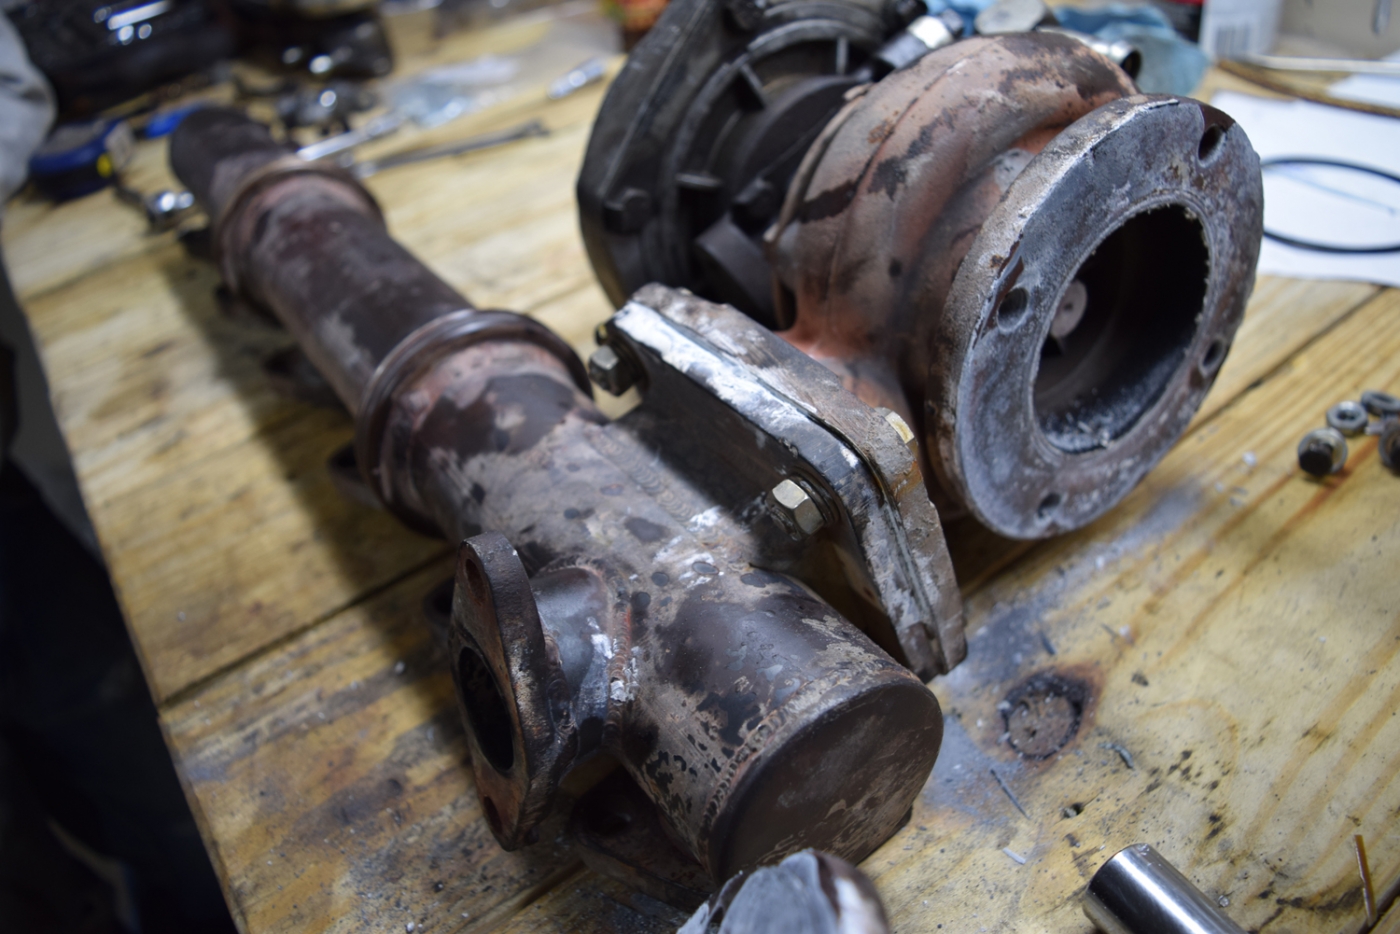
Regardless, we finally got it off, and the manifold and turbo came out as one unit. This was a tight fit, and we scraped the front inner fender arch a little bit because of the tight fit. Removing one of the exhaust studs was also necessary. so here's how it all looked after the aforementioned ~3000 miles. The exhaust gasket and mating ring was taken off on the bench, this photo was just after we removed it.

Image

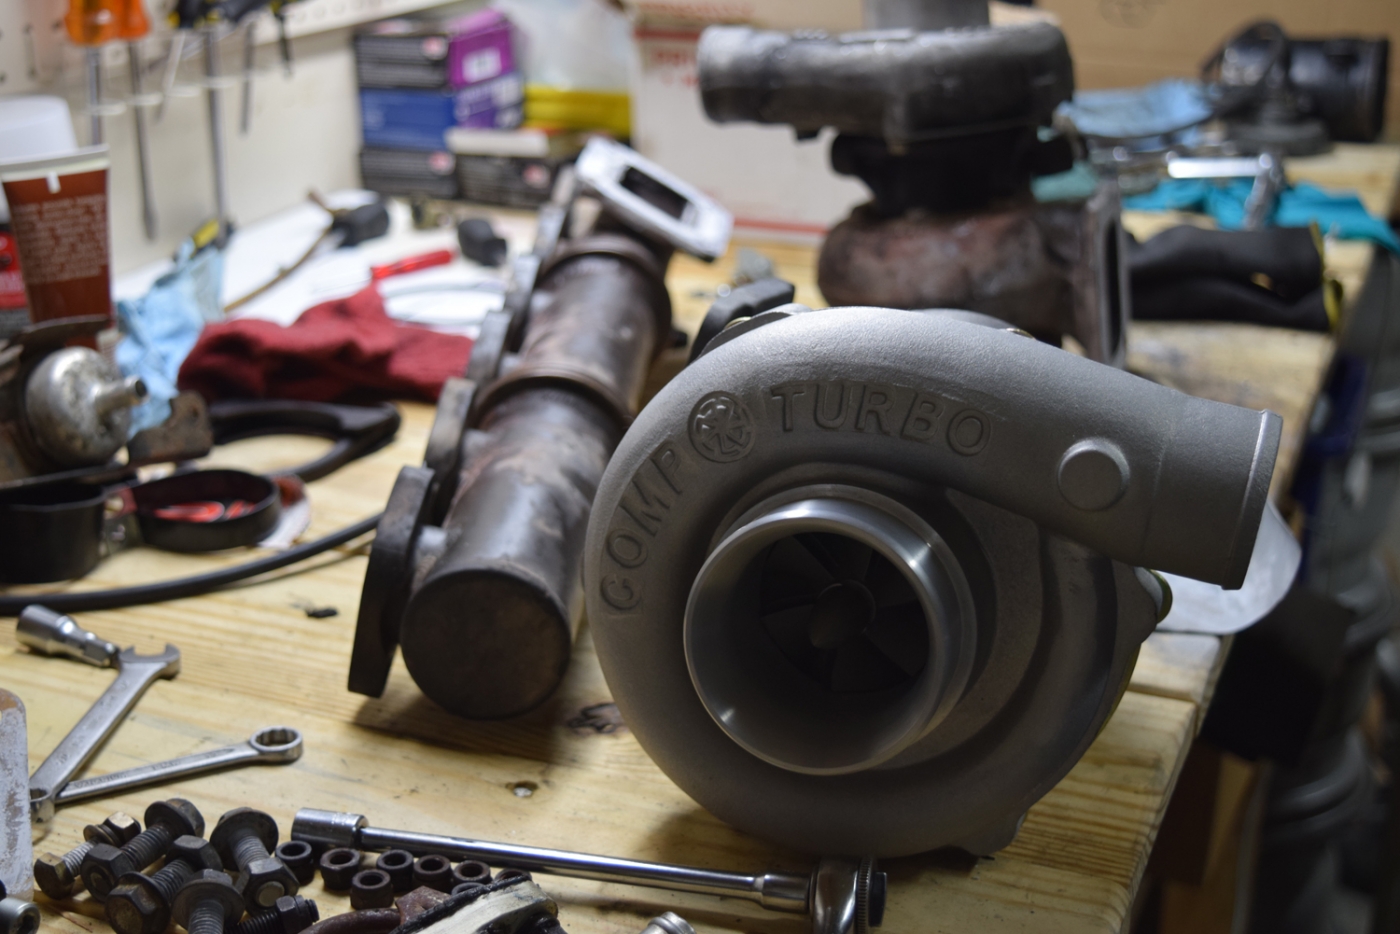
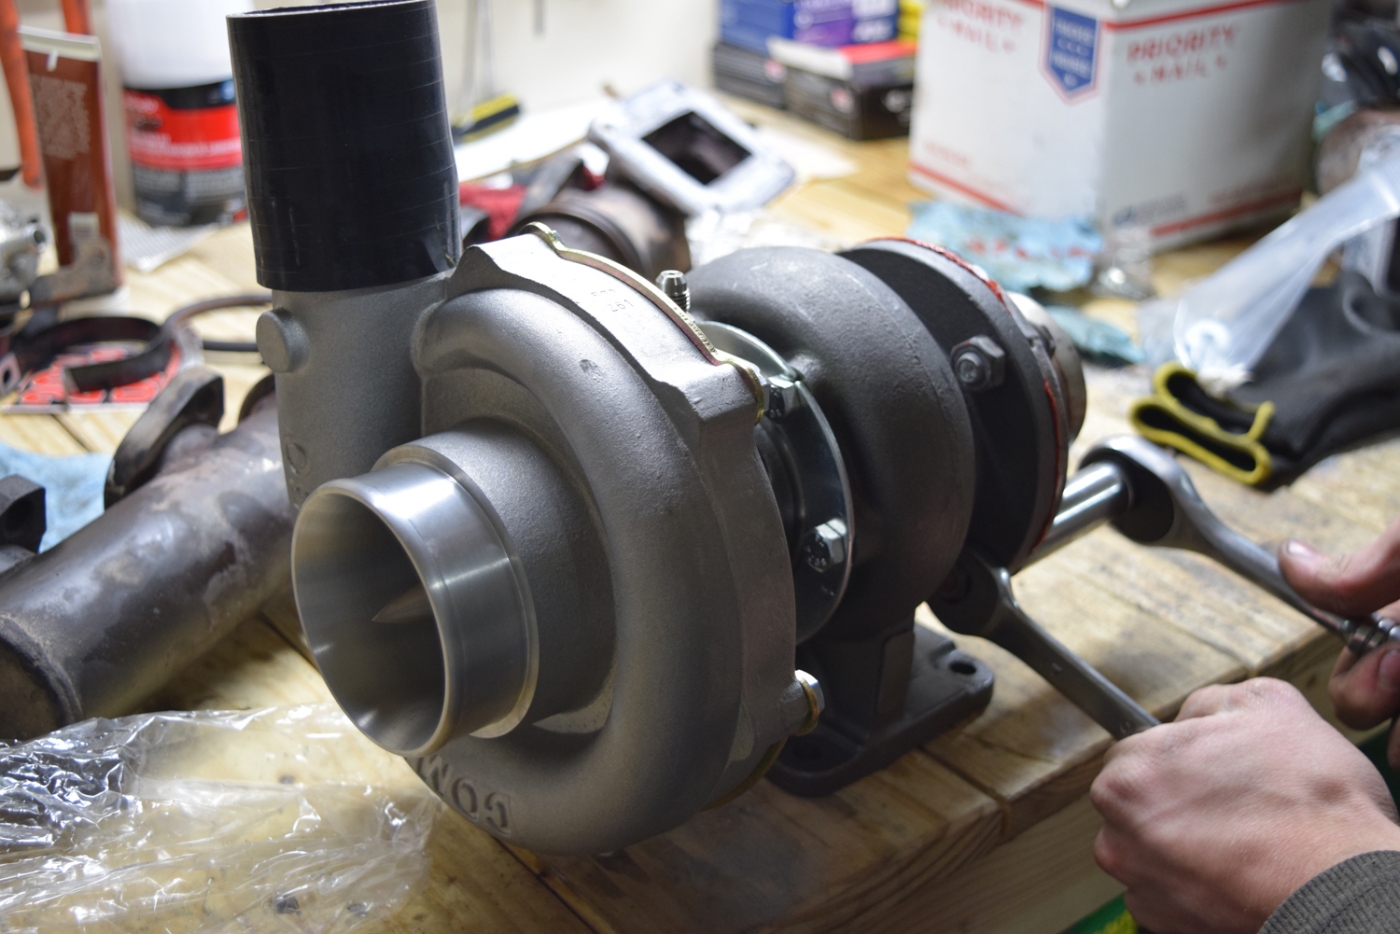
We separated the parts, and then got out the new turbo. in comparison, the compressor housing is bigger than the rotomaster. According to Todd, this is T04e, 60mm compressor wheel. Standard journal bearing turbo with P trim turbine and .58 A/R on center housing. This is from the TCD M30 kits.

Image

Getting it ready.

Image

Due to the size of the compressor housing, we quickly realized we would not be able to mount the manifold+turbo in one swift motion the way that we had removed it. This meant the two could not be mated on the bench prior to installation. We thought for a minute and then decided to place the turbo on the side of the exhaust and then maneuver the manifold into place above it. My brother was nice enough to support the turbo as I got the manifold in and tried to start the mating S.S. bolts. This meant I also added the silicone while he held the turbo. Fortunately we got it together and then could focus on tightening the two together. This gave us the clearance we needed. One small addendum, the clearance from the Rotomaster to the Comp turbo was not the same for the most inward/forward mounting hole to the manifold. This was the same hole missing a bolt when Mike and I took off the manifold last year. Both the manifold and turbo were designed to have a screw enter form the opposite side. We got create and used a threaded exhaust stud through. This part barely fit, and then we were able to thread new 12mm exhaust nuts on both sides and tighten.

Image

Image

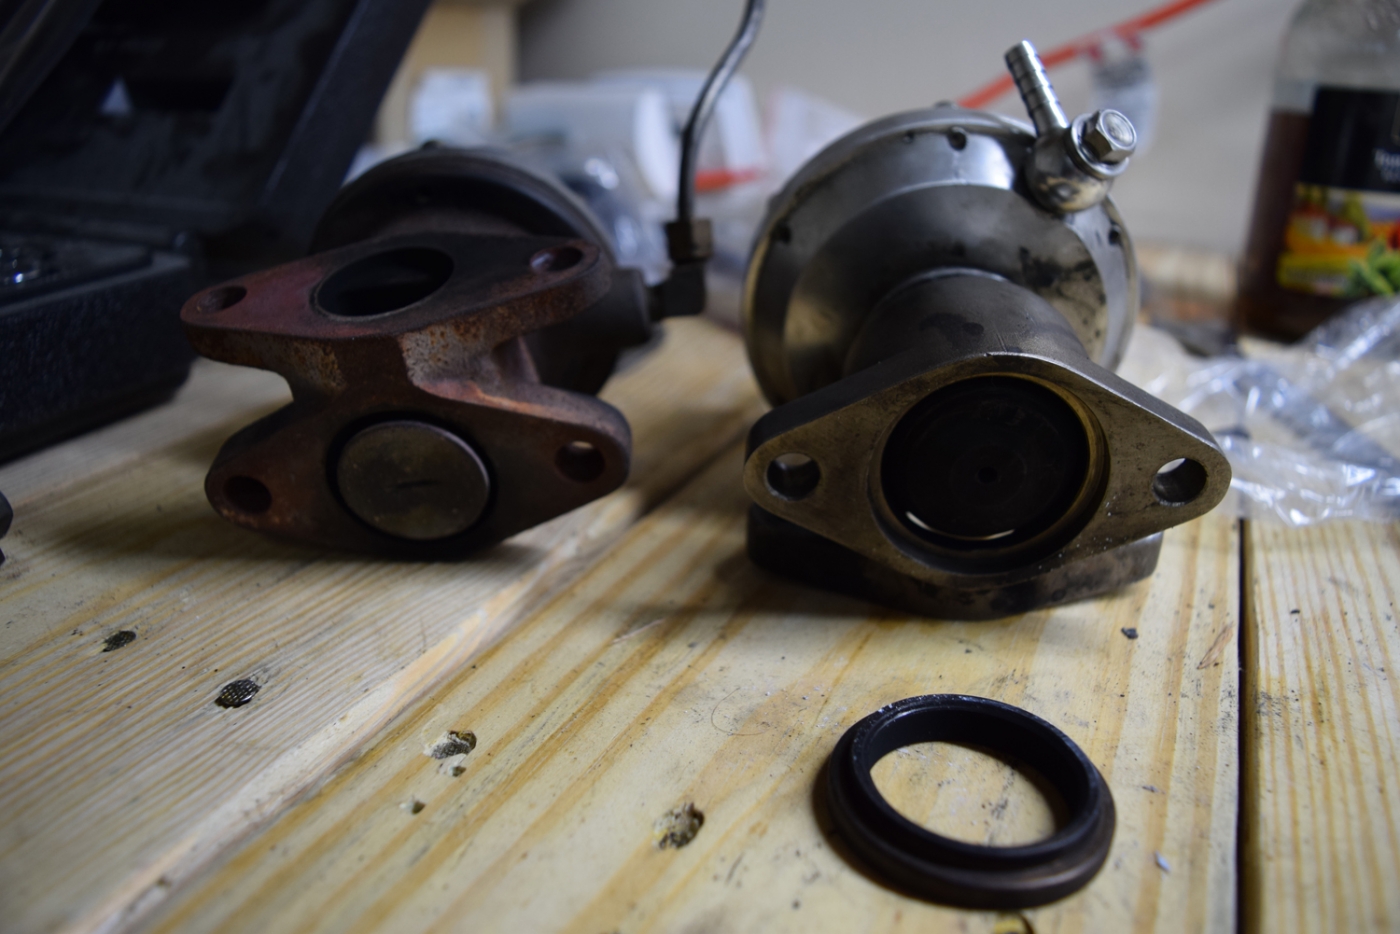
My brother also happened to bring his no-name spare waste-gate. We had realized that without a gasket I was getting major exhaust bypass through the waste-gate in normal operating conditions. This would explain why spool up was rather slow for such a small unit.

Image

Installed

Image

To clarify, I think there are some major reasons why this setup should improve dramatically from before:

1. Waste-gate bypass should be eliminated. This will likely be a major difference in the two waste-gates. My brother thinks that this no-name has a 10psi spring in it. We will find out, but the turbo won't have to be fighting a manifold exhaust leak to get up to boost pressures.

2. Turbo airflow capacity. The new unit should be very well matched to the airflow generated by the M30B34. This places the engine in the efficiency zone of the turbo at or very near to the optimum 78% island at my current boost pressure. This efficiency means less heat generated, and hopefully more dense charge air being delivered.
In my prior posts, I document that the rotomaster is drastically undersized for this application in terms of the turbine size. I believe that it was causing a high exhaust back pressure on the engine. Of course the ability to move air really depends on a pressure differential, so this is a critical piece to the puzzle. The high back pressure meant that the old unit had to work even harder and overcome this back pressure before being able to flow additional air through the engine. This would explain why the car felt sooo slow (slower than NA) when I would lose a hose coupling just enough not to build boost pressure. This happened at the track, and the engine had to work to overcome the back pressure, but with no gain of additional air for the lost 'work' put into spinning the turbo.

3. New turbo technology. It is very evident that the new Comp unit has improved technology over the Rotomaster. This is very obvious when looking at the compressor inlet on both. The Rotomaster has an exposed threaded shaft and nut. The new Comp unit has an aggressive looking cover on this shaft, much to the similarity of a jet engine. I imagine this is to delay the separation point of the boundary layer to turbulent flow, and better control the airflow in. This new technology is probably leaps and bounds different from that of 30 years prior.

4. General condition of new vs old. It was evident that the rotomaster had a lot of friction or something causing the shaft to be somewhat difficult to spin by hand. I attribute this to oil coking or something similar. It simply won't spin freely like other turbos and the new Comp unit. I don't attribute this to the technology, but rather the general condition of the Rotomaster. I mean it, worked, as you can see from the videos, but there are likely major gains to be had from this difference of condition. The nice thing is that the Rotomaster did not have shaft play or oil leakage, and I didn't have to pay for a new turbo when I was so new to the game.

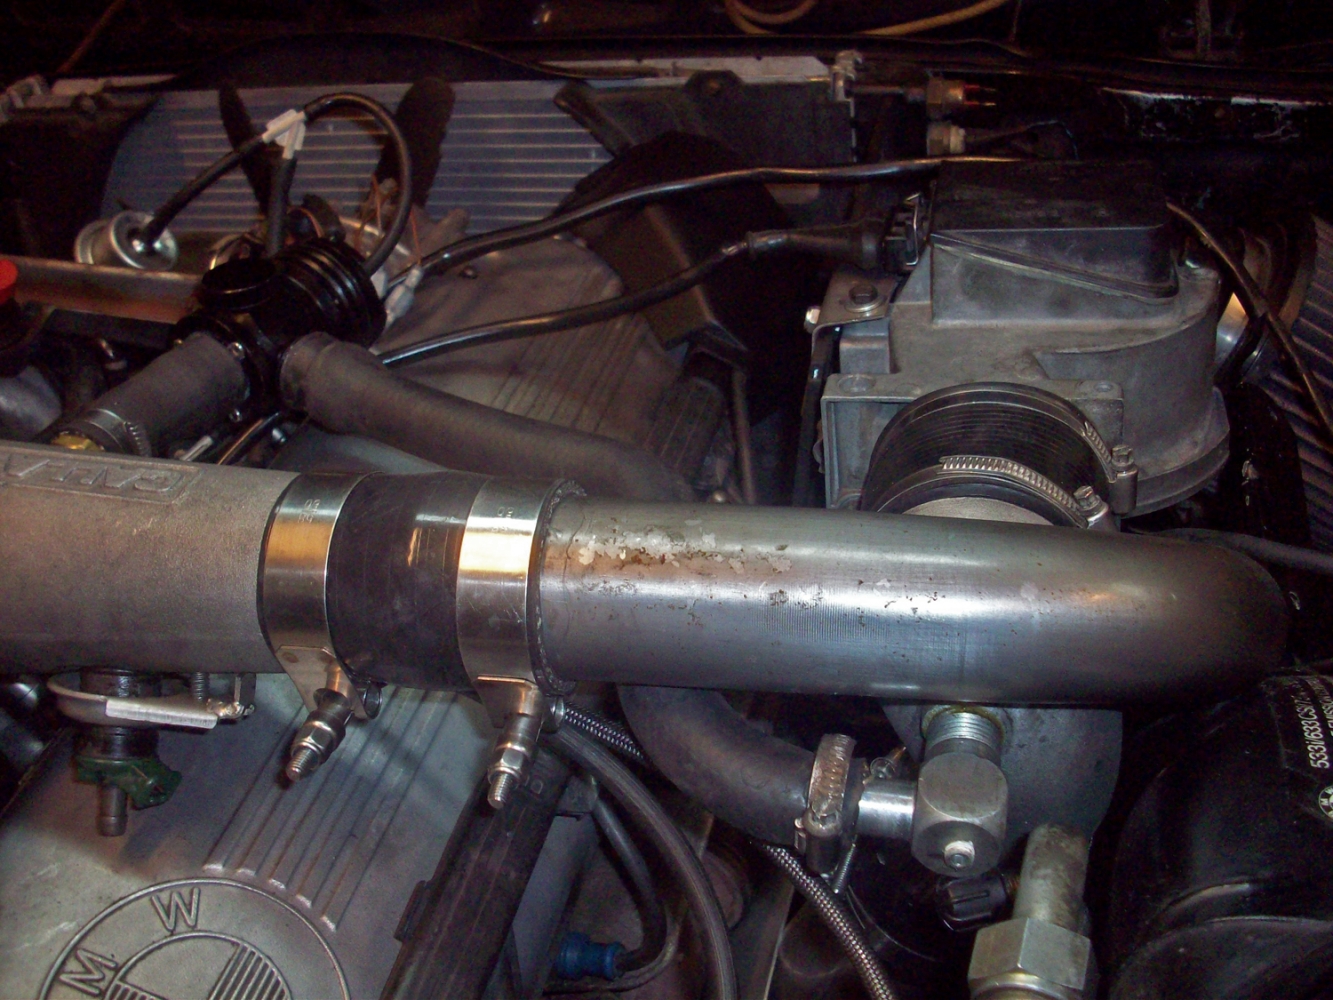
5. The last difference should be intercooling. I am upgrading the charge piping to remove boost leaks and add an intercooler with additional frontal area. I did notice a lot of heat in the engine bay on hot days, and the car was noticeably slower. My brother fortunately had an spare intercooler and I started getting it fit in place. I also plan to make a couple of heat shields to help protect the charge piping and air filter from the high temperatures. Fresh air can only help to increase power and reduce the risk of detonation.

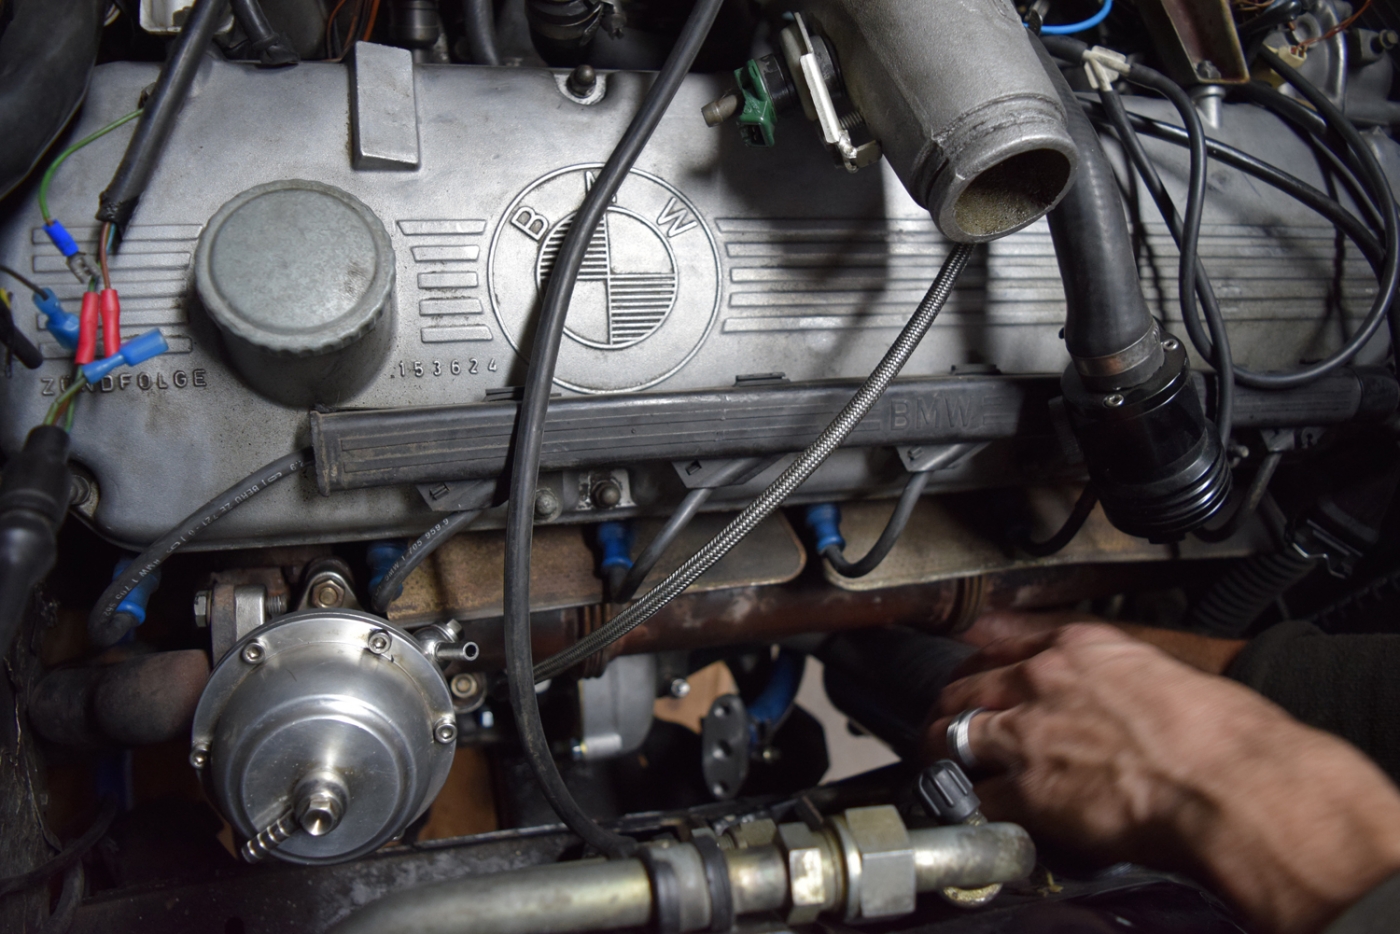
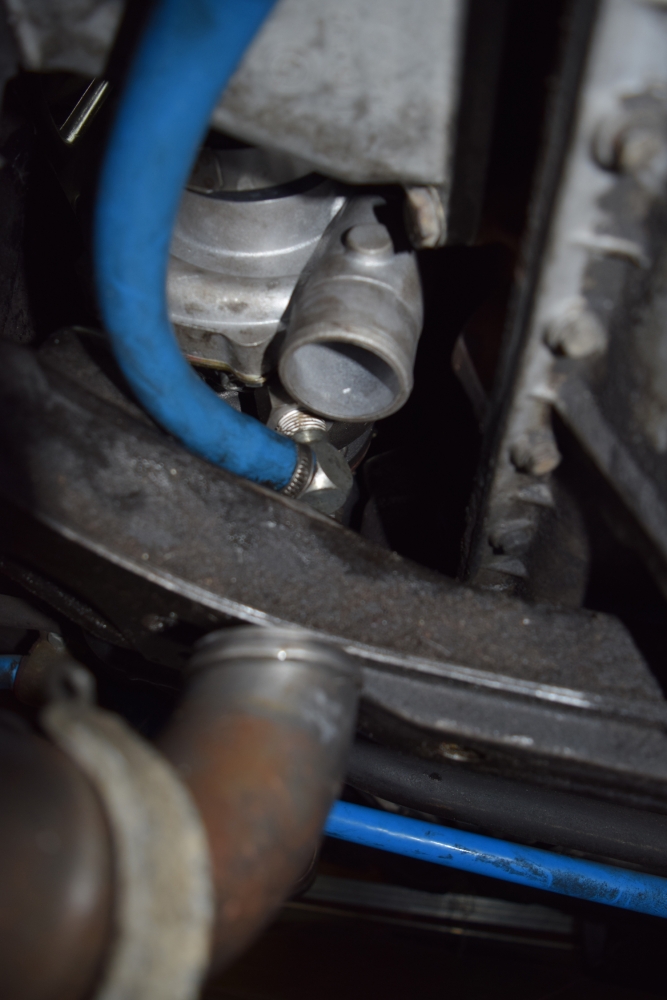
I also took the opportunity to adjust the oil return as the old method had a kink. It didn't drain as I had hoped because the fitting I wanted to use would not fit with the steering arm underneath. this had resulted in a snaking line to the oil pan that actually went around the motor mount. This was certainly something on my list to change. I used the adapter block from the Rotomaster and then added a 3/8 NPT x 3/8 NPT m/f adapter fitting to space everything downward. This allowed me to reinstall the same 3/8" npt elbow from before where I could install the hose. I may have to shorten the hose but I didn't want to cut it too short...

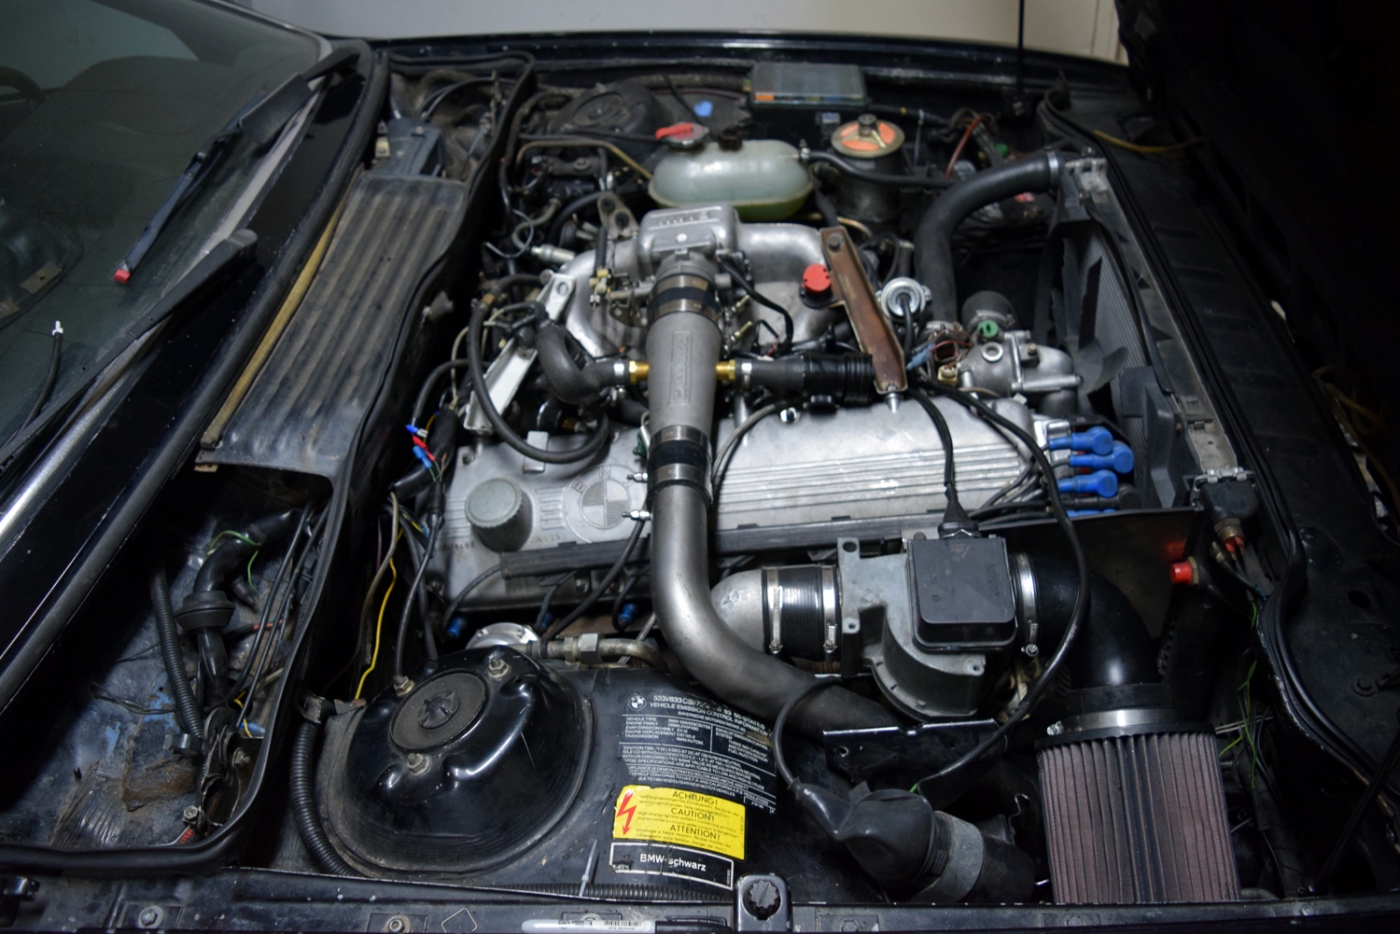
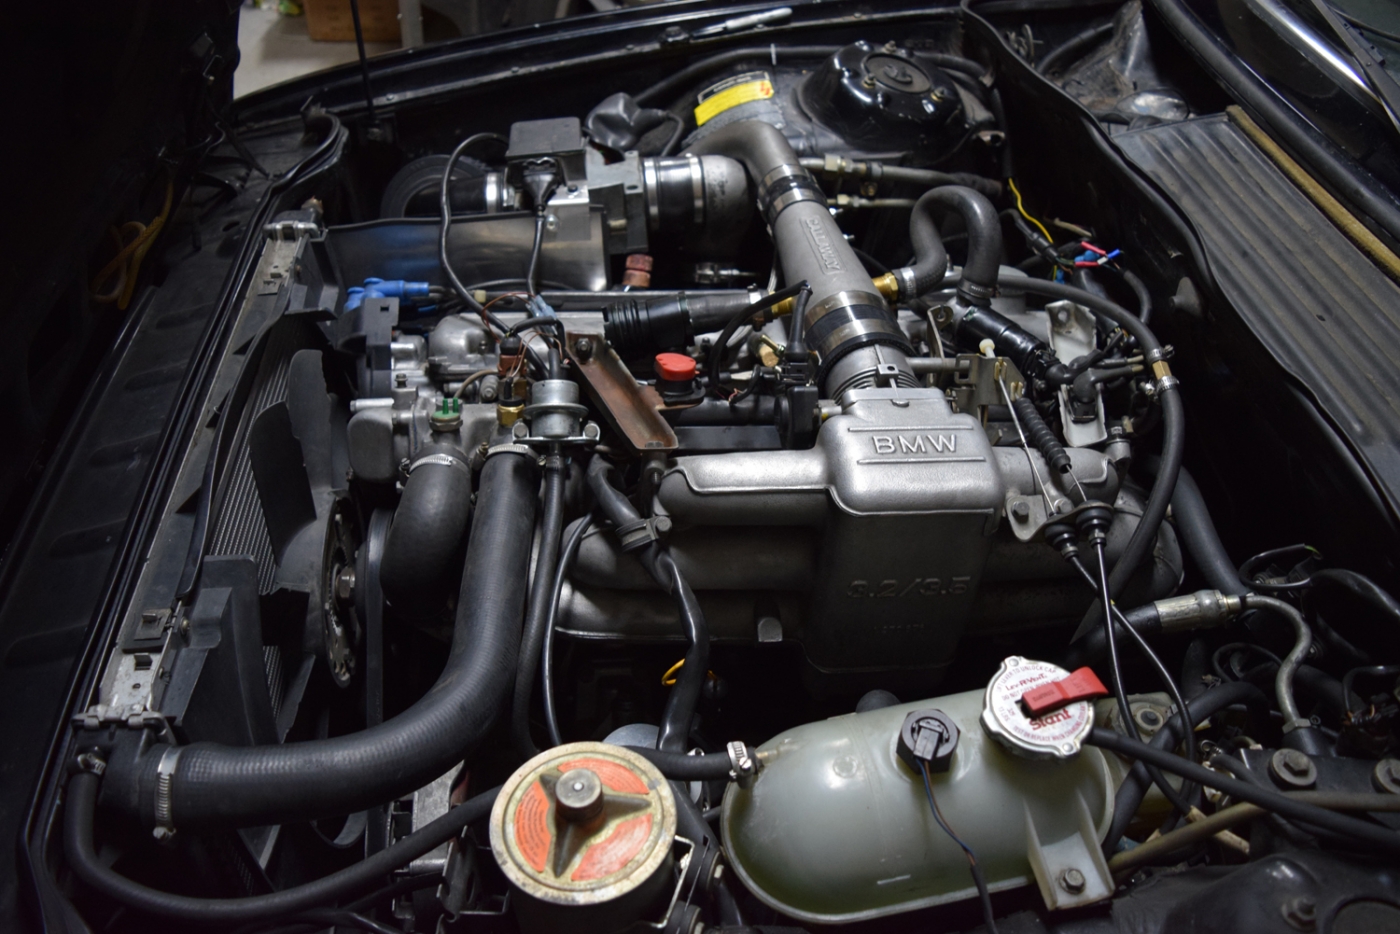
Here's the clearance with the clocking of the compressor outlet. It is very tight, but after clocking it a couple times, it should work. The oil inlet is on the other side (180 degrees apart) and barely clears the manifold, but I didn't want an elbow that would disrupt smooth flow.

Image

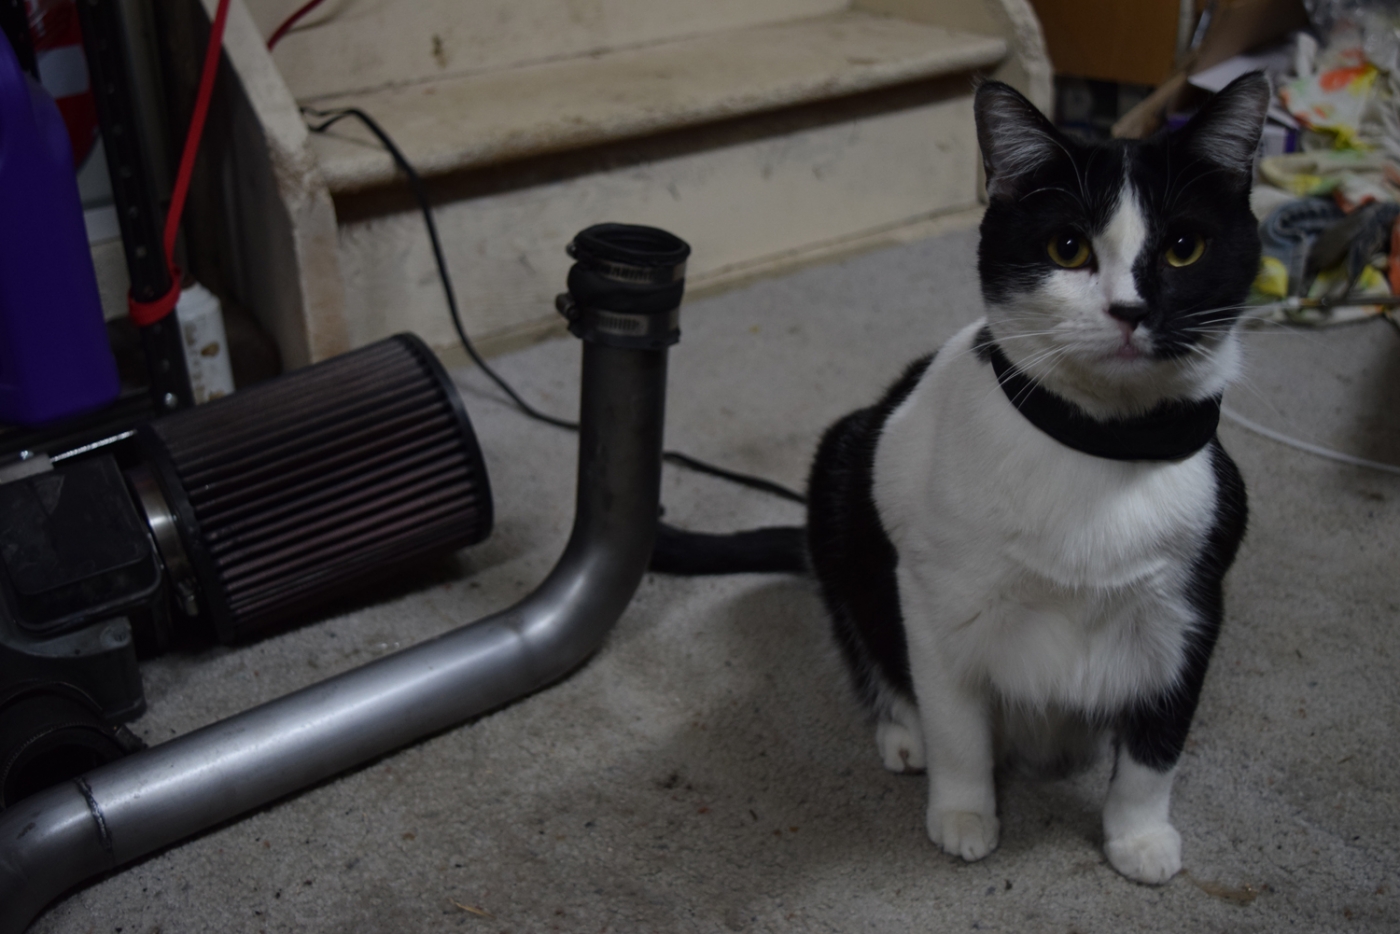
We had a spectator too

Image

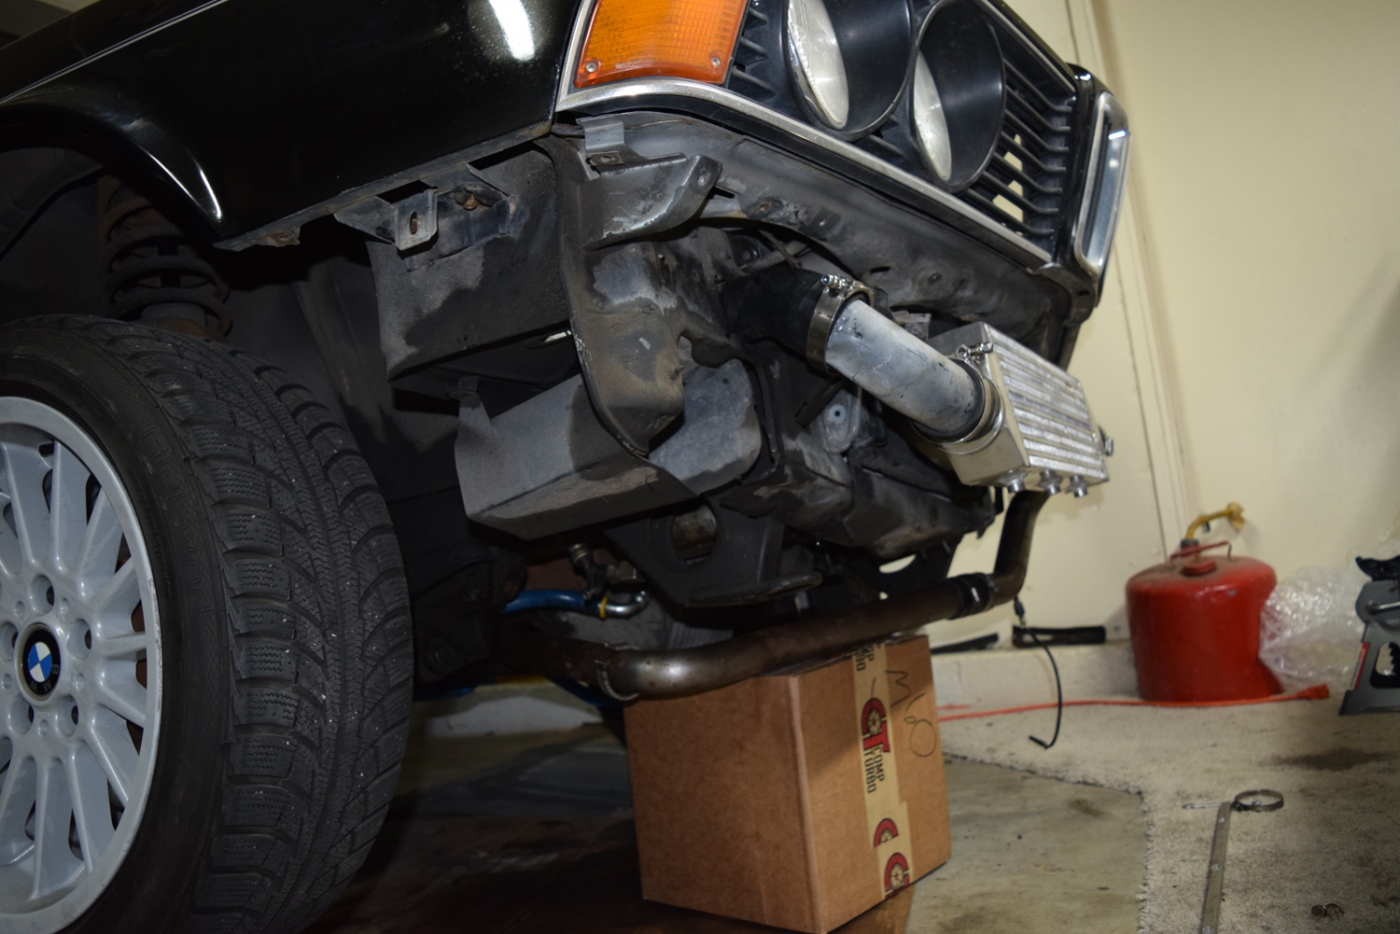
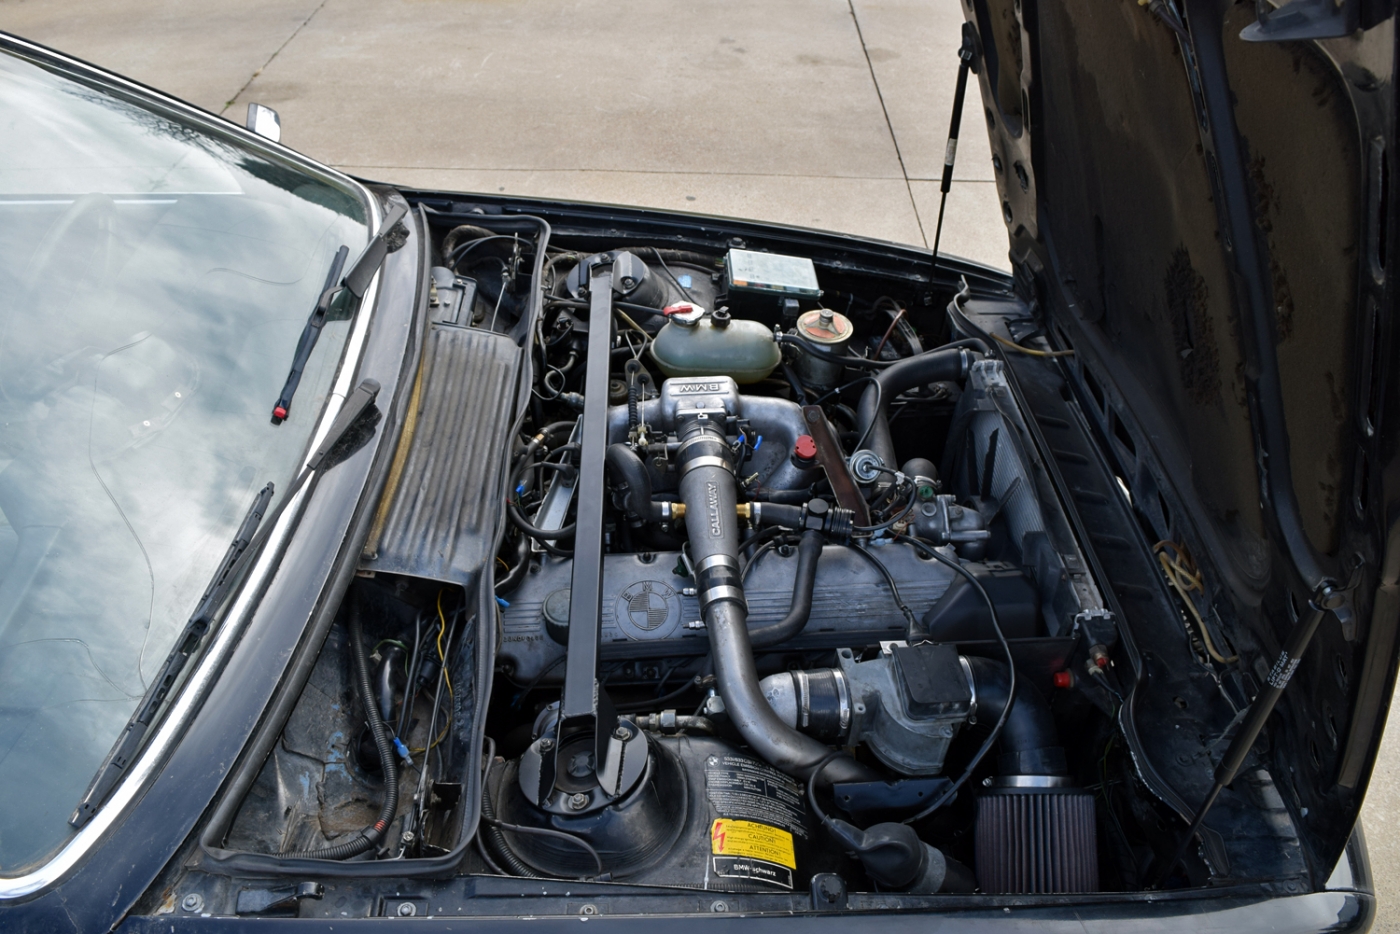
Here's the charge piping and intercooler. Still working on this, but I am close to what I want. I basically added an elbow and changed some of the positions/angles of the Callaway piping.

Image

Next steps, I am working on cleaning up the intercooler piping, along with the idle air connection and some other misc items. Another update probably last this week, or this weekend.

Re: Callaway 633CSi - 2/25 New Turbo Install Process

Posted: Feb 25, 2016 6:11 PM
by 86GT635
This is awesome. So many good pictures.

Re: Callaway 633CSi - 2/25 New Turbo Install Process

Posted: Feb 28, 2016 12:20 AM
by tschultz
I put the last few pieces back together to get the car started today. Removed the wiring for the OBC horn, added some heat shielding and just got it all in place so I can finally take the car to an exhaust shop in the next week or 2.

Image

Image

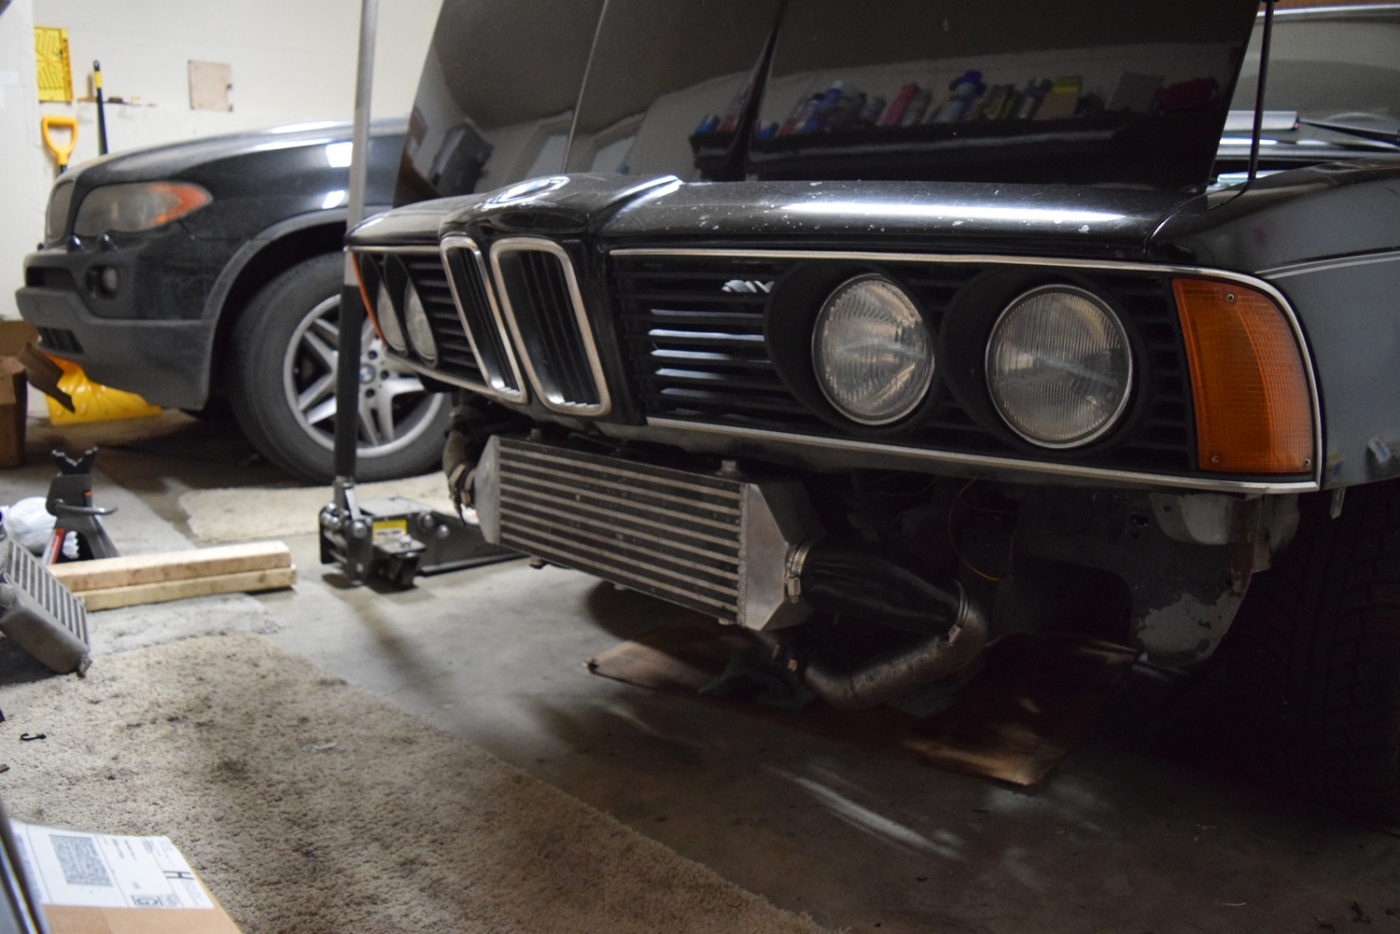
Another view of the intercooler piping. Right now the front bumper won't clear, so I will have to decide how I want to proceed...

Image

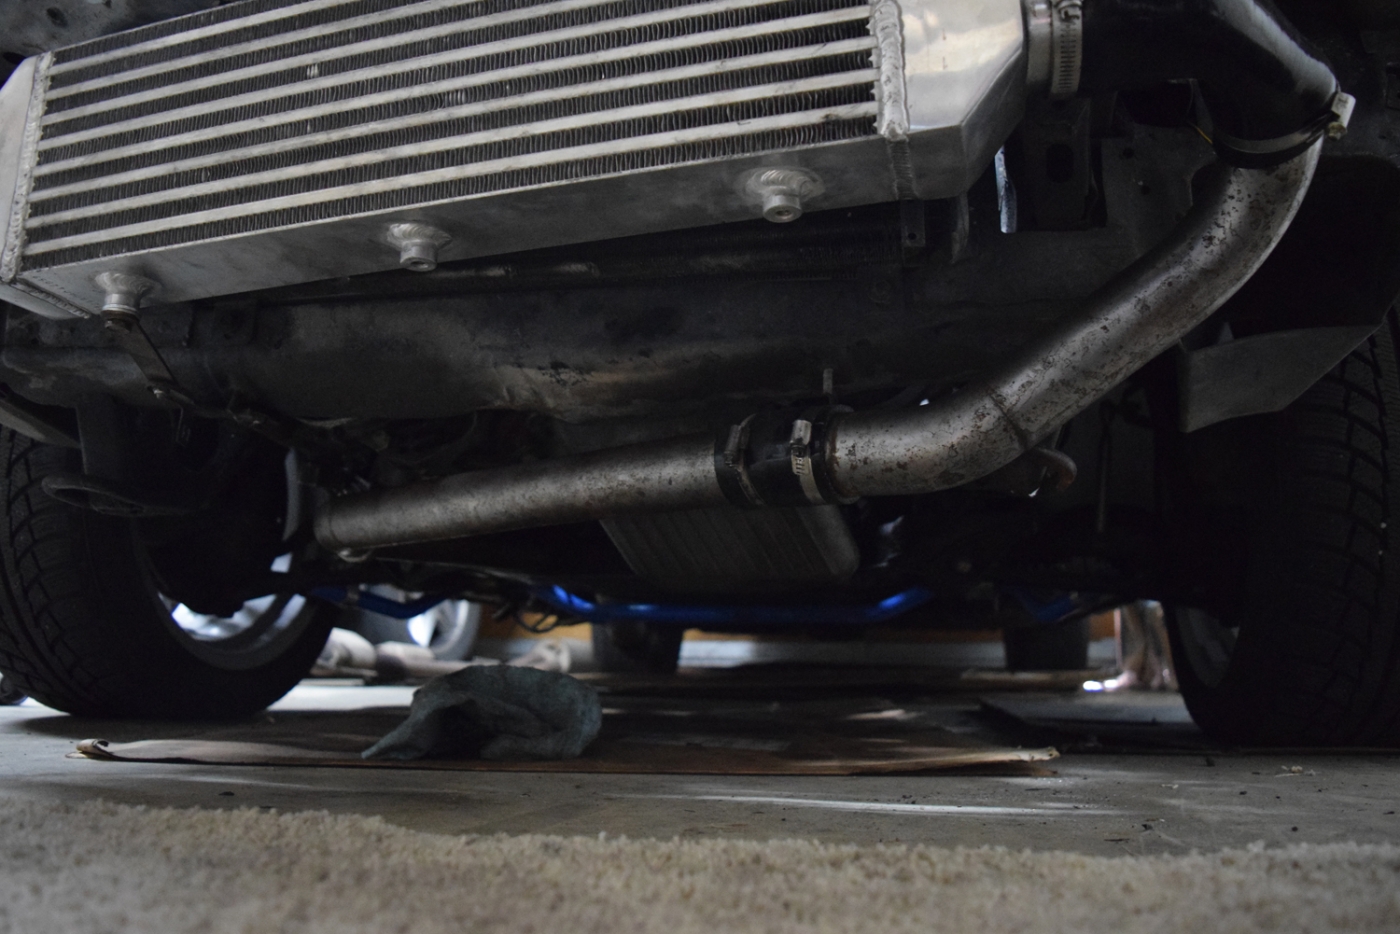
A shot underneath. still using basically all 2 in diameter piping from the callaway kit and an extra elbow and the new intercooler. Fortunately the charge piping immediately post turbo provides another location to receive fresh, cool air for cooling before reaching the IC.

Image

My piping is slightly larger than 2in diameter so it is difficult to get my 2in diameter tbolt clamps on place. I may still use them, but I need to decide how I am going to fit the front spoiler and bumper over all of the piping.

I started the car and got it idling for a good 10 minutes to check for leaks and such. Still idling at about 1000rom, but everything else appeared in good shape. after getting the exhaust on, I took the car around the block. Initial impressions, it feels very similar to before, but likely smoother power delivery. AFR's were slightly rich as I tried the FQS switch at both 0 position and the 2 position (where I had it). The car was much closer to 12.5 target AFR's with the FQS switch still at position 2 (where it was before). I was confidant enough that I opened her up. The new wastegate has a 7psi spring and overall power delivery is nice and steady. the car felt very similar in acceleration to the Rotomaster turbo at 11psi, but of course I was going easy and not getting up to speed or pushing the car.
The intercooler is definitely working as I could feel a nice temperature gradient from one side to the other, something I couldn't say for the Callaway unit, which was just totally warm throughout. The heat shielding was also helping I think as the charge piping to he intake didn't seem as hot-- Recall it sits right about the exhooassed manifold.

More details and possibly video to follow later this week.

Re: Callaway 633CSi - 2/25 New Turbo Install Process

Posted: Feb 28, 2016 8:54 PM
by tschultz
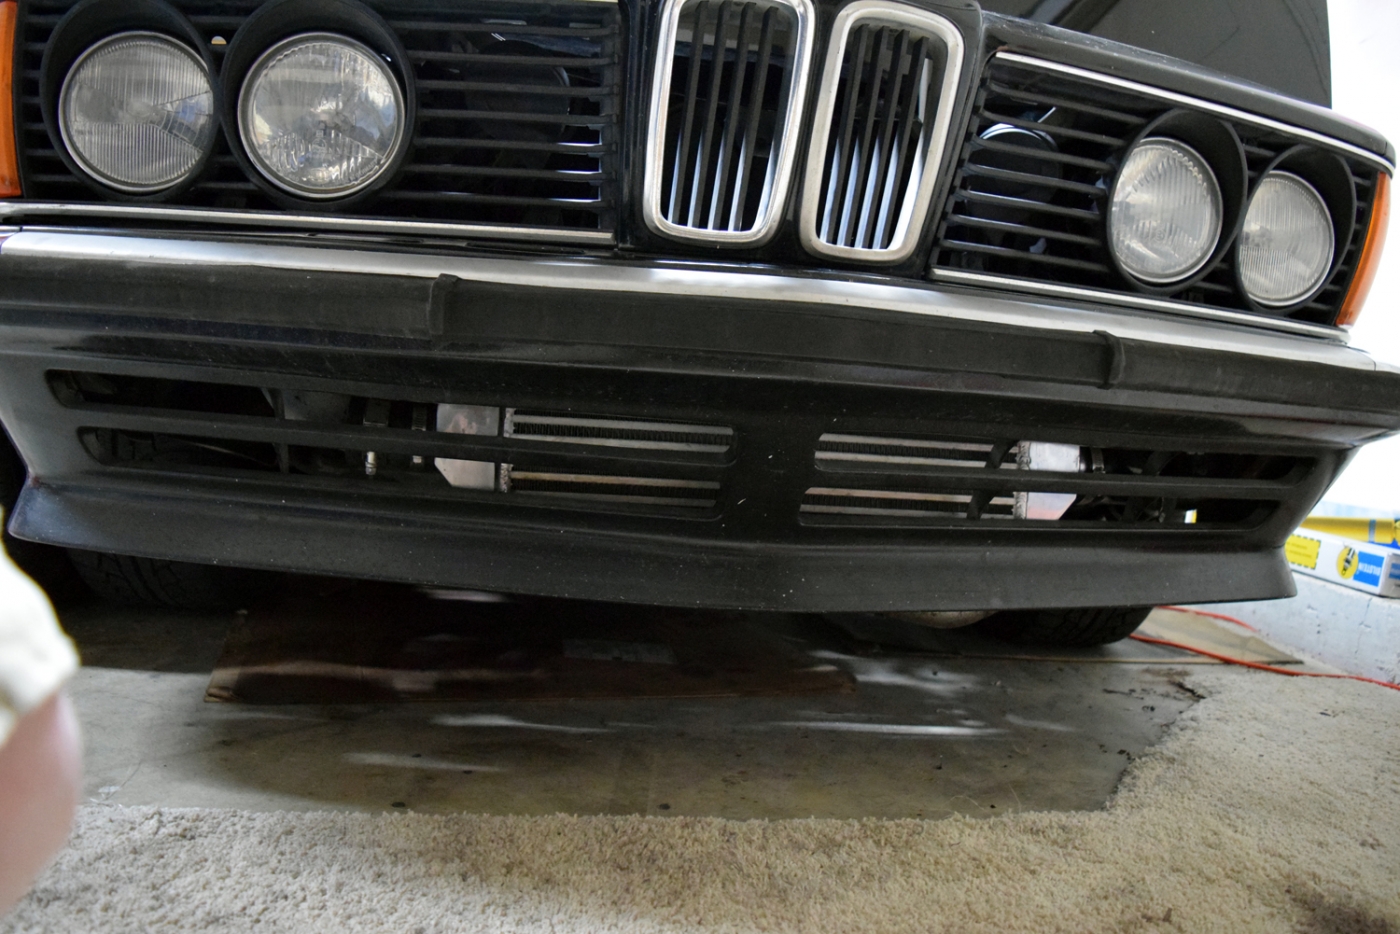
Air dam fits in front of the intercooler! I had to shift everything over slightly for it to all fit, but it fits! Maybe some photos of it later in the week when I have some more time. I'll be curious to note how much the intercooler stands out from behind the airdam visually. I didn't really like how the Callaway unit looked behind the airdam (it didn't really fill it out enough).

Image

Image

Going to try to bring the car to an exhaust shop soon so I can bring everything tighter to the body and finally put on the new bilstein sports, eibach spring, and front strut bar.

Re: Callaway 633CSi - 2/25 New Turbo Install Process

Posted: Mar 01, 2016 10:28 PM
by Mark 88/M5 Houston
Looking very nice! Hit the face of the intercooler with some flat black and it will disappear.

Re: Callaway 633CSi - 2/25 New Turbo Install Process

Posted: Mar 01, 2016 10:28 PM
by tschultz
I may have to do that! I do like the stealth factor :)

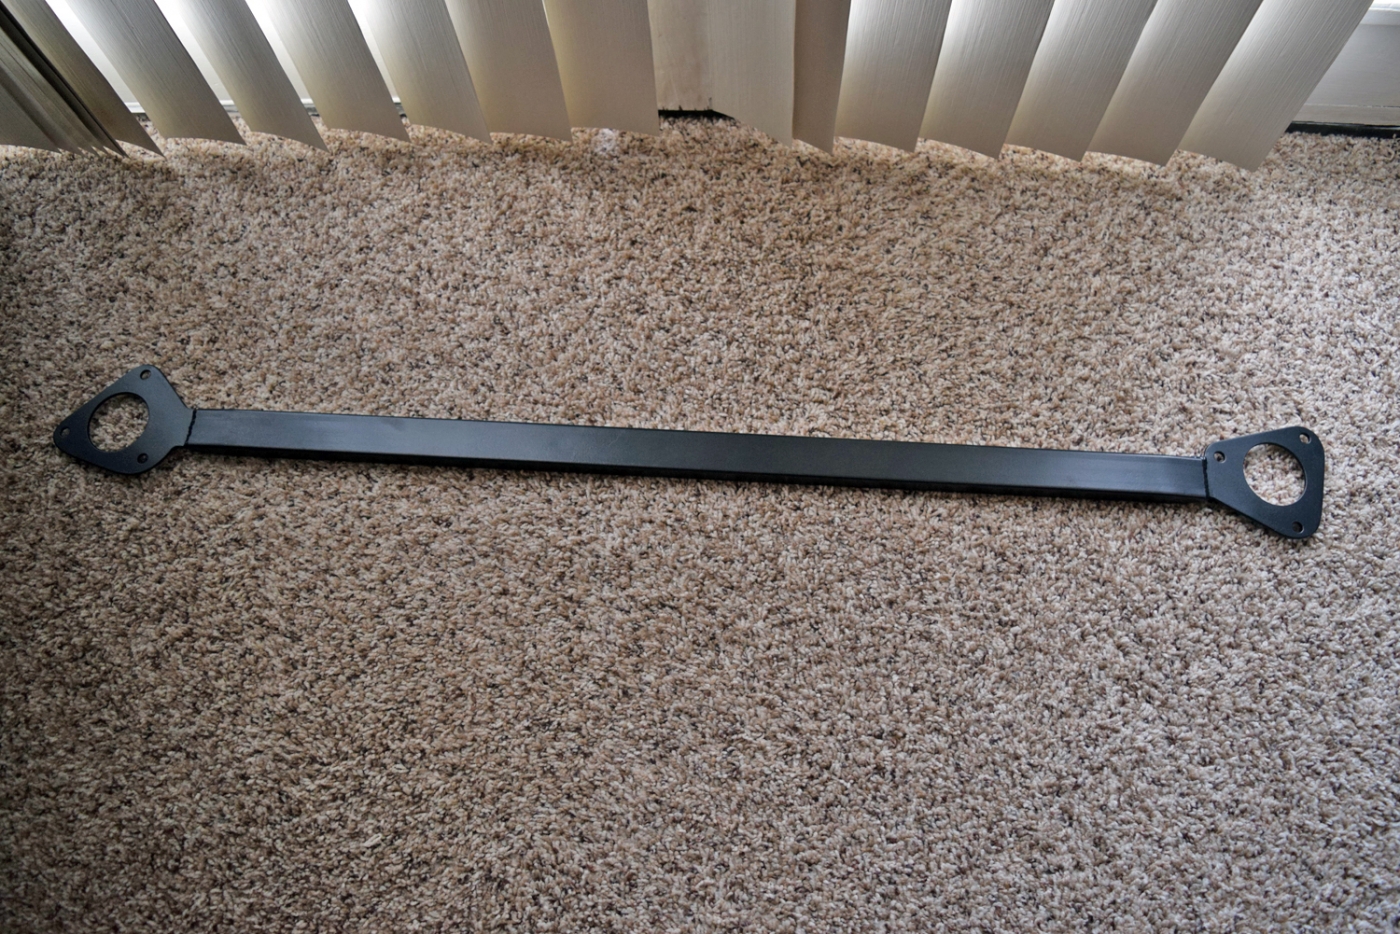
Another small update from tonight. I decided to try to install my rear Mason Engineering strut bar.

Image

The old Jakeb e28 bar wouldn't fit, so I bought one of these. The good news is that it fits! The proximity is very tight just because of the rear geometry of the E24. I think the parcel shelf sits lower than that on an e28, so there really is almost no space for a rear bar. I was glad to finally get everything in place after dropping rear shocks/springs from each side. See photos below.

Image

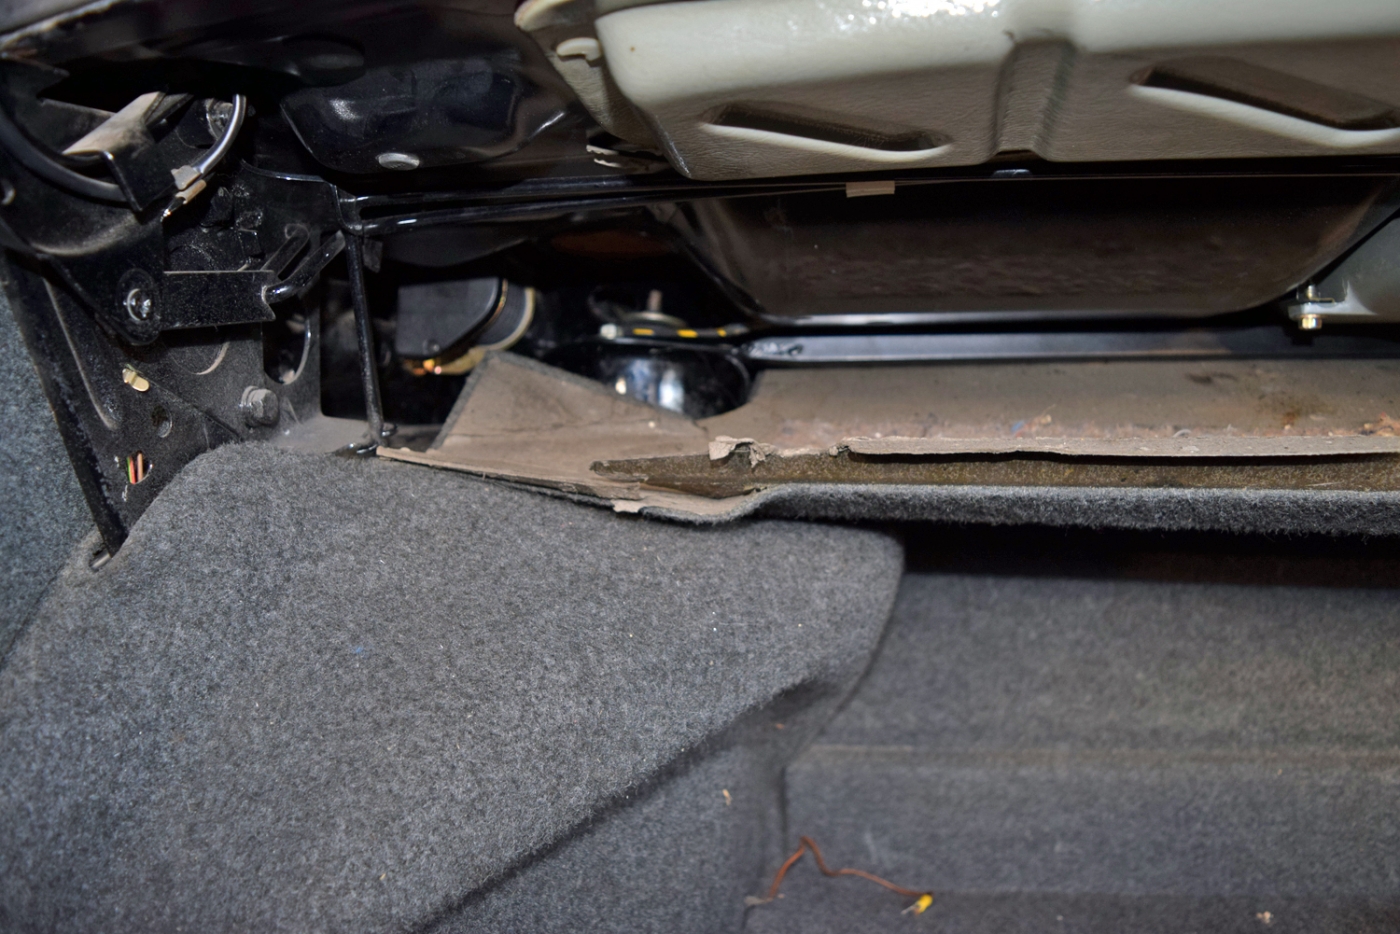
The expansion tank fits above the bar, but I did have to pull it out to get everything into place.

Image

The front-most nut on the right side I can't tighten much past finger tight. That's ok because I won't be able to get it off later if I can tighten it. I don't really care to remove the parcel shelf at this point...

Image

All buttoned up, and you can't even tell it is back there! At least this means it doesn't reduce storage space in the trunk!

Image

I removed the restrictor fitting, so I have the standard #4 JIC x 1/8" NPT DM nipple supplying oil to the turbo. I swapped a new oil pressure sender in the head and found that the oil pressure is a bit better than the other sender indicated. I think oil pressure is acceptable for this engine, albeit maybe on the low side at idle because of the oil pressure being distributed to the turbo. At hot idle, it seems to be in the 8-10 range, the light will flicker when the revs drops slightly. At 2000rpm fully warmed up it has a healthy 30psi, so I am not worried.

I drove the car around tonight after getting everything reinstalled. With the larger injectors and fpr, cruising AFR's are actually richer than where they were with the other turbo. Cruise is close to 12:1, instead of about 15 where it was. The FQS switch is still 2 position 2 (-3% fuel), but I have larger 24lb injectors, a 3 bar FPR, and the BEGI 2025 with both adjustment knobs all the way relaxed.

In boost, AFR's are about 10.5-12.0:1. Slightly richer than what I want, especially in 1st/2nd gear where they are near 10.5. I am thinking about reverting back to the 2.5bar FPR to see if that helps to bring cruise back to a reasonable level. The other option would be to go back to the stock 17lb fuel injectors and keep the 3 bar FPR and simply increase the rail pressure on the RRFPR. Not sure which of the two I want to try first. I am thinking the 2.5bar FPR won't make a significant difference, but only one way to find out.

Re: Callaway 633CSi - 2/25 New Turbo Install Process

Posted: Mar 02, 2016 9:12 PM
by 9mil
Interestingly i just reverted back to stock injectors to fix a fueling issue... Going to start changing one thing at a time now that I have gotten closer on my fueling. I haven't changed my FQS yet... Going to toss in the 24s at some point and document what has to change to accommodate.

Re: Callaway 633CSi - 2/25 New Turbo Install Process

Posted: Mar 04, 2016 9:45 AM
by tschultz
Yeah, with Motronic, you have to deal with the imprecise mixture. You can make it run fairly reliable, but you can't really push for high power due to the risk of detonation, and the inaccurate AFR's. It sounds like with MS a primary advantage is adjusting fuel in increments throughout the map so that with any injectors, the proper AFR's can be achieved.

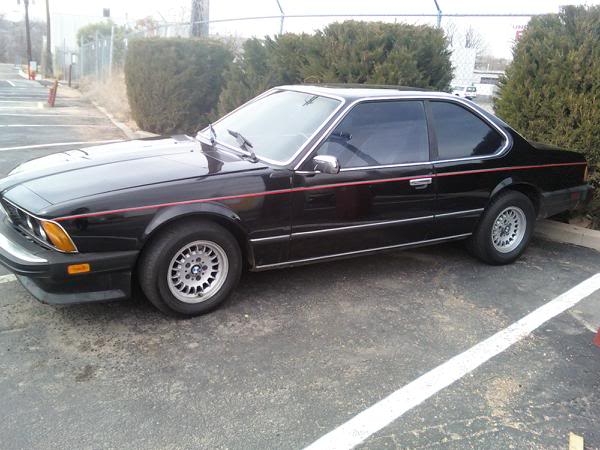
I had a virus last year (cryptolocker) that damaged some of my files, and I lost some of the original images of the car from the ad and previous owner. But I did find one from the owner before him who had listed the car on bimmerforums. Here's his only picture. It looks like it was kept fairly nice at this point... Not sure what year the photo was taken-- he posted it 3/2011.

Image

I took the car to an exhaust shop for a quote on bringing the exhaust system closer to the body along with getting it properly hung in place.

The bad news is that I now have a large oil leak, and due to safety concerns, they won't work on it until the leak is fixed (and oil is not coating the underside of the car and the exhaust). I investigated after getting home and retightened the oil drain fitting, as I thought that was the culprit.

Unfortunately after simply restarting the car and idling, it leaks out a small puddle of oil from between the bellhousing and engine. This is on the passenger side, basically right behind the turbo (hence my original thought on the oil drain). I am thinking this is a bad rear main seal :bawl:. Here's a good thread on the topic: http://www.mye28.com/viewtopic.php?f=3& ... 1&start=25

I don't know that I have the time or tools to pull the trans and swap out the seal myself, so I am trying to contact a local private mechanic to see if he can help. From my research, everybody indicates it's a pain to reach the top trans bolts and get them out without stripping.

I really wanted to get the exhaust repaired and fixed soon so I can finish the front end shock/spring/control arm swap and go to a lapping day in early April. I already registered early this week, not knowing I had this sort of issue :x

Re: Callaway 633CSi - 2/25 New Turbo Install Process

Posted: Mar 04, 2016 10:23 AM
by 9mil
You probably are aware of all the items, but just to make sure - I would take a look at the Duck gasket just above the bellhousing along with the oil pressure sending unit. Not sure where your turbo is located off hand but I had a nasty little crack in my oil supply housing (k27) that somehow made its way to the back of the motor as well.
The bolts aren't that bad- just unhook the driveshaft and jack the front of the motor up to tilt it back and give you the ability to use a few extensions (wobbles in the right sequence) from the output shaft of the trans all the way up to the bolts. its a bit of a pain, but I can do it pretty quickly now.

Do you have the removable flywheel cover? might want to try to take that off and take a look to confirm rear main. and make sure you buy a new rear main seal holder piece. I have replaced just the rear main and used the old holder and had it fail.

MS is better for sure... if you know what you're doing and don't have 2 little kids and work 80 hours a week and play taxi on the weekends and have no other hobbies or work that needs to be done on your cars :-)

Re: Callaway 633CSi - 2/25 New Turbo Install Process

Posted: Mar 07, 2016 7:10 PM
by tschultz
9mil,

You were correct. It was a leak at the sender! I was freaking out trying to determine how I would get it fixed if it was in fact the rear main seal. But it turns out the sender I checked immediately after starting and it wasn't leaking only because pressure had not yet been built up. When I went to check again, oil pressure had built up and I identified it at the sender. :lol:

I am dropping the car off at the exhaust shop tonight so that they can work on it tomorrow. Then commences the front end refresh :alright: (finally!)

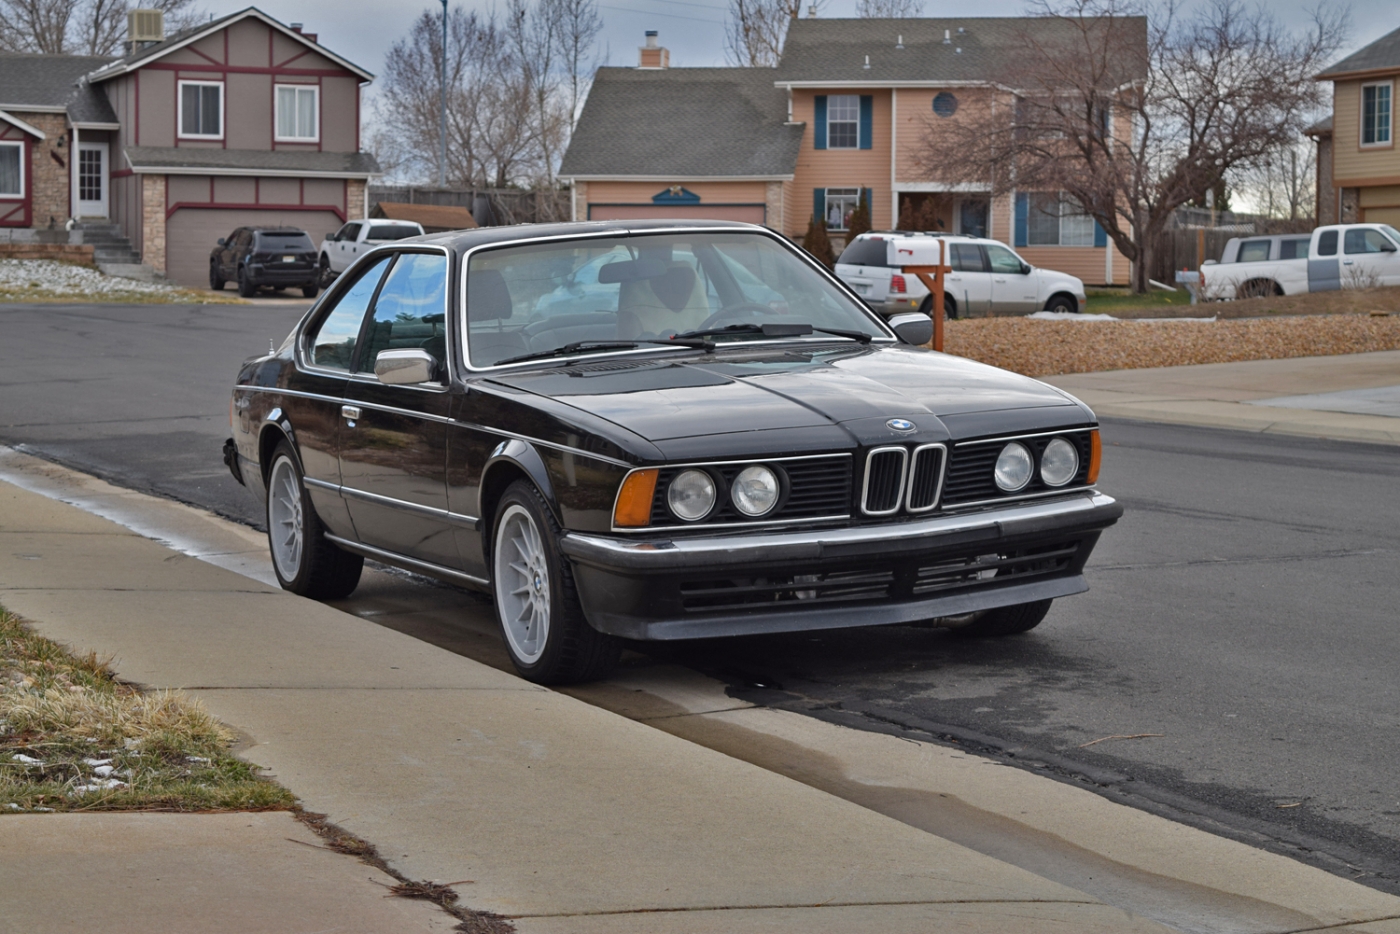
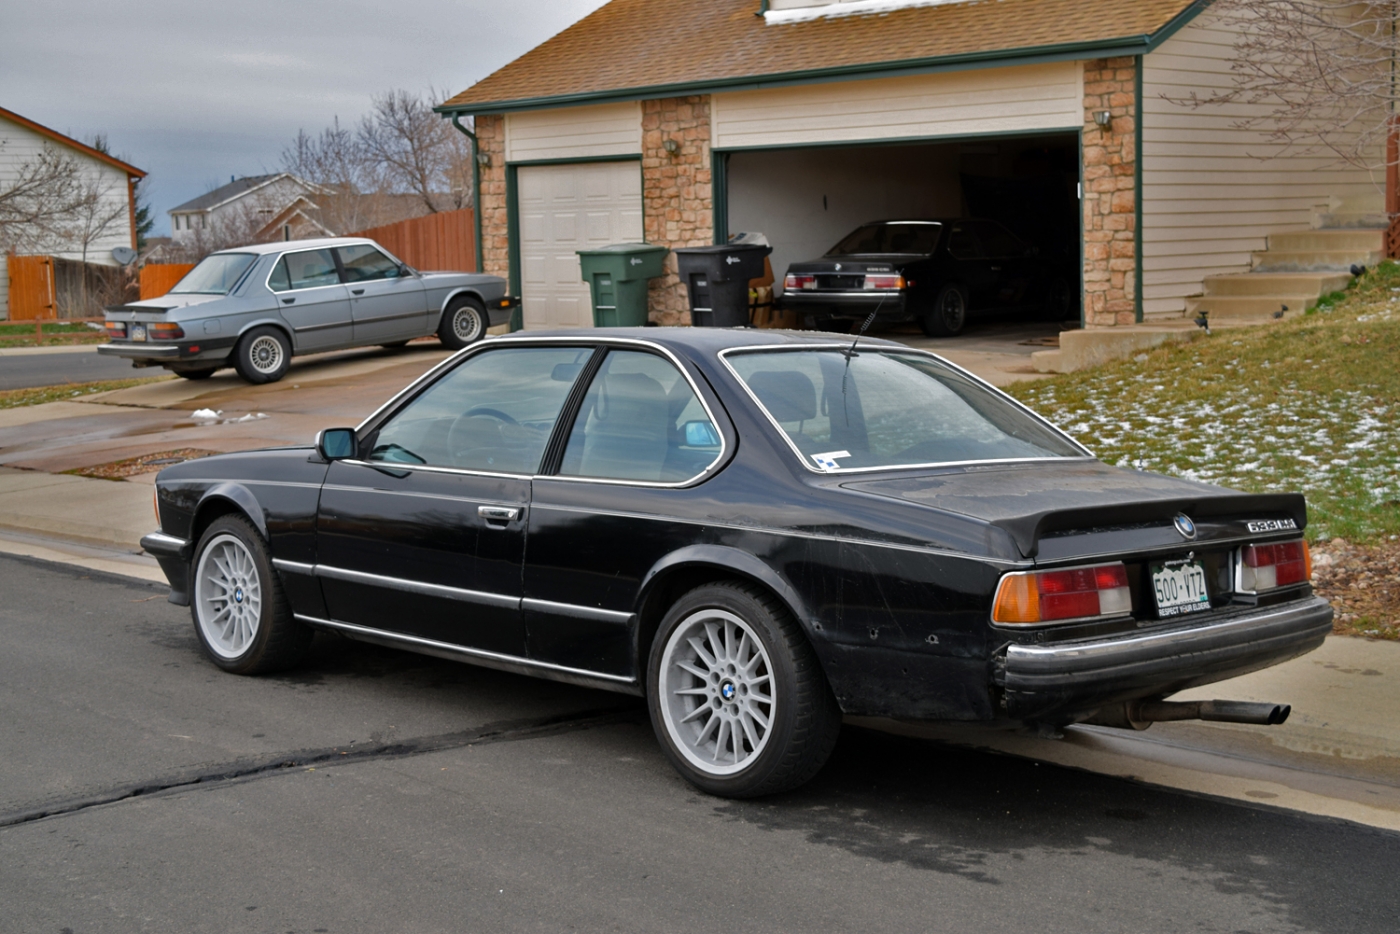
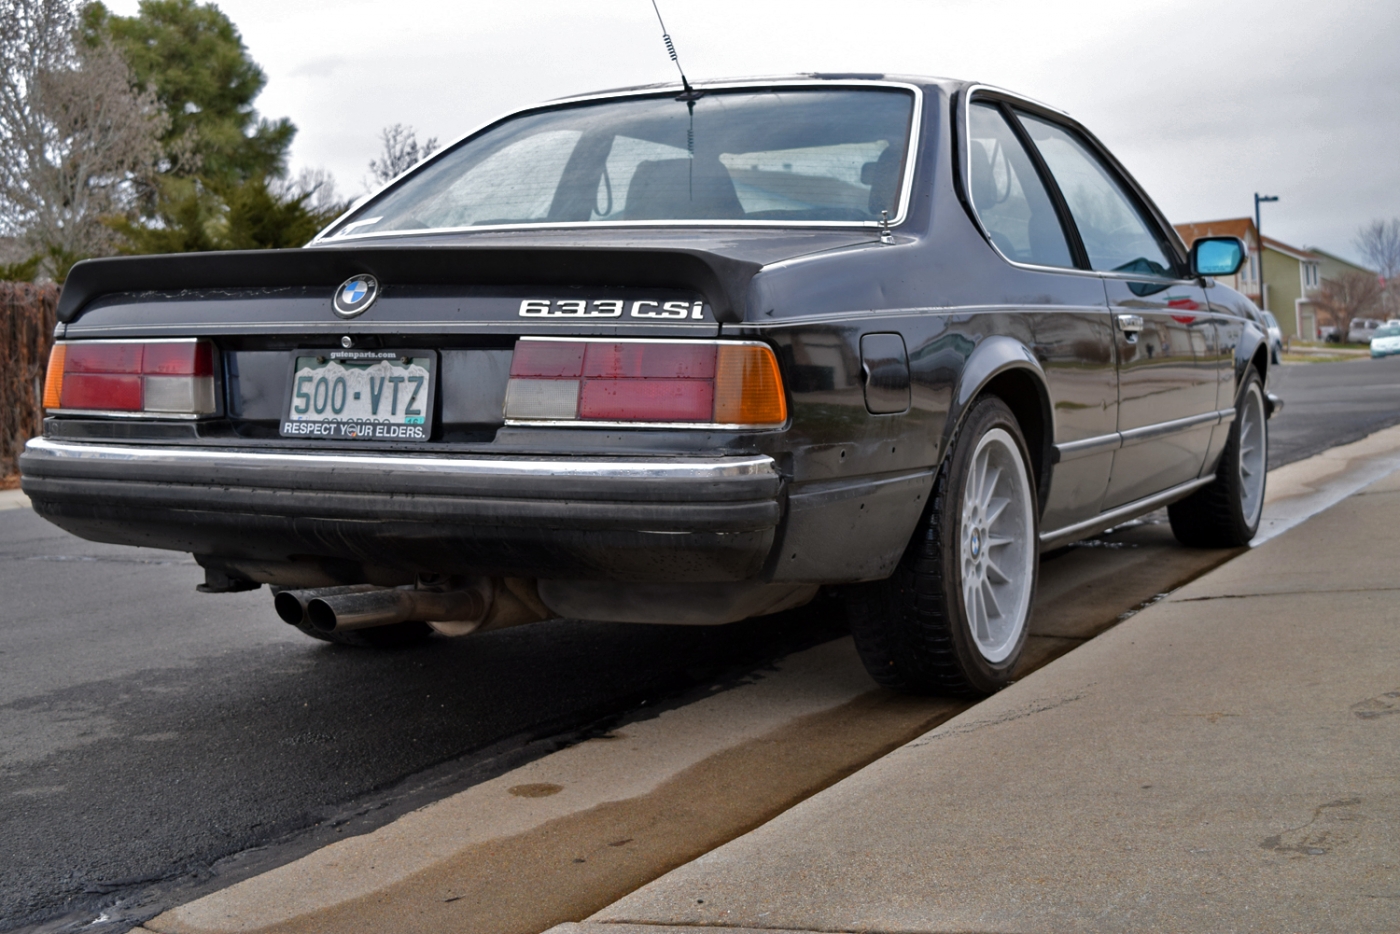
Some photos with the Style 32's. They make the car look a lot more aggressive than any of the other wheels I have had on it so far:

Image

Image

Image

Re: Callaway 633CSi - 2/25 New Turbo Install Process

Posted: Mar 07, 2016 8:43 PM
by 86GT635
My goodness what a difference you've made from the last owner. I really appreciate how you're tackling this in a orderly fashion by not only doing a ton of research, but also taking it step by step. It seems like you're putting things back in place the way it was 20 years ago, and understanding it fully. Can't wait to see where this goes.

Re: Callaway 633CSi - 2/25 New Turbo Install Process

Posted: Mar 07, 2016 11:00 PM
by tschultz
Thanks 86GT! Pretty excited myself for the next stages. At one point I had been thinking of selling the because it was going to be too large of a project. Now I am glad I didn't and it has me thinking body work and paint at some point down the line.
But for me, first things first-- the mechanicals are the most important detail.

Re: Callaway 633CSi - 2/25 New Turbo Install Process

Posted: Mar 08, 2016 12:25 PM
by Adam W in MN
Wow, just found this thread.... where the hell have I been?! What a saga but fun to read through and all the pictures are great.

Re: Callaway 633CSi - 2/25 New Turbo Install Process

Posted: Mar 08, 2016 1:42 PM
by tschultz
Thanks Adam!
I sure enjoy following your E12 M535i myself :) Probably because of the connection with my euro 635 with the same engine. They are cool cars and a blast to drive! I can't sell it because it really is such a nice package. For my entry price, I'm better off enjoying it for what it is-- I'm likely never going to have another dogleg box anyway.

Speaking of your car, we need more updates on it! :)


A couple of small details that I may not have conveyed lately:

1. I went back to a standard oil inlet fitting (1/8" NPT x #4 AN). No restrictor.

2. Right now my blowoff valve does vent to atmosphere. This causes a rich condition after shifts, and the car will occasionally die. Considering changing this in the upcoming weeks. Any thoughts on the importance of this? I would be plumbing the air back into the system post-AFM and pre-turbo.

3. I have the valve cover breather venting to atmosphere with a "breather vent." Basically it won't allow small objects in or out, just air and vapors. Do I really need to plumb this back into the intake system (before the AFM) or is it acceptable to leave venting to atmosphere?

4. I am currently running with FQS switch at position #2 which is -3.9% fuel. I have not yet determined if this adjusts the fuel map through the range or simply everything but idle and/or WOT.

5. I have disconnected my WOT wire on the TPS. It was causing everything to go too rich when the throttle was fully pressed.

6. Fueling goes more rich in colder temperatures. I imagine this is the case with the standard system, but maybe it is exaggerated a bit more due to my larger injectors. I have further testing to do in warm weather, but like that my FQS switch will allow me to both add and remove fuel with the simple rotation of the knob. I still need to determine if this is a reasonable setting to change based on air temperatures. Maybe on hot does I effectively add fuel, and on very cold temps I might consider removing fuel.

7. With my current setup I am not using O2 feedback in any fashion. I have a terminal sitting there so I can connect and disconnect for testing purposes, but my current fuel method is not using O2. This leaves the O2 sensor in place but disconnected, and my Wideband sensor in place giving me digital AFR readouts.

8. The current wastegate is a non-name TIAL knockoff. The spring setting is 7 psi. No boost controller yet, but I have looked into them. First, I plan to bump the spring up to 11psi and tune fueling if required. The new TCD turbo seems to spool up about the same amount as the old Rotomaster. Overall power at 7psi isn't much less than the Rotomaster at 11psi. Good to know that I haven't really sacrificed anything with the new turbo. Also, the SS hardware had no problem coming apart.
I am hoping this power bump will allow me to keep up with stock E36 M3's on the track. They have the altitude loss of NA power, where FI doesn't lose quite as much.

9. The rear strut bar didn't fit perfectly. I had to elongate the holes slightly so that they would line up with the holes of my chassis. Not sure if this is due to the accident history of my car or the Mason Engineering Strut bar. Hopefully I won't have this problem with the front one. Regardless, the idea is that both are more tied together than before.
10. I have the AC compressor in place but haven't charged the system and may not end up doing so. The heater box is messed up in terms of flapper vents. I should have fixed them when I was in there, but I didn't. I also haven't installed the AC belt yet. Lastly, I don't know where to get R-12 and haven't really cared now that the windows work and I don't have an exhaust leak.

Re: Callaway 633CSi - 2/25 New Turbo Install Process

Posted: Mar 09, 2016 9:03 PM
by tschultz
Had a couple hours to work on the car tonight.

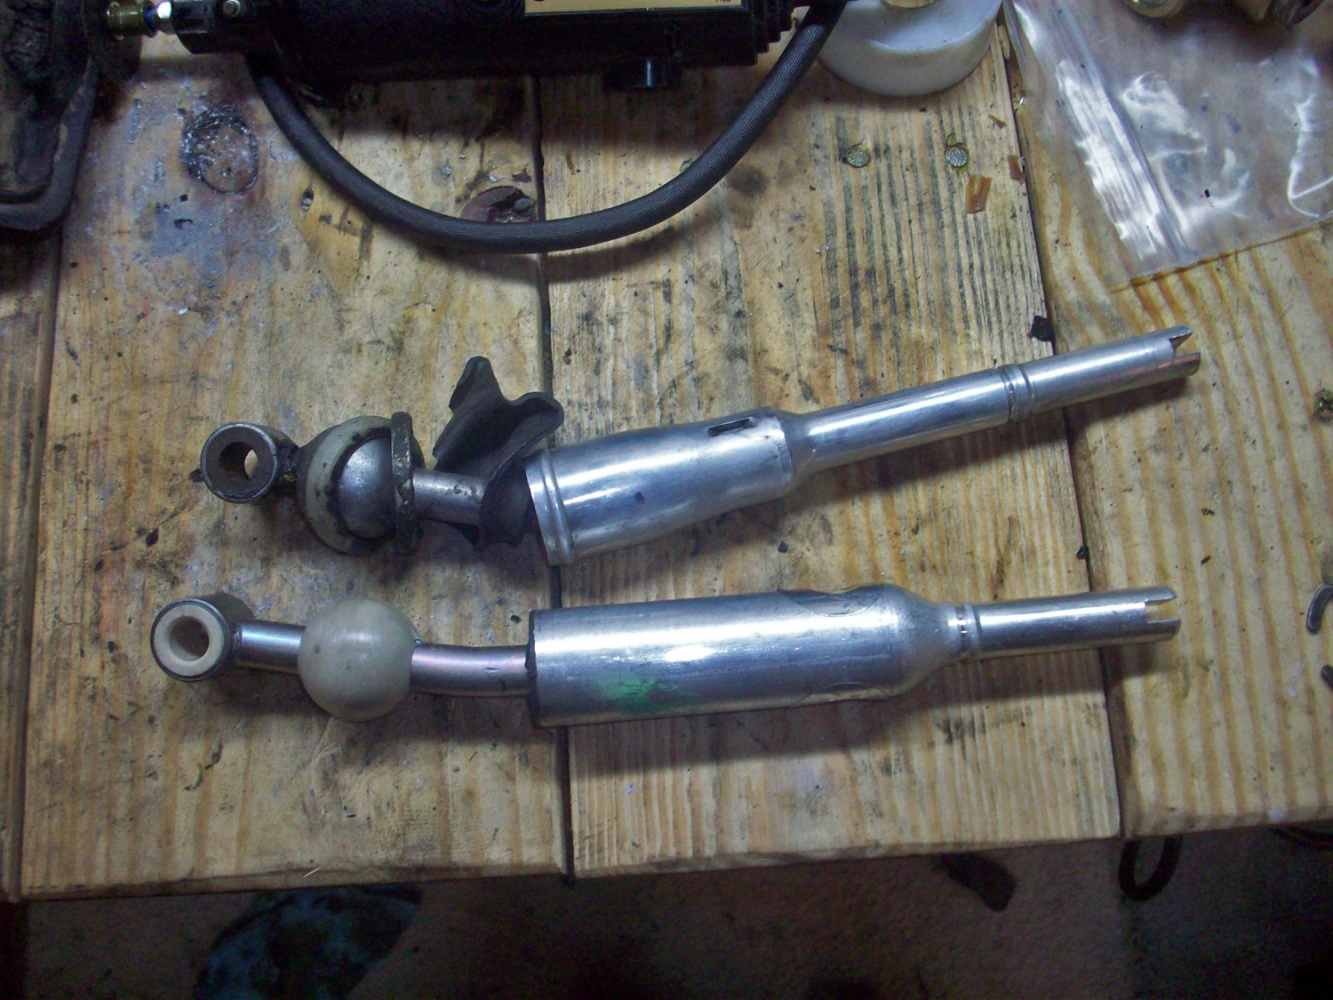
I had ordered the Z3 1.9 shift lever and was able to install it today. Basically the new style (one-piece) shifters can be installed on the old style sheet metal console by simply cutting a slot in the upper ball cup and the upper retainer so that they slide over the ball and into place. I found a nice writeup on it online, maybe I will save a couple of the photos and add to this post. It is very straight forward though.

EDIT: here's the writeup: http://www.unofficialbmw.com/e30/drivet ... t_shifter/

Here's photo of the shift levers side by side. Had I known the Z3 1.9 was this much shorter than the stock lever, I probably would have gotten the E36 M3 lever which is very similar, but slightly taller.
Image

Overall, the shifter feels much much tighter, and it does make it a shorter throw. I didn't care too much about the throw, but I will be curious to see how it feels when driving around. Definitely something to adjust to as it will have the shortest throw of all my cars.

I had been contemplating a bypass/recirculation valve for quite a while. I had been unsure how I would plumb it back in, and had wanted to wait until the new turbo and charge piping was finally in place. I ended up using the location I was originally thinking, which was a boss on one of the Callaway elbows. My co-worker was nice enough to tap it to 1/2" NPT since it had the required wall thickness. I then used the original npt elbow (as shown on page 1) to connect up my blow off valve. Hopefully this will make the car run better between shifts and eliminate the rich surge that would follow each shift.

Image

Here's a shot of the exhaust from underneath. It is a bit lower than I anticipated in a couple of places, but overall should work for my needs. It is quiet, and subtle. I like it that way for more of a sleeper/under the radar approach. It's fun to listen to exhaust noises and all, but it doesn't seem like it would suit what I am going for.

Image

This exhaust is super light. The shop cut out the low hanging pipe, added flanges, and then bent a new pipe that t hey welded to the rear section of the exhaust. I think it is 2.5" in diameter before it splits to the dual section. They added a hanger and everything is nice and secured now. I was able to work around the exhaust and get to the shift lever, which was nice.

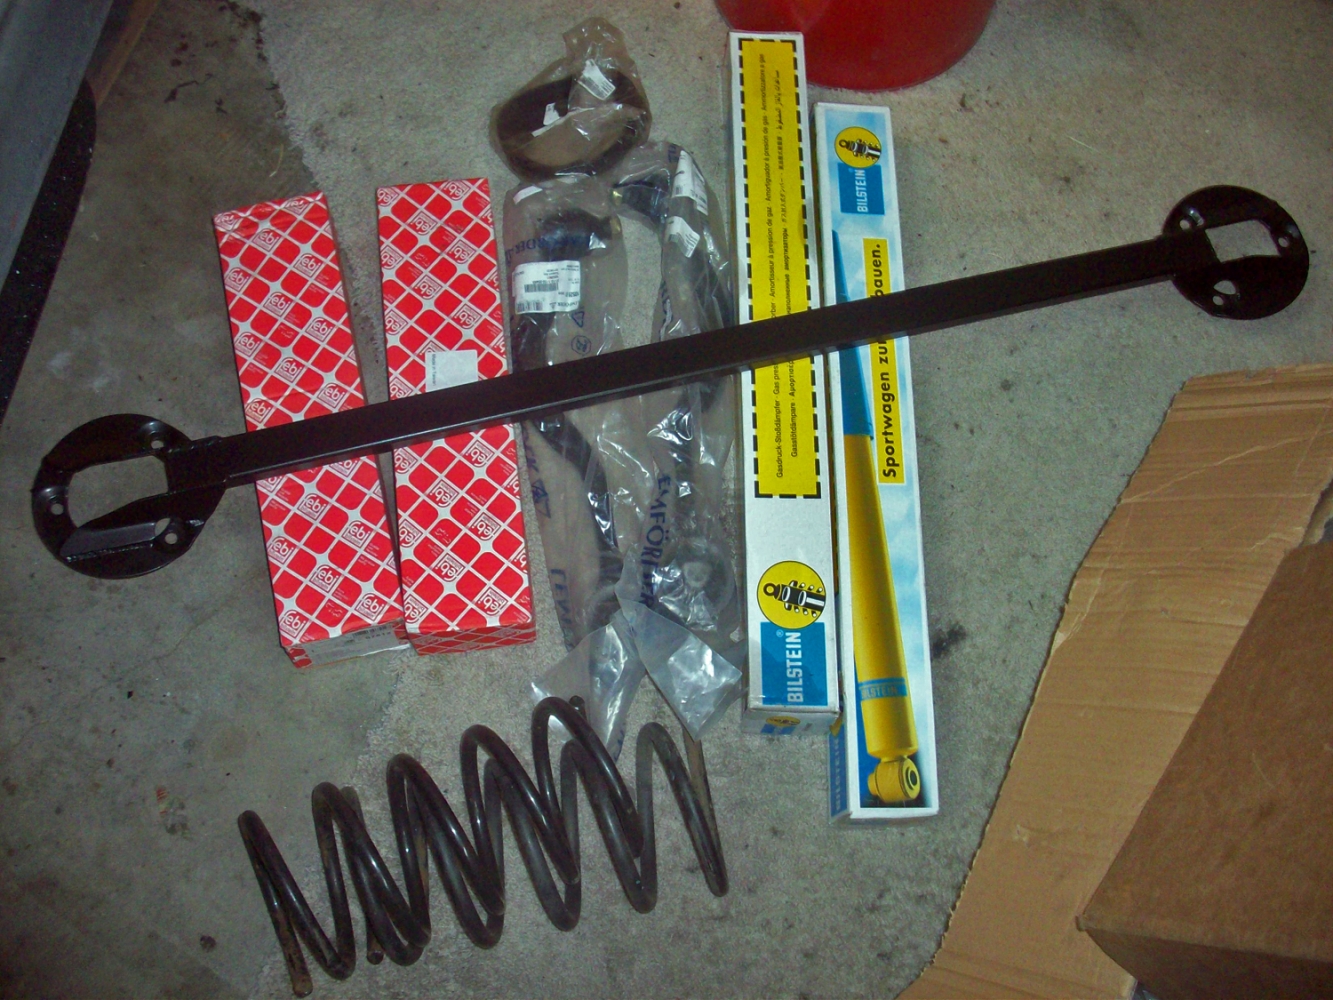
Lastly, I have my last major collection of parts ready to go on the car (finally!). Some of these parts have been in the garage since 2014 waiting to be installed.
Bilstein sport shocks, Eibach lowerin springs (from my 535i), brand new upper and lower control arms, and a Mason Engineering Steel strut bar. I am hoping to get these items reinstalled by this weekend.

Image

I put in an order for fixed camber plates from IE and I hope they will be delivered quickly. So far they haven't shipped, though. More updates tomorrow.

Re: Callaway 633CSi - 2/25 New Turbo Install Process

Posted: Mar 10, 2016 1:12 AM
by downforce22
tschultz wrote:
3. I have the valve cover breather venting to atmosphere with a "breather vent." Basically it won't allow small objects in or out, just air and vapors. Do I really need to plumb this back into the intake system (before the AFM) or is it acceptable to leave venting to atmosphere?

6. Fueling goes more rich in colder temperatures. I imagine this is the case with the standard system, but maybe it is exaggerated a bit more due to my larger injectors. I have further testing to do in warm weather, but like that my FQS switch will allow me to both add and remove fuel with the simple rotation of the knob. I still need to determine if this is a reasonable setting to change based on air temperatures. Maybe on hot does I effectively add fuel, and on very cold temps I might consider removing fuel.

7. With my current setup I am not using O2 feedback in any fashion. I have a terminal sitting there so I can connect and disconnect for testing purposes, but my current fuel method is not using O2. This leaves the O2 sensor in place but disconnected, and my Wideband sensor in place giving me digital AFR readouts.

8. The current wastegate is a non-name TIAL knockoff. The spring setting is 7 psi. No boost controller yet, but I have looked into them. First, I plan to bump the spring up to 11psi and tune fueling if required. The new TCD turbo seems to spool up about the same amount as the old Rotomaster. Overall power at 7psi isn't much less than the Rotomaster at 11psi. Good to know that I haven't really sacrificed anything with the new turbo. Also, the SS hardware had no problem coming apart.
I am hoping this power bump will allow me to keep up with stock E36 M3's on the track. They have the altitude loss of NA power, where FI doesn't lose quite as much.

9. The rear strut bar didn't fit perfectly. I had to elongate the holes slightly so that they would line up with the holes of my chassis. Not sure if this is due to the accident history of my car or the Mason Engineering Strut bar. Hopefully I won't have this problem with the front one. Regardless, the idea is that both are more tied together than before.
3. It is fine to leave vented to atmosphere but there are a couple things. Some people notice the smell as you have an oily vapor smell under the hood. From the factory it is recycled and burnt in the intake. You can't do that or you will pressurize the crankcase. With your current setup you could get water or dust in there (in the oil) so I recommend a filter.

6 and 7. Cold starts use the open loop ecu map to give fuel to the engine. With the larger injectors it is pumping in more than necessary hence the rich condition. After it warms up the coolant temp sender sends signal to the ecu which helps lean it out some. The oxygen sensor also is used to lean it out to stoich. Since youre not using the oxygen sensor you have the fuel pressure and injectors close to what the engine needs based off the open loop map. If you swapped to the 2.5 bar reg it would help lean it out during cold starts but it would also make you lean higher up in the rpm range. If you did that, you could use the BEGI to get your settings close to what you need. Hence the entry cost of standalone, less fiddling with parts to make it work right and more precision throughout the entire rev range.

8. When you change springs, the fueling requirements will change so keep that in mind.

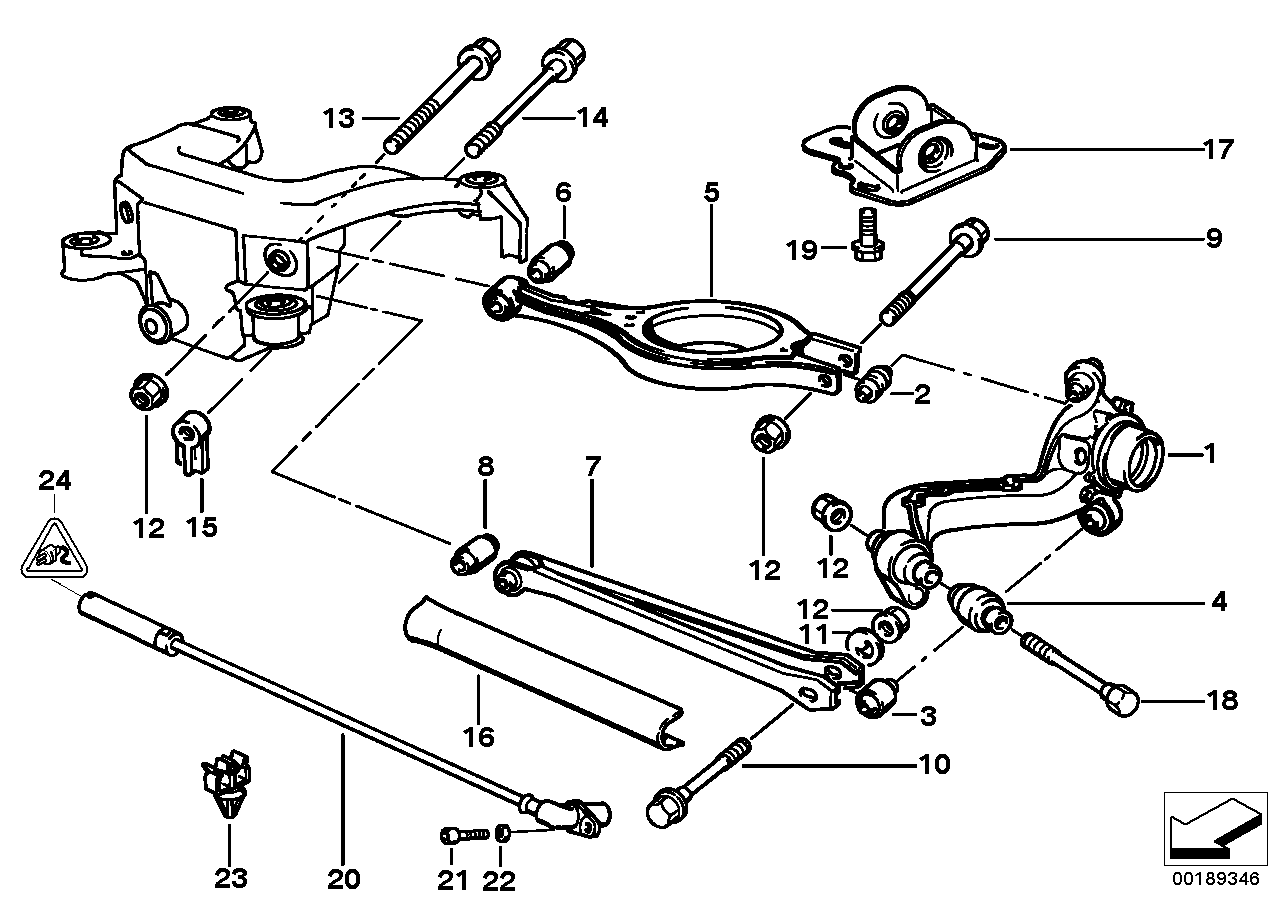
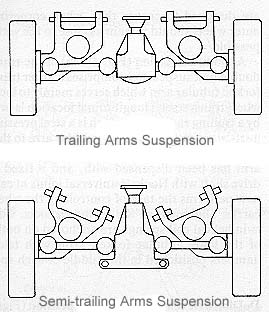
9. I was looking at this today and it led me further than I was originally planning on looking. I have some more research to do but here is what I gathered. Basically due to the suspension geometry used by bmw a rear strut bar may not have much advantage in an e24/e28/e30/z3 due to the rear semi-trailing arm layout. The forces on the suspension act directly into the rear subframe mounting points and the strut itself is just there to damp the springs. The upper springs perch absorbs a lot of force and, as seen below, due to the semi trailing arm, the lateral forces are absorbed by the trailing arm itself bolted into the subframe. Tying the rear struts together may not do a whole lot if the rear of the car is still stiff, a feat for a 25+ year old car, perhaps. Some people are of the idea that more stiffness is not a bad thing and I can see where they come from. The rear bench/tire well/speaker area should help stiffen the rear of the car but again, 25+ years old. Basically the rear subframe is where all of the forces go, look at the pictures below.

As for the front with the macpherson struts the lateral forces are sent into the frame via the control arms and the other mounting point, the strut towers. With some simple knowledge of torque and the height of the struts you could imagine the forces acting on the strut towers at high cornering loads and the amount of continued stress over 25+ years of driving. I think the front strut bar should help to stiffen the front up, but i am not so sure the rear is as critical to performance driving with the suspension geometry of these old BMWs.

Image

"Compare with the following rear suspensions, Trailing arm / Semi-trailing arm suspensions are rather old. It was commonly used in nearly all mid-price to high-price sedans before multi-link rear suspension became popular in 1990s. From '82 BMW 3-series to Mercedes 560SEC, even the Porsche 911, trailing arm / semi-trailing arm suspensions dominated half the world.
Trailing arm suspension (the upper picture) employs two trailing arms which are pivoted to the car body at the arm's front edge. The arm is relatively large compare with other suspensions' control arms because it is in single piece and the upper surface supports the coil spring. It is rigidly fixed to the wheel at the other end.

Note that it only allows the wheel to move up and down to deal with bump. Any lateral movement and camber change (with respect to the car body) is not allowed. Nevertheless, when the car rolls into a corner, the trailing arm rolls for the same degree as the car body, thus changes camber angle (with respect to the road surface). Now, you can see both wheels lean towards the outside of the corner, thus lead to understeer. Because of this reason, pure trailing arm was forgotten by car makers long long ago. Instead of it, they adopted semi-trailing arm.

Semi-trailing arm suspension (the lower picture) has the trailing arm pivoted at inclined angles - about 50 to 70 degrees. Otherwise are the same as trailing arm suspension. Apparently, the semi-trailing arms are half trailing and half transverse. You can analyse it by splitting it into two vectors, one is the trailing component and another is the transverse component. The trailing component leads to understeer, as already mentioned. On the other hand, the transverse component is actually equals to a swing axle suspension. Now, you may remember that the swing axle suspension always introduce oversteer due to body roll. As a result, the two components cancel each other and result in near neutral steering response.

Semi-trailing has a disadvantage - when the wheel moves up and down, camber angle changes, unlike double wishbones suspension.

No matter semi-trailing arm or pure trailing arm suspensions, since they are rigidly attached to the wheels, inevitably more shock and noise could be transferred to the car body, especially under hard cornering or running on bumpy roads. Moreover, a lot of unsprung weight of the trailing arm leads to poorer ride quality. Therefore most modern sedans replace it with multi-link or double wishbones suspension. Trailing arm / Semi-trailing is disappearing in the industry.

Advantage: All round, few weakness.
Disadvantage: Less refined than multi-link.
Who use it ? Many sedans and coupes."

E30 front and rear suspension
Image
E30 Macpherson strut front suspension.
Image
E30 semi-trailing arm rear suspension.

1976-81 6-Series suspension

Front:

MacPherson strut;
ZF power steering gear;
280 mm (11 inch) ventilated front disc brakes.
Image

Rear:

272 mm (10.7 inch) ventilated rear disc brakes;
3.45:1 (630 CS) or 3.25:1 (633 CSi) final drive ratio.
Image

1982-89 6-Series suspension

The front suspension is also substantially different from the original layout, although variable ratio power steering remains as trustworthy as ever. Note the double link strut principles of 7-Series have been adopted, then adapted via 5-Series for BMW's prestige coupe.
Image

The 1982 BMW 6-Series picked up the 528i's use of the 13° rear trailing arm layout and additional top mounted link. Note that the 1982 cars have quietly dropped the use of ventilated rear disk brakes, falling inty line with 5-Series too.
Image

"BMWs have always been famed for their superb handling, together with the wonderful engines these two things define what a BMW is all about. The big breakthrough for BMW came with the Neue Klasse saloon in the early 60's. At a time when most cars had a rigid rear axle the BMW 1500 introduced independent rear semi trailing arm suspension coupled with front Macpherson struts and thus invented the compact affordable sports saloon! The Neue Klasse was a revelation in handling terms. The system is similar in principle to the later E30 system show in the above diagrams.
The system was developed continuously and worked well until being replaced with the Z axle multi-link rear suspension pioneered on the Z1 and 8 series. Although a good system the semi-trailing arm suspension has some geometry shortcomings under hard cornering, these are resolved by the more complex multi-link system. One of the few BMWs not to use either system was the race bred M1. Most E36s have the Z axle but interestingly the Z3 and Compact kept the old system to save space (and money)."

"The semi-trailing arm design is a lighter, smaller, cheaper suspension design that just pivots on one axis. There is one moving piece involved.

The multi link (z axle, E36/E46, etc...) has three moving parts and better controls camber (and maybe caster & toe) through it's full range of motion. This helps keep the tire in proper contact with the road.

As for better, the z-axle will have a more refined ride and will be better able to handle uneven road surfaces since it maintains better tire contact as the suspension moves. The downside is weight, cost & complexity. For the same reason, I believe multilink cars have reduced throttle oversteer since the tires have better contact during bumps. If a road surface was perfectly flat and smooth the difference would be less, but in the real world there are potholes, bumps, road undulations, etc....

For a daily driver I'd take a multilink. If you need a superlight track car (on a good, smooth track) a semi-trailing arm would work."

"Z-Axle" / Multi Link - E36/E46/Z4/others. #1, #5 and #7 move.
Image

Re: Callaway 633CSi - 2/25 New Turbo Install Process

Posted: Mar 10, 2016 9:23 AM
by tschultz
Interesting detail, thanks for sharing.

Yesterday, I stumbled upon an old link and happened to try wayback to see if it had been saved.

To my luck, it had been saved and has great discussion on lowering, strut bars, suspension design and other interesting details, relating mostly to an E30 M3. I like the brief and to the point discussions here as I haven't yet started reading any books on suspension theory.

But take a look here, it has good info:

https://web.archive.org/web/20071011235 ... theory.htm

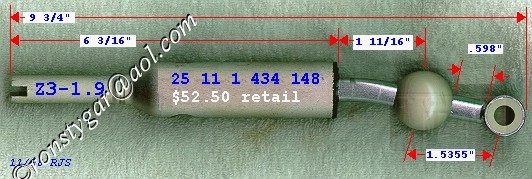
Also, some good information on E36 Shift Levers vs Z3 1.9. I am thinking the Z3 may be shorter than I'd prefer, so I am saving this tidbit here. It will also provide a point of reference from my current shift lever (Z3 1.9)
Not sure if the Euro M3 e36 with the S50 engine/gearbo combo has a different Gear lever though. My Sport Evo came with a Z3 1.9 shifter, which I replaced for an EURO M3 e36 (I took it out of the donor car myself) and the latest is almost an inch higher and the throws are longer enough to reduce the notchiness but I have no link to show it so you'll have to trust me on this...

EDIT:

Just took a better look at the link and actually THERE is a difference between the Euro M3 and the US M3 e36 lever's. Euro M3 (same as E46 M3 and M5) is a 5.63:1 and US M3/328 is a 4.86:1 whereas the Z3 1.9 is in between (5.13:1) in terms of ratio. So as I said, the EURO M3 e36 has longer throws AND has a longer lever from the ball up.
Image

Image

Re: Callaway 633CSi - 2/25 New Turbo Install Process

Posted: Mar 12, 2016 6:13 PM
by tschultz
I registered for a track day in april and have been aiming to get everything ready for that day. It will be interesting to see how the changes I have made affect driving dynamics and approximate lap times. As I mentioned before, I hope for the car to be on par with E36 M3's. They have a similar weight and likely similar power figure I'd imagine.

I spent probably about 9 hours this week taking apart the front end of the car and replacing the suspension components now that the exhaust was brought up and in.

I had done this before on my 535i is separate steps where I would either do shocks/springs only, or control arms only. I knew it would take some time to do it all so I started early.

I didn't take a lot of pictures as I was super greasy from the amount of old, caked on grease and dirt on the car. Upper and lower control arms were a difficult proposition because the sway bar was in the way. I didn't want to take it off as I recall it being a tight fit and difficult to install. Luckily an adjustable wrench got me enough onto the nuts to take them off.

The control arms looked totally shot, with visible cracks all the way through the bushing. The ball joints seemed OK all in all. I had a new set of standard control arms, so I don't have the Meyle HD arms on there, but I figure it's a place to start.
Then I removed the front struts, which was relatively easy considering I have done it probably 5 times prior with my e28's. I had all the tools I needed and got the struts out. interestingly, they had a different 'gland nut' holding in the shocks than I had seen in the past. This led me to believe they were original (9/82) to the car. Luckily not rusted in place, but a nice 18" pipe wrench helped me take them off. The bump stops were destroyed, along with the dust covers.
The old shocks did not absorb anything or rebound at all. Prior, I was basically riding on front springs only! '

The new Bilstein sport shocks slid right in, and I got everything reinstalled with my old Eibach springs that used to be on my 535i. I had liked how they performed for me on my 535i at the race track in the past, and they were much better than a progressive coil like the H&R's.

I finally got everything back into place, and then pre-loaded the new suspension bits. I think my alignment is now off, and I have some excess toe-out but I will look at this later in the week. I may or may not get it aligned just yet. Since everything is new, it is easy to adjust, and I can get real close by eyeballing it on the ground and then driving it and rechecking it.

The sway bar adjustable links (from Ireland Engineering) were one of the last items to reinstall. Unfortunately I found that one was cross-threaded by the previous owner. I hope to get it cleaned up or even remade at my work this week.
Also, the O2 sensor was cross threaded in the exhaust :roll: I need to call the shop and see if they could fix it monday. I want a new sensor and/or bung if it is messed up! I didn't loosen it and haven't touched it so that I don't have to pay a cent.

On to the pictures! I think it looks good all in all :)

Image

Image

Image

Image

You certainly notice the et20 wheels and the arches sticking out. The BBS RS's or these 32's with 12mm spacers would fit very well, I imagine!


Is this really the same car as page 1? :shock:

Image

Image


Initial impressions: Well, there is no front sway bar hooked up currently, so the car has a little worse turn-in response than before. But overall, it rides very well over the bumps (with no sway bar, hah) and seems like it should work well.
The Z3 shift lever sits a little lower than i wanted, but after driving, it is pretty nice in terms of throw. I might still go for E36 Euro M3 lever, just so that the longer lever length reduces the force required to shift into each gear. But overall, it was easy to get used to; it's a good upgrade to really eliminate a lot of the normal throw of the g265.

The recirculation of the bov has helped a lot! The car no longer wants to stumble after shifts, and feels a lot more smooth with this modification. I imagine with my plumbing, that the vacuum of the turbo helps to pull any built up blowoff pressure from the intake tract when the throttle is closed. I feel a lot better after driving it.

Also, the BOV had been opening slightly at idle, causing a lean condition. This had been an on-going problem that I hadn't tracked down. I happened to notice it when I pulled the car in the garage this week and I wondered if it had anything to do with the breather vent that I added on the valve cover. With the old hose (and narrow relief opening), I would occasionally find the dip stick popped out of the tube, and I imagine there was some crack-case pressure (bad). Now, the dip-stick hasn't popped up, and there seems to be more vacuum at idle. This was pulling the BOV open enough to run lean, but now any air pulled through has already been metered by the AFM.

At idle, my mixture was very rich (12.3:1). I loosened the AFM bypass screw and it idles at about 13.5:1 now. I would like this closer to 14.5 or so, but I imagine it is ok as-is. Fueling is quite good right now, with approximately 11.5-12.3:1 AFR's. I have the BEGI all the way opened, and it seems like I could use either the 2.5 bar fpr to reduce fuel pressure slightly, and then correct with the BEGI adjustment needle valve. Hope to try that in a few weeks.

More details to come later this week.

Re: Callaway 633CSi - 2/25 New Turbo Install Process

Posted: Mar 14, 2016 9:54 AM
by tschultz
Right now, the car is running probably the smoothest since I have owned it, and I think a lot of it has to do with the recirculation that I set up last week. No more stumbling after shifts, and no more lean idle. There's almost no more BOV noise, but that's OK with me :heehee:

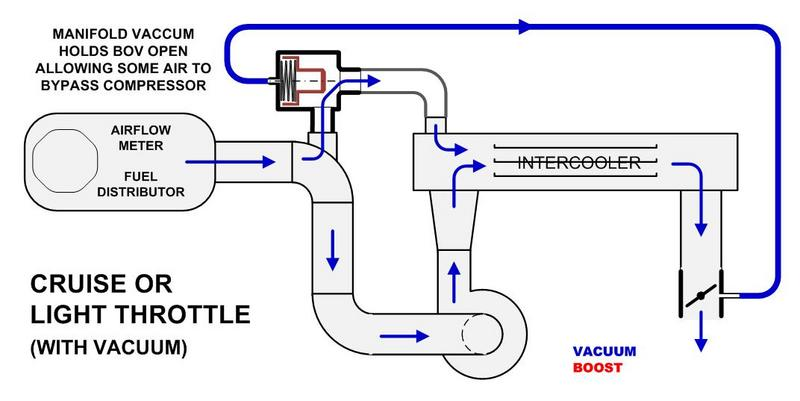
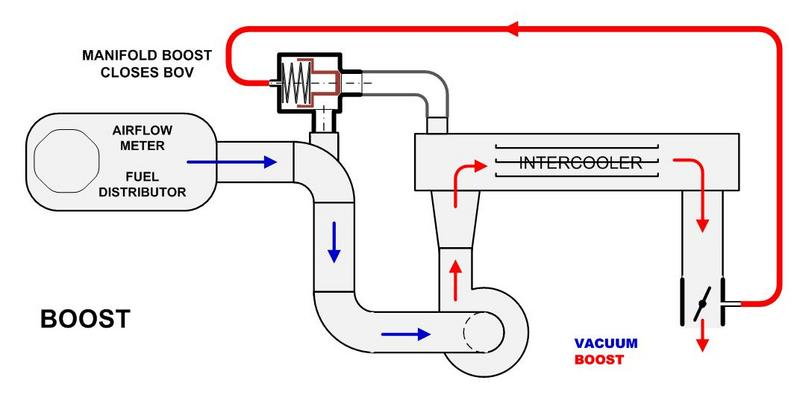
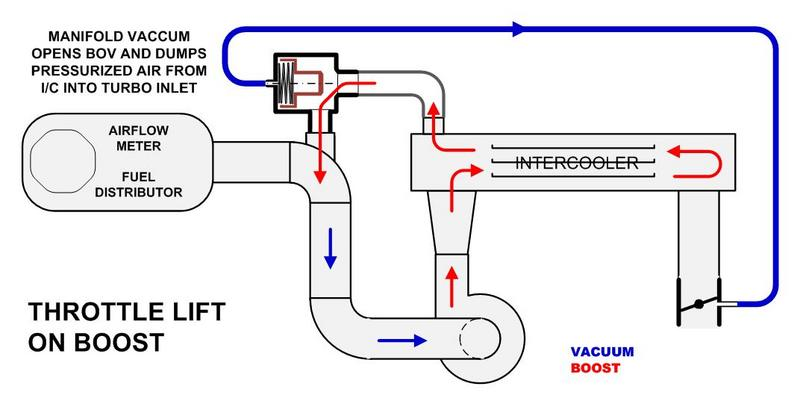
My BOV: I believe it is an Audi replacement/aftermarket valve-- I had purchased it on ebay, and it seems to be working well. I liked it because it wasn't plastic, it had hose connections, and a spring adjustment in case it was too stiff or too soft. Here's a schematic of the way my valve is set up, the only difference being my valve is placed right before the throttle plate, so excess pressure is vented right at the throttle.

Image

Image

Image


According to the discussion, this may help boost build slightly, along with reduce the load in conditions like idle where air can bypass the turbo and intercooler. Anybody else tried theirs this way?

http://forums.pelicanparts.com/911-930- ... v-lag.html

I let my friend Mike (who did the engine swap with me) drive the car again. He has been able to ride in it/drive it at a few of the major milestone points and give me some feedback. Back in October he drove the car and was surprised with how nicely it was running (with the old turbo) since we had first started it up.
Yesterday, he agreed that power delivery was much smoother than before, not much a launch you back in the seat all at once, but rather progressive acceleration until you look down and realize how fast you are going. He was really impressed with how much smoother the car is running in general, and mentioned he thought the car felt faster than his M635 (at altitude)!

I would still like to tinker around with swapping the 2.5bar FPR (at another location), and possibly getting the 10psi wastegate spring from my brother. As I mentioned before, 10psi is really the max for me with stock headgaskets and head bolts. Want to keep it reliable :)

Re: Callaway 633CSi - 2/25 New Turbo Install Process

Posted: Mar 14, 2016 9:09 PM
by ZenitramNaes
Jesus, that car was a disaster before you got ahold of it. Glad it's getting the attention it needs.

I just kind of browsed through this, lots of reading. I'll have to go through it later to catch up but nice work so far!

Re: Callaway 633CSi - 2/25 New Turbo Install Process

Posted: Mar 15, 2016 2:42 PM
by white chocolate
Man, this thing is awesome, what a transformation!

Love your updates, keep up the good work!

Re: Callaway 633CSi - 2/25 New Turbo Install Process

Posted: Mar 15, 2016 2:52 PM
by tschultz
Thanks guys! Still a lot of detail work to continue working through, but it is coming along!

Re: Callaway 633CSi - 2/25 New Turbo Install Process

Posted: Mar 22, 2016 9:02 PM
by tschultz
I installed Ireland Engineering fixed camber plates (e30maxplate) only to hear them rubbing when coming out of my driveway. This was disappointing, especially since after some digging, I found that others on this board had the same problem. My beef is that they didn't advertise the plates would make the springs rub, even though I specified my car and they advertise E24 fitment. Additionally, the plates have studs that aren't long enough on one side, and too long on the other side. Lastly, they didn't fit the strut bearings well-- I had to force them together with a pair of channel locks.

So, i decided to order the Turner fixed camber plates since I noticed them on sale. I was able to install them tonight, and the front of the car feels much more willing to change direction than ever before. The best part--no rubbing of the springs.

I am hoping to return the IE plates, we will see what they say.

Re: Callaway 633CSi - 2/25 New Turbo Install Process

Posted: Mar 29, 2016 2:57 PM
by tschultz
A few updates:

I got a deal on some used Performance Friction 11 pads from a E36 M3, so I installed them in preparation for my upcoming track day. I was originally looking for 08's after conversations with a few people, but I couldn't argue the entry cost for these PFC 11's. Just breaking them in, they are must better at stopping the car than the stock pads. Of course there is a little squeaking too though.

I got the boost controller in the mail and it does seem to make a difference in mid range drivability/spool! Small difference, but noticeable at least. I messed with it briefly and adjust boost to 11psi before bringing it back down right away. Have to continue dialing fueling before upping the boost.
I used the dawes-device unit and am very happy with it. I will get pictures at some point...

I also put in the E36 M3 Euro shift lever (E46 M3, E39 M5) and that placed the knob in the same position as stock. The Z3 shifter was nice, but it sat lower than my liking and made 2nd gear difficult to shift into on cold mornings. The throw is in between the Z3 and the stock lever, but finding each gear is more precise than the stock lever.

I took the car on Saturday in for an alignment. Front camber was a pleasant -1.6 and -1.8, with rear about the same at -1.8 and -1.9. I had toe set at -0.5* toe on each side.

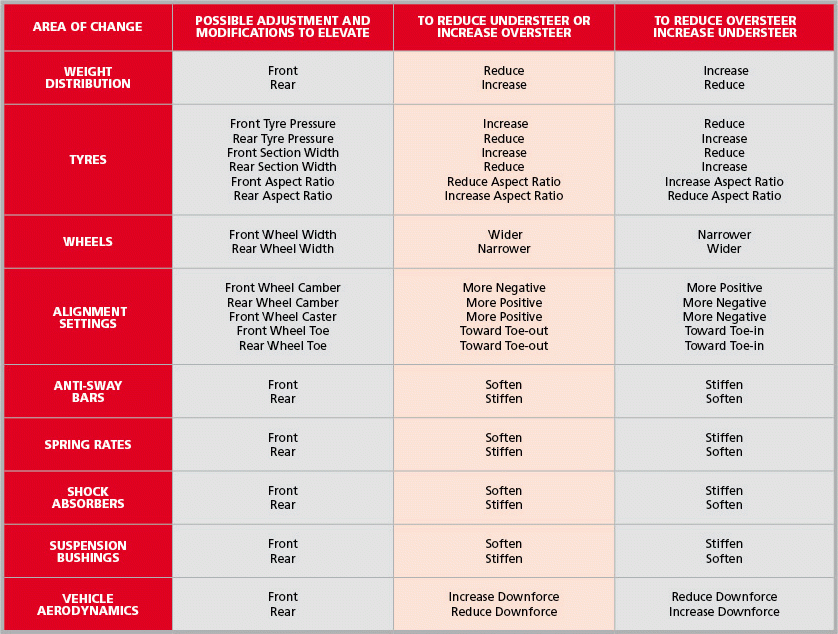
My recent free time has been used researching vehicle handling as I now have a few aftermarket handling parts on my car. This has made me interested in general handling trends/characteristics. Here is some nice information I found that I wanted to save for later use.

Image

Posted elsewhere here on mye28:
Image

Image

Image

Image


On the road, the (Turner Motorsport) camber plates improved turn in response, and with the new shocks/springs, the car feels solid and fairly compliant. Only in cold weather (below 50 F) does it feel rough on the bumpy roads. Returned the IE plates, as they told me varying information from me installing the parts wrong, to the parts not fitting any 633's, to fitting only 635's (like my E12 based car, no way). But they accepted the return which was nice. Excited for the next steps!

Re: Callaway 633CSi - 2/25 New Turbo Install Process

Posted: Apr 03, 2016 7:56 PM
by tschultz
So I got some work done today on the car. I drove out to my Welder's place and put the car up in the air.

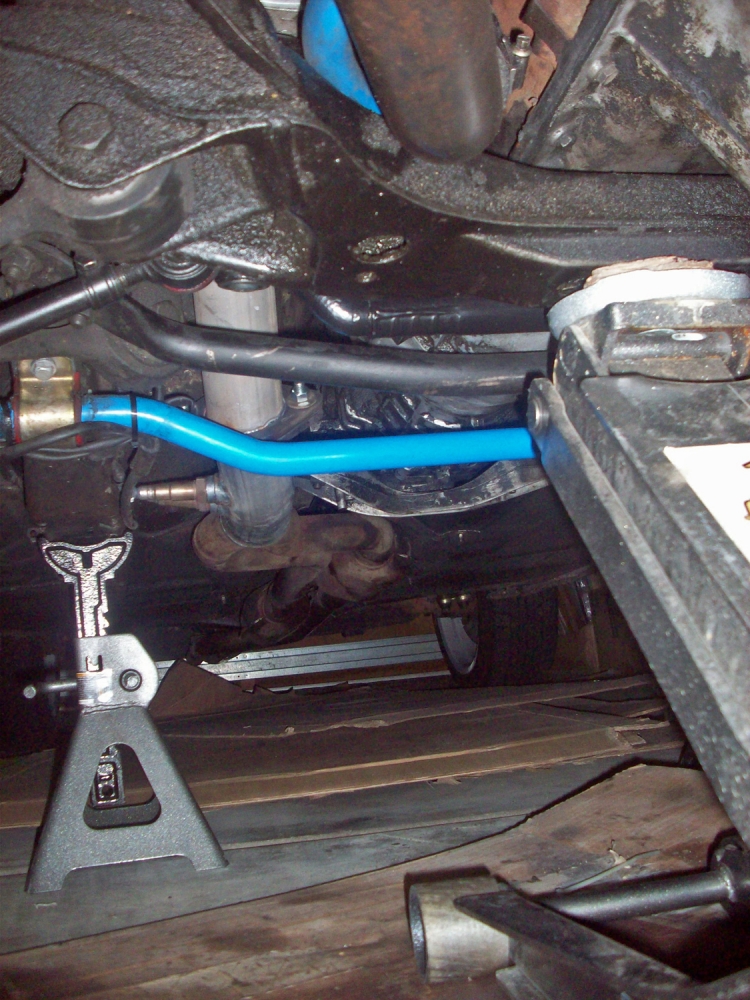
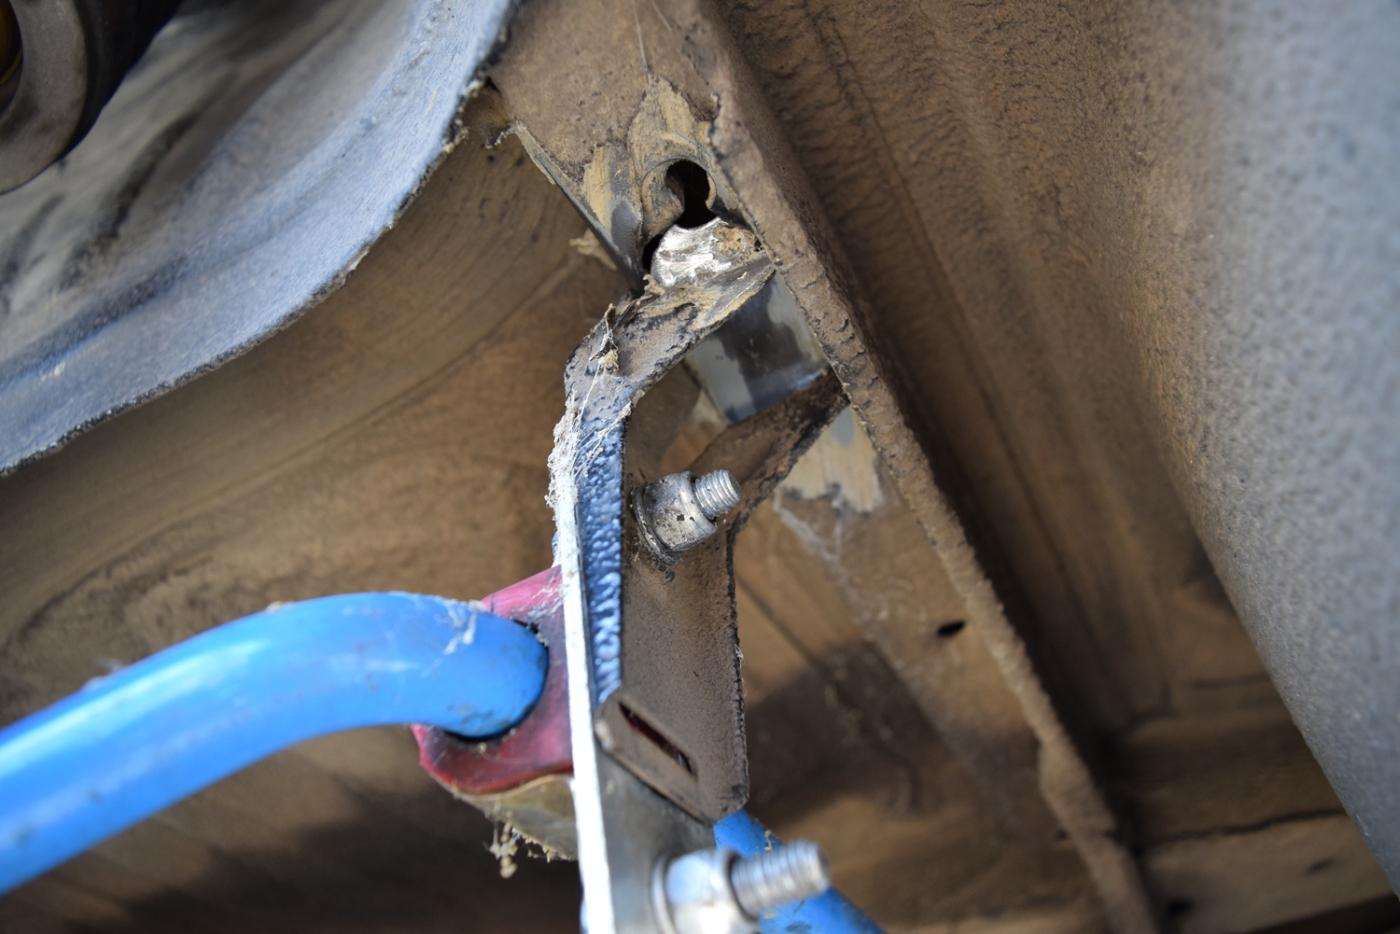
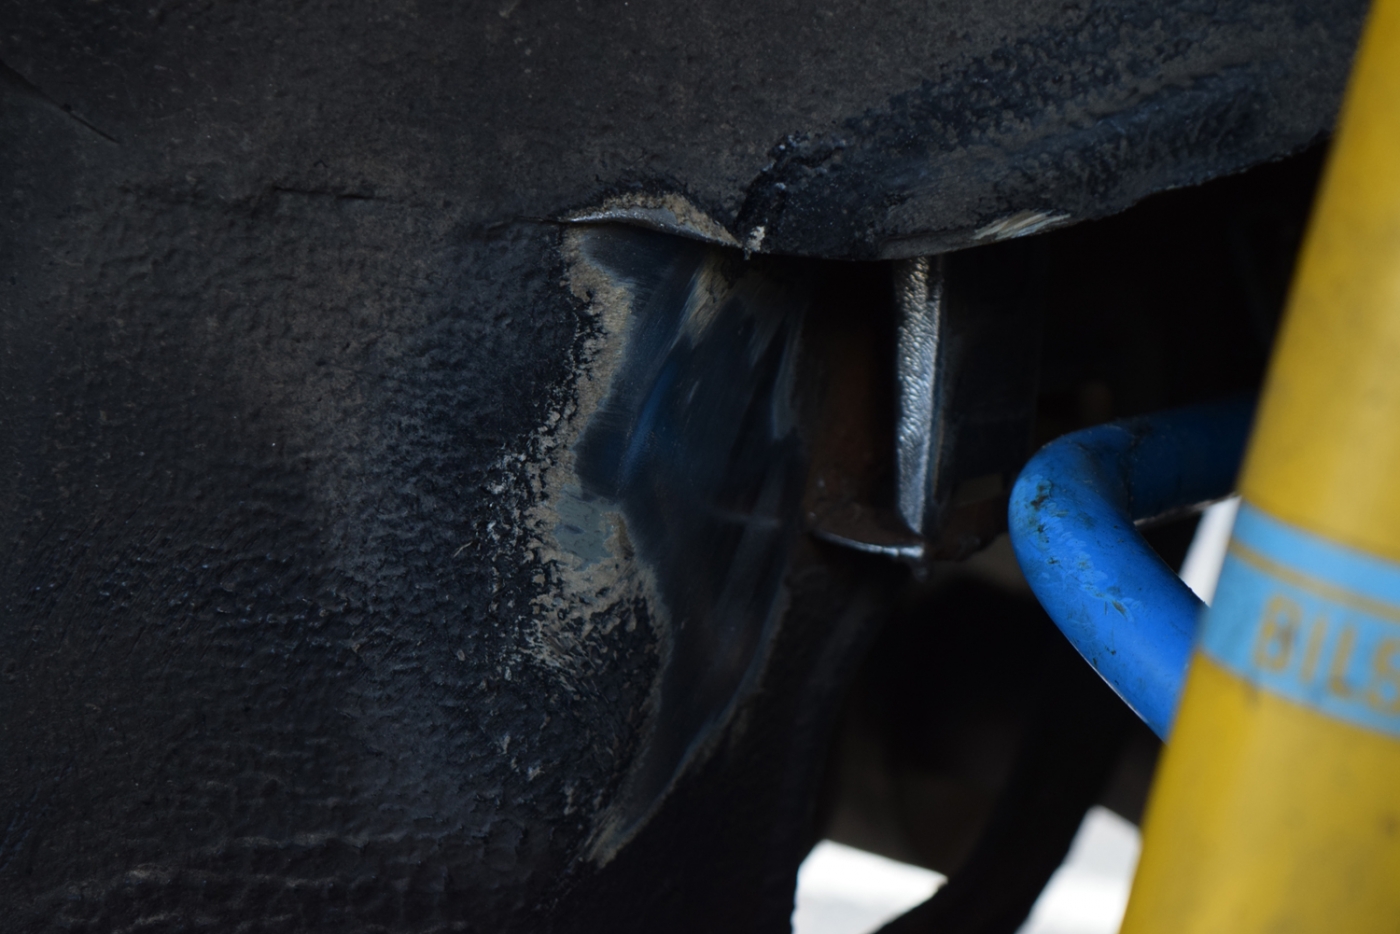
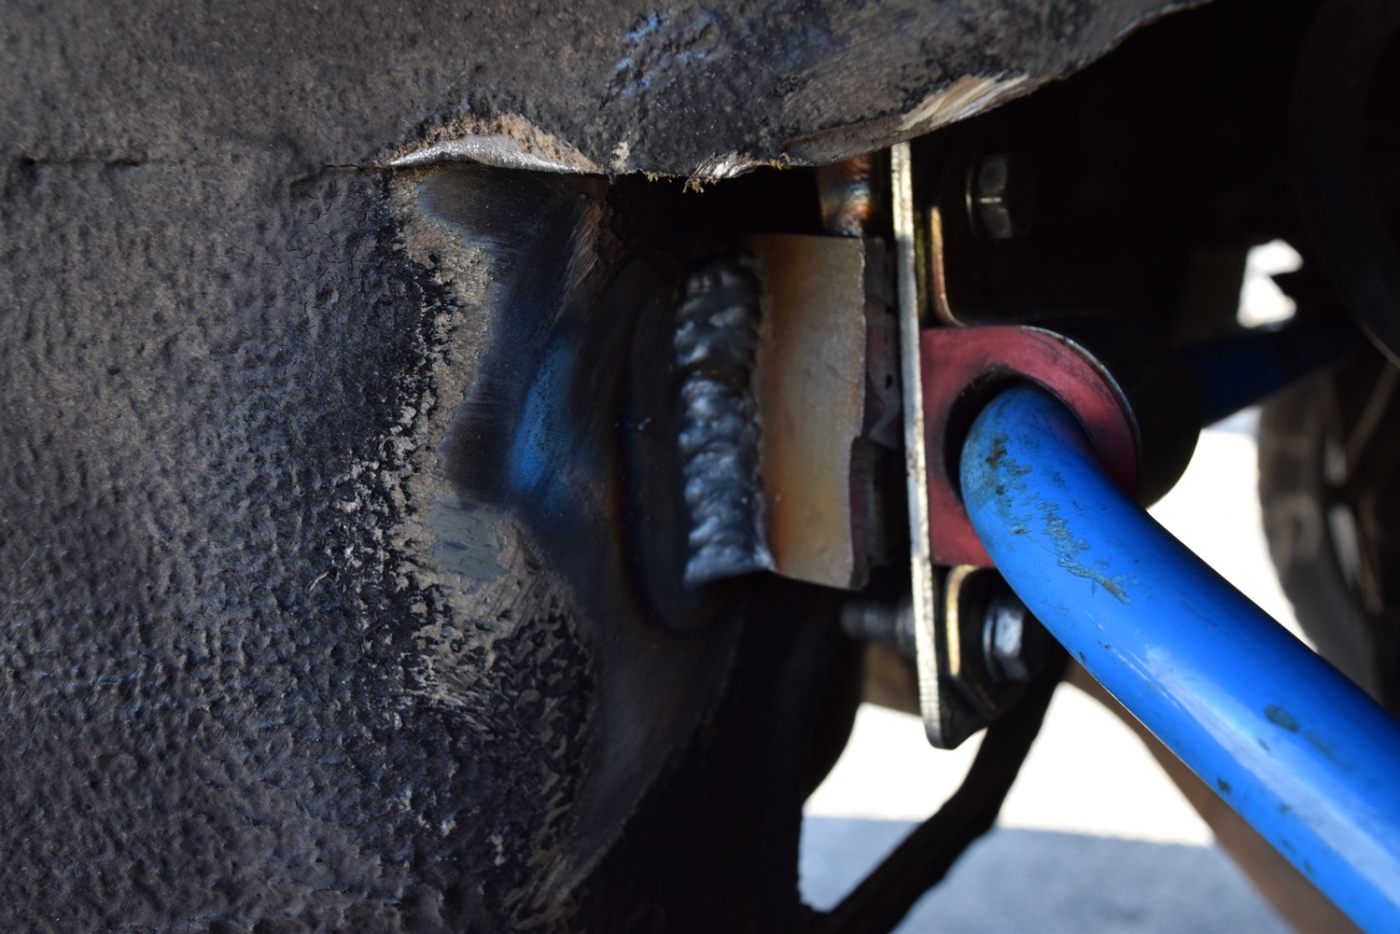
After taking off the rear wheel, I saw the rear sway bar mount sheared off the unibody. in effect, i have driven all week with no rear bar. It was predictable and understeered a bit more, that's all. I was going to get this fixed as I saw the problem starting to develop a couple weeks ago. Recall this is a 633, so the mounts are the early style. They are weaker than the later e28 mounts, and nobody has a reinforcement fix for them

Where it failed:
Image


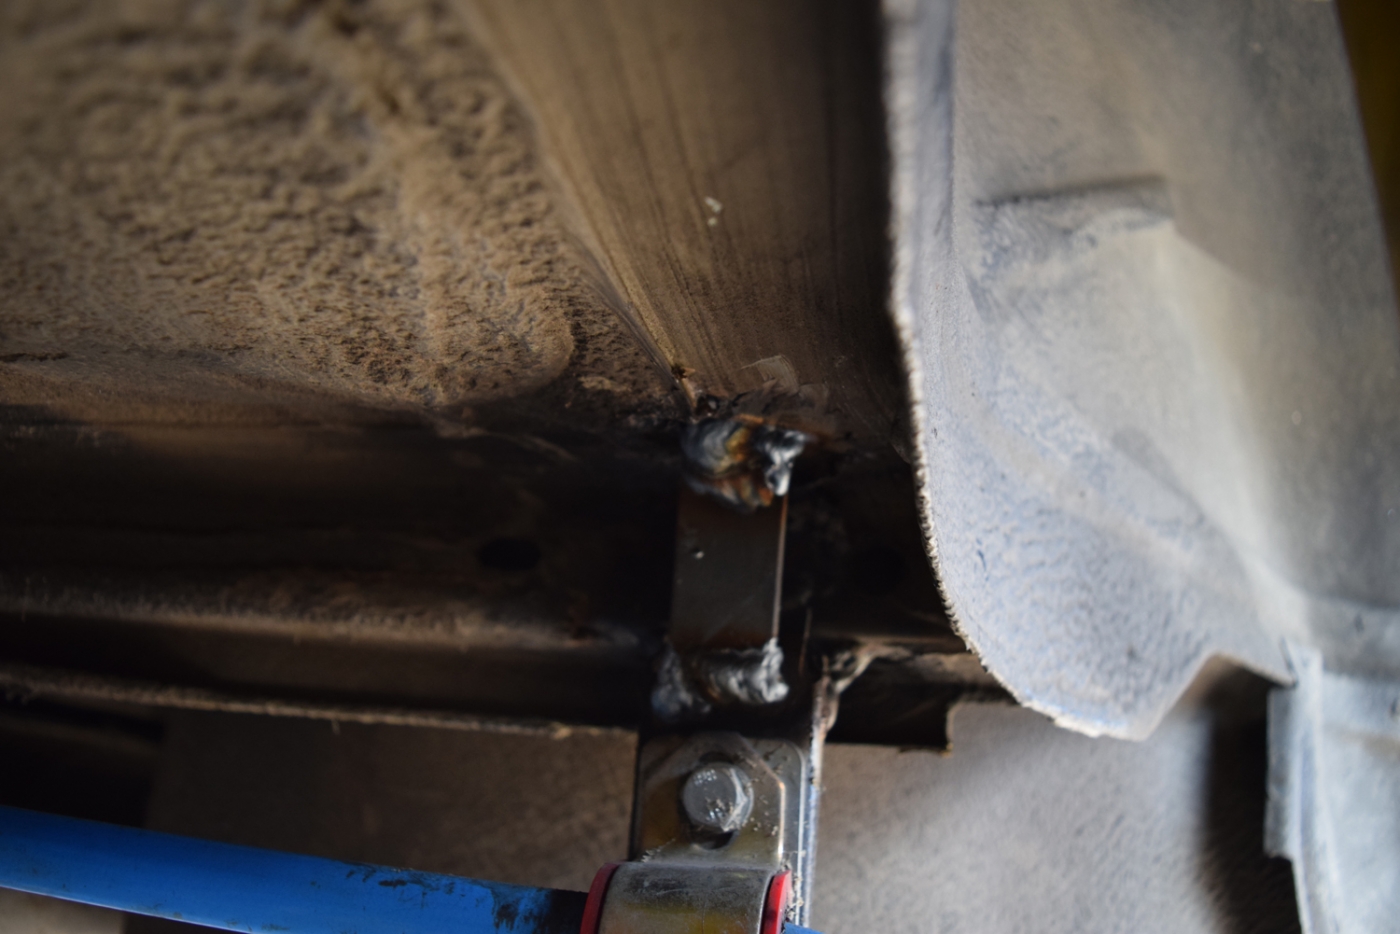
I had my welder re-weld the stock locations, although they are mounted in a location that is somewhat flimsy. I added a 1/4" thick plate of steel to the back side to hopefully give some structural support. We figured the underbody was the best bet since everything else around this location was super thin sheet metal.

Image

The passenegr side is boxed in somewhat already to the heat shield/splash guard for the gas tank. We decided to add another one of these small plates to the face of the guard, and the corners of the bracket.

Image

We had to trim down the weld beads a bit because the IE mounting plate needed to sit flush against this bracket. I hope they both hold up at the upcoming track day.

Image
Unfortunately on the way home, my AFR's became very rich. To the tune of 11.5 idling and 12.5 cruising. The only thing I did from when I parked it was unplug the battery so that the welding wouldn't damage the electronics. Nothing else was touched... If you recall I am running no O2 and was operating off whatever map the Motronic has stored (-6% fuel due to FQS setting). For reference, the idle before was about 13-13.5 idling and 14.7 cruise --the settings were really close to what I wanted! I just checked, and fuel pressure was at 40psi when idling...

Any ideas?

Re: Callaway 633CSi - 2/25 New Turbo Install Process

Posted: Apr 04, 2016 7:03 PM
by tschultz
I was able to get under the car today and spray those exposed metal parts with body undercoating.

I also bled my brakes with Typ 200 (amber version of super blue) and installed my spare set of summer tires. They are summer tires that have probably 15000 street miles and also 5 track days on them (mounted on E28 M5 wheels). I noticed that the driver side caliper is sticking a little bit with the new pads. I will work it in and out tomorrow to hopefully solve that issue.


In other news, I started the car up and was getting very rich idle, 11-12 AFR's like I described yesterday. I reconnected the stock Narrowband O2 sensor and let it idle for a bit before taking it around the block. Of course, target 14.7 mixtures were achieved which was good.

Next, I disconnected the O2 sensor at the plug. Mixtures were close 15:1 idle, so I took it for a drive. All of the sudden my normal 14.7 cruise (open loop) was restored. Obviously the narrowband input somehow saves to the ECU. I am not sure if this is in threshold "brackets" or what, but good to know that if I disconnect the battery, this will restore my mixture.

I don't leave it connected all the time because I disconnected my TPS WOT signal, so under boost the computer actually fights injector hold time to achieve 14.7 (bad!), where the RRFPR still increases fuel pressure. This alternate methods seems to work reliably in my experience, and I could return to stock form if I wanted... Obviously my AFM didn't need to be adjusted either. I can simply turn the idle bypass screw and slightly dial in the mixture if I like. (For reference I am doing this with 24lb injectors and the FQS switch at -6% fuel.

Re: Callaway 633CSi - 2/25 New Turbo Install Process

Posted: Apr 12, 2016 10:29 AM
by tschultz
So this week I was able to get the car out to the track with all of the major items installed. I wasn't quite happy with my mixtures, but didn't want to spend the day fiddling, so I went with the setting on the BEGI. Those settings were full open needle valve and center screw of RRFPR. Transition to boost was slightly rich (12.5:1), and with boost got progressively richer down to 11:1 and even in the high 10's on the long straight. I didn't get the correct restrictor with the BEGI, but I was using a .080" vacuum connection. From what I read this was the same as supplied with the begi from the start. Either way, the car would cruise at about 14.2:1 and this got worse in colder temperatures, so I was hoping for a warmer day.

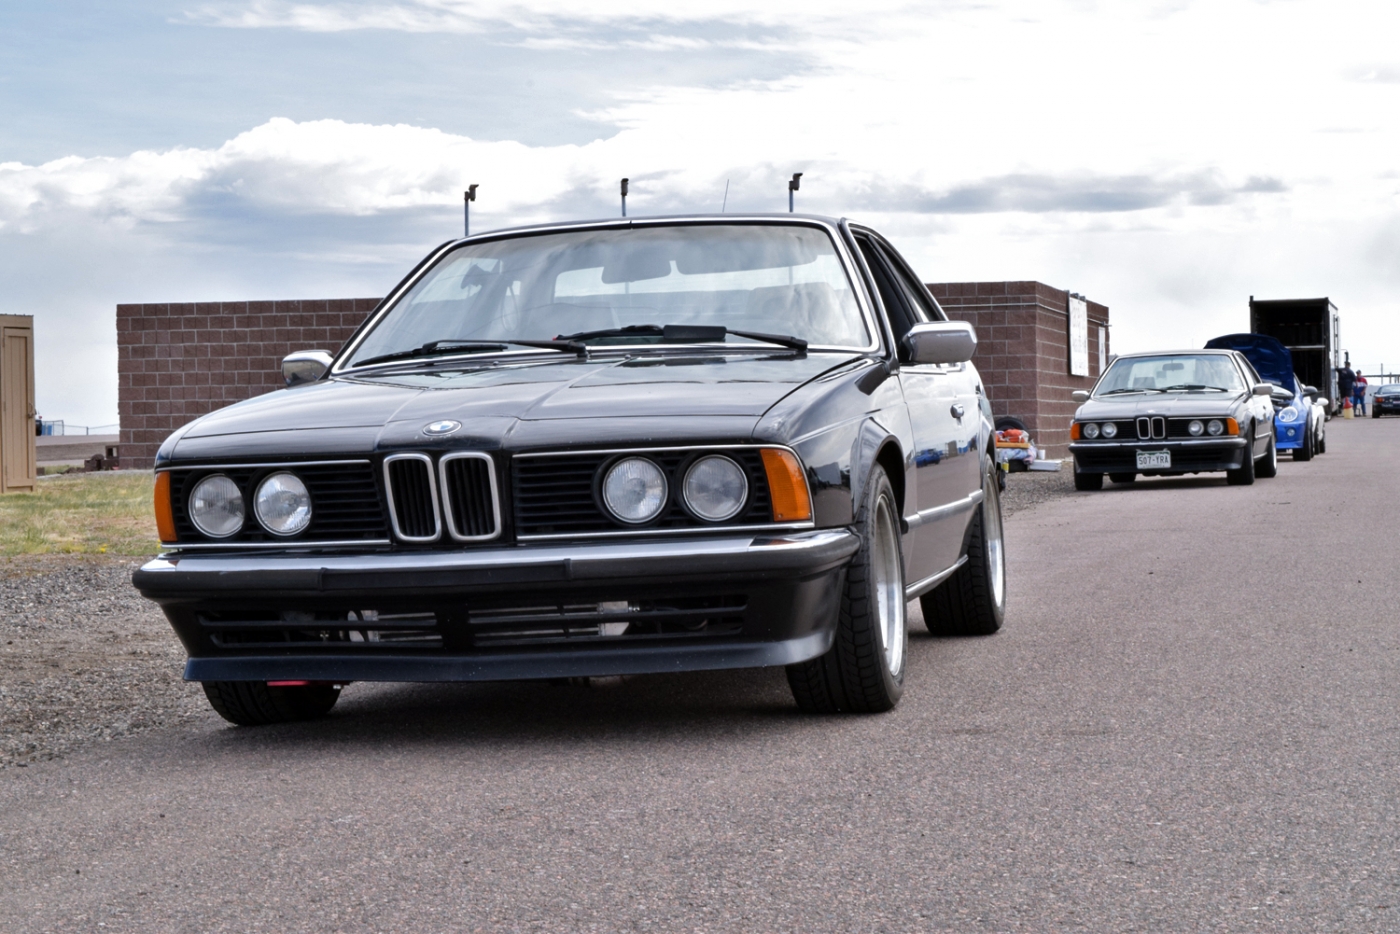
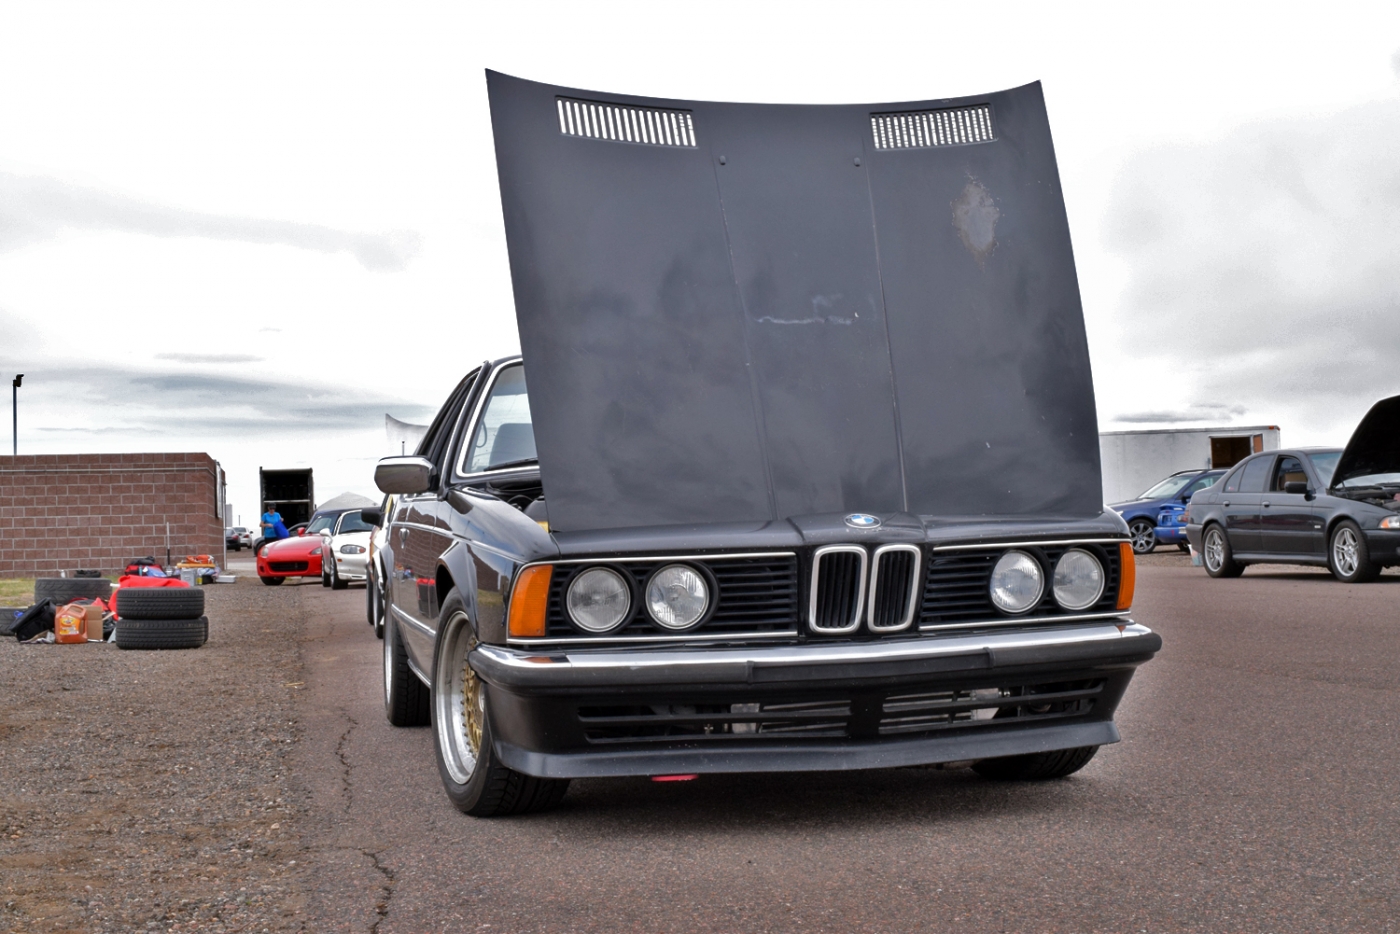
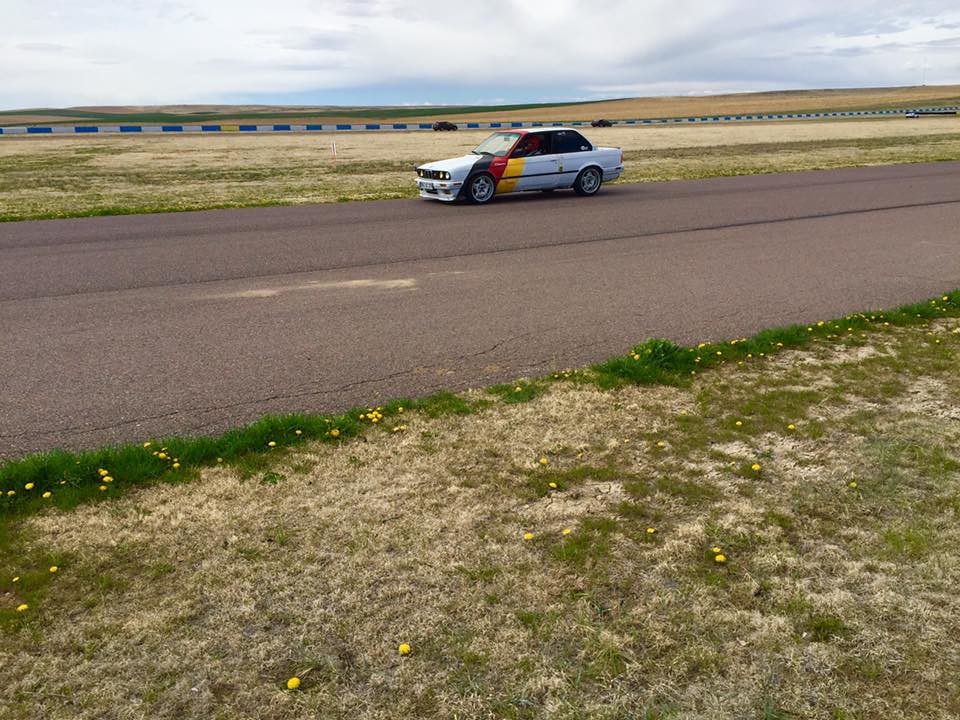
We drove out to the track and my friend Mike who swapped the engine with me decided to cruise out with us for his first time ever at a track. He really seemed to enjoy the sights and sounds. Here's a photo of his '86 635CSi with the early euro bumpers behind my car.

Image

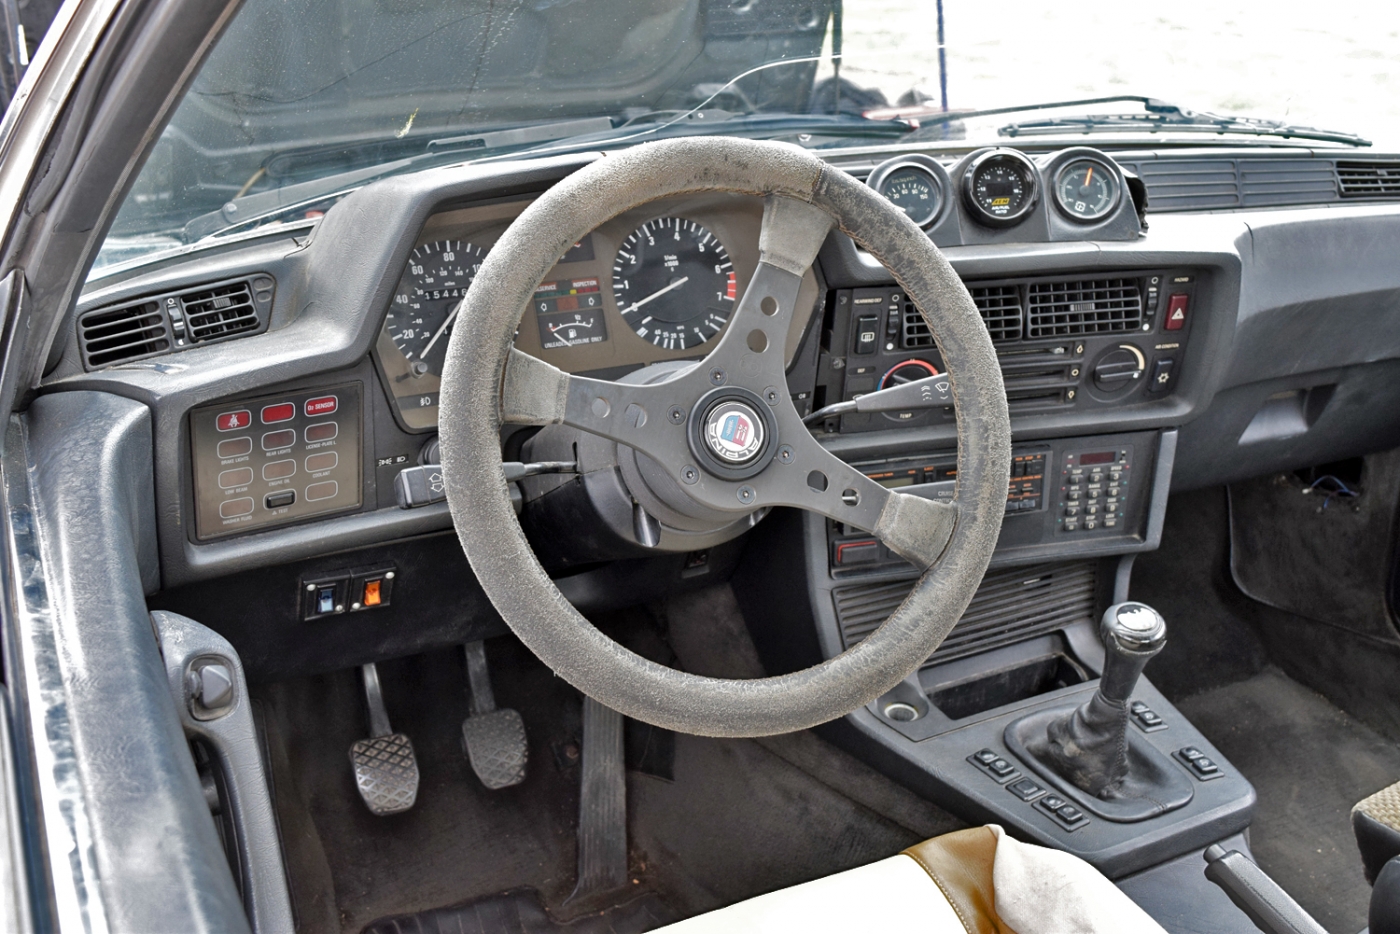
I had installed the Racemark steering wheel earlier in the week, but had found it to obstruct my view of the gauges (330mm). It felt really nice and made the car seem to steer more quickly, but I decided to put on a similar wheel that I purchased, I think it is 350 or 360mm. It's the same steering wheel, but instead of leather, it had a worn suede material. This was great compromise between the stock wheel and the 330mm and was very easy to grip with driving gloves.

Image

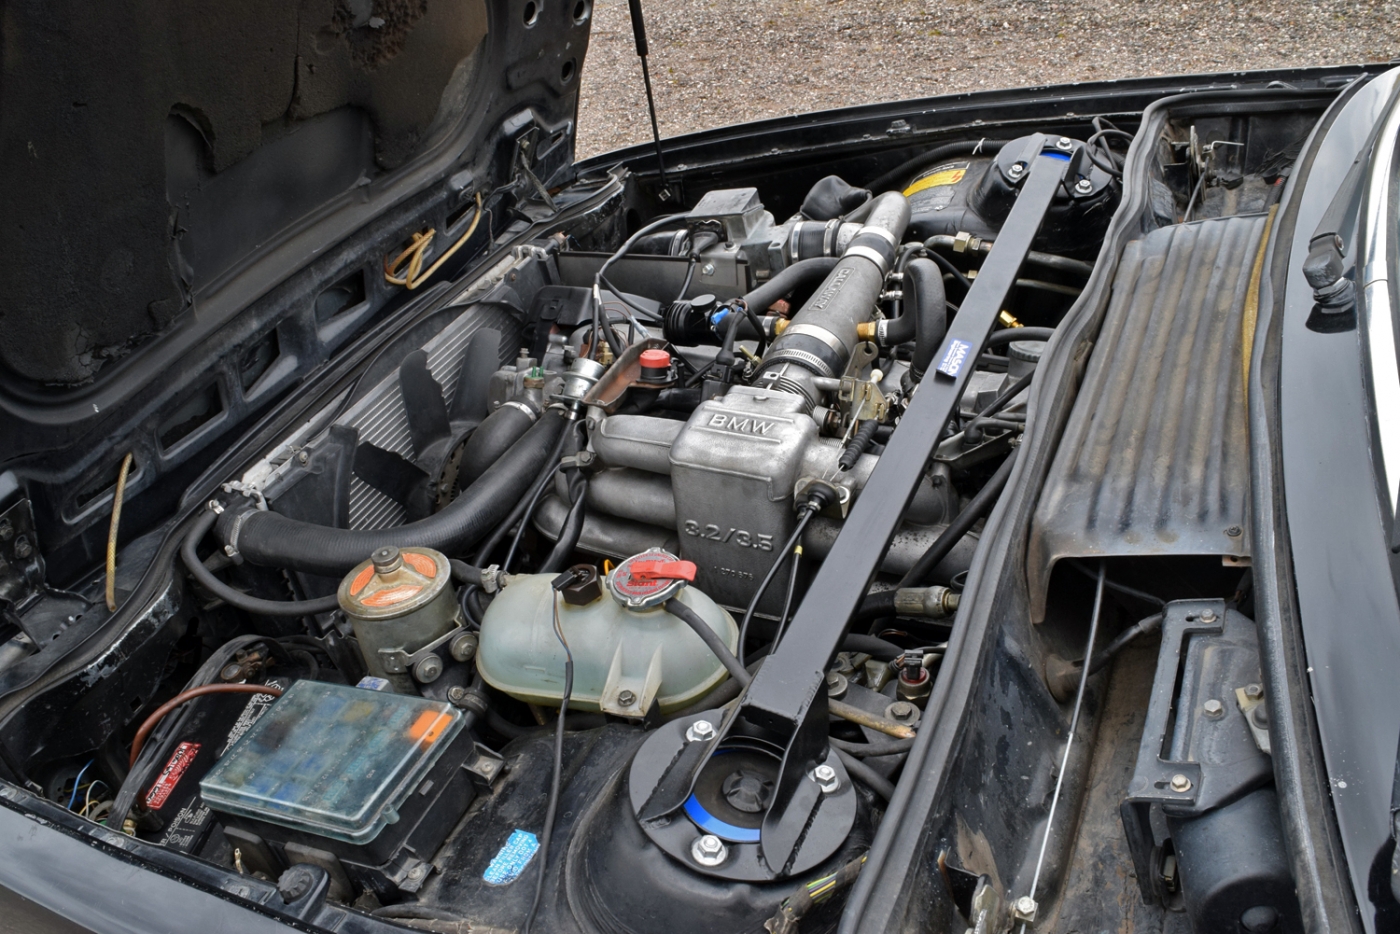
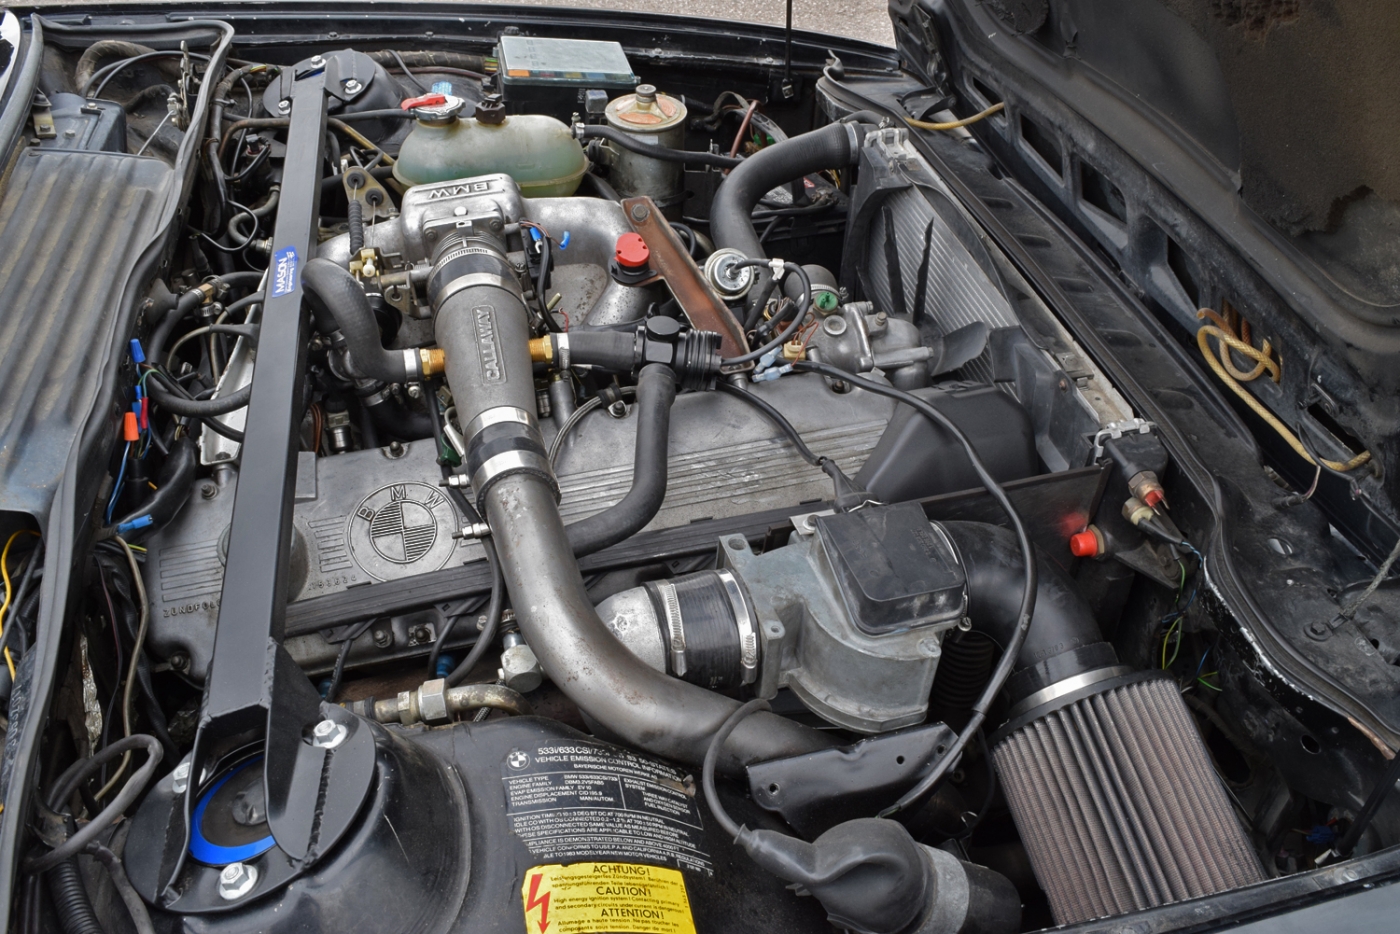
A couple photos of the engine bay. Fuel pressure gauge is still in there for fine tuning. At some point I will have to clean up the wiring. I have the WOT connection disconnected with terminals if I wanted to reconnect it. You can also see the Turner fixed camber plates.

Image

Image

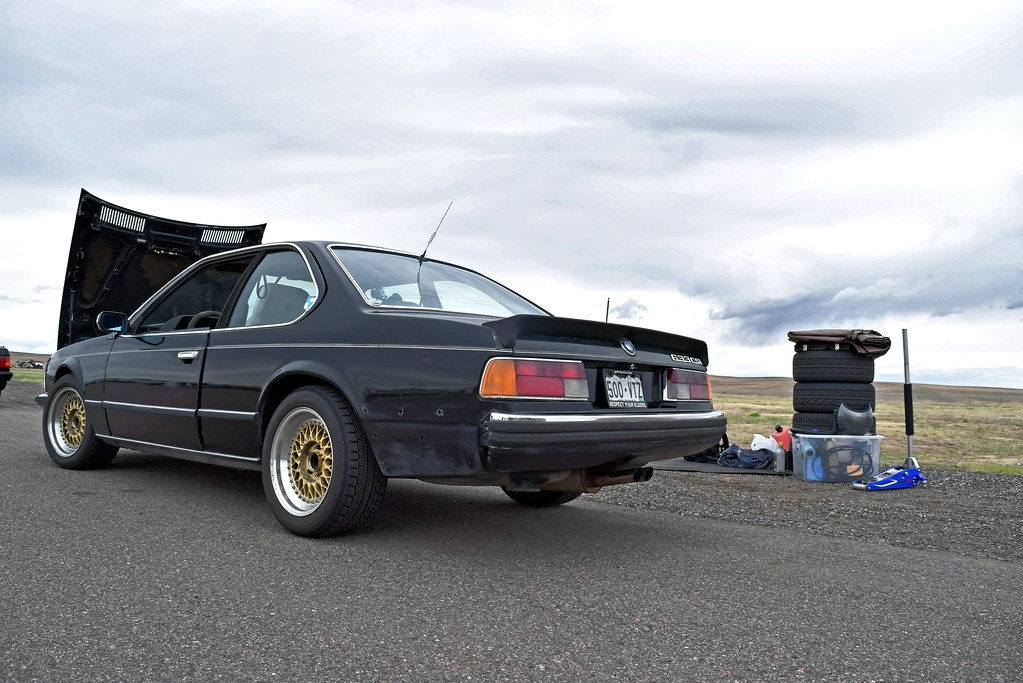
I swapped on the BBS RS wheels again, with the same tires as last fall for comparison purposes.

Image

Image

The BMW friends joined in once again, and my brother finally got his 318is out with us. If you recall, last fall he blew a cooling pipe as we were leaving for the track. He had bought this car with E36 5 lug swap and bolt in cage. He let me drive it later in the day and it did very well. For reference he was able to run 2:23/2:24's with it, about the same speed or faster than my stock 535i E28.

Image

stock 325i 4 door

Image

E39 540i/6 (and some Style 66's I sold him)

Image

Another 540i

Image

Pretty serious E36.

Image

My dad's 1602. My older brother was driving it. I was able to take the wheel later in the day and play cat/mouse with the 318is (for about 35 minutes straight!). The cars were so even, we weren't able to get around each other without point-by's on the straights. Now of course we weren't taking chances, but it was really awesome to drive. Adjustable camber plates, larger front sway bar, 9.3:1 2L M10, bolt in cage, 3.91 diff, (old) r-compound tires. Was really easy to slide around and induce off-throttle oversteer. You drive it like the gas-powered indoor carts and get on the gas as early as possible in the turns. I was really surprised to feel how similar it makes power to the M30B34. It falls off at 5500rpm, so there's no point in revving it out as there is more torque in the next gear at about 4000rpm.

Image

Image

Image

A friends e28 lemons 535i was there also. I have a bit of video but the driver was still working on lines and such. I rode with him and gave him some pointers in his 5 series AWD wagon.

Image

Image

But onto the E24. It really was blast to drive! With the reinforced sway bar mounts and mason engineering strut bars, the chassis felt solid and the rear of the car felt a lot more tossable than ever before. My 535i always seemed to understeer with the shame shocks/springs but stock sway bars. Power delivery from the turbo was fairly modest, the TCD turbo and manual boost controller meant that power delivery was very smooth, and never sudden. This made it very easy to drive, and with the recirculating setup and new exhaust, the car was super quiet. No BOV noises or anything, but it did allow me to really listen to the tires when feeling out the car.

The most challenging thing about driving this car was the brakes. With the PFC 08 race pads all around (E32/E34 BBK), the brakes felt awesome. But the rears always locked up first- recall this car doesn't have ABS. This was a new challenge for me, and forced me to get the car slowed down before entering the corner. I didn't play with trail-braking because of this, but I was fine with that. It meant I tended to brake early and get on the gas at or before the apex so I could get max acceleration out of the turn and on the straights. As the day went on, this tendency to lock got worse, mainly because of low fuel. Next time, I may put the spare tire back in on the track for some extra ballast/balance during braking. Otherwise, I might have to relocate the battery or remove the AC compressor.

Regardless, I really enjoyed it out on the track, and with the same tires as last time, I was able to shave a good 5-6 seconds off my laps time. Obviously 8psi vs 11psi before was a difference, but I think I was hitting the same straightaway speeds. I know I was losing power on the straights at 11:1 AFR's. Once I dial in fueling a bit more, I may go to 10psi, but I want to keep it reliable and I want to be very comfortable with the power level before stepping up. I don't want to pop a headgasket just because of lap times. I enjoy pushing lap times via driver skill rather than vehicle power.
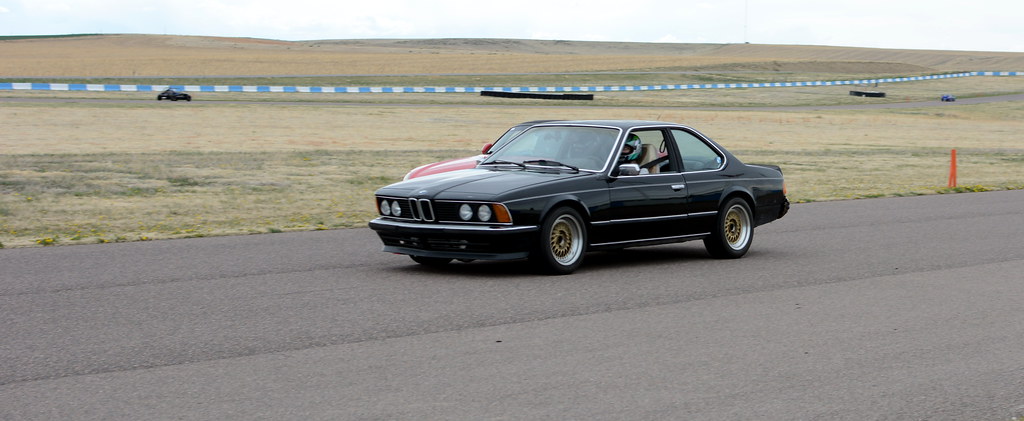
Some more great photos:

Image

Image

Image

Image

Image

Image

Image

Image

Image

Image

Image

Image

Temps were about 60 degrees, but I liked that it would keep the engine cool. I know my oil got hot after each session, but I don't have temp gauge for that (or an oil cooler yet). I was able to pass both 540i's, one which have the 6 pot front brakes, along with the Ford Focus ST (seen in the video below). The car felt really good and it really seemed like a good bit of power for the car. It ran all day, about 125 track miles and didn't have any hiccups. The only issue was a shimmy under braking, even with new control arms. I should have gotten the HD ones :evil: .

The tires were squealing quite a bit and I think very much becoming the limiting factor in my lap times. Of course dropping some weight would help the car, but I do like it being streetable with quiet interior and radio. I don't know, maybe it would be quiet enough if I took out the carpeting, parcel self, seats and other (along with AC). I know that the rear seats are pretty light, but still.
More photos for those interested: (not mine) https://www.flickr.com/photos/steveandm ... 777408214/

Also, some more car setup notes that I thought were useful. I didn't experiment with tire pressures, but I may do that to try to get different braking characteristics next time.
Car Setup Notes

Springs
Run as soft as practical for maximum grip
Hard:
◾Reduced Grip
◾Increased reaction

Soft:
◾Increased Grip
◾Decreased reaction

Soft Front, Hard rear = Oversteer
Hard Front, Soft rear = Understeer

Anti-Roll
Primary effect in slow turns
Front:
◾Hard = Steering precision in slow turns, understeer, bad turn-in, more precise handling
◾Soft = Grip in slow turns, oversteer, better turn-in, less precise handling

Rear:
◾Hard = Reduce Understeer in slow turns, oversteer, better turn-in
◾Soft = Reduce Oversteer in slow turns, understeer, worse turn-in

Large effect on relative L/R tire temp, Soft front/hard rear may balance. Run zero or low in wet conditions. Harder increases tire ware

Dampers (Shocks/Anti-shock)
Dampers work in speed rates (Fast (low numbers) and Slow (high numbers)) not Soft or Hard
Slow Dampers
◾Slow F+R = Slow weight transfer, Corner stability
◾Fast F+R = Fast weight transfer, Good grip
◾Slow F, Soft R = Corner entry+exit oversteer
◾Fast F, Hard R = Corner entry+exit understeer

Fast Dampers
◾Fast Rebound will normally need to be faster than Fast bound.
◾Slow F+R = Reduced bounce over bumps and curbs
◾Fast F+R = Good grip over bumps and curbs
◾Slow F, Soft R = Bump understeer
◾Fast F, Hard R = Bump oversteer


Bound/Rebound (Mainly for Slow dampers (weight shift)):
Front Bound
◾Slow = Slower weight shift under Brake, Reduce oversteer on Turn-in
◾Fast = Faster weight shift under Brake, Better Turn-in response + Reduce understeer

Rebound
◾Slow = Slower Nose Lift under Accel
◾Fast = Faster Nose Lift under Accel

Rear Bound
◾Slow = Slower weight shift under Accel
◾Fast = Faster weight shift under Accel

Rebound
◾Slow = Slower Nose Drop under Brake, Better Turn-in response + Reduce understeer
◾Fast = Faster Nose Drop under Brake, Reduce oversteer on Turn-in

Slow dampers
Left turn Oversteer Right turn Oversteer
Corner Entry Increase FR Bump, Decrease RL Rebound Increase FL Bump, Decrease RR Rebound
Corner Exit Increase FL Rebound, Decrease RL Bump Increase FR Rebound, Decrease RR Bump

Left turn Understeer Right turn Understeer
Corner Entry Decrease FR Bump, Increase RL Rebound Decrease FL Bump, Increase RR Rebound
Corner Exit Decrease FL Rebound, Increase RR Bump Decrease FR Rebound, Increase RL Bump

Differential
Power
◾High = Good propulsion out of corners, power understeer, Snap oversteer with overpower
◾Low = Poor propulsion out of corners, power oversteer, easier but more frequent traction loss with overpower

Coast
◾High = Stable braking, lift off understeer
◾Low = Unstable braking, lift off oversteer

Pre-load (low throttle range)
◾High = Nervous transitioning from braking/acceleration, easier to balance turns with throttle, harder to keep stable accelerating from slow turns, easy to spin under power, easier to break traction with rapid power lift-off
◾Low = Less responsive transitioning from braking/acceleration, easier to accelerate from slow turns but tendency to understeer

Wing
◾High = Good grip, Oversteer
◾Low = Good speed, Understeer

Tires
After running in (at least two minutes):
◾Target temp = 70-90C (155-195 F)
◾Inner edge should be approximately 5c hotter than the Outer edge, increase camber to increase difference
◾Center temp should be roughly in the middle of the Inner and Outer temps, an increase in tire pressure will raise the center temperature (may require a softening of the springs to counter the effect on handling)

Tire pressure Front:
◾Higher = Oversteer
◾Lower = Understeer

Tire pressure Rear:
◾Higher = Understeer
◾Lower = Oversteer

Brake
Duct
◾Target = 300..600c range while running

◾Bias
◾Target = Front+Back Lock simultaneously

Caster
◾Increase for harder steering + feedback or Understeer
◾Decrease if too firm or unstable in high speed turn
◾Large effect on tire temperature distribution

Camber
Always run negative cambers
Higher neg angle will increase the temperature difference between the inner and outer tire edges
Too high will result in loss of grip

Toe in
Front
◾+ for line stability
◾- for sharp turn-in

Rear
◾+ for line speed
◾- for rear end stability in turns

Front ride height
Front
◾High = Understeer
◾Low = Oversteer

Rear ride height
◾High = Oversteer
◾Low = Understeer
VIDEOS
Afternoon traffic after getting more comfortable with the car. According to my gopro my fast lap was about a 2:19, about 5-6 seconds faster than in the fall:
https://www.youtube.com/watch?v=FydYgLWbiKQ

My brother's video of the 318is. Part of the day he was in a different run group:
https://www.youtube.com/watch?v=F7JQ20zucqM


Can't wait until the next one!

Re: Callaway 633CSi - 4/10/16 Track Day #2

Posted: Apr 12, 2016 1:12 PM
by T_C_D
Congrats on a successful day. BTW, the m30 isn't sensitive to AFR. 11.0 is rich but probably not costing more than a few HP.

Re: Callaway 633CSi - 4/10/16 Track Day #2

Posted: Apr 12, 2016 4:54 PM
by tschultz
Thanks Todd. So at least somebody read through my ramblings :laugh: Seriously though, the turbo is awesome, my brother commented how it doesn't even feel like driving a turbo'd car.

I know your kits are 8-10psi non-intercooled but with the track use, I don't want to destroy the headgasket. Even at 8psi right now it can get into plenty of trouble. When getting on the gas early in the corners, I kept up fine with the Focus ST. He'd walk away from me in acceleration if I carried too much speed and had to let off the gas for a second when exiting the turns.

I have some thoughts on next upgrade. Likely a less aggressive rear pad to eliminate the rear brake locking, and then at some point some stickier tires. I certainly want to keep dialing it in before upping the boost. I did, however add a .035" restrictor last night for the RRFPR and that allowed me to increase the gain on the needle valve. The mixture seems closer to what I want (15:1 during cruise, 13:1 when passing through atmospheric, 12:1 at full boost), but I have to do more testing.