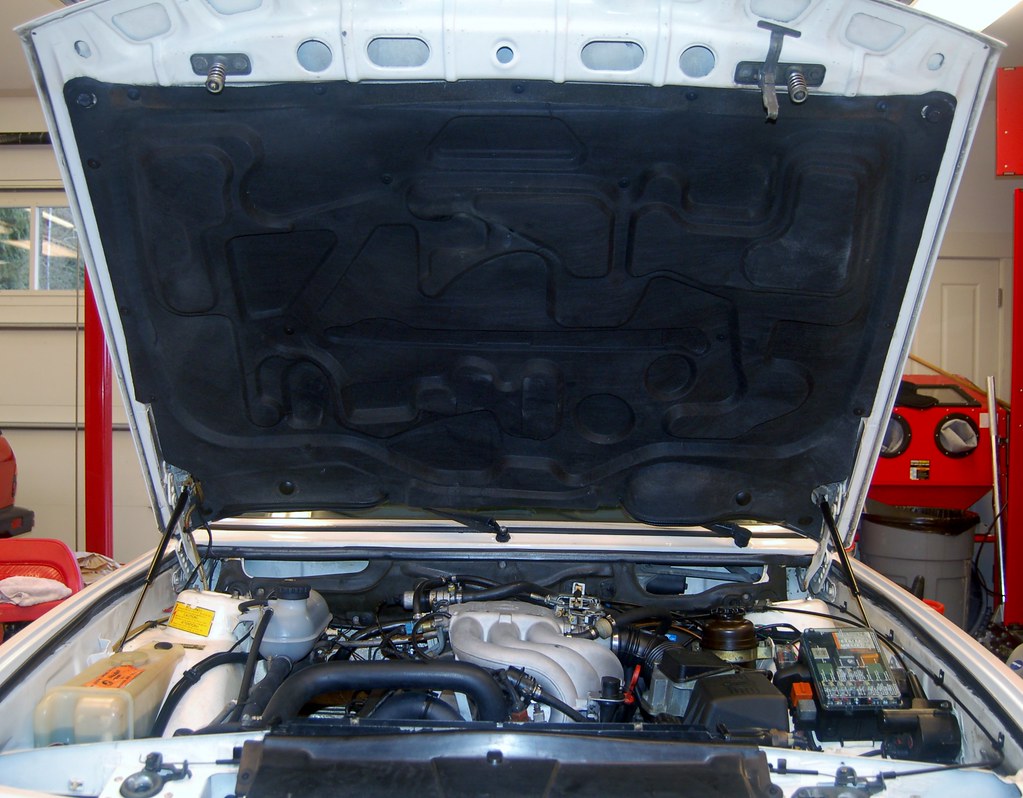
Looks just like the pad that was under the hood of my 528e, except mine was lighter with lots of oily spots on it.cek wrote:... However, THAT car was a 528e as well. The hood padding may have come from yet another car. Might it have been a td?
(I've now gone over all VIN stickers on the car and all the rest match, except the front-right fender where there is no sticker, but I already knew it had been re painted).
External links now open in a new browser tab - turn this off in your UCP - Read more here.
Maytag: The Alpine '87 529i
My 86 and 84 both had underhood pads, I've also pulled a couple out of 528's in the junk yard. I put one in my 535is even though it isn't "correct", it really cleans it up imho. To clean them I've washed with degreaser and a hose before then painted with vinyl and fabric paint. Seems to hold up ok.
Beautiful car.
Beautiful car.
-
Acid House
- Posts: 580
- Joined: Dec 04, 2012 2:06 AM
I picked up some work in Breckenridge, so I've been saddling up the ETA for the 4 hour round trip over the Continental Divide and back 2-3x a week.cek wrote:FWIW: This.Coldswede wrote:Don't be surprised if you find yourself liking the 528e MUCH more than you ever intended! I speak from experience.
I drive mine all the time, happily.
The poor thing is holding up great, but definitely took some shots in the storms (lost a fog light to some debris), and the 2002 project is taking what little free time I do have.
I think she is feeling neglected, but rock solid when I need her!
If you follow my Vlad thread you'll know that I belatedly found out that the green lead to the Aux Fuse Box is hot in start and run and NOT in accessory.
Thus it is a bad idea to use it, as is, for a head-unit, radar detector, etc. because (a) it is not hot in accessory, and this means your radio won't work in accessory, and (b) when the starter is running you get of voltage spikes.
To address this I decided to rewire the aux fuse box. I decided to do it in Maytag first since I give less a shit about Maytag than Vlad and it's a great place to do "trial runs".
My original plan was to just connect a violet lead (hot in accessory; ETM page 0670-3) in the fuse box directly to the green lead that goes out of the fuse box to the aux fuse box.
Upon opening the fuse box on Maytag I discovered two things:
1) Moar remnants of the ancient alarm system.

This relay was connected to the horn. It was obviously how the alarm made noise. I pulled it all out and fixed the wires were the cheapo splices were installed.
2) I could not tell with 100% certainty that the green lead from the hot side of Fuse 6 went directly to the green lead that goes to the aux fuse box.

I didn't want to cut anything unnecessarily so I reconsidered my plan and decided it would be a far better idea to just run a 3rd wire from inside the fuse box to the aux fuse box.
I went searching for some 16ga purple wire locally and the best I could find was 18ga. I really wanted to use purple so that it would be completely obvious to anyone who worked on this car in the future what I had done. 18ga is too small, IMO, so I used some blue 16ga instead. There's no other blue wire in there so the purpose of the splice should be pretty obvious.

I used non-insulated bullet crimp connectors with shrink tubing.
The green lead is still there, just bent back against the other leads and taped off.
Works great. Now to do the same thing to Vlad....

(Yes, I realize my fuse box cover is on upside down in this pic. Just fixed that.)
Thus it is a bad idea to use it, as is, for a head-unit, radar detector, etc. because (a) it is not hot in accessory, and this means your radio won't work in accessory, and (b) when the starter is running you get of voltage spikes.
To address this I decided to rewire the aux fuse box. I decided to do it in Maytag first since I give less a shit about Maytag than Vlad and it's a great place to do "trial runs".
My original plan was to just connect a violet lead (hot in accessory; ETM page 0670-3) in the fuse box directly to the green lead that goes out of the fuse box to the aux fuse box.
Upon opening the fuse box on Maytag I discovered two things:
1) Moar remnants of the ancient alarm system.

This relay was connected to the horn. It was obviously how the alarm made noise. I pulled it all out and fixed the wires were the cheapo splices were installed.
2) I could not tell with 100% certainty that the green lead from the hot side of Fuse 6 went directly to the green lead that goes to the aux fuse box.

I didn't want to cut anything unnecessarily so I reconsidered my plan and decided it would be a far better idea to just run a 3rd wire from inside the fuse box to the aux fuse box.
I went searching for some 16ga purple wire locally and the best I could find was 18ga. I really wanted to use purple so that it would be completely obvious to anyone who worked on this car in the future what I had done. 18ga is too small, IMO, so I used some blue 16ga instead. There's no other blue wire in there so the purpose of the splice should be pretty obvious.

I used non-insulated bullet crimp connectors with shrink tubing.
The green lead is still there, just bent back against the other leads and taped off.
Works great. Now to do the same thing to Vlad....

(Yes, I realize my fuse box cover is on upside down in this pic. Just fixed that.)
Just finished same job on Vlad. Amazing how much faster you can do something the 2nd time 
I see a lot of people here mentioning they soldier wire splices on cars. I have found that soldier wire splices are really prone to breaking over time. I much prefer using high quality bullet crimps with a real crimp tool. A race driver friend of mine showed me these and I really like how easy they are to use.


I've cheated in the past and just used pre-insulated bullet crimps, but I just got a new supply of these un-insulated ones.
I see a lot of people here mentioning they soldier wire splices on cars. I have found that soldier wire splices are really prone to breaking over time. I much prefer using high quality bullet crimps with a real crimp tool. A race driver friend of mine showed me these and I really like how easy they are to use.


I've cheated in the past and just used pre-insulated bullet crimps, but I just got a new supply of these un-insulated ones.
Delcity.com calls them Barrel Butt Connectors. That's where I get them.
http://www.delcity.net/store/Non!insula ... s/p_801870
Here's a good crimp tool.
http://www.delcity.net/store/Insulated- ... ol/p_10426
http://www.delcity.net/store/Non!insula ... s/p_801870
Here's a good crimp tool.
http://www.delcity.net/store/Insulated- ... ol/p_10426
Sitting here considering what project I should engage in today. Figured updating the to-do list on the cars would help me decide.
Status:
Left to do, in priority order:
I have to say that's a pretty damn good list of stuff I've gotten done. It's a fricken sweet car now. So far, I've spent $1032 in parts, not including the BBS RX wheels and snow tires (which don't count because they are just temporarily on the car).
Given demand for these rare and special Etas, I bet I could get $15-16K for it easy, right?
Status:
- New timing belt (done)
- New water pump (done)
- Newish spark plugs (when I baselined Vlad, the plugs I pulled out were basically new; I used those).
- Cleaned injectors (done)
- Soda blasted valve cover (done)
- New radiator hoses (done)
- Cleaned up thermostat and ICV wiring (done)
- Cleaned throttle (done)
- R&R'd heater fan (done)
- R&R'd heater control valve (new solenoid kit) (done)
- Replace headlamps (done)
- Tidy up engine bay with zip-ties etc... (done)
- Pull out old alarm (done)
- Install (temporary) BBS RX wheels (done)
- Replace dog-bones/pitman arms (done)
- Replace all heater/cooling hoses (done)
- Fix battery run down (done)
- Fix surging idle (temporarily fixed with penny with hole method; waiting on a replacement ICV) (done)
- Install new stereo (same unit Vlad has ordered from Crutchfield) (done)
- Install $17 remote keyless locking system I just ordered on Amazon (done)
- Install new odometer gears (current gears are ticking) (done)
- Fix trim on windshield (locks strips) to prevent water from entering (temporarily fixed)
- Find a trunk carpet set (done, minus one part)
Left to do, in priority order:
- Replace right front wheel bearing
- Install new front rotors & pads
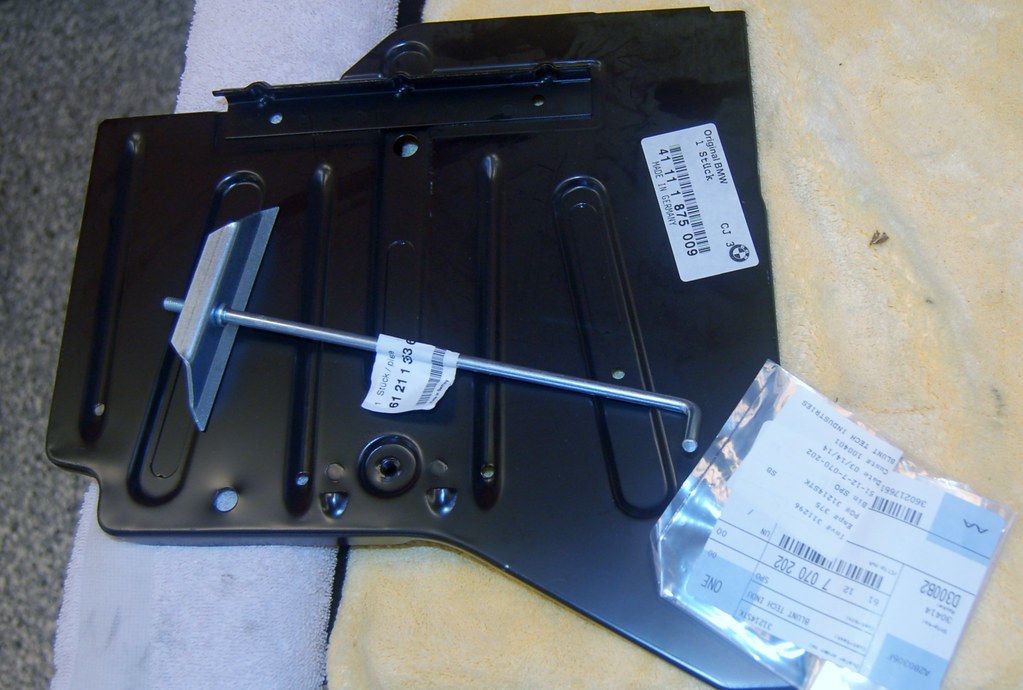
- Fix rust hole in battery box and secure battery
- Right fog lamp works intermittently.
- Left low-beam lamp does not stay on when brights are on.
- Heater fan is noisy. I pulled it and cleaned it, so it's better, but not good enough.
- Heater fan seeks to "3" intermittently (for about 1 second) at a time. I think resistor pack needs replacing.
- Fix head rests (in-op)
- Mount Conti DW tires on Style 8's; take off snow wheels/tires
- Fix/replace antenna once it finally fails from making all the noise it makes when it reaches the top
- Replace trunk seal (current one does not leak, but I'm worried it's going to start).
- Replace driver's door B-pillar trim and door seals as they are toast.
- Find a replacement carpet set
- Deal with ATF seepage through soft part of ATF cooling lines.
I have to say that's a pretty damn good list of stuff I've gotten done. It's a fricken sweet car now. So far, I've spent $1032 in parts, not including the BBS RX wheels and snow tires (which don't count because they are just temporarily on the car).
Given demand for these rare and special Etas, I bet I could get $15-16K for it easy, right?
-
carnutdallas
- Posts: 1915
- Joined: Apr 13, 2008 3:22 PM
- Location: Frisco, TX
- Contact:
Nice cars like yours will be worth a pretty coin someday soon. At least $6-7K and then some. I think the market is on the way up. The sooner than later inflation will help toocek wrote:Sitting here considering what project I should engage in today. Figured updating the to-do list on the cars would help me decide.......
.......I have to say that's a pretty damn good list of stuff I've gotten done. It's a fricken sweet car now. So far, I've spent $1032 in parts, not including the BBS RX wheels and snow tires (which don't count because they are just temporarily on the car).
Given demand for these rare and special Etas, I bet I could get $15-16K for it easy, right?
- Right fog lamp works intermittently.
- Left low-beam lamp does not stay on when brights are on.
Fixed. Fog light lead to bulb was worn out. Replaced bulb. Headlamp simply was not working in high-beam mode. Returned it to Napa and replacement works fine. Must have been defective.
However, this sucks:

There is no (visible) way water can be getting by the windshield gasket. But I guess it has to be, because I can't imagine anywhere else water could be entering. And remember, I was able to get water to show at this spot by spraying water in gap that used to exist before I sealed it at the top corner so it seems super likely that it is the windshield that is leaking.
All ears for other suggestions.
I guess I just need to bite the bullet and pull the windshield and re-seal it correctly.
That is a very strange place for a windshield leak to get to.
Does that happen with the car stationary, or while driving?
If stationary, I want to guess at the sunroof drain hose not attached properly at the top or split half way down from ice at some time.
If it shows up after driving on very wet roads, I want to say getting in from wheel well somewhere.
I have never had success trying to "fill" leaking windshields.
I was just cleaning out a year worth of kid debris (after clearing 4 inches of snow from the driveway) from the wife's daily and thought how I should just fly you over and have you detail it in the spring!
Keep that eta going! Spring can't come soon enough, so I can drive mine.
I was just cleaning out a year worth of kid debris (after clearing 4 inches of snow from the driveway) from the wife's daily and thought how I should just fly you over and have you detail it in the spring!
Keep that eta going! Spring can't come soon enough, so I can drive mine.
I've verified the sunroof drains are working correctly and not the cause. I also proved water comes out here from the windshield, before I (hack) sealed the gasket.waynet1 wrote:That is a very strange place for a windshield leak to get to.
Does that happen with the car stationary, or while driving?
If stationary, I want to guess at the sunroof drain hose not attached properly at the top or split half way down from ice at some time.
If it shows up after driving on very wet roads, I want to say getting in from wheel well somewhere.
I am sure it happens while driving. Not sure about sitting.
I figured the leak wasn't going to fix itself so I jumped in and pulled the trim strip off the windshield.

Then I yelled down to my son to come up to the garage to help me pull the glass. We set it somewhere safe and then inspected the frame.
We first put water down the little holes. The water came out by the fender as expected. Then we sprayed some water down on the inside corner between the frame and dash. Sure enough the water came right out of where the speaker is.

There frame is in great shape. I had a mini-nightmare that I'd get the windshield out and find rot galore.

The only place there's anything slightly more than surface rust is on the left side. I'm going to sand it down and POR15 it. It looks like someone has put POR15 in there before... I'll do it right.

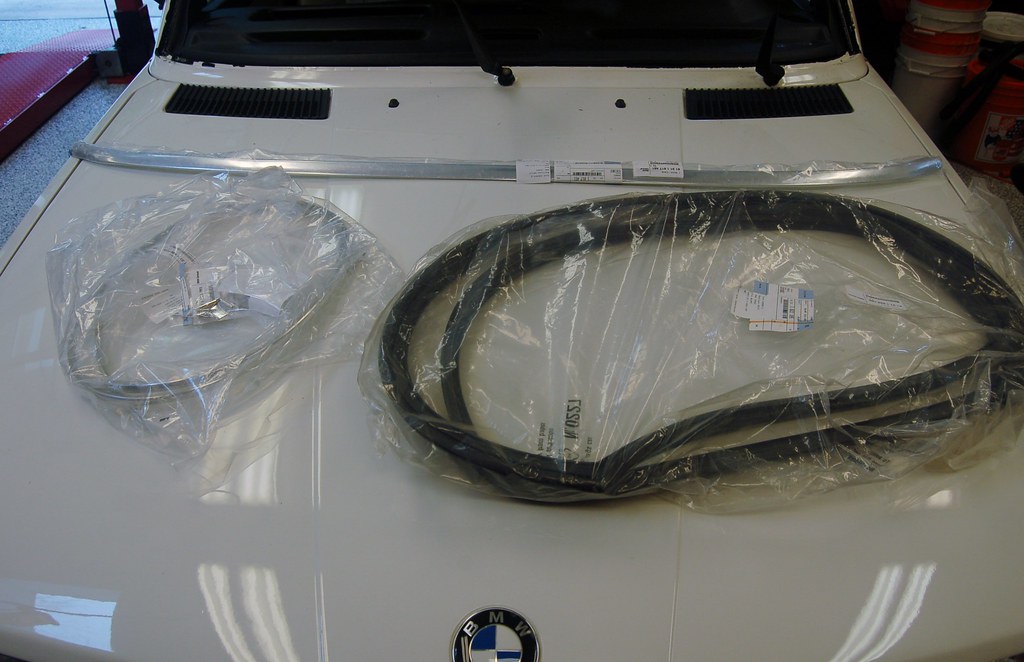
Now off to Blunt to order a new gasket and trim set. I don't want to use the old stuff given it was leaking and not aligned right.

Then I yelled down to my son to come up to the garage to help me pull the glass. We set it somewhere safe and then inspected the frame.
We first put water down the little holes. The water came out by the fender as expected. Then we sprayed some water down on the inside corner between the frame and dash. Sure enough the water came right out of where the speaker is.

There frame is in great shape. I had a mini-nightmare that I'd get the windshield out and find rot galore.

The only place there's anything slightly more than surface rust is on the left side. I'm going to sand it down and POR15 it. It looks like someone has put POR15 in there before... I'll do it right.

Now off to Blunt to order a new gasket and trim set. I don't want to use the old stuff given it was leaking and not aligned right.
I guess the water could get there from the windshield. The reason I say, hard to get there is, when I had a leaky windshield on the passenger side, it would just come down the inside of the fire wall. Never had any sign at the speaker.
I wont bore you with the details of what I went through with the windshield people years ago.
I wont bore you with the details of what I went through with the windshield people years ago.
Ah, and if there had been sealant this wouldn't have happened you think?wkohler wrote:Right side means the right side of the car. You have a problem on the left. I had one on the right. I figured it out when I realized that the windshield moved in the gasket and the gasket moved in the car. A lot. Haha.
-
Karl Heinz
- Posts: 951
- Joined: Feb 12, 2006 12:00 PM
- Location: Knoxville, TN
Check at the bottom of the drain area where the outside air intake is, where your windshield wiper motor resides. I kept on having a major leak from what I considered to be the windshield on the drivers side. Lo and behold, after stripping out the dash and everything in the car, it happened to have rusted through to the interior from the very far corner of the outside air vent cavity.
It is a great design, if your previous owner kept it clean of muck. Mine did not. You can look up through the drivers side wheel well and see the drain. I found it by poking at it with my handy dandy pick set. Much to my chagrin, it went through into the cabin with no effort at all. Epoxy steel on the inside and out worked wonders, after proper prep with a die grinder, wire wheel, and some cleaner. I did not cover the drain, as it suprising was not rusted
  However, where it had been draining against the firewall was a bloody hidden mess, as there is a body seam right where the drain exits. I guess I did not have enough factory "goop" in my seam.

It is a great design, if your previous owner kept it clean of muck. Mine did not. You can look up through the drivers side wheel well and see the drain. I found it by poking at it with my handy dandy pick set. Much to my chagrin, it went through into the cabin with no effort at all.
Appreciate you pointing this out. I have sprayed water directly into the air intake is and detected NO water in the cabin as a result. I've tried this multiple times, so I'm pretty darn sure no water is getting in that way (yet). I will follow your advice and really clean the drain out though.Karl Heinz wrote:Check at the bottom of the drain area where the outside air intake is, where your windshield wiper motor resides. I kept on having a major leak from what I considered to be the windshield on the drivers side. Lo and behold, after stripping out the dash and everything in the car, it happened to have rusted through to the interior from the very far corner of the outside air vent cavity.
It is a great design, if your previous owner kept it clean of muck. Mine did not. You can look up through the drivers side wheel well and see the drain. I found it by poking at it with my handy dandy pick set. Much to my chagrin, it went through into the cabin with no effort at all.Epoxy steel on the inside and out worked wonders, after proper prep with a die grinder, wire wheel, and some cleaner. I did not cover the drain, as it suprising was not rusted
However, where it had been draining against the firewall was a bloody hidden mess, as there is a body seam right where the drain exits. I guess I did not have enough factory "goop" in my seam.

For now, I am convinced my problem was the windshield seal. Specifically, no sealant was applied when the seal was installed.
Just documenting progress...
I didn't want dust from wire-wheeling the rust in the windshield frame going in the interior so I covered everything up.
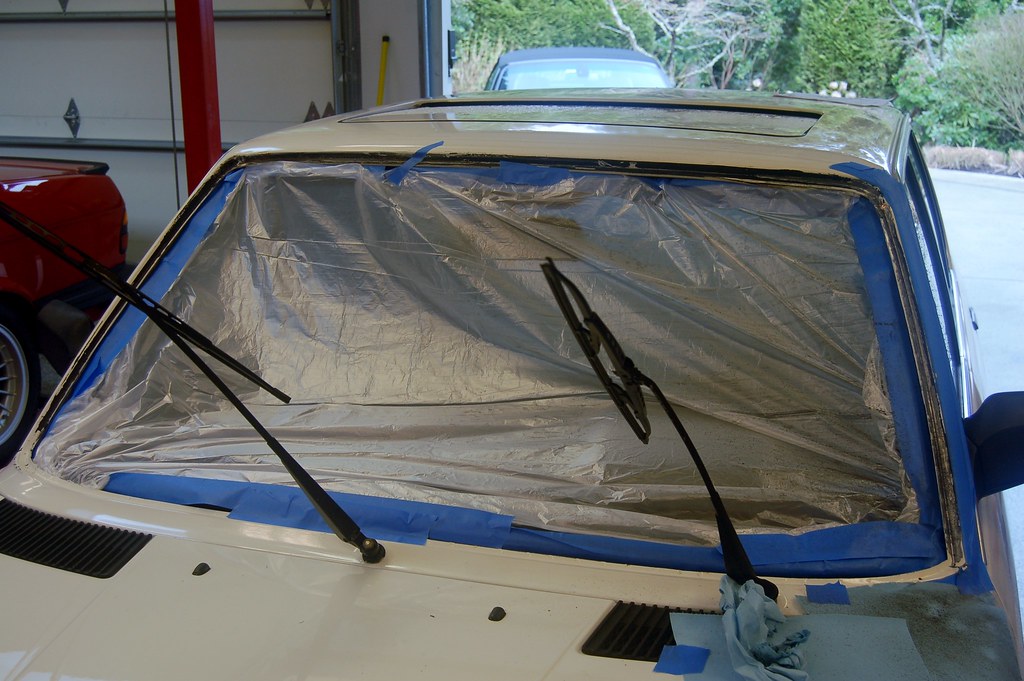
Then I used my die grinder with a little wire wheel to get down to bare metal where the surface rust is in the frame.
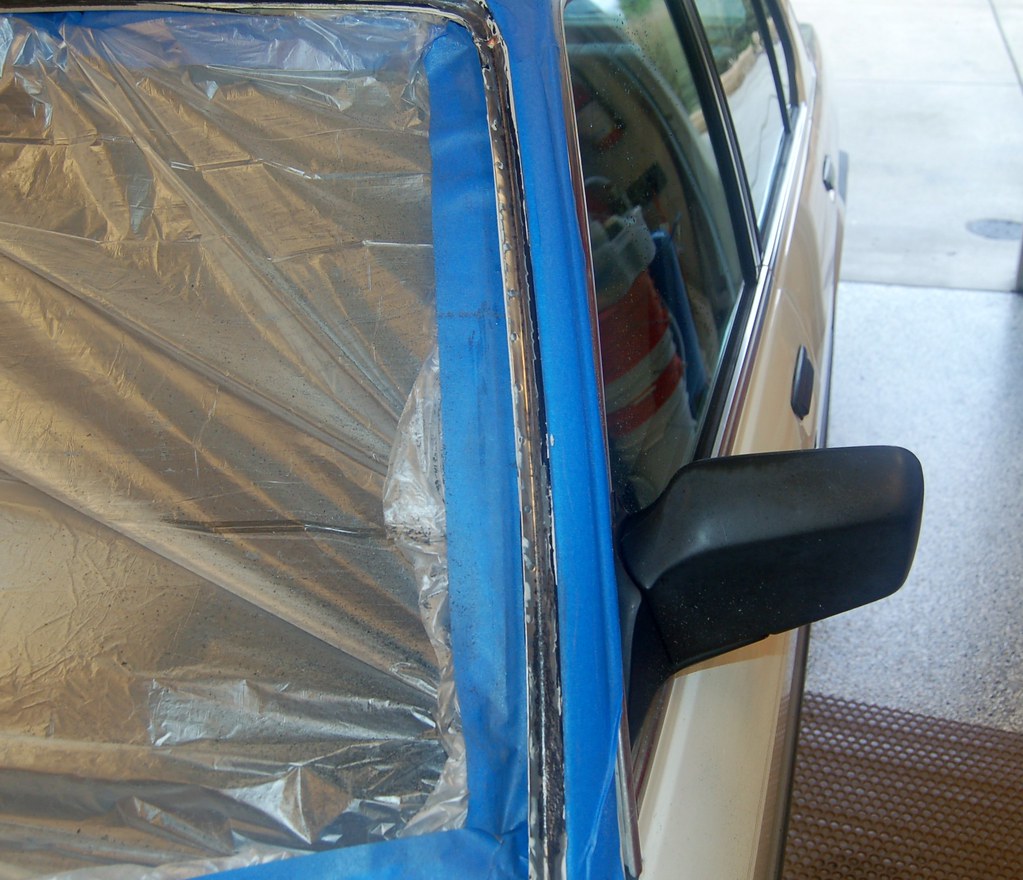
I'm relieved to see that it is really just surface rust, but if this hand't been taken care of I'm sure some ugly rotting would be starting.
After cleaning with Marine Clean and prepping with Metal Ready I applied the first coat of POR15.
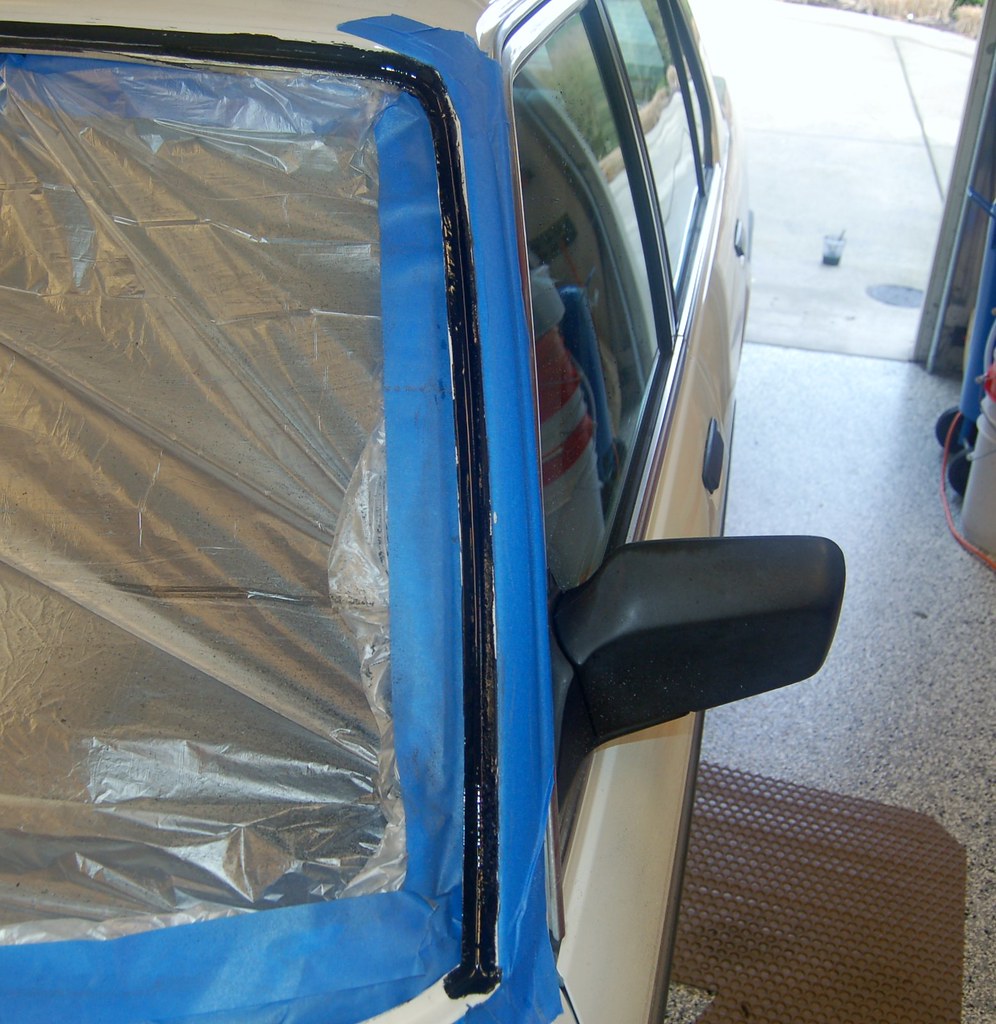
I'm not going to bother painting over the POR15; I think that's OK for this application, no?
I didn't want dust from wire-wheeling the rust in the windshield frame going in the interior so I covered everything up.

Then I used my die grinder with a little wire wheel to get down to bare metal where the surface rust is in the frame.

I'm relieved to see that it is really just surface rust, but if this hand't been taken care of I'm sure some ugly rotting would be starting.
After cleaning with Marine Clean and prepping with Metal Ready I applied the first coat of POR15.

I'm not going to bother painting over the POR15; I think that's OK for this application, no?
I've read every thread I could find on installing windshields, multiple times. I think I understand the theory. I have the entire day budgeted to try to apply said theory. I am not confident.
Here's the plan:
Here's the plan:
- Setup a suitable prop to hold the windshield face down so I can get the weatherstrip around it.
- Get the weatherstrip around the glass. Use a small amount of 3M Bedding & Glazing compound in between the glass and weatherstrip.
- Install the rope in the inside weatherstrip lip, taping the leads to the inside of the windshield.
- Apply the 3M stuff in the windshield channel, all the way around. ???
- Set the glass in place.
- Use the rope method to pull the inside lip around the window frame.
- Install upper lock strip, using lots of 'lube' and ensuring that it is 'pushing out' at the corners and not 'pulling in'. This, I understand is going to be a bitch.
- Install the lower lock strip using more 'lube'
- Get the corner clips in.
- Have a really good beer.
- Should I really put the 3M compound around the ENTIRE frame? Or just on the sides/corners?
- Will the rope method really work on our cars. I've found no threads indicating that it actually does, only suggestions to use it.
-
carnutdallas
- Posts: 1915
- Joined: Apr 13, 2008 3:22 PM
- Location: Frisco, TX
- Contact:
Wish I was closer. Piece of cake. You described it well. I use aerosol window cleaner for my lube. Easy peasy. Lock strip is easy too. I use a plastic/bone tool, setting one side in and using tool to work into seal on opposite side.cek wrote:I've read every thread I could find on installing windshields, multiple times. I think I understand the theory. I have the entire day budgeted to try to apply said theory. I am not confident.
Here's the plan:
My biggest questions are:
- Setup a suitable prop to hold the windshield face down so I can get the weatherstrip around it.
- Get the weatherstrip around the glass. Use a small amount of 3M Bedding & Glazing compound in between the glass and weatherstrip.
- Install the rope in the inside weatherstrip lip, taping the leads to the inside of the windshield.
- Apply the 3M stuff in the windshield channel, all the way around. ???
- Set the glass in place.
- Use the rope method to pull the inside lip around the window frame.
- Install upper lock strip, using lots of 'lube' and ensuring that it is 'pushing out' at the corners and not 'pulling in'. This, I understand is going to be a bitch.
- Install the lower lock strip using more 'lube'
- Get the corner clips in.
- Have a really good beer.
I was serious about buying beer & lunch for anyone in the Seattle area with experience doing this.
- Should I really put the 3M compound around the ENTIRE frame? Or just on the sides/corners?
- Will the rope method really work on our cars. I've found no threads indicating that it actually does, only suggestions to use it.
I would imagine typing "roping glass" or "roping windshield" into YouTube should bring out lots of good video's. Now asking me to do the rear glass of a Targa Porsche is a whole 'nother story. I can do it, but requires some ingenious effort and patience. Gotten pretty good at those too. -R


