And so it starts, Maeve
Re: And so it starts, Maeve
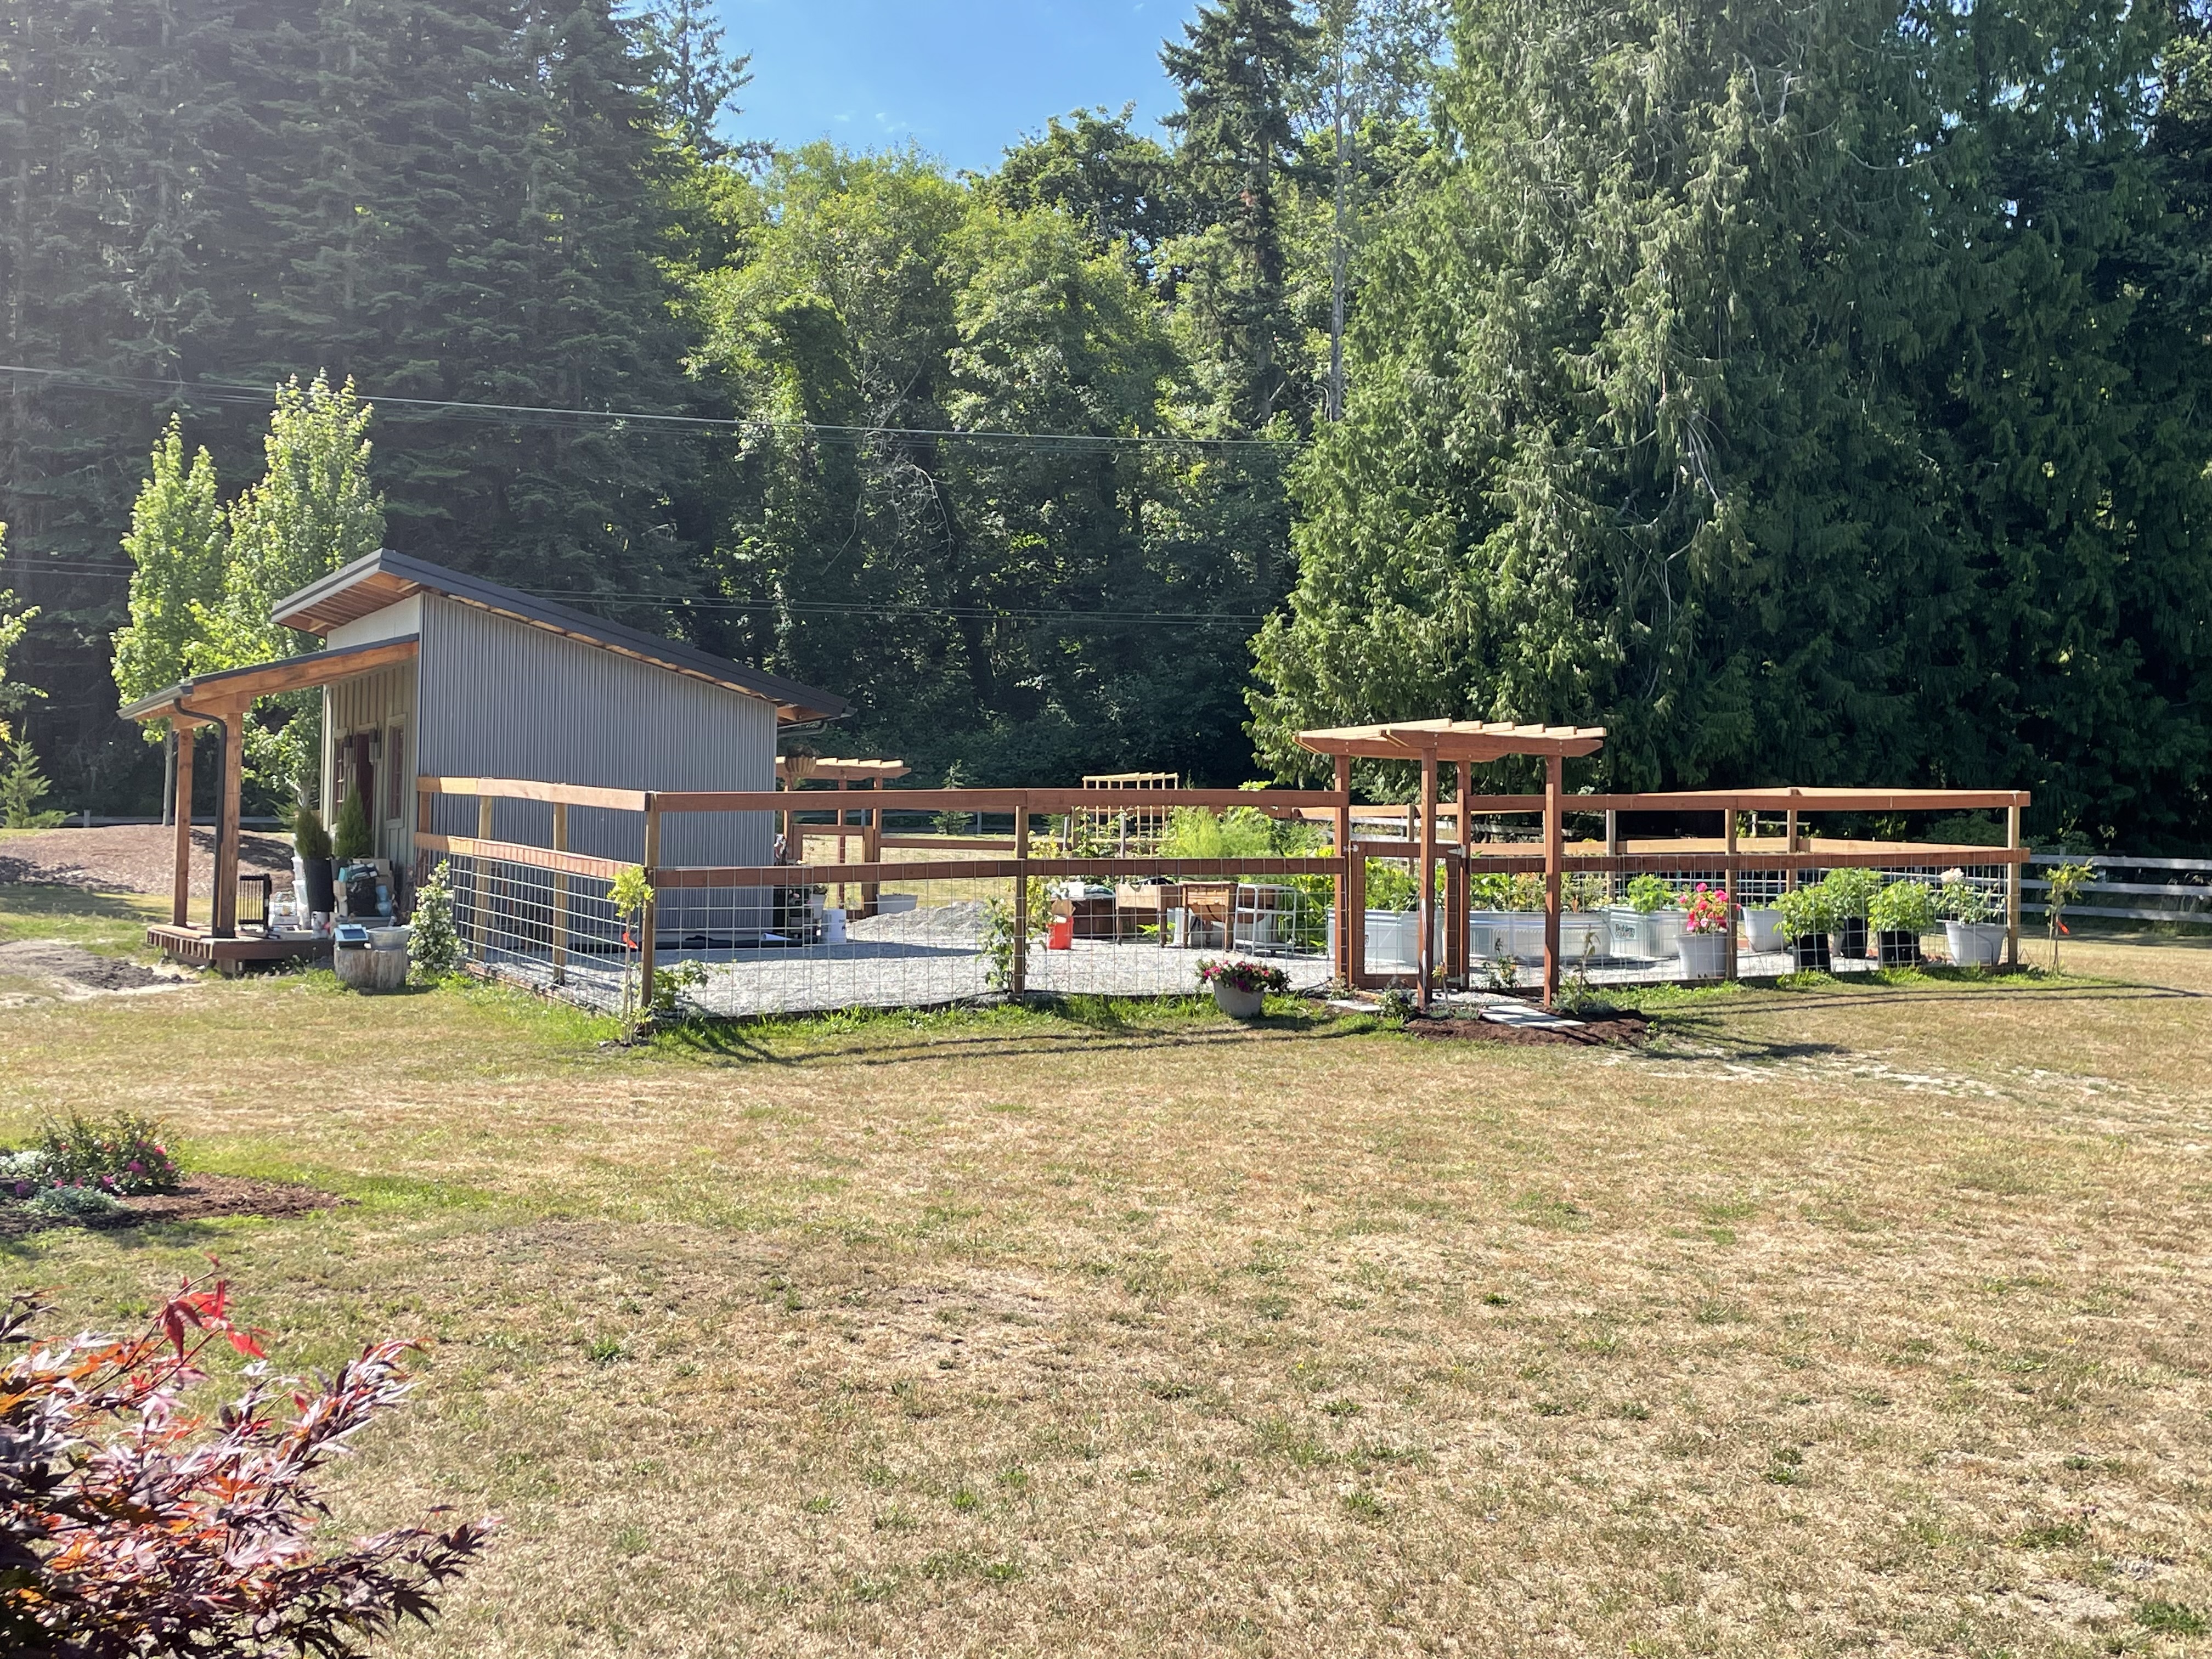
I'm back after a long absence due to shoulder surgery, and my wife's project making it to the top of the list. This is what I've been busy working on in place of Maeve. Deer around here are pests. Cute and destructive to plants, so the need for a fenced in garden area. I'm almost finished with her project, and then back to Maeve.


Re: And so it starts, Maeve
starting back in on the HVAC system. New parts etc, and probably the AC Solutions Sanden kit too. But here is where I get stumped, finding a list/diagram showing all the parts in the HVAC system. Real OEM helps, but when you get down to O-rings and small parts, real OEM is not always helpful.
I'm trying to spec thesis three o-rings that are part of the expansion valve installation. Any here with a list or hyperlink?
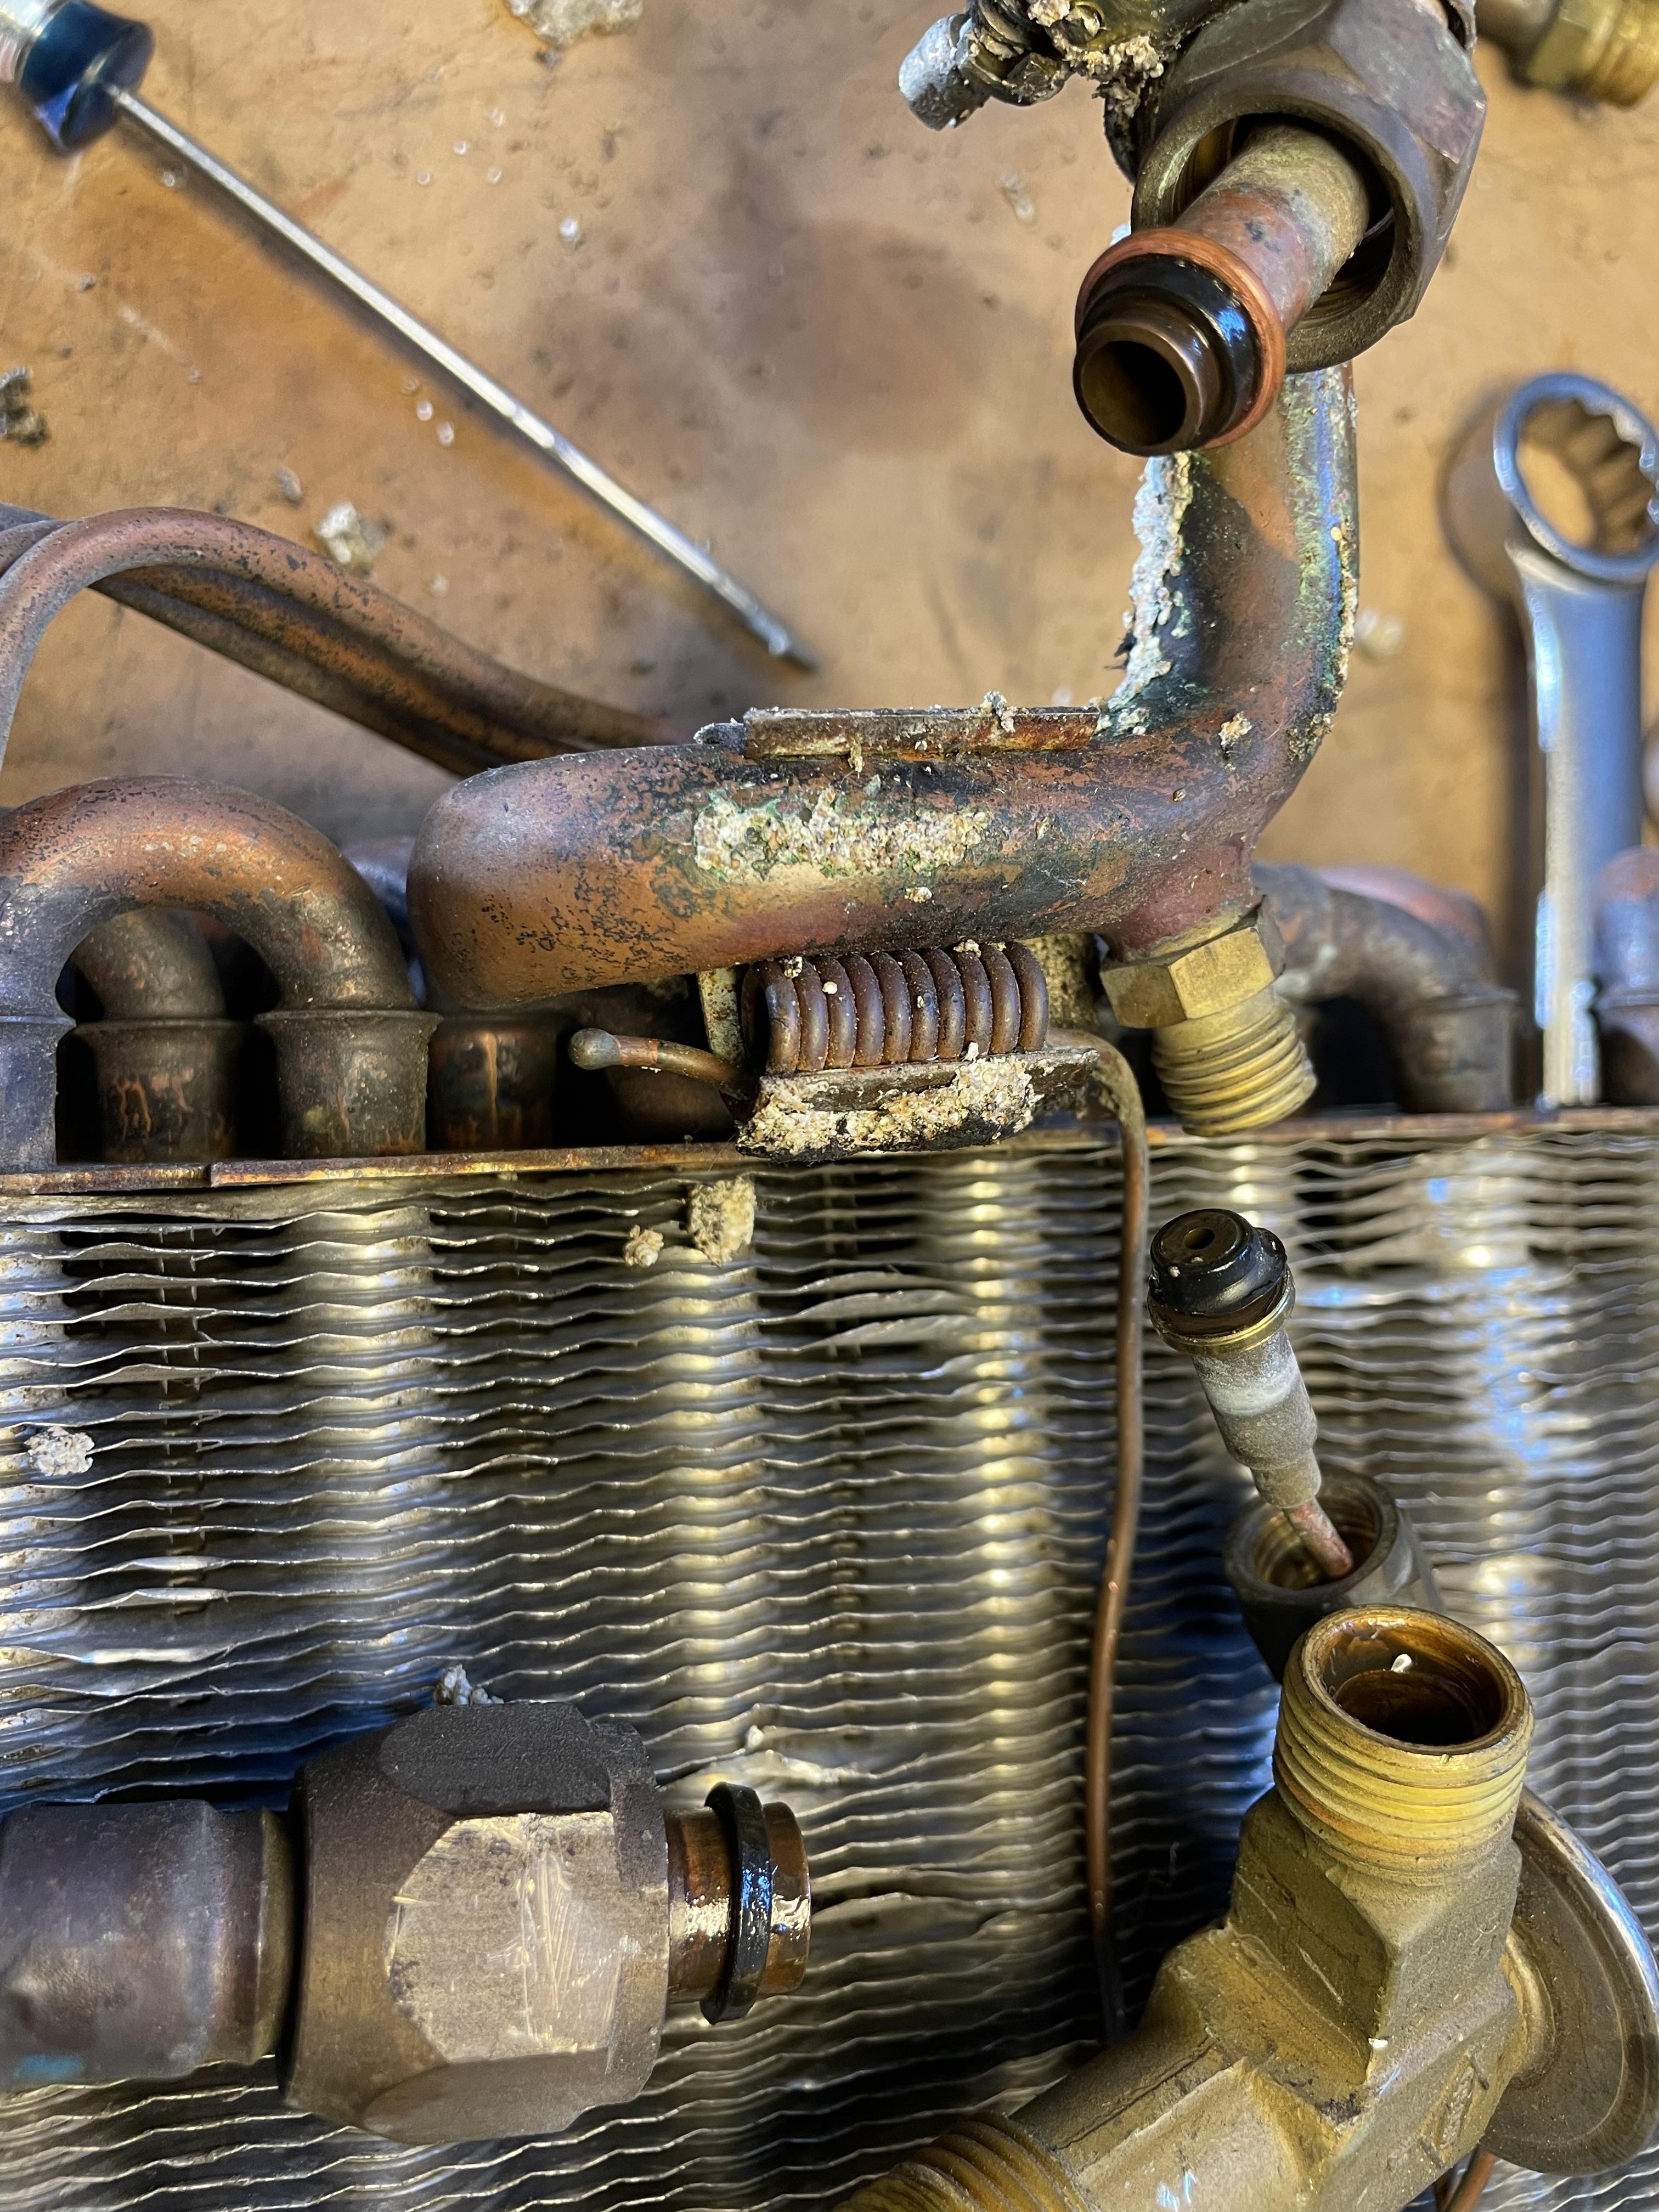
I'm trying to spec thesis three o-rings that are part of the expansion valve installation. Any here with a list or hyperlink?

Re: And so it starts, Maeve
starting to make progress again.
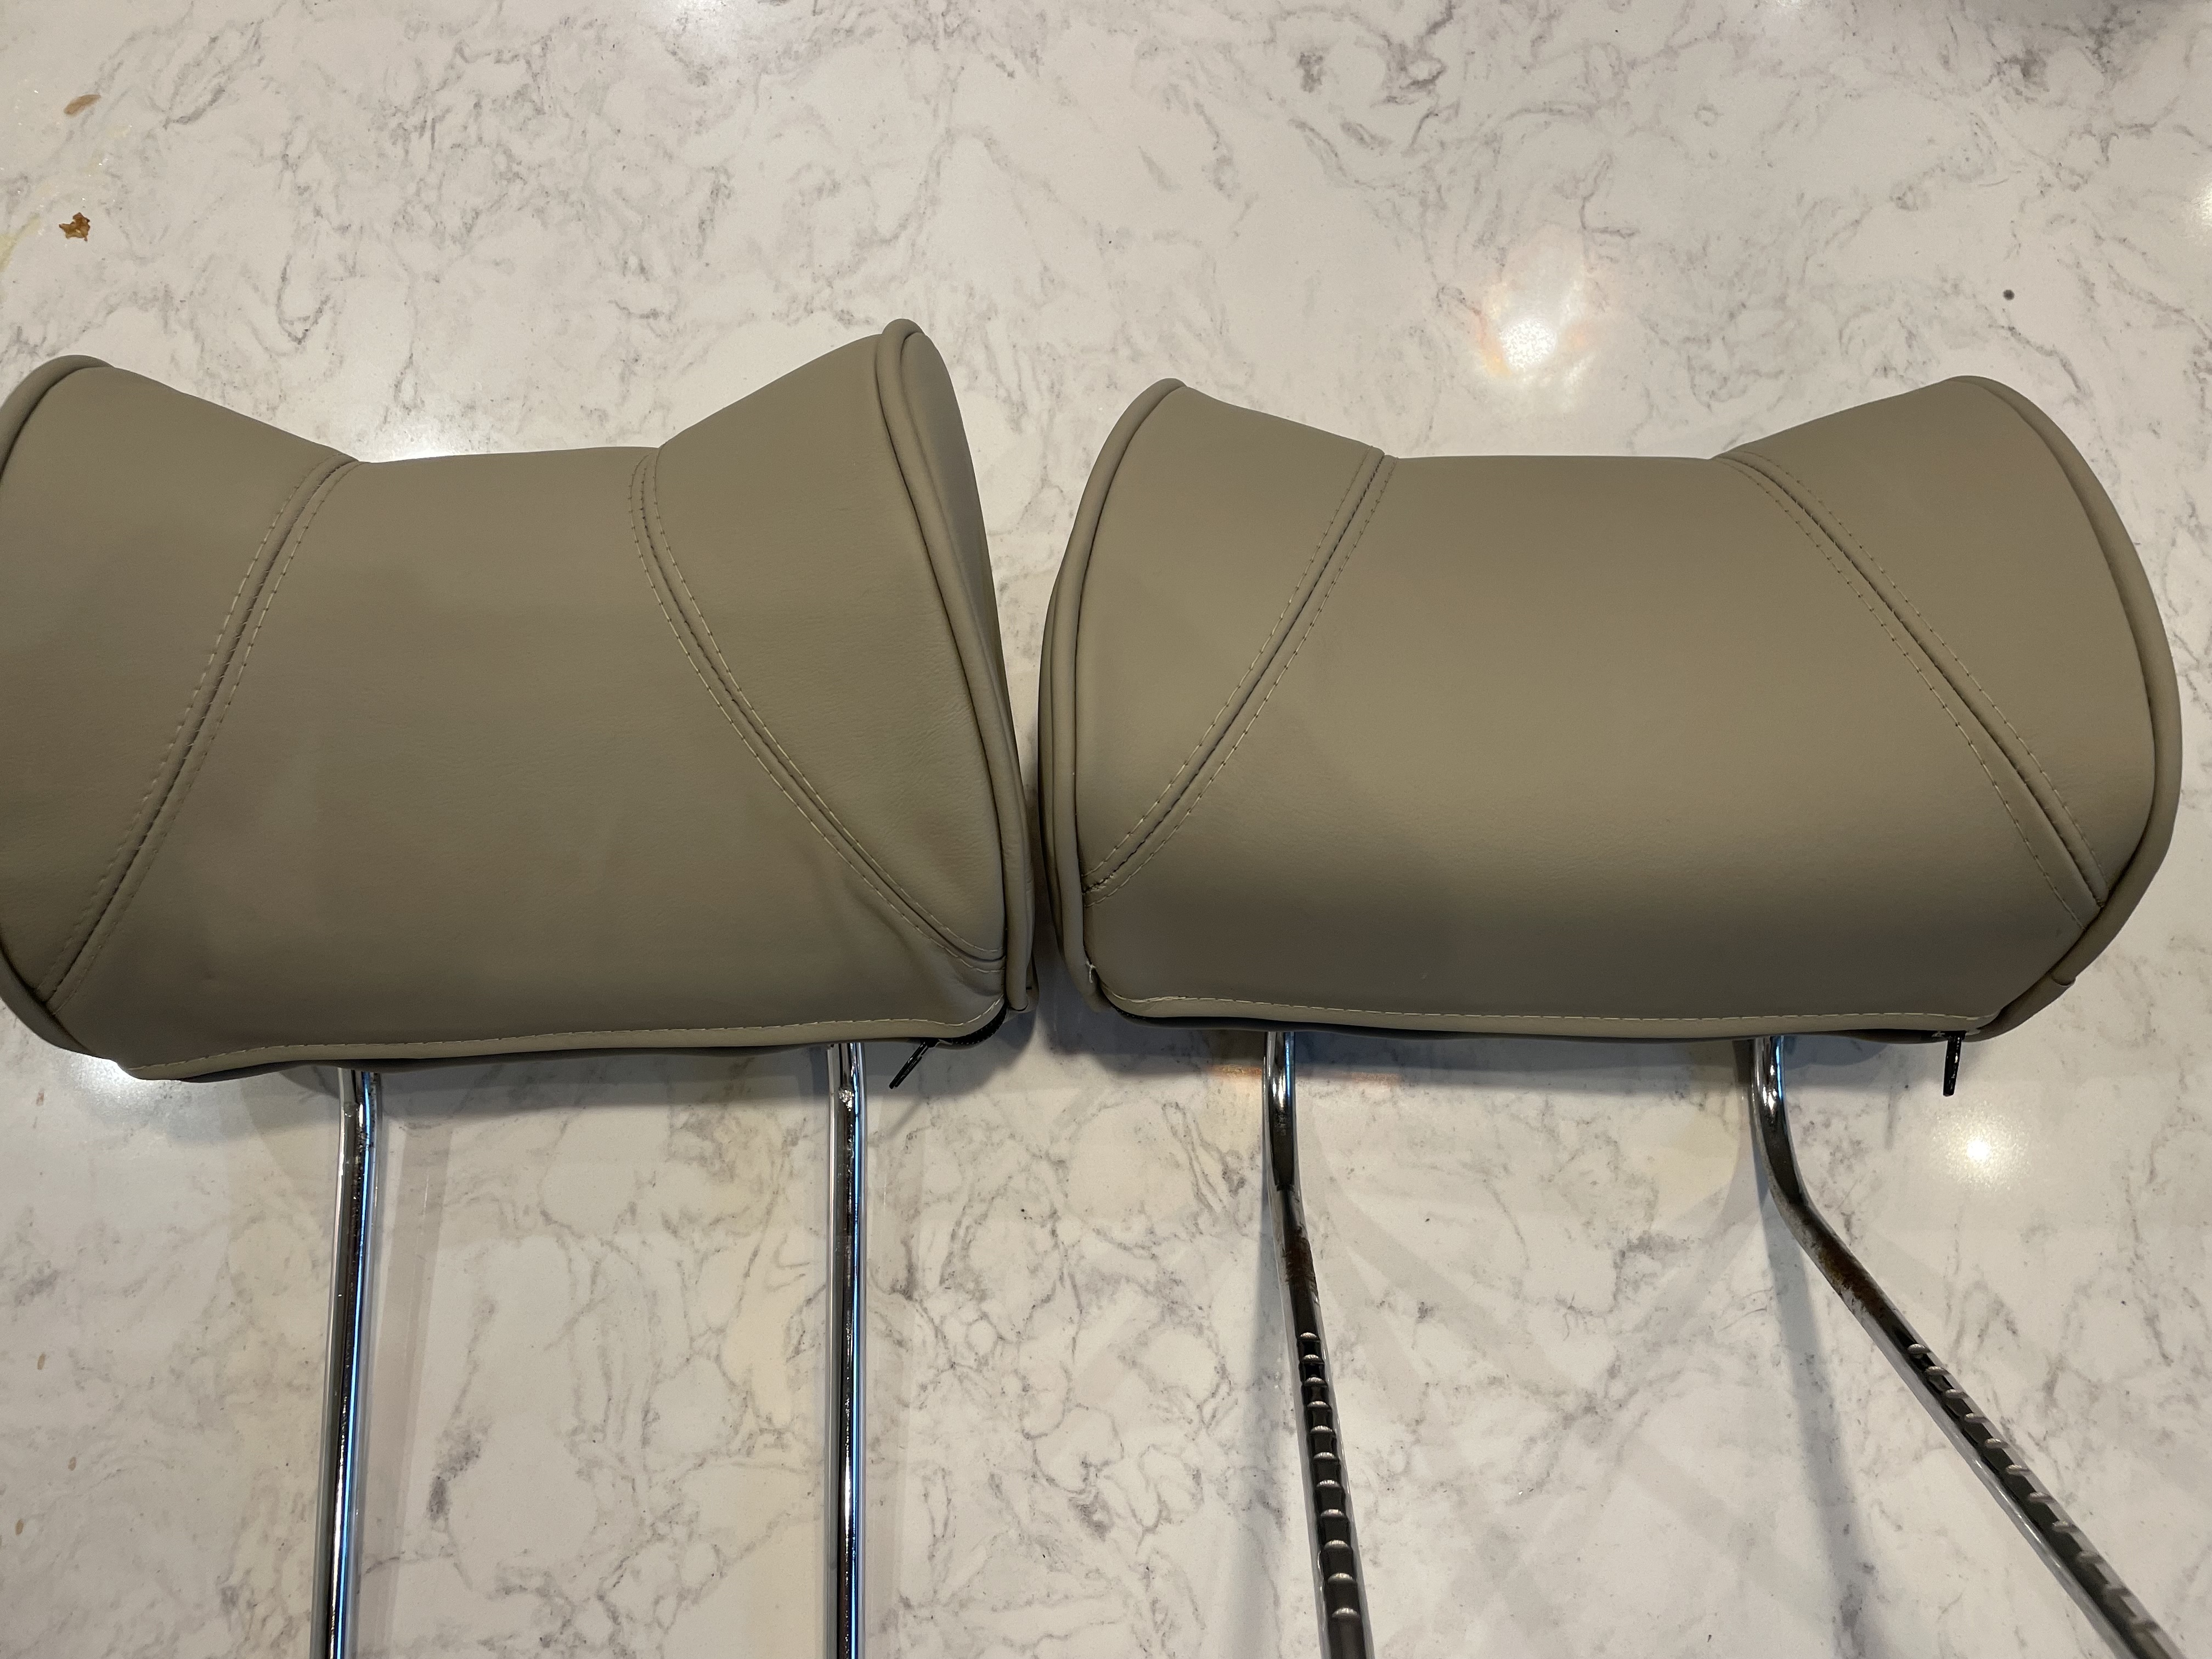
I have to say, with all the discussion about whose seat covers to use (GAHH, zoom zoom, etc) I am happy with zoomzoom off of eBay. I emailed Steven about headrest covers, and he suggested I mail him the headrests and he would make the covers and install them. Mail them there, he mails them back, and this is what I received in the mail yesterday, front and back that came with the car.
not perfect, but plenty nice for a daily driver. I'm starting on the sport seats this weekend after I got an estimate of $2000 for a local shop to install the new seat covers. Seemed a little high.

-
Blue Shadow
- Posts: 10291
- Joined: Feb 12, 2006 12:00 PM
- Location: SE PA
Re: And so it starts, Maeve
I don't know prices for this work. I do recall decades ago the San Diego area had new leather installed in an M5 or something for maybe 1500 but included the rear seats. Believe there was some cross-border connection to keep the price low. Maybe your quote is close to the new price, especially in the more expensive places to live in the US.gwb72tii wrote: Jul 21, 2023 11:58 AM I got an estimate of $2000 for a local shop to install the new seat covers. Seemed a little high.
Re: And so it starts, Maeve
alas I think you're correct, shadow man
Re: And so it starts, Maeve
Finally, back at it.
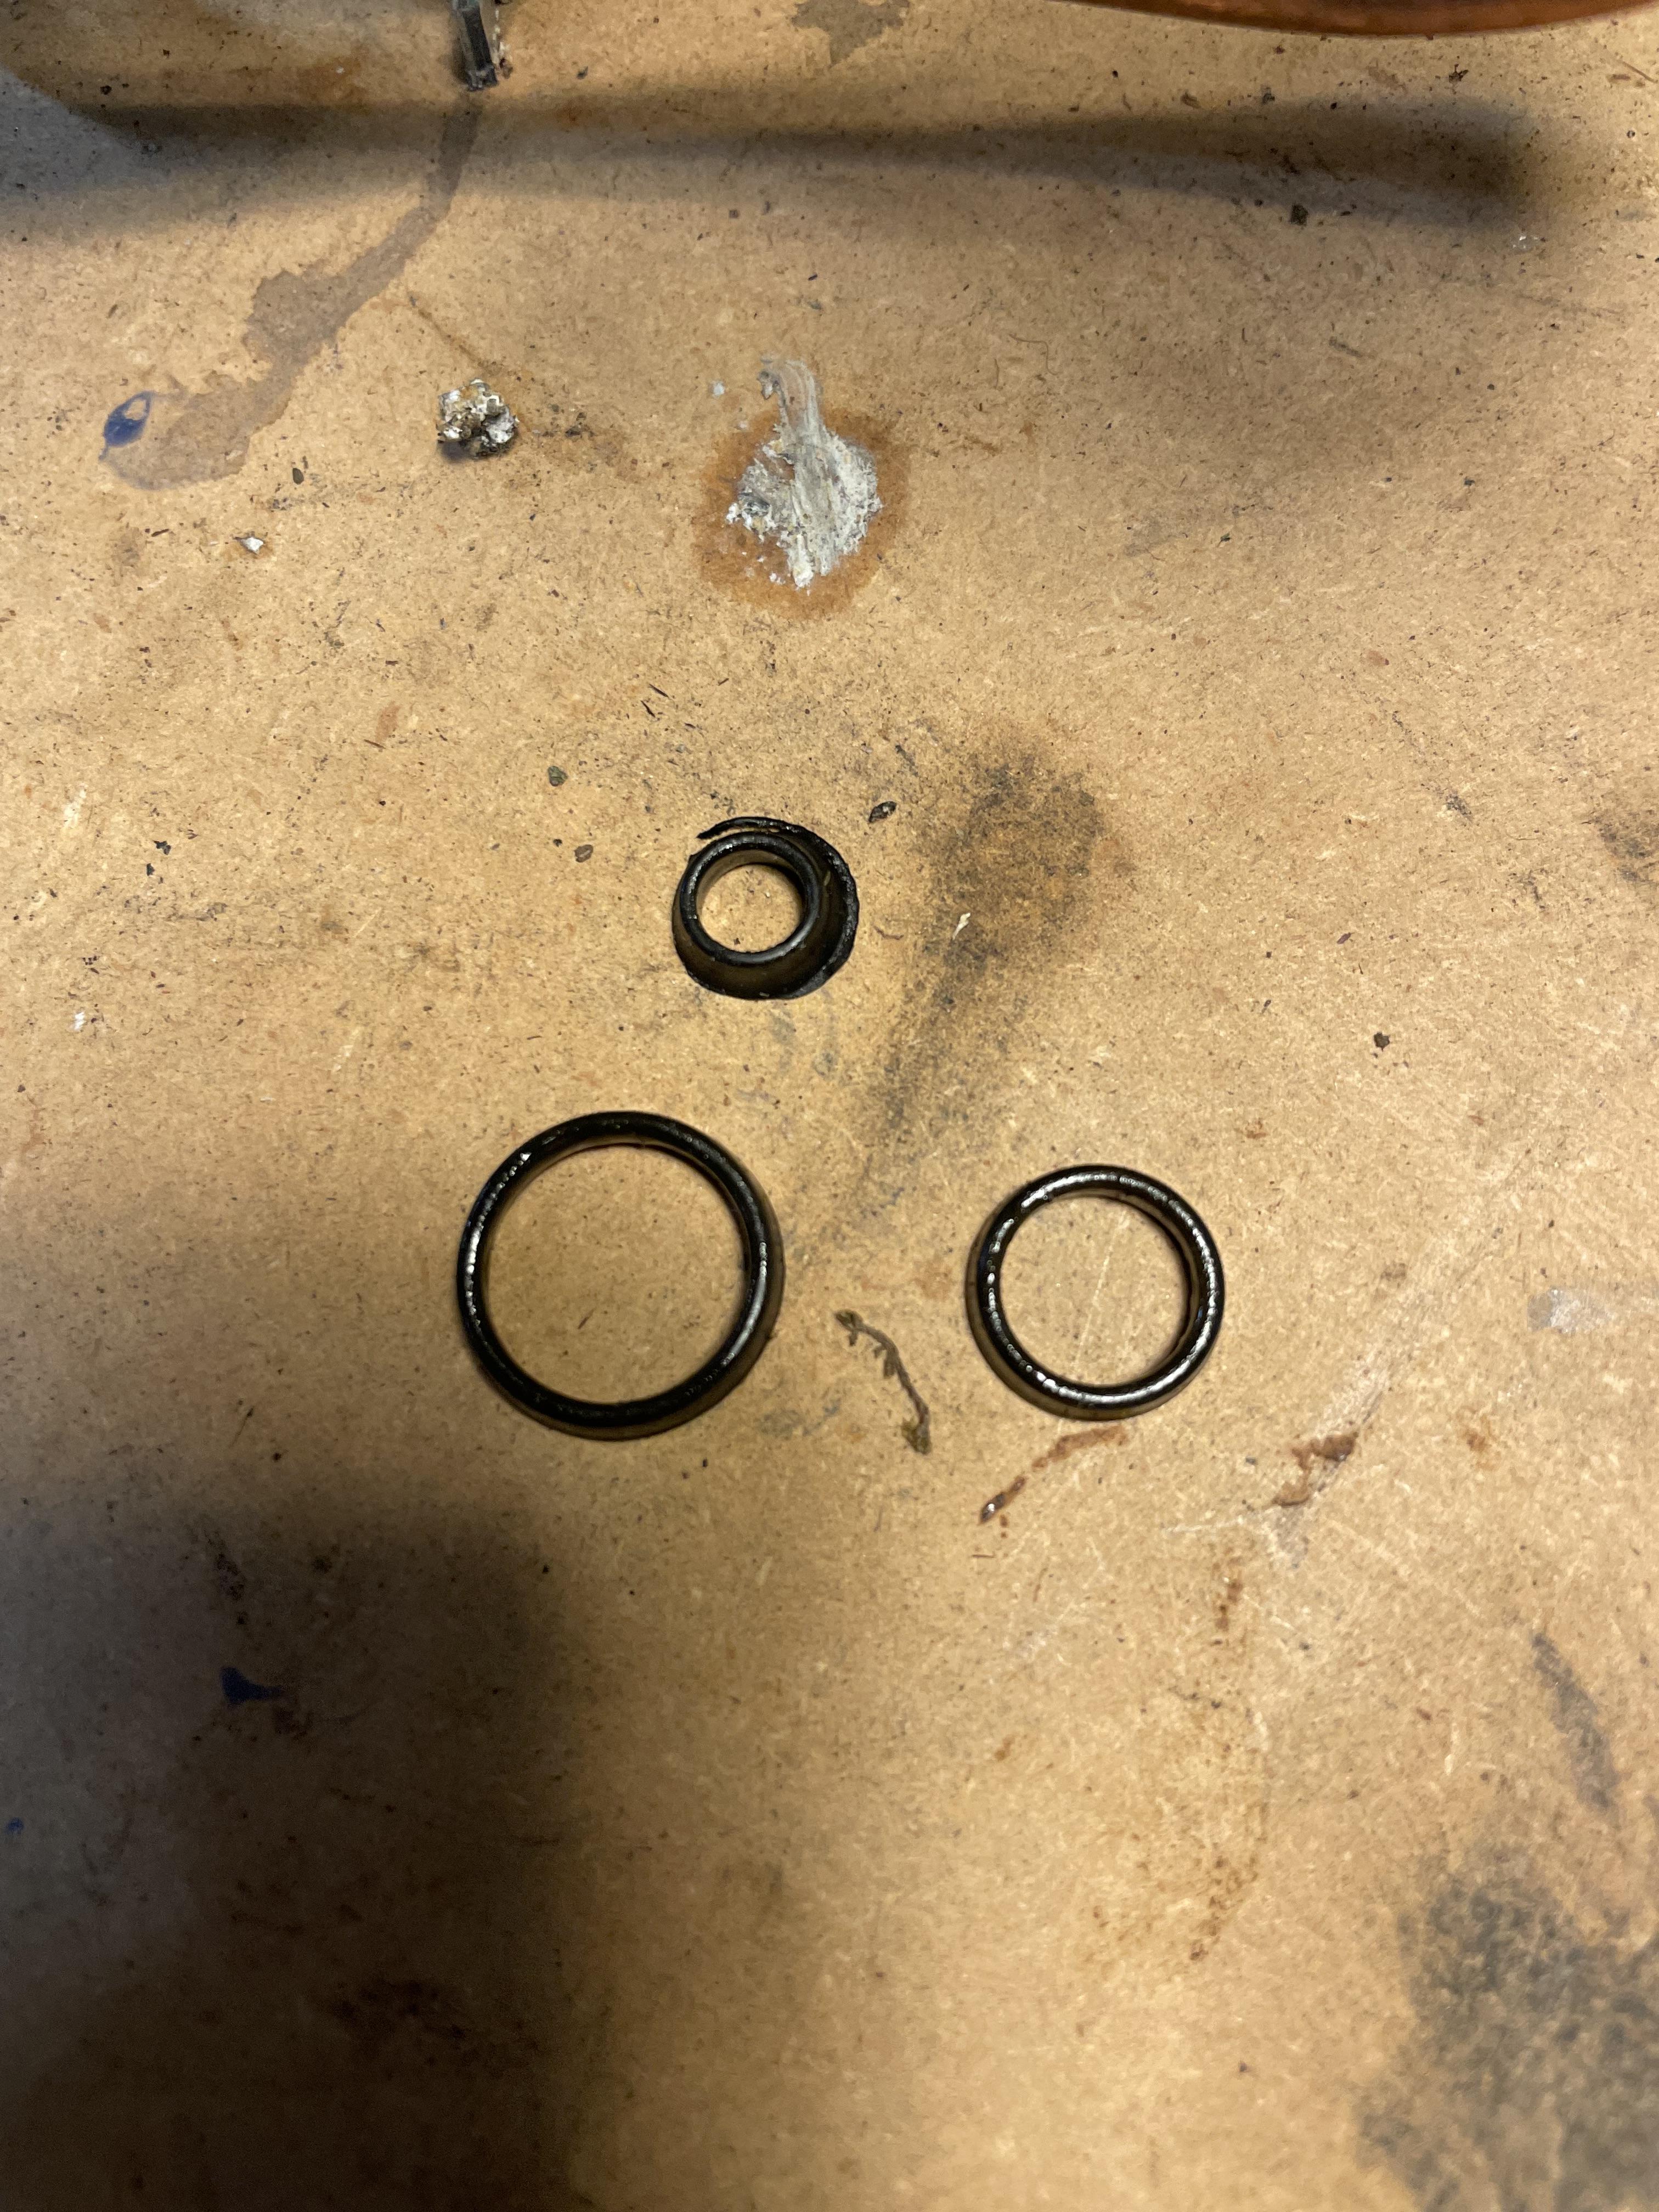
Started reassembly of my AC box, with a new evaporator and expansion valve, complete with new o-rings (thanks Mike W).
new o-rings assembled with Nylog Blue
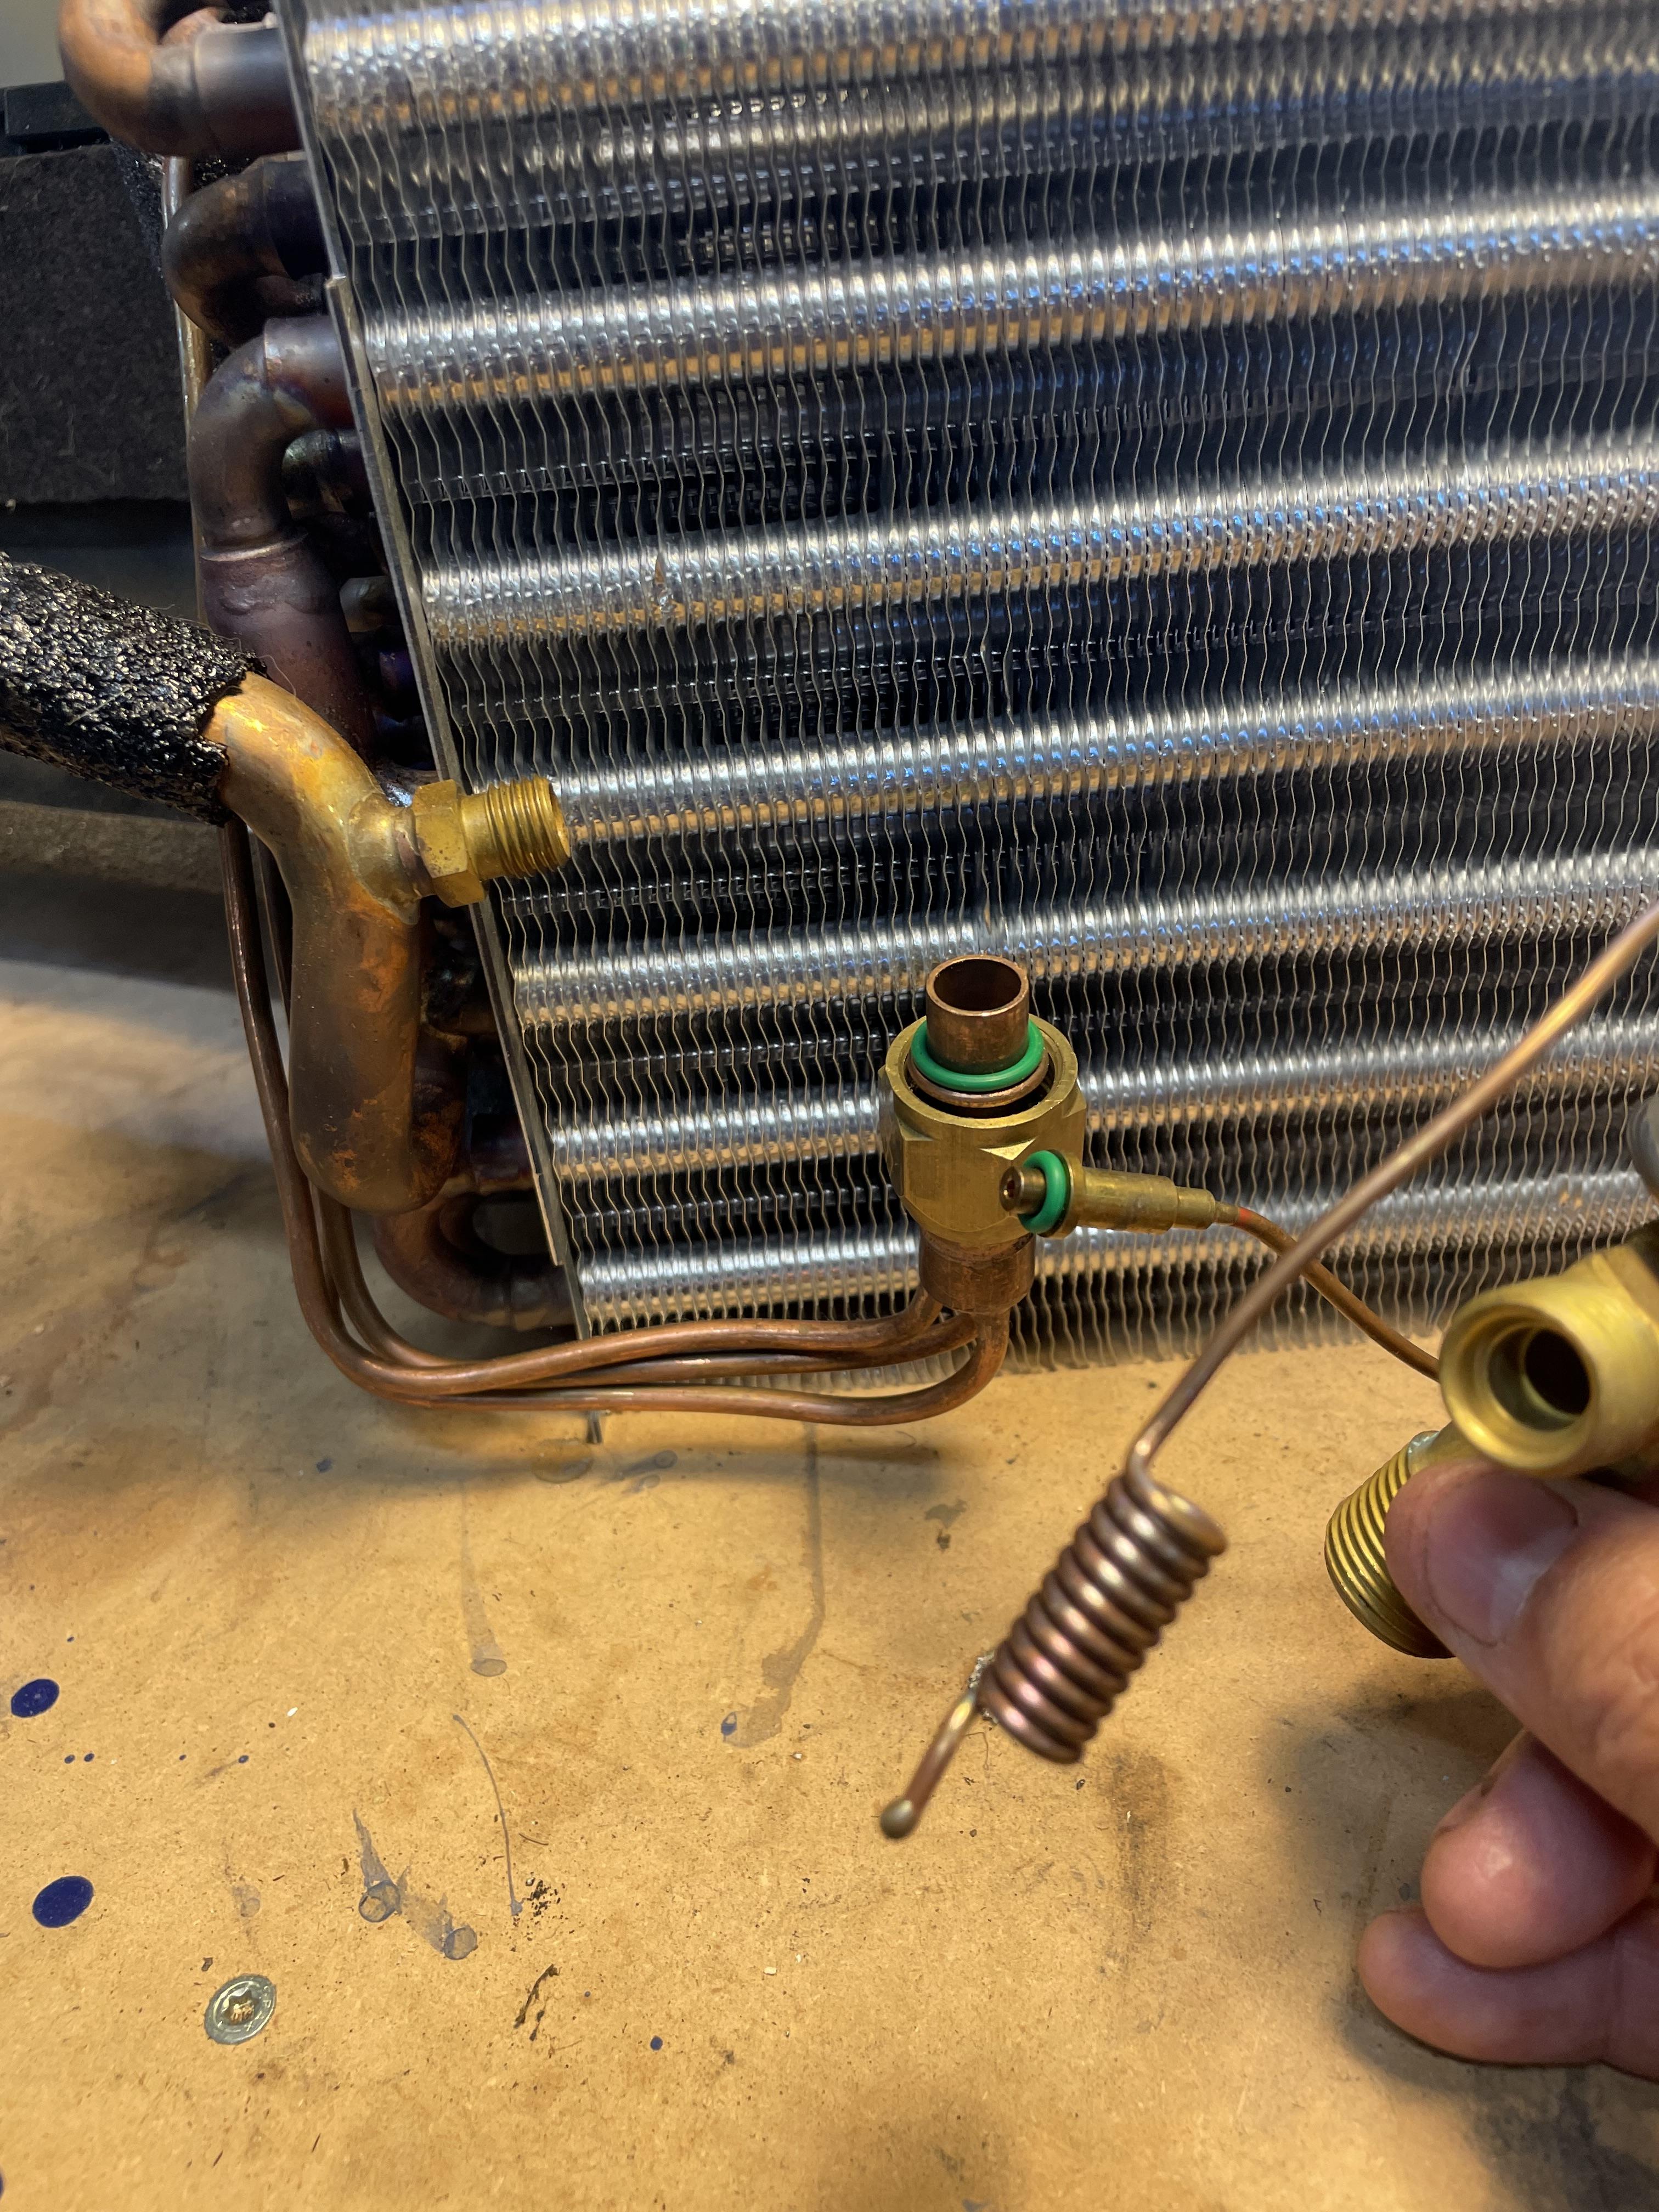
old o-rings cross sections weren't "O" shaped any longer
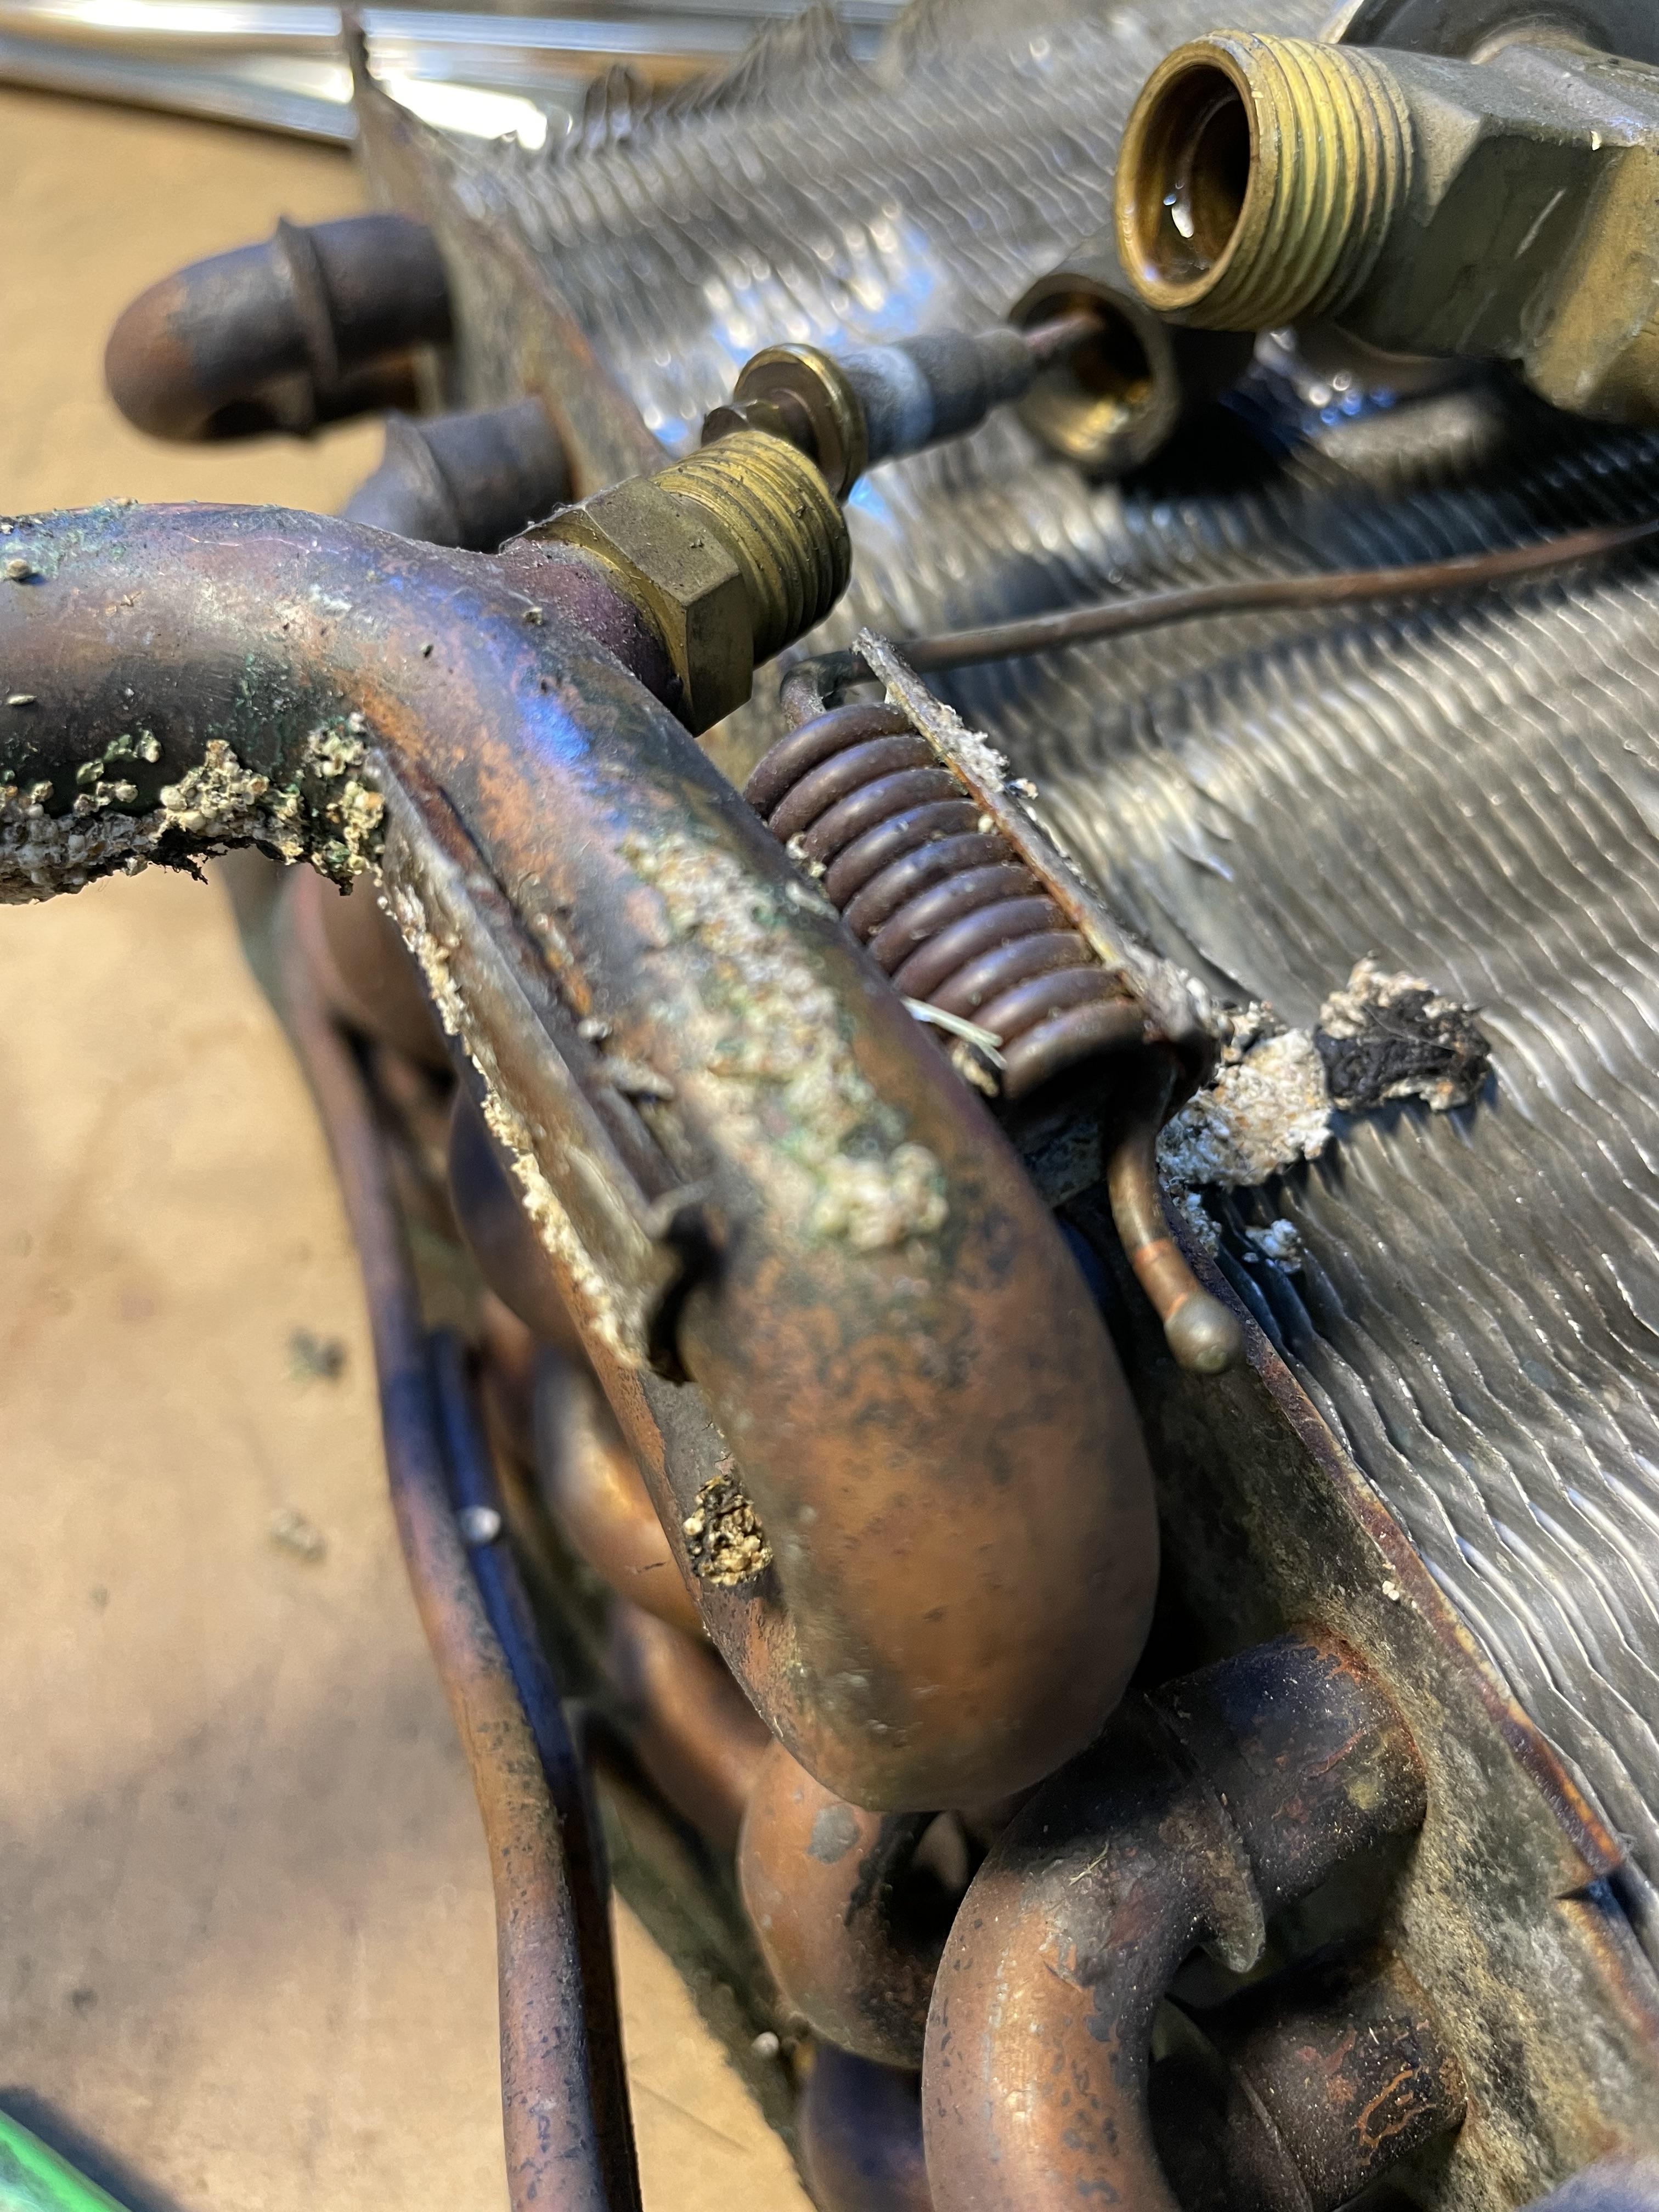
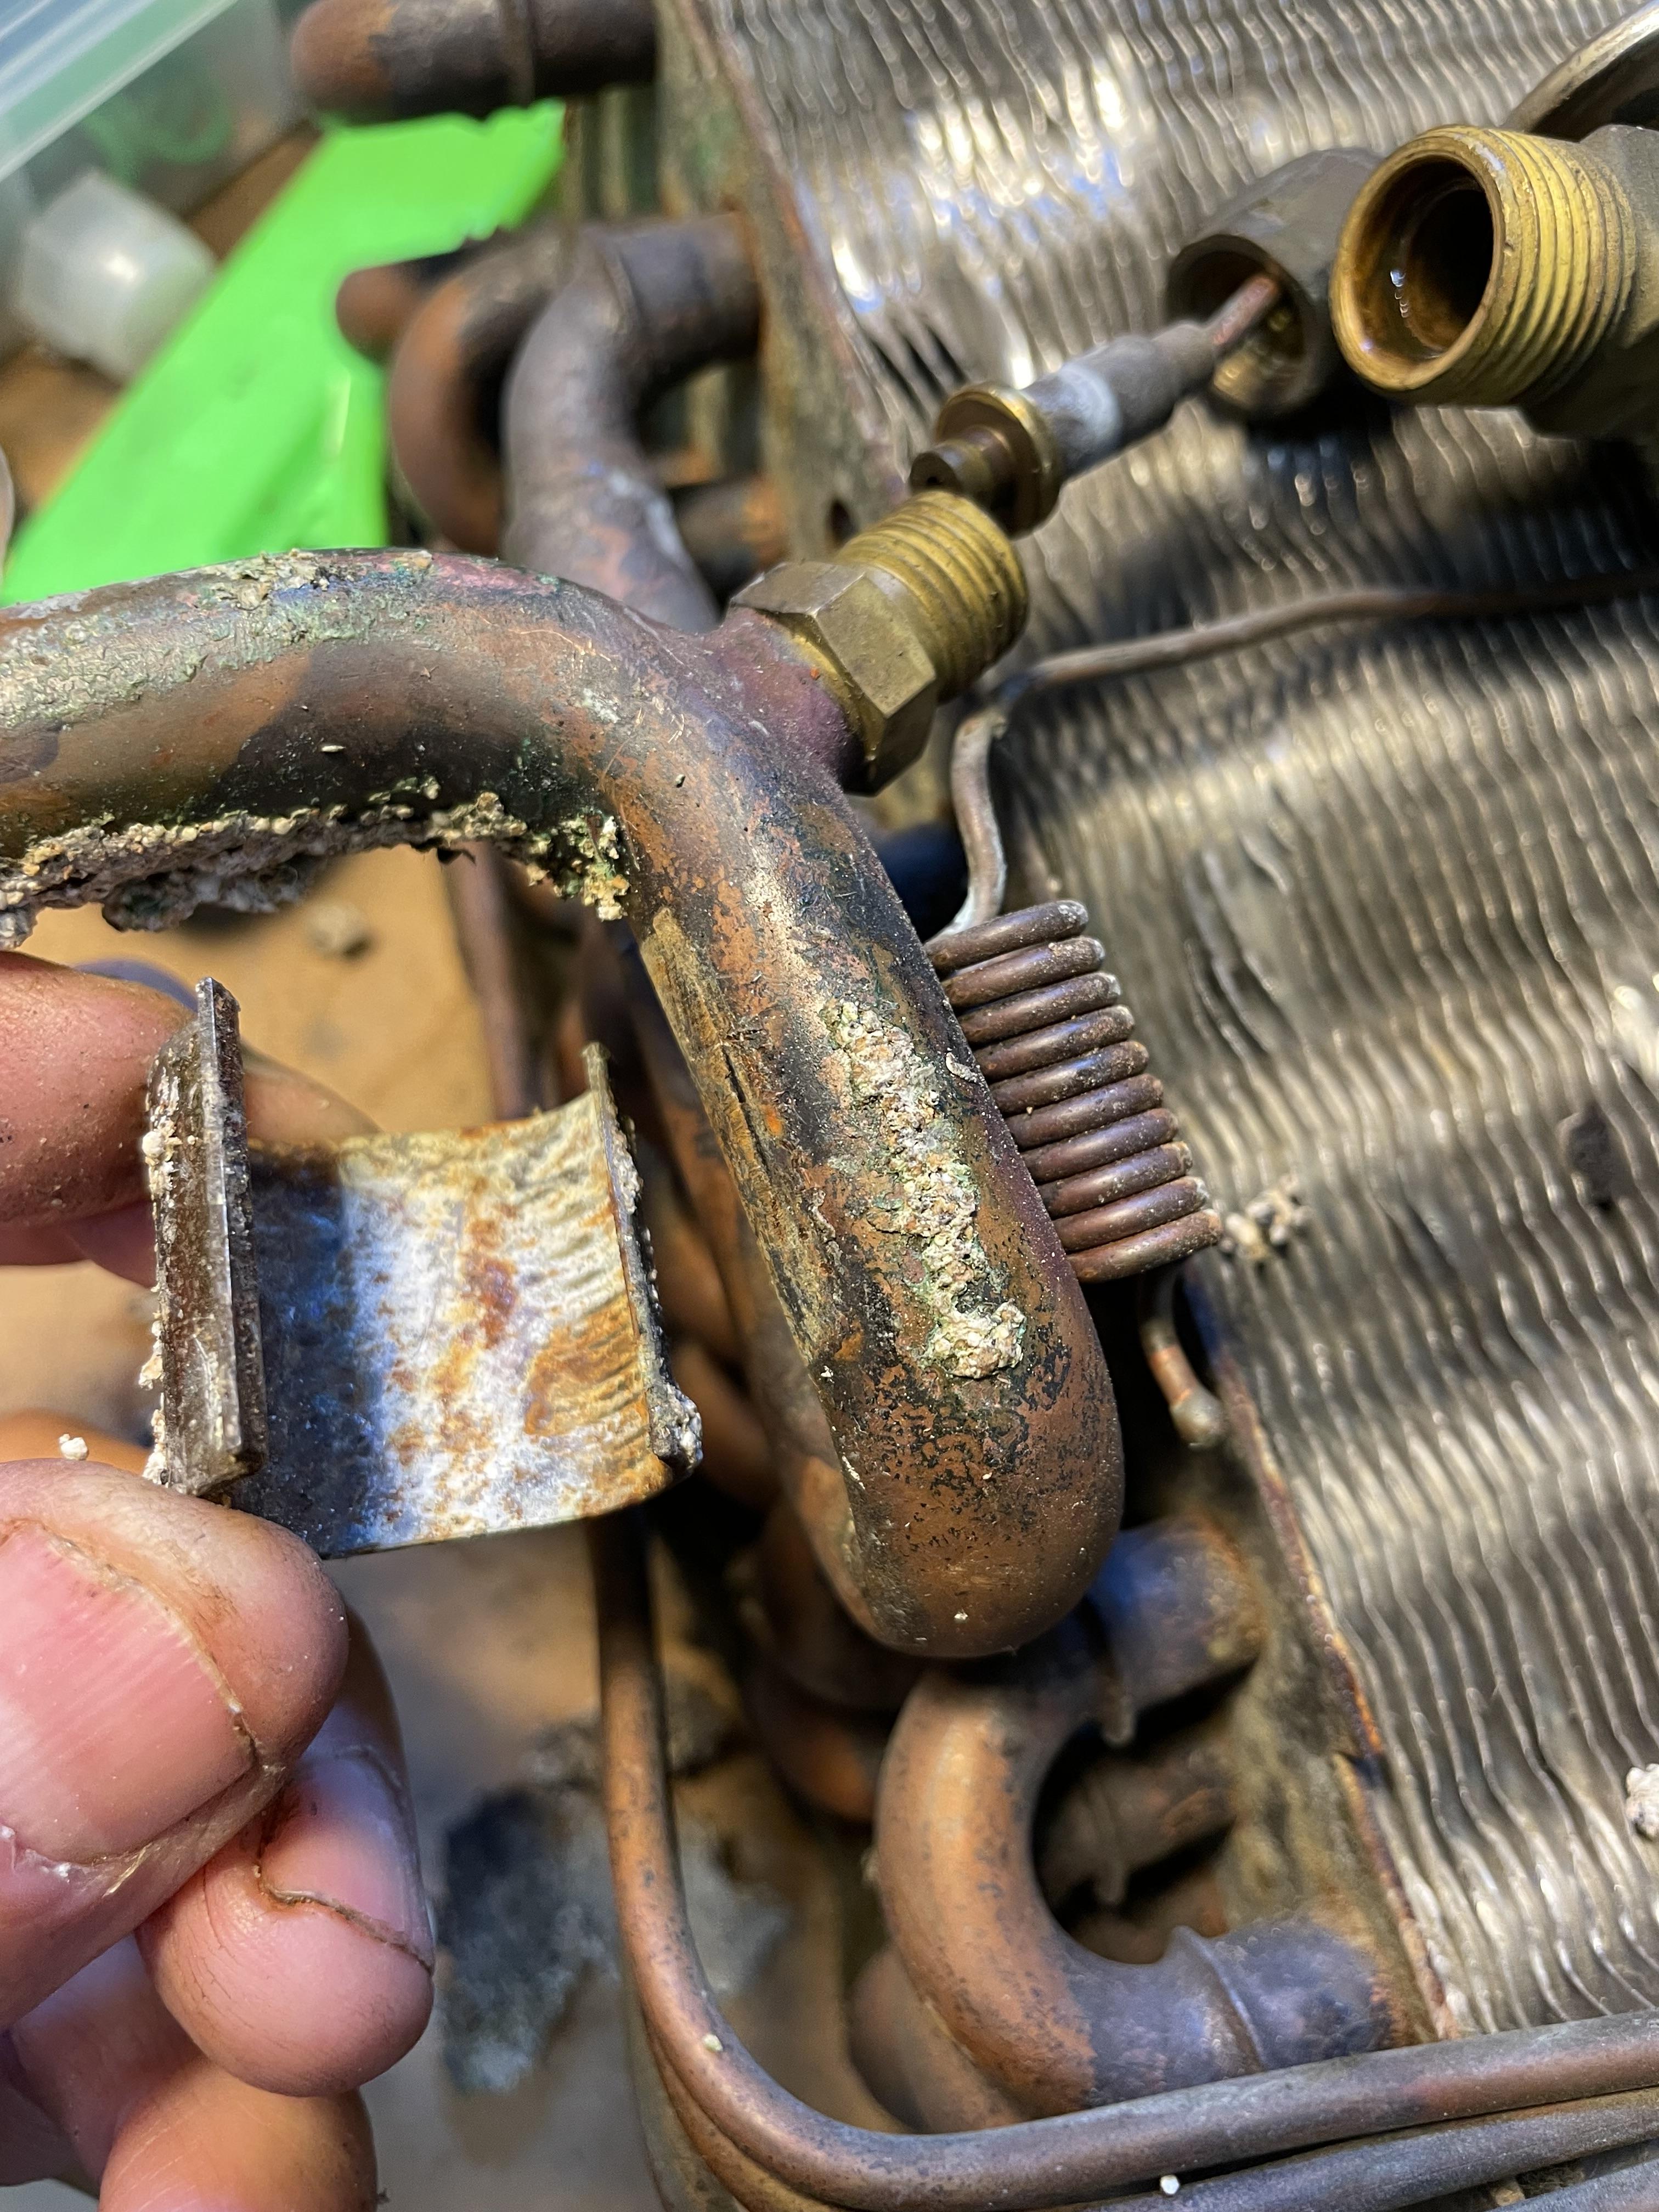
removing this clip is harder than it could be, but necessary
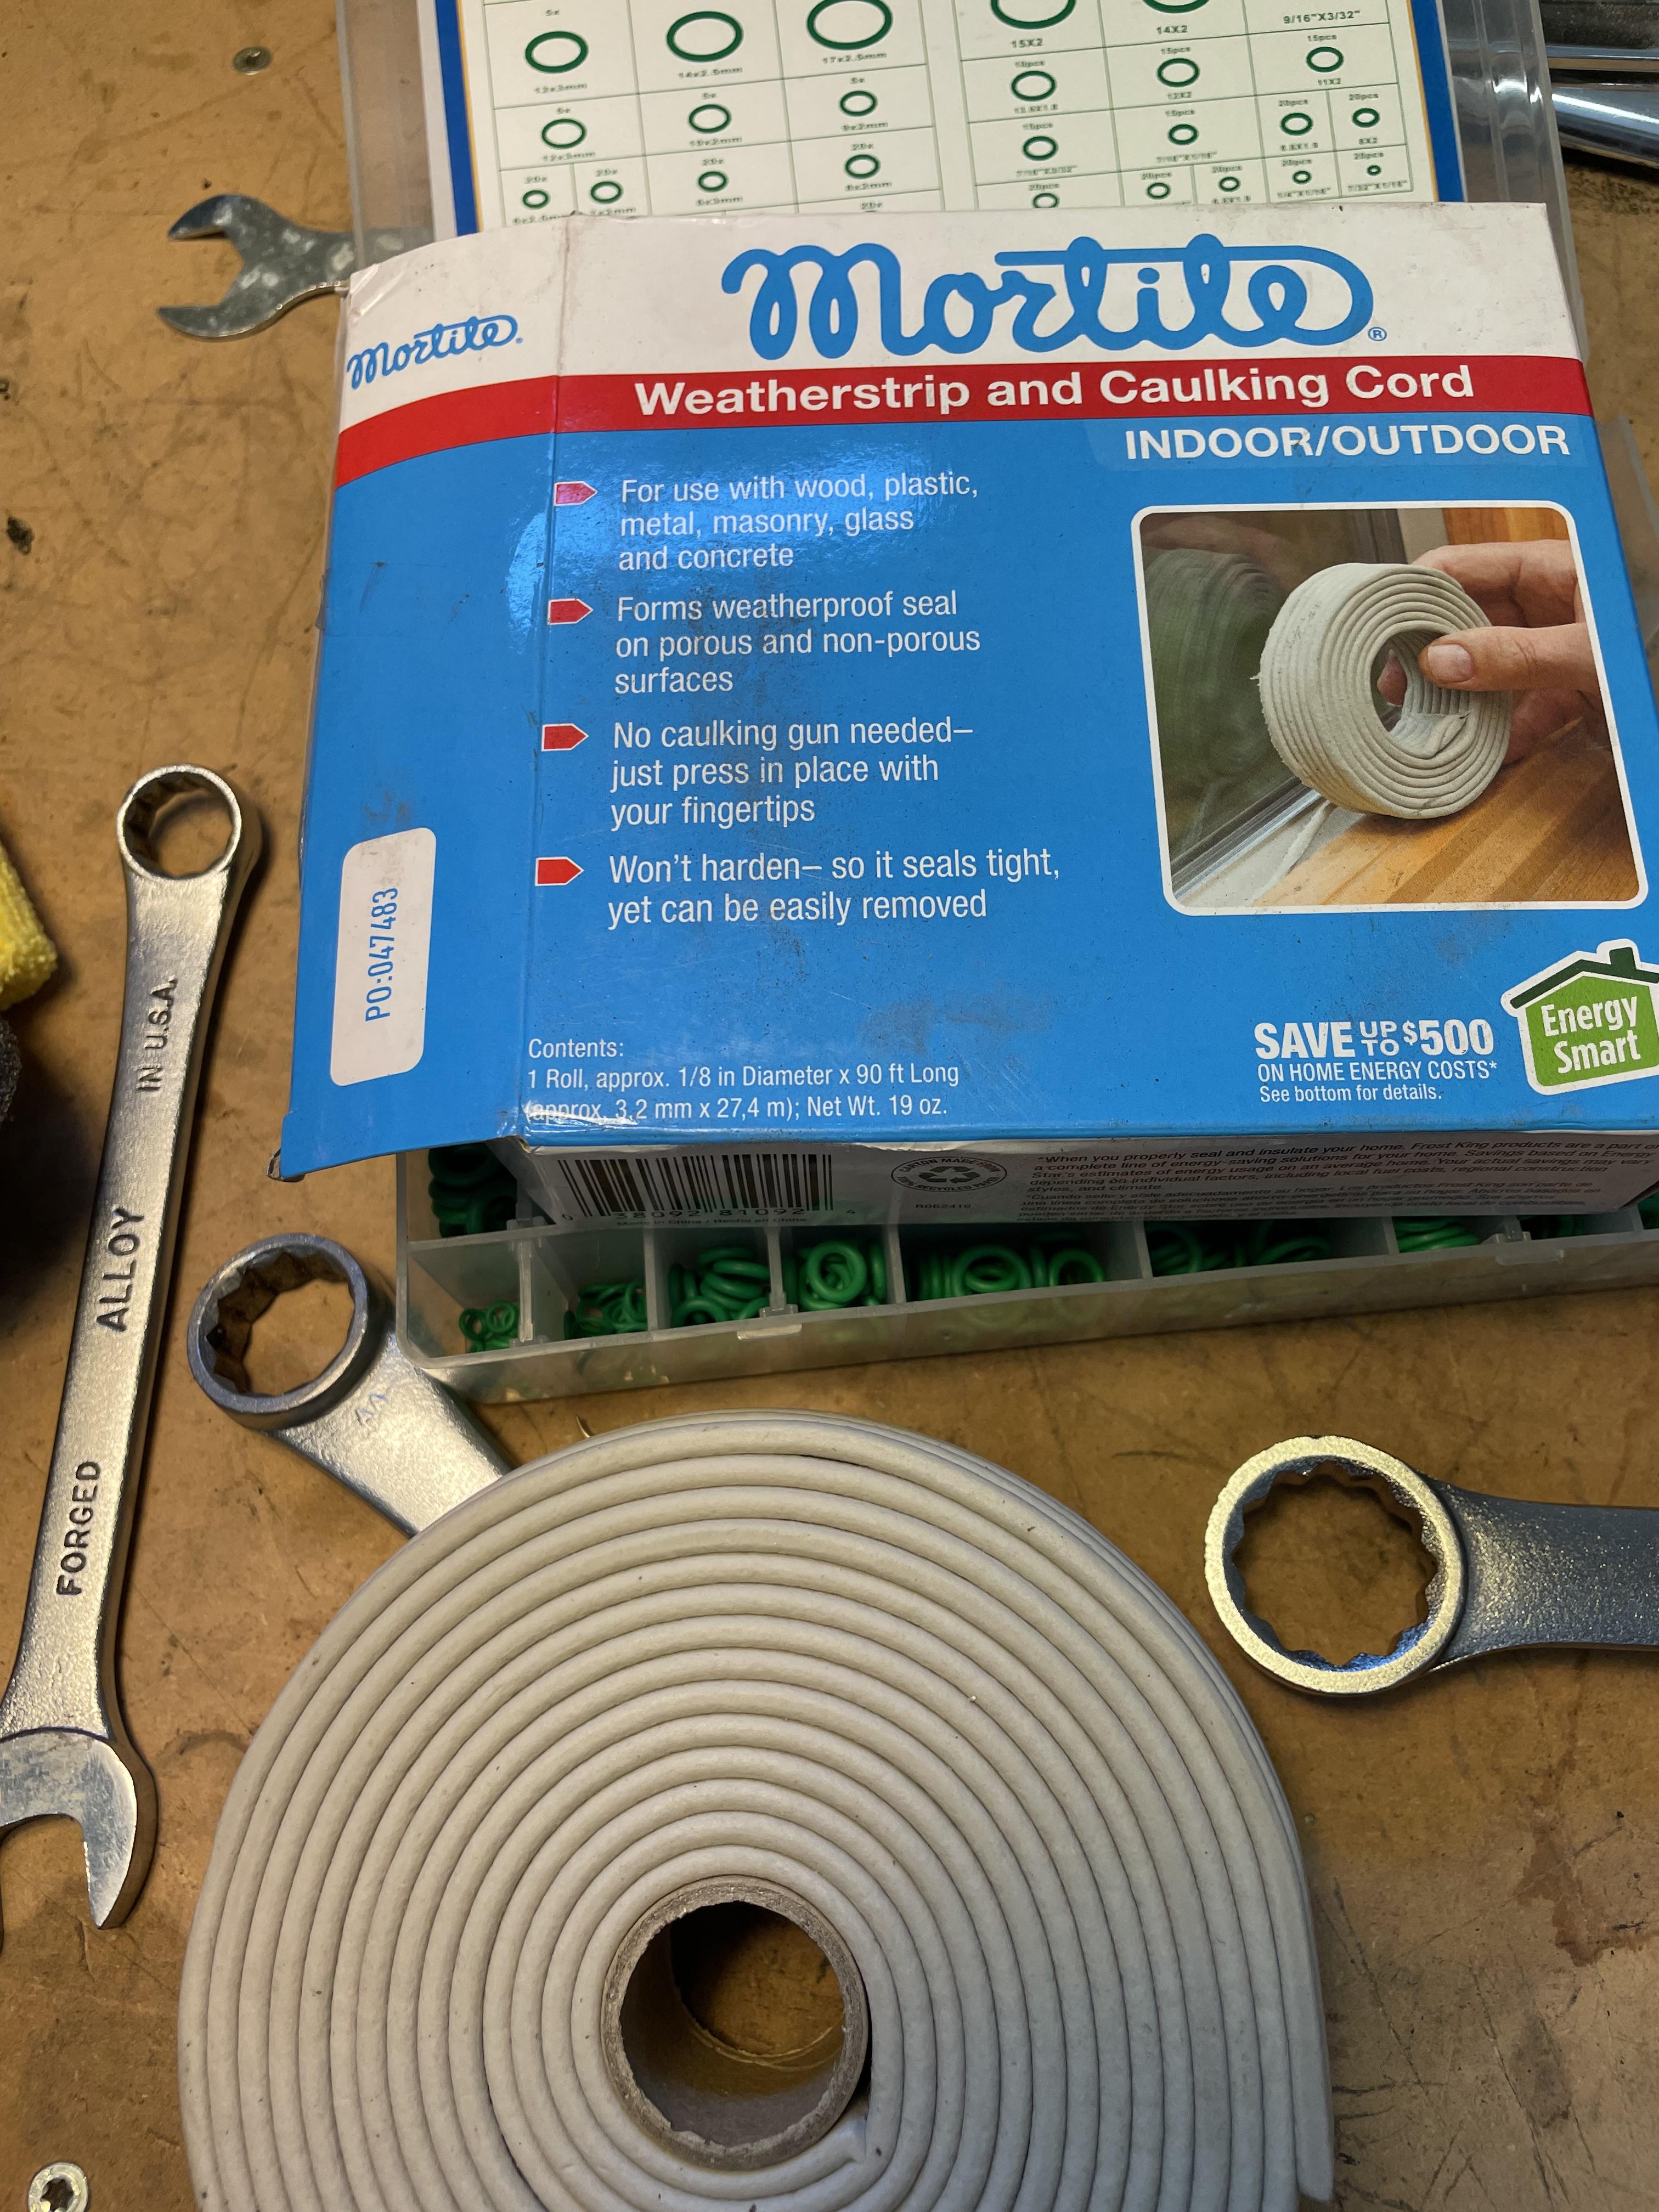
re-insulated the pipe coming out of the expansion valve
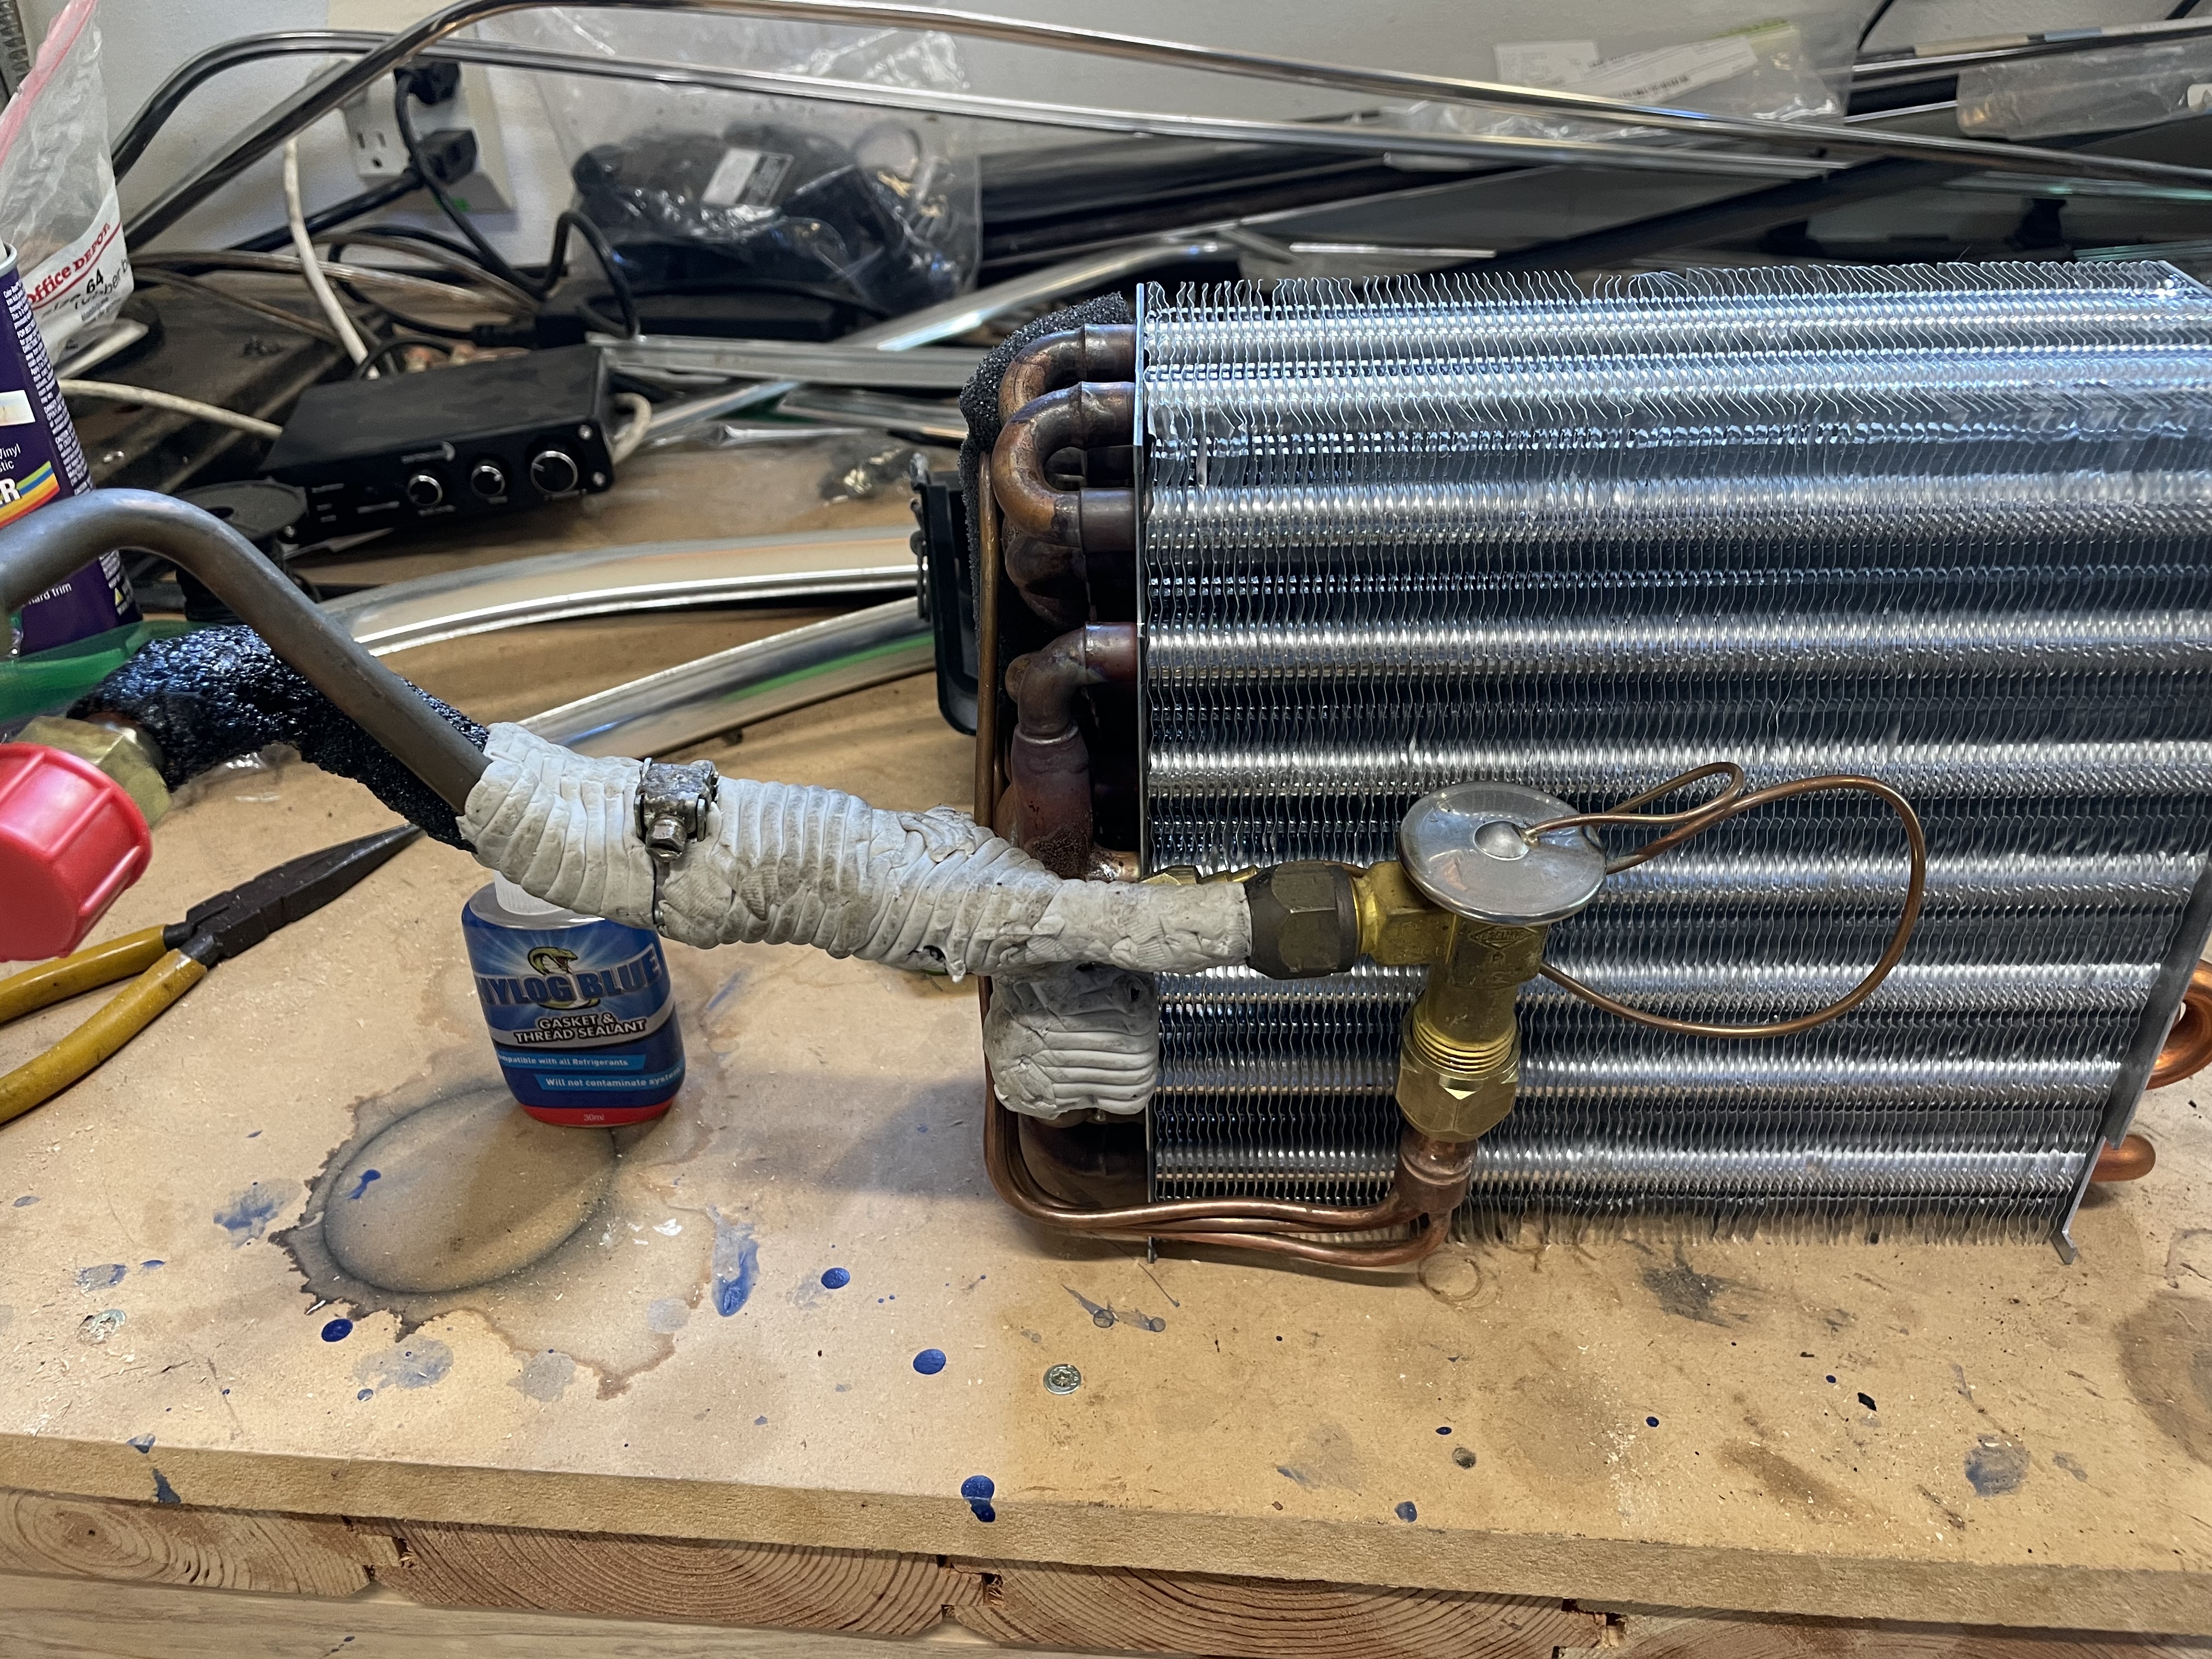
with this
amazing how fragile the cooling vanes on the evaporator are. I spent about 20 minutes with a small flat head screw driver straightening them.
most of you know all this stuff but I'm adding pics and descriptions for future noobs to the e28 like me
Started reassembly of my AC box, with a new evaporator and expansion valve, complete with new o-rings (thanks Mike W).
new o-rings assembled with Nylog Blue

old o-rings cross sections weren't "O" shaped any longer

removing this clip is harder than it could be, but necessary


re-insulated the pipe coming out of the expansion valve

with this

amazing how fragile the cooling vanes on the evaporator are. I spent about 20 minutes with a small flat head screw driver straightening them.
most of you know all this stuff but I'm adding pics and descriptions for future noobs to the e28 like me
Re: And so it starts, Maeve
Good news, bad news.
Good news is my wife's garden shed is almost done.
Bad news is it's not done, and for some reason my wife believes her shed takes precedence over working on Maeve. Go figure!
But I did get a couple things done later this afternoon.
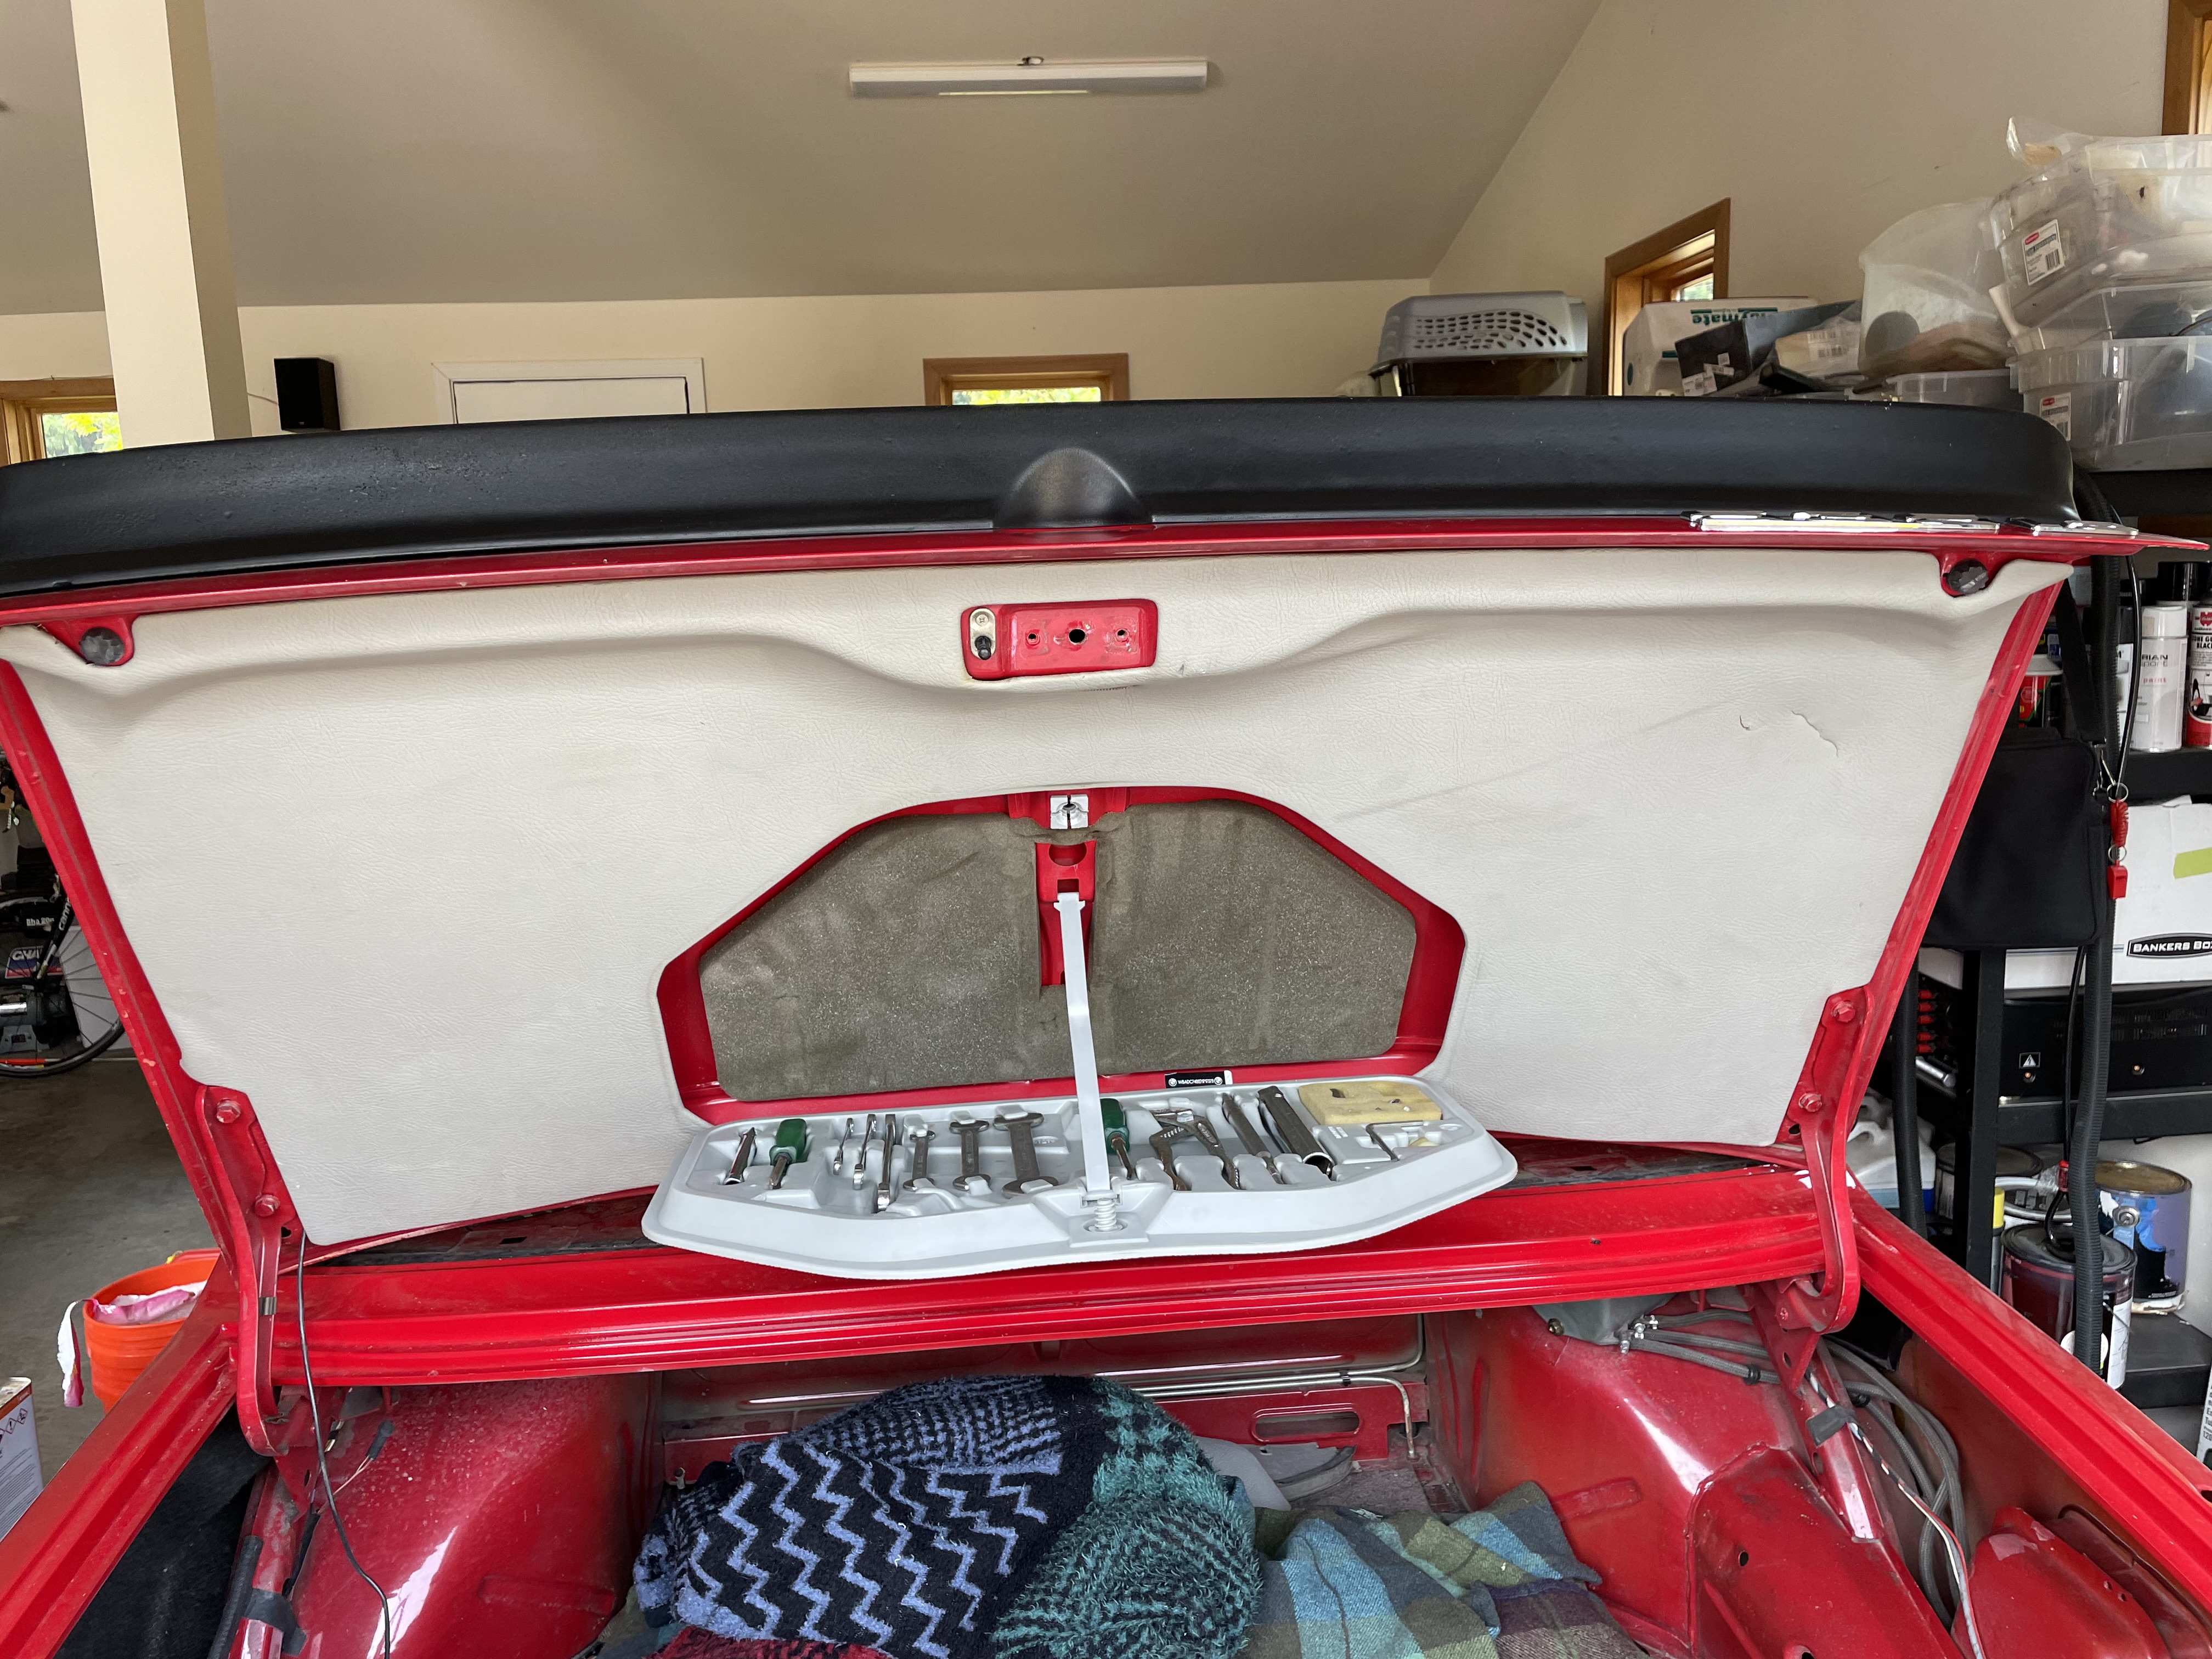
First, I reinstalled the trunk lid cover and tool box. Maeve came with a complete set of tools!
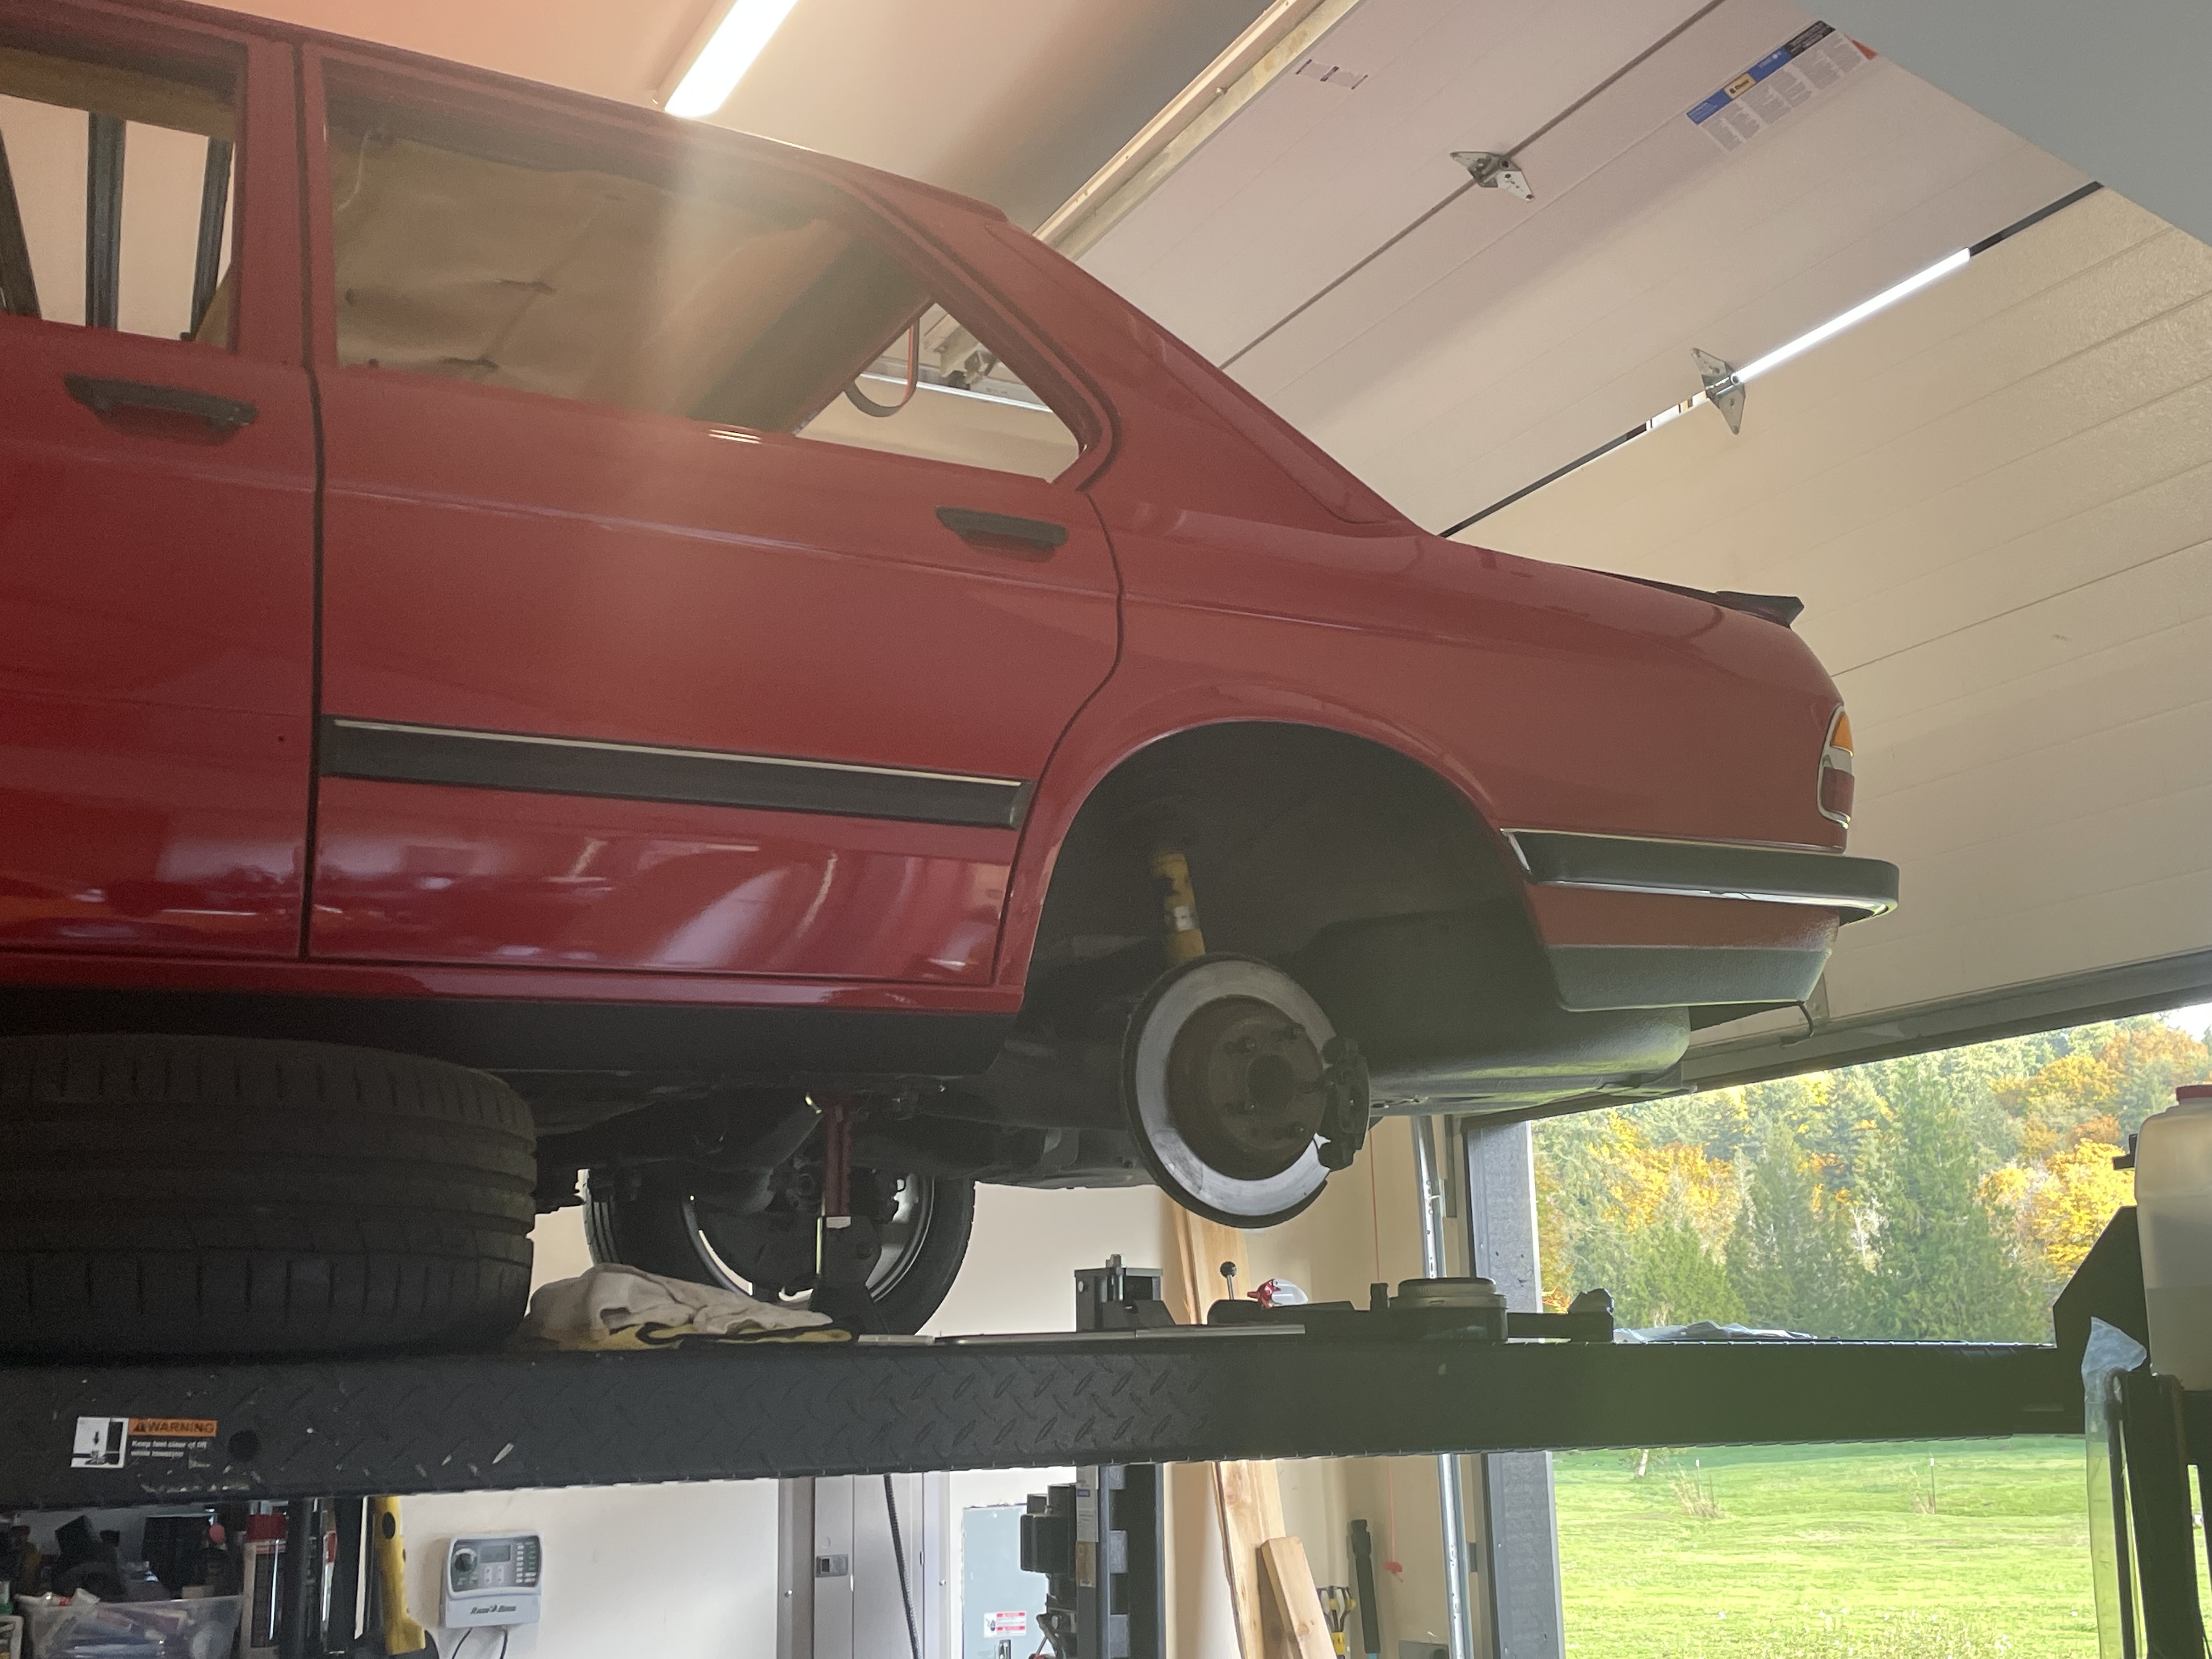
Then I removed the left rear wheel to get a better look at the brakes and suspension bits. Look what I found:
Not one, but two spacers
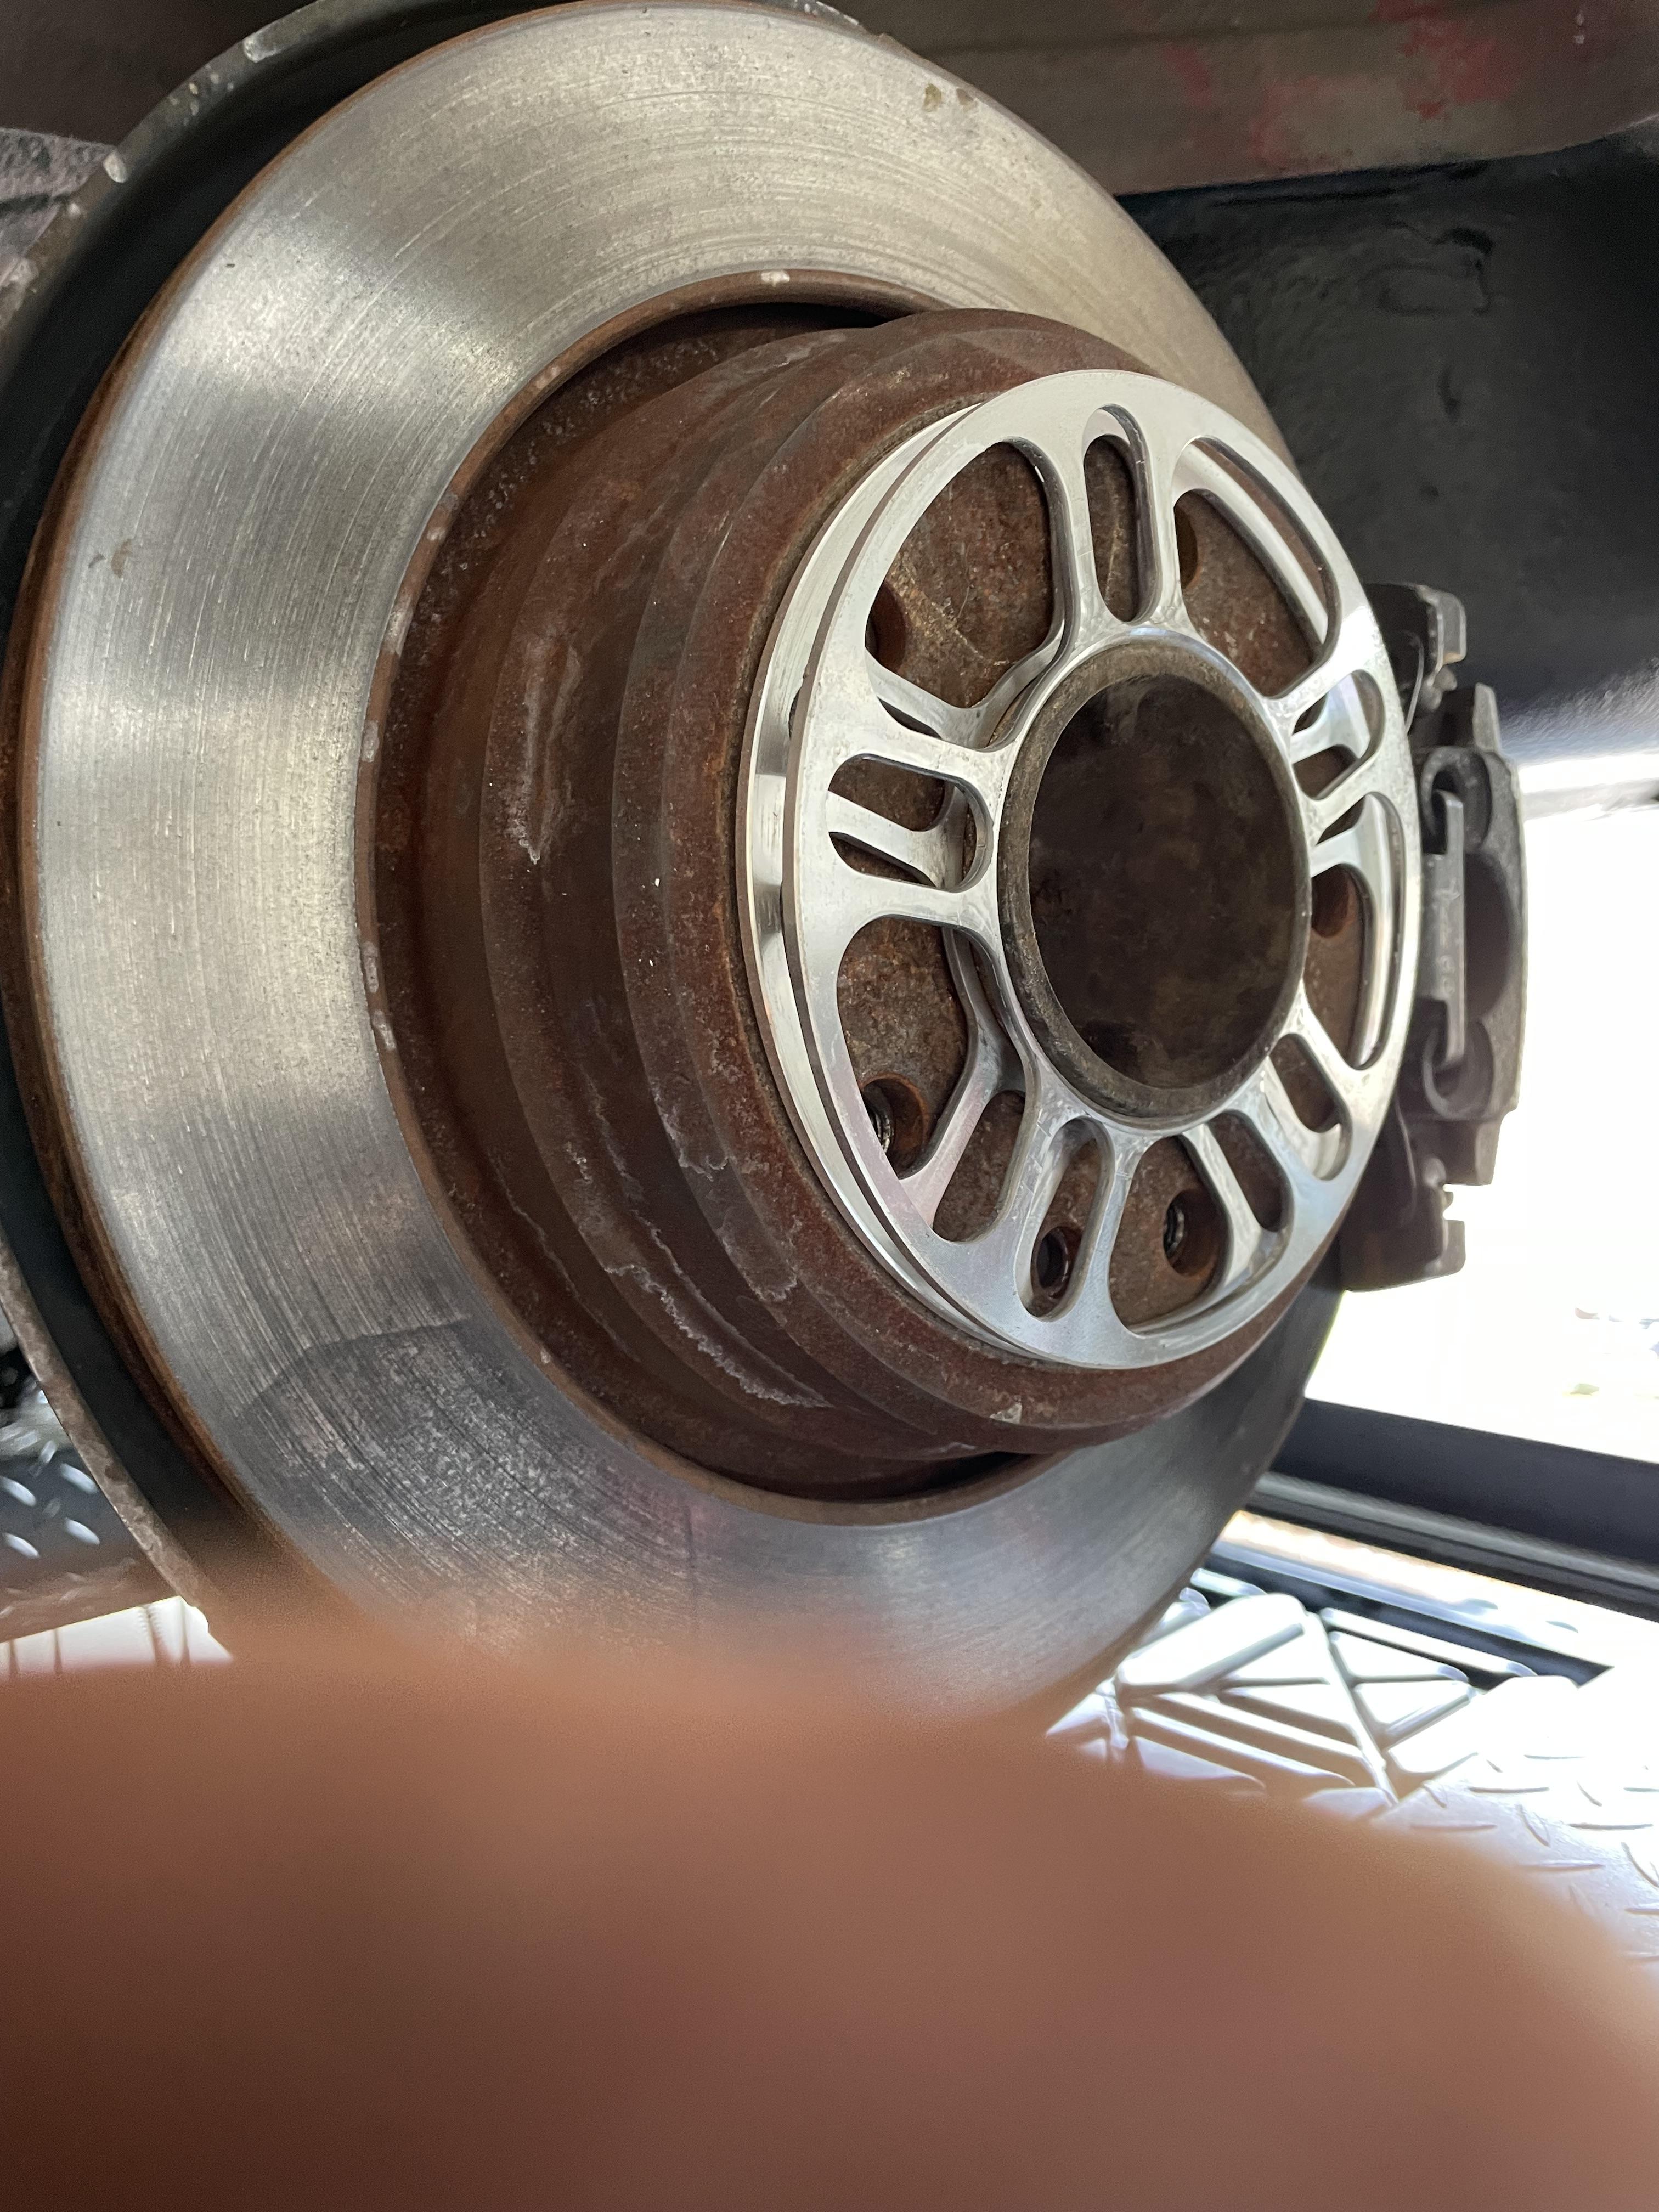
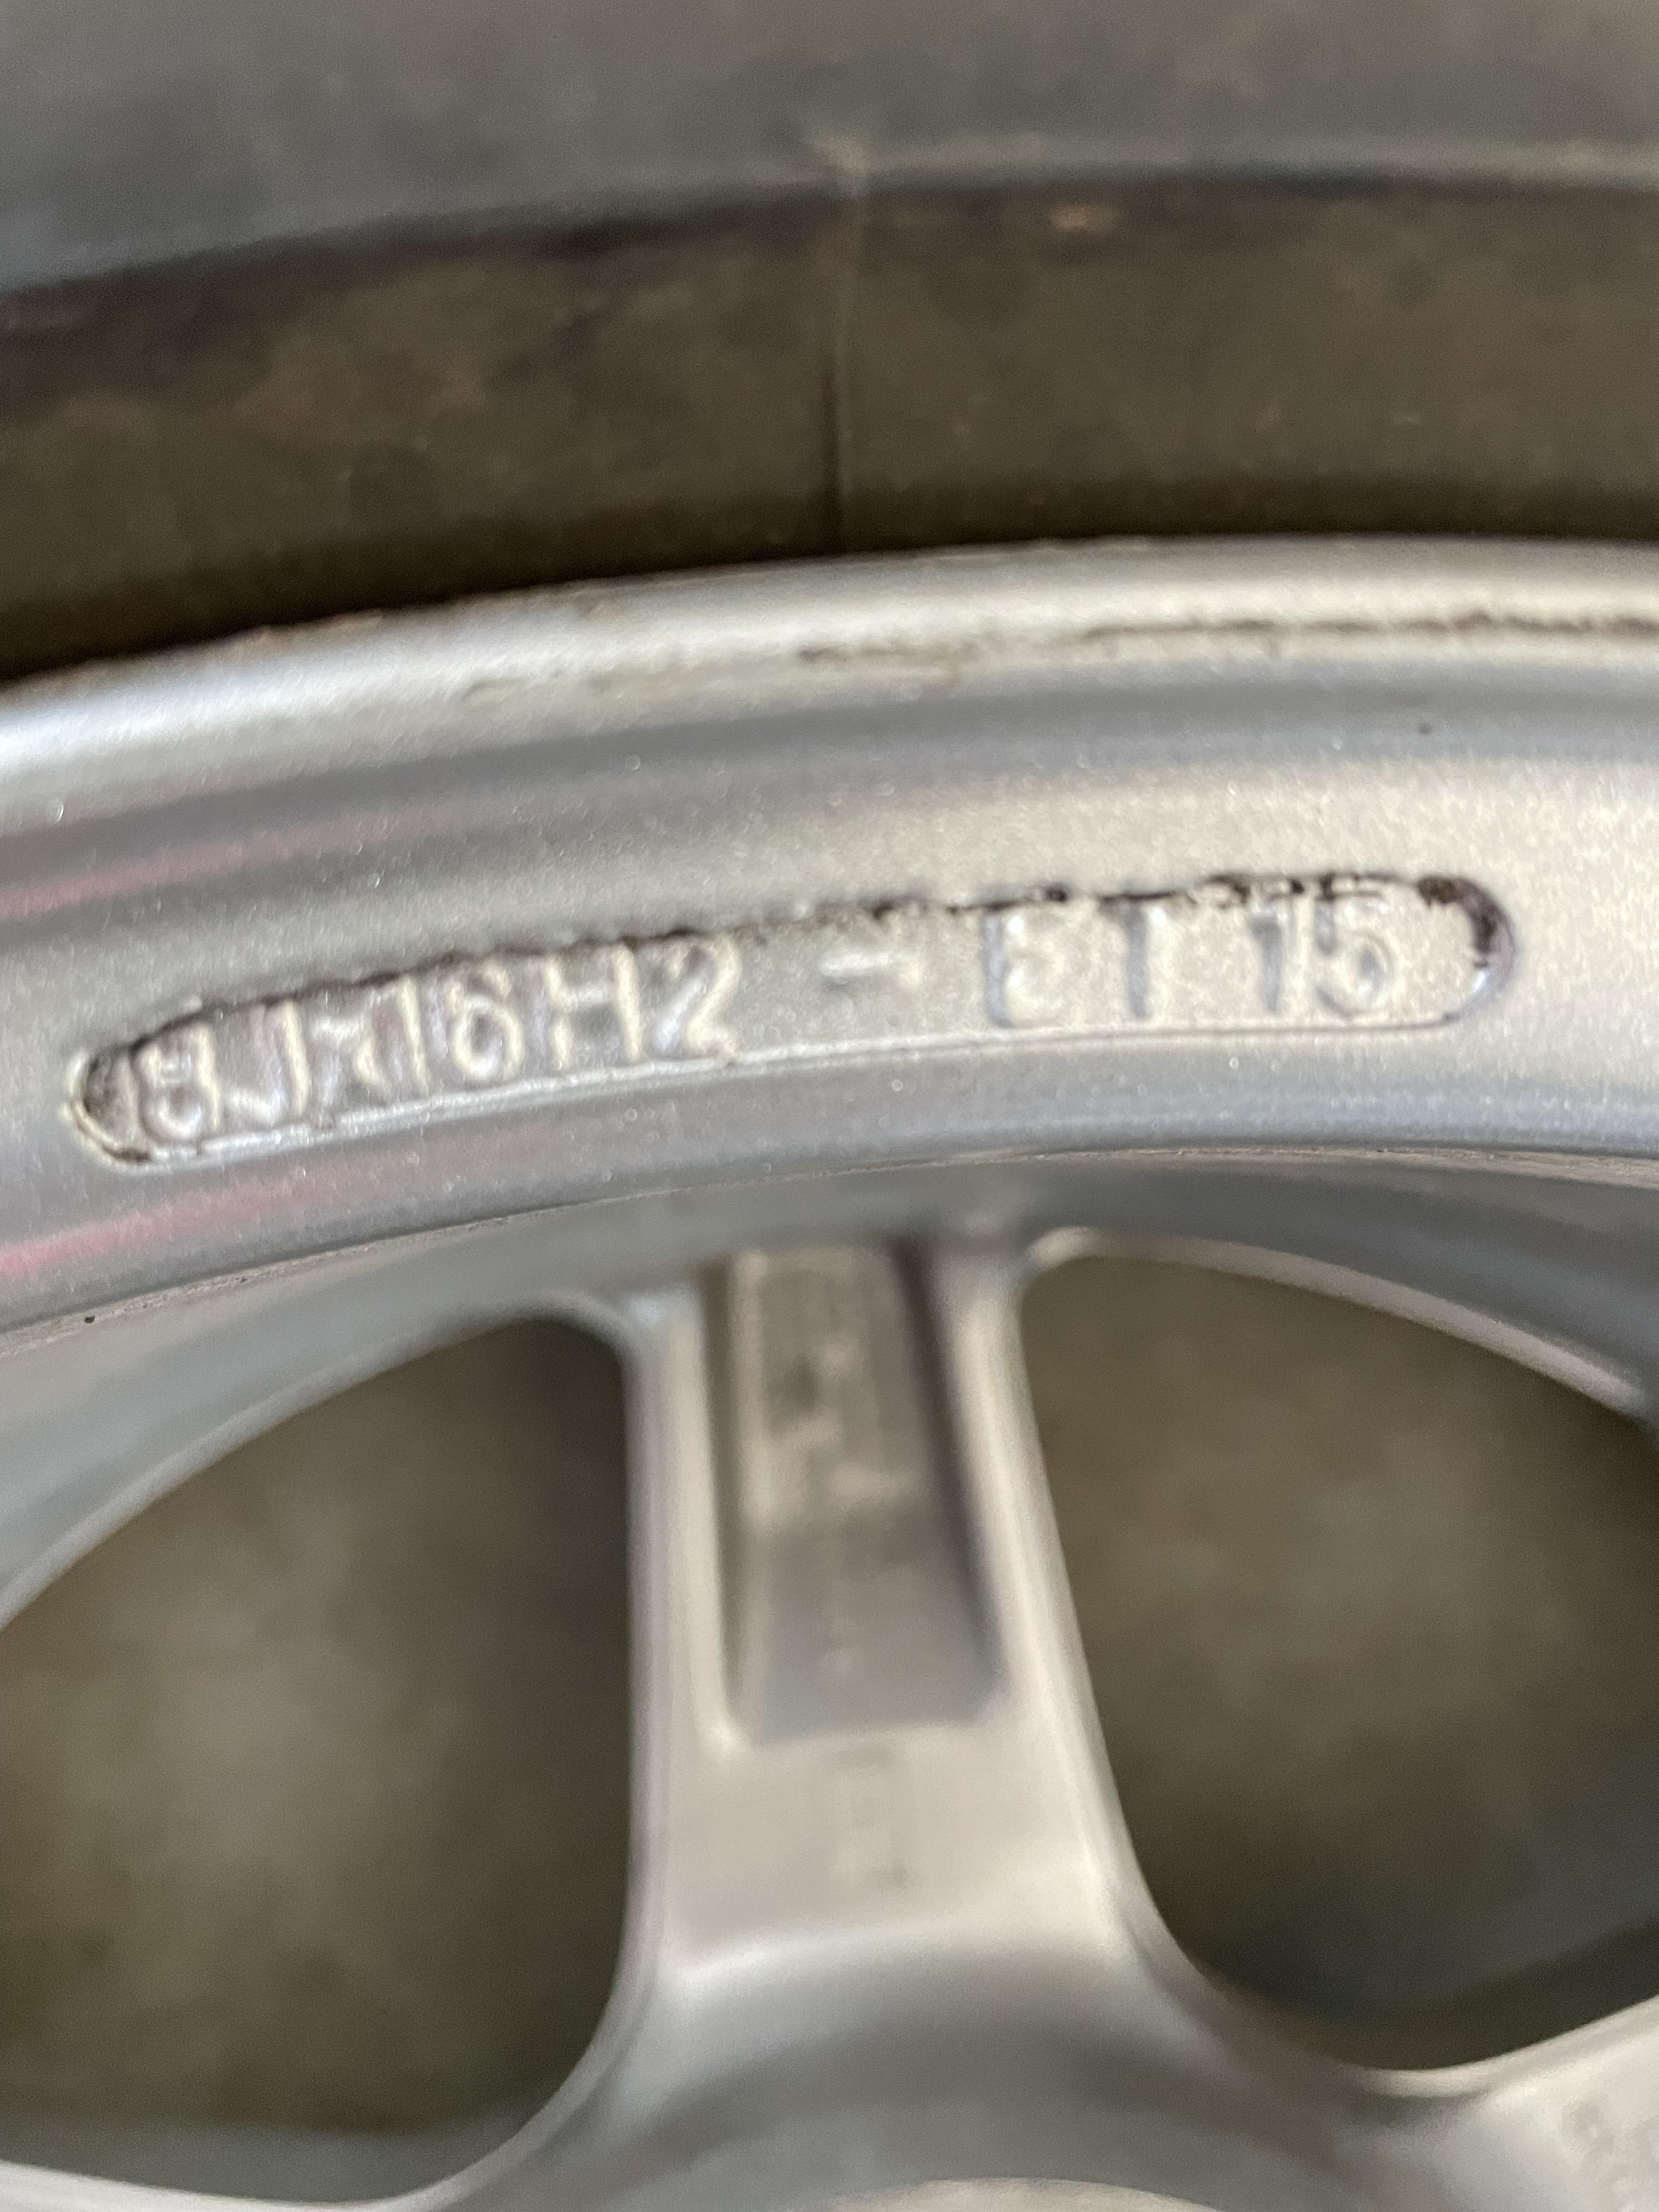
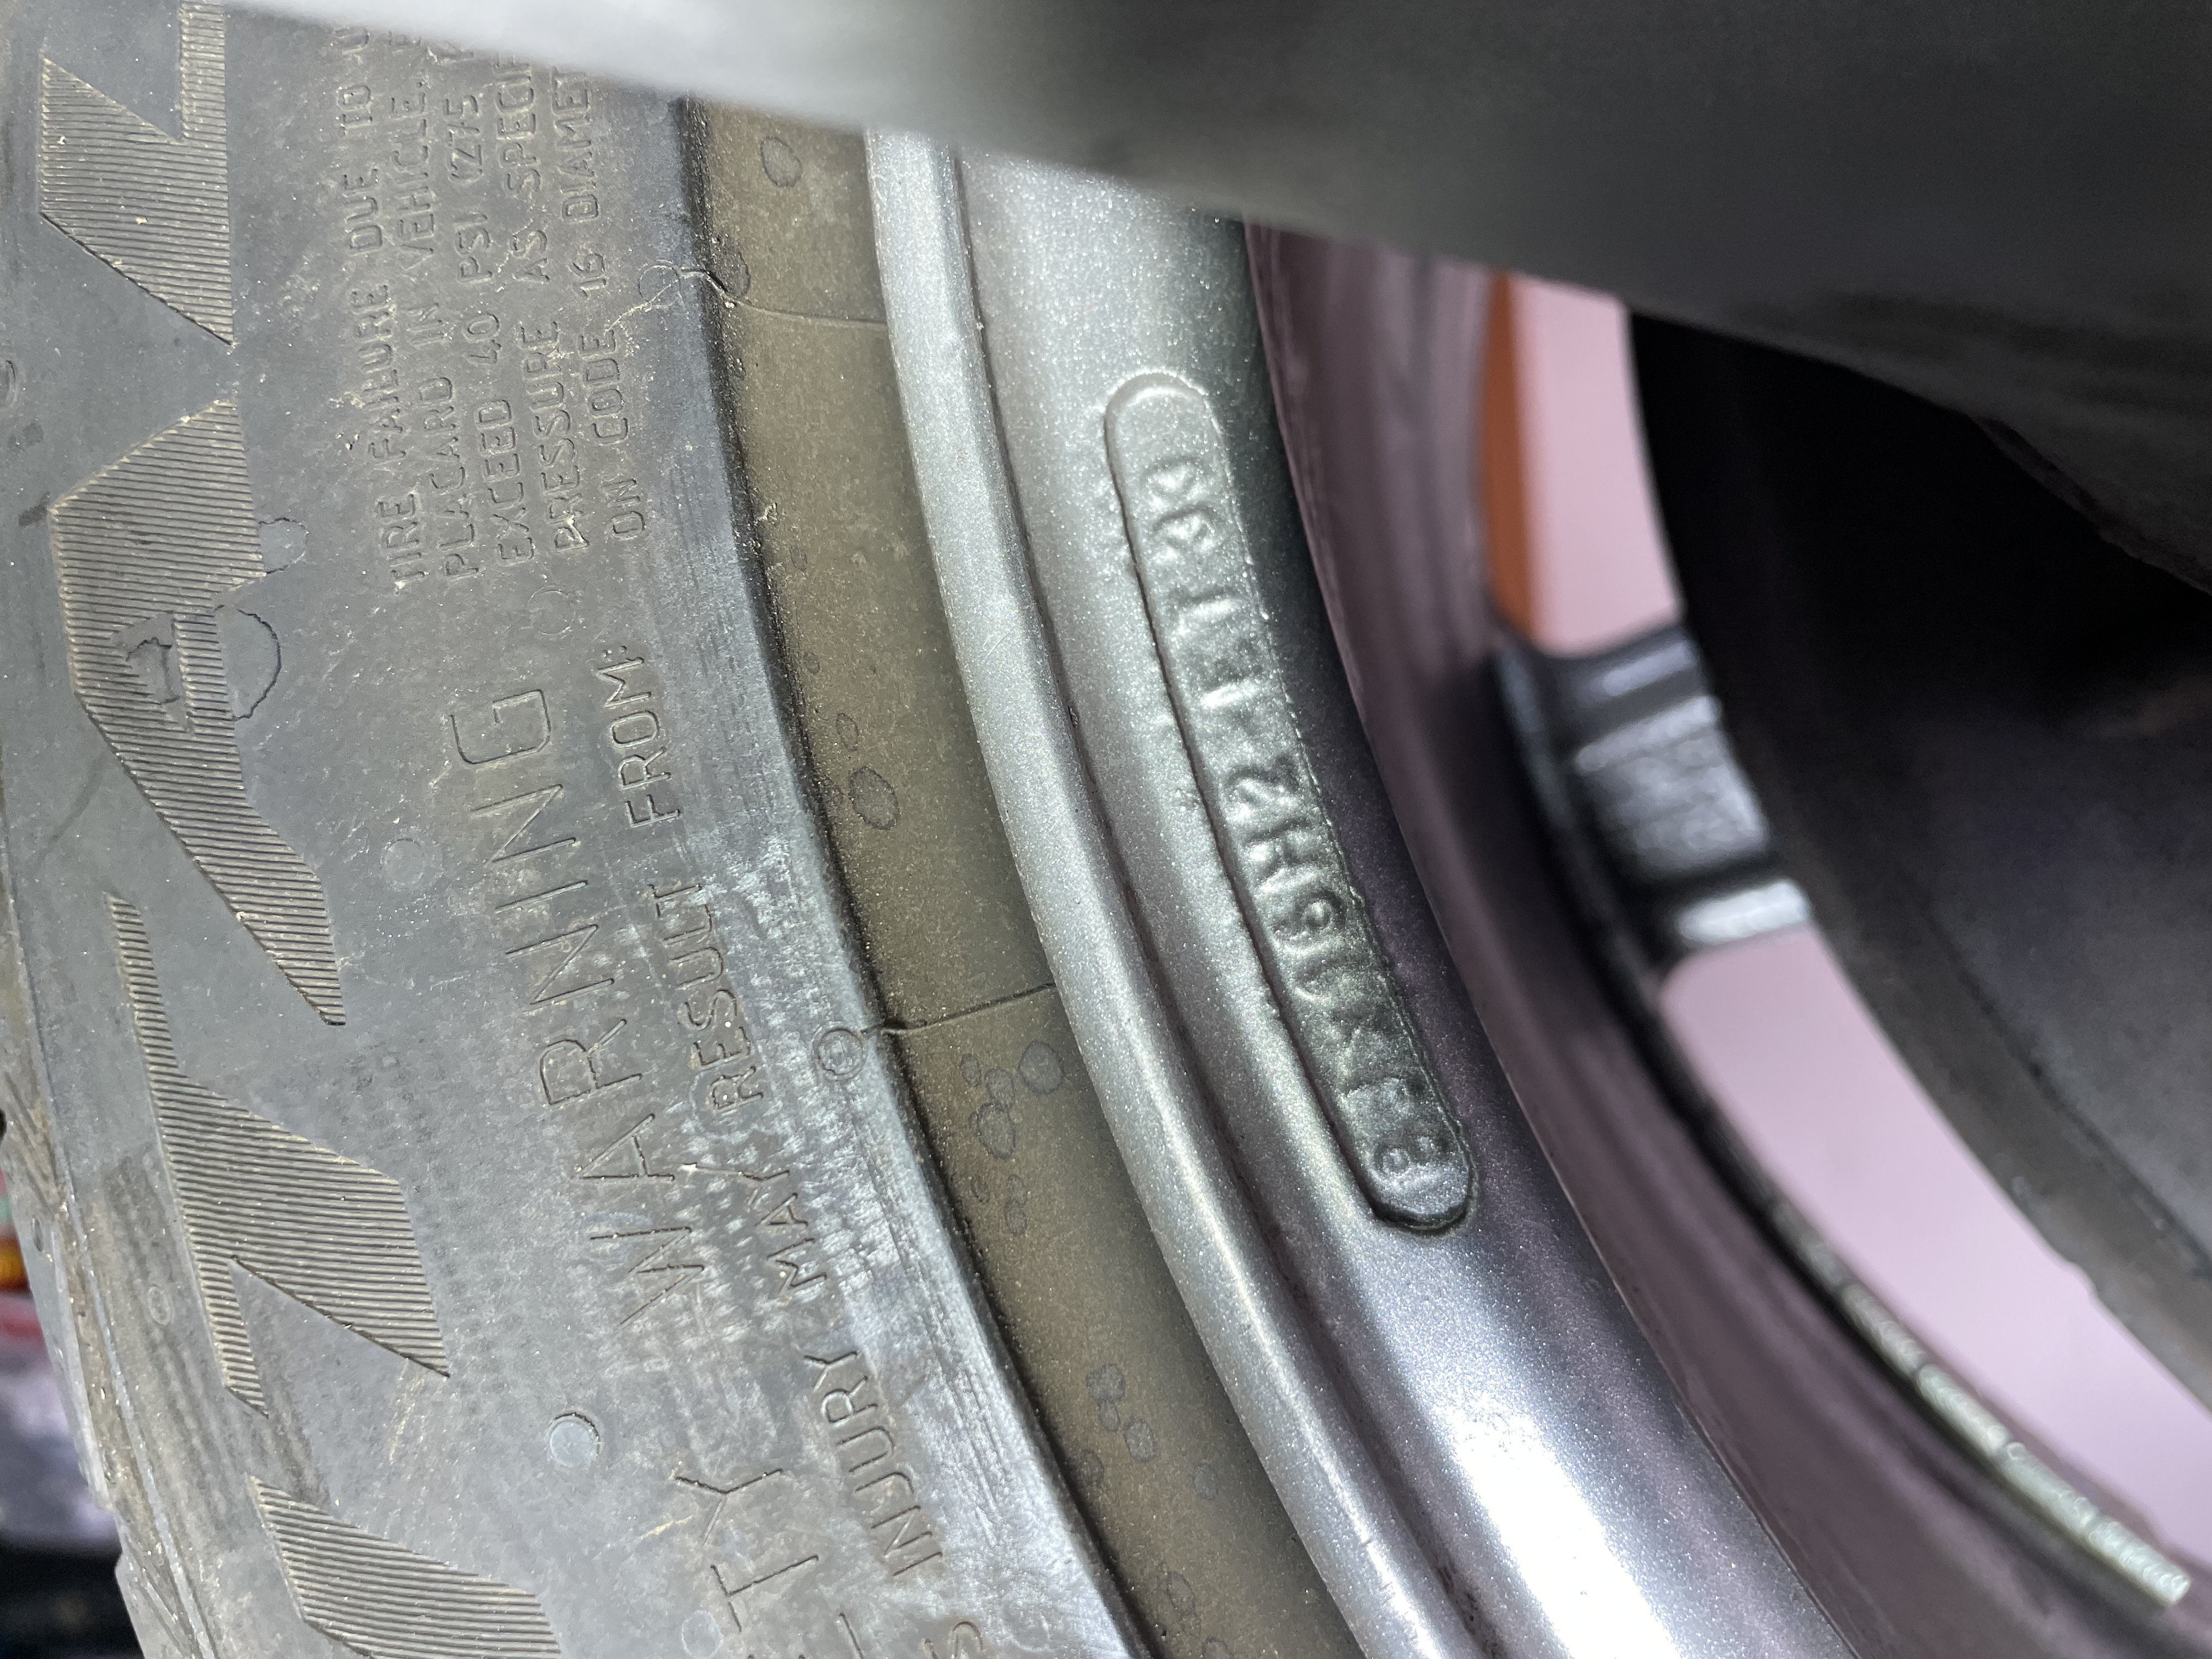
Together they measured 0.244" thick, or 6.2mm. I will be the first to admit confusion here. My wheel is 8x16 et15 (I thought it was et20), which effectively adjusts the offset to ET8.8! On the drive north from Mesa, AZ I never noticed any rubbing, and the tire shows nothing either.
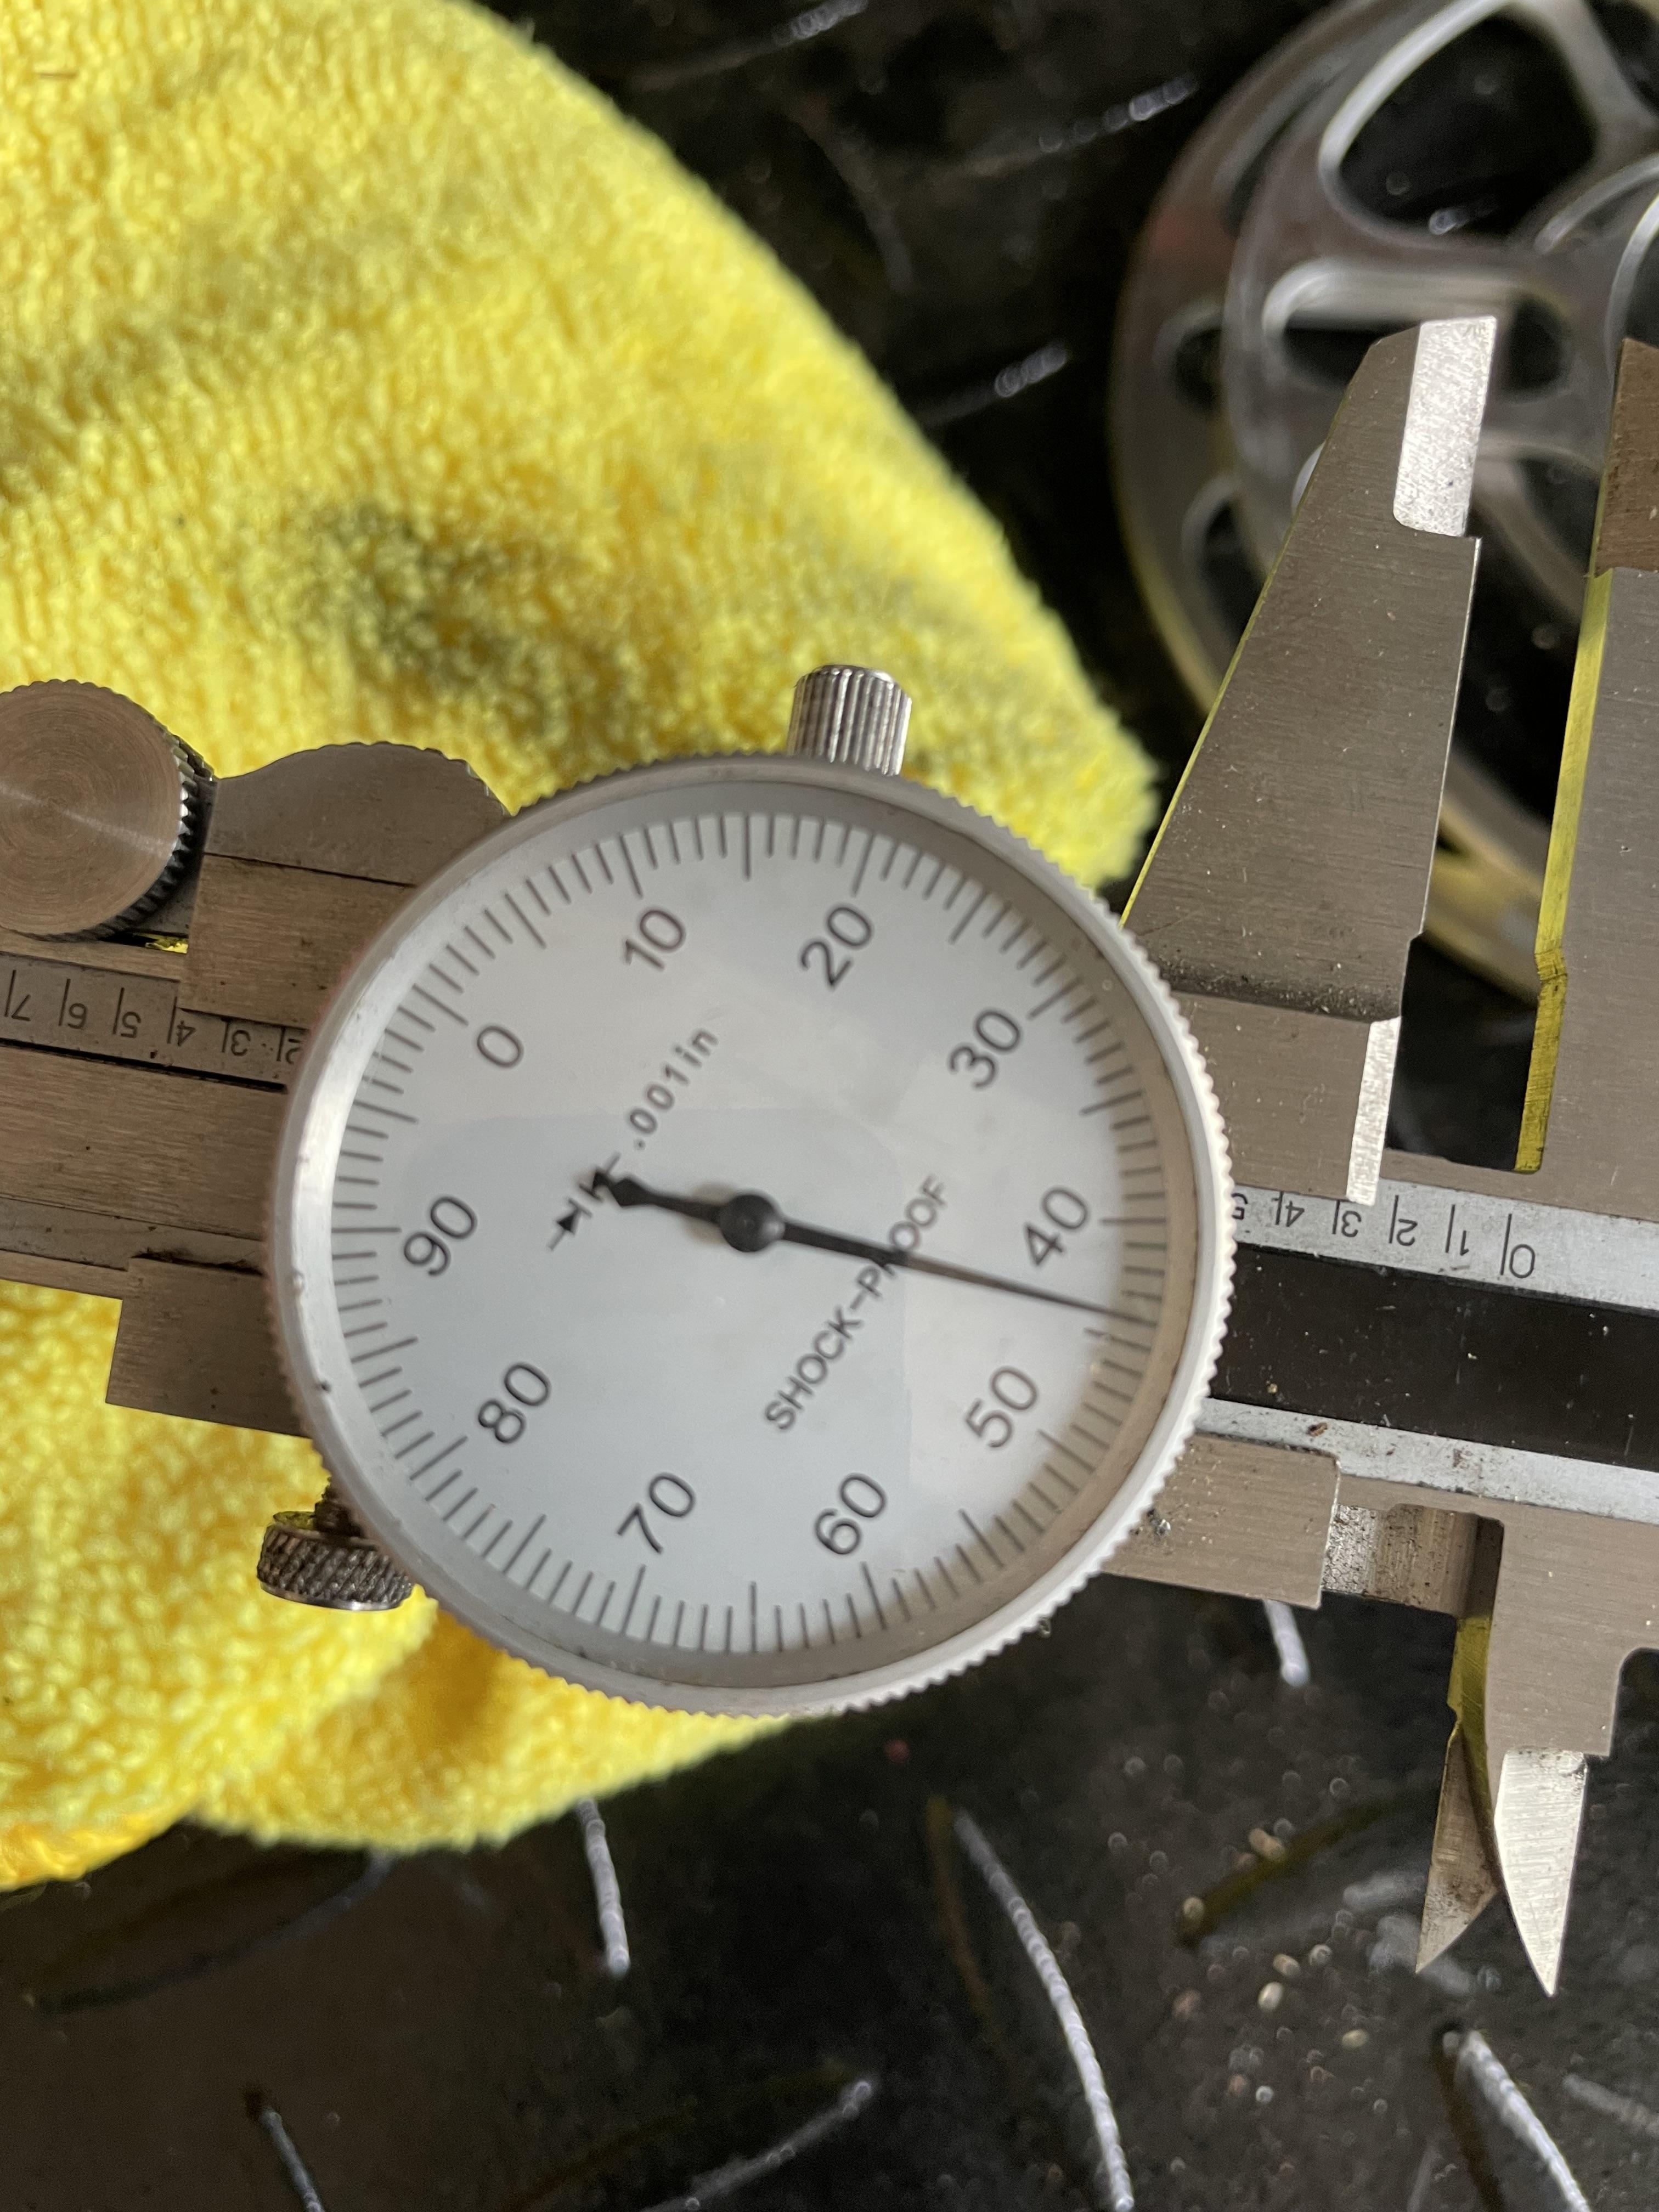
Here is the right rear side, with a 10mm spacer adjusting the wheel to et23! My car should have looked a little off center for those that followed me on I5 north.
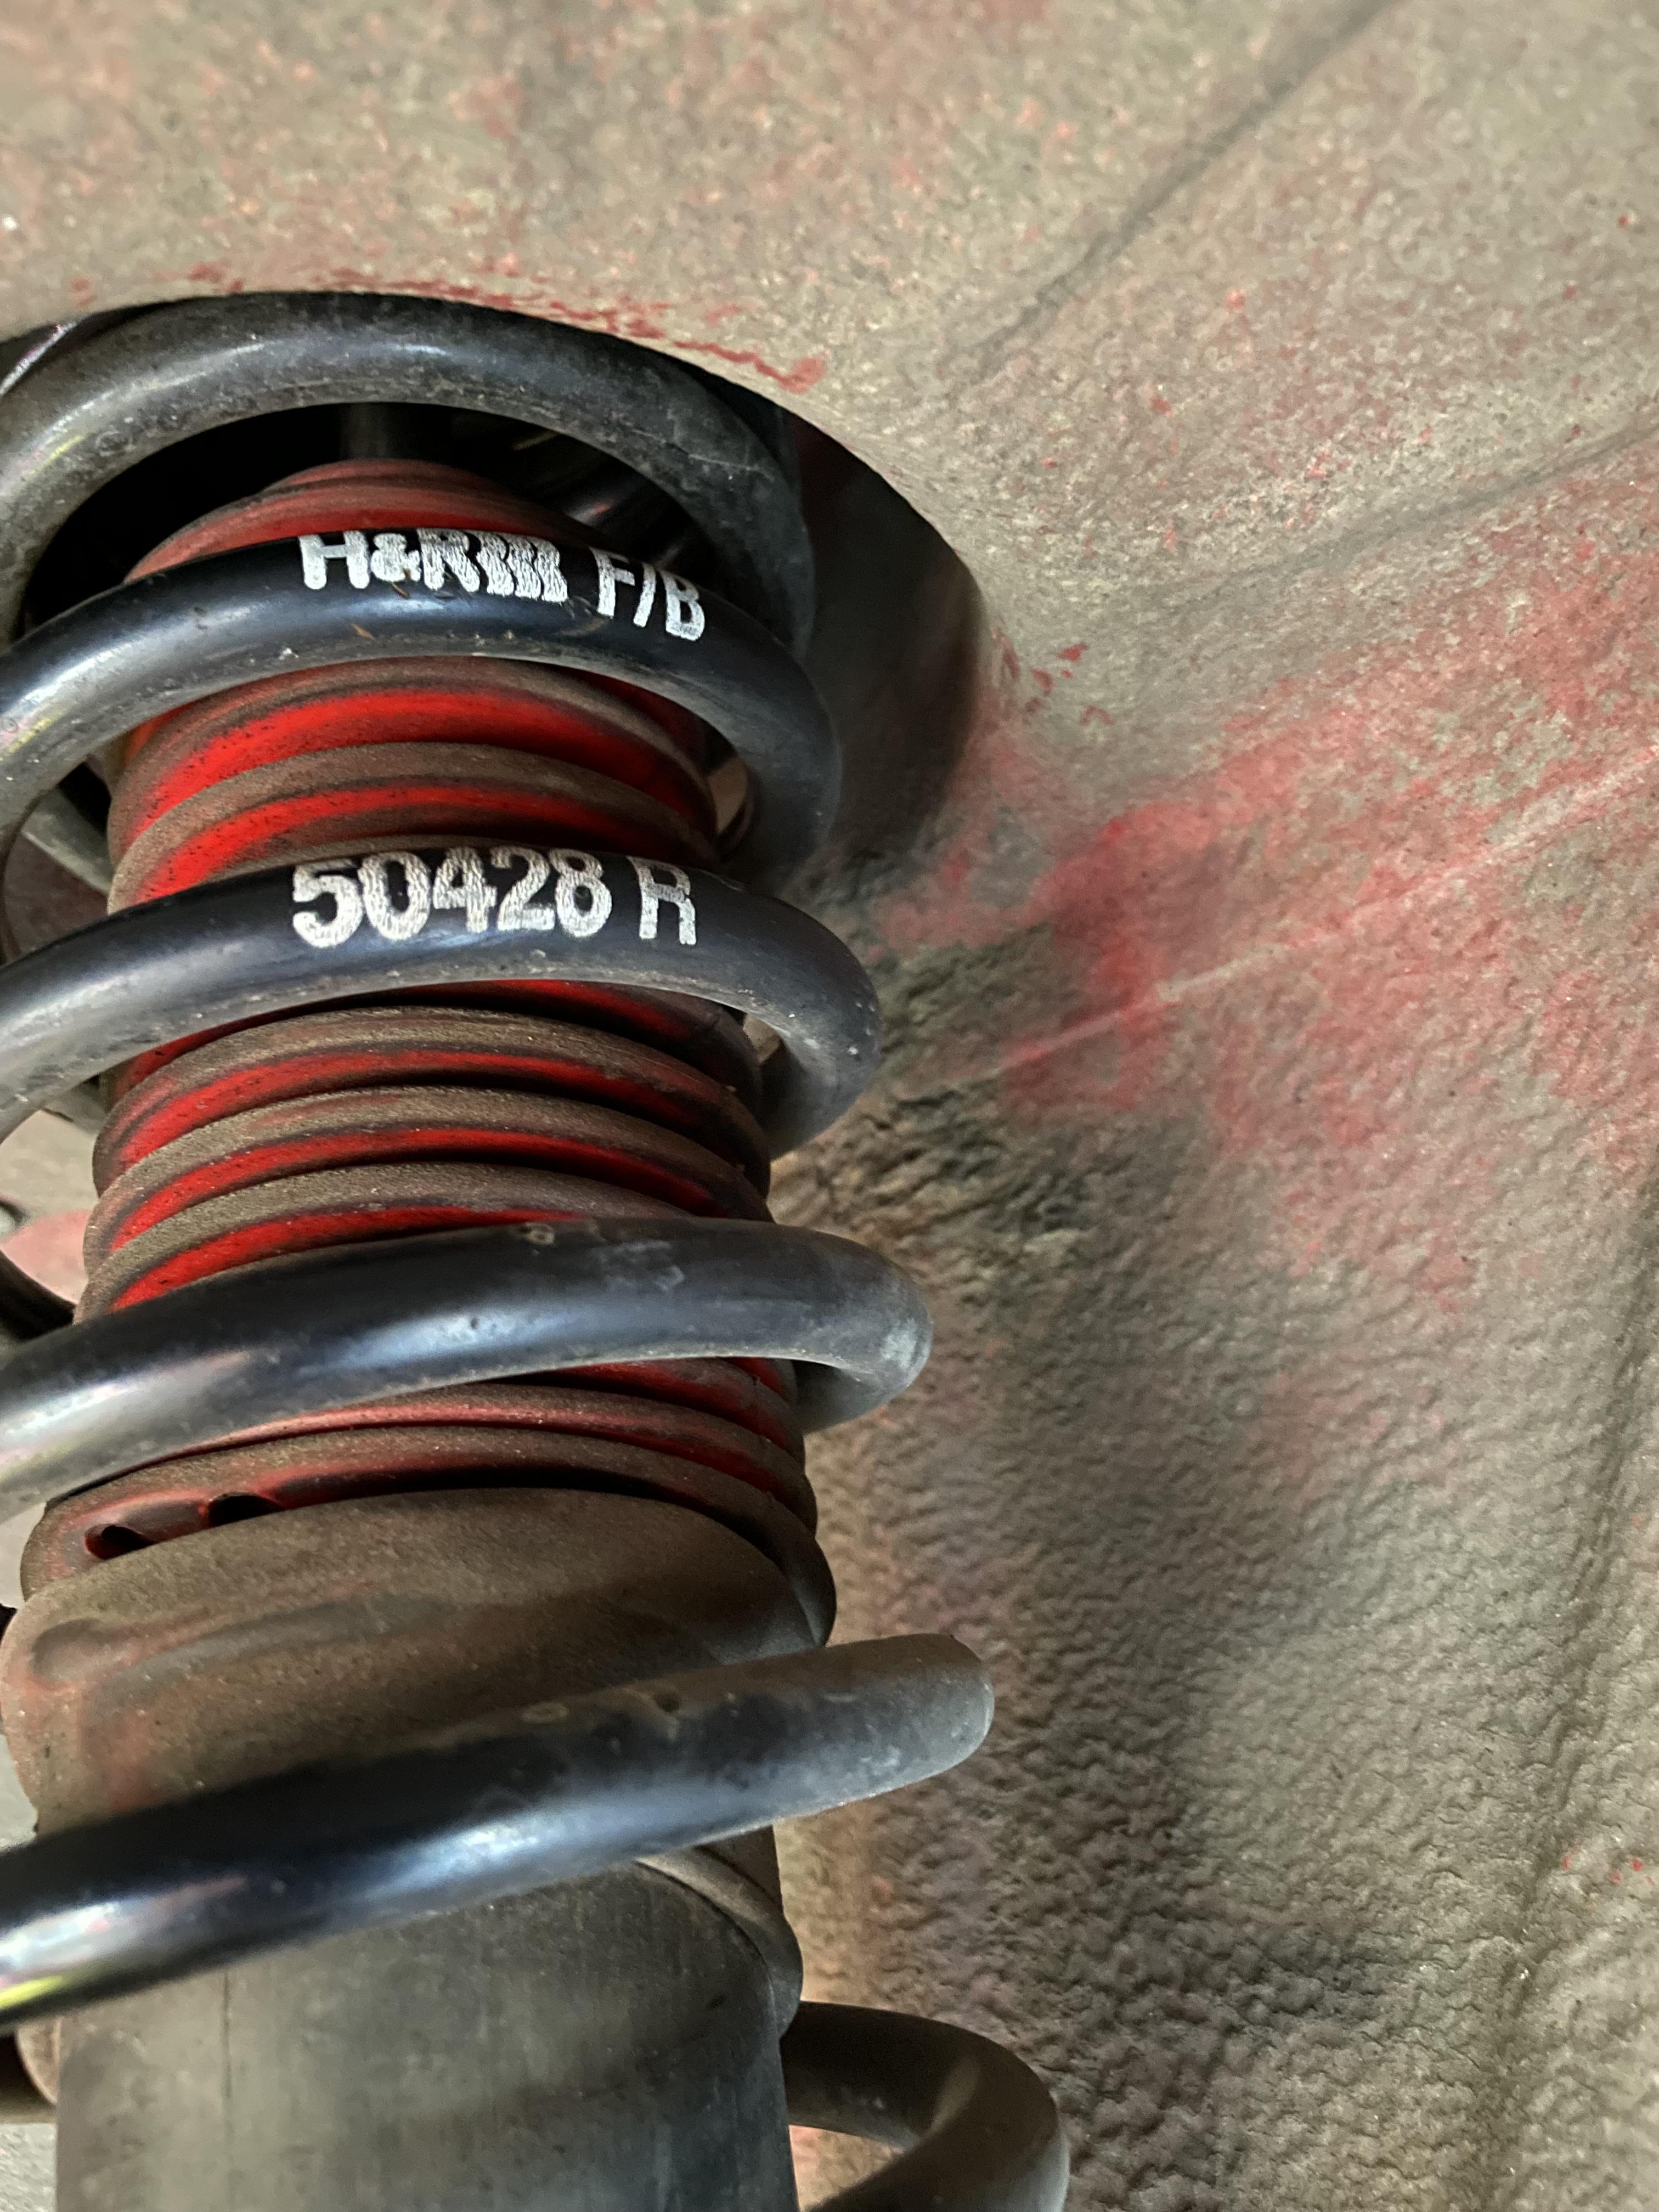
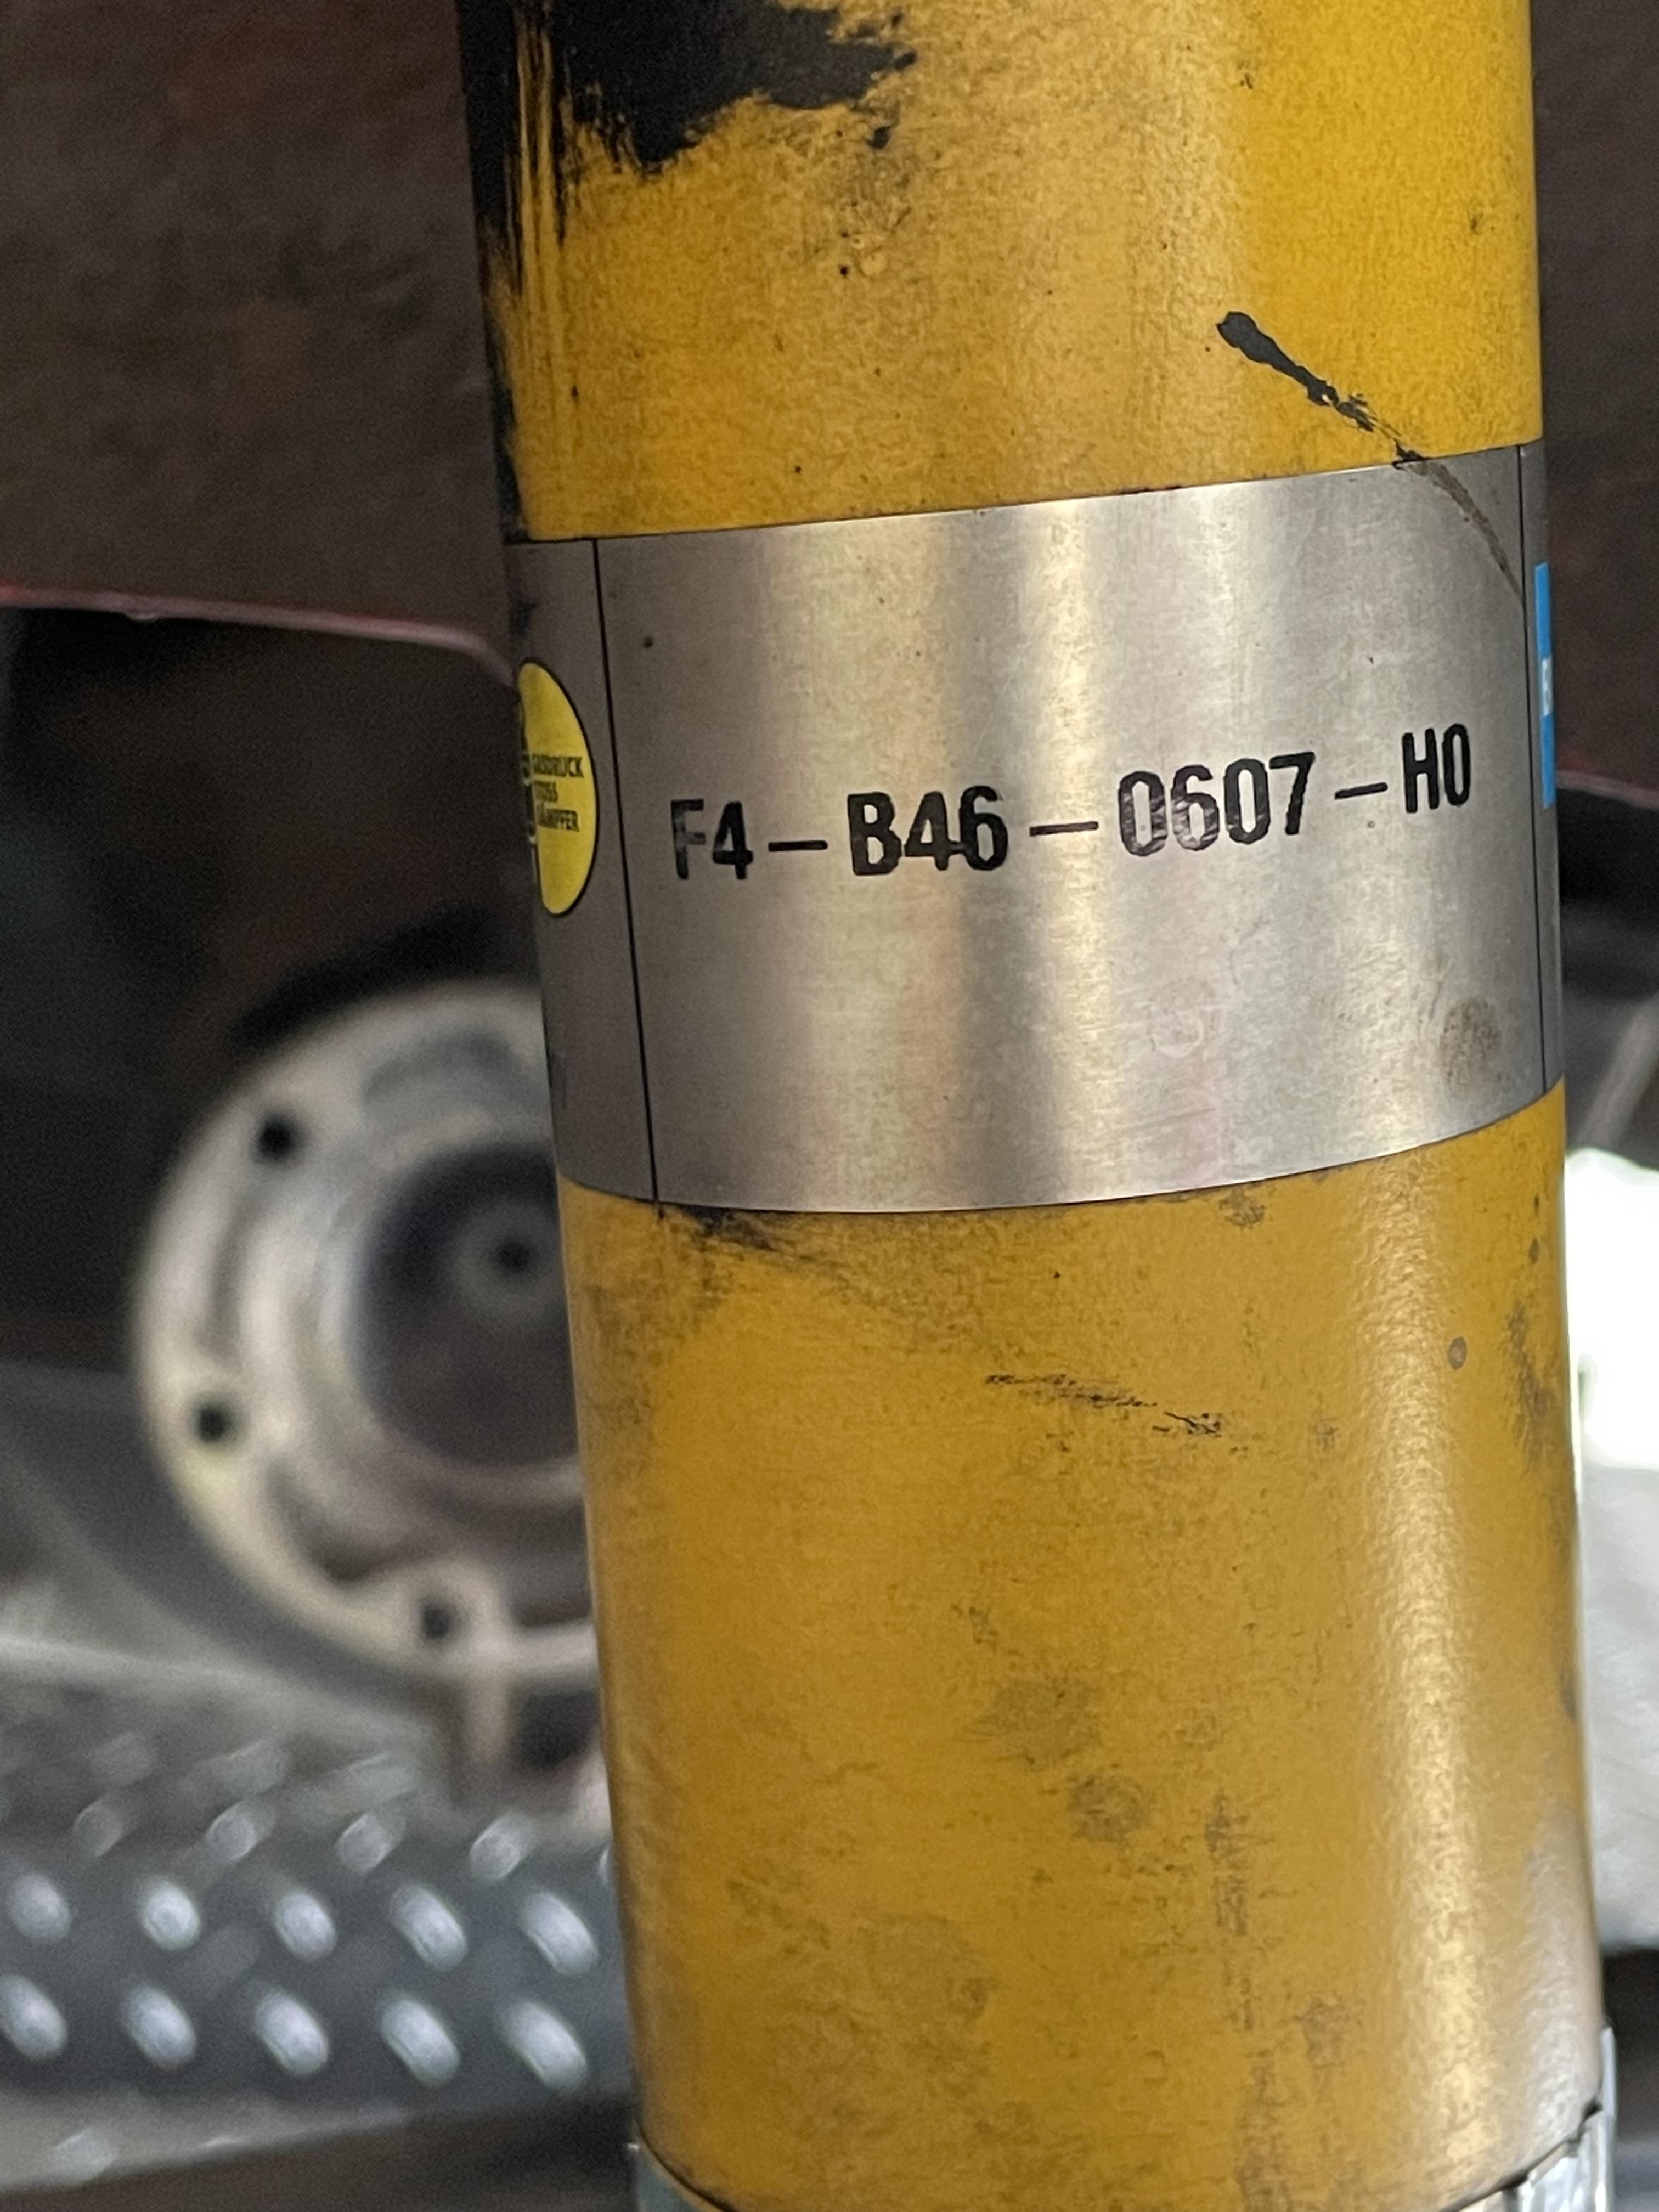
I have been curious about the shocks and HR springs on Maeve. Turns out the shocks are Bilstein sport shocks, which is good. The H&R springs are spec'd to an e28 also so looks like I'm good to go if the shocks are good. My problem is unknown mileage on the springs and shocks. Kohler mentioned some time back that H&R hasn't made black springs for some time.
Good news is my wife's garden shed is almost done.
Bad news is it's not done, and for some reason my wife believes her shed takes precedence over working on Maeve. Go figure!
But I did get a couple things done later this afternoon.
First, I reinstalled the trunk lid cover and tool box. Maeve came with a complete set of tools!

Then I removed the left rear wheel to get a better look at the brakes and suspension bits. Look what I found:
Not one, but two spacers

Together they measured 0.244" thick, or 6.2mm. I will be the first to admit confusion here. My wheel is 8x16 et15 (I thought it was et20), which effectively adjusts the offset to ET8.8! On the drive north from Mesa, AZ I never noticed any rubbing, and the tire shows nothing either.


Here is the right rear side, with a 10mm spacer adjusting the wheel to et23! My car should have looked a little off center for those that followed me on I5 north.

I have been curious about the shocks and HR springs on Maeve. Turns out the shocks are Bilstein sport shocks, which is good. The H&R springs are spec'd to an e28 also so looks like I'm good to go if the shocks are good. My problem is unknown mileage on the springs and shocks. Kohler mentioned some time back that H&R hasn't made black springs for some time.


Re: And so it starts, Maeve
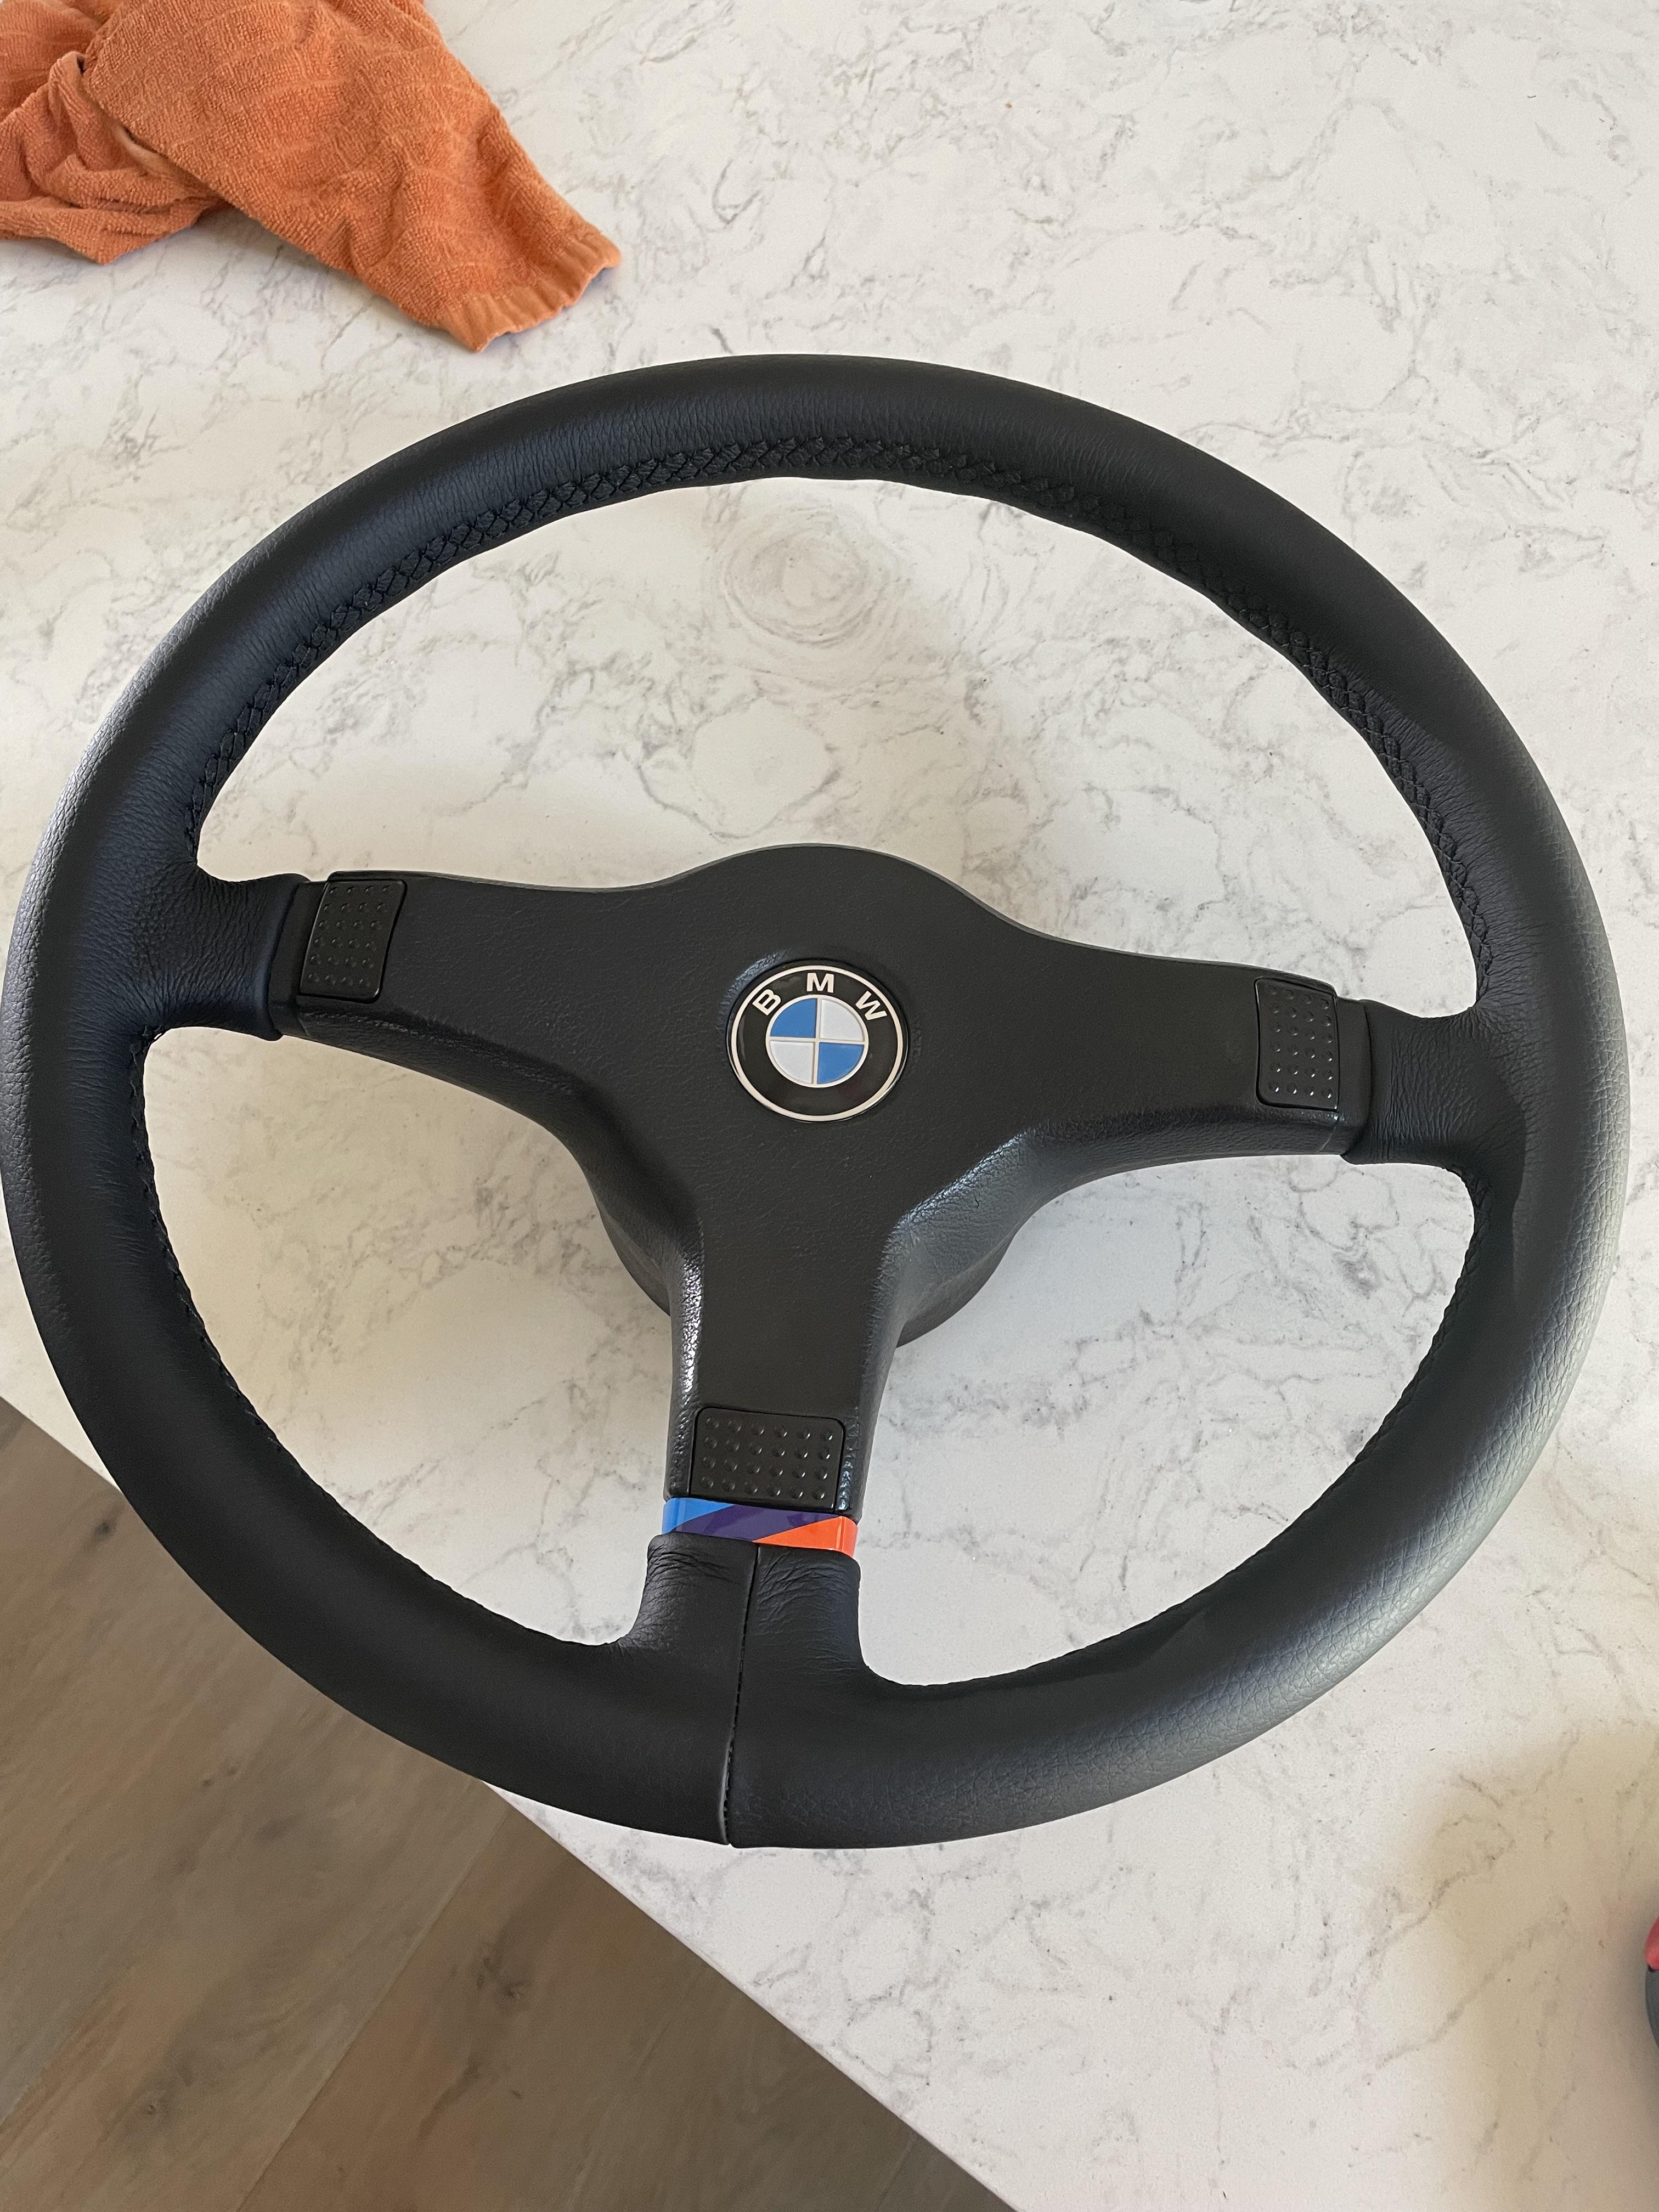
This came in the mail yesterday, from reyno in Latvia. Maeve came with the same Mtech 1 wheel but after years in the AZ sun it is dried out and the sewing threads are coming undone. Sils (reyno) does really nice work and I could not be happier.

-
John in VA
- Posts: 5295
- Joined: Feb 12, 2006 12:00 PM
- Location: Leesburg, VA
Re: And so it starts, Maeve
Looks great - thanks for not adding a boy racer stripe at 12:00 to it!
Re: And so it starts, Maeve
I feel attacked!John in VA wrote: Sep 23, 2023 6:55 PM Looks great - thanks for not adding a boy racer stripe at 12:00 to it!
Good job gwb. Happy to see some progress!
Re: And so it starts, Maeve
Looks great! Thank you for keeping us updated. I am anxiously waiting to see her when you finish.
Re: And so it starts, Maeve
Yes, thanks. Up here in the great Pacific Northwest we’ve had an epic summer with 80* days and I think only two days of light rain. Until now.
As the saying goes, someone threw the switch from summer to fall, and now the high temps are in the low 60’s and it’s been raining for the past week. My wife’s garden shed was number 1, and frankly playing golf sounded better than working in the garage. So the motivation has been lacking somewhat. But the MM motor should be here in January so the push is on now to get the car ready.
As the saying goes, someone threw the switch from summer to fall, and now the high temps are in the low 60’s and it’s been raining for the past week. My wife’s garden shed was number 1, and frankly playing golf sounded better than working in the garage. So the motivation has been lacking somewhat. But the MM motor should be here in January so the push is on now to get the car ready.
Re: And so it starts, Maeve
Starting the reupholstery of my front and rear seats.
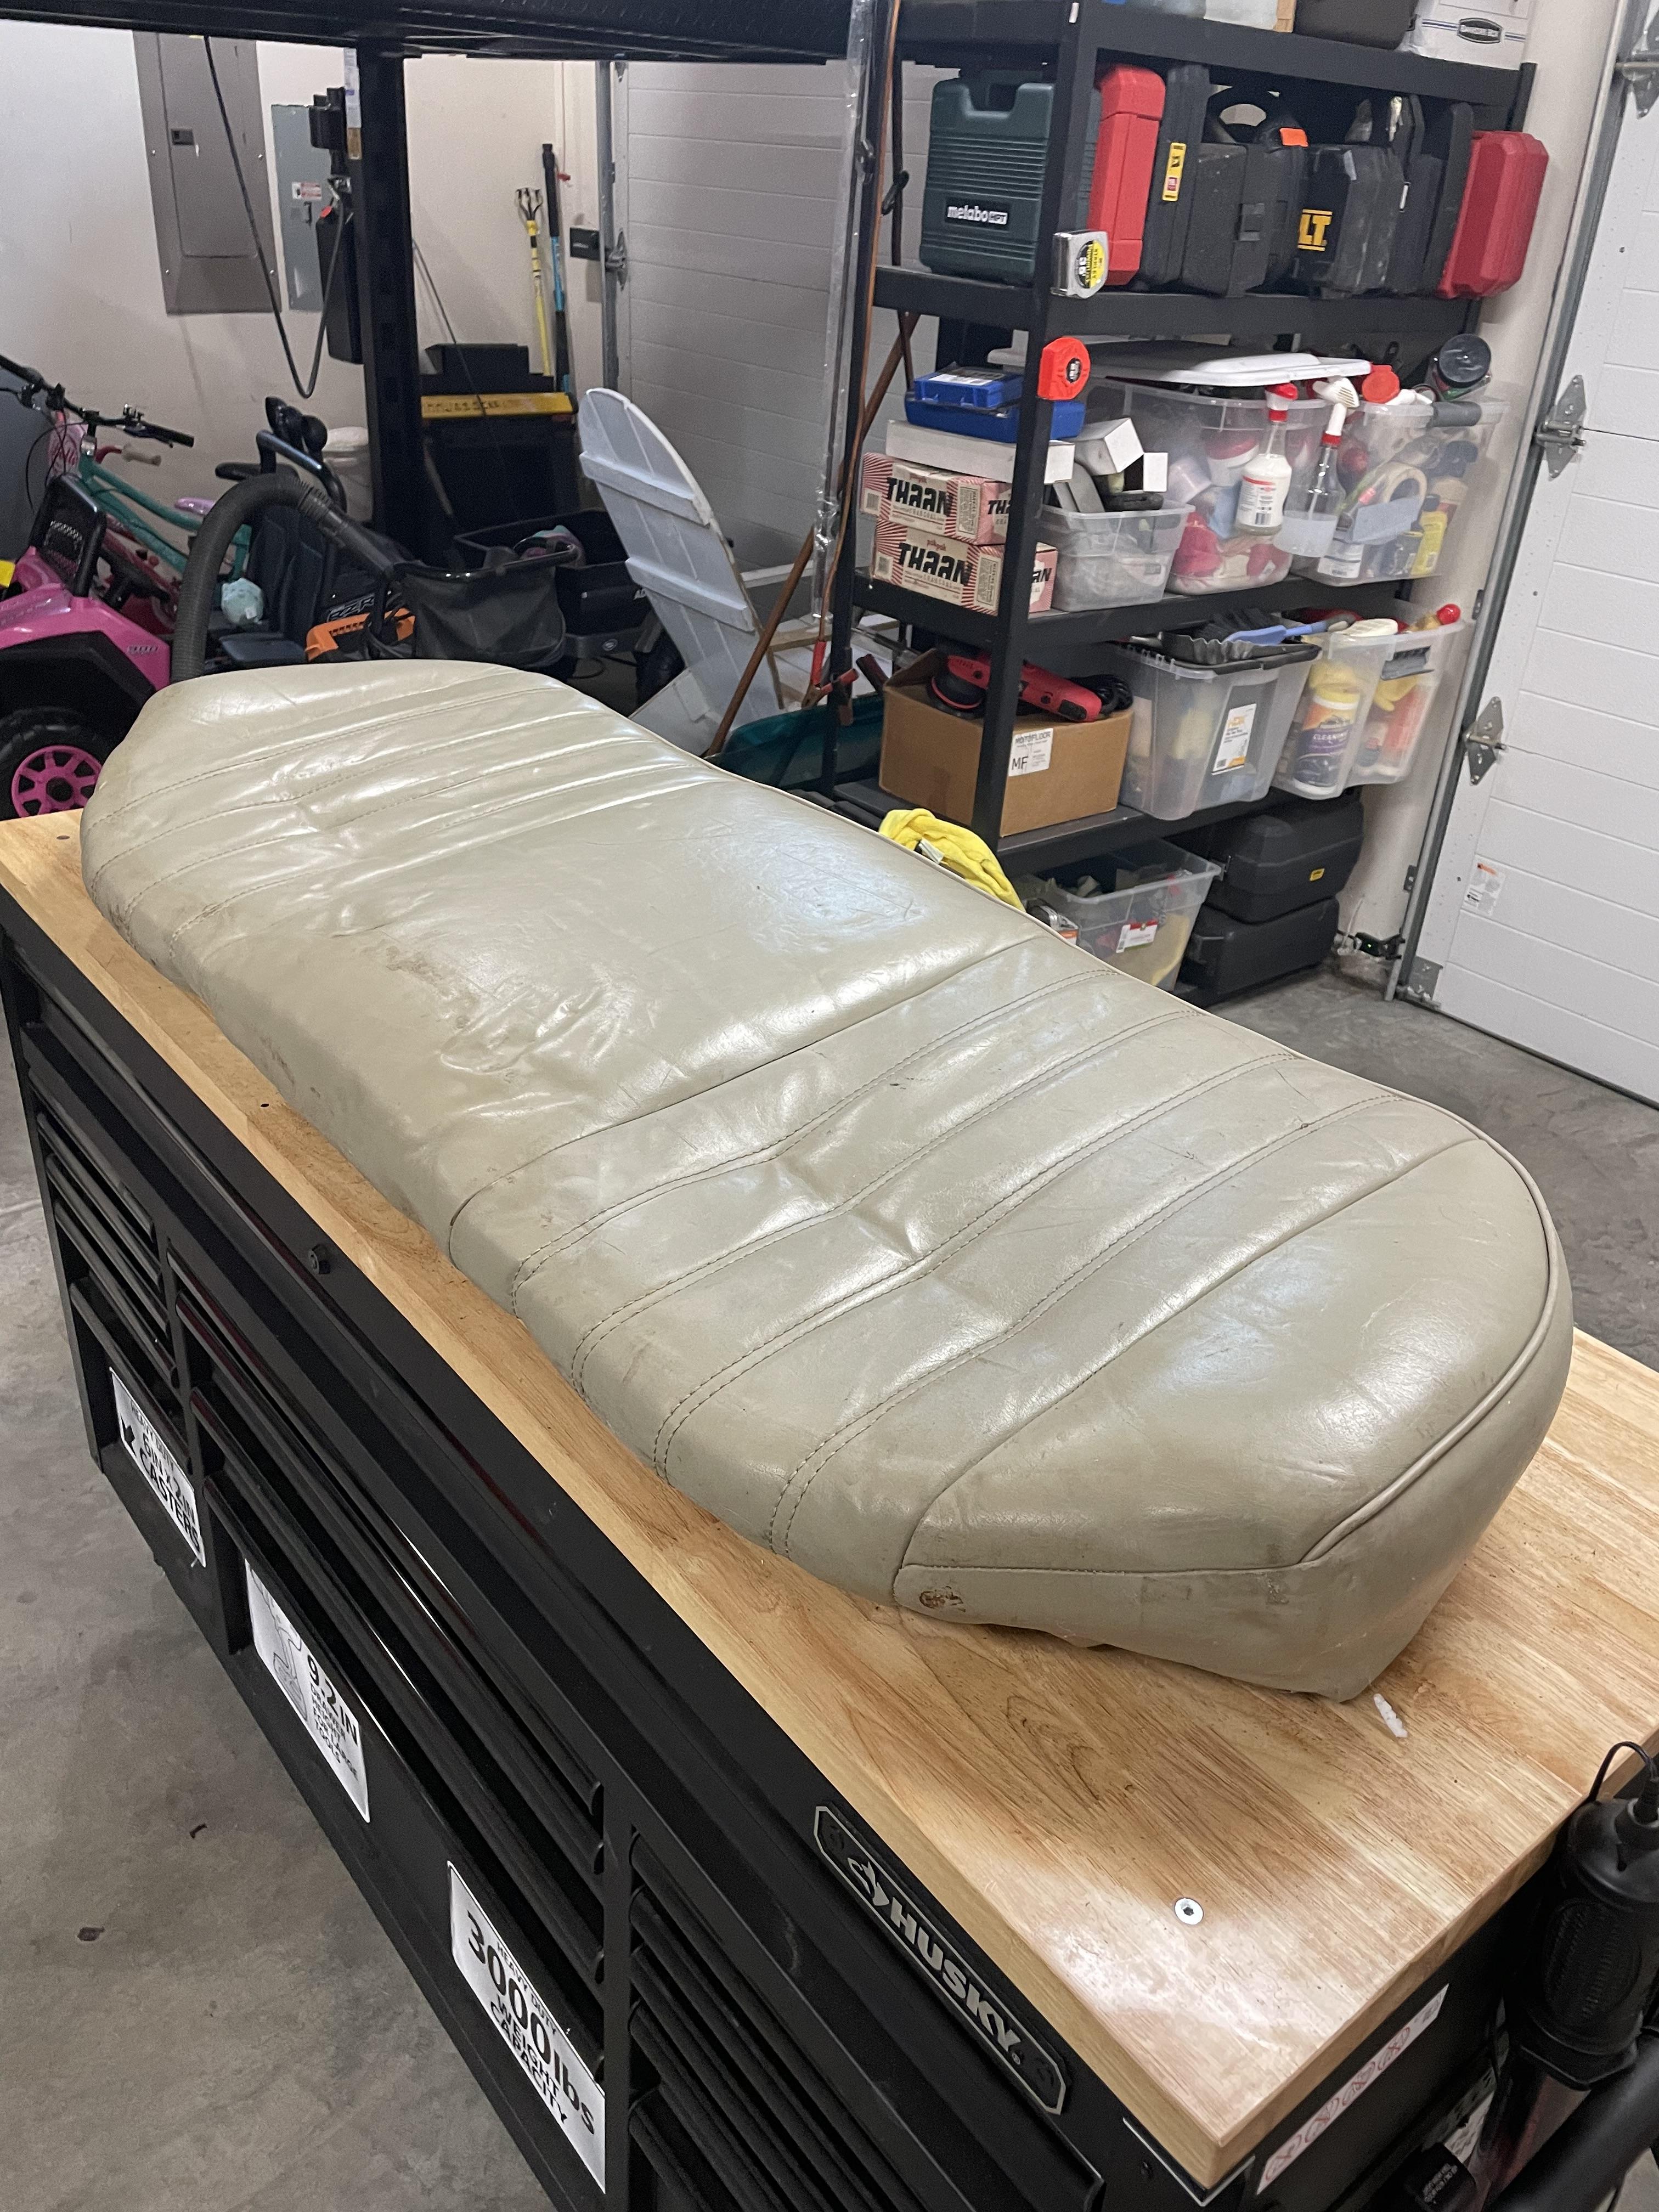
35 year old rear seat. Actually in pretty good shape other than faded and a little discolored.
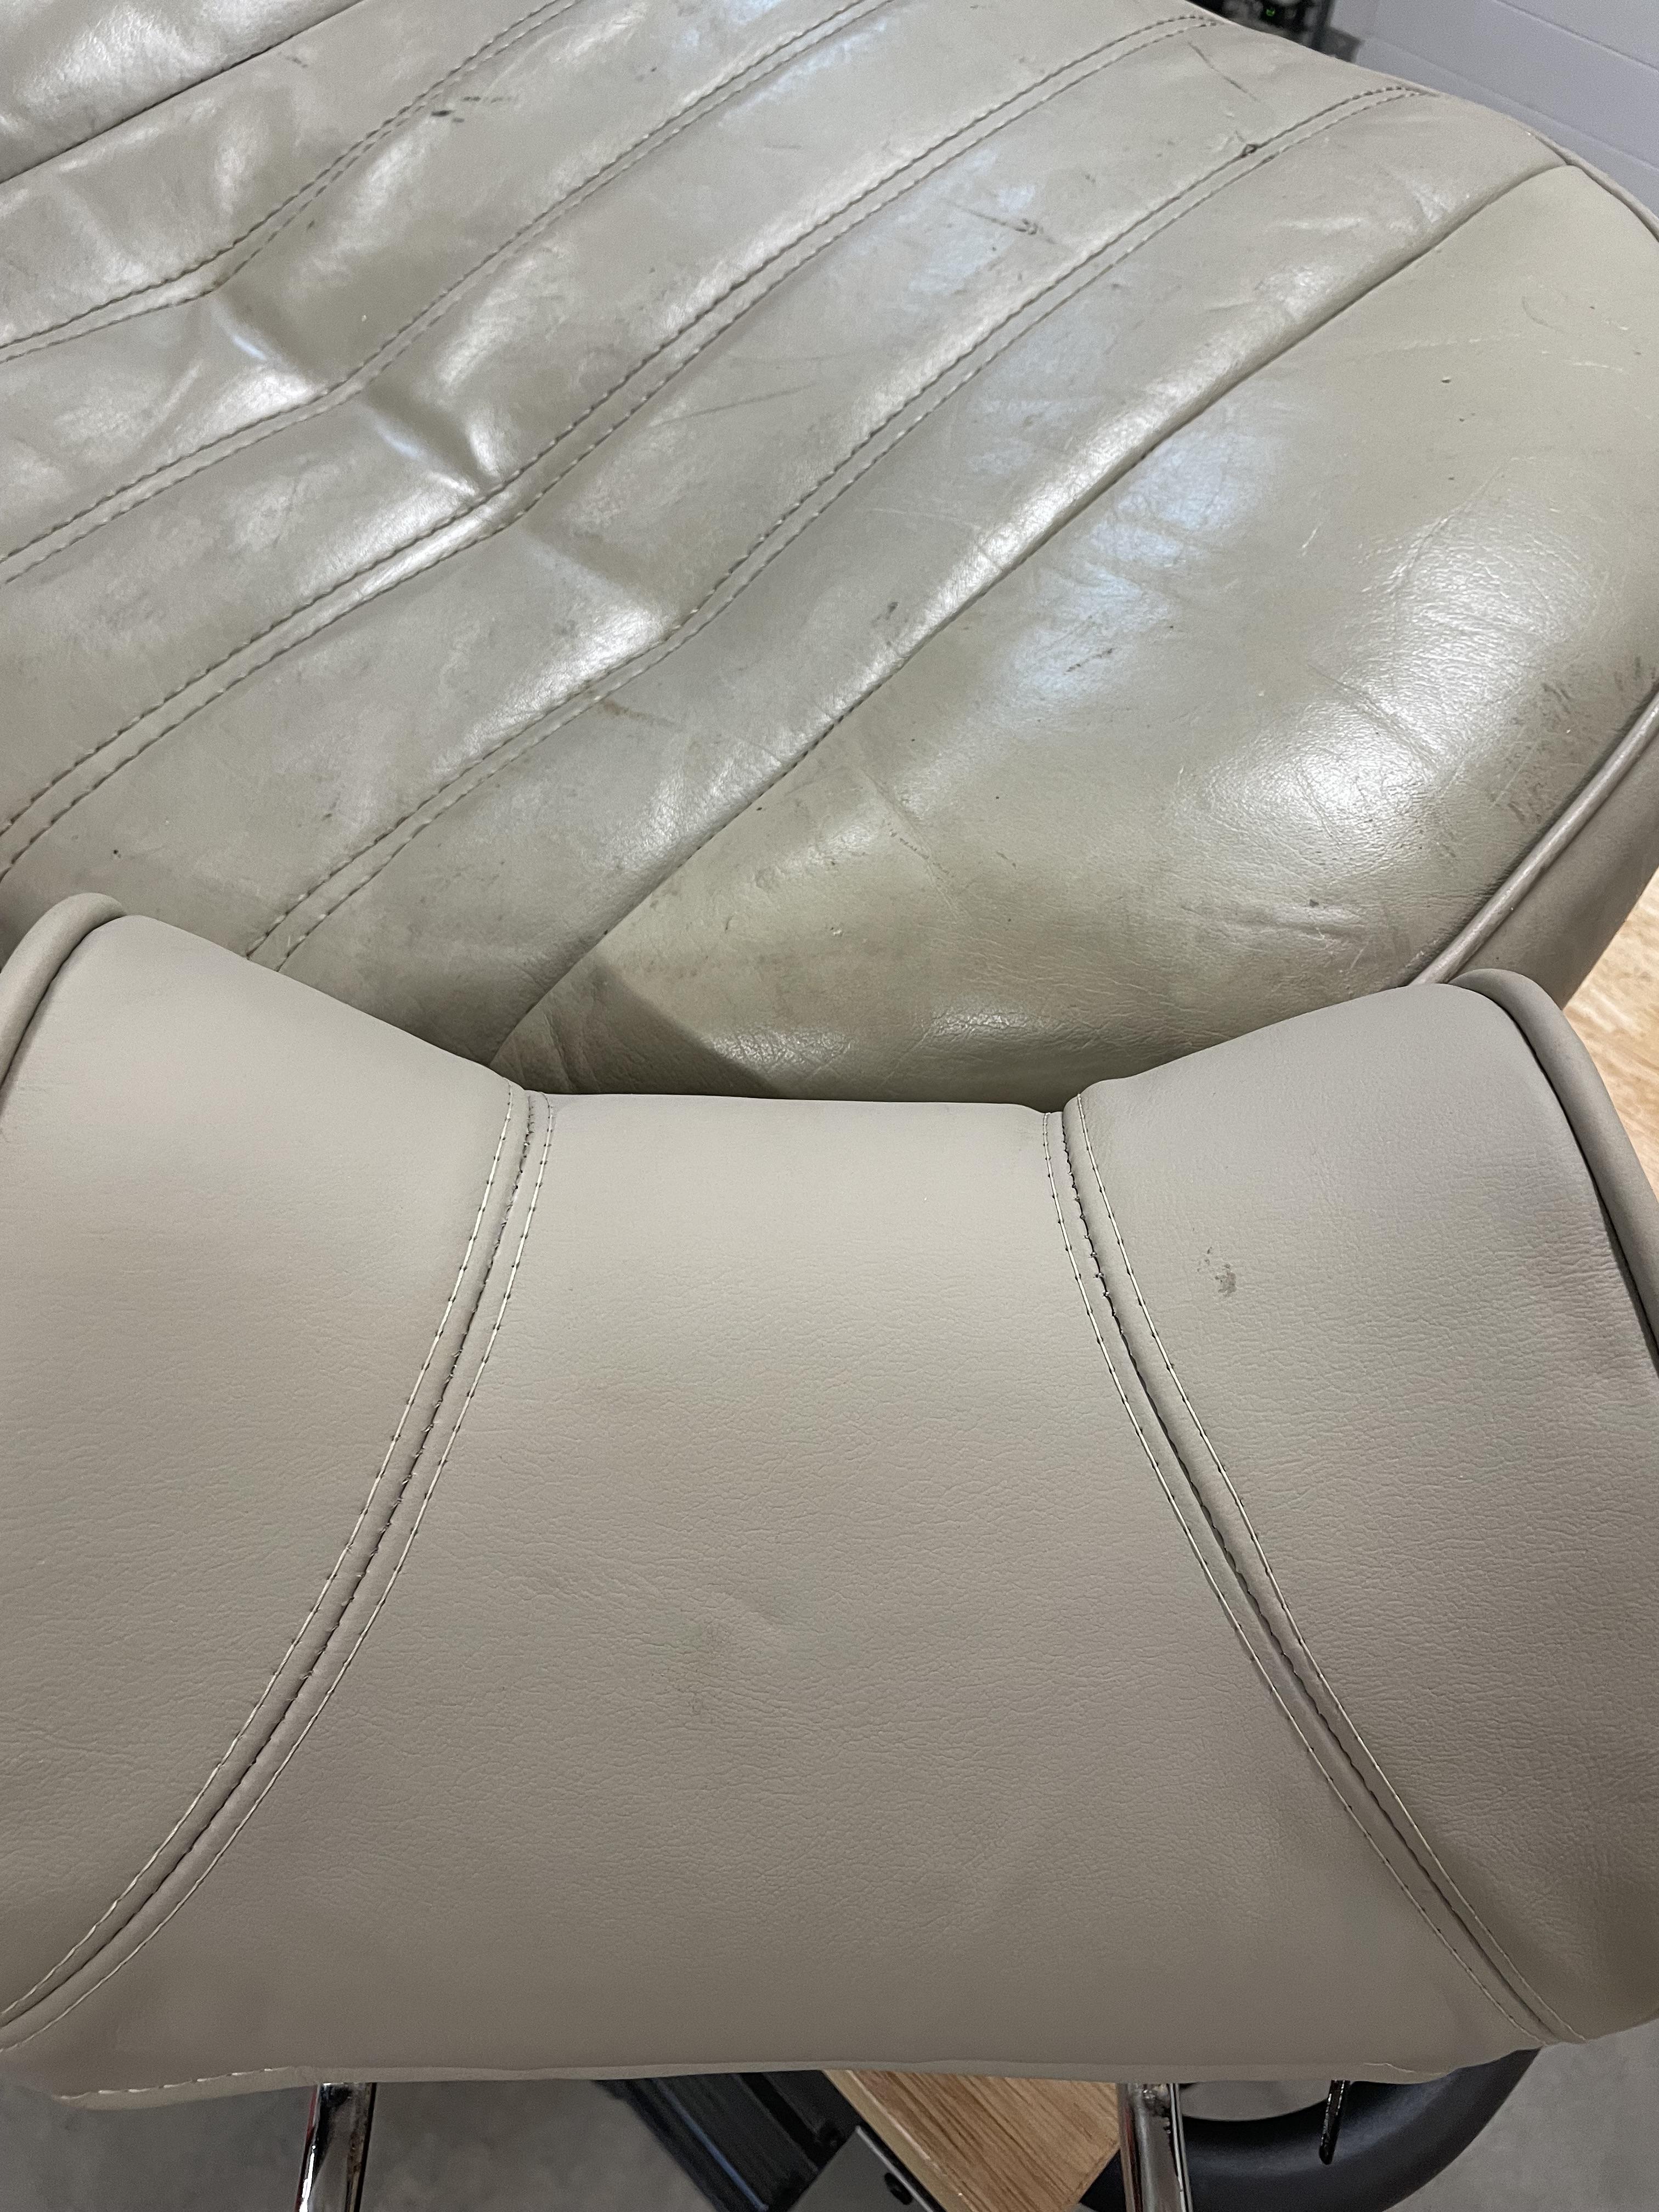
Here you can see the difference between a newly recovered headrest and the seat:
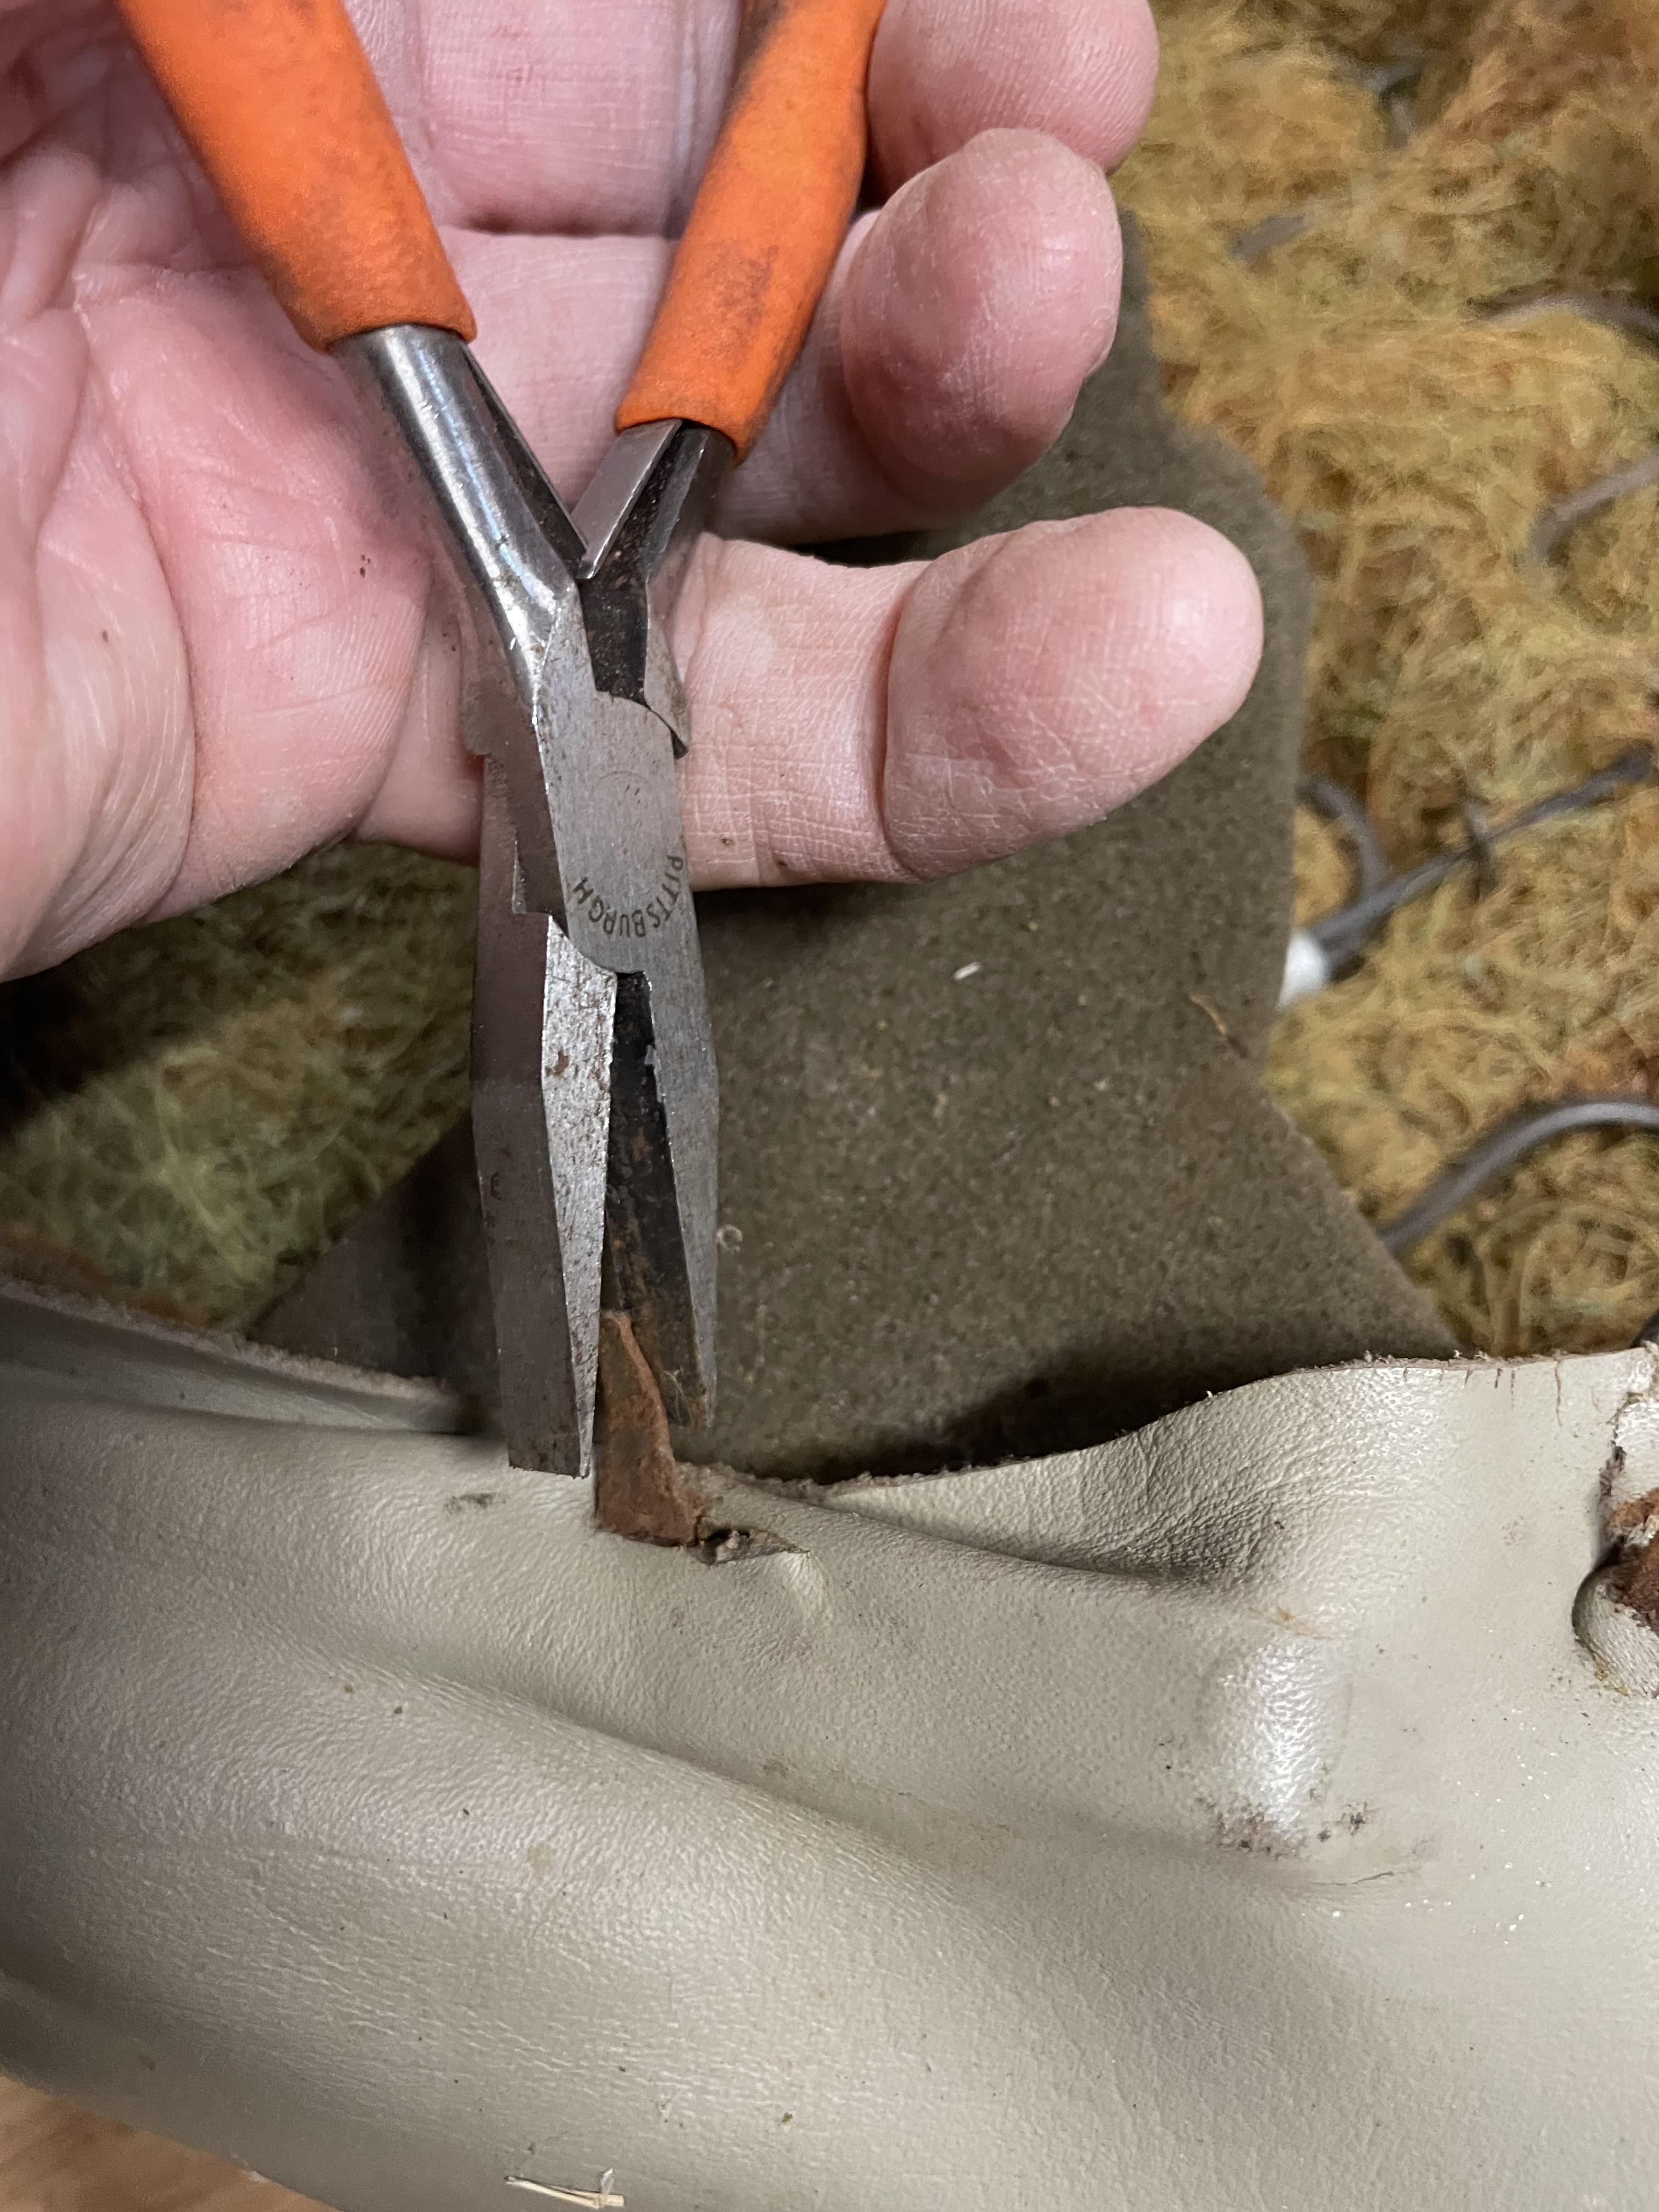
Bending up the sharp pointed ears that hold the leather skin in place:
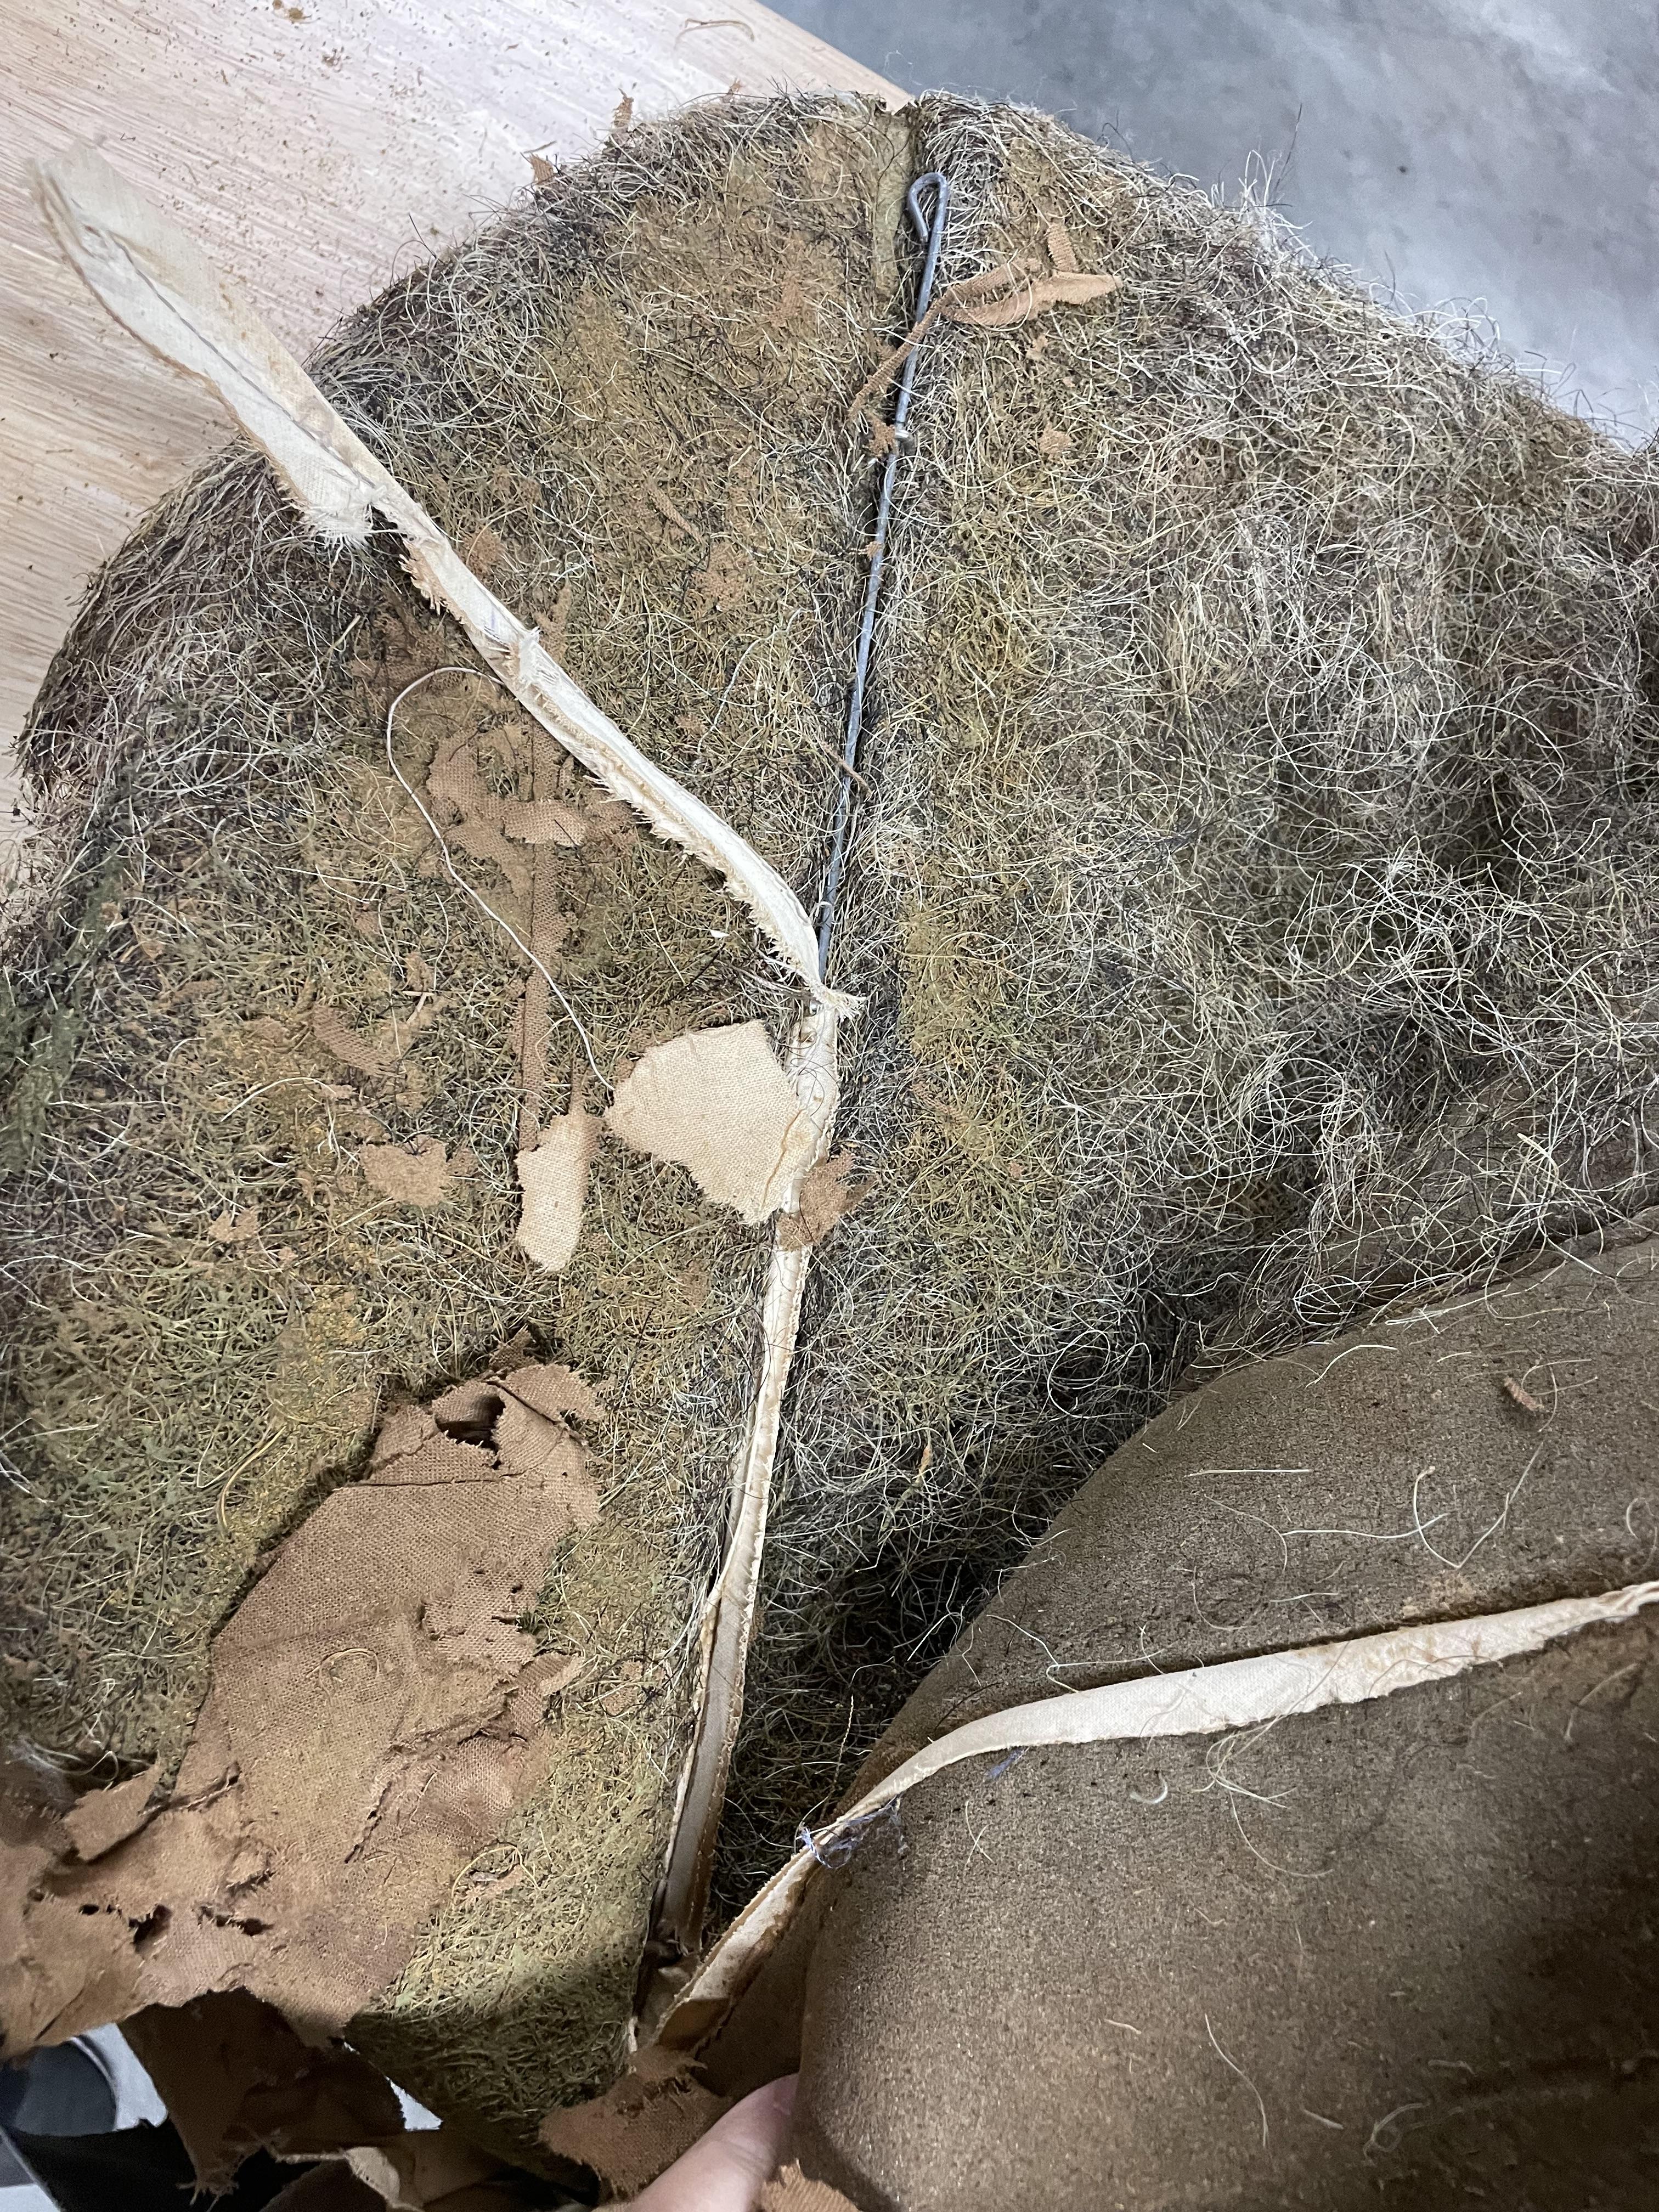
Here you can see the dried out horsehair pad. I'm going to need to replace it with either foam or rubberized horsehair:
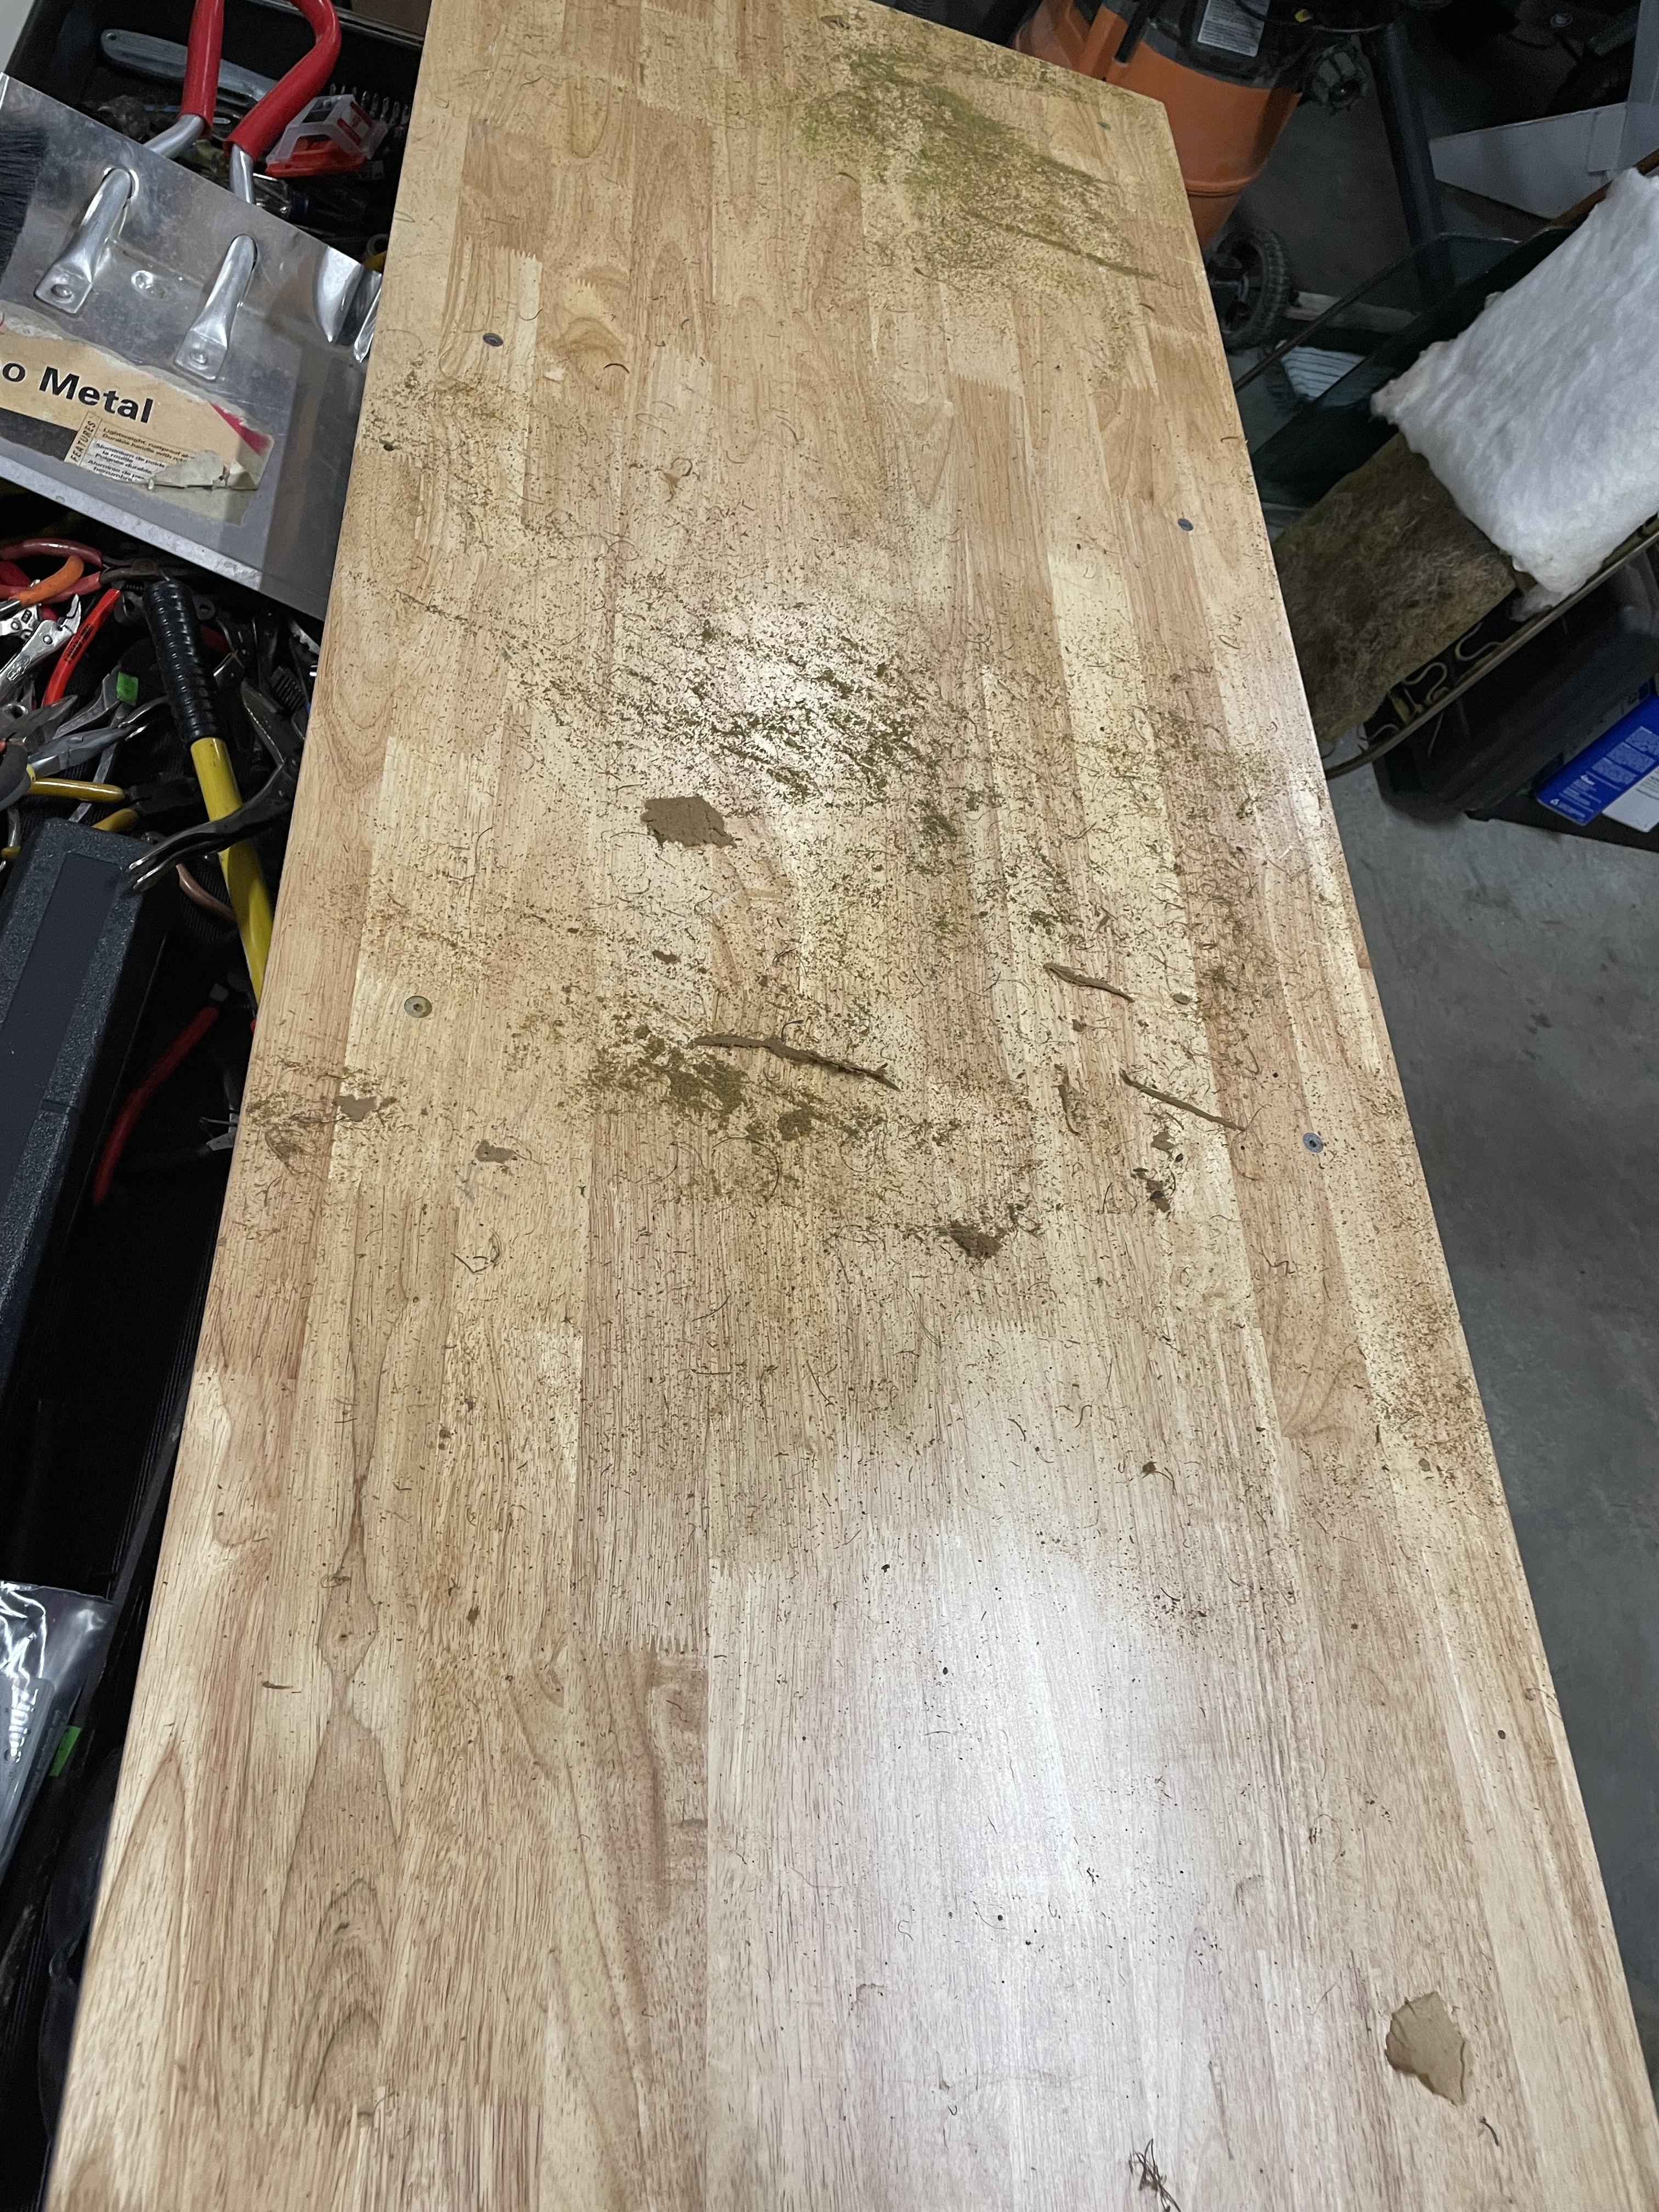
And here you can see some of the dust from disintegrating old dried out horsehair:
35 year old rear seat. Actually in pretty good shape other than faded and a little discolored.

Here you can see the difference between a newly recovered headrest and the seat:

Bending up the sharp pointed ears that hold the leather skin in place:

Here you can see the dried out horsehair pad. I'm going to need to replace it with either foam or rubberized horsehair:

And here you can see some of the dust from disintegrating old dried out horsehair:

Re: And so it starts, Maeve
Is mixing original horsehair and foam or rubberized horsehair an option? I ask because I've read that the original stuff has a smell and feel that new padding can never offer.
All, is there any truth to the latter?
All, is there any truth to the latter?
-
John in VA
- Posts: 5295
- Joined: Feb 12, 2006 12:00 PM
- Location: Leesburg, VA
Re: And so it starts, Maeve
Years ago, in my 2002, I added a layer of carpet to the bottom of the horsehair seat pad to help keep it from being destroyed by the springs. With the cost of the gummihaar pads many have resorted to multiple layers & densities of foam sculpted & glued together to fill out the seat cover but the formed pads do the best job.
Re: And so it starts, Maeve
I feel there is truth. I re upholstered the front seats and the smell has never been as intense as it once was. I've always thought it was the loss of the horse hair padding. Maybe I'll get some horse hair from etsy and put it under the seats. I just tried a goodle search and came up with this, but the link is broken:Mdreamer wrote: Oct 03, 2023 11:05 PM I ask because I've read that the original stuff has a smell and feel that new padding can never offer.
All, is there any truth to the latter?
finkbuilt.com
› blog › bmw-2002-seat-covers
January 29, 2006 - I’ts a very complex, sort of musty but not unpleasant aroma, somewhat organic and entirely automotive. You smell it when you first get into an old VW, Mercedes or BMW, most noticeably on a warm day after the windows have been rolled up for a while. One of the primary contributors to that distinctive smell, is the horsehair padding that was used in the seat cushions in these old cars...
Re: And so it starts, Maeve
Thanks to my friends over at bmw2002faq.com for the thread on reupholstering seats.
I've ordered 2 rolls of the 2x24x72 so I can do both the bottom and seat back rear seats.
https://www.onlinefabricstore.com/produ ... =affiliate
plus natural burlap to lay down over the springs to limit damage to the pad:
https://www.onlinefabricstore.com/natur ... abric-.htm
https://www.bmw2002faq.com/forums/topic ... -hair-pad/
Re: And so it starts, Maeve
I continue to run across surprising things when working on Maeve. From common things like dried out rubber bits, missing fasteners etc.
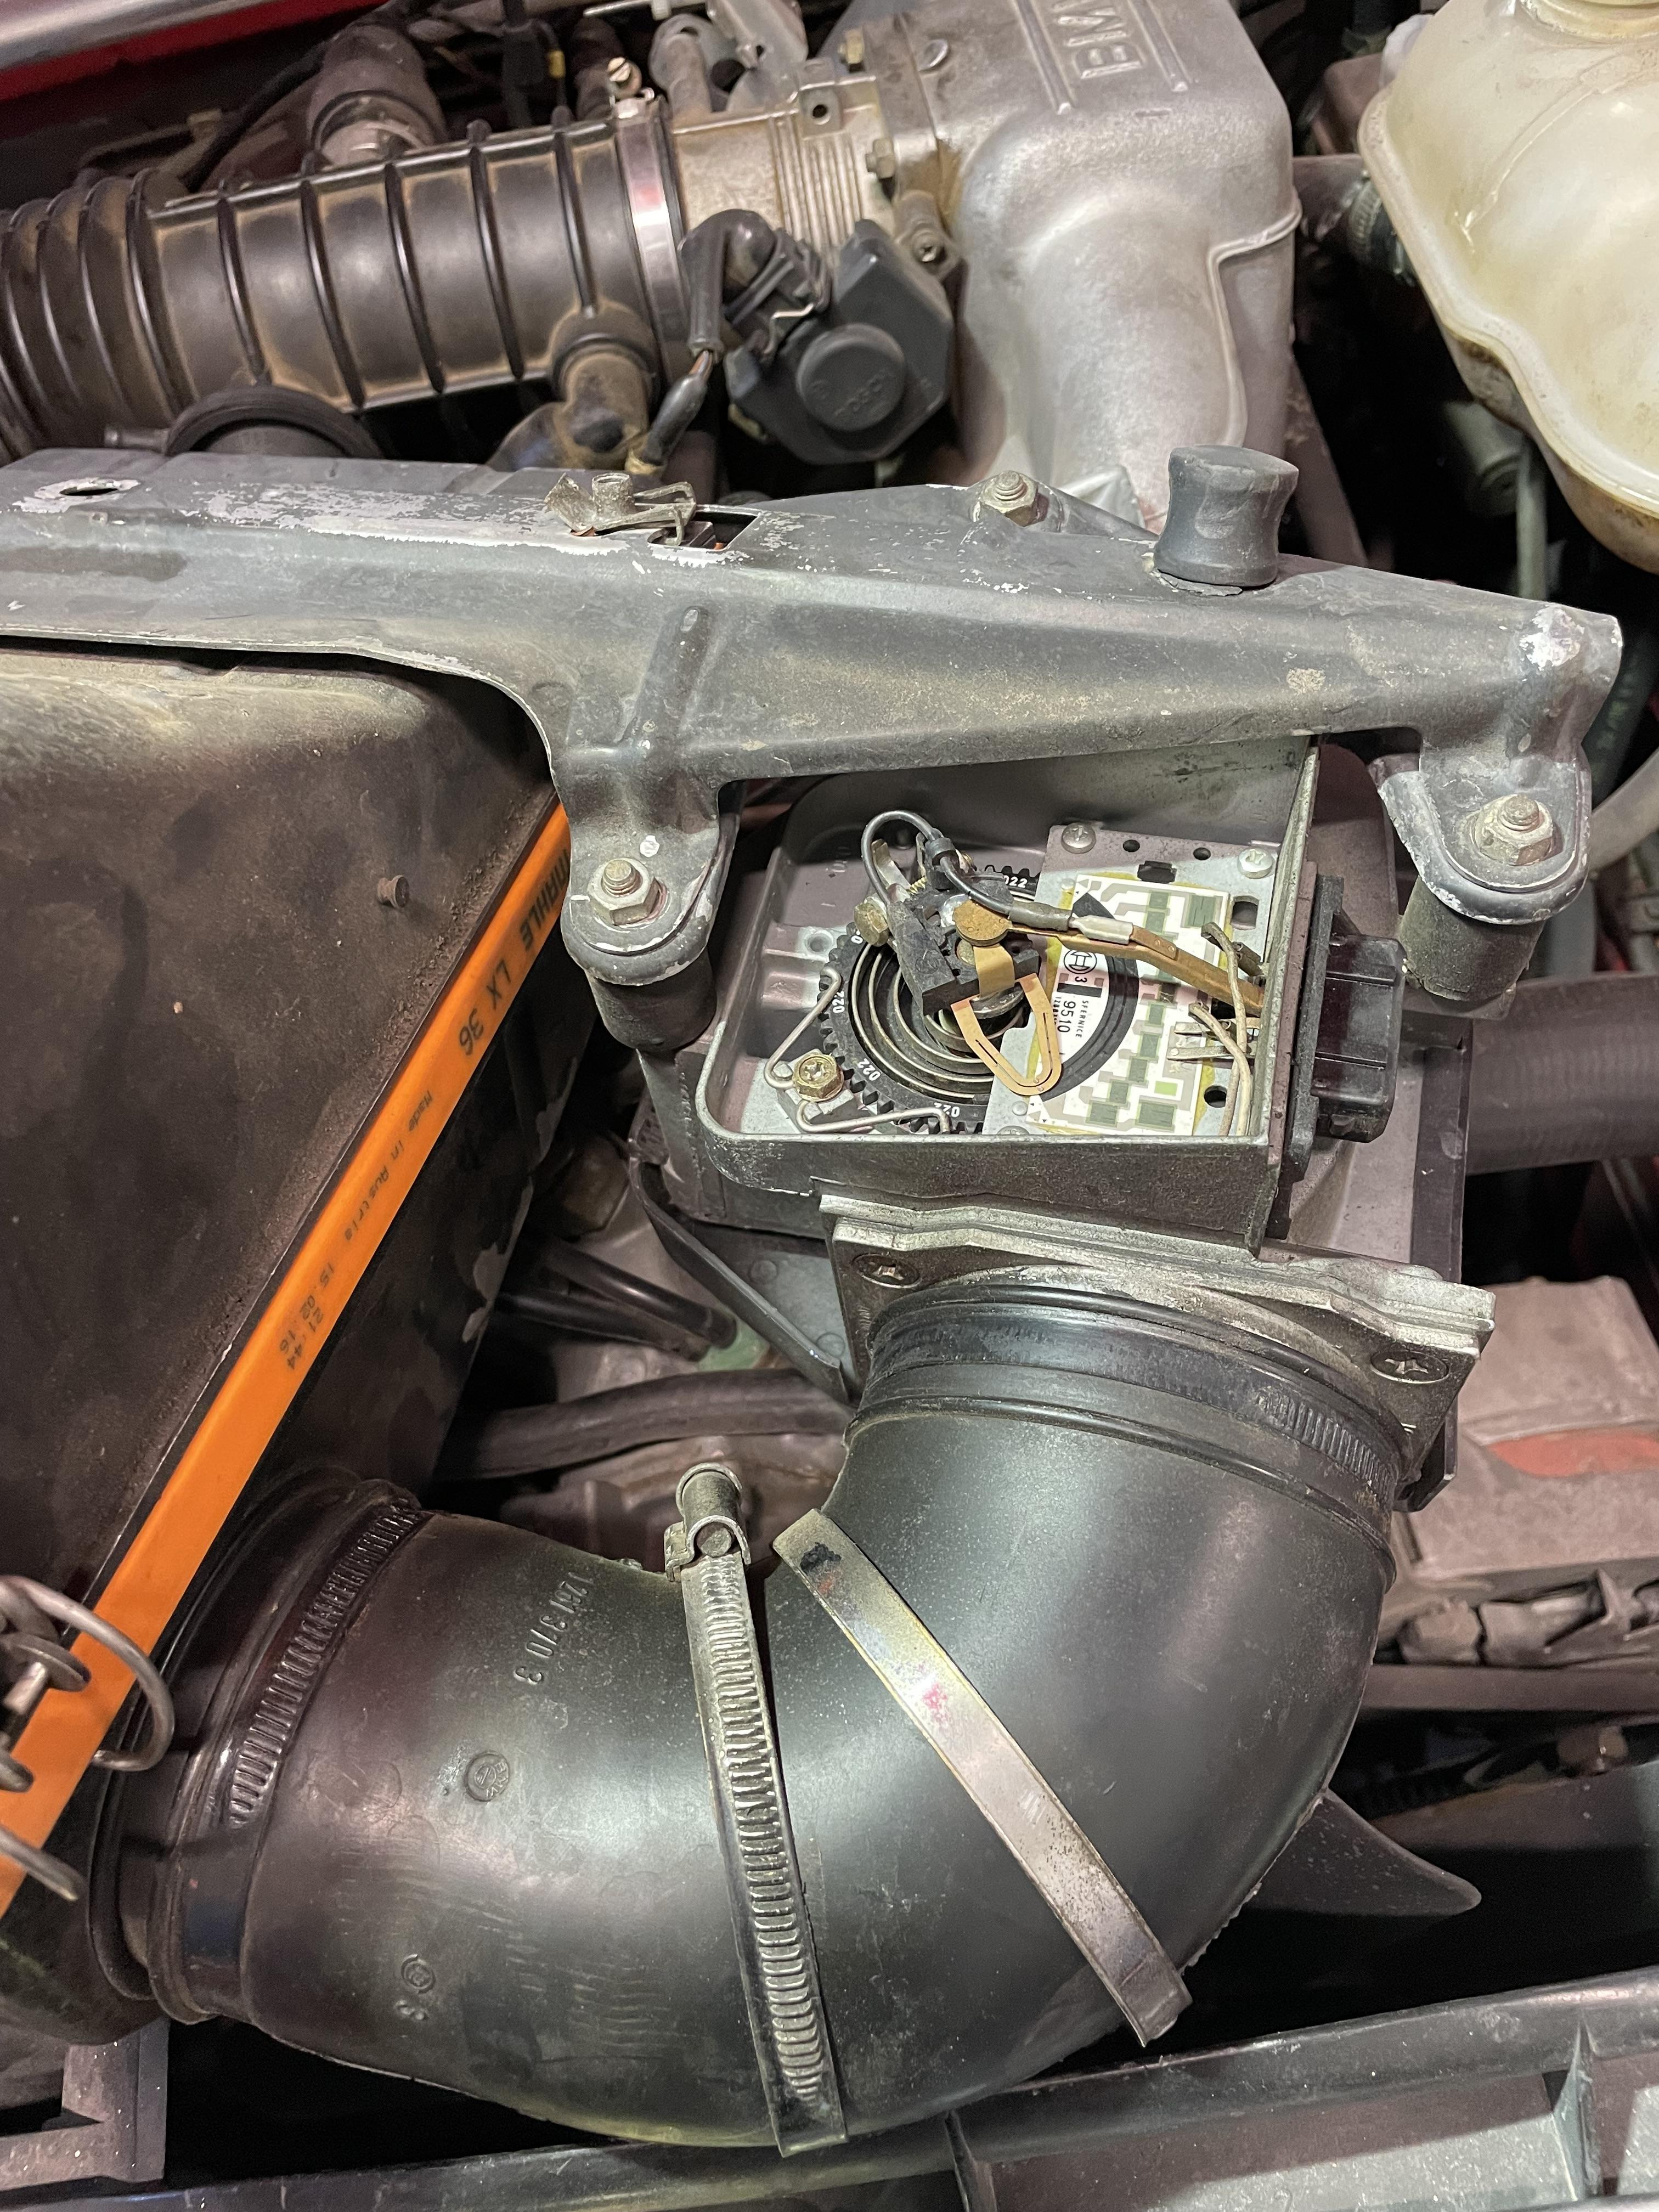
And then things like this:
I'm starting to get everything disassembled in the engine bay so I can remove the motor/tranny in a few weeks. Took off the air cleaner/air flow sensor only to find the bottom open to the atmosphere. I'm pretty sure it should have a cover, no?
Please advise.
And then things like this:
I'm starting to get everything disassembled in the engine bay so I can remove the motor/tranny in a few weeks. Took off the air cleaner/air flow sensor only to find the bottom open to the atmosphere. I'm pretty sure it should have a cover, no?
Please advise.

Last edited by gwb72tii on Oct 05, 2023 9:05 PM, edited 1 time in total.
Re: And so it starts, Maeve
I'm also realizing that I have a LOT of work to do before Maeve is on the road. Much more than just swapping motors.
I'm not someone to do something half way, so when the motor is out it's time to replace the firewall shielding with something else. Multiplied by 10 with other areas of the car and my goal is to have my car on the road sometime in late spring. I still have a day job so my time is limited to a degree.
ugh...
I will get her completed and drive her for a long time. But after Maeve, my 2002tii is going to be completely disassembled and repainted after I mashed in her passenger side. Smaller car, I know everything about the car, no computers etc. Straightforward. But a lot of work too. So my spare time is pretty much spoken for over the next three years. I'm going to be 70 this January and will move to other things in life when I turn 73, so with a little perserverence both my cars will be ready by then.
Then I'm going to buy my dream car, a Citroen 2CV
Re: And so it starts, Maeve
gwb72tii wrote: Oct 05, 2023 8:52 PM I continue to run across surprising things when working on Maeve. From common things like dried out rubber bits, missing fasteners etc.
And then things like this:
I'm starting to get everything disassembled in the engine bay so I can remove the motor/tranny in a few weeks. Took off the air cleaner/air flow sensor only to find the bottom open to the atmosphere. I'm pretty sure it should have a cover, no?
Please advise.

Yeah there's supposed to be a cover. Normally it's glued on at factory, but you need to take it off to adjust the wiper if the track is wearing
Re: And so it starts, Maeve
Should be able to source a cover here.gwb72tii wrote: Oct 05, 2023 8:52 PM Took off the air cleaner/air flow sensor only to find the bottom open to the atmosphere. I'm pretty sure it should have a cover, no?
Please advise.

I'd offer but I don't have one that's not attached to the AFM.
Re: And so it starts, Maeve
A little progress, and one step back.
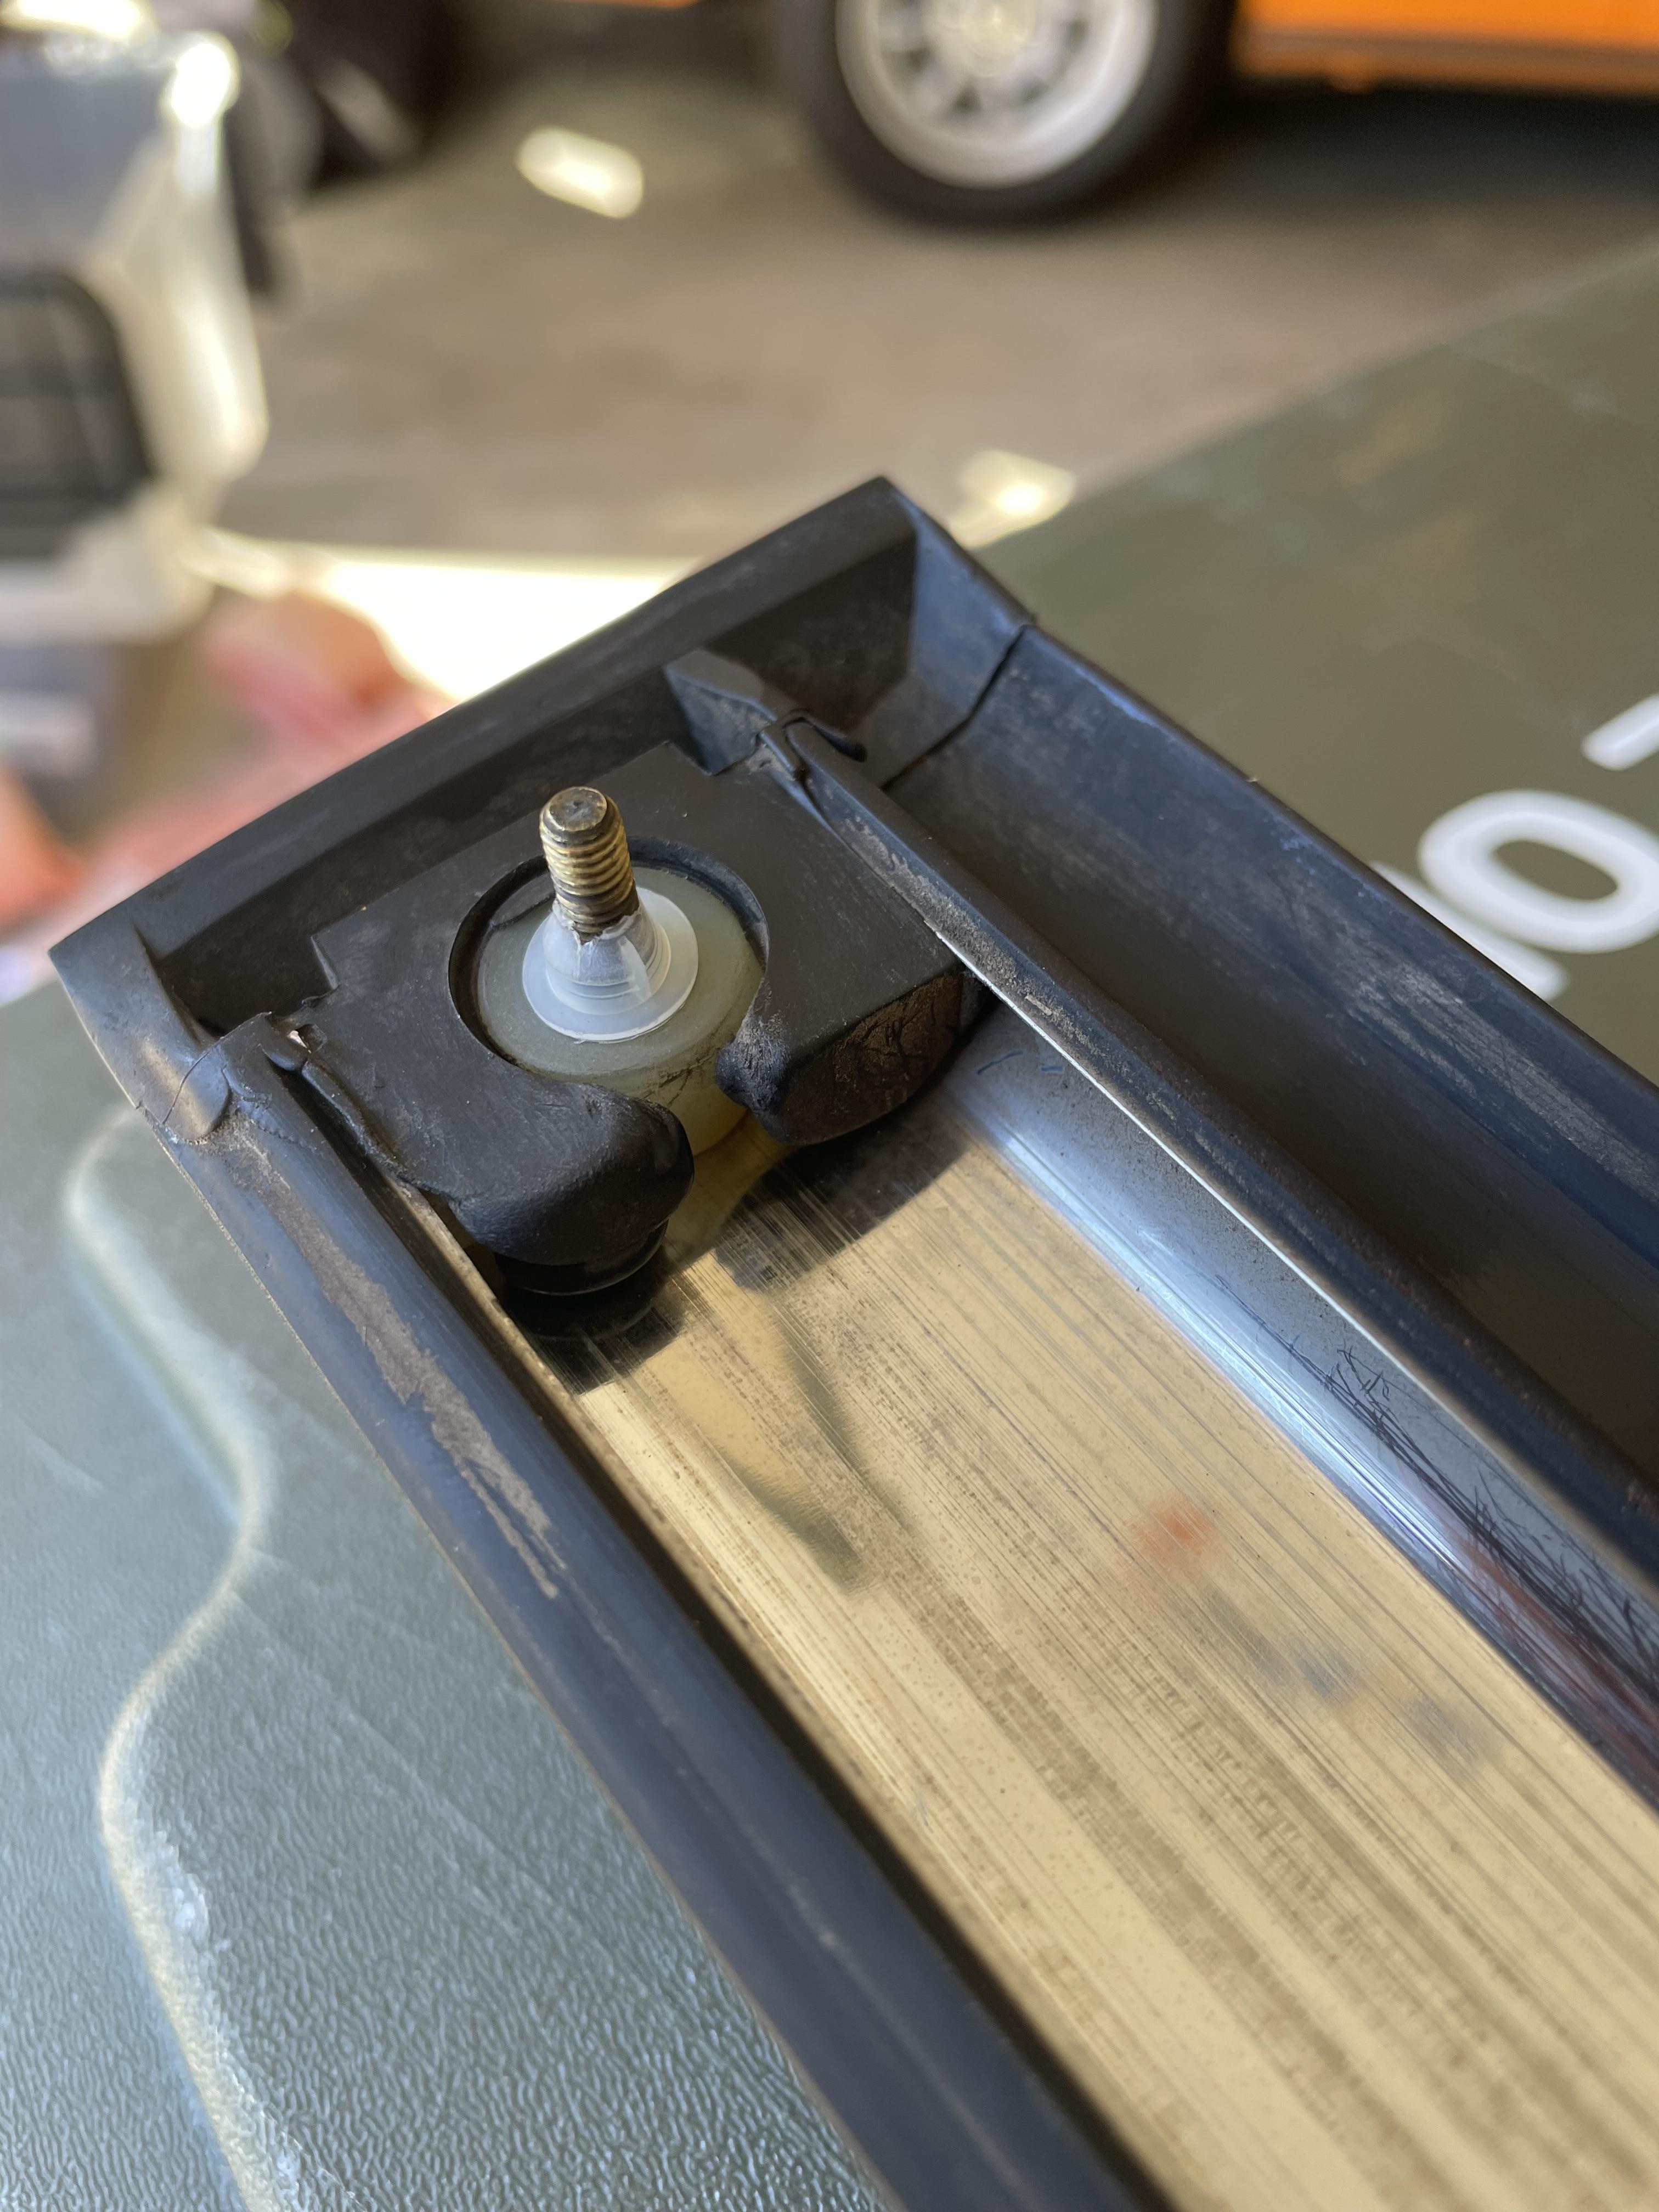
I finally received from ECS the necessary parts to install the knee trim mouldings. For once, German engineers made it simple:
this is an ingenious seal that pushes onto the threaded stud that locates the front of the rear door trim. It pushes into the clearance hole for the stud and is pulled tight against the door when you tighten the nut, sealing the opening against water intrusion:
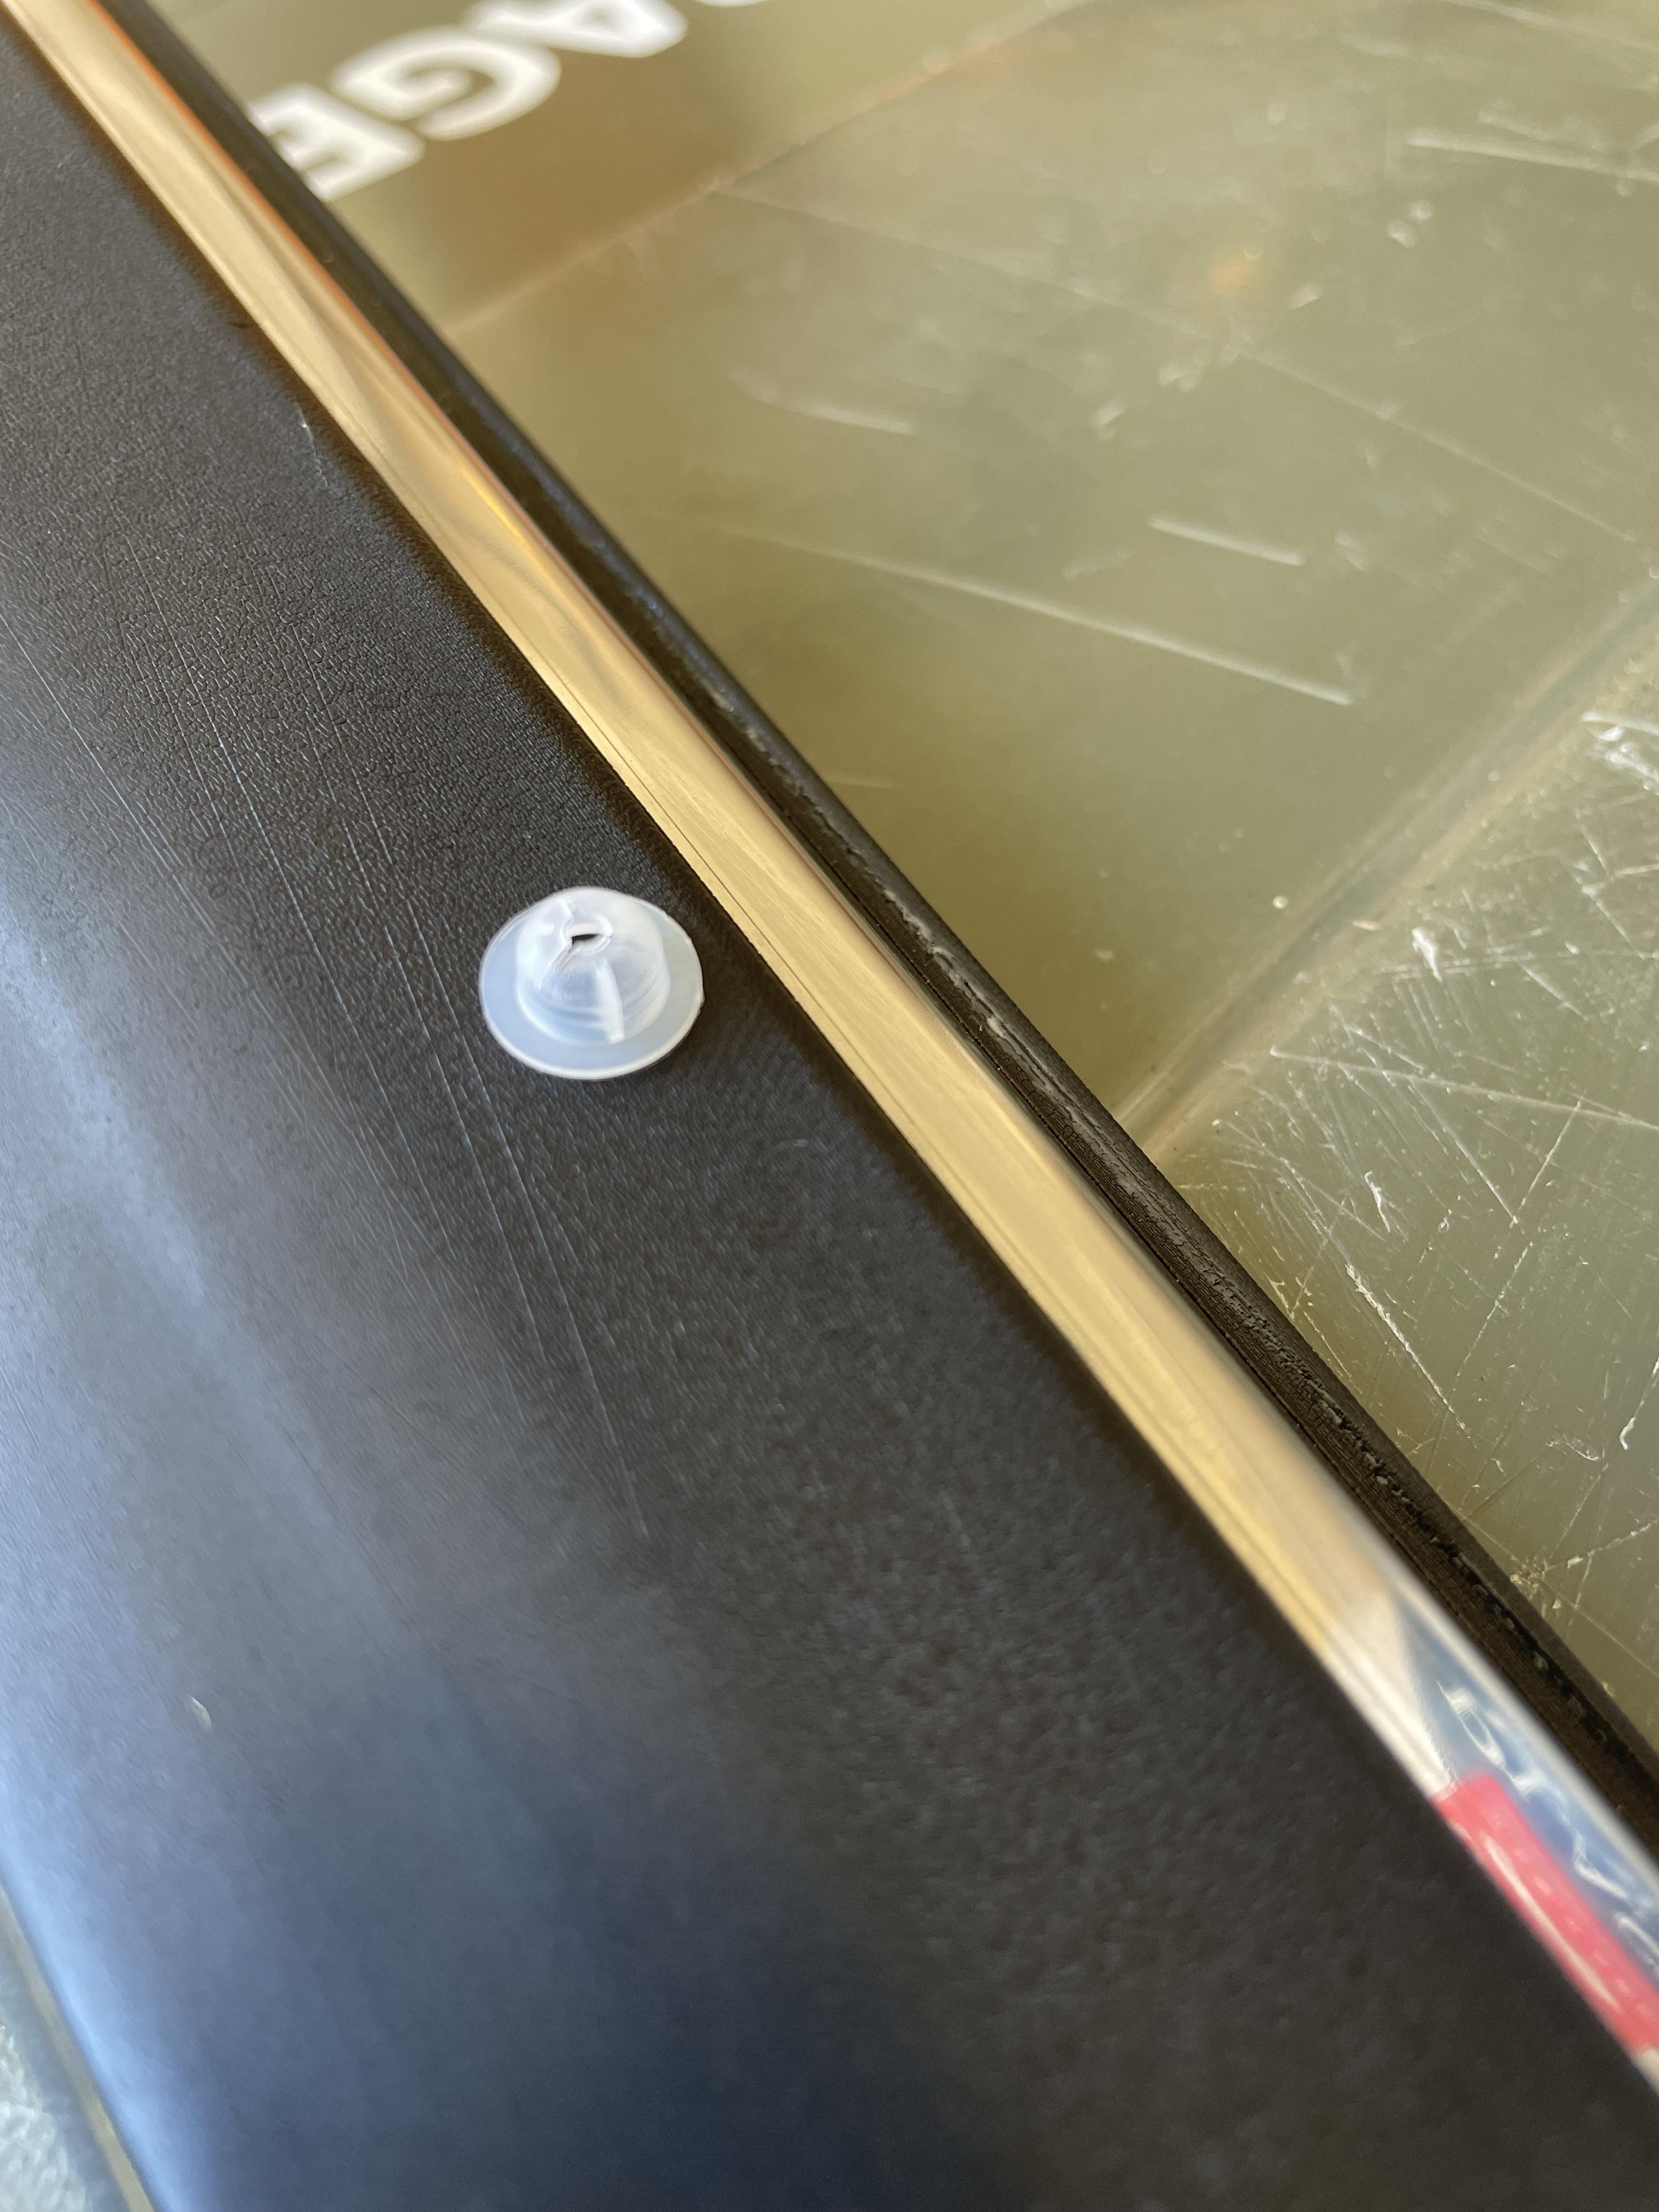
here it is on the stud:
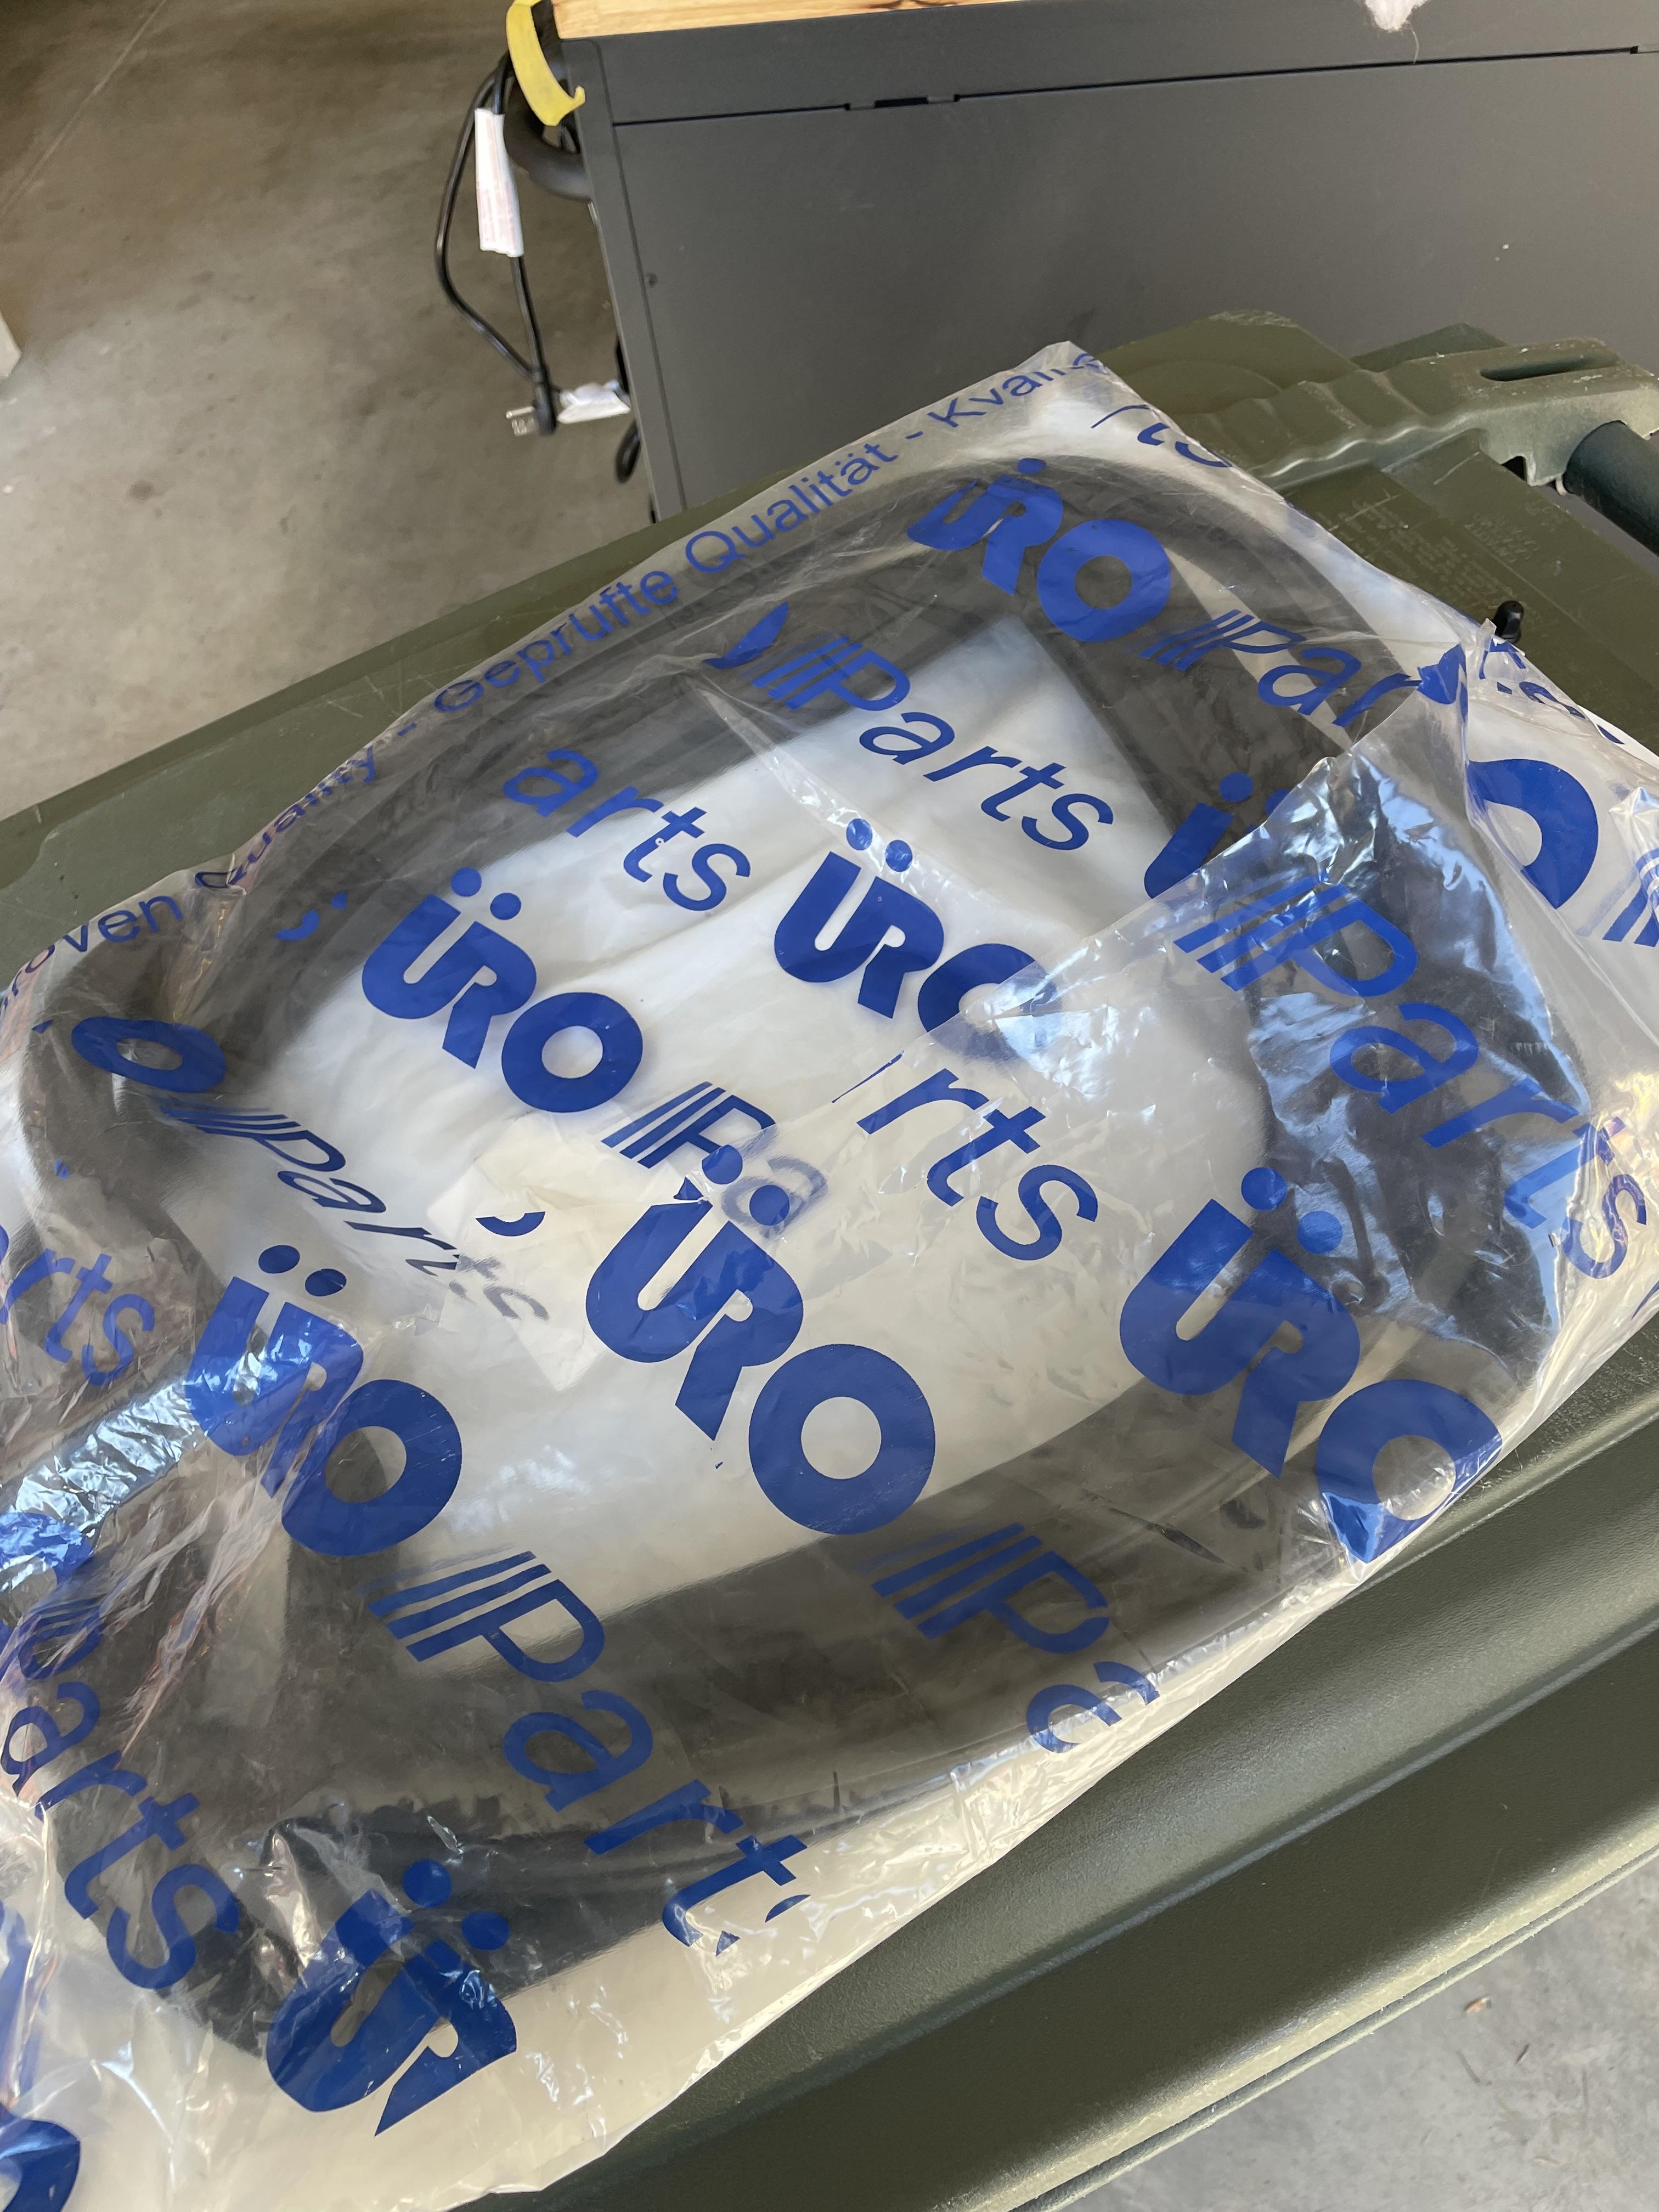
I also recieved this, the trunk seal from the infamous URO.
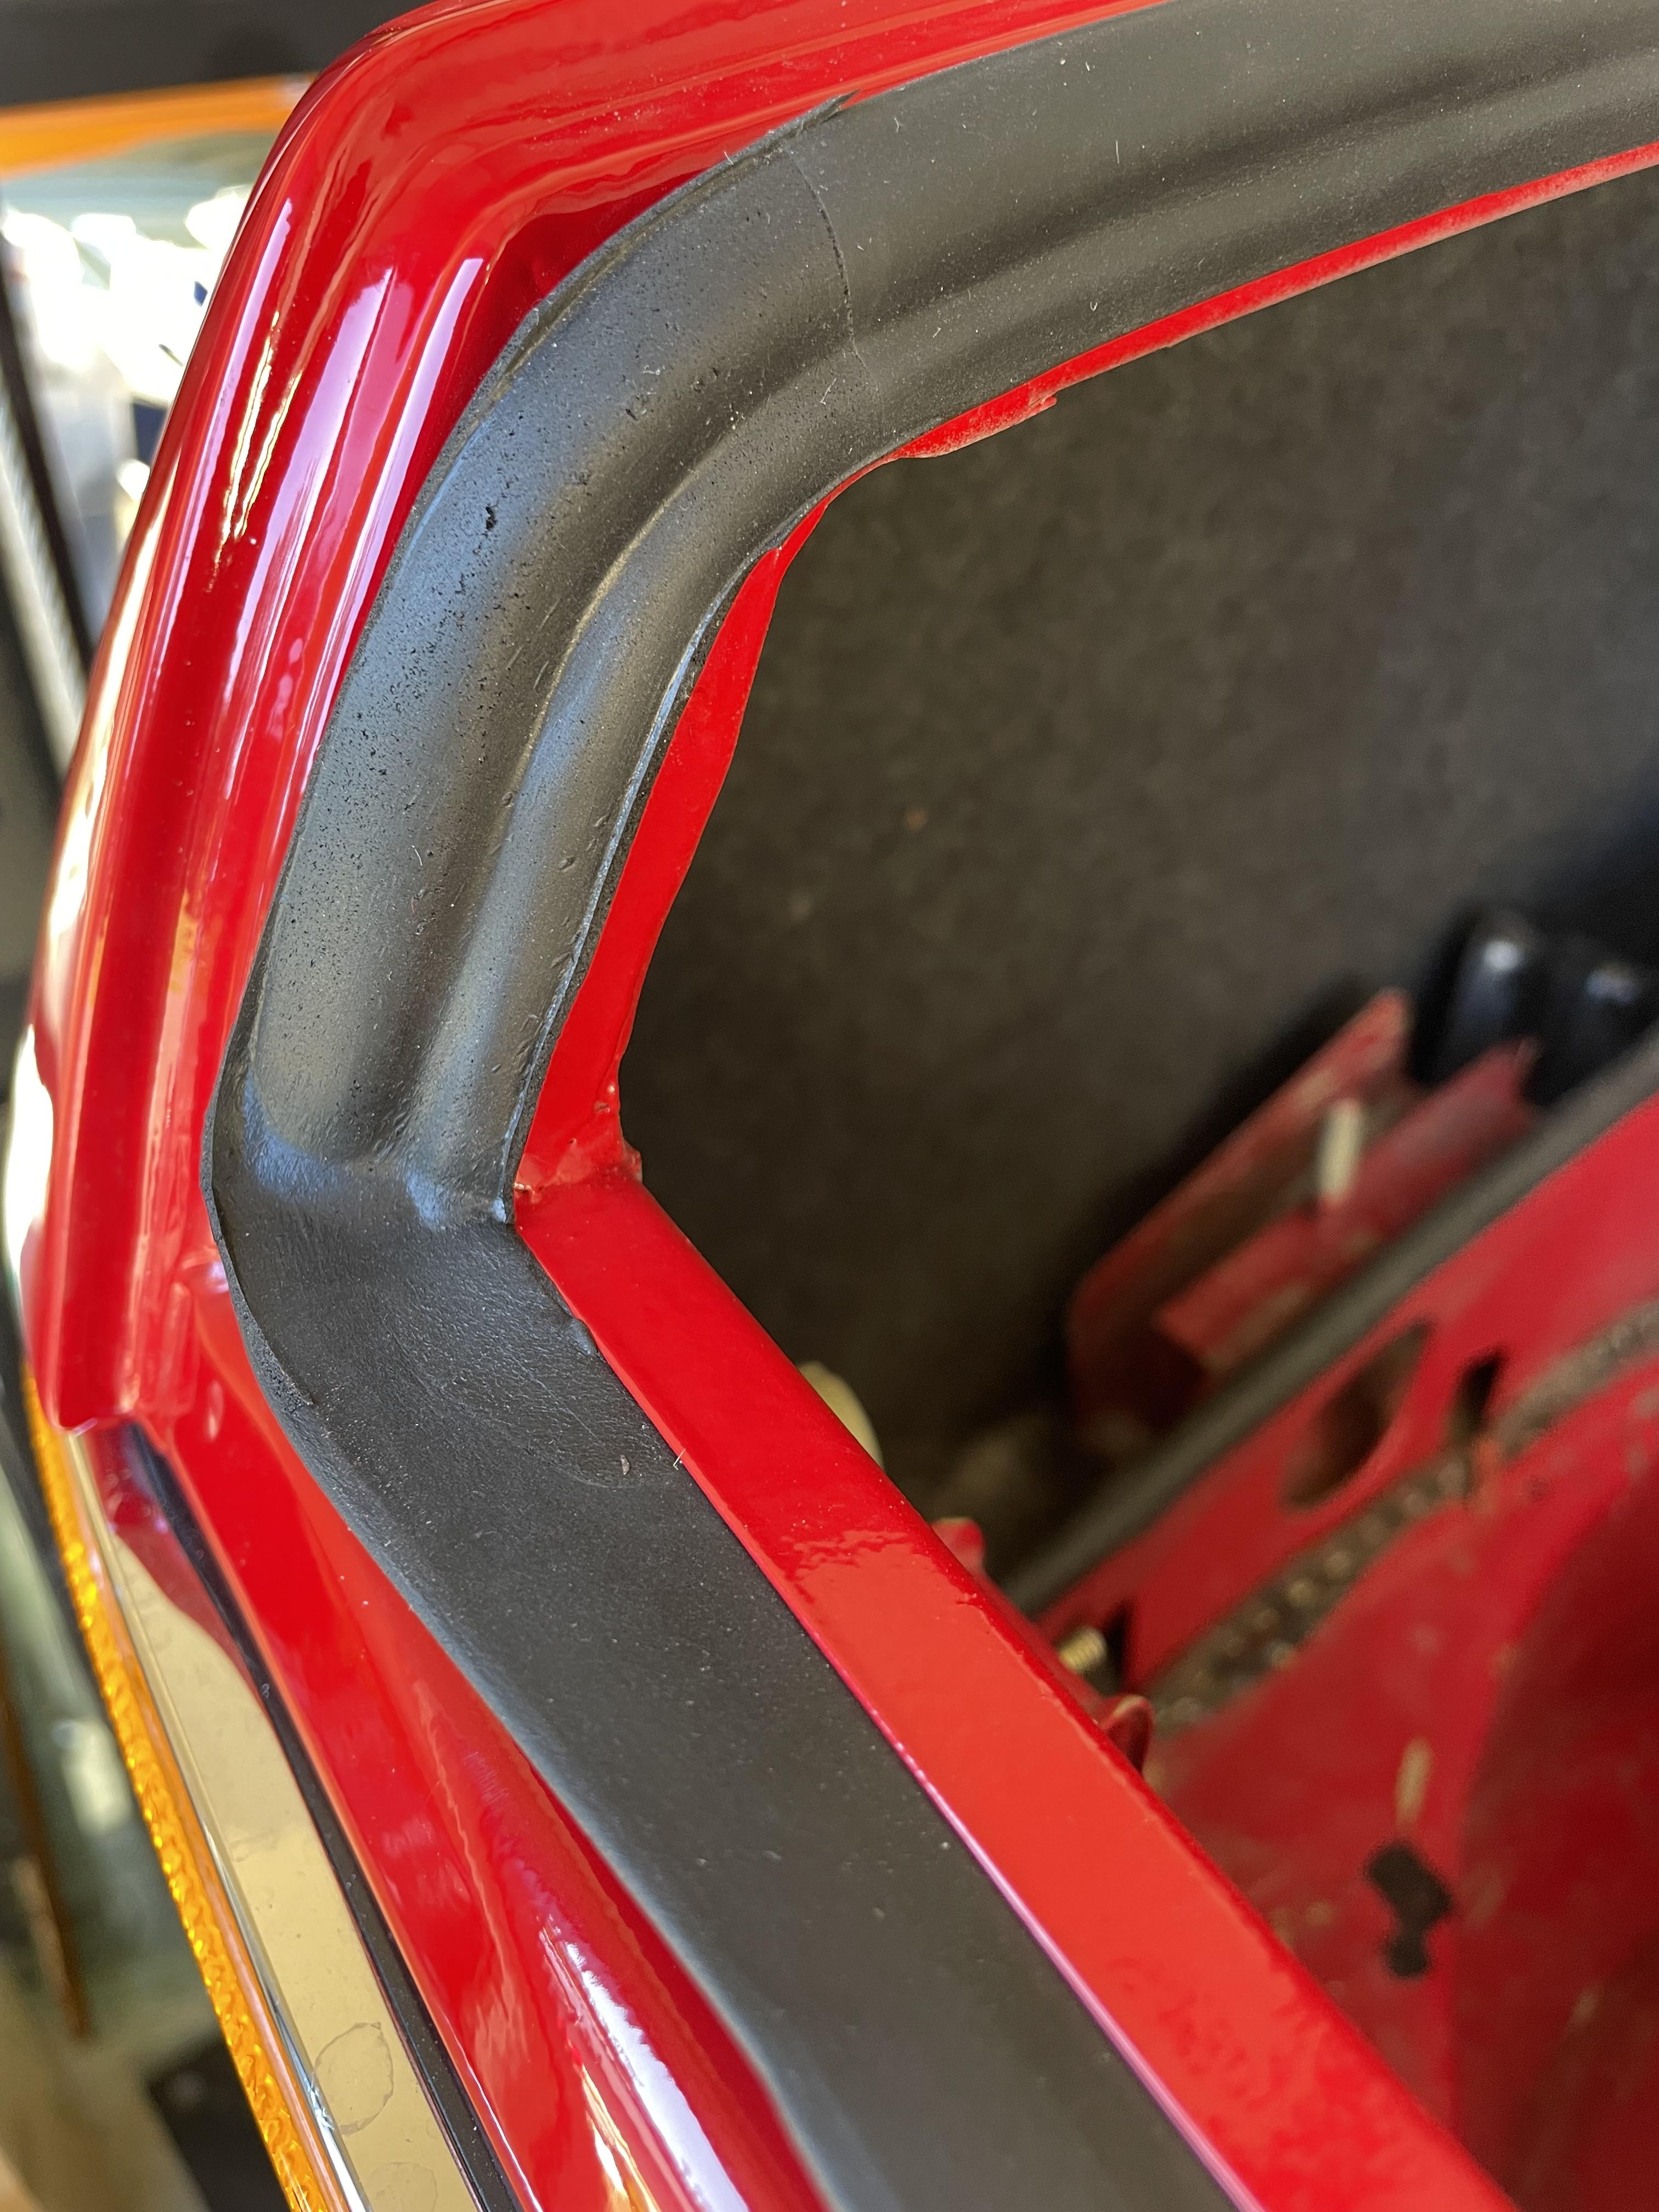
I have to say it fits perfectly:
One step back. I'm having a problem in how to orient the rear euro bumper brackets so the bumper is located correctly:
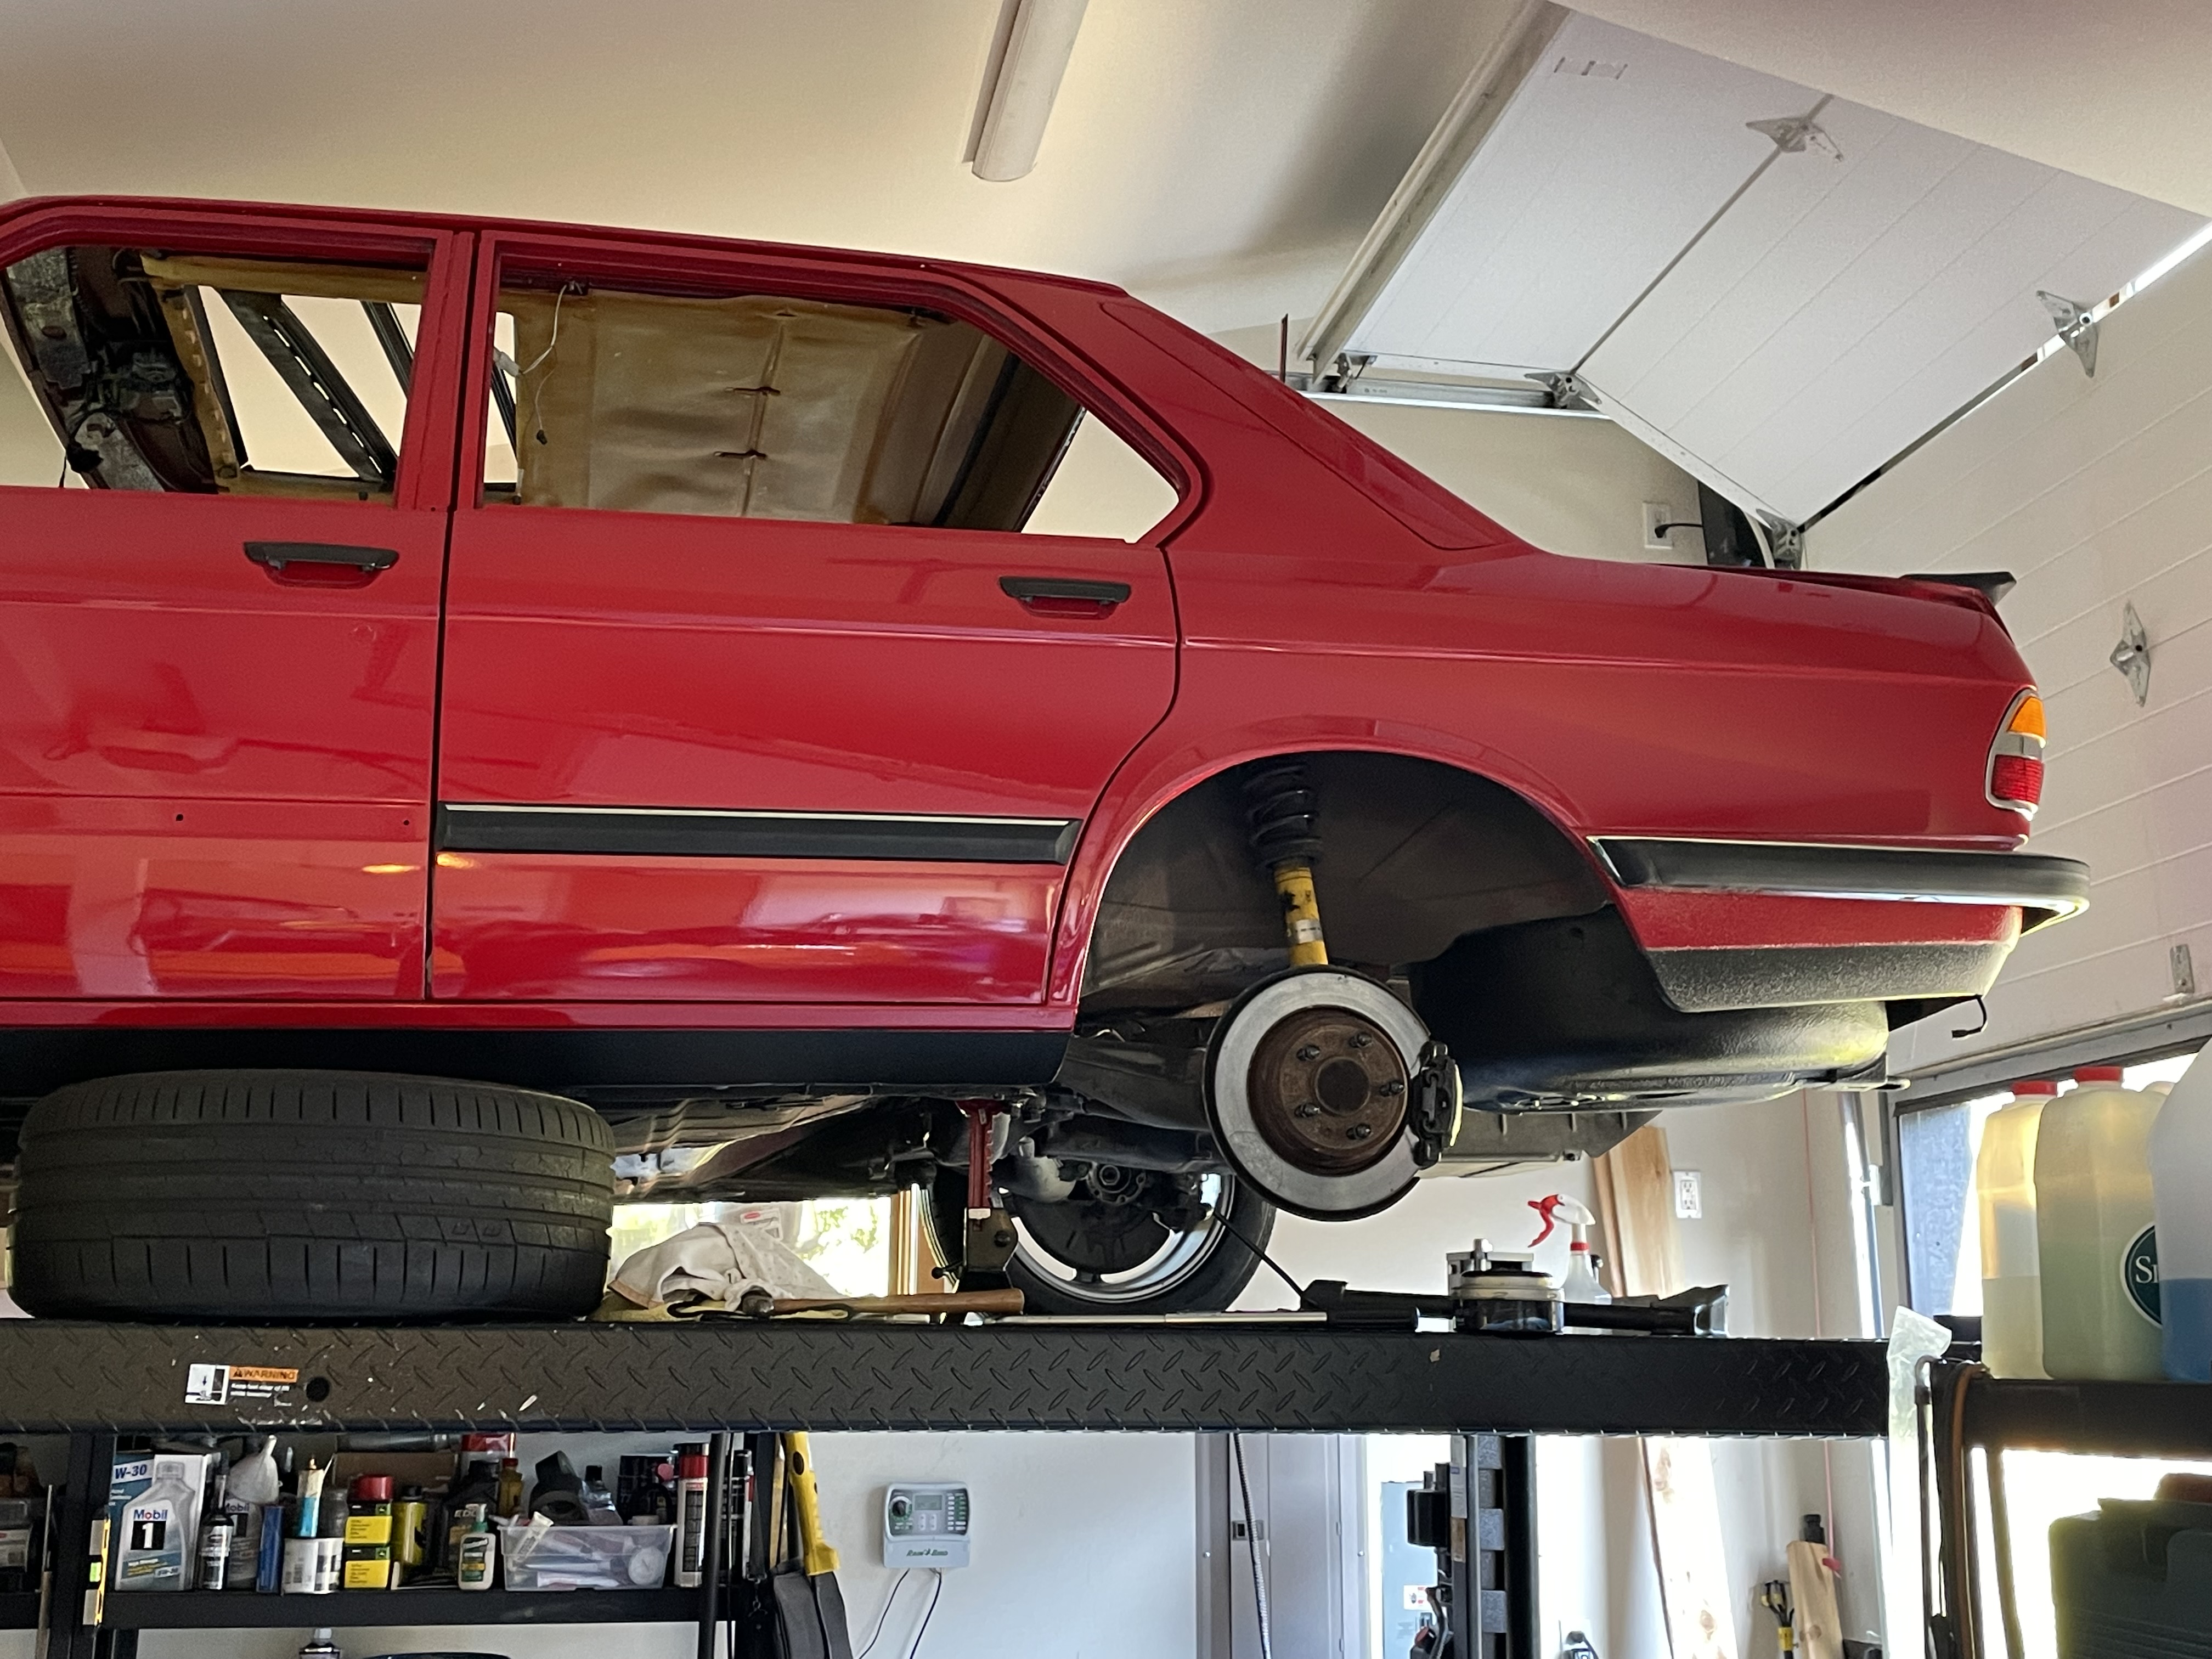
This is not how it is supposed to be:
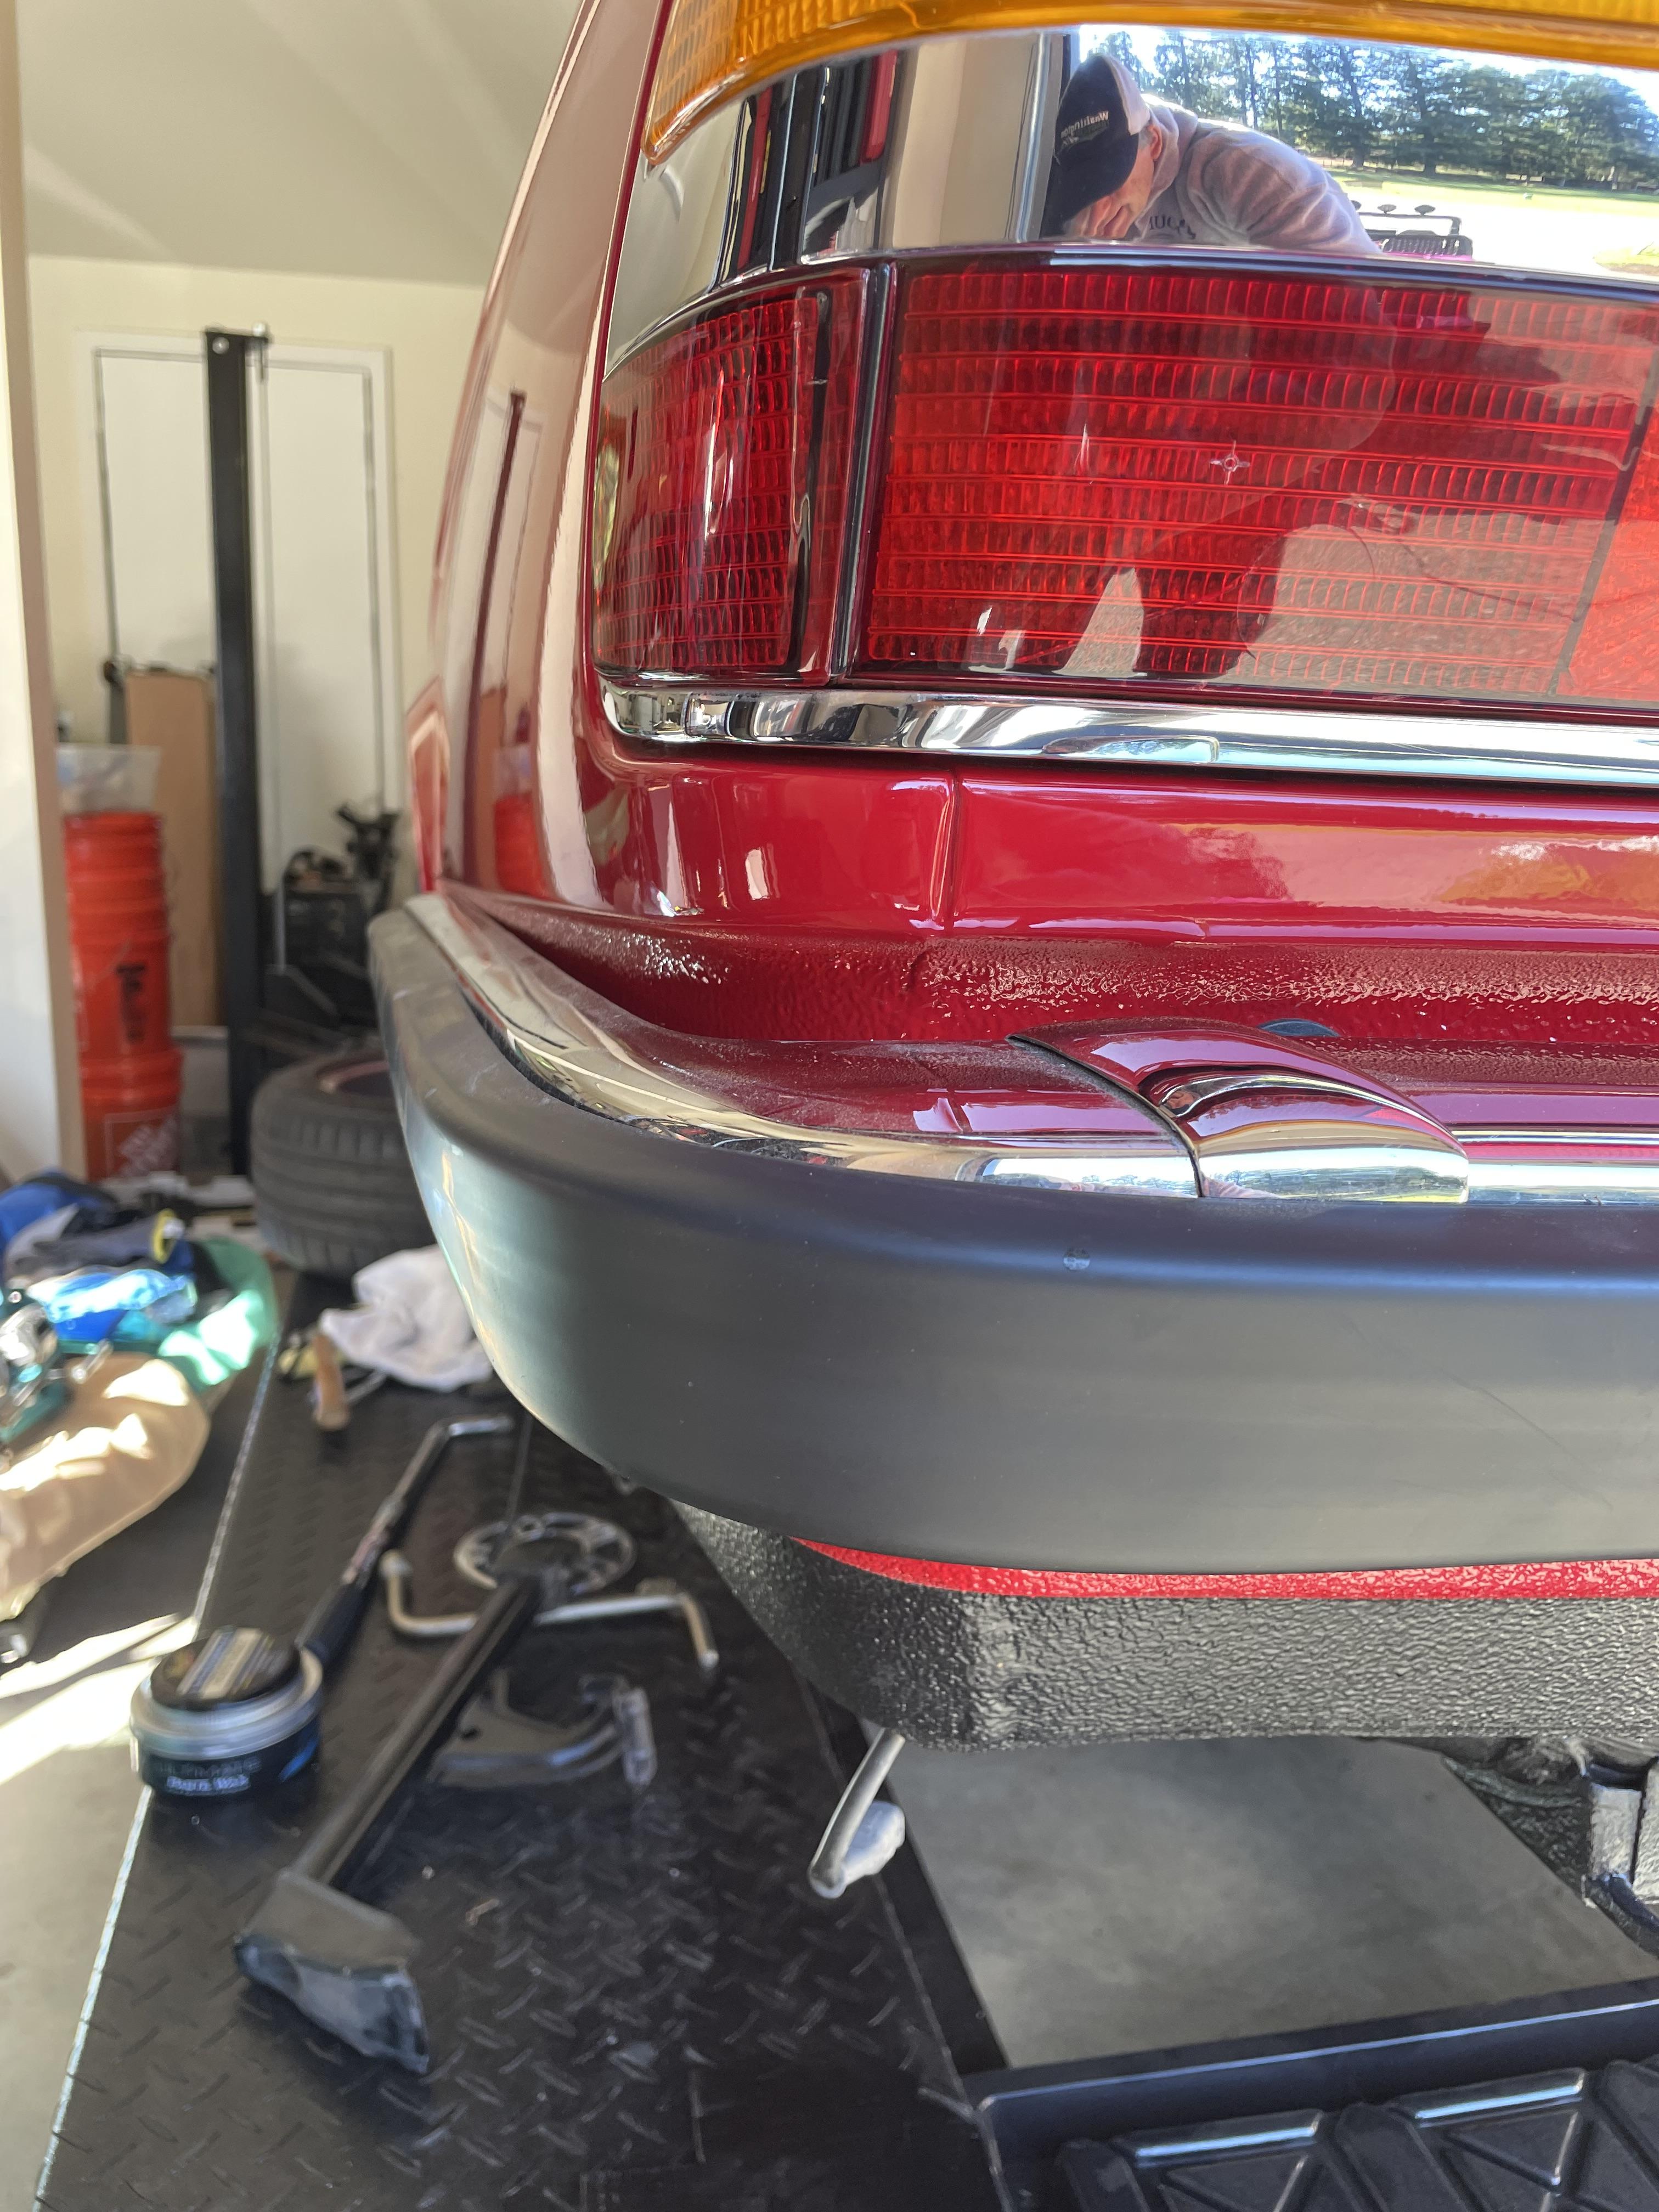
Anybody know the proper way to orient the brackets? I have a question posted under "Tech Talk".
These are the brackets:
https://e28goodies.com/product/rear-eur ... stainless/
I finally received from ECS the necessary parts to install the knee trim mouldings. For once, German engineers made it simple:
this is an ingenious seal that pushes onto the threaded stud that locates the front of the rear door trim. It pushes into the clearance hole for the stud and is pulled tight against the door when you tighten the nut, sealing the opening against water intrusion:

here it is on the stud:

I also recieved this, the trunk seal from the infamous URO.

I have to say it fits perfectly:

One step back. I'm having a problem in how to orient the rear euro bumper brackets so the bumper is located correctly:

This is not how it is supposed to be:

Anybody know the proper way to orient the brackets? I have a question posted under "Tech Talk".
These are the brackets:
https://e28goodies.com/product/rear-eur ... stainless/
-
Blue Shadow
- Posts: 10291
- Joined: Feb 12, 2006 12:00 PM
- Location: SE PA
Re: And so it starts, Maeve
This was properly answered in your other thread but here is the answer from realoem showing the brackets installed horizontally. Not that realoem is the best place to find orientation of parts. But in this case it works.gwb72tii wrote: Oct 30, 2023 7:57 PM
One step back. I'm having a problem in how to orient the rear euro bumper brackets so the bumper is located correctly:
Anybody know the proper way to orient the brackets? I have a question posted under "Tech Talk".
These are the brackets:
https://e28goodies.com/product/rear-eur ... stainless/
https://www.realoem.com/bmw/enUS/showpa ... Id=51_0697
Re: And so it starts, Maeve
well sort of blue manBlue Shadow wrote: Oct 31, 2023 3:47 PMThis was properly answered in your other thread but here is the answer from realoem showing the brackets installed horizontally. Not that realoem is the best place to find orientation of parts. But in this case it works.gwb72tii wrote: Oct 30, 2023 7:57 PM
One step back. I'm having a problem in how to orient the rear euro bumper brackets so the bumper is located correctly:
Anybody know the proper way to orient the brackets? I have a question posted under "Tech Talk".
These are the brackets:
https://e28goodies.com/product/rear-eur ... stainless/
https://www.realoem.com/bmw/enUS/showpa ... Id=51_0697
the issue is there is a proper left/right bracket because of how the bend of the bracket where it sits on the rear valance is not at 90*. That means there is an inherent angle to the bracket depending on which side you mount it, up or down.
my problem is neither way seems to be correct as it's either too low or too high.
my brackets do not seem to be damaged etc, so I'm still at a loss as to how to attach them to the car properly. I've done a pretty thorough search on this board and on the inter webs but I can't find a YouTube or any installation pics/instructions.
I will figure it our eventually, I was hoping someone here that had converted to euro bumpers had faced the same challenge and had some advice.
-
Blue Shadow
- Posts: 10291
- Joined: Feb 12, 2006 12:00 PM
- Location: SE PA
Re: And so it starts, Maeve
Please, BS is the handle and frequently the reply's value.
I'll see if I can look at Chip's ride next time I'm over there. We euthanized (put on the € crap*) a few years ago and I don't recall exactly. I'll be sure to check the bumper ride height.
Doesn't anyone have a picture of their rebumpered car showing the bumper in the proper place and another showing the alignment of the brackets in the trunk? This shouldn't be that hard to get.
words like crap and junk are just easy to type. Do not read much meaning into my use of these words. Dealing with vintage audio I call it all crap/junk just cause it is easier making a post. Particularly when I call a stylus a nail.
Re: And so it starts, Maeve
This is how my car came north, and I believe the positioning of the bumper to be correct. I unfortunately did not take any pics when I removed the bumper prior to painting the car, but the brackets ar the same, so there is a correct way.'
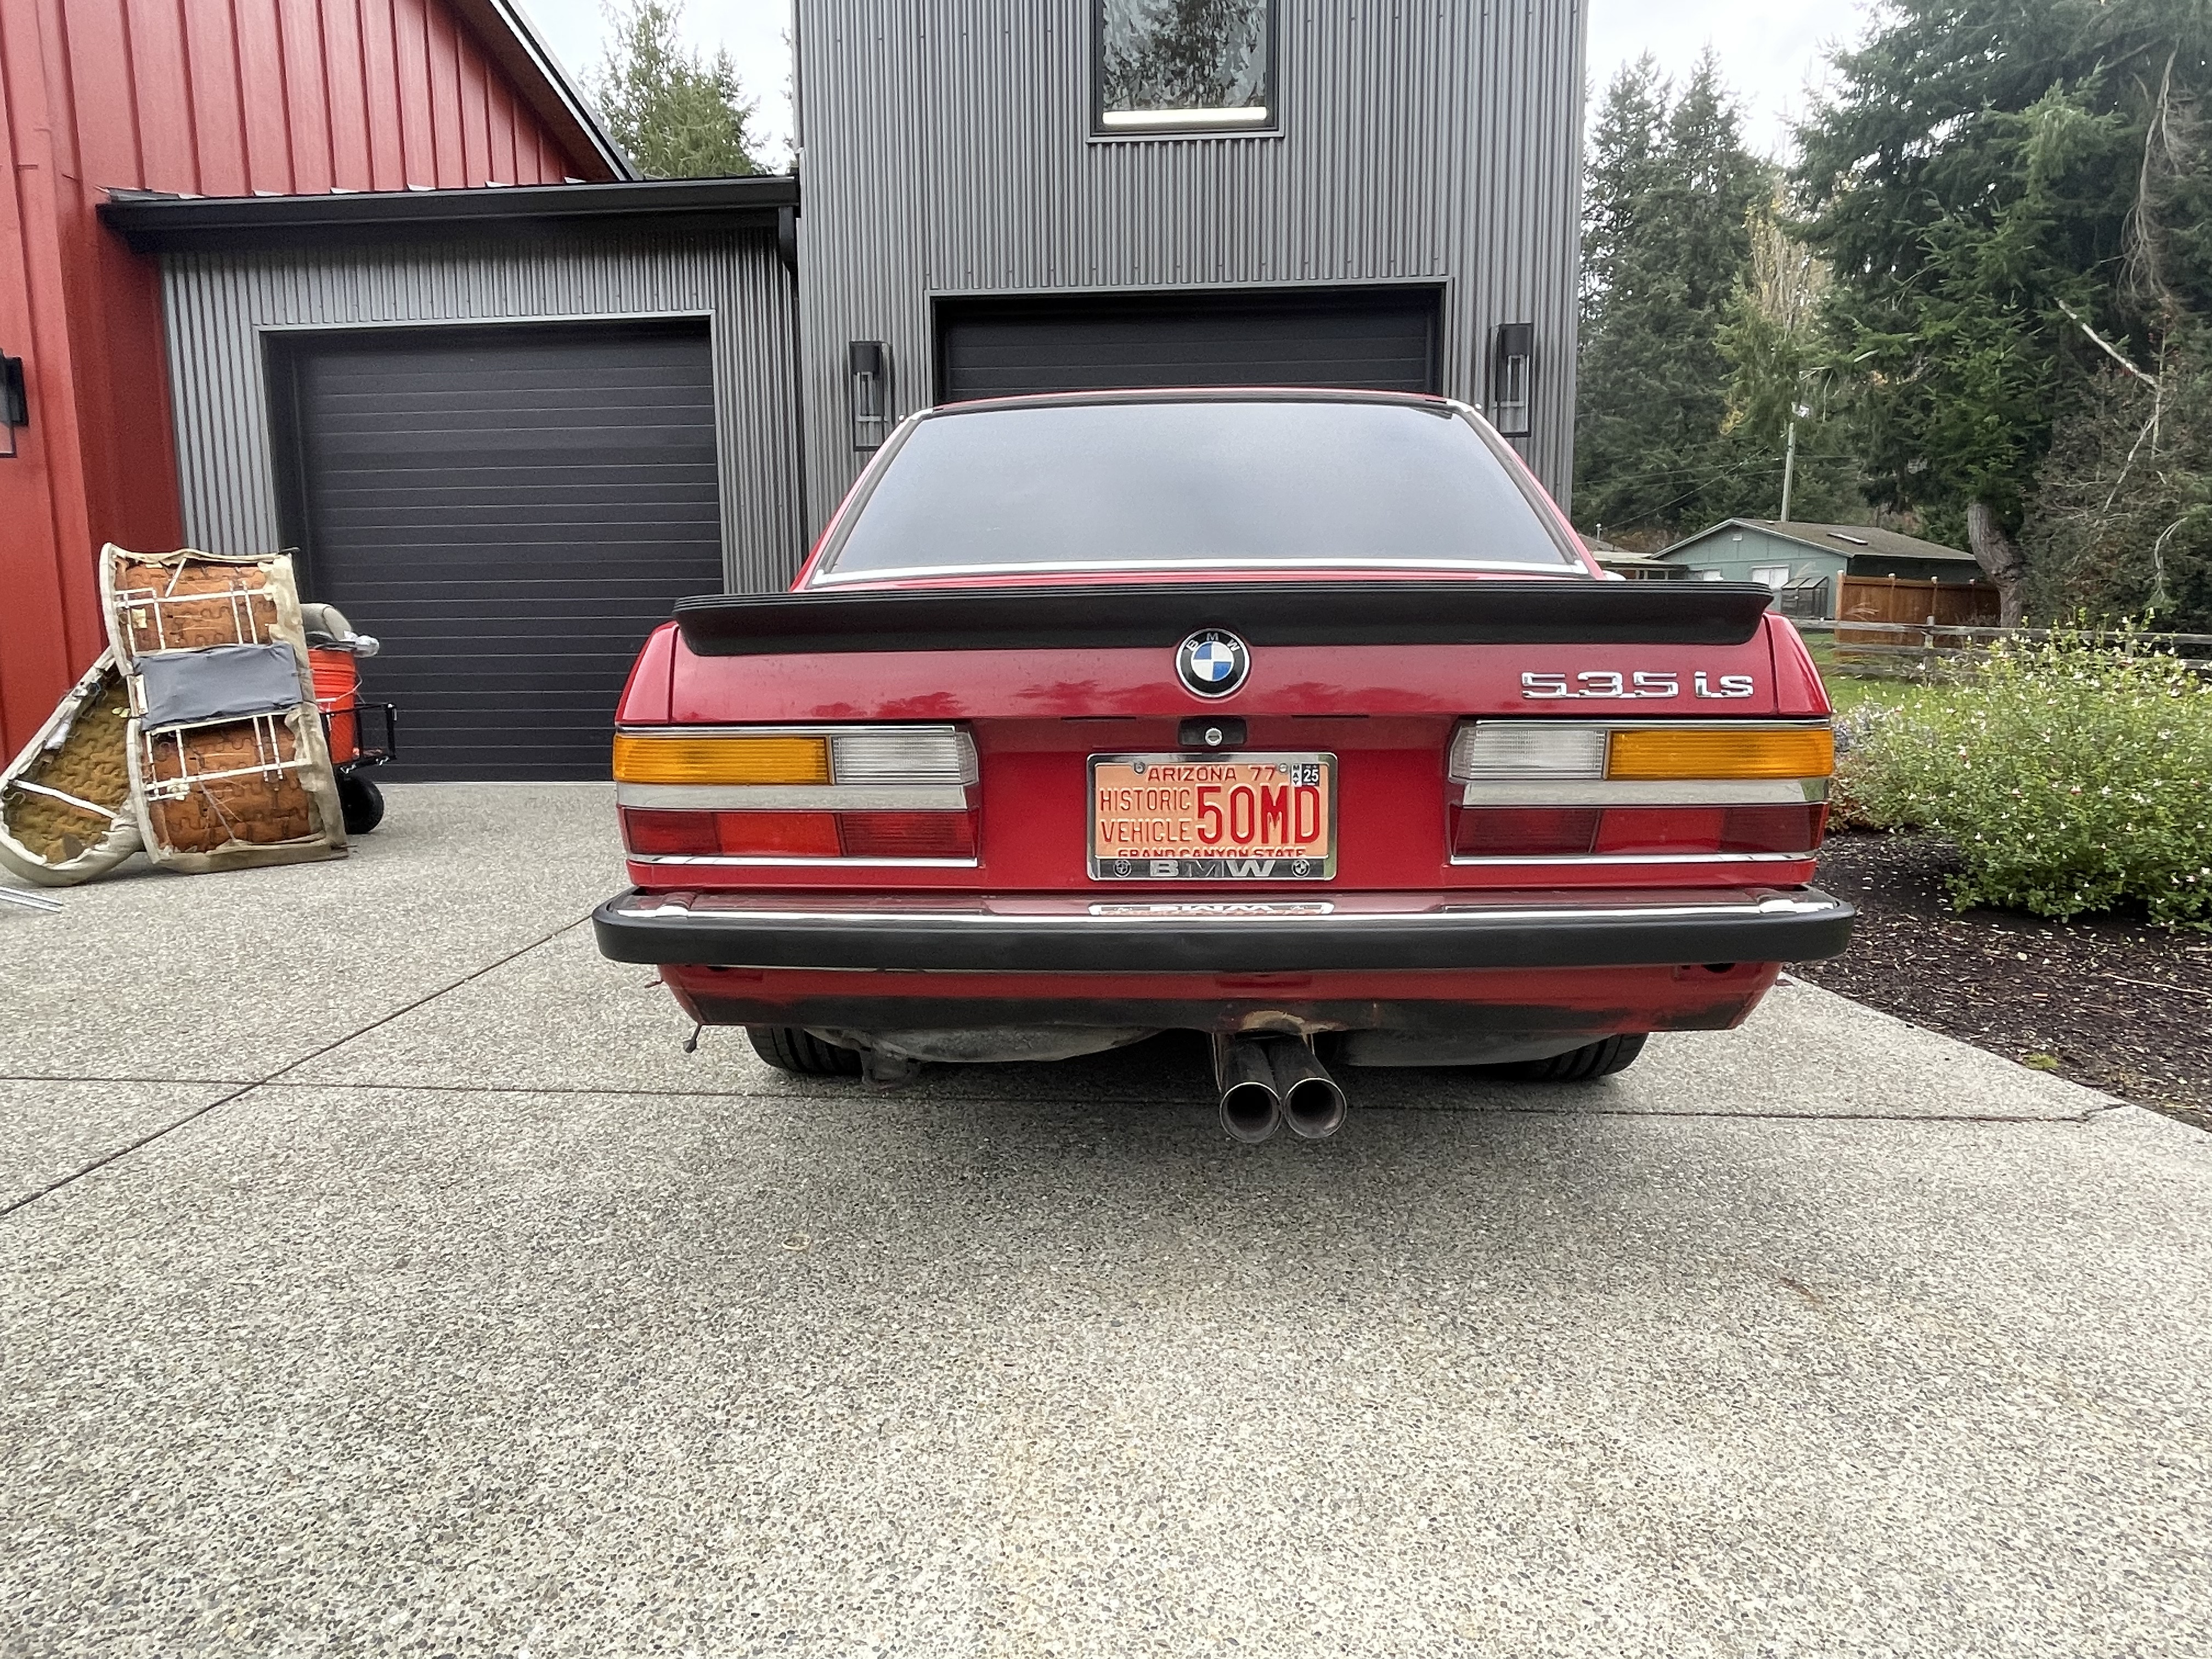
Re: And so it starts, Maeve
One thing I try to remember when working on cars as old as an e28, is "I'm smarter than the car".
The rear bunker brackets are designed as a left and right bracket. As it turns out, the proper installation is with the tabs for mounting the bumper facing outwards and down. I had it backwards yesterday, and walked away from the darn car to think it over. Removed the bumper and brackets today, mounted the bumper, and viola! The bumper fits as intended. See, I am smarter than the car:
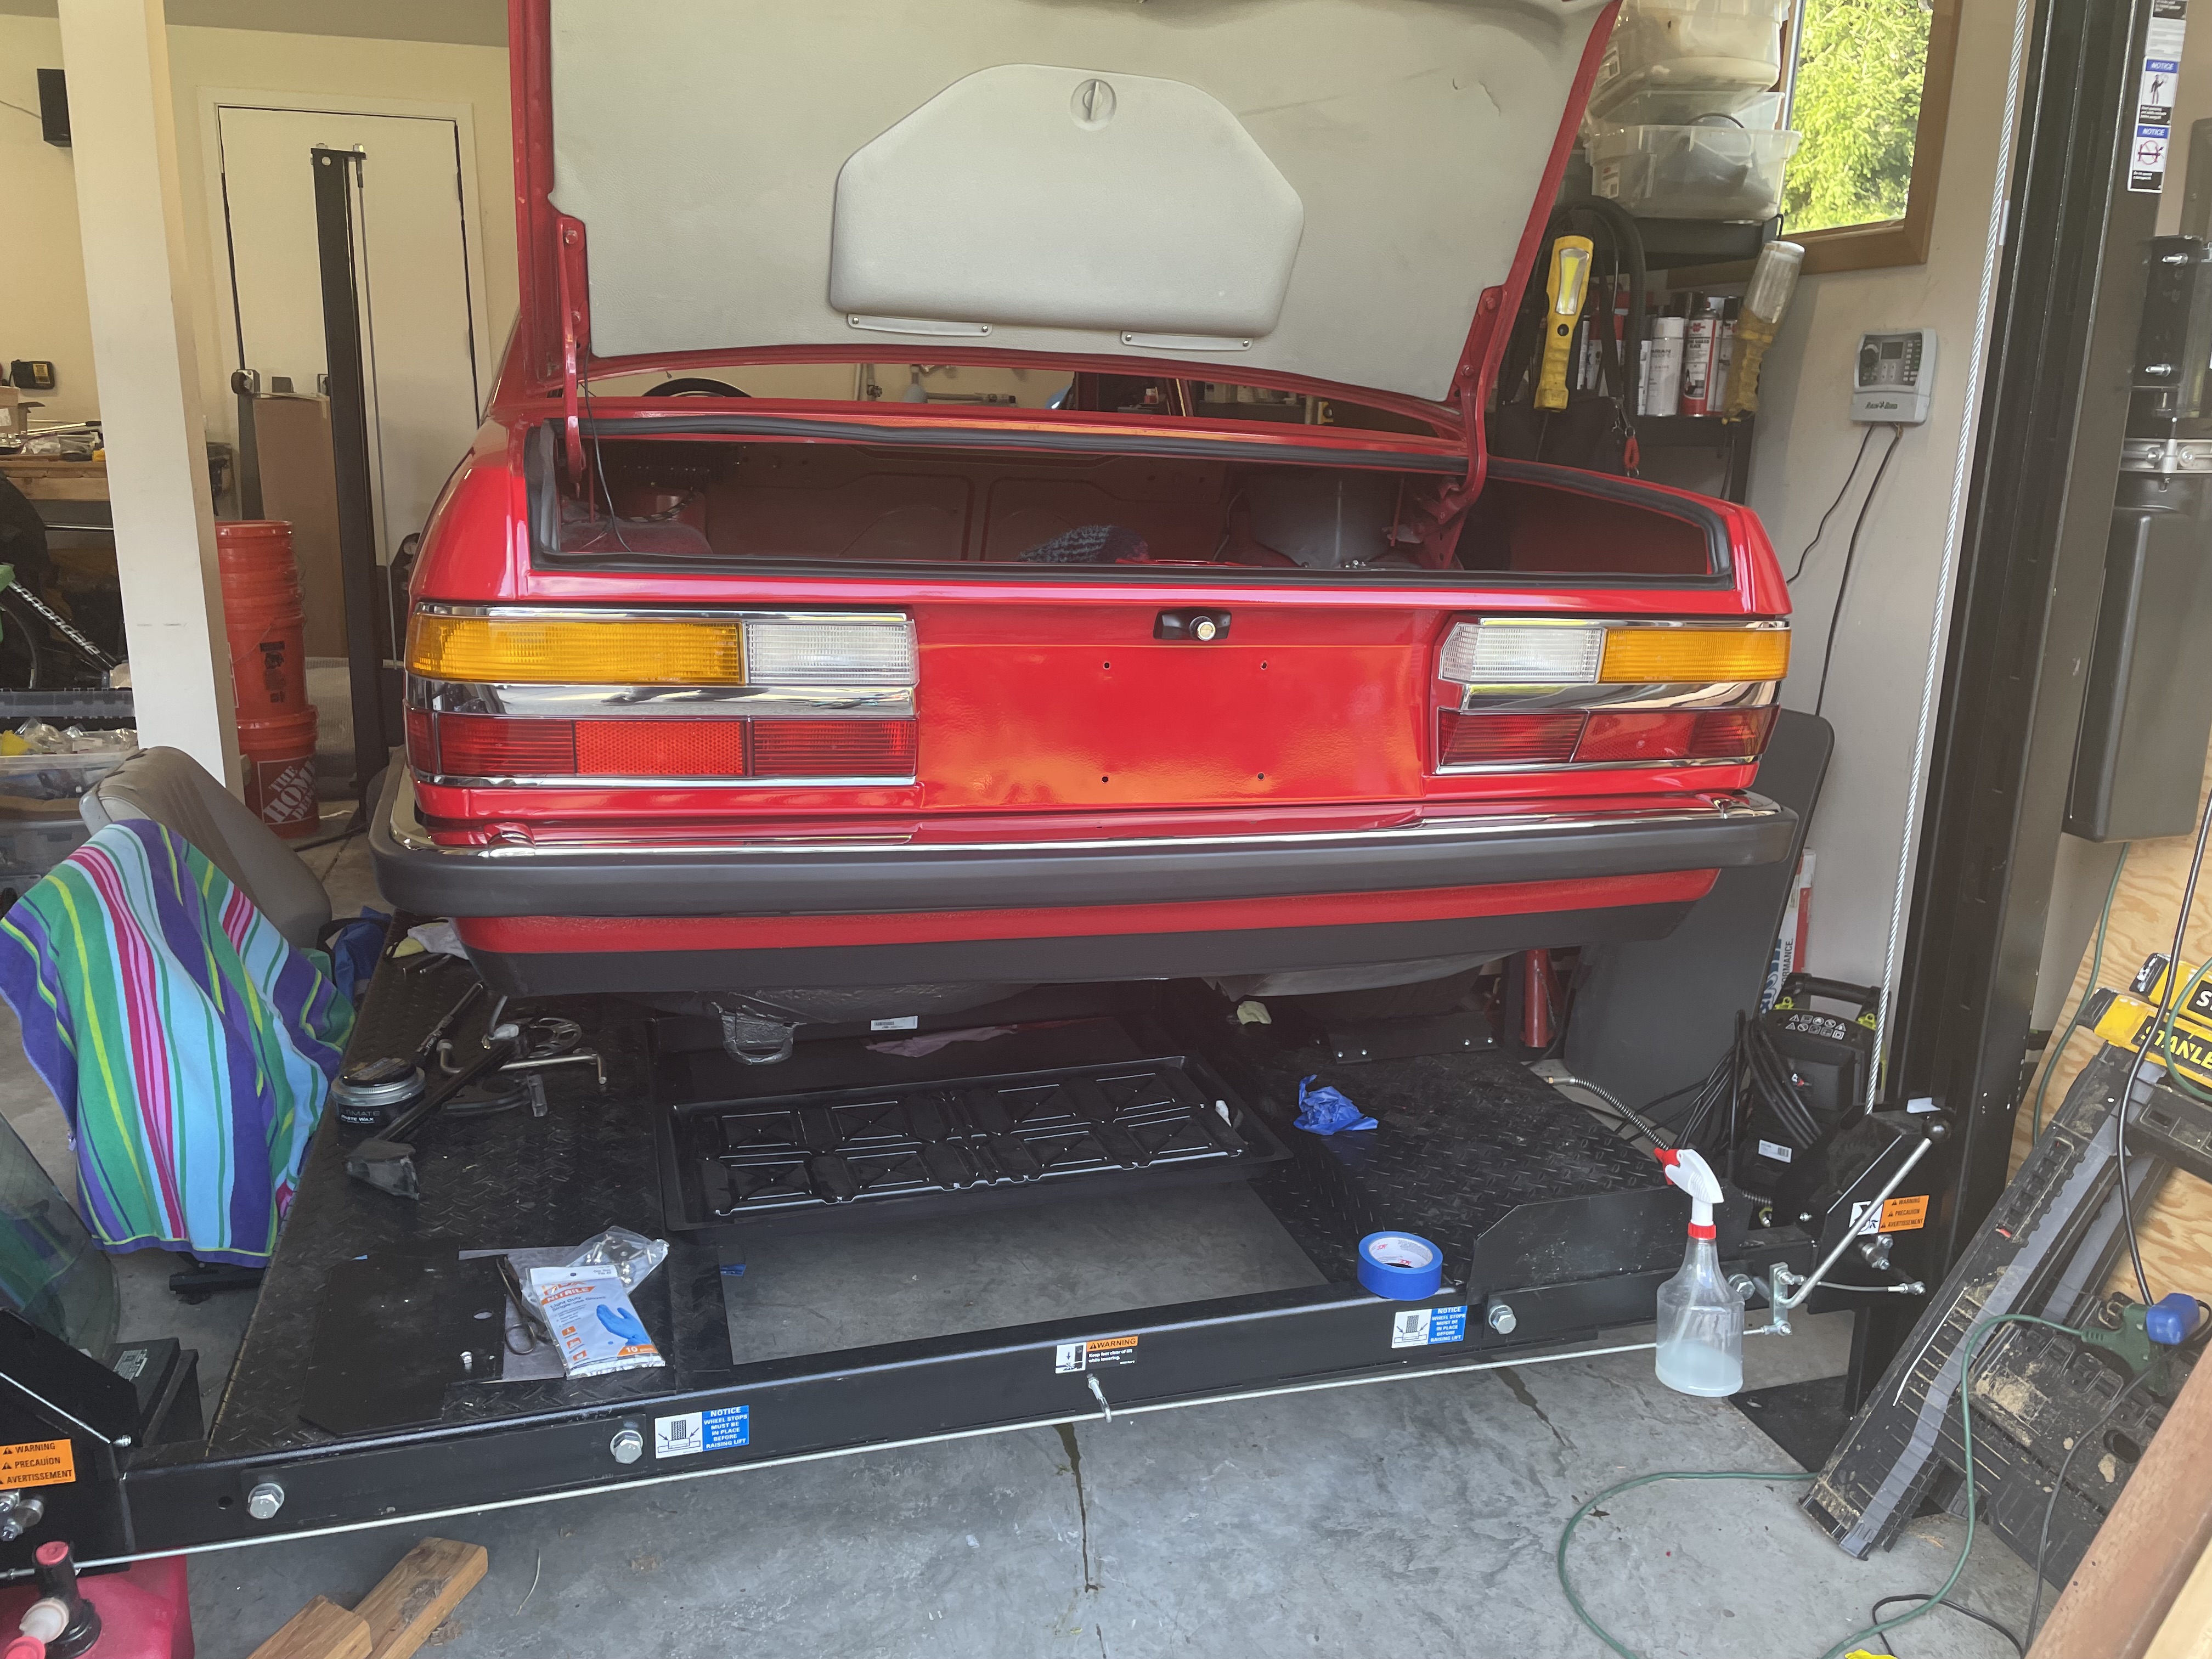
This is the right side bracket mounted with the tab inwards, which is exactly 180* from correct:
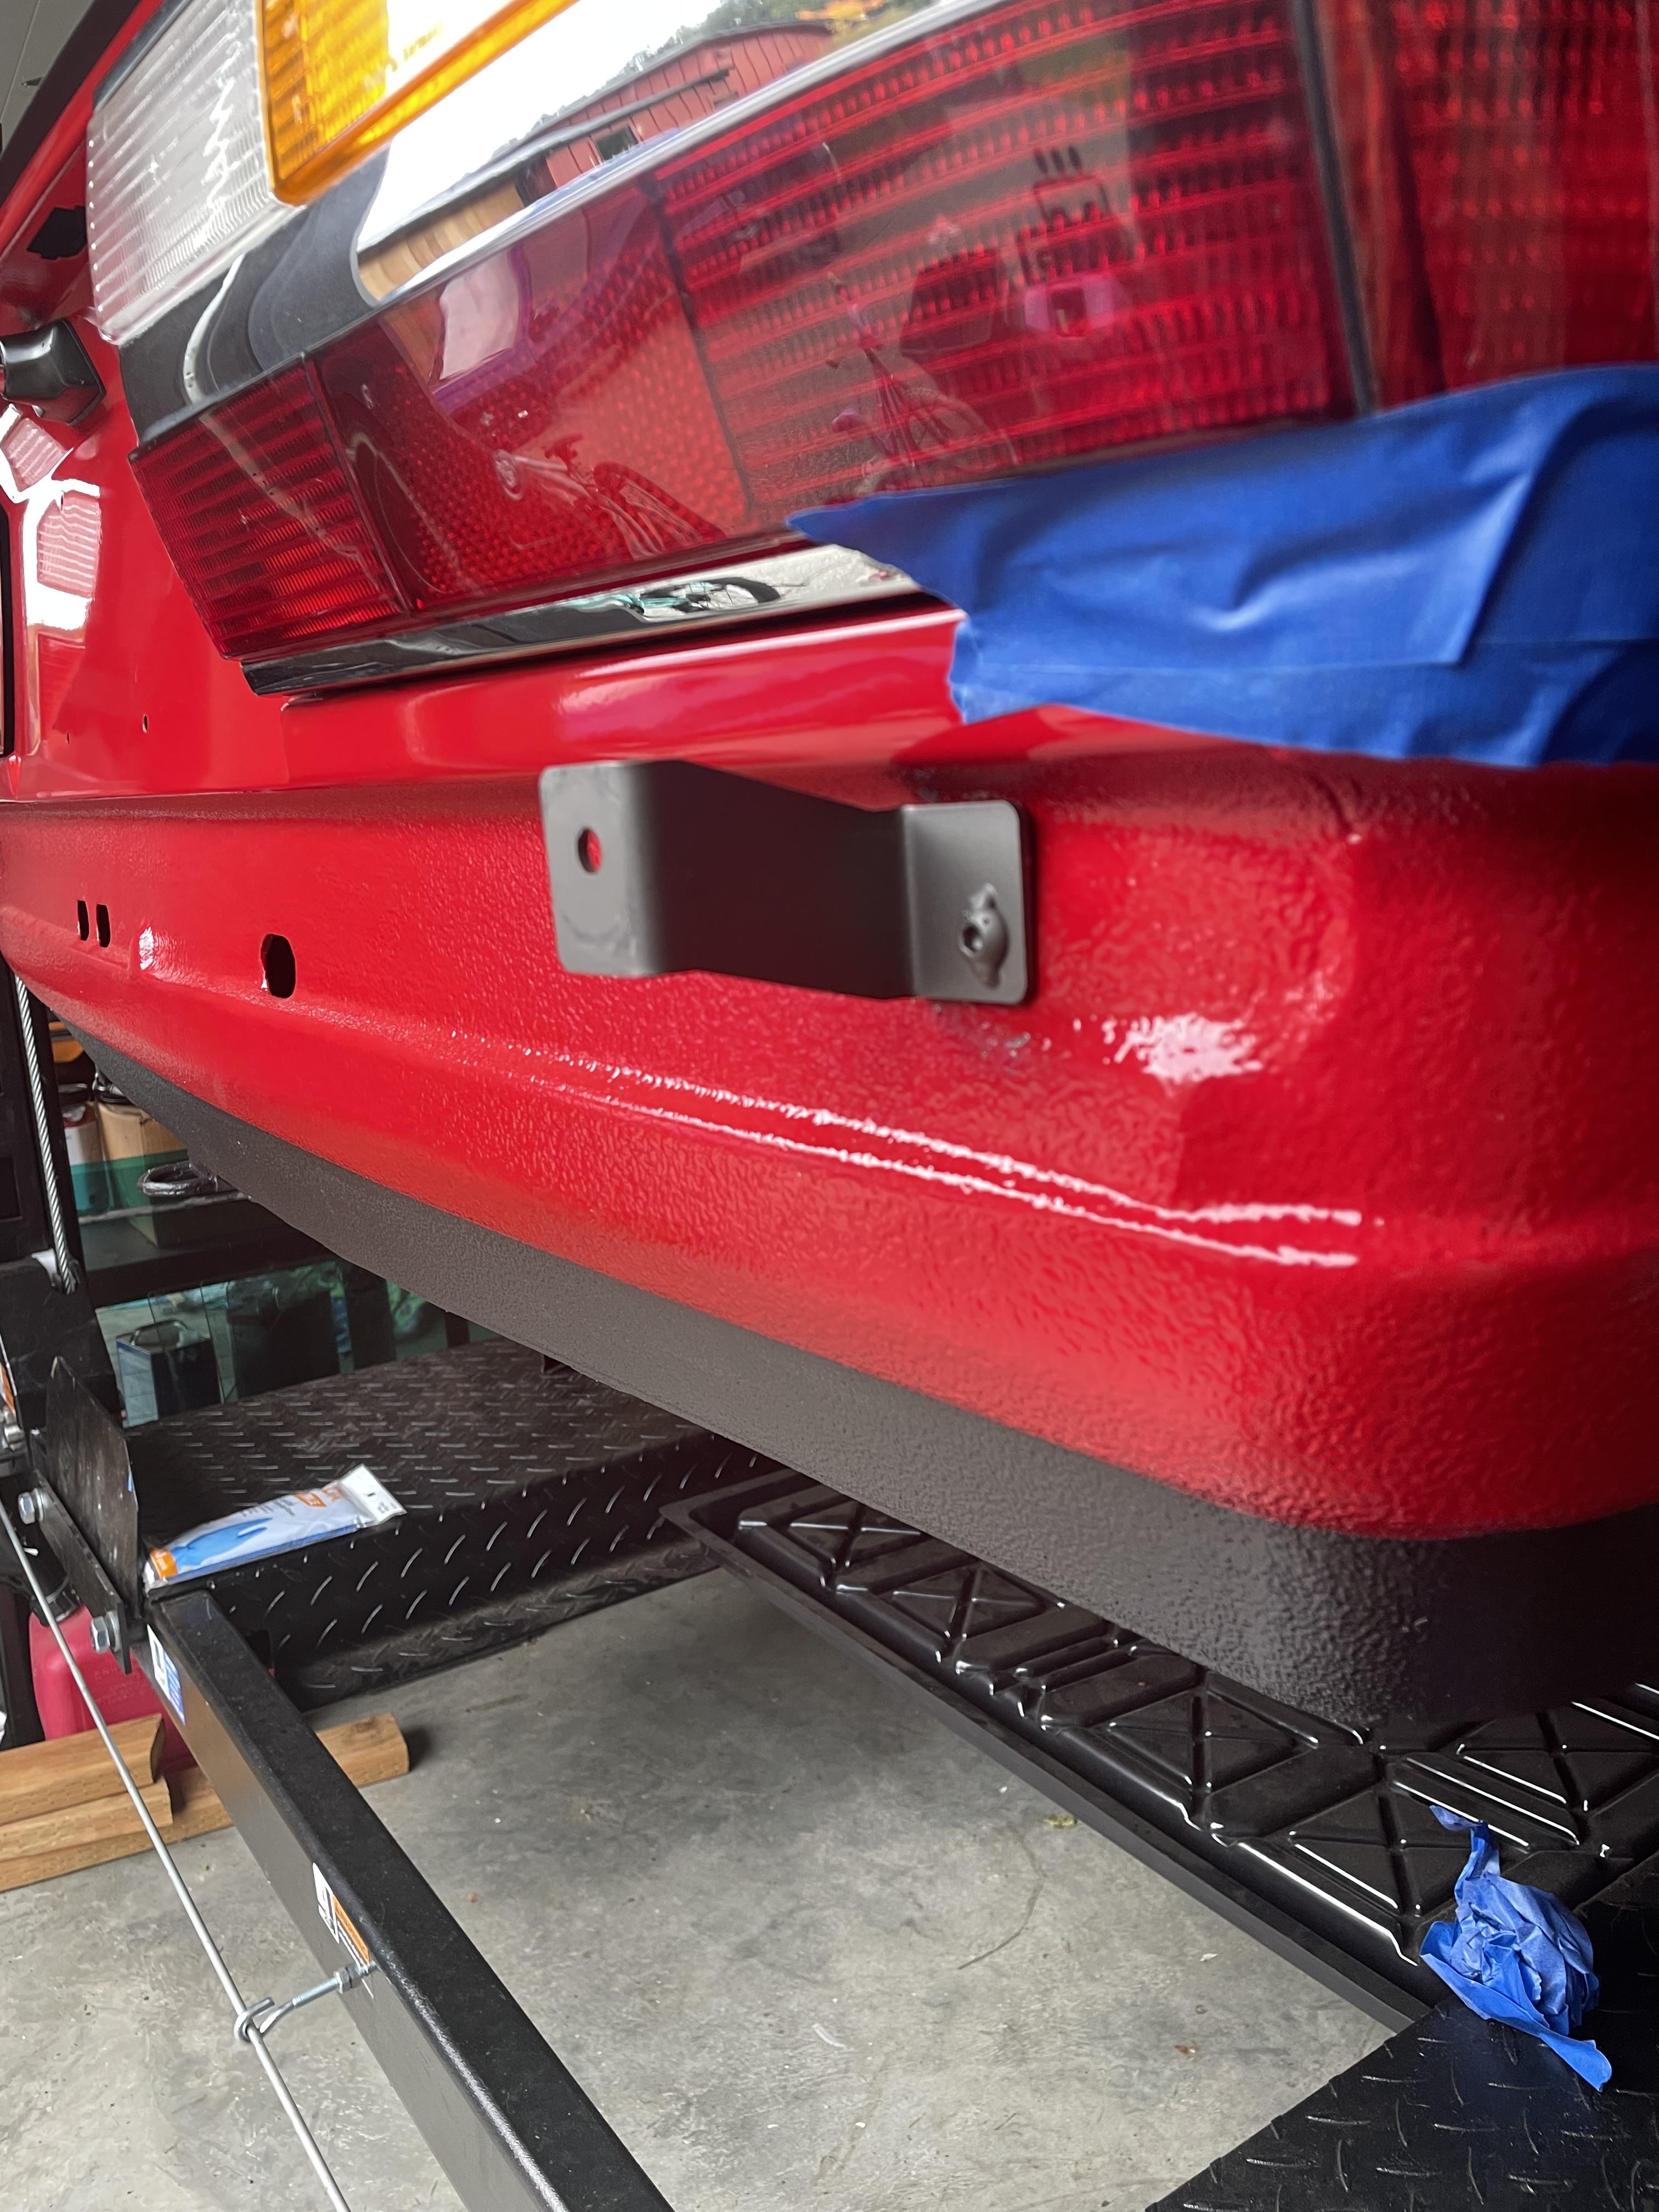
And now, you can see the car starting to look like an e28 again, with the left rear door knee trim installed along with the bumper:
More knee trim next week, and onto the rear right suspension tomorrow.
The rear bunker brackets are designed as a left and right bracket. As it turns out, the proper installation is with the tabs for mounting the bumper facing outwards and down. I had it backwards yesterday, and walked away from the darn car to think it over. Removed the bumper and brackets today, mounted the bumper, and viola! The bumper fits as intended. See, I am smarter than the car:

This is the right side bracket mounted with the tab inwards, which is exactly 180* from correct:

And now, you can see the car starting to look like an e28 again, with the left rear door knee trim installed along with the bumper:

More knee trim next week, and onto the rear right suspension tomorrow.
-
John in VA
- Posts: 5295
- Joined: Feb 12, 2006 12:00 PM
- Location: Leesburg, VA
Re: And so it starts, Maeve
gwb72tii wrote: Nov 04, 2023 7:37 PMRemoved the bumper and brackets today, mounted the bumper, and viola! The bumper fits as intended.

-
Blue Shadow
- Posts: 10291
- Joined: Feb 12, 2006 12:00 PM
- Location: SE PA
Re: And so it starts, Maeve
Fortunately this was not a timed test. winner might have been different.gwb72tii wrote: Nov 04, 2023 7:37 PM One thing I try to remember when working on cars as old as an e28, is "I'm smarter than the car". I had it backwards yesterday, and walked away from the darn car to think it over. Removed the bumper and brackets today, mounted the bumper, and viola! The bumper fits as intended. See, I am smarter than the car:
Re: And so it starts, Maeve
Lol had to laugh at that BS
-
Blue Shadow
- Posts: 10291
- Joined: Feb 12, 2006 12:00 PM
- Location: SE PA
Re: And so it starts, Maeve
Hey, John started it.
Re: And so it starts, Maeve
it's my way of spelling voila
-
Blue Shadow
- Posts: 10291
- Joined: Feb 12, 2006 12:00 PM
- Location: SE PA
Re: And so it starts, Maeve
Better than those that think it is half the name of a Washington town, walla, seen many times on this forum.
Re: And so it starts, Maeve
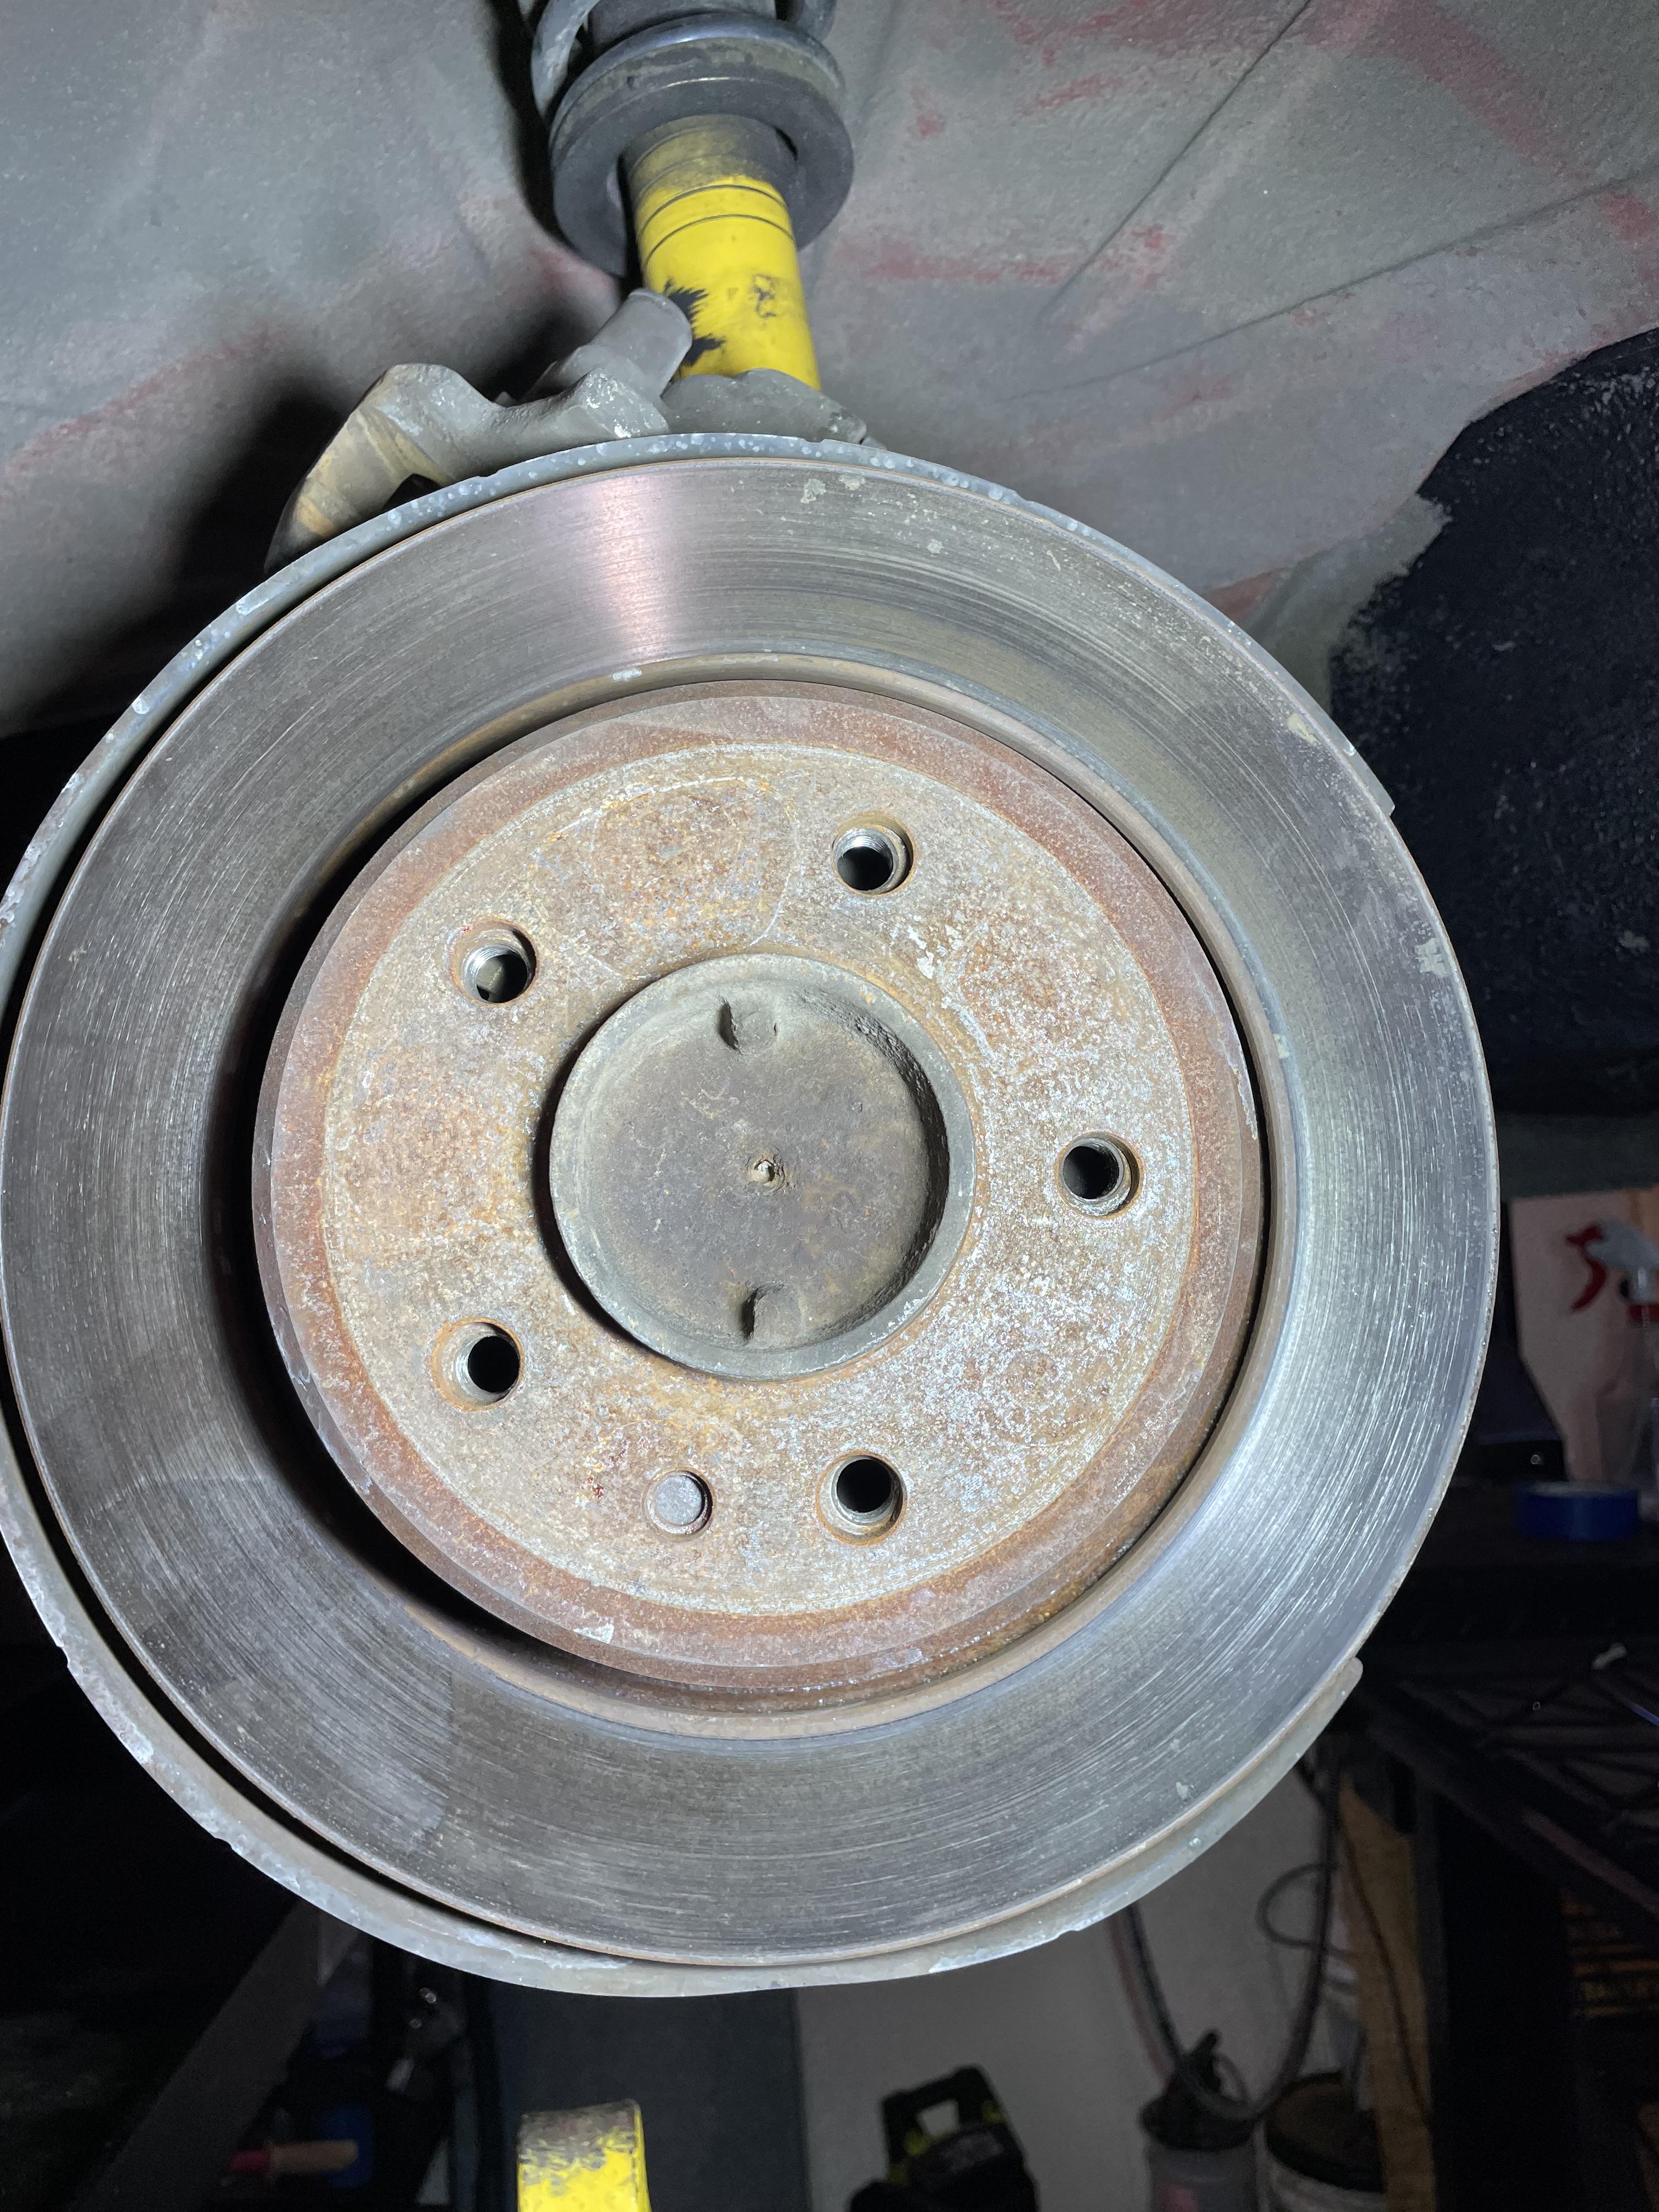
Surprise. It seems Maeve's rear brakes were upgraded by the PO to e34 brakes, I think. The rotor diameter, as close as I can tell with a tape measure, is 300mm, the same diameter as an e34.
The rotor's socket head locating screw was gone, and the threads are all chungered up, again by the PO. I think I can get a tap in there and clean them up enough to get a new set screw to thread in.
One thing I always do with a new-to-me old car is a complete brake job, so the rotors and pads will be new.
Now, I wonder what the PO did to the front brakes?
wait, the rotor is vented and 20mm wide, so an e34 540i rotor, I think.

Re: And so it starts, Maeve
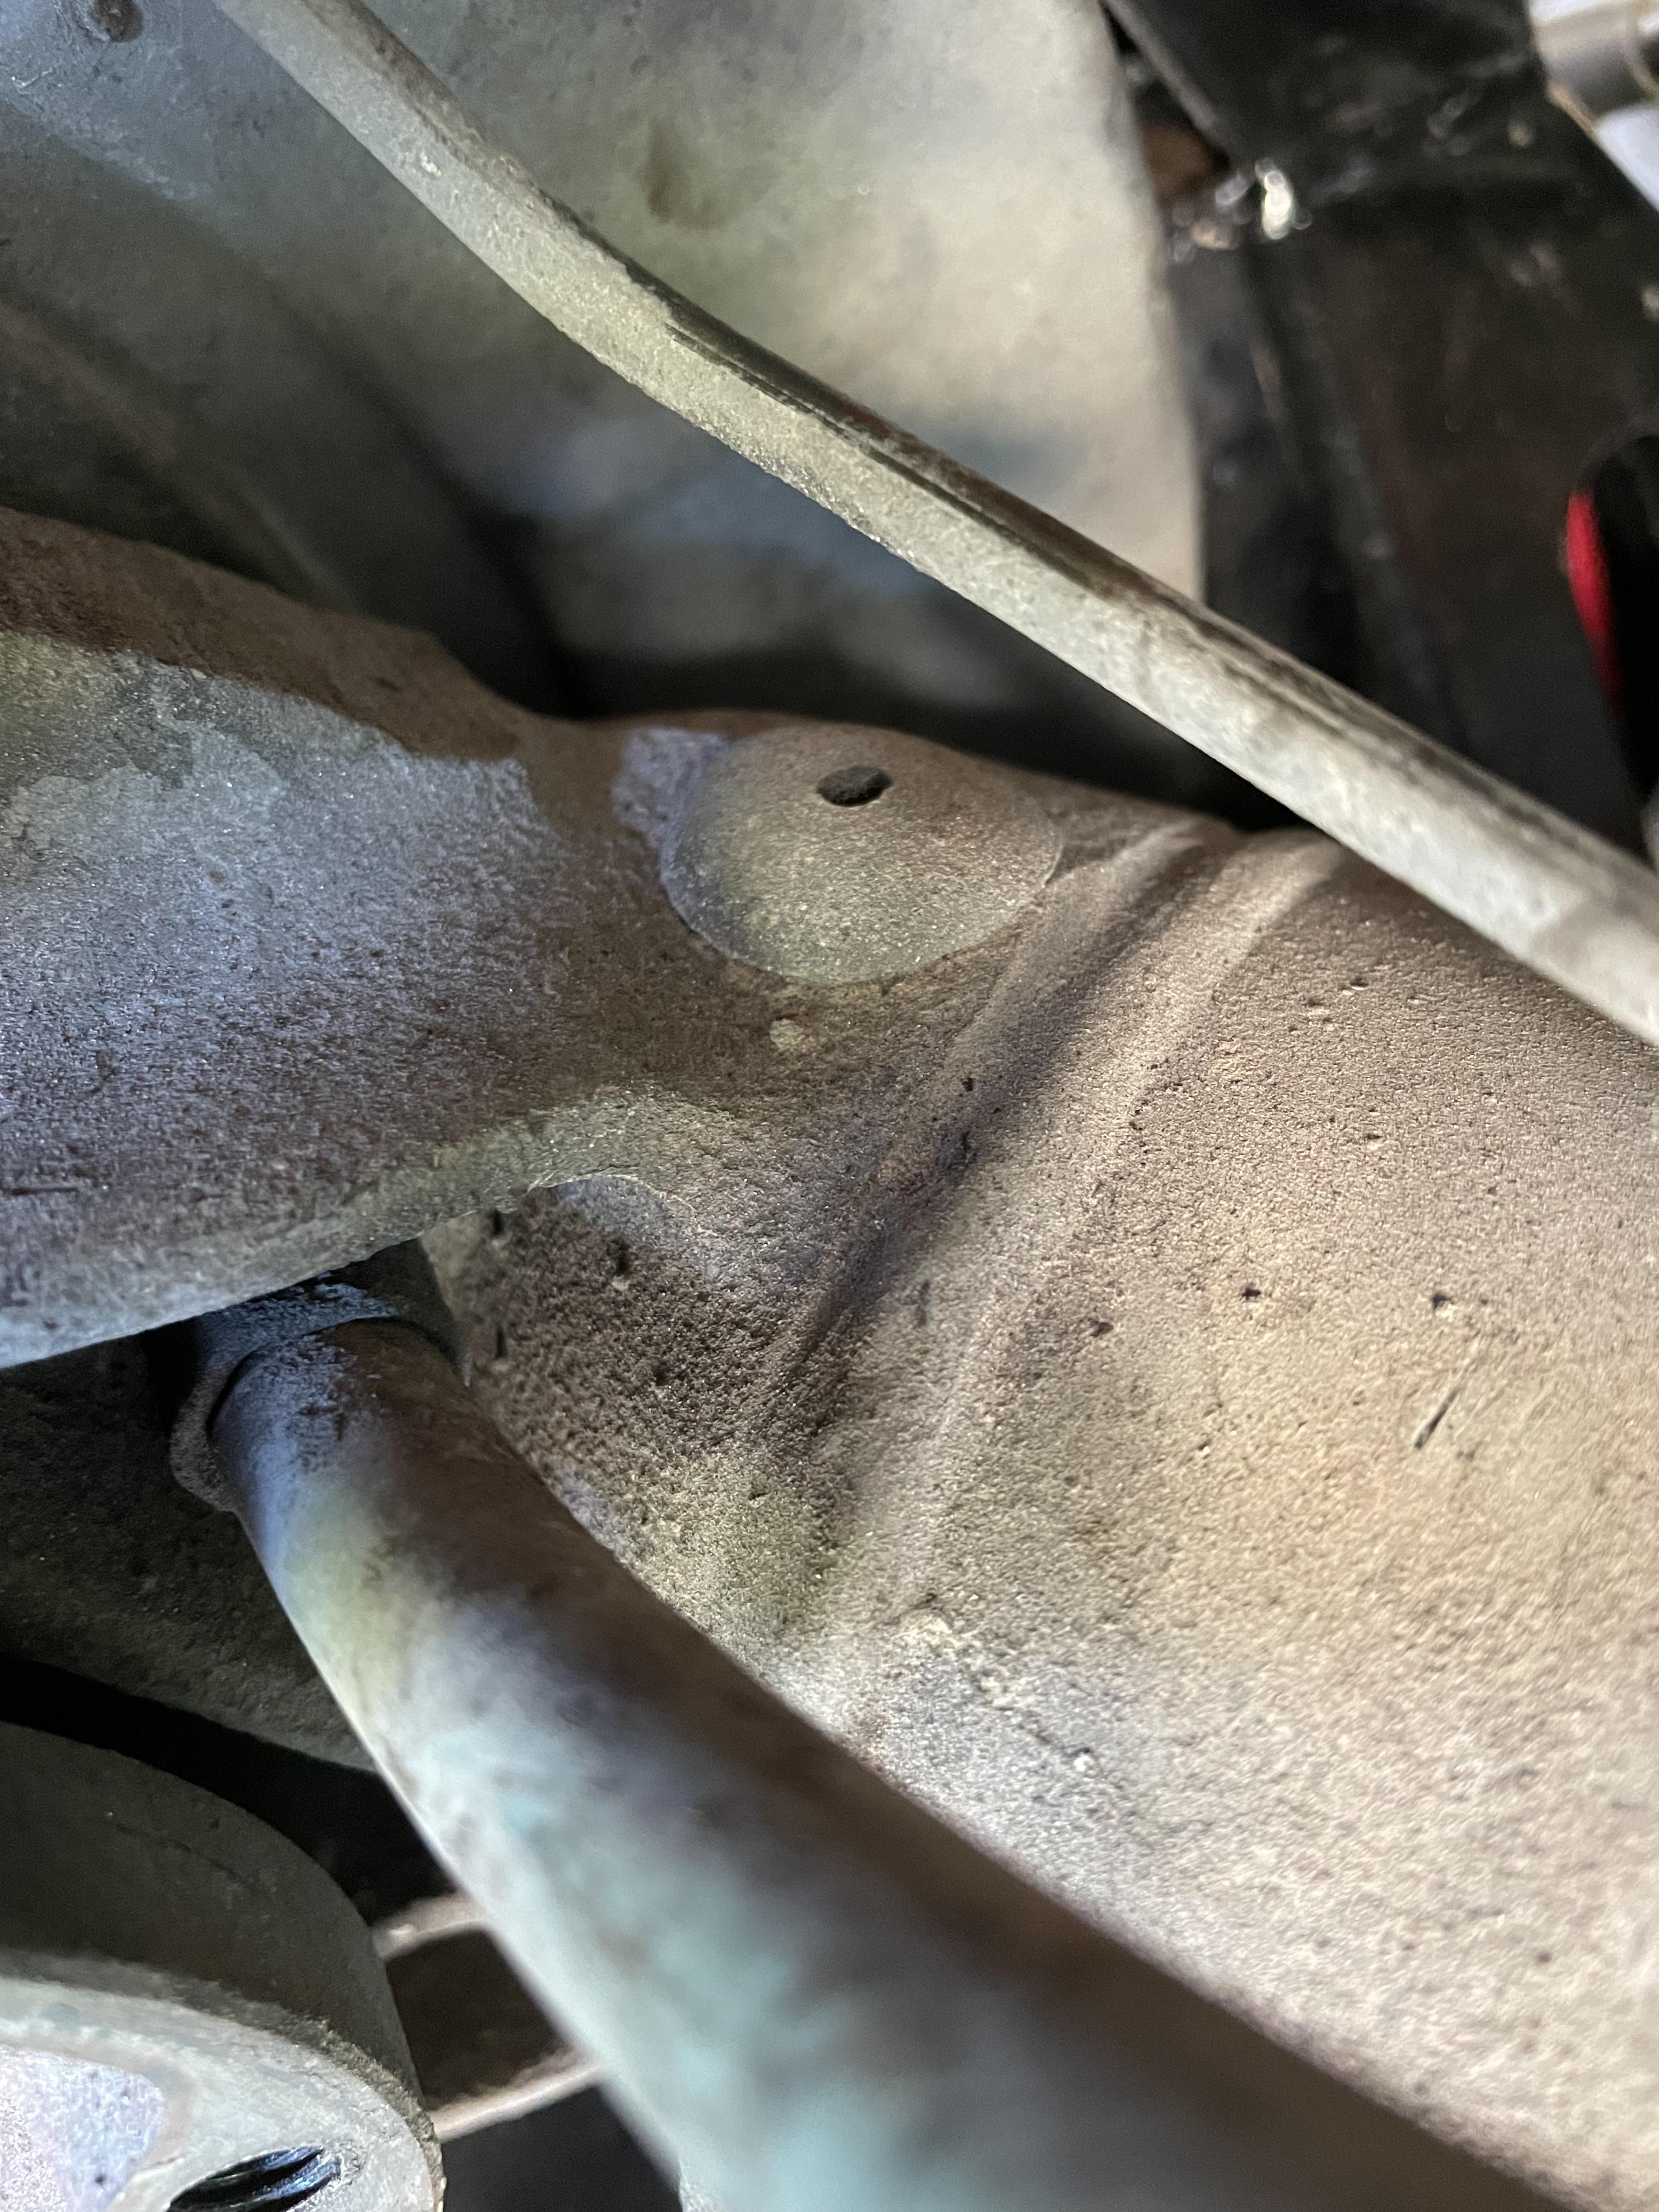
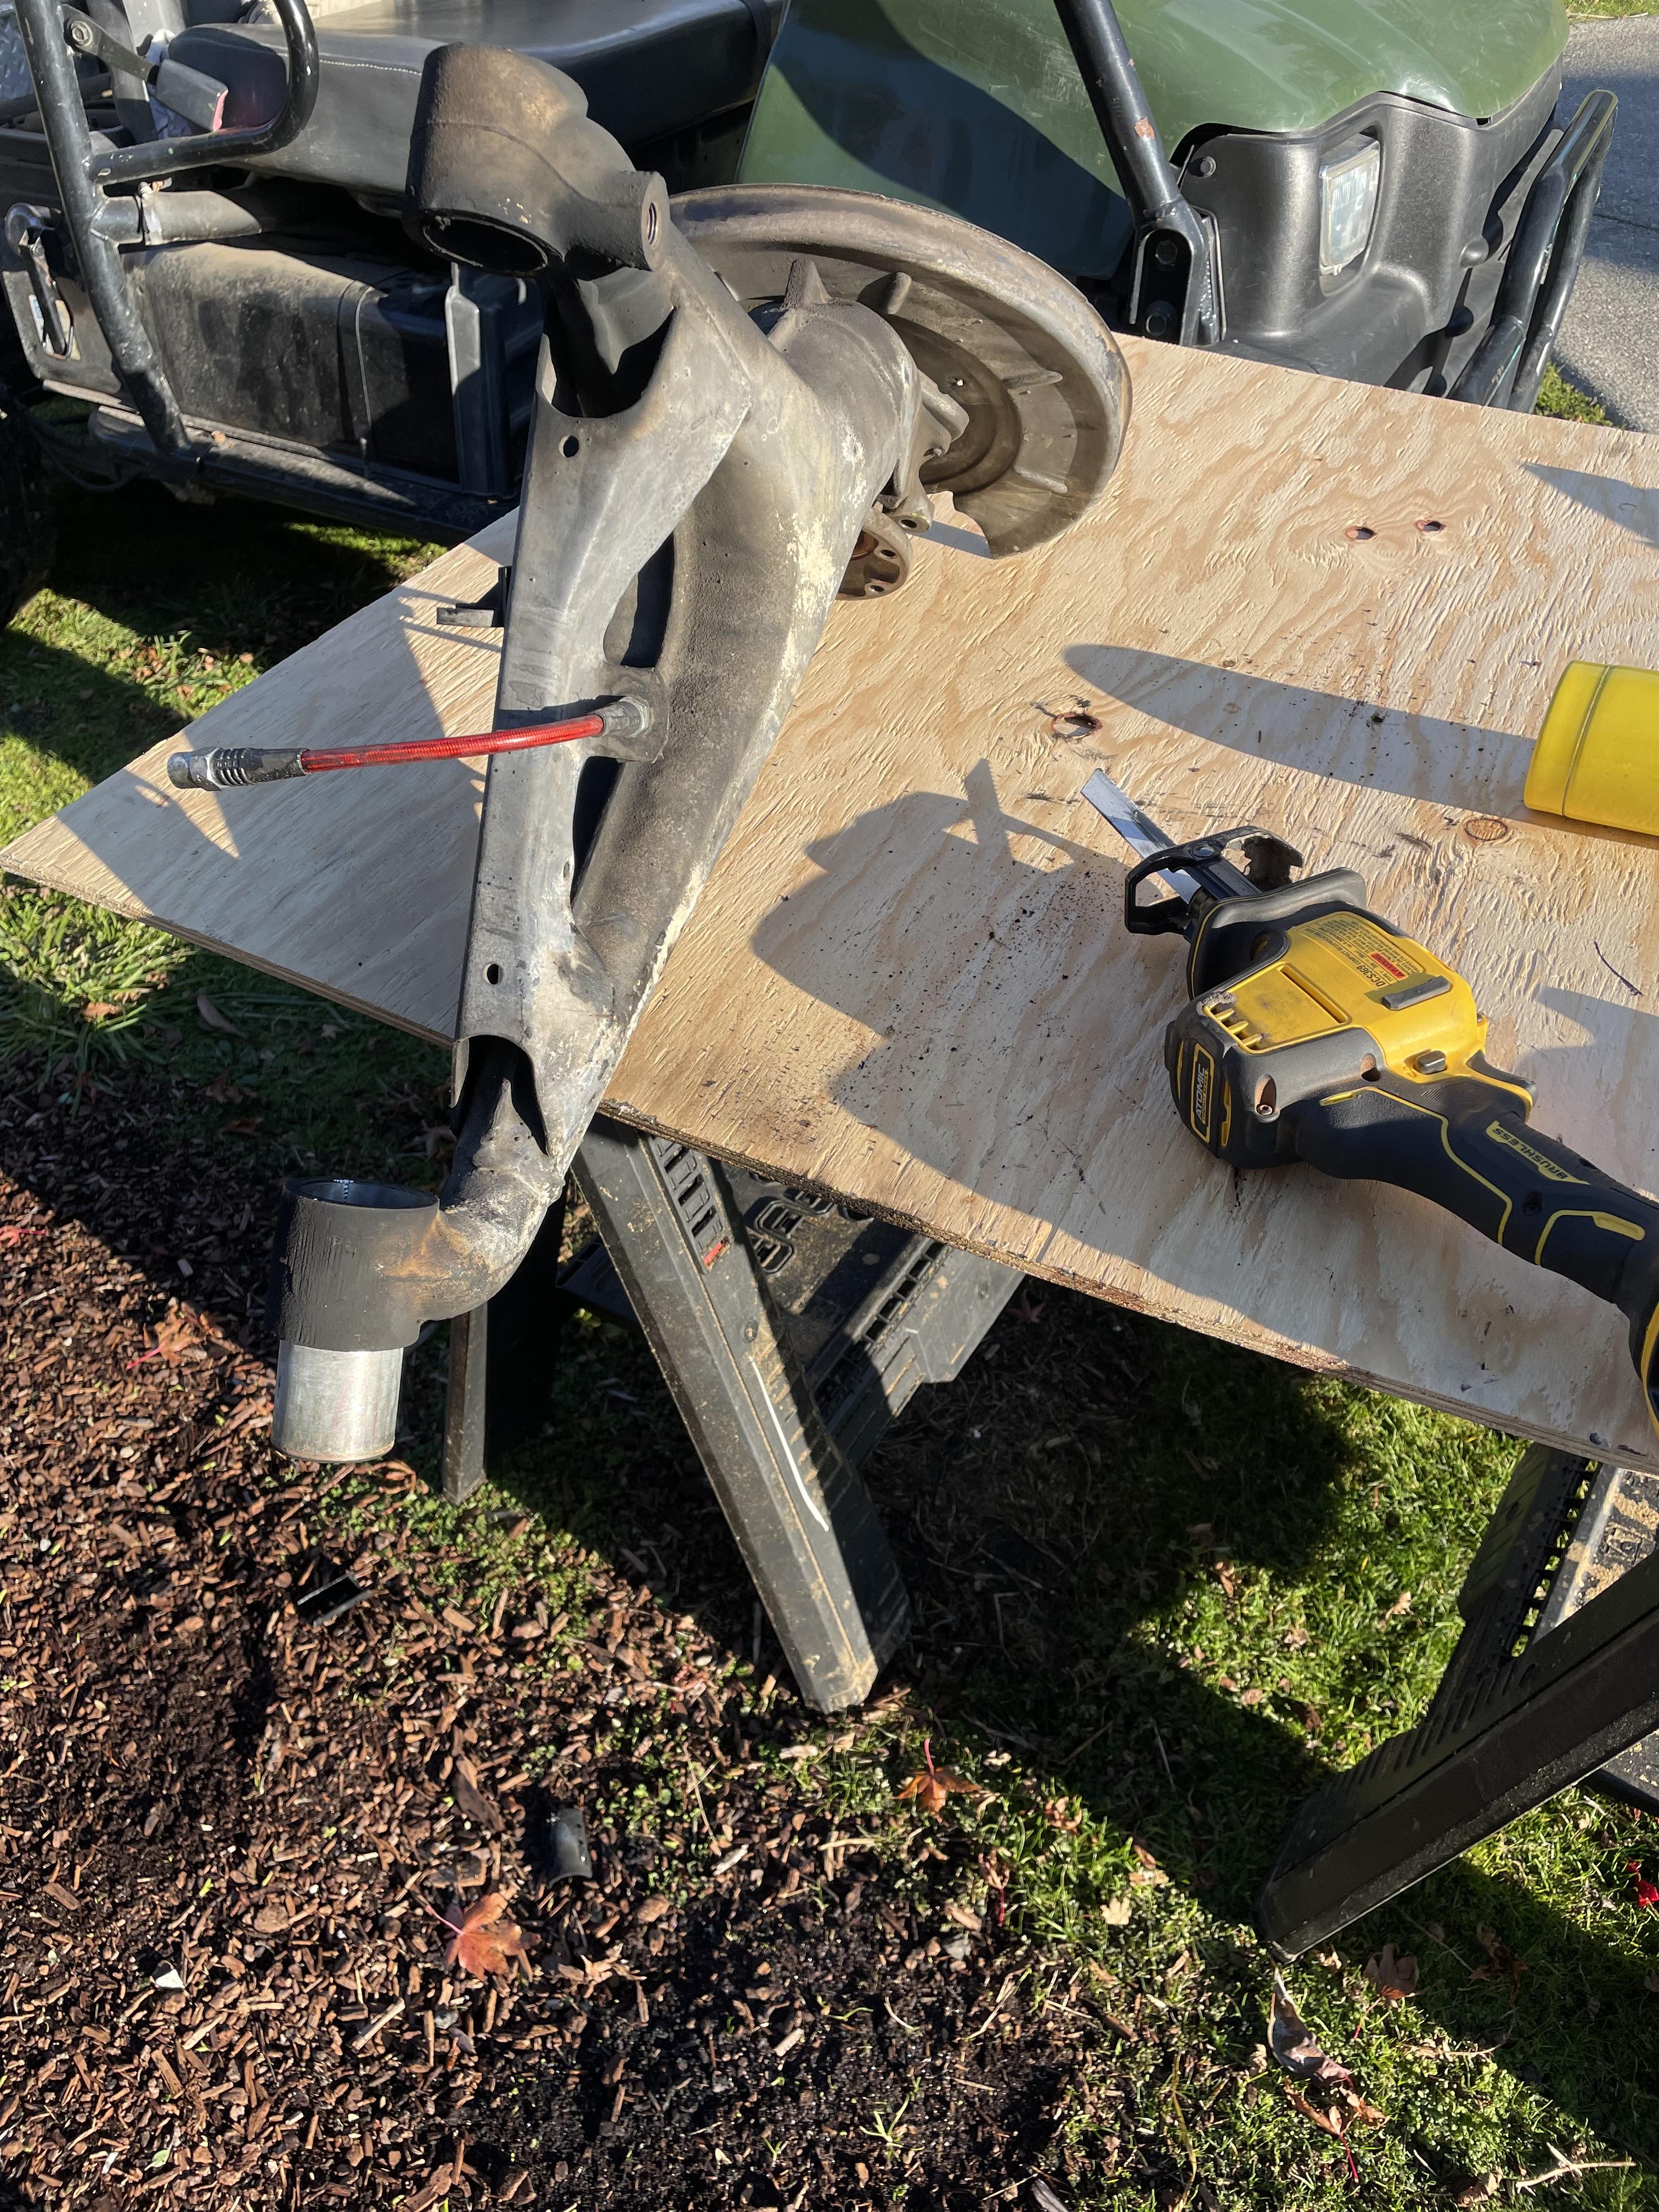
Removed the left rear trailing arm to replace the bushings. I couldn't find any step by step instructions on rear trailing arm removal, so I started taking everything apart, and then got stumped on this: the parking brake cable. Finally found it just pulls out, no fasteners:
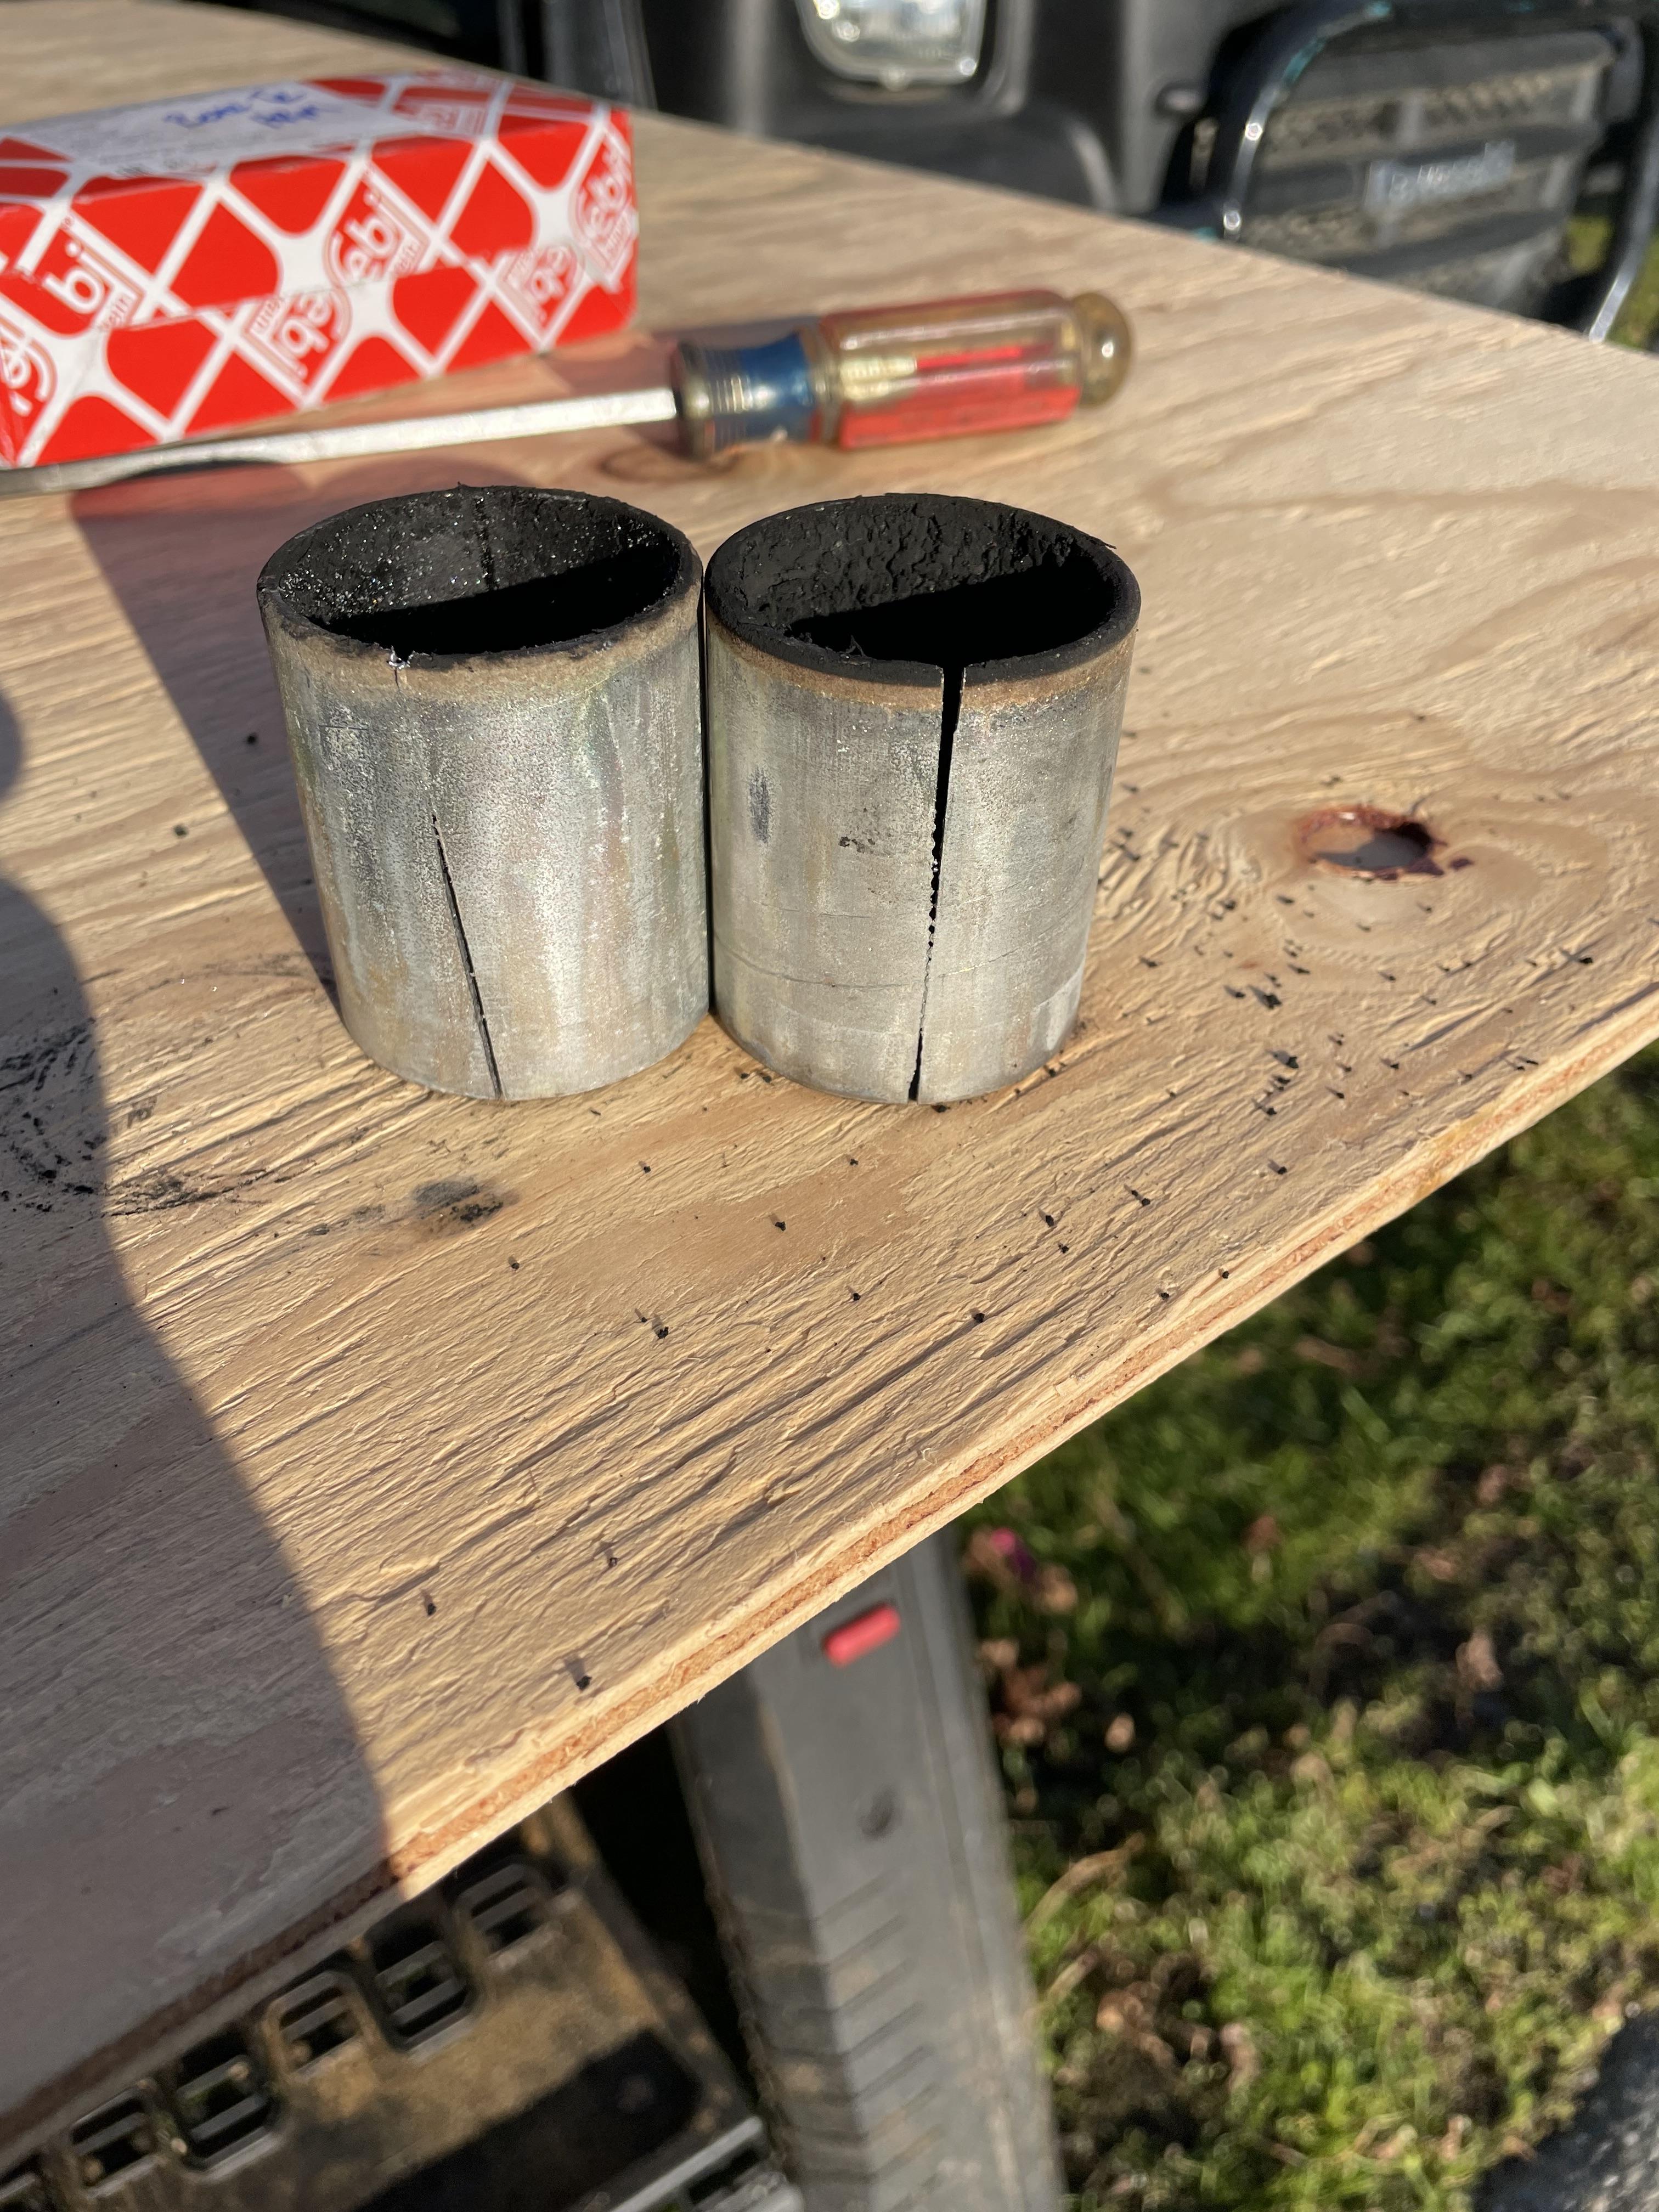
I followed what I thought would be the easiest method to remove the bushings, removing the inner bits and then map gas. First I drilled out the inner most steel sleeve:
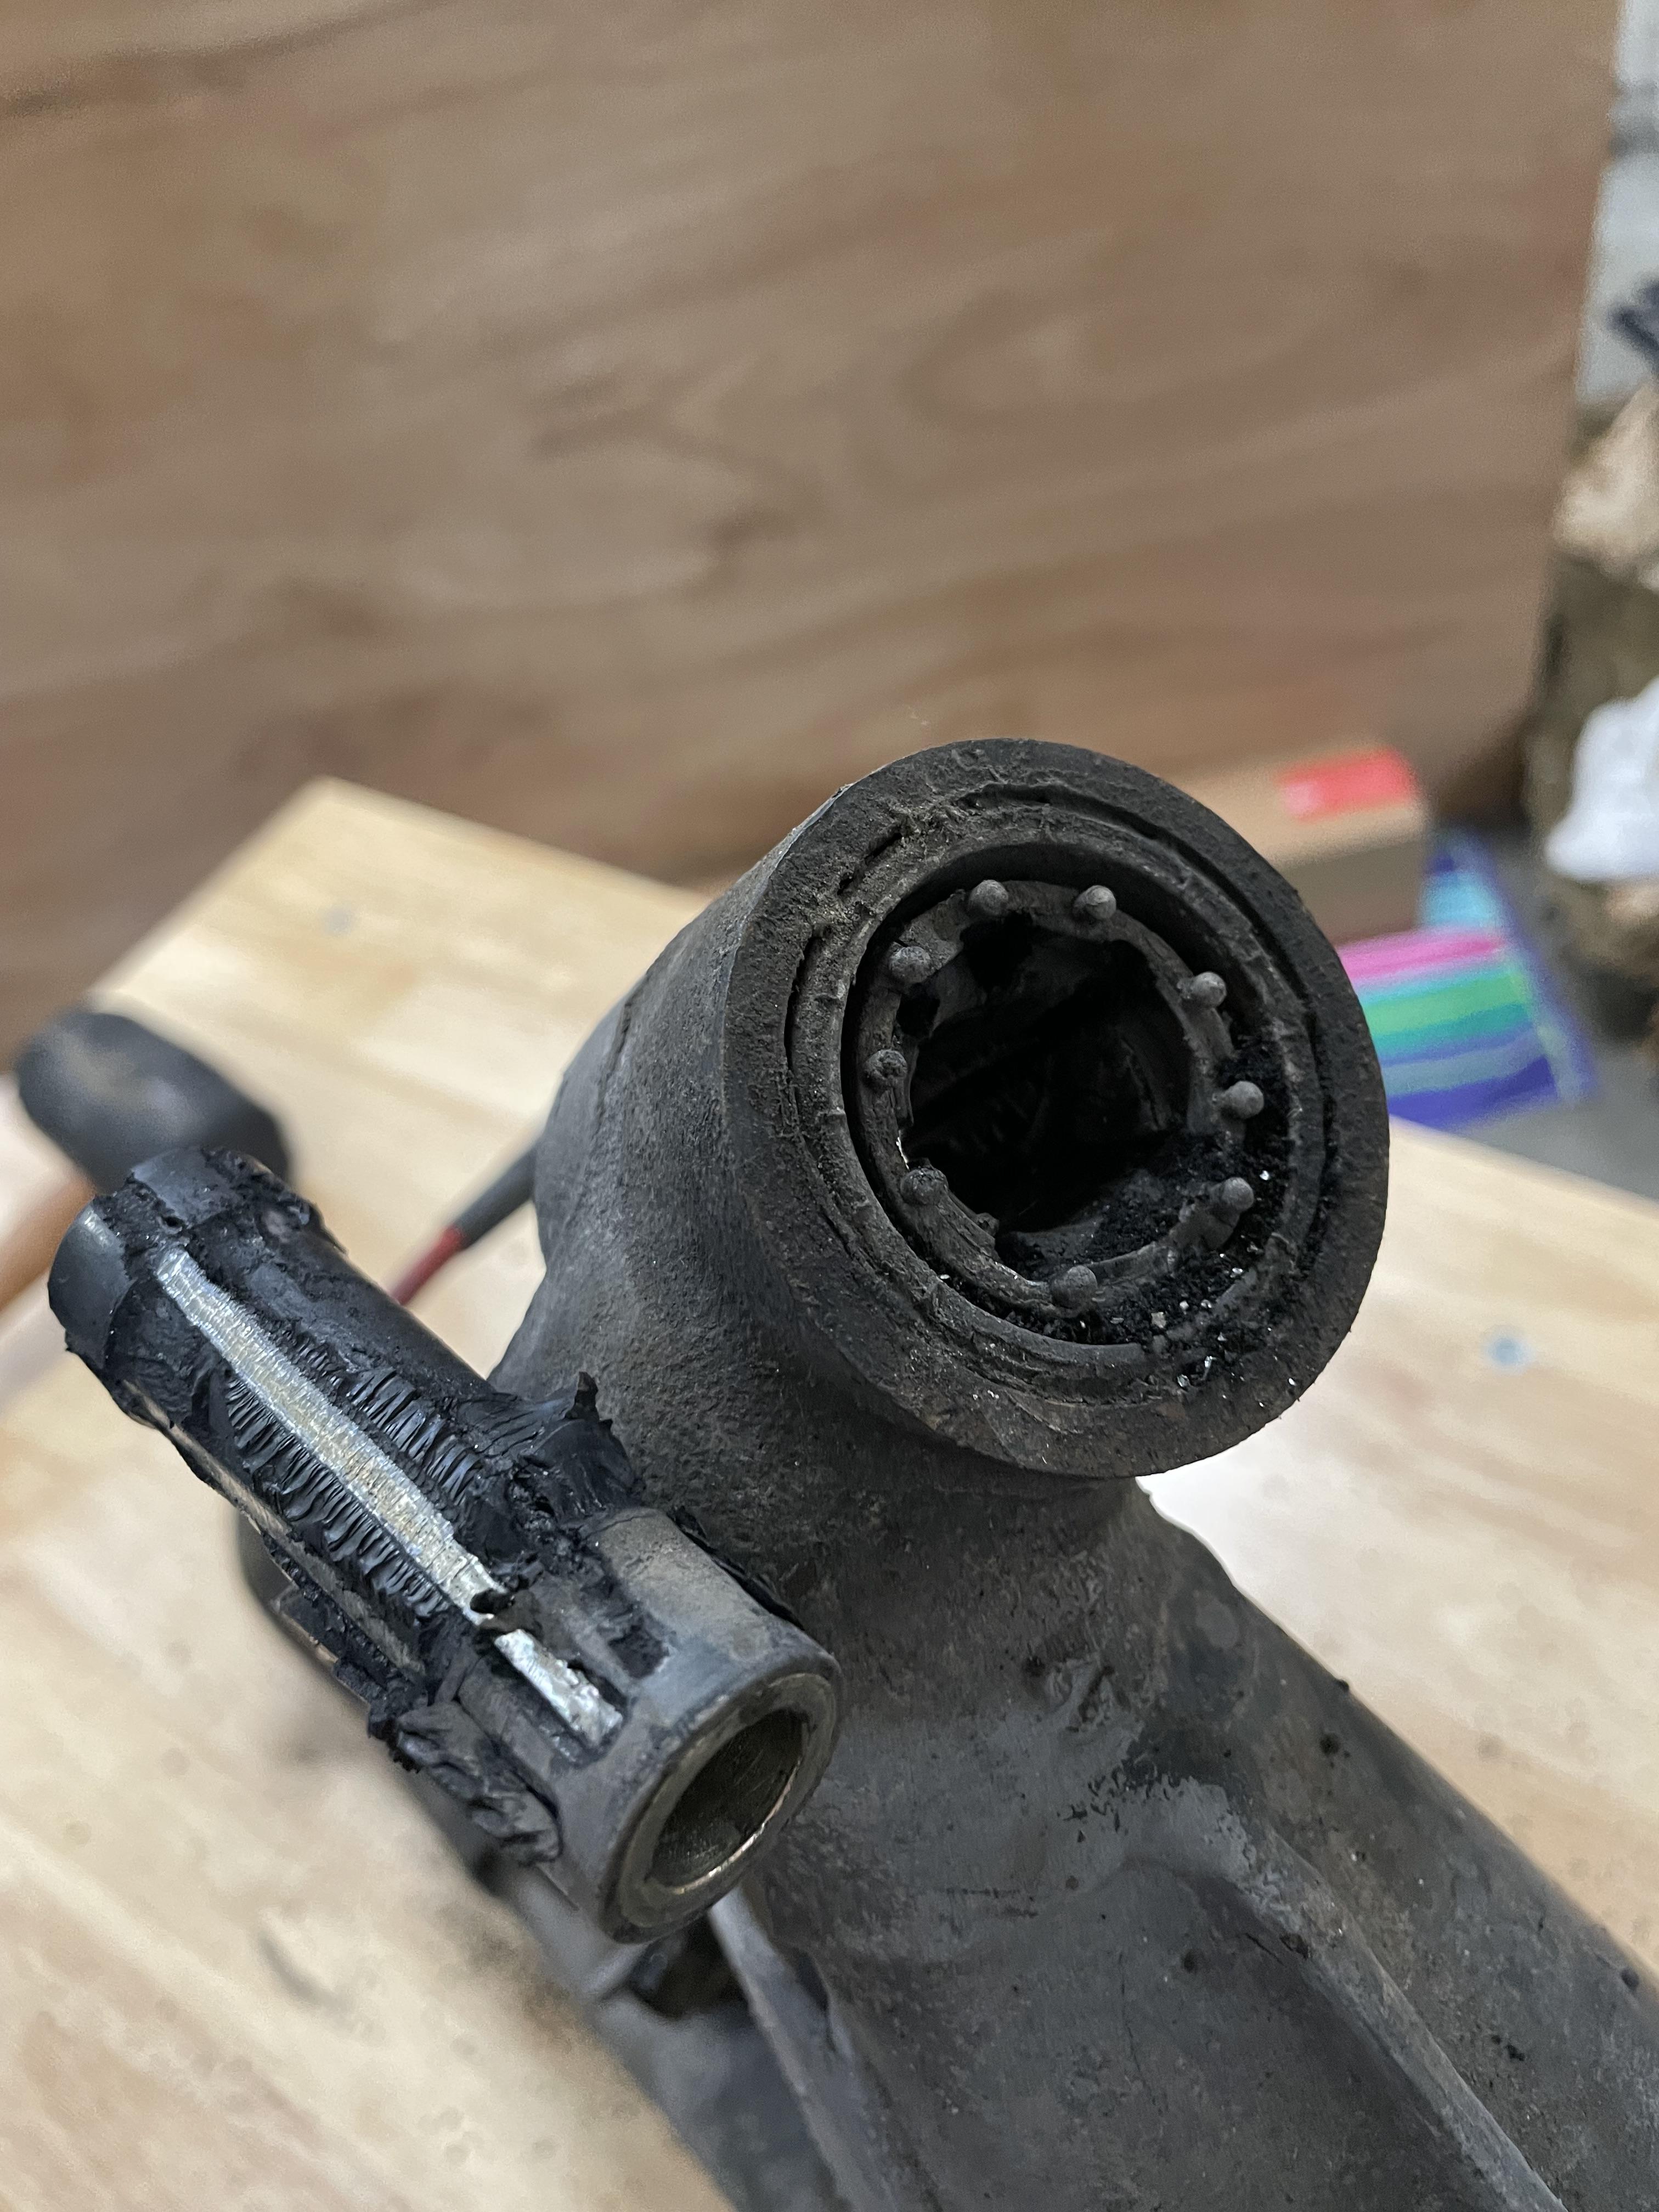
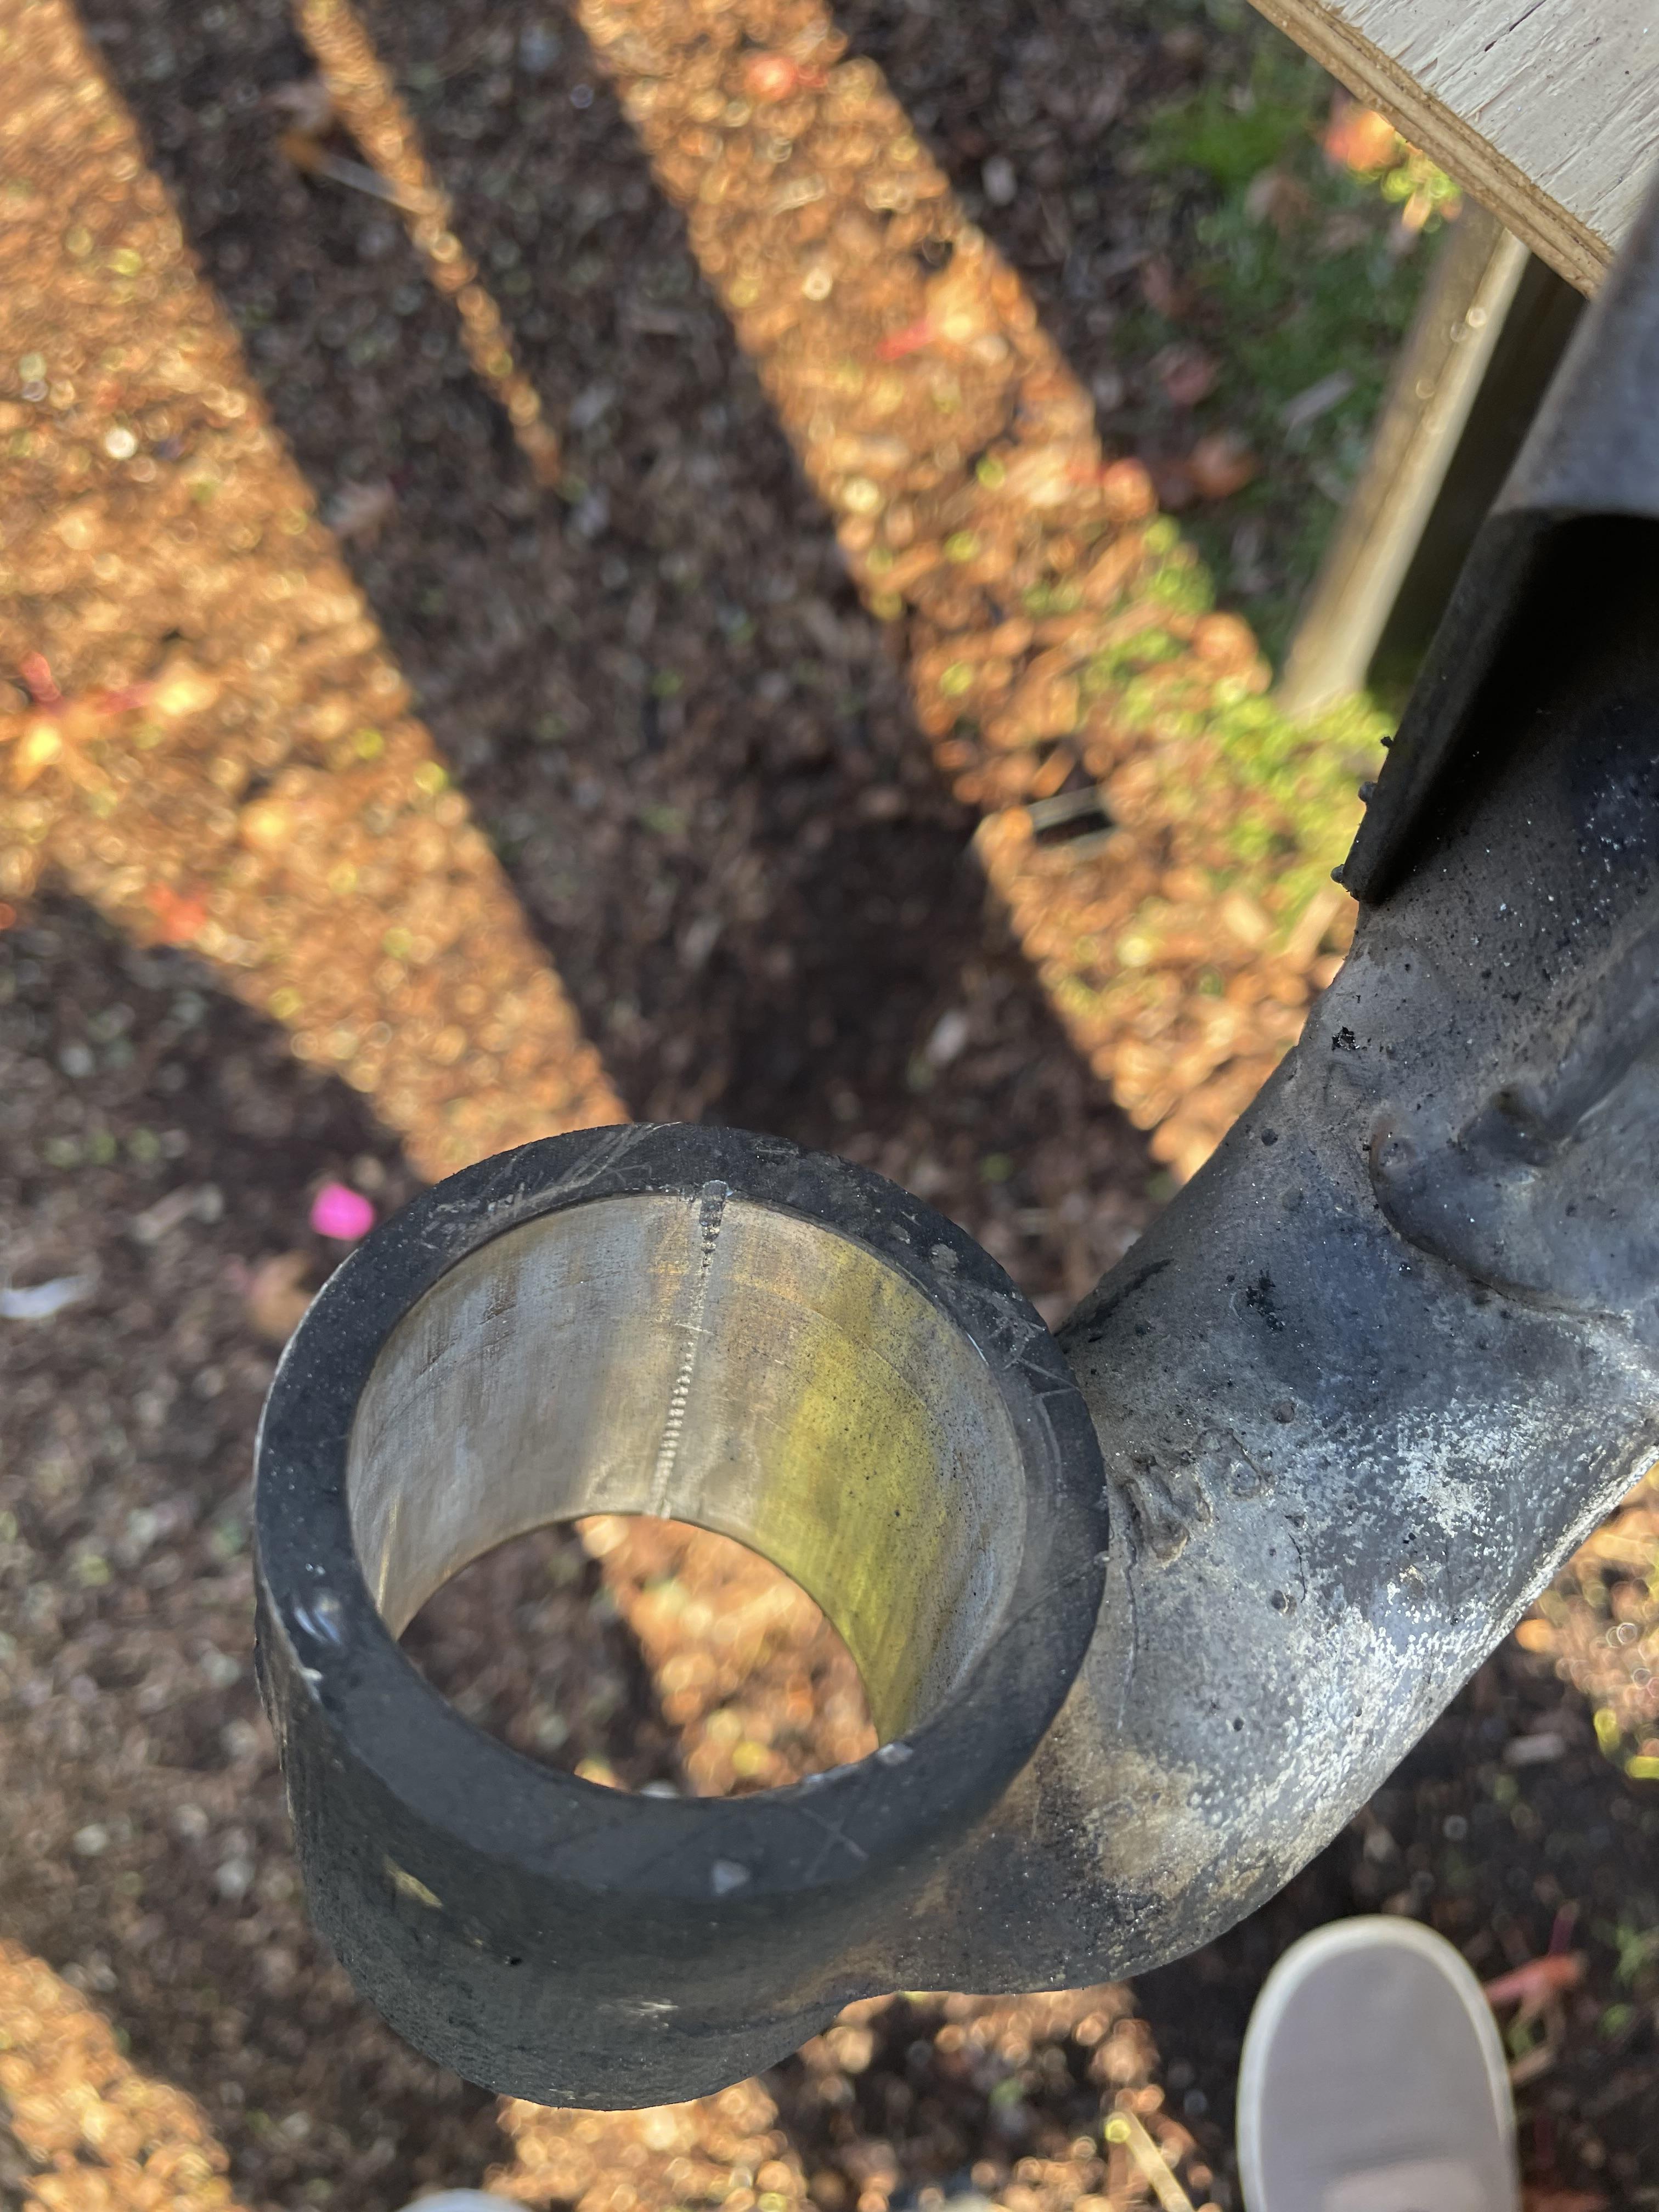
Then I burned out all the rubber bits and the next steel sleeve. Once I was down to just the outer steel sleeve, I cut one groove thru the sleeve and it popped out. Luckily I took my time and didn't damage the trailing arm much:
I've been stressing on the rear trunk latch. It is all together, but when I push the latch button in, it leaves about 1/8" unused travel, it doesn't fully depress the mechanism. I verified it was reinstalled correctly, so in a moment of truth, I closed the trunk lid until it latched. And to my relief, pushing in the trunk lock button does unlock the trunk.

I followed what I thought would be the easiest method to remove the bushings, removing the inner bits and then map gas. First I drilled out the inner most steel sleeve:

Then I burned out all the rubber bits and the next steel sleeve. Once I was down to just the outer steel sleeve, I cut one groove thru the sleeve and it popped out. Luckily I took my time and didn't damage the trailing arm much:


I've been stressing on the rear trunk latch. It is all together, but when I push the latch button in, it leaves about 1/8" unused travel, it doesn't fully depress the mechanism. I verified it was reinstalled correctly, so in a moment of truth, I closed the trunk lid until it latched. And to my relief, pushing in the trunk lock button does unlock the trunk.
Re: And so it starts, Maeve
and, the boot latch fear is real.
Much to be thankful for,
Re: And so it starts, Maeve
So now onto installing the replacement bushings. Here's what I'm going to try, freeze the bushings to hopefully reduce the OD a small amount, and get the TA warm, but not hot. Then see if I can then tap the bushing in with a socket. I'll report back in a few hours....
Well that didn't work. Tried the threaded rod with assembly lube on the bushing, that did not work. We are currently trying the vice method, and have the bushing about half way home. It gets stuck, and then if you take a hammer and tap the TA at the bushing it lets go and works its way in. Slow going. So far we've managed to bend the hell out of the vice handle.
Well that didn't work. Tried the threaded rod with assembly lube on the bushing, that did not work. We are currently trying the vice method, and have the bushing about half way home. It gets stuck, and then if you take a hammer and tap the TA at the bushing it lets go and works its way in. Slow going. So far we've managed to bend the hell out of the vice handle.
-
Blue Shadow
- Posts: 10291
- Joined: Feb 12, 2006 12:00 PM
- Location: SE PA
Re: And so it starts, Maeve
bushing tool, a chuck of all thread a large socket to receive the end of the bushing and a socket to push the bushing on the other end and a wrench worked a treat when I did the E23 bushings.
Re: And so it starts, Maeve
tried that BS, no go
Re: And so it starts, Maeve
And so it goes.
Bushing installation is proving to be difficult, although I think it's peculiar to my car perhaps.
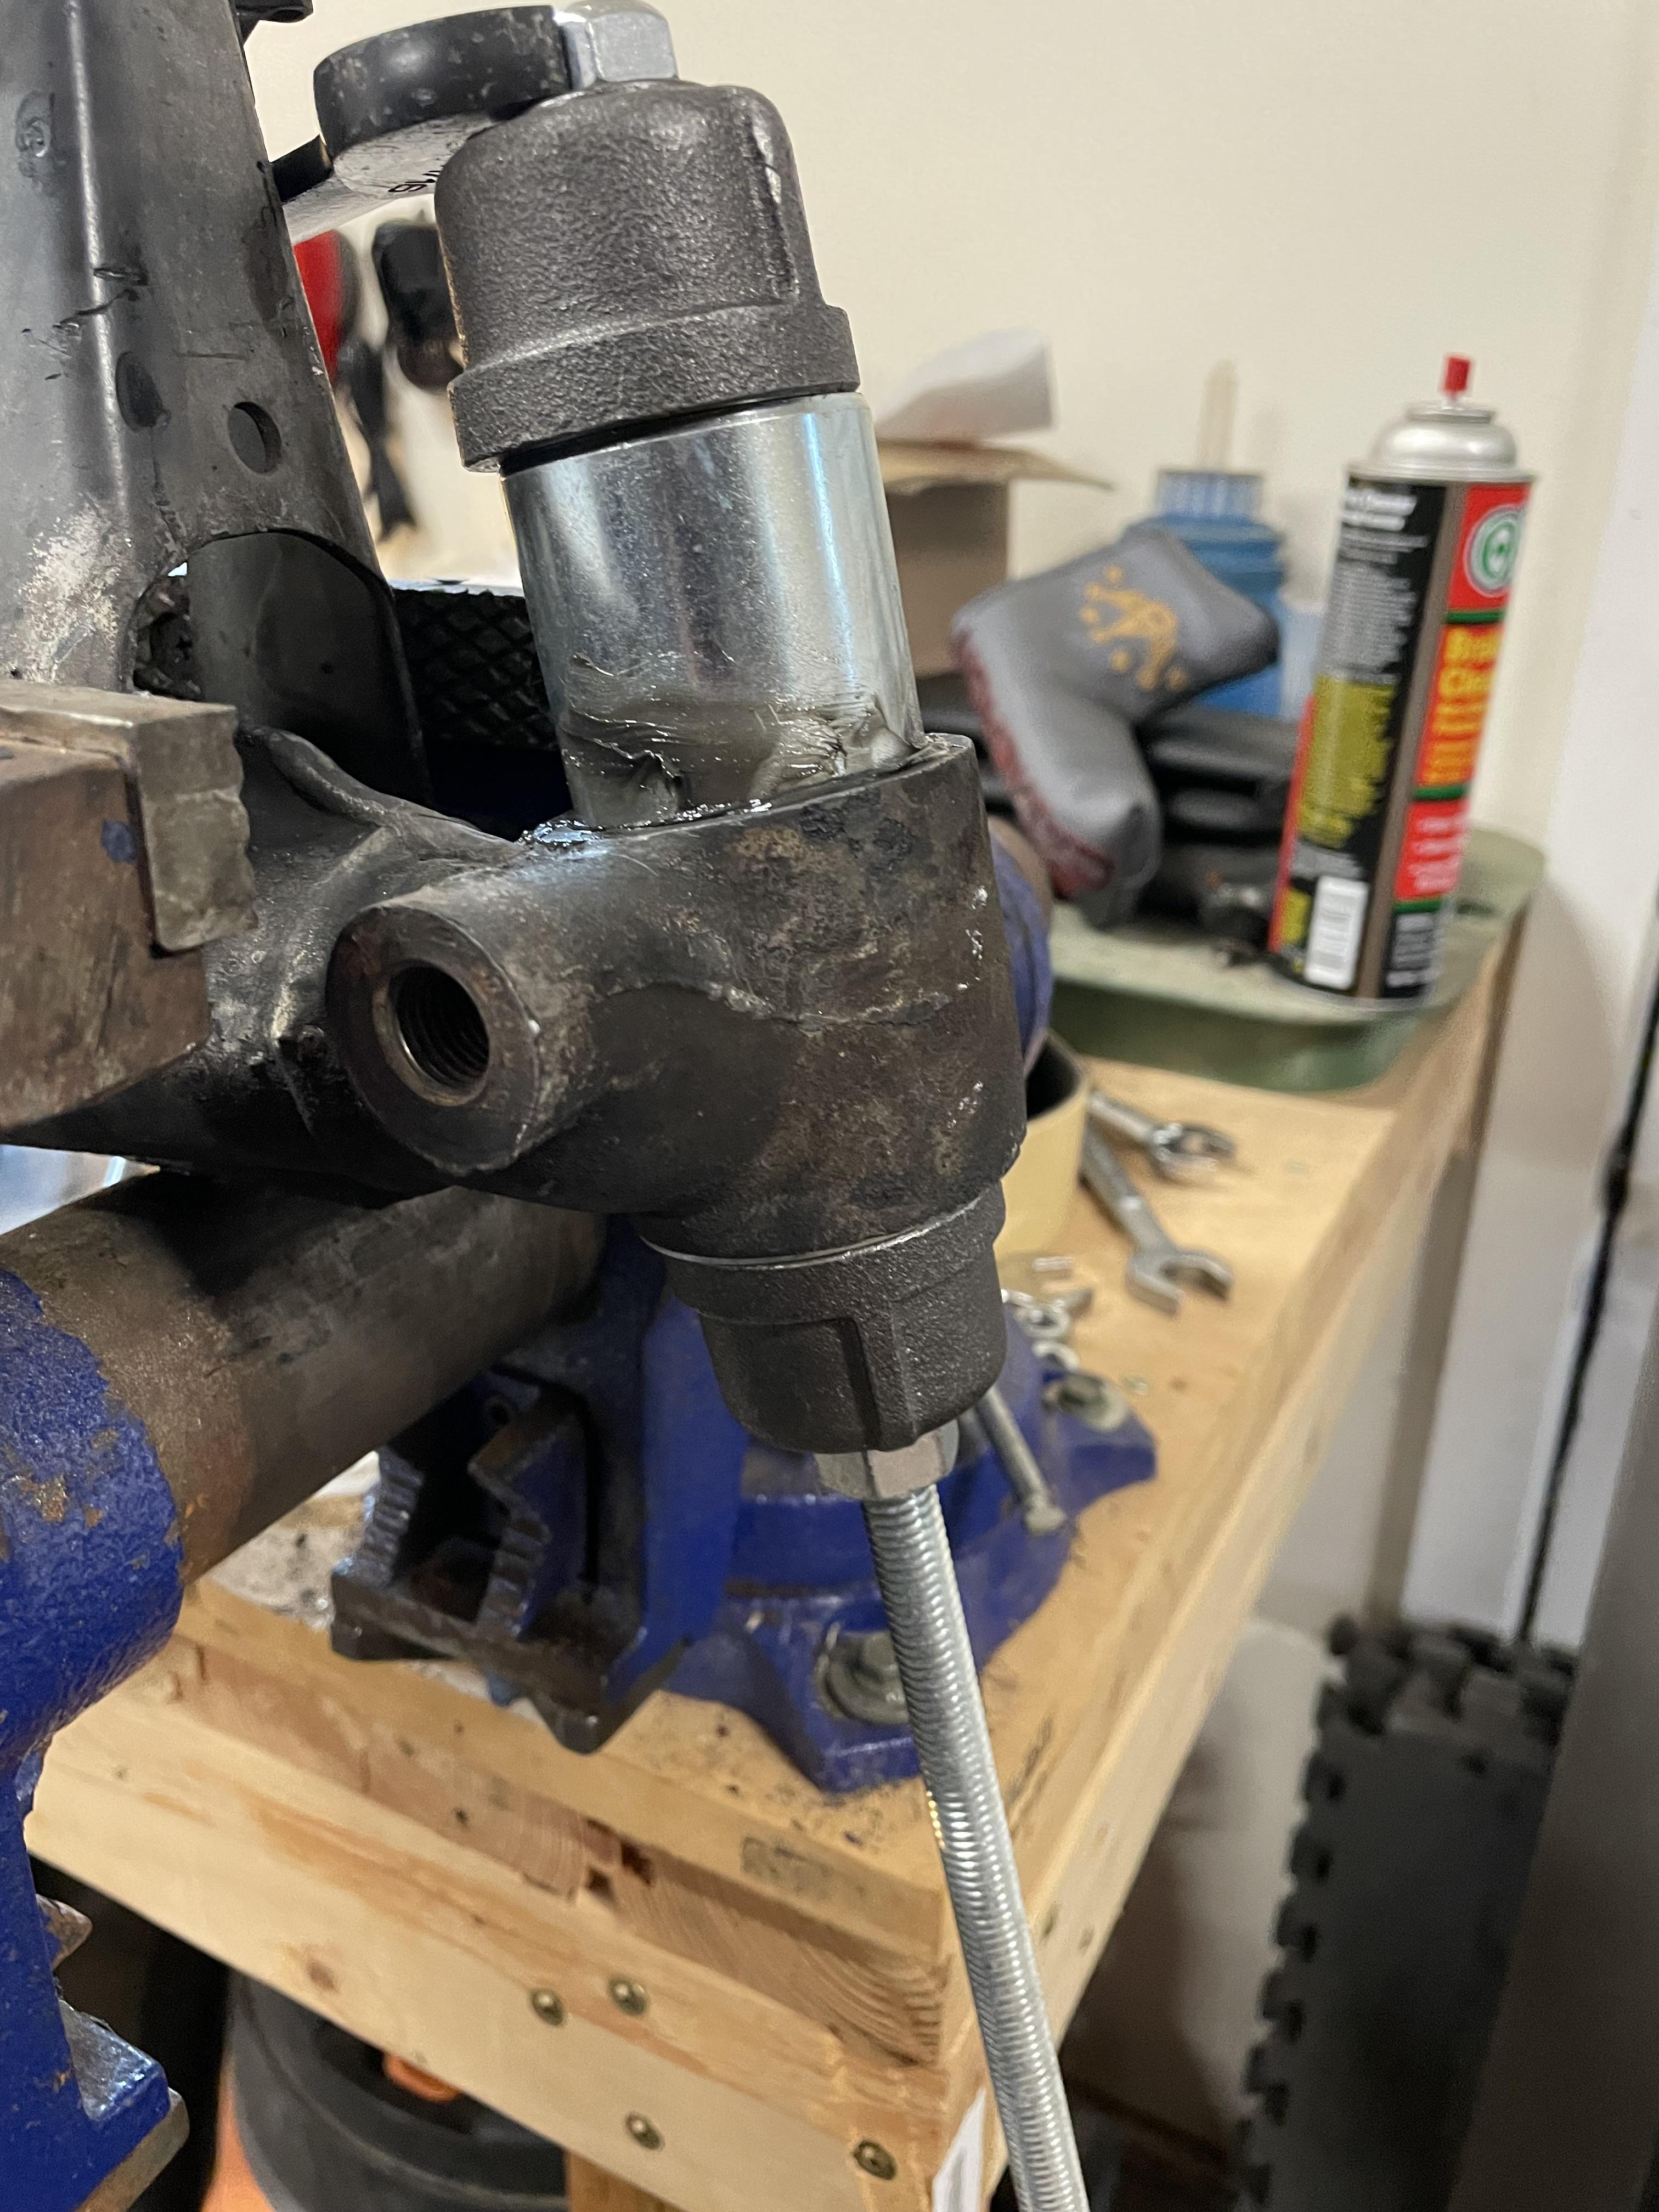
The largest threaded rod that will pass through the bushing is 7/16. Got my threaded rod, two nuts, couple of pipe caps and rigged a home made bushing installer:
Also bought a length of pipe to provide some persuasion:
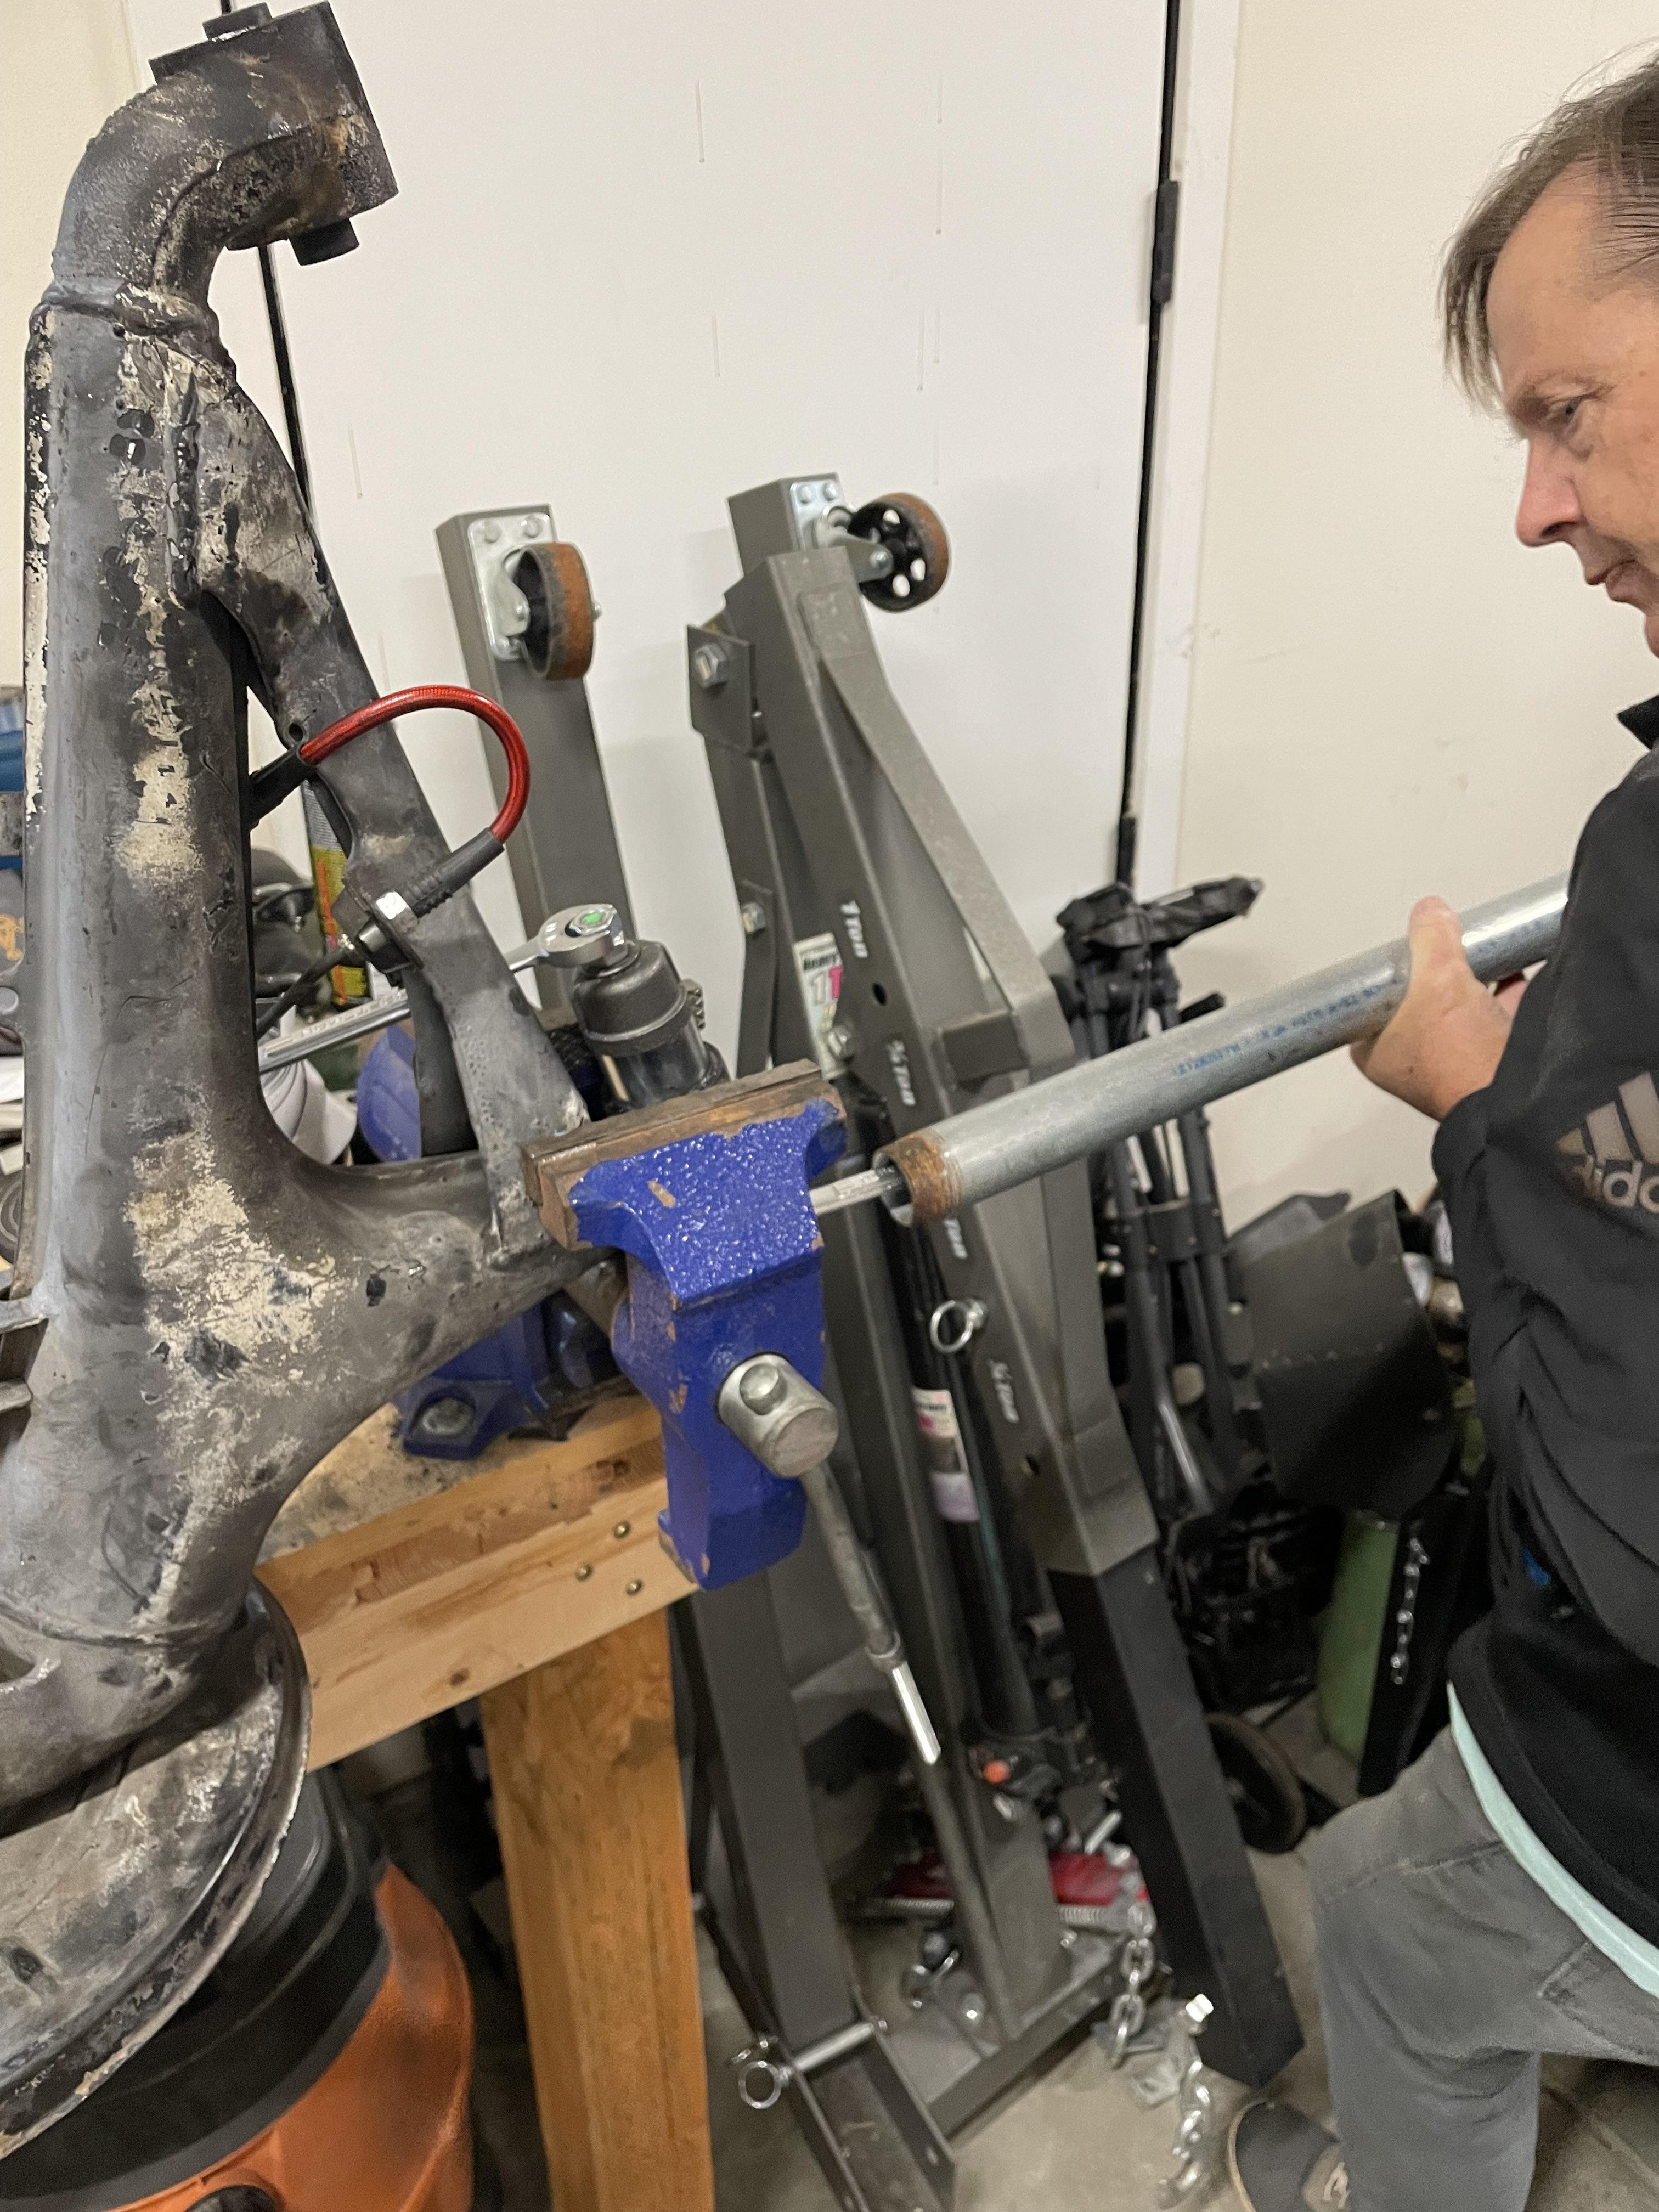
Got the bushing started, and then the things took a turn for the worse. The amount of force I was putting through the threaded rod caused the rod to fail, too little tensile strength. That was exciting the first time as all the pieces went flying everywhere. Decided right then that safety glasses were probably a good idea.
I then picked up heat treated rod and grade eight nuts. The rod held, but the nut threads stripped, which is a new one to me. Ever try to drill off a grade 8 nut? So thinking I need more threaded area, I bought a coupling nut. My local fastener store was closed so I resorted to Ace hardware for the nut:
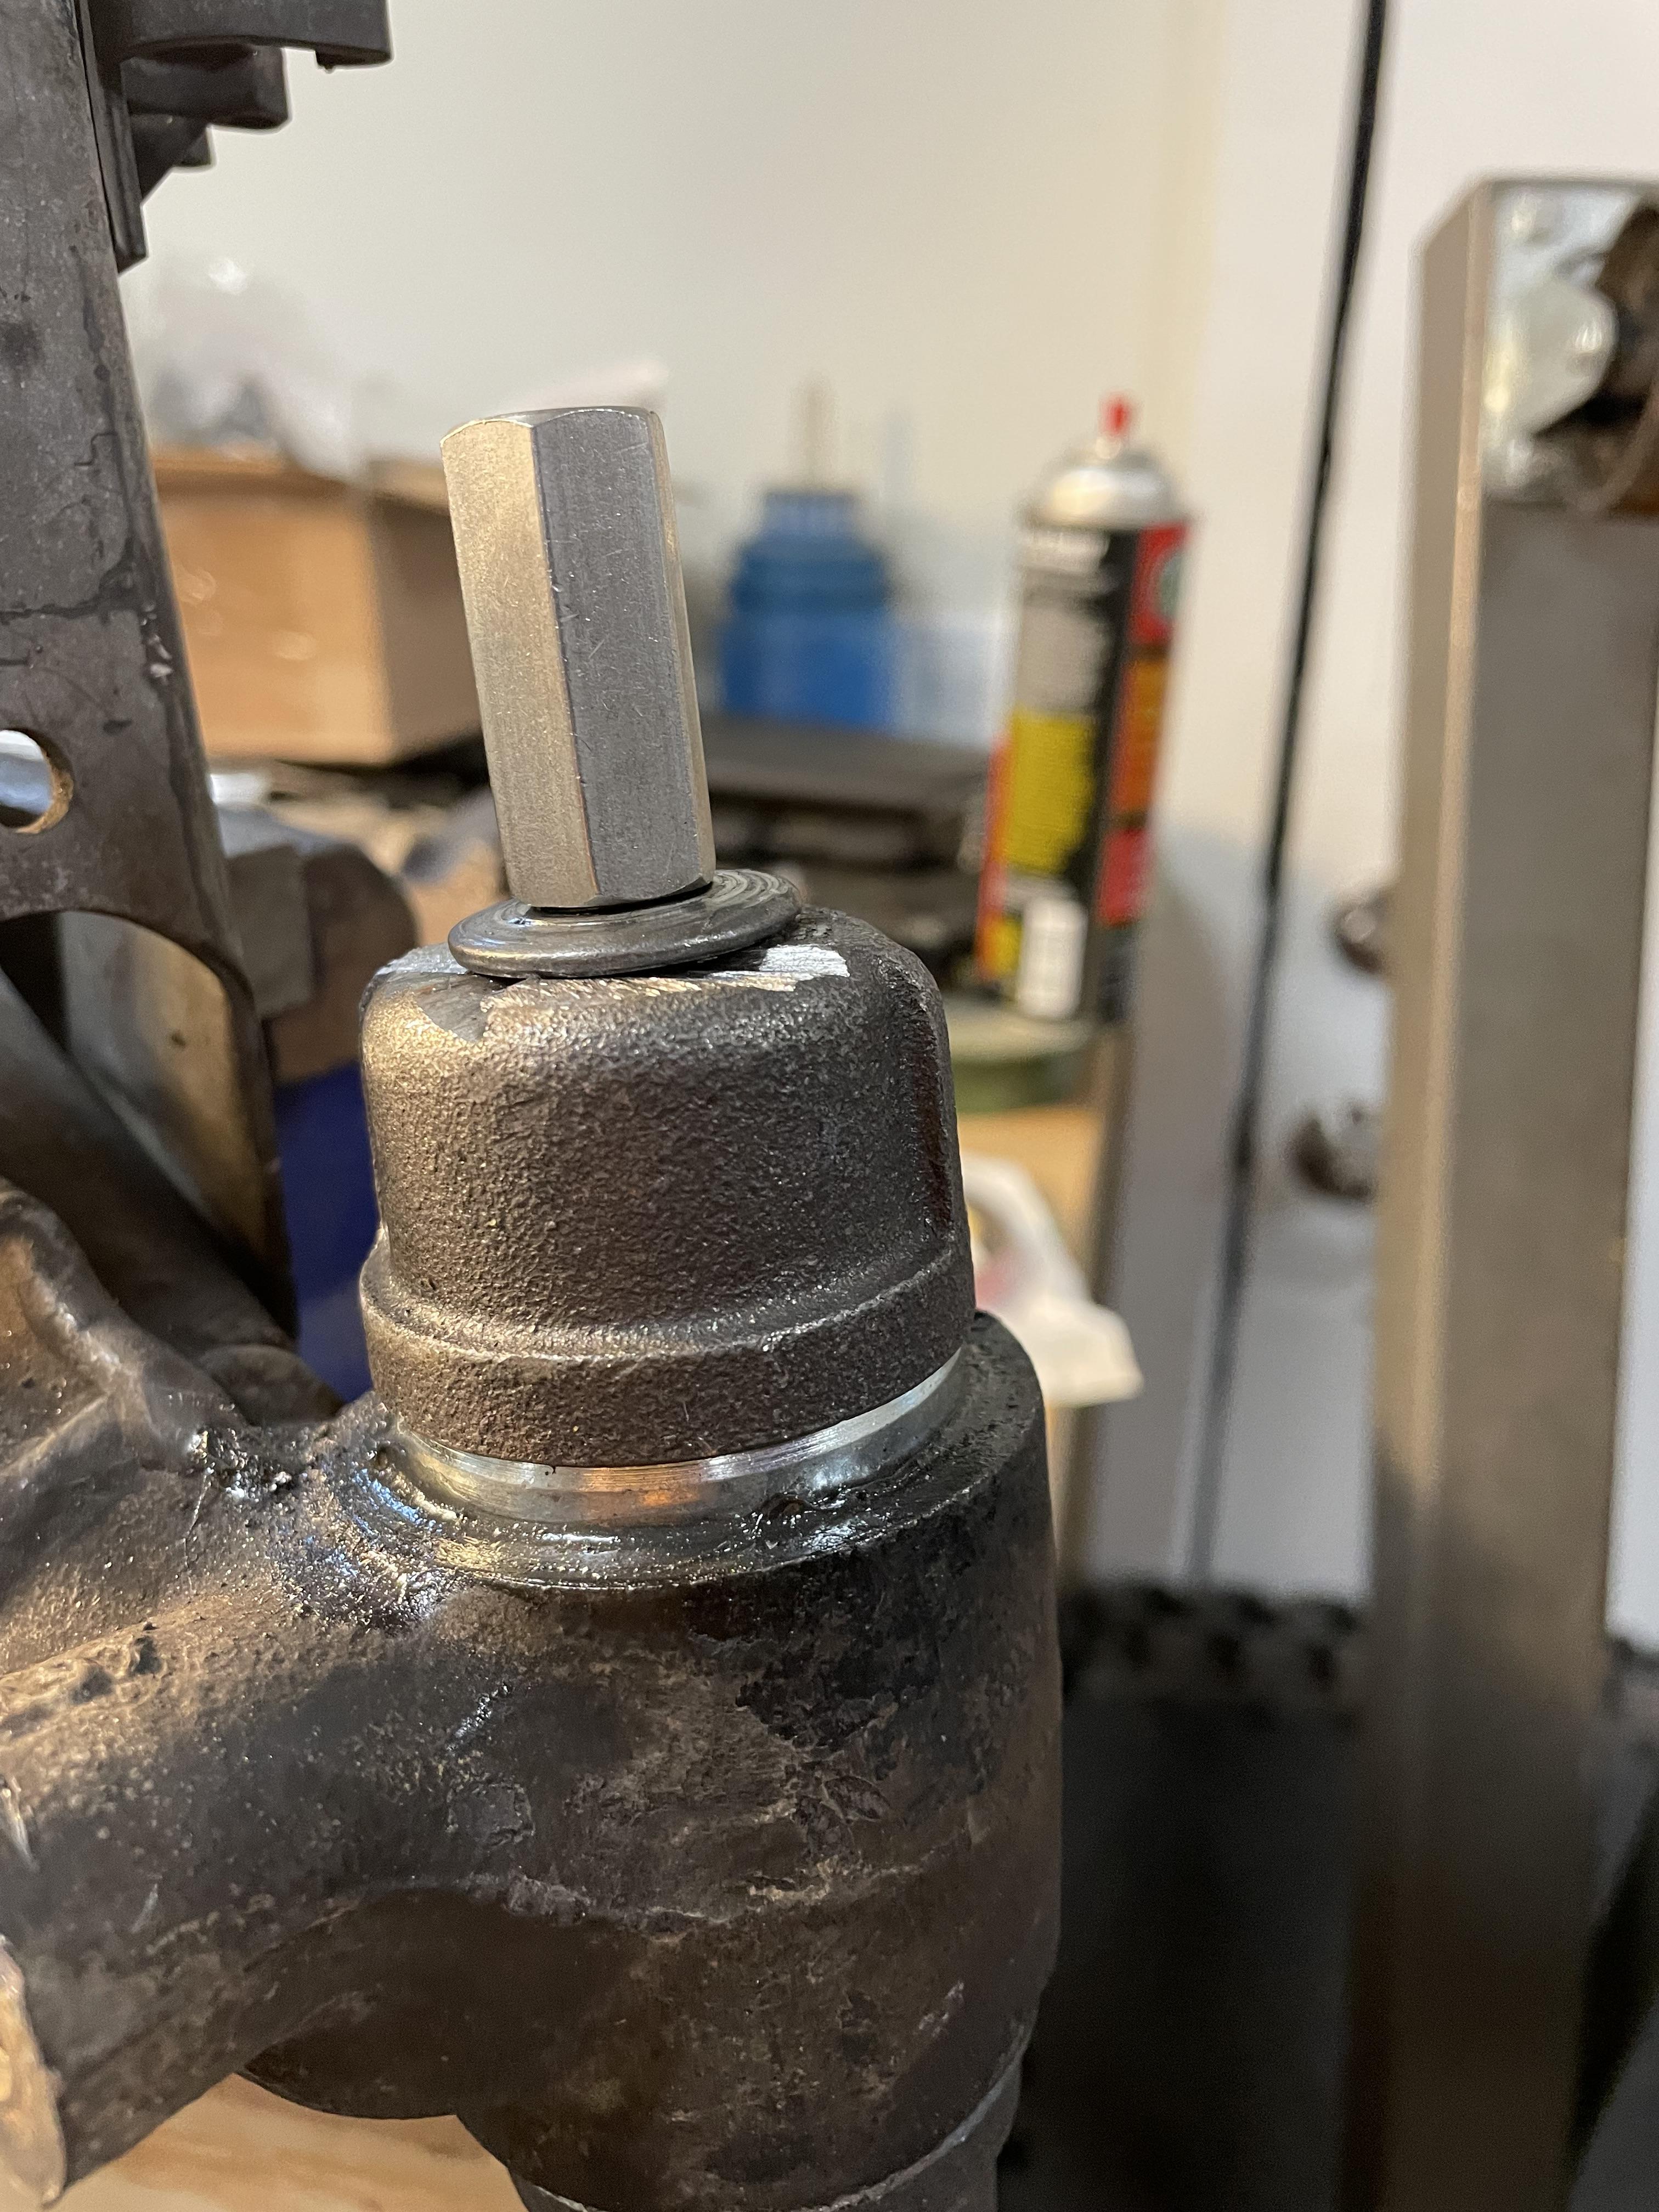
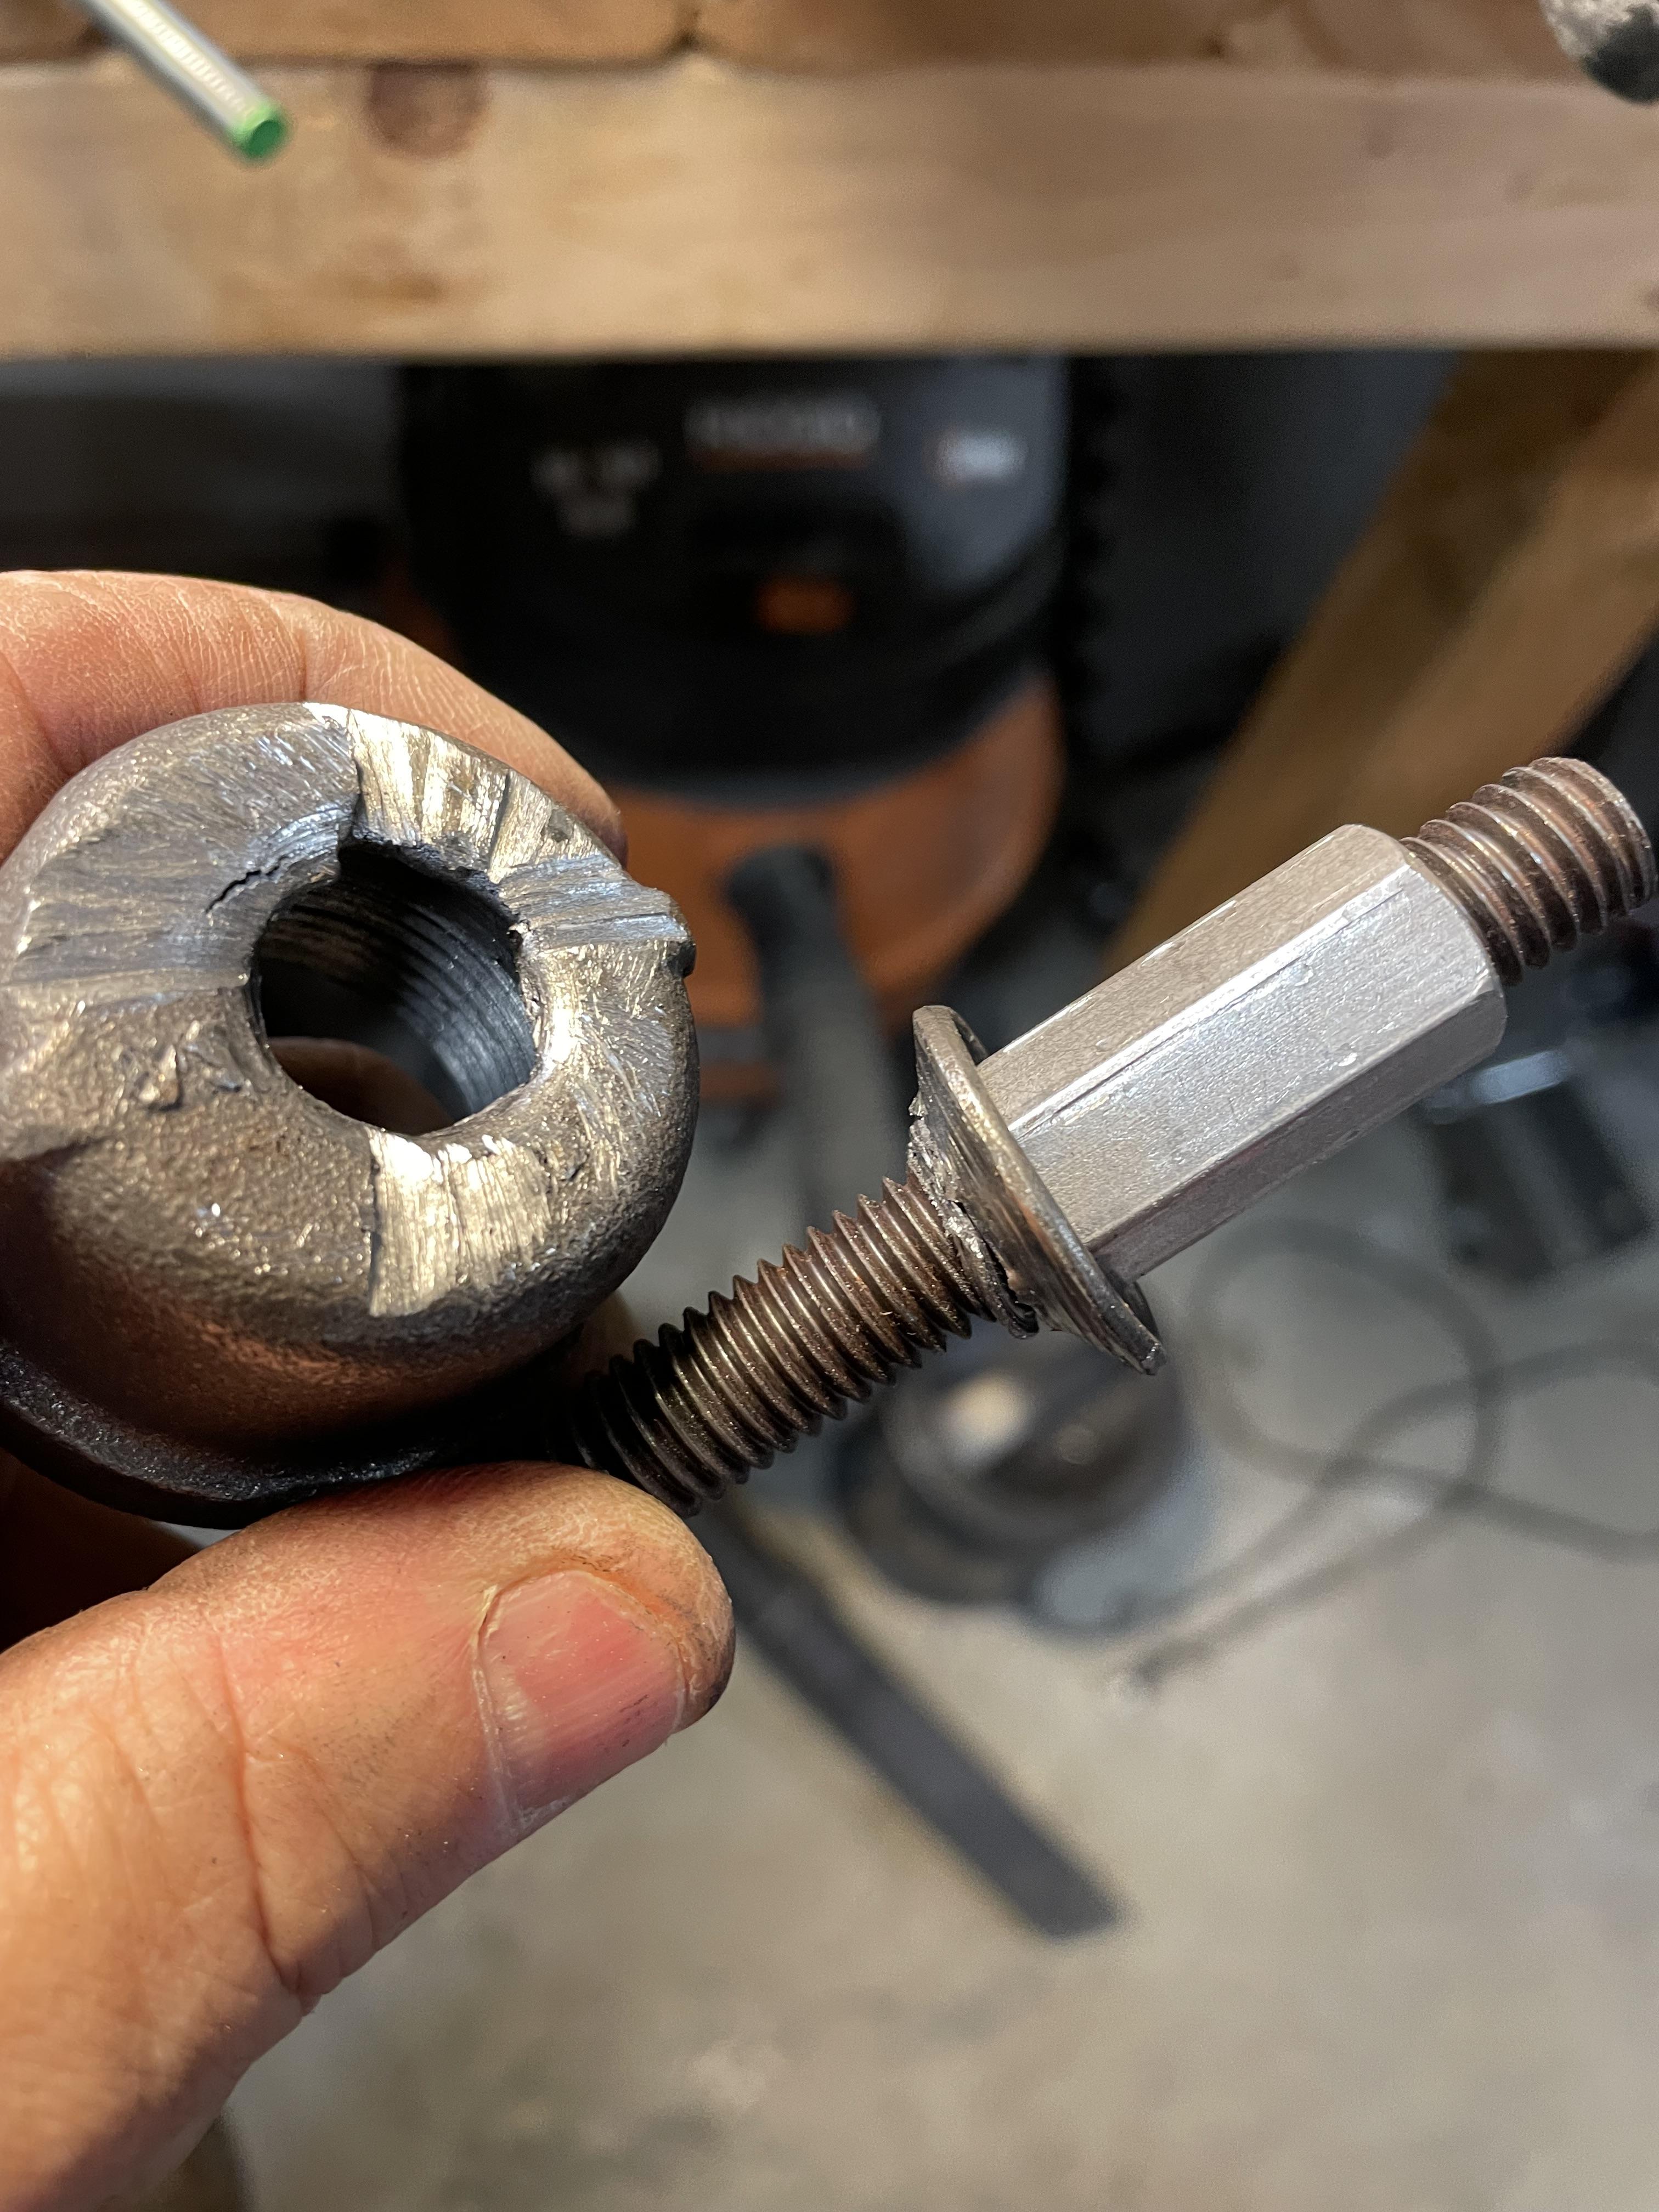
And this happened, I basically started pulling the nut through the pipe cap:
taking a close look I noticed this, the seat for the bushing is oblong, not circular. Looks like some PO used the edge of the trailing arm bushing area to jack up the car with a bottle jack. What a dipstick...
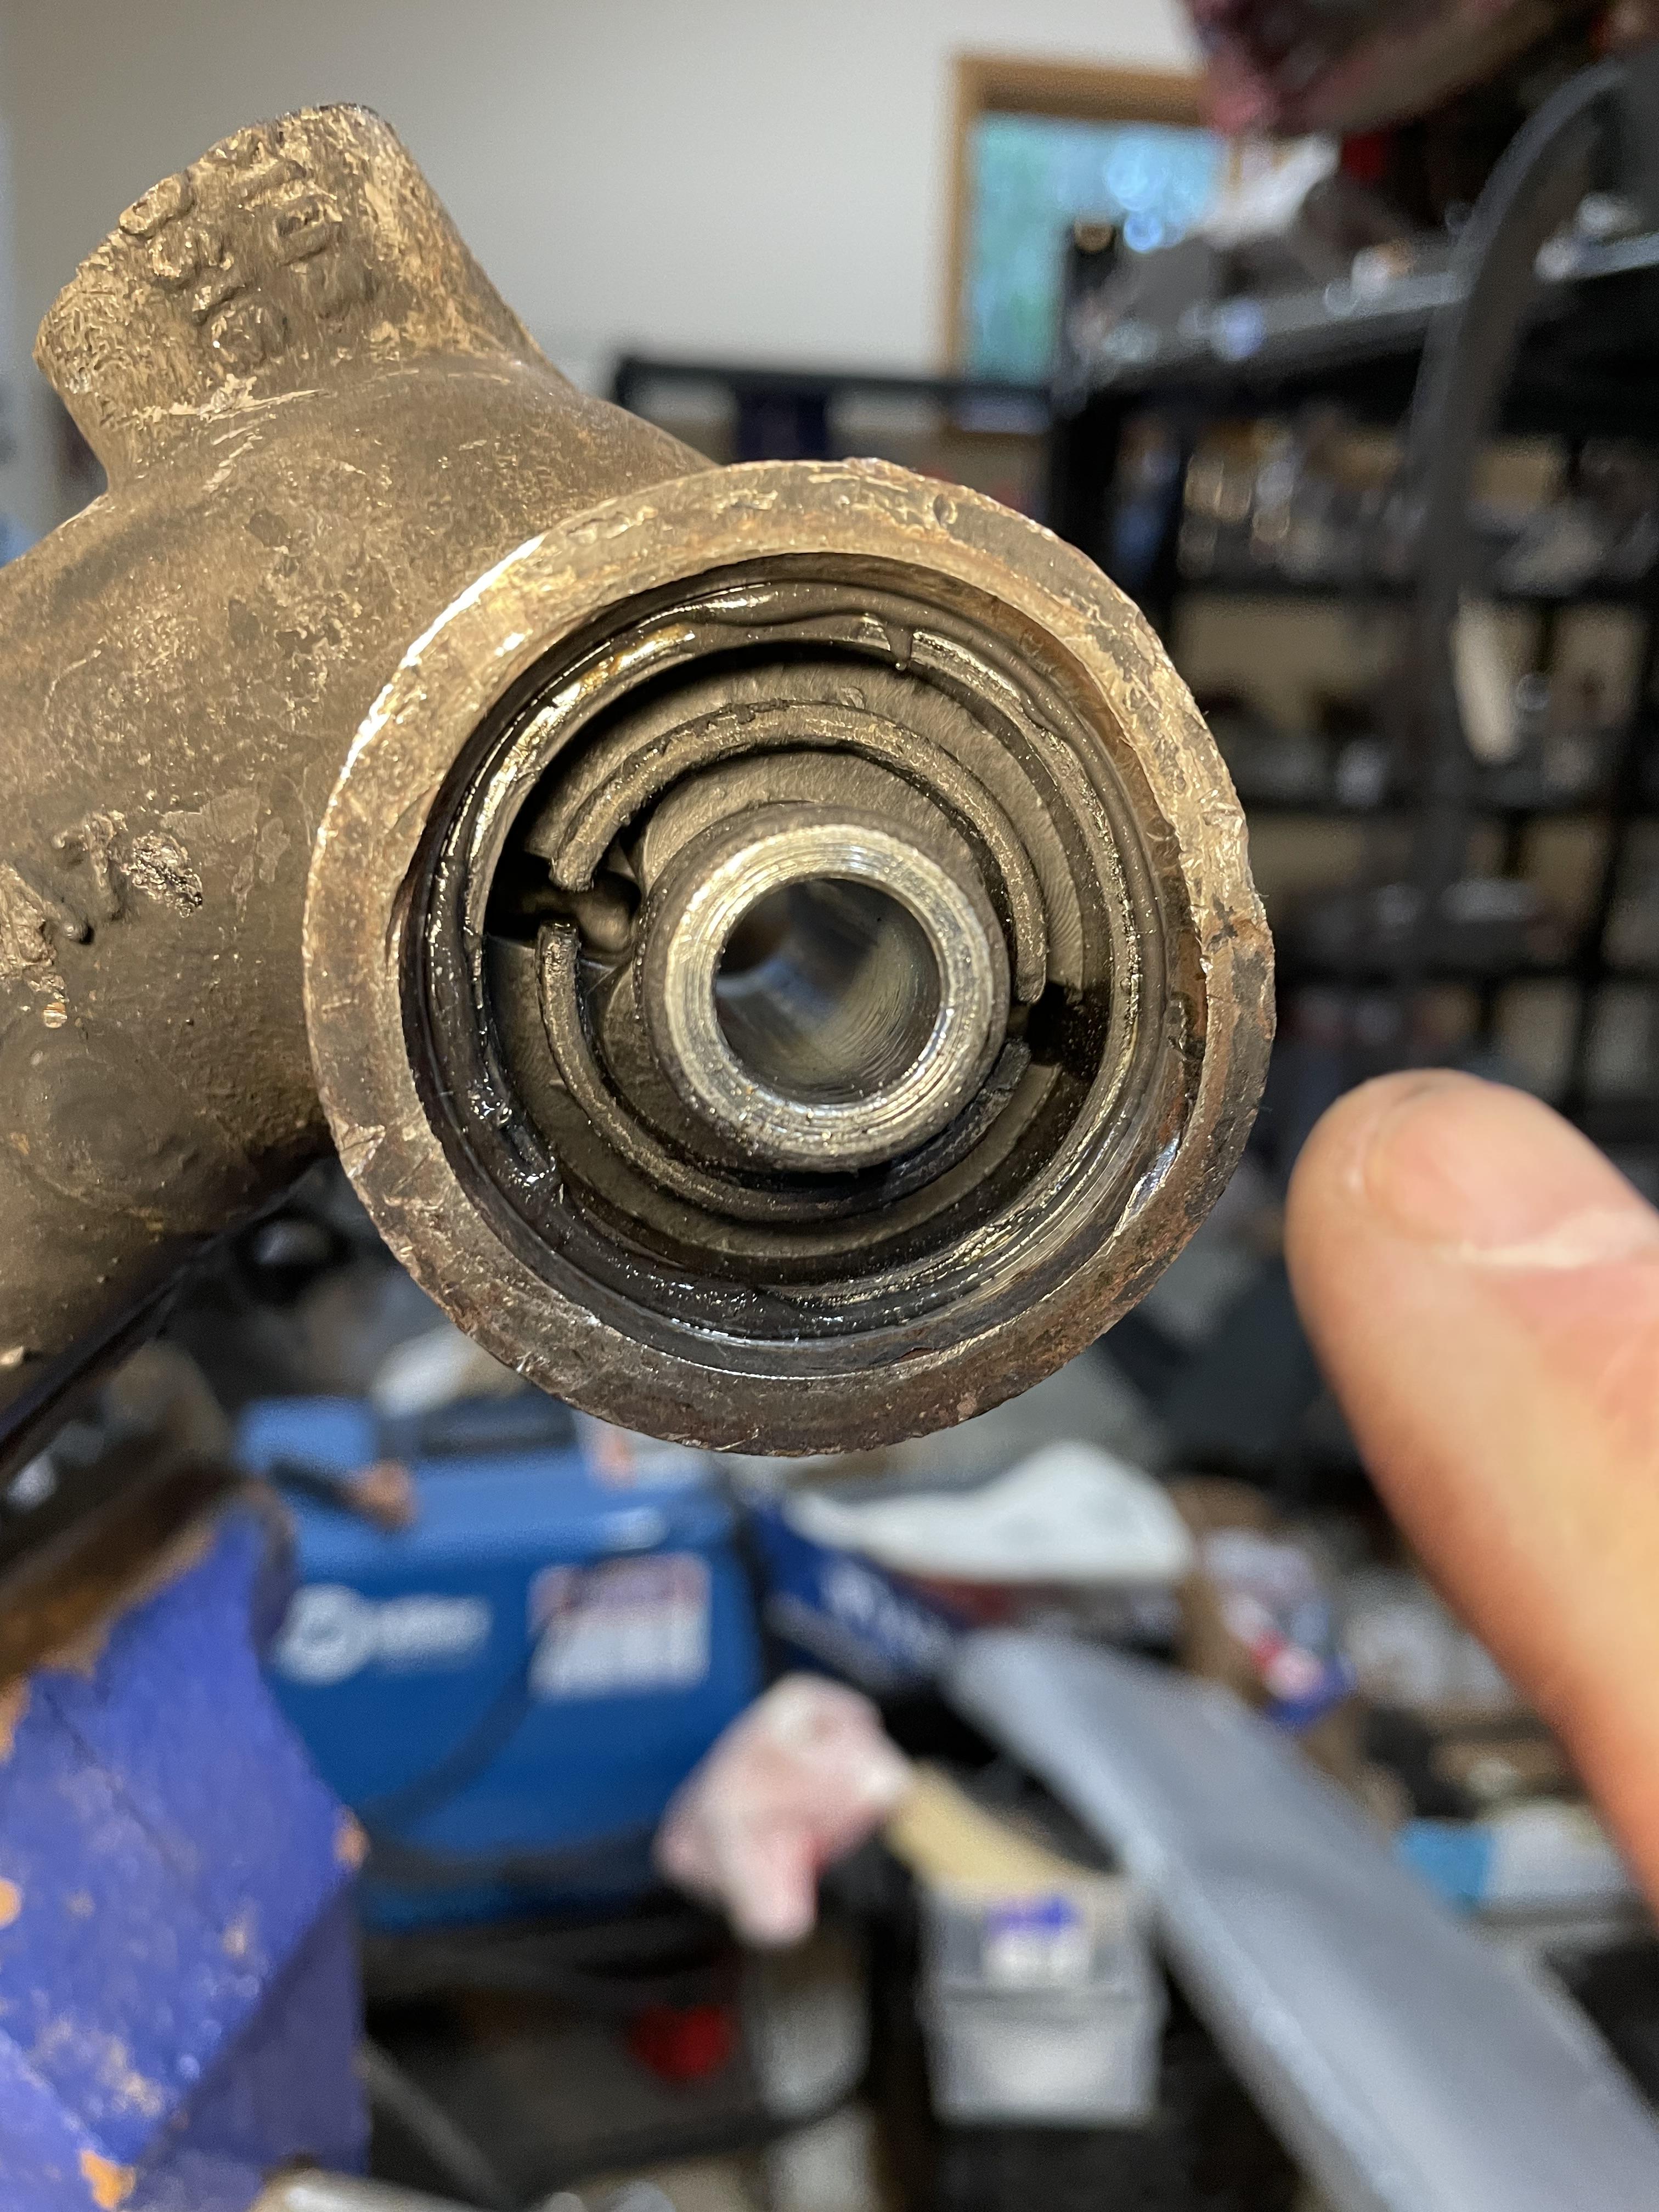
I have about an 1/8" to go and I'm stuck again. I can't access the bushing with my press as the gap between outer and inner bushings is too close. I can cut out the bushing a try to install it from the outside with the press, but I'm thinking the oblong hole will make life difficult.
Lesson for all you aspiring garage mechanics. Place jacks in areas that are meant for jacks to lift the car.
Bushing installation is proving to be difficult, although I think it's peculiar to my car perhaps.
The largest threaded rod that will pass through the bushing is 7/16. Got my threaded rod, two nuts, couple of pipe caps and rigged a home made bushing installer:

Also bought a length of pipe to provide some persuasion:

Got the bushing started, and then the things took a turn for the worse. The amount of force I was putting through the threaded rod caused the rod to fail, too little tensile strength. That was exciting the first time as all the pieces went flying everywhere. Decided right then that safety glasses were probably a good idea.
I then picked up heat treated rod and grade eight nuts. The rod held, but the nut threads stripped, which is a new one to me. Ever try to drill off a grade 8 nut? So thinking I need more threaded area, I bought a coupling nut. My local fastener store was closed so I resorted to Ace hardware for the nut:

And this happened, I basically started pulling the nut through the pipe cap:

taking a close look I noticed this, the seat for the bushing is oblong, not circular. Looks like some PO used the edge of the trailing arm bushing area to jack up the car with a bottle jack. What a dipstick...

I have about an 1/8" to go and I'm stuck again. I can't access the bushing with my press as the gap between outer and inner bushings is too close. I can cut out the bushing a try to install it from the outside with the press, but I'm thinking the oblong hole will make life difficult.
Lesson for all you aspiring garage mechanics. Place jacks in areas that are meant for jacks to lift the car.

