And so it starts, Maeve
Re: And so it starts, Maeve
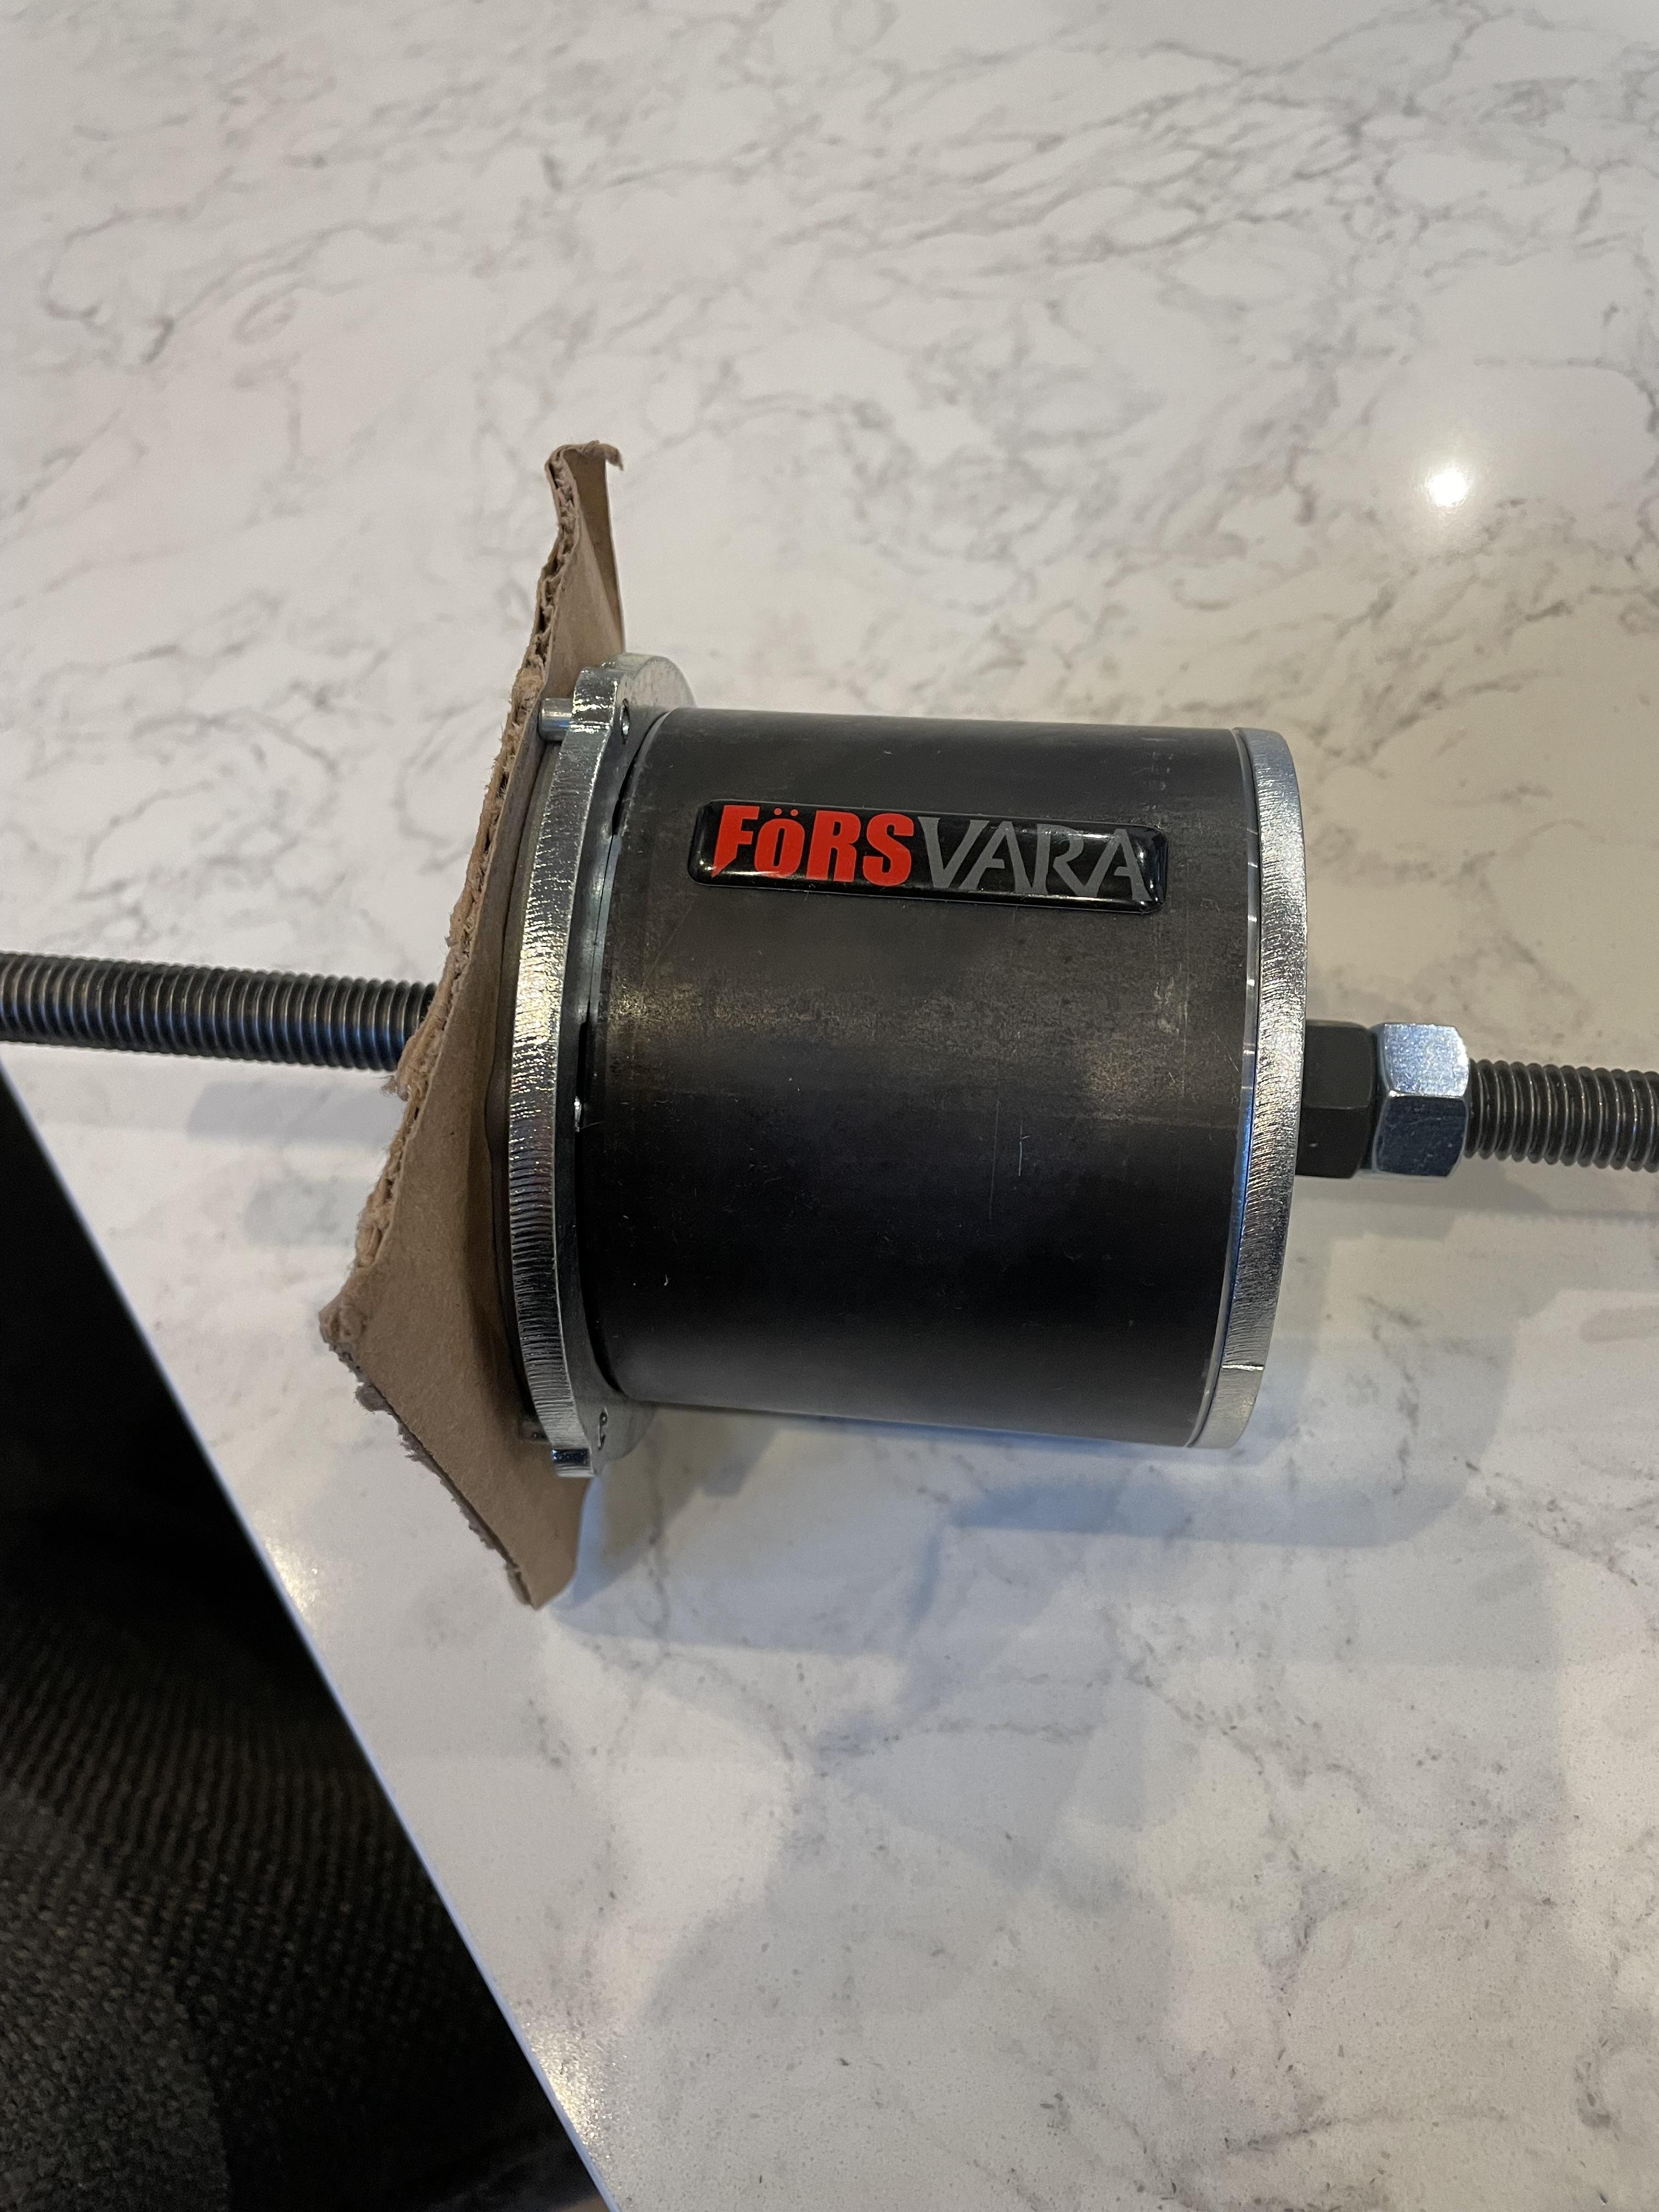
This came today! Someone else on mye28 posted about this tool, which is made for e28 rear subframe bushings. Looks similar to my home made tool with pipe caps, threaded rod and nuts eh? haha I should be able to get the rear end completely restored this weekend.


Re: And so it starts, Maeve
I also, with some soul searching, decided against recovering Maeve's seats on my own. I have the replacement covers from zoomzoomzoom-ing on Ebay, and they are really nice. The seats are one of the first things you see, and sit in, and they need to be spot on. I delivered front and rear seats to a local upholstery shop and they should be back next week.
The old leather covers are not ripped. The are aged and in need of a good cleaning etc., but they are in good shape. I asked the upholstery guy to try to save them. If they did, I will give them away for free to whoever would like them. You pay the shipping. First come first served.
The old leather covers are not ripped. The are aged and in need of a good cleaning etc., but they are in good shape. I asked the upholstery guy to try to save them. If they did, I will give them away for free to whoever would like them. You pay the shipping. First come first served.
Last edited by gwb72tii on Jan 10, 2024 9:35 AM, edited 1 time in total.
Re: And so it starts, Maeve
-
thrty8street
- Posts: 595
- Joined: Feb 21, 2011 1:13 AM
- Location: Maryland
Re: And so it starts, Maeve
Would you happen to have the part number for these buckets? One of mine is cracked as well. I checked realeom but was unable to find it.
gwb72tii wrote: Aug 12, 2022 4:32 PM Small steps to report but necessary steps.
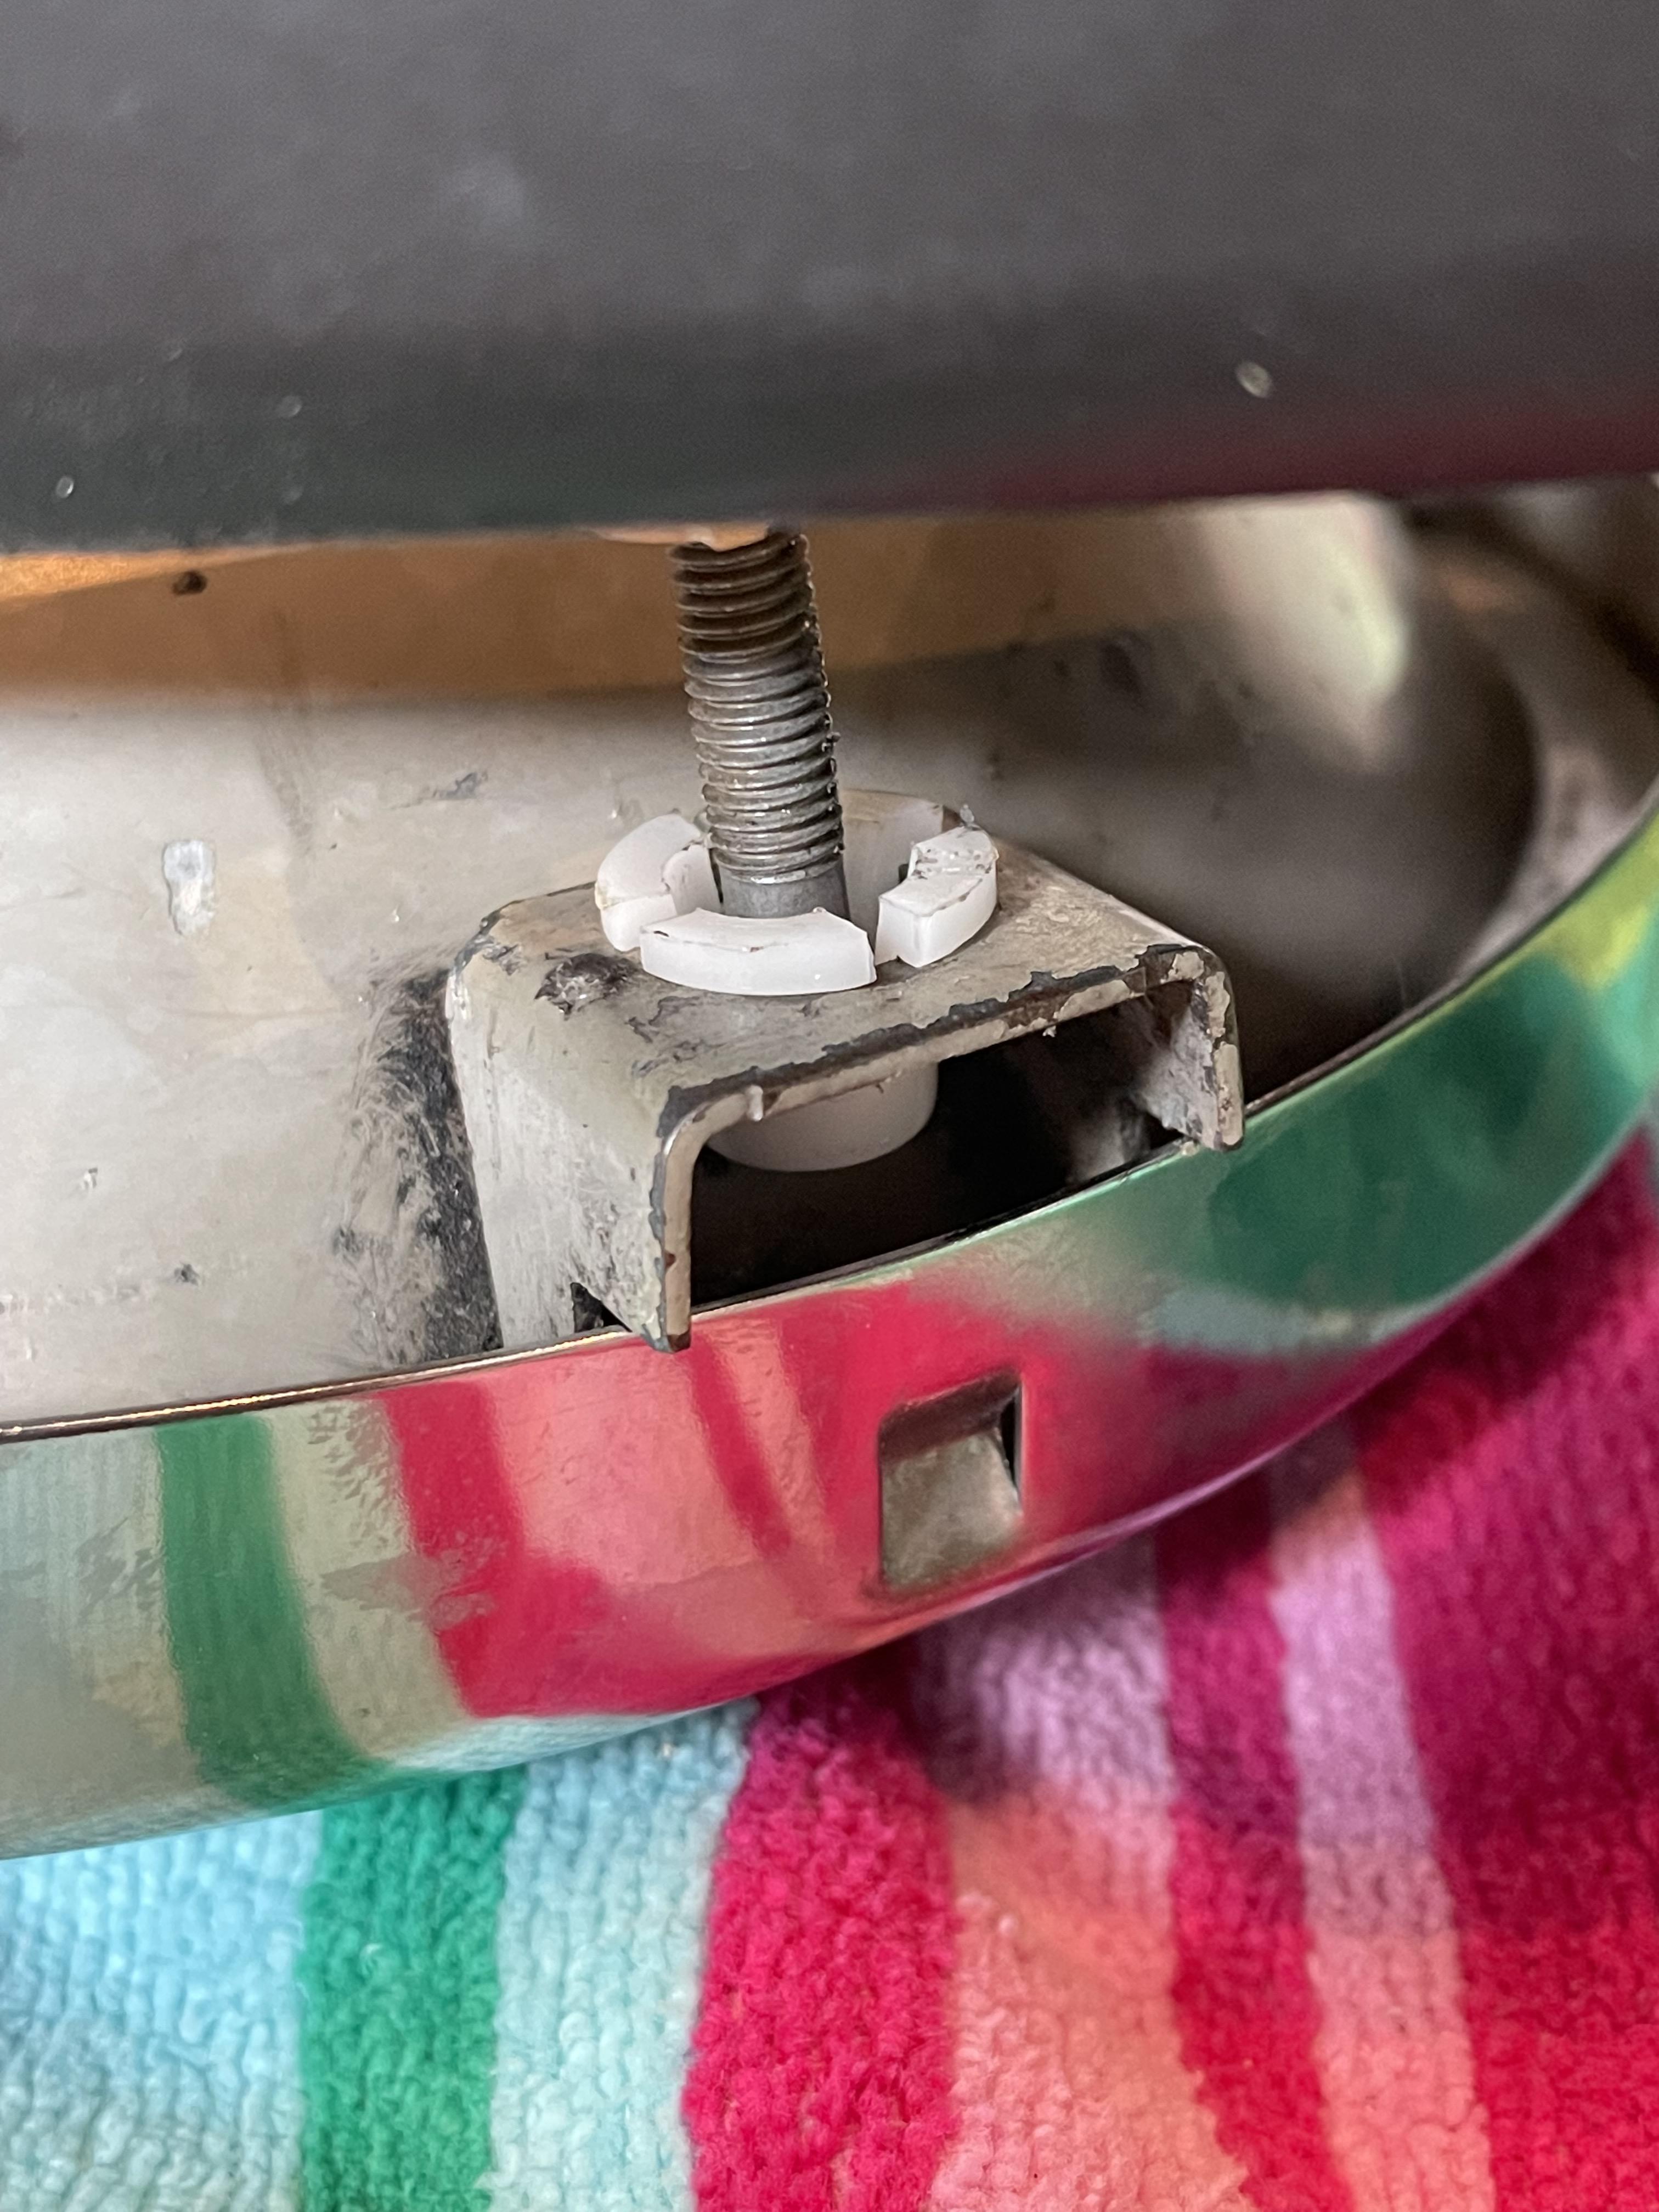
First was reassembling the Euro headlights. They are held to the buckets with a snap in ball and socket design. After careful cleaning and lubing with a light grease, I snapped in the first ball and guess what, the bucket cracked. So off to FCP Euro to order 6 new buckets.
Re: And so it starts, Maeve
yes, you have to search RealOem for Euro versions of the 535i
Here is the ECS page:
https://www.ecstuning.com/b-genuine-bmw ... 121369833/
Here is the ECS page:
https://www.ecstuning.com/b-genuine-bmw ... 121369833/
Re: And so it starts, Maeve
Back at it today.
I'm back from a Panama Canal cruise aboard the Windstar, which only holds 145 passengers. Then off in Costa Rica to see friends and explore.
Both my wife and I managed to get Covid from he cruise, so the last few days in CR were spent sequestered in our hotel room for the most part. CR requires you to isolate for 14 days if you have Covid, so while we didn't let anyone know, we were careful not to be around others.
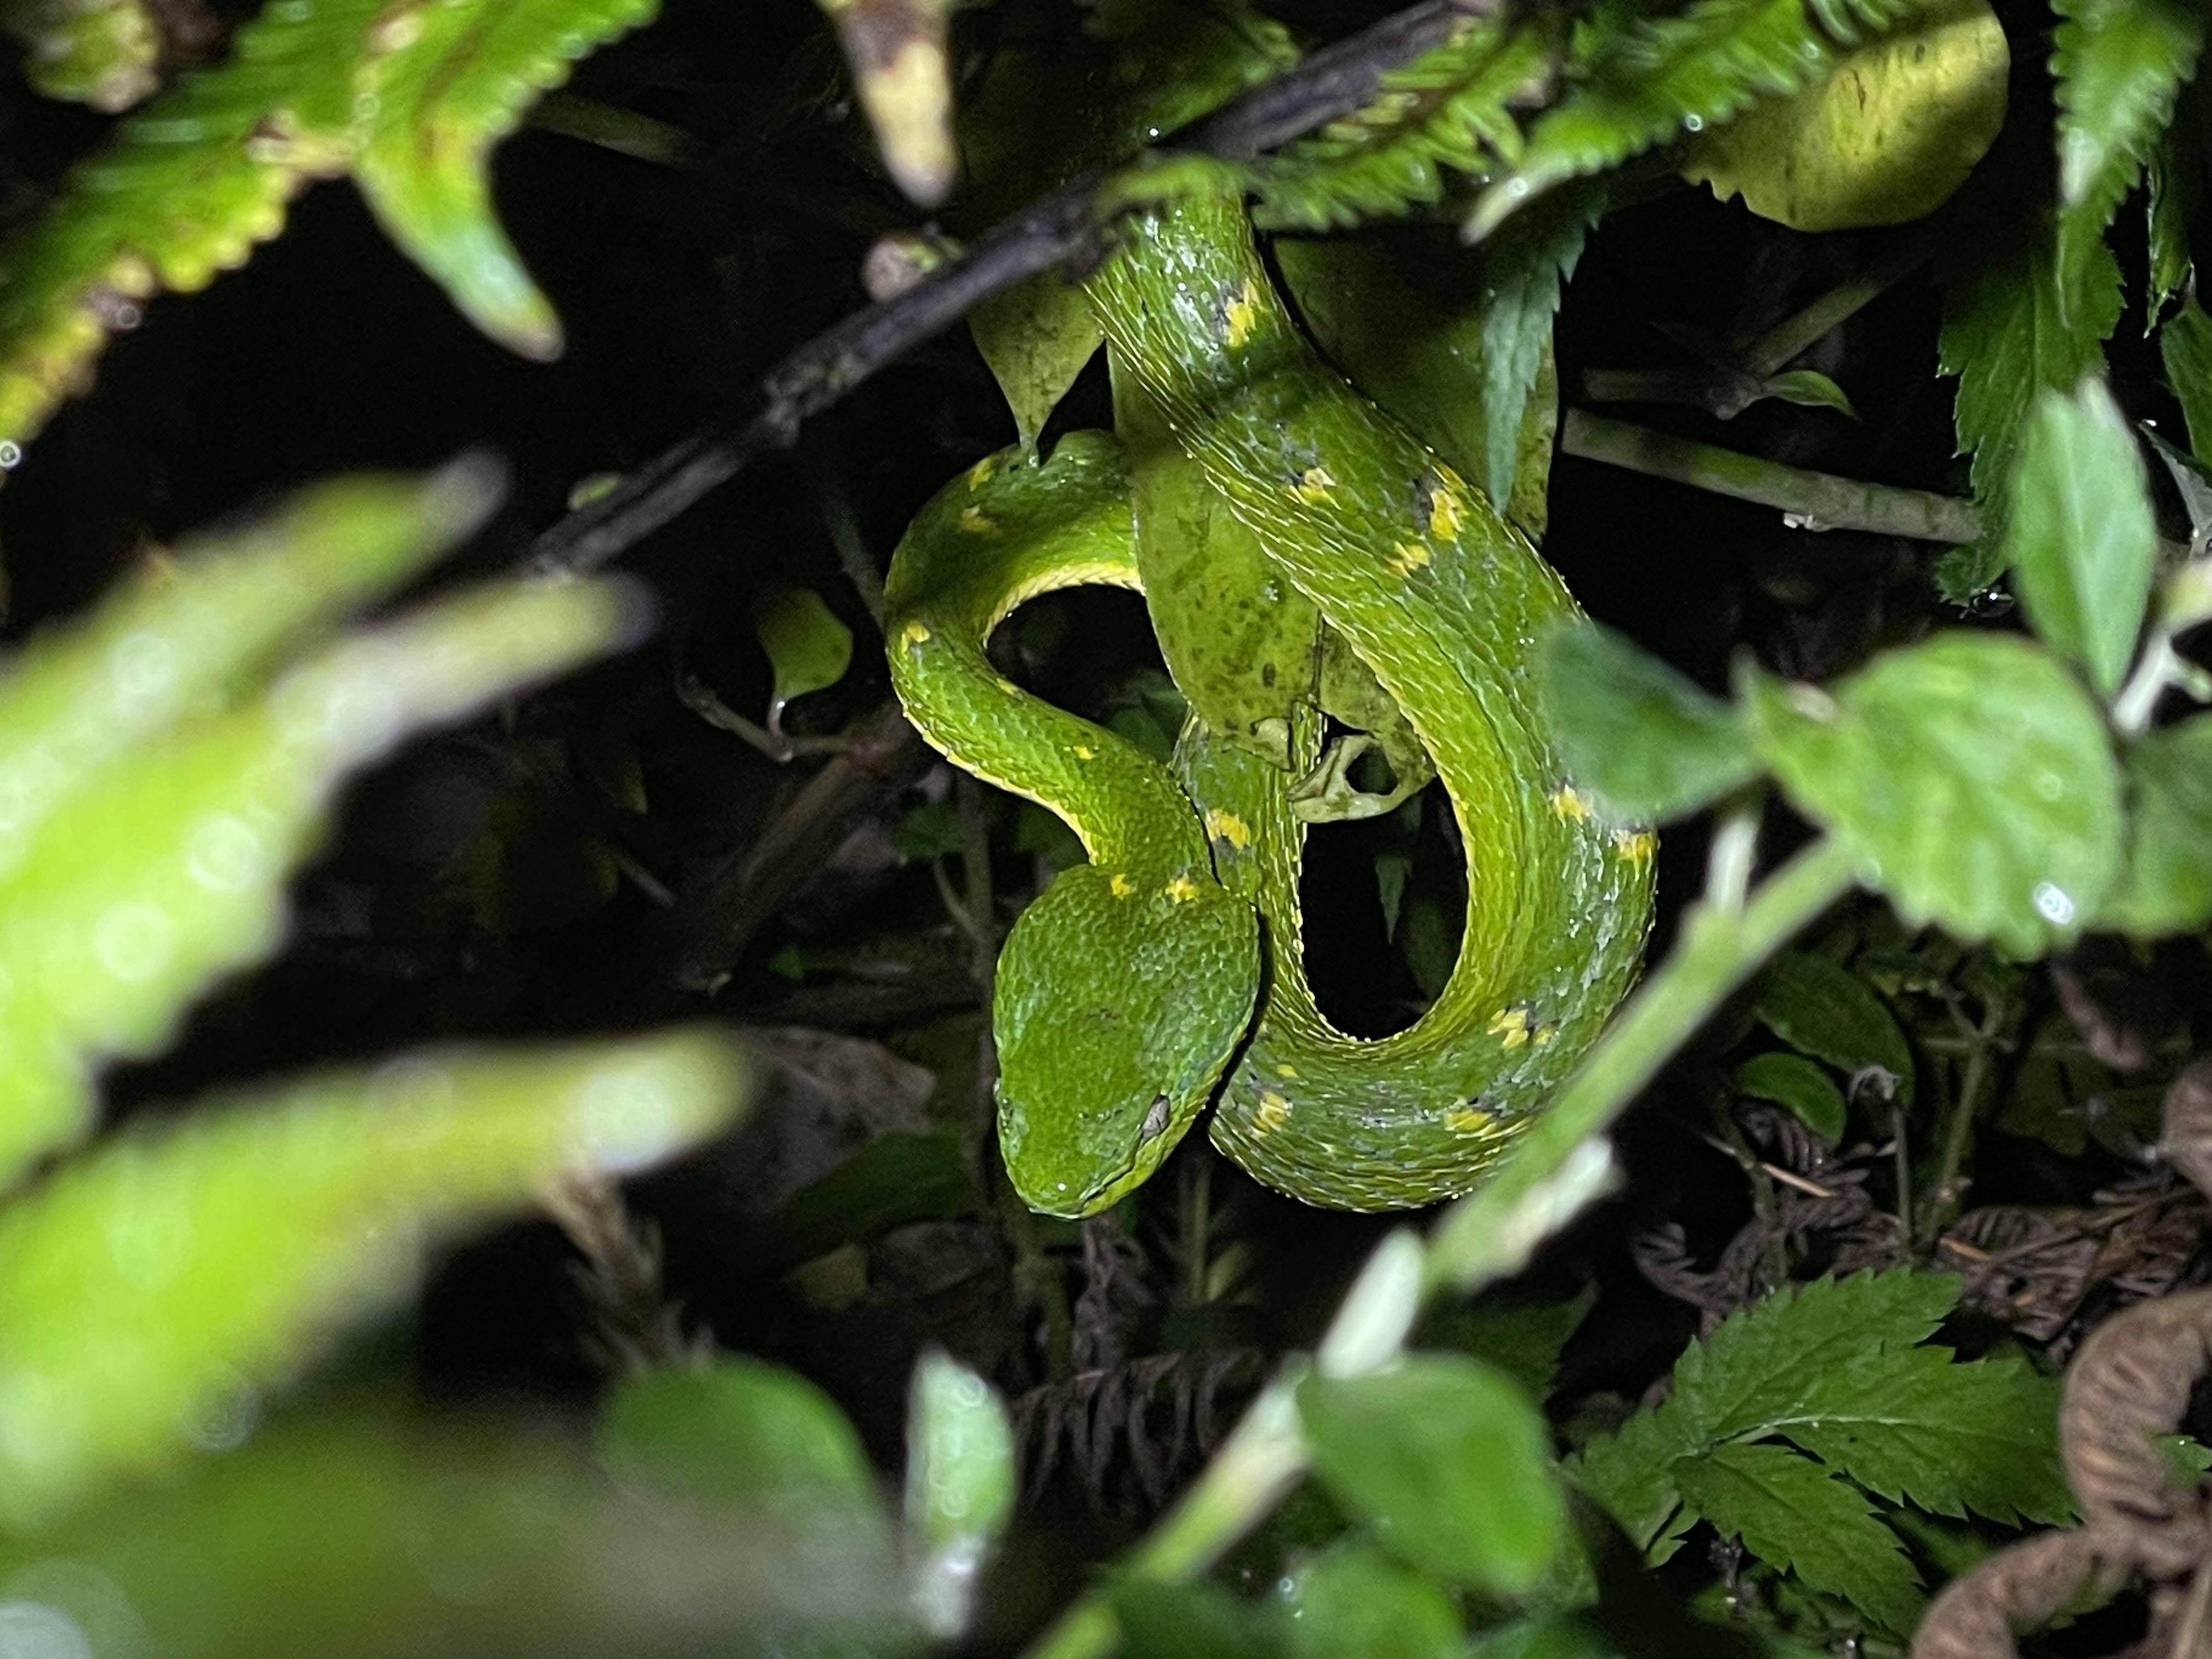
Here's one critter we found on a night hike:
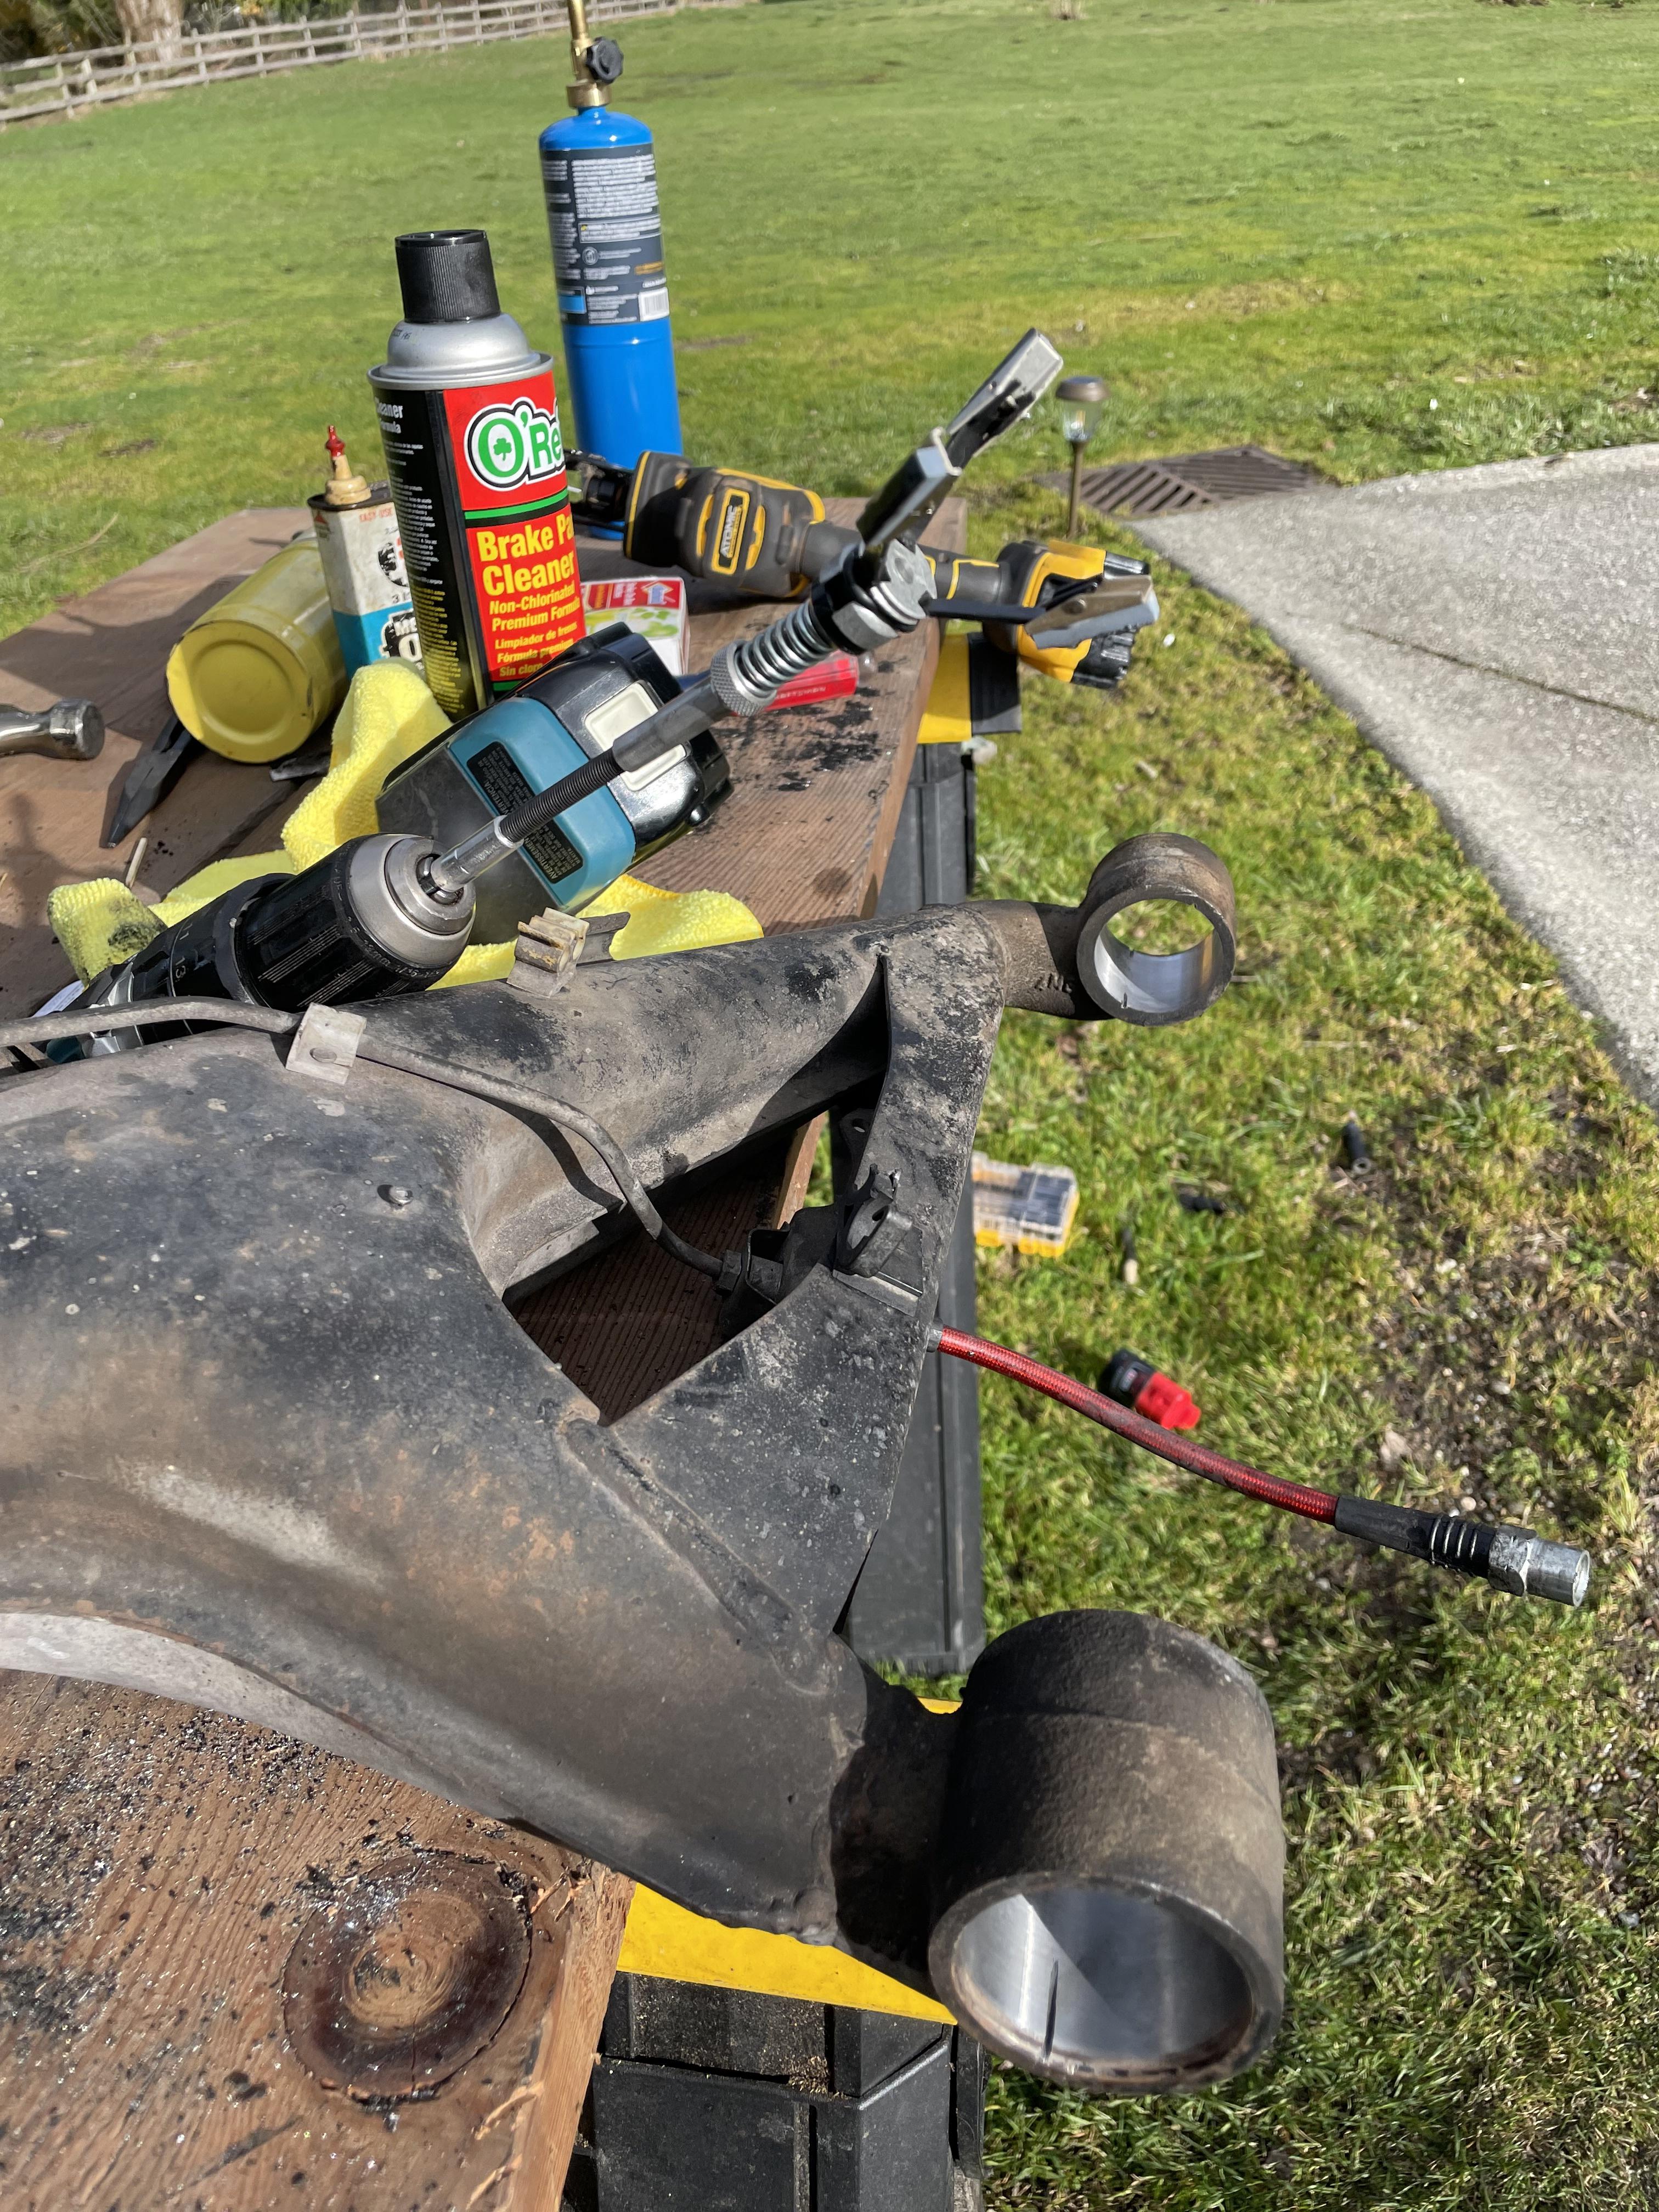
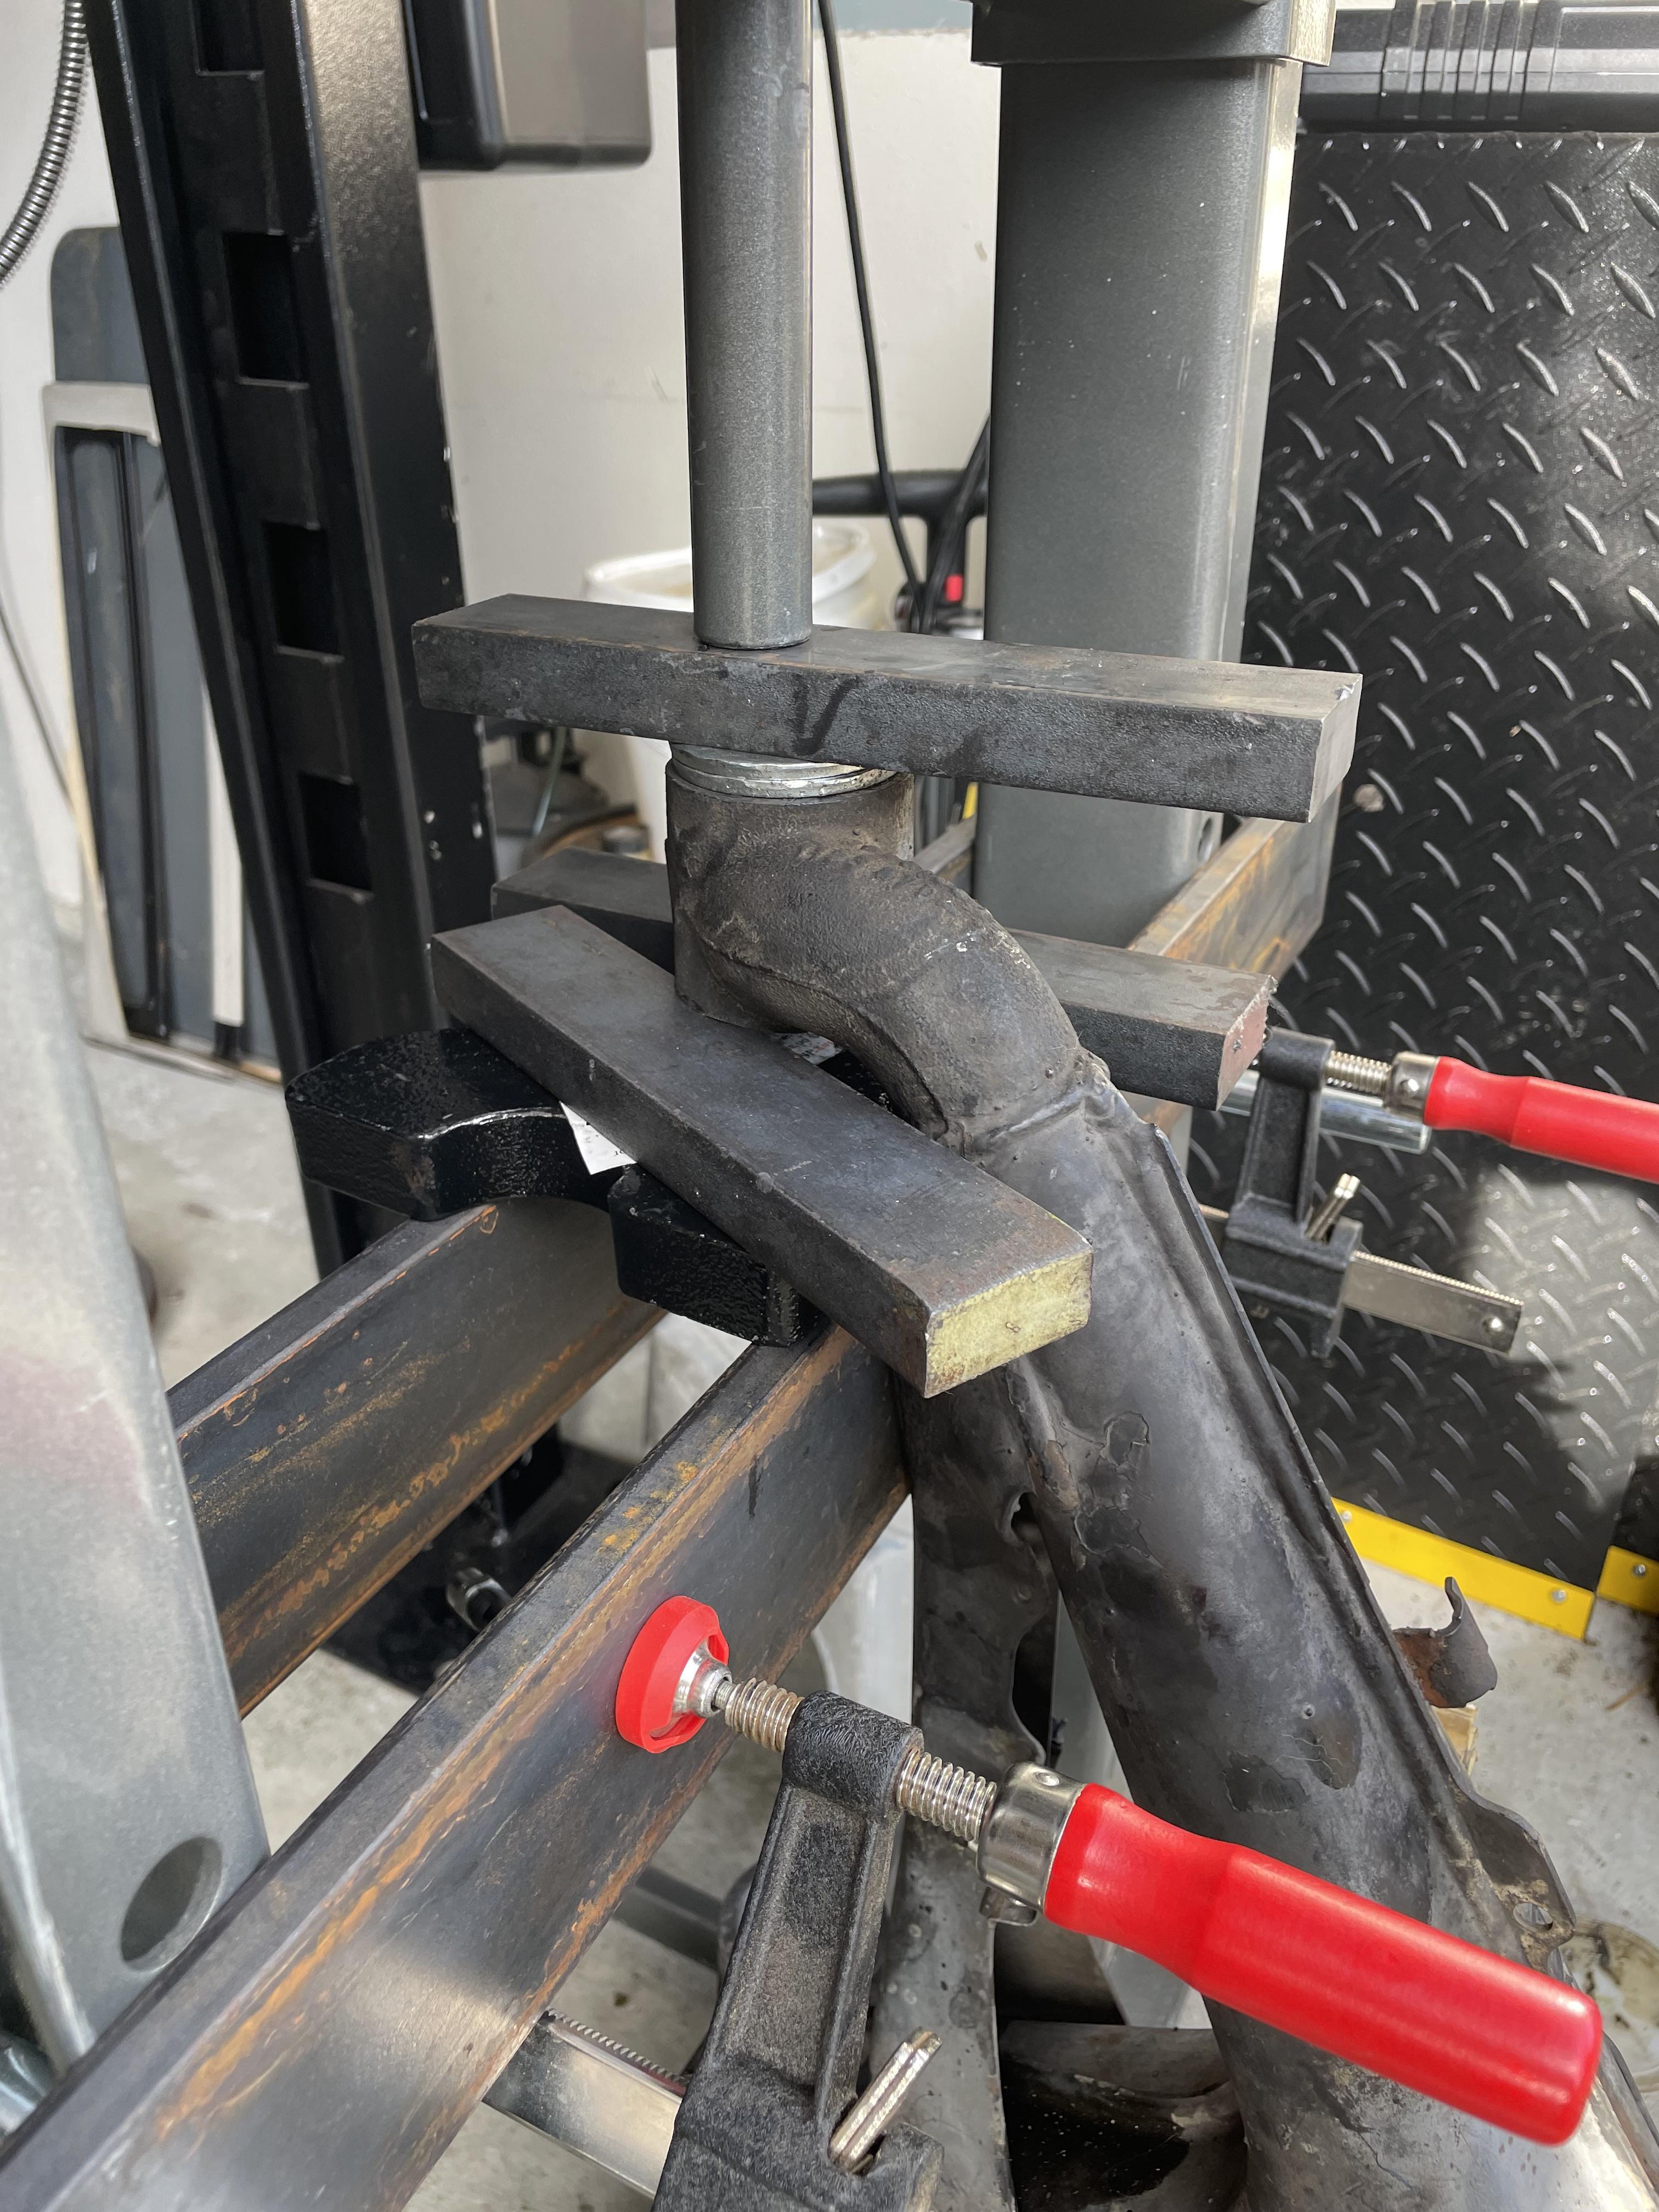
Finished up installing the right rear trailing arm bushings. I figured out how to center the TA under the 12T press so this time the removal/install was way quicker. As usual the second time around, after all the trial and error of the first attempt, things go way easier. After sawing through the outer race of the bushing to make removal easy, I cleaned up the bore of the TA with a brake hone. Then a little grease on the bushing and bore and I was done in about an hour. The hardest part was centering the bushing under the press. The 12T Harbor Freight press is not a precision instrument so a little fudging enabled me to get the bushing started in the bore:
I'm back from a Panama Canal cruise aboard the Windstar, which only holds 145 passengers. Then off in Costa Rica to see friends and explore.
Both my wife and I managed to get Covid from he cruise, so the last few days in CR were spent sequestered in our hotel room for the most part. CR requires you to isolate for 14 days if you have Covid, so while we didn't let anyone know, we were careful not to be around others.
Here's one critter we found on a night hike:

Finished up installing the right rear trailing arm bushings. I figured out how to center the TA under the 12T press so this time the removal/install was way quicker. As usual the second time around, after all the trial and error of the first attempt, things go way easier. After sawing through the outer race of the bushing to make removal easy, I cleaned up the bore of the TA with a brake hone. Then a little grease on the bushing and bore and I was done in about an hour. The hardest part was centering the bushing under the press. The 12T Harbor Freight press is not a precision instrument so a little fudging enabled me to get the bushing started in the bore:


Last edited by gwb72tii on Feb 09, 2024 8:01 PM, edited 2 times in total.
Re: And so it starts, Maeve
Then a little work on the air conditioner and heater.
There is a resistor piece in the a/c that I am replacing so I'm not forced to do it after reinstallation.
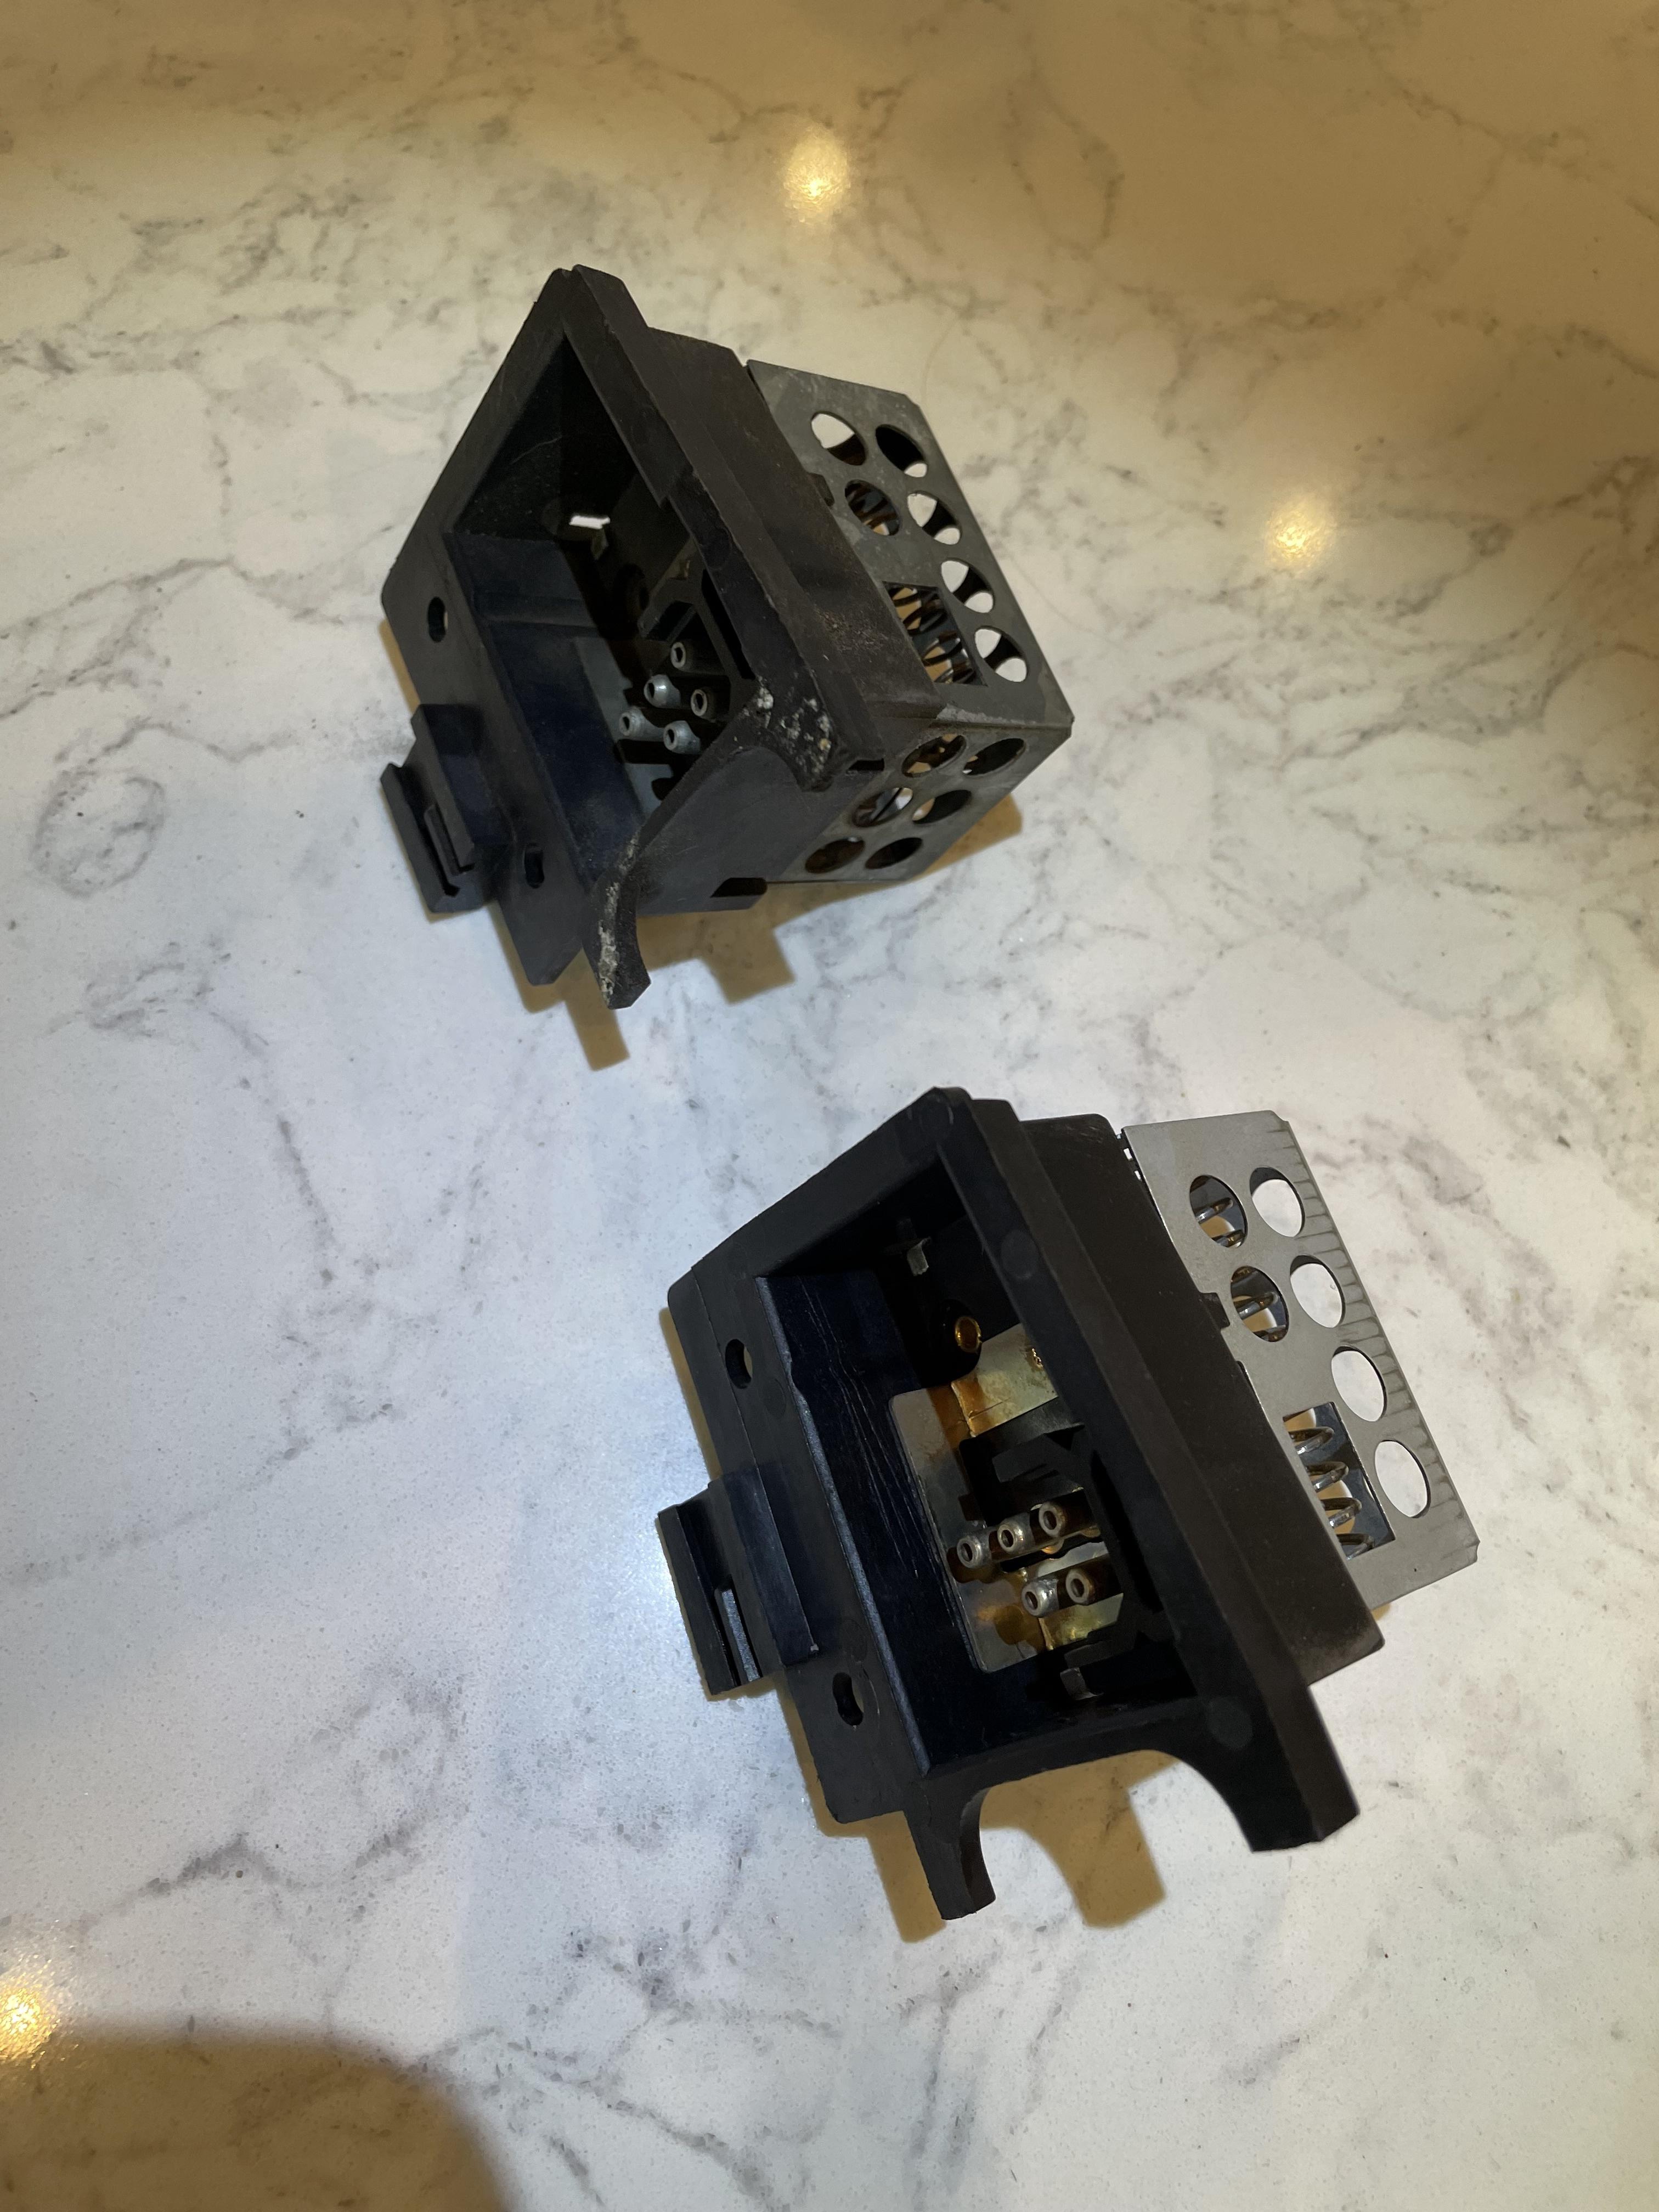
This is the piece, p/n 64511373277, the old one on top. I have no clue if it's still operational. Maybe someone can instruct me how to test it with a multimeter?
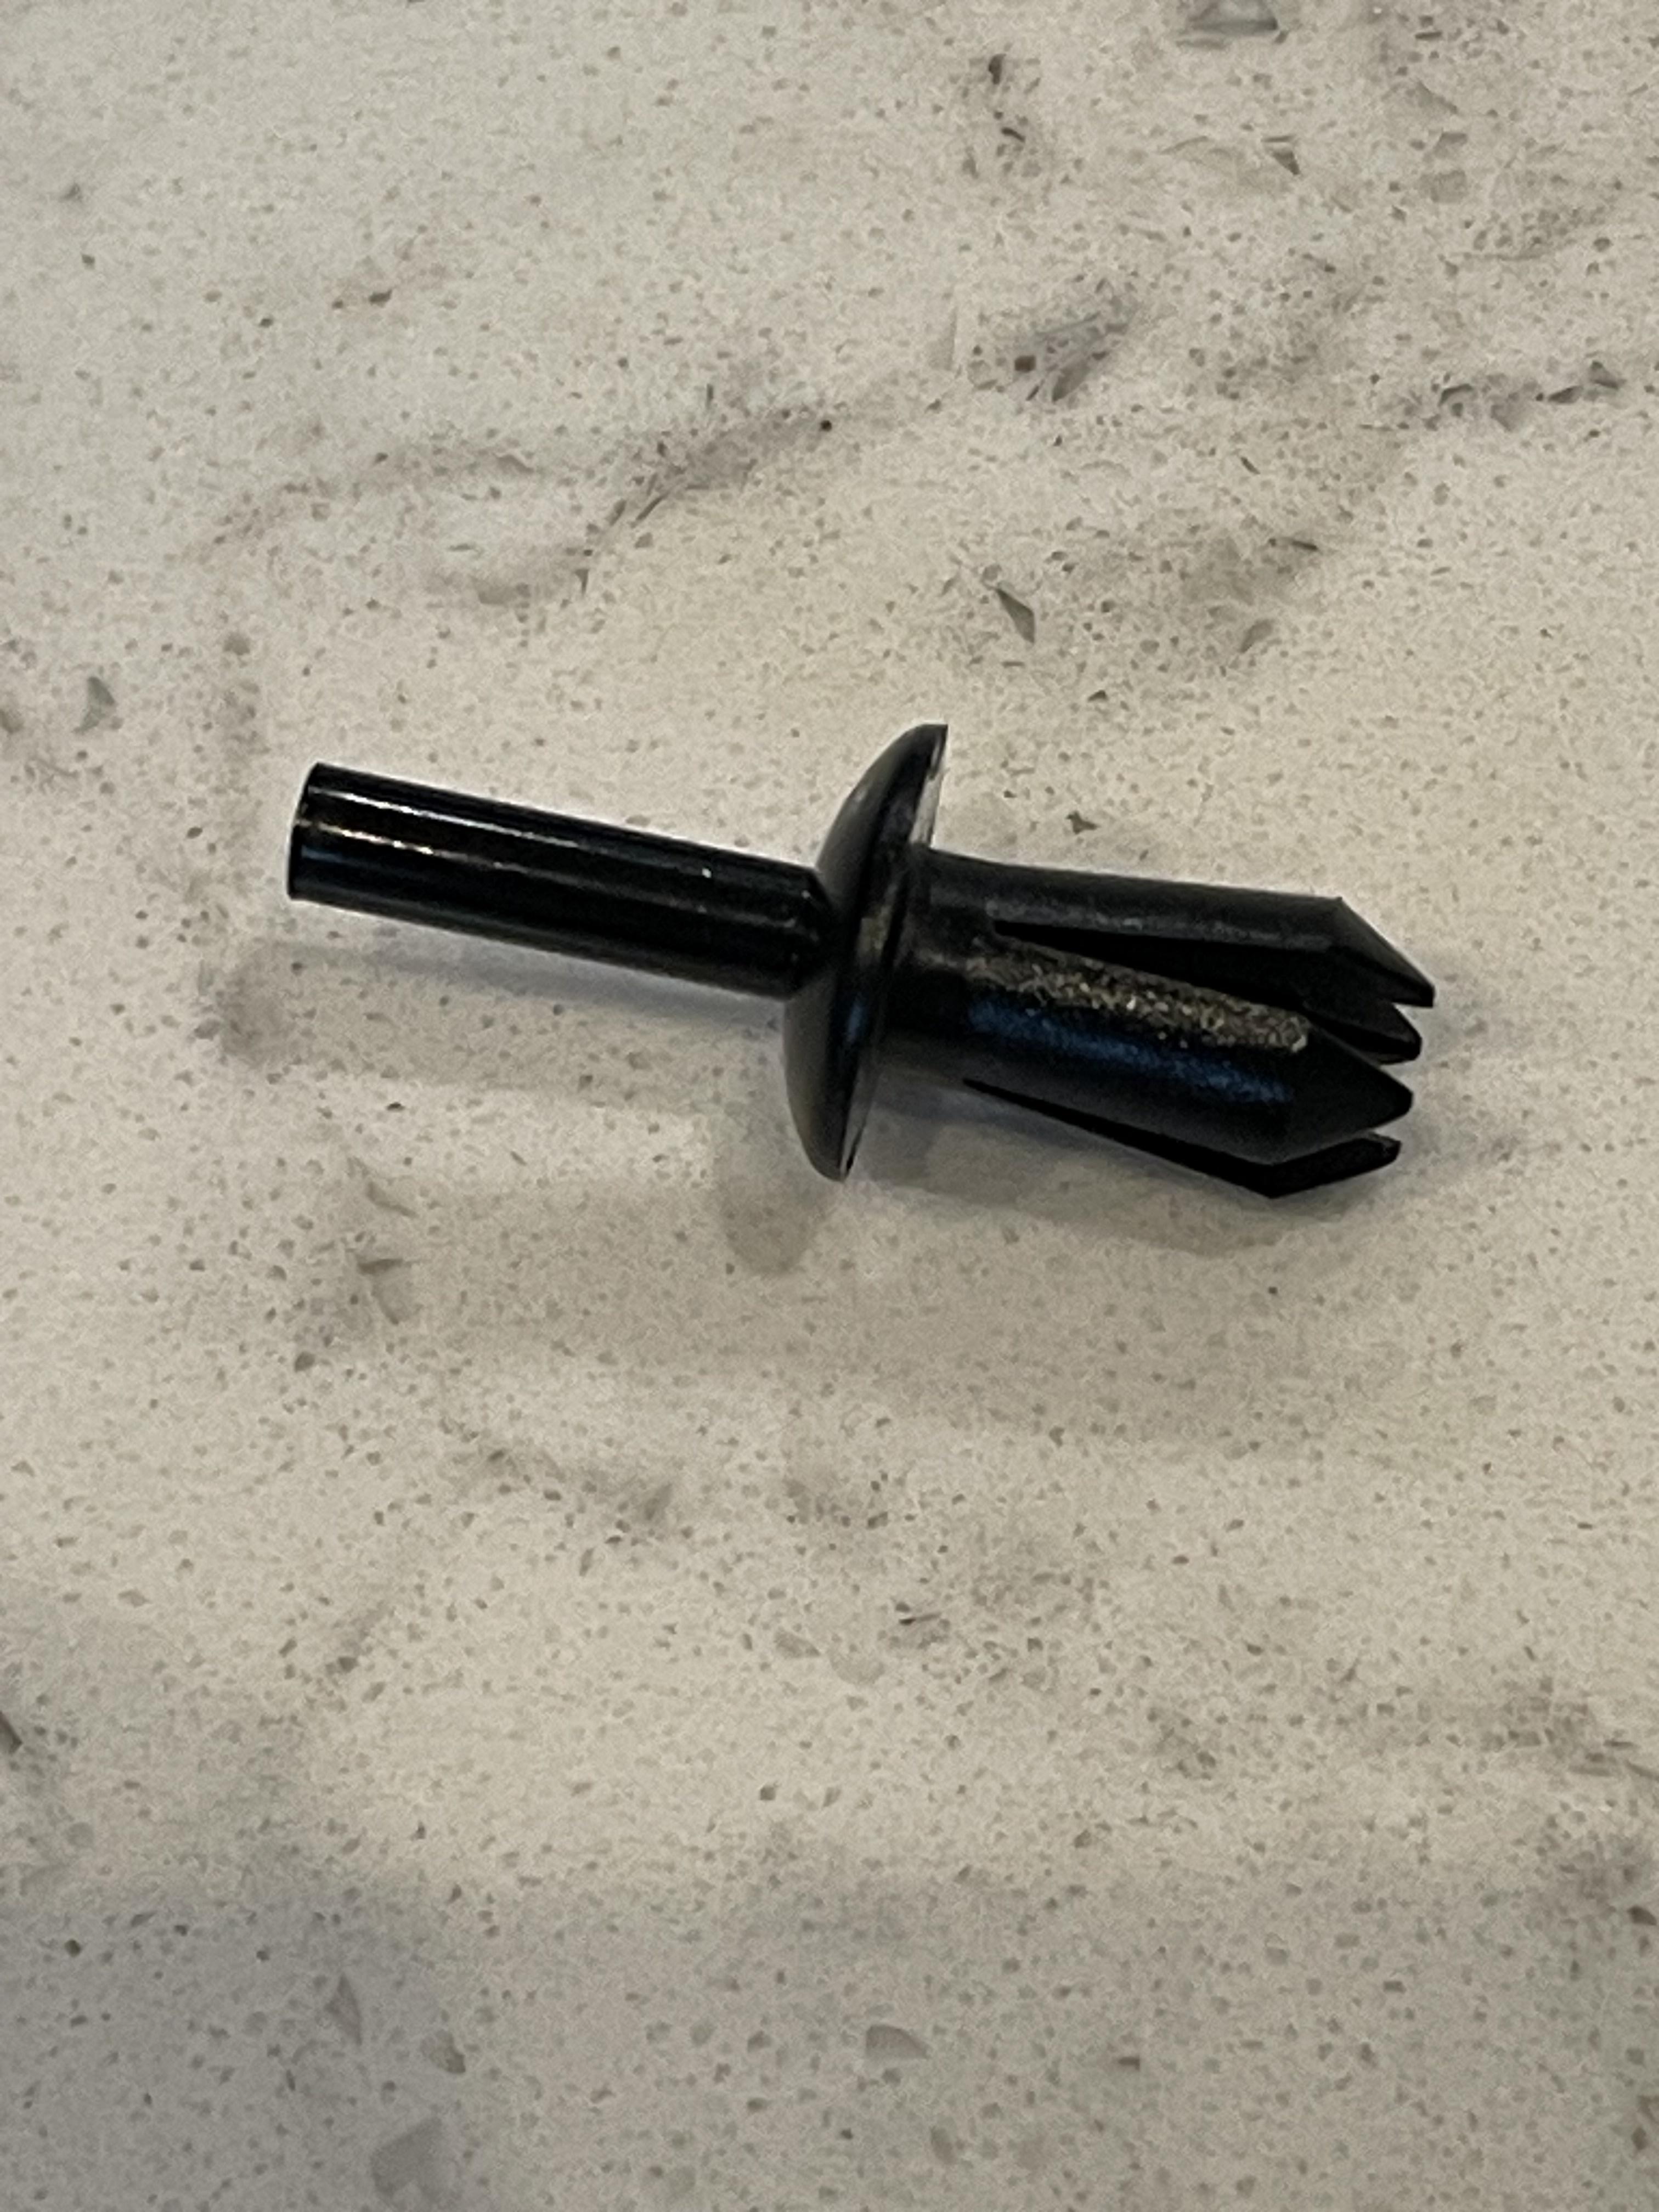
Be sure to order the expanding rivets as well (51161881149) as getting to old ones out are near impossible without breaking them. You will need two:
There is a resistor piece in the a/c that I am replacing so I'm not forced to do it after reinstallation.
This is the piece, p/n 64511373277, the old one on top. I have no clue if it's still operational. Maybe someone can instruct me how to test it with a multimeter?

Be sure to order the expanding rivets as well (51161881149) as getting to old ones out are near impossible without breaking them. You will need two:

Re: And so it starts, Maeve
I don't have a blower resistor in front of me, but here's the rough sketch of what to do:gwb72tii wrote: Feb 09, 2024 7:57 PM Then a little work on the air conditioner and heater.
There is a resistor piece in the a/c that I am replacing so I'm not forced to do it after reinstallation.
This is the piece, p/n 64511373277, the old one on top. I have no clue if it's still operational. Maybe someone can instruct me how to test it with a multimeter?

There's at least one coiled up thing in there, it'll connect to pins. Put a multimeter in ohms mode, probe the two pins it connects to (if there's more than one coiled resistor, do this for each). You should get a number somewhere between say 1 ohm and 10 ohm. If you don't have a halfway decent digital multimeter it may be hard to get an accurate reading, but it almost doesn't matter what the exact number is.
If all the coils ohm out fine it's good - I'd be very surprised if this had a failure mode that wasn't open-circuit. I'd put the new one in just in case, and test the old one to see if it's a good spare.
Re: And so it starts, Maeve
Success! Rear subframe bushings are in and seated fully. The FoRSVARA tool helped immensely. This type of job is made for ratcheting wrenches:
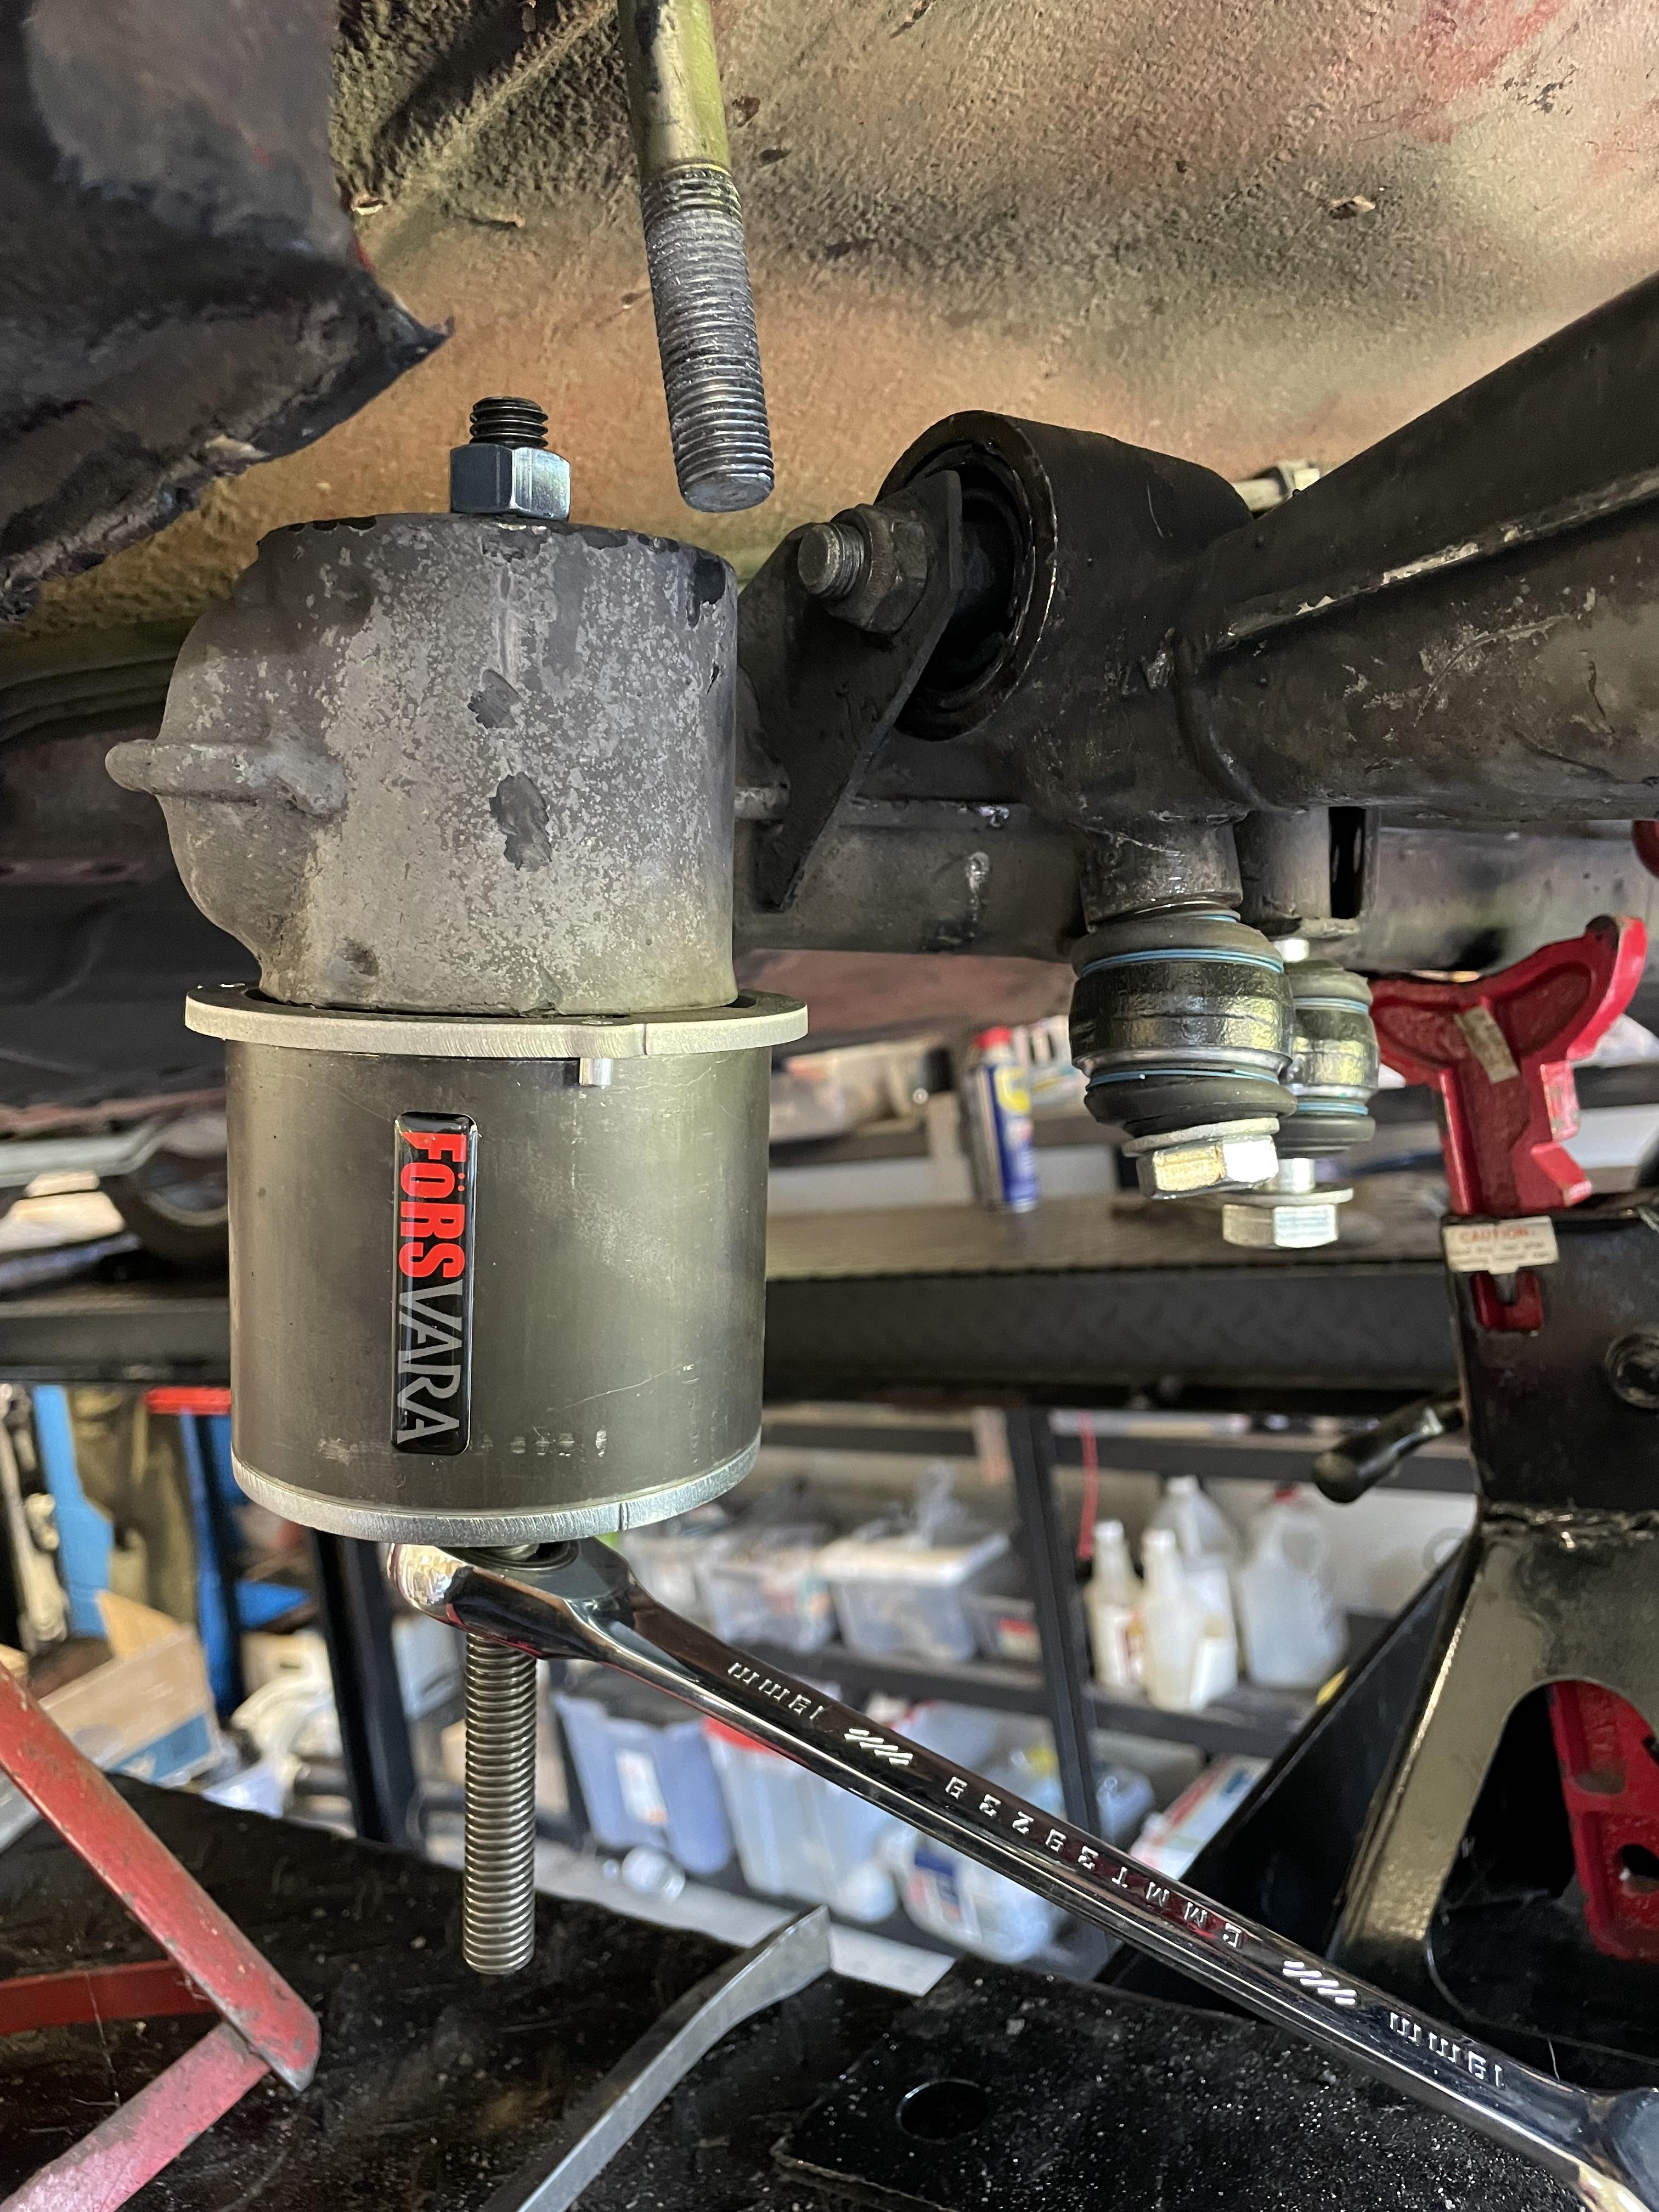
The PO, attempted to replace the bushings but never got them fully seated. The driver's side was extended about 1/4"", and the passenger side needed another 3/8" to go in all the way. Now they are perfect:
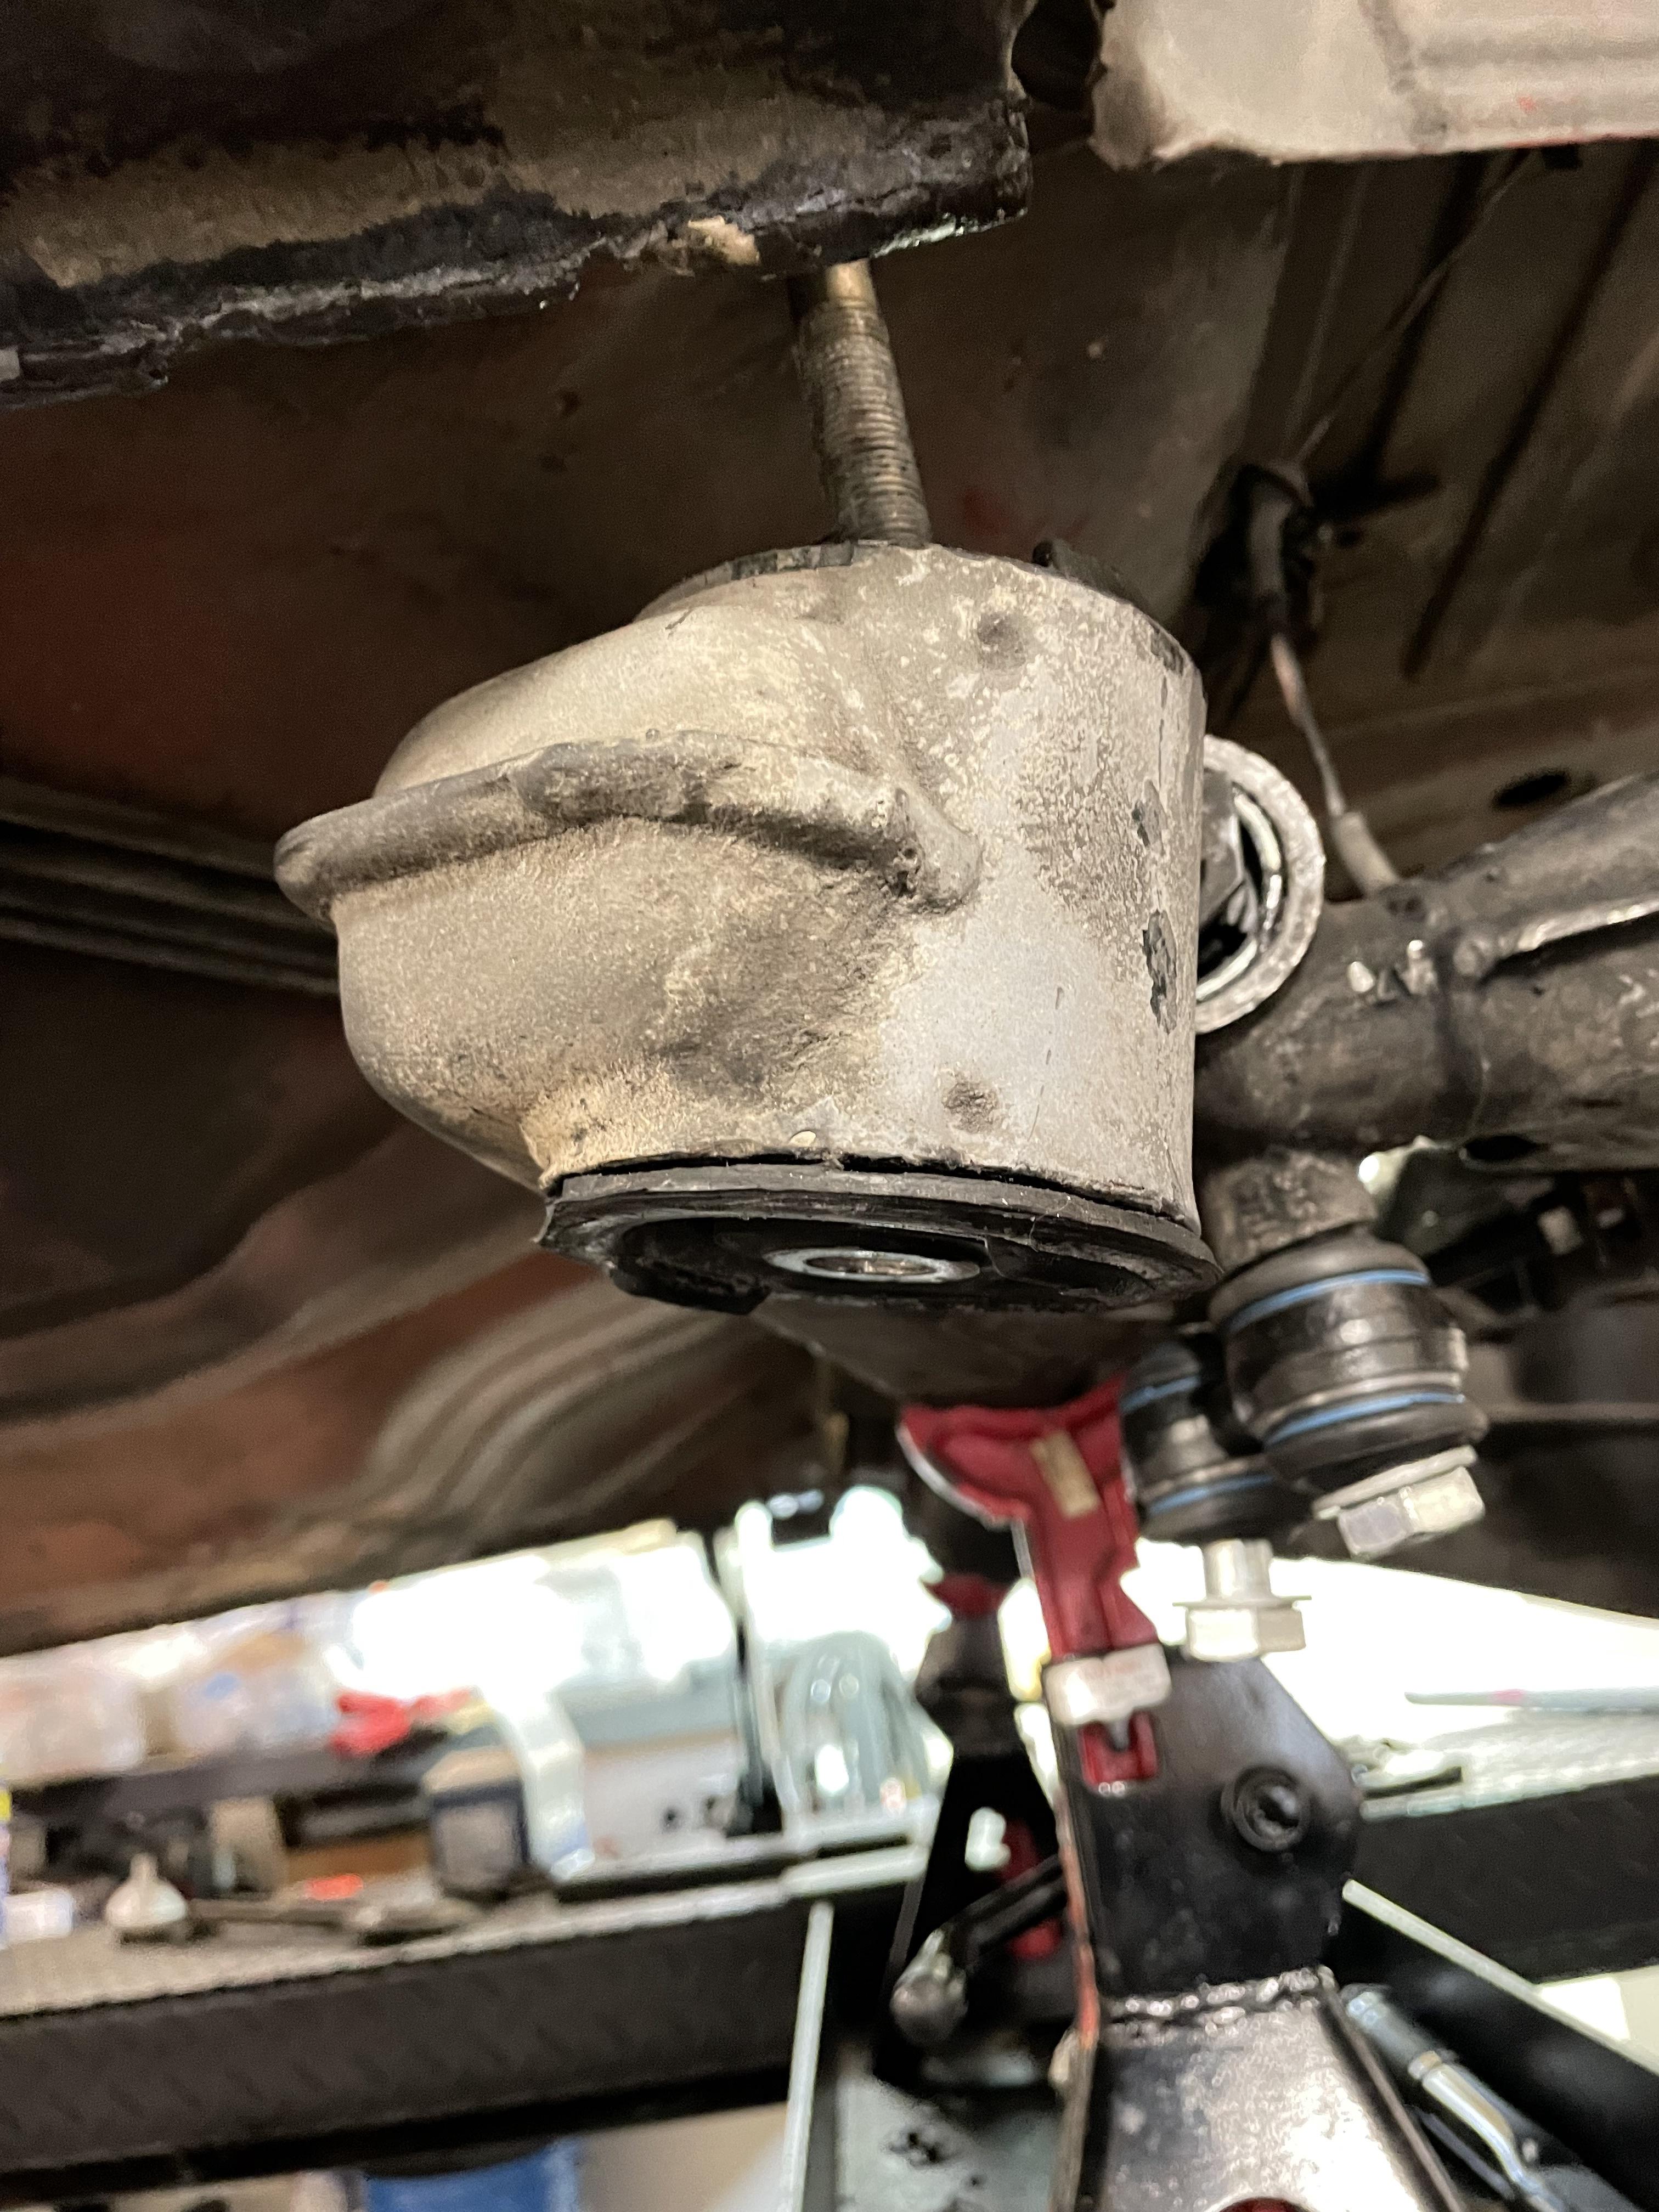
I tried and tried and tried using a BFH to remove the subframe bushing pins, and even bought a pneumatic hammer, but nothing worked. So I loosened the diff mount, jacked the car up and dropped the rear subframe enough so it came off the pins. Now I realize I need a new diff mounting bracket, thought I had one, but now have to wait until I get one to finish the rear end suspension. sigh....
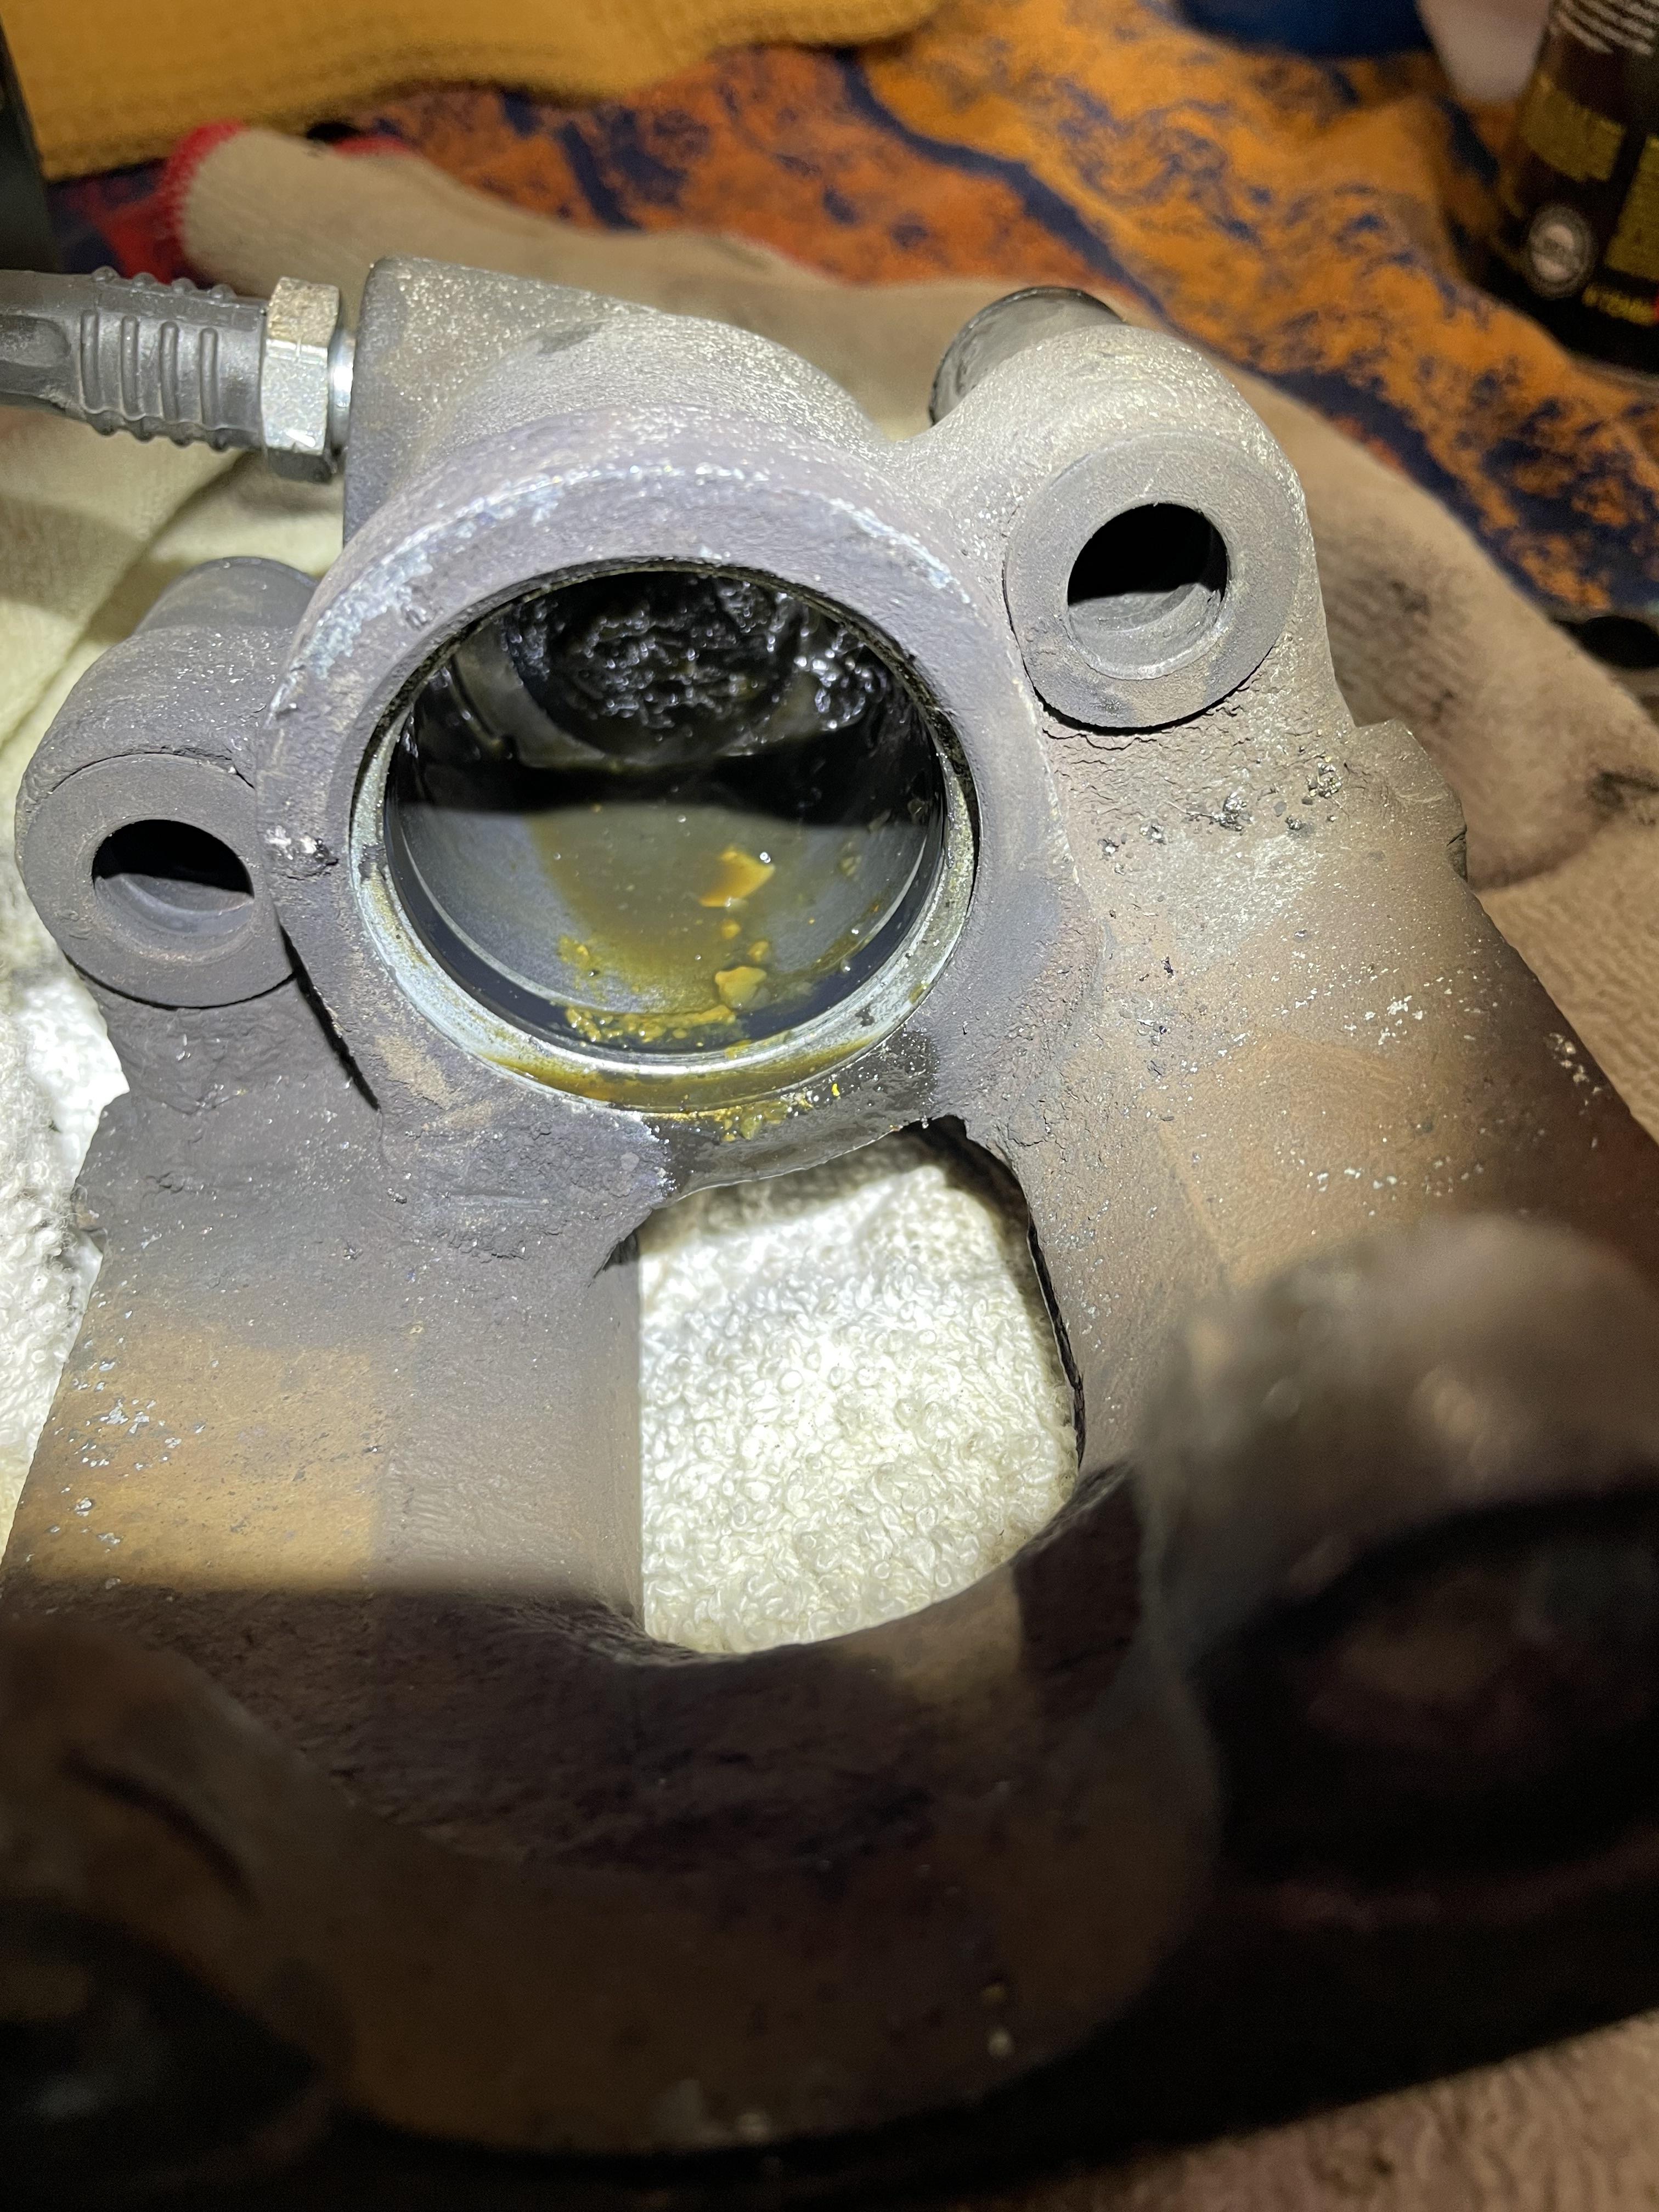
So in the mean time why not replace the caliper seals and make sure the brakes are in good shape? I removed the piston in one of the rear calipers, and this is what I found. Yuck!
So now I'm headed to Northwest BMW to order the diff mount. BMW is also about $40 cheaper that ECS or FCP.

The PO, attempted to replace the bushings but never got them fully seated. The driver's side was extended about 1/4"", and the passenger side needed another 3/8" to go in all the way. Now they are perfect:

I tried and tried and tried using a BFH to remove the subframe bushing pins, and even bought a pneumatic hammer, but nothing worked. So I loosened the diff mount, jacked the car up and dropped the rear subframe enough so it came off the pins. Now I realize I need a new diff mounting bracket, thought I had one, but now have to wait until I get one to finish the rear end suspension. sigh....
So in the mean time why not replace the caliper seals and make sure the brakes are in good shape? I removed the piston in one of the rear calipers, and this is what I found. Yuck!

So now I'm headed to Northwest BMW to order the diff mount. BMW is also about $40 cheaper that ECS or FCP.
Last edited by gwb72tii on Feb 25, 2024 9:15 PM, edited 2 times in total.
Re: And so it starts, Maeve
Make sure to buy the 528e diff bushing, it's stronger and with your new motor you'll most likely need it.
Re: And so it starts, Maeve
I think I did kojo. I bought the diff mount p/n 33171126951, and it's listed for the 528e up to 9/84, and the mounting pattern for the 4 cap screws is different, so it doesn't fit. What am I doing wrong?kojo96 wrote: Feb 25, 2024 9:04 PM Make sure to buy the 528e diff bushing, it's stronger and with your new motor you'll most likely need it.
may have answered my own question. I looks like the 528e diff mount from 1985 on fits, plus it's cheaper.
Re: And so it starts, Maeve
Yes, the later built diff mount.gwb72tii wrote: Feb 25, 2024 9:10 PMI think I did kojo. I bought the diff mount p/n 33171126951, and it's listed for the 528e up to 9/84, and the mounting pattern for the 4 cap screws is different, so it doesn't fit. What am I doing wrong?kojo96 wrote: Feb 25, 2024 9:04 PM Make sure to buy the 528e diff bushing, it's stronger and with your new motor you'll most likely need it.
may have answered my own question. I looks like the 528e diff mount from 1985 on fits, plus it's cheaper.
Re: And so it starts, Maeve
More accomplished today. My son Greg and I put the rear suspension back together and torqued everything. The old differential mount came out in pieces!
Next step is rebuilding the rear brake calipers with new seals, and then flushing the brake lines. When I disassembled the calipers, it looked like there was cottage cheese in the lines and behind the caliper piston. I'm guessing from water being absorbed over time and no periodic brake fluid flushing from the PO.
I'm getting excited to get the car completed and on the road even though I have a long way to go.
Re: And so it starts, Maeve
Today was finish rebuilding brake caliper day.
After trial and error, I finally went back and searched for an e28 brake caliper rebuild on YouTube, and found this:
https://www.youtube.com/watch?v=E5tHq1Gim6Y
The hardest part is getting the boot on the piston in a position that allows you to get the boot lip in the caliper groove PRIOR to getting the piston reinserted. If the piston is in the bore of the caliper at all you cannot get the boot lip inserted.
First thing was to clean up the piston and bore with 2500 grit wet/dry sandpaper. Removed all the varnish built up on the piston, reinserted the main seal in the bore, and then positioned the boot correctly and presto, the piston slides in with a little effort. I also used a grease compatible with brake fluid which helped a lot.
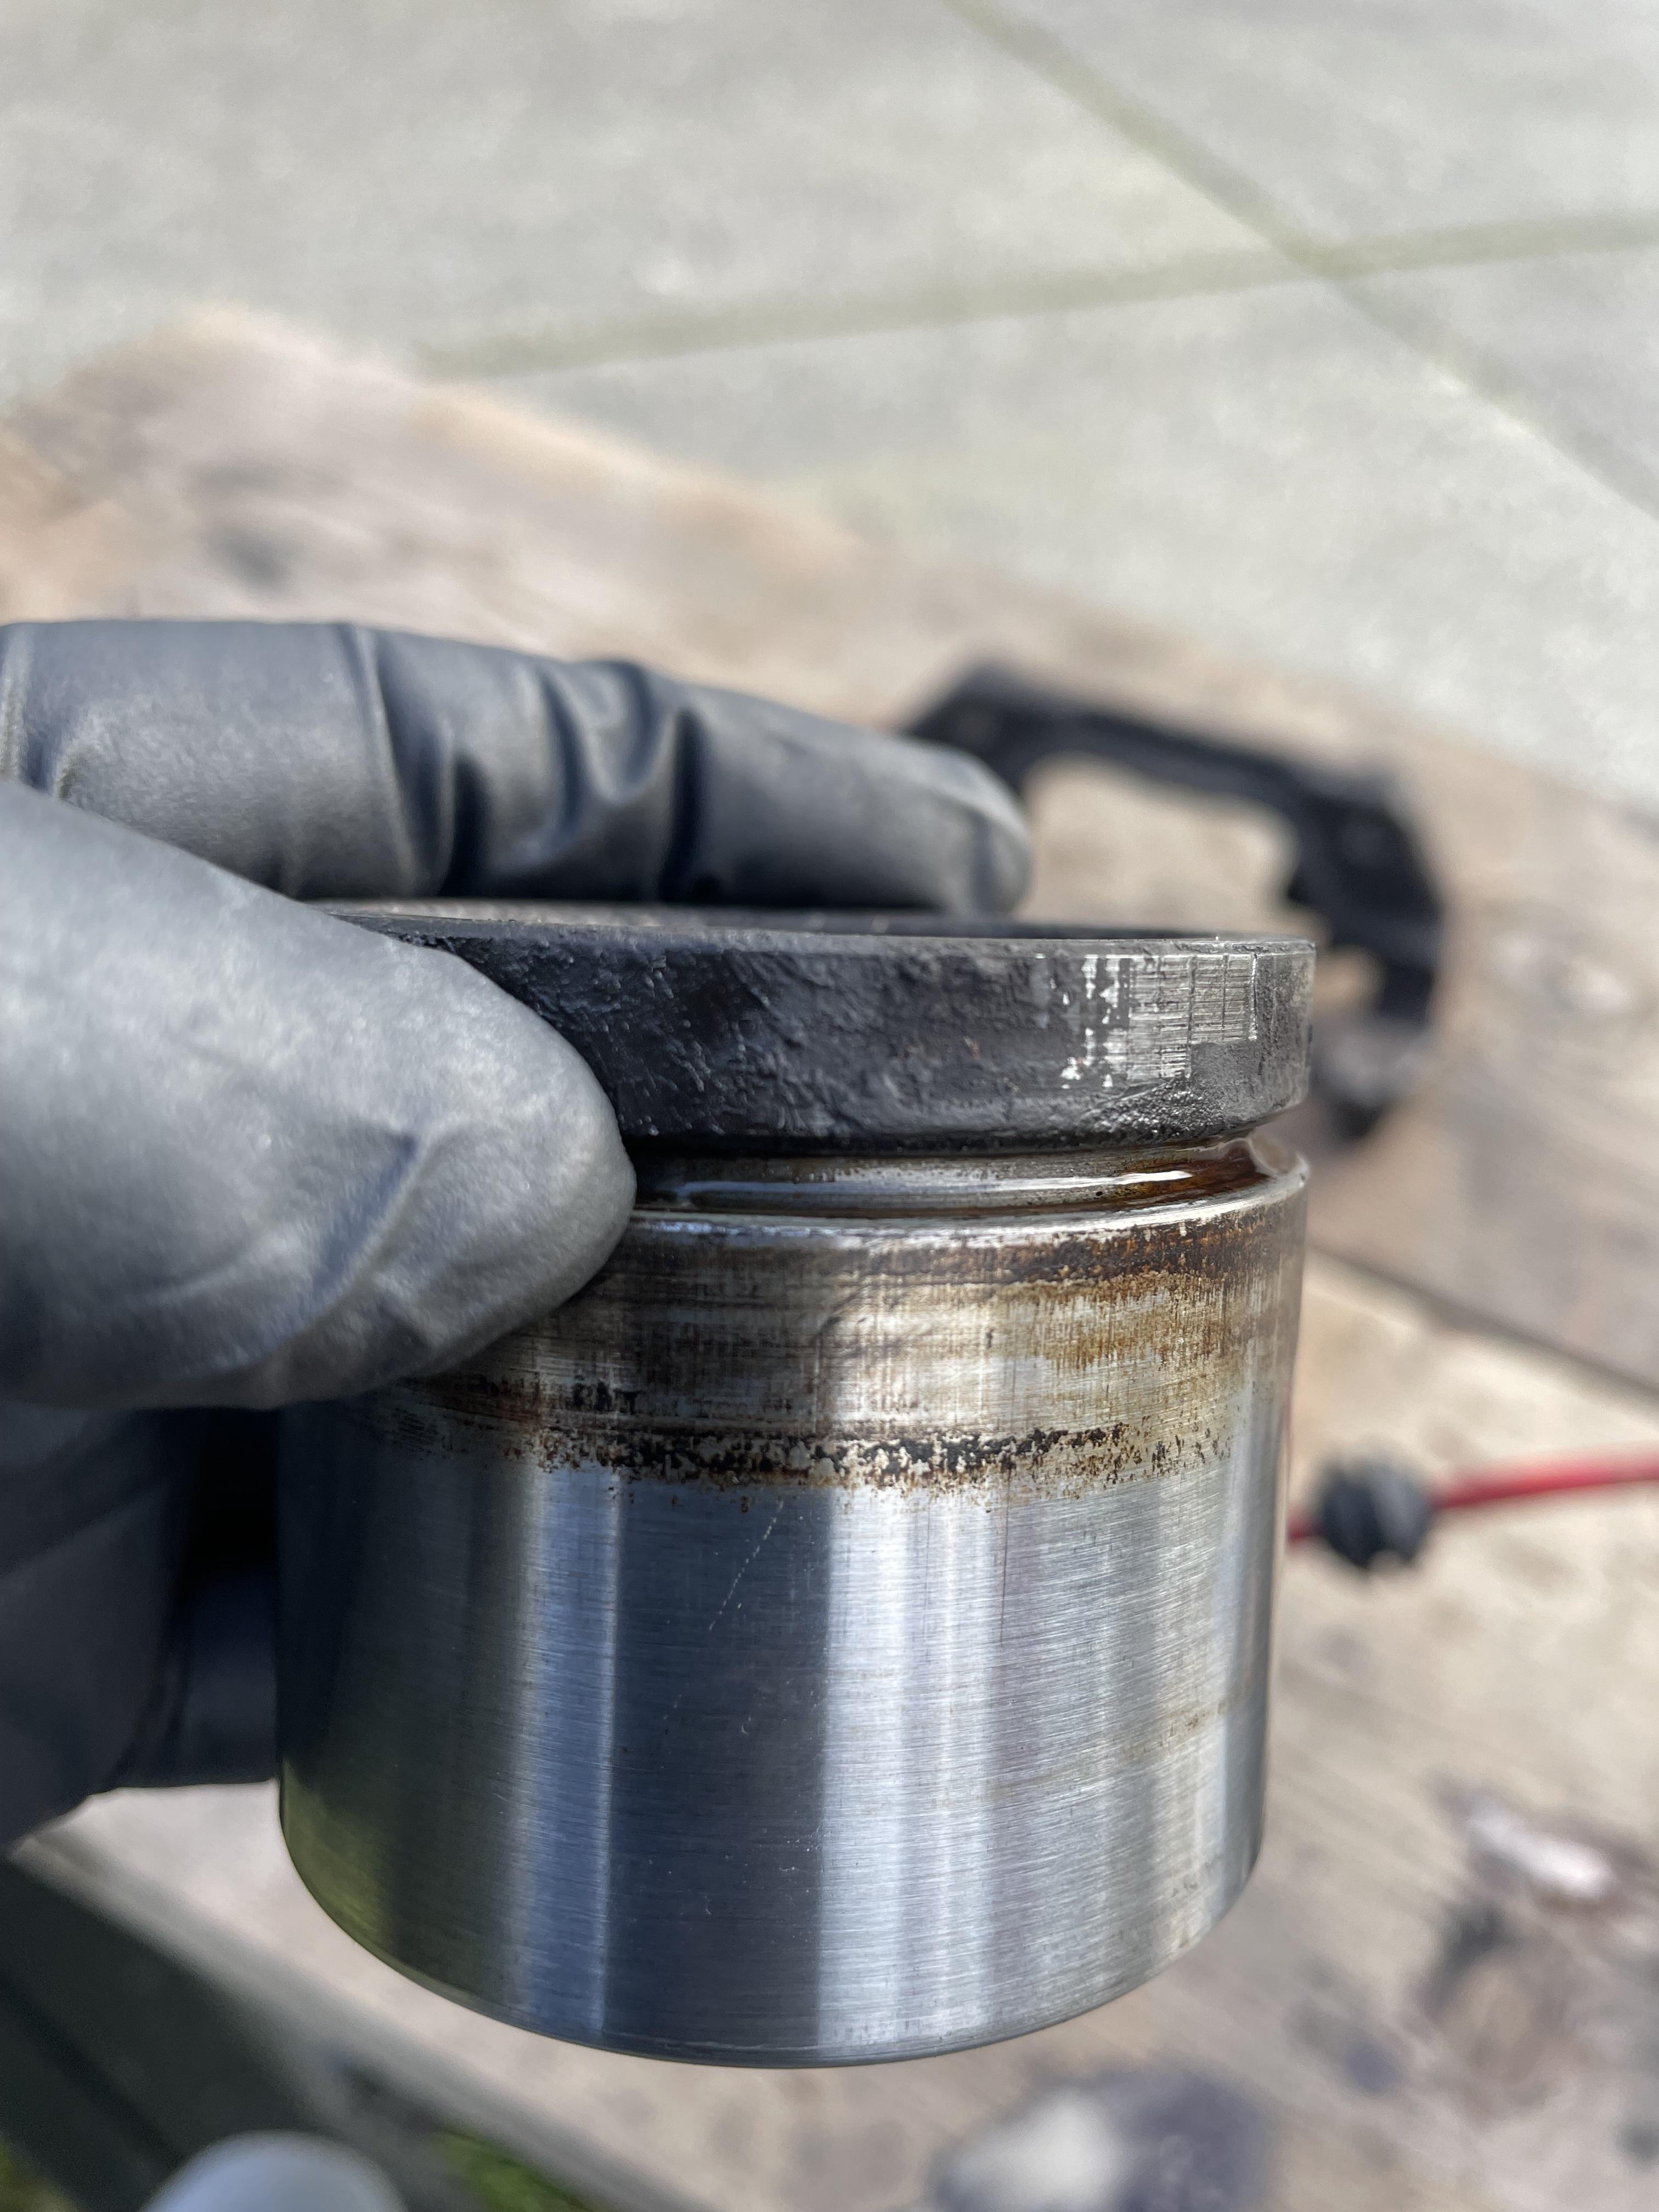
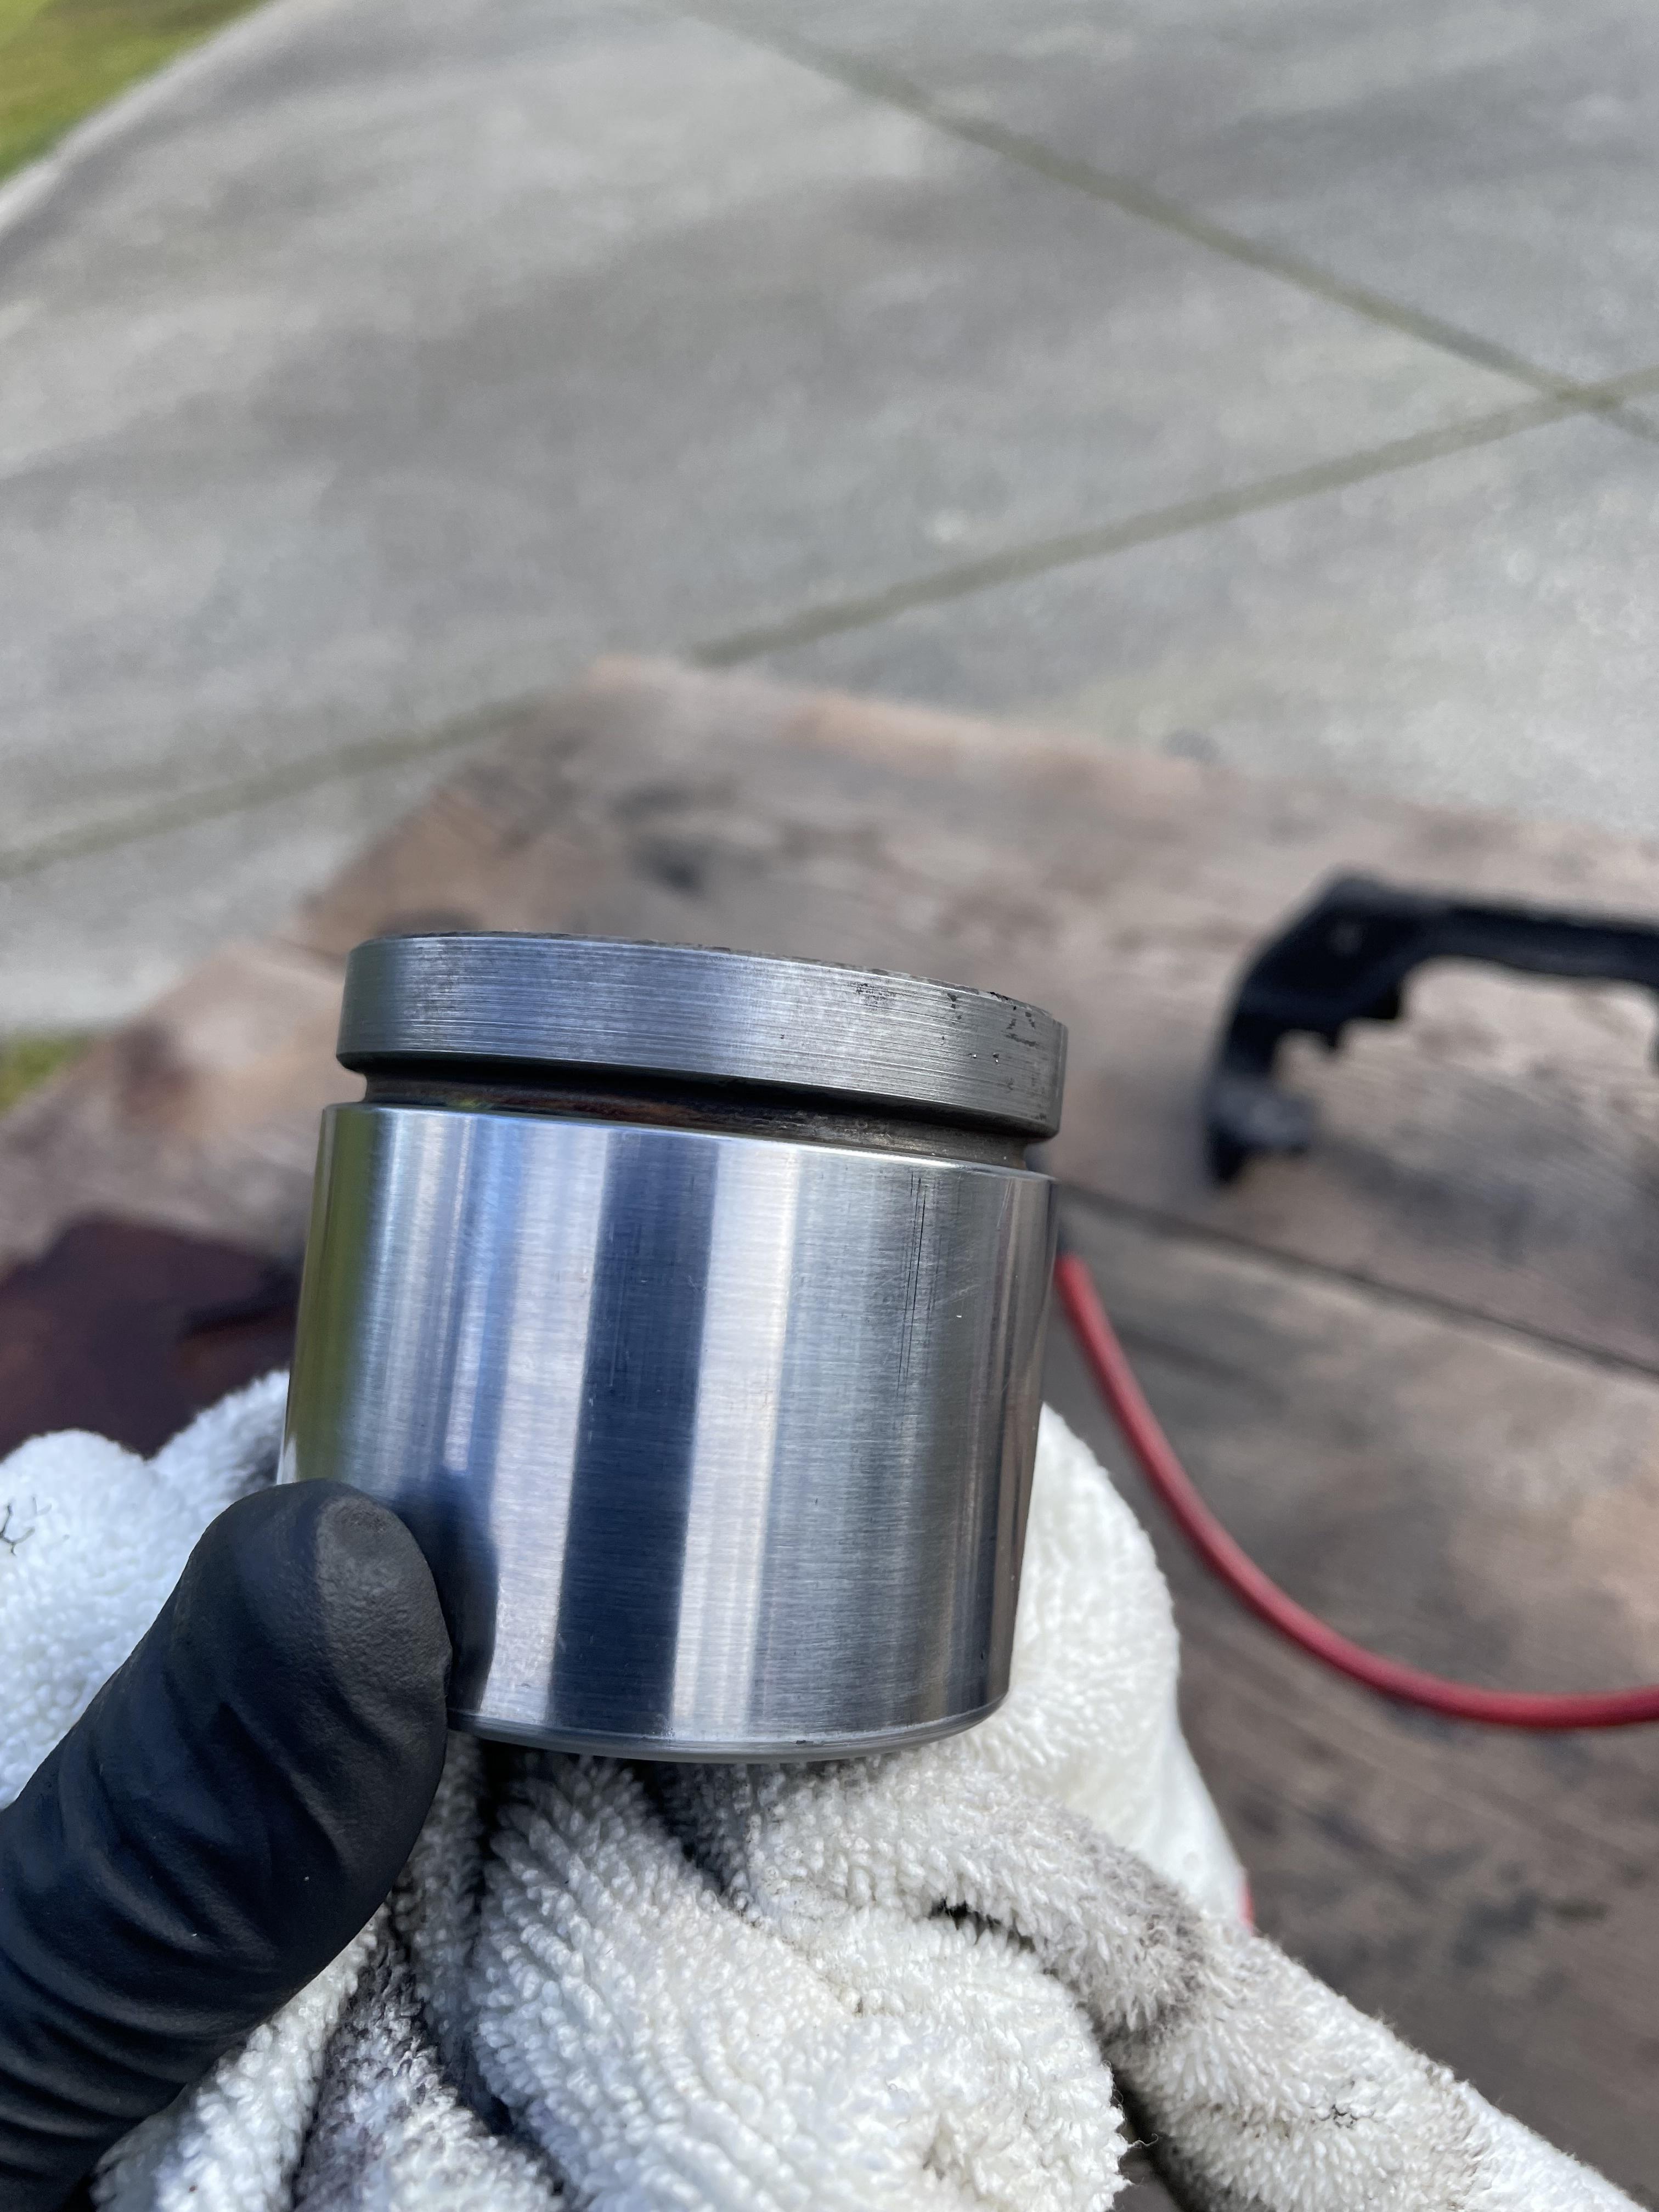
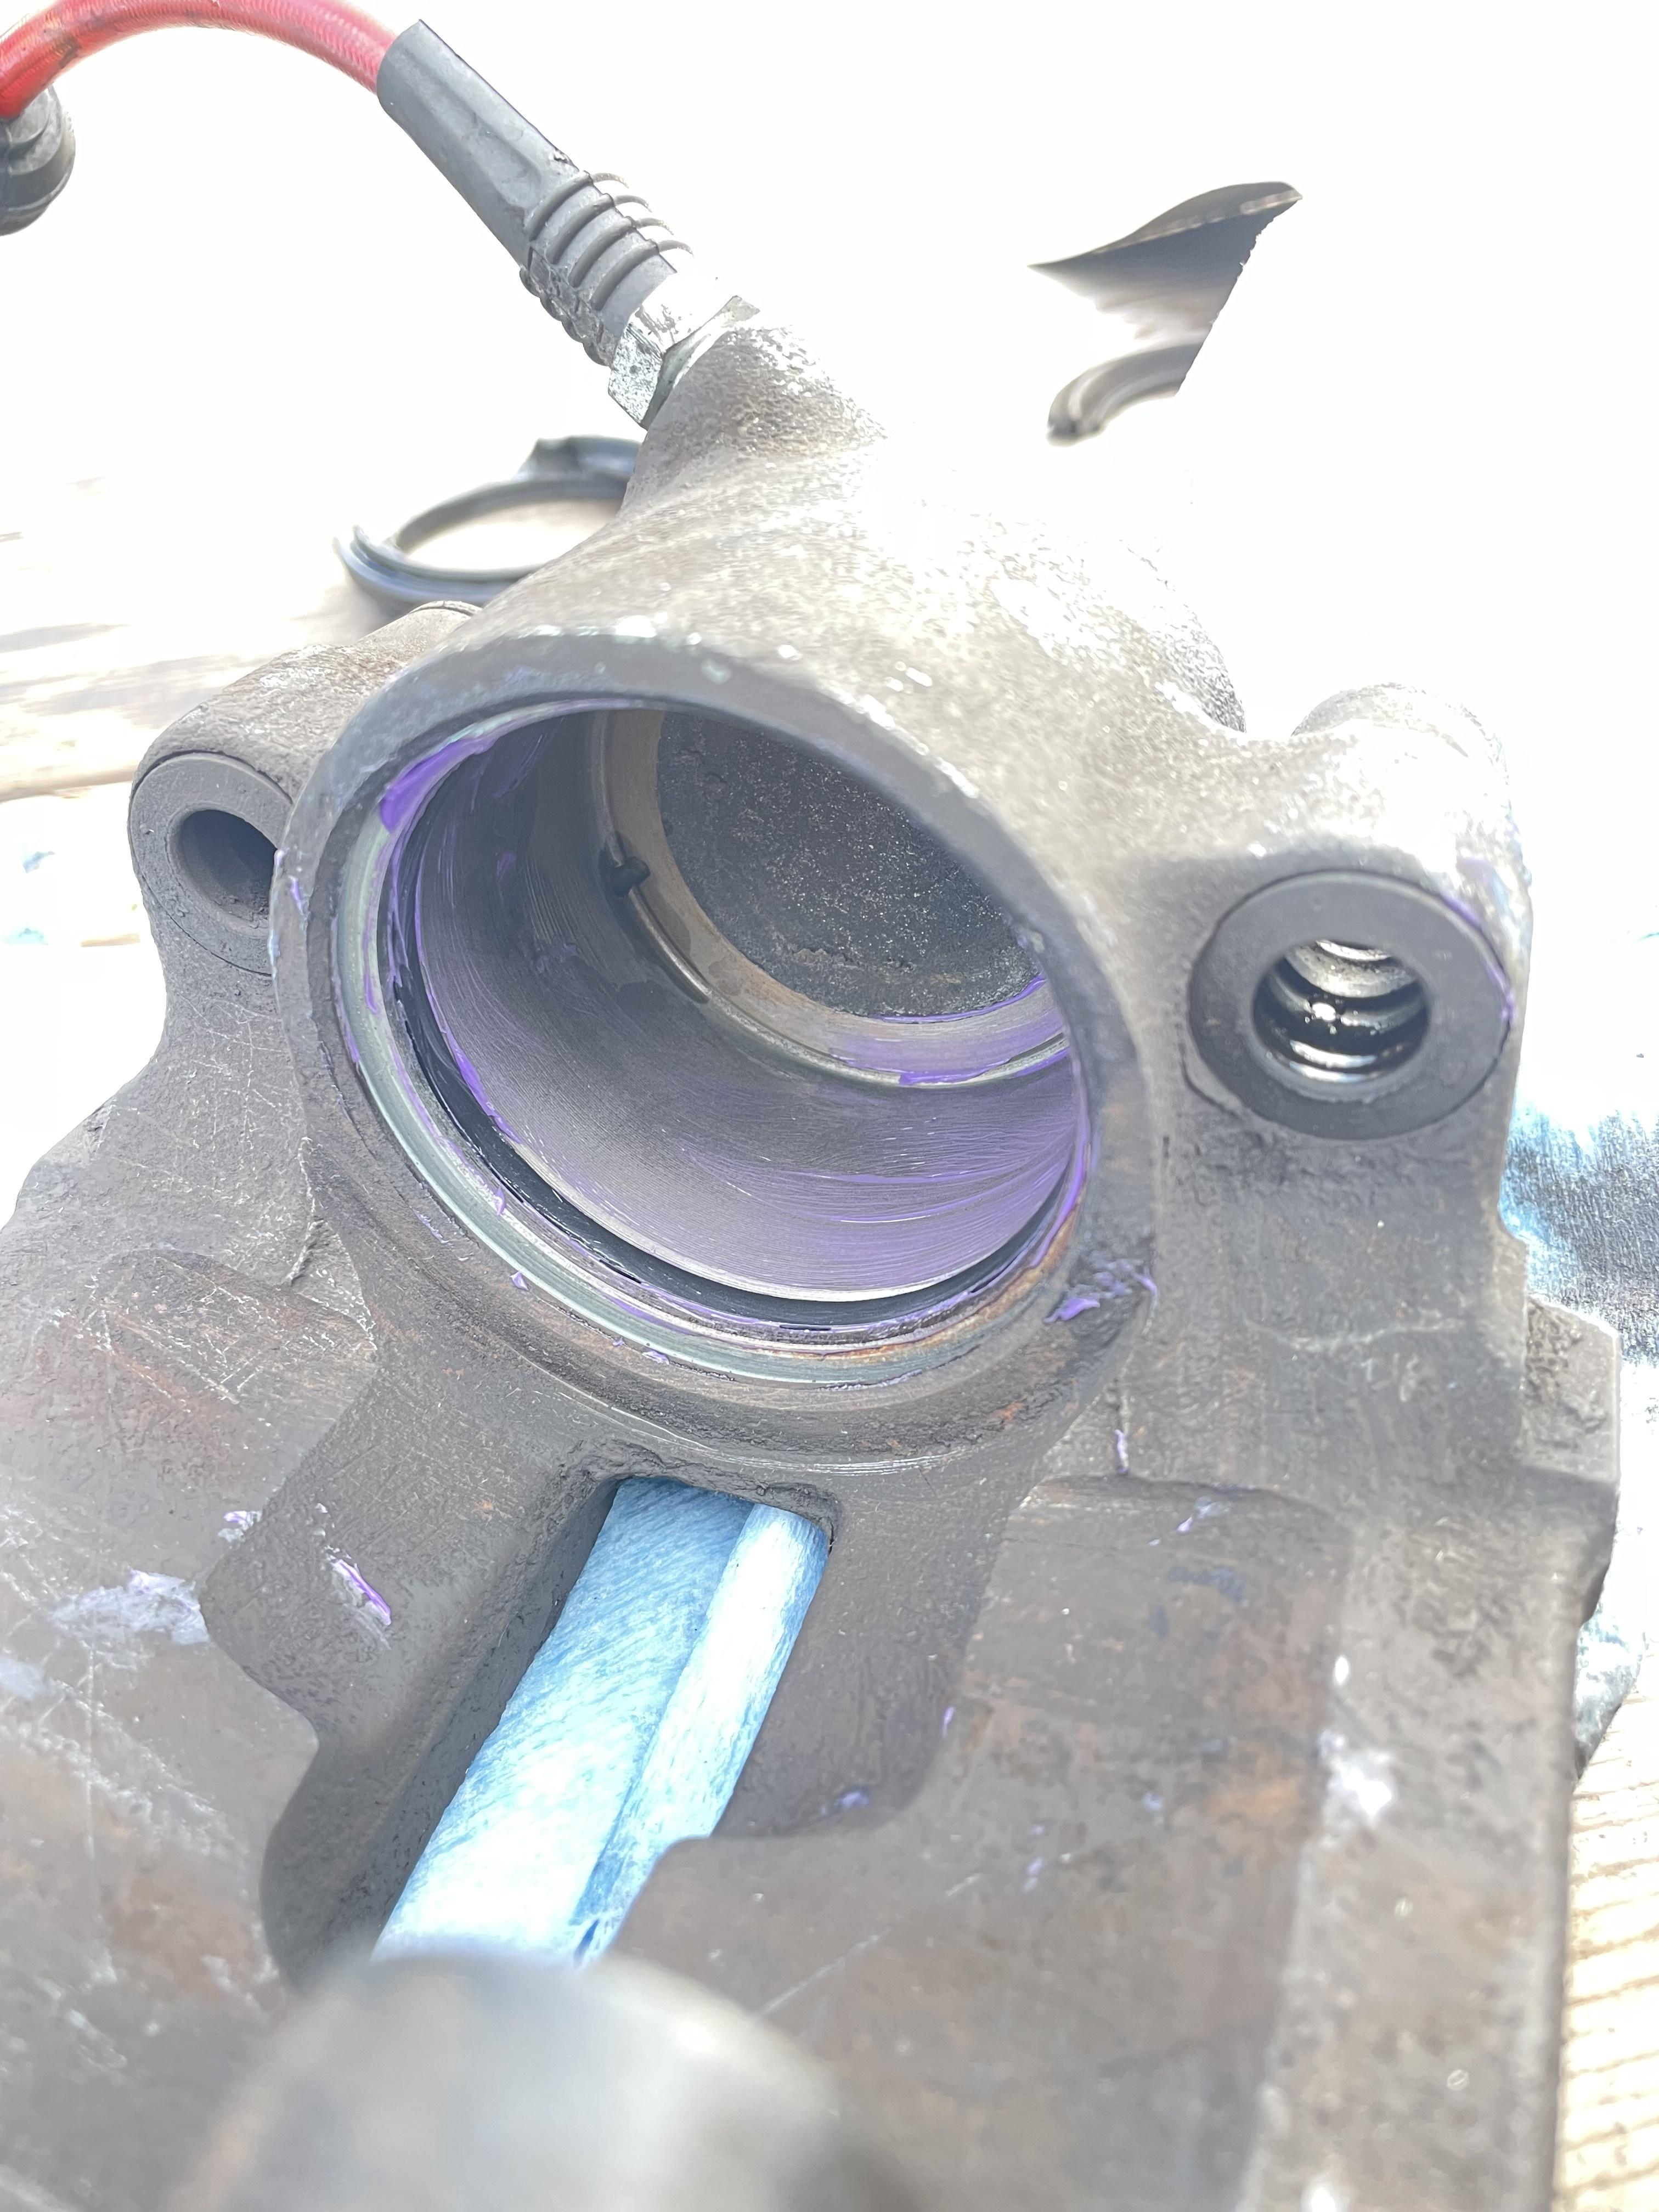
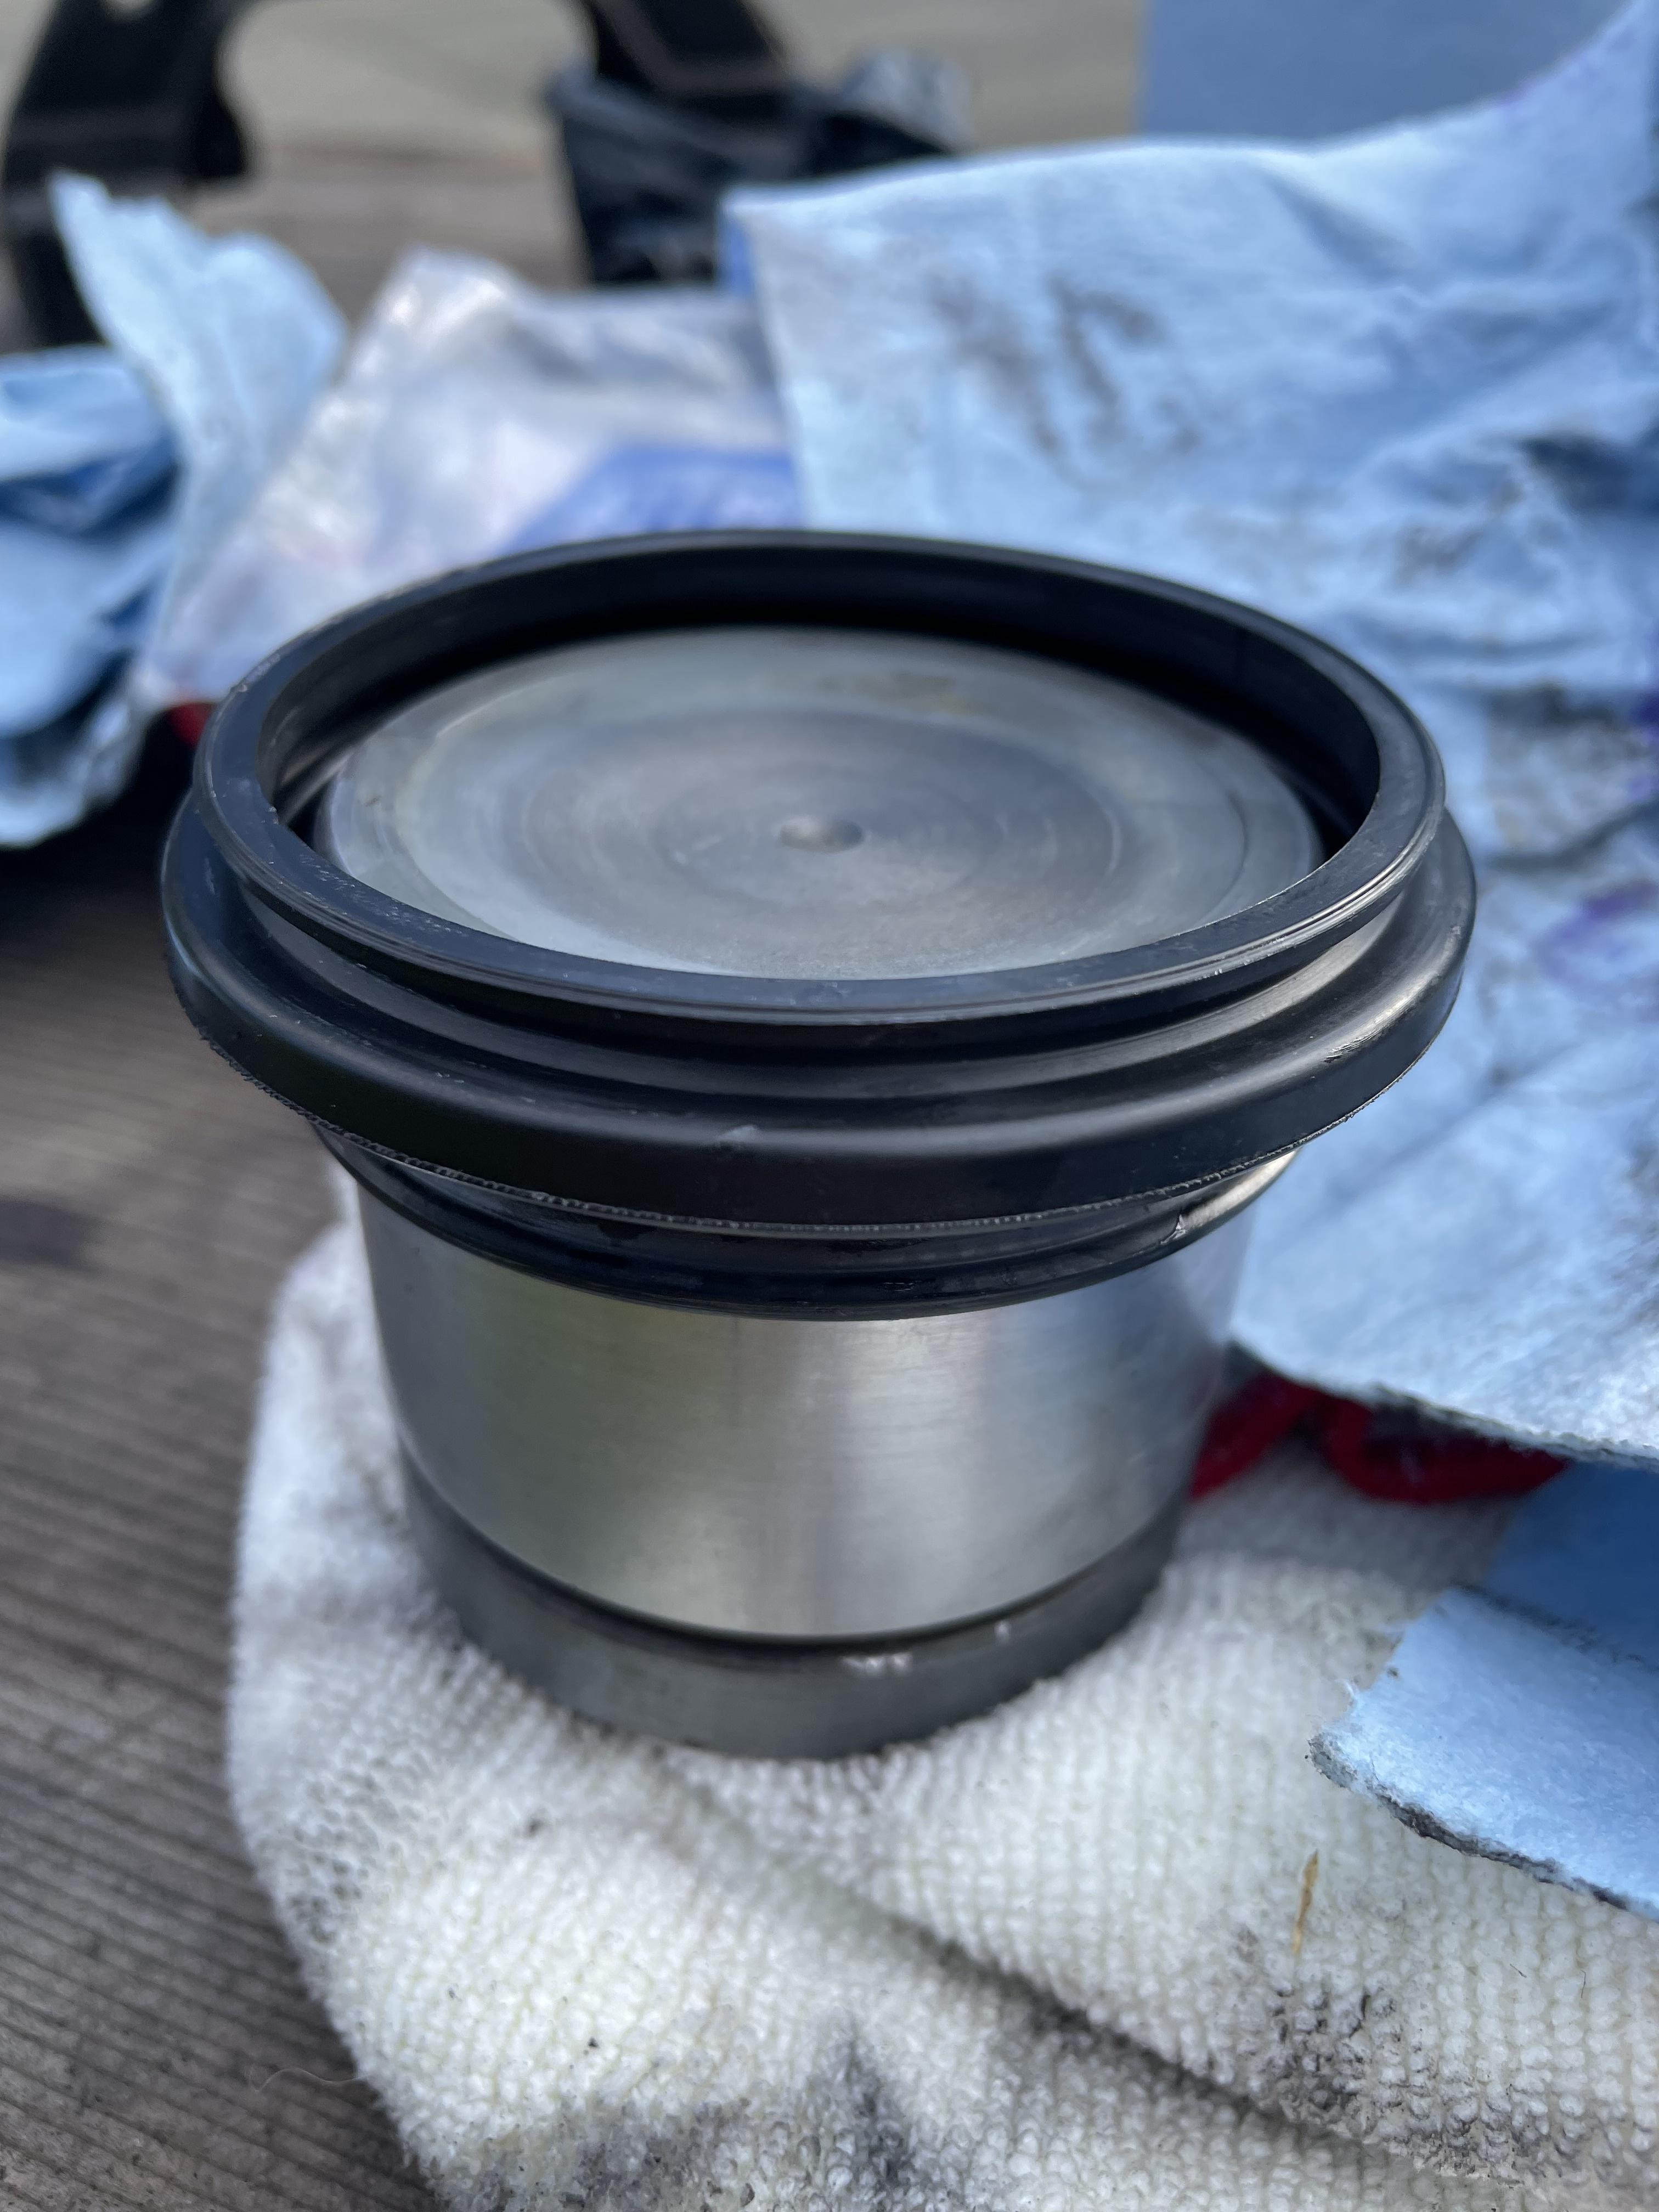
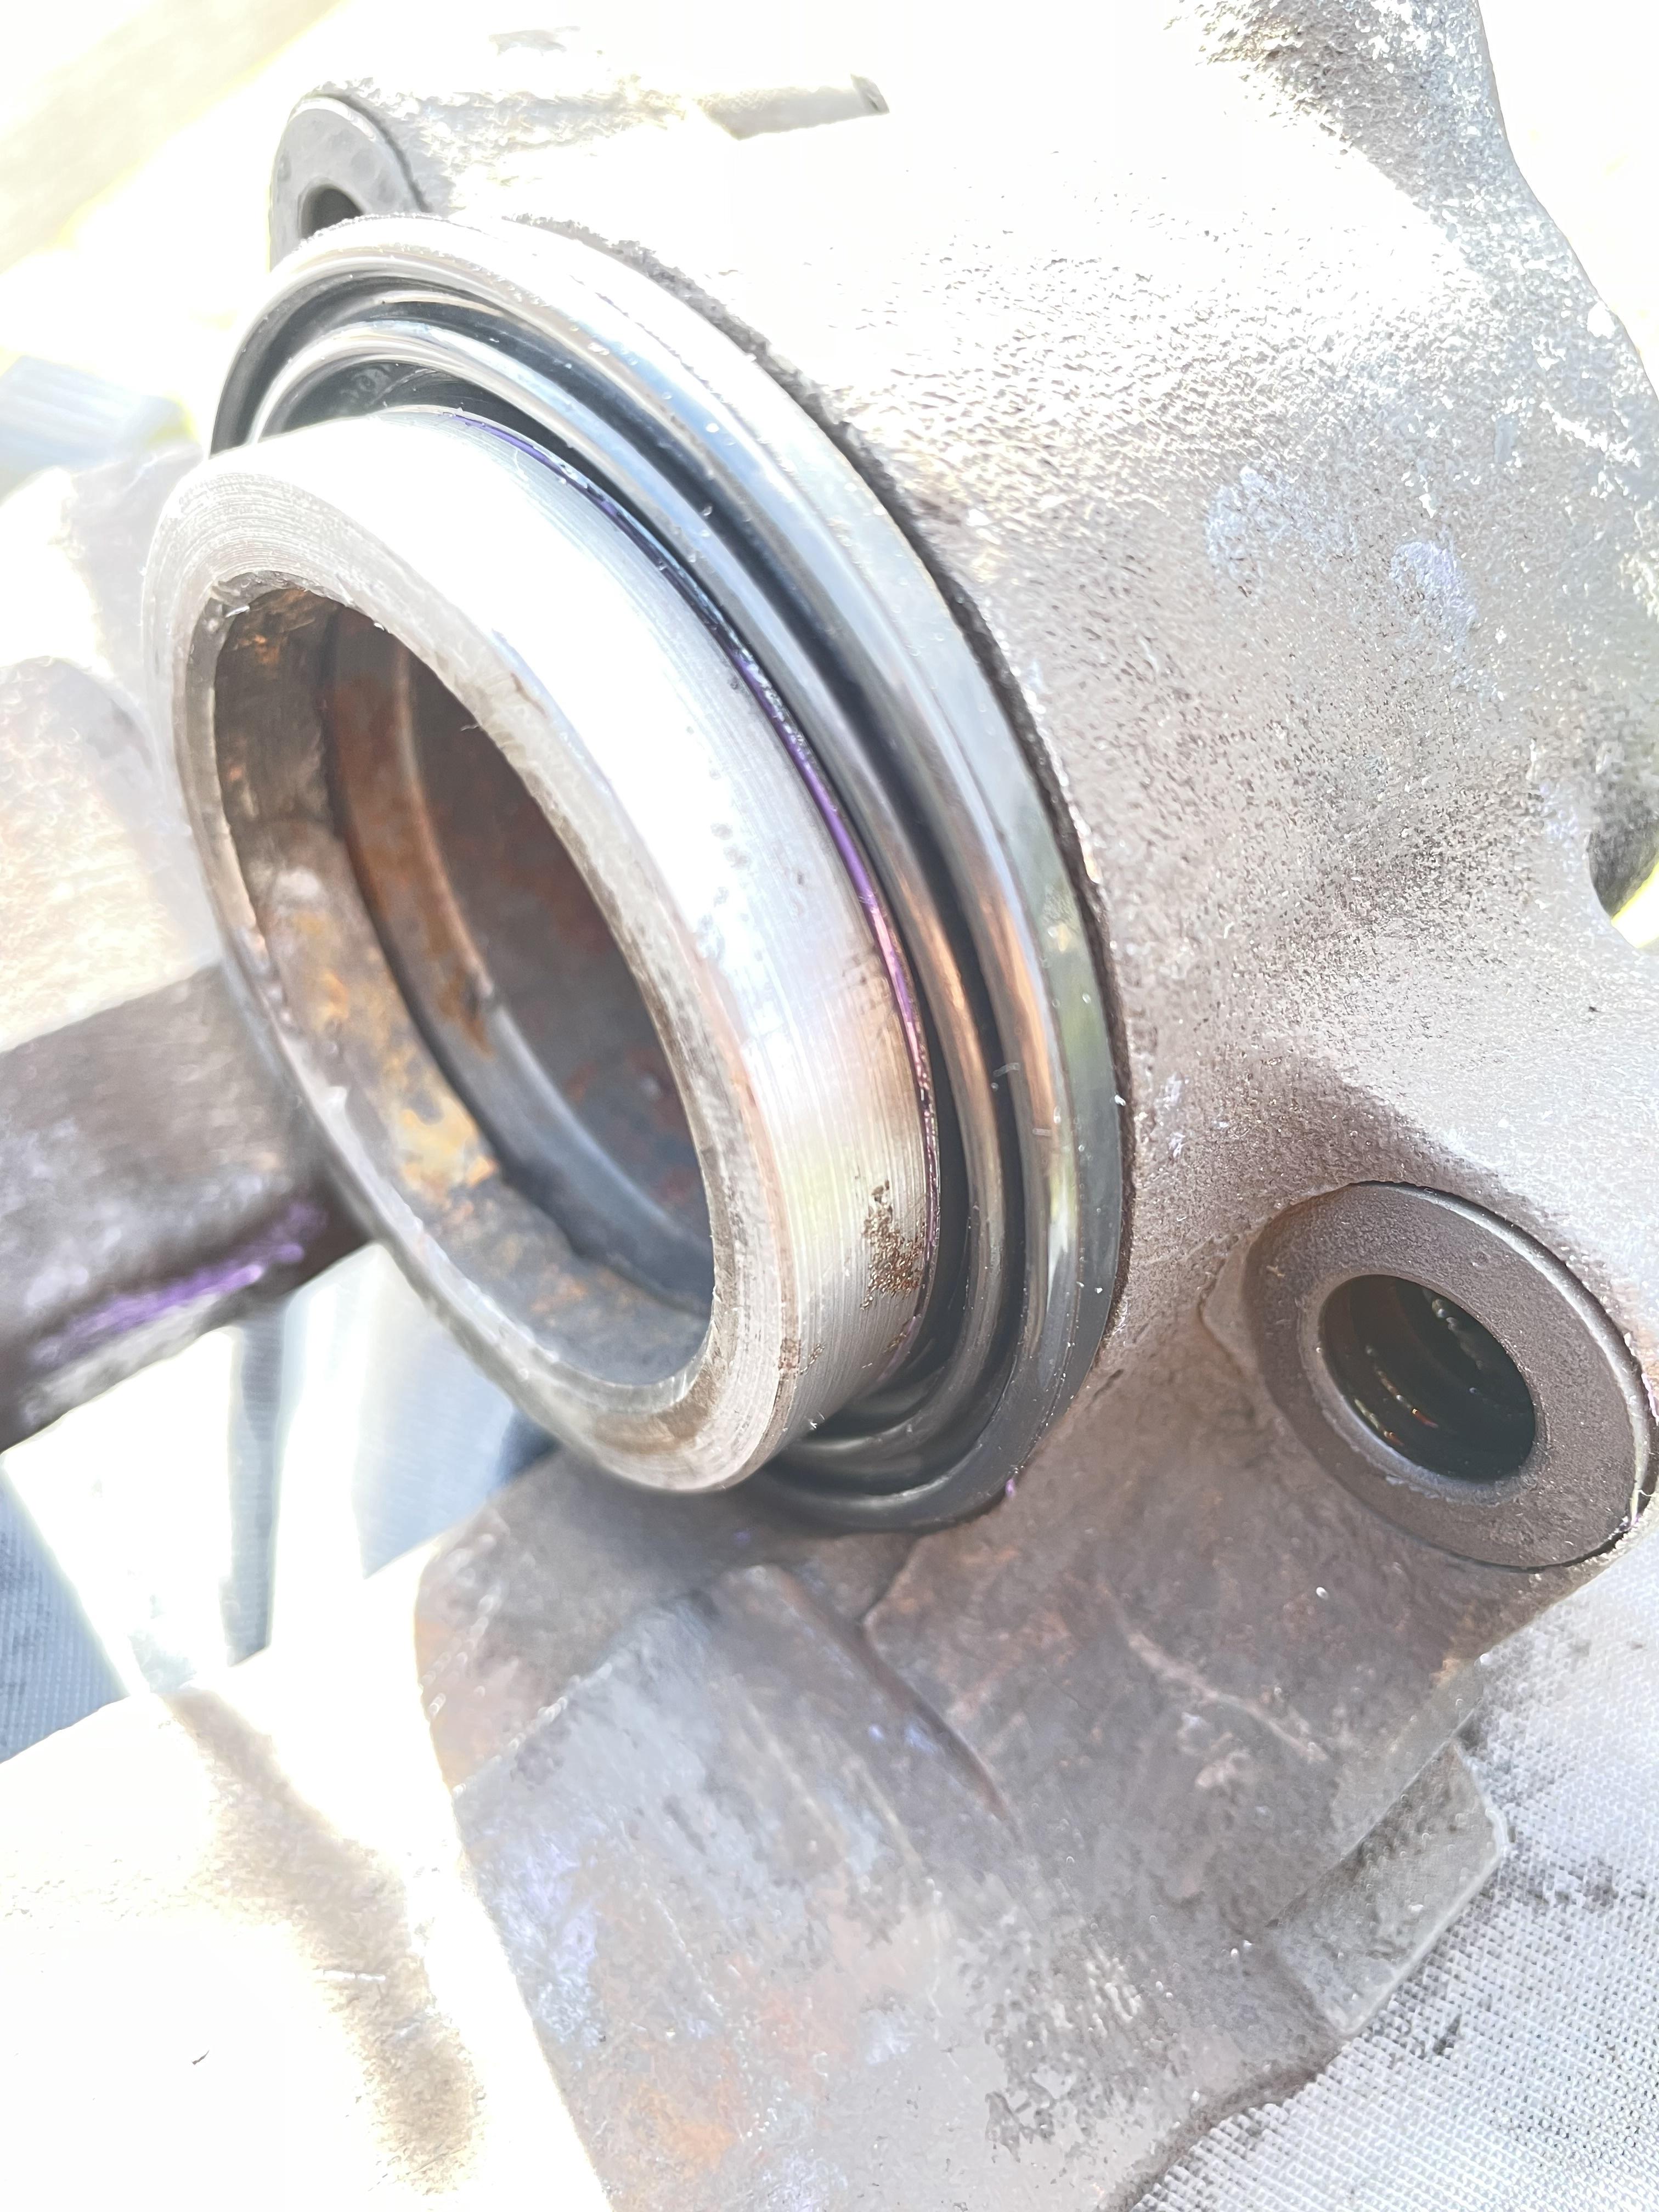
This is an e34 540i brake caliper fyi
After trial and error, I finally went back and searched for an e28 brake caliper rebuild on YouTube, and found this:
https://www.youtube.com/watch?v=E5tHq1Gim6Y
The hardest part is getting the boot on the piston in a position that allows you to get the boot lip in the caliper groove PRIOR to getting the piston reinserted. If the piston is in the bore of the caliper at all you cannot get the boot lip inserted.
First thing was to clean up the piston and bore with 2500 grit wet/dry sandpaper. Removed all the varnish built up on the piston, reinserted the main seal in the bore, and then positioned the boot correctly and presto, the piston slides in with a little effort. I also used a grease compatible with brake fluid which helped a lot.


This is an e34 540i brake caliper fyi
Re: And so it starts, Maeve
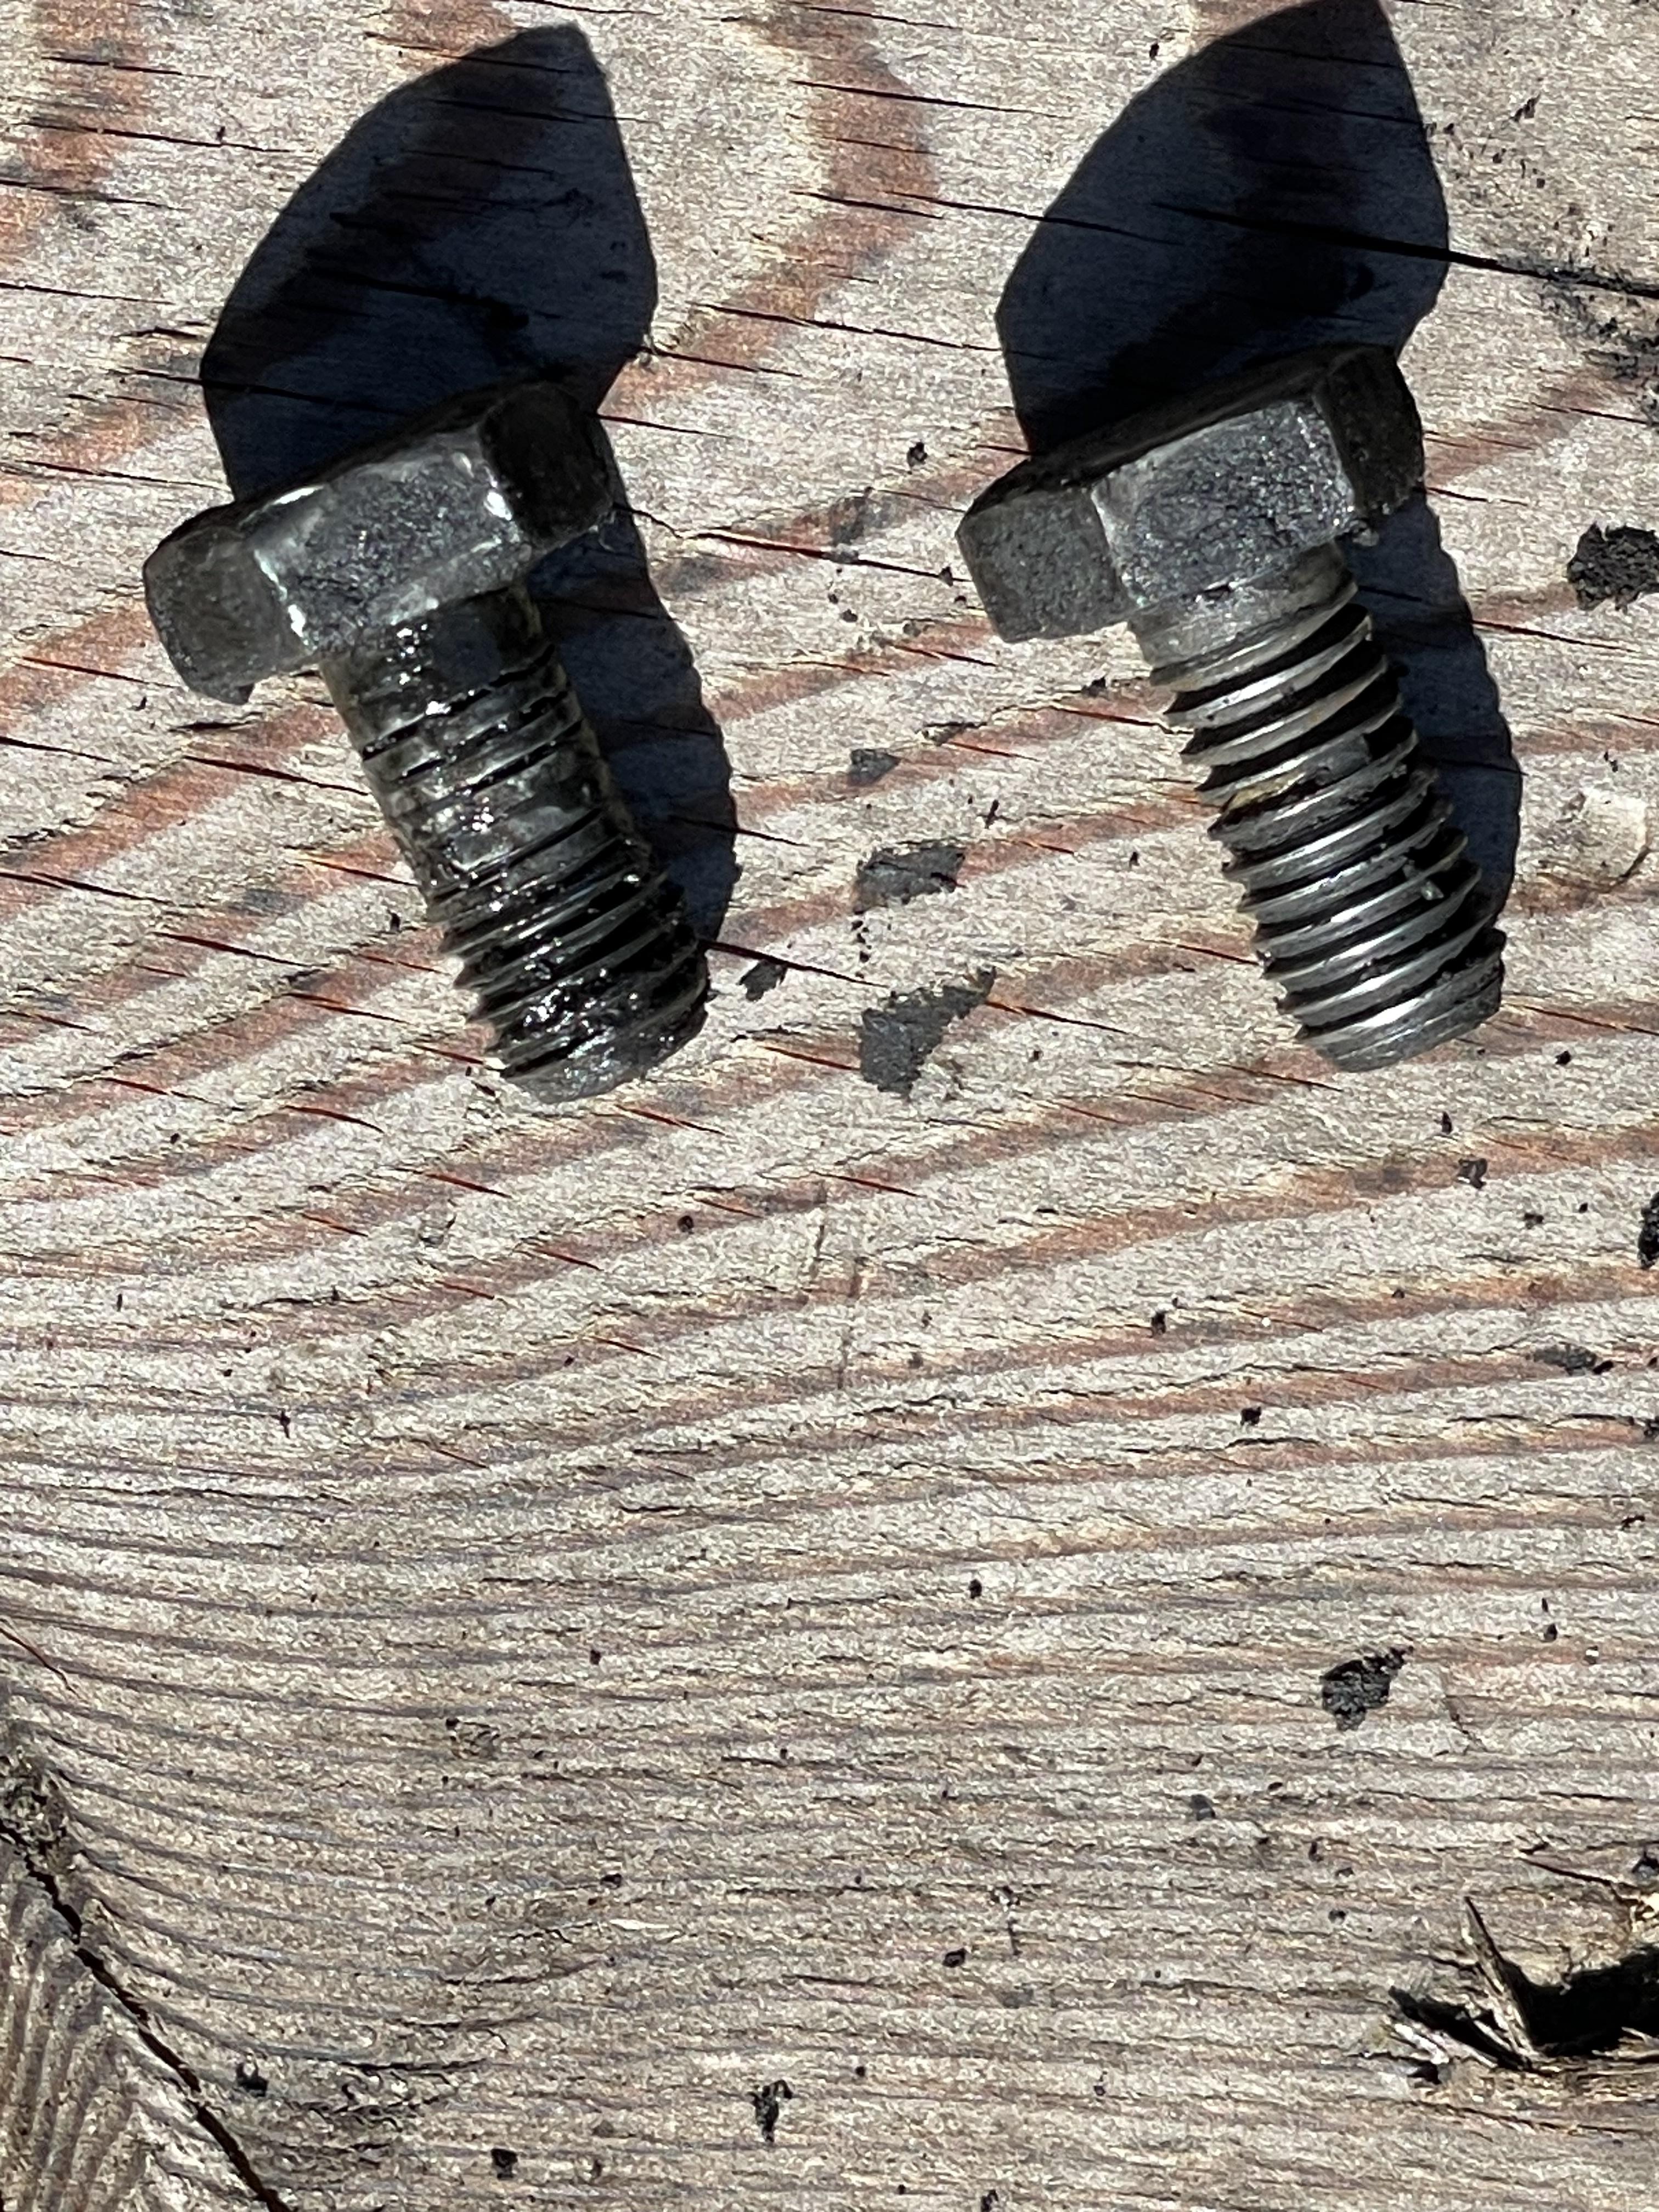
Time to replace the front shocks. Removed the entire strut assembly, took off the various control arms, and look what I found, a missing screw. Plus one of the two that were actually screwed in was stripped:
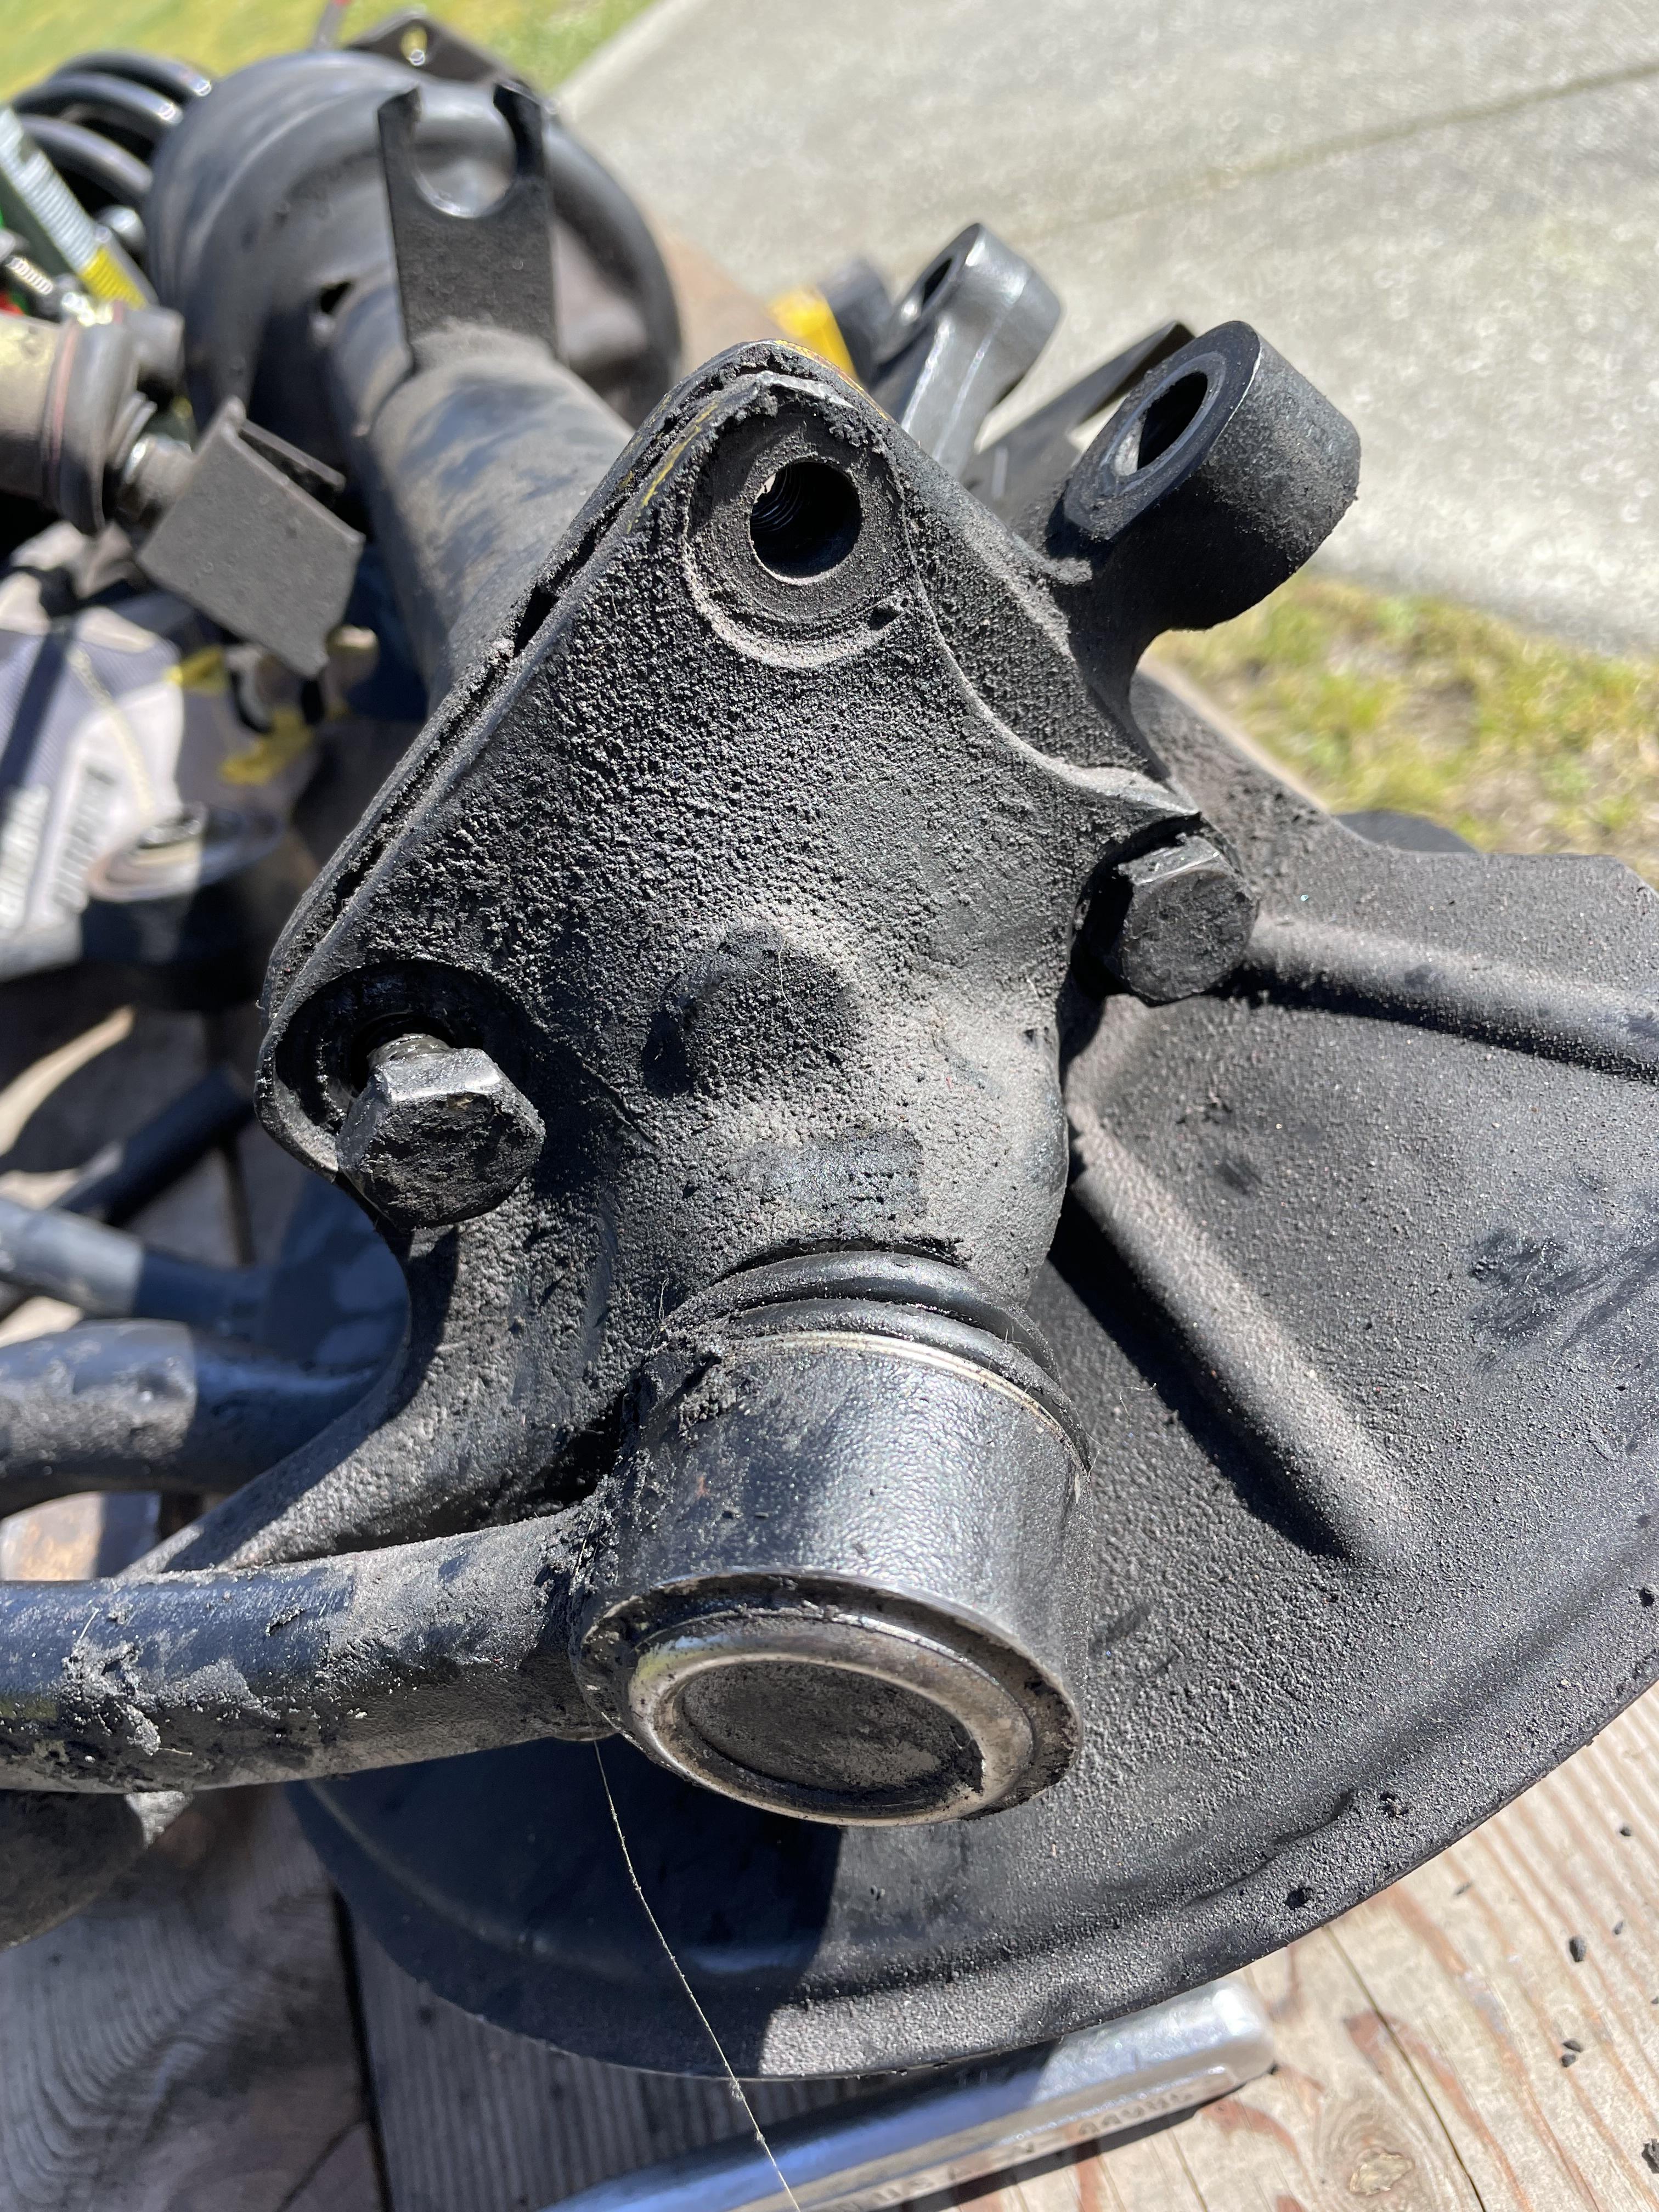
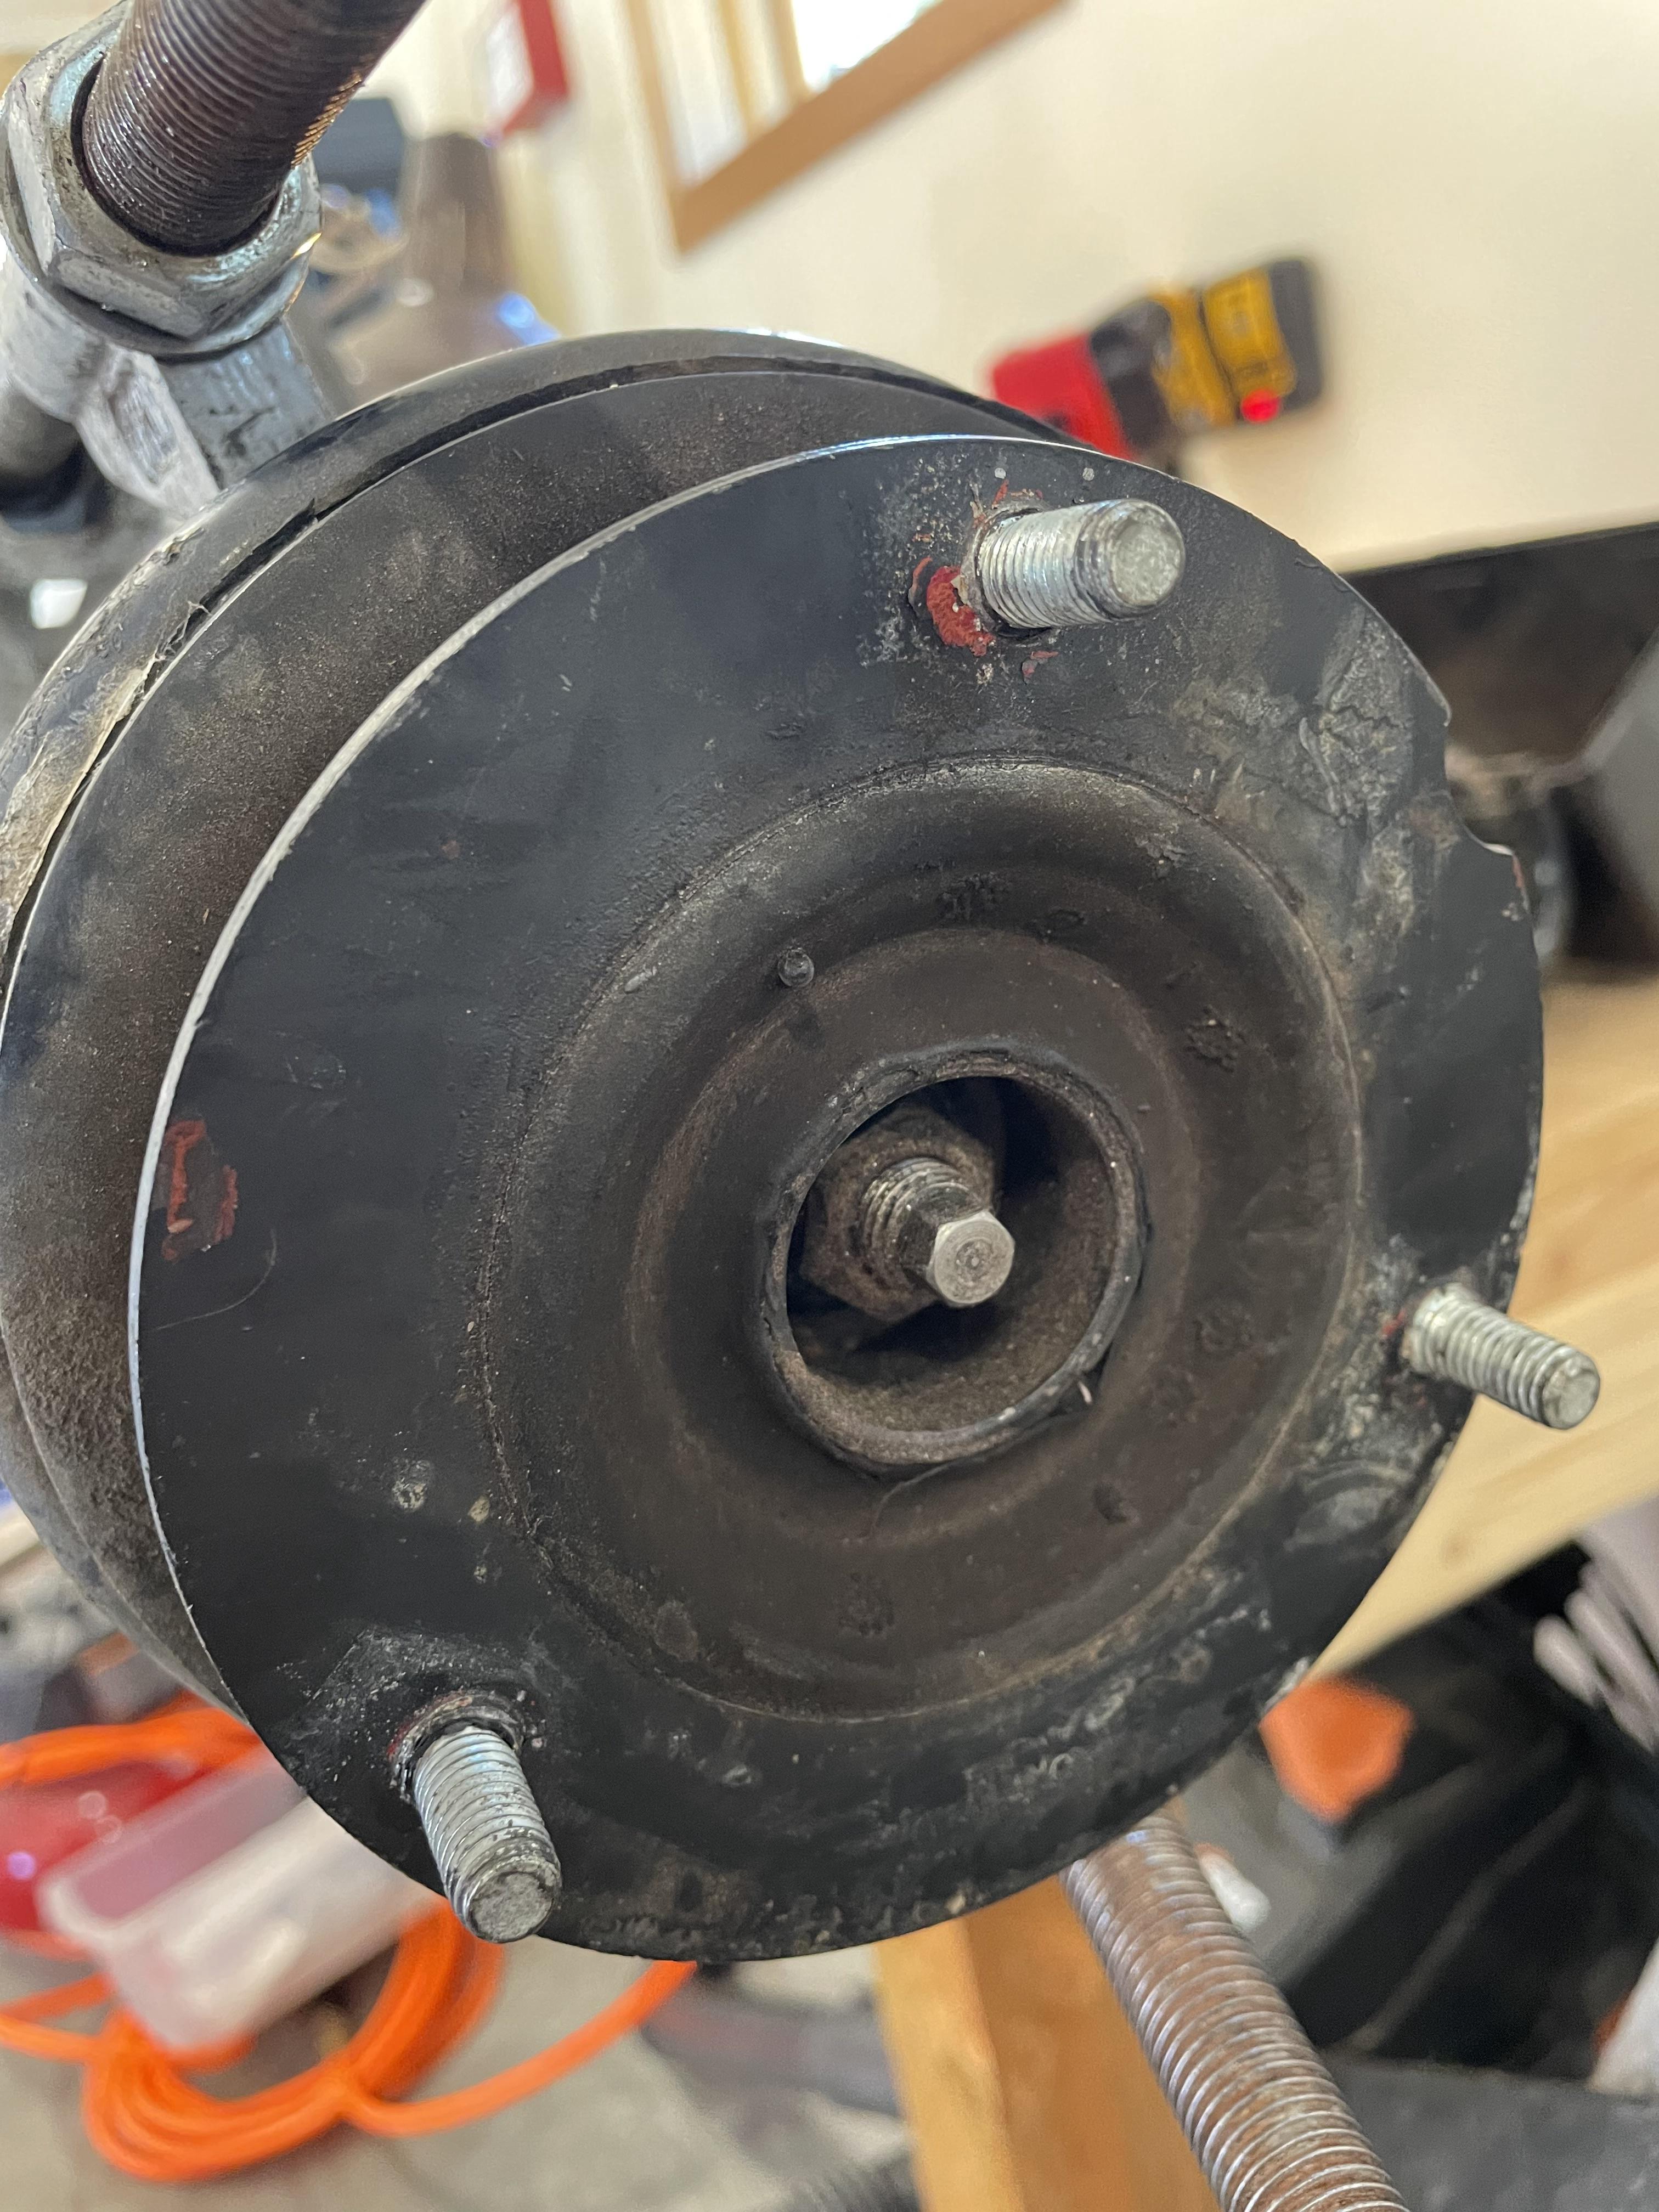
To remove the insert, you have to remove the springs and upper strut mount. You have to compress the springs to remove the upper mount. There is a trick as you have to hold the shaft of the insert from rotating as you remove the nut:
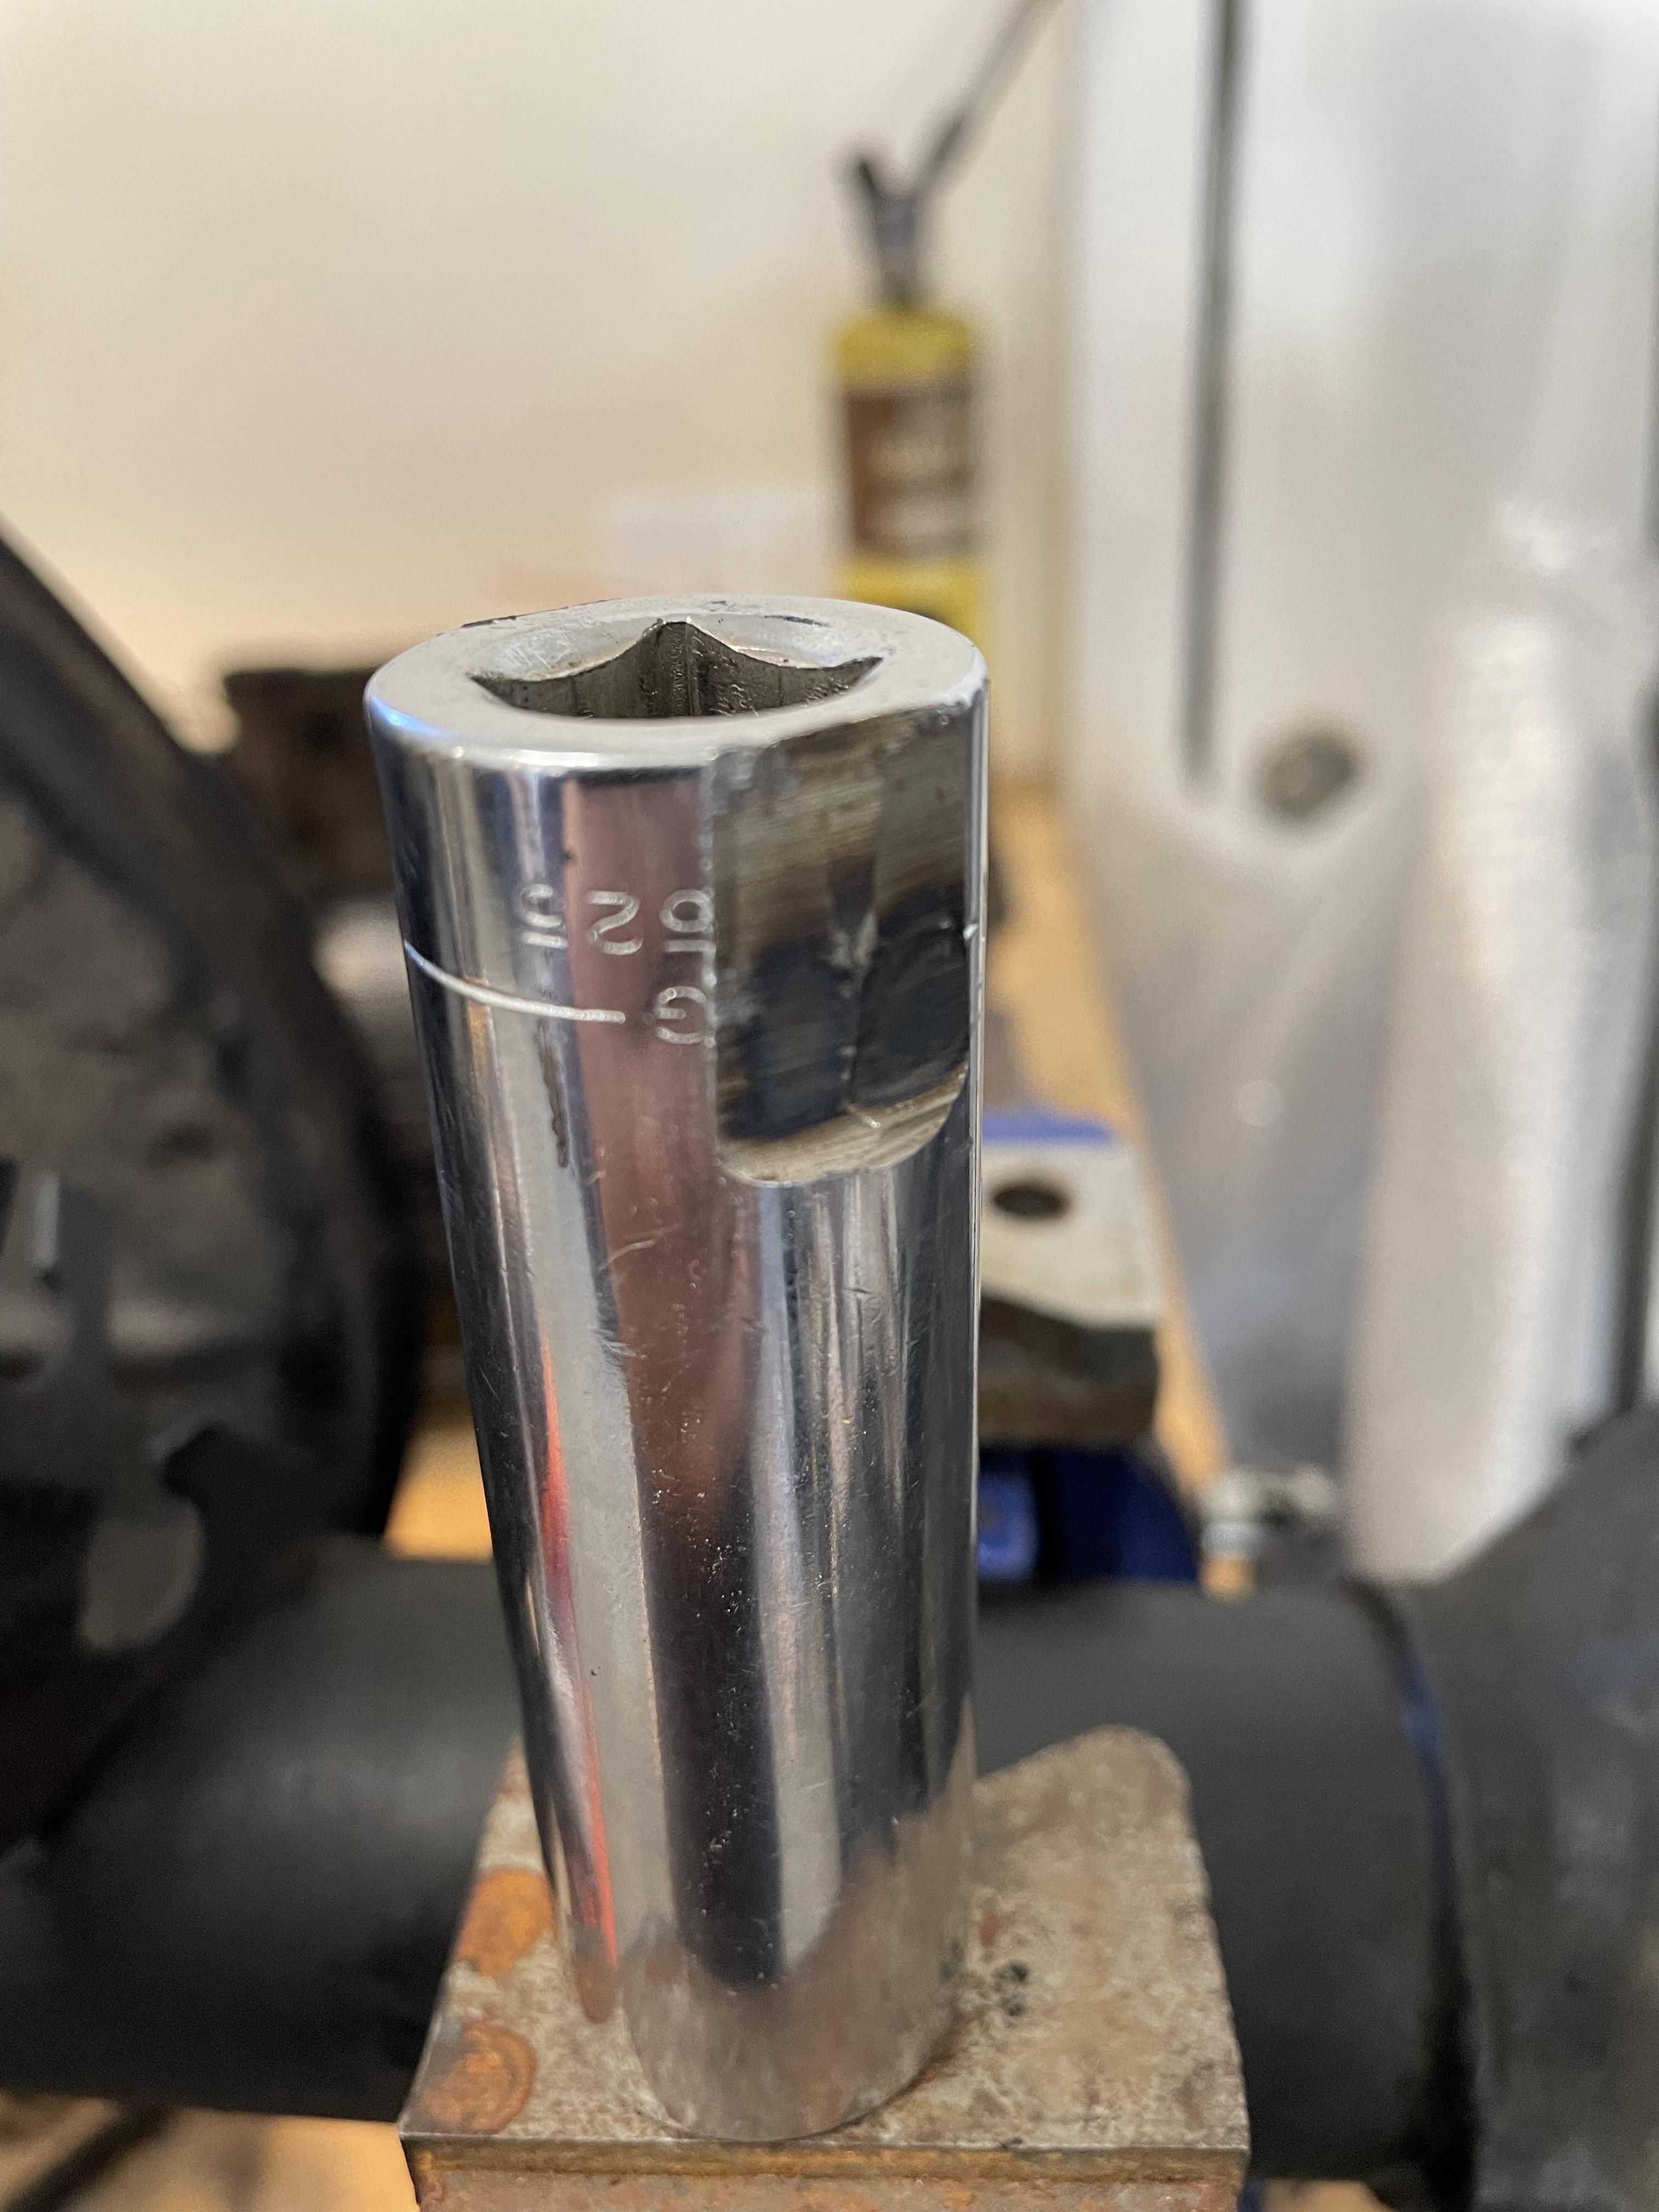
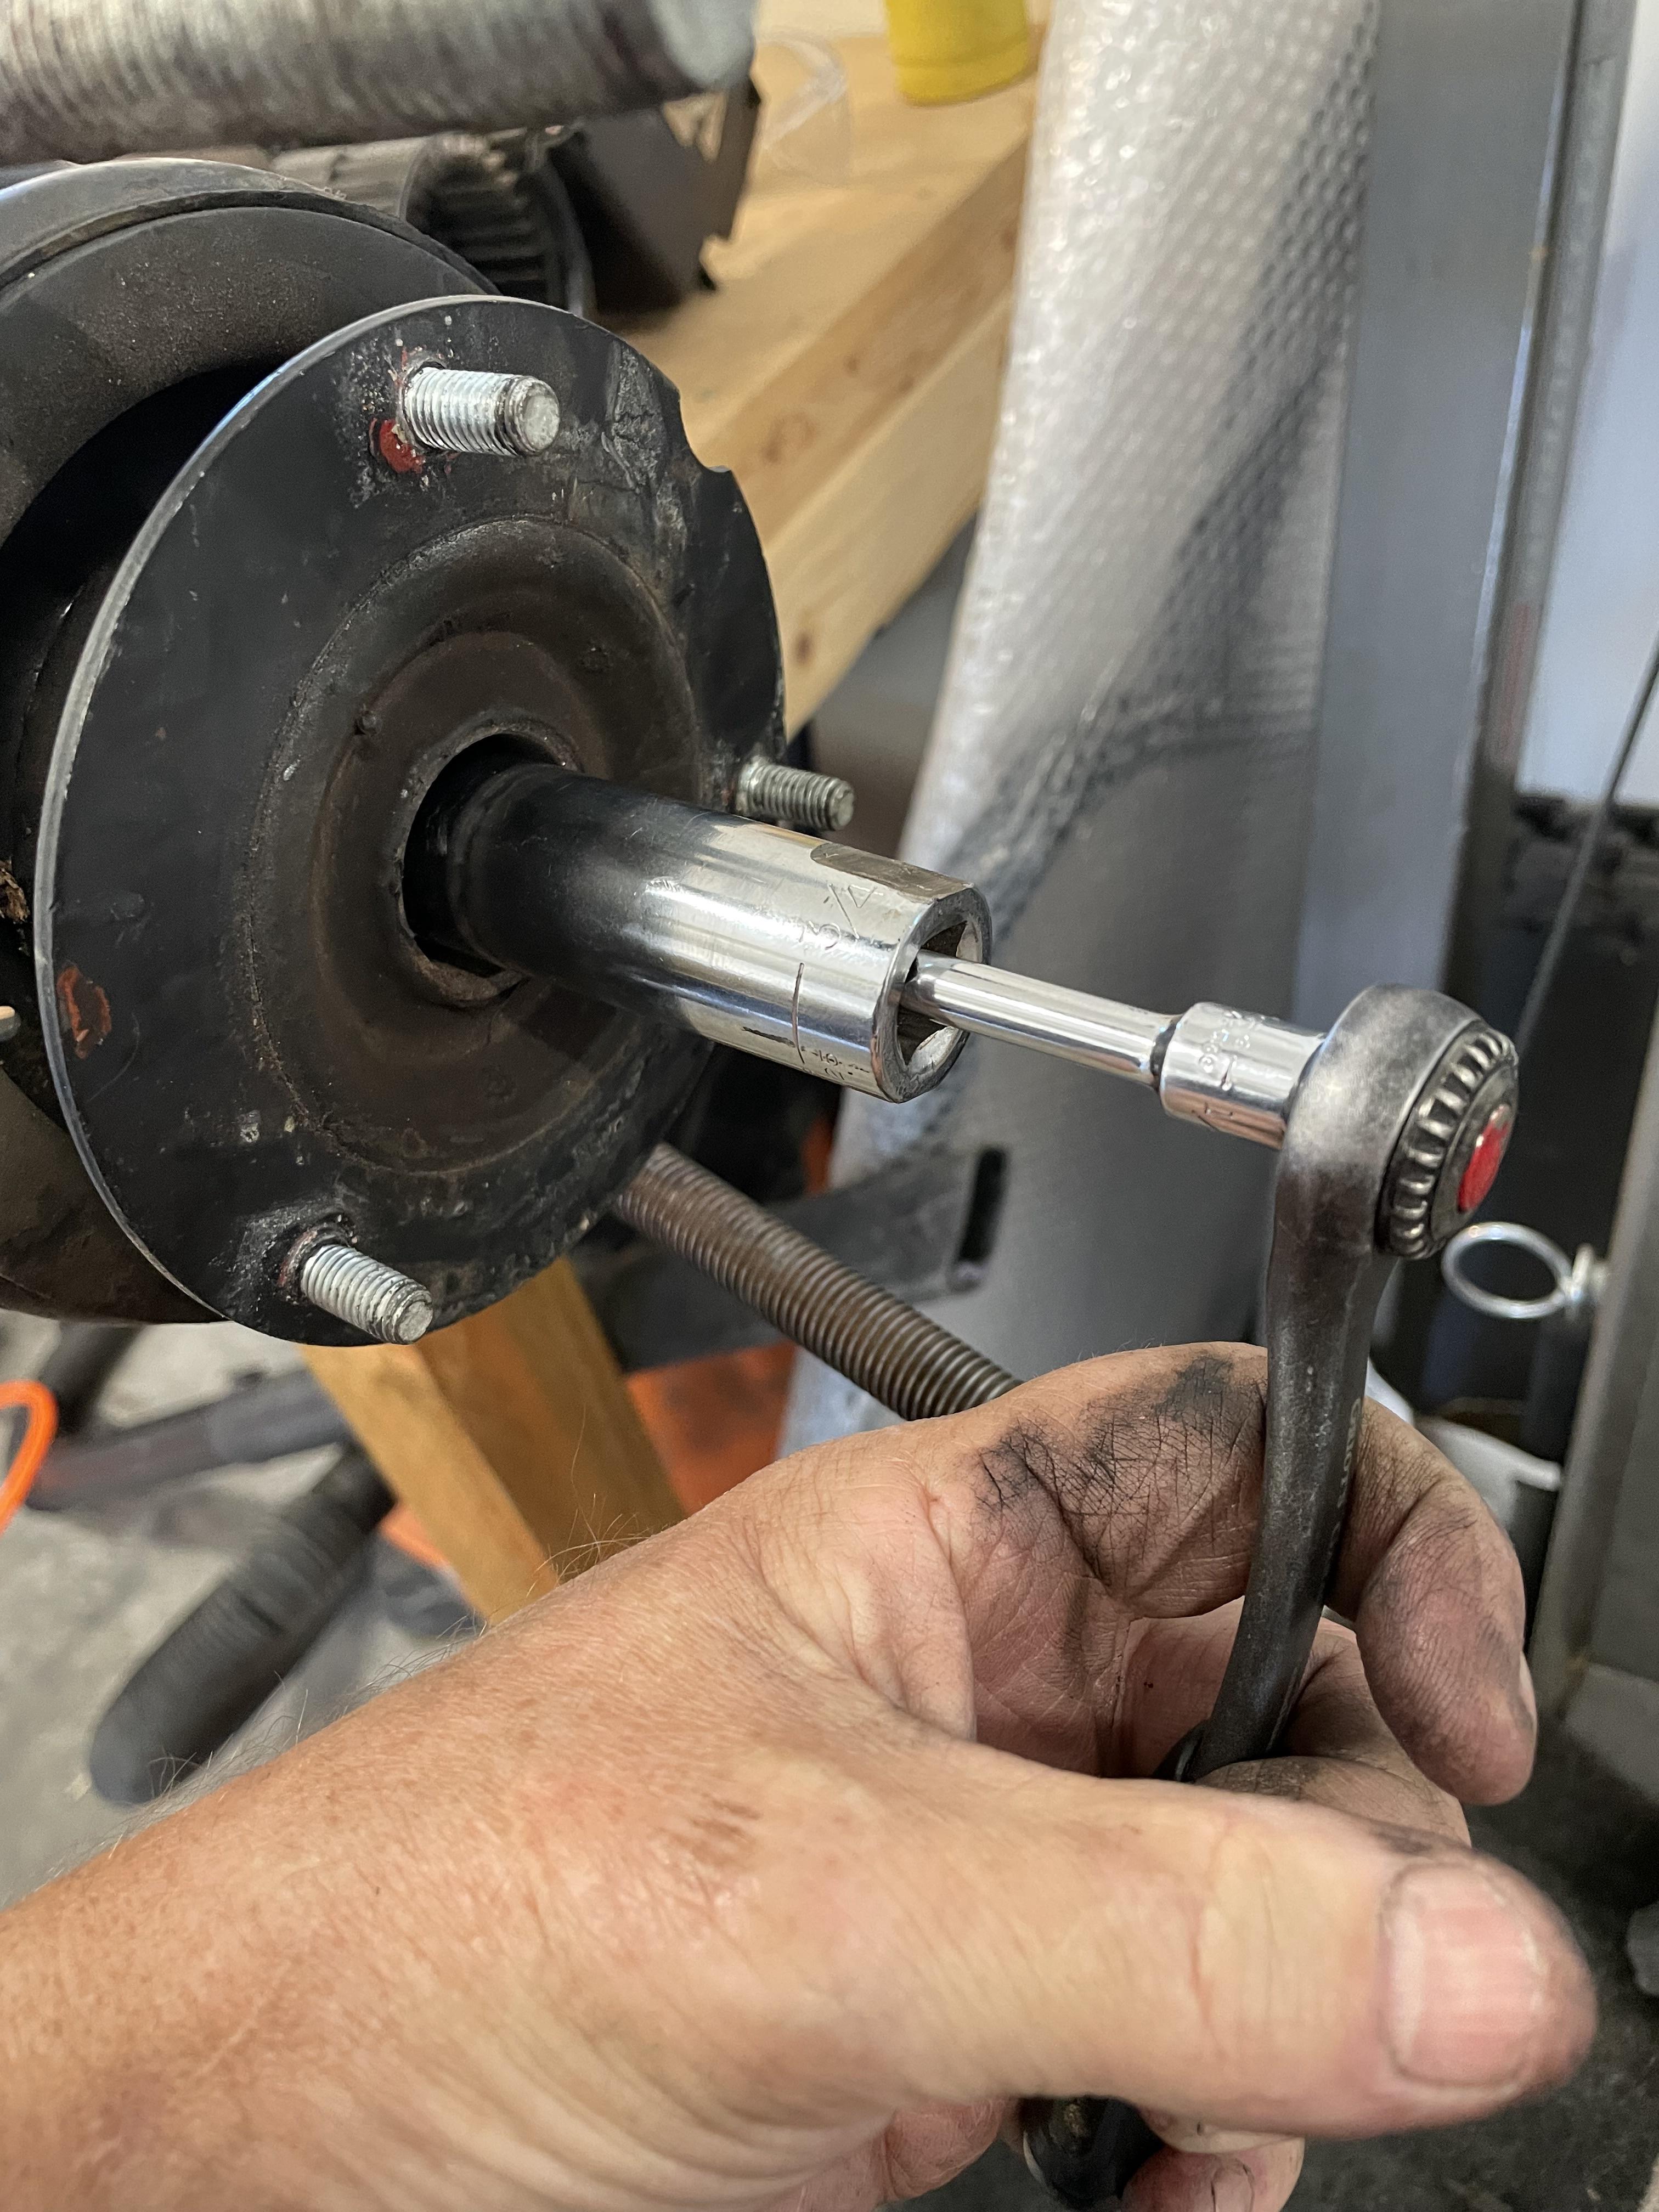
I've had this long socket in my tool box for a long time and I'd forgotten what it was for. I had ground to flat areas with my bench grinder, and looking at it a light came on. I had used this socket to replace the strut inserts on my 2002tii years ago. It allows you to put it on the nut and then reach in with a 1/4" drive long socket to fit on the hex end of the shaft. You can then prevent the shaft from turning and use an open end wrench to turn the big socket:
Then, after removing the spring etc you get to this nut that holds the insert in the strut. It calls for a special tool, but I have used, like many others, and pipe wrench to loosen it. Guess what, it wasn't even finger tight!
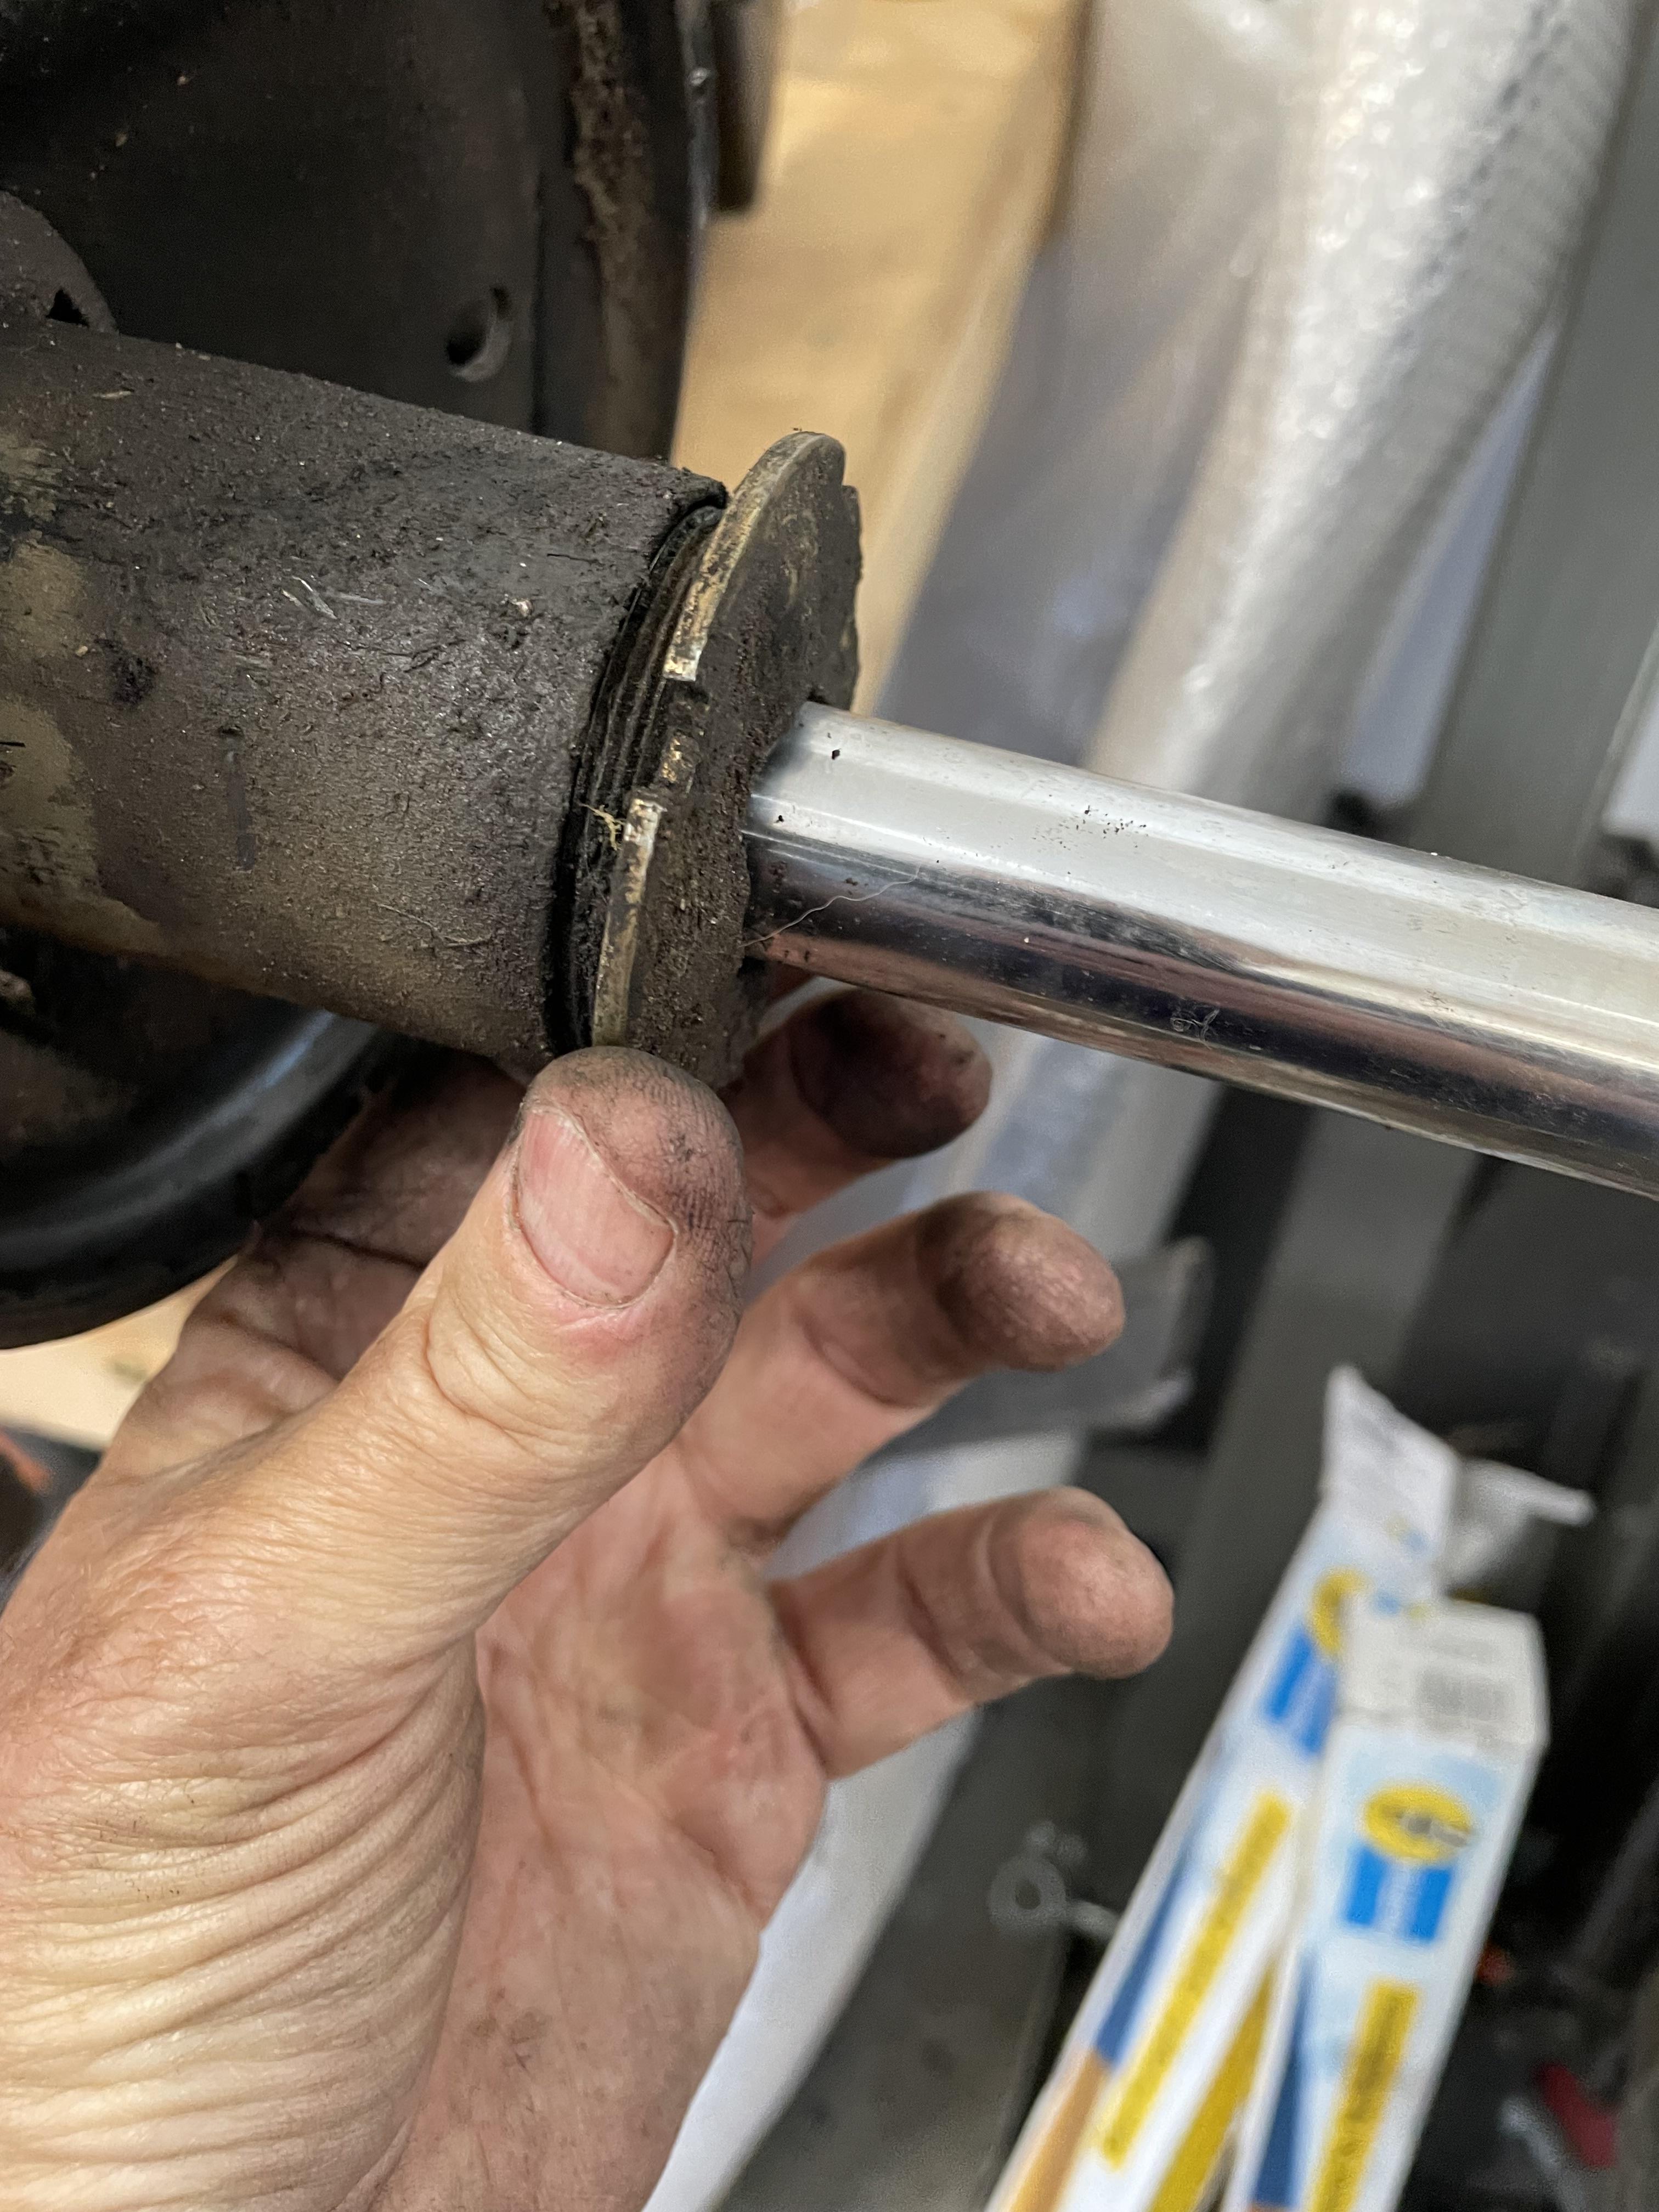
When you buy someone else's car, and there is no record of repairs, who did them etc. you don't know what you're going to get. I think maybe an angel was riding along with Cindy and me when we drove Maeve home to the Great Pacific Northwest from Mesa, AZ. Had I known about all the defects I'm finding, I would have probably passed on Maeve and looked for another car. But she'll have a completely sorted new suspension when I'm finished, and I'll know everything is as it should be.


To remove the insert, you have to remove the springs and upper strut mount. You have to compress the springs to remove the upper mount. There is a trick as you have to hold the shaft of the insert from rotating as you remove the nut:

I've had this long socket in my tool box for a long time and I'd forgotten what it was for. I had ground to flat areas with my bench grinder, and looking at it a light came on. I had used this socket to replace the strut inserts on my 2002tii years ago. It allows you to put it on the nut and then reach in with a 1/4" drive long socket to fit on the hex end of the shaft. You can then prevent the shaft from turning and use an open end wrench to turn the big socket:


Then, after removing the spring etc you get to this nut that holds the insert in the strut. It calls for a special tool, but I have used, like many others, and pipe wrench to loosen it. Guess what, it wasn't even finger tight!

When you buy someone else's car, and there is no record of repairs, who did them etc. you don't know what you're going to get. I think maybe an angel was riding along with Cindy and me when we drove Maeve home to the Great Pacific Northwest from Mesa, AZ. Had I known about all the defects I'm finding, I would have probably passed on Maeve and looked for another car. But she'll have a completely sorted new suspension when I'm finished, and I'll know everything is as it should be.
Re: And so it starts, Maeve
Man, those lower knuckle bolts could have been a major problem/very dangerous issue had they worked loose. Good thing you're in there now. As an FYI, the early car had those safety tied. You may want to think about that.gwb72tii wrote: Mar 14, 2024 7:49 PM Time to replace the front shocks. Removed the entire strut assembly, took off the various control arms, and look what I found, a missing screw. Plus one of the two that were actually screwed in was stripped:
To remove the insert, you have to remove the springs and upper strut mount. You have to compress the springs to remove the upper mount. There is a trick as you have to hold the shaft of the insert from rotating as you remove the nut:
I've had this long socket in my tool box for a long time and I'd forgotten what it was for. I had ground to flat areas with my bench grinder, and looking at it a light came on. I had used this socket to replace the strut inserts on my 2002tii years ago. It allows you to put it on the nut and then reach in with a 1/4" drive long socket to fit on the hex end of the shaft. You can then prevent the shaft from turning and use an open end wrench to turn the big socket:
Then, after removing the spring etc you get to this nut that holds the insert in the strut. It calls for a special tool, but I have used, like many others, and pipe wrench to loosen it. Guess what, it wasn't even finger tight!
When you buy someone else's car, and there is no record of repairs, who did them etc. you don't know what you're going to get. I think maybe an angel was riding along with Cindy and me when we drove Maeve home to the Great Pacific Northwest from Mesa, AZ. Had I known about all the defects I'm finding, I would have probably passed on Maeve and looked for another car. But she'll have a completely sorted new suspension when I'm finished, and I'll know everything is as it should be.
-
Blue Shadow
- Posts: 10292
- Joined: Feb 12, 2006 12:00 PM
- Location: SE PA
Re: And so it starts, Maeve
Air took off the strut top nut without needing to hold the strut from turning. But your car with all the looseness is just being easy to work on. The next guy is gonna have trouble, you putting things back right.
Re: And so it starts, Maeve
Yes, kojo, those same bolts on my tii are safety wired.
-
Blue Shadow
- Posts: 10292
- Joined: Feb 12, 2006 12:00 PM
- Location: SE PA
Re: And so it starts, Maeve
The repair manual specifies bolt cement for these once cleaned prior to reinstallation.kojo96 wrote: Mar 14, 2024 8:09 PM Man, those lower knuckle bolts could have been a major problem/very dangerous issue had they worked loose. Good thing you're in there now. As an FYI, the early car had those safety tied. You may want to think about that.
Re: And so it starts, Maeve
Progress.
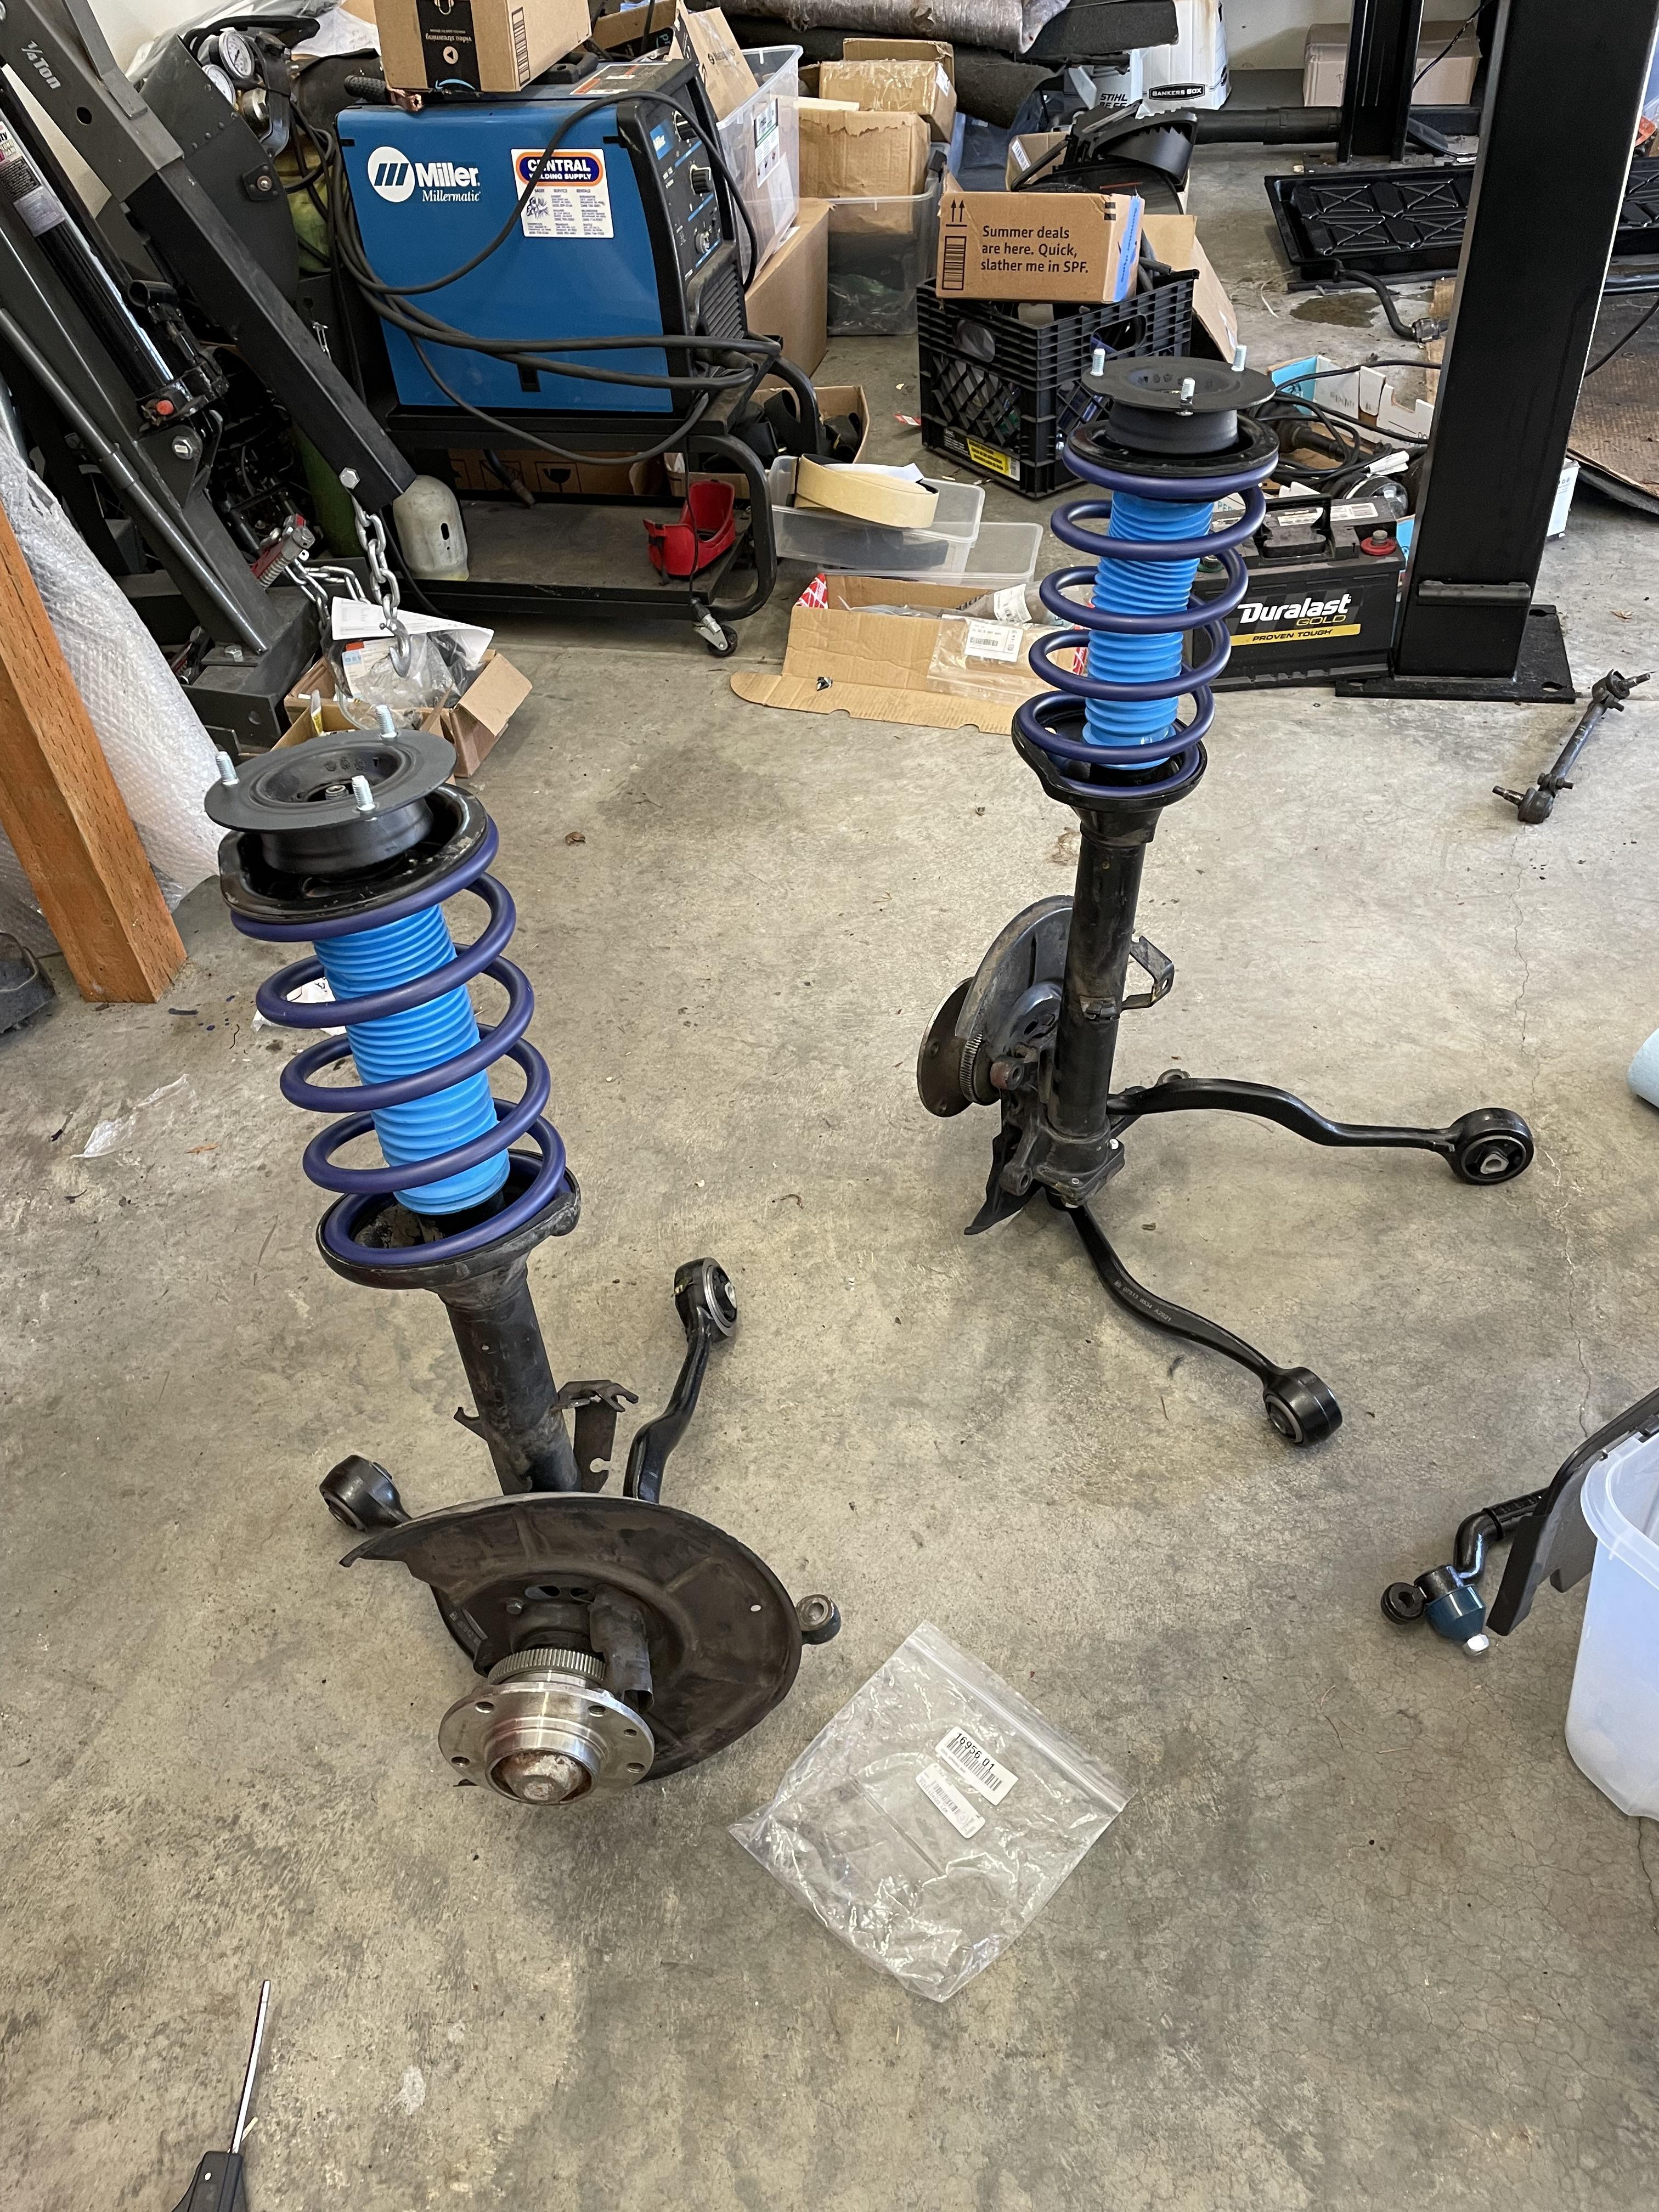
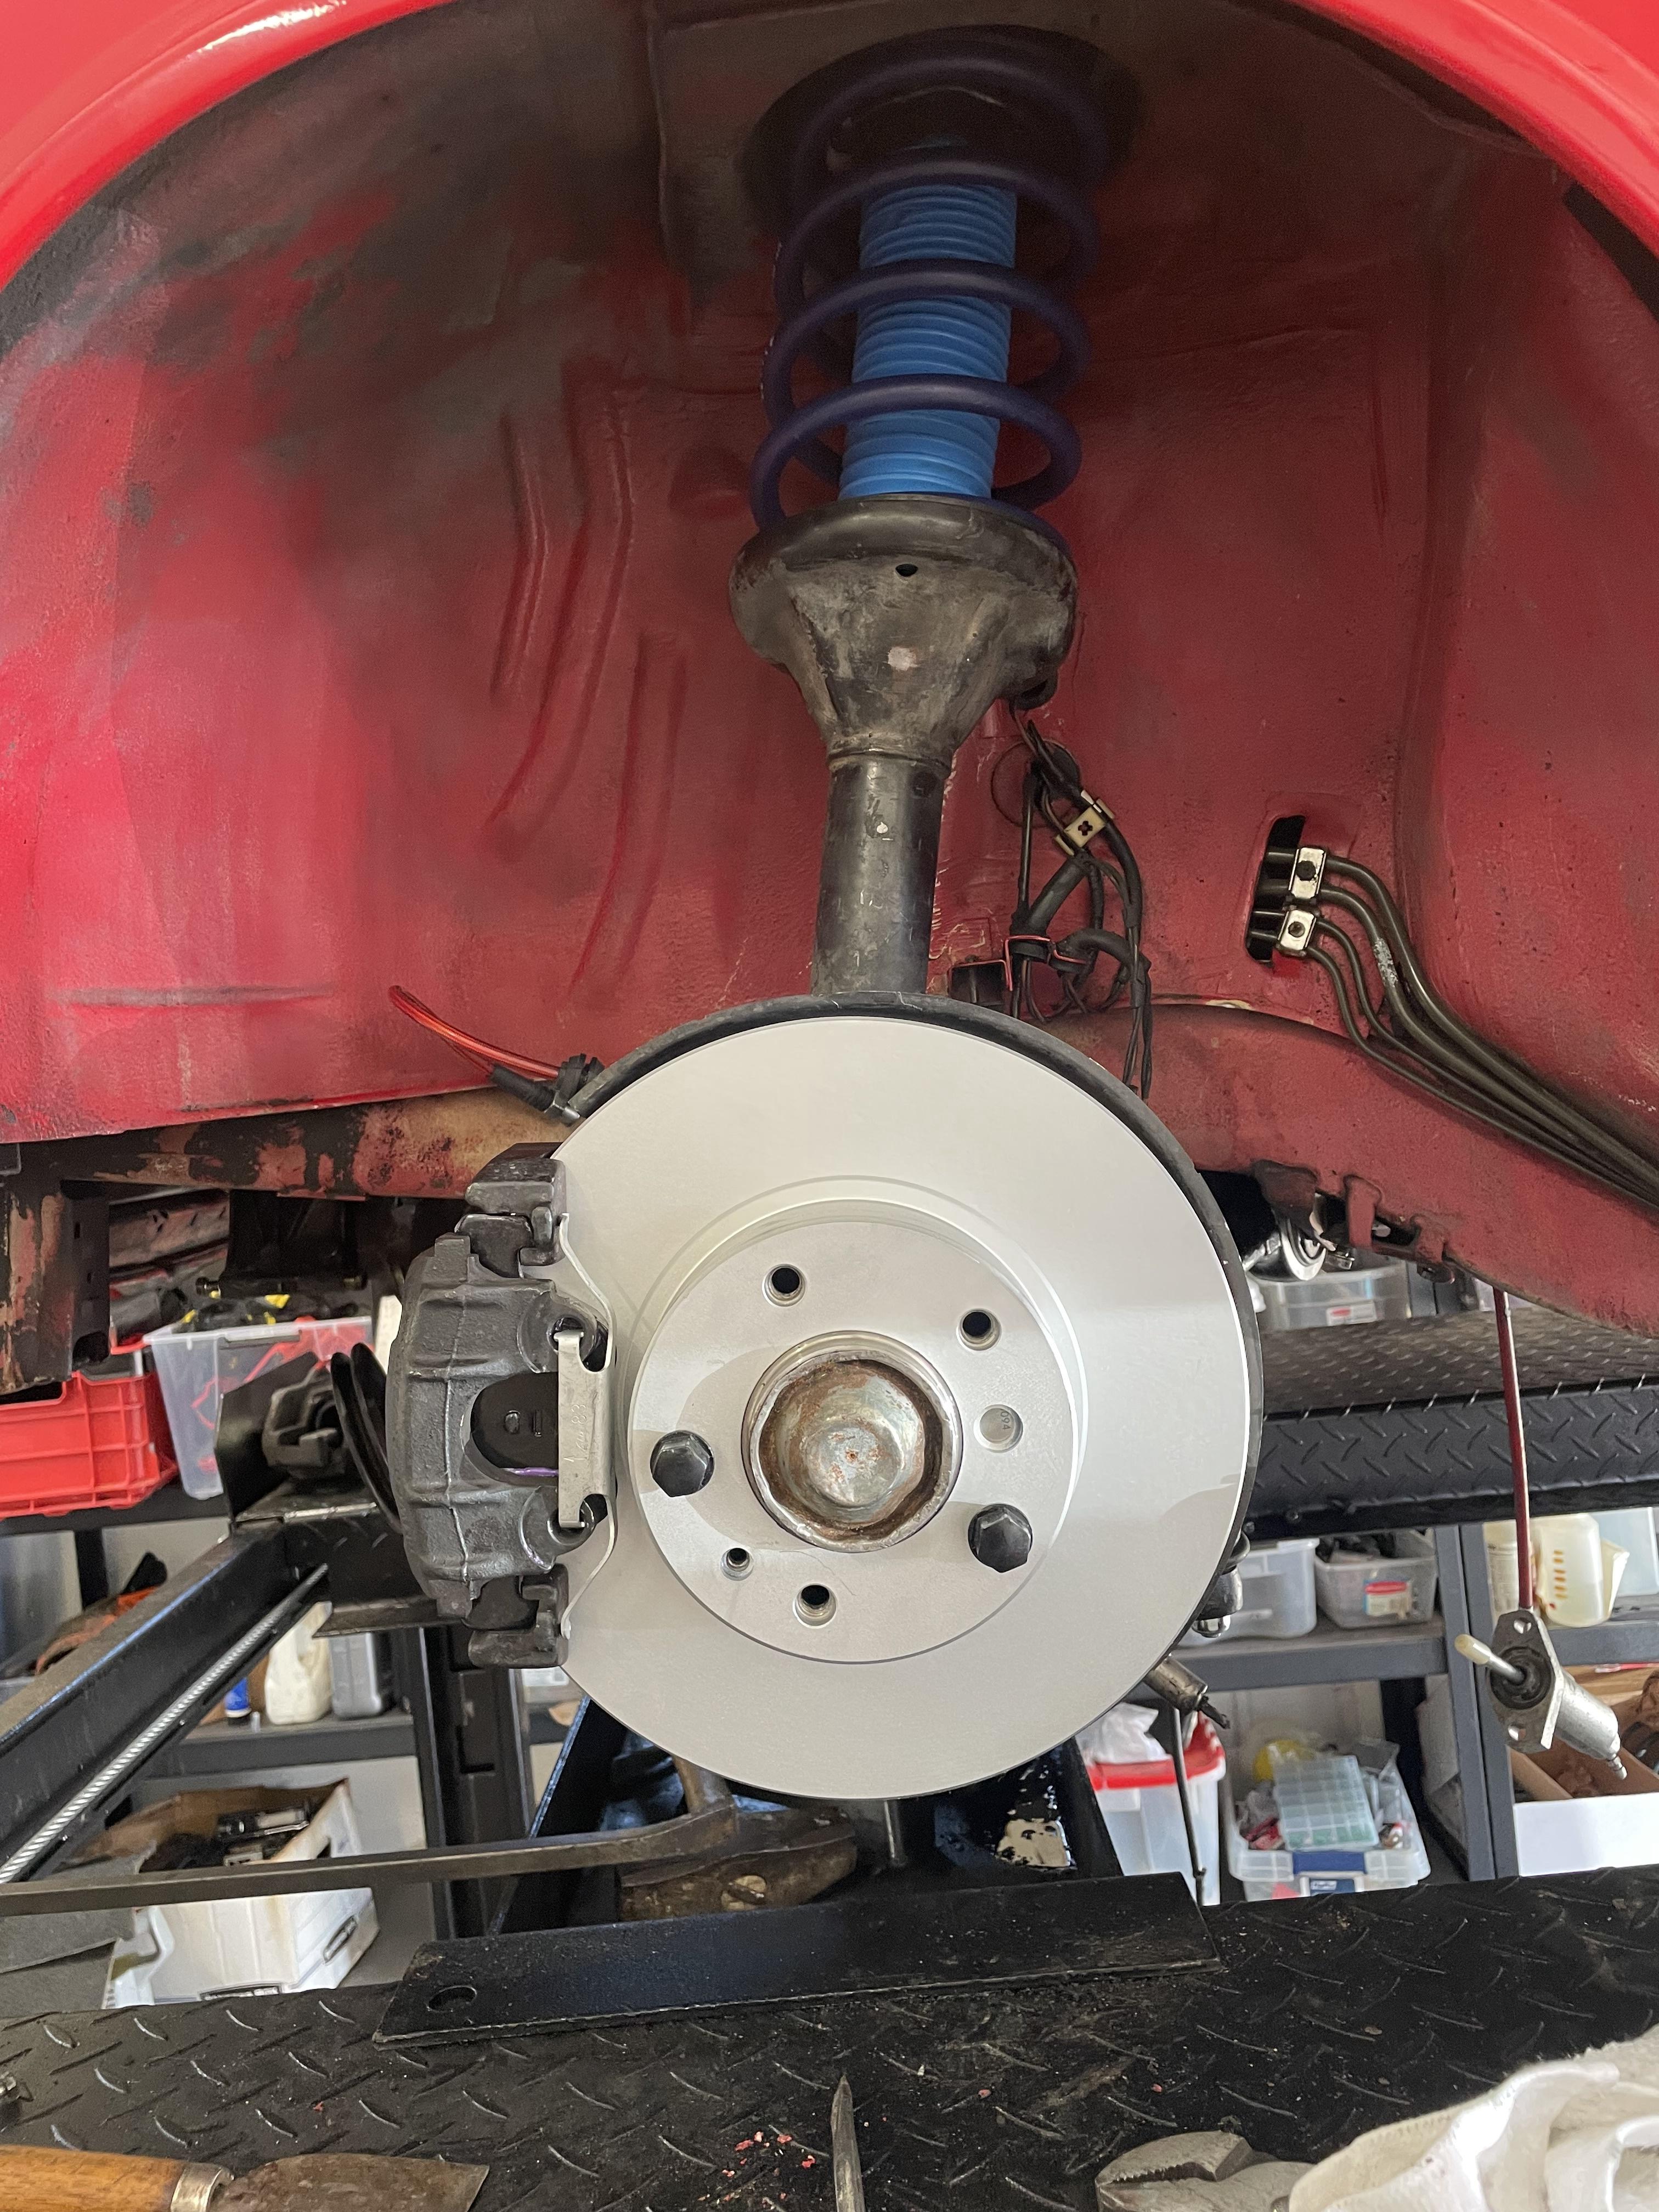
Mounted both front struts after cleaning and installing the new Bilstein inserts. Everything related to the front suspension is new. As is normal. once I did the left side the right side came apart and back together quicker.
I was stressing as I didn't remember if the caliper was in front of the brake disc, and during reassembly I had attached the control arms. Luckily I did everything right and all is as it should be. The bottom on the car would be complete if not for having to build a 16x4x2 raised bed plalnter for Cindy. Moved about 6 out 7 yards of dirt and this took most of the day.
Don't you like it when everything looks newer? the brakes on Maeve are e34 540i brakes btw. Thank you PO.
Once I mount the wheels again and let Maeve off the jack stands and the suspension is loaded, I can tighten up the lower control arm bolts.
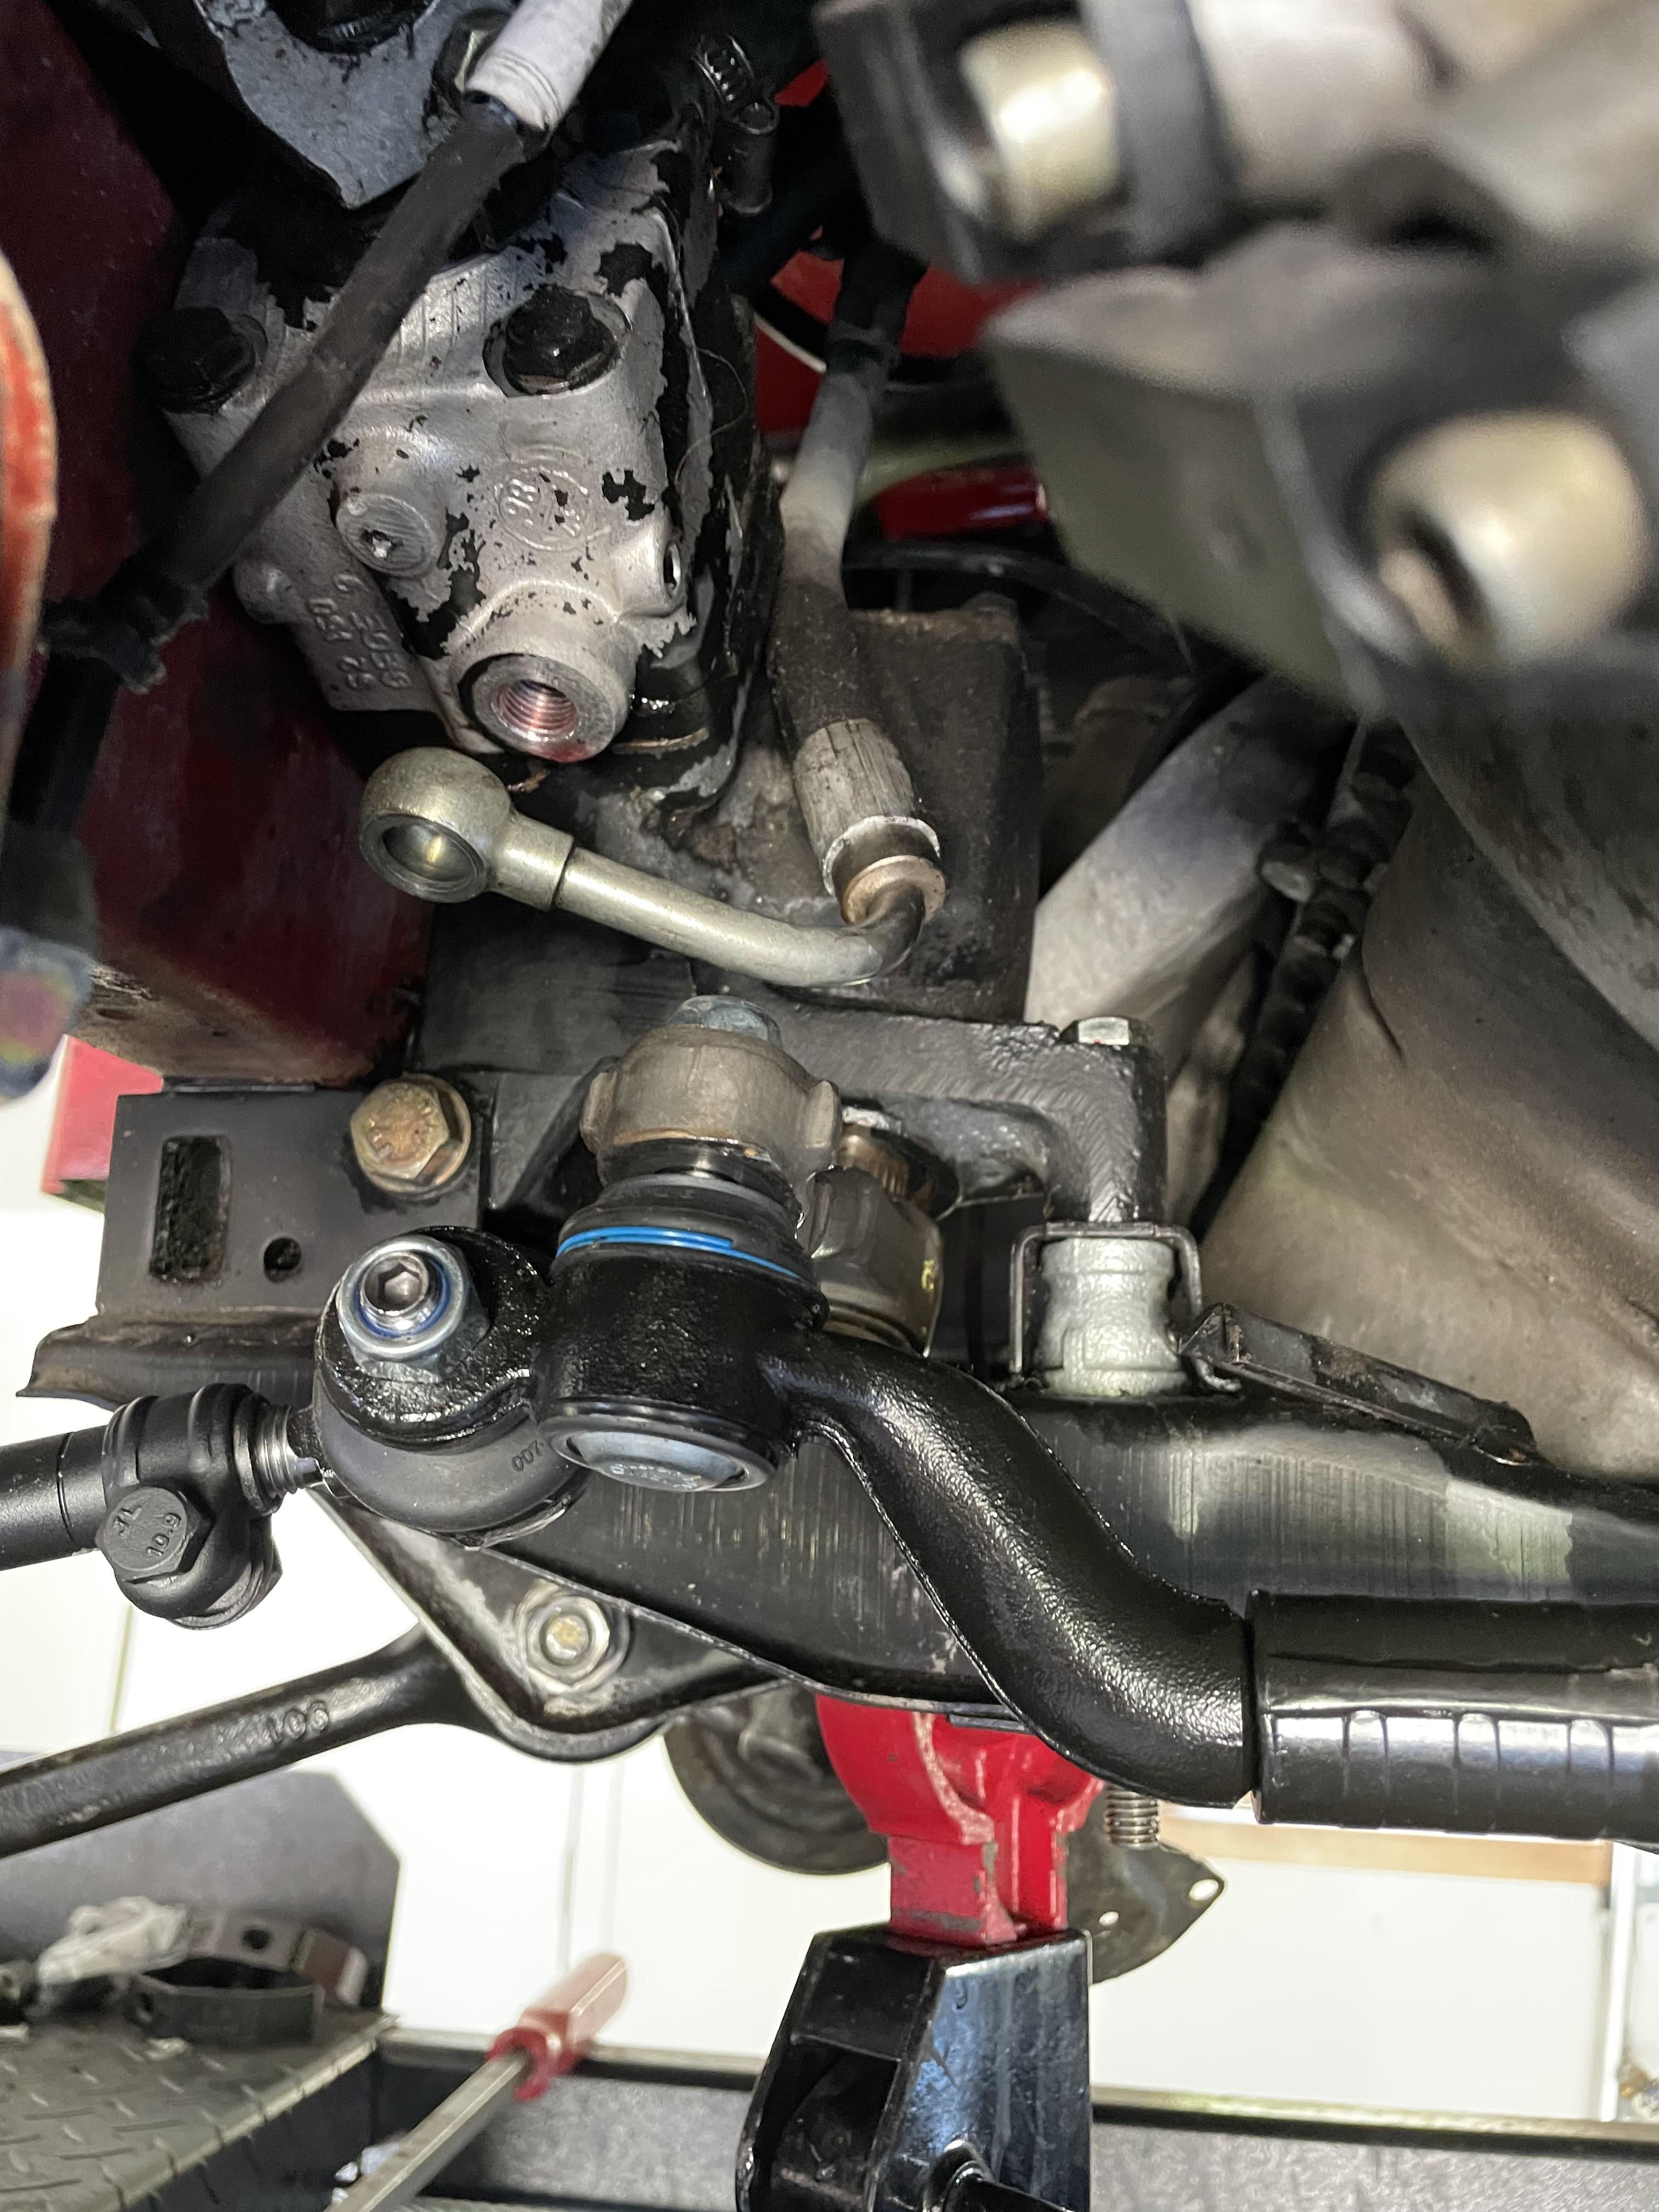
10 points to whoever points out what's wrong in this pic, and can tell me the correct repair!
Maeve is slowly starting to look like a car again:
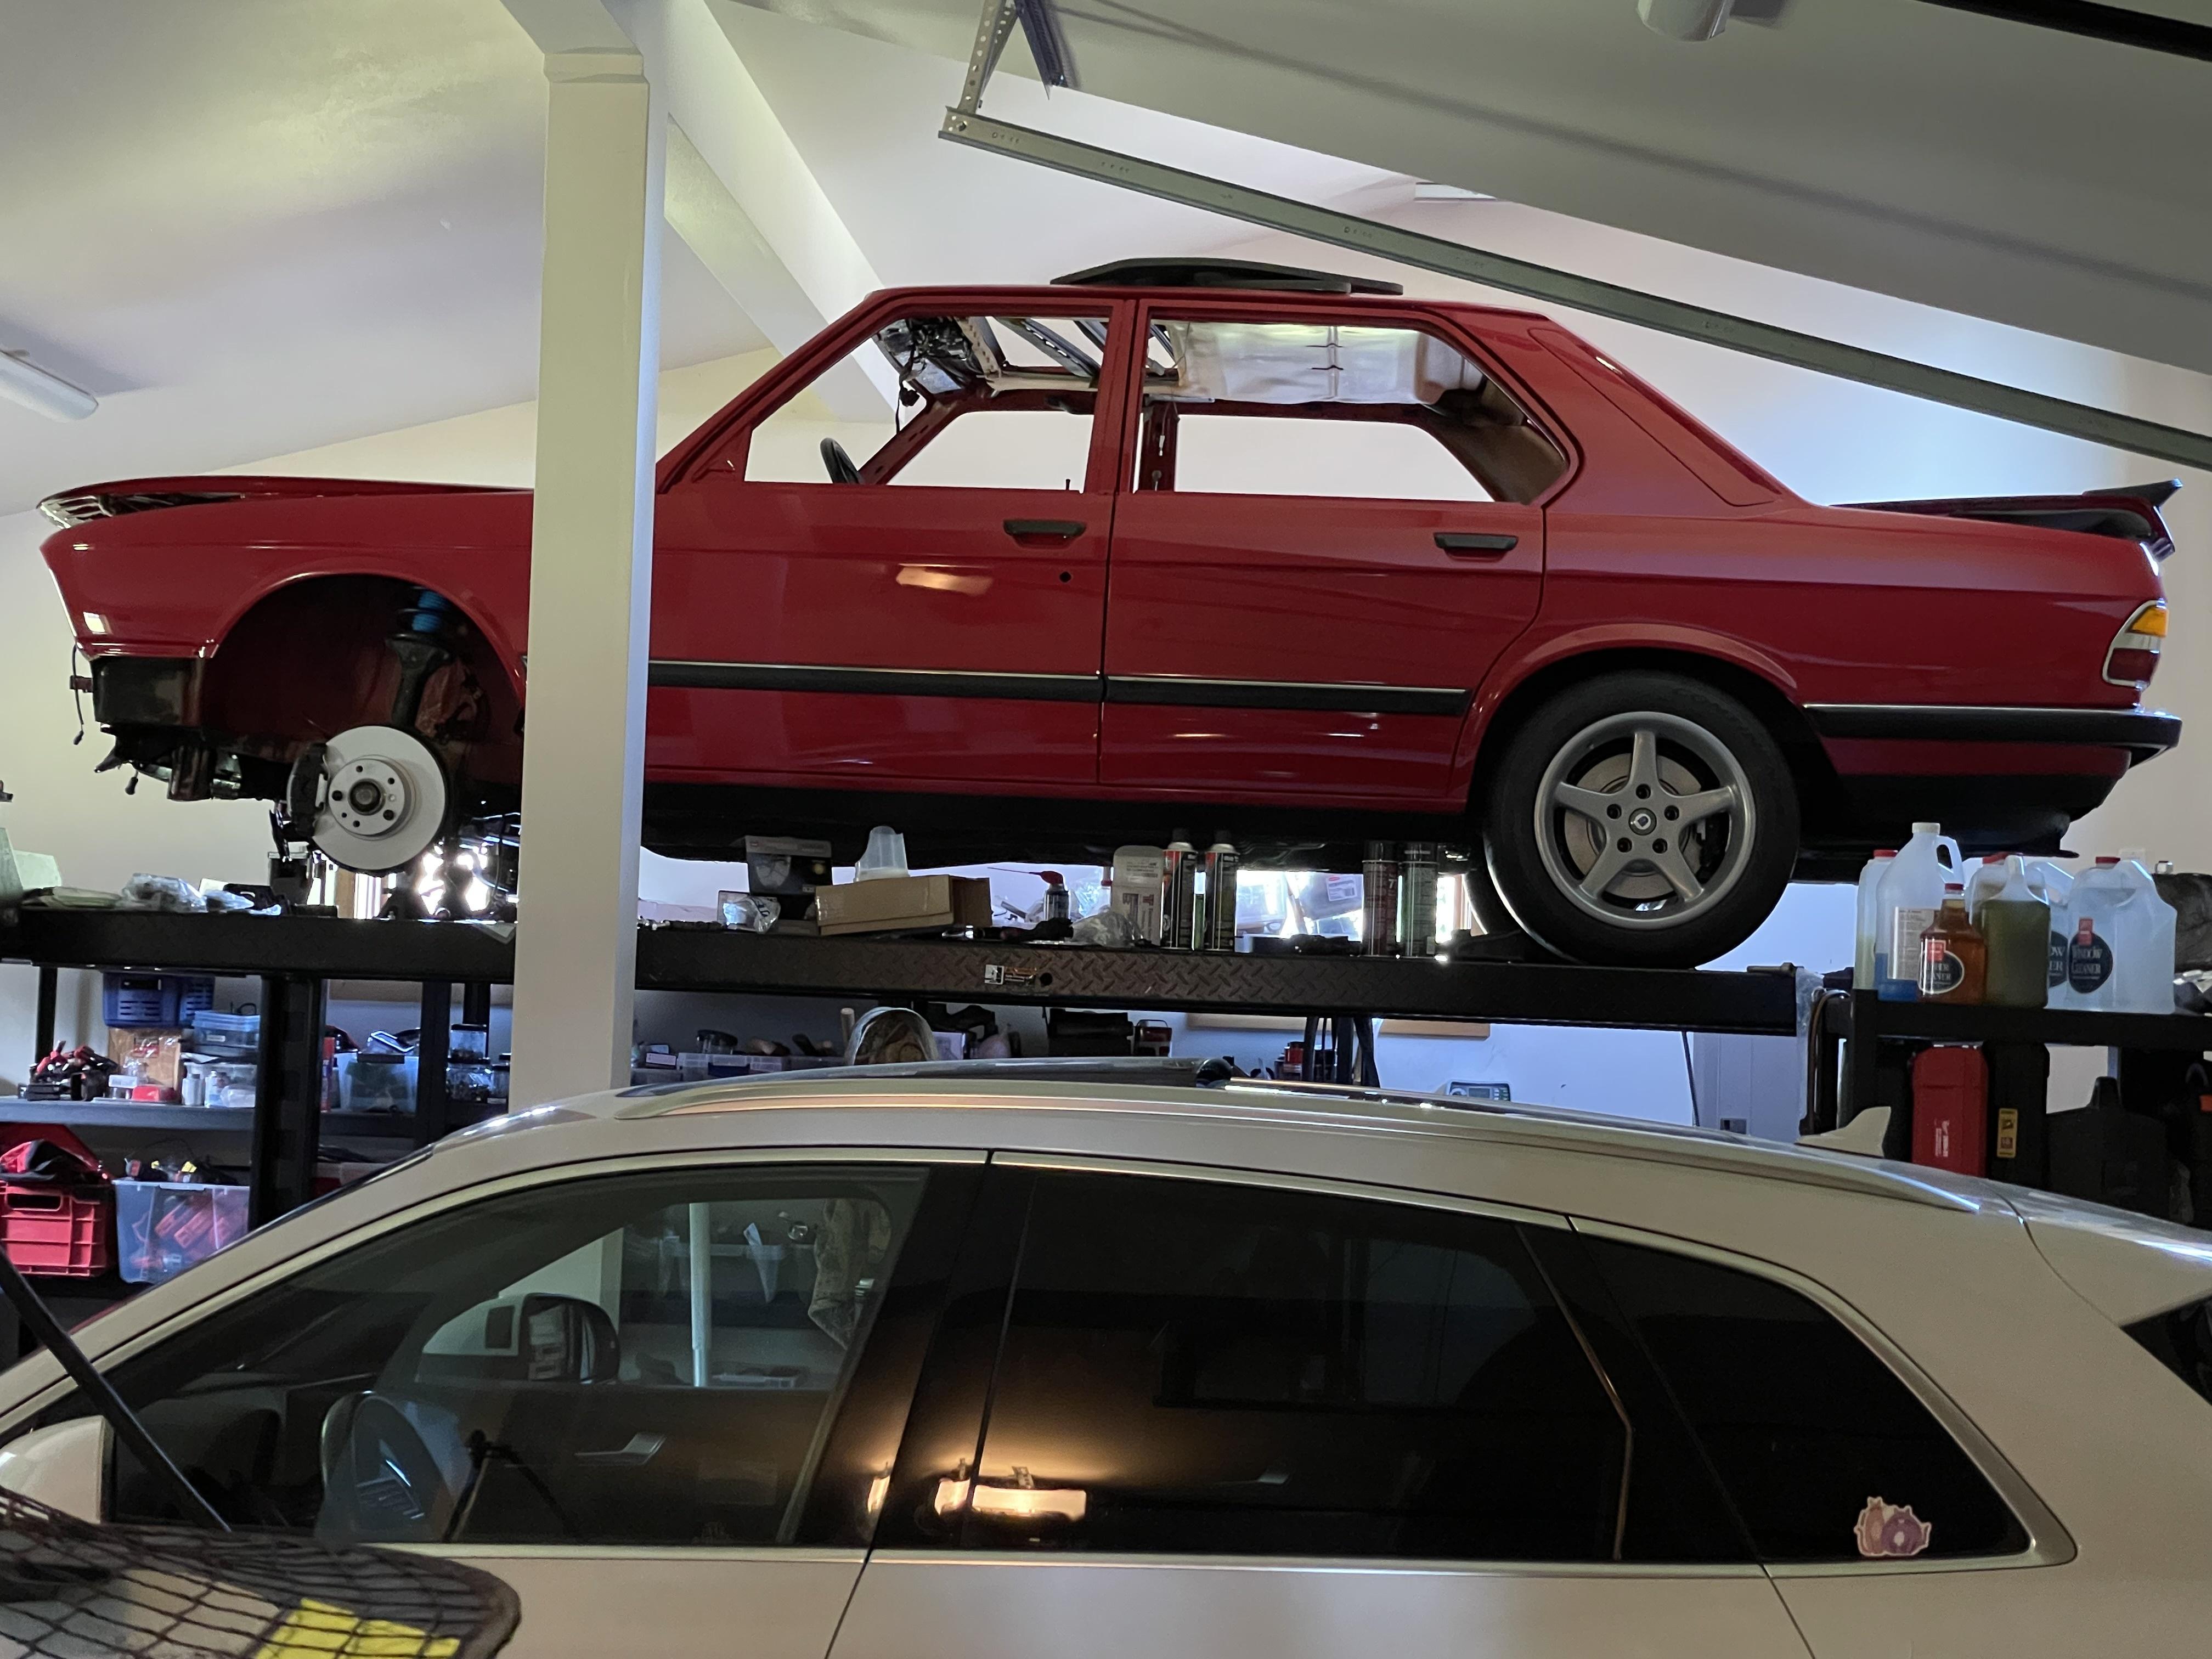
My anxiety is slowly building as after getting the underside of the car complete, brakes flushed and MC replaced, it's on to the interior. I still have the HVAC to reinstall, remount the dash, etc. One of the biggest challenges will be the headliner. Fortunately I've done several 2002 headliners and it looks like the e28 is similar. But when I search for reinstalling the sunroof I can't find much help online. Anyone have a link?
Mounted both front struts after cleaning and installing the new Bilstein inserts. Everything related to the front suspension is new. As is normal. once I did the left side the right side came apart and back together quicker.
I was stressing as I didn't remember if the caliper was in front of the brake disc, and during reassembly I had attached the control arms. Luckily I did everything right and all is as it should be. The bottom on the car would be complete if not for having to build a 16x4x2 raised bed plalnter for Cindy. Moved about 6 out 7 yards of dirt and this took most of the day.
Don't you like it when everything looks newer? the brakes on Maeve are e34 540i brakes btw. Thank you PO.
Once I mount the wheels again and let Maeve off the jack stands and the suspension is loaded, I can tighten up the lower control arm bolts.


10 points to whoever points out what's wrong in this pic, and can tell me the correct repair!

Maeve is slowly starting to look like a car again:

My anxiety is slowly building as after getting the underside of the car complete, brakes flushed and MC replaced, it's on to the interior. I still have the HVAC to reinstall, remount the dash, etc. One of the biggest challenges will be the headliner. Fortunately I've done several 2002 headliners and it looks like the e28 is similar. But when I search for reinstalling the sunroof I can't find much help online. Anyone have a link?
Last edited by gwb72tii on Apr 02, 2024 2:50 PM, edited 1 time in total.
Re: And so it starts, Maeve
Appreciate the comments and advice BS. I tightened the new strut insert upper nut with air and it was easy peezy.Blue Shadow wrote: Mar 15, 2024 11:39 AMThe repair manual specifies bolt cement for these once cleaned prior to reinstallation.kojo96 wrote: Mar 14, 2024 8:09 PM Man, those lower knuckle bolts could have been a major problem/very dangerous issue had they worked loose. Good thing you're in there now. As an FYI, the early car had those safety tied. You may want to think about that.
Re: And so it starts, Maeve
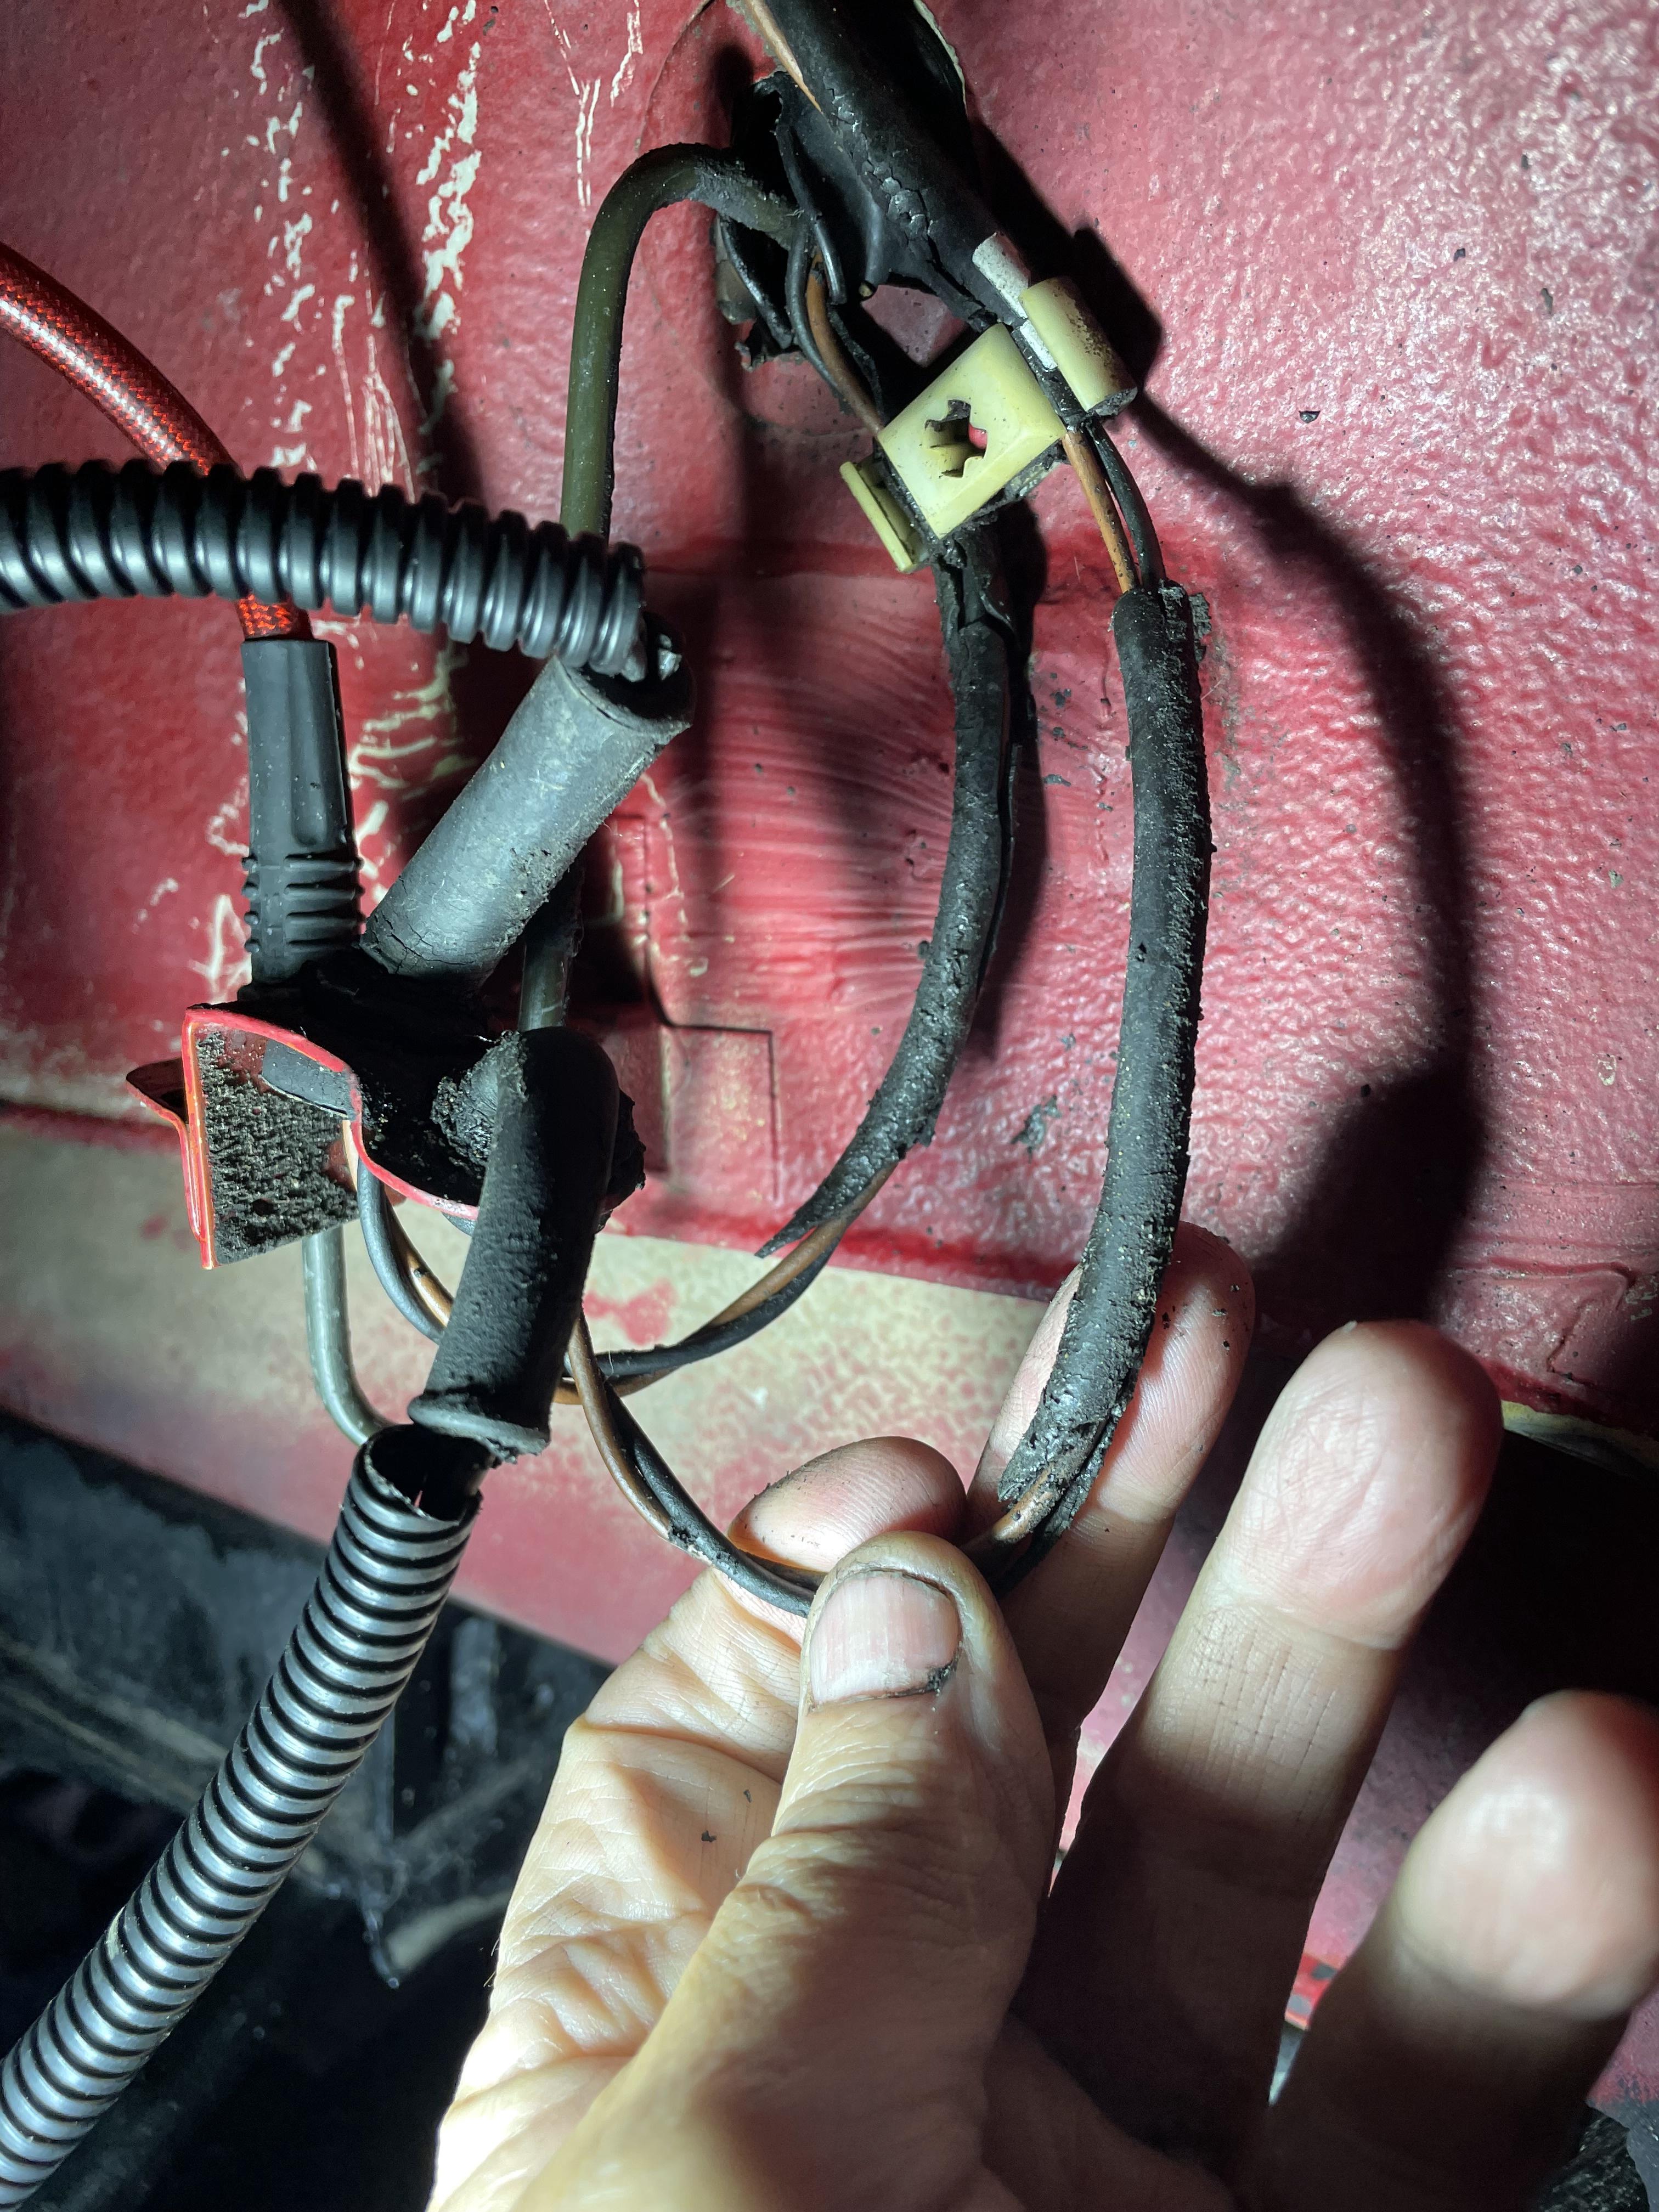
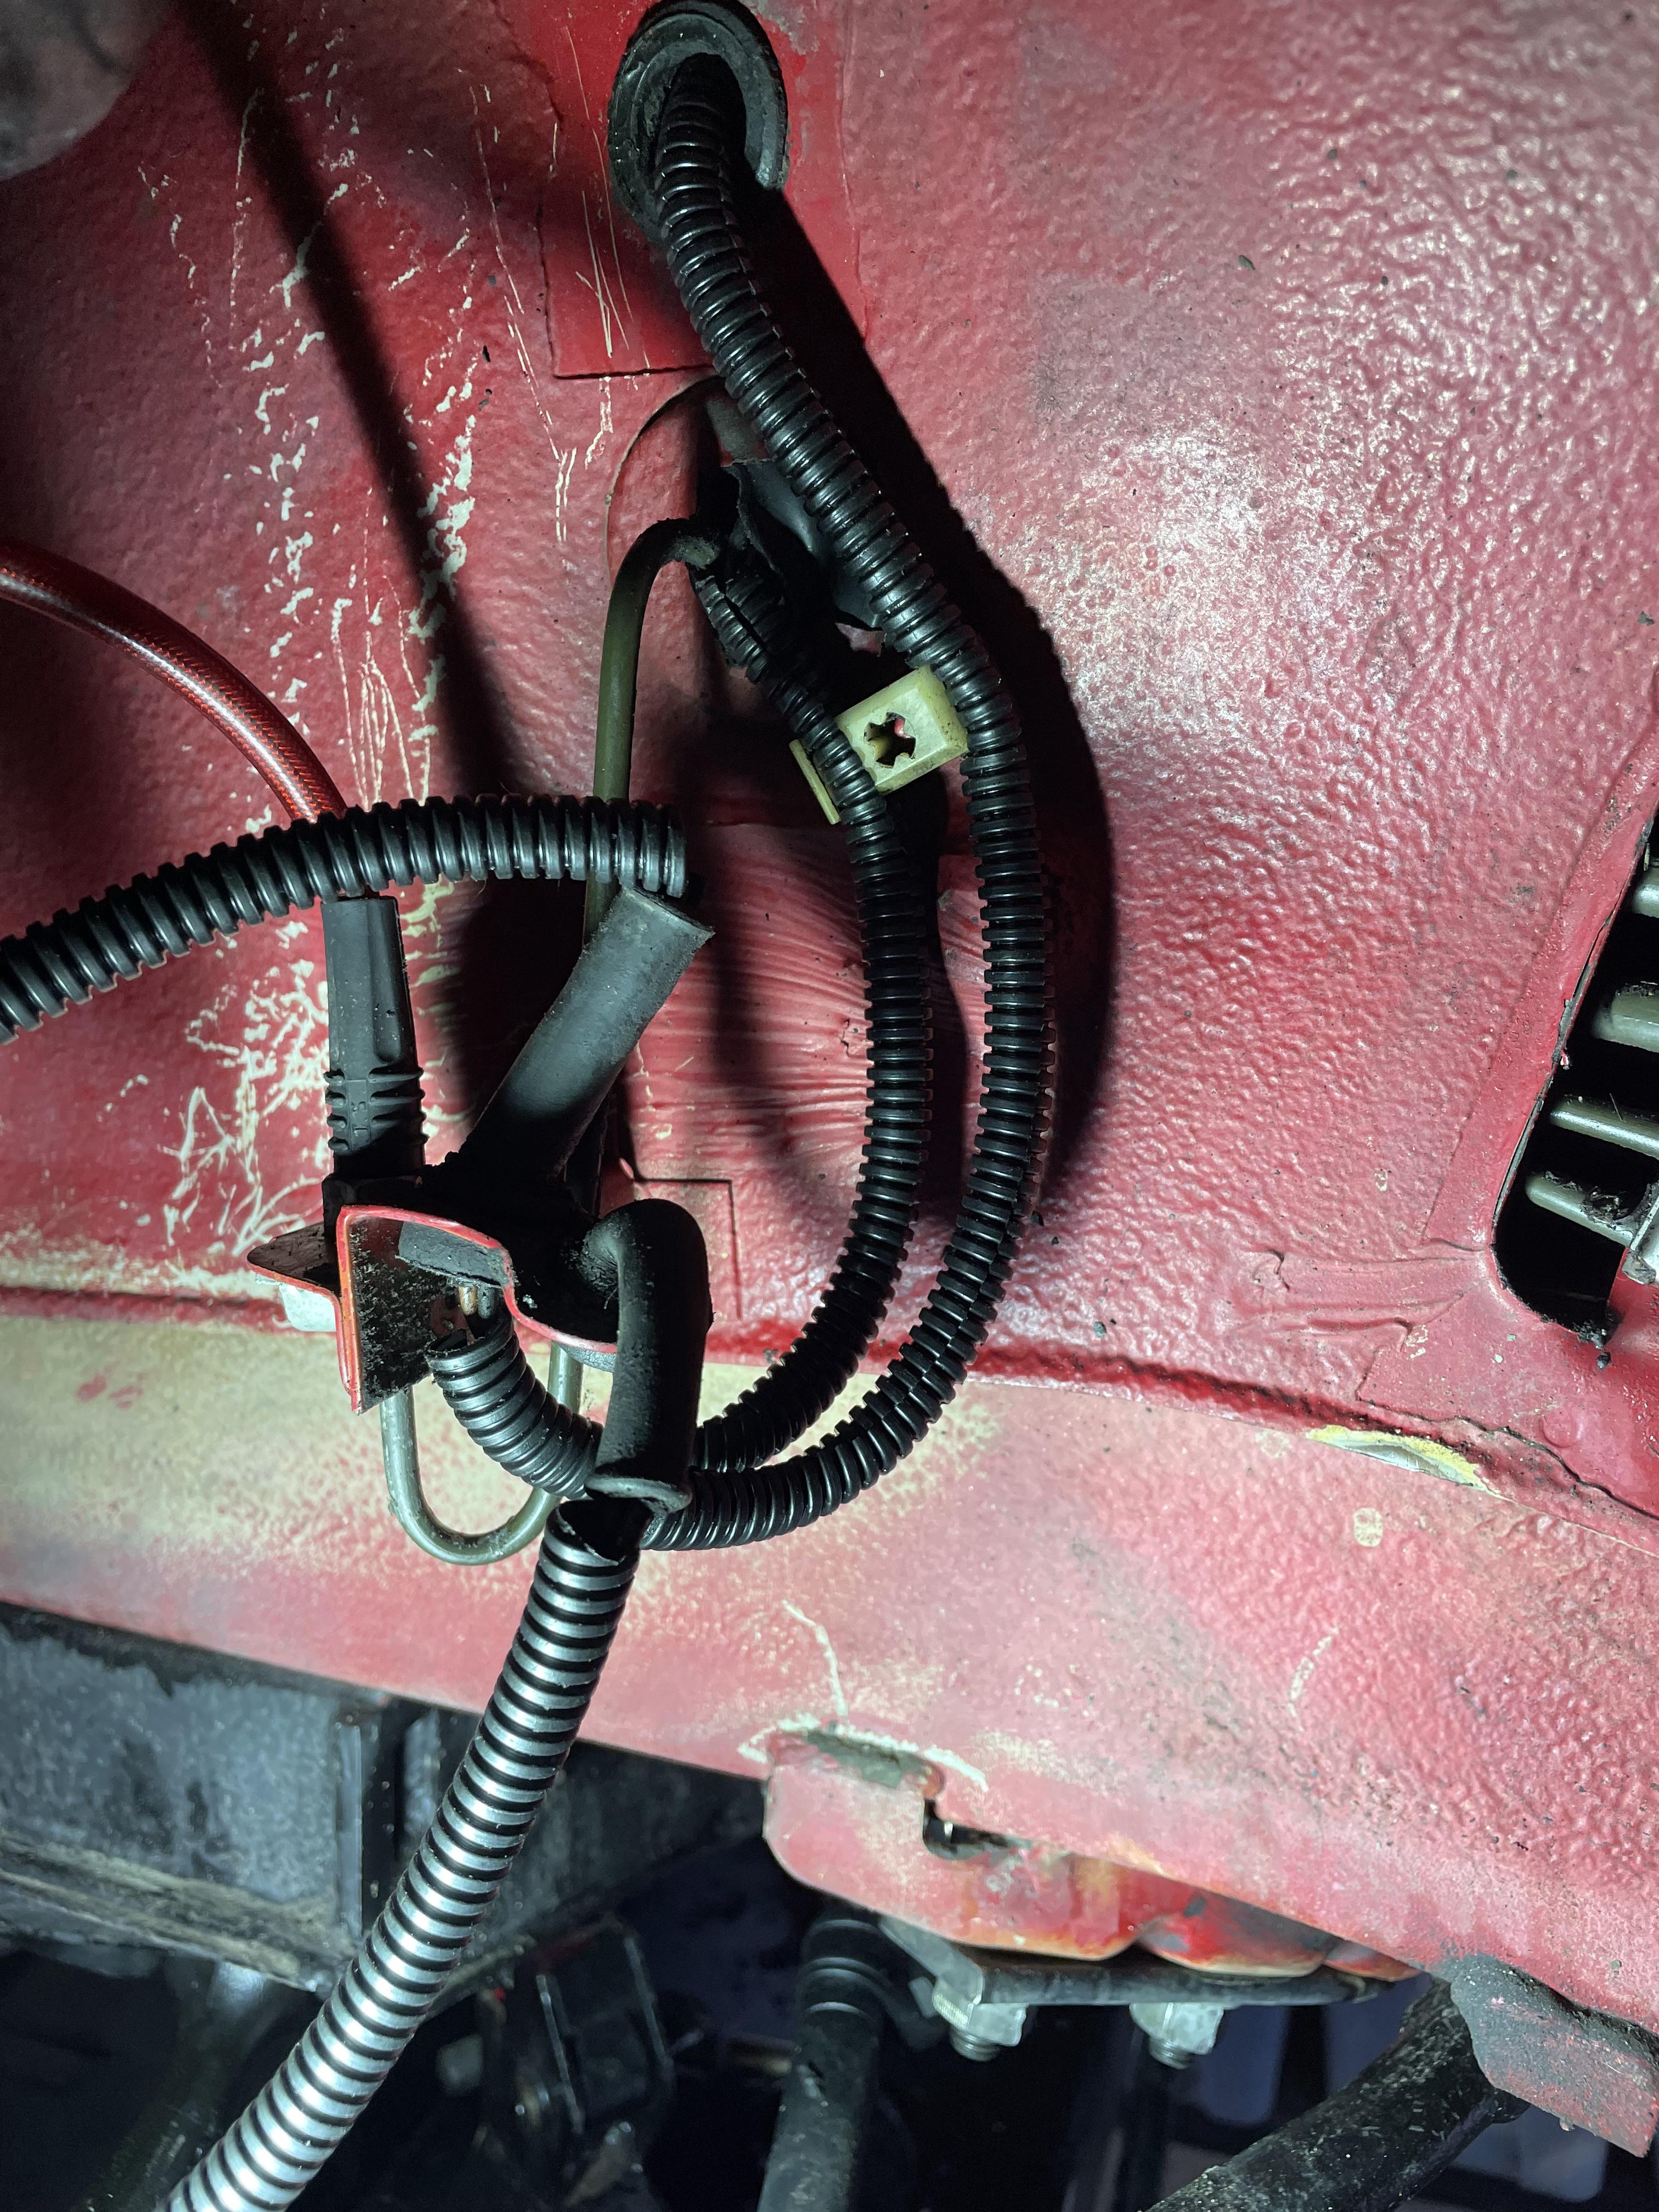
Something I'd wager lot's of you have run into, the protective rubber coating on various wires that see the outside/underside of the car is crumbling away, exposing the wires. I bought some of the split accordion type tubing to put over the wires so they are protected. I am not a fan of the look of this type of tubing but it's necessary I think to protect the wires.
Here you can see the rubber coating and that a potion of it is gone. This is the driver front brake area:
Here you can see the accordion type of protective tubing. I won't be using this und the hood:
Here you can see the rubber coating and that a potion of it is gone. This is the driver front brake area:

Here you can see the accordion type of protective tubing. I won't be using this und the hood:

Re: And so it starts, Maeve
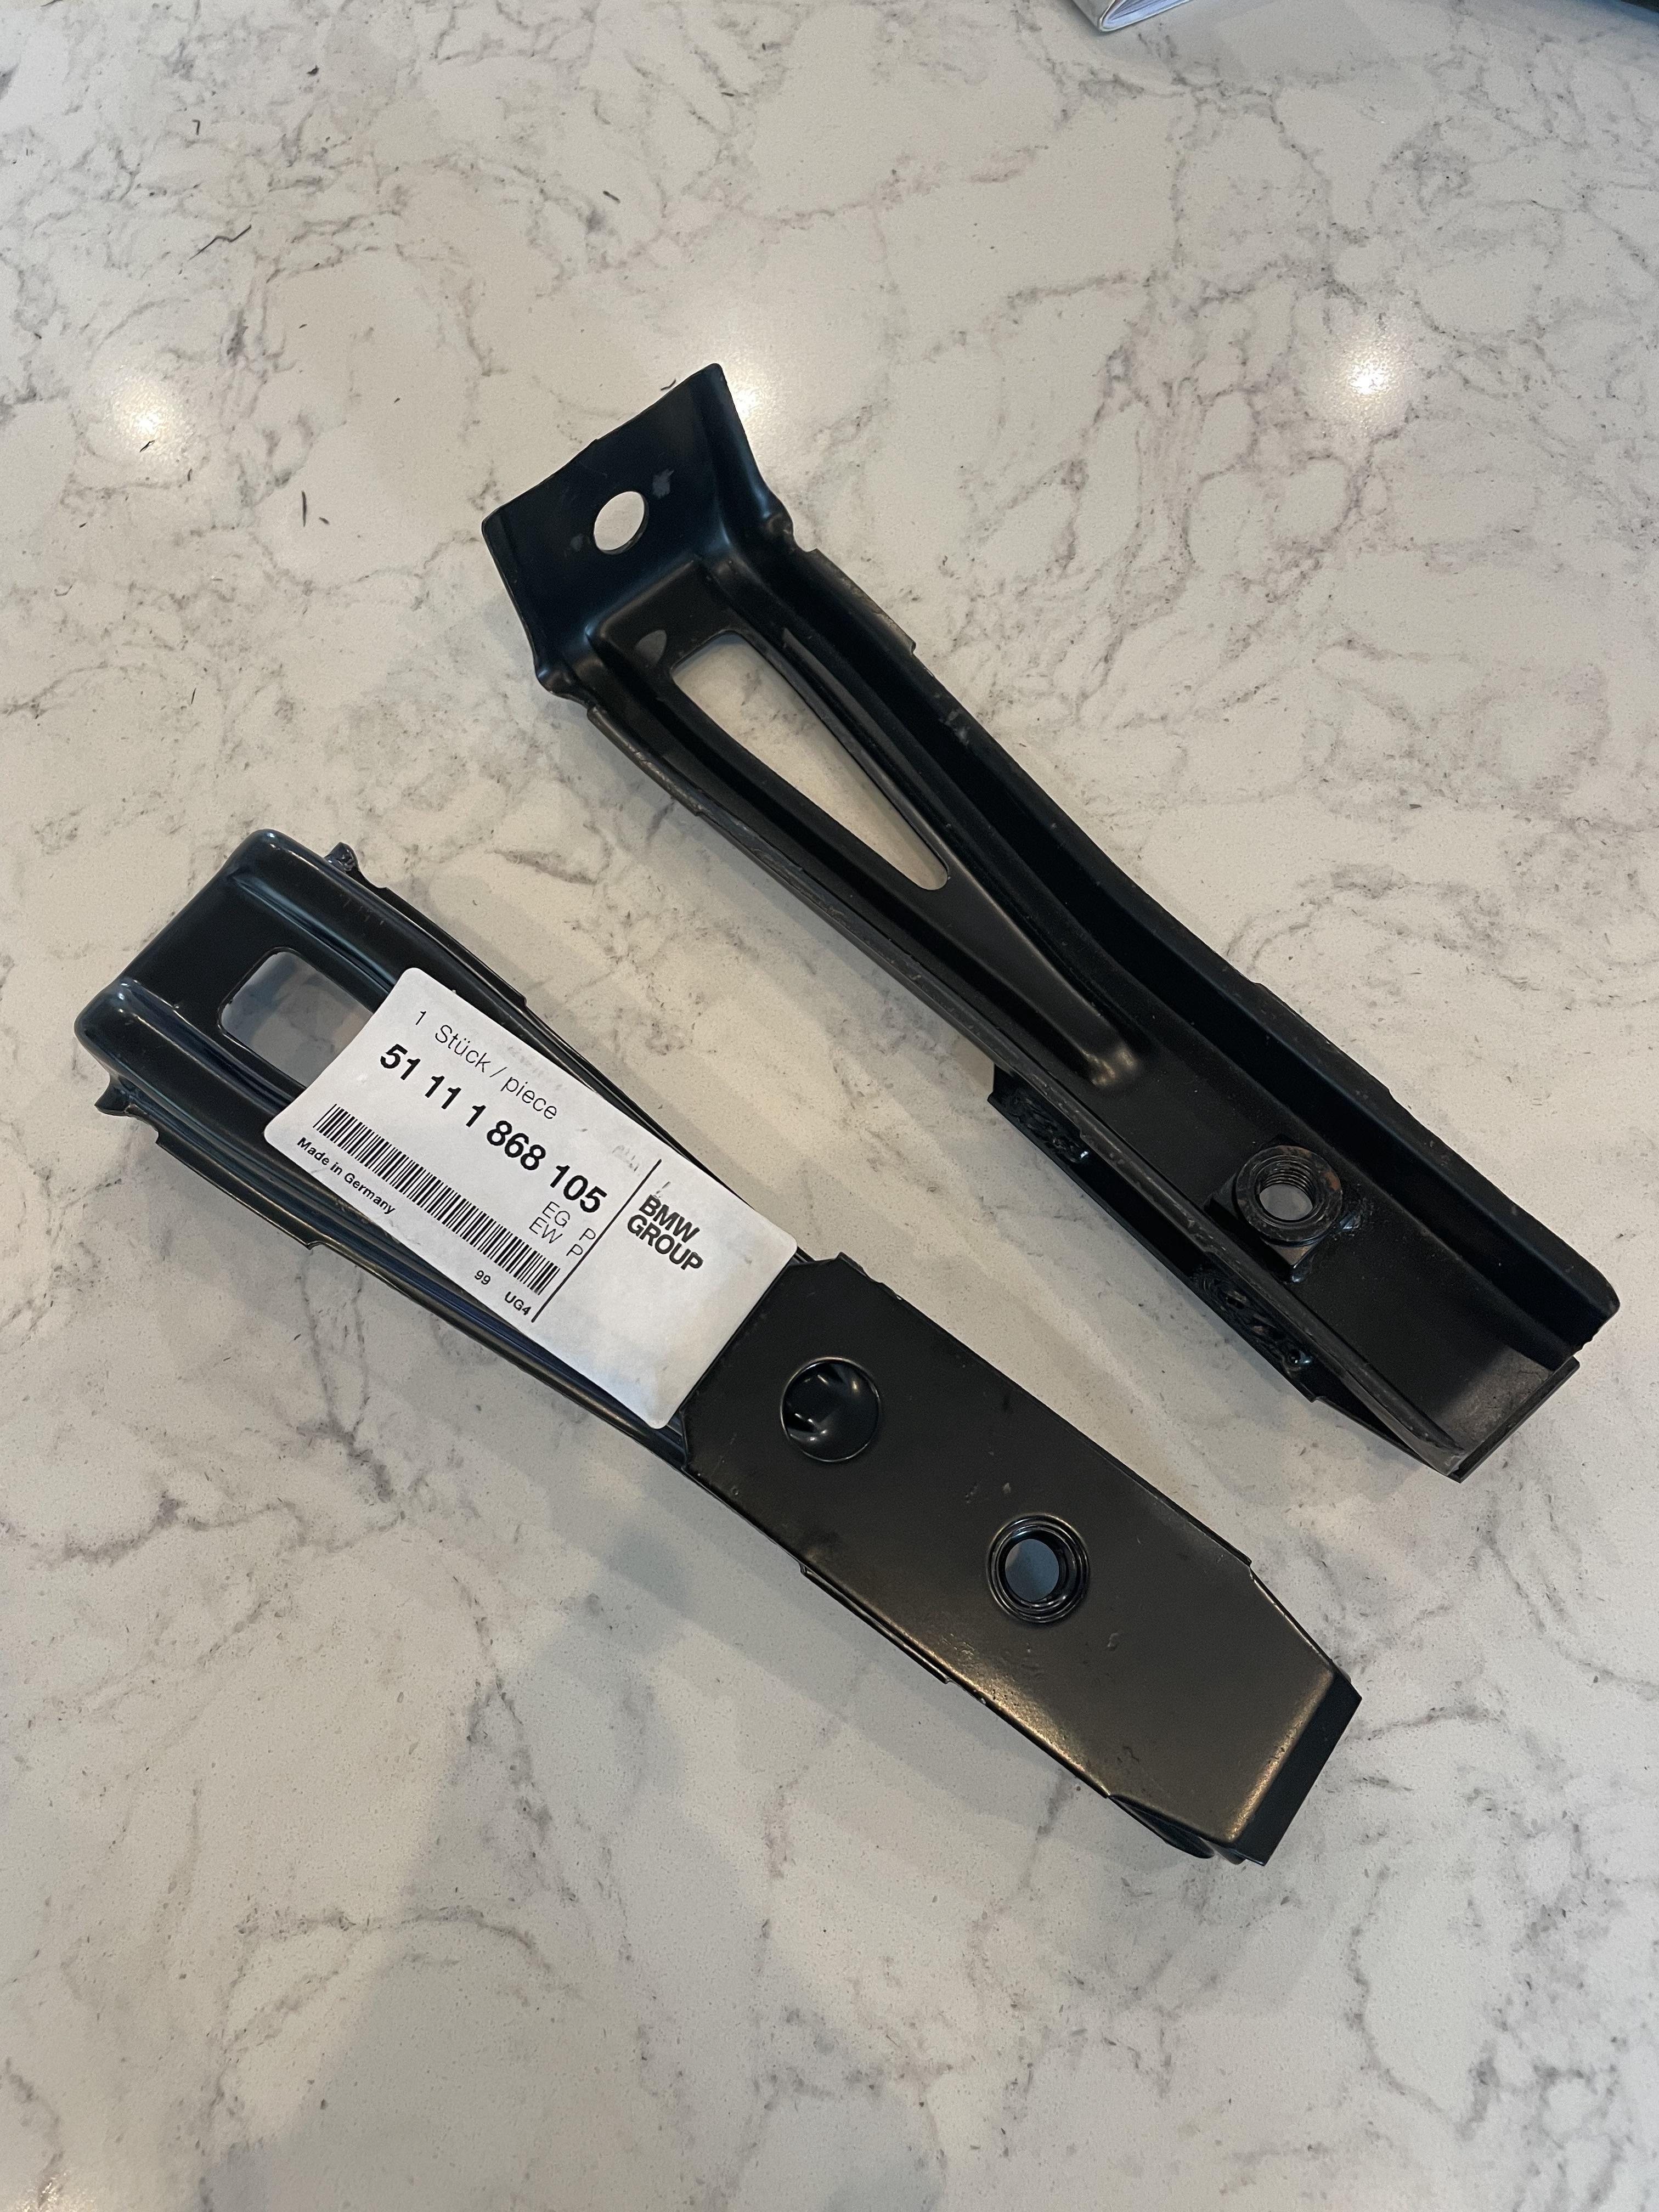
And look what came today. FedEx from Athens, Greece in less than a week.

Re: And so it starts, Maeve
It's been a good day. Maeve came with three 16x8 et33 Racing Dynamics RGR 5 spoke wheels, and one et15.
I've been looking about every other day for a matching wheel for the last 18 months and have had no luck.
I asked my son today to look for me and he found the exact match newly listed on eBay today. 2 rims for $499. So my spare will match.
I like the look of the wheels, and they are easy to keep clean.
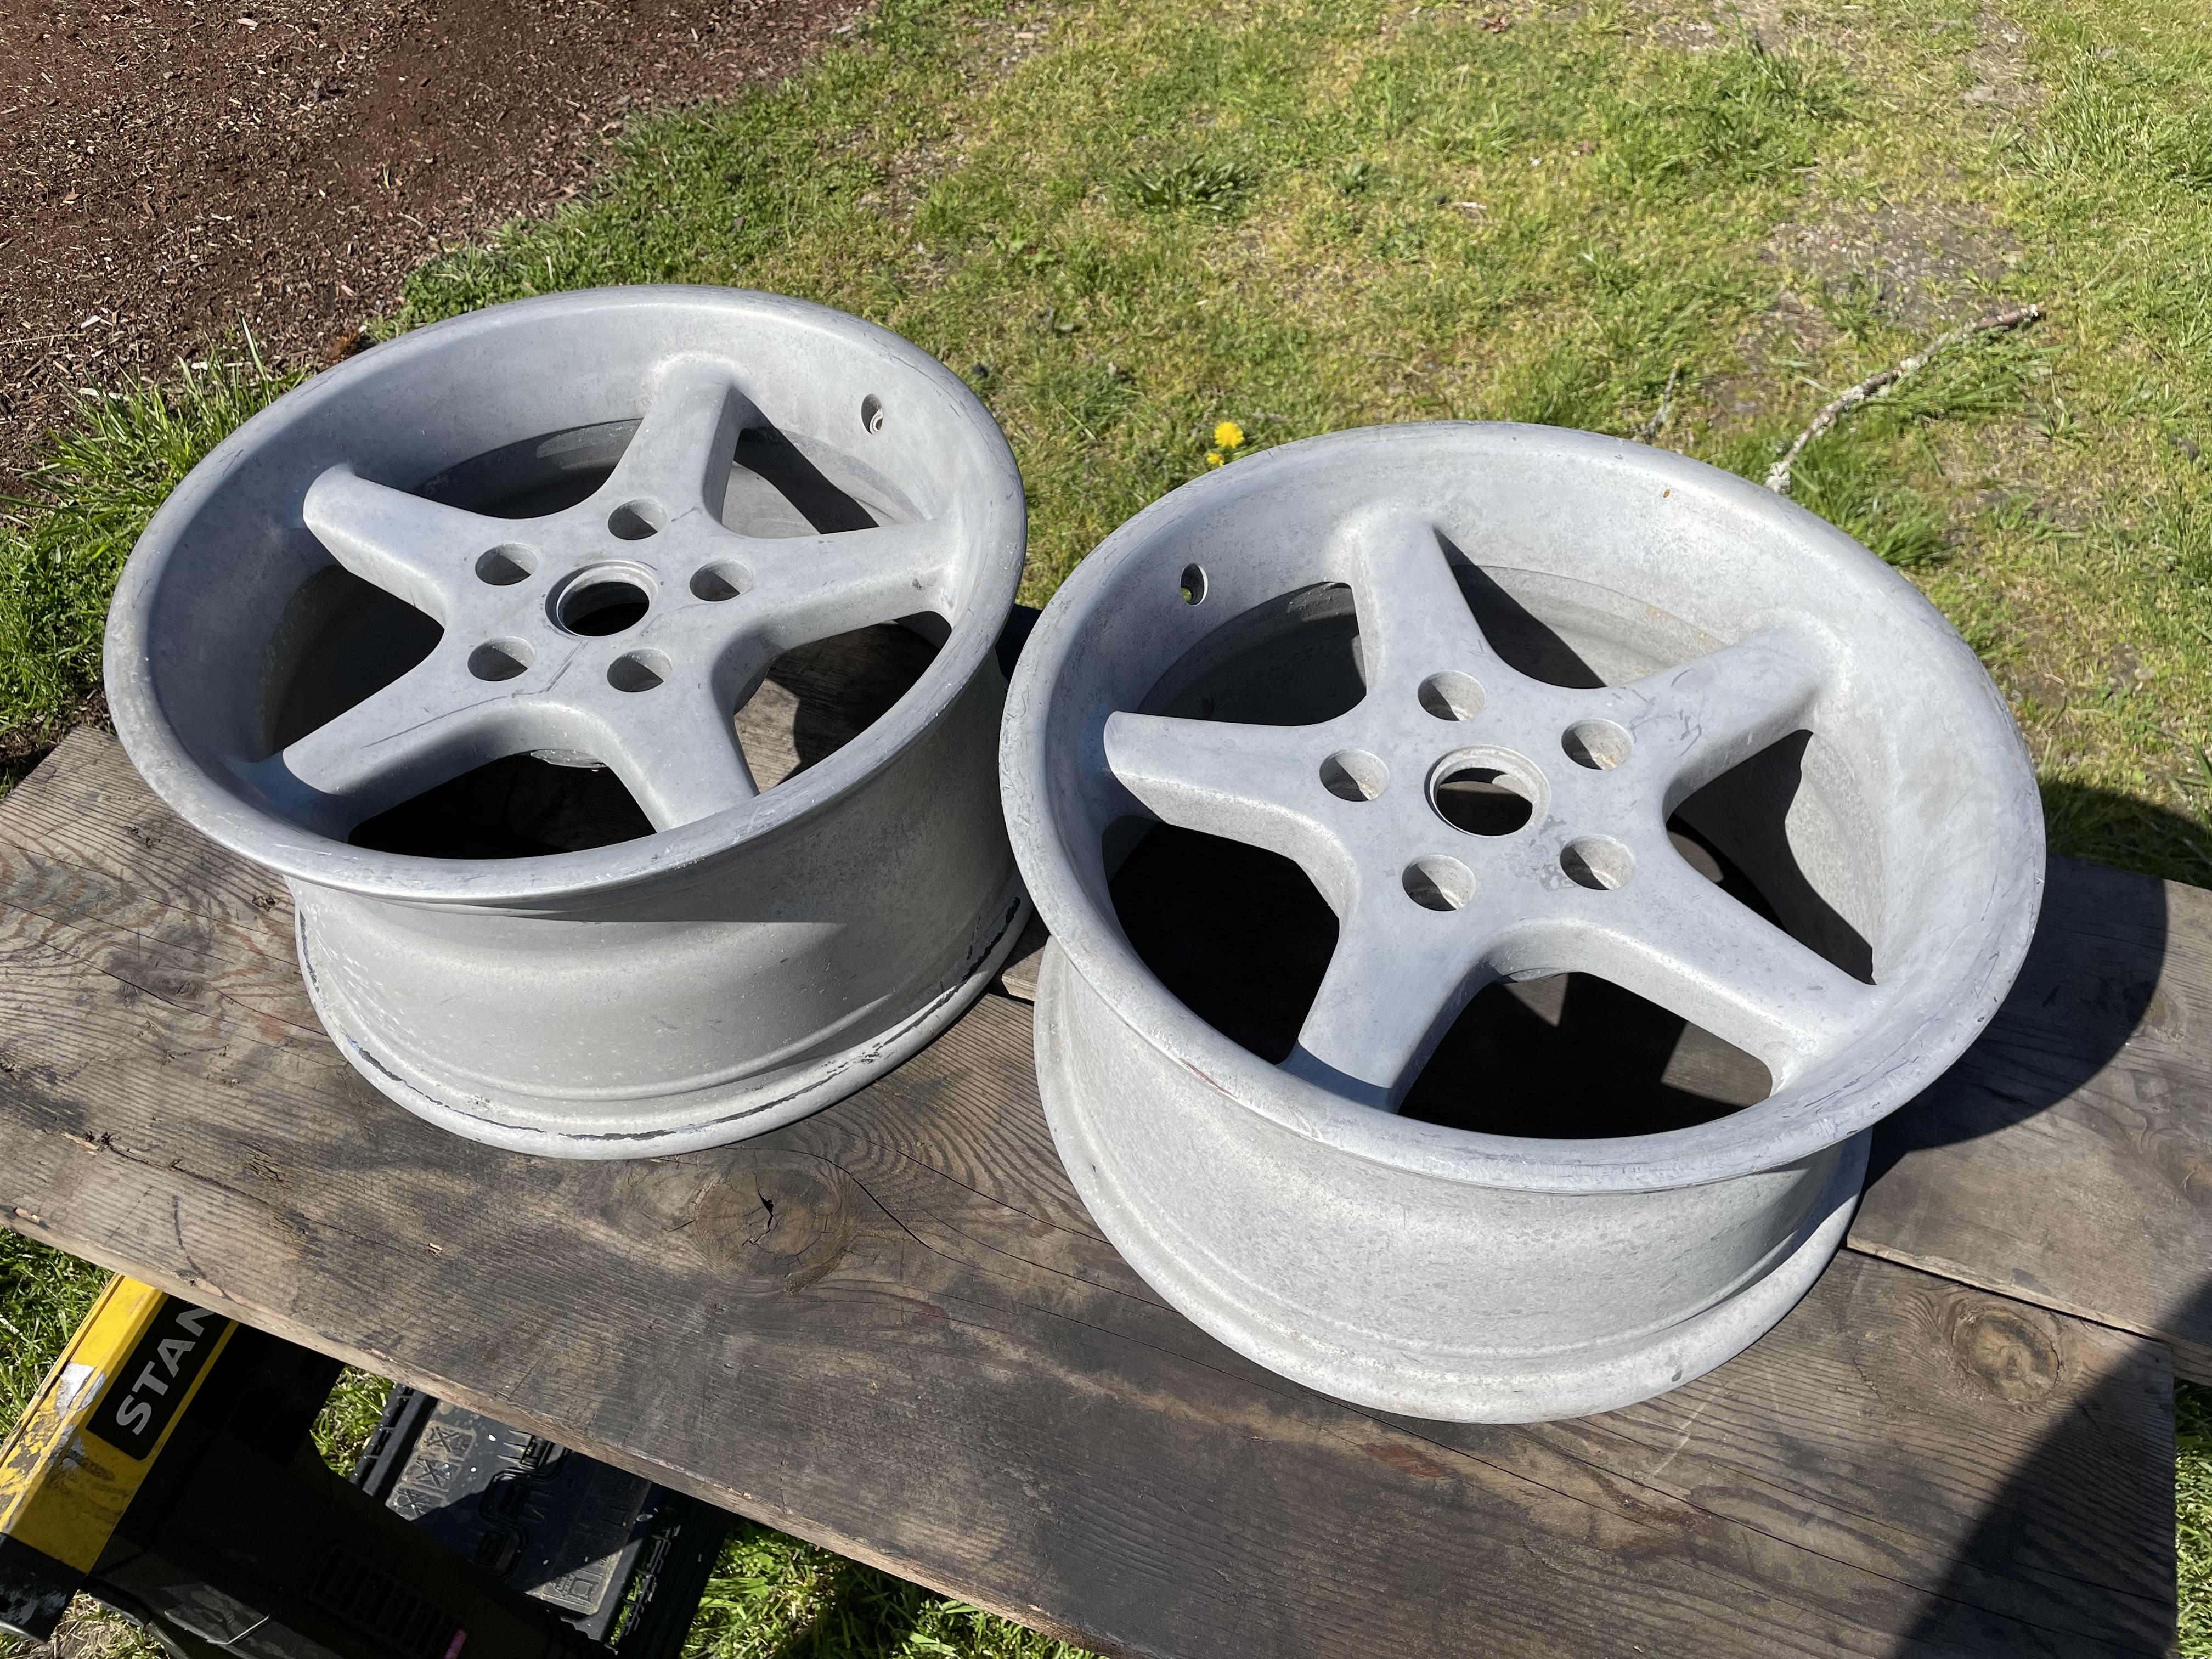
these jut were delivered and they are basically raw aluminum which is better than I expected.
I've been looking about every other day for a matching wheel for the last 18 months and have had no luck.
I asked my son today to look for me and he found the exact match newly listed on eBay today. 2 rims for $499. So my spare will match.
I like the look of the wheels, and they are easy to keep clean.

these jut were delivered and they are basically raw aluminum which is better than I expected.
-
thrty8street
- Posts: 595
- Joined: Feb 21, 2011 1:13 AM
- Location: Maryland
Re: And so it starts, Maeve
Which trailing arm bushings did you install? Factory parts (p/n 33329061946)?
Re: And so it starts, Maeve
Yes, factory parts all the way. I'm now 70 years young, feel like I'm 30, like to drive fast through the corners when it's safe, all the stuff I did for the last 50 years, and don't feel the need for the car to be so stiff that it hurts to go over paint stripes.
BTW Maeve is temporarily on hold as I help the wife plant a vegetable garden and move bark and dirt for general landscaping. She keeps buying trees and things that need holes dug.
BTW Maeve is temporarily on hold as I help the wife plant a vegetable garden and move bark and dirt for general landscaping. She keeps buying trees and things that need holes dug.
Re: And so it starts, Maeve
A happy wife...gwb72tii wrote: May 13, 2024 10:07 PM Yes, factory parts all the way. I'm now 70 years young, feel like I'm 30, like to drive fast through the corners when it's safe, all the stuff I did for the last 50 years, and don't feel the need for the car to be so stiff that it hurts to go over paint stripes.
BTW Maeve is temporarily on hold as I help the wife plant a vegetable garden and move bark and dirt for general landscaping. She keeps buying trees and things that need holes dug.
Re: And so it starts, Maeve
Yes, I'm alive. it's been a long time since I've posted. Doing other things wife related, and lack of enthusiasm for working on Maeve.
Part of my issue is the motor I ordered 2+ years ago, which was originally due this time last year, is delayed to the end of August this year. A little deflating knowing I can get the entire car back together and still have no motor.
Well today I started up again. Here is the issue facing me today, the sunroof:
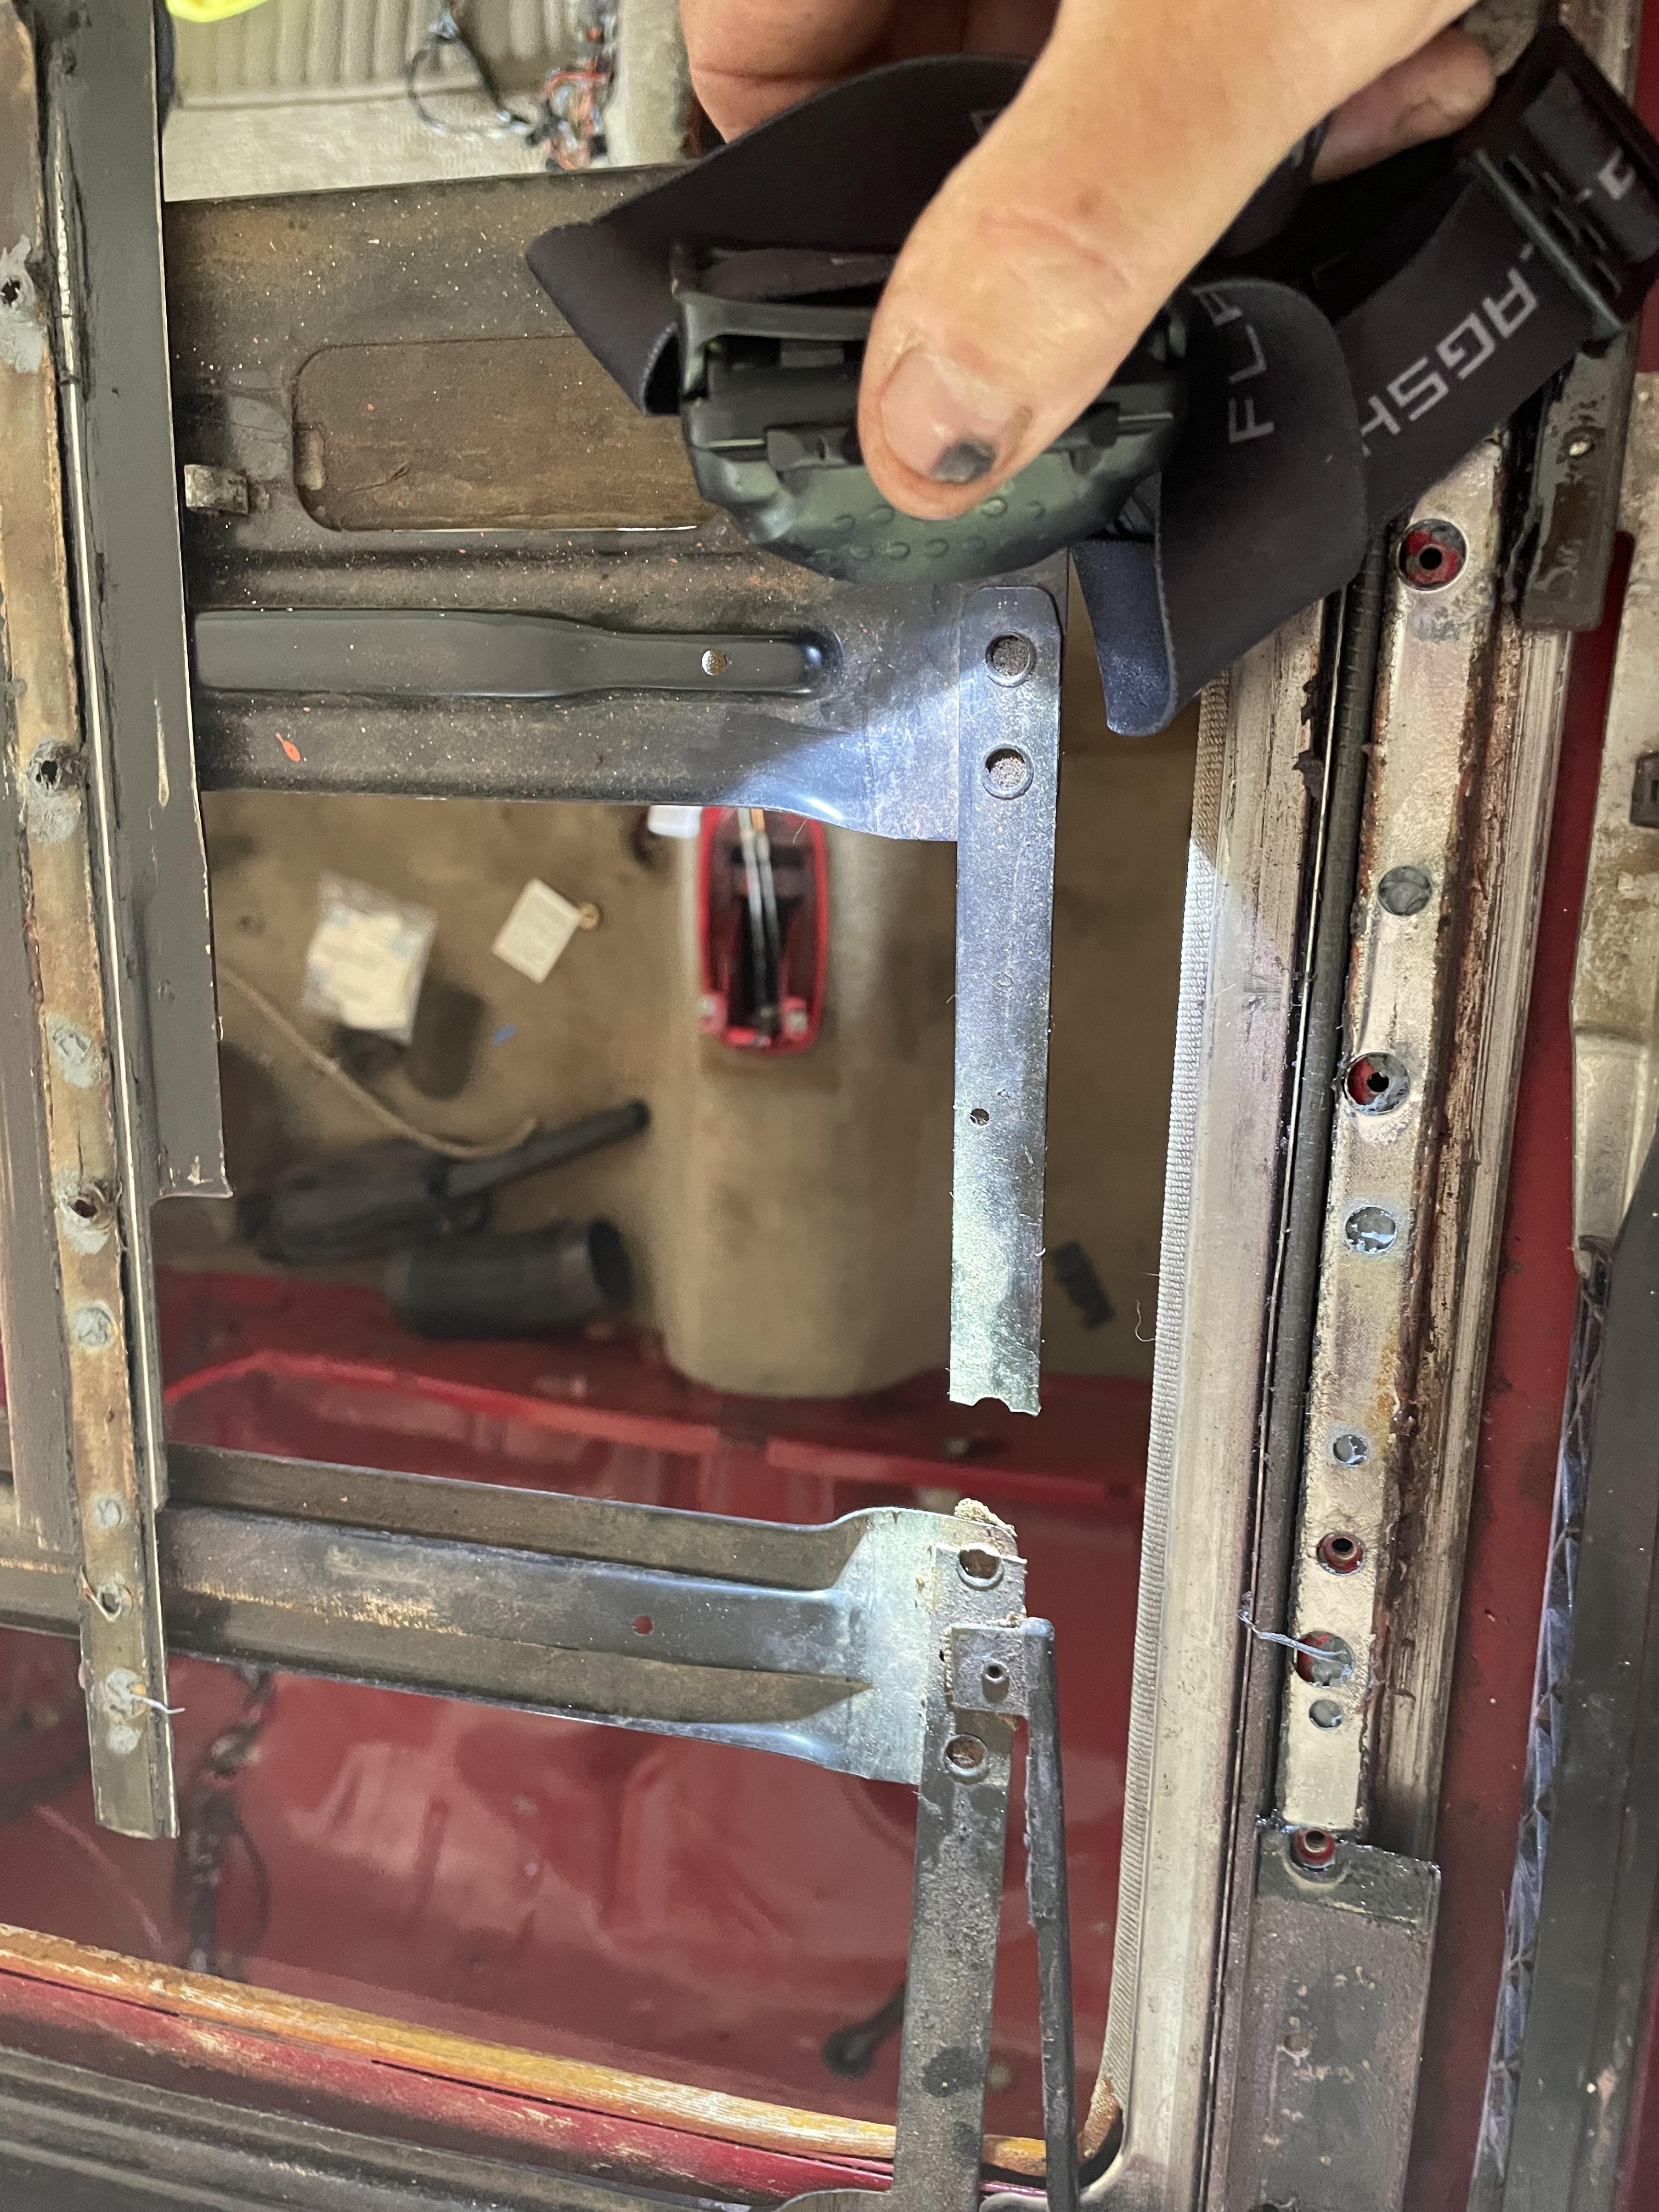
Fortunately I have a replacement but researching how to get it out took longer than anticipated. And now, mission creep. ugh! No sense just putting everything back together as is, right? So now full removal. Cleaning, repair and reinstall of all the various sunroof pieces.
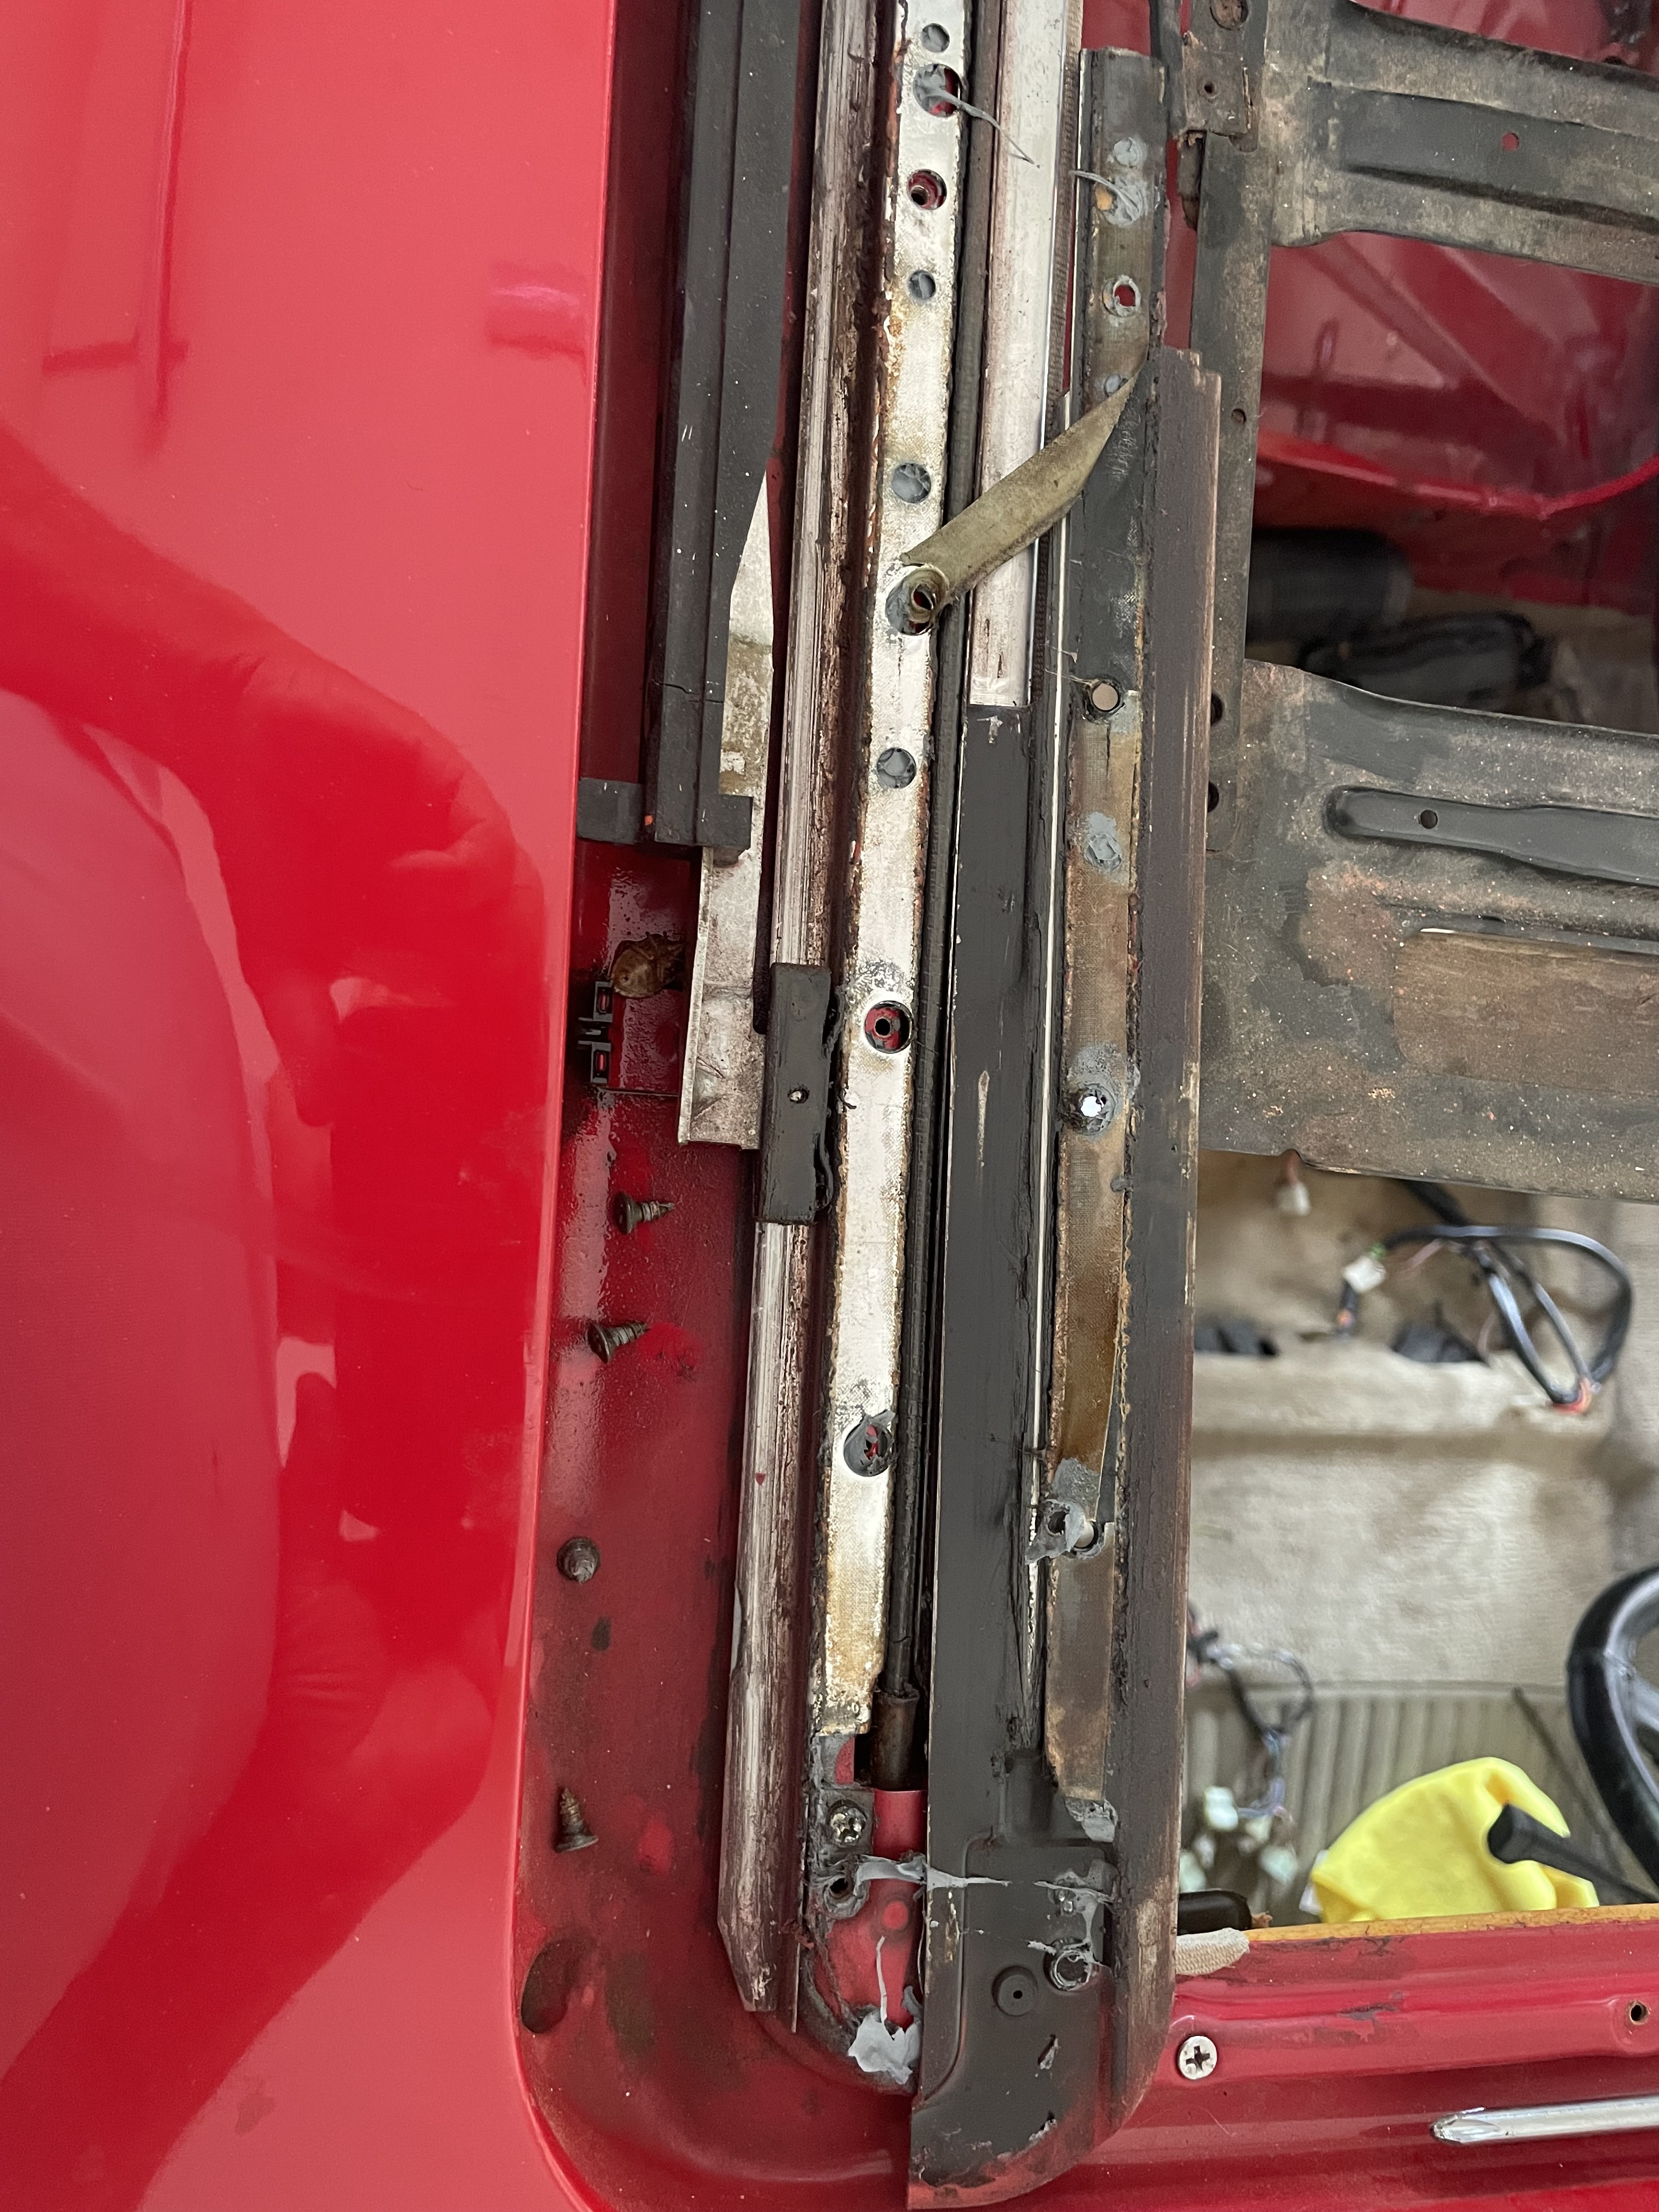
It's amazing how dirty and in need of repair things get over time. Here's a pic of the rails partially disassembled so yo can see what I mean. All of this is coming out to be made as new as possible:
I also glued and installed the trunk seal. It's a Uro product and it fits correctly. Used 3M 5200 marine adhesive (had some left from working on my boat).
Part of my issue is the motor I ordered 2+ years ago, which was originally due this time last year, is delayed to the end of August this year. A little deflating knowing I can get the entire car back together and still have no motor.
Well today I started up again. Here is the issue facing me today, the sunroof:

Fortunately I have a replacement but researching how to get it out took longer than anticipated. And now, mission creep. ugh! No sense just putting everything back together as is, right? So now full removal. Cleaning, repair and reinstall of all the various sunroof pieces.
It's amazing how dirty and in need of repair things get over time. Here's a pic of the rails partially disassembled so yo can see what I mean. All of this is coming out to be made as new as possible:

I also glued and installed the trunk seal. It's a Uro product and it fits correctly. Used 3M 5200 marine adhesive (had some left from working on my boat).
Re: And so it starts, Maeve
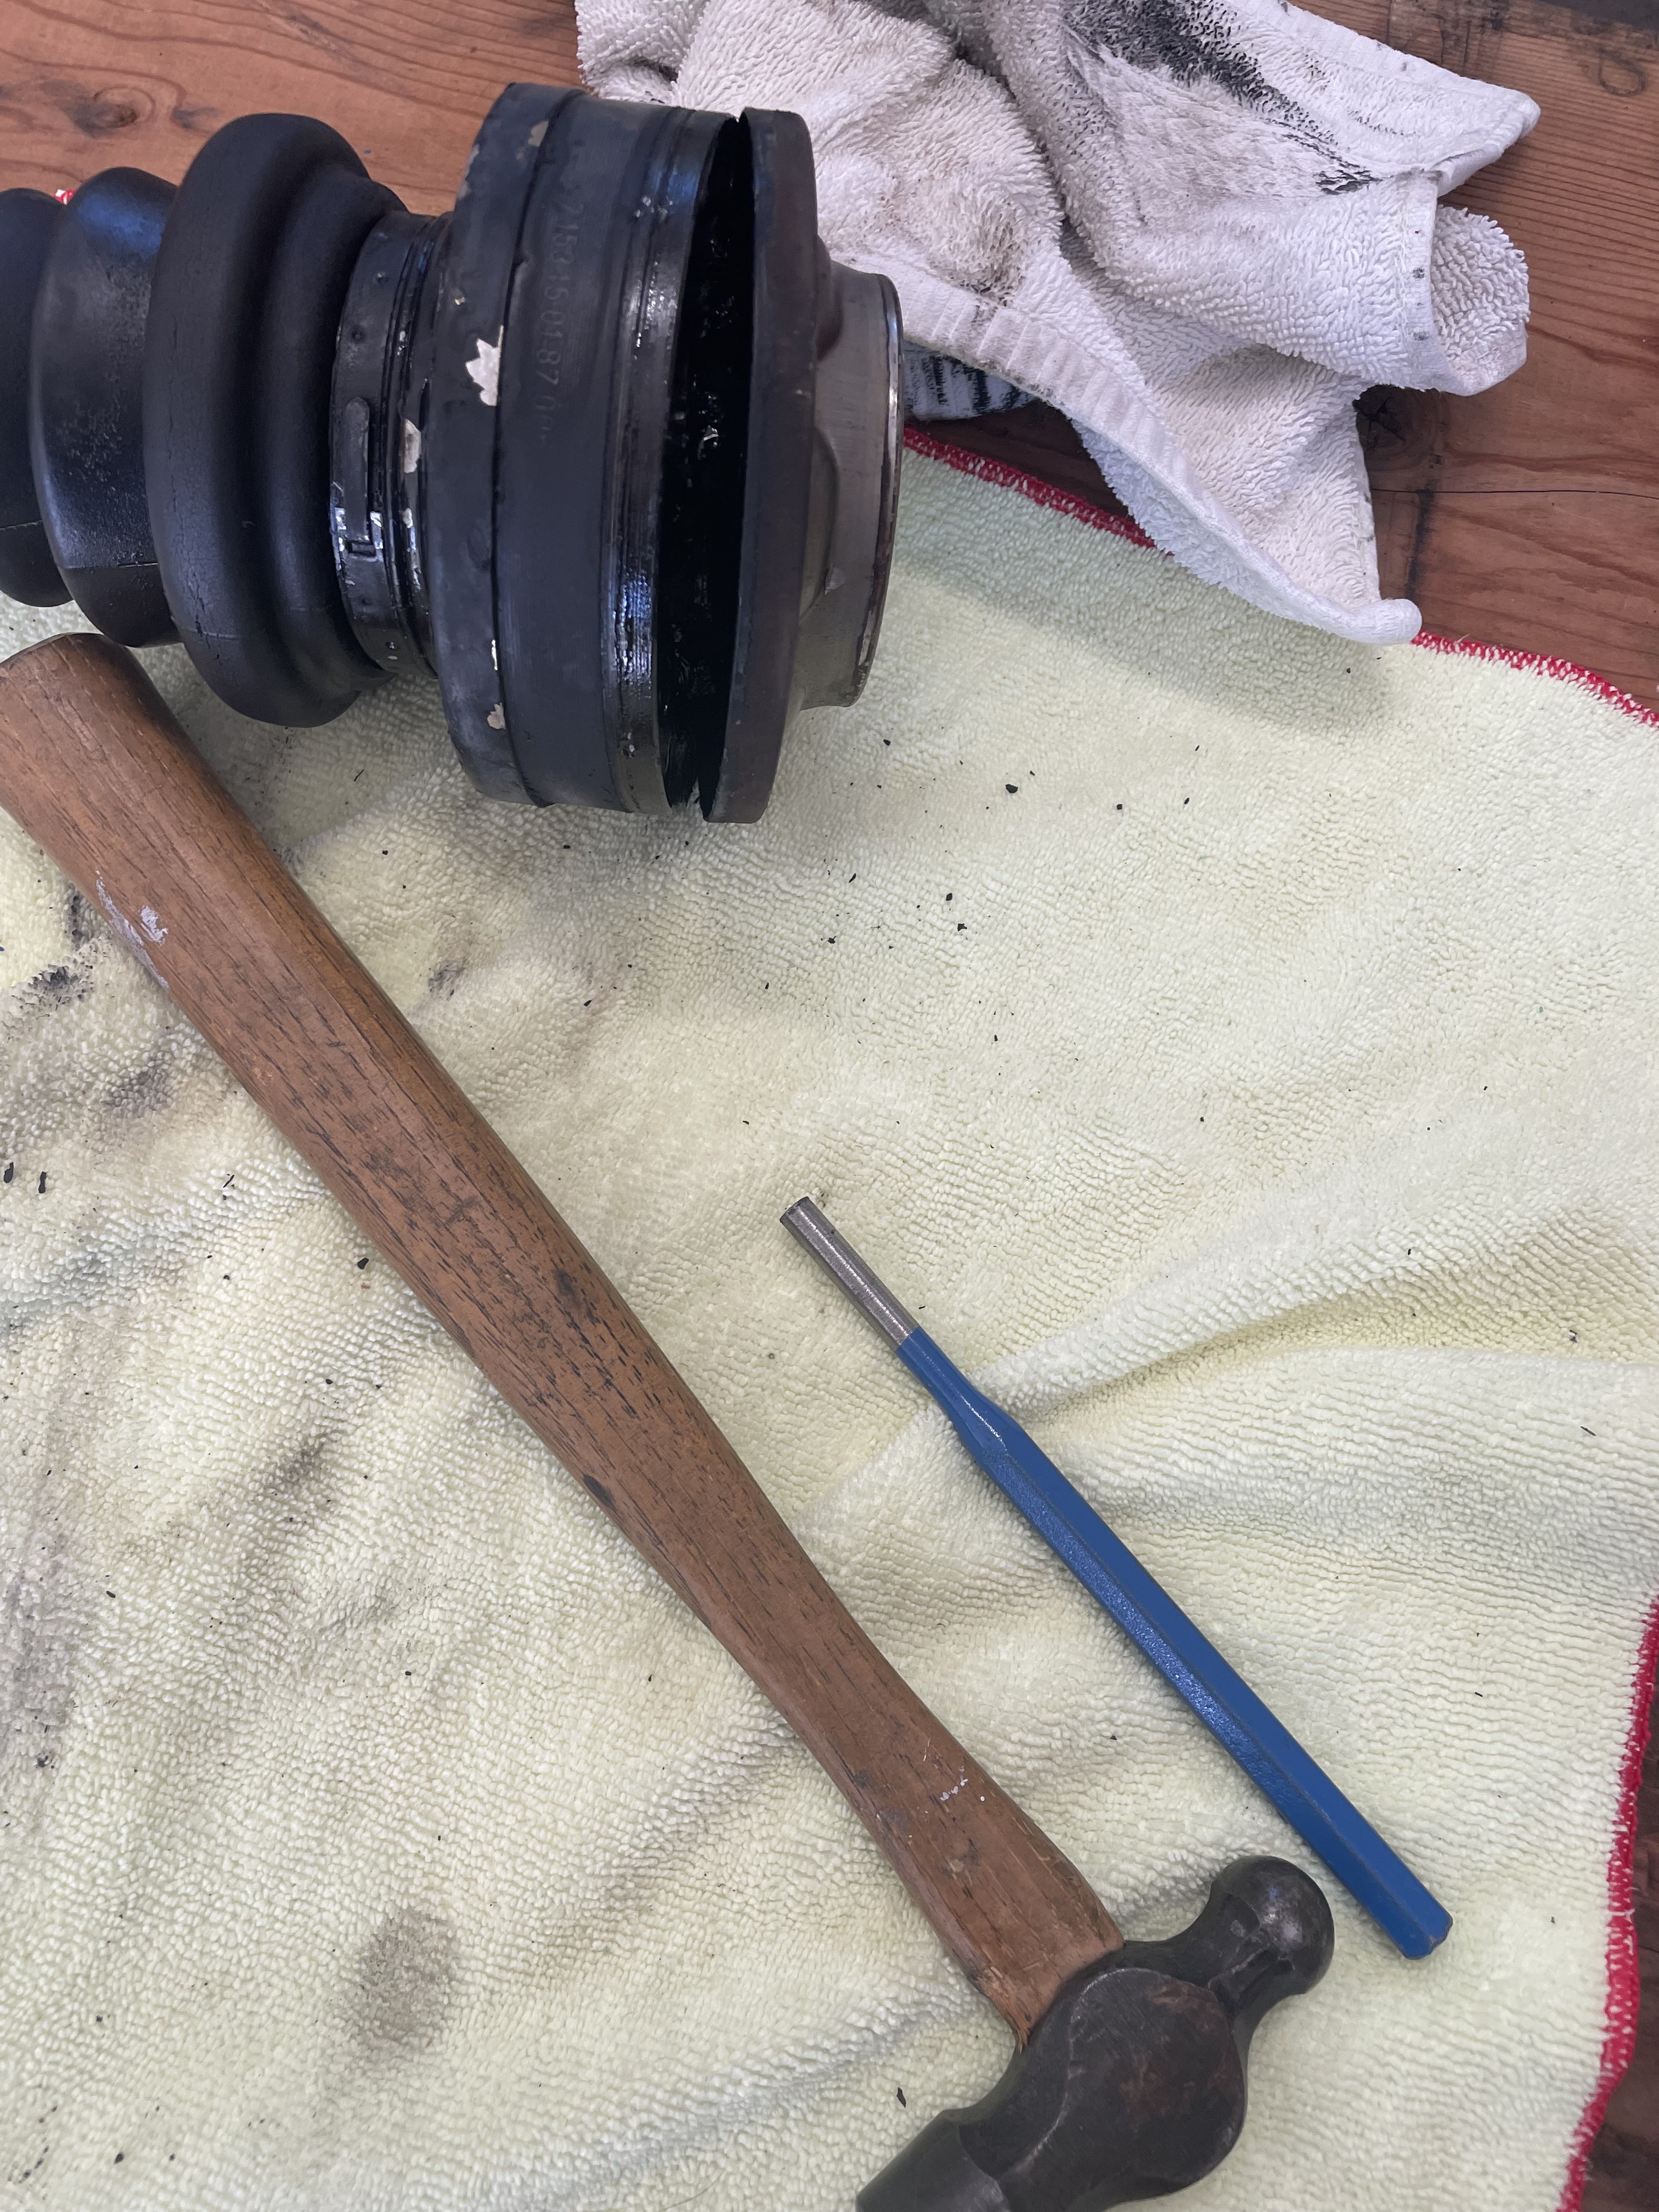
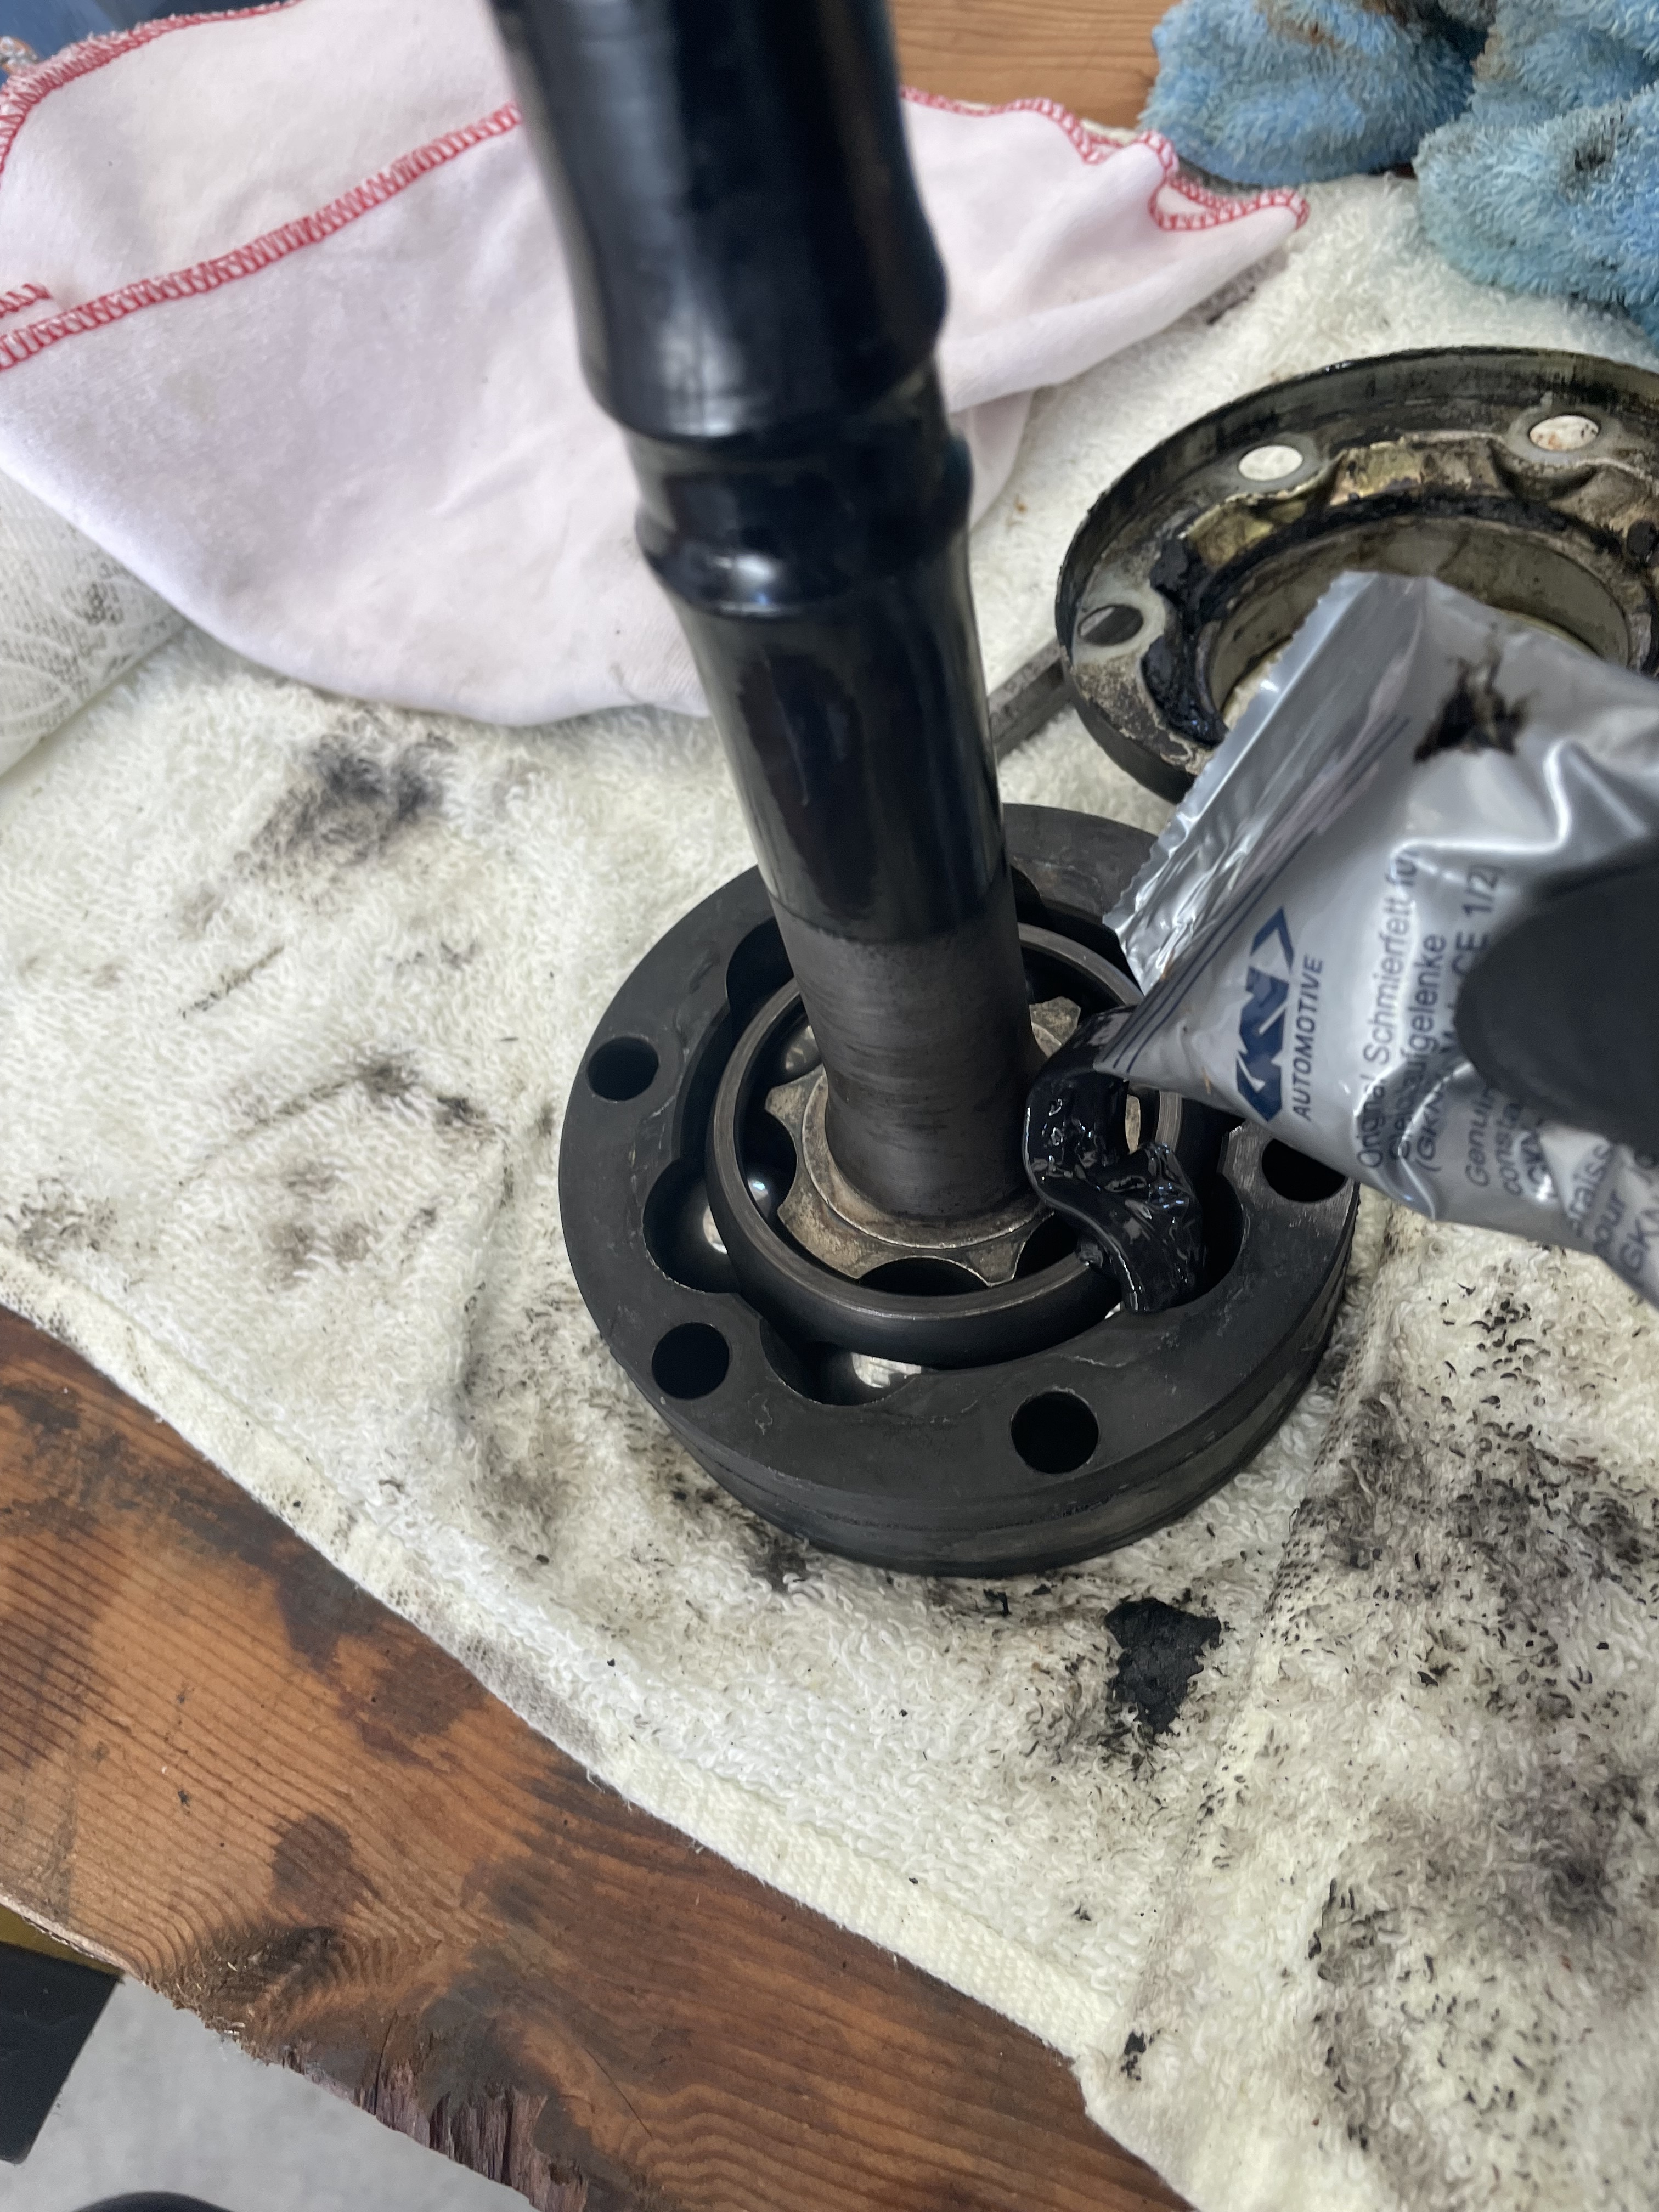
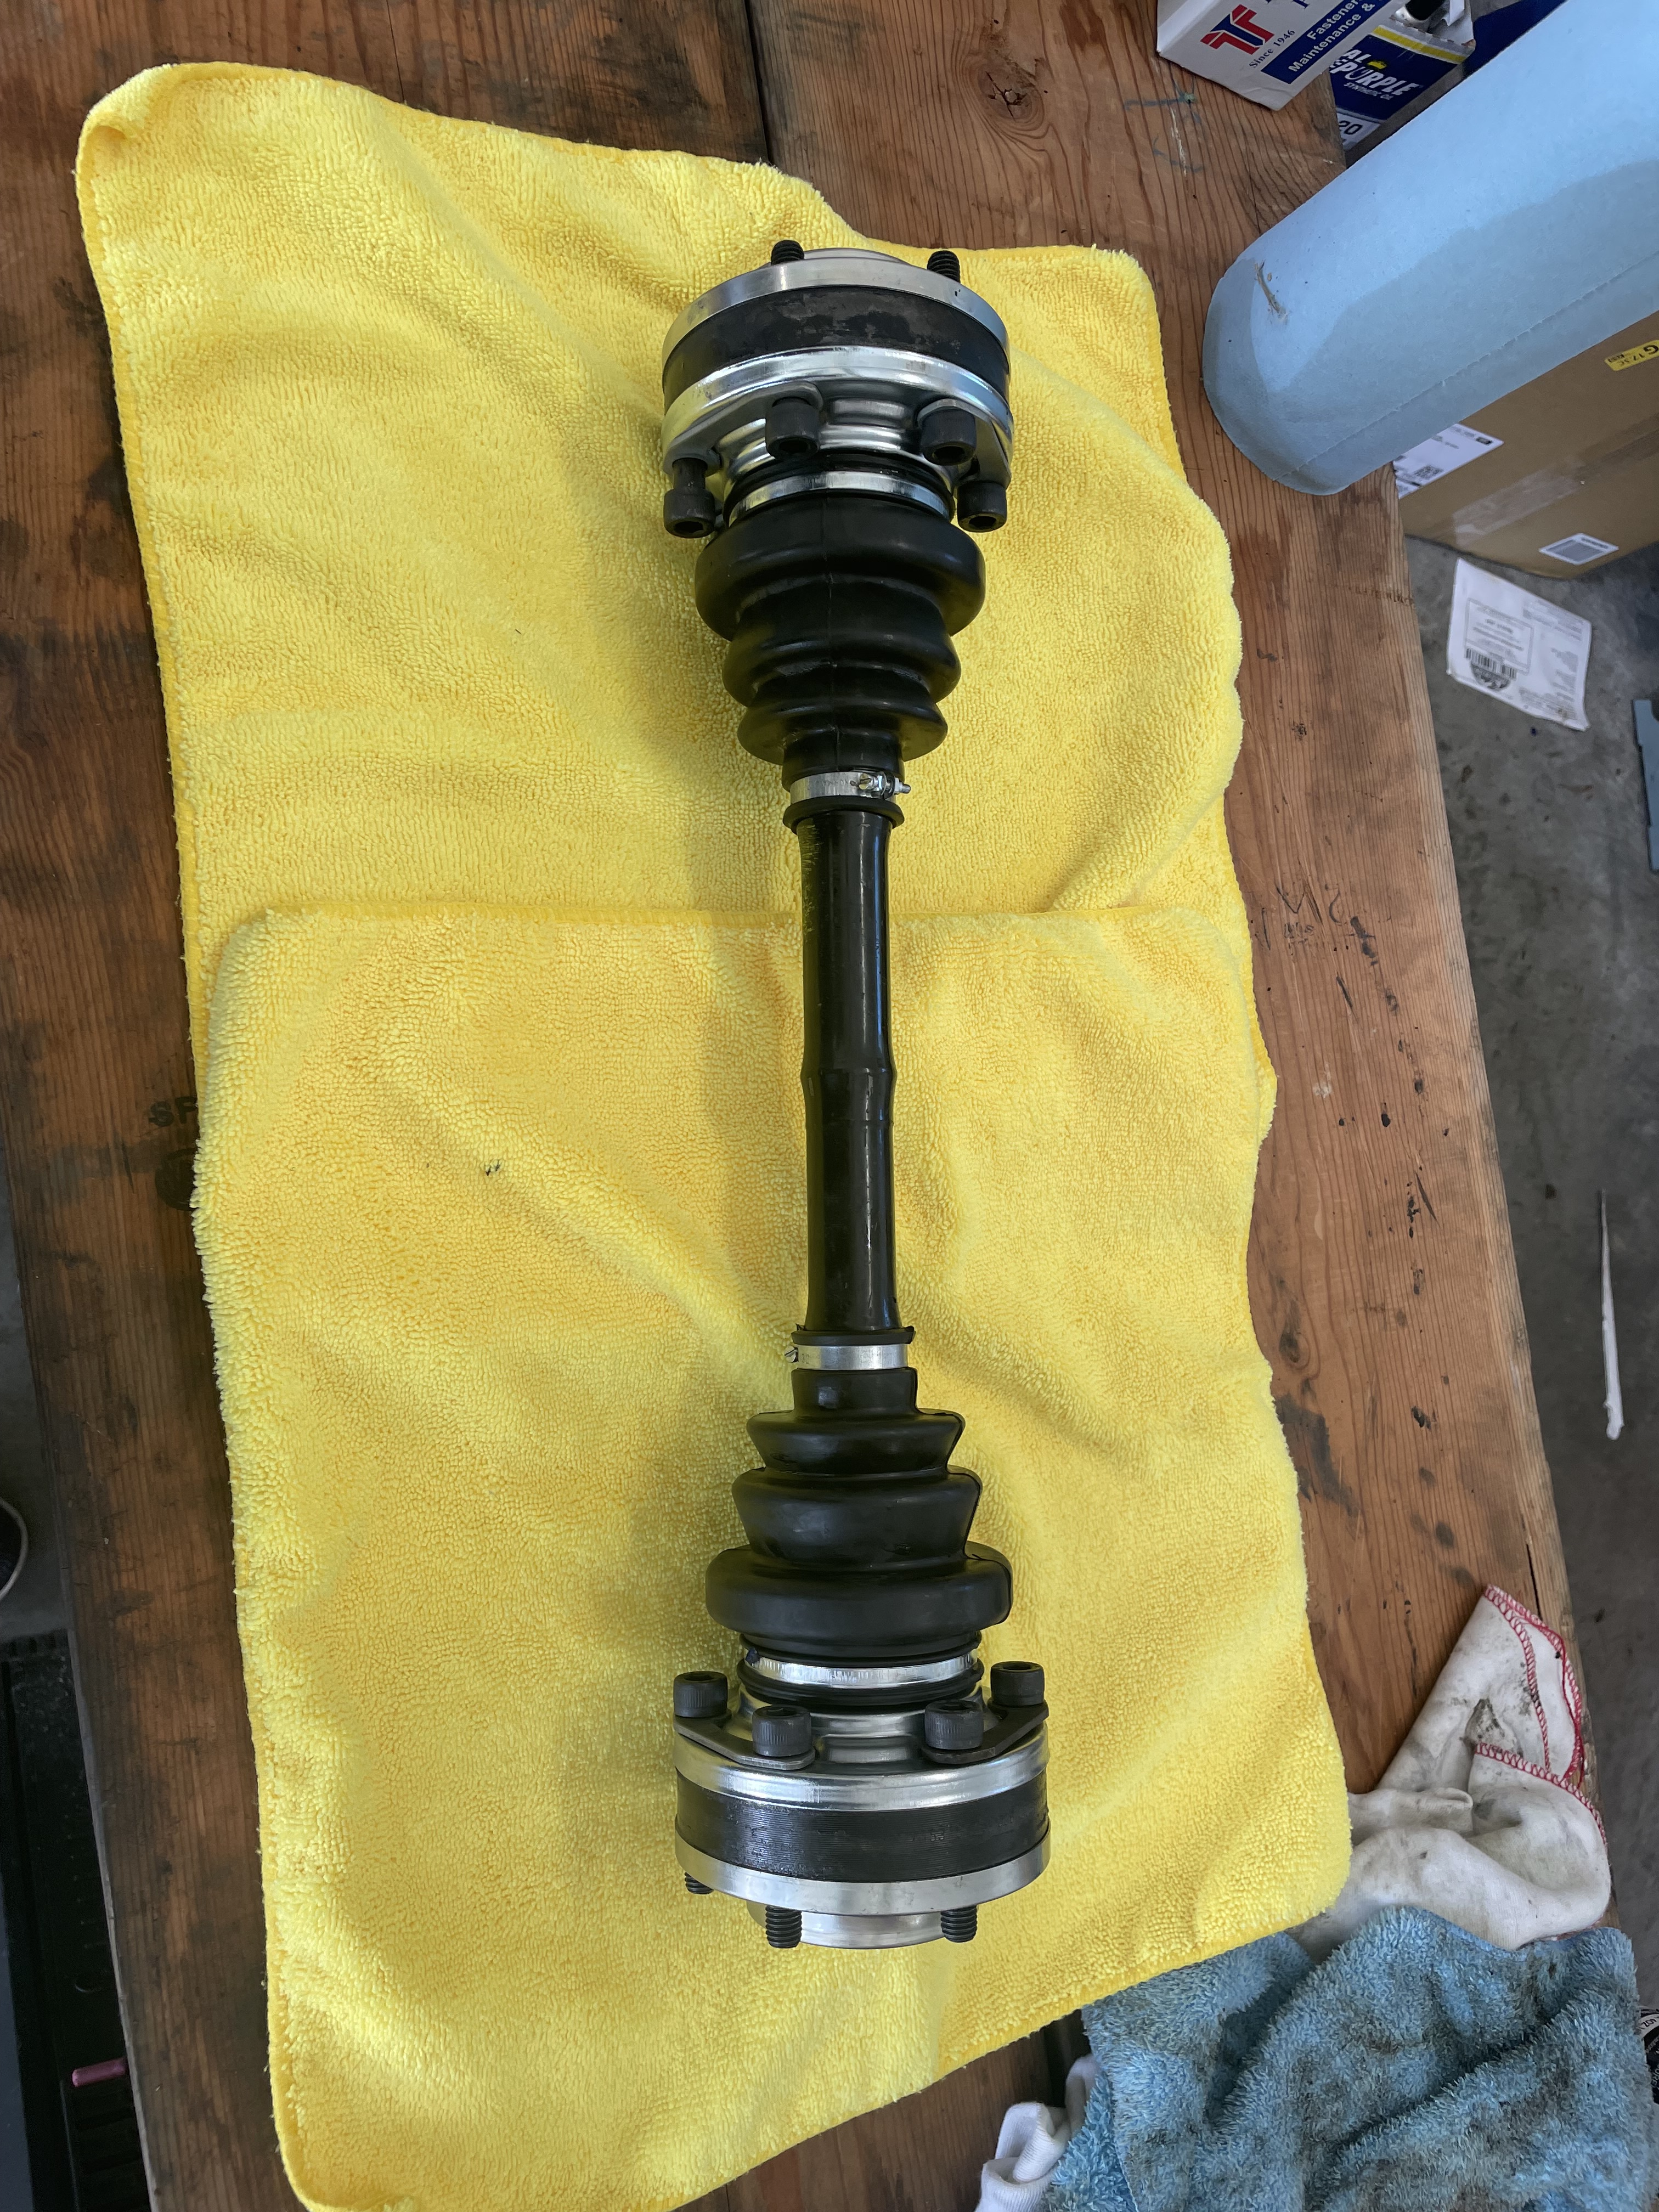
Today was CV joint day. I had removed the CV joints and they felt fine when I turned them by hand, but the boots were dried out:
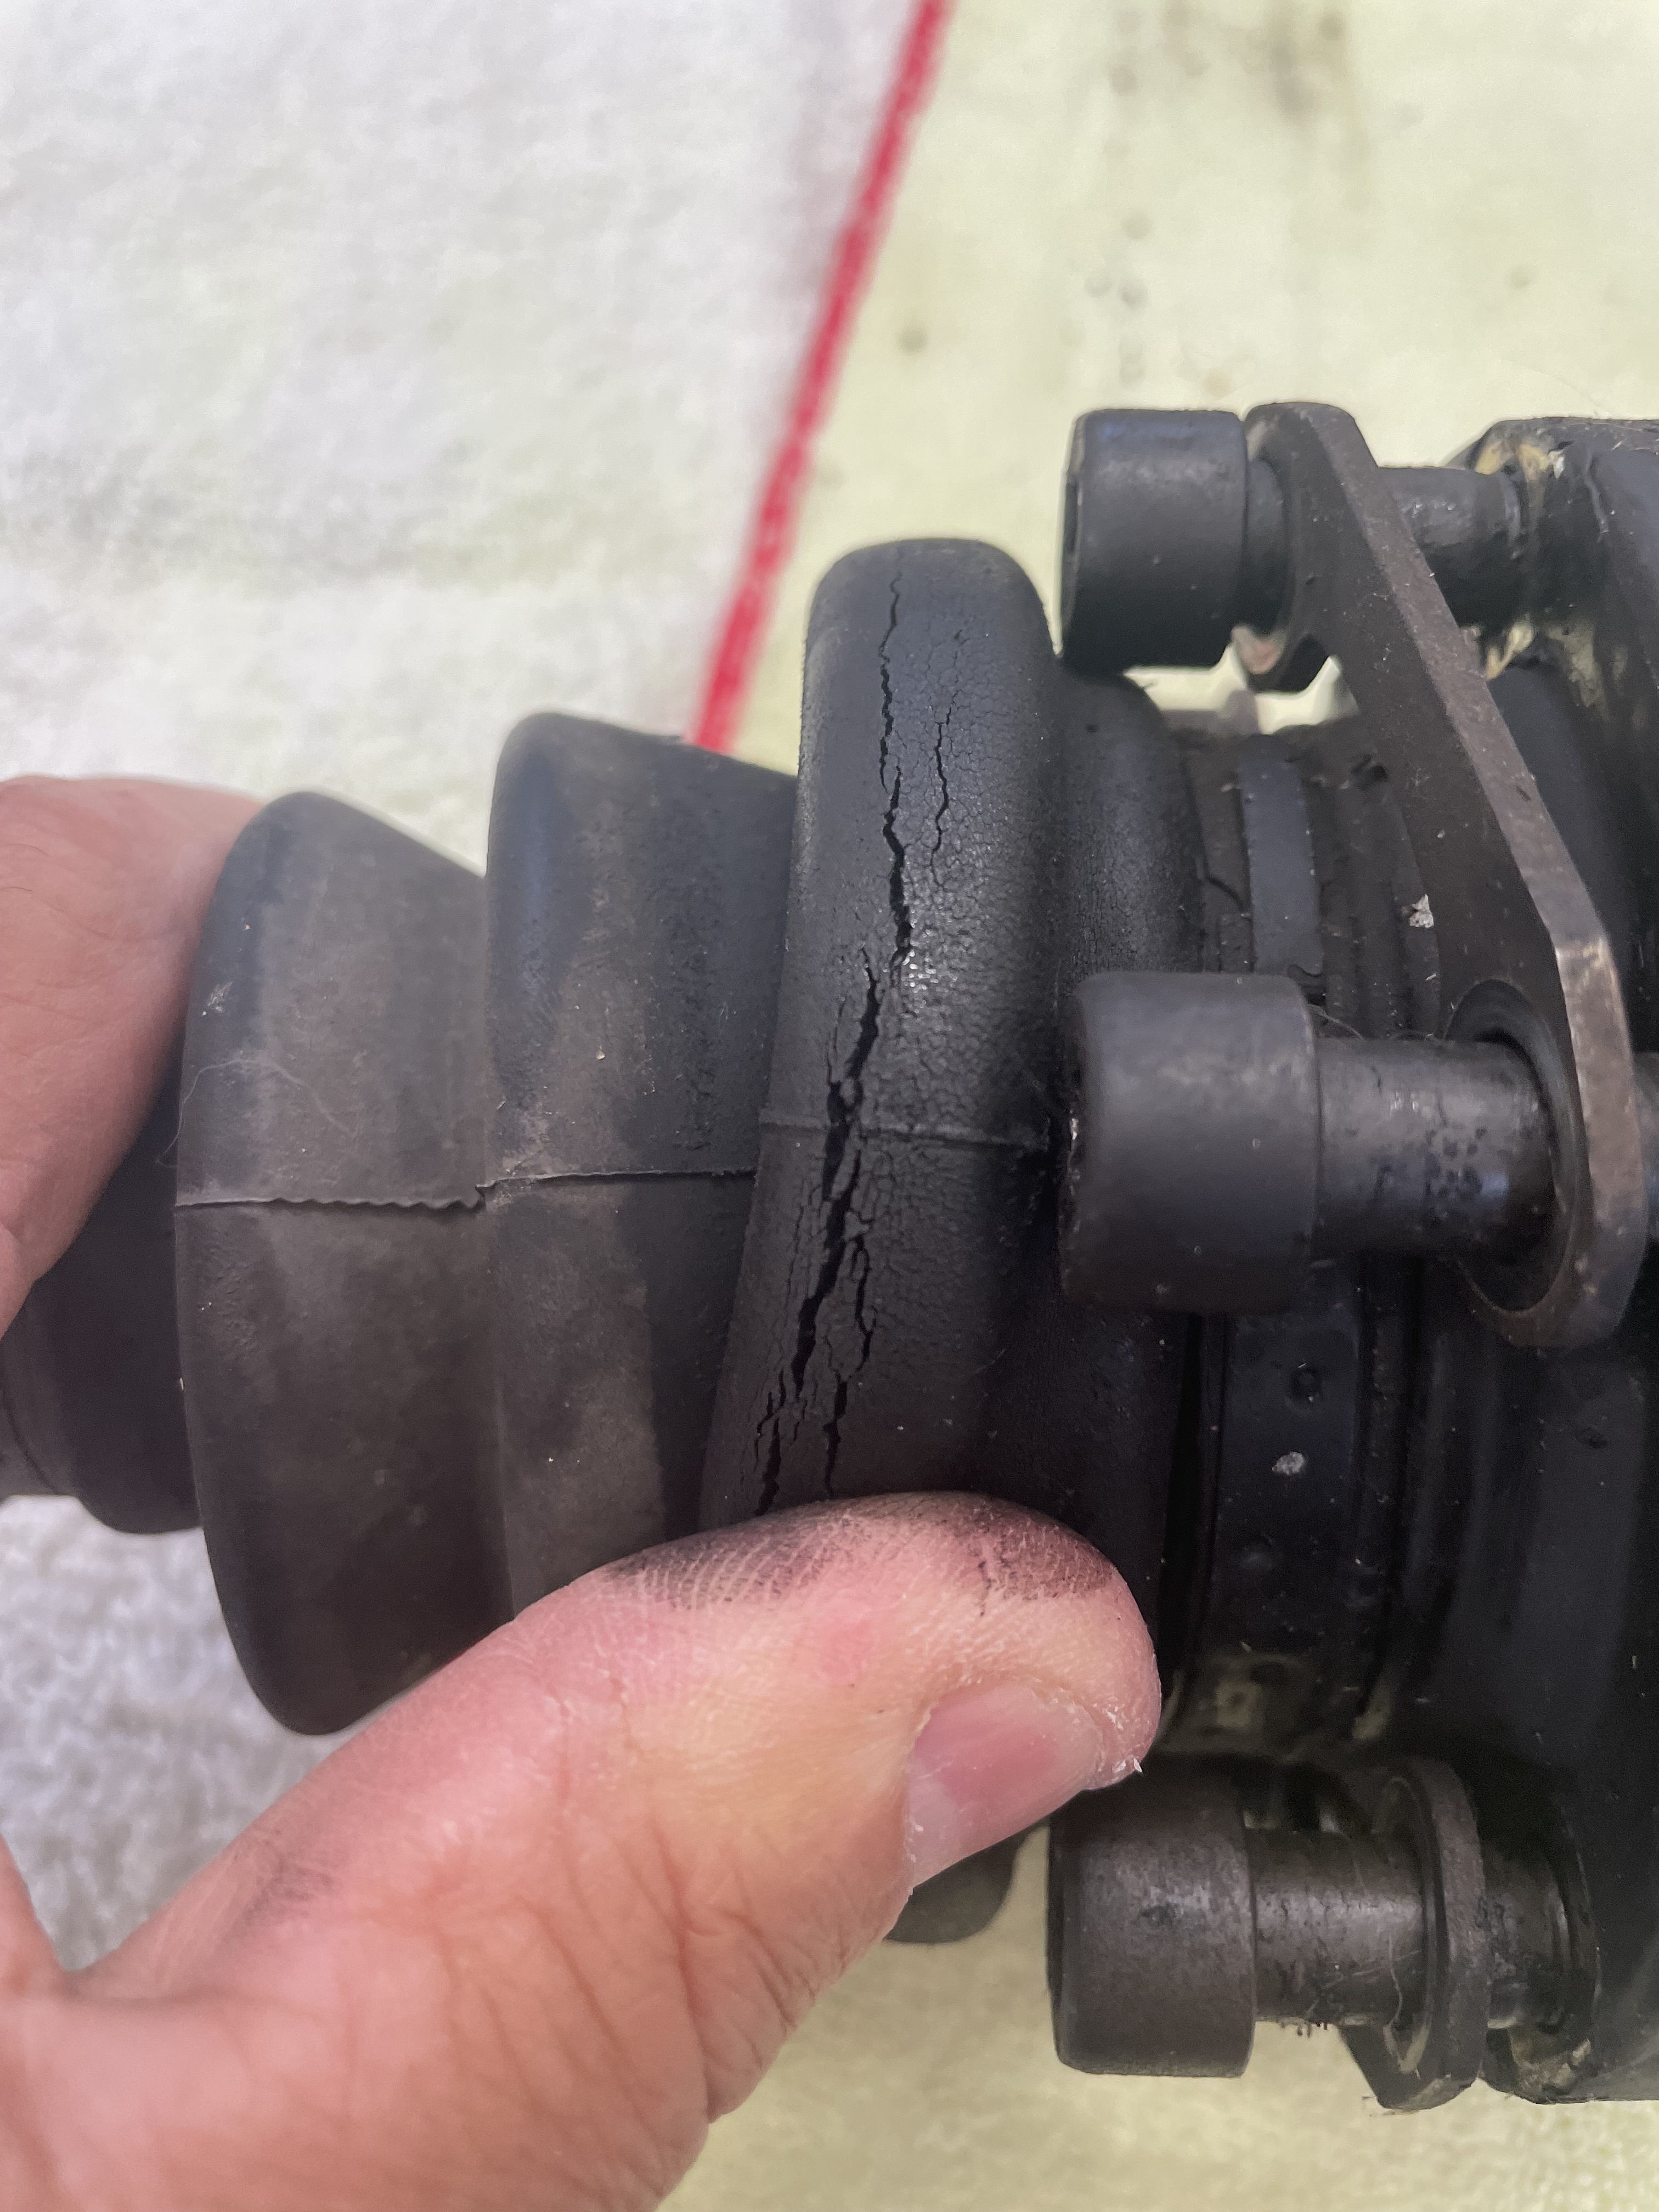
in order to remove the boots, the CV joints must come off.
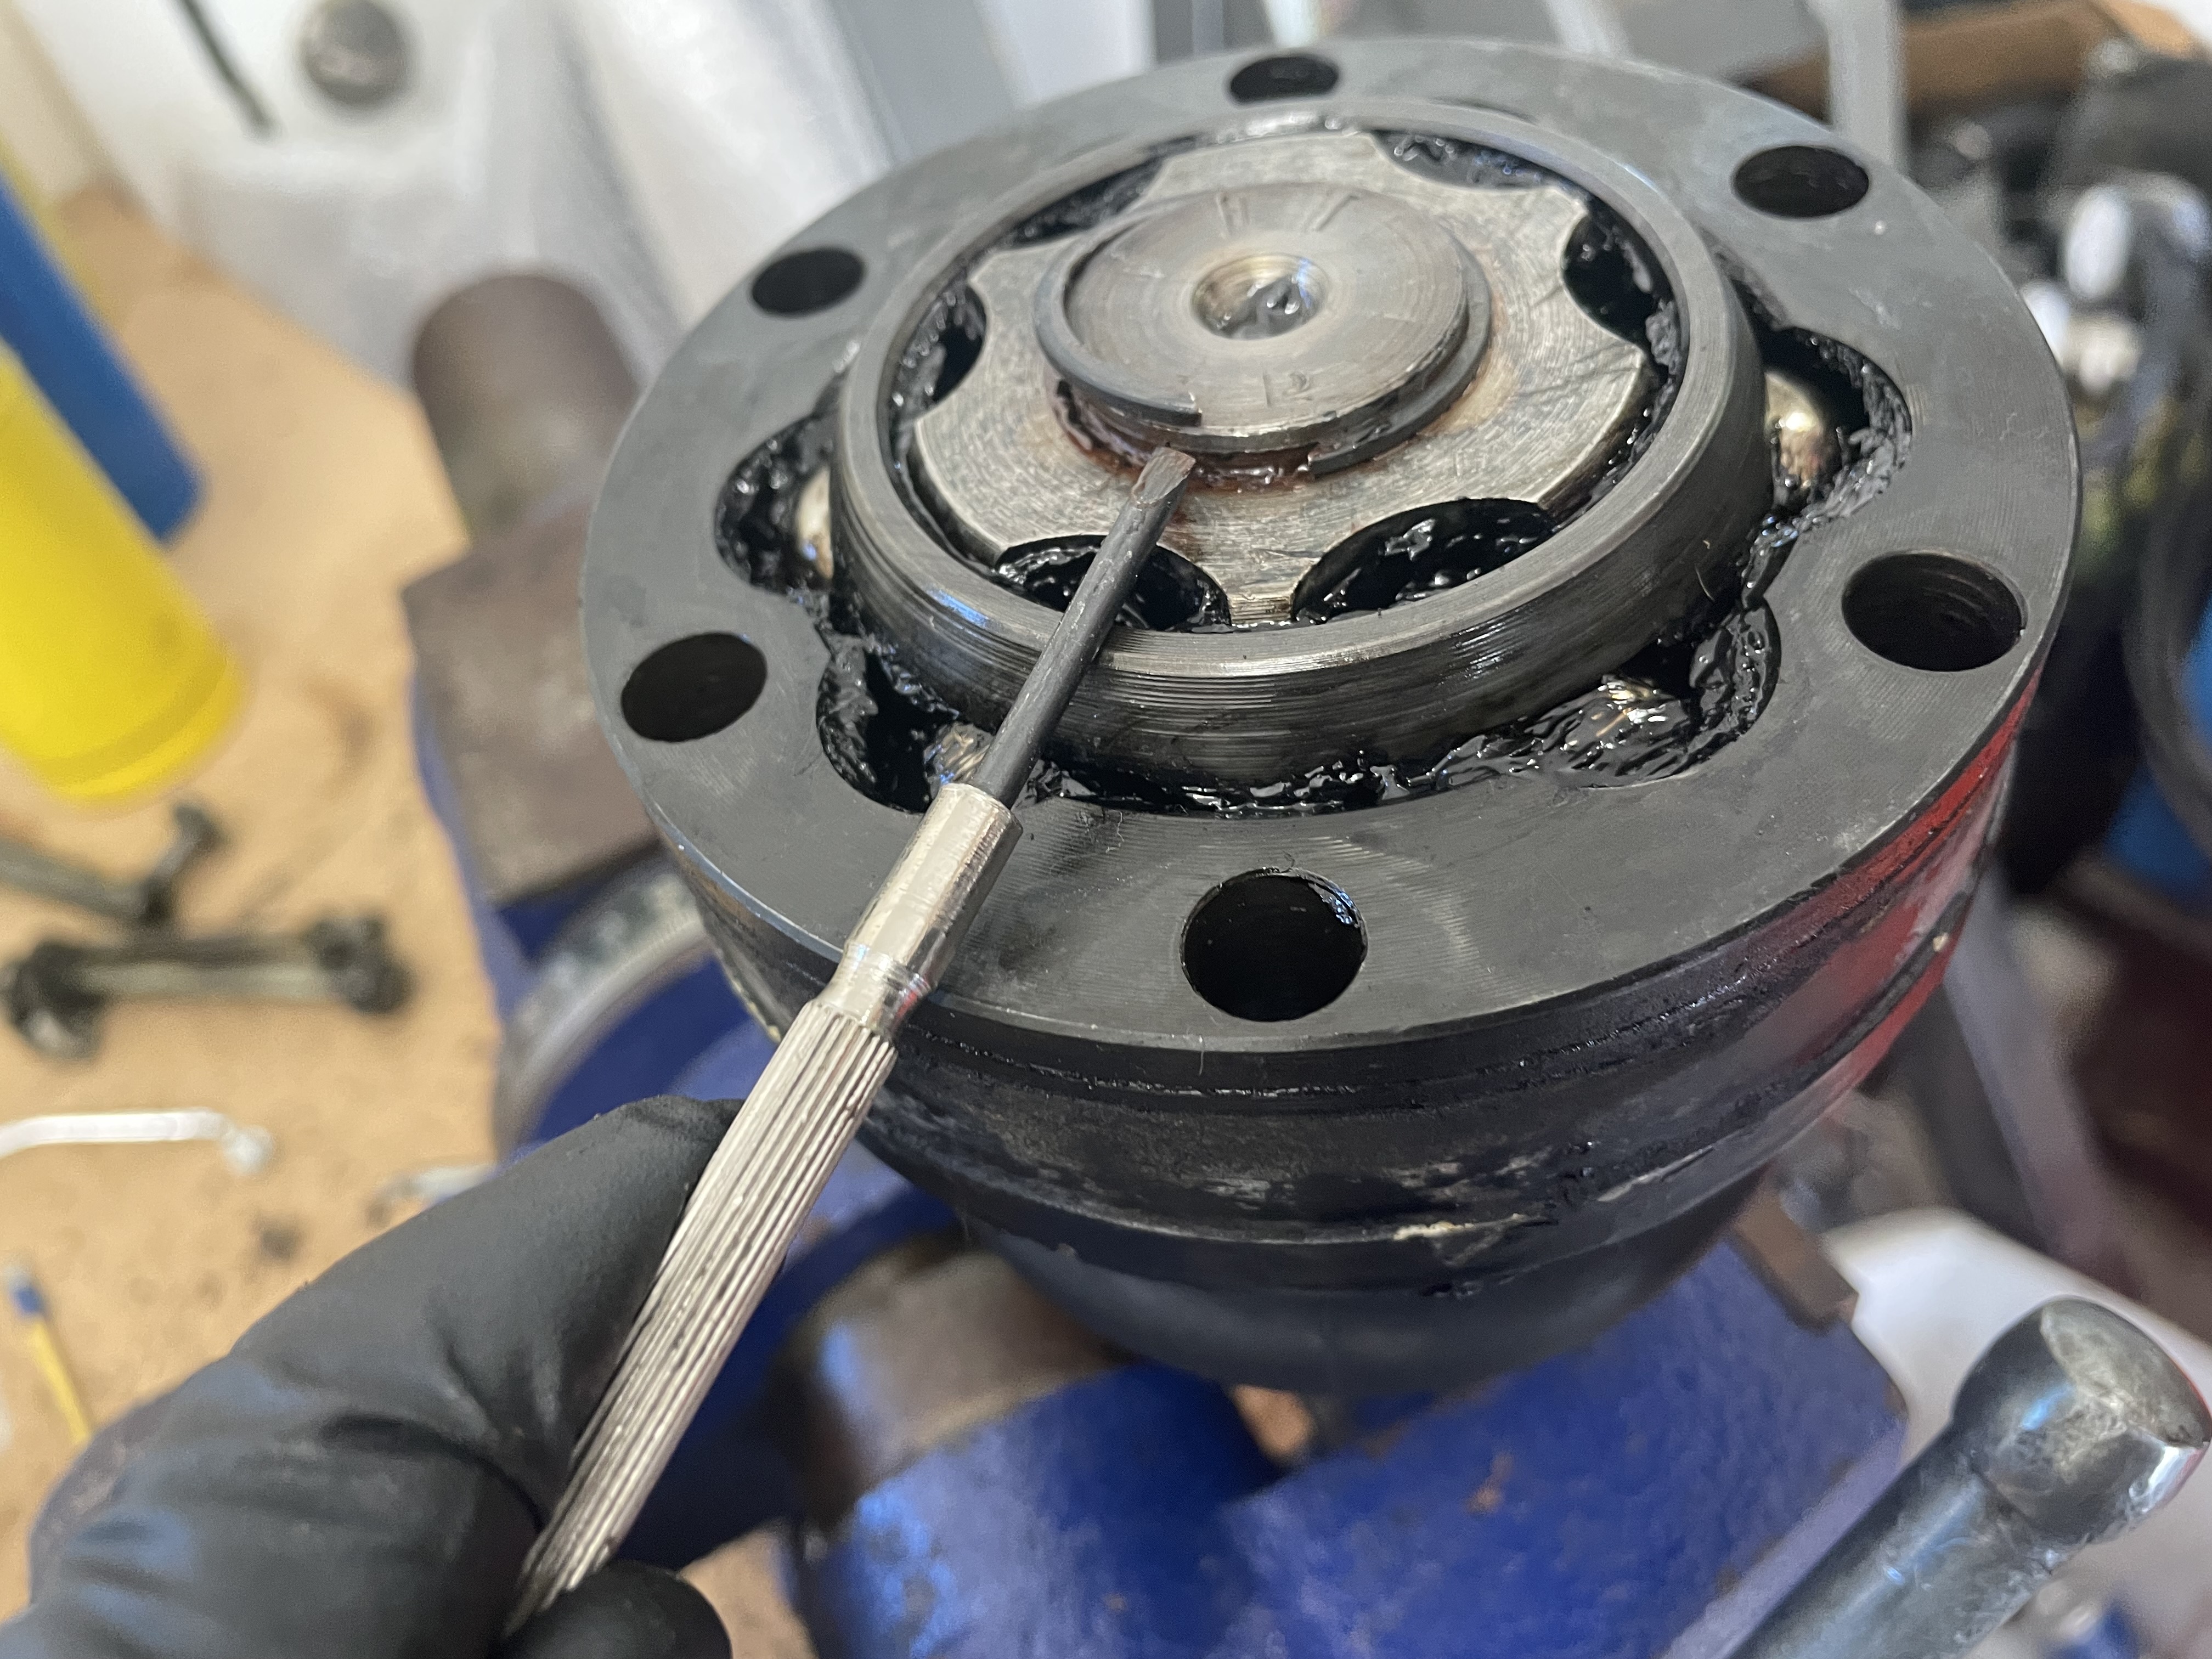
There is a circlip that holds the CV joint on the shaft. This one is OEM I think as there are no tabs for your circlip pliers. The grease in this joint was marginally ok, but somewhat dried out.
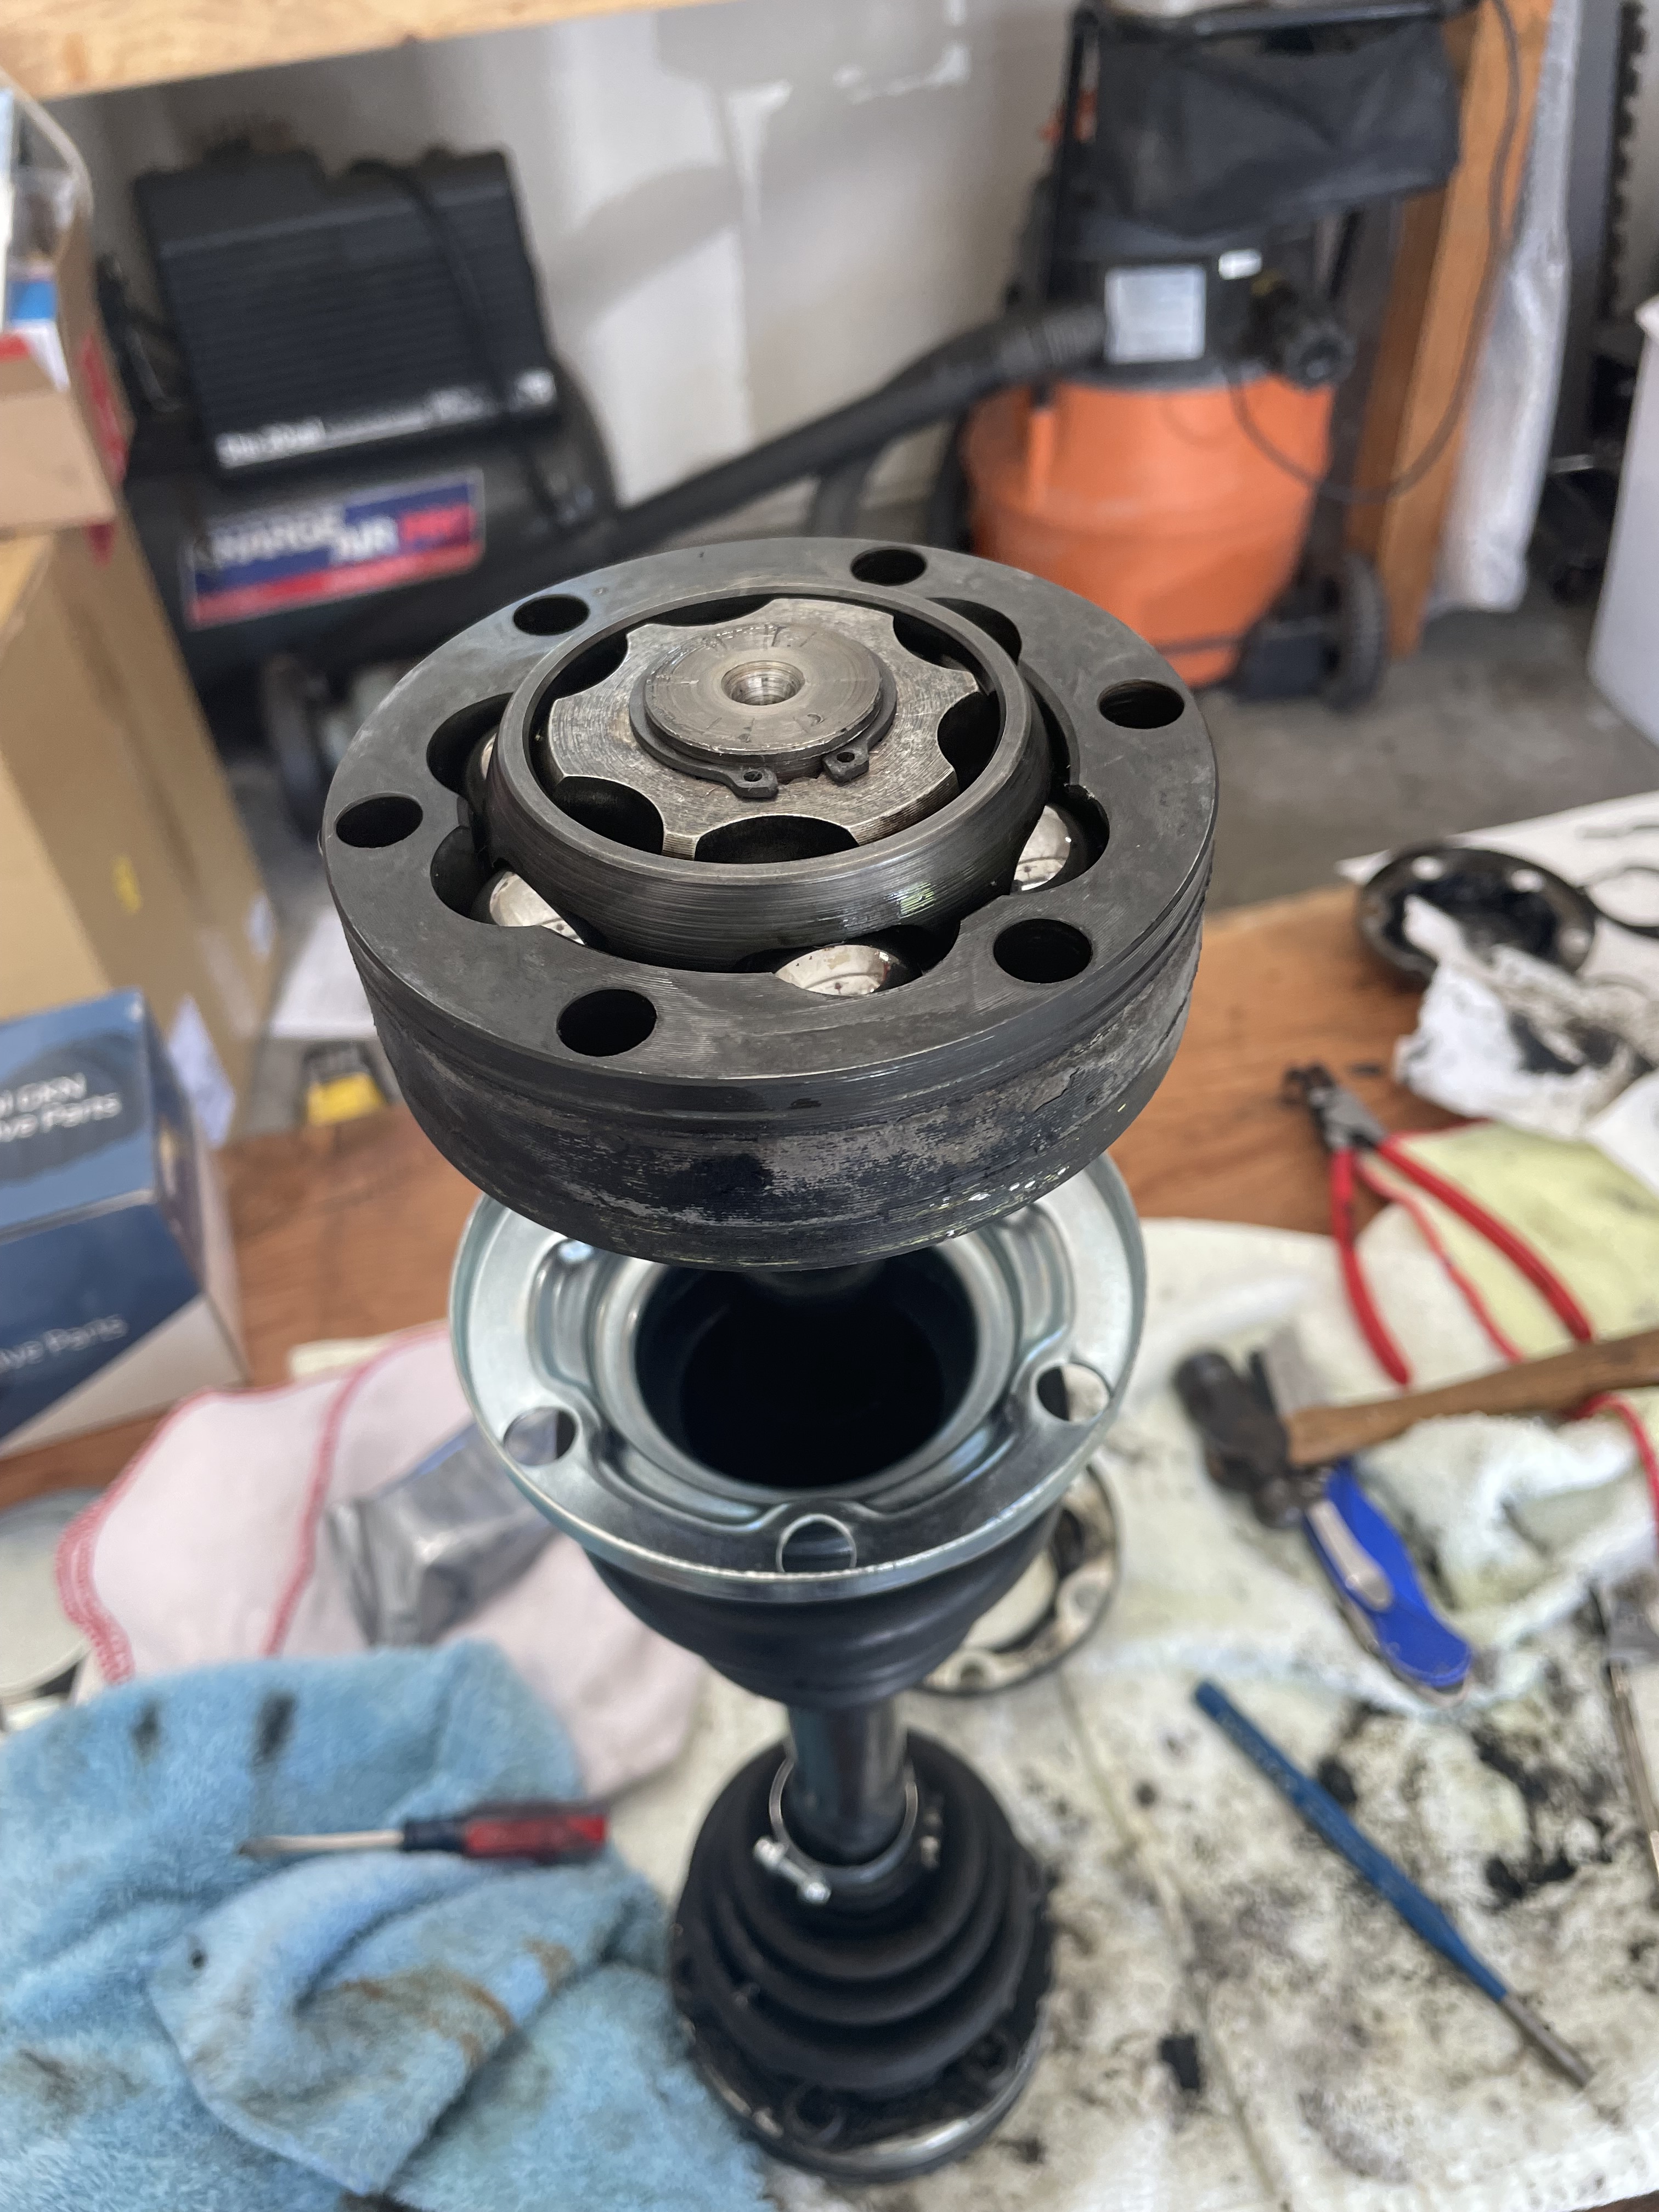
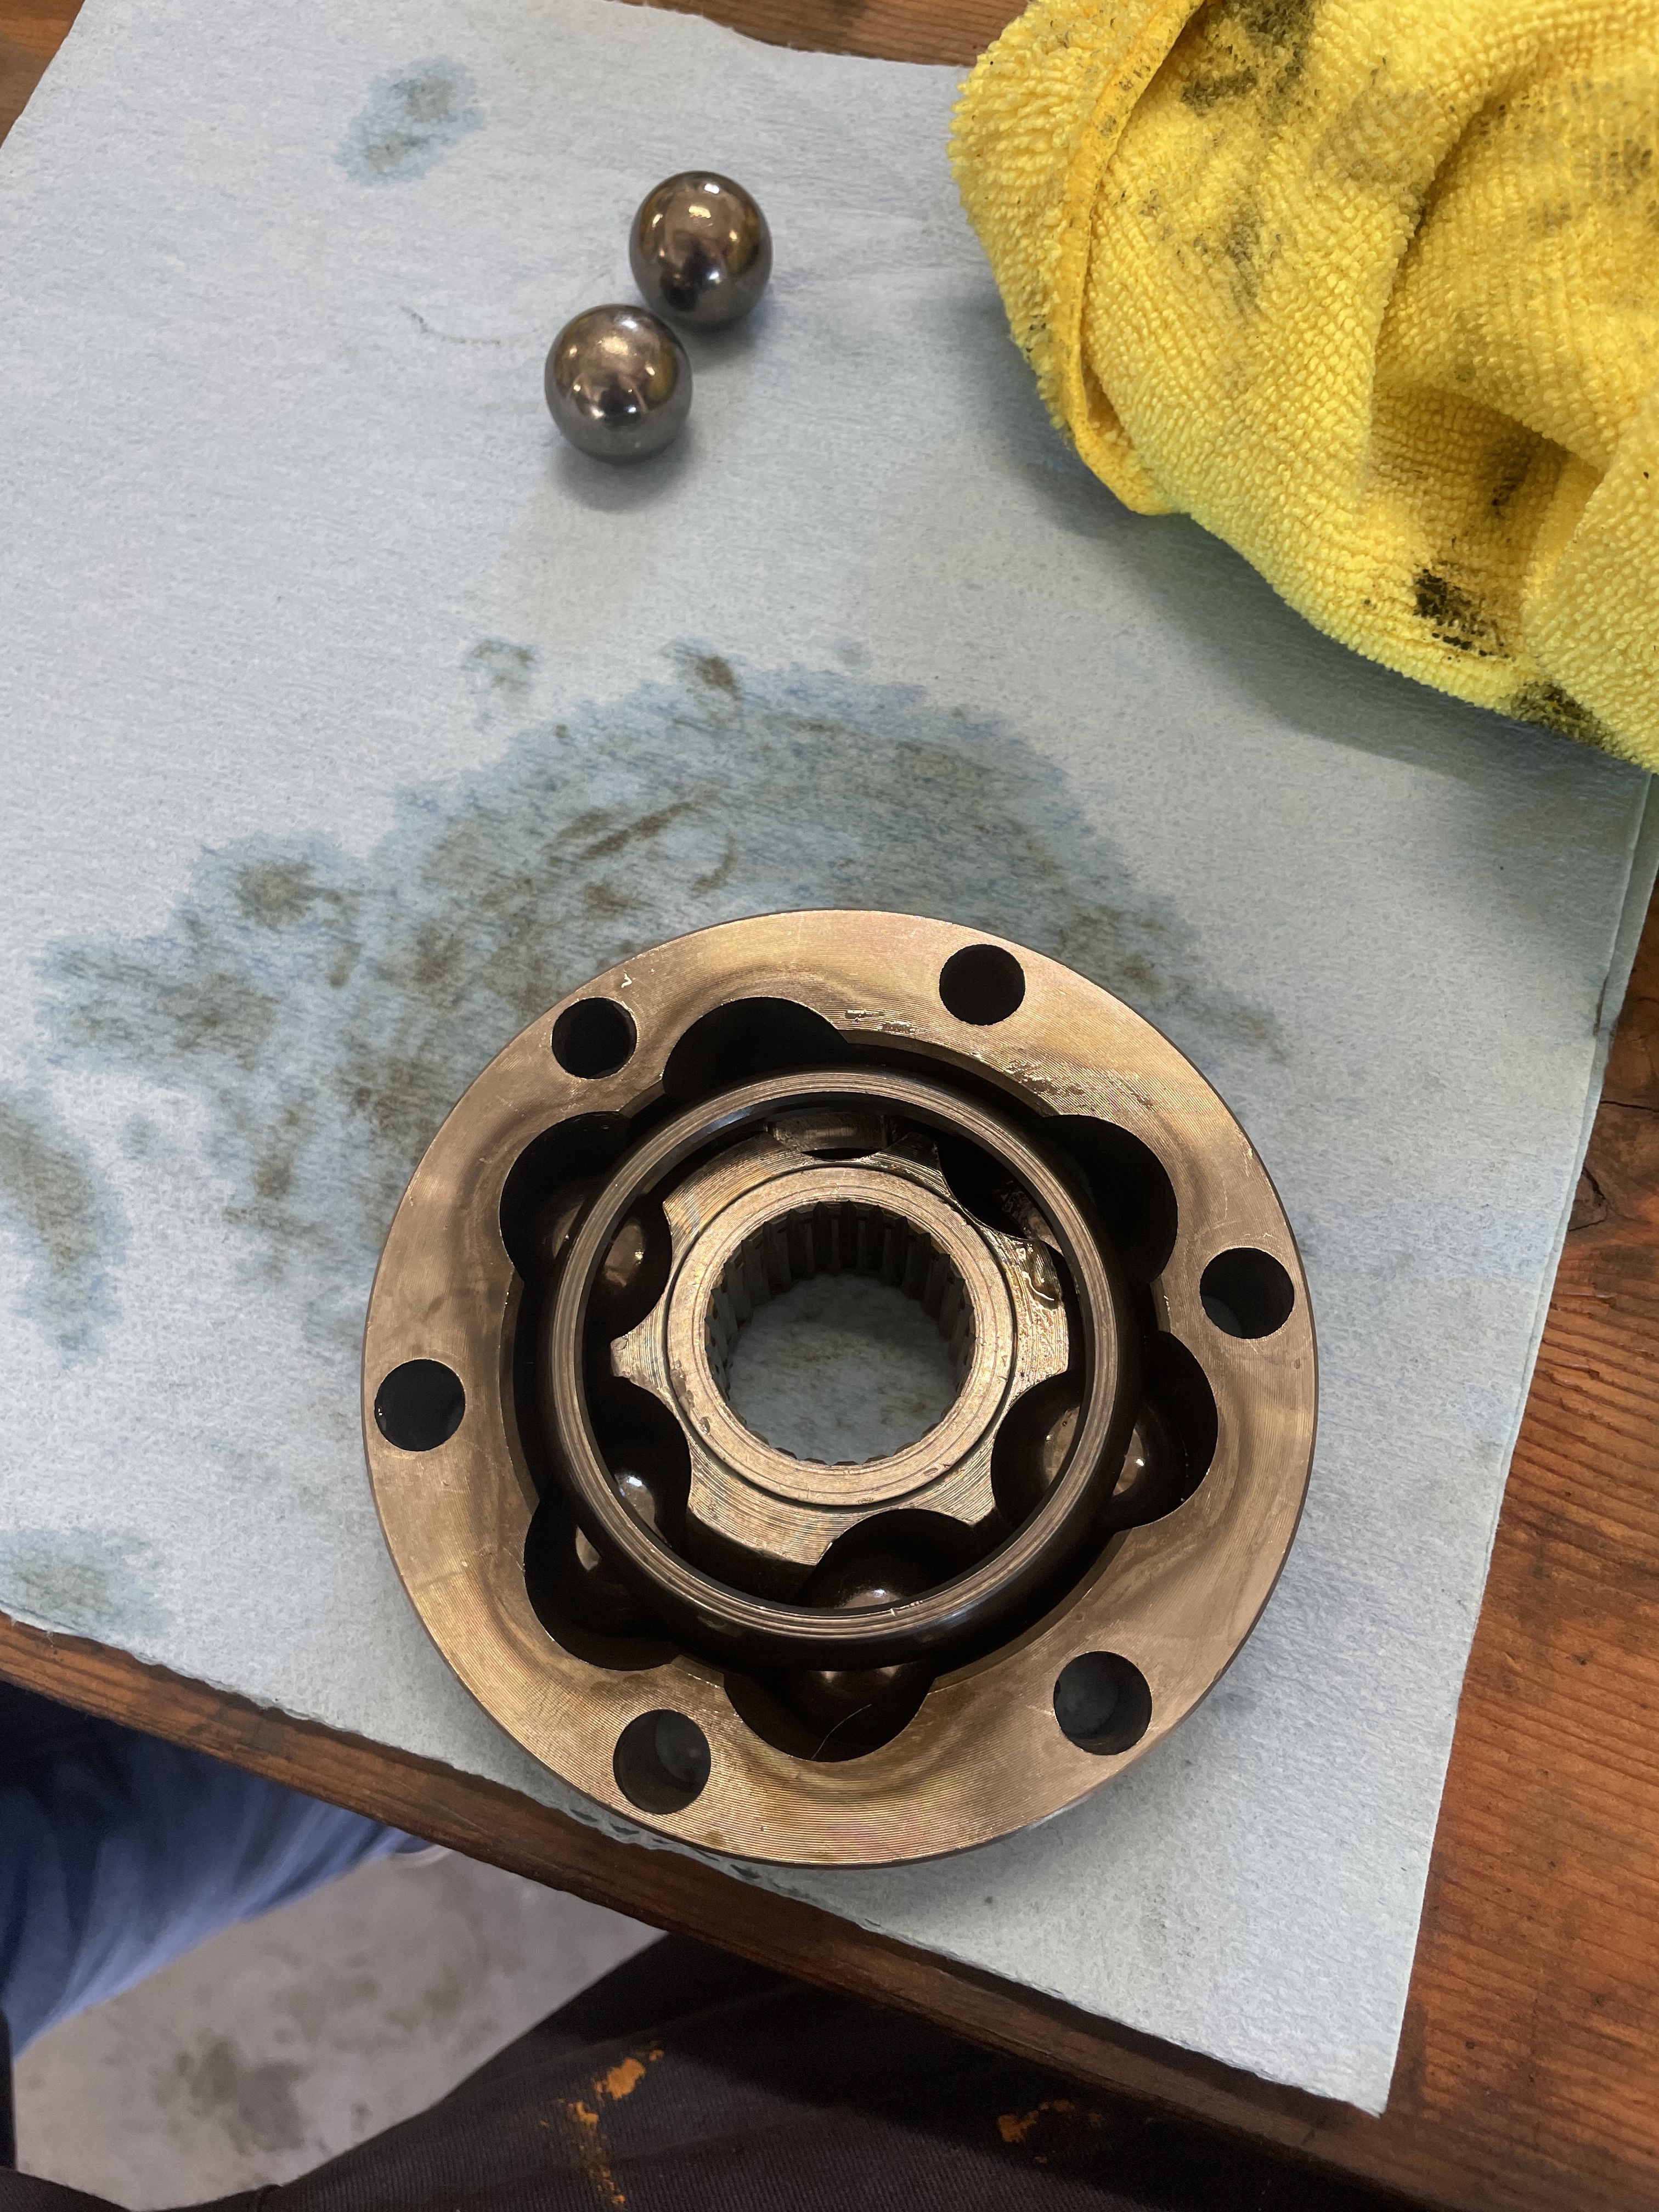
The CV kits you can buy come with a new boot, circlip and grease. After struggling years ago rebuilding my 2002 cv joints, my goal was to not have the ball bearings come out. If you don't know, there is a specific orientation between the outer and inner races. You can reassemble the joint incorrectly, but it will be frozen. I'm learning to navigate YouTube efficiently and there is a short to-the-point video of how to reassemble the joint. I made it to the last joint and failed. Ugh, but the video saved me. https://www.youtube.com/watch?v=1hQBPdhJtBo

in order to remove the boots, the CV joints must come off.

There is a circlip that holds the CV joint on the shaft. This one is OEM I think as there are no tabs for your circlip pliers. The grease in this joint was marginally ok, but somewhat dried out.

The CV kits you can buy come with a new boot, circlip and grease. After struggling years ago rebuilding my 2002 cv joints, my goal was to not have the ball bearings come out. If you don't know, there is a specific orientation between the outer and inner races. You can reassemble the joint incorrectly, but it will be frozen. I'm learning to navigate YouTube efficiently and there is a short to-the-point video of how to reassemble the joint. I made it to the last joint and failed. Ugh, but the video saved me. https://www.youtube.com/watch?v=1hQBPdhJtBo


Re: And so it starts, Maeve
YouTube U is a wonderful place.
I've earned several degrees.
I've earned several degrees.


