E28 Alpina B7 Turbo/1 #0083
Progress and a great degree of satisfaction 
Lookin' good Chris! The worst is now behind you... it should only get better from here.
See, I told you it would be fun to watch you shuffle all those cars around to get the Alpina into the garage, etc... loved your description of the "musical cars" event
-RoyW
Lookin' good Chris! The worst is now behind you... it should only get better from here.
See, I told you it would be fun to watch you shuffle all those cars around to get the Alpina into the garage, etc... loved your description of the "musical cars" event
-RoyW
-
BrewCity11
- Posts: 18
- Joined: May 19, 2008 3:01 PM
- Location: Maplewood, NJ
Damn dude,
Your thread came up on a google search for an alpina airdam so i just scrolled through these last few pages.
First off, sorry you've had these issues. Hope it doesn't take away from the overall glory of this beauty.
Anyway, we're doing a near full resto of an E28 ourselves here and some of your speedbumps will (hopefully) be a lesson to us, namely the window trim. Not looking forward to installing those.
And great fact about the rivets for the hood latches. I would've used aluminum had i not read this today.
For the rear door strikers, i just removed them, but put the screws back in to hold the backing plate. Will just tape up the screws so we get a little more coverage when its painted.
Need to go through this thread a bit more to see if there are any other pointers i can take.
Best of luck on reassembly.
*and quick question. I may come across it after reading more, but whats the deal with the rear valance? Is it a euro vs US thing, where yours goes down and extra 1-2" with the exhaust cutout?
Cheers
Turk
-
Eddie in TO
- Posts: 1007
- Joined: Feb 12, 2006 12:00 PM
- Location: Toronto, Ontario, Canada
- Contact:
Great to see it's back home. You've experienced enough grief and I hope things get sorted in a timely manner and to your satisfaction.
I'm looking forward to seeing you putting it all back together.
I find this time very exciting because parts are going back on for good and the end is near which I hope provides more relief for you. All there is to do afterwards is enjoy it.
You're doing an excellent job. Hats off to you!
I'm looking forward to seeing you putting it all back together.
I find this time very exciting because parts are going back on for good and the end is near which I hope provides more relief for you. All there is to do afterwards is enjoy it.
You're doing an excellent job. Hats off to you!
-
Mark 88/M5 Houston
- Posts: 8548
- Joined: Feb 12, 2006 12:00 PM
- Location: Far North Houston
-
euronewbie
- Posts: 84
- Joined: Mar 15, 2012 9:59 AM
- Location: Australia
Small update. No photos. All stuff I've covered before anyway.
So, I haven't had a lot of time to do anything (I'm busy - have to pay for this crap somehow). I came home this afternoon and figured the first thing that needs to go back into the car is the main fuel tank. Wasn't really looking forward to this, but I figured since it's been sitting on my patio for three months, I should at least get it cleaned up. I was on the phone for much of the process. I figured with it cleaned up, it wouldn't hurt to at least put the car in the air and have a look at making sure I had everything I needed to put it back together. Jacked the car up, put the rear tires on the ramps. Checked everything out. Looked fine. Put the electrical through the hole and removed the bolts that secured the tank (I put them back in the car so I wouldn't lose them - didn't realize I was that smart!!). I got off the phone and figured, what the heck? I will give it a couple minutes to install.
I nailed it on the first try. I couldn't believe it. In fact, I couldn't believe it so much that the bolts were out of reach, so I reached and reached, holding the tank up with my knee and got them. Well, it's in, so I hooked up all of the hoses and the connectors and put the access cover plate on. Then I vacuumed the trunk. Next, I need to find the side trunk carpeting which I think is in the E12 somewhere. That will get vacuumed, then I can run the wiring harness out past the wheelhouses and put the auxiliary tank in. Once that is done, I can start it. Fun.
It's progress. What can I say?
To answer the question on the rear valance, Euro cars had a lip on the bottom, which extended the valance 40mm below that of a US car. The top of the exhaust cutout is even with the bottom of the US rear panel. All Euro cars have it.
-
unt0uchable
- Posts: 2265
- Joined: Jul 21, 2011 8:05 PM
- Location: Rochester Hills, Michigan
- Contact:
Like I said, last night, I got the main fuel tank in without drama. Today, I put the auxiliary tank in the trunk, installed the tail lamps and figured now was as good a time as any to put the rear bumper on. Also installed the fuel door lock actuator with the rubber boot, etc.
Still need to run the wiring harnesses to where they need to go, install the trunk actuator, check control stuff, etc. That stuff will probably be next.
I could probably have the car back together by Monday, but I dropped the ball ordering all the fasteners and stuff, so I'm waiting for all of that to come in.
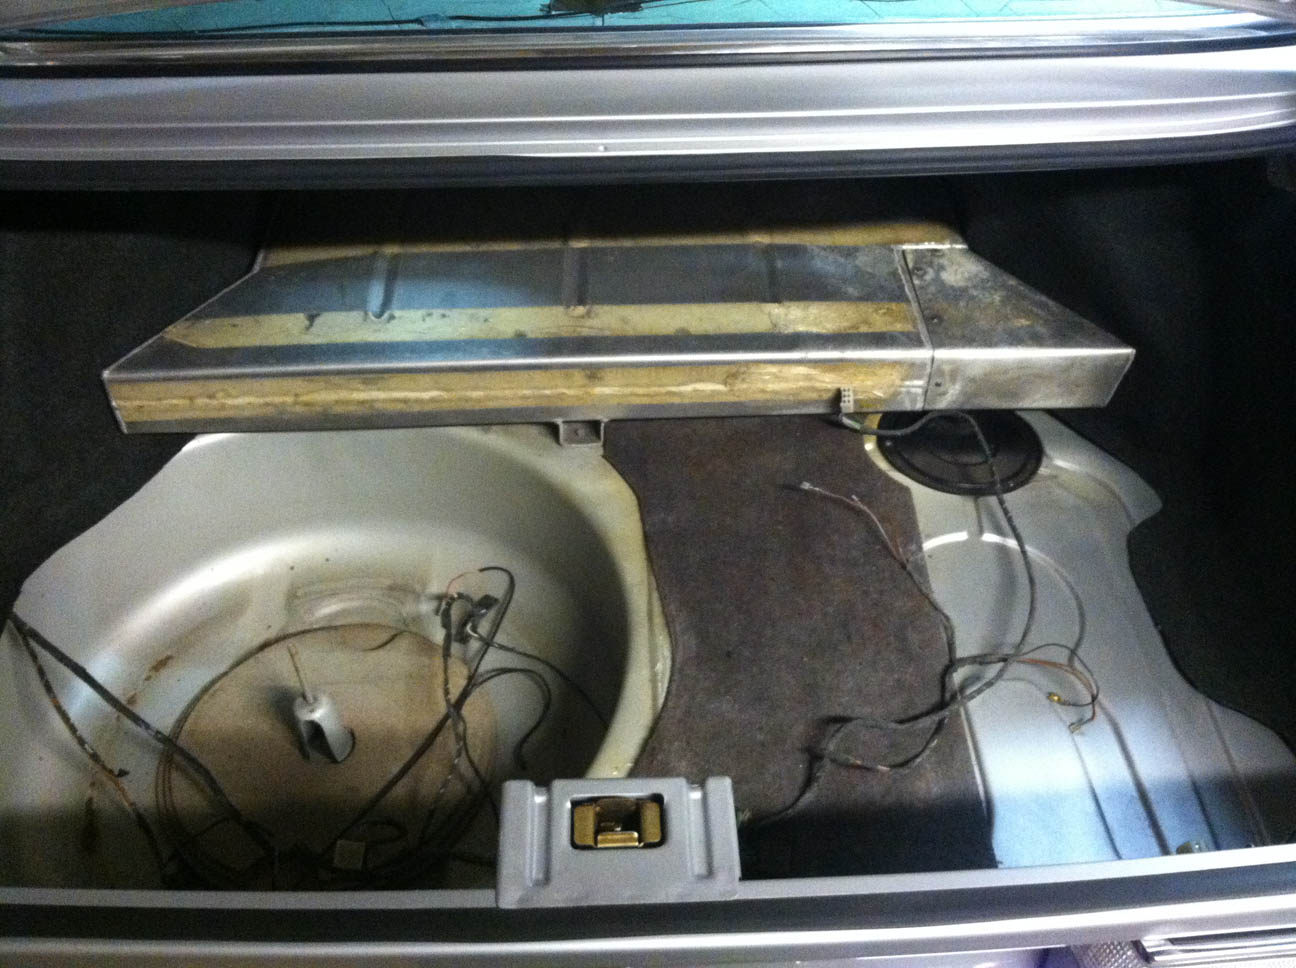
Here's a photo of the trunk showing the fuel tanks installed (sorry, all I had was the phone):
And here's the rear bumper:
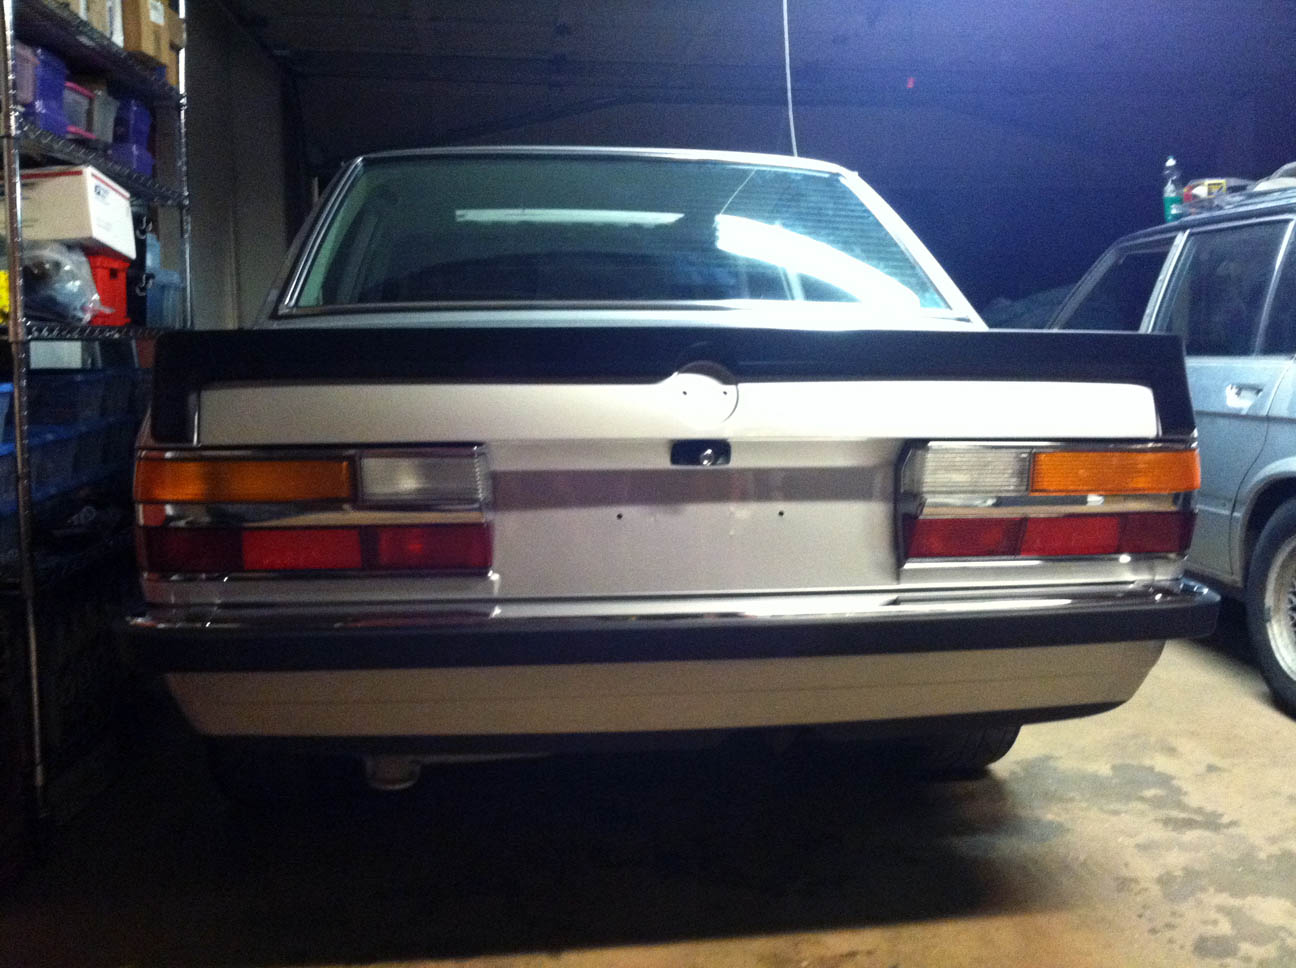
Not used to looking at the car without a big dent in the bumper.
The installation set I got for the rear bumper was short two of the 13mm flange nuts, but had two extra 10mm. For now, I robbed (well, burgled since no people were around) a couple from the front pack. I fortunately have two extra new ones left over from some project I did.
The style 8s will have to come off in the morning as they're going on a car I'm selling and I guess that means the Alpinas will go on for now. They haven't been refinished yet.
Still need to run the wiring harnesses to where they need to go, install the trunk actuator, check control stuff, etc. That stuff will probably be next.
I could probably have the car back together by Monday, but I dropped the ball ordering all the fasteners and stuff, so I'm waiting for all of that to come in.
Here's a photo of the trunk showing the fuel tanks installed (sorry, all I had was the phone):

And here's the rear bumper:

Not used to looking at the car without a big dent in the bumper.
The installation set I got for the rear bumper was short two of the 13mm flange nuts, but had two extra 10mm. For now, I robbed (well, burgled since no people were around) a couple from the front pack. I fortunately have two extra new ones left over from some project I did.
The style 8s will have to come off in the morning as they're going on a car I'm selling and I guess that means the Alpinas will go on for now. They haven't been refinished yet.
I cannot agree more...alijonny wrote:Wow, what a fine ass!
I know how you feel now, Chris. And I can promise you, it is just a couple of weeks since I could add the Alpina-decals myself, remember?
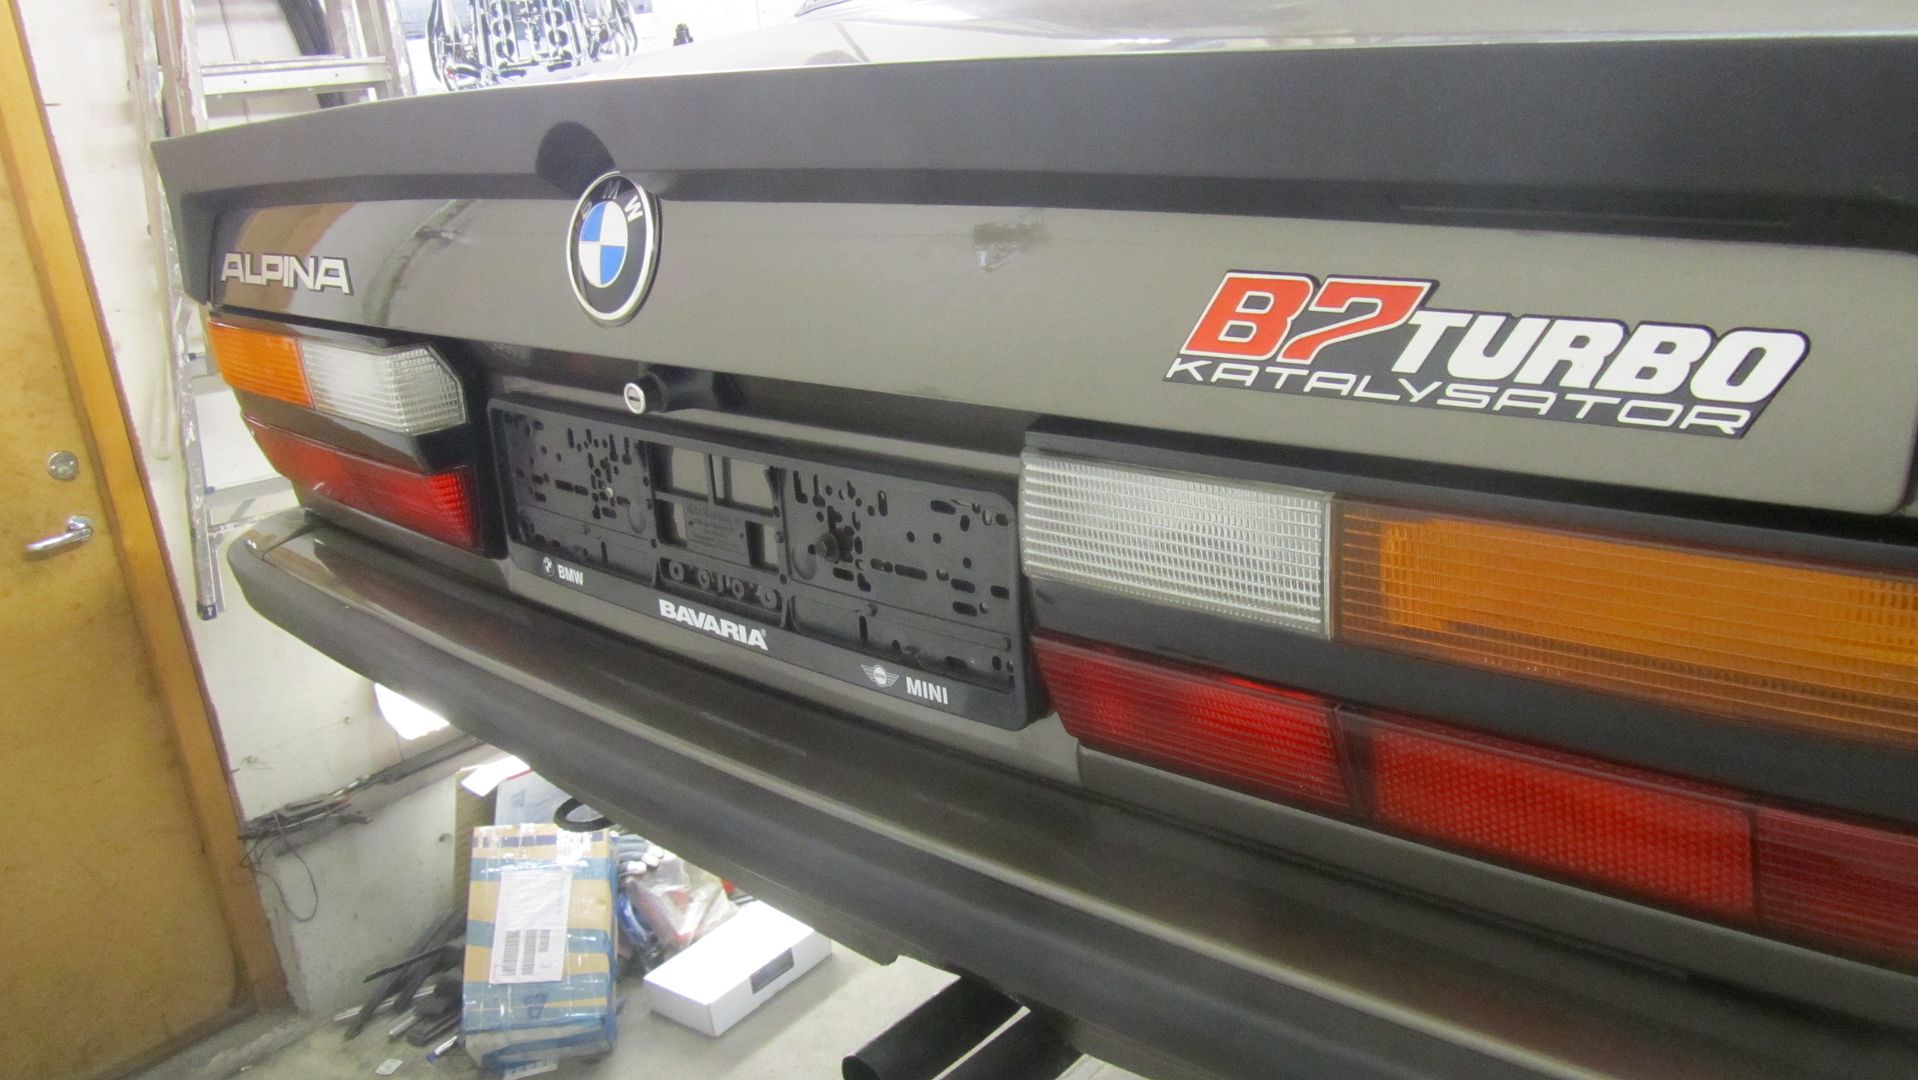
Just have to ask...
Do you have new Alpina decals, or are the old ones going on?
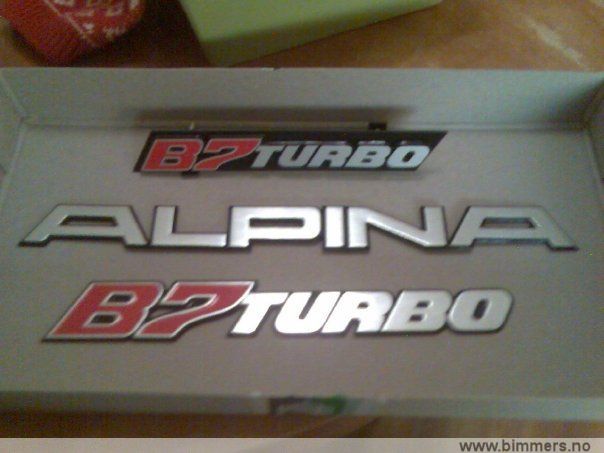
I do have a BNIB B7Turbo-decal here, even though I have not decided if I ever will let it go (I have a dream of owning a totally restored E24 B7 turbo once in my lifetime, and I might wanna save it till then...)
-
Patrick McHugh
- Posts: 4163
- Joined: Feb 12, 2006 12:00 PM
- Location: Richmond, VA
Nice progress. I'd be livid about the windows, just the fact that he goobered the seal up and then continued to goober it up until EVERYTHING was goobered up. They're hard and you really have to be on your game to get them right.
Did he use any sealant on the windshield? I insisted they weren't supposed to have sealant with customer then installed a windshield with a new BMW seal, glass and lockstrips without sealant and it decided to leak, thus making me look like a fool.
Did he use any sealant on the windshield? I insisted they weren't supposed to have sealant with customer then installed a windshield with a new BMW seal, glass and lockstrips without sealant and it decided to leak, thus making me look like a fool.
I don't know what they did, but it will be redone and I'll figure it out then. At this point, I'm just trying not to think much about it, which has allowed me to do other stuff.
Here's the deal, though. I decided to look at what the blue binder says about installing windscreens and I learned some stuff. Procedure begins on 51-28. It is the same for both the front and rear glass. There were two types of seals offered for these cars (same for E12s - checked that book too). One has a rigid side which attaches to the pinch weld much like how the sunroof seal does. This seal is installed onto the body, then the windshield installed into it. You then use special tools to install the lower trim and the lockstrips. No sealant. Then, there is the other style seal, which I imagine is all they sell now since I've got three different part numbers for windshield seals and they're all the same. These lack that stiff/rigid component, simply being all rubber. They require a sealant and they also recommend fully installing the assembly (locking strips, everything) off the car on the table, then offer it up to the car using the rope method. They suggested a piece of string or wire that is 22 feet long.
As for my progress on the car, the refinished drip rails are installed, I've run the car for about 10 minutes and every seems to function properly. All trunk equipment has been reinstalled and I've located the remnants of the original radio wiring. I hope to procure what I need to put it back into working shape by going to the yard in the next day or so, though it will most likely not happen for a while.
Roy, you take the glass, put on the seal, and install the locking strips. Run a rope around the channel in the seal, then as you install into body, pull the rope out to get the rubber lip in place over the body lip (hopefully the headliner is glued well so you don't pull it loose). Someone on the outside applies some pressure to help it seat. Pretty much how you installed glass for decades before the glue-in types.
I wouldn't necessarily install the plastic locking strips, since it might make the work more difficult when "sucking in" the seal at the corners, but would try BMW's recommendation first and see how it goes. Metal pieces are advisable to install since they may help support the weight of the glass or keep the seal from getting deformed and are hard to install later.
I've not actually done glass before but have seen plenty of older cars get restored and been around when the glass gets installed. 911 rear glass is a PITA. All metal lockstrips, so those need to go in first. And lots of soapy water.
-
Tammer in Philly
- Posts: 10719
- Joined: Feb 12, 2006 12:00 PM
- Location: CHI, IL
I tried doing a 71 VW bus windshield and failed miserably twice before I just gave up and sold it.Justin_FL wrote:Roy, you take the glass, put on the seal, and install the locking strips. Run a rope around the channel in the seal, then as you install into body, pull the rope out to get the rubber lip in place over the body lip (hopefully the headliner is glued well so you don't pull it loose). Someone on the outside applies some pressure to help it seat. Pretty much how you installed glass for decades before the glue-in types.
I wouldn't necessarily install the plastic locking strips, since it might make the work more difficult when "sucking in" the seal at the corners, but would try BMW's recommendation first and see how it goes. Metal pieces are advisable to install since they may help support the weight of the glass or keep the seal from getting deformed and are hard to install later.
I've not actually done glass before but have seen plenty of older cars get restored and been around when the glass gets installed. 911 rear glass is a PITA. All metal lockstrips, so those need to go in first. And lots of soapy water.
-
tavern gnome
- Posts: 352
- Joined: May 19, 2008 11:14 PM
- Location: Tacoma, WA
- Contact:
-
GaAlpinaOwner
- Posts: 1120
- Joined: Feb 12, 2006 12:00 PM
- Location: Atlanta Georgia USA
[quote="wkohler"]I don't know what they did, but it will be redone and I'll figure it out then. At this point, I'm just trying not to think much about it, which has allowed me to do other stuff.
Here's the deal, though. I decided to look at what the blue binder says about installing windscreens and I learned some stuff. Procedure begins on 51-28. It is the same for both the front and rear glass. There were two types of seals offered for these cars (same for E12s - checked that book too). One has a rigid side which attaches to the pinch weld much like how the sunroof seal does. This seal is installed onto the body, then the windshield installed into it. You then use special tools to install the lower trim and the lockstrips. No sealant. Then, there is the other style seal, which I imagine is all they sell now since I've got three different part numbers for windshield seals and they're all the same. These lack that stiff/rigid component, simply being all rubber. They require a sealant and they also recommend fully installing the assembly (locking strips, everything) off the car on the table, then offer it up to the car using the rope method. They suggested a piece of string or wire that is 22 feet long./quote]
Chris I have not been on this site for a while - been busy restoring a 2003 LandRover Discovery2 TReK Edition #5 of 16.But I also went through the same ordeal with my 85 B7 windshield ...a complete loss with seal and all trim pieces destroyed. There is only one way to do these right and the instructions you have are dead on....find someone that has done these and pay to have it done right. The trim is finicky especially on the corners. Also the new sunroof headliner complete is on its way to you.
the car looks fantastic.
Thanks David! I appreciate you offering that panel to me. Will help to make this that much better.
So, most of the stuff I've been doing lately has involved making sure all the wiring I need is where it is inside the car. As I've said before this car once had a big stereo and an alarm, so now that all of that wiring has been removed and no one ever responded to my request for some non-premium sound wiring, I had to take matters into my own hands and went to the yard.
I came back with remnants of stereo wiring from a few cars, none of them E28s as our yards had exactly one E28 and being a super eta with premium sound, it will not work for me. I did get the antenna wiring from this car though.
So, I ended up pulling the harnesses out of an E30 and all the wires are the same as E28. It was a little screwed up from douche-nozzles destroying the dashboard, but with cheating off the 533, I got it figured out without much issue. Fortunately, the rear speaker harness was complete in my car, so I got everything working and can put that all where it needs to go, then put the interior back together.
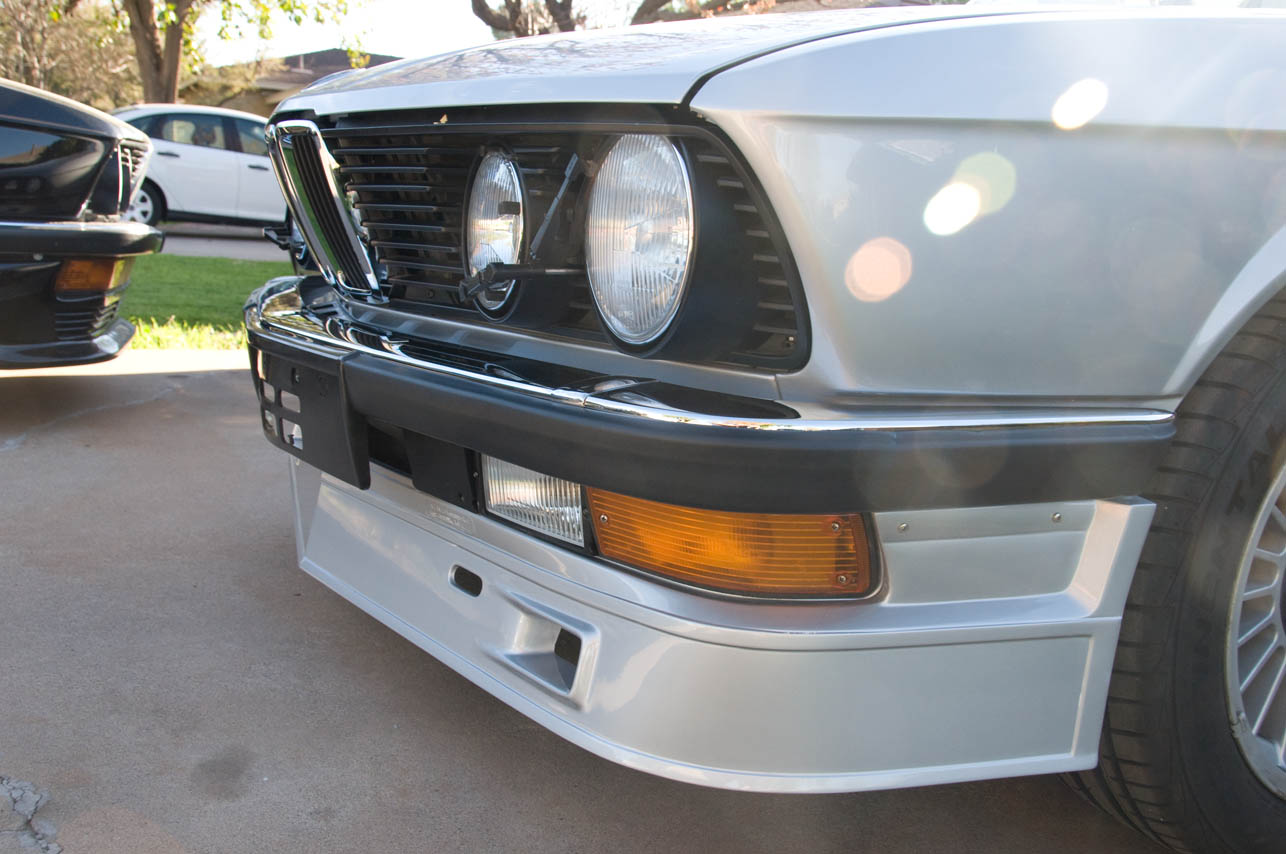
With that sorted, I decided to spend a bit of time on the front of the car. The valance had a bit of overspray on it from the chip guard, so before I did anything with it, I said, "This is Mike's problem" and drove out to Mesa. He took care of it no problem. little thinner, some wet sanding and buffing. Came back home and bolted it up. Forgot my phone had a camera so no photos.
Then I put the bumper together last night. Disappointed that the right front corner has a couple marks in it and my new bumper trim has a bunch of sharp indentations/impressions in it, but I can't afford to keep buying stuff I've already bought.
Still forgot photos. I started getting antsy. I decided to call the dealer this morning and buy the ten expanding nuts to put my lights in the valance. They've used them on every car since these were made, so they have to stock them and stock them they did. At $.36 each, I decided you can never have too many, so I bought 16. Not sure how I arrived at that number, but it was more than 10 and less than I needed to do two cars, so seems about right.
Three years ago, I bought brand new turn signals and grilles. Never looked at them. Found out a few weeks back that whoever "built" the assemblies was a moron and put E23/E24 plugs on them.

The yellow connector is correct.
I had some pigtails from the signals that I used on my 535is. I searched everywhere for a tool to take them apart, but I didn't want to pay $60. Then I looked at the wiring on the car and I noticed the Federalized running light was actually done nicely with heatshrink, etc and runs off of the city light circuit, so it can't be that bad to keep it. My housings were nice, too, so I cleaned them up and just used the new lenses. This meant removing them from the 528i, replacing those with another okay set I had and moving on. Fogs installed and time for a photo.
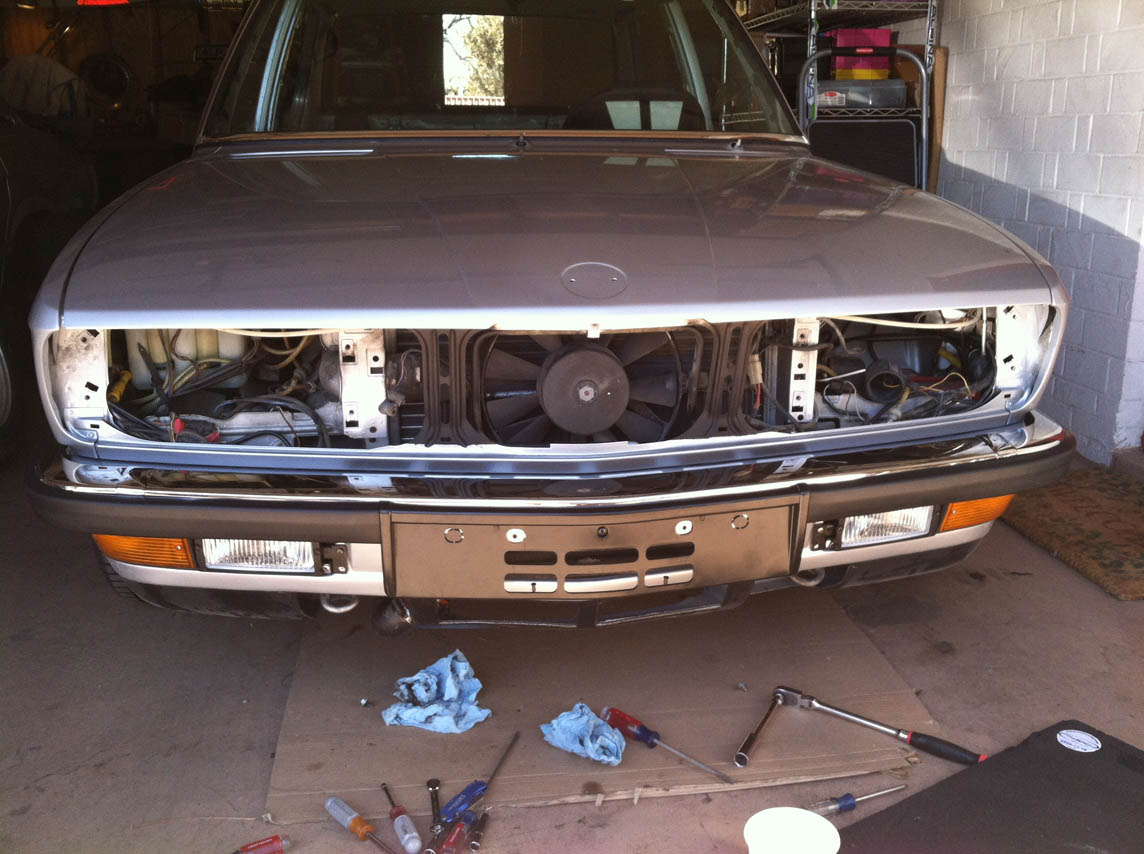
Then I said, "I can't just leave it there, so I need to put my lights in."
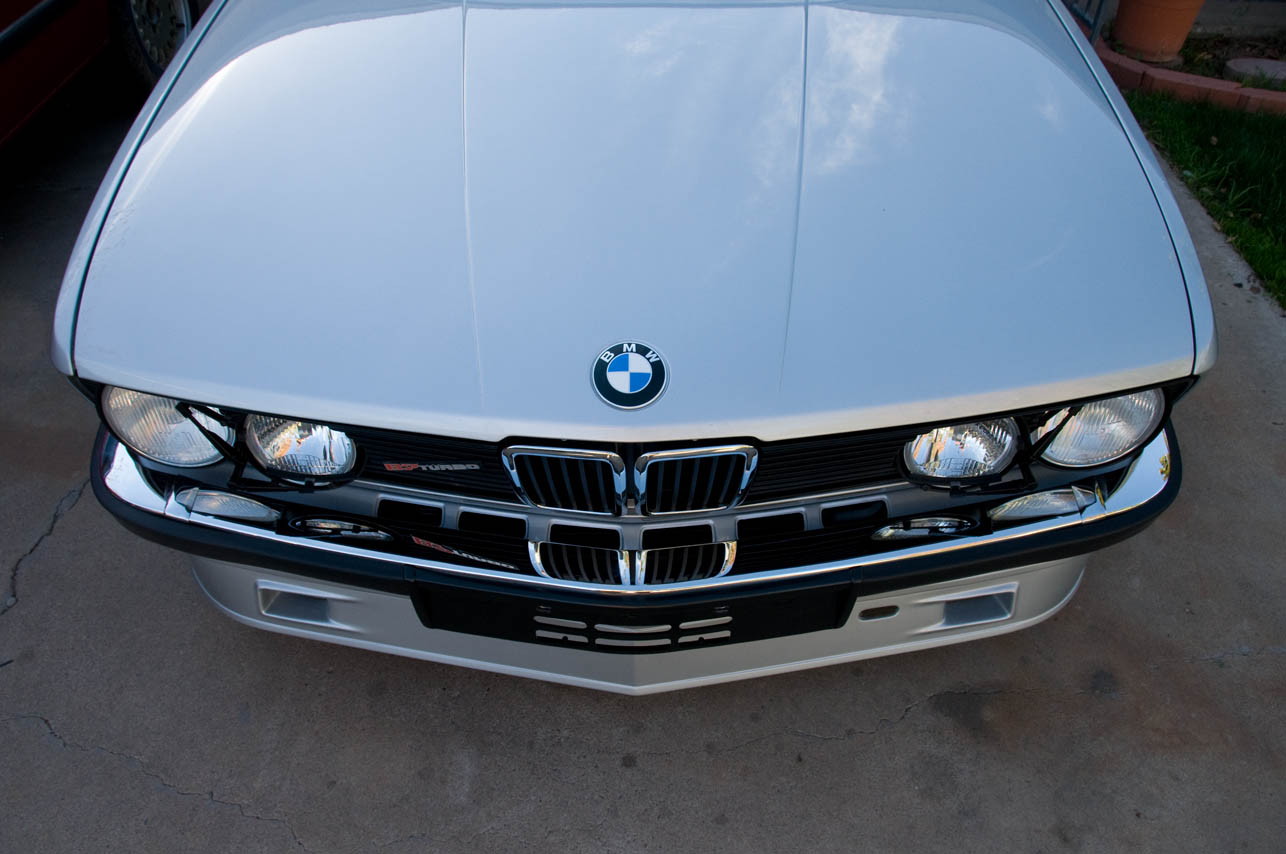
I had bought some lamps from Ivo. I didn't like the French high beams for this car, but wanted them for something else. I dipped into my newly delivered set of lamps from Schmiedmann and replaced the high beams. Twice. I installed them upside down only to find the spring wouldn't connect. So, I did it over. Replaced the bulbs and installed the wiper motors, etc.
Then I figured we need grilles. So, I grabbed those grilles I bought a few years ago and put them in.
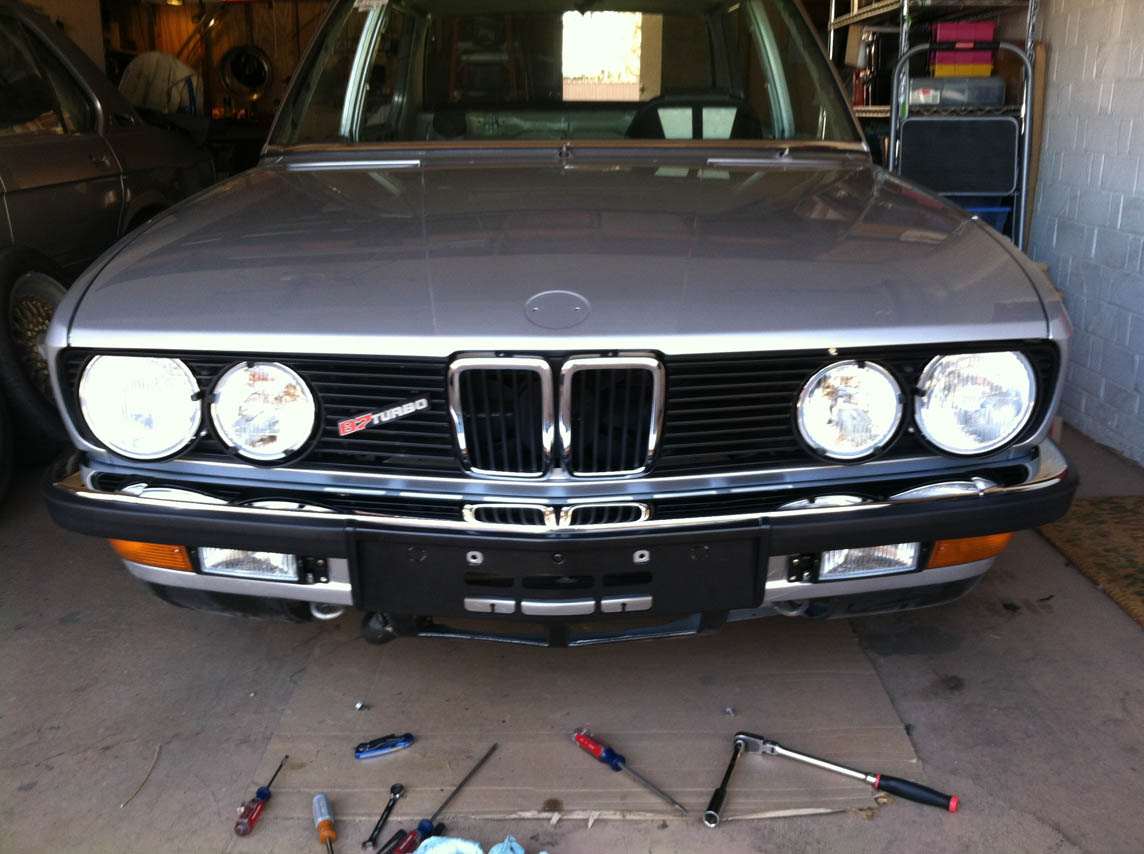
Then I looked at it harder and said, let's put those wipers on.
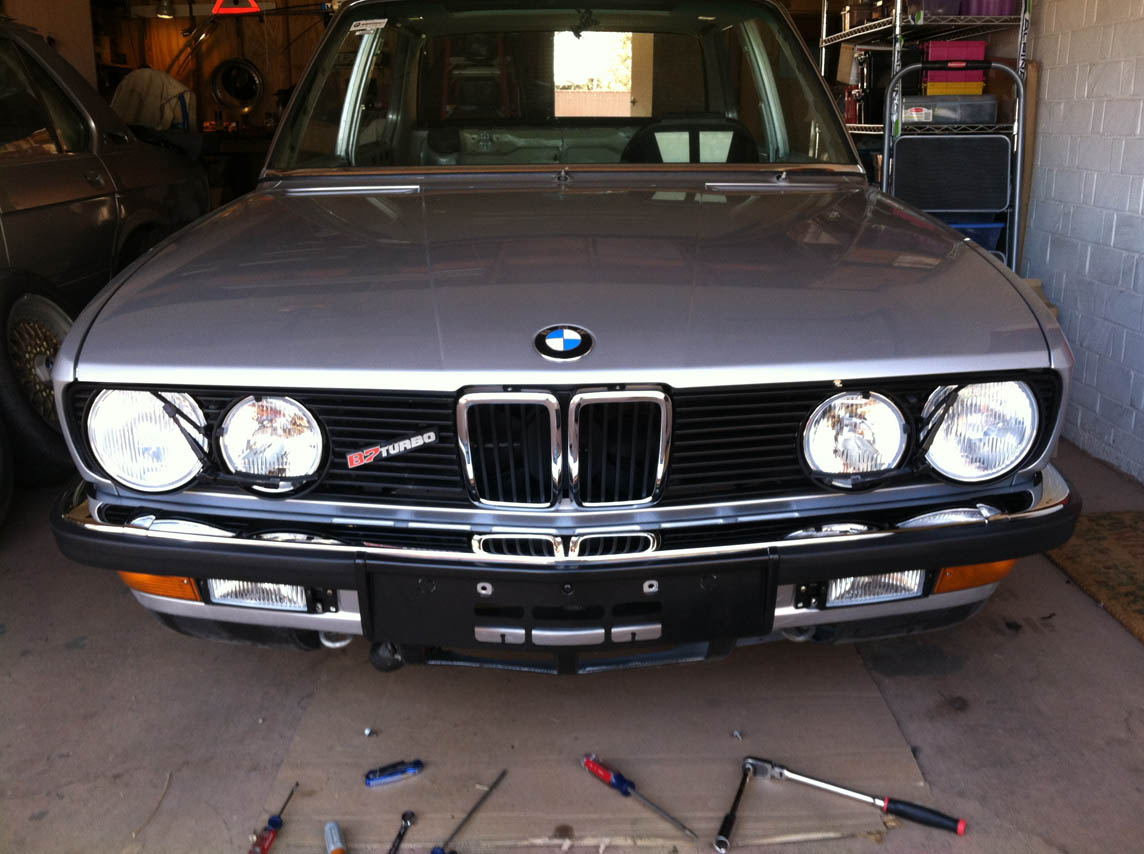
I also decided that the photo would look stupid without the roundel, so I set one on the hood.
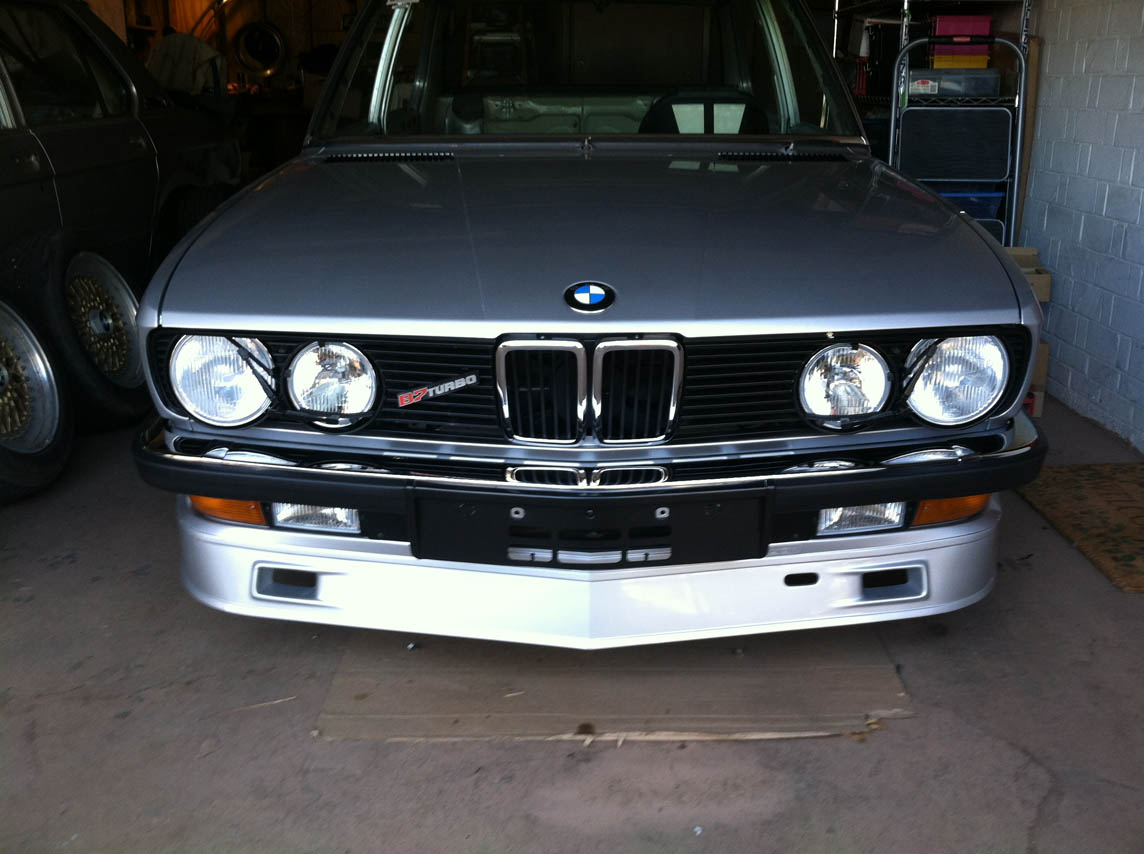
The anchors for the screws for the spoiler survived removal, but only three came back from the shop. I went searching for a suitable option, but every "expanding nut" was square. I had round holes and learned at an early age that it doesn't work.
I bought something out of boredom, but no worky. I decided on the way home that if this doesn't work, Machine screws, fender washers and nuts were the solution. Precisely what I did using metric stainless stuff, but I kept the nuts zinc plated.
And here's the spoiler.
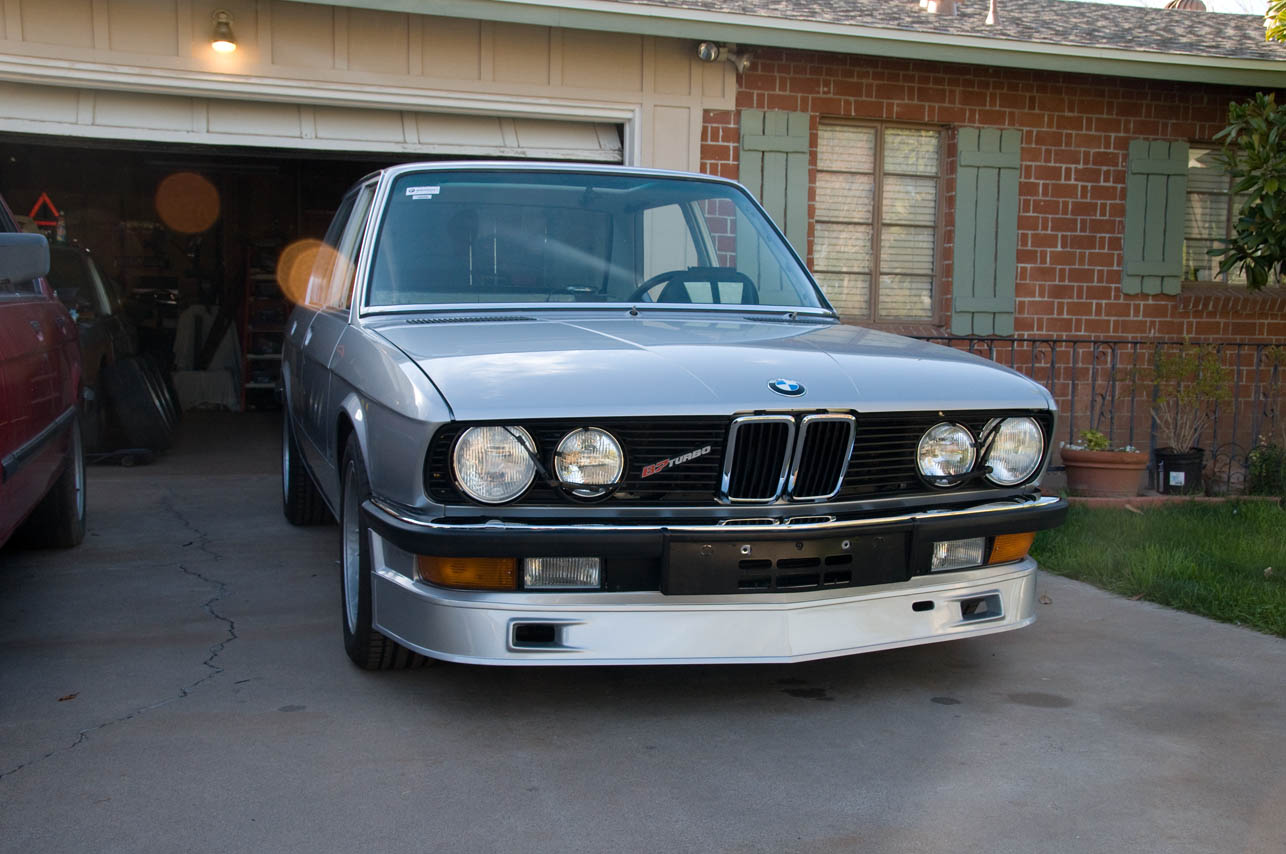
After that, I grabbed my real camera, pushed the car out and took a few photos of the progress so far.
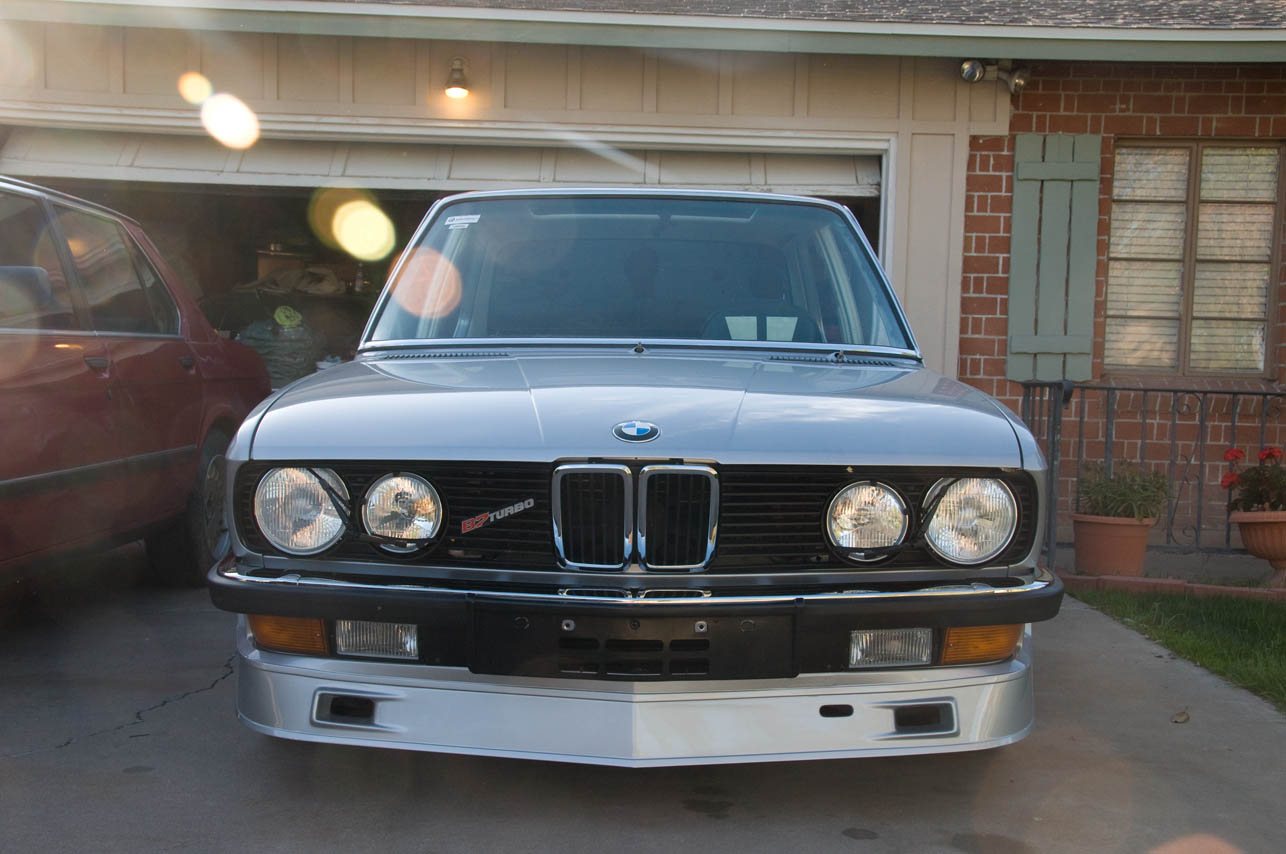
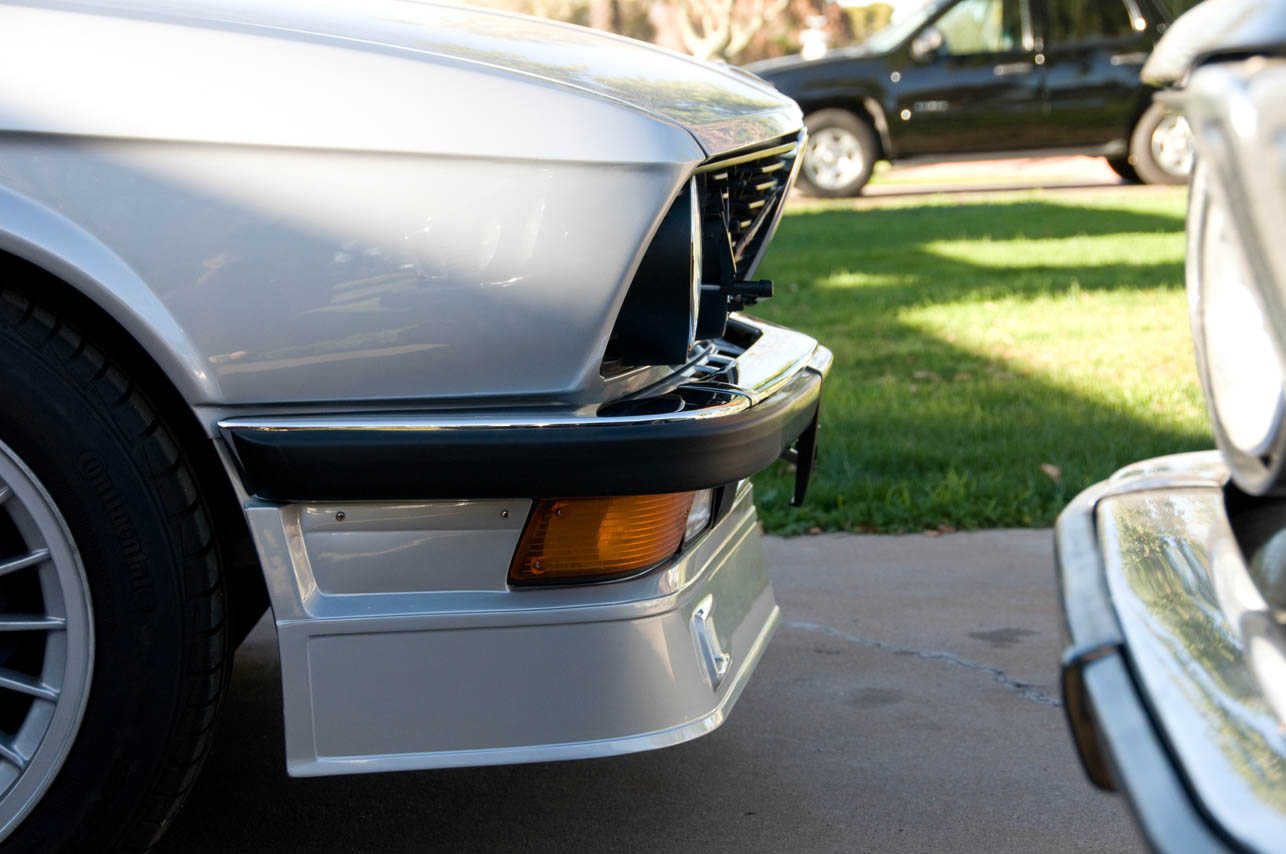
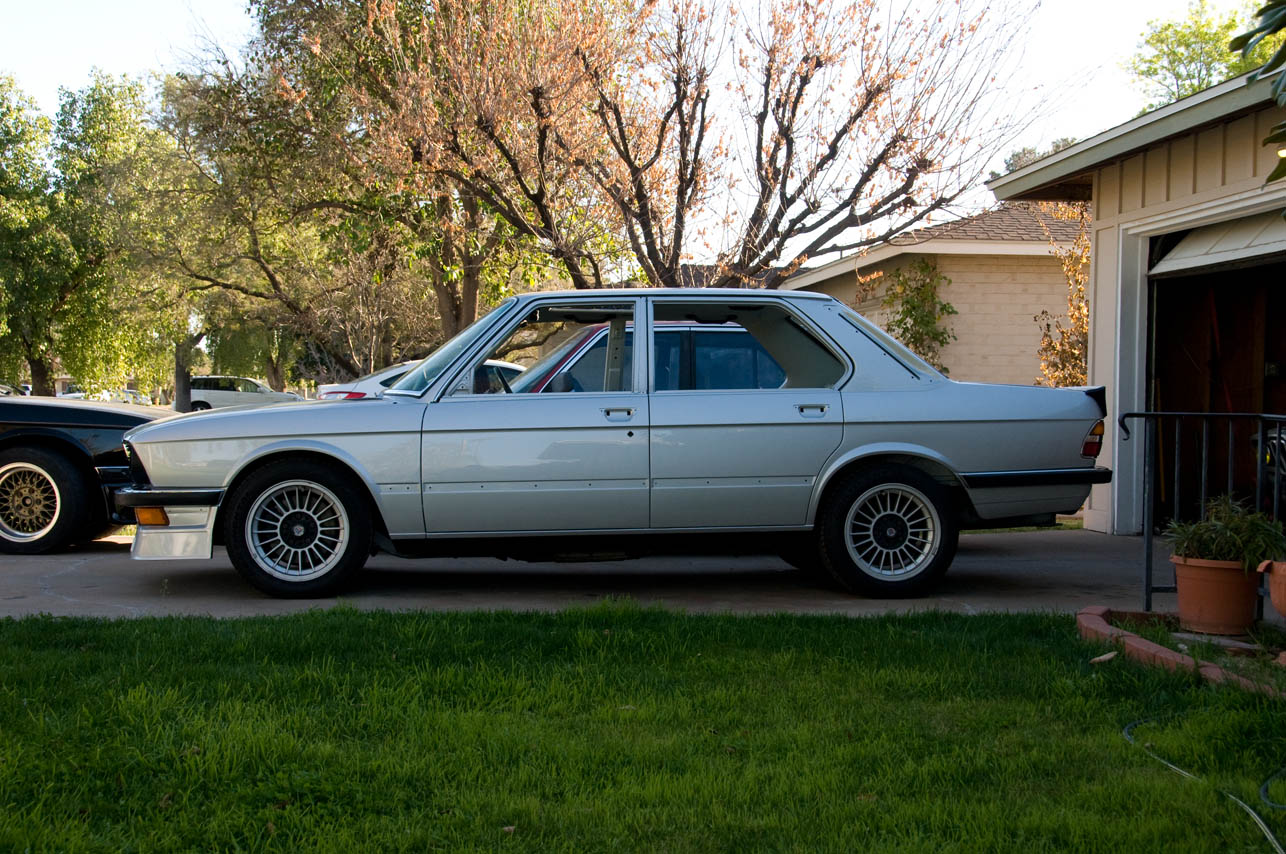
I've got the tow hook extension, but it's in Georgia right now. It was in two pieces, so I offered it for duplication, and it should be repaired and I should be getting one of the duplicates if I understood the arrangement correctly.
Then, I got an idea.
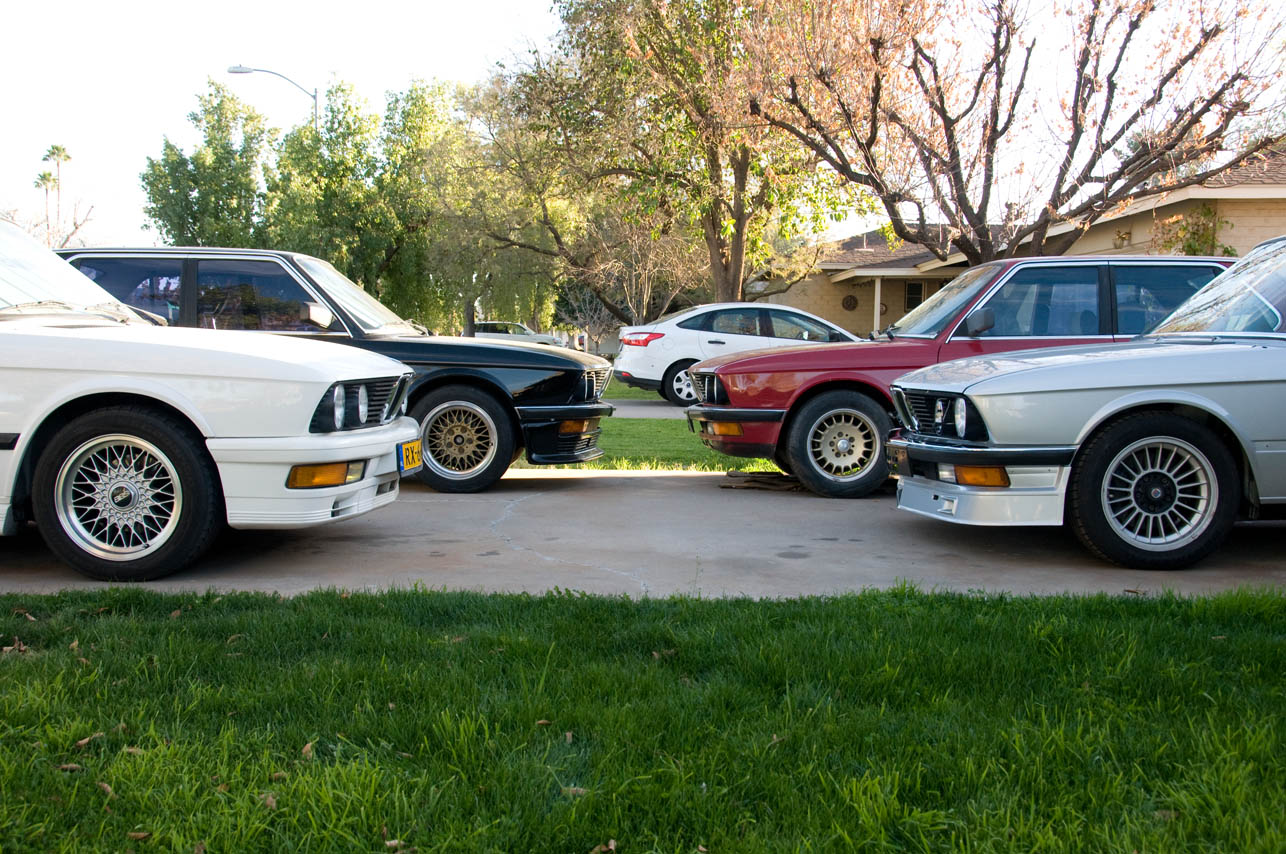
That's all for now.
So, most of the stuff I've been doing lately has involved making sure all the wiring I need is where it is inside the car. As I've said before this car once had a big stereo and an alarm, so now that all of that wiring has been removed and no one ever responded to my request for some non-premium sound wiring, I had to take matters into my own hands and went to the yard.
I came back with remnants of stereo wiring from a few cars, none of them E28s as our yards had exactly one E28 and being a super eta with premium sound, it will not work for me. I did get the antenna wiring from this car though.
So, I ended up pulling the harnesses out of an E30 and all the wires are the same as E28. It was a little screwed up from douche-nozzles destroying the dashboard, but with cheating off the 533, I got it figured out without much issue. Fortunately, the rear speaker harness was complete in my car, so I got everything working and can put that all where it needs to go, then put the interior back together.
With that sorted, I decided to spend a bit of time on the front of the car. The valance had a bit of overspray on it from the chip guard, so before I did anything with it, I said, "This is Mike's problem" and drove out to Mesa. He took care of it no problem. little thinner, some wet sanding and buffing. Came back home and bolted it up. Forgot my phone had a camera so no photos.
Then I put the bumper together last night. Disappointed that the right front corner has a couple marks in it and my new bumper trim has a bunch of sharp indentations/impressions in it, but I can't afford to keep buying stuff I've already bought.
Still forgot photos. I started getting antsy. I decided to call the dealer this morning and buy the ten expanding nuts to put my lights in the valance. They've used them on every car since these were made, so they have to stock them and stock them they did. At $.36 each, I decided you can never have too many, so I bought 16. Not sure how I arrived at that number, but it was more than 10 and less than I needed to do two cars, so seems about right.
Three years ago, I bought brand new turn signals and grilles. Never looked at them. Found out a few weeks back that whoever "built" the assemblies was a moron and put E23/E24 plugs on them.

The yellow connector is correct.
I had some pigtails from the signals that I used on my 535is. I searched everywhere for a tool to take them apart, but I didn't want to pay $60. Then I looked at the wiring on the car and I noticed the Federalized running light was actually done nicely with heatshrink, etc and runs off of the city light circuit, so it can't be that bad to keep it. My housings were nice, too, so I cleaned them up and just used the new lenses. This meant removing them from the 528i, replacing those with another okay set I had and moving on. Fogs installed and time for a photo.

Then I said, "I can't just leave it there, so I need to put my lights in."
I had bought some lamps from Ivo. I didn't like the French high beams for this car, but wanted them for something else. I dipped into my newly delivered set of lamps from Schmiedmann and replaced the high beams. Twice. I installed them upside down only to find the spring wouldn't connect. So, I did it over. Replaced the bulbs and installed the wiper motors, etc.
Then I figured we need grilles. So, I grabbed those grilles I bought a few years ago and put them in.

Then I looked at it harder and said, let's put those wipers on.

I also decided that the photo would look stupid without the roundel, so I set one on the hood.
The anchors for the screws for the spoiler survived removal, but only three came back from the shop. I went searching for a suitable option, but every "expanding nut" was square. I had round holes and learned at an early age that it doesn't work.

I bought something out of boredom, but no worky. I decided on the way home that if this doesn't work, Machine screws, fender washers and nuts were the solution. Precisely what I did using metric stainless stuff, but I kept the nuts zinc plated.
And here's the spoiler.

After that, I grabbed my real camera, pushed the car out and took a few photos of the progress so far.


I've got the tow hook extension, but it's in Georgia right now. It was in two pieces, so I offered it for duplication, and it should be repaired and I should be getting one of the duplicates if I understood the arrangement correctly.
Then, I got an idea.

That's all for now.


