E28 Alpina B7 Turbo/1 #0083
-
Adam W in MN
- Posts: 5053
- Joined: Feb 12, 2006 12:00 PM
- Location: Don't waste my motherf***in' time!
- Contact:
-
mooseheadm5
- Beamter

- Posts: 23035
- Joined: Apr 08, 2009 10:30 PM
- Location: Charlottesville, VA
- Contact:
-
Das_Prachtstrasse
- Posts: 5616
- Joined: Sep 10, 2006 7:06 AM
- Location: Melbourne, Doooown Under
-
Tammer in Philly
- Posts: 10719
- Joined: Feb 12, 2006 12:00 PM
- Location: CHI, IL
Thanks all. It's not 100% finished up front. Some stuff has to come back apart to change all the washer hose and replace a few fasteners. It's nice to have something to look at when I open the garage door.
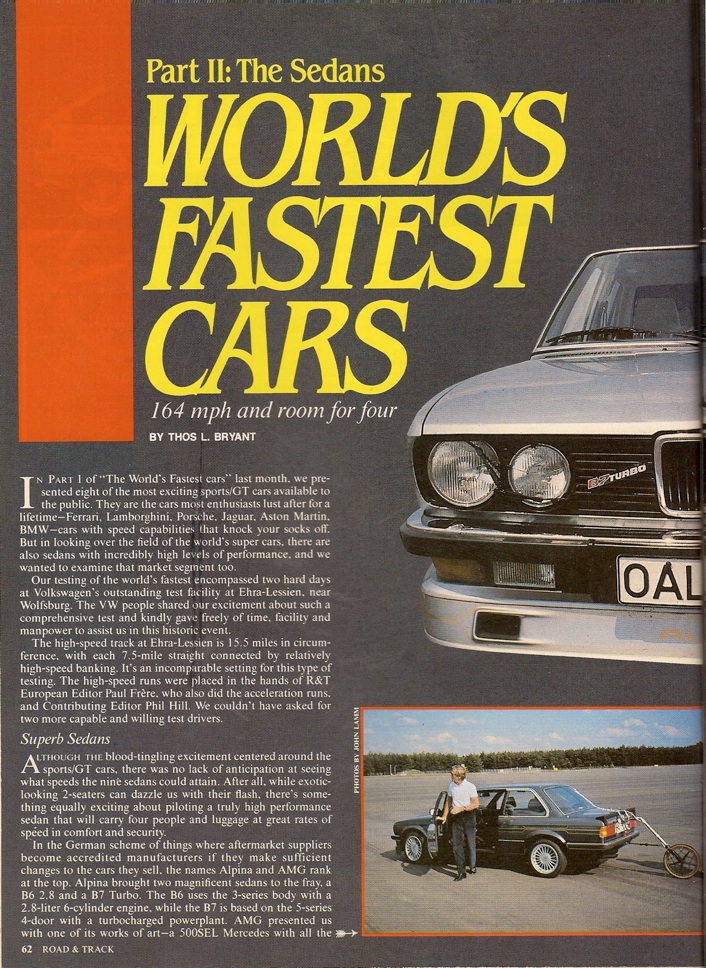
Tammer - I plan on re-shooting that last photo. It wasn't apparent at the time, being more of a hmmm, this is interesting kinda deal, so I didn't give it much thought but it's the first thing you notice in the photo.
Sure, I might have the only B7 Turbo in North America with the badge on the grille like that, but so far as I can figure, it's the correct way - at least for my car, as I understand it's angle varied. Either way, I think it's neat like that and it was that way when the car came to me. I didn't notice any signs of it having been removed and repositioned or the grille having been changed.Das_Prachtstraße wrote:Looks excellent, Chris.
Are you leaving the grille badge crooked?

Tammer - I plan on re-shooting that last photo. It wasn't apparent at the time, being more of a hmmm, this is interesting kinda deal, so I didn't give it much thought but it's the first thing you notice in the photo.
My english is limited to one single word, that should cover it all:
WOW!
That front-picture is totally amazing, I am stunned...
I "hate" the fact that my car is newly painted too, with new bumpers +++, but my front does not look that shiny, fresh and new like yours....
BTW...
Do you have the Alpina Deko-set? If not, PM me...
WOW!
That front-picture is totally amazing, I am stunned...
I "hate" the fact that my car is newly painted too, with new bumpers +++, but my front does not look that shiny, fresh and new like yours....
BTW...
Do you have the Alpina Deko-set? If not, PM me...
-
abdielhiram
- Posts: 316
- Joined: Oct 30, 2011 2:05 PM
- Location: Costa Rica
Chris, your attention to detail is outstanding.
You have done a phenomenal job with this car.
I had the Windshield replaced on two of my cars along with the seal and had no issues, I am sure that you will be able to find someone who can get it perfect for you.
Now that she is done, go get her appraised and insured for what's she worth.
Congrats again, Chris, Good Job!!!
I like the progress, looks stunning. 
 I have only seen one B7, once driving in Tallahassee one thanksgiving day....Hands down my favorite e-28.
Looking at the photos got me thinking about a few things when I do my paint job..(entering 5 yr of planning)
Question - I know you can buy the factory stickers for the engine bay/ color codes...but what about the vin stickers for the door jams? Are they avail for the restorations?
Looking at the photos got me thinking about a few things when I do my paint job..(entering 5 yr of planning)
Question - I know you can buy the factory stickers for the engine bay/ color codes...but what about the vin stickers for the door jams? Are they avail for the restorations?
-
GaAlpinaOwner
- Posts: 1120
- Joined: Feb 12, 2006 12:00 PM
- Location: Atlanta Georgia USA
alpina front spoiler
Chris,
Your bringing the ALPINA B7 to the highest level of e28 standards. I am very impressed with your progress. Keep focused and take your time....it is really paying off.
Best Regards,
Paul
Your bringing the ALPINA B7 to the highest level of e28 standards. I am very impressed with your progress. Keep focused and take your time....it is really paying off.
Best Regards,
Paul
-
Eddie in TO
- Posts: 1007
- Joined: Feb 12, 2006 12:00 PM
- Location: Toronto, Ontario, Canada
- Contact:
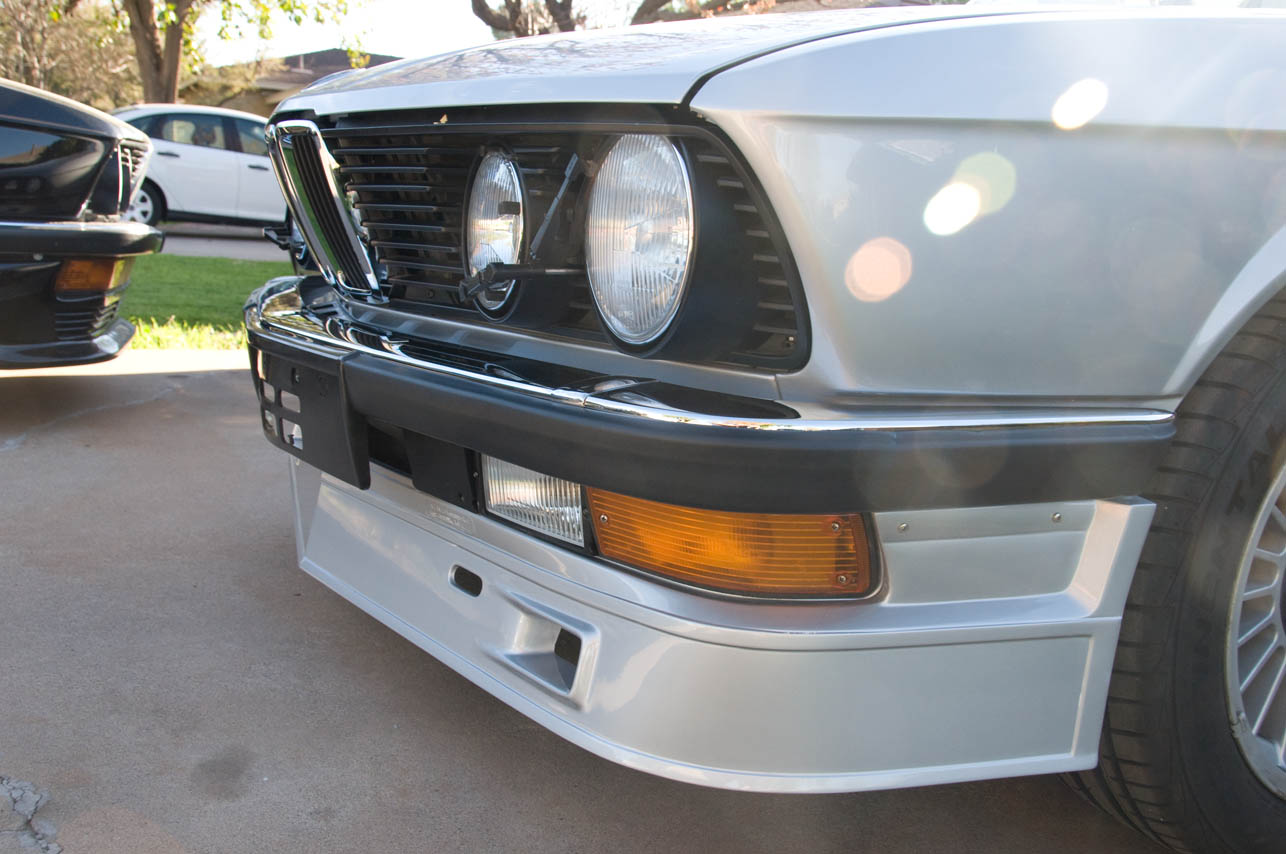
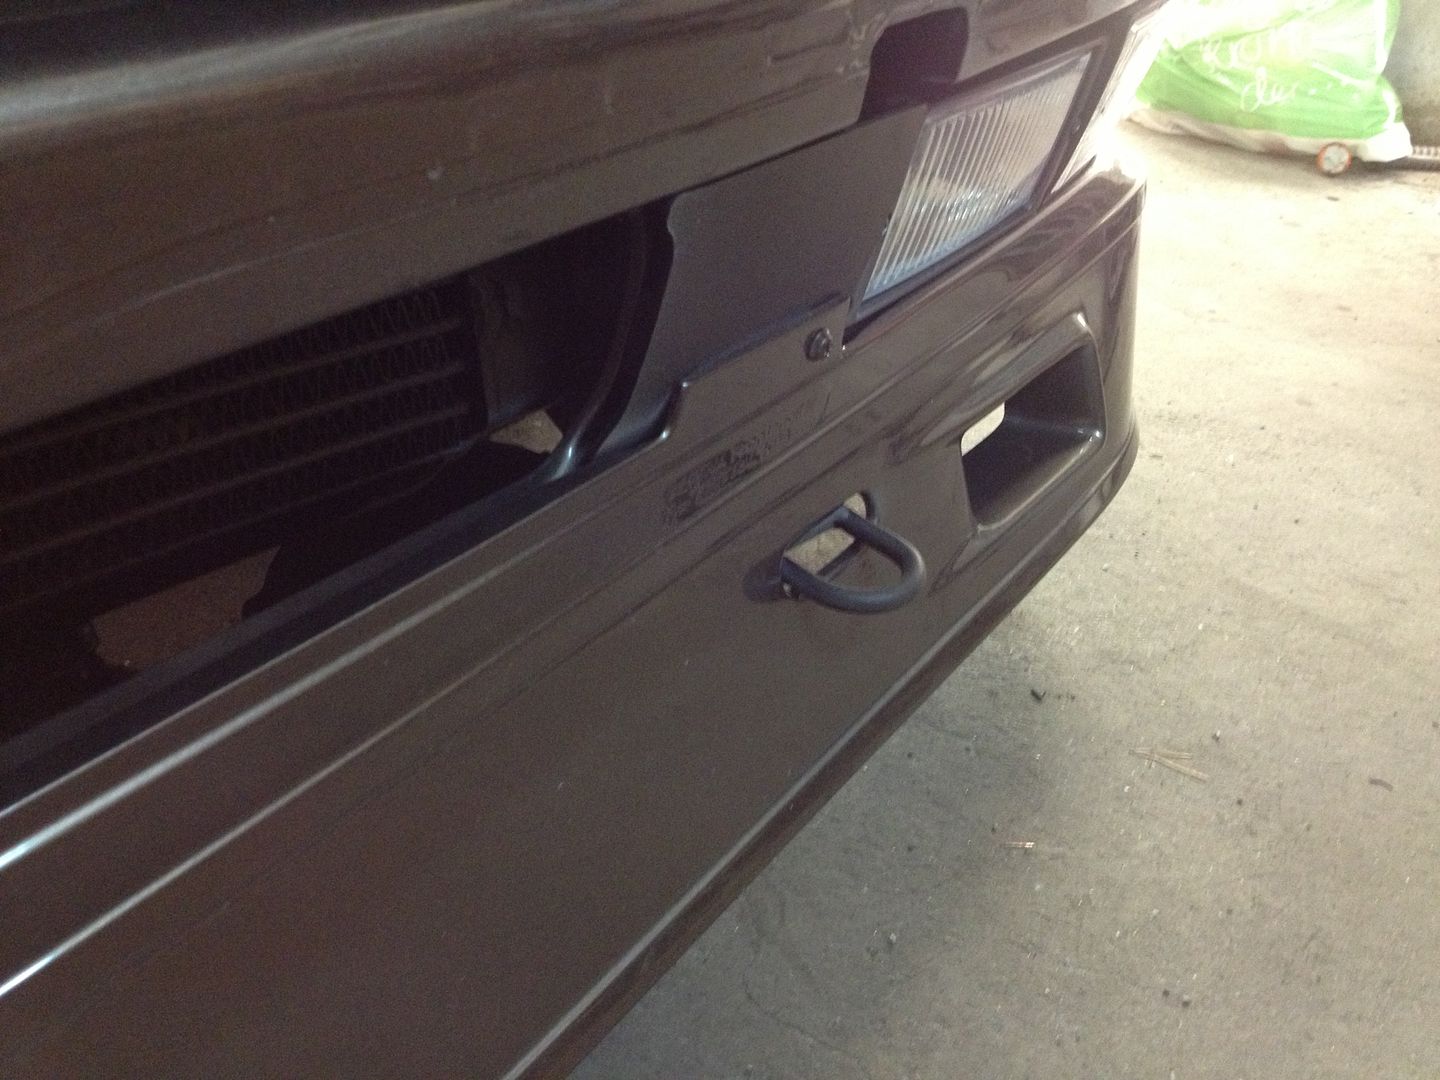
The car came to me without the spoiler, so I really had nothing to go on. I had noticed your photos with the spoiler mounted on the outside and started wondering if in fact that area was supposed to be painted black or something to blend. I then went and looked at photos of various Alpina E28s. I found that while several mounted the spoiler on the outside, all of the "official" photographs or the car in the article I posted earlier, had it behind.Pedi wrote:
I see that you have mounted the covers next to the fog-lights OVER the Alpina-spoiler.
I tried both over and under, and it surely fitted best under. But it looks odd, your solution looks better.
Did you just install it over the spoiler, or did you use shims or similar to make it fit?
So, when I was fitting the spoiler, I noticed that it had been shaped to allow that covering plate to fit properly and that the pre-made hole for mounting was large enough for the correct factory BMW screw to pass through it. I was certainly leery, but it went together easily and despite being fiberglass, you'd have thought this piece was a factory BMW part. It fit well.
I do have a deko kit in gold (correct for the car) en route. I appreciate the offer. That said, I'd love to see someone do the thin stripes in the blue/green combo. I think that would be fantastic, but we will go with the gold as that's what came on it.
BTW, if you decide you want to part with your other set of badges, let me know what you would be thinking price-wise and I will see if I can swing it. Thanks!
Sure, I know I said this update is for the 17th and today is the 18th, but it's been a long day, I'm tired and I actually plan to do more work on Monday (the 18th), so I decided this is the best route to go.
I got started pretty late today - around 2pm. I started off by running the antenna wiring. Before I did that, though, I had to separate the antenna coax cable from the power wiring, which meant unwrapping 4.5x10²³ feet of electrical tape from this ridiculously long cable. Then using adhesive cleaner to remove all of the gunk. routed the cable, installed the antenna and you apparently have an uncle named Robert.
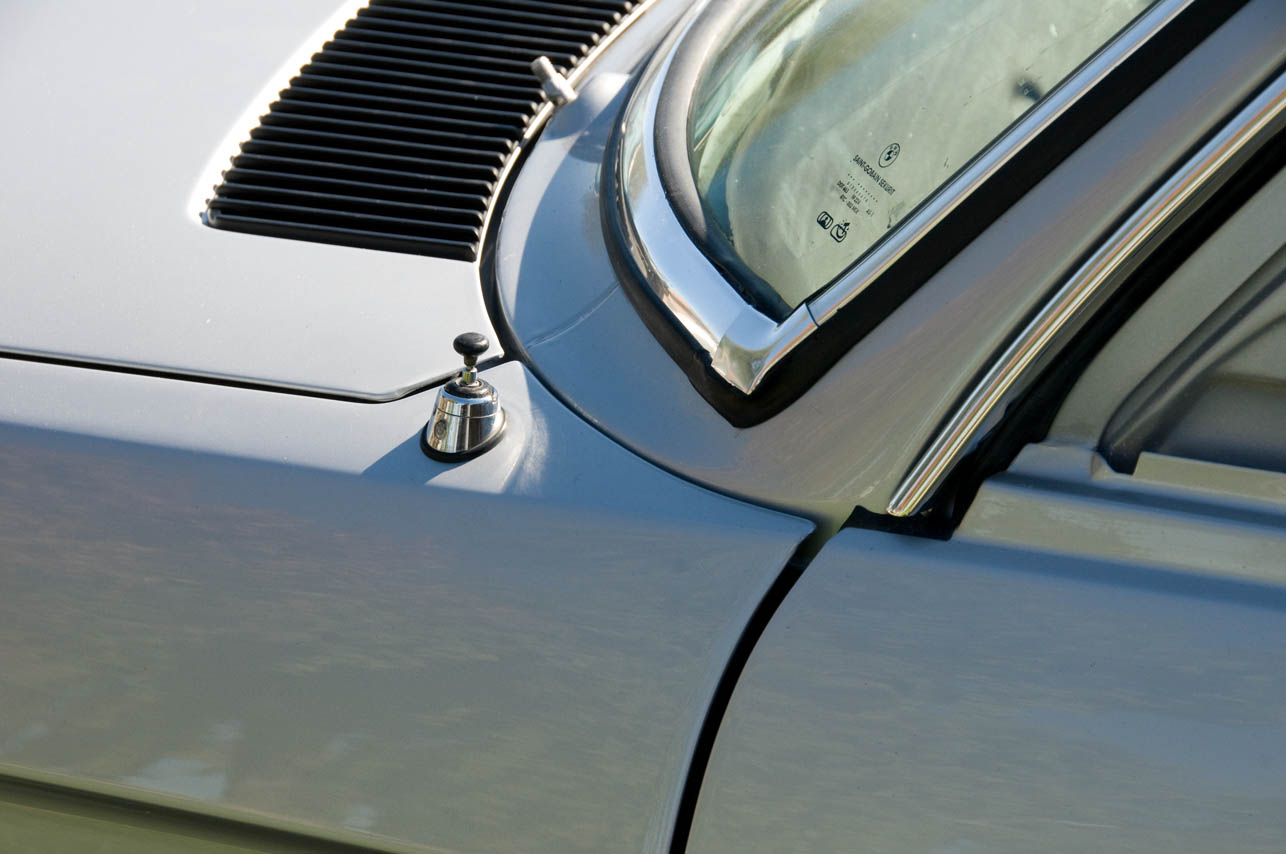
Then it's time to give the carpet a really thorough vacuum. Battery died in the camera.
Then, I moved onto installing the parcel shelf. Before that could go in, though, the rear seatbelts must be installed. This meant making holes in my new headliner. Talk about scary - if you don't know where they go. Got that all sorted with some minor alterations and now we are ready for the shelf! Yesterday, I mounted the speakers to the parcel shelf. Fortunately, when the speakers were changed sometime over the years, they retained the Pioneer spacer dealies from the original speakers, which allowed a 6" driver to be installed without modifying the sheetmetal beheath them. These have many holes provided in them, so I was ecstatic to learn that there were four holes perfectly in line with the speed nuts for the 4x6" holes. The speaker mounts with three screws, two of which are the same ones that mount the base to the board, so that's great, too. Has to be great. Can't be not-great.
Battery charged, yo.
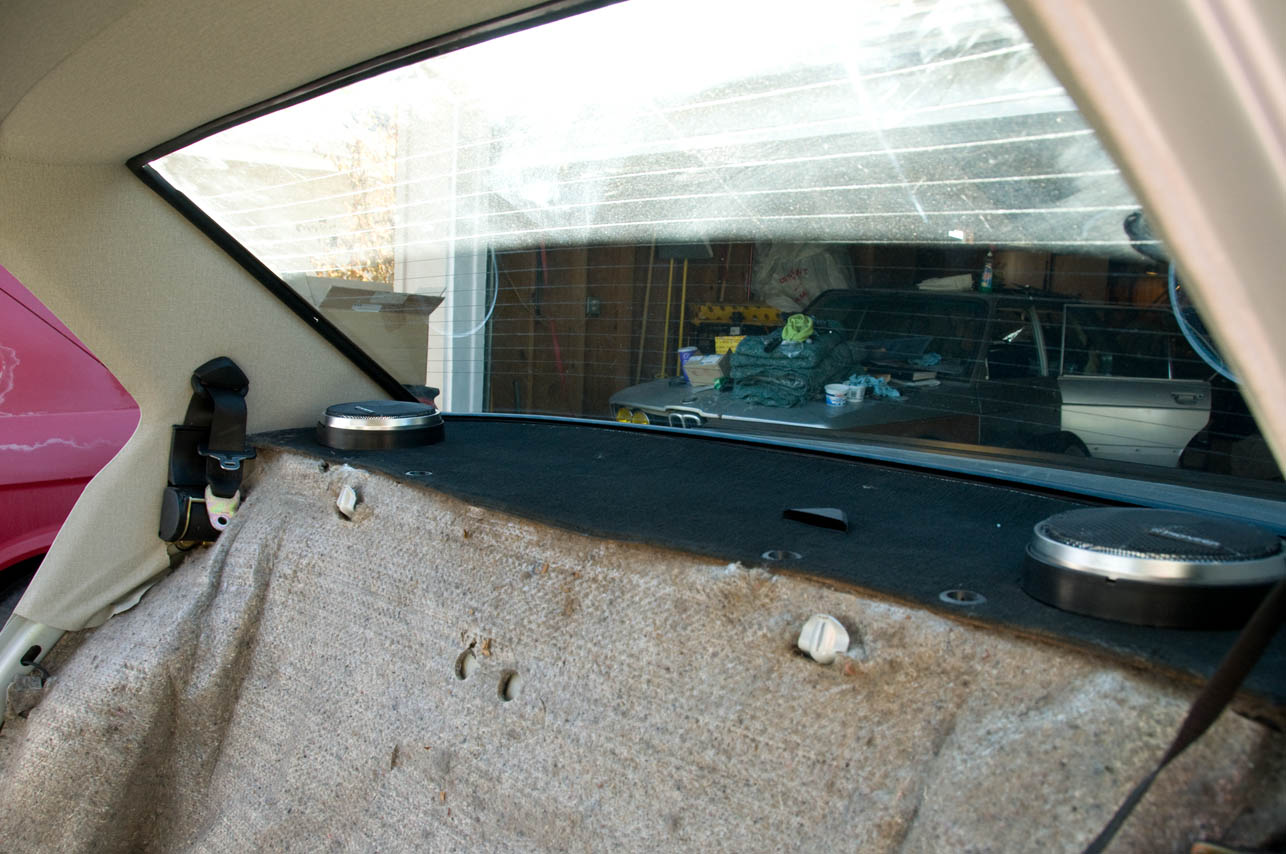
In the background, you can see my E12 M535i living the dream.
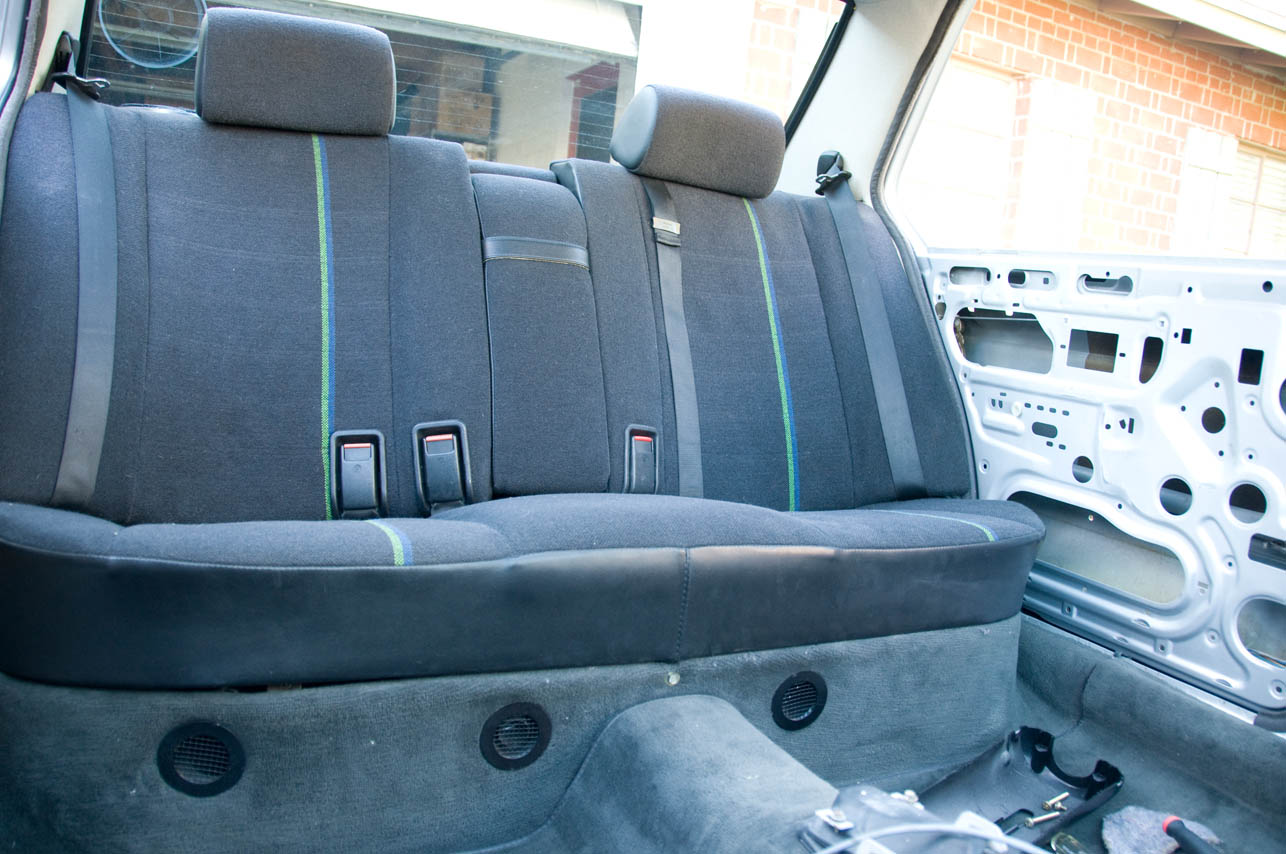
With that in and the headrest grommets secured (hammer and wood block just to be sure), it was time for the rear seat. I was fortunate with this car that the original upholstery was in overall excellent condition. The door panels were the only disappointing part, but merely a result of the normal shrinkage seen with BMW cloth (my car did not come with Alpina cloth on the door panels).
Rear seat is in. Photo is pre-re-cleaning. Apparently when you handle stuff, it gets dirty again.
Then I got a phone call. Using one hand, and occasionally holding the phone with my shoulder, I prepared my "new" dashboard. This involved making sure all of the vents and ducts were clean and were the original ones to the car, etc, as the dash I received had a couple of ducts and they were broken.
I was saved by a guy on a bicycle who thought I was a dealer and wanted me to find him a junk E36 M3 so he could make an electric dragster. I suggested he could accomplish his goal with a 318i or 325i but he was pretty adamant on the M3. He left. Time to install the dash.
From no dash to dash fully secured in 17 minutes. This involved installing the front door caps to make sure the dash was at the right location.
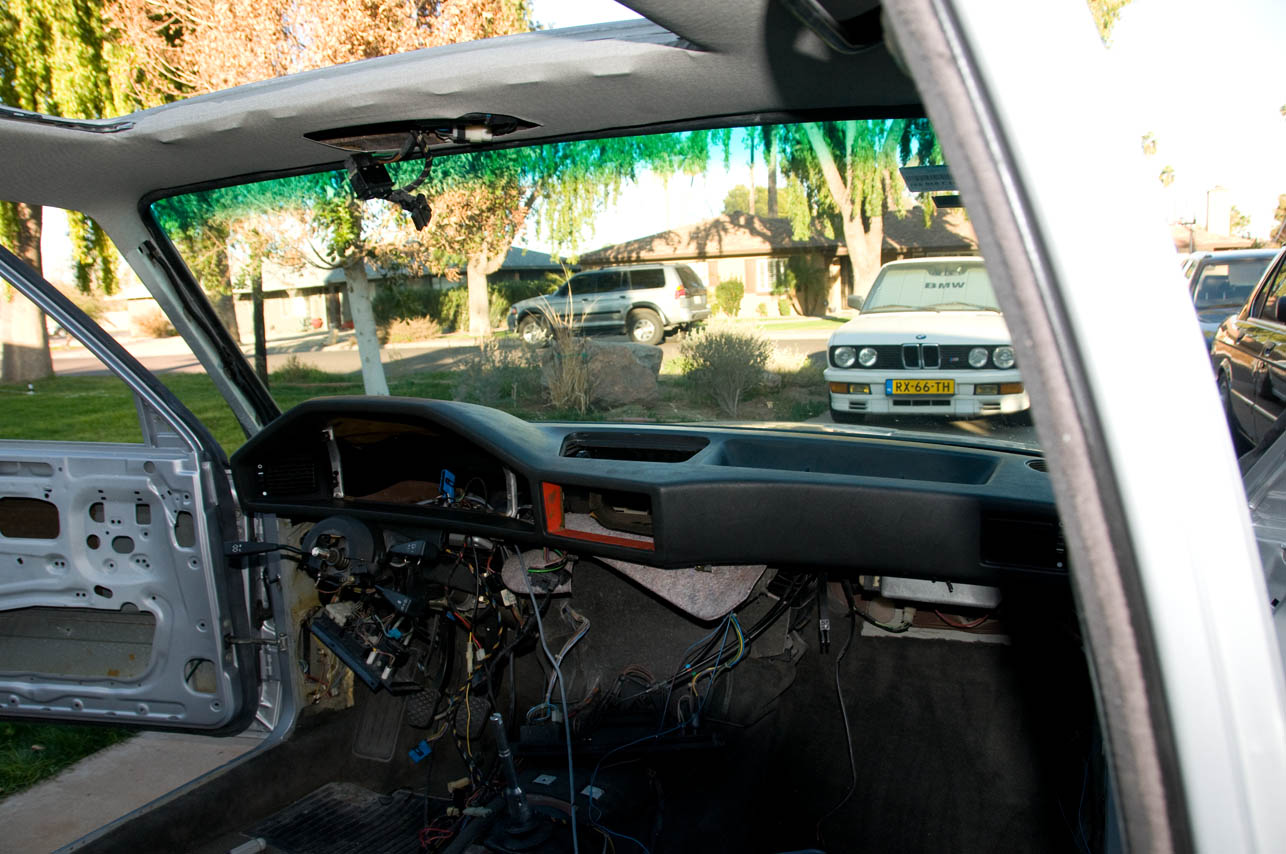
Center console is back in. Was a lot easier installing the auxiliary gauge vent system now that I know how it works. It was a bit of a struggle on removal since there is a connector of power, inputs, etc and a vacuum hose. On the bottom is where the output to the display goes. I'm very happy I have no air conditioning.
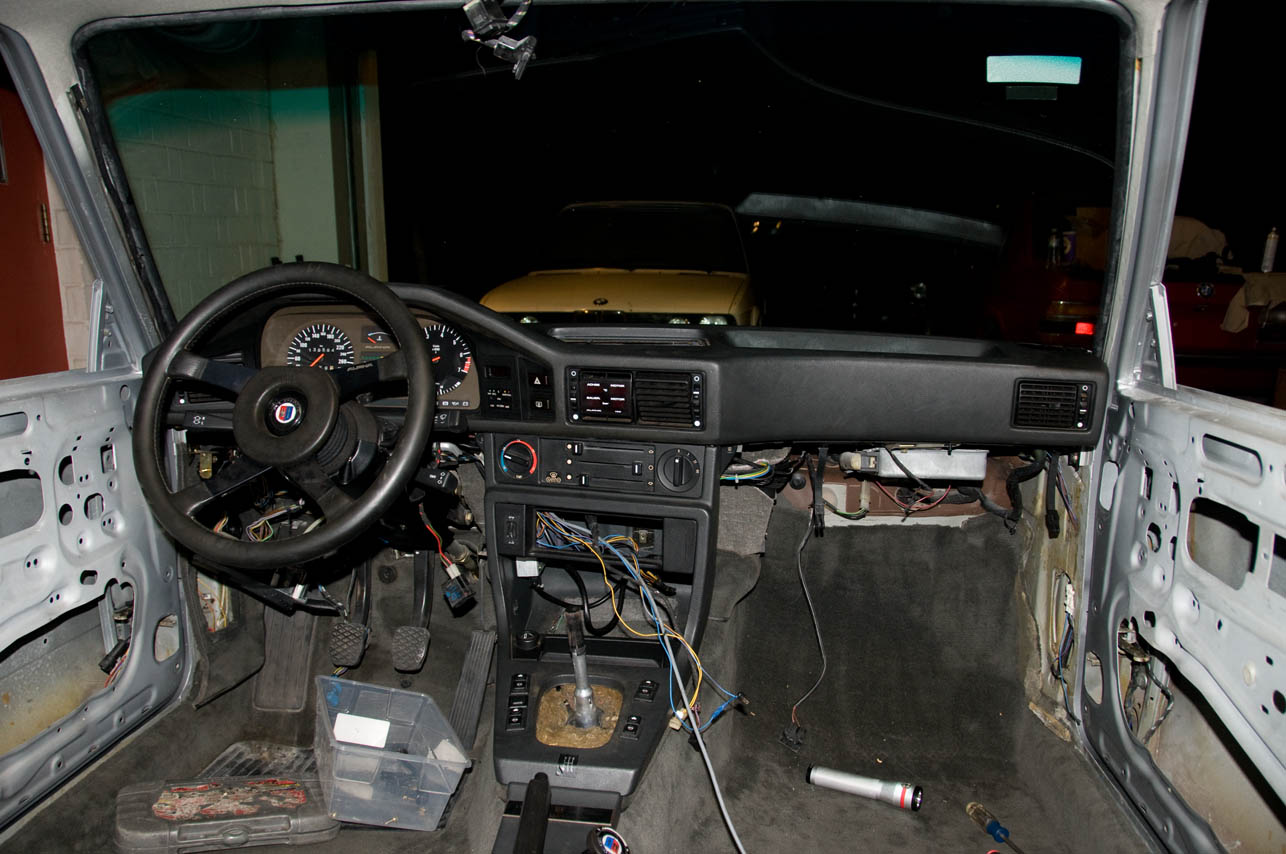
Around 7pm, I decided that I needed some dinner and the dogs definitely needed their dinner, so I took a break. I was almost ready to call it a day, but decided not to. I almost wish I had!
First task was installing the visor panel. This way I could put the a-pillar covers in and the body door frame seals. We all know what those look like, so I saw no point in photos. I trimmed the headliner to the correct opening and the sunroof deflector is back in too, as it secures the rear most edge of the vinyl. On to installing the radio.
I had been searching for over a year for the correct radio for this car. I've seen them on German eBay, but they're afraid to sell the heritage of their nation to me, an 'murican, so I was always shot down. Between that and purchasing the correct speaker covers from a UK eBayer, only to not receive them, I've had poor luck with the stereo for this car. Believe it or not, Blaupunkt made several different models of this radio and they all look the same. I was looking for the specific model, but have acquired a pretty nice collection of Montereys, and also received a shipment of one Monterey SQR 23, a Köln SQR 22, and a Köln SQR 23. The latter, being the correct one, after all this time.
I knew all of my stereo wiring worked. I tested it with a known good stock BMW radio. Time to plug in the correct one. Nothing. No power. Come to find out exactly ZERO of the three radios I received work at all. No power. Nothing. One had a blown fuse and one had no fuse, but I had known good fuses I swapped in. No dice. I then decided to just put a Monterey in for now. Four Montereys later and I have one that works, doesn't smell like an ashtray but lacks a tape deck. Oh well. It's easy enough to change, I guess.
Fed up with that process and installing my nemesis on the left side of the dash, I decided to call it quits for tonight.
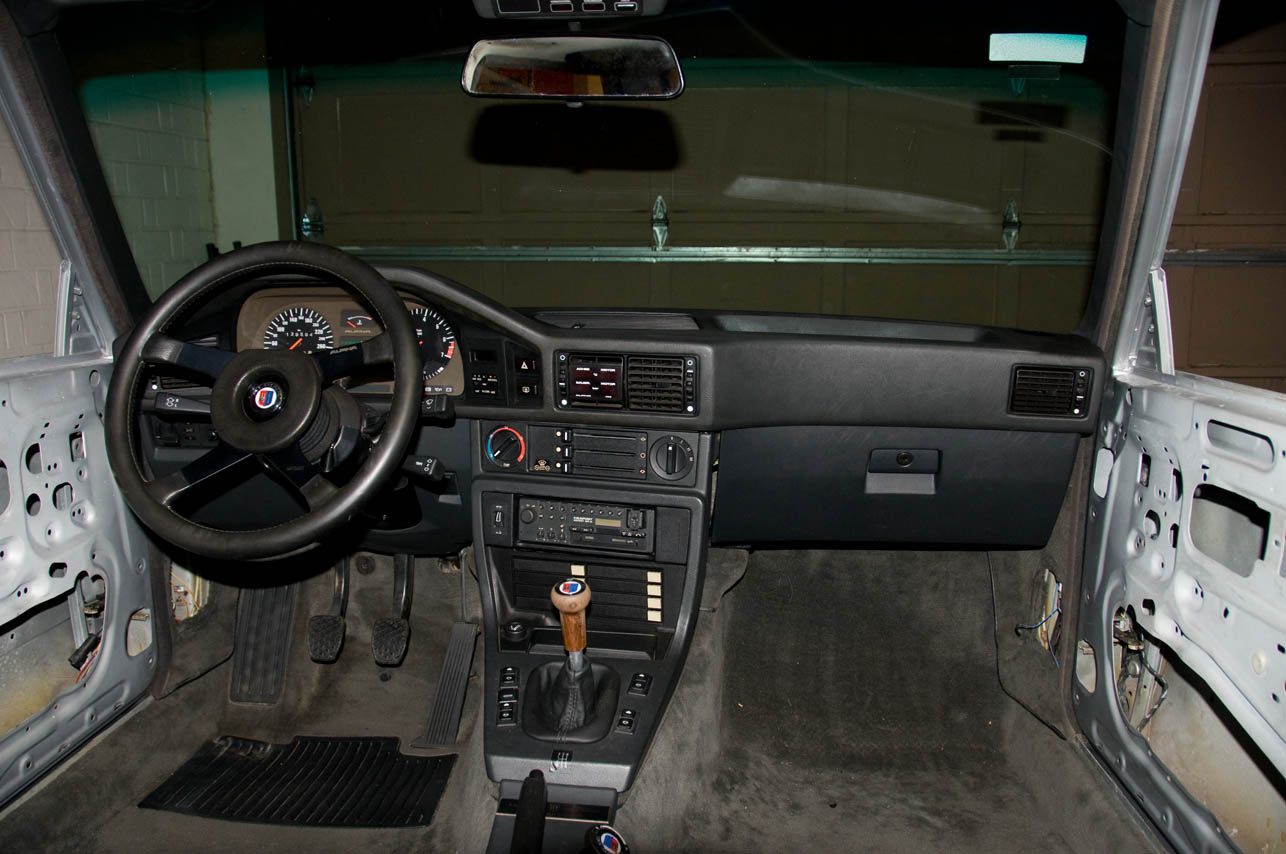
The carpet needs another thorough vacuum. All that's left for the interior is to install the visors themselves, the front seatbelts, B-pillar covers and the front seats. Then it's just sunroof and doors, which can't be done until the clips arrive for the trim atop the windows, as they must be installed before the window guides and the rear quarter windows for sure!
I could probably be working more quickly, but I'm too concerned about organization and being able to find things quickly and easily. It certainly slows things down a bit.
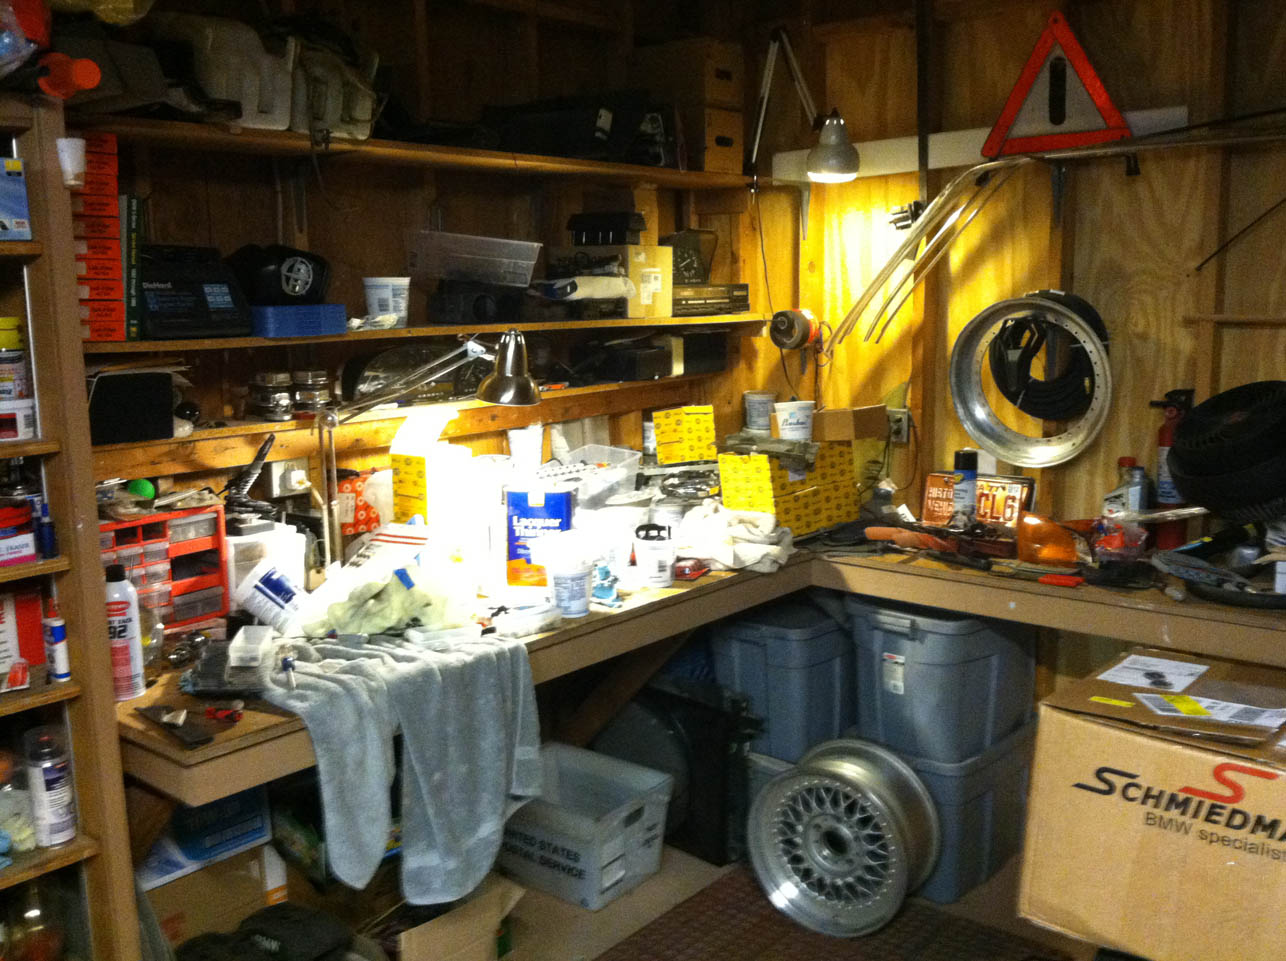
I got started pretty late today - around 2pm. I started off by running the antenna wiring. Before I did that, though, I had to separate the antenna coax cable from the power wiring, which meant unwrapping 4.5x10²³ feet of electrical tape from this ridiculously long cable. Then using adhesive cleaner to remove all of the gunk. routed the cable, installed the antenna and you apparently have an uncle named Robert.

Then it's time to give the carpet a really thorough vacuum. Battery died in the camera.
Then, I moved onto installing the parcel shelf. Before that could go in, though, the rear seatbelts must be installed. This meant making holes in my new headliner. Talk about scary - if you don't know where they go. Got that all sorted with some minor alterations and now we are ready for the shelf! Yesterday, I mounted the speakers to the parcel shelf. Fortunately, when the speakers were changed sometime over the years, they retained the Pioneer spacer dealies from the original speakers, which allowed a 6" driver to be installed without modifying the sheetmetal beheath them. These have many holes provided in them, so I was ecstatic to learn that there were four holes perfectly in line with the speed nuts for the 4x6" holes. The speaker mounts with three screws, two of which are the same ones that mount the base to the board, so that's great, too. Has to be great. Can't be not-great.
Battery charged, yo.

In the background, you can see my E12 M535i living the dream.
With that in and the headrest grommets secured (hammer and wood block just to be sure), it was time for the rear seat. I was fortunate with this car that the original upholstery was in overall excellent condition. The door panels were the only disappointing part, but merely a result of the normal shrinkage seen with BMW cloth (my car did not come with Alpina cloth on the door panels).
Rear seat is in. Photo is pre-re-cleaning. Apparently when you handle stuff, it gets dirty again.

Then I got a phone call. Using one hand, and occasionally holding the phone with my shoulder, I prepared my "new" dashboard. This involved making sure all of the vents and ducts were clean and were the original ones to the car, etc, as the dash I received had a couple of ducts and they were broken.
I was saved by a guy on a bicycle who thought I was a dealer and wanted me to find him a junk E36 M3 so he could make an electric dragster. I suggested he could accomplish his goal with a 318i or 325i but he was pretty adamant on the M3. He left. Time to install the dash.
From no dash to dash fully secured in 17 minutes. This involved installing the front door caps to make sure the dash was at the right location.

Center console is back in. Was a lot easier installing the auxiliary gauge vent system now that I know how it works. It was a bit of a struggle on removal since there is a connector of power, inputs, etc and a vacuum hose. On the bottom is where the output to the display goes. I'm very happy I have no air conditioning.

Around 7pm, I decided that I needed some dinner and the dogs definitely needed their dinner, so I took a break. I was almost ready to call it a day, but decided not to. I almost wish I had!
First task was installing the visor panel. This way I could put the a-pillar covers in and the body door frame seals. We all know what those look like, so I saw no point in photos. I trimmed the headliner to the correct opening and the sunroof deflector is back in too, as it secures the rear most edge of the vinyl. On to installing the radio.
I had been searching for over a year for the correct radio for this car. I've seen them on German eBay, but they're afraid to sell the heritage of their nation to me, an 'murican, so I was always shot down. Between that and purchasing the correct speaker covers from a UK eBayer, only to not receive them, I've had poor luck with the stereo for this car. Believe it or not, Blaupunkt made several different models of this radio and they all look the same. I was looking for the specific model, but have acquired a pretty nice collection of Montereys, and also received a shipment of one Monterey SQR 23, a Köln SQR 22, and a Köln SQR 23. The latter, being the correct one, after all this time.
I knew all of my stereo wiring worked. I tested it with a known good stock BMW radio. Time to plug in the correct one. Nothing. No power. Come to find out exactly ZERO of the three radios I received work at all. No power. Nothing. One had a blown fuse and one had no fuse, but I had known good fuses I swapped in. No dice. I then decided to just put a Monterey in for now. Four Montereys later and I have one that works, doesn't smell like an ashtray but lacks a tape deck. Oh well. It's easy enough to change, I guess.
Fed up with that process and installing my nemesis on the left side of the dash, I decided to call it quits for tonight.

The carpet needs another thorough vacuum. All that's left for the interior is to install the visors themselves, the front seatbelts, B-pillar covers and the front seats. Then it's just sunroof and doors, which can't be done until the clips arrive for the trim atop the windows, as they must be installed before the window guides and the rear quarter windows for sure!
I could probably be working more quickly, but I'm too concerned about organization and being able to find things quickly and easily. It certainly slows things down a bit.

-
Das_Prachtstrasse
- Posts: 5616
- Joined: Sep 10, 2006 7:06 AM
- Location: Melbourne, Doooown Under
wkohler wrote:In the background, you can see my E12 M535i living the dream.
I'm surprised you went with those parcel shelf speakers given the apparent originality of the rest of the car. Would not have been my personal choice, but then again it's not my car, is it?
What are the vents in the bulkhead below the rear seat? Are they too speaker points, or perhaps outlets for the optional under seat fuel burning heater? Your project really is coming up tremendously, I'll be sure to pay you a visit (welcome or unwelcome) on my next trip up North.
The speakers are what the car came with. It took me a whole year to find them and I am trying to make the car as close to original as I can. The build sheet is posted in the very first post of the thread. You will see that the rear speakers are Pioneer TS-167s and the fronts are Pioneer TS-465s. I have not been able to find a pair of the 465s - or even the grilles (well, I did, but I was ripped off), so for now, I'm going to put the 4x6s that came with the car behind stock BMW grilles.
The grilles under the rear seat are for the auxiliary heater. When replacing the fuel lines, I did not leave it in the system, so it will be non-functional and therefore safer.
The grilles under the rear seat are for the auxiliary heater. When replacing the fuel lines, I did not leave it in the system, so it will be non-functional and therefore safer.
-
Das_Prachtstrasse
- Posts: 5616
- Joined: Sep 10, 2006 7:06 AM
- Location: Melbourne, Doooown Under
That's very interesting to note. I was not aware that Alpina did such things. Ill have a look around locally for some speakers to complete it. Good call on the heater, I never trusted the idea of having a fuel burning device under the rear seat.wkohler wrote:The speakers are what the car came with. It took me a whole year to find them and I am trying to make the car as close to original as I can. The build sheet is posted in the very first post of the thread. You will see that the rear speakers are Pioneer TS-167s and the fronts are Pioneer TS-465s. I have not been able to find a pair of the 465s - or even the grilles (well, I did, but I was ripped off), so for now, I'm going to put the 4x6s that came with the car behind stock BMW grilles.
The grilles under the rear seat are for the auxiliary heater. When replacing the fuel lines, I did not leave it in the system, so it will be non-functional and therefore safer.
Chris... my grill badge was angled the same as yours, and, I too had a number of people say that it may be wrong and might look better horizontal. I also verify through photos that the angled mount of the B7 TURBO badge is correct (even though, IMO, it looks kinda weird). I choose to change mine and mount it horizontally (easy to reverse). So leaving it as original is cool!wkohler wrote:Thanks all. It's not 100% finished up front. Some stuff has to come back apart to change all the washer hose and replace a few fasteners. It's nice to have something to look at when I open the garage door.
Sure, I might have the only B7 Turbo in North America with the badge on the grille like that, but so far as I can figure, it's the correct way - at least for my car, as I understand it's angle varied. Either way, I think it's neat like that and it was that way when the car came to me. I didn't notice any signs of it having been removed and repositioned or the grille having been changed.Das_Prachtstraße wrote:Looks excellent, Chris.
Are you leaving the grille badge crooked?
Tammer - I plan on re-shooting that last photo. It wasn't apparent at the time, being more of a hmmm, this is interesting kinda deal, so I didn't give it much thought but it's the first thing you notice in the photo.
BTW... great job... everything looks fantastic!
-RoyW
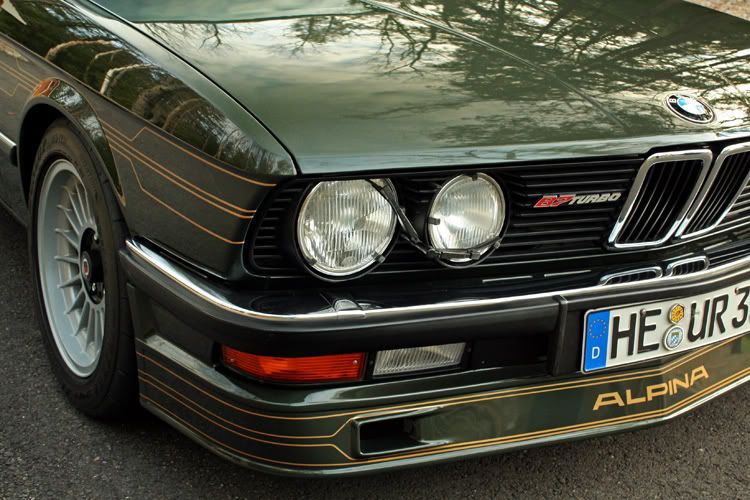
Fantastic work! 
Looks like the grill badge was sometimes horizontal, according to Alpina's website:
http://www.alpina-automobiles.com/en/mo ... s/e28.html
Looks like the grill badge was sometimes horizontal, according to Alpina's website:
http://www.alpina-automobiles.com/en/mo ... s/e28.html


