Page 16 of 24
Re: Noob M30B35 Build. 2014-06-28: Engine is in!!!
Posted: Jun 30, 2014 3:15 AM
by tig
kzolee wrote:cek wrote:
Who else has done the B35/E32/E34 housing? Do you have instructions and pictures that show how you made it fit? Does it ACTUALLY fit (I'm super skeptical).
It fits, I did it also.
Here's some information:
http://www.mye28.com/viewtopic.php?t=101481
That thread was spectacularly un-helpful. Thanks for confirming that it fits.
You have an 87 535is with a fuel cooler? It fits there? What did you have to modify to make it fit and be secure?
Re: Noob M30B35 Build. 2014-06-28: Engine is in!!!
Posted: Jun 30, 2014 3:58 AM
by kzolee
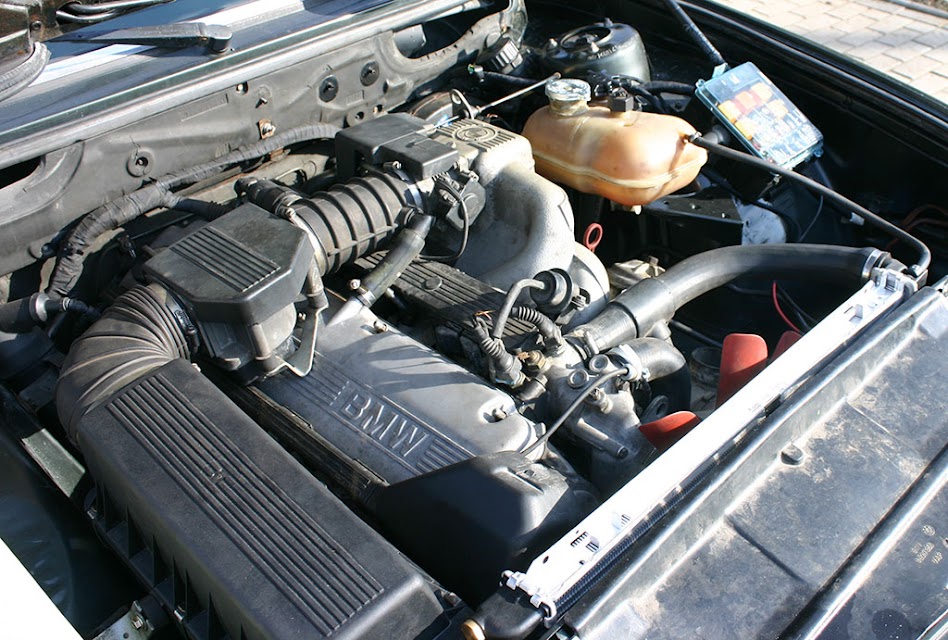
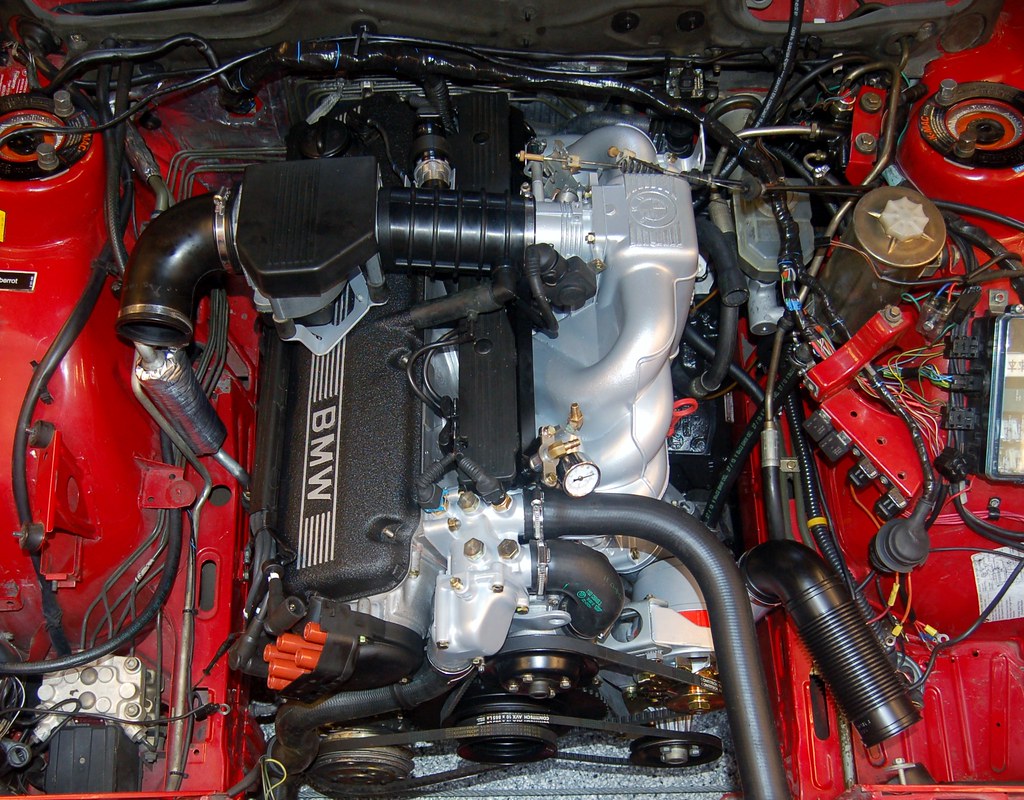
A photo of my installaion of the B32 airbox:
cek wrote:kzolee wrote:cek wrote:Coil.
The B35 coil is different than the B34 coil and the B35 plugs want you to mount it near the firewall.
It is different, but functionally the same. You can use the B34 coil on its original location.
Not if you want to use the B35 spark plug harness, unmodified.
Yes, with B35 harness you need to relocate.
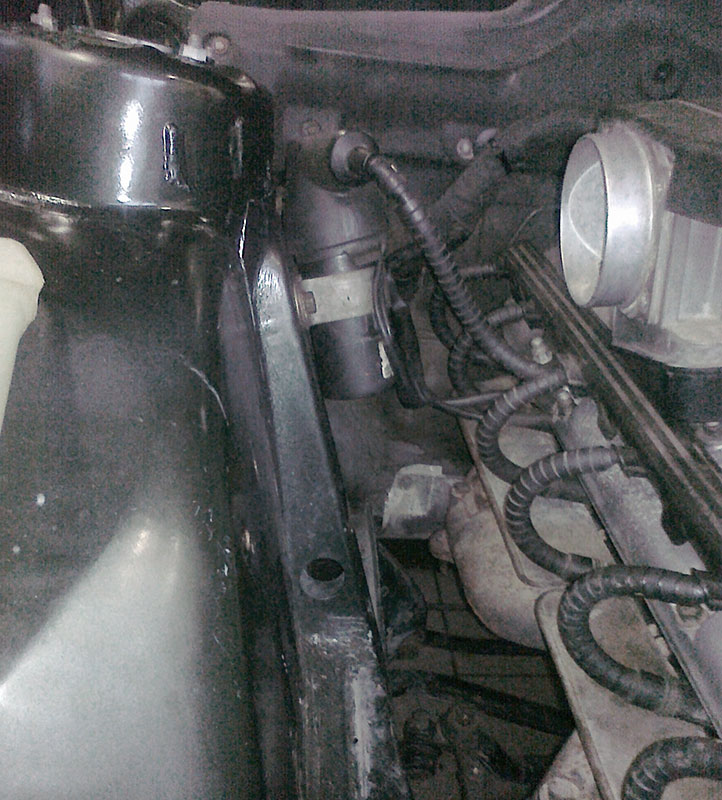
I have crappy cell phone pic of my solution:
Re: Noob M30B35 Build. 2014-06-28: Engine is in!!!
Posted: Jun 30, 2014 4:04 AM
by kzolee
cek wrote:
That thread was spectacularly un-helpful. Thanks for confirming that it fits.
You have an 87 535is with a fuel cooler? It fits there? What did you have to modify to make it fit and be secure?
My car was originally an M20 car, with no options (No ABS, A/C....) There is no fuel cooling.
Re: Noob M30B35 Build. 2014-06-28: Engine is in!!!
Posted: Jun 30, 2014 5:58 AM
by Das_Prachtstrasse
I just realized I never got back to you in regards to the airbox, so here's a few pics of how I did it in my car. Apologies for the poor lighting, I need to replace the fluro's in the garage. I should also make it noted that this install was only ever intended to be temporary until I installed the new engine with the ITB's, so the quality of the bracketry and the fitment in general isn't something I'm proud of, but could be improved easily with a little intuition. Apologies also for the appalling state my engine bay is in at the moment. Hasn't received any love for a long time.
Anyway, I made a simple bracket to mount to the side of the box using the factory rubber at the top, and mounted to the OEM coil location on the bottom. The underside of the box sits on another small T shaped bracket which mounts to the frame rail through a small hole that's otherwise unused from the factory stamping. I can remove the airbox and take a picture of that if you need. The bellmouth sits nicely just below the RH high beam, and has a decent flow of air from behind the headlights. If it were a more permanent install, I'd have included a small plastic guide to direct the air from behind the kidney's. The first three plug wires are no problem provided you wrap them in cloth tape, or some of that curly hard plastic stuff you find on home appliance cords otherwise they will eventually chafe on the airbox heat shield, as it IS a tight fit. I also put a small piece of adhesive loop sided velcro on the body to prevent the aft airbox clip from chafing the paint, due basically to laziness. It doesn't touch the body as it sits, and would clear easily if Id made the lower bracket a few mm taller but I didn't care enough to properly amend it.
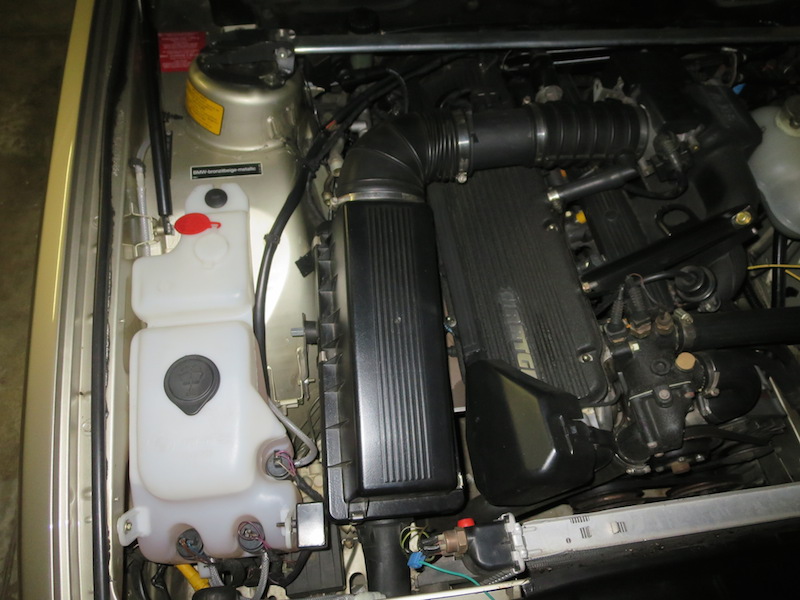
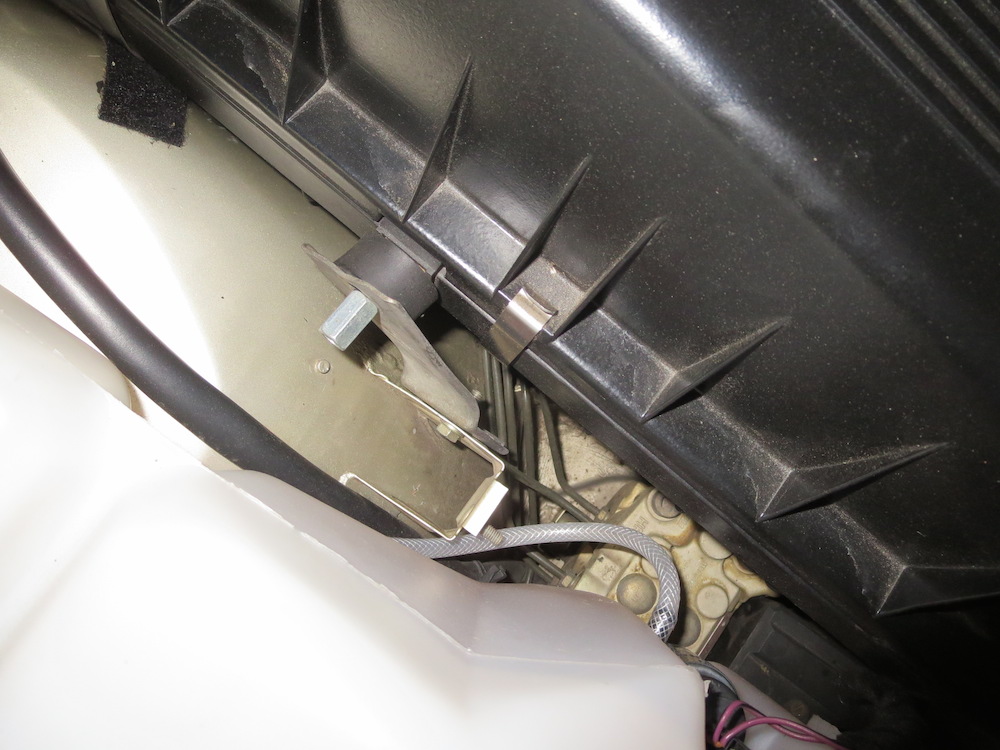
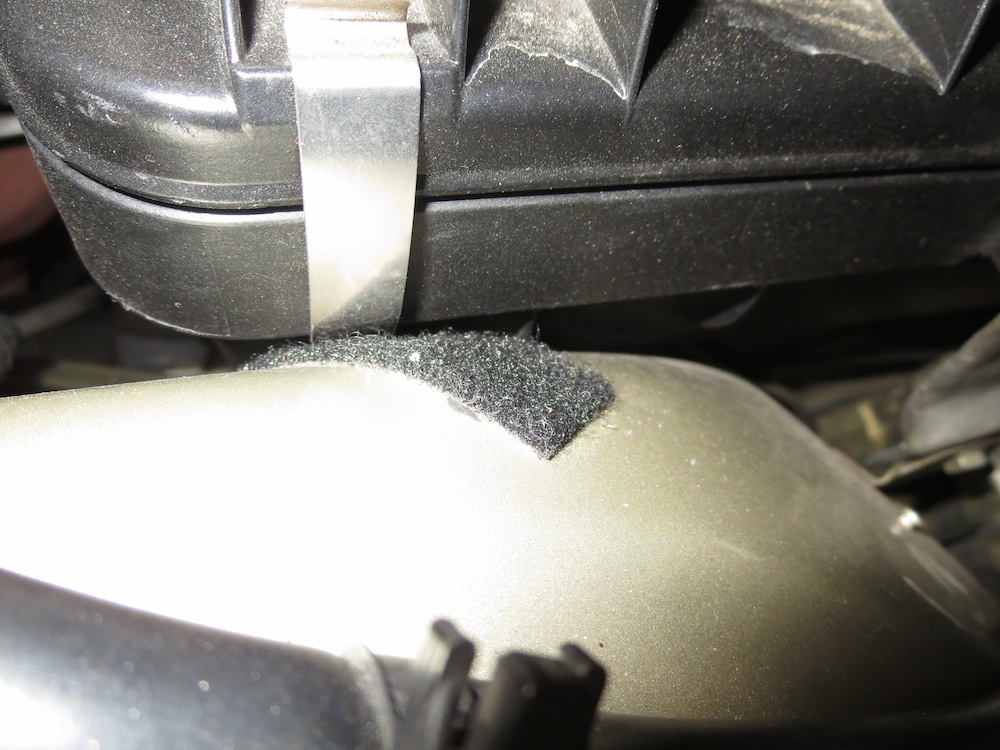
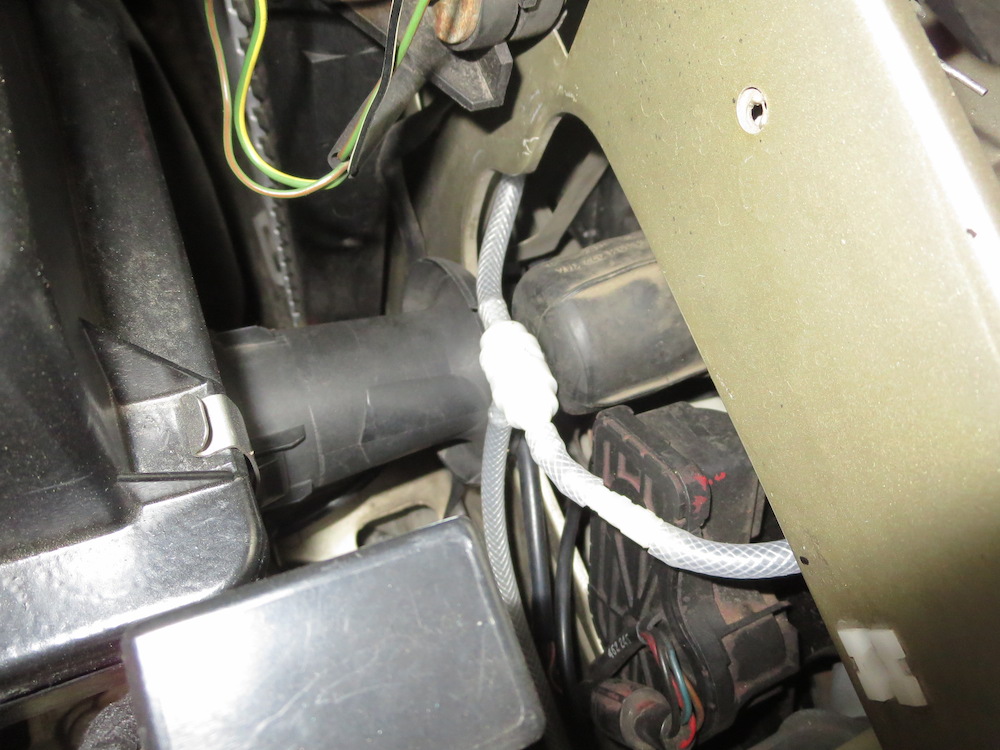
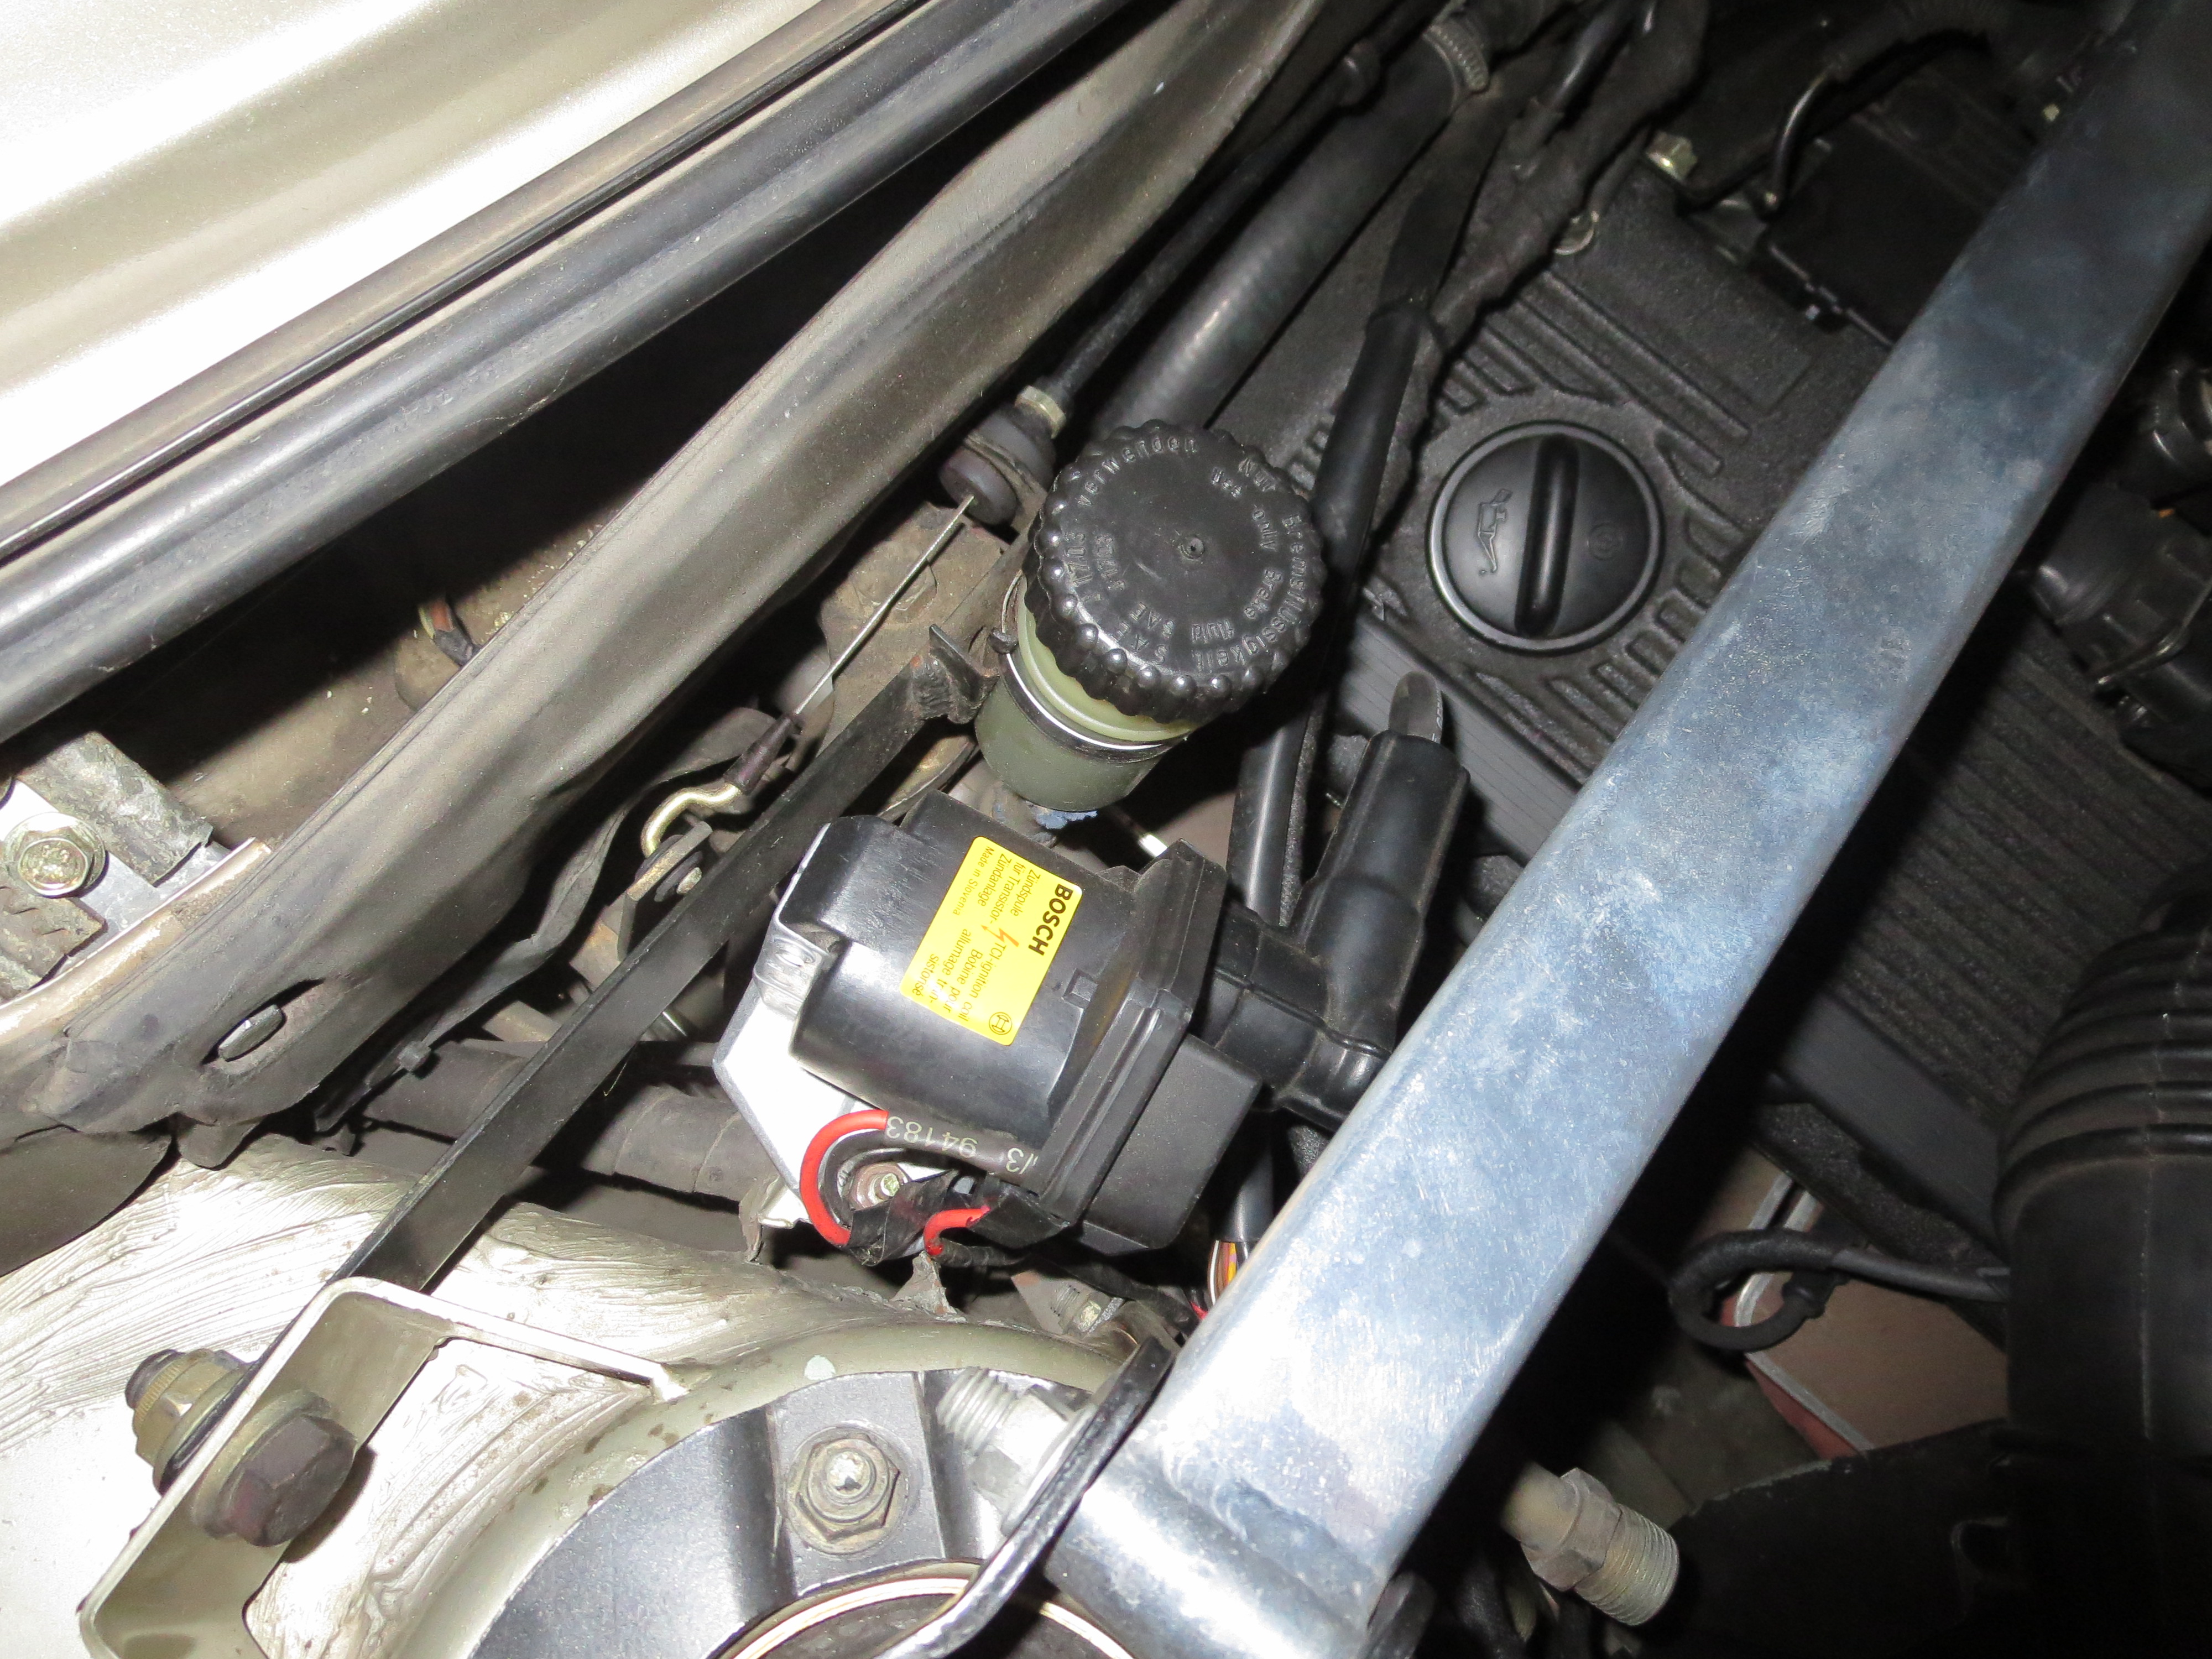
I also mounted my B35 coil to the factory bracket left behind after the M20 coolant tank removal. Works nicely, and isn't too close to the exhaust manifold however I'm guessing you wont have this bracket.
Re: Noob M30B35 Build. 2014-06-28: Engine is in!!!
Posted: Jun 30, 2014 11:55 AM
by tig
Bob, you are a scholar and a gentleman. Thanks a ton for these pics and description. Immensely helpful.
So you didn't have to butcher the OE brackets on the fender that hold the B34 airbox? They look to be in the way on my car.
Re: Noob M30B35 Build. 2014-06-28: Engine is in!!!
Posted: Jun 30, 2014 11:56 AM
by tig
kzolee wrote:A photo of my installaion of the B32 airbox:
It looks like, in your install, the airbox is farther away from the front part of the valve cover than Bob's. Can you explain?
Re: Noob M30B35 Build. 2014-06-23: I beat the wiring harness
Posted: Jun 30, 2014 12:17 PM
by tn535i
cek wrote:I don't know what runout is or how to measure it. Bentley's lists a "Clutch disc runout" but doesn't show where you measure it. Please advise. Thanks.
https://www.google.com/search?q=magneti ... B480%3B360
You need something like one of these kits and an innexpensive import works fine. I think mine came from Enco. The mag base goes on the block and you adjust the arms so the lever or stem runs perpendicular to the friction surface. Rotate the flywheel looking for changes. It would have been easier still out of the car but too late. These things are also ideal for checking hubs and rotors btw.
Bentley says maxiam axial runout is .1mm (.004") at outer diameter. Personally I would try to get it to 1/2 or less since whenever I've measured one before removing it is almost undetectable runout.
Also a quote from Bentley says "If the flange height has been reduced to zero clearance during machining, the flange surface of the flywheel must machined until some clearance exists. See figure 5-6. BMW does not list the specification for this flange height." I guess we need someone to measure a new flywheel to give guidance. I would try to replicate the flange height of a new flywheel.
Bentley also says the minimum flywheel thickness for a 535 is 26.5mm (1.043") and I think yours is now much thinner than this. What does that mean? My guess is too thin results in hot spots and warping. This is another reason to avoid the way that flywheel is machined as I think hot spots develop in the areas of less mass, every 60'.
But I really don't know from experience what happens.
Re: Noob M30B35 Build. 2014-06-28: Engine is in!!!
Posted: Jun 30, 2014 12:39 PM
by kzolee
cek wrote:kzolee wrote:A photo of my installaion of the B32 airbox:
It looks like, in your install, the airbox is farther away from the front part of the valve cover than Bob's. Can you explain?
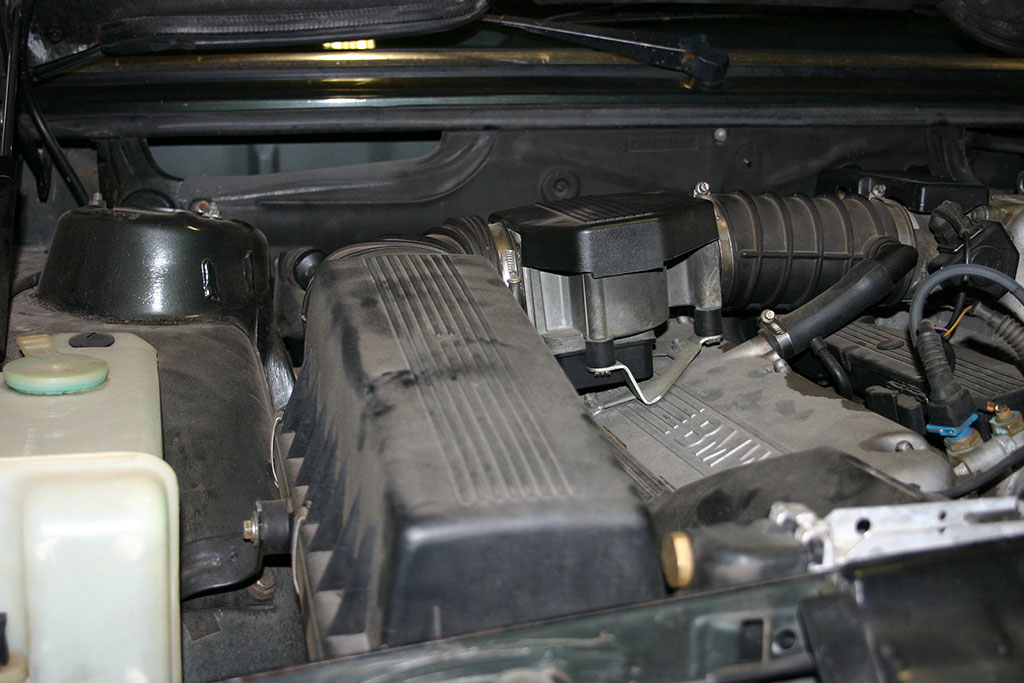
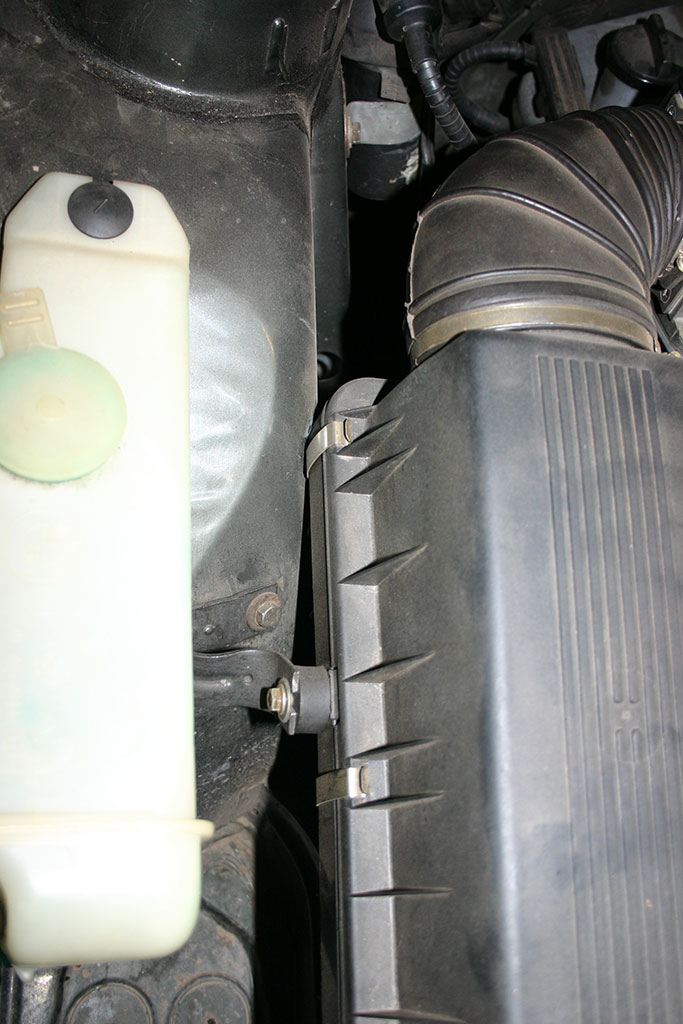
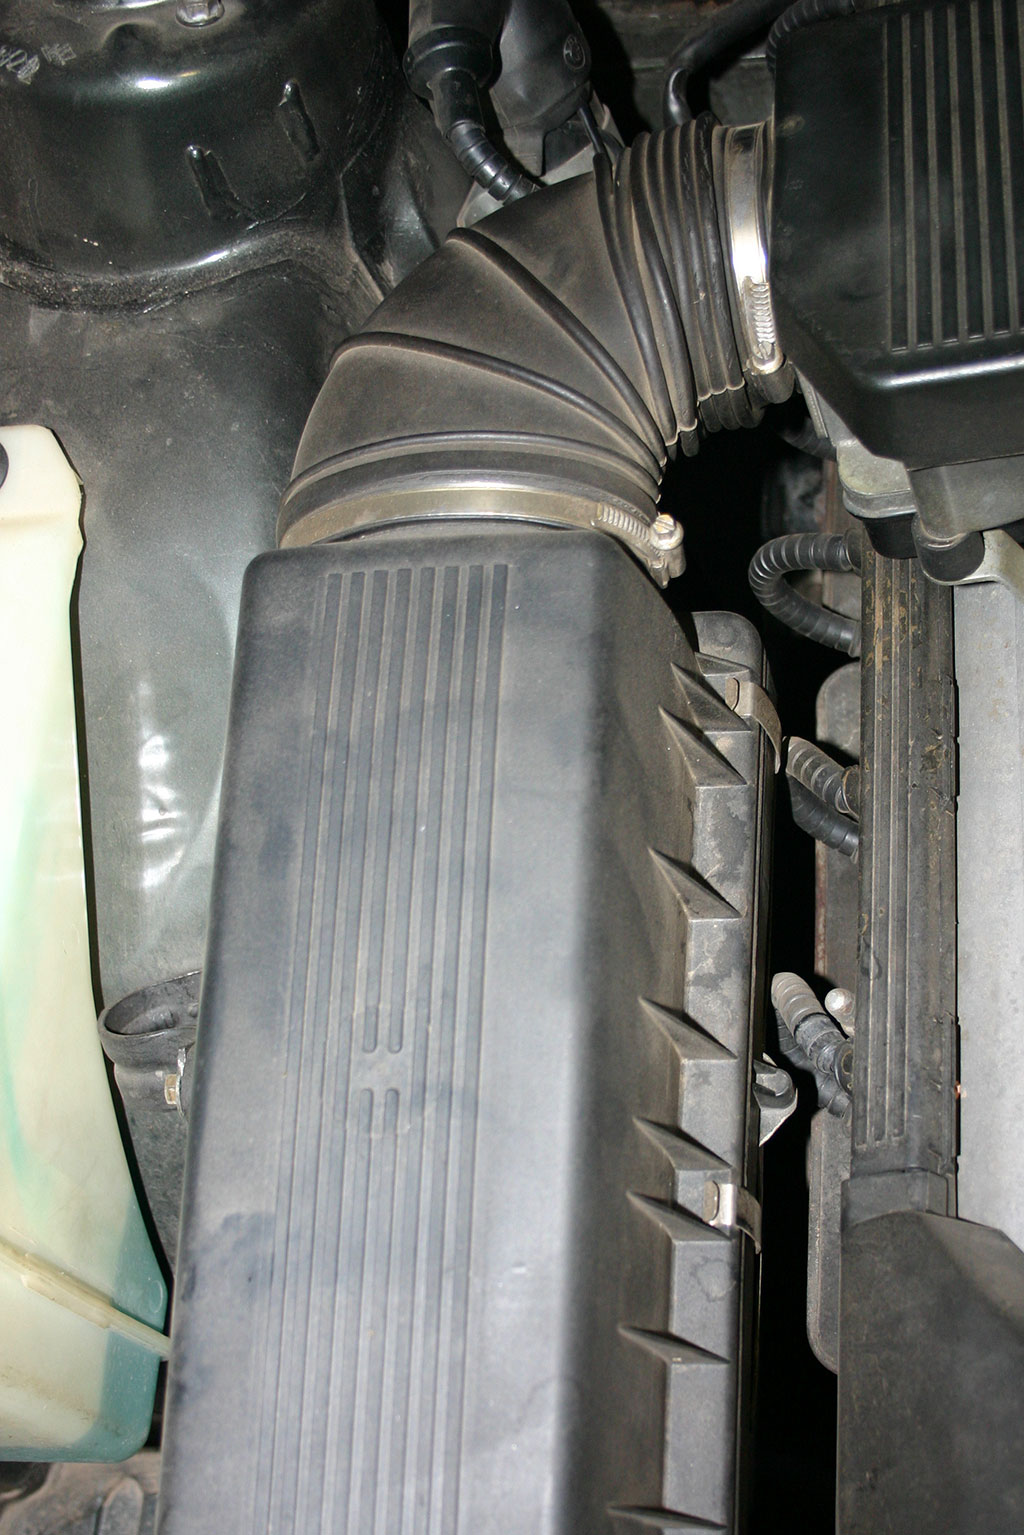
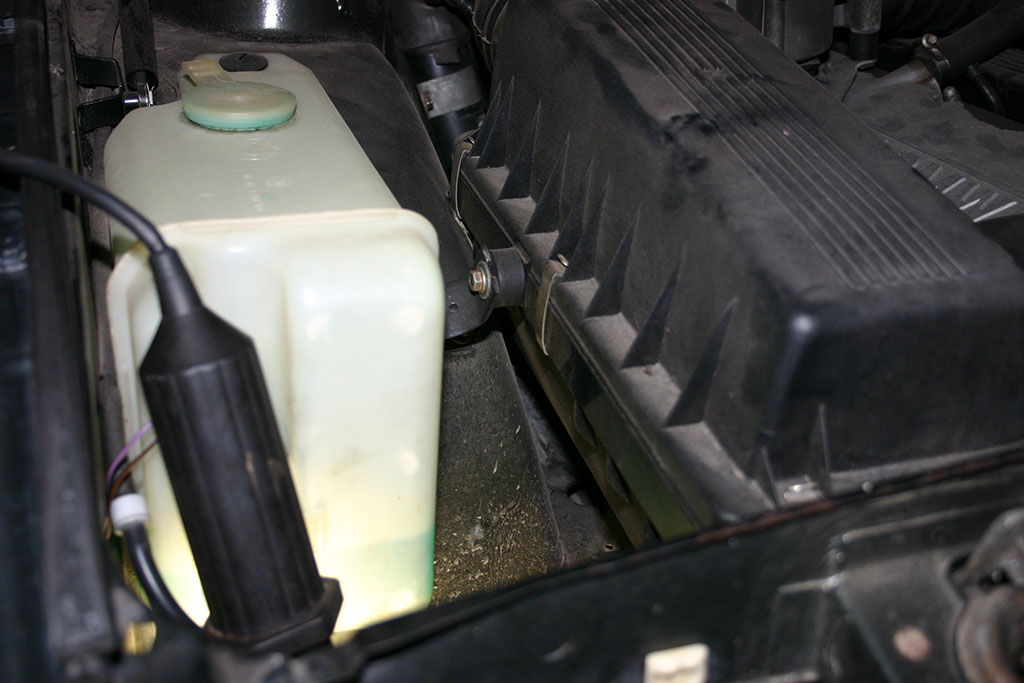
Bob has a MAF, and his airbox is positioned in a little different angle.
But both our cars were M20 originally, so we had a bit easiest job...
I took some photos for You of the current position. As Bob, I have also a temporary bracket. I have also put a piece of adhesive under the airbox.
Re: Noob M30B35 Build. 2014-06-28: Engine is in!!!
Posted: Jun 30, 2014 7:11 PM
by Das_Prachtstrasse
I've got the airbox positioned closer to the valve cover due to the extensive washer bottle relay preventing it from moving across further, as you can see if you look closely. With the old regular washer bottle in there, it was a much better fit with the bell mouth positioned nicely between the two headlights, and a fair bit more room between the plug wires, as per kzolee's pic. Again, if I'd intended on the fitment being permanent, I'd have relocated the headlight washer relay to allow a little more room.
Re: Noob M30B35 Build. 2014-06-28: Engine is in!!!
Posted: Jul 01, 2014 11:17 AM
by tig
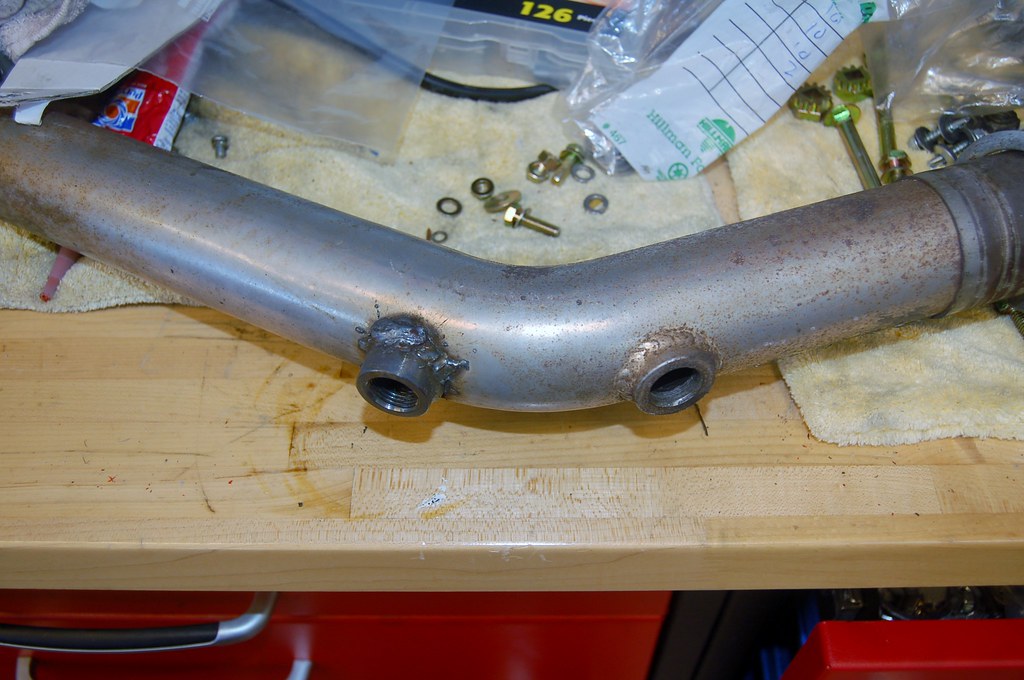
So that I can more easily play with my wideband gauge(s) I welded in an extra O2 sensor bung.
Re: Noob M30B35 Build. 2014-06-28: Engine is in!!!
Posted: Jul 01, 2014 2:21 PM
by BuzzBomb
cek wrote:So that I can more easily play with my wideband gauge(s) I welded in an extra O2 sensor bung.

Before you continue, test fit an 02 sensor into your new bung, and make sure the probe reaches fully into the exhaust stream. A drivability problem was recently solved because of a bung that was too tall, keeping the 02 sensor from correctly interpreting the exhaust gasses. I know it sounds crazy, but I wouldn't believe it either if I didn't see it for myself.
Re: Noob M30B35 Build. 2014-06-28: Engine is in!!!
Posted: Jul 01, 2014 4:59 PM
by tig
Will do. Thanks!
Re: Noob M30B35 Build. 2014-06-28: Engine is in!!!
Posted: Jul 04, 2014 10:44 AM
by tig
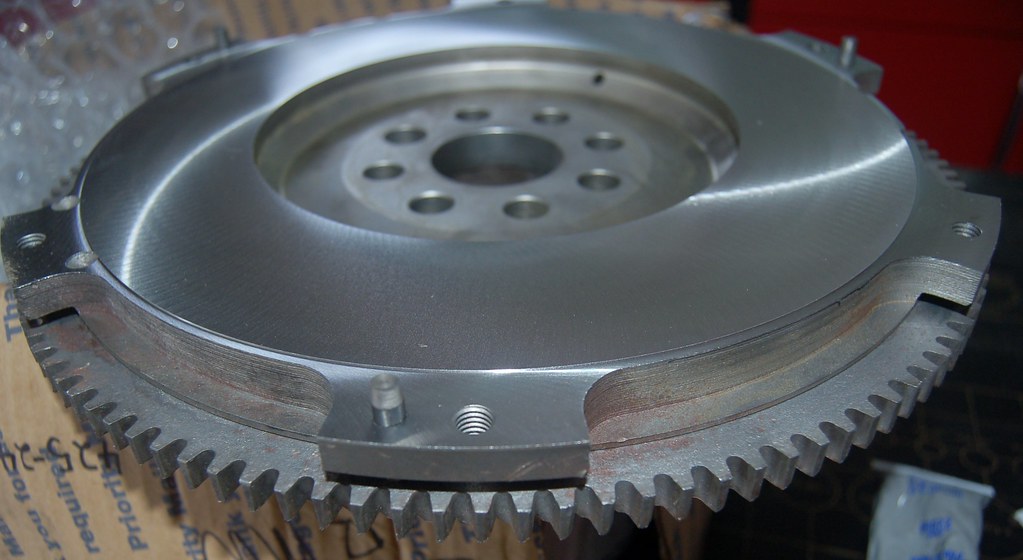
I took Vlad's old flywheel and the lightened one back to my machinist. He analyzed them and recommended milling the step in the lightened one. Picked it up yesterday.
The list:
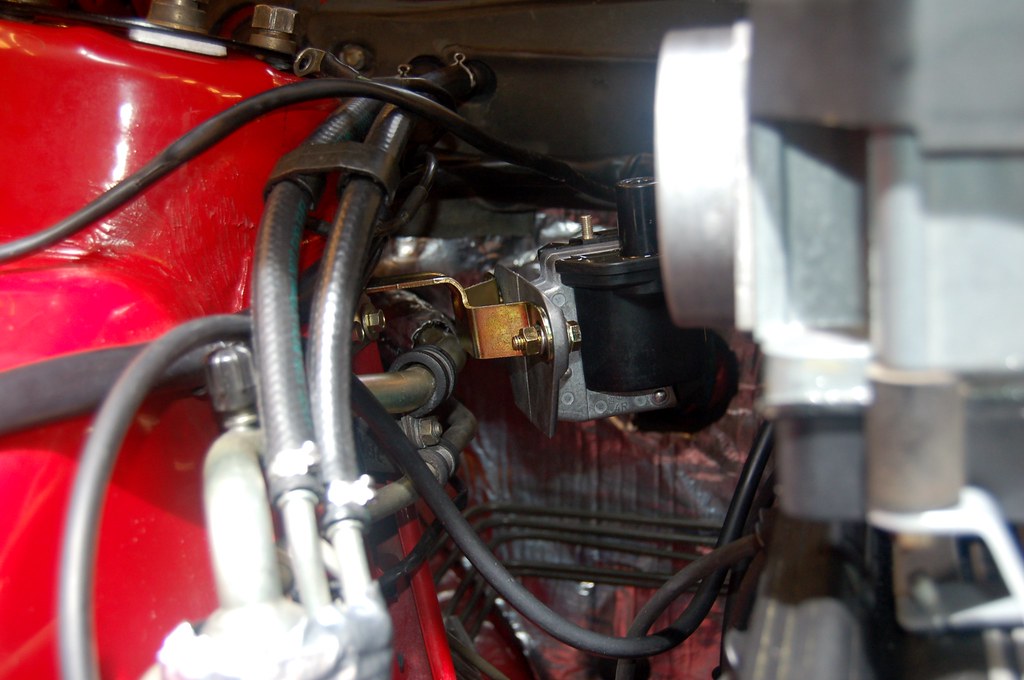
- Mount the B35 coil.
- Put new wiper tank in and connect.
- Put new coolant overflow tank in and connect.
- Tighten belts.
- Put radiator back in.
- Drop in the new in-tank fuel pump.
- Final attach AFR.
- Reattach strut bar.
- Attach fuel hose from tank to rail.
- Install short-shift kit.
- Install lightened & balanced flywheel and new clutch.
- Install transmission.
- Install rebuilt driveshaft.
- Attach headers.
- Reinstall exhaust. (once the car is drivable I'm taking it into a shop and having the exhaust rebuilt)
- Fill fluids. Bleed brakes, PS, clutch.
- Install plugs.
- Put air filter housing in.
- Remember to tighten steering column nut (I have a piece of tape on the dashboard where I wrote "don't forget steering nut!").
- Cross fingers and start it up. 20 minutes, then re-torque head bolts.
I've lost a ton of sleep worrying about what happens if it doesn't start...
Re: Noob M30B35 Build. 2014-07-04: Will it start this weeken
Posted: Jul 04, 2014 11:19 AM
by kzolee
21. Have a beer.

Looks like a tight weekend program, good luck!
Re: Noob M30B35 Build. 2014-06-28: Engine is in!!!
Posted: Jul 04, 2014 12:26 PM
by tig
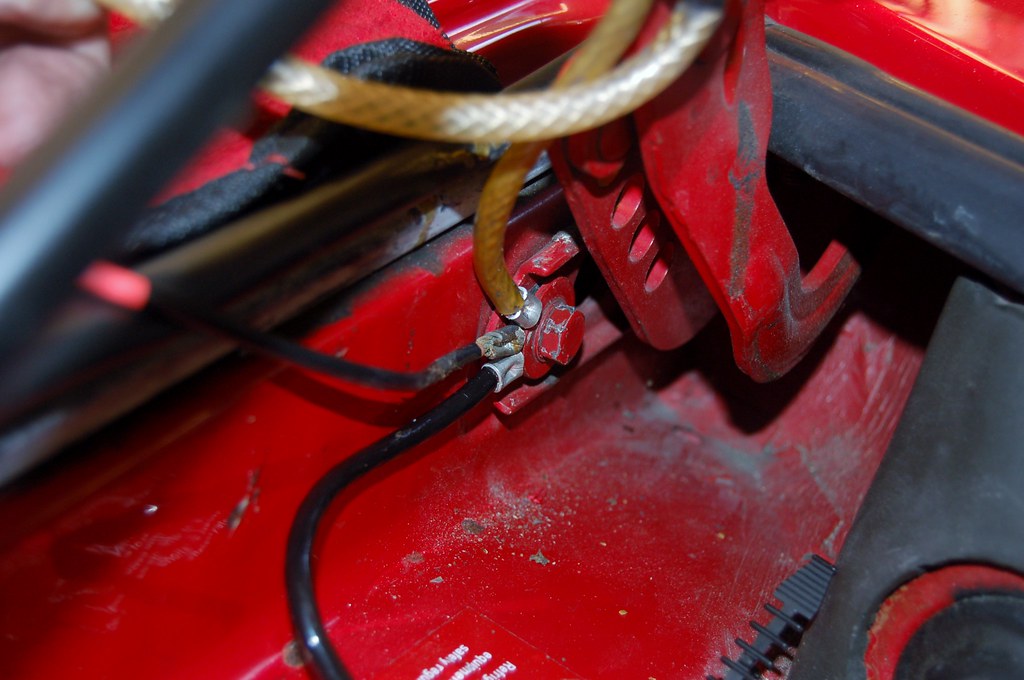
The wire for ground point from the hood to the body at the RHS hinge was just about to break.
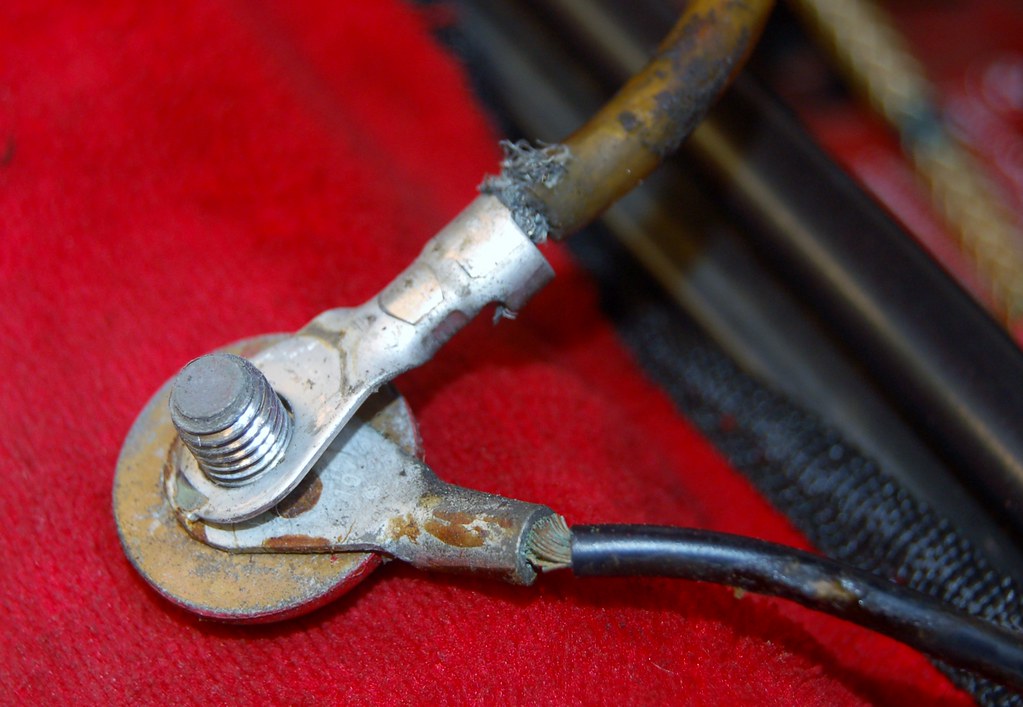
I bought new connectors and fixed it. I wired the harness ground wires to a nut/bolt that then goes to the 2nd black 8ga wire you see in this photo providing grounding for the hanress.
Coil installation.
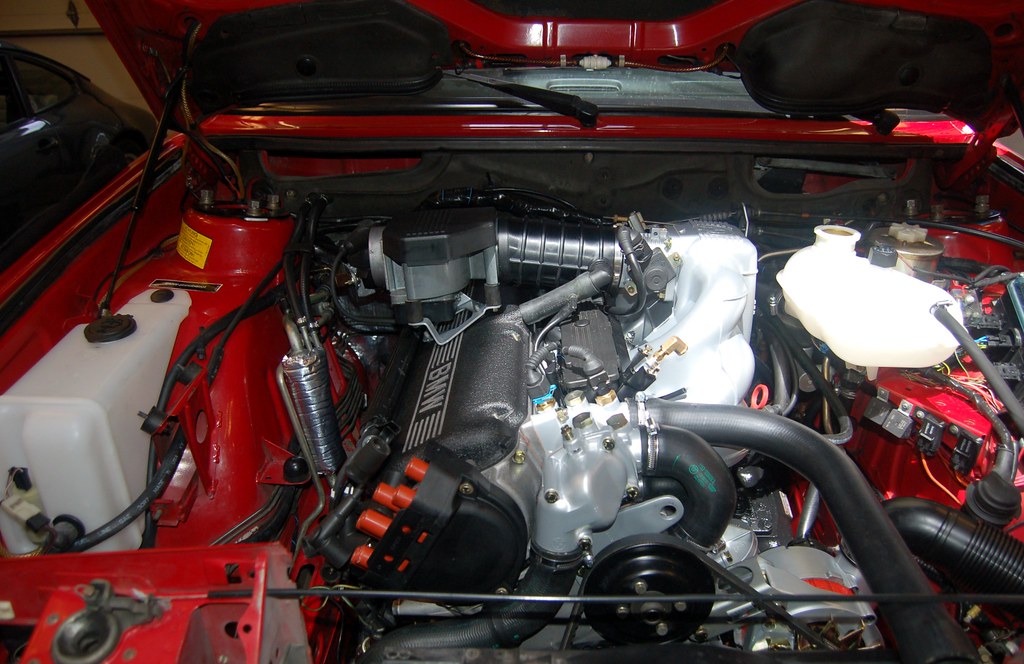
I can't find my coolant overflow tank cap. I have a basically new one here somewhere...
The list:
- Mount the B35 coil (DONE).
- Put new coolant overflow tank in and connect (DONE).
- Tighten belts (DONE).
- Attach fuel hose from tank to rail (DONE).
- Connect new grounds for wiring harness on RHS (DONE).
- Put new wiper tank in and connect (DONE).
- B35 bellhousing has hole w/ plastic cap. Plastic cap wants to fall out. Buy cap at Ace hardware that fits! (DONE)
- Put radiator back in.
- Drop in the new in-tank fuel pump.
- Final attach AFR (waiting for the UPS man for some brass fittings).
- Reattach strut bar.
- Install short-shift kit.
- Install lightened & balanced flywheel and new clutch.
- Install rebuilt driveshaft.
- Attach headers.
- Reinstall exhaust. (once the car is drivable I'm taking it into a shop and having the exhaust rebuilt)
- Fill fluids. Bleed brakes, PS, clutch.
- Install plugs.
- Put air filter housing in.
- Remember to tighten steering column nut (I have a piece of tape on the dashboard where I wrote "don't forget steering nut!").
- Cross fingers and start it up. 20 minutes, then re-torque head bolts.
- Have beer.
Re: Noob M30B35 Build. 2014-07-04: Will it start this weeken
Posted: Jul 04, 2014 5:35 PM
by tig
Just realized I'm missing the cable that goes from the (+) battery terminal to the starter.
Oops.
Now where did I put it?
Re: Noob M30B35 Build. 2014-07-04: Will it start this weeken
Posted: Jul 04, 2014 5:47 PM
by tig
Right where I left it...attached to the old motor.
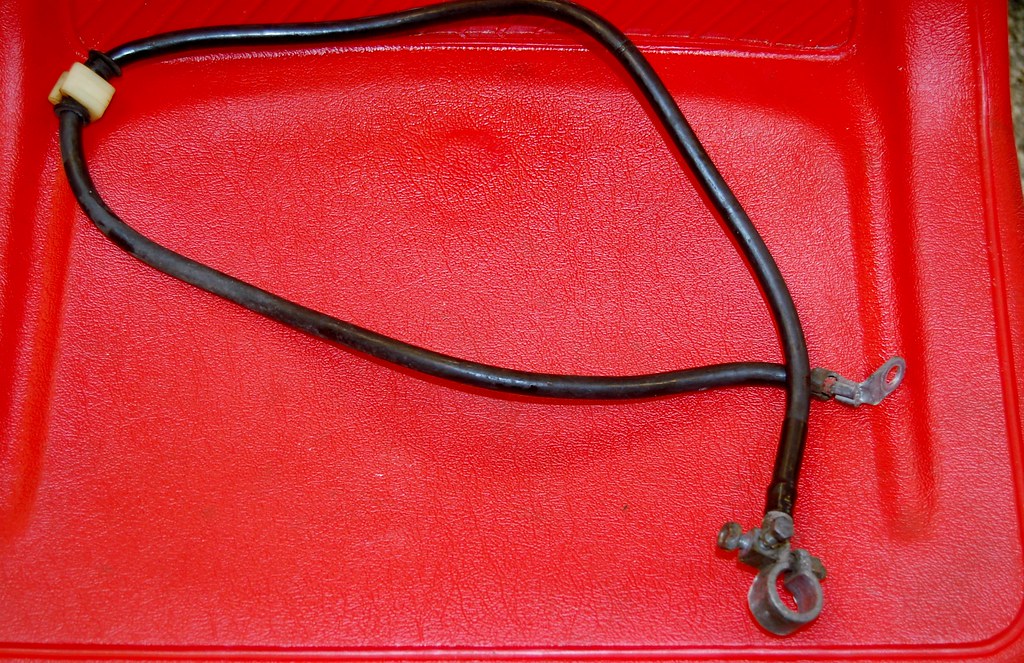
I hate the terminal on this thing. With all the wires that need to connect to the battery, it's just a mess. I may try to see what the auto-parts store has with one of those newfangled terminals...
Re: Noob M30B35 Build. 2014-07-04: Will it start this weeken
Posted: Jul 05, 2014 7:55 PM
by tig
This morning was all about the transmission.
My son was supposed to help me, but he got invited up to some shindig on an island and left early this morning. Good thing he left two of his buddies at our house. They helped me get the transmission on the transmission jack. My back is not capable.
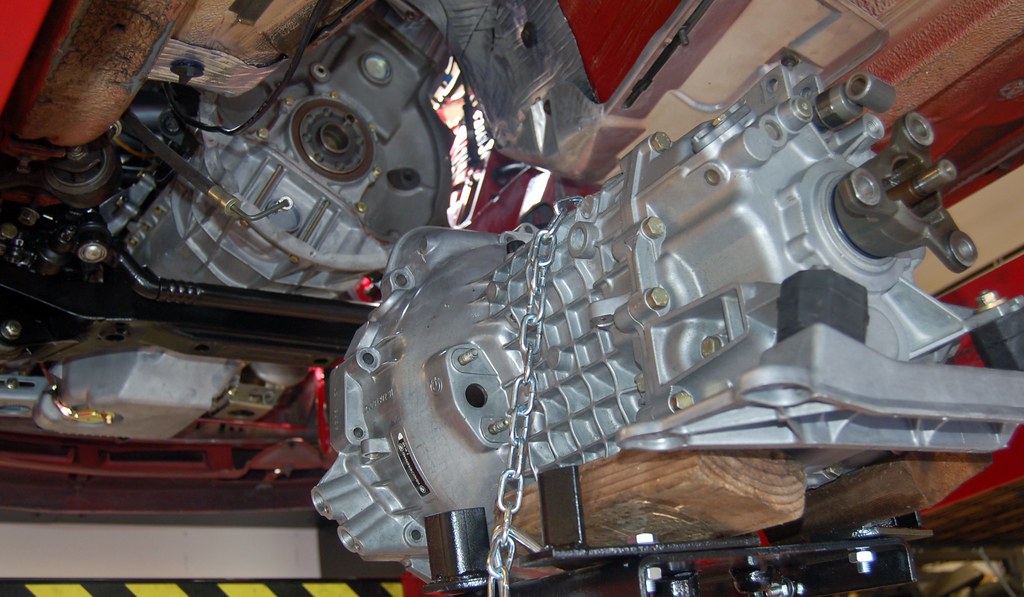
They also helped me test fit the transmission to ensure I could get to all the bolts with the socket extensions I have on hand. I can.
I'd never installed a clutch or transmission before so I took my time double checking everything (and Bentley's). Those of you who are master-class probably could do what I did in about 20 minutes, but it took me about half a day.
Got the short-shift kit assembled.
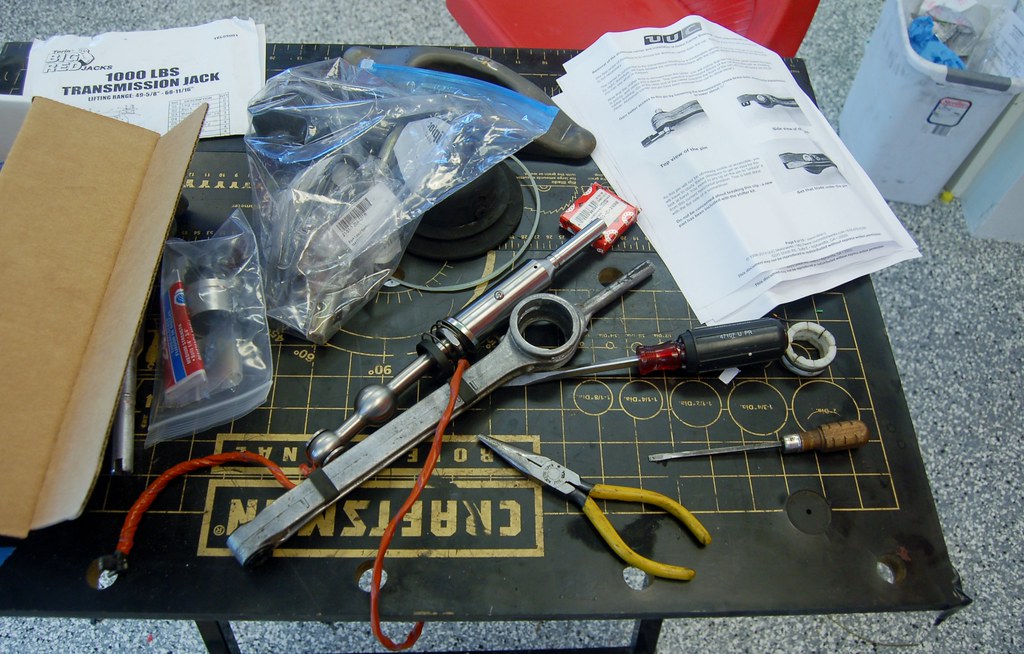
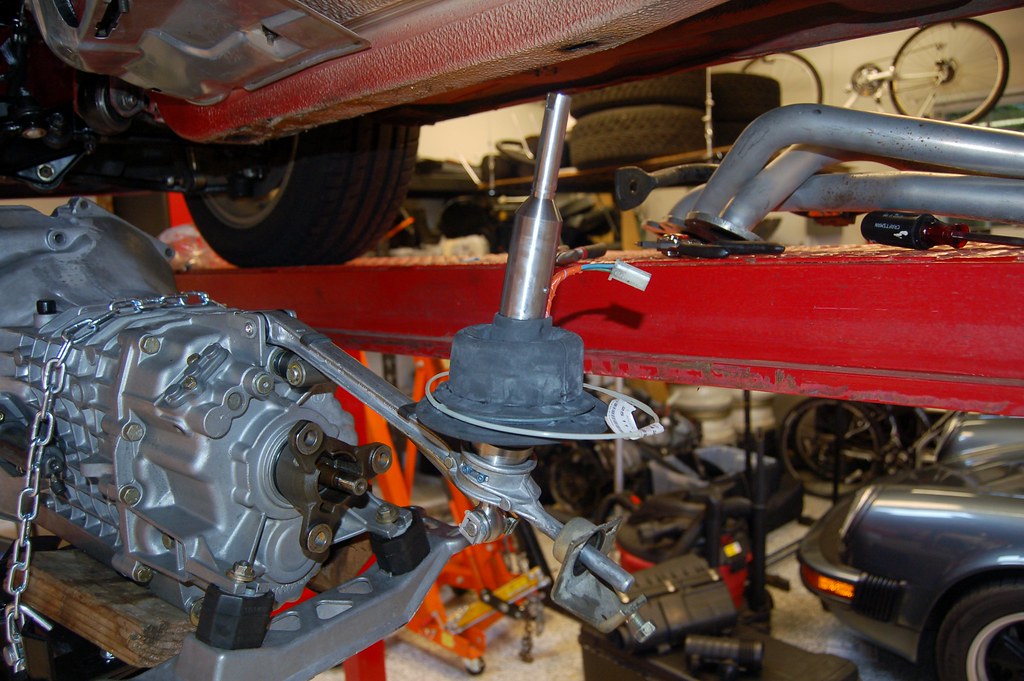
Doing it was a bit of 2 step forward 1 back. Notice in the pic of the transmission above the direction the long side of the shift-rod bushing is pointing? That's backwards. The guy who replaced the seals on the transmission put it on backwards. I couldn't figure out why the shift-rod wouldn't fit right. I looked at my old photos and saw the thing pointed the other way and the shift-rod went on the right. I then figured out how to get the bushing off (remove the ring that covers the pin, push the pin out).
I also had trouble with the UUC bushings for the shift lever end of the rod. They wouldn't fit (I'm glad I took my time and did a test fitting; it would have sucked to discover this later). A little emory paper on the end was all it took.
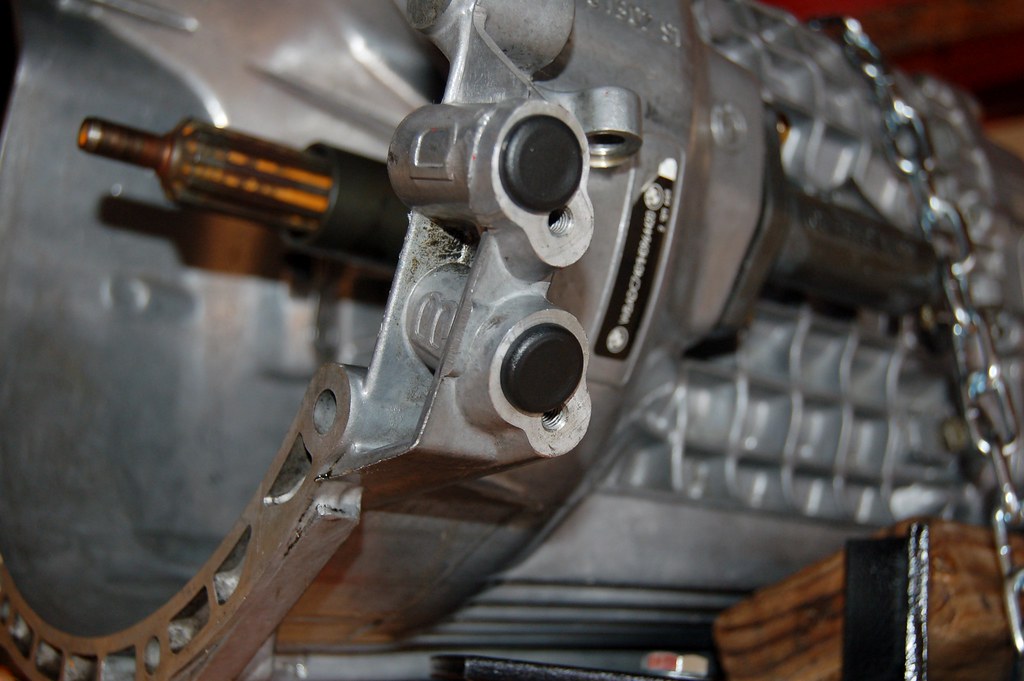
The B34 has two flywheel reference sensors that attach to the tranny. The B35 does not. I didn't like having those holes uncovered so I went to Ace hardware and bought a collection of caps that might fit. The rubber stoppers would have worked no matter what, but they would have felt ghetto so I was hoping...
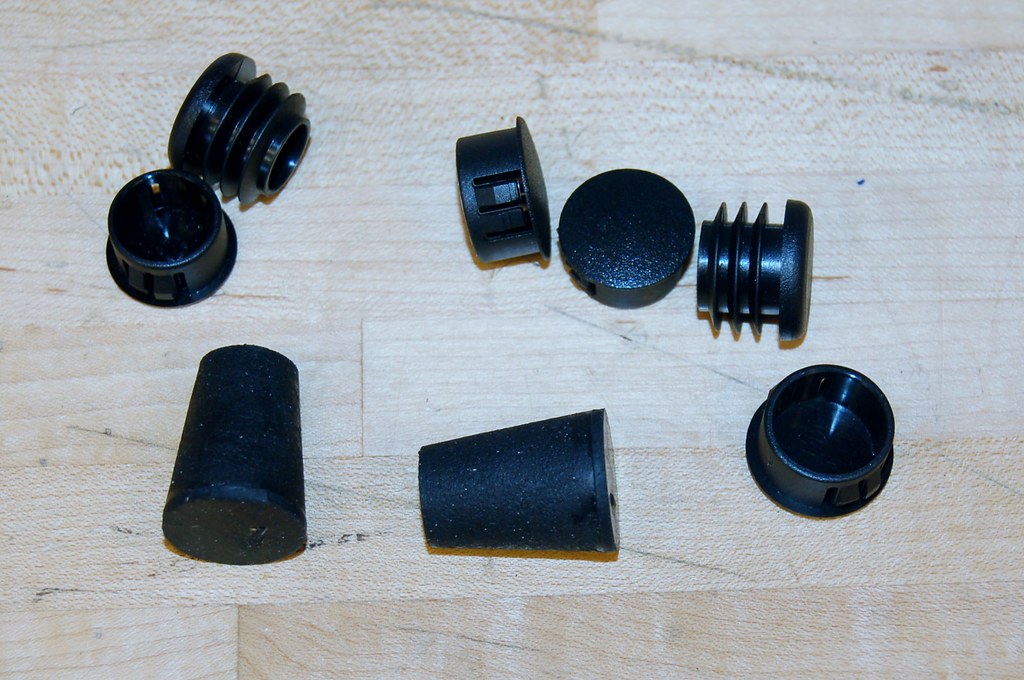
The plastic ones with the 3 ribs fit perfectly. Heh.
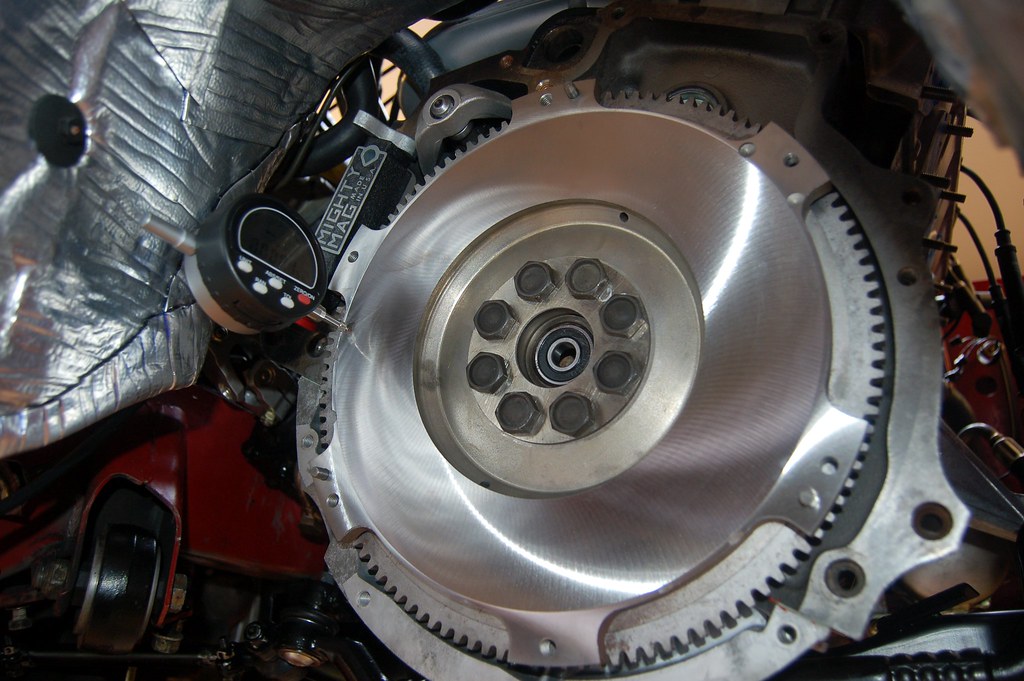
Next, following @tn535i's advice on testing the runout on the flywheel, I hooked up my new indicator (always love an excuse to get a new tool!) and measured (using old bolts so that the loctite on the new ones would not be used up). The runout was hardly measurable (+/-0.010mm).
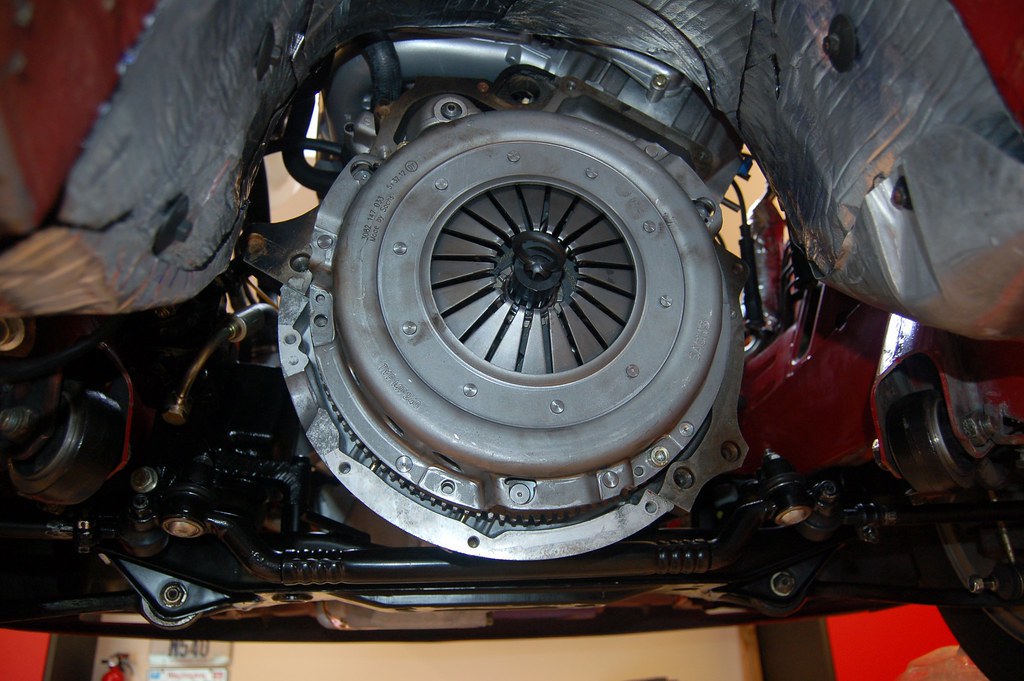
Clutch is in.
The list:
- Mount the B35 coil (DONE).
- Put new coolant overflow tank in and connect (DONE).
- Tighten belts (DONE).
- Attach fuel hose from tank to rail (DONE).
- Connect new grounds for wiring harness on RHS (DONE).
- Put new wiper tank in and connect (DONE).
- B35 bellhousing has hole w/ plastic cap. Plastic cap wants to fall out. Buy cap at Ace hardware that fits! (DONE)
- Install short-shift kit. (DONE)
- Install lightened & balanced flywheel and new clutch. (DONE)
- Attach transmission.
- Put radiator back in.
- Drop in the new in-tank fuel pump.
- Final attach AFR (waiting for the UPS man for some brass fittings).
- Reattach strut bar.
- Install rebuilt driveshaft.
- Attach headers.
- Reinstall exhaust. (once the car is drivable I'm taking it into a shop and having the exhaust rebuilt)
- Fill fluids. Bleed brakes, PS, clutch.
- Install plugs.
- Put air filter housing in.
- Put in 179 ECU and plug it in.
- Remember to tighten steering column nut (I have a piece of tape on the dashboard where I wrote "don't forget steering nut!").
- Cross fingers and start it up. 20 minutes, then re-torque head bolts.
- Have beer.
Re: Noob M30B35 Build. 2014-07-04: Will it start this weeken
Posted: Jul 05, 2014 8:43 PM
by BuzzBomb
Doing #8 before installing the trans will make make your life a lot harder. Once the trans is bolted up and before raising it to installed level, drop the shift lever down through the tunnel and secure the ball lock ring, along with the linkage. Then backup light wires. Then clutch slave. There's a lot that is easier to do while the trans is still suspended and not raised and the crossmember fixed to the chassis.
Re: Noob M30B35 Build. 2014-07-04: Will it start this weeken
Posted: Jul 05, 2014 9:36 PM
by tig
BuzzBomb wrote:Doing #8 before installing the trans will make make your life a lot harder. Once the trans is bolted up and before raising it to installed level, drop the shift lever down through the tunnel and secure the ball lock ring, along with the linkage. Then backup light wires. Then clutch slave. There's a lot that is easier to do while the trans is still suspended and not raised and the crossmember fixed to the chassis.
Yep, that's precisely what I did:
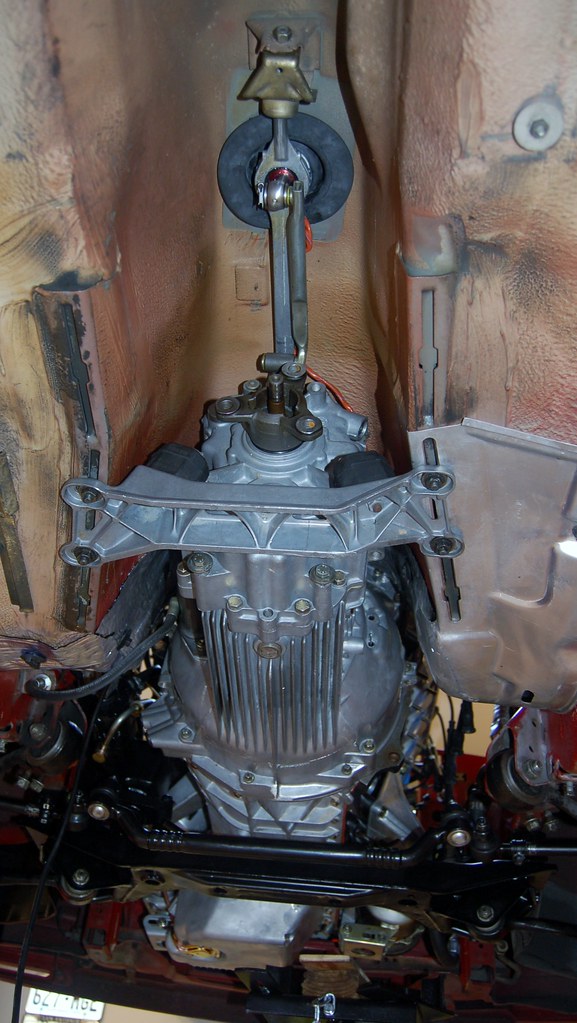
Woo-hoo!!!!
The list:
- Mount the B35 coil (DONE).
- Put new coolant overflow tank in and connect (DONE).
- Tighten belts (DONE).
- Attach fuel hose from tank to rail (DONE).
- Connect new grounds for wiring harness on RHS (DONE).
- Put new wiper tank in and connect (DONE).
- B35 bellhousing has hole w/ plastic cap. Plastic cap wants to fall out. Buy cap at Ace hardware that fits! (DONE)
- Install short-shift kit. (DONE)
- Install lightened & balanced flywheel and new clutch. (DONE)
- Attach transmission (DONE).
- Have beer. Watch Sounders game.
- Put radiator back in.
- Drop in the new in-tank fuel pump.
- Final attach AFR (waiting for the UPS man for some brass fittings).
- Reattach strut bar.
- Install rebuilt driveshaft.
- Attach headers.
- Reinstall exhaust. (once the car is drivable I'm taking it into a shop and having the exhaust rebuilt)
- Fill fluids. Bleed brakes, PS, clutch.
- Install plugs.
- Put air filter housing in.
- Put in 179 ECU and plug it in.
- Remember to tighten steering column nut (I have a piece of tape on the dashboard where I wrote "don't forget steering nut!").
- Cross fingers and start it up. 20 minutes, then re-torque head bolts.
- Have beer.
Re: Noob M30B35 Build. 2014-07-04: Will it start this weeken
Posted: Jul 06, 2014 11:44 AM
by tig
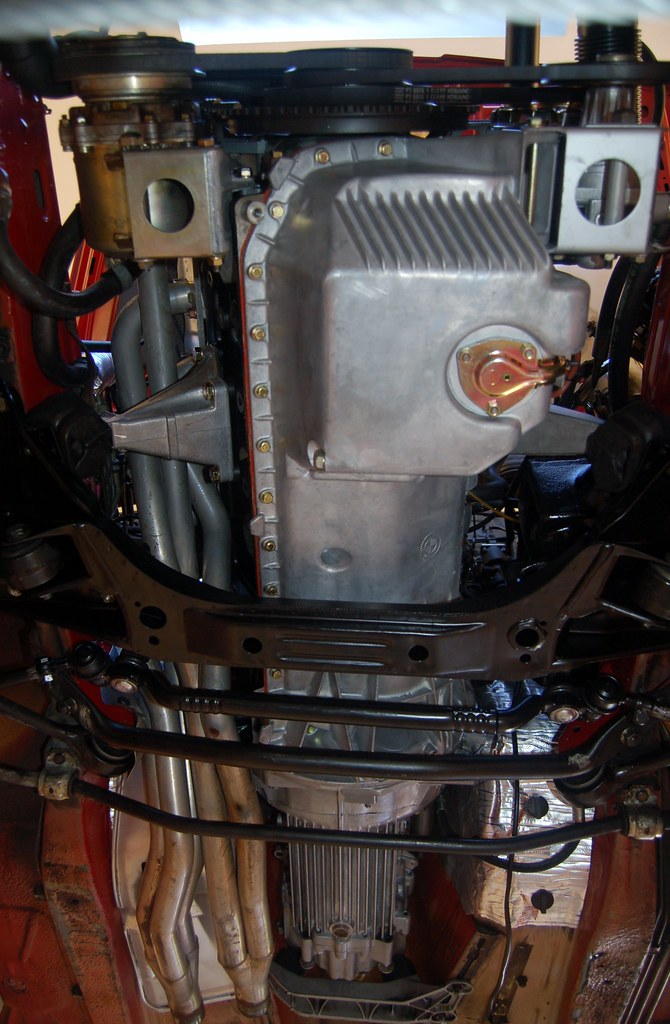
Rear header in. Taking a break because it's exhausting work reaching overhead. I can't imagine what a PITA this would be without a lift.
Pro-tips for installing headers (I wish I had known these when I put them in last year):
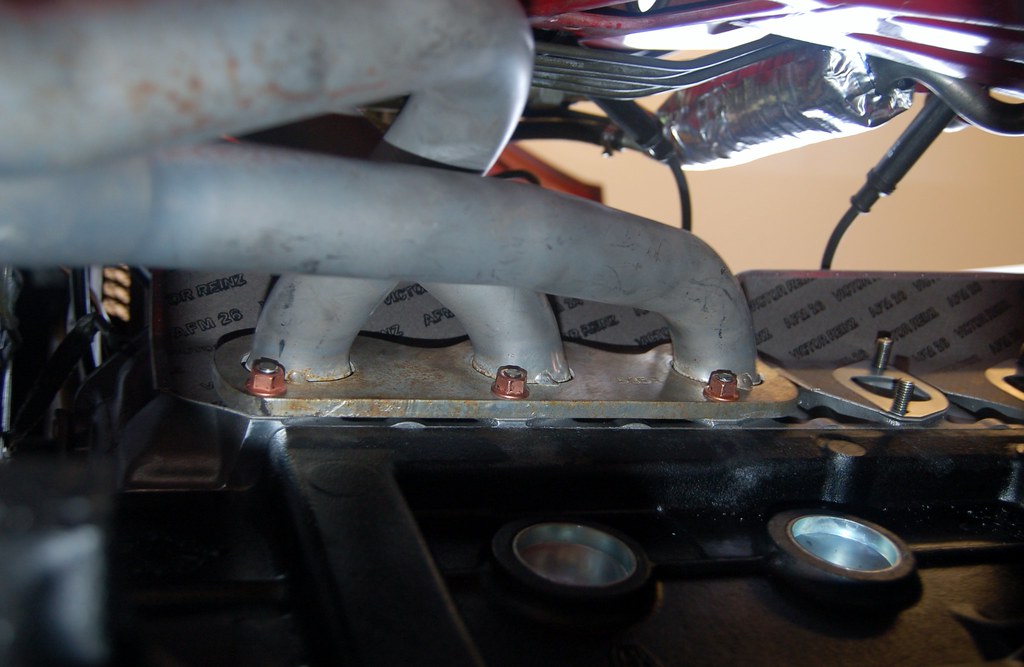
- Use shorter studs. I find 35mm is perfect for the IE headers. See pic below for how perfect they fit. This makes getting the headers on/off much easier. It also improves access to the nuts.
- Turn steering hard to the left.
- Remove cross-member.
- Remove heat-shield that covers the LHS trailing arm mount to frame.
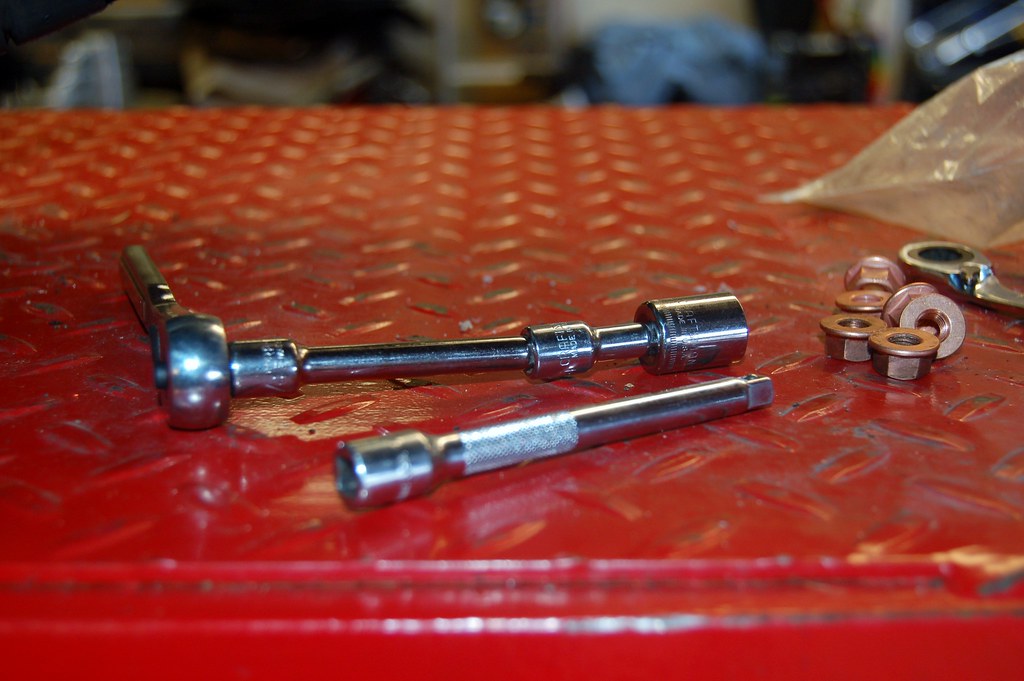
- Use a mini (1/4") ratchet. Have several lengths of extensions. This will let you get to all the nuts with little fuss.
- Do the rear one first. DO NOT put both headers in and then try to tighten nuts. This was the biggest mistake I made last year! Duh.
Re: Noob M30B35 Build. 2014-07-04: Will it start this weeken
Posted: Jul 06, 2014 1:06 PM
by trevmmeister
Charlie how in the world did you find my instagram....


Loving the installation progress by the way.
Re: Noob M30B35 Build. 2014-07-04: Will it start this weeken
Posted: Jul 06, 2014 2:18 PM
by tig
Re: Noob M30B35 Build. 2014-07-04: Will it start this weeken
Posted: Jul 06, 2014 2:30 PM
by tn535i
Nice Nice Nice. Everything about this project is looking Nice.
I'm not sure what you may have missed (if anything) and what I have probably just missed reading. Right now my only thought is do you have the special moly based grease to lube the splines on the input shaft?
Thanks for keeping us up to date. Waiting to hear it's running.
Re: Noob M30B35 Build. 2014-07-04: Will it start this weeken
Posted: Jul 06, 2014 2:38 PM
by waynet1
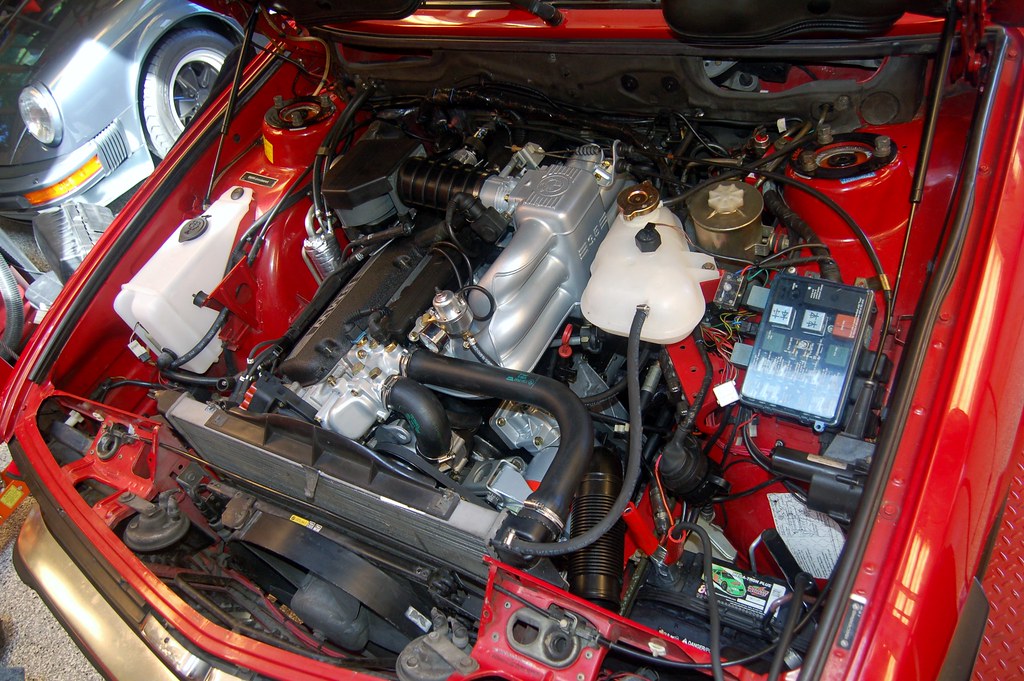
This really does look great. The red engine bay really accentuates everything nicely.

Re: Noob M30B35 Build. 2014-07-04: Will it start this weeken
Posted: Jul 06, 2014 2:40 PM
by tig
tn535i wrote:Nice Nice Nice. Everything about this project is looking Nice.
I'm not sure what you may have missed (if anything) and what I have probably just missed reading. Right now my only thought is do you have the special moly based grease to lube the splines on the input shaft?
Thanks for keeping us up to date. Waiting to hear it's running.
Yep. The clutch kit came with some.
Crossing fingers. Just a few hours away!
Re: Noob M30B35 Build. 2014-07-04: Will it start this weeken
Posted: Jul 06, 2014 4:12 PM
by tig
Oil in.
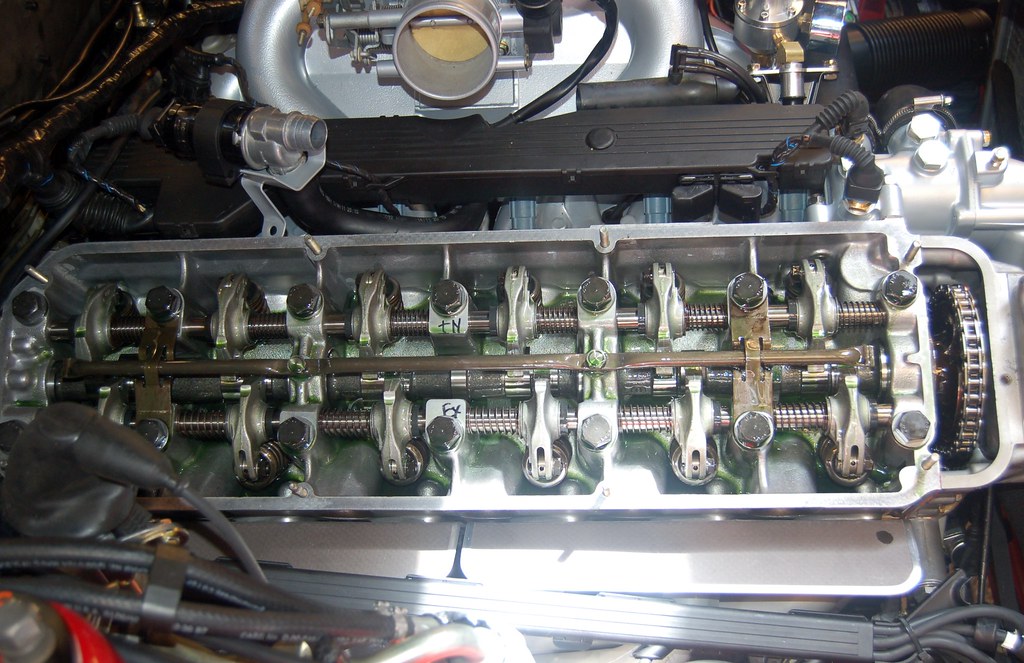
Pretty much everything 'up top' is ready to go. Using a battery charger/starter I cranked it over and it actually cranked. Had fuel relay disconnected, of course (and the ECU not plugged in). It sounded smooth!
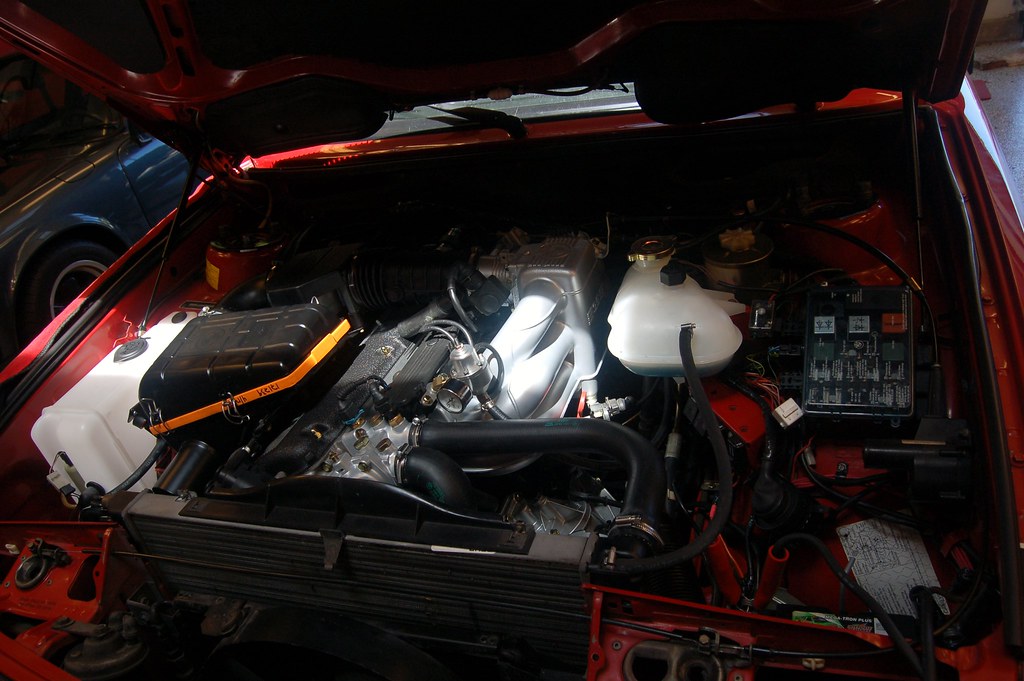
I don't have any PS fluid. Time to run to autoparts store and get some lunch. Then tackle the rest!
- Mount the B35 coil (DONE).
- Put new coolant overflow tank in and connect (DONE).
- Tighten belts (DONE).
- Attach fuel hose from tank to rail (DONE).
- Connect new grounds for wiring harness on RHS (DONE).
- Put new wiper tank in and connect (DONE).
- B35 bellhousing has hole w/ plastic cap. Plastic cap wants to fall out. Buy cap at Ace hardware that fits! (DONE)
- Install short-shift kit. (DONE)
- Install lightened & balanced flywheel and new clutch. (DONE)
- Attach transmission (DONE).
- Have beer. Watch Sounders game. (DONE)
- Put radiator back in. (DONE)
- Final attach AFR (waiting for the UPS man for some brass fittings). (DONE)
- Reattach strut bar, etc... (DONE)
- Attach headers. (DONE)
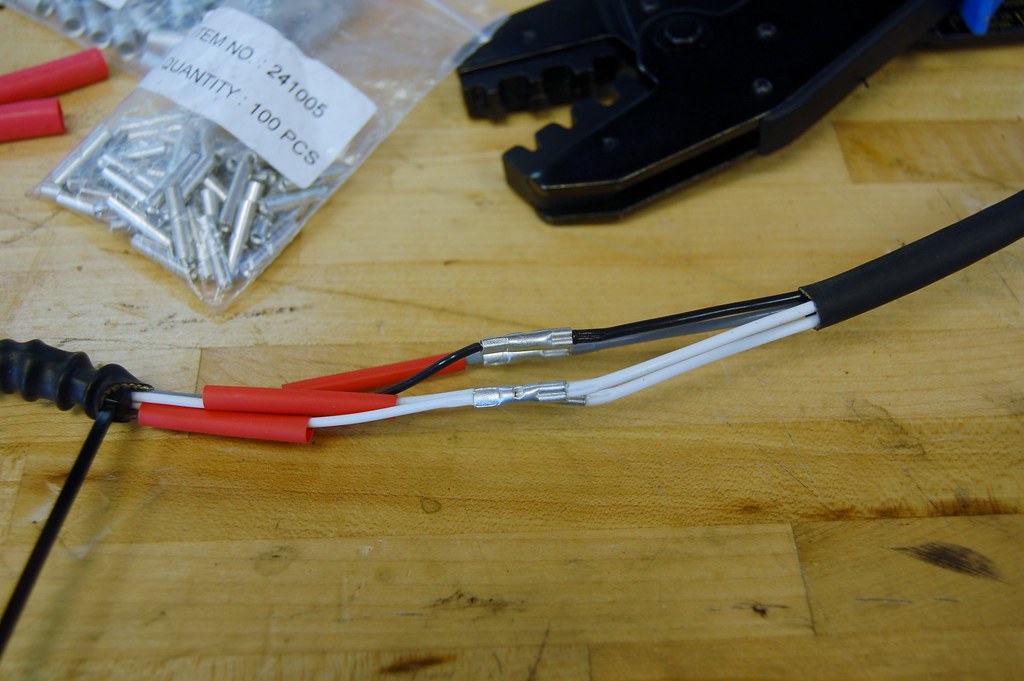
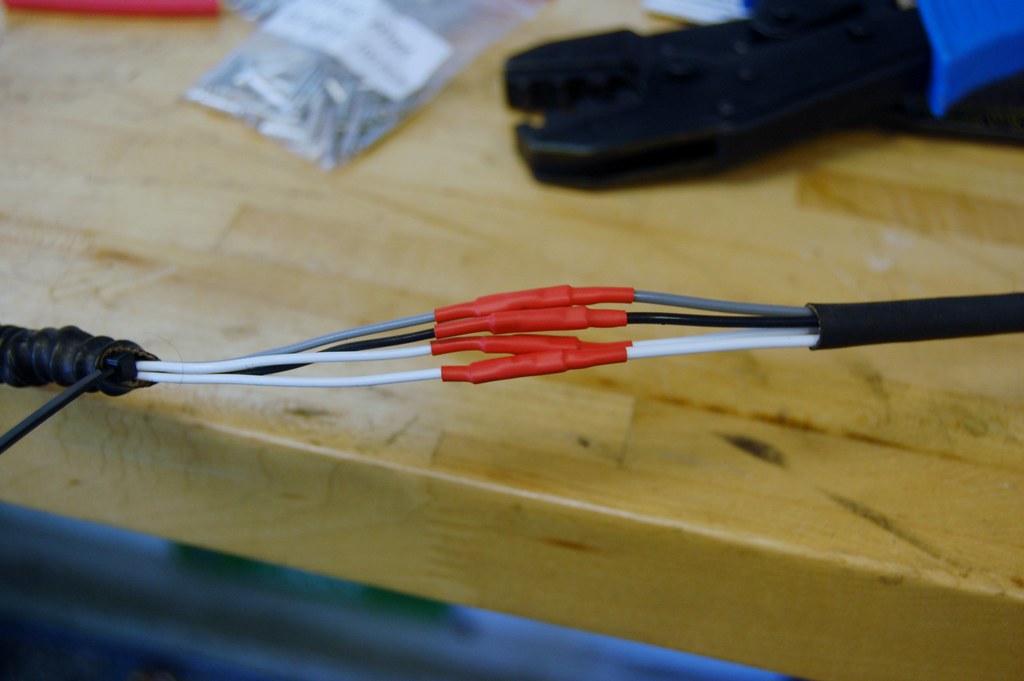
- Splice in new O2 sensor using connector bimmerguy got me (DONE)
- Re-do (+) battery connections. Charge battery. (DONE)
- Shift knob, etc... (DONE)
- Fill coolant. (DONE)
- Fill break-in oil; manually turn crank? (DONE)
- Install plugs. (DONE)
- Put air filter housing in. (DONE)
- Put in 179 ECU and plug it in. (DONE)
- Install rebuilt driveshaft.
- Reinstall exhaust. (once the car is drivable I'm taking it into a shop and having the exhaust rebuilt)
- Fill brake fluid; bleed.
- Fill PS fluid.
- Drop in the new in-tank fuel pump.
- Remember to tighten steering column nut (I have a piece of tape on the dashboard where I wrote "don't forget steering nut!").
- Cross fingers and start it up. 20 minutes, then re-torque head bolts.
- Have beer.
Re: Noob M30B35 Build. 2014-07-04: Will it start this weeken
Posted: Jul 06, 2014 6:37 PM
by tig
Uh, oh.
Major problem.
Came back from lunch and found coolant on floor under car.
The gooseneck at the back of the head is leaking (between the block and gooseneck, not at hose). It's brand new, with a gasket.
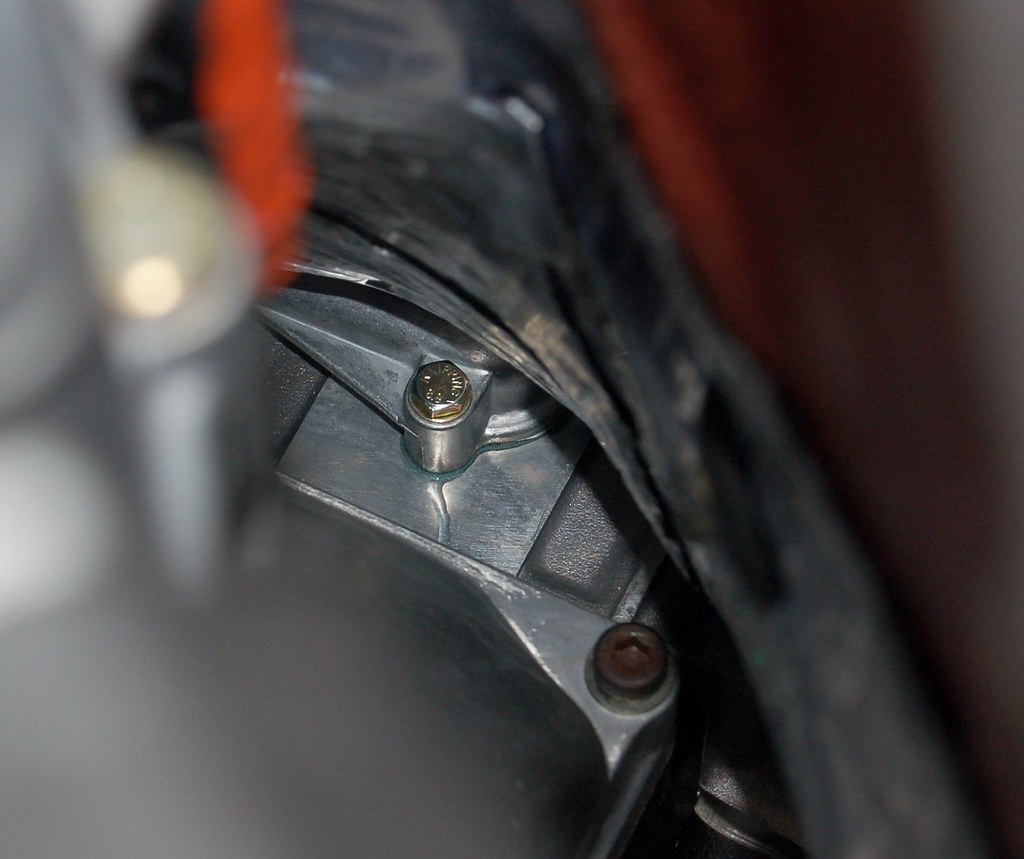
This sucks because there is no way to get in there with the engine where it is. I've tried tightening the bolts; I can just barely get a wrench in there. They are plenty tight. Still leaks.
I'll have to pull the transmission off again, so I can tilt the engine forward and get access from above.
I wonder if it's a defective gasket? Could a new gooseneck have a crack in it? It looks like it's leaking around the gasket.
This is a major set back. It means I will not be starting the car today, and I have a full week at work, so unlikely until next weekend! Frak.
However, i'm glad I found this now; I decided to crank the engine a bit once I put coolant, oil, and PS fluid. It would have sucked even worse to have discovered this after I started it and have to remove the exhaust & driveshaft again.
Re: Noob M30B35 Build. 2014-07-04: Will it start this weeken
Posted: Jul 06, 2014 6:59 PM
by elcrazon
Did your put permatex #3 on the gasket?
Re: Noob M30B35 Build. 2014-07-04: Will it start this weeken
Posted: Jul 06, 2014 7:04 PM
by tig
elcrazon wrote:Did your put permatex #3 on the gasket?
I thought I did.


