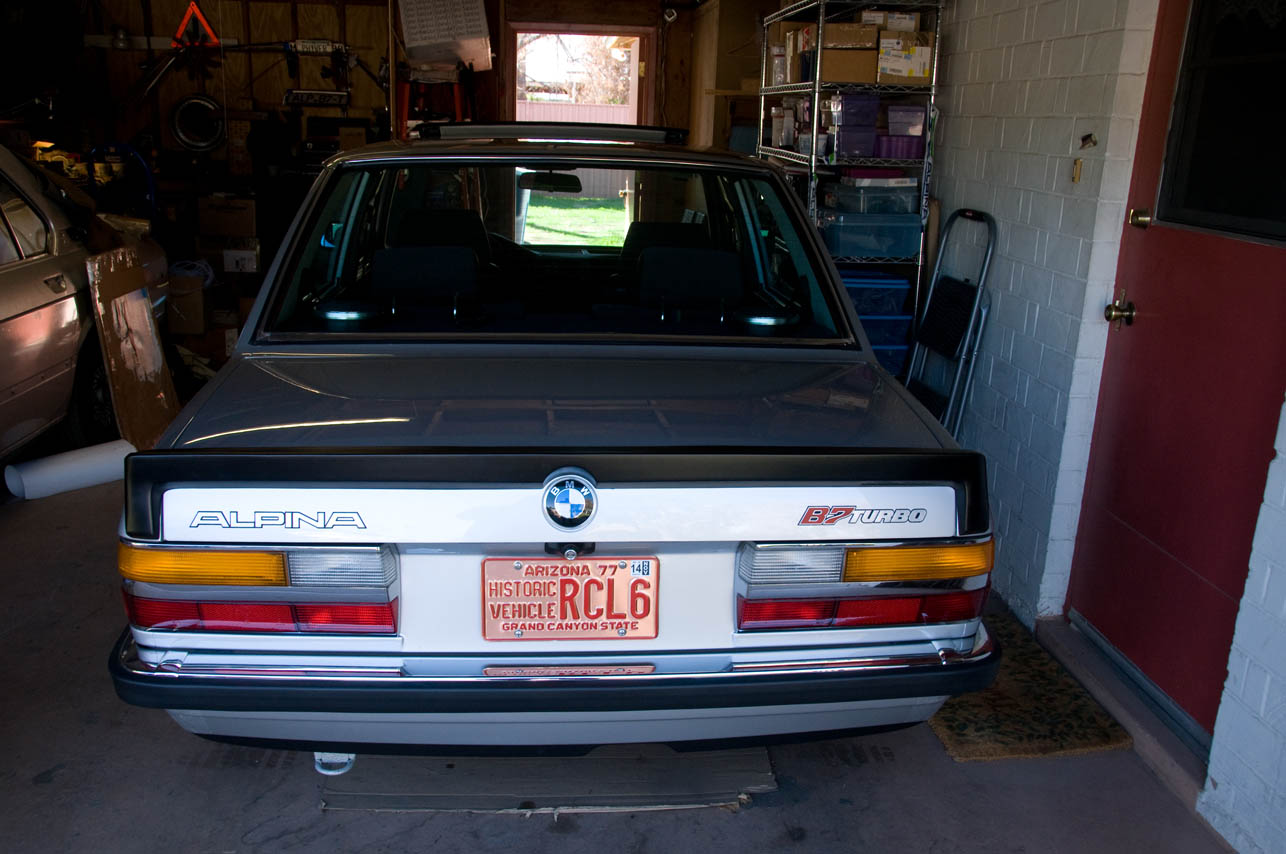
Thanks! That's what I used. The package is pictured. $20 per roll.Sonador1984 wrote:Great build, and what A stunning E28.
A tip for masking the centers up: Fine line tape
External links now open in a new browser tab - turn this off in your UCP - Read more here.
E28 Alpina B7 Turbo/1 #0083
-
unt0uchable
- Posts: 2265
- Joined: Jul 21, 2011 8:05 PM
- Location: Rochester Hills, Michigan
- Contact:
-
snakebrain
- Posts: 966
- Joined: Feb 15, 2010 10:37 AM
- Location: Belfast
Measure diameter of area to be painted. Draw circle on thin card. Draw a concentric circle of diameter, say, 4" larger. Cut out inner circle. Cut round outer circle to make a ring-shaped stencil. Overlay wheel with stencil. Tape stencil down well. Mask off behind/around stencil. Spray. Reuse stencil for all 4 wheels.wkohler wrote:Thanks for the comments. I investigated several options for masking the hole. I have a compass with an x-acto knife on it and I couldn't get it centered. I have some leftover vapor barrier scraps that I was going to use for this but the problem is that you really cannot reposition it without distortion. I certainly appreciate the suggestion. I think I might give it a shot again before I do the next wheel. We will see.
I have no idea what was used on the spoiler. I didn't do it. Mike did it. He said it is flexible and won't crack. He used the same stuff on my mirrors.
(Let me know if it works!)
Last edited by snakebrain on Mar 24, 2013 4:41 AM, edited 1 time in total.
-
snakebrain
- Posts: 966
- Joined: Feb 15, 2010 10:37 AM
- Location: Belfast
Just saw this...cibie wrote:Chris,
Just an idea to help with your painting, use Duck Tape sheets: Take a quality compass divider to trace a circle & then cut the inside of the circle out.
If Duck Tape sheets are no good because they'll leave residue on your wheels,
1. Line a sturdy sheet of paper with packaging tape.
2. Apply masking tape over the packaging tape. Make sure you start on one end so you can peel off later.
3. Do the compass divider trick.
4. Cut the inside of the circle out.
5. Peel off the masking tape & apply to your wheel.
Don
-
Das_Prachtstrasse
- Posts: 5616
- Joined: Sep 10, 2006 7:06 AM
- Location: Melbourne, Doooown Under
With my Alpina rear spoiler, I made a template with the boot closed, then cut out the shapes on some clear stone guard decal sheets. With a fine mist of water, a heat gun, and a plastic applicator, it went on seamlessly. I'll take a photo for you when it isn't night time.Karl Grau wrote:
Are you doing anything with that rear spoiler to prevent chafing on the paint?
Car looks great, Chris.
-
Eddie in TO
- Posts: 1007
- Joined: Feb 12, 2006 12:00 PM
- Location: Toronto, Ontario, Canada
- Contact:
+1Das_Prachtstraße wrote:With my Alpina rear spoiler, I made a template with the boot closed, then cut out the shapes on some clear stone guard decal sheets. With a fine mist of water, a heat gun, and a plastic applicator, it went on seamlessly. I'll take a photo for you when it isn't night time.Karl Grau wrote:
Are you doing anything with that rear spoiler to prevent chafing on the paint?
Car looks great, Chris.
I'll echo Christian's really good suggestion!
It works very well and adds great protection.
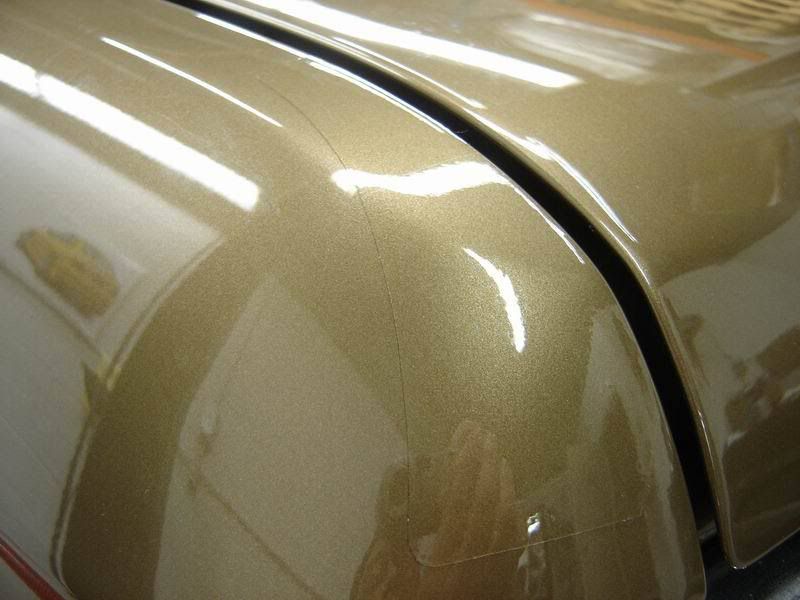
Here's how I made mine.
Tools required;
lint free rags
70% isopropyl alcohol (you can buy them in pad form or bottled)
masking tape
3M clear vinyl
cardstock paper
pencil
scissors
patience
Steps;
1. Place masking tape onto the rear quarter panels where you think the spoiler will fit over.
2. Drop the deck lid down and trace the edge of the spoiler onto the masking tape.
3. Carefully remove the masking tape in one piece and lay it onto some cardstock paper.
4. Cut it out and there is your template.
5. Obtain some 3M clear vinyl and cut your templates out.
6. When done, go back to the car and place masking tape onto the quarter panel around the edge of the spoiler (same as what you did when tracing the edge onto the masking tape for your template). This time you're using the masking tape to create your boundary.
7. Open the rear deck lid and now you have the intended area that you wan to protect. Check if the template will fit within the masked area and trim your 3M vinyl where you think it's necessary.
8. Clean the surface area with 70% isopropyl alcohol. You may want to perform this more than once depending on how much wax you have on your finish. Let dry.
9. Peel back the 3M liner to expose the adhesive backing and use a small spatula/squeegee (a credit card works well too) and start from the center of the protector and work your way outboard to the edge to remove the air bubbles.
10. Sit back and have a cold one.
-
GaAlpinaOwner
- Posts: 1120
- Joined: Feb 12, 2006 12:00 PM
- Location: Atlanta Georgia USA
I need to do this on mine as well.......Das_Prachtstraße wrote:With my Alpina rear spoiler, I made a template with the boot closed, then cut out the shapes on some clear stone guard decal sheets. With a fine mist of water, a heat gun, and a plastic applicator, it went on seamlessly. I'll take a photo for you when it isn't night time.Karl Grau wrote:
Are you doing anything with that rear spoiler to prevent chafing on the paint?
Car looks great, Chris.
David Frankel
-
GaAlpinaOwner
- Posts: 1120
- Joined: Feb 12, 2006 12:00 PM
- Location: Atlanta Georgia USA
If you make a template please copy it as i need to redo the black centers on my wheels as well......great job BTWwkohler wrote:Thanks for the comments. I investigated several options for masking the hole. I have a compass with an x-acto knife on it and I couldn't get it centered. I have some leftover vapor barrier scraps that I was going to use for this but the problem is that you really cannot reposition it without distortion. I certainly appreciate the suggestion. I think I might give it a shot again before I do the next wheel. We will see.
I have no idea what was used on the spoiler. I didn't do it. Mike did it. He said it is flexible and won't crack. He used the same stuff on my mirrors.
David
Thanks! The car will get the stripes (gold), but it has to go back to the shop for a couple of minor things, so they will wait until after I get it back again.
So, I finished the wheels. I just used the fine line tape as I had on the spare. Worked fine. So, I got them mounted to the car, installed my wipers and new washer nozzles. Here's some photos.
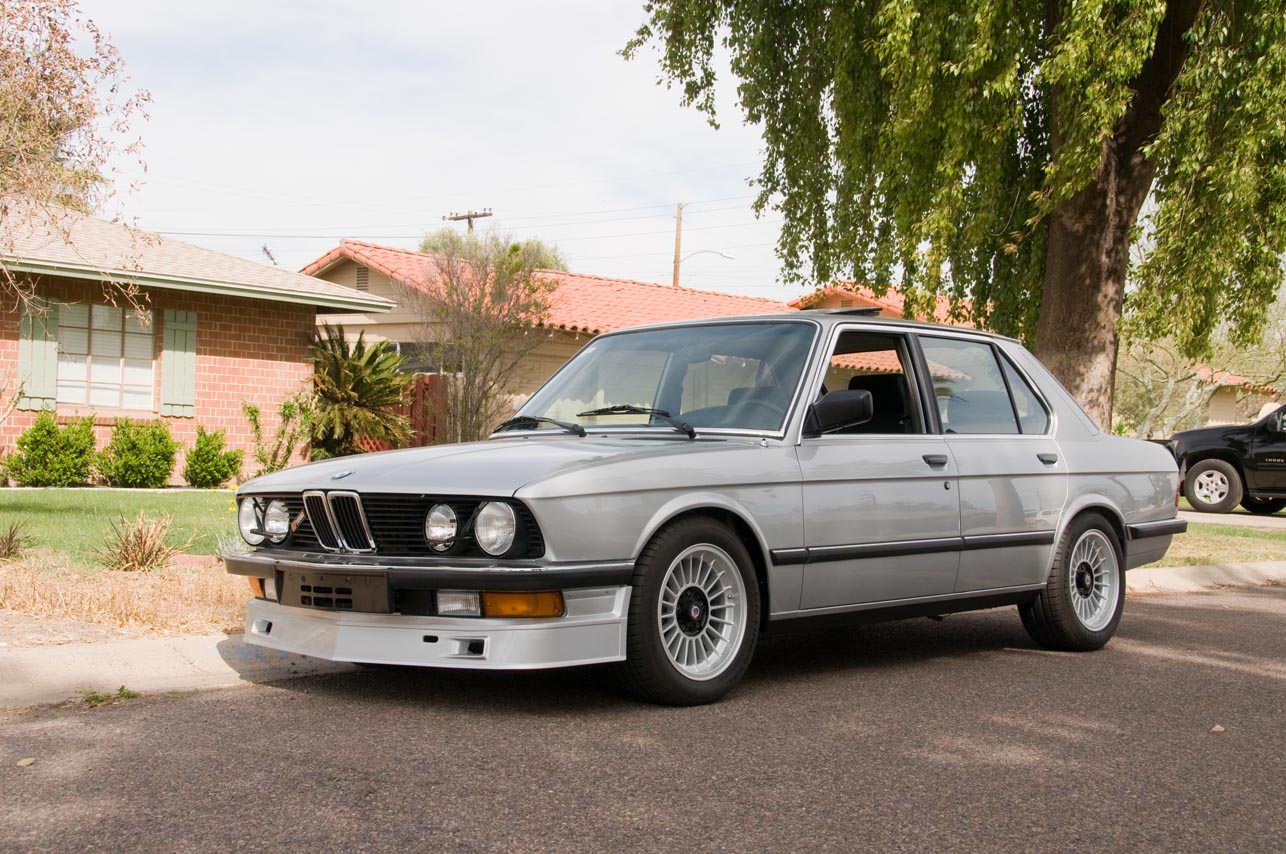
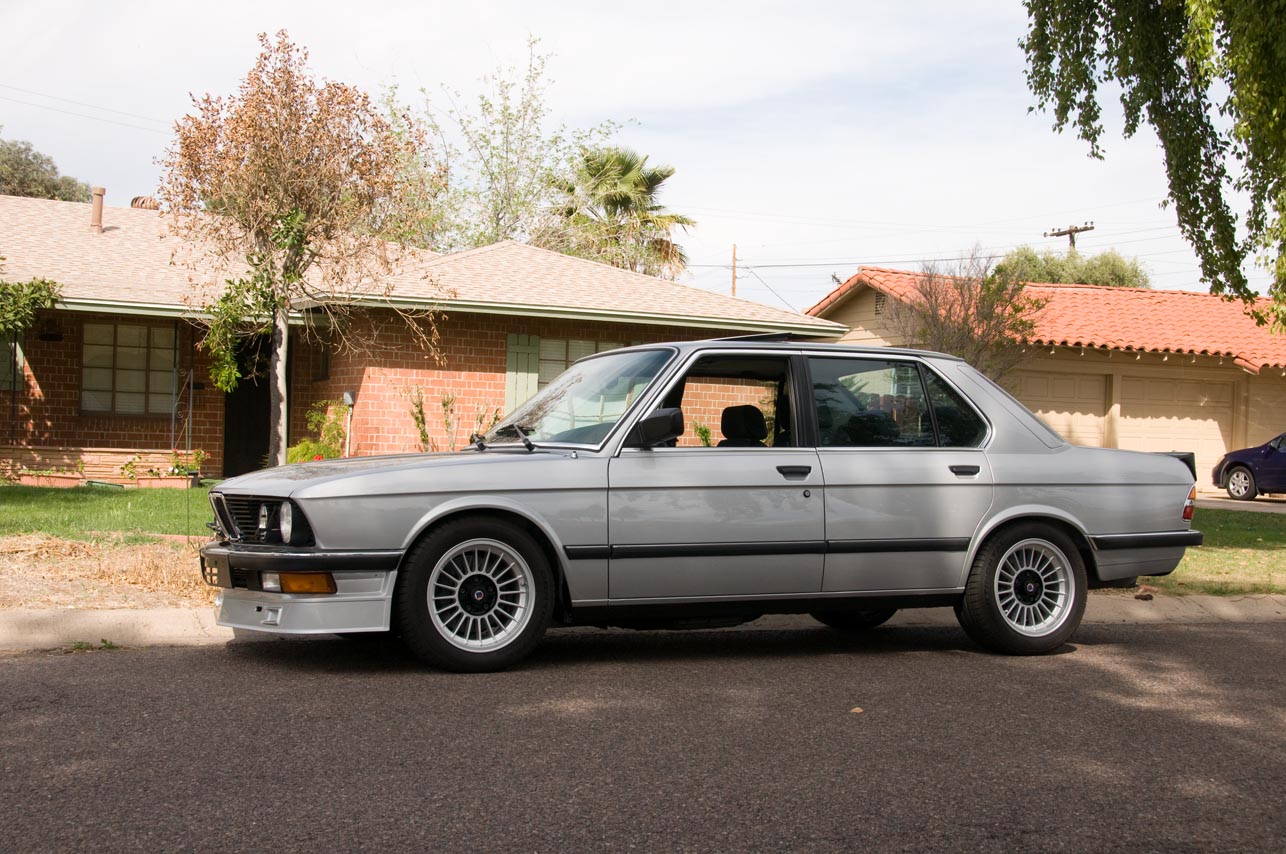
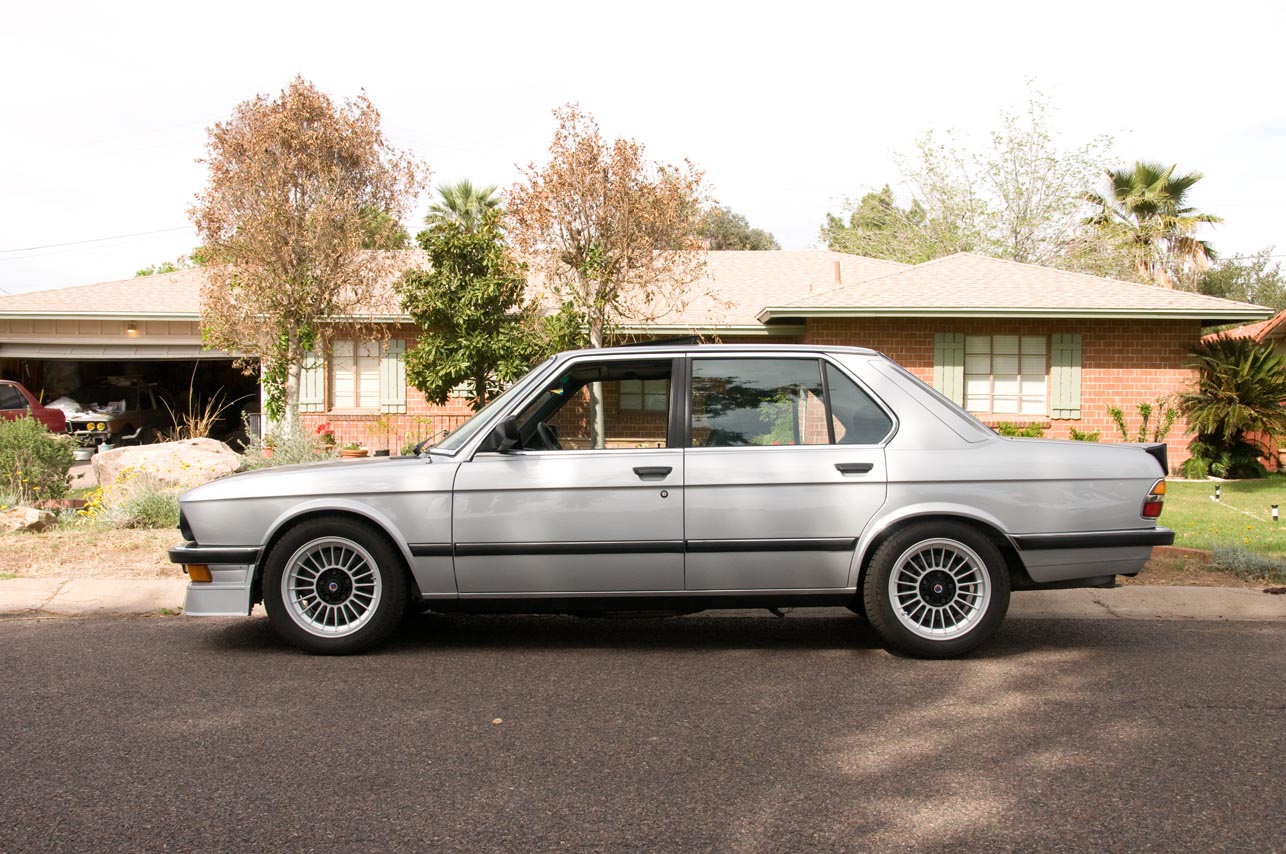
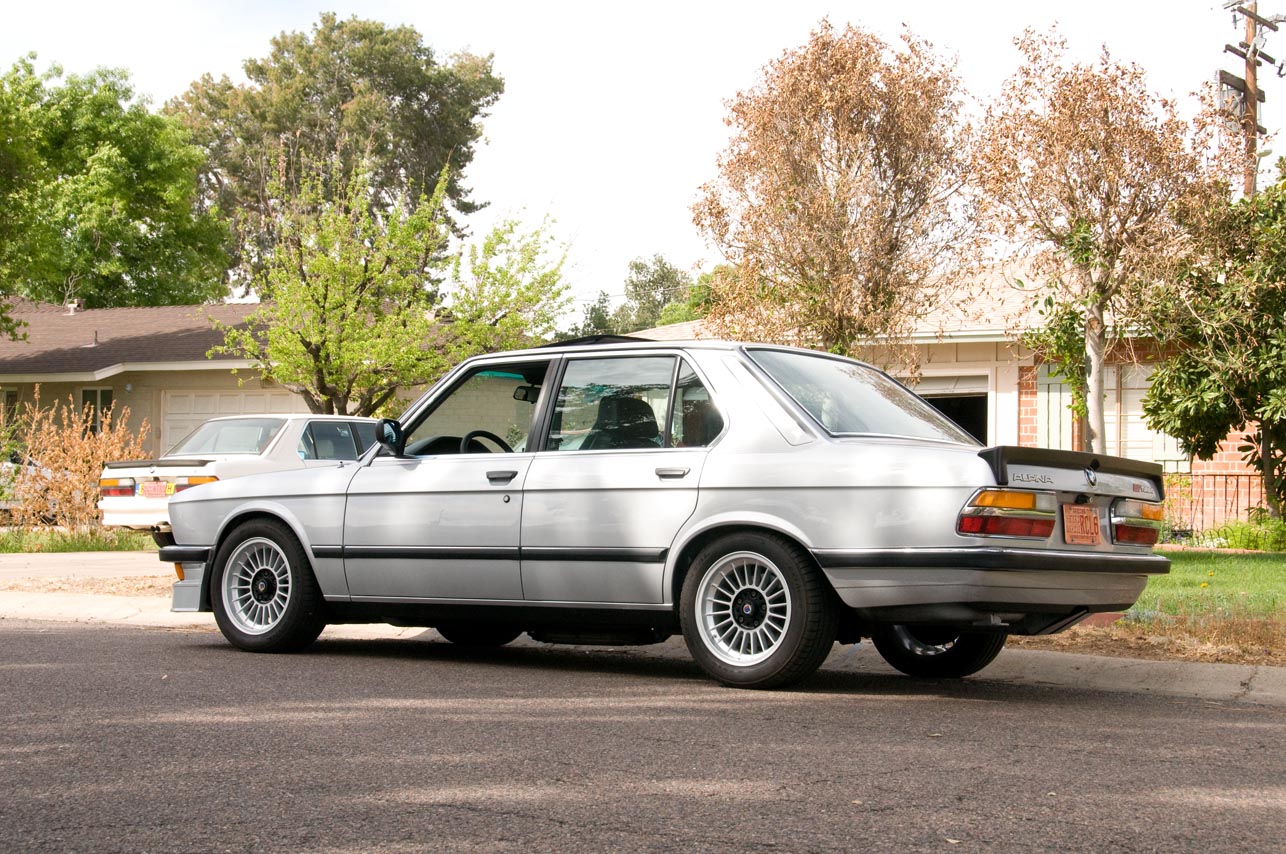
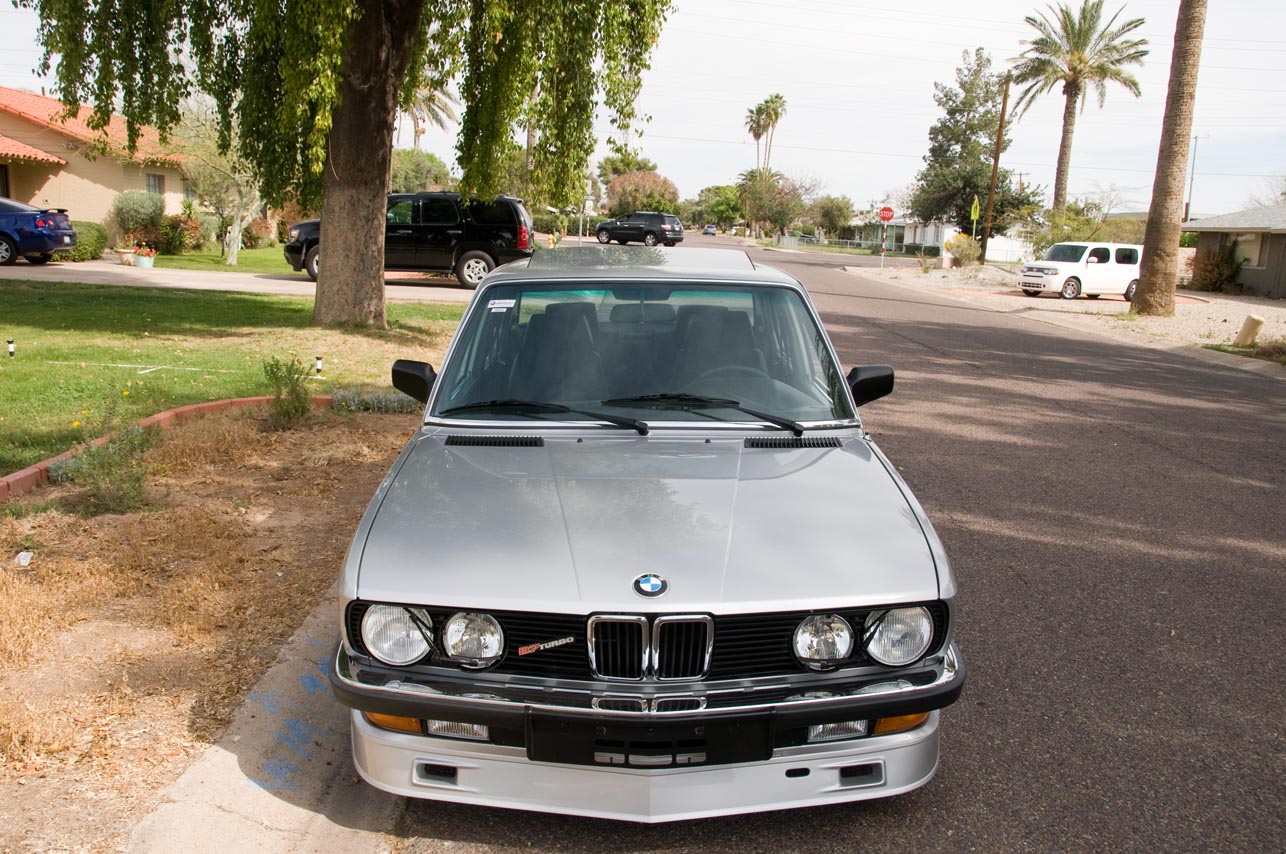
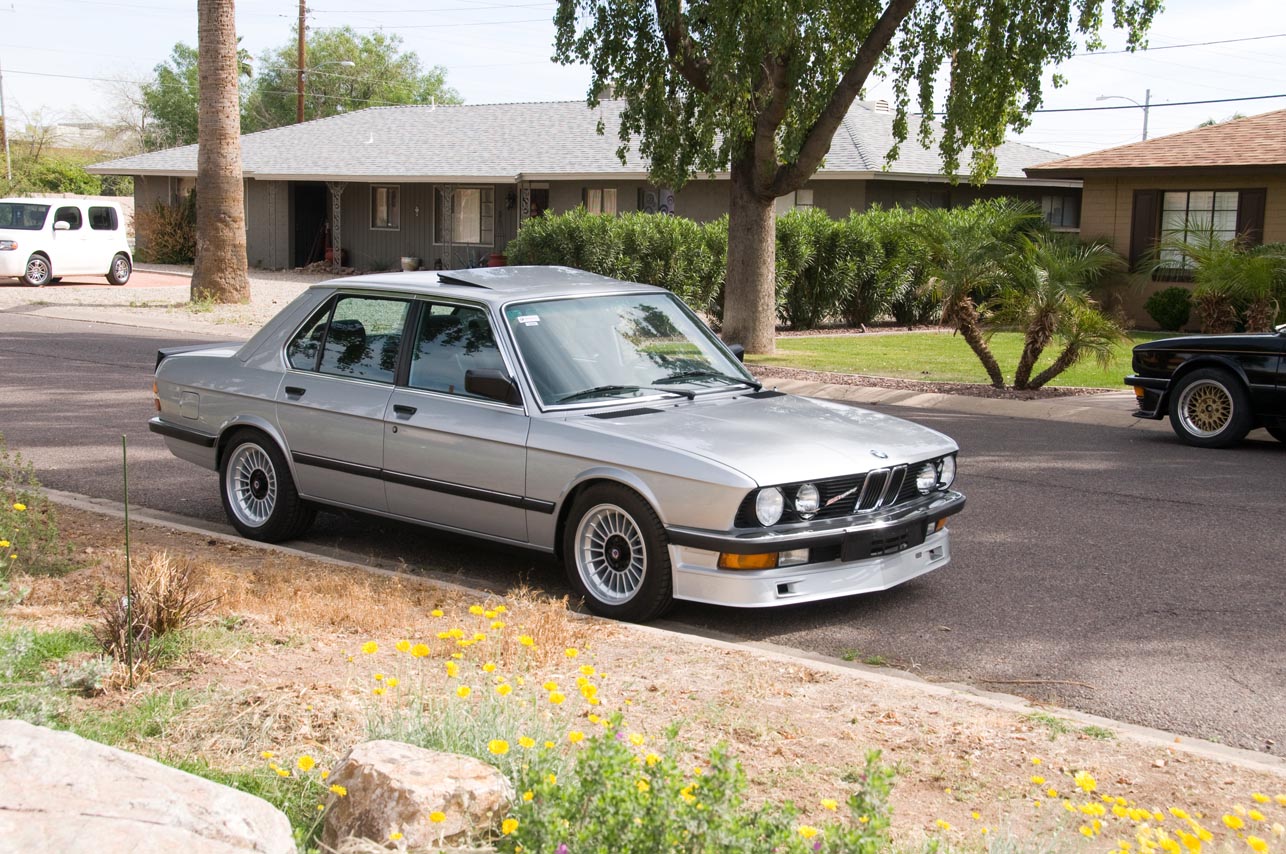
So, I finished the wheels. I just used the fine line tape as I had on the spare. Worked fine. So, I got them mounted to the car, installed my wipers and new washer nozzles. Here's some photos.


-
GaAlpinaOwner
- Posts: 1120
- Joined: Feb 12, 2006 12:00 PM
- Location: Atlanta Georgia USA
-
BimmerSultan
- Posts: 1387
- Joined: Dec 17, 2011 8:46 PM
- Location: Wilmington, NC
-
Eddie in TO
- Posts: 1007
- Joined: Feb 12, 2006 12:00 PM
- Location: Toronto, Ontario, Canada
- Contact:
-
tavern gnome
- Posts: 352
- Joined: May 19, 2008 11:14 PM
- Location: Tacoma, WA
- Contact:
Looks terrific Chris!! Lovin' the details. BTW, get ready for a long day when you put that decal kit on, it is a very tedious process to get the body lines straight, and the front valance is difficult because of the curves... it much easier to do the valance when its off the car, and having two people when doing the sides. Good luck
-RoyW
-RoyW
OMG seems to suit this thread just fine.
But please don't park that on the street again, makes me scared.
I'm sure if you need to move it around, you can get a few other Bimmer guys to run a blockade formation around you.
Thanks for proving out Paul's post made 1-1/2 years ago.
http://www.mye28.com/viewtopic.php?p=908036#908036
But please don't park that on the street again, makes me scared.
I'm sure if you need to move it around, you can get a few other Bimmer guys to run a blockade formation around you.
Thanks for proving out Paul's post made 1-1/2 years ago.
http://www.mye28.com/viewtopic.php?p=908036#908036
It had been so long since I worked on the car, I almost couldn't find the thread when it came time for an update.
I still don't have time to work on the car as it's now my super-busy time of year and on top of that, I've been helping my dad recover stuff from the house that exploded.
The car had to go back to Mike for a couple of touch ups and stuff - nothing that was my fault. Just some minor stuff that needed fixing. Enough time had passed and the car was just sitting, so I figured, let's get it done. I was hoping to get the exhaust done first. Mike agreed since he figured it wouldn't be until after the first of May when he could take the car. So, exhaust it is.
The exhaust on the car when it came to me consisted of the Alpina downpipe running into a Y to two factory E28 M5 cats and from there into a Strömung cat-back system didn't fit the car. Ground clearance was a disaster, and it showed on the cats. Even mild speed bumps were pushing it.
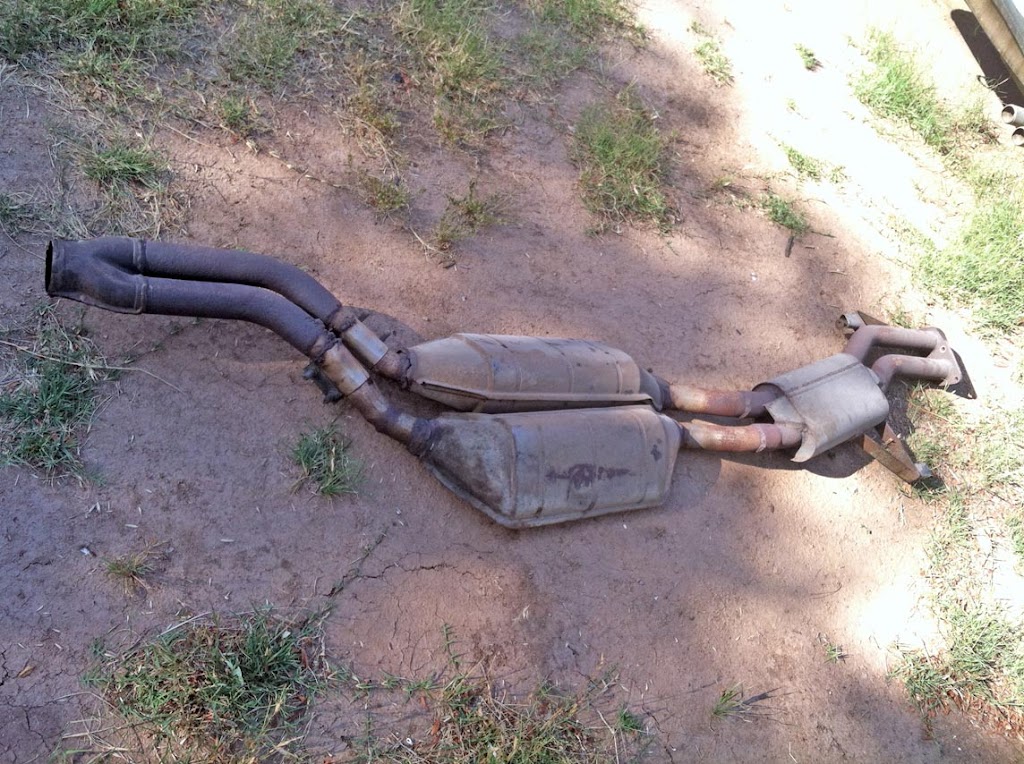
The only good part of the system was the flange between the resonator and the rear muffler, since I could simply unbolt it after I cut the muffler off the car with a Sawzall. Designed for a US car, someone mounted it by dropping a bolt through one of the plugs in the trunk into the center trunk support, attaching a bracket welded to the muffler mount to the bolt with a nut, then tack-welding the nut to the bolt. From January 2012 until the car went in for paint, it was held up with a coat-hanger.
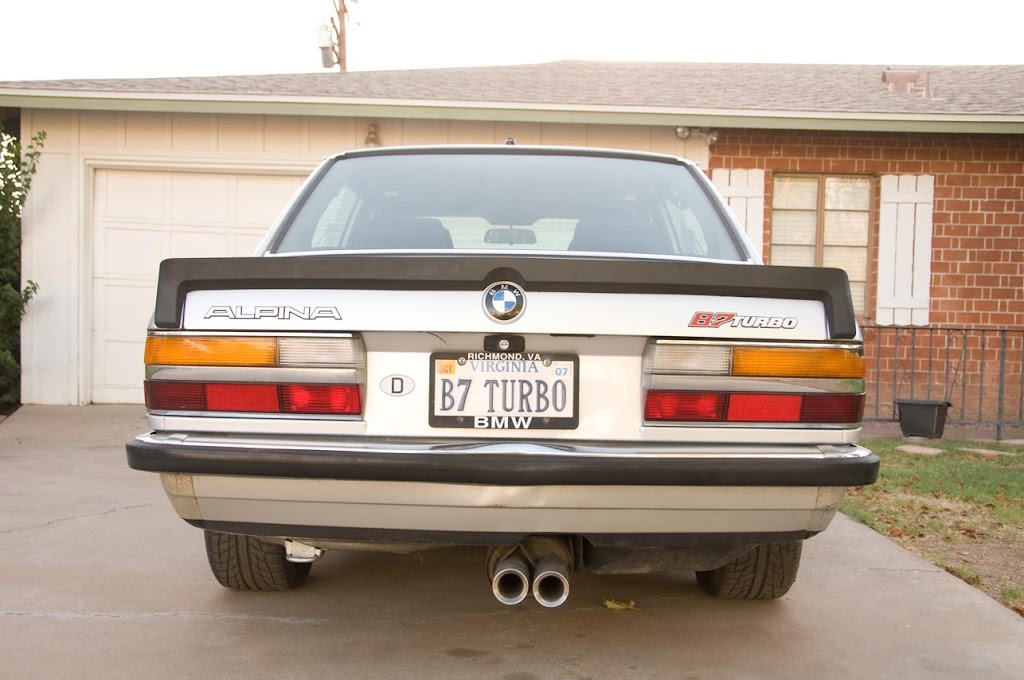
So, trying to figure out what to do was tough. The original Alpina stuff was NLA. I had thought about doing a custom 3" system from the downpipe to a single muffler in the rear, but I wanted it to look stock and I feared the car would be loud with lots of resonance and that wasn't what I was going for. The first time I drove the car without the rear muffler, I thought it was kinda cool, but it got old really quickly.
I had ordered a brand new Euro M5 rear muffler. I already had an NOS pair of the NLA chrome tips for it. I decided that a resonator wasn't necessary, going off of the B7S which had pipes to a muffler. So, what I needed was to connect the downpipe to the muffler.
I was given a couple of leads, but first decided to hit up the people who had done some work for me in the past on my white car, mating the SuperSprint headers to the Stebro exhaust. They moved the shop, so it wasn't very close anymore. Oh well. Apparently, they developed a phone allergy during the move, so nothing was doing with them. I Googled the first lead and it appeared to be some complete auto care kinda place, so no thanks. The second was from a place I was warned would be pricey, but excellent quality. I was after the quality. I called Precision Chassis Works out in Gilbert (no one does anything near my house - it sucks). The owner, Kent, answered and I explained what I was looking to have done and that I was told he was the guy to do it. He said they do quite a bit of it and he wanted me to bring the car in so he could look at it and see what we can do.
I brought the car to his shop and was very impressed with his work. He can lay down a row of dimes like I've never seen before. He looked under the car and at the muffler I brought and he gave me his idea. I said sounds good. An estimate would be in my inbox by the end of the day. It was pricey but I was impressed by his attitude, interest in the car and the quality of his work. I paid for materials and we set a rough time to do the job. I also learned he's the brother of the guy who powder-coated my wheels. Crazy.
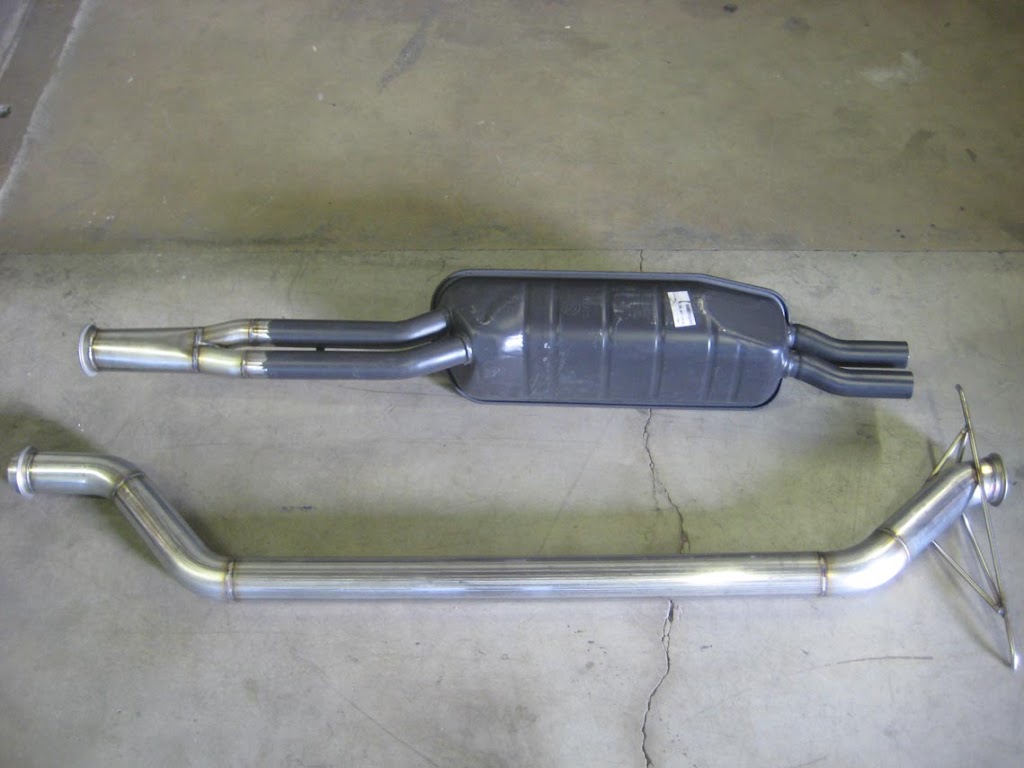
Our plan ended up being modify the downpipe for a V-band clamp, then run a 3" section from that back to another V-band at a custom 3" to 2" collector thingy welded to the M5 muffler. What's cool about this is that the whole 3" section is easily removable by loosening two nuts and flipping a couple levers. The muffler can stay in place for driveshaft stuff - this sort of thing is important to me, almost like I'm anticipating something. Another cool thing is that due to the design of the mounting points for the resonator hangers, we could use a stronger, more modern hanger system using the existing mounting points, which would also save fabrication time.
The following day, I got the car in at Mike's. I was leaving the next day for work, so he could have the car for a few days to get everything done. He was blown away by how it came together. His shop was a zoo that day too and lots of people were there, all very impressed with the car. I was overwhelmed. I showed Mike the stuff that needed attention and told him when I'd be back in town.
After a couple of minor delays, Mike was finally done with the car. I had made arrangements with Kent to bring him the car that afternoon. Of course, stuff I can't do myself, so I brought my mom along to drive the touring from Mike's to Kent's shop.
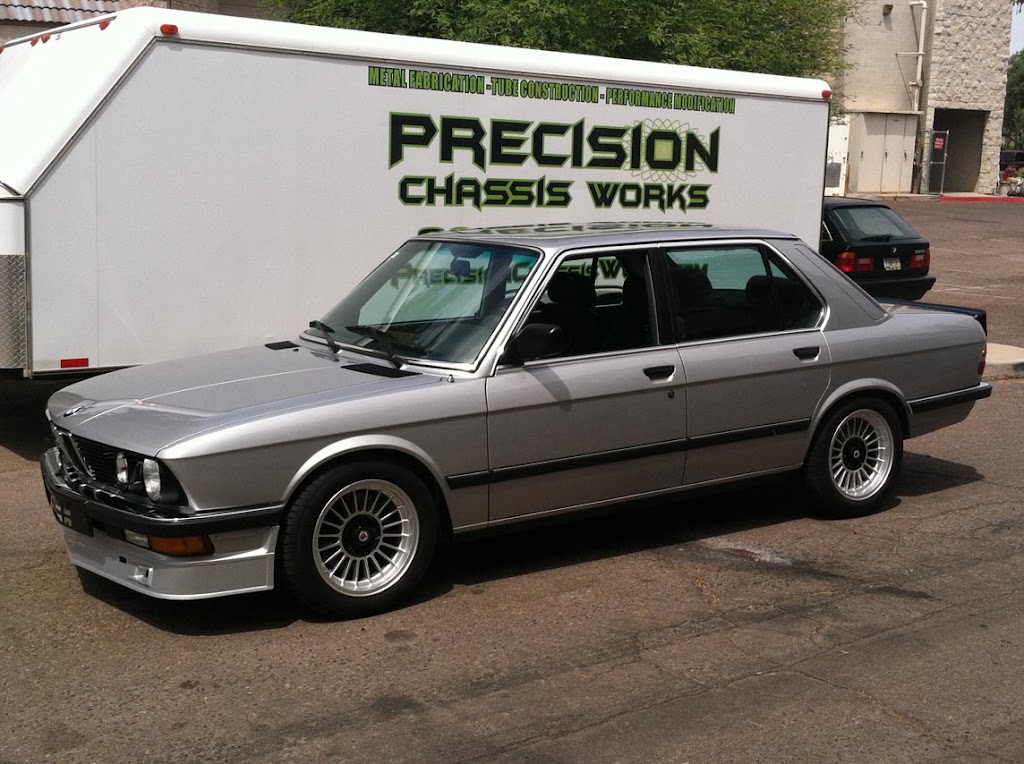
Quickly ran over everything with Kent again and he figured he'd need the car until Friday. Fine with me. I was kinda flattered to learn that he found the car interesting enough to post about it on his Facebook page, then posted a picture of the quality welding done when the car was brought into the US. You can see it in the above photo of the old exhaust, in front of the cats. If only he had an idea of how bad the work was in the doors and bumpers - all fixed now.
As usual with me, timing was a nightmare. I stopped by Thursday and checked things out since I was in the area. I also used the opportunity to pick up the old exhaust since I want to sell the cats and the Strömung stuff, as I think someone could definitely use it. He showed me the collector he made to go into the muffler (I guess it's more of a disperser?). I was again impressed.
Had to work today (Friday). Checked in with him around 2pm and he had everything put together, just needed to be fully welded. Figured a couple of hours. I could get the car tonight until 7 or so. Didn't hear from him by 20 after 6, so I called. I hate calling and bothering people, but I'm trying to plan, too. Kent always answers the phone and I find that refreshing. He had just started the car up after getting everything put back together. I called Ray and asked if he could run down there with me. He did. It was dark when we got there and the car was off the rack, so I couldn't see it, but it was okay as I didn't have a ton of time, though that didn't stop us from talking a while and giving Ray a chance to check things out in the shop.
I was surprised at how quiet the car is and I'm actually happy about that. The ground clearance is a welcome change as well. It was a very pleasant drive home, so I feel it was money well spent.
I asked Kent to send me some photos for my records. He happily obliged. No photo of the downpipe off of the car unfortunately. I should have taken one myself. Everything he did is 304 stainless and every joint is fully back-purged.
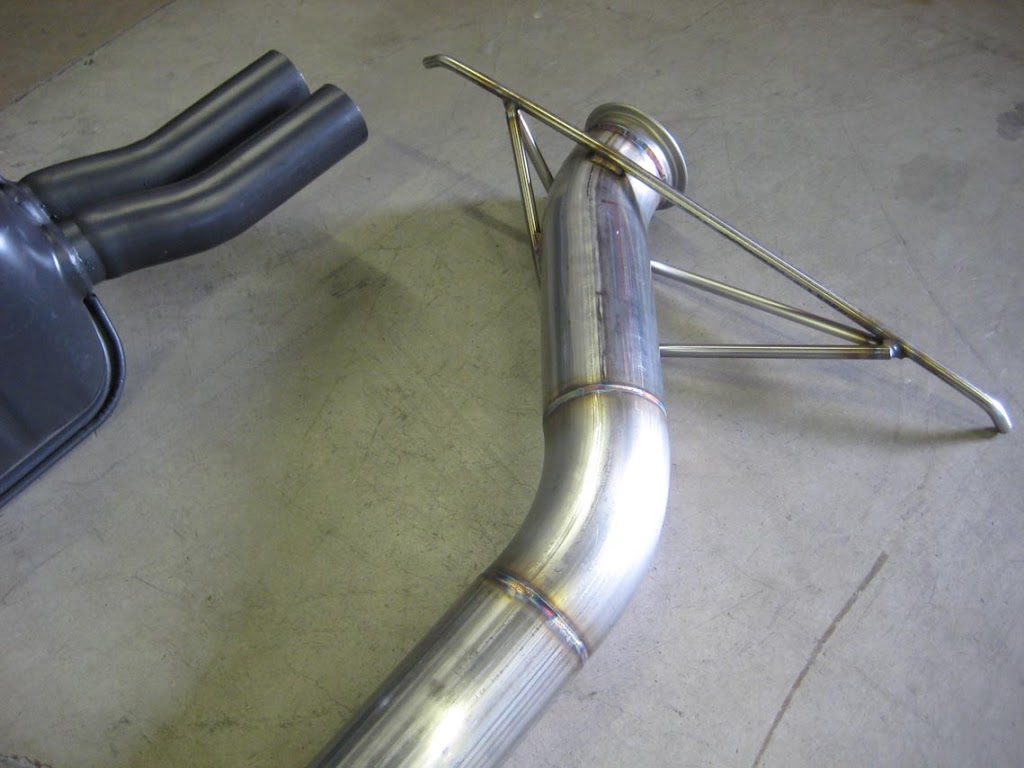
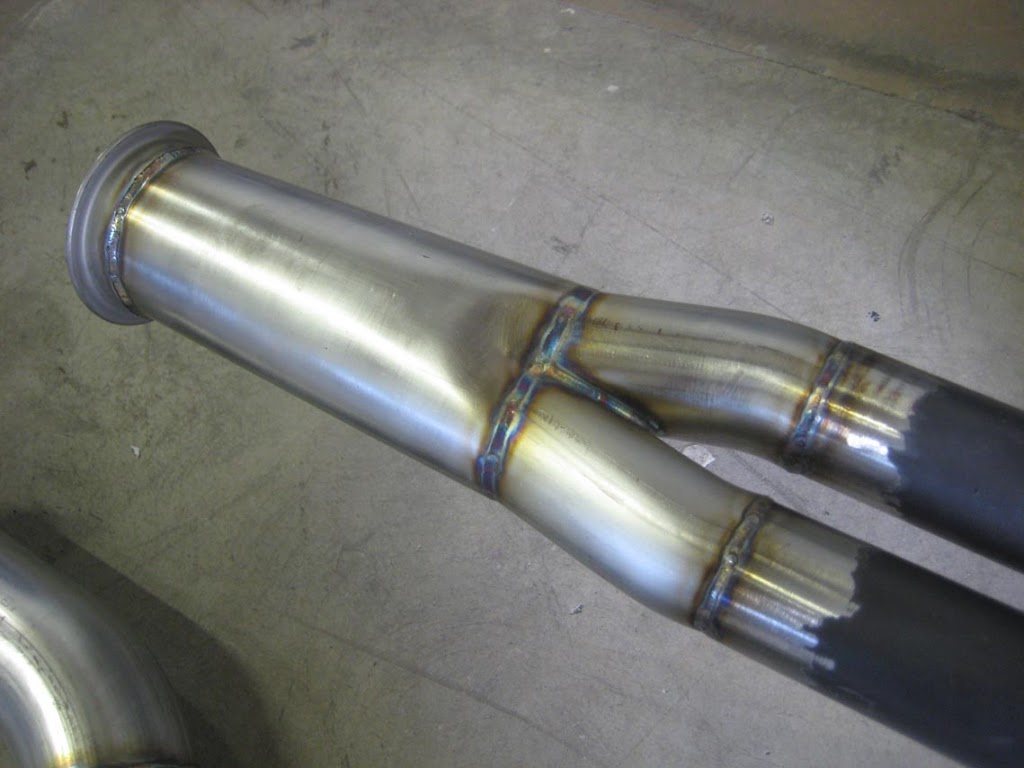
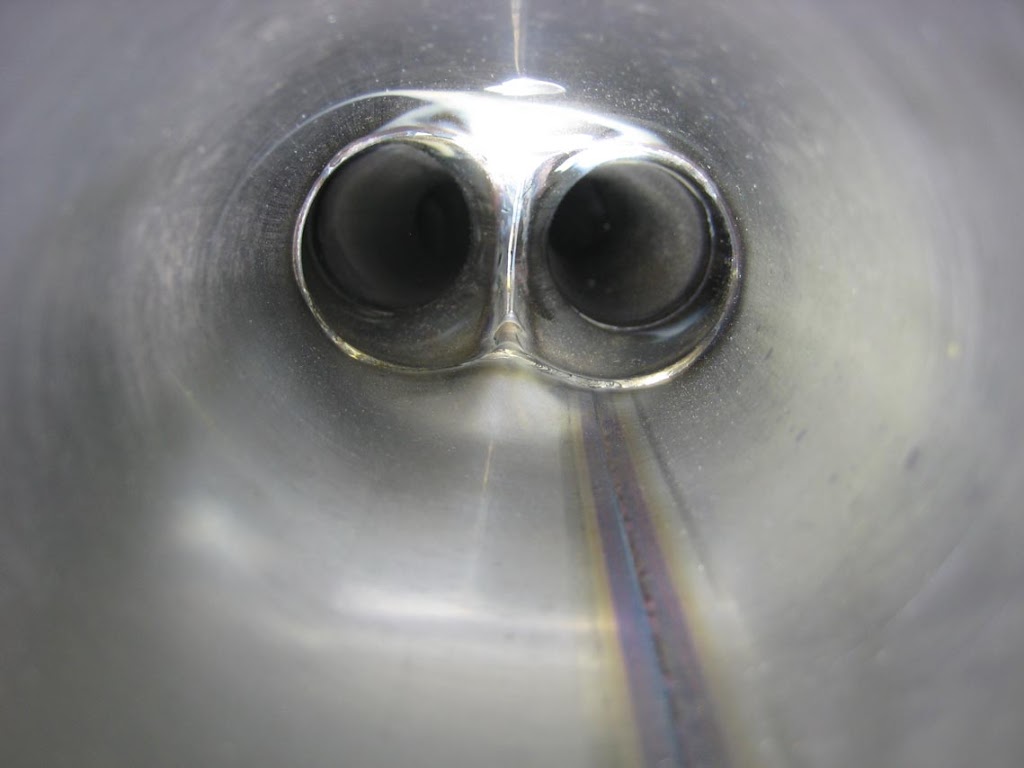
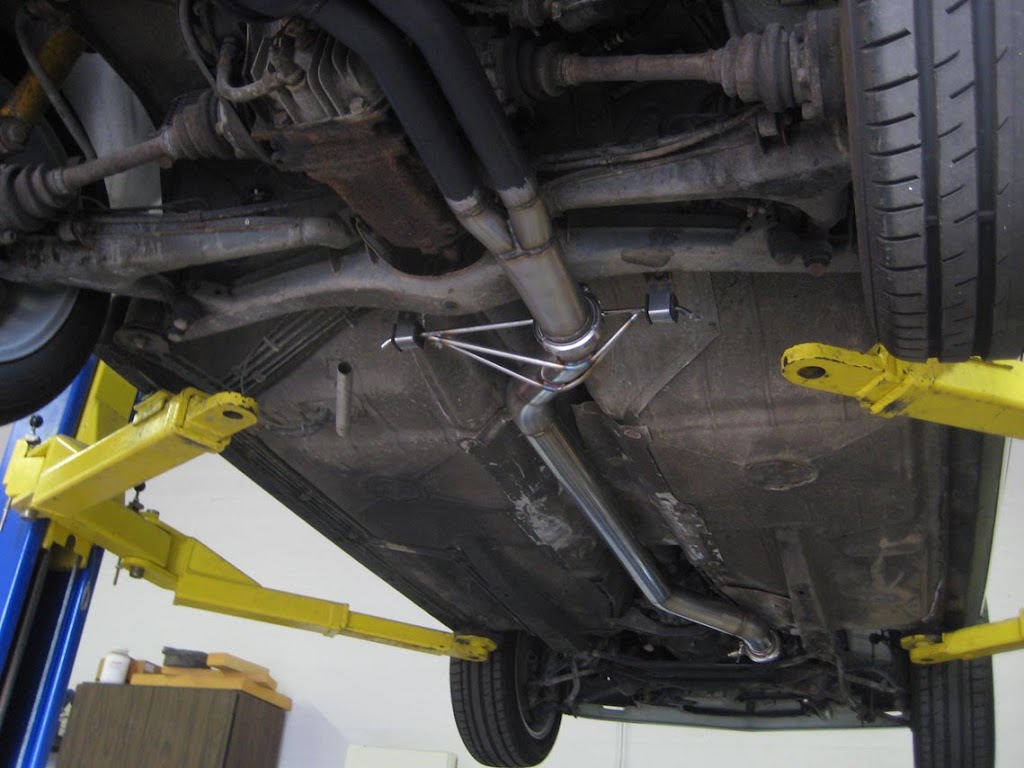
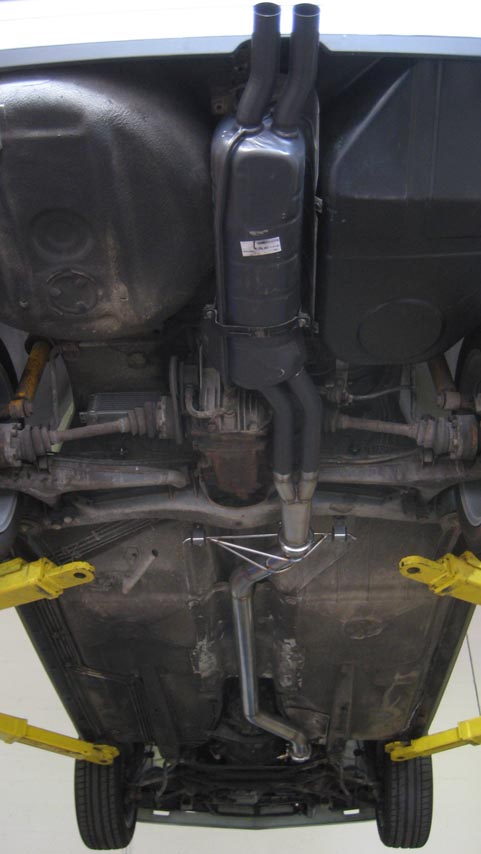
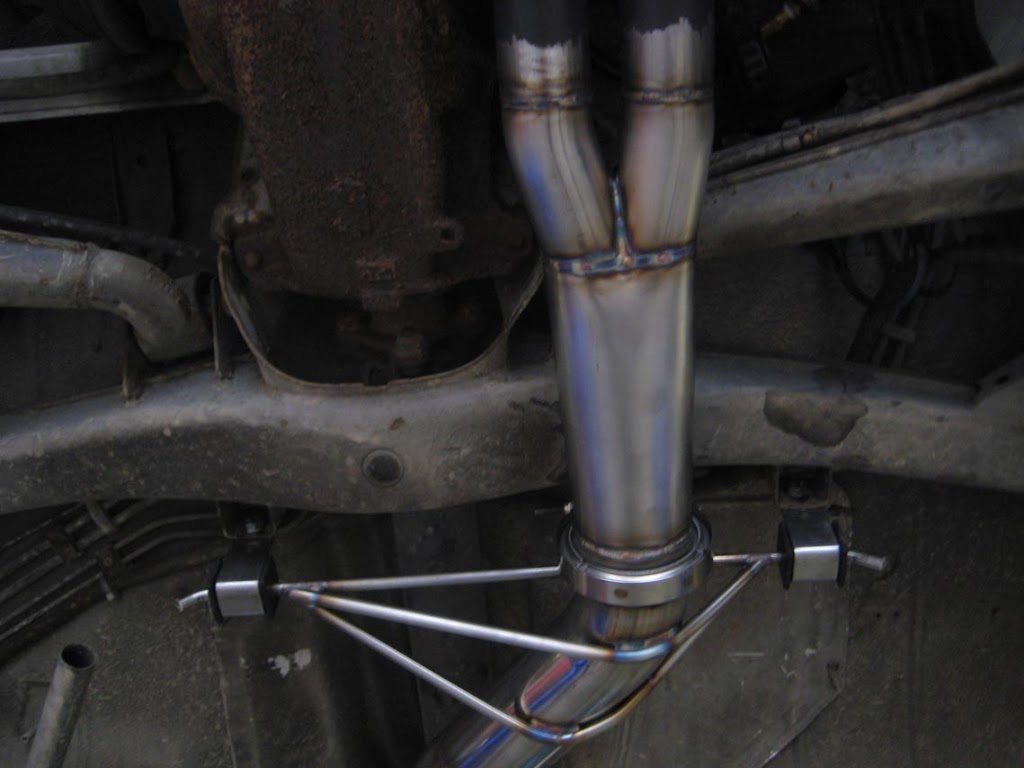
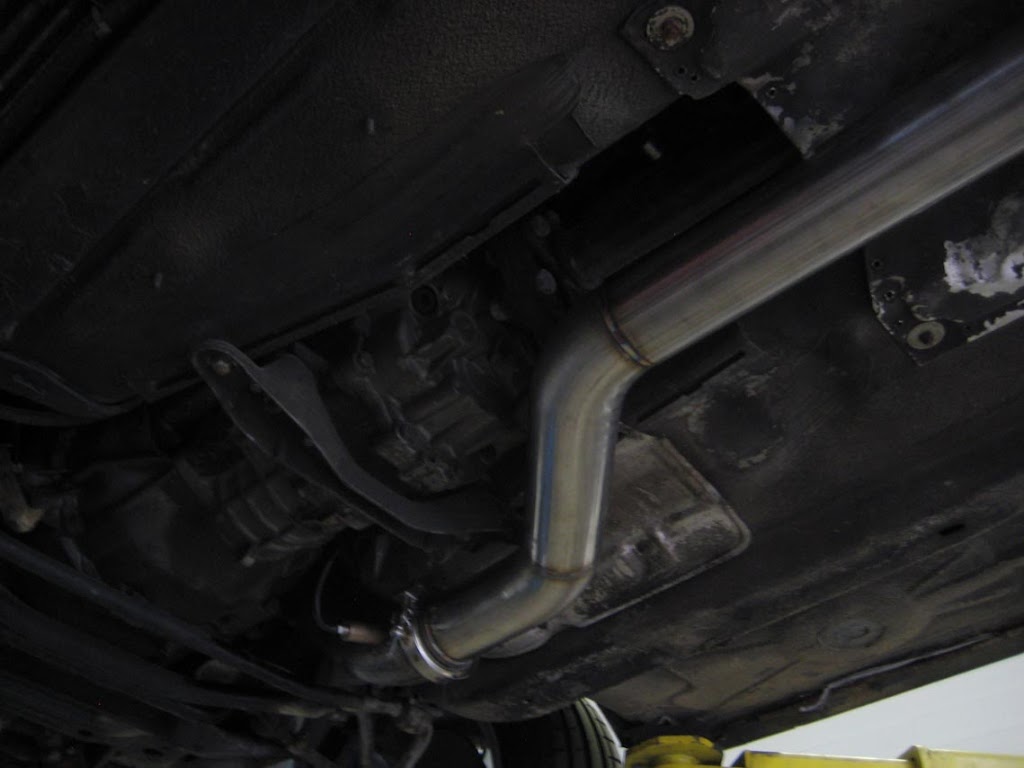
The deko-set is next!
I still don't have time to work on the car as it's now my super-busy time of year and on top of that, I've been helping my dad recover stuff from the house that exploded.
The car had to go back to Mike for a couple of touch ups and stuff - nothing that was my fault. Just some minor stuff that needed fixing. Enough time had passed and the car was just sitting, so I figured, let's get it done. I was hoping to get the exhaust done first. Mike agreed since he figured it wouldn't be until after the first of May when he could take the car. So, exhaust it is.
The exhaust on the car when it came to me consisted of the Alpina downpipe running into a Y to two factory E28 M5 cats and from there into a Strömung cat-back system didn't fit the car. Ground clearance was a disaster, and it showed on the cats. Even mild speed bumps were pushing it.

The only good part of the system was the flange between the resonator and the rear muffler, since I could simply unbolt it after I cut the muffler off the car with a Sawzall. Designed for a US car, someone mounted it by dropping a bolt through one of the plugs in the trunk into the center trunk support, attaching a bracket welded to the muffler mount to the bolt with a nut, then tack-welding the nut to the bolt. From January 2012 until the car went in for paint, it was held up with a coat-hanger.

So, trying to figure out what to do was tough. The original Alpina stuff was NLA. I had thought about doing a custom 3" system from the downpipe to a single muffler in the rear, but I wanted it to look stock and I feared the car would be loud with lots of resonance and that wasn't what I was going for. The first time I drove the car without the rear muffler, I thought it was kinda cool, but it got old really quickly.
I had ordered a brand new Euro M5 rear muffler. I already had an NOS pair of the NLA chrome tips for it. I decided that a resonator wasn't necessary, going off of the B7S which had pipes to a muffler. So, what I needed was to connect the downpipe to the muffler.
I was given a couple of leads, but first decided to hit up the people who had done some work for me in the past on my white car, mating the SuperSprint headers to the Stebro exhaust. They moved the shop, so it wasn't very close anymore. Oh well. Apparently, they developed a phone allergy during the move, so nothing was doing with them. I Googled the first lead and it appeared to be some complete auto care kinda place, so no thanks. The second was from a place I was warned would be pricey, but excellent quality. I was after the quality. I called Precision Chassis Works out in Gilbert (no one does anything near my house - it sucks). The owner, Kent, answered and I explained what I was looking to have done and that I was told he was the guy to do it. He said they do quite a bit of it and he wanted me to bring the car in so he could look at it and see what we can do.
I brought the car to his shop and was very impressed with his work. He can lay down a row of dimes like I've never seen before. He looked under the car and at the muffler I brought and he gave me his idea. I said sounds good. An estimate would be in my inbox by the end of the day. It was pricey but I was impressed by his attitude, interest in the car and the quality of his work. I paid for materials and we set a rough time to do the job. I also learned he's the brother of the guy who powder-coated my wheels. Crazy.
Our plan ended up being modify the downpipe for a V-band clamp, then run a 3" section from that back to another V-band at a custom 3" to 2" collector thingy welded to the M5 muffler. What's cool about this is that the whole 3" section is easily removable by loosening two nuts and flipping a couple levers. The muffler can stay in place for driveshaft stuff - this sort of thing is important to me, almost like I'm anticipating something.
The following day, I got the car in at Mike's. I was leaving the next day for work, so he could have the car for a few days to get everything done. He was blown away by how it came together. His shop was a zoo that day too and lots of people were there, all very impressed with the car. I was overwhelmed. I showed Mike the stuff that needed attention and told him when I'd be back in town.
After a couple of minor delays, Mike was finally done with the car. I had made arrangements with Kent to bring him the car that afternoon. Of course, stuff I can't do myself, so I brought my mom along to drive the touring from Mike's to Kent's shop.

Quickly ran over everything with Kent again and he figured he'd need the car until Friday. Fine with me. I was kinda flattered to learn that he found the car interesting enough to post about it on his Facebook page, then posted a picture of the quality welding done when the car was brought into the US. You can see it in the above photo of the old exhaust, in front of the cats. If only he had an idea of how bad the work was in the doors and bumpers - all fixed now.
As usual with me, timing was a nightmare. I stopped by Thursday and checked things out since I was in the area. I also used the opportunity to pick up the old exhaust since I want to sell the cats and the Strömung stuff, as I think someone could definitely use it. He showed me the collector he made to go into the muffler (I guess it's more of a disperser?). I was again impressed.
Had to work today (Friday). Checked in with him around 2pm and he had everything put together, just needed to be fully welded. Figured a couple of hours. I could get the car tonight until 7 or so. Didn't hear from him by 20 after 6, so I called. I hate calling and bothering people, but I'm trying to plan, too. Kent always answers the phone and I find that refreshing. He had just started the car up after getting everything put back together. I called Ray and asked if he could run down there with me. He did. It was dark when we got there and the car was off the rack, so I couldn't see it, but it was okay as I didn't have a ton of time, though that didn't stop us from talking a while and giving Ray a chance to check things out in the shop.
I was surprised at how quiet the car is and I'm actually happy about that. The ground clearance is a welcome change as well. It was a very pleasant drive home, so I feel it was money well spent.
I asked Kent to send me some photos for my records. He happily obliged. No photo of the downpipe off of the car unfortunately. I should have taken one myself. Everything he did is 304 stainless and every joint is fully back-purged.


The deko-set is next!
-
JoshInAtlanta
- Posts: 4434
- Joined: Apr 22, 2006 11:35 PM
- Location: Holly Springs, GA
-
Kyle in NO
- Posts: 17638
- Joined: Feb 12, 2006 12:00 PM
- Location: Nasty Orleans------> Batten-Rooehjch------>More Souther LA


