External links now open in a new browser tab - turn this off in your UCP - Read more here.

Noob M30B35 Build

E28 technical advice asked and given! Troubleshooting, modifications and more.
vinceg101
Posts: 4928
Joined: Jun 20, 2007 2:40 AM
Location: Los Angeles, CA

Re: Noob M30B35 Build. 2014-07-04: Will it start this weeken

Post by vinceg101 »

cek wrote:
kzolee wrote:
cek wrote: In order to get the hoses off I need to drop the tank.
I changed the fuel hoses without dropping the tank...

Why You want to change the fuel pump? :roll: If You change the fuel hoses, take a look at the main filter. Maybe it needs to be replaced.

Pro tip: wear protective goggles. Not like me... :brickwall:
I could sorta see how you could snake new hoses through. Still don't think it's worth doing now given I want to replace my tank anyway.
x2 on not needing to drop the tank entirely; all you have to do is loosen the tank mounting bolts on the right side and front. It will provide enough clearance to snake the fuel hose through.
But as you say, if you're dropping the tank anyway...
LeiseyJr
Posts: 1527
Joined: Dec 22, 2013 10:11 PM
Location: Houston,Tx

Re: Noob M30B35 Build. 2014-07-04: Will it start this weeken

Post by LeiseyJr »

I would recommend you drop the tank. Its not needed but since the car is apart Anyway I would just replace all the hoses, clean/paint the tank like I did on mine. Its really not that difficult of a job. Just get it done now so you wont have to worry about it later. We cleaned my tank with a bunch of B-12 carb cleaner and sprayed it with some Rustoleum flat black. The hoses go to the expansion tank can be a bitch and the rubber piece that goes around the filler neck.
tig
Posts: 9397
Joined: Mar 18, 2013 6:25 PM
Location: Durango
Contact:

Re: Noob M30B35 Build. 2014-07-07: I Effed up. Twice.

Post by tig »

Updated To-Do List:
  1. Mount the B35 coil (DONE).
  2. Put new coolant overflow tank in and connect (DONE).
  3. Tighten belts (DONE).
  4. Attach fuel hose from tank to rail (DONE).
  5. Connect new grounds for wiring harness on RHS (DONE).
  6. Put new wiper tank in and connect (DONE).
  7. B35 bellhousing has hole w/ plastic cap. Plastic cap wants to fall out. Buy cap at Ace hardware that fits! (DONE)
  8. Install short-shift kit. (DONE)
  9. Install lightened & balanced flywheel and new clutch. (DONE)
  10. Have beer. Watch Sounders game. (DONE)
  11. Put radiator back in. (DONE)
  12. Final attach AFR (waiting for the UPS man for some brass fittings). (DONE)
  13. Splice in new O2 sensor using connector bimmerguy got me (DONE)
  14. Re-do (+) battery connections. Charge battery. (DONE)
  15. Shift knob, etc... (DONE)
  16. Fill coolant. (DONE)
  17. Fill break-in oil; manually turn crank? (DONE)
  18. Install plugs. (DONE)
  19. Put air filter housing in. (DONE)
  20. Put in 179 ECU and plug it in. (DONE)
  21. Fill brake fluid; bleed. (DONE, sort-of)
  22. Fill PS fluid. (DONE)
  23. Finish removing transmission. (DONE)
  24. Figure out why gooseneck is leaking. (DONE)
  25. Install new gasket (Ordered, will be her tomorrow)
  26. Attach transmission. AGAIN.
  27. UUC is sending me a replacement part for the short-shift kit; what they sent me would work, but it was clearly defective. Should be here tomorrow.
  28. Attach headers. AGAIN.
  29. Reattach strut bar, etc... AGAIN.
  30. Install rebuilt driveshaft.
  31. Reinstall exhaust. (once the car is drivable I'm taking it into a shop and having the exhaust rebuilt)
  32. Bleed clutch master (need to buy one of those oil can pump thingies).
  33. Remember to tighten steering column nut (I have a piece of tape on the dashboard where I wrote "don't forget steering nut!").
  34. Cross fingers and start it up. 20 minutes, then re-torque head bolts.
  35. Have beer.
wkohler
Posts: 50928
Joined: Oct 05, 2006 11:04 PM
Location: Phönix, Arizona, USA
Contact:

Re: Noob M30B35 Build. 2014-07-07: I Effed up. Twice.

Post by wkohler »

I'd have dropped the tank while everything was apart. All new hoses new pumps and filter. No easier time than when there is no exhaust. Get the tank cleaned out and refinished too.
tig
Posts: 9397
Joined: Mar 18, 2013 6:25 PM
Location: Durango
Contact:

Re: Noob M30B35 Build. 2014-07-07: I Effed up. Twice.

Post by tig »

wkohler wrote:I'd have dropped the tank while everything was apart. All new hoses new pumps and filter. No easier time than when there is no exhaust. Get the tank cleaned out and refinished too.
It may still happen if other parts don't get here. Filter is newish.

Exhaust will come out soonish anyway, as I'm going to have it modified.
ldsbeaker
Posts: 6133
Joined: Mar 25, 2007 10:14 PM
Location: Slicktop City, AZ
Contact:

Re: Noob M30B35 Build. 2014-07-07: I Effed up. Twice.

Post by ldsbeaker »

I was able to replace all of the hoses with the tank in place. Very fiddly, and now that you mention it... Yeah, it would be SO much easier with the tank either completely removed or loosened just a little... :oops:
tig
Posts: 9397
Joined: Mar 18, 2013 6:25 PM
Location: Durango
Contact:

Re: Noob M30B35 Build. 2014-07-04: Will it start this weeken

Post by tig »

cek wrote: On the pumping fluid back in through the slave bleeder: If you do that, does the fluid then push up through the master and then to the reservoir? IOW, leave the cap of the reservoir off?
I had a few minutes this morning. I used my new trusty oil can and a length of hose connected to to the slave bleeder. I opened the cap of the reservoir. I pumped. I'm not sure it's doing anything. I didn't want to over-do it and ran out of time.

But I still feel like I'm missing something in the technique here. Clutch pedal still goes to floor with almost no resistance.
trevmmeister
Posts: 847
Joined: Mar 02, 2014 9:20 PM
Location: Newnan, GA

Re: Noob M30B35 Build. 2014-07-07: I Effed up. Twice.

Post by trevmmeister »

master cyl/pedal pulled all the way up, nipple on slave cyl opened up, cap off reso, just pump until bubbles come up. easier with two people, 1 under car making sure nipple stays open and hose stays attached, the other pumping and watching for bubbles.

one of the few things I know exactly how to do, have replaced master cyl 6 times in the past two years. kept replacing them until finally realized slave was the problem. -.-

pull some fluid out of the resovoir first so there is room for the fluid
wkohler
Posts: 50928
Joined: Oct 05, 2006 11:04 PM
Location: Phönix, Arizona, USA
Contact:

Re: Noob M30B35 Build. 2014-07-07: I Effed up. Twice.

Post by wkohler »

http://www.mye28.com/viewtopic.php?t=100245

There's a video here that should help you out.
tig
Posts: 9397
Joined: Mar 18, 2013 6:25 PM
Location: Durango
Contact:

Re: Noob M30B35 Build. 2014-07-07: I Effed up. Twice.

Post by tig »

Thanks Chris. Video was helpful.

I'm thinking to myself "Wow, a pressure bleeder like the Motive would be nice to own." Only $50? I'll go check Amazon.

I see this:

Image

Uh, where the Eff did I put it?
tig
Posts: 9397
Joined: Mar 18, 2013 6:25 PM
Location: Durango
Contact:

Re: Noob M30B35 Build. 2014-07-07: I Effed up. Twice.

Post by tig »

I want to be home right now wrenching so bad. But work.

Anything I should know about installing my refurbished driveshaft? I've read Bentley's, Haynes, and the factory repair manual. I don't see anything non-intuitive, but just wanted to make sure.
wkohler
Posts: 50928
Joined: Oct 05, 2006 11:04 PM
Location: Phönix, Arizona, USA
Contact:

Re: Noob M30B35 Build. 2014-07-07: I Effed up. Twice.

Post by wkohler »

Its a lot easier if your rear wheels are free and the car is in neutral, so put your jack back there. I wrote up a thing on how to pull a driveshaft in 15 min or so. I have gotten very good at it. Don't forget to pre-load the center support bearing before tightening it. Simply push it forward a quarter inch or so.
tig
Posts: 9397
Joined: Mar 18, 2013 6:25 PM
Location: Durango
Contact:

Re: Noob M30B35 Build. 2014-07-07: I Effed up. Twice.

Post by tig »

I'm either completely idiotic, or something is very wrong.

I tried again to bleed the clutch. Something is blocking fluid from reaching the master/reservoir. I have just ruined a brand new slave because my pumping caused the rubber to expand and pop.

Image

Anyone have any ideas?
wkohler
Posts: 50928
Joined: Oct 05, 2006 11:04 PM
Location: Phönix, Arizona, USA
Contact:

Re: Noob M30B35 Build. 2014-07-07: I Effed up. Twice.

Post by wkohler »

Did you take the cap off of the reservoir?
tig
Posts: 9397
Joined: Mar 18, 2013 6:25 PM
Location: Durango
Contact:

Re: Noob M30B35 Build. 2014-07-07: I Effed up. Twice.

Post by tig »

wkohler wrote:Did you take the cap off of the reservoir?
Yes, I had my son watching for bubbles...
demetk
Posts: 8431
Joined: Aug 09, 2007 8:58 AM
Location: CT, USA

Re: Noob M30B35 Build. 2014-07-07: I Effed up. Twice.

Post by demetk »

Is this a reverse bleeding thing?

I think that slave can be salvaged.
dsmith
Posts: 2362
Joined: Jan 20, 2012 12:52 AM
Location: Charleston, SC

Re: Noob M30B35 Build. 2014-07-07: I Effed up. Twice.

Post by dsmith »

I use this and am successful 100% of the time. I just replaced a slave and clutch line and brake master, calipers etc and no issues.

MV6835 Vacuum Brake Bleed Kit
tig
Posts: 9397
Joined: Mar 18, 2013 6:25 PM
Location: Durango
Contact:

Re: Noob M30B35 Build. 2014-07-07: I Effed up. Twice.

Post by tig »

demetk wrote:Is this a reverse bleeding thing?

I think that slave can be salvaged.
How can it be salvaged if it squirts fluid when under pressure?
trevmmeister
Posts: 847
Joined: Mar 02, 2014 9:20 PM
Location: Newnan, GA

Re: Noob M30B35 Build. 2014-07-07: I Effed up. Twice.

Post by trevmmeister »

something wasnt right, is metal line from the bottom of the master down to the slave twisted or kinked? was the master cylinder attached to the pedal correctly and pulled up, not compressed to the floor? only two things I can think of that would have restricted flow.
demetk
Posts: 8431
Joined: Aug 09, 2007 8:58 AM
Location: CT, USA

Re: Noob M30B35 Build. 2014-07-07: I Effed up. Twice.

Post by demetk »

cek wrote:
demetk wrote:Is this a reverse bleeding thing?

I think that slave can be salvaged.
How can it be salvaged if it squirts fluid when under pressure?
All you did was push the piston rod out of the bore. There is a rubber cup attached to the piston rod that does the real pressure work. That diaphragm is just weather protection. Easy to take it apart and see how simple the design is. Push the piston back in without tearing the rubber cup and you're good to go.

We all have to do this at least once. Here's mine,

Image
tig
Posts: 9397
Joined: Mar 18, 2013 6:25 PM
Location: Durango
Contact:

Re: Noob M30B35 Build. 2014-07-07: I Effed up. Twice.

Post by tig »

demetk wrote: We all have to do this at least once.
Haha. I pulled it apart just before you posted that...I see what you mean. Why do I continue to be surprised with how simple this stuff can be.

Still don't know where the blockage is....
Kyle in NO
Posts: 17638
Joined: Feb 12, 2006 12:00 PM
Location: Nasty Orleans------> Batten-Rooehjch------>More Souther LA

Re: Noob M30B35 Build. 2014-07-07: I Effed up. Twice.

Post by Kyle in NO »

Is the clutch pedal all the way up while you are doing this? If not...
wkohler
Posts: 50928
Joined: Oct 05, 2006 11:04 PM
Location: Phönix, Arizona, USA
Contact:

Re: Noob M30B35 Build. 2014-07-07: I Effed up. Twice.

Post by wkohler »

Kyle in NO wrote:Is the clutch pedal all the way up while you are doing this? If not...

There's my follow-up question.
tig
Posts: 9397
Joined: Mar 18, 2013 6:25 PM
Location: Durango
Contact:

Re: Noob M30B35 Build. 2014-07-07: I Effed up. Twice.

Post by tig »

I think the first time I tried it, I must have had the pedal depressed. The slave was in the transmission.

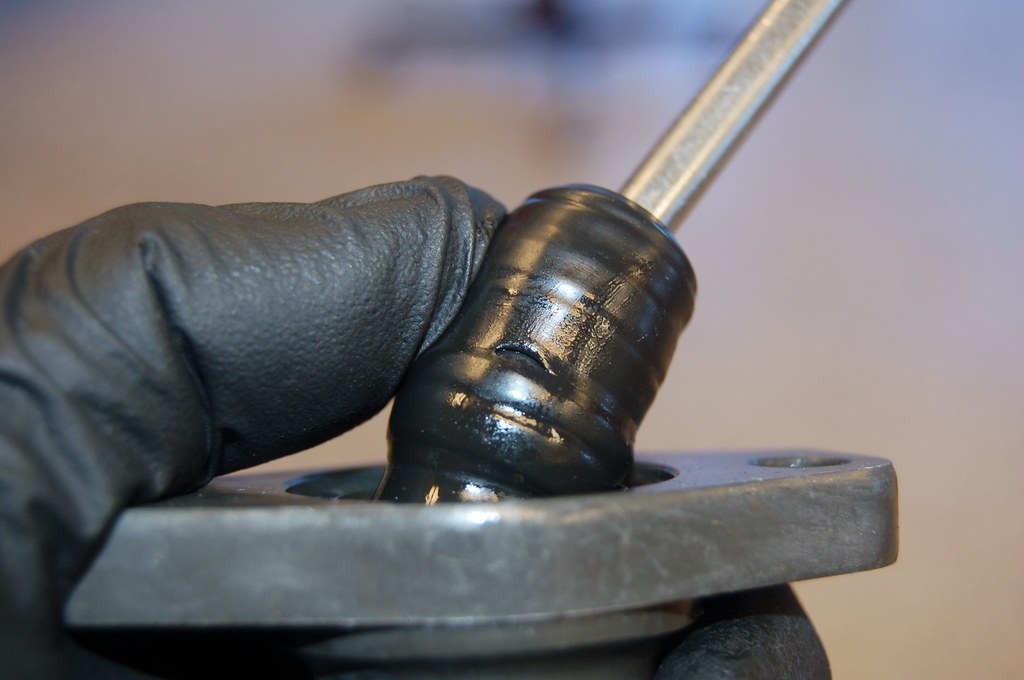
Then, after I had to pull the tranny off to fix the water leak, I decided to use the time to bleed the clutch. I had the pedal out, but.... the slave wasn't in the transmission. Nothing was holding the piston back. So the piston pushed out into the boot and from there it was all down hill.

After pulling both slaves apart I've decided the one that was in the car is perfectly fine. It's a higher quality housing, the weather seal is in great shape, and the piston is tight.

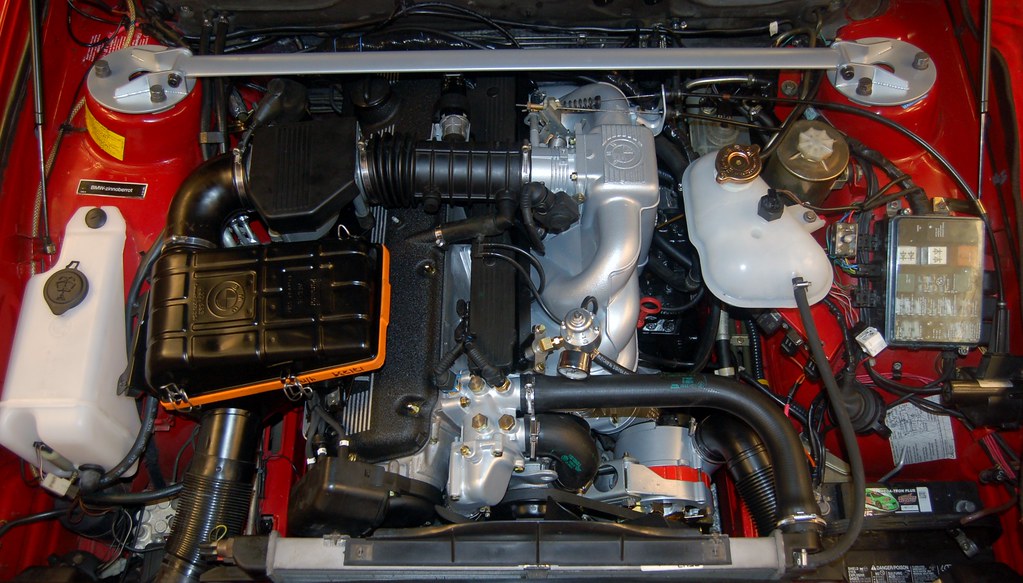
I installed it in the transmission (oh, yea, I've got the transmission & headers back on after getting a new gasket today for the gooseneck... and, yes, I used #3 permatex and anti-seize). WIth it in the transmission and the pedal out I made progress! My son has abandoned me for the night so I don't have him to watch the overflow, so I just did it part way. But now the clutch actually works!

Now I know.

New gasket with #3.
Image

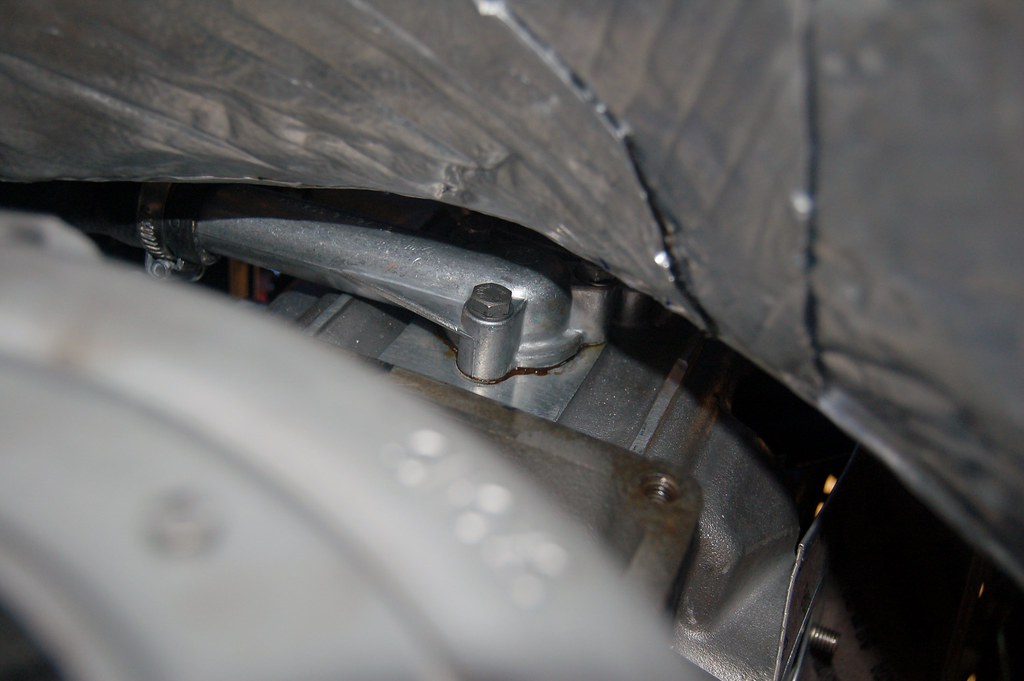
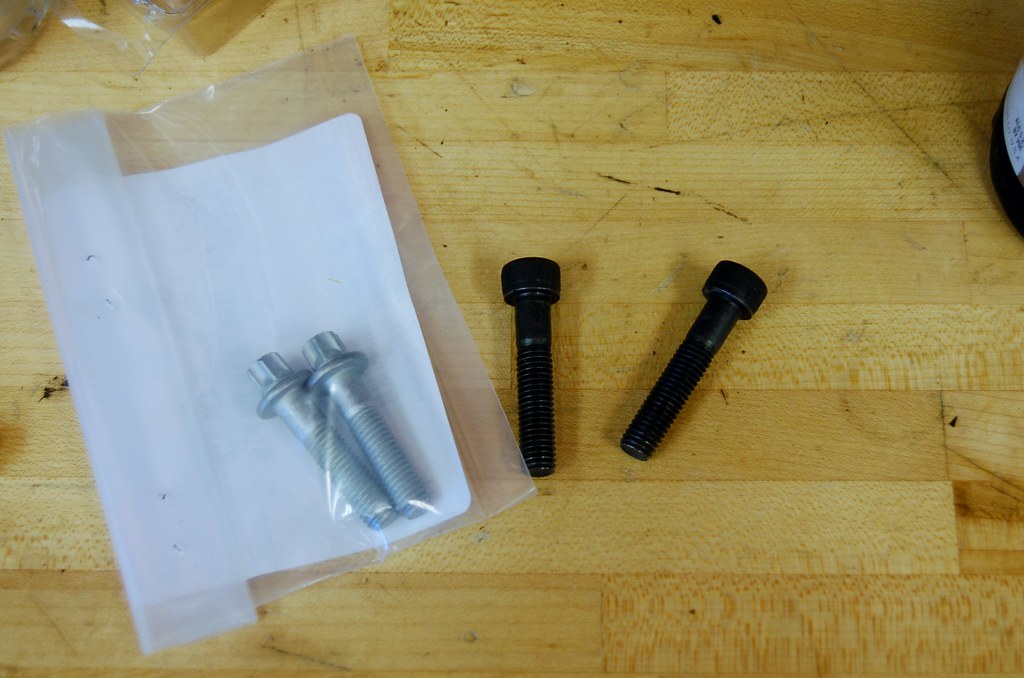
I also got torq bolts to replace the allen head bolts the PO had installed.
Image

I re-filled coolant/water and bled the cooling system. Then we removed the spark plugs and used the starter to turn the motor a bunch.

No leaks. Yay.

I have an issue with my UUC shifter kit. It has a defective part. I was going to just live with it, but this delay caused me to call them. A replacement part will be here tomorrow. This means I can't put the drive shaft in tonight.

I won't be able to wrench tomorrow, until late at night, if at all, so first start wont' happen until thursday night at the earliest now.

I'm going to button a few more things up tonight...
wkohler
Posts: 50928
Joined: Oct 05, 2006 11:04 PM
Location: Phönix, Arizona, USA
Contact:

Re: Noob M30B35 Build. 2014-07-07: I Effed up. Twice.

Post by wkohler »

I'm SHOCKED! SHOCKED! A UUC kit with a defective part. Unheard of.
tig
Posts: 9397
Joined: Mar 18, 2013 6:25 PM
Location: Durango
Contact:

Re: Noob M30B35 Build. 2014-07-07: I Effed up. Twice.

Post by tig »

Image

Updated To-Do List:
  1. Mount the B35 coil (DONE).
  2. Put new coolant overflow tank in and connect (DONE).
  3. Tighten belts (DONE).
  4. Attach fuel hose from tank to rail (DONE).
  5. Connect new grounds for wiring harness on RHS (DONE).
  6. Put new wiper tank in and connect (DONE).
  7. B35 bellhousing has hole w/ plastic cap. Plastic cap wants to fall out. Buy cap at Ace hardware that fits! (DONE)
  8. Install short-shift kit. (DONE)
  9. Install lightened & balanced flywheel and new clutch. (DONE)
  10. Have beer. Watch Sounders game. (DONE)
  11. Put radiator back in. (DONE)
  12. Final attach AFR (waiting for the UPS man for some brass fittings). (DONE)
  13. Splice in new O2 sensor using connector bimmerguy got me (DONE)
  14. Re-do (+) battery connections. Charge battery. (DONE)
  15. Shift knob, etc... (DONE)
  16. Fill coolant. (DONE)
  17. Fill break-in oil; manually turn crank? (DONE)
  18. Install plugs. (DONE)
  19. Put air filter housing in. (DONE)
  20. Put in 179 ECU and plug it in. (DONE)
  21. Fill brake fluid; bleed. (DONE, sort-of)
  22. Fill PS fluid. (DONE)
  23. Finish removing transmission. (DONE)
  24. Figure out why gooseneck is leaking. (DONE)
  25. Install new gasket (Ordered, will be her tomorrow) (DONE)
  26. Attach transmission. AGAIN. (DONE)
  27. Attach headers. AGAIN. (DONE)
  28. Reattach steering support bar, etc... AGAIN. (DONE)
  29. Install powder coated strut brace (DONE).
  30. Tighten steering column nut (DONE)
  31. Straighten steering wheel (DONE)
  32. UUC is sending me a replacement part for the short-shift kit; what they sent me would work, but it was clearly defective. Should be here tomorrow.
  33. Install rebuilt driveshaft, new guibo.
  34. Reinstall exhaust. (once the car is drivable I'm taking it into a shop and having the exhaust rebuilt)
  35. Final bleed clutch
  36. Put fuel in tank.
  37. Test fuel pump.
  38. Cross fingers and start it up. 20 minutes, then re-torque head bolts.
  39. Have beer.
wkohler
Posts: 50928
Joined: Oct 05, 2006 11:04 PM
Location: Phönix, Arizona, USA
Contact:

Re: Noob M30B35 Build. 2014-07-08: Back on track.

Post by wkohler »

It *looks* good. Hope things progress without further issues. Hope you're learning a lot, too!
tig
Posts: 9397
Joined: Mar 18, 2013 6:25 PM
Location: Durango
Contact:

Re: Noob M30B35 Build. 2014-07-08: Back on track.

Post by tig »

wkohler wrote:It *looks* good. Hope things progress without further issues. Hope you're learning a lot, too!
I think it looks good too. Will look better when I have time to invest in putting in the E34 air filter housing.

Fingers are crossed that there are no more issues. But there are so many things I could have done wrong with the wiring... I tested the heck out of everything; double and triple checked. But so many things...

I am learning a lot. Tons. Sometimes only once, too.

It's amazing how much easier it was putting that transmission in the 2nd time :oops:
wkohler
Posts: 50928
Joined: Oct 05, 2006 11:04 PM
Location: Phönix, Arizona, USA
Contact:

Re: Noob M30B35 Build. 2014-07-08: Back on track.

Post by wkohler »

I guess put me in the minority on the B35 airboxes. I think they really look out of place in the E28. ;)
tig
Posts: 9397
Joined: Mar 18, 2013 6:25 PM
Location: Durango
Contact:

Re: Noob M30B35 Build. 2014-07-08: Back on track.

Post by tig »

wkohler wrote:I guess put me in the minority on the B35 airboxes. I think they really look out of place in the E28. ;)
So do E34 Sport Seats, right?
Post Reply