M30/B35 Rebuild

Discussion pertaining to positive pressure E28s.
RED89E34
Posts: 78
Joined: May 15, 2011 12:02 PM
Location: MIssion Viejo,CA

Re: M30/B35 Rebuild

Post by RED89E34 »

Engine is running great.

Working on rebuilding front susps. and driveshaft.
:)

Turbo setup will be in late Feb. :)
RED89E34
Posts: 78
Joined: May 15, 2011 12:02 PM
Location: MIssion Viejo,CA

Re: M30/B35 Rebuild

Post by RED89E34 »

Car Updates and BFest!

Anyone head to BFest? I had a blast Saturday at the autocross and then on the in-field talking to a few people and vendors. I even spoke with a really cool race car driver I spotted while soaking in the ///. Ya know, obviously I am pursuing that career too and I just walked up and introduced myself and asked if he had a few minutes to talk about how to get to where he is in auto racing...he shared his story and how to become a modest and successful one too. Super cool guy! Relatively cheap invest and annual costs from what he said. Training from 8 - 15k and a club car costing 50k a year. Sound right? Or average? I guess it all depends on where you want to start.

The largest takeaway from BFest for me was the autocross. You can play HOURS of a simulation in the comfort of your home in bimmer briefs and sofa. Tuning a car takes 2 seconds and you can even paint a car. LOL. But actually living it, breathing it, getting sun burnt, taking 20 minutes to install a front strut brace. That's what I am talking about now. Hands on experience.

I pushed this car to the limit and it did pretty well for what it is. One instructor said it was pretty "nibble". I dropped times from 1:20 seconds to I think my best was 1:10 of 7 runs.

What it needs is a new steering wheel. I can flex the oem sooooo sooo...so so much. I'll have to get a video of it. It's pretty funny.
A nice modest race set with side support would be nice too.

Updates on the 5!
Moosehead Engineering rear strut mounts installed - I think this was later 2015 or early 2016. But for anyone picking up those mounts. Make sure the welds penetrate through the steel. Mine were 50% done and they both broke over time. They sent over replacements as soon as I emailed them too. Very helpful.
Rear Koni adjustable shocks. Love the shocks.
New Fuel Pump - Thank you Todd @TCD. He was super helpful and got back to me very quickly.
Driveshaft center support repair - Well, I had a shop do this, because I didn't have time. And then do it again. And then someone broke into my car. And then it failed again. They installed it incorrectly. Luckily the car was super locked and they didnt get any goodies! I was just left with damage to a few ares of the car. But still, really upset that happened. I was really upset because it was a friends shop and they don't help out with repairs. Live and learn.
Front suspension cross link and idler arm replaced. Super easy and you WILL notice a big difference.
Valve Adjustment - I noticed if I push the engine hard the valve clearance increases by .001" on the exhaust valves. Sometimes on the intake. Maybe due to the expansion of heat? Maybe a setting of .011" clearance would suffice and reduce this increase in clearance. Or I may need to replace the eccentric, bolts and nuts on the rockers.
The cam cover plate on the back of the head started leaking oil again. The bolts were very loose. I am suspecting NVH caused this or the camshaft is moving in/outward dependent on rpm. I am thinking new lock washers should be installed.
I removed my oil pressure mechanical line. I need to get an electronic / digital one. Oil leaked inside the car a bit. :( For now, I have the oem one installed.
New Firestone Fire Hawk Indy 500 Tires. Love these tires. Lots of grip and relatively inexpensive. Tread wear is a bit low but it all depends on how you take the corners!
17" racing dynamic rims. Looks great but are HEAVY! You really feel a difference with the 16" rims. I might switch back to those. MPG decreases too.
New V-belts
Dropped the exhaust and cleaned it up and painted it black. Added new gaskets and muffler sealer to ensure no leaks. New rubber mounts as well. I highly recommend replacing the stock exhaust. Stock exhaust is extremely heavy compared to an aftermarket alternative. The con? LOUD NOISES! :) But who doesn't love hearing the engine they built rev and rev and rev.
Dropped the LSD and leaned it up. and cleaned the axle mounts and fasteners. They were dirty from oil spray from front of the car.
New blower motor for the HVAC - I took a trip to SF last year in June. AMAZING drive. :) I started heading back after a music event and the sucker wouldn't shut off and started smoking! The bearings where shot and it shorted somewhere in the armature. That was hilarious. No damage to the car. Just my health.
*Pro Tip - I highly recommend checking all rubber hoses on the metered air side of the engine by removing them and applying Permatex Sensor-Safe Blue RTV Silicone or similar. I saw a nice improvement in a smooth idle and steady acceleration.


Future repairs after the BFest weekend.
Clutch master cylinder needs to be replaced - the bore inside is scored and it gets hung up internally, resulting in a "low pedal".
Front Brakes - Brake fad happened a lot while on the autocross. I plan to keep the original E34 brakes and if I find the larger 540 brakes I will have to grab them. But until then, I'll pick up some better friction material pads.
Oil Change
Brake Flush
Coolant Flush
Still need to install my Moosehead Engineering lower control arm bearings.

Well, until next time. Thanks for reading and hope this helps future tuners.
tig
Posts: 9351
Joined: Mar 18, 2013 6:25 PM
Location: Durango
Contact:

Re: Update:

Post by tig »

cek wrote:
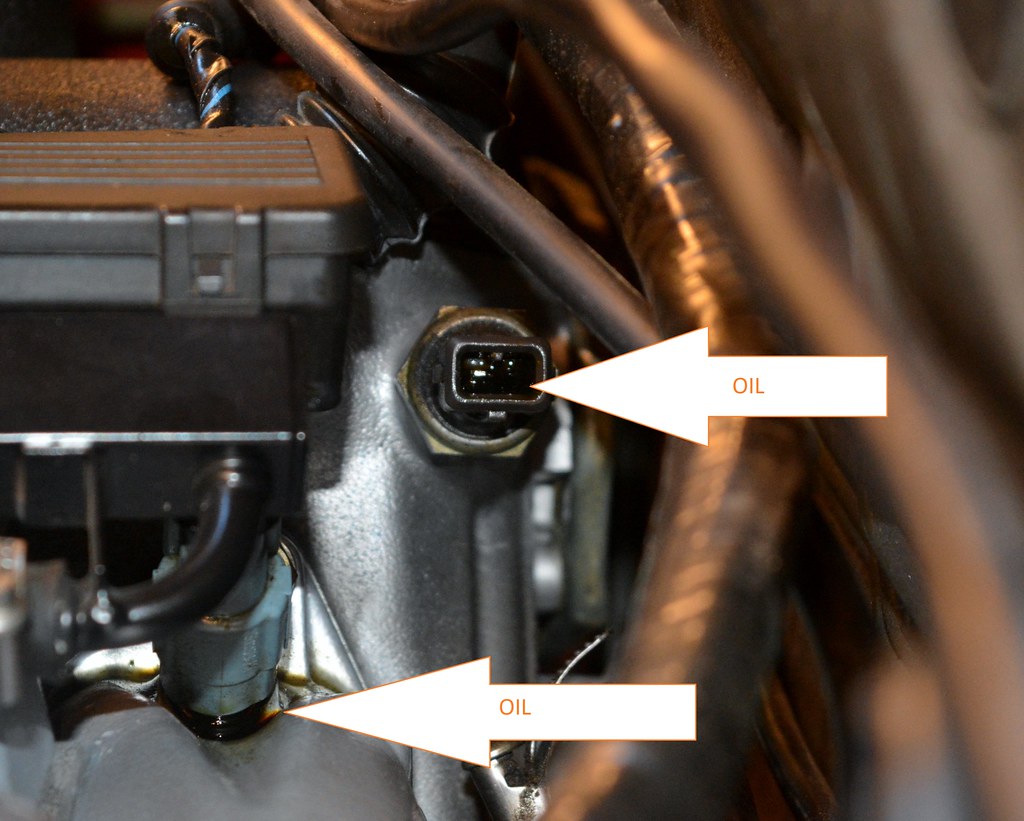
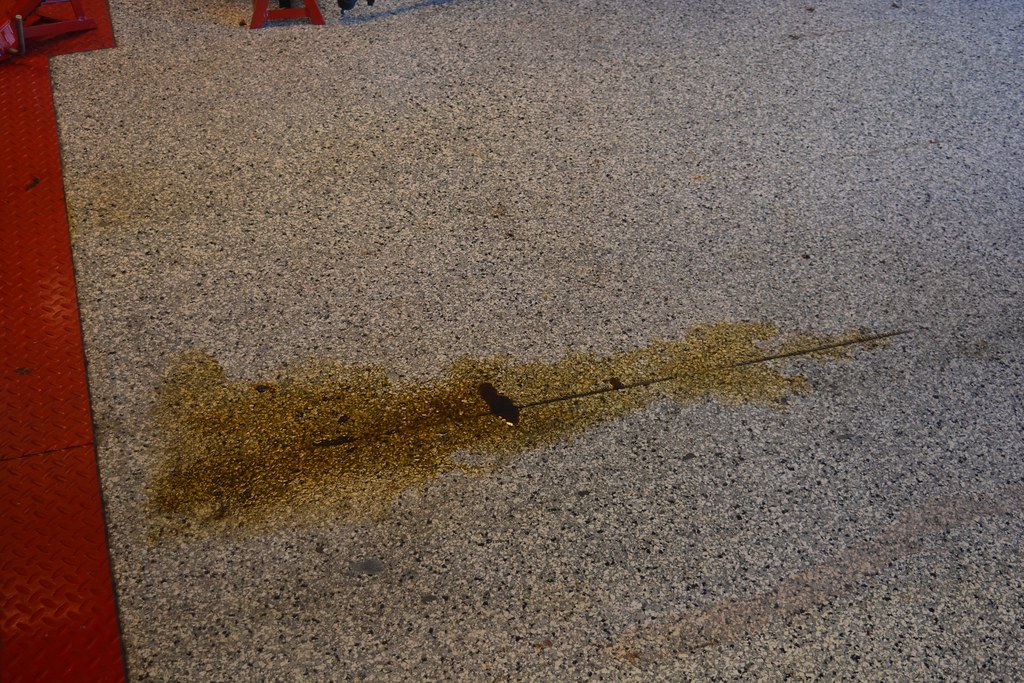
RED89E34 wrote: When we had some wet streets here in Cali I was having fun sliding around with the manual transmission and keeping the revs high. This caused the oil pressure sensor to break and dump oil past the casing. Easy fix but I was surprised it broke! Symptom was oil leakage, oil burning and oil pressure light coming on at idle.
Thanks for updating us!

I found it interesting that you inferred high-revs caused the oil pressure sensor to break. Is that really something that can fail due to high-revs? I figured they just get old. Just curious.
18K on my M30B35 where I put a new oil pressure switch on. This week I developed a nasty oil leak.

Image

Poking around, I found oil on the sensor wire. Pulled sensor.

Image

Have a used one lying around, not sure it's right. Searched for "M30B35 oil pressure switch". Found this thread, that I had commented on 2 years ago.

I think these things just fail. Sure I drive this motor hard, but for it to fail at 18K miles?

Figured I'd share.
marc79euro645
Posts: 513
Joined: Dec 08, 2008 11:33 PM

Re: M30/B35 Rebuild

Post by marc79euro645 »

The earlier model oil pressure switch with the spade ends leak bad too. I finally eliminated mine.Now if I could just find the elusive drip on the front of the motor.
RED89E34
Posts: 78
Joined: May 15, 2011 12:02 PM
Location: MIssion Viejo,CA

Re: M30/B35 Rebuild

Post by RED89E34 »

Bimmerfest 2018 Autocross video. :)

https://www.youtube.com/watch?v=DTIizDF_WYM
Tiit
Posts: 290
Joined: Oct 06, 2017 6:27 AM
Location: Canberra

Re: M30/B35 Rebuild

Post by Tiit »

Wow. Trunk lid is moving around quite a bit.
RED89E34
Posts: 78
Joined: May 15, 2011 12:02 PM
Location: MIssion Viejo,CA

2019 Updates

Post by RED89E34 »

Hello fellow Bimmer Boys.

Sorry about being off radar. Sumer of 2017 was life changing. And this build wasn't as important as other priority items.

Hope everyone is doing well!
Still driving this car hard though.

Went to BFest with my son. Hes 13.5 months. Its been great with him and sharing the motorsport hobby with him.

I've seen a lot of e34s on the road and people who enjoy the classic. I love the comradery that all e34 and car enthusiasts share.

Updates:
2018 I replaced the radiator, engine mounts and fan after a engine moint broke which made the fan contact the hood, rad shroud and radiator. Today I finished a deep cleaning/flush of cooling system.

Found and fixed a short circuit when I was reving the engine by the throttle body. The cable was sparking when it touched the intake manifold. I found the throttle cable was rubbing on a harneas near the heater valve assembly. Easy fix.

Fixed non-op right low beam. I was getting 9.5 volts instead of battery voltage. After tests...I found the lamp control module relay had dirty contacts and the solder joints were cracked. Cleaned everything, added more solder, and cleaned up the headlamp wiring a bit.

Installed a deep dish steering wheel about 6 months ago. It feels great with gloves and I feel connected to the road even more now. I bought it from a guy in Bulgaria/eBay. The hex bolts supplied were cheap so I bought larger hex bolts to add more torque. Solid as a rock now.

My center support bearing has been modified and has not failed in almost a year. I used a solid/flexible "caulk" for concrete and it sustains high temperature and stress loads. I applied this to my lower forward thrust arms which helped reduce the 55mph steering shimmy.

Tightening of large nut on steering shaft. This really helped with the steering shimmy. I highly recommend checking this if you drive your car hard.

Installed new master and slave cluch cylinders.flushed brake/clutch fluid. I did this in 2017 before bfest.

Replaced front steering linkage stabilizer bar. And idler arm. Also helped reduce 55mph shimmy. Sometime in 2018.

Replaced all rubber seals and hoses in and for gas tank. I did this a while ago. It was failing smog test years ago.

Replaced interior seating and door panels. Heated seats.
Door panels have updated leather arm rests. Great pickyourpart find. May 2018

Sort of fixed my driver door lock/unlock issue. The mechanism is worn out and takes some jiggling to make it unlock/lock. The rear doors are manual. I removed the actuators. They were rusted solid.

Had a new catalytic converter installed in April 2019.

And that's pretty much it.

I'm planning on getting all the hardware for the turbo soon. The build list and plan is finalized...and I need to pull the trigger on purchase. Kinda excited...

And now I have to rebuild a ZF 5HP30 from the 540. Gawd.
RDAvena
Posts: 514
Joined: Feb 12, 2006 12:00 PM
Location: Falcon, CO

Re: Reference Video: Oil Pump Flow Check

Post by RDAvena »

RED89E34 wrote:Found a useful video that is showing a faulty pressure relief valve in oil pump.
Reminds me of this video showing upgrades to a M30 oil pump -

Without the upgrade it displays almost the same air in oil stream problem as in the previous video -
https://www.youtube.com/watch?v=-kgUbMHBwP4


Now with the upgrade there is no air in the flow -
https://www.youtube.com/watch?v=hsm5daEnOKw

Who knows what kind of voodoo he does to the pressure relief valve.
Tuner's page is https://www.p-m-tec.de/ (no affiliation).
RED89E34
Posts: 78
Joined: May 15, 2011 12:02 PM
Location: MIssion Viejo,CA

Re: M30/B35 Rebuild

Post by RED89E34 »

Maintenance:
Fixed electrical gremlins. RH side headlamp (HID) wouldn't power up. At connector for module there was only 7 to 9v. Started at the LKM and worked my way through the wiring. I had to install new wire for power and ground.
After a few hours of testing and workarounds, I am convinced the wire has just fatigued over the three decades of use. I then checked the light switch and found more evidence of higher than normal circuit loads.
The lights are working great now.

Replaced the oil filter housing gasket which was the main cause of oil seepage / leakage. Completed a oil change as well.

Replaced the door latch plastic eyelets for the lever on RF and RR doors. The issue was the cable hook slipped out of the latch lever hole and a passenger would become stuck inside the car. Also patched up the RF door panel. The old glue dried out and the fur trees were not attached to the door panel when removed. Solid now.

Since the powertrain has a single mass flywheel from an E24, I am sourcing out a new clutch kit. The current is okay but under high revs and hard shifting there is minor slipping. And I also want to replace the bushings for the linkage and upgrade the shift rod so it is stronger.

The budget to complete the turbo build is between $1500 and $2300. Plus exhaust fab and tuning costs. No rush though.

Until next time...
RED89E34
Posts: 78
Joined: May 15, 2011 12:02 PM
Location: MIssion Viejo,CA

Re: M30/B35 Rebuild

Post by RED89E34 »

Installed new E34 front lower thrust arms with Spherical ball joints. AMAZING.
https://mooseheadengineering.com/#!/Sph ... ry=1512126

Alignment was done as well. I had E32 arms in before which gave it a bit more negative camber and maybe more caster. Toe was COMPLETELY off obviously.

Next up is clutch and bushing parts.

Finishing up a 540 transmission project along with rear main seal and coolant plate reseal. Note: RealOEM.com has the trans cooler coolant pipes labeled incorrectly on their site, Right is left and vice versa.
Overall, easy job with the right tools with a 240lb auto trans.
RED89E34
Posts: 78
Joined: May 15, 2011 12:02 PM
Location: MIssion Viejo,CA

Re: M30/B35 Rebuild

Post by RED89E34 »

The 540 trans project was a success. Back to the 535.

Photo Update:
Im trying to recover the photos from the start of this thread. They were really useful for anyone doing a build.
I tried archive.org/web but the image links are broken. Imageshack might have deleted them for good.

So back in 2017 I documented the valves would get a bit louder after enthusiast driving.

I discovered that #4 exhaust valve was becoming mushroomed from being hammered. About 1 to 2 mm was removed from the top of the valve. The repair included replacing the valve. All other valves were okay and didnt have any signs of mushrooming. I also replaced all the bolts, nuts and eccentrics to adjust the valve clearances. My thoughts are the original bolts and nuts lost torque from heat and vibration, leading to the #4 Ex. valve getting hammered.

Upon removing the head, I discovered the chain tensioner guide was broken and the guide rail. So the lower timing cover HAD to come off. Along with the BF nut. I made a crank holder tool out of a 2x6 of wood, a template from aluminum foil and drilled out the bores in the wood. Used a 4 ft conduit pipe for leverage and the nut came right off.

With the head off, I decided to give all the valves a good lapping but they were all holding water in the ports when the valves were closed. Normal carbon deposits on the pistons and the combustion chambers on the heads. Valves were slightly brown on the intake, and a bit gray on the exhaust side. I have suspected the engine is running a bit lean and a bit higher in temp due to the .120" MLS head gasket.

Reinstalled with a new .120" cometic HG, reused ARP studs, etc etc.

After installation of everything, the engine fired right up and was noticeable smoother at idle. Performance should have increased a bit and cant wait to take this on another autocross soon.
Post Reply