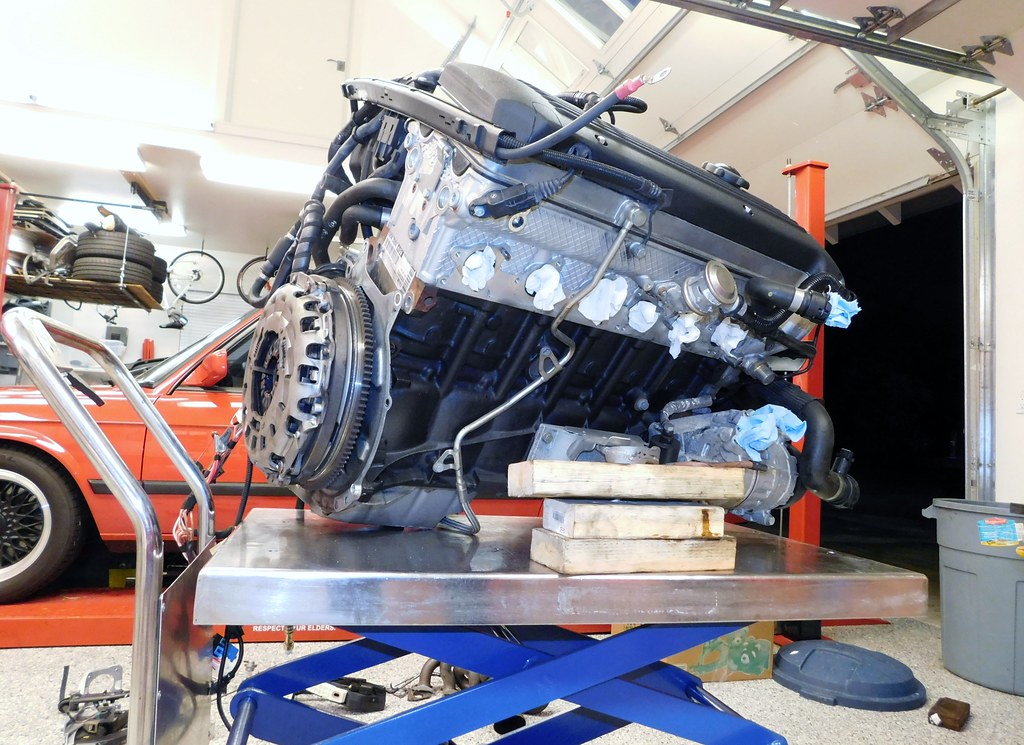
Minerva: The S54 powered, better than new, E28
Re: Minerva: The S54 powered, better than new, daily driver
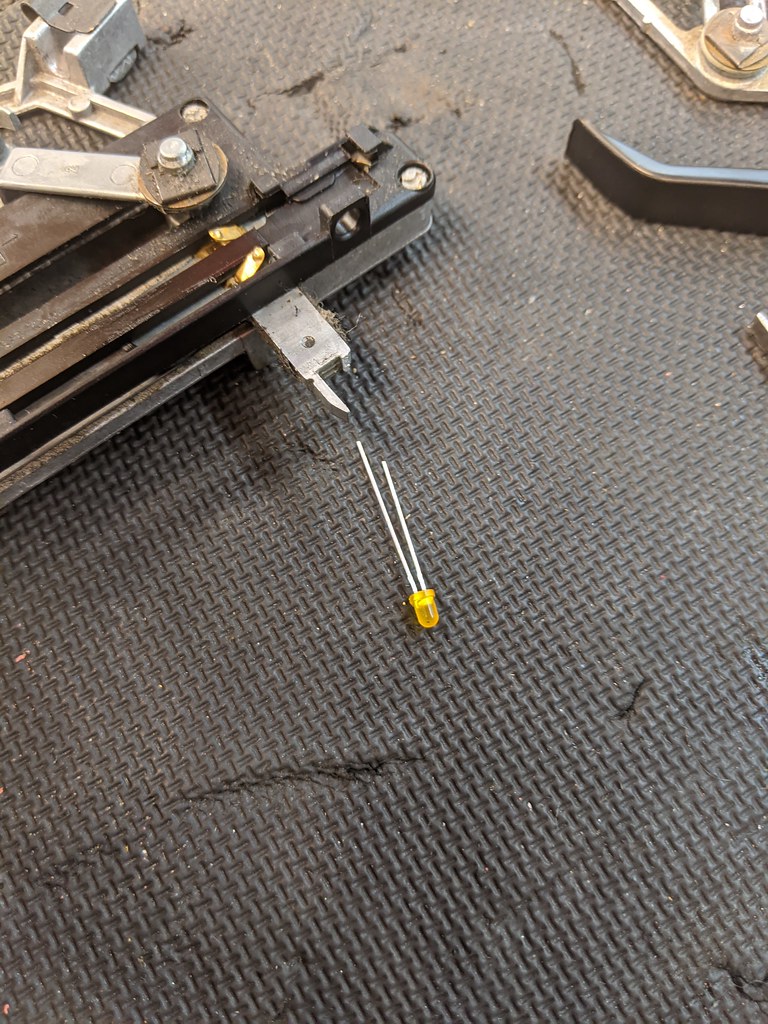
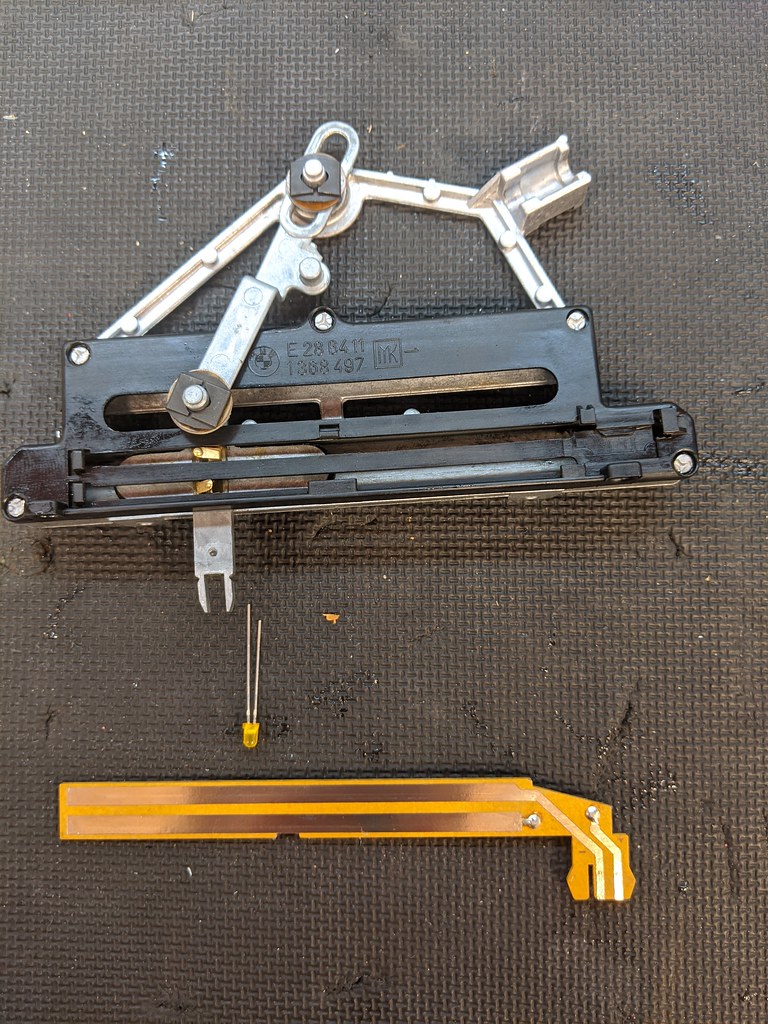
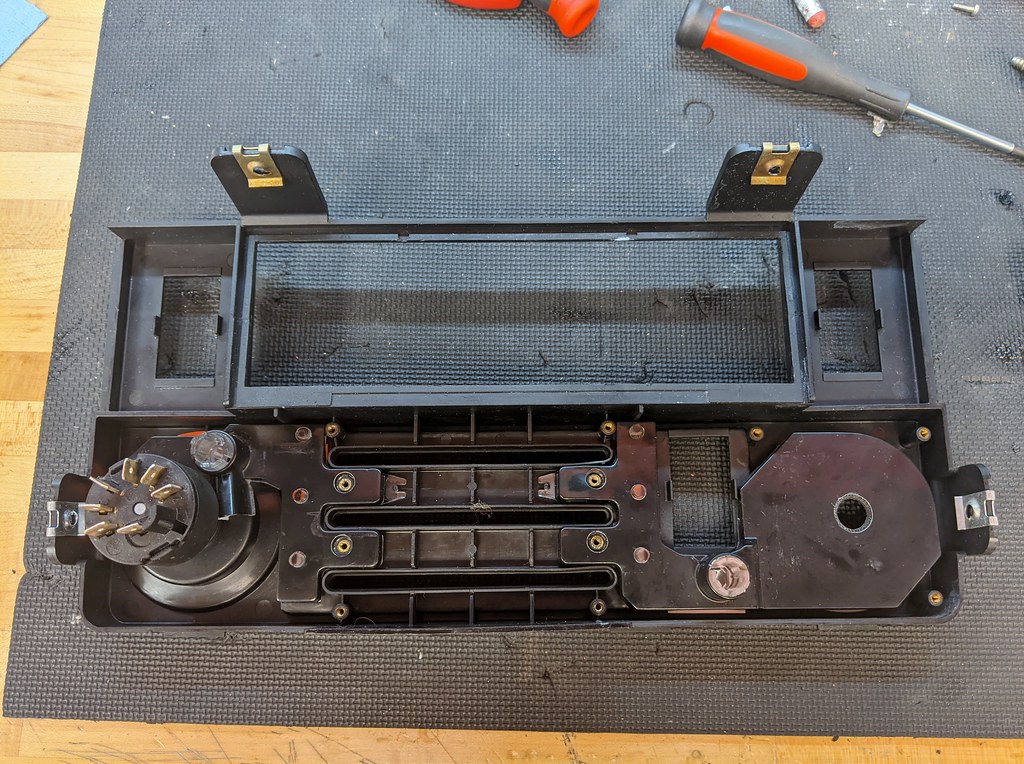
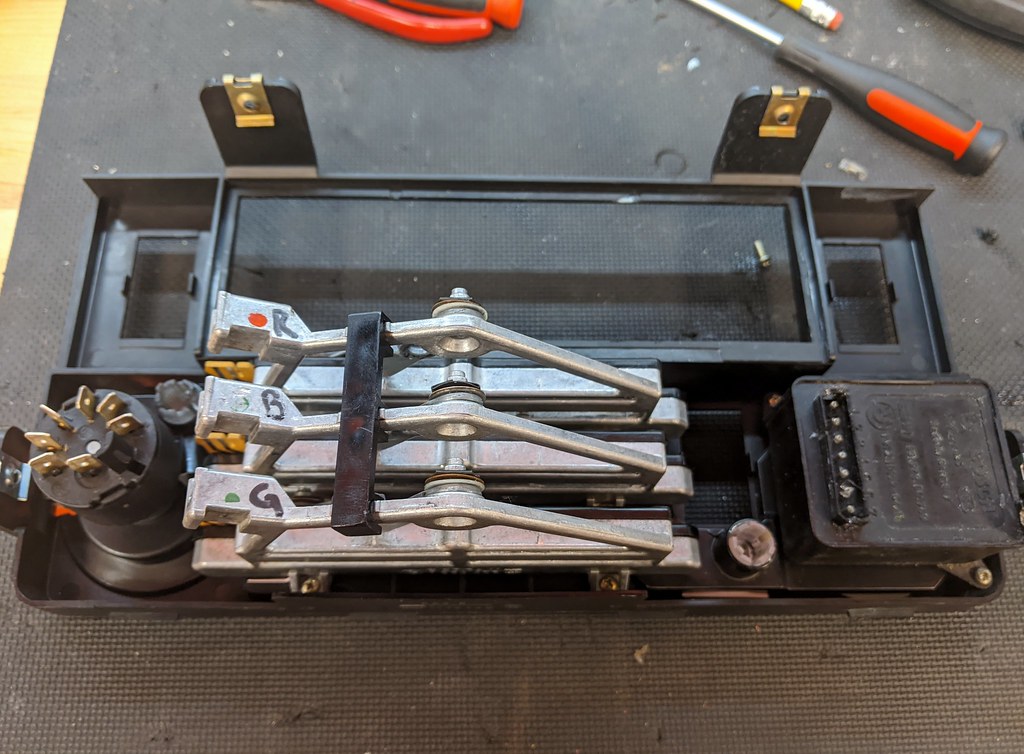
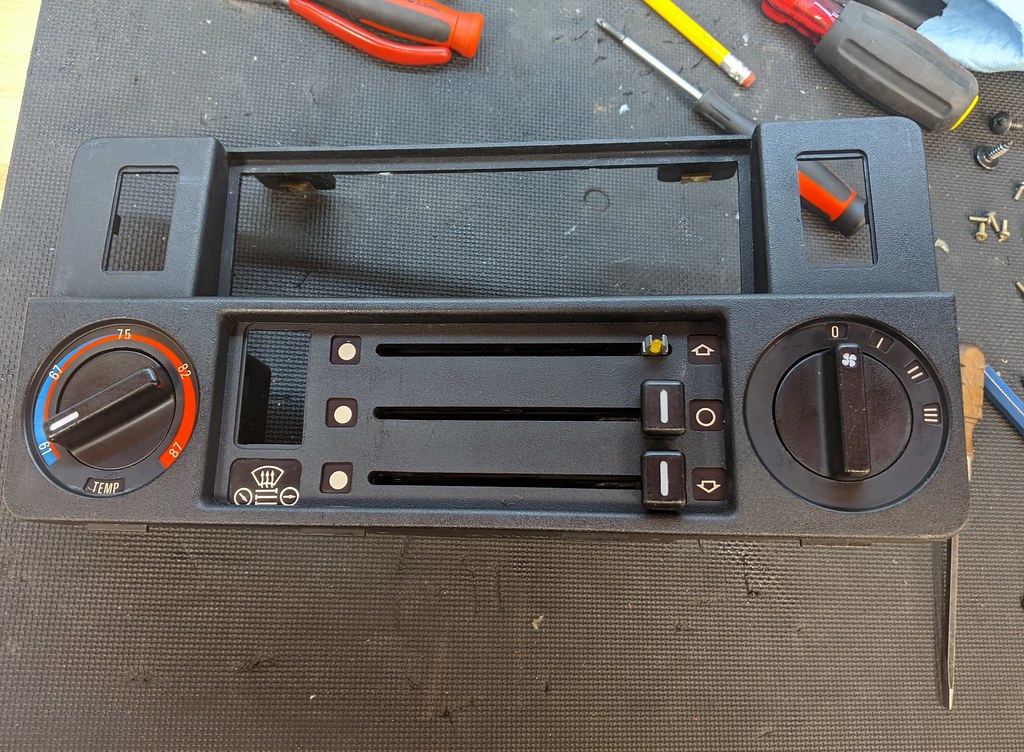
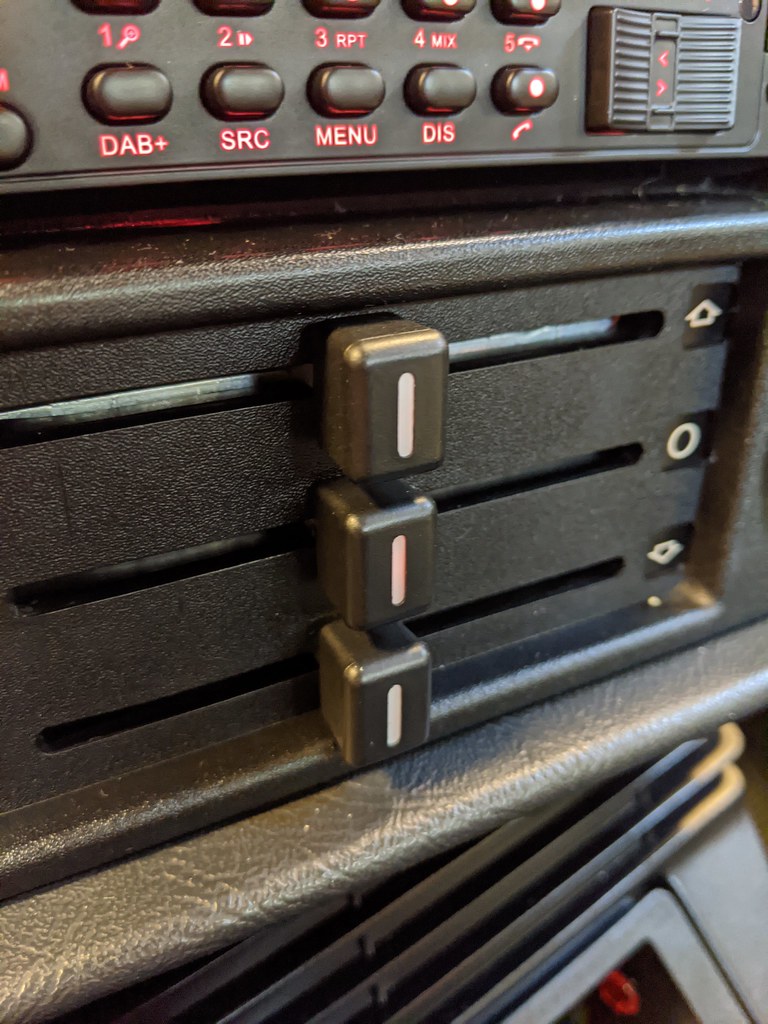
I completed the restoration of the HVAC controls.
For reference, because as far as I can tell there's no way to tell by looking at the device, this is the proper orientation of the LEDs. Note these LEDs are NLA but if they did need to be replaced it would be easy to source them. I haven't tested their amperage yet but based on the resistor colors (Yellow - 4, Violet - 7, Brown - 1, Gold - +/5%) the resistors are 47KΩ.
All cleaned and lubed.
I'm missing a knob, but they are NOT NLA so I've ordered new.
Thanks to @south26 the appropriate early-style wires are inbound.
Re: Minerva: The S54 powered, better than new, daily driver
Bravo, Charlie! Keep fighting the good fight.
On batteries, I just had to replace the 2 year old Bosch (I think it was an H4?) I had in the M535; it too couldn't hold a charge anymore. I do have a parasitic drain (likely in the audio system amp board but could also be a bad relay I replaced also) that I am trying to isolate but with the weak battery it was hard to pin-point. It died while it was on a tender recently and kept testing "weak" no matter how much I charged it. I replaced it with a Champion H6 AGM (Johnson Controls) that PepBoys seems to be pushing instead of the Bosch these days. The old one was under warranty so the AGM was an upgrade for only pocket change. It did require me to upgrade my battery tender also (CTEK-40-206 MXS with AGM settings) which I wasn't accounting for but necessary.
We'll see how well it does.
Can't wait to see this car in person. Someday. Soon...
Last edited by vinceg101 on Nov 03, 2020 12:02 PM, edited 1 time in total.
Re: Minerva: The S54 powered, better than new, daily driver
I did not know AGM required different battery tenders! Is this true of big chargers too? E.g. can my old Craftsman correctly charge an AGM battery?!?vinceg101 wrote: Oct 30, 2020 11:59 AM Bravo, Charlie! Keep fighting the good fight.
On batteries, I just had to replace the 2 year old Bosch (I think it was an H5?) I had in the M535; it too couldn't hold a charge anymore. I do have a parasitic drain (likely in the audio system amp board but could also be a bad relay I replaced also) that I am trying to isolate but with the weak battery it was hard to pin-point. It died while it was on a tender recently and kept testing "weak" no matter how much I charged it. I replaced it with a Champion H7 AGM (Johnson Controls) that PepBoys seems to be pushing instead of the Bosch these days. The old one was under warranty so the AGM was an upgrade for only pocket change. It did require me to upgrade my battery tender also (CTEK-40-206 MXS with AGM settings) which I wasn't accounting for but necessary.
We'll see how well it does.
Can't wait to see this car in person. Someday. Soon...
Re: Minerva: The S54 powered, better than new, daily driver
Unknown. Heading to the Great God Google...cek wrote: Oct 30, 2020 1:00 PMI did not know AGM required different battery tenders! Is this true of big chargers too? E.g. can my old Craftsman correctly charge an AGM battery?!?vinceg101 wrote: Oct 30, 2020 11:59 AM Bravo, Charlie! Keep fighting the good fight.
On batteries, I just had to replace the 2 year old Bosch (I think it was an H5?) I had in the M535; it too couldn't hold a charge anymore. I do have a parasitic drain (likely in the audio system amp board but could also be a bad relay I replaced also) that I am trying to isolate but with the weak battery it was hard to pin-point. It died while it was on a tender recently and kept testing "weak" no matter how much I charged it. I replaced it with a Champion H7 AGM (Johnson Controls) that PepBoys seems to be pushing instead of the Bosch these days. The old one was under warranty so the AGM was an upgrade for only pocket change. It did require me to upgrade my battery tender also (CTEK-40-206 MXS with AGM settings) which I wasn't accounting for but necessary.
We'll see how well it does.
Can't wait to see this car in person. Someday. Soon...
Re: Minerva: The S54 powered, better than new, daily driver
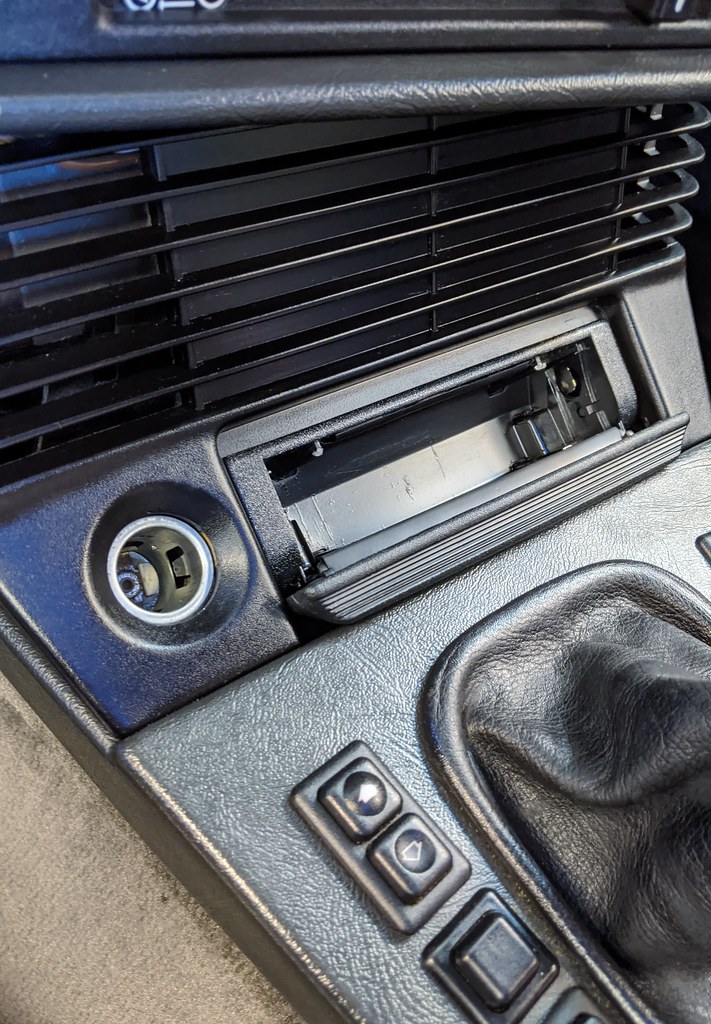
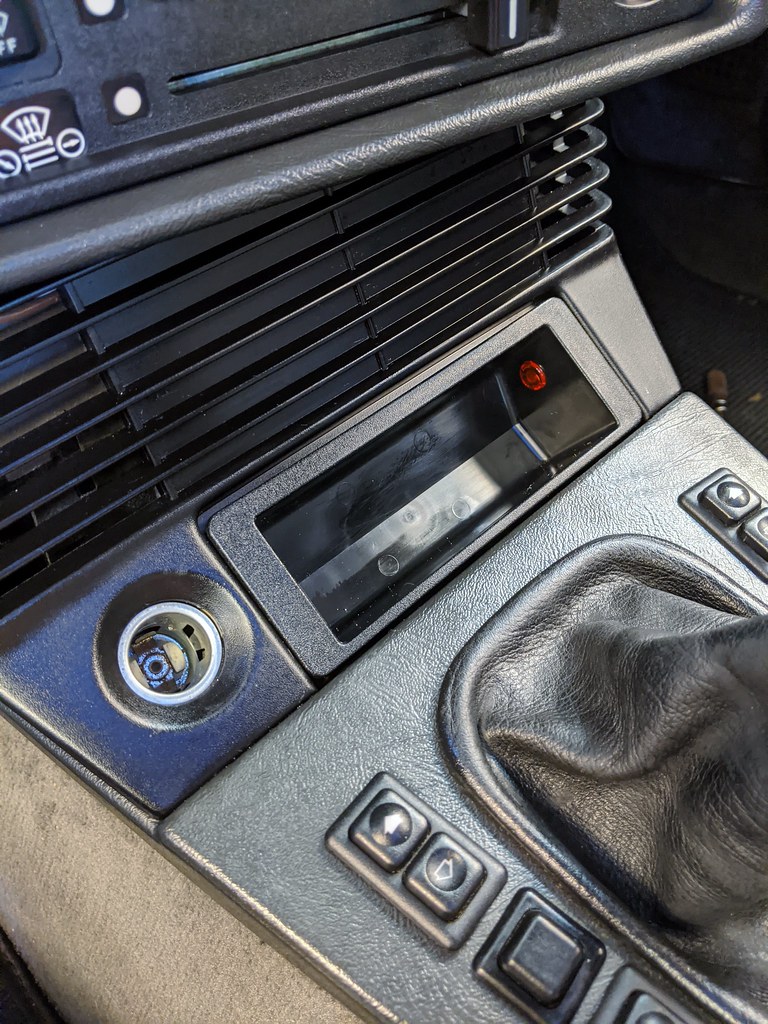
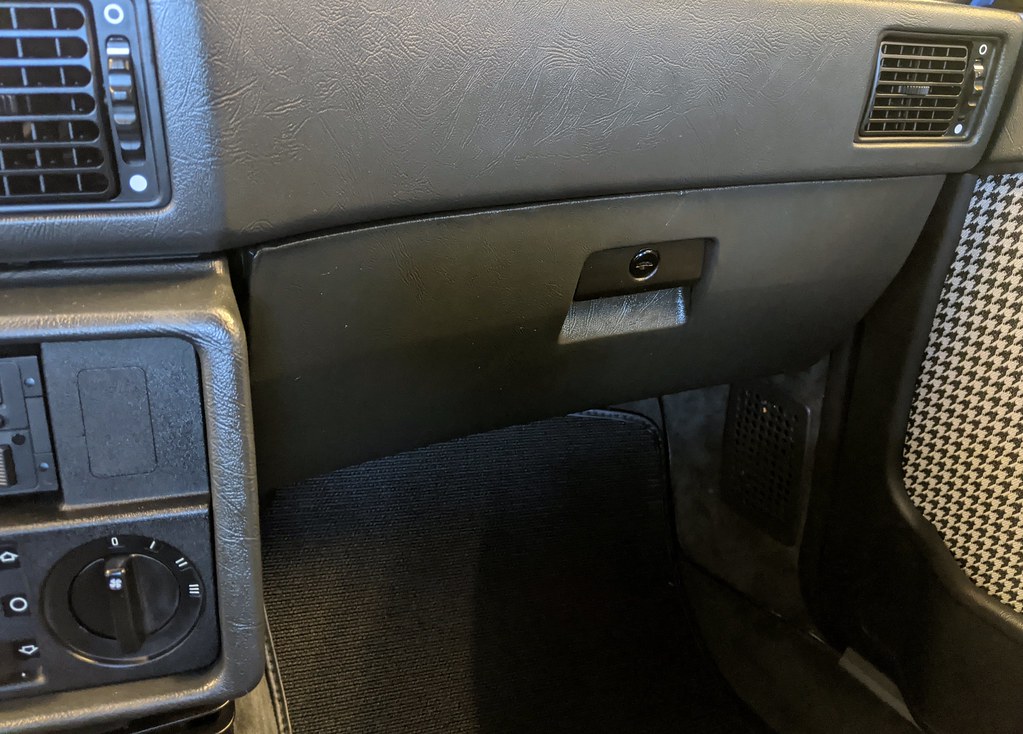
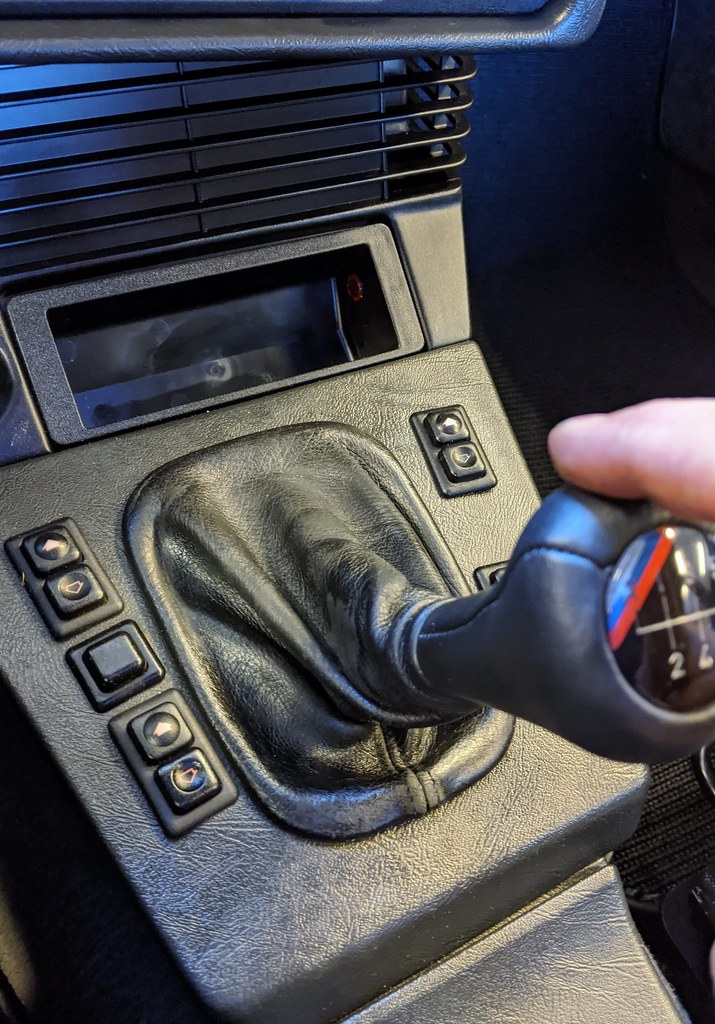
Shocking that it took the whole weekend to put the center console and glove box in. Of course, it's never that easy and this is the first time those parts have been fitted on this chassis in anger. I only had to redo everything twice, which is a record for me. I made sure all the grommets behind the glove box were sealed up as I was getting a l lot of engine noise through them.
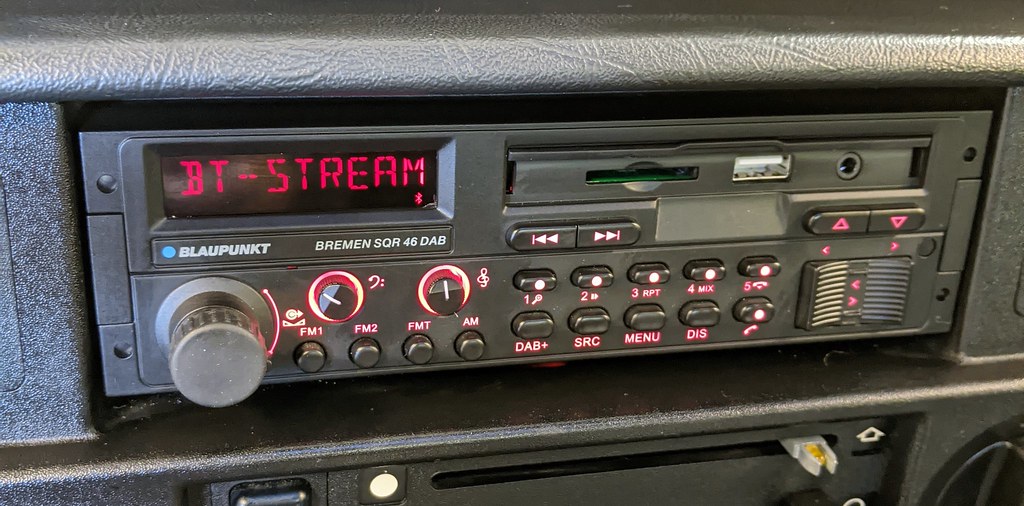
Along the way I updated the firmware on Blaupunkt SQR 46 and was very pleased to find out that the new FW remembers what input the unit was on, so my biggest gripe has been addressed. I'm now planning on keeping it.
See this thread for more deets: viewtopic.php?p=1492943#p1492943
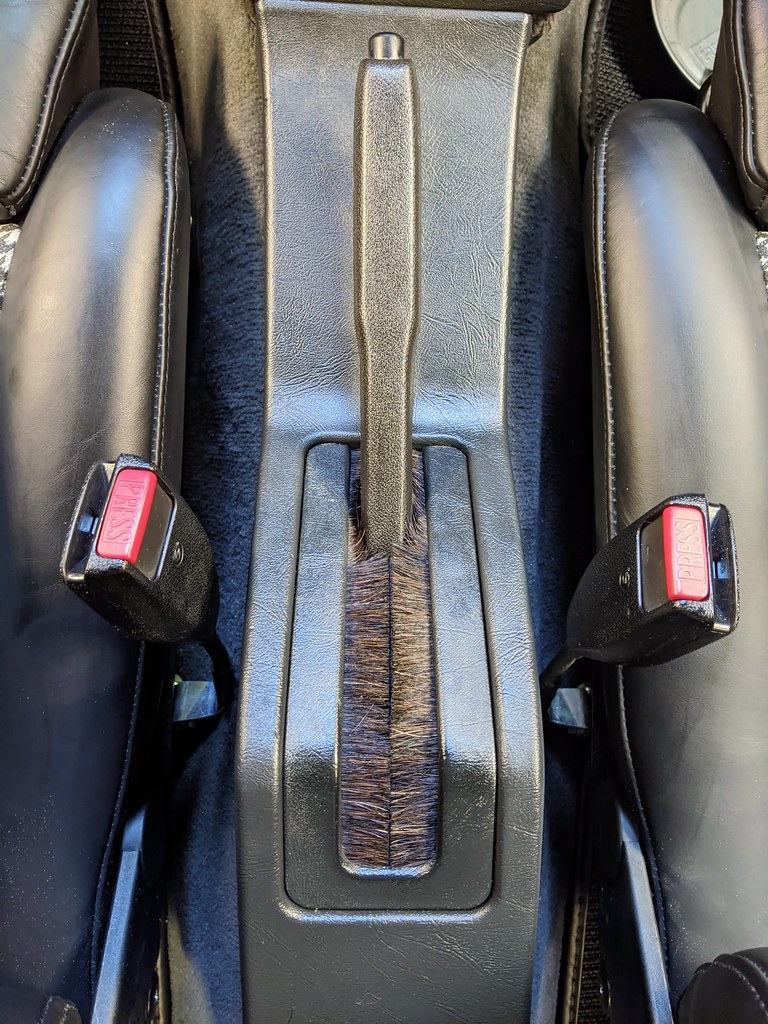
New Jay Stratton horse hair on the e-brake console, and I fitted the handle correctly (the button wasn't fully extended; you need to whack the handle on pretty solidly with a rubber mallet).
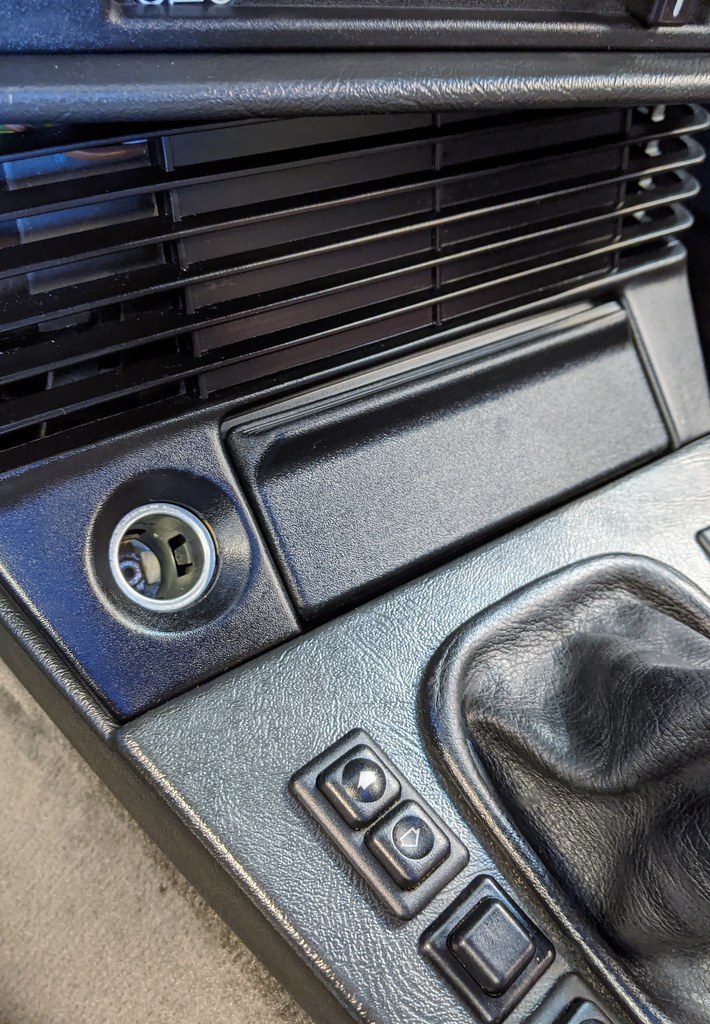
Still debating whether I like the non-smoker version:
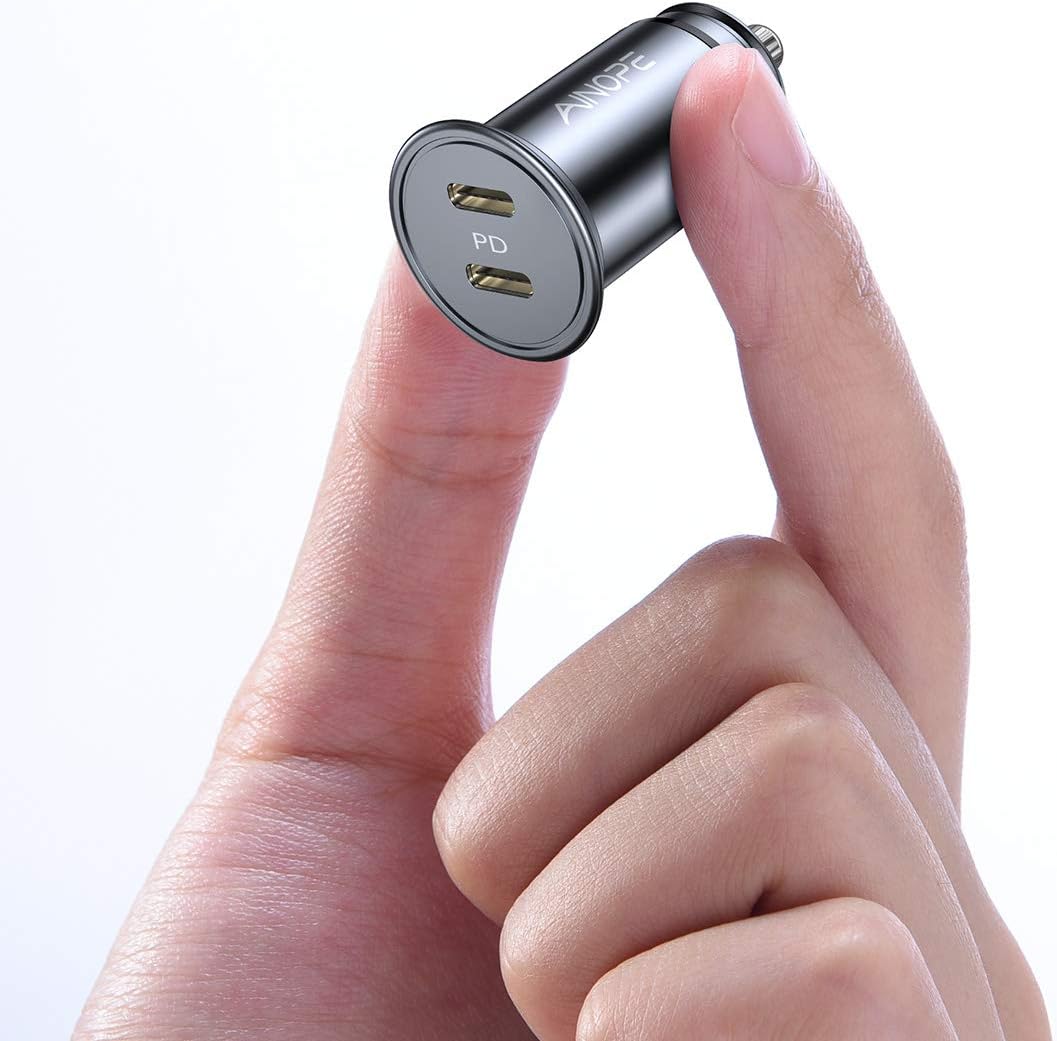
This was my favorite cig-lighter USB-C adapter, but it's NLA, apparently. I liked it because it fit tighter than the Aukey version.
https://www.amazon.com/gp/product/B07M8 ... =ceklog-20
Gonna try one of these instead:
https://www.amazon.com/dp/B089R67JV4?tag=ceklog-20
Of course I broke this. Two steps forward, one back.
I used the better glove box on Maytag and kinda forgot. So now ISO another glove box, because this will not do.
Finally, I guess the S54/G420 transmission sits a little further back as the standard boot stretches when in 2, 4, or 6. This boot is in pretty good shape so I have sad. It doesn't pop out so I may leave it as is.
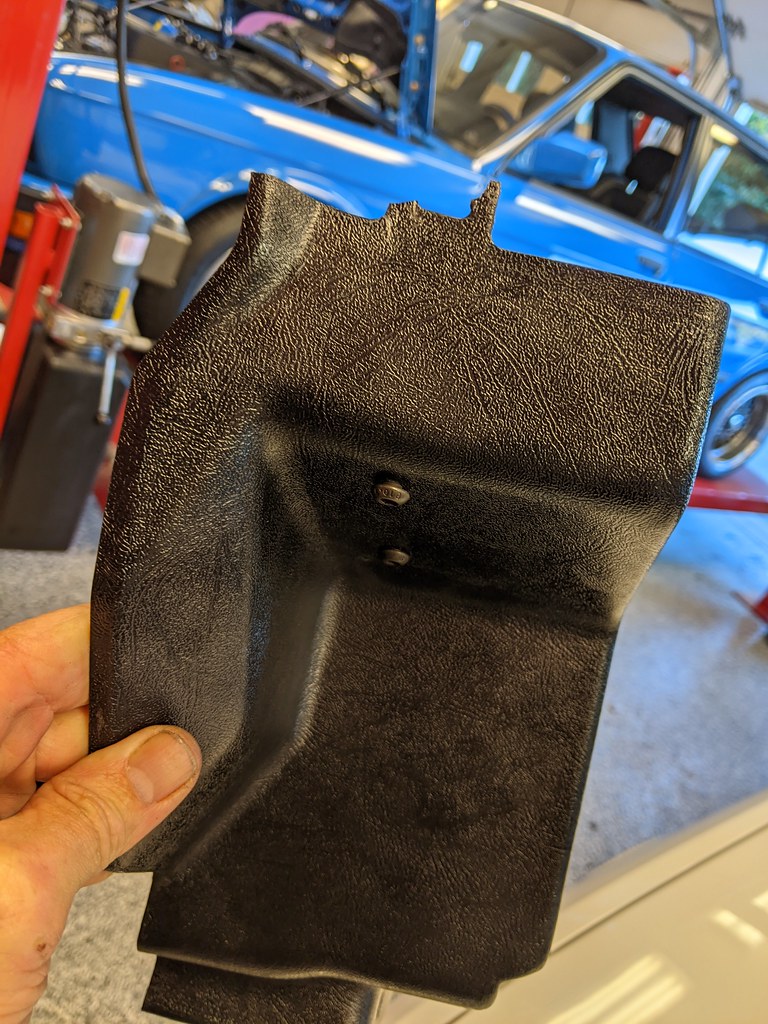
After a few shakedown drives, with everything in the interior installed except the driver's kick panel, I can now comment authoritatively on interior noise levels: this car is no more nosier to drive than Vlad. All the work I did on the spray-on sound insulation, and buttoning up the firewall paid off. Very nice!
Re: Minerva: The S54 powered, better than new, daily driver
New old stock E28 Glove Box anthracite LHD for sale in Greece.
https://www.ebay.de/itm/BMW-E28-Glove-B ... SwjZJZ937y
Best regards,
Mick
https://www.ebay.de/itm/BMW-E28-Glove-B ... SwjZJZ937y
Best regards,
Mick
-
- Posts: 516
- Joined: Feb 20, 2017 4:56 AM
- Location: CA
Re: Minerva: The S54 powered, better than new, daily driver
Ooo now I want that ashtray, never seen that before
Re: Minerva: The S54 powered, better than new, daily driver
Thanks for the update as always. I need to do that update to my headunit, i've got it in my e24. I've got the same gripes as Kohler with it but I ultimately feel like it looks the best and sounds fine. It does look better in the e28 than in the e24. The e28 trim panel makes it look flush mount. On the e24 it sticks out, which I hate.
-
- Posts: 516
- Joined: Feb 20, 2017 4:56 AM
- Location: CA
Re: Minerva: The S54 powered, better than new, daily driver
Do you know the part number? Or what year/model e28?
Re: Minerva: The S54 powered, better than new, daily driver
Storing Partition 72.60.1.942.786
Best regards,
Mick
Best regards,
Mick
Re: Minerva: The S54 powered, better than new, daily driver
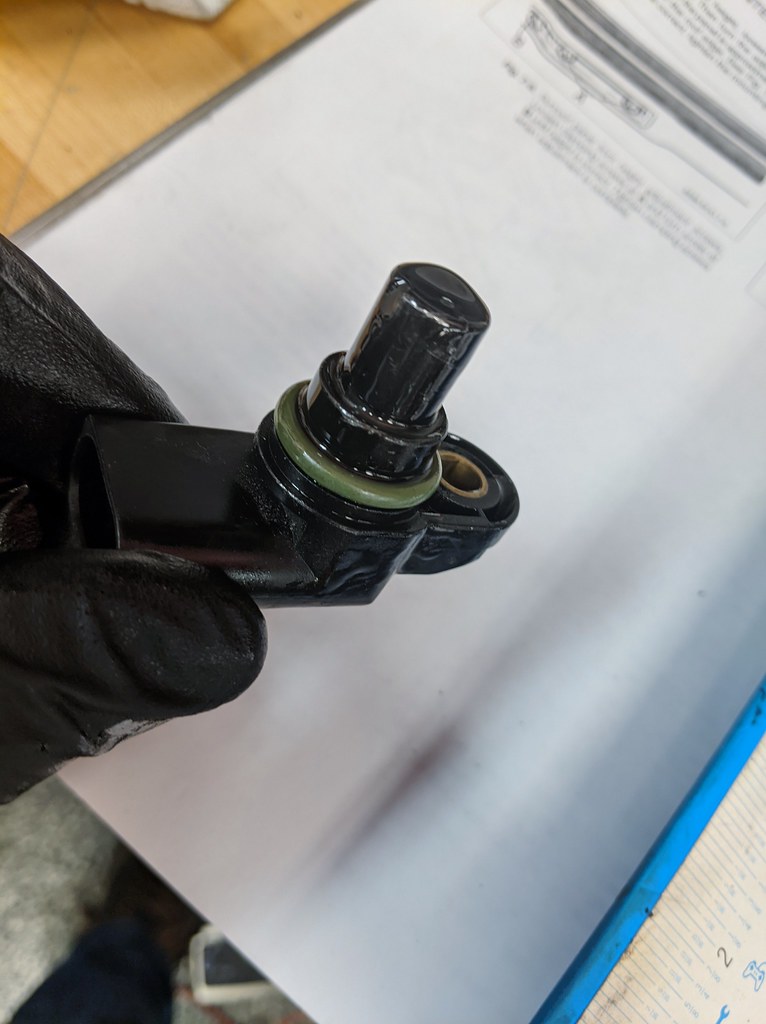
Minerva has an oil leak.
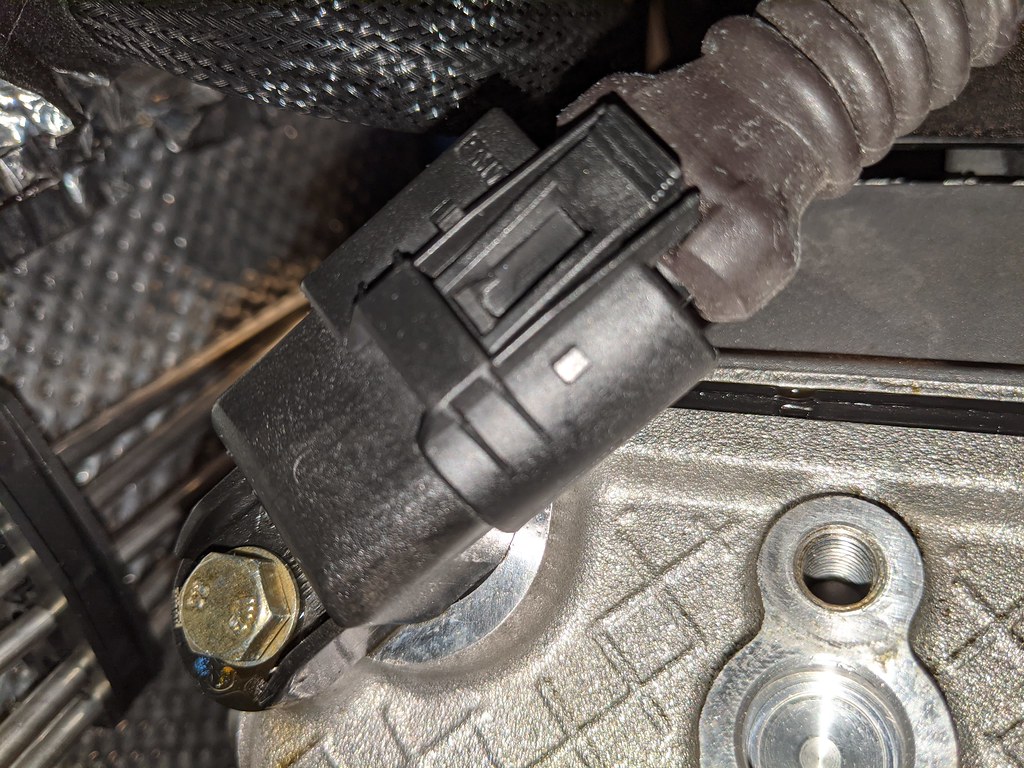
It is coming from the back-right of the head and is either the exhaust cam sensor o-ring or the valve cover gasket. My initial inspection (and I think optimism) made me believe it was the exhaust cam sensor.
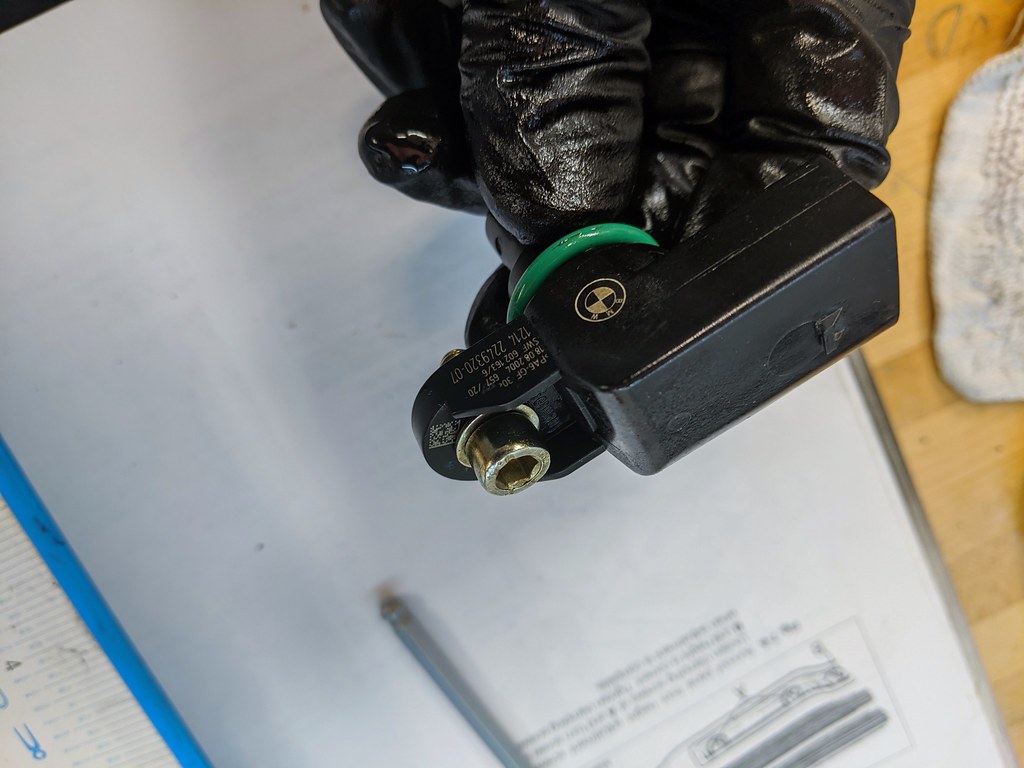
I noted that the sensor has the wrong style bolt holding it in. Pic I took of donor motor way back, clearly shows a hex/allen bolt:
Sensor in car:
Not that this could cause a leak, but annoying. The sensors (and valve cover) were put on by 425 after the motor came back from being built by Steve Dinan's crew at Carbahn.
New o-ring came next day via Amazon and I had the proper hex bolt in my stash.
Old.
New.
Will check today to see if it's still leaking after driving to dinner last night. If it is, then it's the valve cover gasket. I talked to Steve Dinan and he says the OE gasket is the best but even it sucks and they all leak eventually. But no reason it should be leaking this bad right after being built.
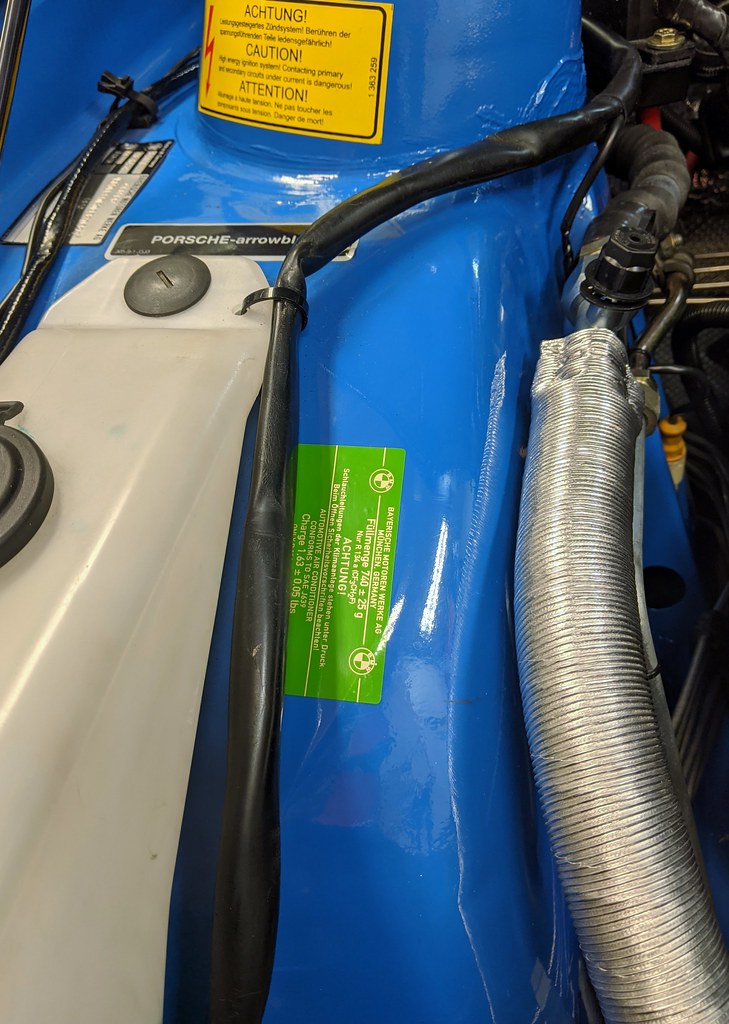
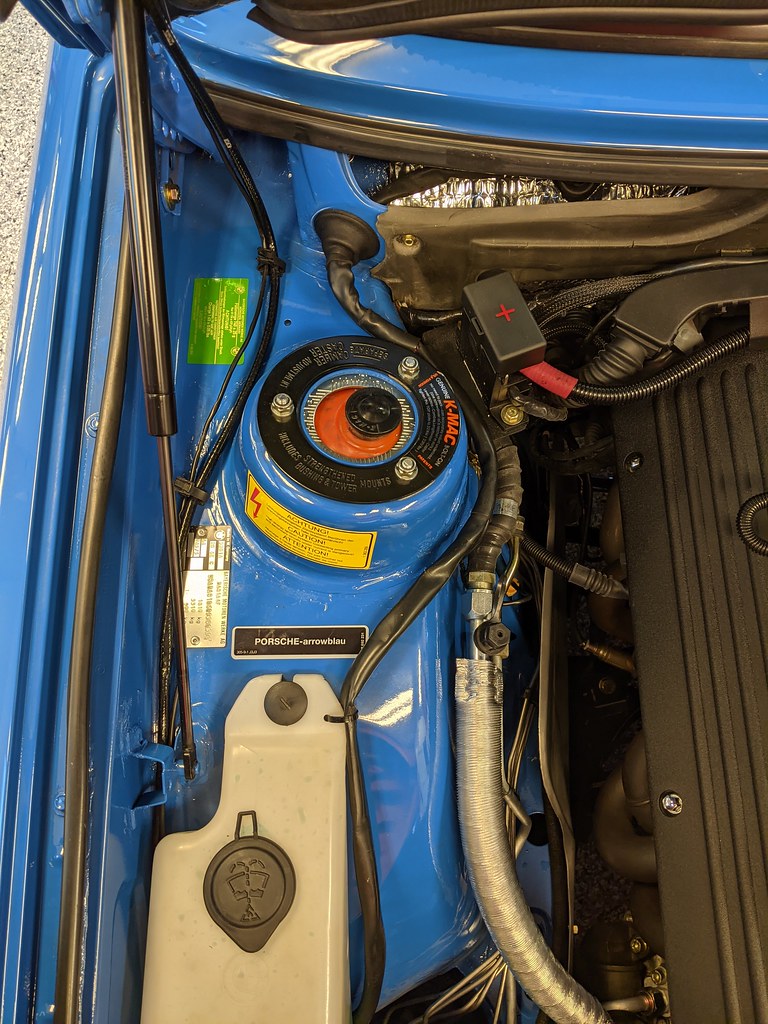
Because the car has an E46 AC system in it, I procured the E46 AC sticker which goes on the hood of the E46. I decided to put it here:
Re: Minerva: The S54 powered, better than new, daily driver
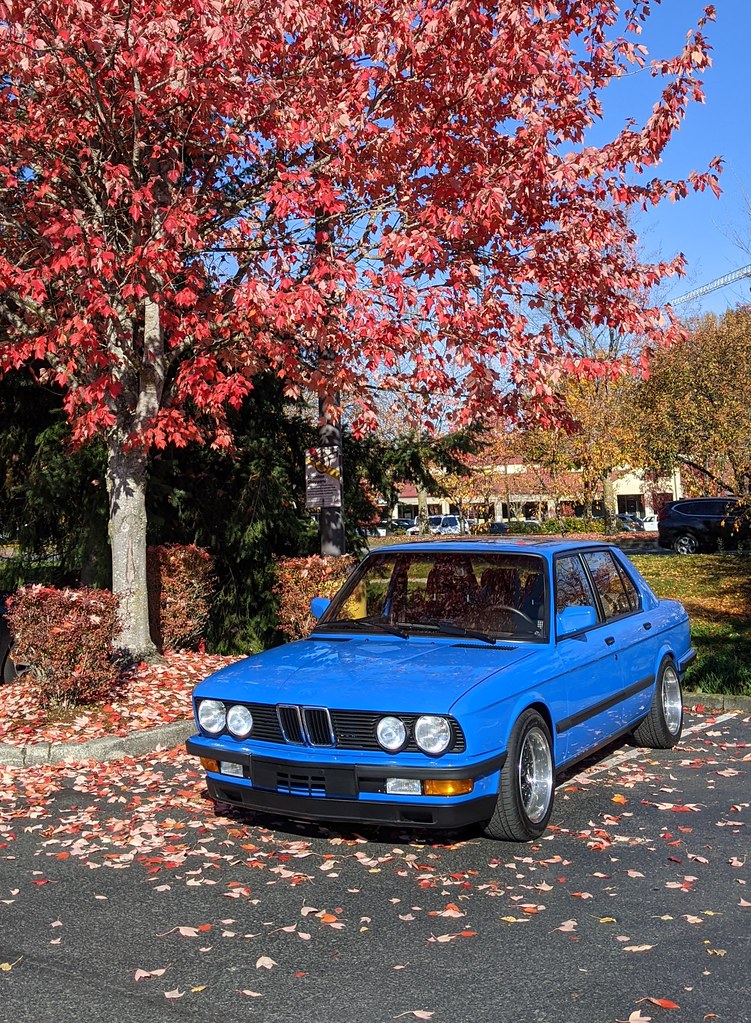
Makes a great burrito fetching vehicle.
Tried on some new shoes. I like.
Moved AC sticker to correct spot and fixed wiper fluid hose routing.
A little music.
https://youtu.be/IZnW1Pis6ss
Tried on some new shoes. I like.
Moved AC sticker to correct spot and fixed wiper fluid hose routing.
A little music.
https://youtu.be/IZnW1Pis6ss
Re: Minerva: The S54 powered, better than new, daily driver
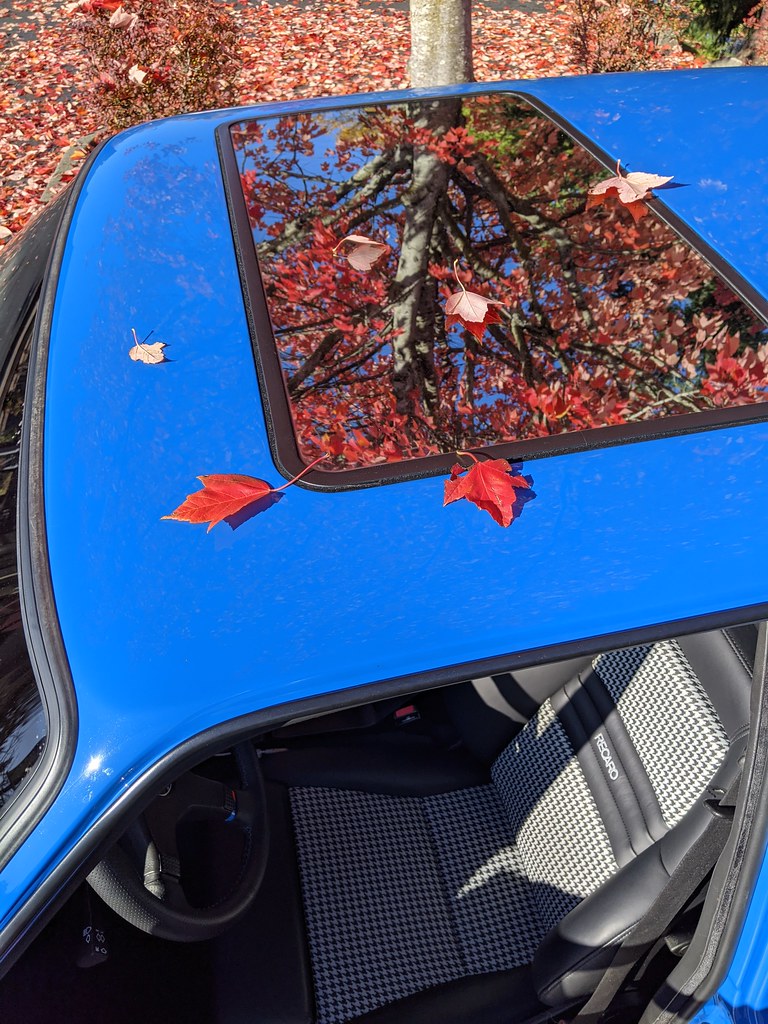
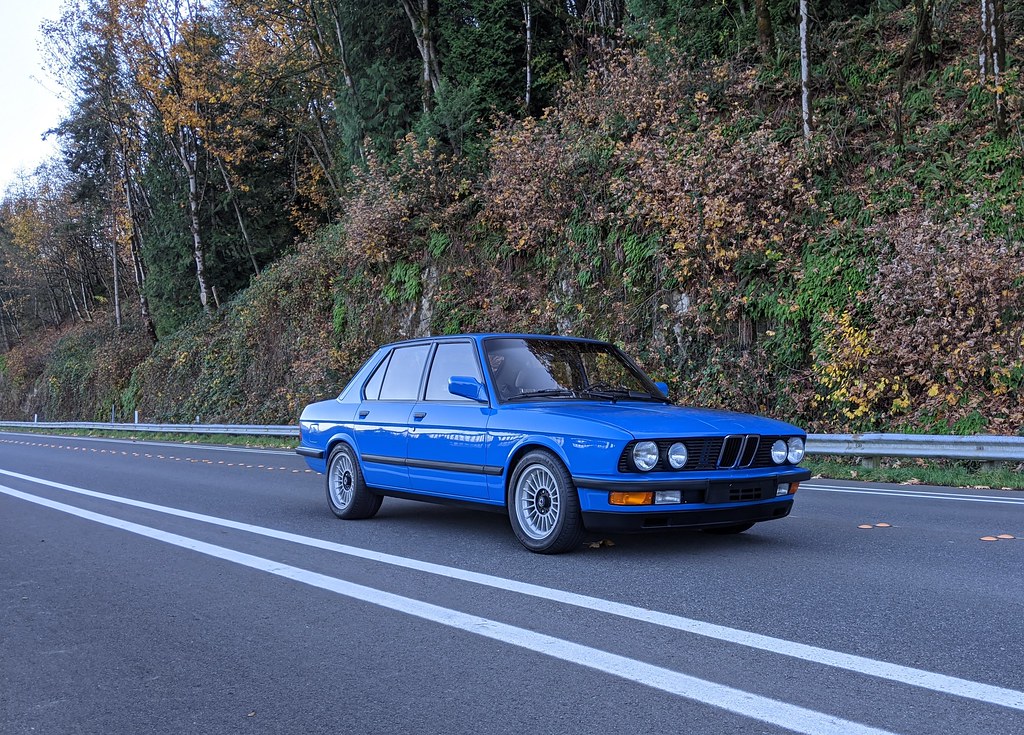
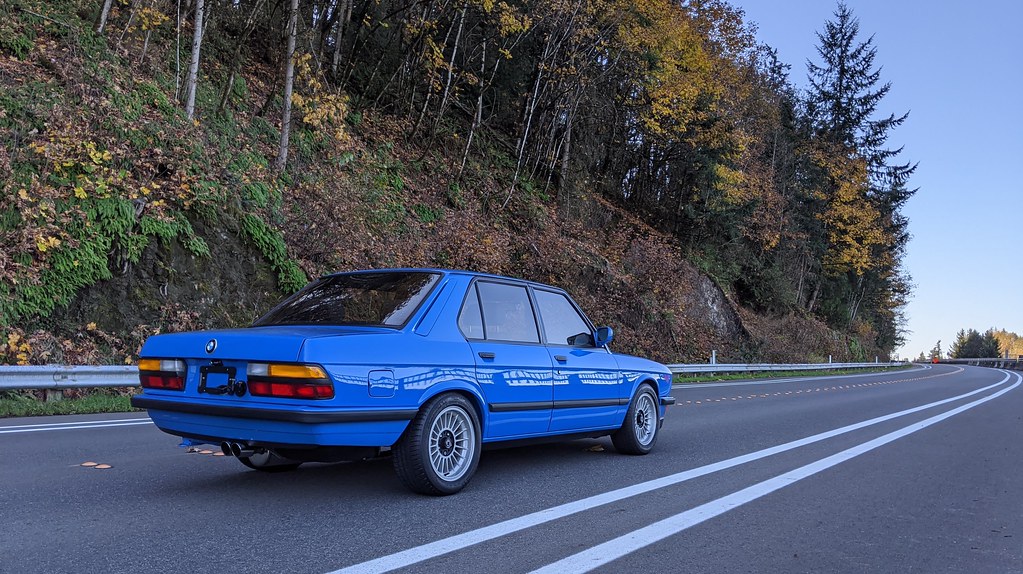
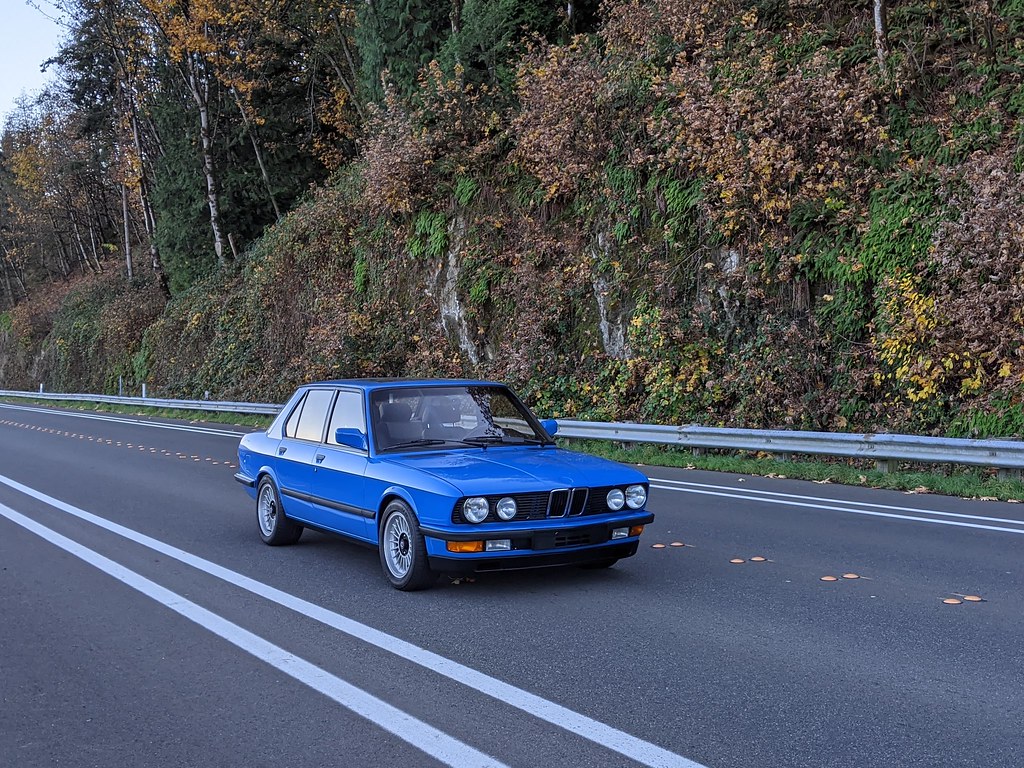
Wow, that blue against the fall colors, very beautiful.
Re: Minerva: The S54 powered, better than new, daily driver
Any chance you can tell me the cable holder part you used to secure the washer fluid lines, mine are shattered...
Anything on this page?
https://www.realoem.com/bmw/enUS/showpa ... Id=12_1306
Anything on this page?
https://www.realoem.com/bmw/enUS/showpa ... Id=12_1306
Re: Minerva: The S54 powered, better than new, daily driver
I'll let Charlie answer, but I think they are #2 on this page:topher800 wrote: Nov 10, 2020 11:03 AM Any chance you can tell me the cable holder part you used to secure the washer fluid lines, mine are shattered...
Anything on this page?
https://www.realoem.com/bmw/enUS/showpa ... Id=12_1306
https://www.realoem.com/bmw/enUS/showpa ... Id=61_0538
Here's a better picture:
https://www.ecstuning.com/b-genuine-bmw ... 131369507/
Which are unfortunately NLA. They must be recently NLA'd because I could have sworn I bought some not that long ago.
These are nifty little ties as they hook onto the studs on the fenders.
Re: Minerva: The S54 powered, better than new, daily driver
[/quote]
Very impressive workmanship on Minerva..Great job!.
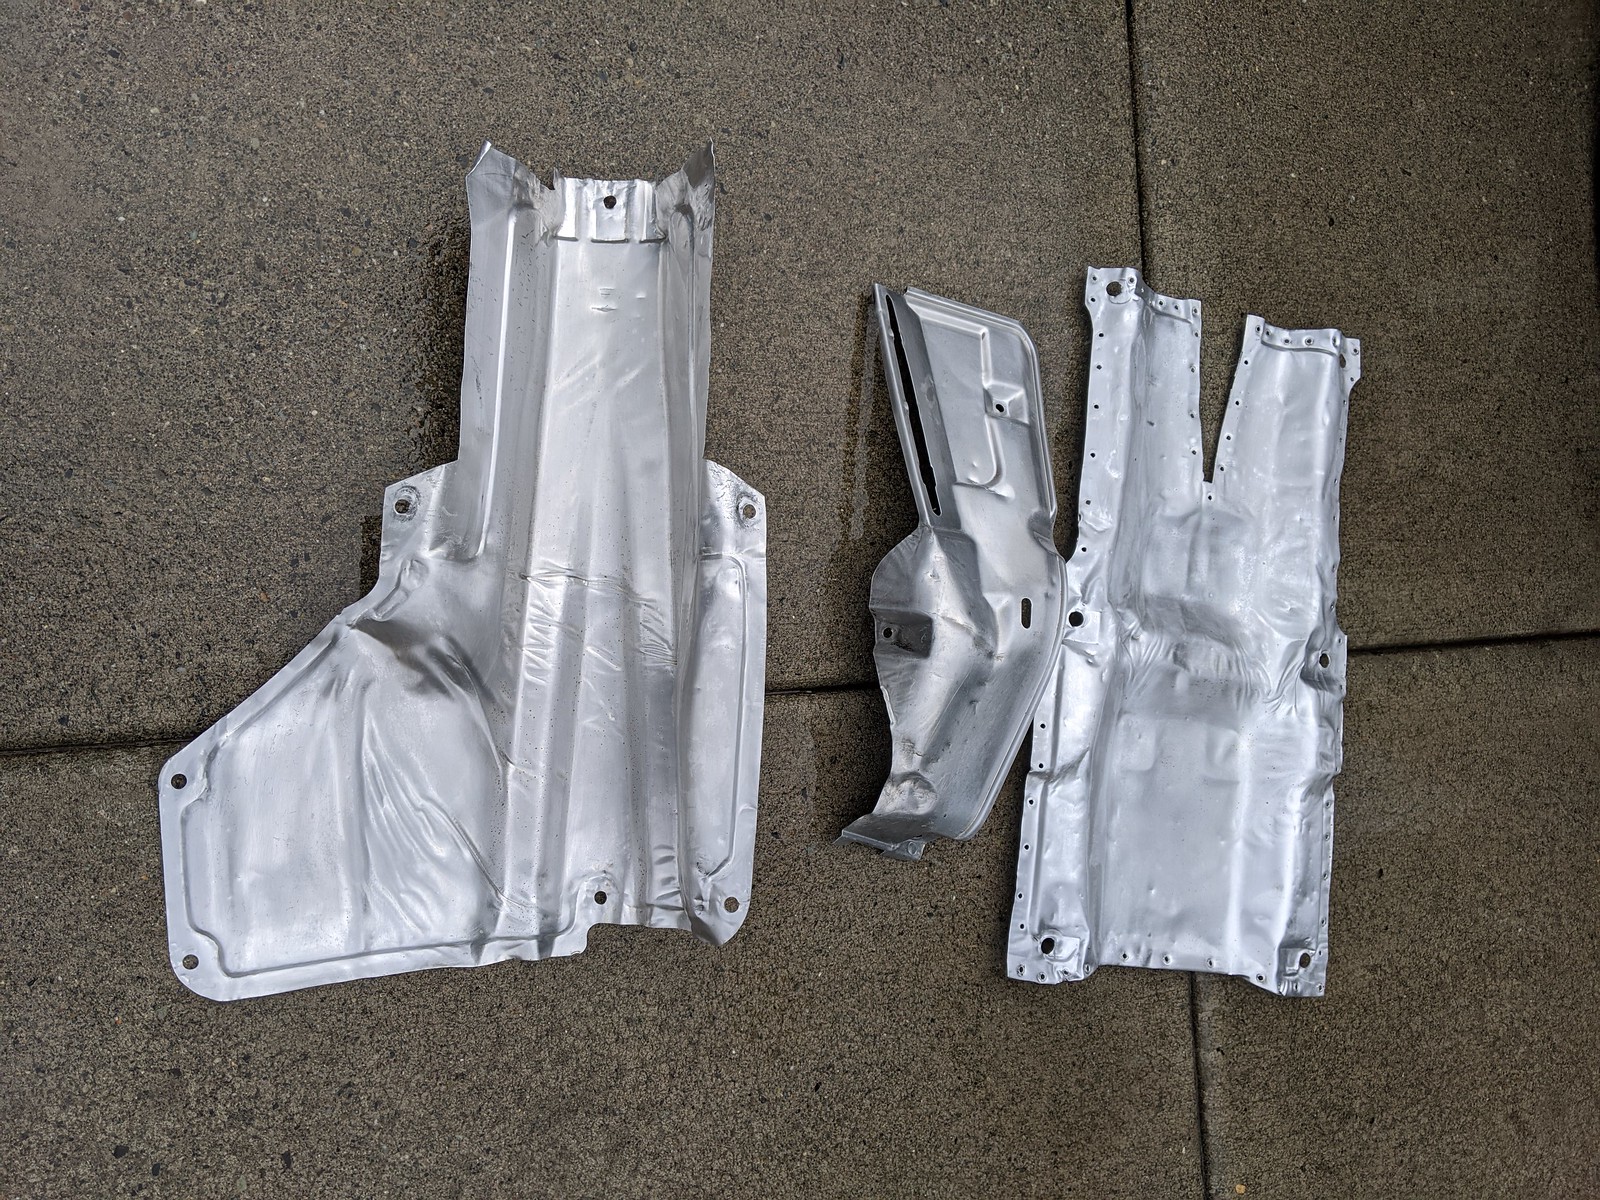
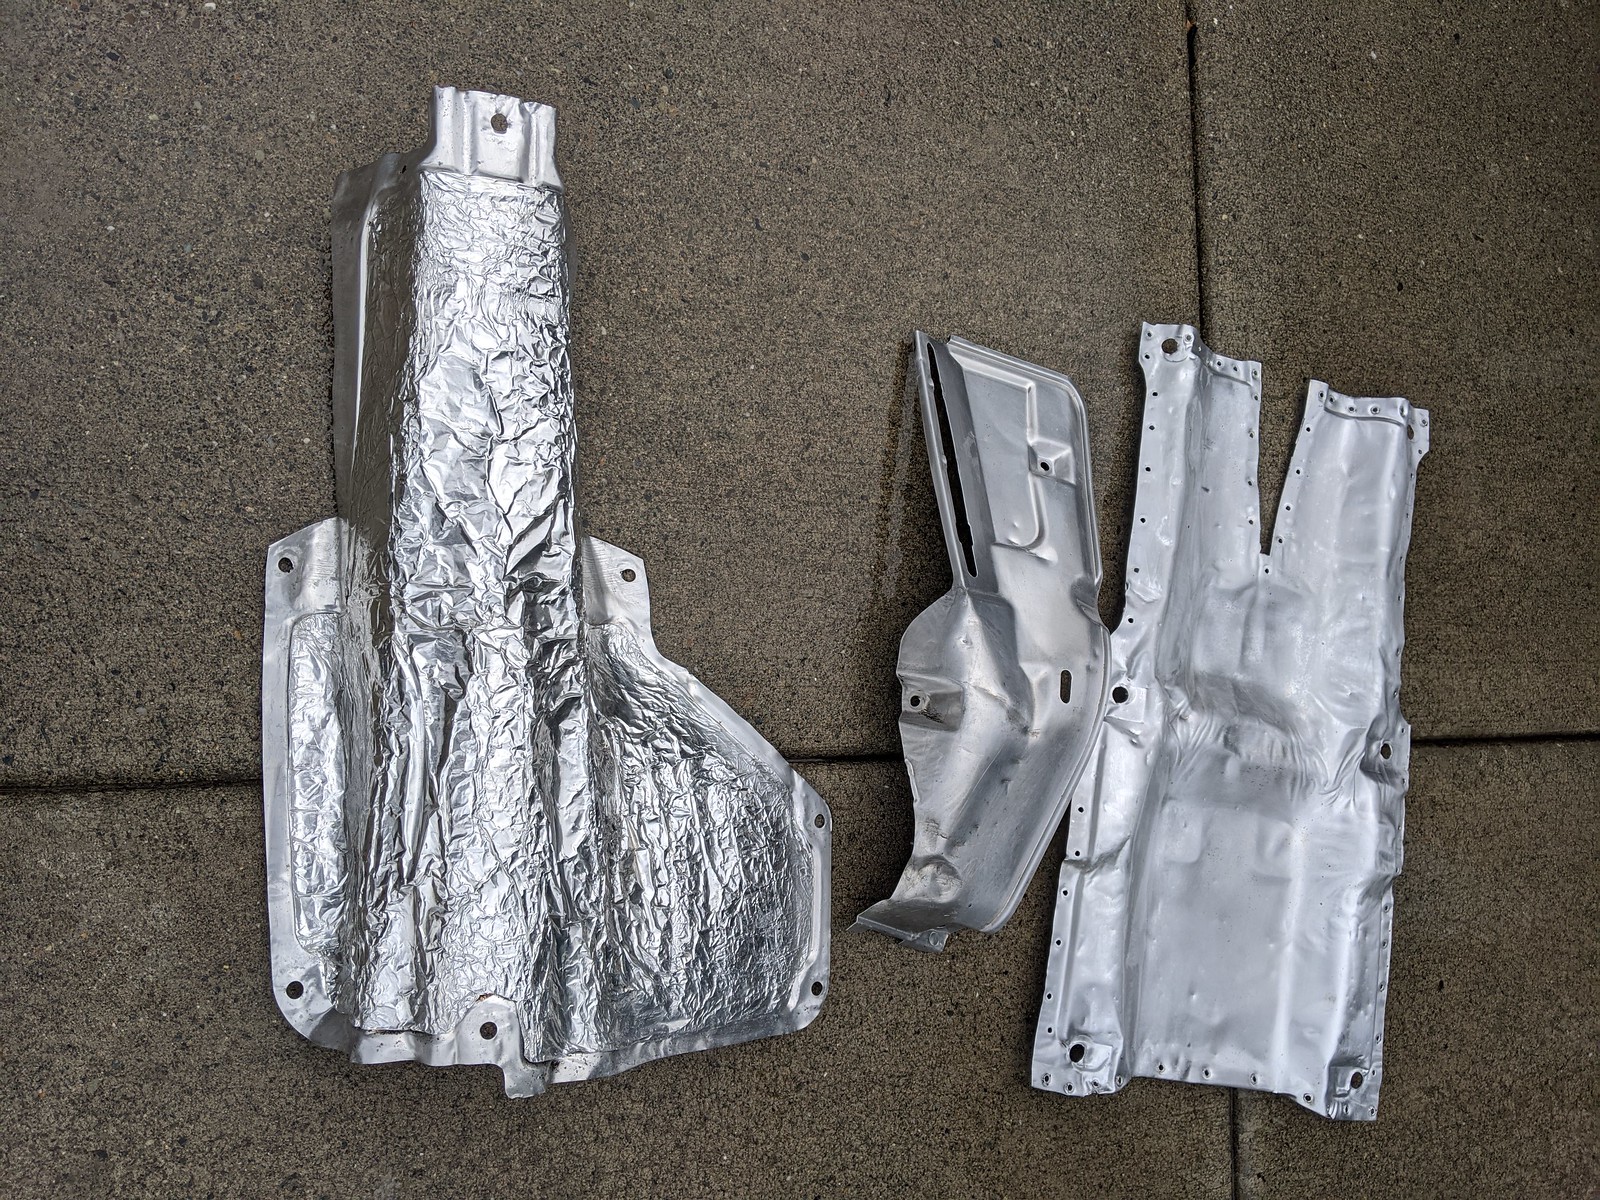
I have a question, how did you remove the cosmoline from the heat shields..I am in the process of installing mine.
I can't get them to come out like new like you did....The heat shield under the passenger side I powder coated mine..
if you can share any tips..
cek wrote: Aug 09, 2020 9:53 AM
If I could remove one person from history, it would be the idiot that decided to spray these cars with cosmoline before shipping them across the Atlantic. I hate that stuff, but I have to say it's pretty rewarding once it's all off.
Re: Minerva: The S54 powered, better than new, daily driver
The trick is:hunneman wrote: Nov 11, 2020 7:59 AM Very impressive workmanship on Minerva..Great job!.
I have a question, how did you remove the cosmoline from the heat shields..I am in the process of installing mine.
I can't get them to come out like new like you did....The heat shield under the passenger side I powder coated mine..
if you can share any tips..
1) Oil Eater
2) Scotchbrite sponges
3) Elbow grease
4) Rinse and repeat
Opinions differ on what product to use, but I swear by Oil Eater:
https://www.amazon.com/Oil-Eater-Origin ... =ceklog-20
Get the parts wet.
Spray diluted Oil Eater on them.
Let it sit for a few minutes.
Use your Scotchbrite pads to scrub-a-dub-dub. It is hard work.
Once you've made progress stop, rinse it all off with water and repeat the above until done.
Some of the cosmoline will be very hard to get off. In the past I've had success using either a heat gun or a steam cleaner to warm it up to soften it.
I've also had some success letting it with diesel fuel.
A brass wire brush can be used, but be very careful as that's very aggressive and will leave scratches which you'll then have to remove (if you are as anal as I am).
I didn't have to resort to anything but Oil Eater for these.
-
- Posts: 313
- Joined: Feb 12, 2006 12:00 PM
- Location: Surrey
Re: Minerva: The S54 powered, better than new, daily driver
Brown = x10 multiplier, which would make the resistor 470Ω.cek wrote: Oct 30, 2020 9:54 AM
resistor colors (Yellow - 4, Violet - 7, Brown - 1, Gold - +/5%) the resistors are 47KΩ.
I concur with Oil eater, it works awesome on cleaning up oily messes.
I love the hounds tooth interior.
Re: Minerva: The S54 powered, better than new, daily driver
470Ω 5% is the correct value.Crazy_Canuck wrote: Nov 18, 2020 7:13 PM Brown = x10 multiplier, which would make the resistor 470Ω.
In case anyone was wondering why that number specifically: you generally want somewhere between 10-30mA through an indicating LED like this one; 470Ω puts this right around 27mA if the alternator is running. The exact value you pick isn't critical as long as you take voltage drop across the LED and current rating into account (which is why they can get away with the 5% resistors instead of a tighter spec).
Re: Minerva: The S54 powered, better than new, daily driver
cek wrote: Nov 11, 2020 9:28 AMThe trick is:hunneman wrote: Nov 11, 2020 7:59 AM Very impressive workmanship on Minerva..Great job!.
I have a question, how did you remove the cosmoline from the heat shields..I am in the process of installing mine.
I can't get them to come out like new like you did....The heat shield under the passenger side I powder coated mine..
if you can share any tips..
1) Oil Eater
2) Scotchbrite sponges
3) Elbow grease
4) Rinse and repeat
Opinions differ on what product to use, but I swear by Oil Eater:
https://www.amazon.com/Oil-Eater-Origin ... =ceklog-20
Get the parts wet.
Spray diluted Oil Eater on them.
Let it sit for a few minutes.
Use your Scotchbrite pads to scrub-a-dub-dub. It is hard work.
Once you've made progress stop, rinse it all off with water and repeat the above until done.
Some of the cosmoline will be very hard to get off. In the past I've had success using either a heat gun or a steam cleaner to warm it up to soften it.
I've also had some success letting it with diesel fuel.
A brass wire brush can be used, but be very careful as that's very aggressive and will leave scratches which you'll then have to remove (if you are as anal as I am).
I didn't have to resort to anything but Oil Eater for these.
If only I had the patience.
Re: Minerva: The S54 powered, better than new, daily driver
Member @Galahad is building a blade-style fuse retrofit kit for E28s. He asked me to help him test/debug his solution and I couldn't resist. I absolutely HATE the bullet fuse design and have been contemplating how to convert our cars to modern blade-style fuses since the beginning of time. I actually bought a late-E24 new fuse box for Minerva and had all intentions of figuring out how to modify the wiring harness to make it work. I decided to wait until after the car was settled before doing that though.
It was a mistake choosing to use Minerva as @Galahad's test case though. I should have gone with either Vlad or Maytag...because they are US cars with US fuse boxes. @Galahad had not considered the Euro differences in his design, and I didn't understand those differences myself. I choose Minerva because it was the car that was in the garage when I decided to dive in. In the end, however, my trials and tribulations getting the kit to work in Minerva will pay off for everyone else because we, collectively, now have tons more details on how both the US and Euro boxes are wired.
See my thread documenting all of that here: viewtopic.php?f=3&t=155587
I've been inside the E28 fuse box before. On one of my cars, I think Maytag, I did some surgery at some point... I dont' remember why. Anyhoo, I knew enough to take tons of pictures as I pulled it apart and I'm glad I did. All the pics were invaluable in documenting it all and final reassembly. It started here:
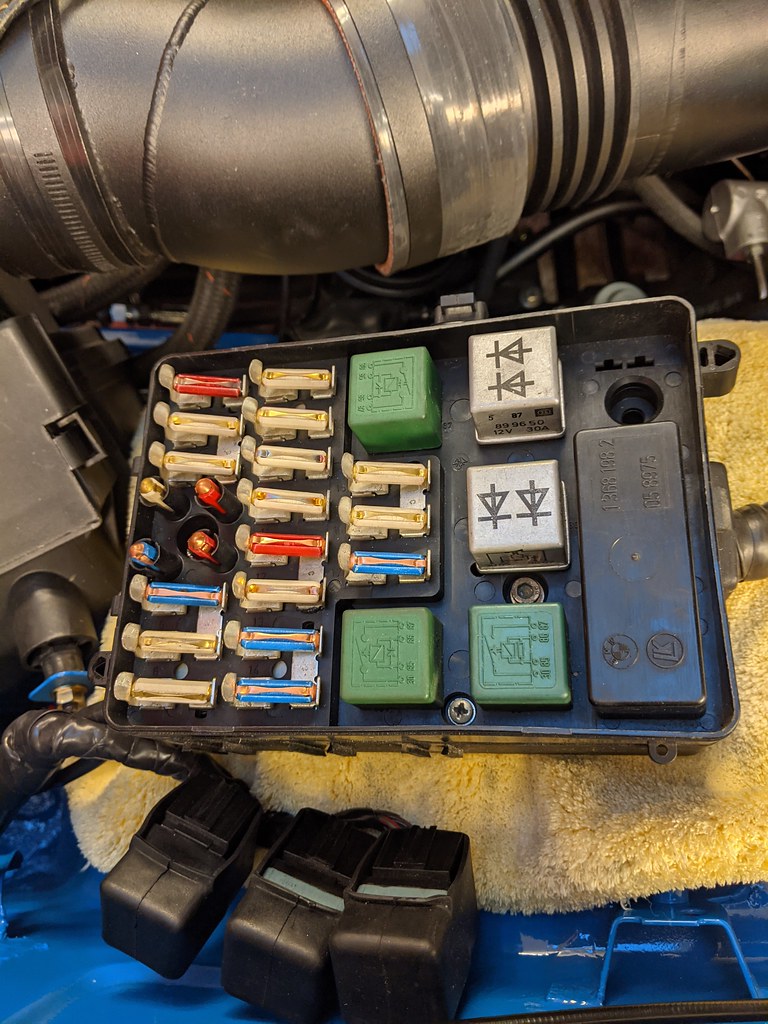
If you click on those photos, you'll go to my Flickr album and you can scroll through the rest. I've tagged those photos with "BMW E28 Euro Fuse Box Wiring" so they'll show up in Bing searches for others. If you searched for such a thing yesterday you got nothing useful.
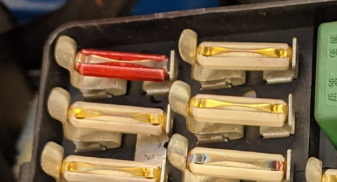
@Galahad's concept is very slick. Brilliant even. The idea is a circuit board that replaces the bullet-style fuse holders in the original box. The board includes blade-style sockets for all 17 of the original E28 fuses as well as sockets for 4 spares. LEDs are provided that show status of the the fuses (off: no power, green: power and good, red: power and missing or blown). He's engineered the board such that it supports the right amount of current.
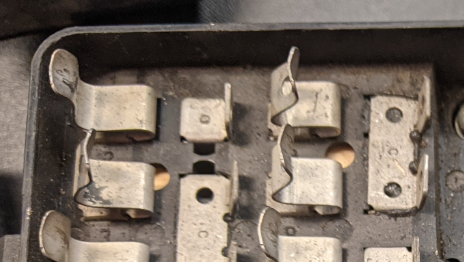
To install you need to irreversibly modify your original fuse box. For Minerva I had ALSO ordered a brand new-euro fuse box way back that we ended up not using because the box that was on the donor chassis was fine. I choose to modify the new one and then swap it into the car. Using a screwdriver and a pair of needle-nose pliers I pulled all of the bullet-fuse holders out through the top. This is a one-way door...
Once they are removed, the new circuit board just slides into place providing all the same pins. Apparently, on early fuse boxes, the leads that attach to the relays on the underside are soldiered to the pins, so retrofitting will be a bit more work.
Once I got everything plugged back in I quickly discovered something was wrong. Like the idiot I am I never really considered the US and Euro boxes would be different. They are. The difference that matters to this conversion has to do with the high-beams. On US cars fuse 7 is the right high-beam and fuse 8 is the left. The inputs to those 8A fuses is the same YL 2.5 wire from the high-beam relay. The input-side (top) of the bullet fuse holder is bridged between 7 & 8.
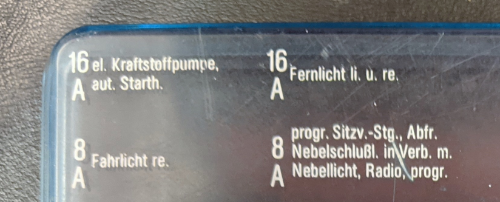
On Euro cars Fuse 7 is 16A and carries both the right & left high beam. It is powered by the YL 2.5 wire from the high-beam relay. Fuse 8 is 8A and is for things other than high-beams and gets its power from the same VI 2.5 wire that powers fuse 11. The fuses have independent inputs:
In my case, my stupidity (and @galahad's not knowing about Euro differences) meant that I had both the YL 2.5 and VI 2.5 wires plugged into the same bridged input between Fuse 7 & 8.
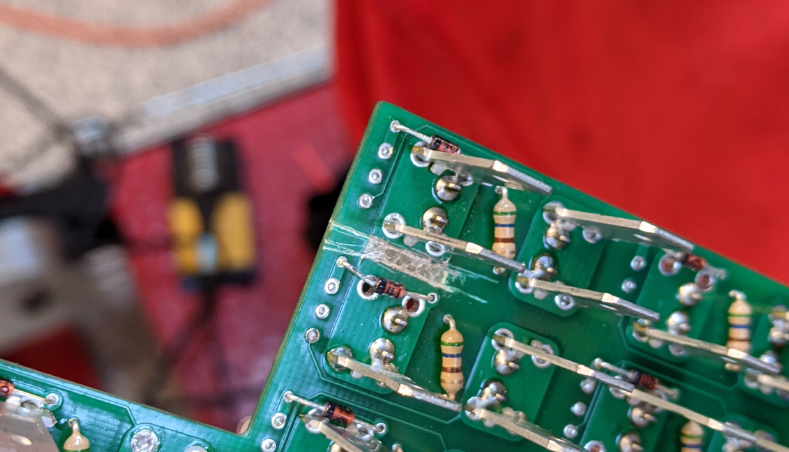
It took me far longer to figure all this out because I had (stupidly) put a US fuse box cover on the car. This led me to continue to believe Fuse 7 and Fuse 8 were for high-beams. Eventually, I figured it all out and realized the fix was easy: Cut the traces on @galahad's circuit board between fuse 7 * 7. We've discussed this and in his final design he will make the bridge between those fuses something that can more easily be modified so his design can work for both styles. I determined there are no other deep differences between the US & Euro boxes. Although some stuff does plug into different places, from the POV of the retrofit kit all will work.
The other interesting thing about @galahad's design is built-in diagnostics LEDs for each fuse. HIs prototype has them working at all times, even when the car is off. This means that fuses 4, 5, & 17 are lit green even when the car is off. I don't like this because these cars don't need any more parasitic drain than they already have. I choose to put a little switch in place to control the ground for the LED circuit. @galahad says he's going to make it so they only work when the car is in ACC or RUN in his final design, which I'm cool with.
I've ordered a new Euro (UK English) cover from Blunt.
I was able to clean up some of the engine bay wiring around the fuse box since I had it all out too.
And, of course, spares:
This is an amazing mod and I'm grateful to @galahad for creating it. He indicates it will be a few months before he has the time to build the final versions. I'm sure he'll create a thread here when he's ready.
While I was in there, I fixed the fact that 425 didn't hook up the city lights properly. They didn't realize how the Euro lights went together and thus modified the euro harness to plug directly to the backs of the bulbs, without using the intermediary connector & boot. I had to undo all this and wire it up as it was from the factory. The city light bulbs weren't even installed!
But now city lights work correctly!
It was a mistake choosing to use Minerva as @Galahad's test case though. I should have gone with either Vlad or Maytag...because they are US cars with US fuse boxes. @Galahad had not considered the Euro differences in his design, and I didn't understand those differences myself. I choose Minerva because it was the car that was in the garage when I decided to dive in. In the end, however, my trials and tribulations getting the kit to work in Minerva will pay off for everyone else because we, collectively, now have tons more details on how both the US and Euro boxes are wired.
See my thread documenting all of that here: viewtopic.php?f=3&t=155587
I've been inside the E28 fuse box before. On one of my cars, I think Maytag, I did some surgery at some point... I dont' remember why. Anyhoo, I knew enough to take tons of pictures as I pulled it apart and I'm glad I did. All the pics were invaluable in documenting it all and final reassembly. It started here:
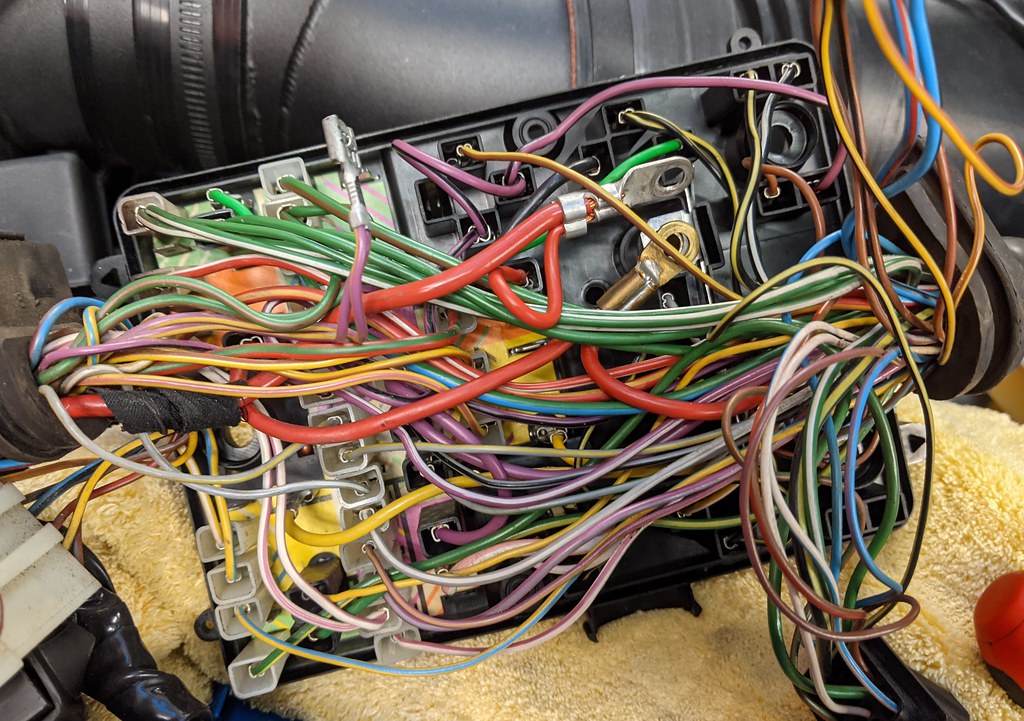
If you click on those photos, you'll go to my Flickr album and you can scroll through the rest. I've tagged those photos with "BMW E28 Euro Fuse Box Wiring" so they'll show up in Bing searches for others. If you searched for such a thing yesterday you got nothing useful.
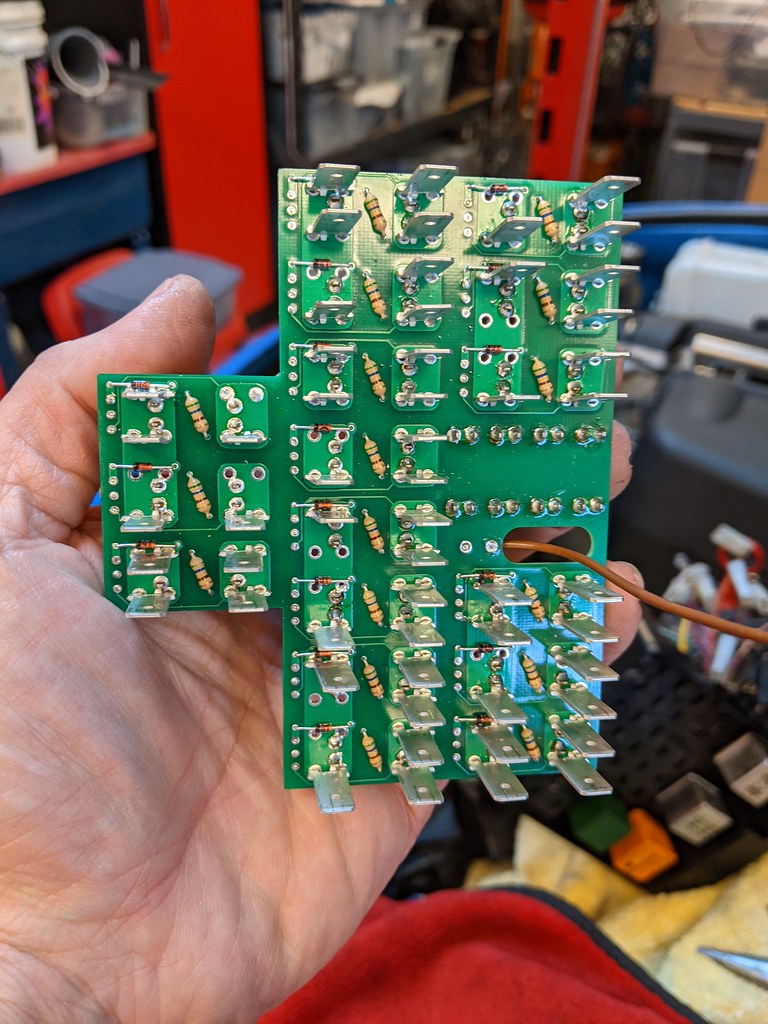
@Galahad's concept is very slick. Brilliant even. The idea is a circuit board that replaces the bullet-style fuse holders in the original box. The board includes blade-style sockets for all 17 of the original E28 fuses as well as sockets for 4 spares. LEDs are provided that show status of the the fuses (off: no power, green: power and good, red: power and missing or blown). He's engineered the board such that it supports the right amount of current.
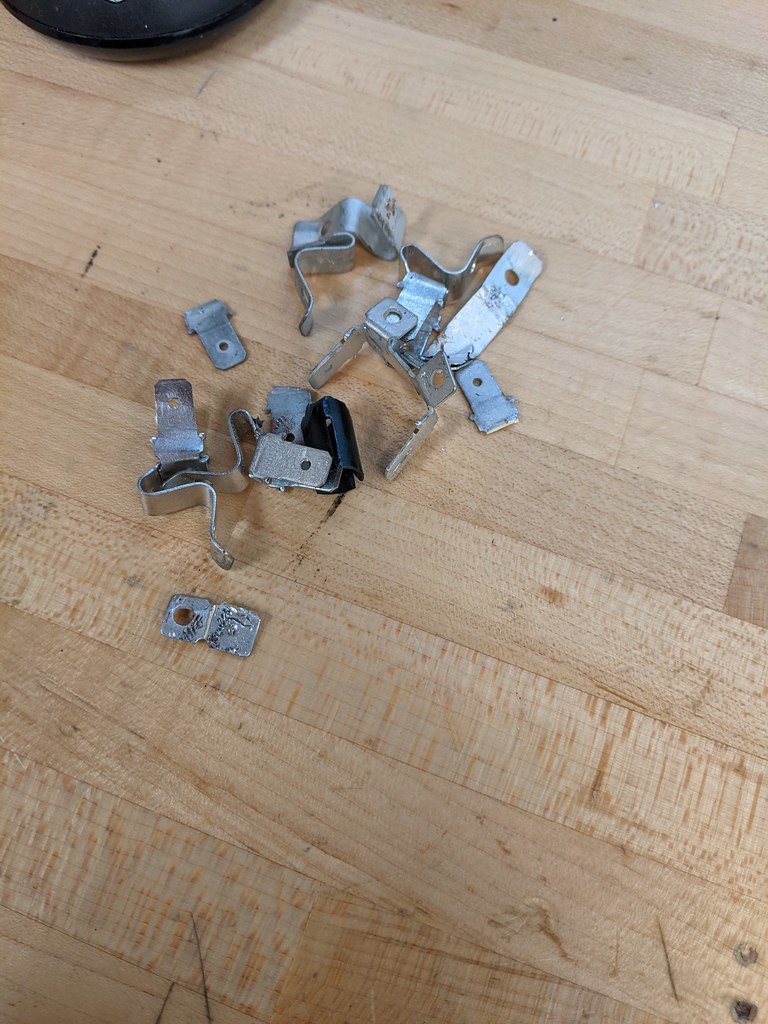
To install you need to irreversibly modify your original fuse box. For Minerva I had ALSO ordered a brand new-euro fuse box way back that we ended up not using because the box that was on the donor chassis was fine. I choose to modify the new one and then swap it into the car. Using a screwdriver and a pair of needle-nose pliers I pulled all of the bullet-fuse holders out through the top. This is a one-way door...
Once they are removed, the new circuit board just slides into place providing all the same pins. Apparently, on early fuse boxes, the leads that attach to the relays on the underside are soldiered to the pins, so retrofitting will be a bit more work.
Once I got everything plugged back in I quickly discovered something was wrong. Like the idiot I am I never really considered the US and Euro boxes would be different. They are. The difference that matters to this conversion has to do with the high-beams. On US cars fuse 7 is the right high-beam and fuse 8 is the left. The inputs to those 8A fuses is the same YL 2.5 wire from the high-beam relay. The input-side (top) of the bullet fuse holder is bridged between 7 & 8.
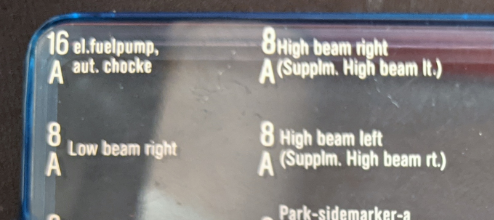
On Euro cars Fuse 7 is 16A and carries both the right & left high beam. It is powered by the YL 2.5 wire from the high-beam relay. Fuse 8 is 8A and is for things other than high-beams and gets its power from the same VI 2.5 wire that powers fuse 11. The fuses have independent inputs:
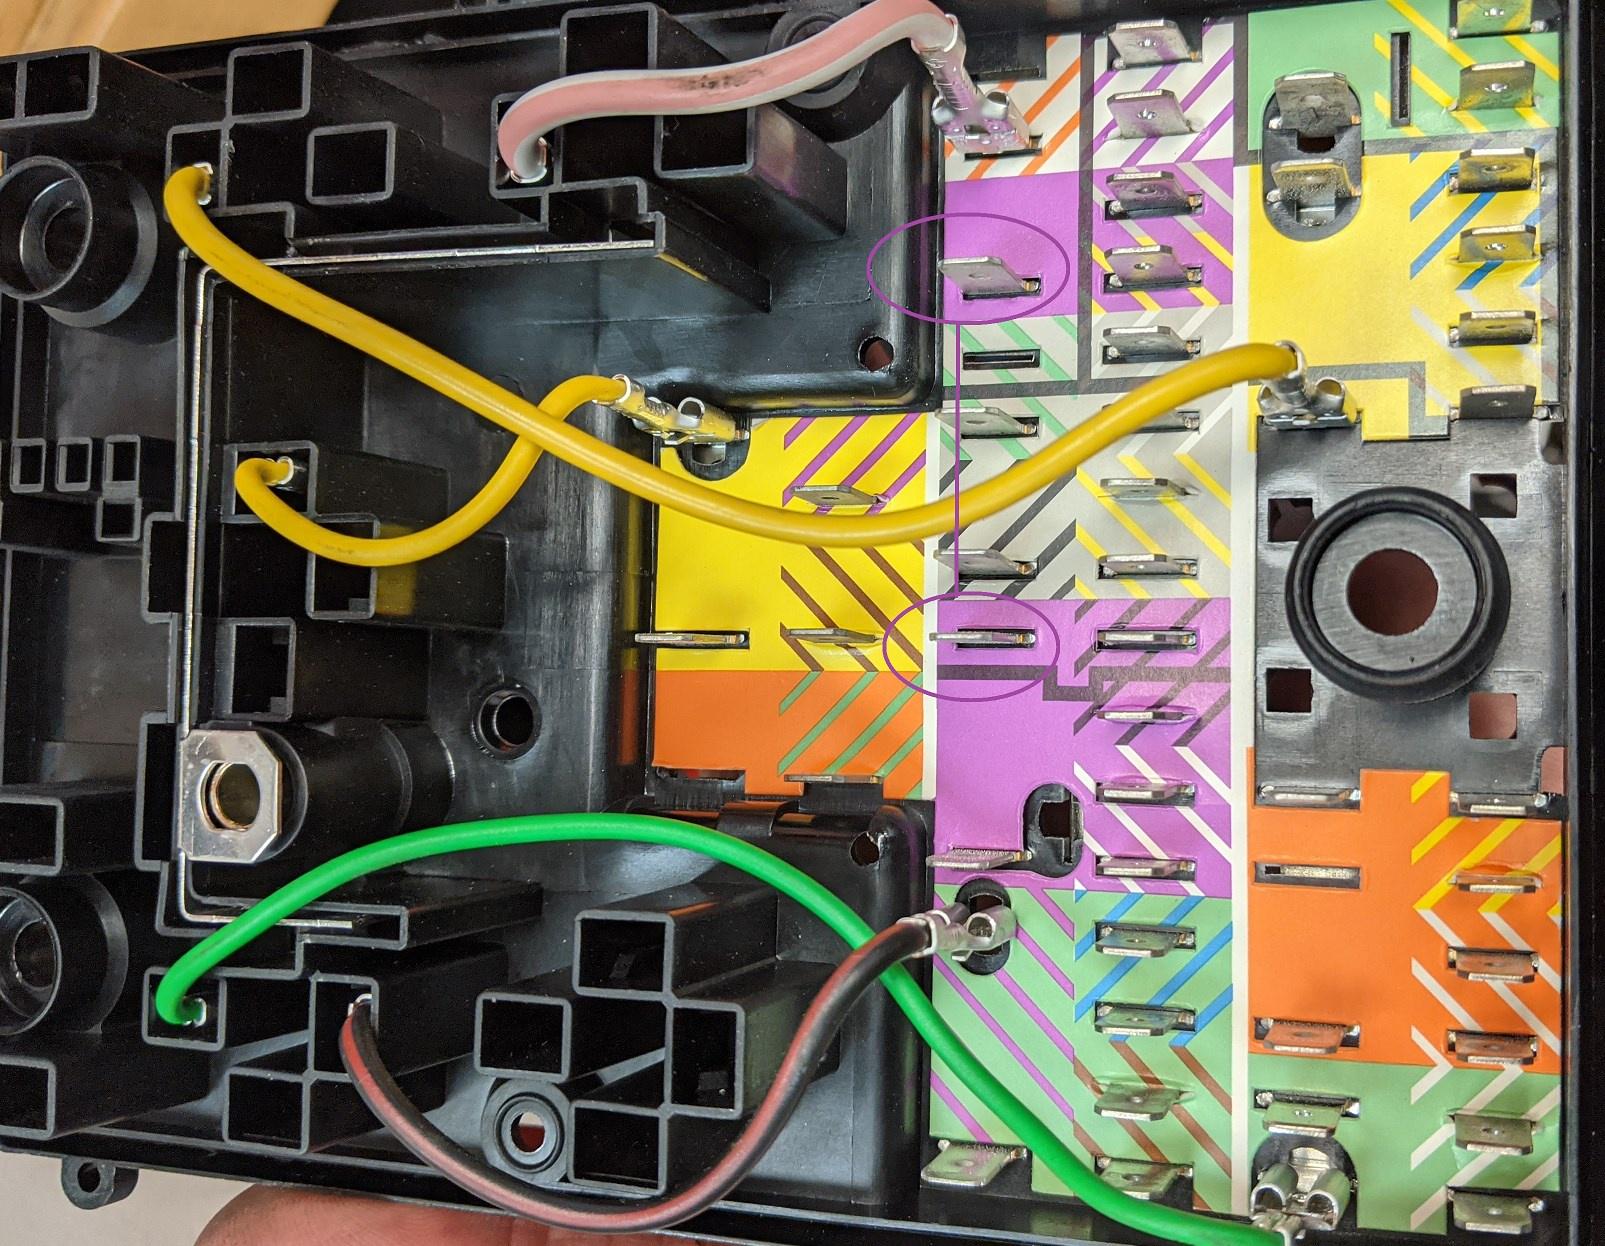
In my case, my stupidity (and @galahad's not knowing about Euro differences) meant that I had both the YL 2.5 and VI 2.5 wires plugged into the same bridged input between Fuse 7 & 8.
It took me far longer to figure all this out because I had (stupidly) put a US fuse box cover on the car. This led me to continue to believe Fuse 7 and Fuse 8 were for high-beams. Eventually, I figured it all out and realized the fix was easy: Cut the traces on @galahad's circuit board between fuse 7 * 7. We've discussed this and in his final design he will make the bridge between those fuses something that can more easily be modified so his design can work for both styles. I determined there are no other deep differences between the US & Euro boxes. Although some stuff does plug into different places, from the POV of the retrofit kit all will work.
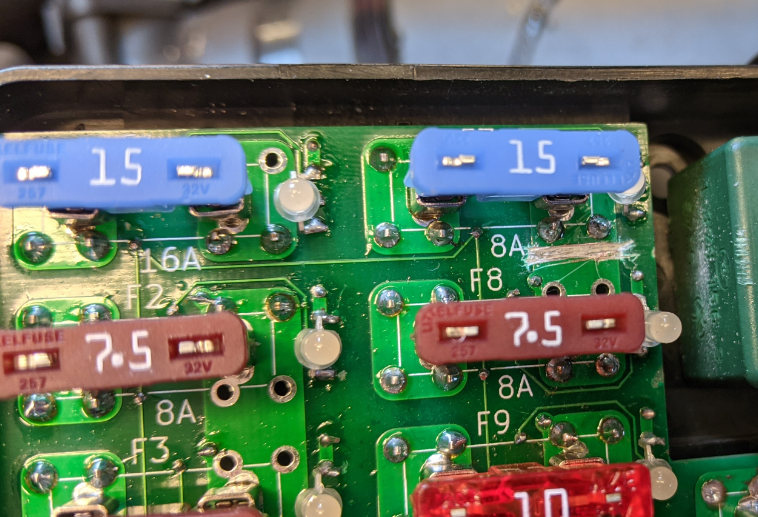
The other interesting thing about @galahad's design is built-in diagnostics LEDs for each fuse. HIs prototype has them working at all times, even when the car is off. This means that fuses 4, 5, & 17 are lit green even when the car is off. I don't like this because these cars don't need any more parasitic drain than they already have. I choose to put a little switch in place to control the ground for the LED circuit. @galahad says he's going to make it so they only work when the car is in ACC or RUN in his final design, which I'm cool with.
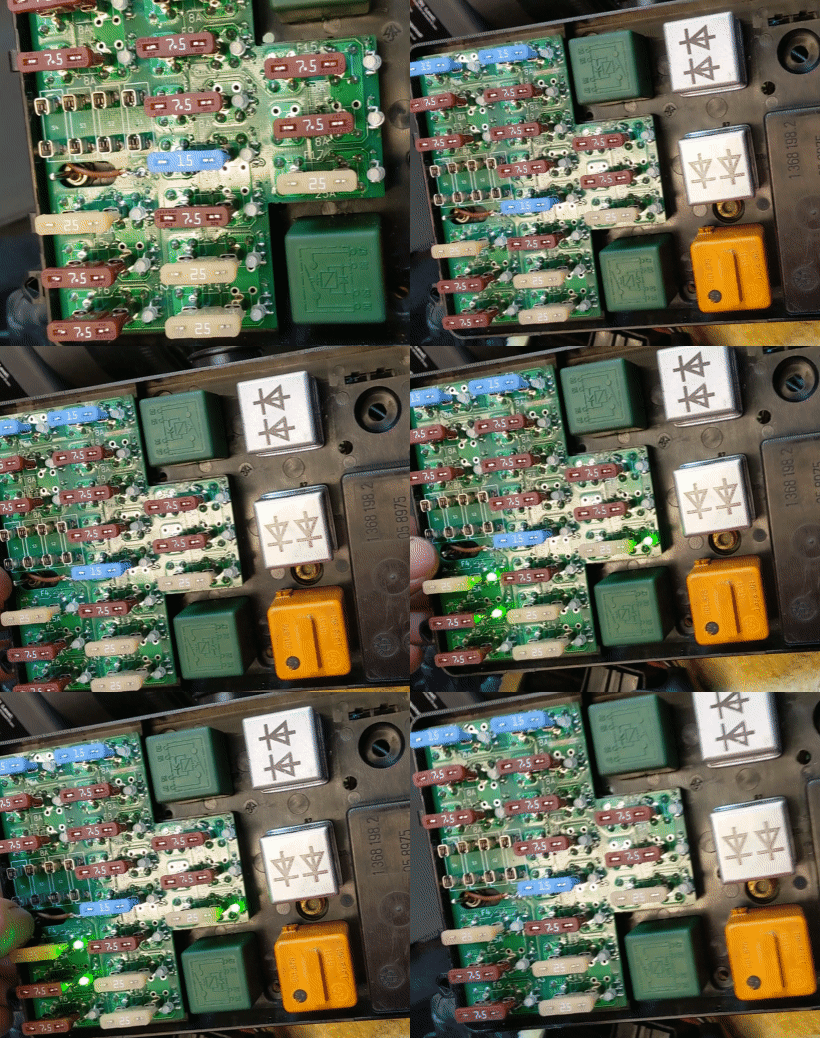
I've ordered a new Euro (UK English) cover from Blunt.
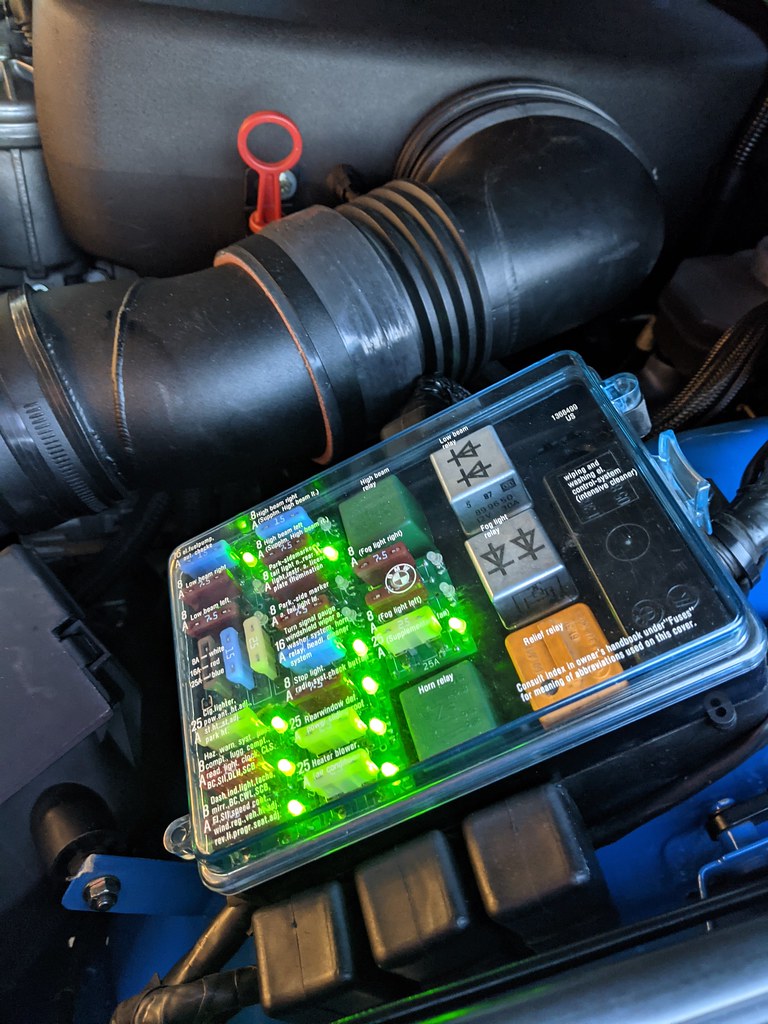
I was able to clean up some of the engine bay wiring around the fuse box since I had it all out too.
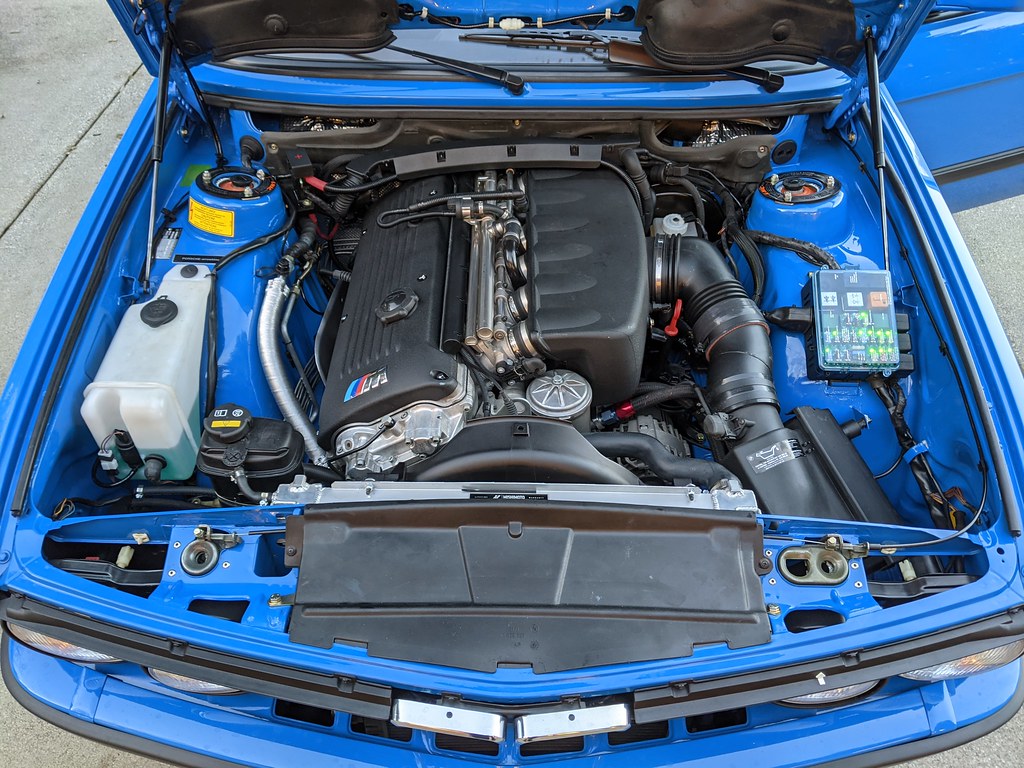
And, of course, spares:
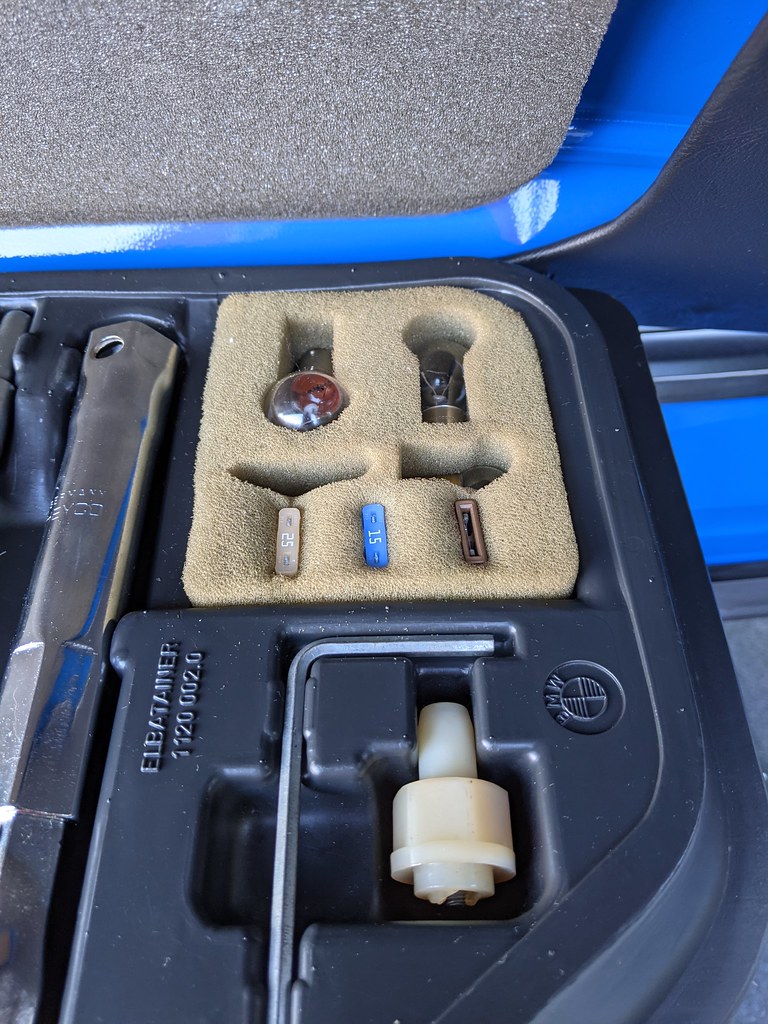
This is an amazing mod and I'm grateful to @galahad for creating it. He indicates it will be a few months before he has the time to build the final versions. I'm sure he'll create a thread here when he's ready.
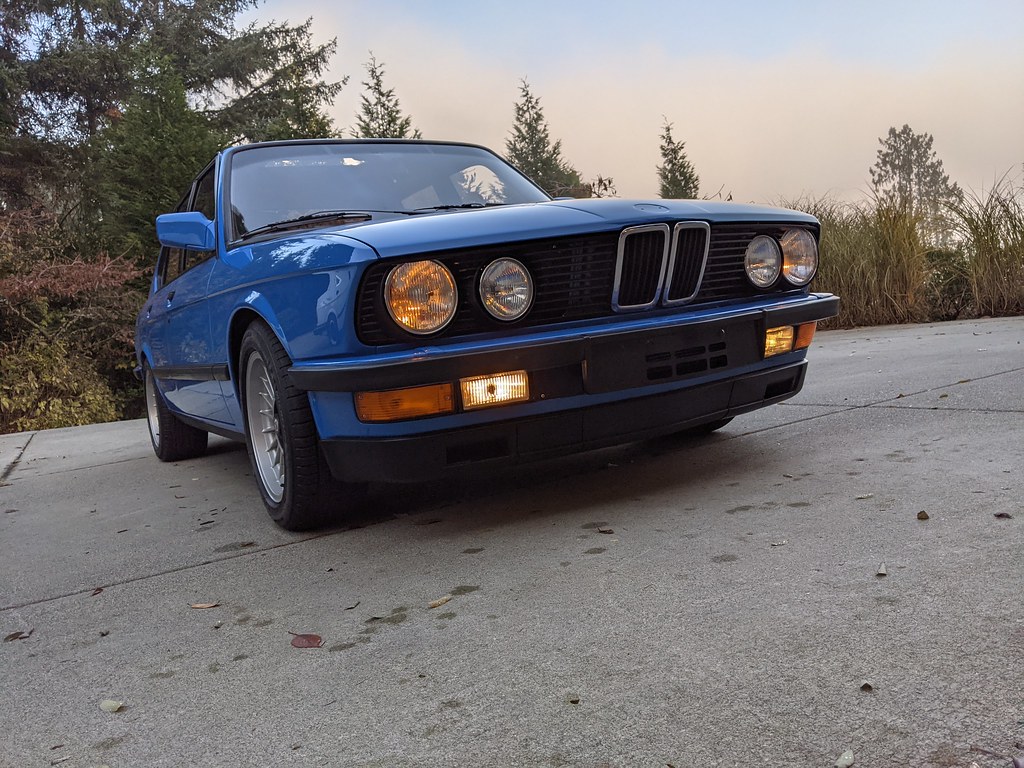
While I was in there, I fixed the fact that 425 didn't hook up the city lights properly. They didn't realize how the Euro lights went together and thus modified the euro harness to plug directly to the backs of the bulbs, without using the intermediary connector & boot. I had to undo all this and wire it up as it was from the factory. The city light bulbs weren't even installed!
But now city lights work correctly!
Re: Minerva: The S54 powered, better than new, daily driver
I'll make my own thread about these when the final product is ready, but I do need to thank cek for his invaluable input on the project. He has been immensely helpful both in testing and with recommendations that will make this a much better product - I would not have been able to figure out the Euro box differences on my own.
Re: Minerva: The S54 powered, better than new, daily driver
Two more things checked off Minerva's list:
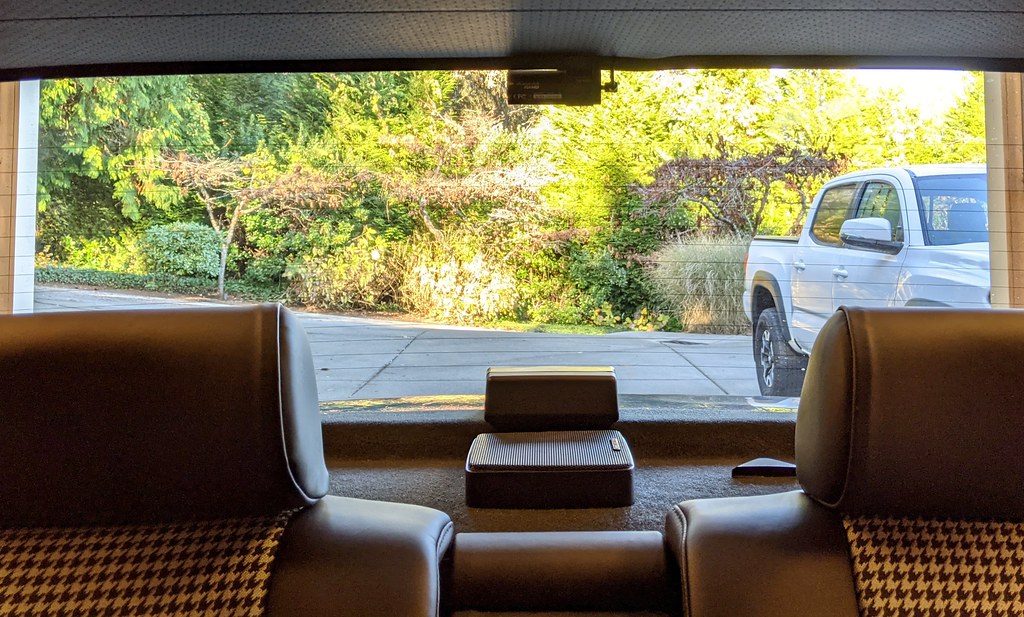
1) Mounted center brake light. Since this is a Euro chassis and harness, there's no provision for it. I had the interior guys only pull two wires (I should have checked the ETM first) so there's no way to wire it into the Active Check System as-is, so I've left it out. So what?
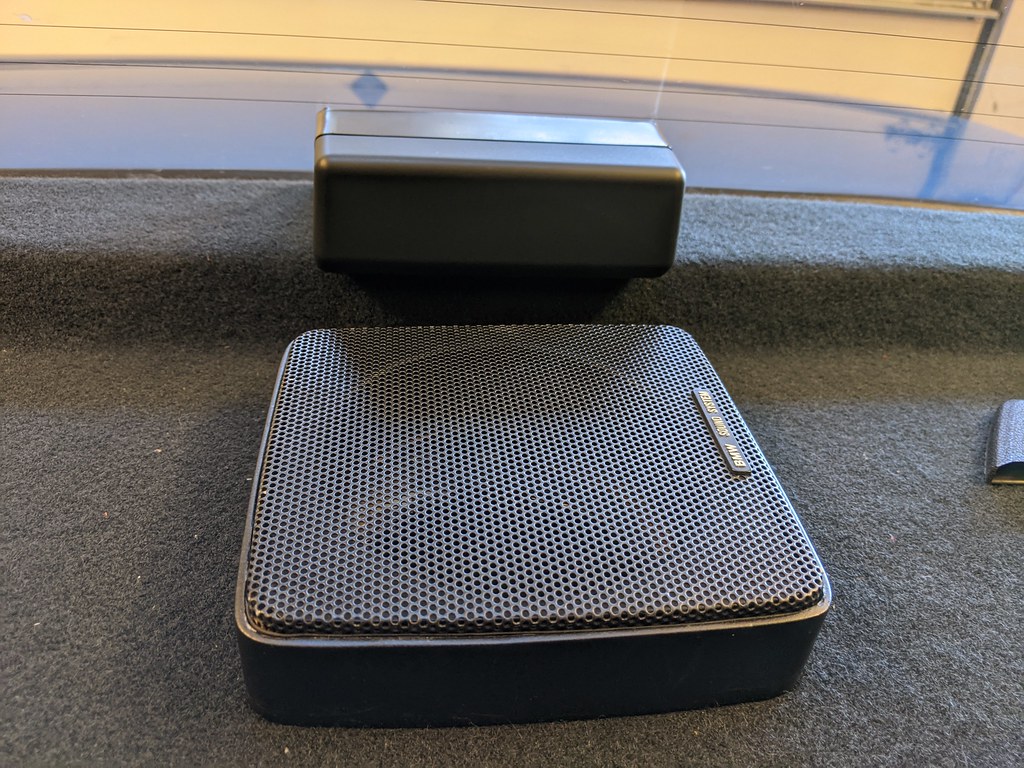
2) I painted the raised lettering on the speaker grills so they look moar new-ish.
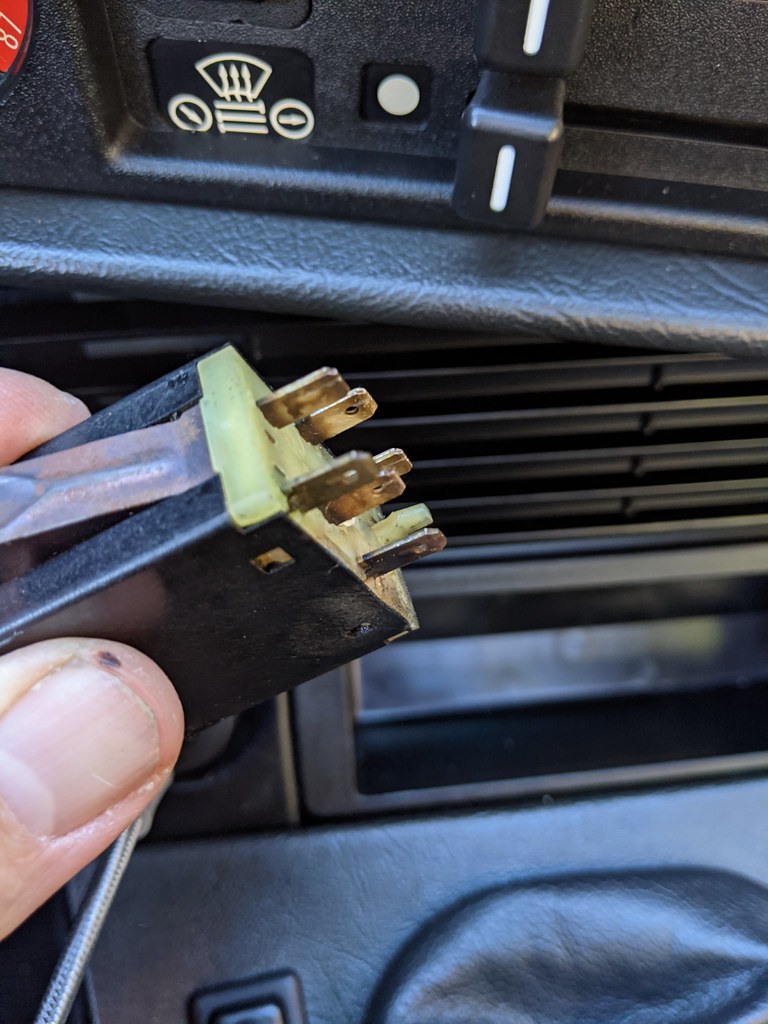
One thing back on the list. I keep trying US/post-85 defogger switches on this car. They keep almost catching on fire. Do you know the definition of insanity? Doing the same thing over and over again and expecting a different result.
I did this because the one in the car wasn't lighting up. So I noticed the one in Maytag was really tits and lights up. And Maytag's defogger is currently not working. So I said to myself "that should be in Minerva".
The amount of smoke it produced was impressive.
Re: Minerva: The S54 powered, better than new, daily driver
that fuse box is slick. I like it!
Re: Minerva: The S54 powered, better than new, daily driver
I'm in the middle of buying every variant of LED bulb available on Amazon. I finally discovered a good 'un that I think works well. Comes in white, red, and amber (white look too white under the lenses), doesn't trip speedy blink or active check, and has good ratings. Once I get em all and I'm confident I'll post details.
Today I (foolishly?) decided to tackle the heater fan noise that I kept hoping would just go away and the oil leak from the valve cover gasket.
Along the way I refurbished the firewall cover. Like most of these, the foam insulation was awol and the lower part had crumbled way. I used single-sided foam tape *(back to back) to re-create the original area on the bottom. I also Vynlix'd it to make it pop.
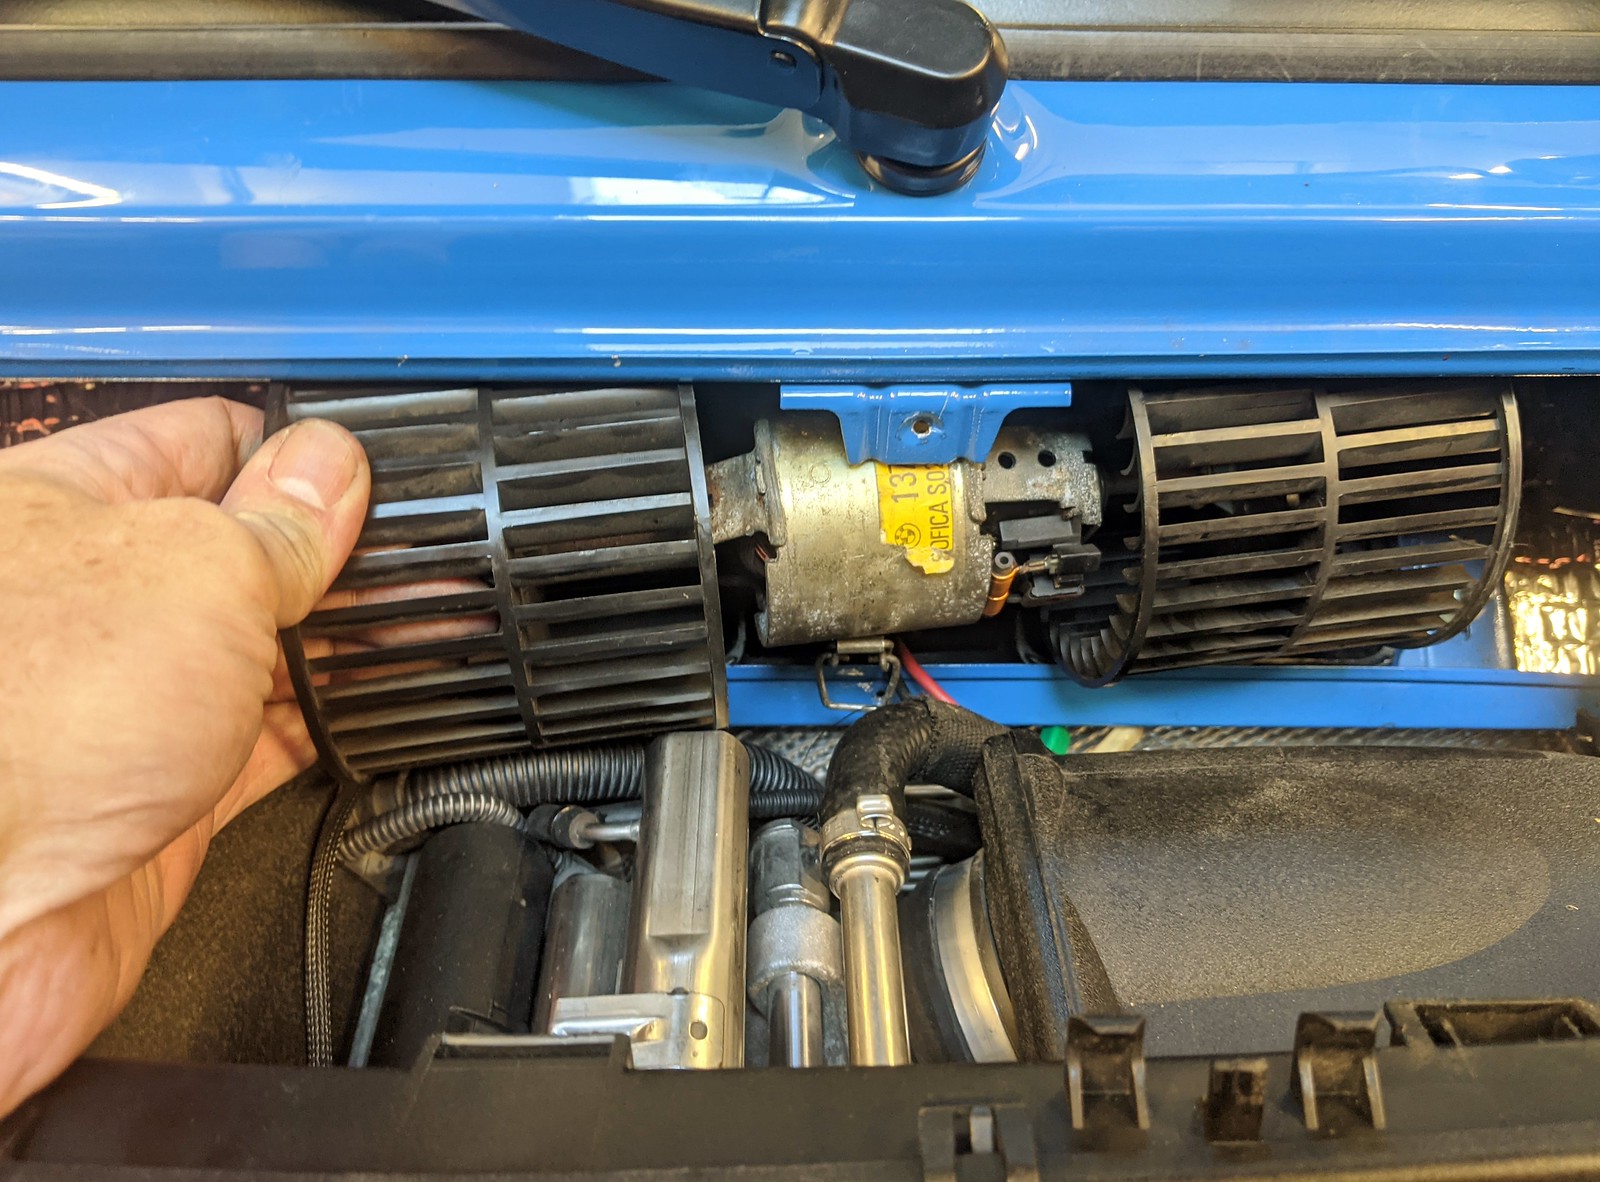
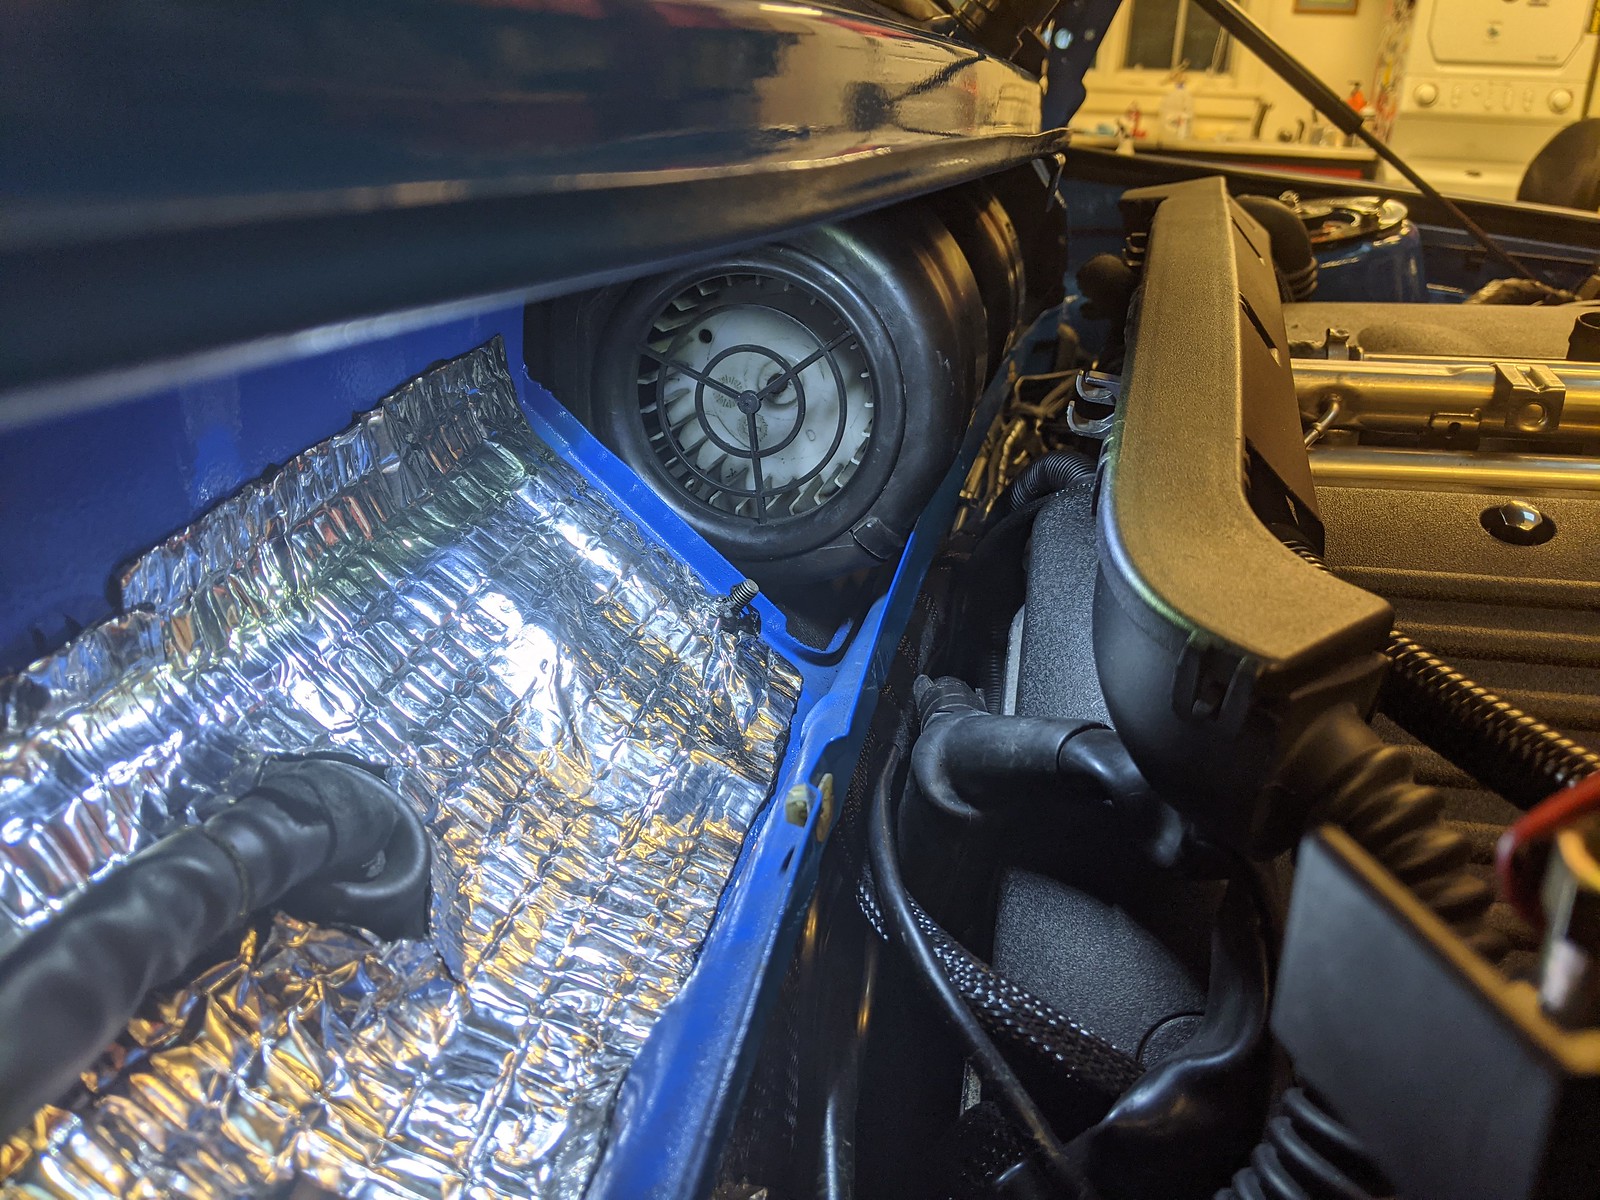
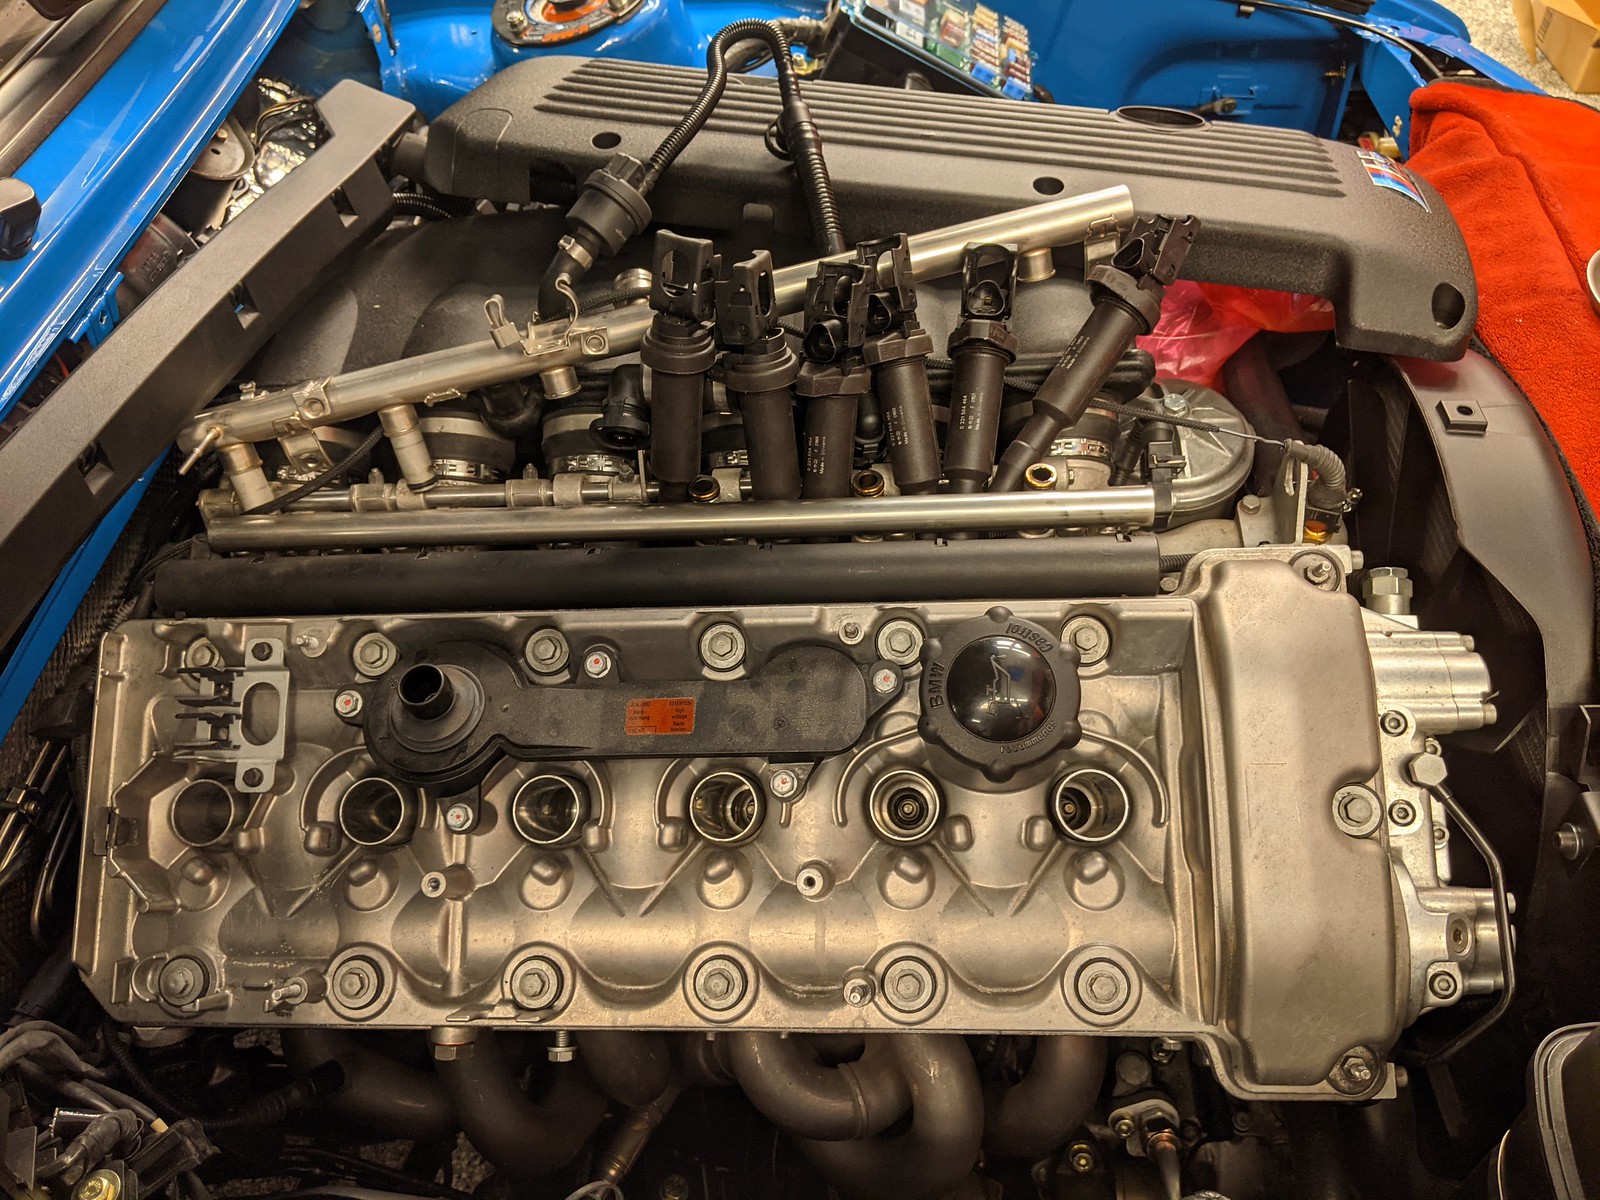
I also discovered that it is not possible to remove an E28 heater fan from an S54 swapped car without removing the fuel rail.
I had really hoped that Sofica (old style heater unit) fan just needed oils. Alas, it was broken at the negative connection and no amount of oil would prevent it from squealing. Good thing I sourced a backup Sofica fan ages ago as these things are hard to find. Now nice and quiet.
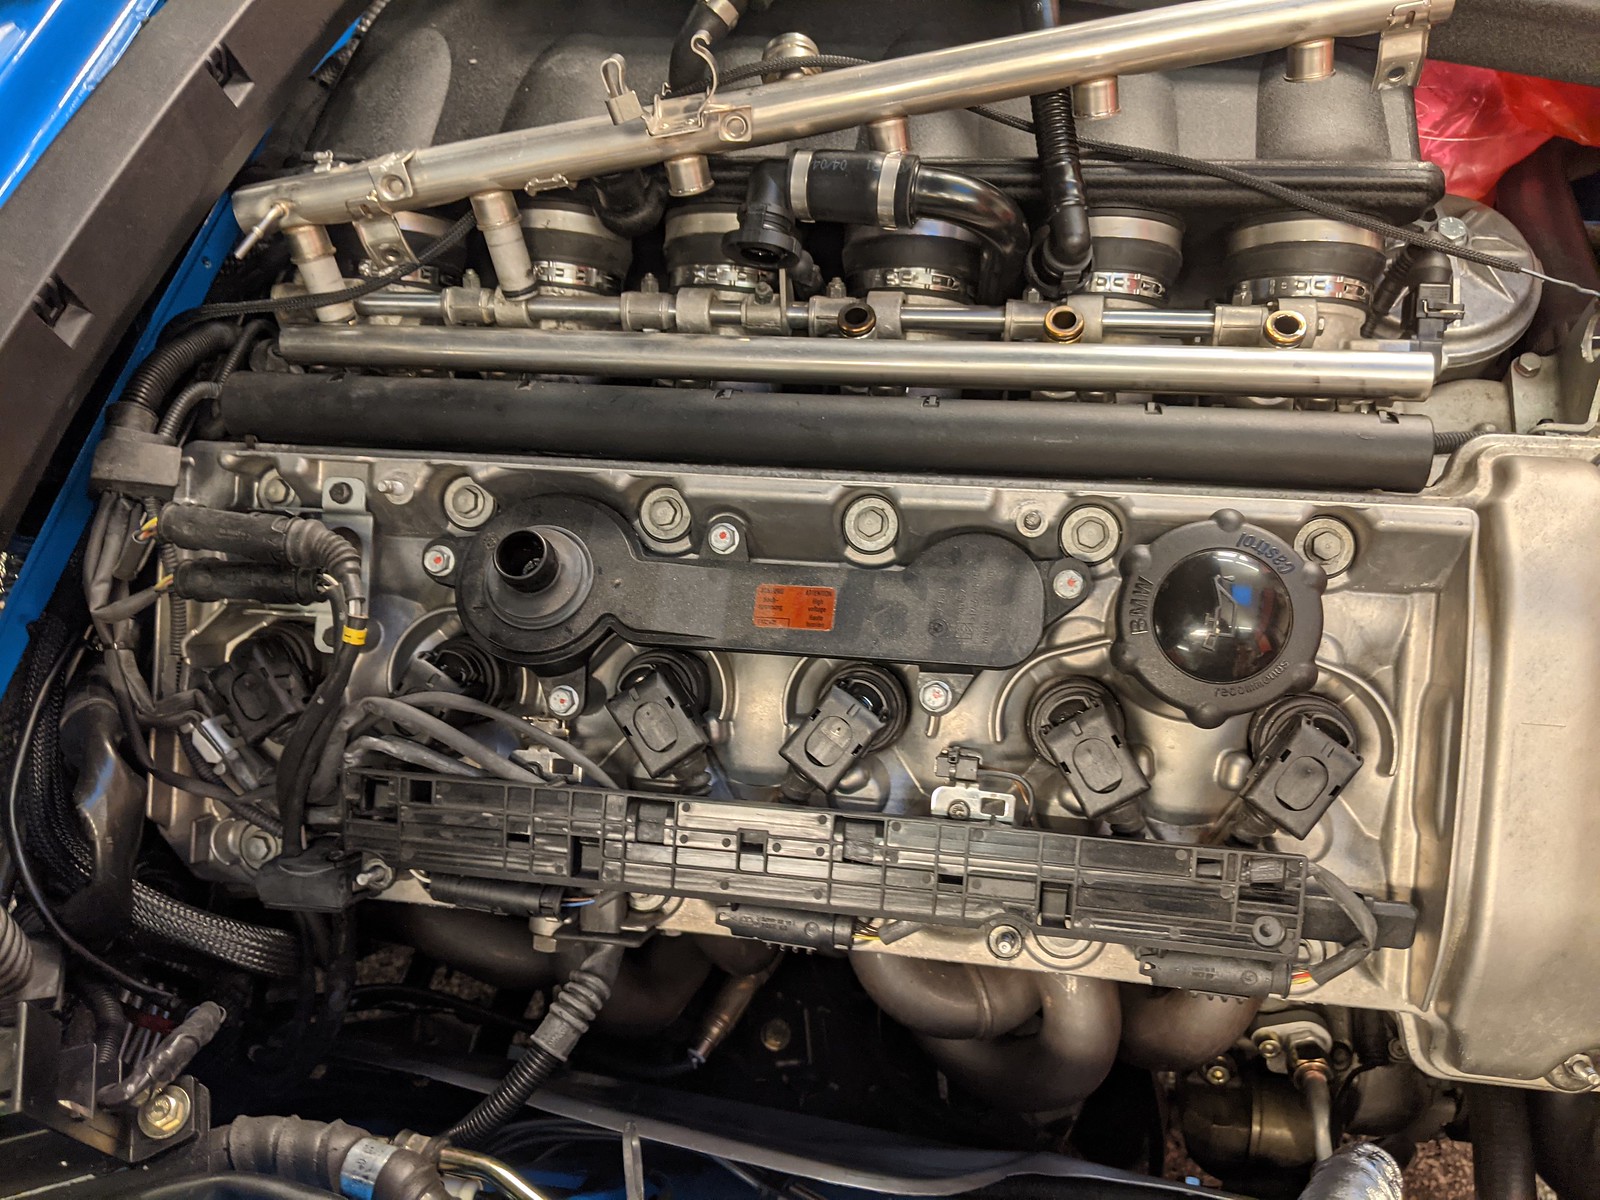
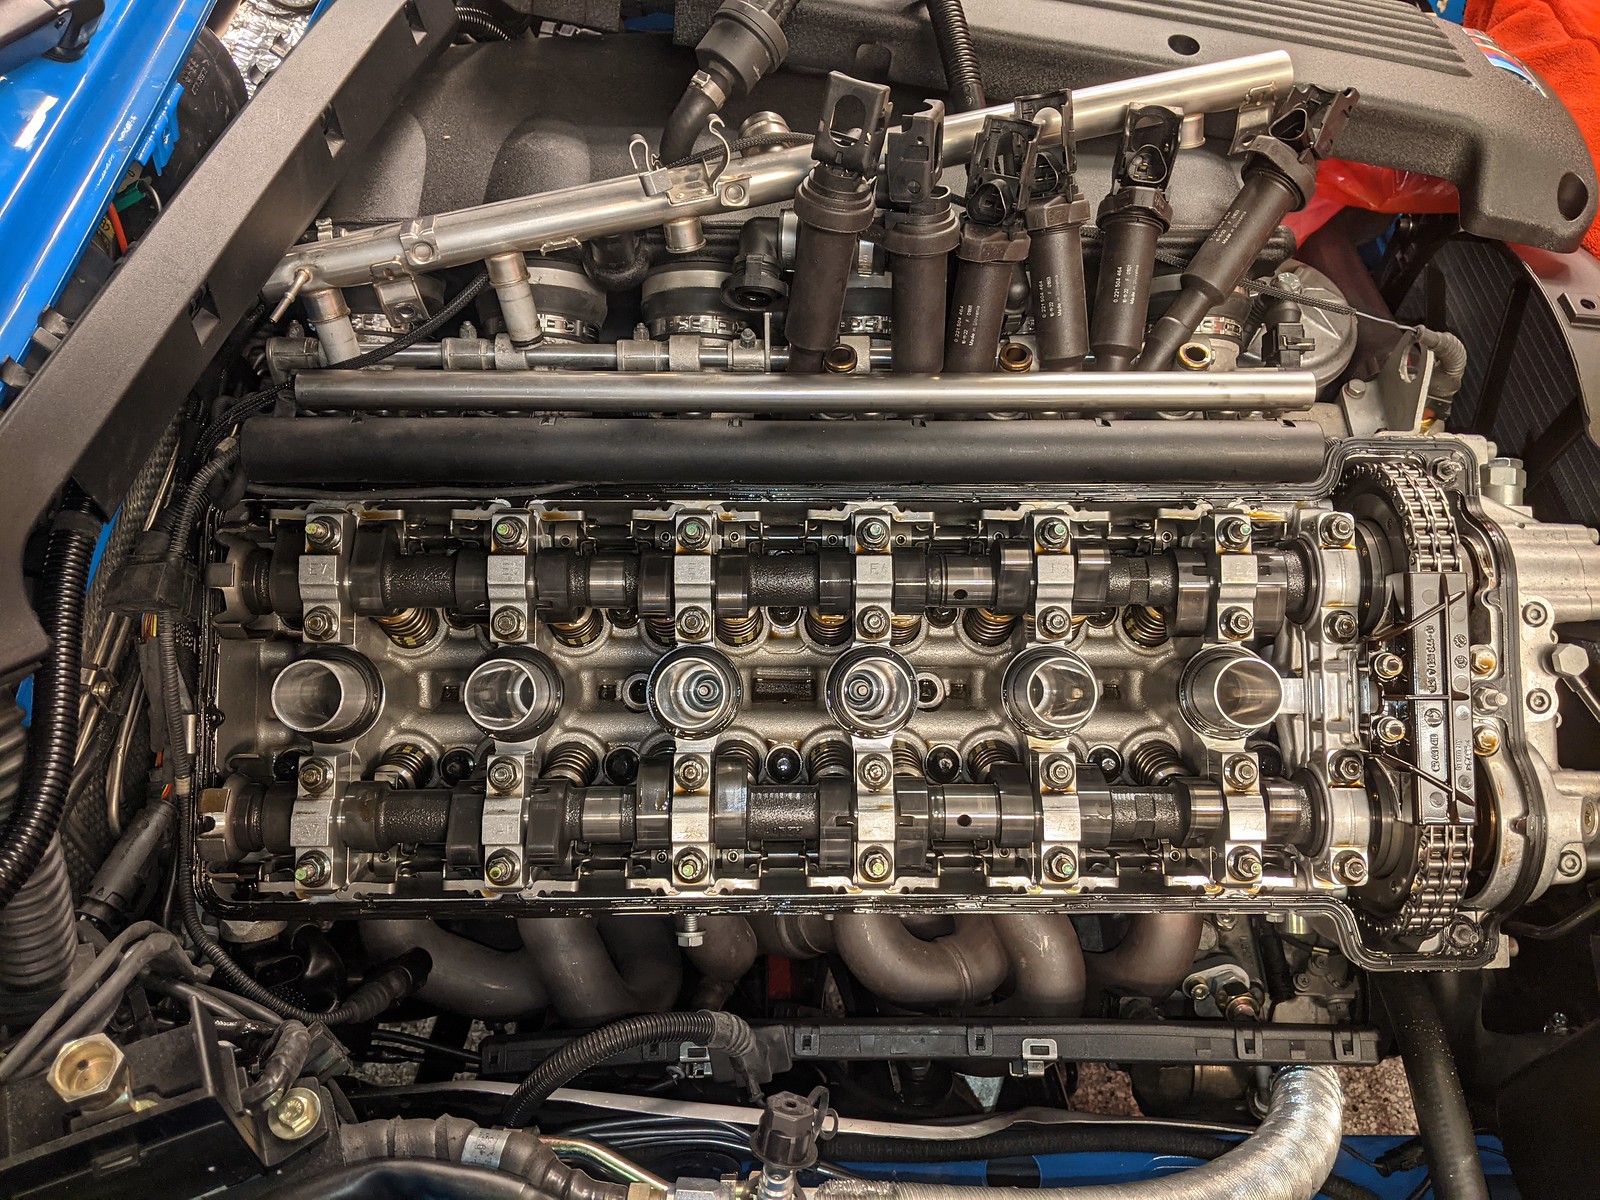
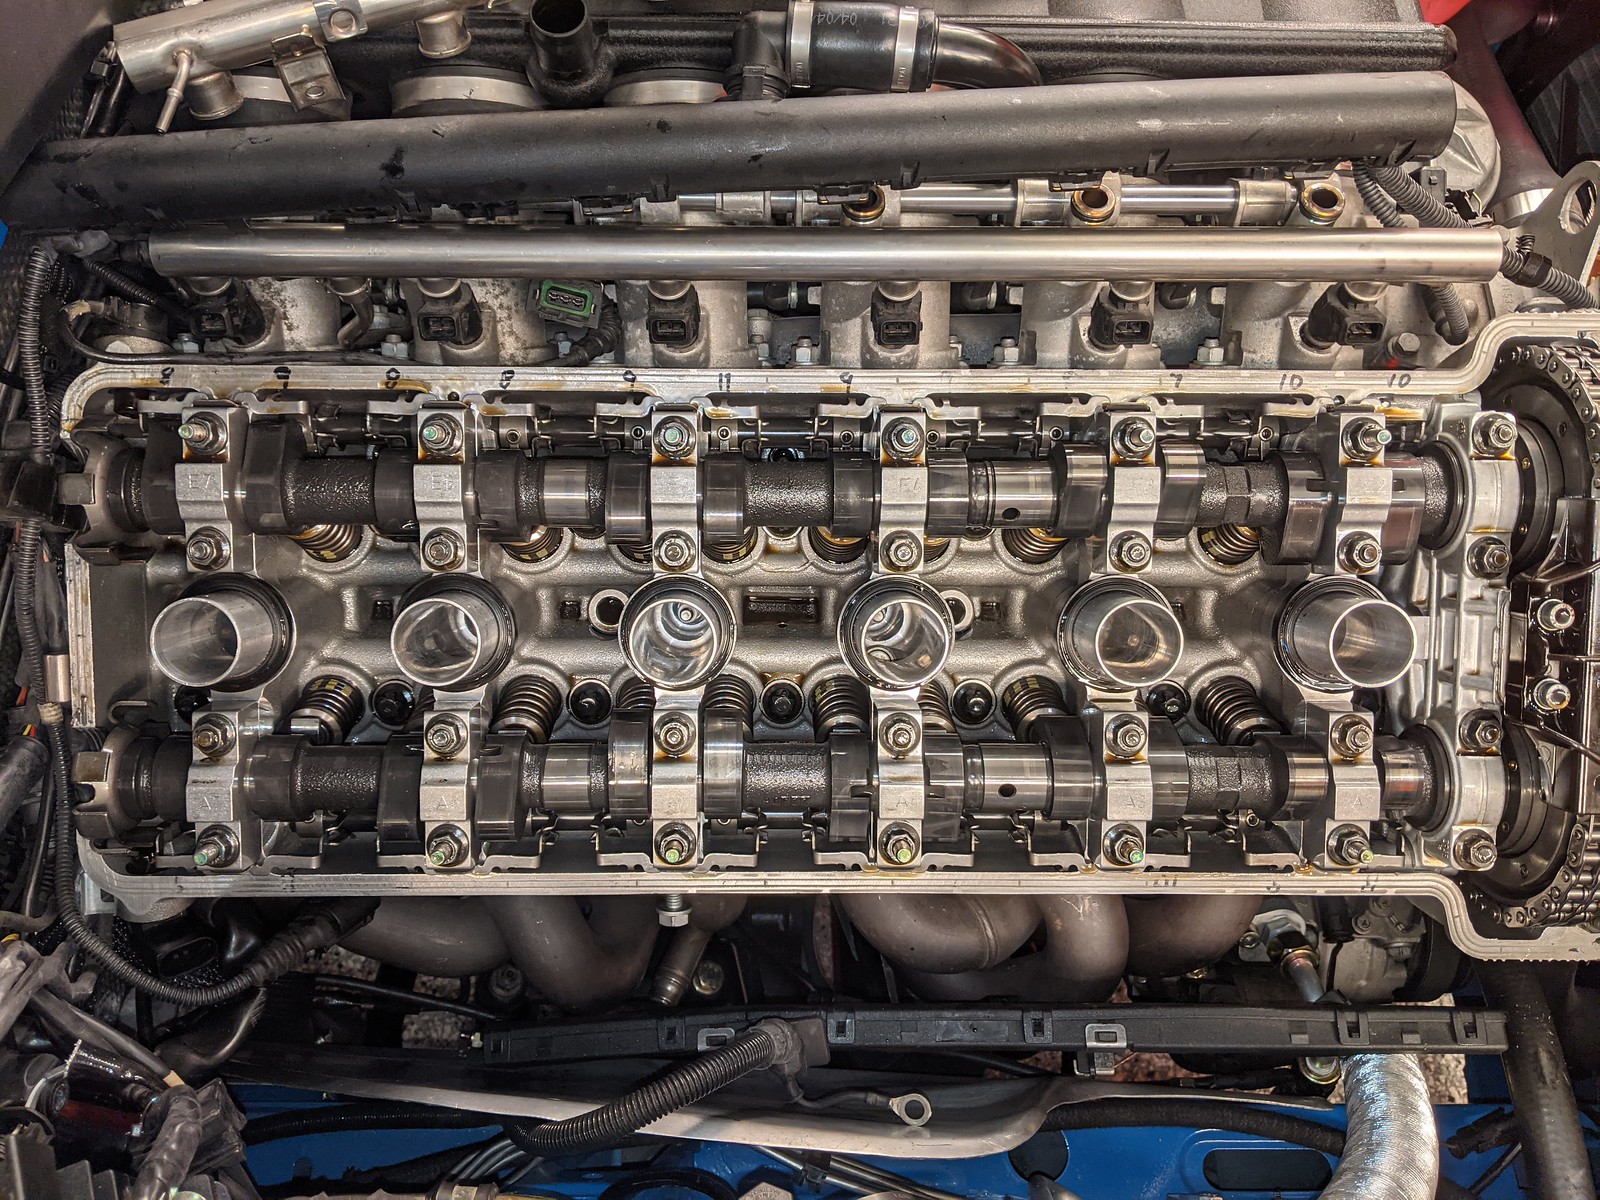
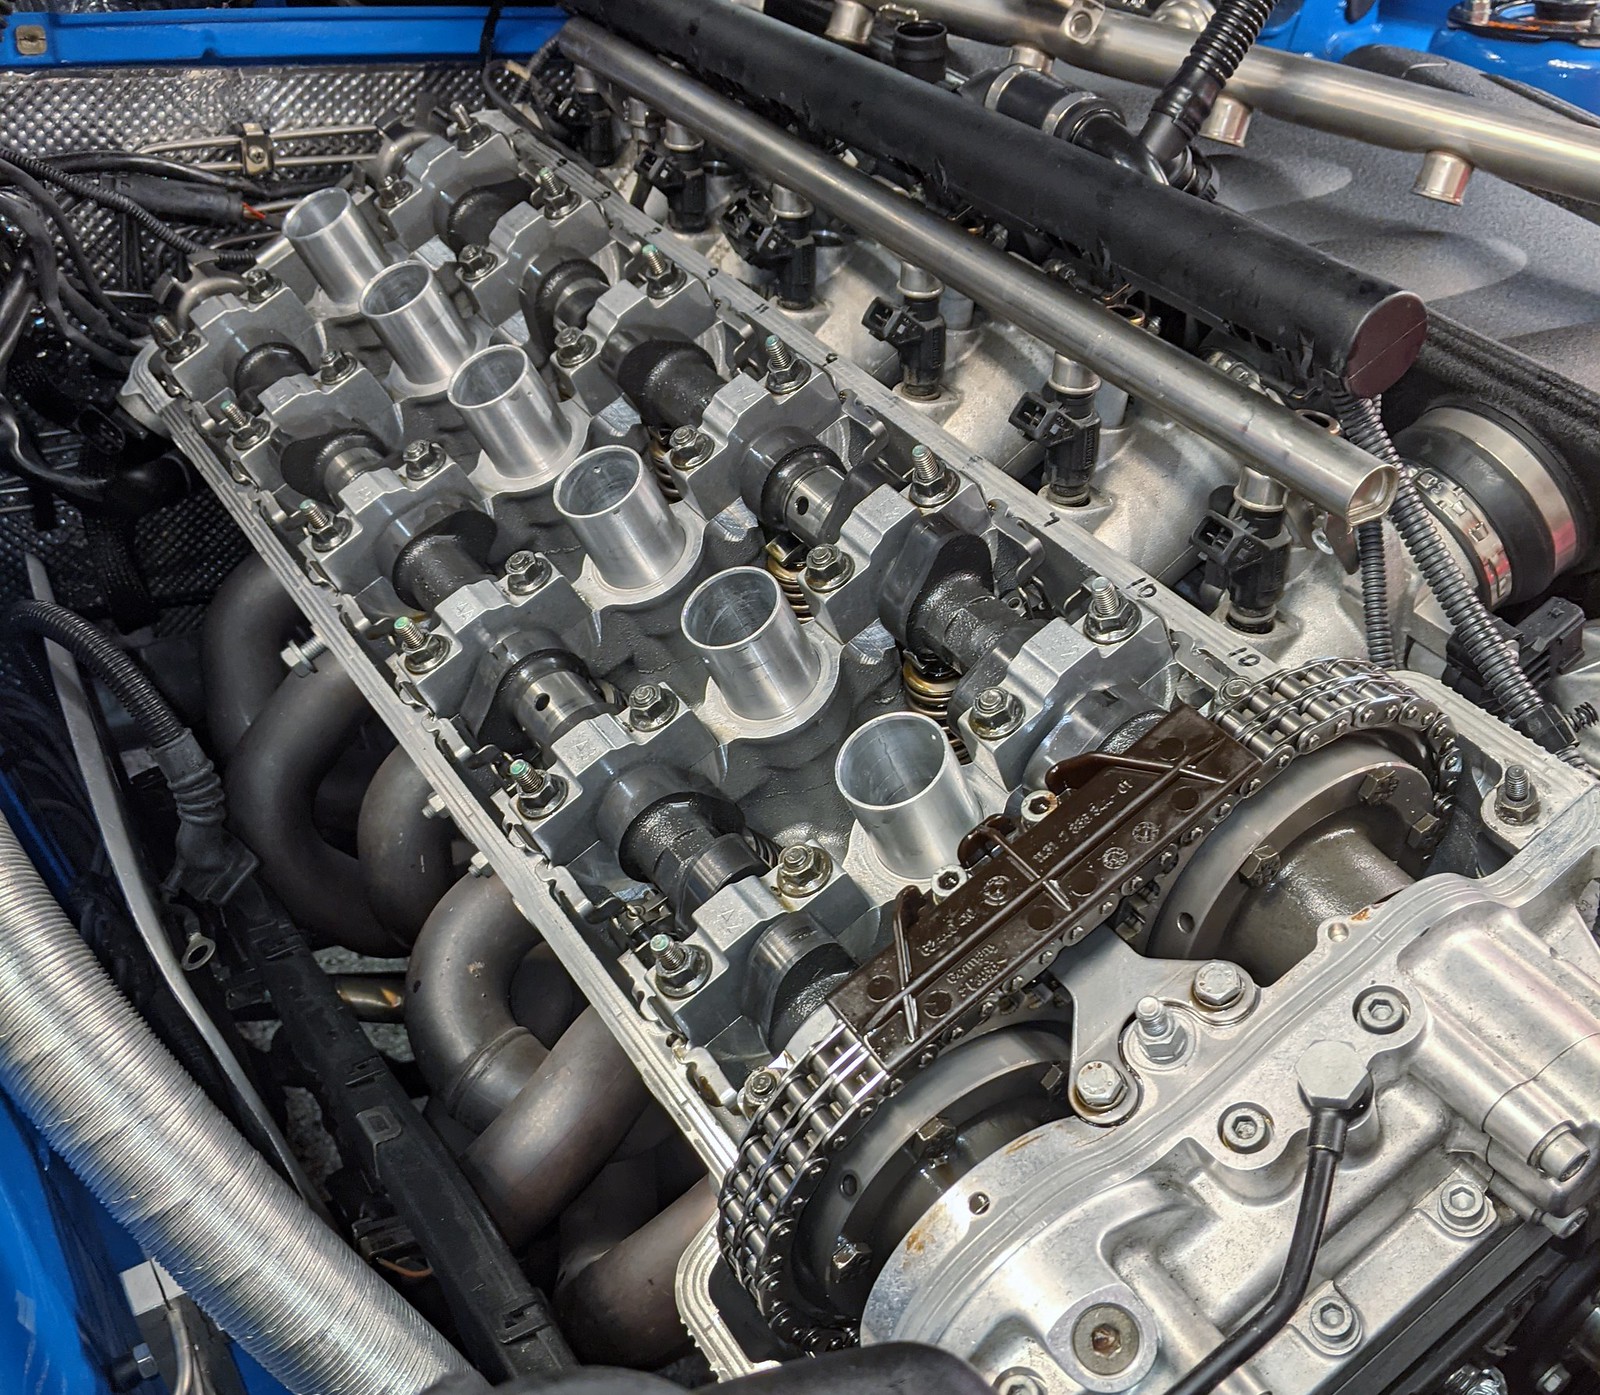
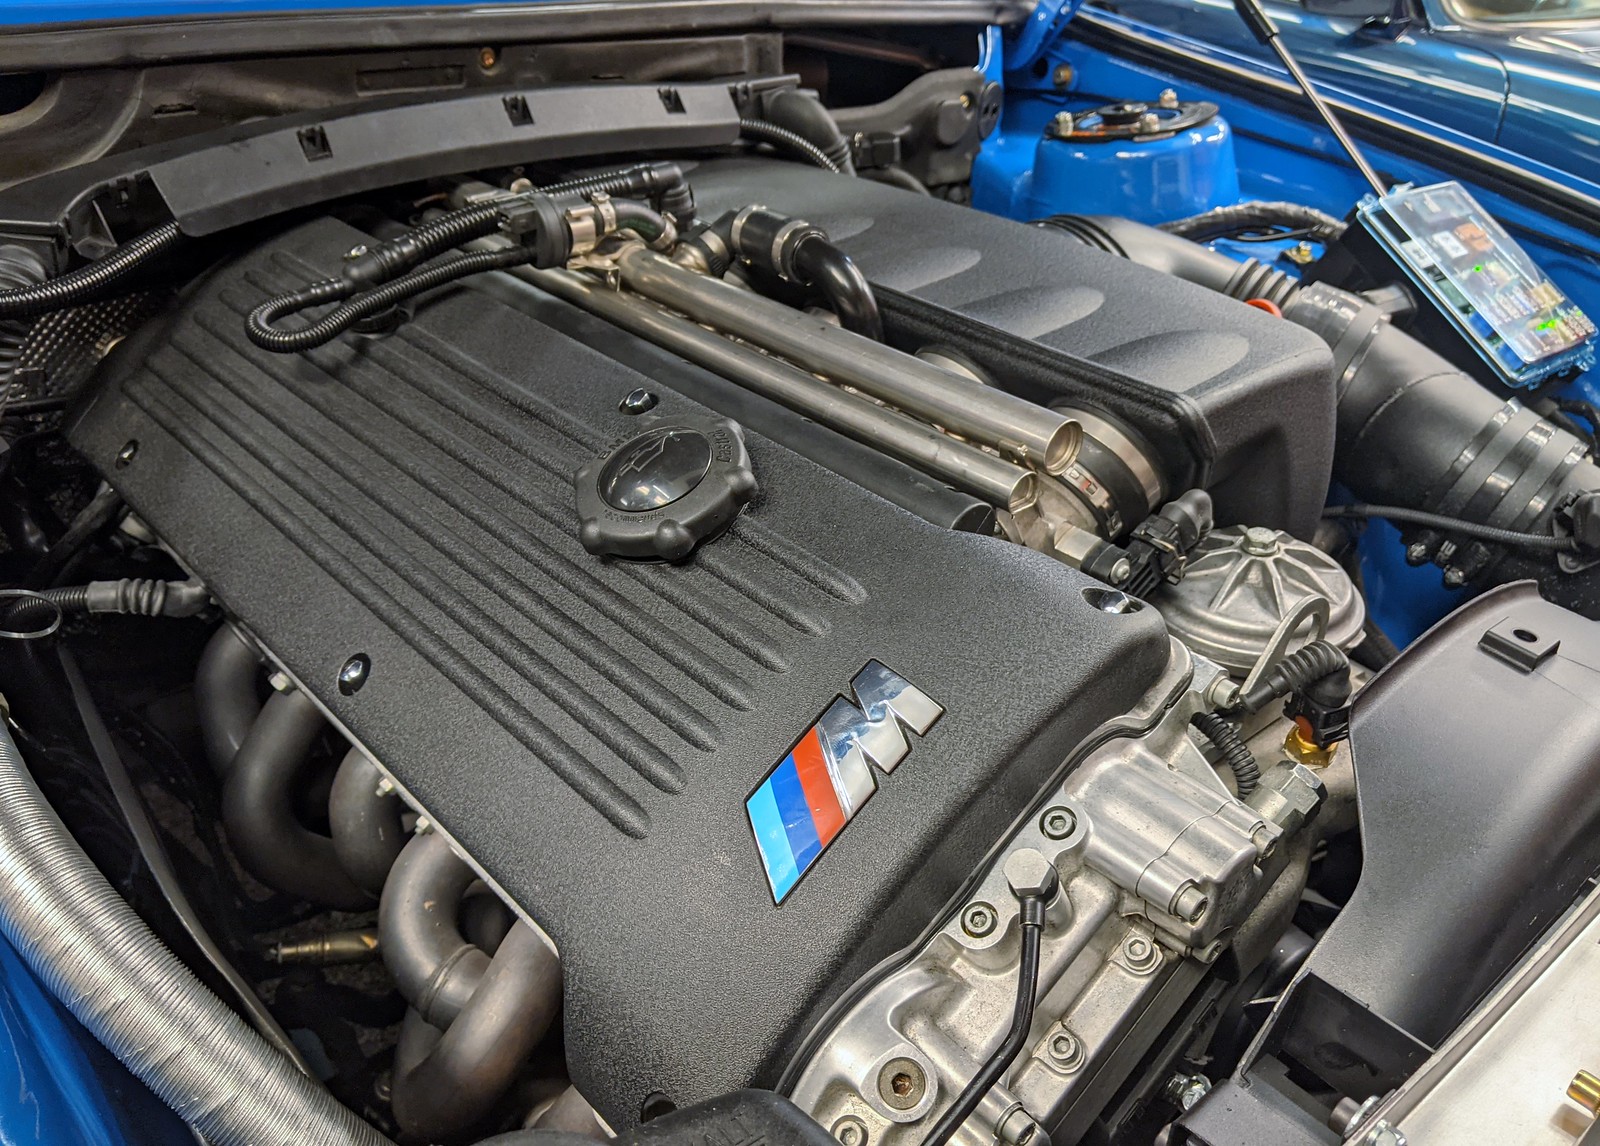
After watching lots of Youtube videos I had the confidence to dive into the valve cover gasket. The ///M cover is plastic. I thought it was metal.
Sexy, Steve Dinan equipped innards.
Too bad 425 re-used the old gasket set when they did the Vanos upgrade. I already yelled at Dan. But getting a new gasket (and all the other O-rings that go with it) in was easy.
All back together and (I think) running fine.
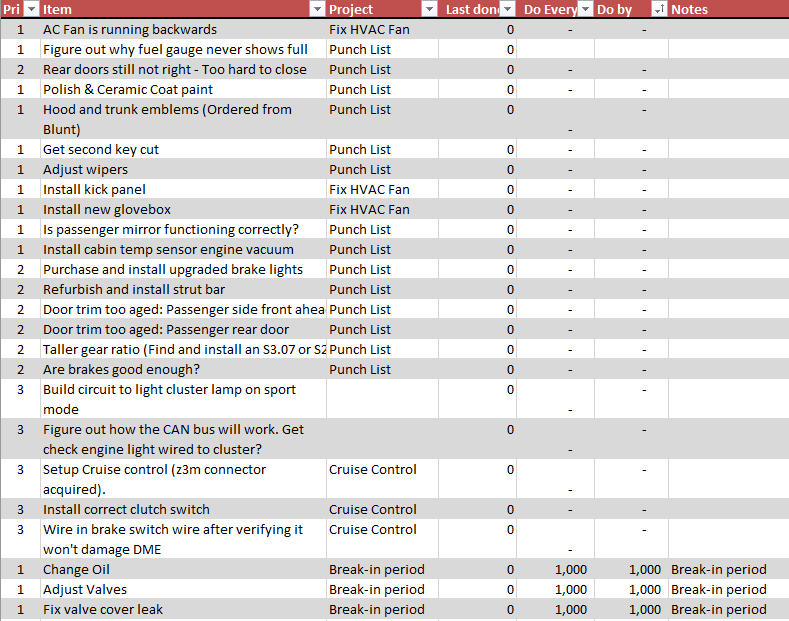
Next up I get to pull the center console apart again to fix whatever the heck I did that made the AC fan run the wrong direction. Sigh.
-
- Posts: 967
- Joined: Oct 26, 2017 3:36 PM
- Location: Fleming Island FL
Re: Minerva: The S54 powered, better than new, daily driver
The pictures of Vlad were "tits" but I fully enjoy these action shots. Great stuff here Charlie- I struggle to figure out how you have the time to tinker and then document so thoroughly (both). Thank you for doing so and I dread the day you feel that you are done. Hoping at that point another E28 finds its way into your garage with yet another vision.
Re: Minerva: The S54 powered, better than new, daily driver
Well, the resurgence in activity is due to the fact that I don't currently have a jobBonsaibacker wrote: Dec 07, 2020 5:06 AM The pictures of Vlad were "tits" but I fully enjoy these action shots. Great stuff here Charlie- I struggle to figure out how you have the time to tinker and then document so thoroughly (both). Thank you for doing so and I dread the day you feel that you are done. Hoping at that point another E28 finds its way into your garage with yet another vision.