szacsi72's 1984 Zinnoberrot 535i Build

General conversations about BMW E28s and the people who own them.
szacsi72
Posts: 287
Joined: Nov 13, 2022 3:41 AM
Location: Hungary

Re: szacsi72's E28 535i build thread - "The Reddie"

Post by szacsi72 »

I have a LOT of questions. A LOT.
I normally post them in the Tech Talk section, however, I don't want to spam the whole board...
So I collected them, and I'm posting them here, hoping that you guys actually read my build thread :laugh:

1. Can I use regular DIN931 bolts in the engine?
I think I've heard someone do this in an S38 for main bolts. Is 10.9 just 10.9? Or do you think that there would be a quality difference between OEM bolts and cheap regular 10.9s from the local hardware store?
For head bolts, I suspect this is a no-go, they are too long and they are thinner in the middle.

2. Would it make sense to get my flywheel and clutch combination balanced?
The flywheel is brand new, made from billet steel and has been balanced at the factory. The clutch is a new Sachs S38B36 clutch. Are these both balanced enough not to cause any trouble when combined? Or should I get them balanced together? Would it make a difference (smoother running?)

3. What do you guys think of running a smaller water pump pulley?
My current one (OEM on the B35) is 130mm, it's the smaller of the two M30 pulleys. But the S38 had 112 and 102mm versions. The water pump impeller is the same on the M30 and S38 water pumps, so I figured this could be a good upgrade for people who mostly use their cars on the street (for track users, the higher rpm would just create more drag and won't flow more after a point).

4. When it comes to a V-belt, which diameter counts when calculating the ratio?
Outer diameter? "Inner diameter" (OD - 2x belt depth)? Middle (OD - Belt depth (2x 0.5))?

5. Would I cook my R8 coils without a heat shield?

I can't use the stock exhaust gaskets and the new gaskets don't have the shield part. (I discussed this a bit more in a previous post)

6. Should I open up my exhaust ports?
The headers I bought are larger than the original ports on my M30. They are 41.5mm OD tubing that are 1.5mm thick, so 38.5mm ID.
The B35 ports have an area of 1081mm2, so its equivalent diameter is 37.099 ~37mm. I would need to open up the exhaust ports "roughly" 0.75mm all around. This sounds OK to me, I don't think the port velocities will get too low especially since I plan to push a lot more air trough. And even if it was a touch too big, I guess it's still better than having a lip? Let me know!

7. Is there a way to fix the oil filter housing's drain valve if it's bad (lets oil flow down?)
So far on most forums they just state that you should replace it (but another used unit can also malfunction..)

8. Can you recommend me a MATERIAL for heat shielding my underbody tunnel?
Not an exact product - I will probably have problem finding it in my country. I'm just looking for materials that adhere well enough and are heat resistant enough to be used on the outside... Transmission tunnel's right side, where the exhaust is.

9. Which clutch cylinder should I use?
My transmission came from an E34 and I've reused the cylinder on it, but I just realised it is 22.2mm instead of the E28's 20.64mm. It did not cause any troubles, but I guess I should swap to one from an E28? That would result in the engagement point being higher, and the clutch pedal being heavier? The clutch master is 19.05mm on both the E28 and the E34...

10. Stainless or regular studs?
Since my headers are made from 304, I figured that using A2 grade exhaust studs instead of 8.8 could be a good idea, because I really don't want to end up with a rusting stainless part! Of course A2 and aluminium like to galvanically corrode, but I think it should be fine with Loctite 8150 anti seize?

Thank you for your answers!
I'm finally feeling better, and now that the build is rolling lot's of thing are popping around in my head...
Galahad
Posts: 539
Joined: Sep 06, 2016 9:08 PM
Location: Beverly/Worcester, MA
Contact:

Re: szacsi72's E28 535i build thread - "The Reddie"

Post by Galahad »

1: I think 10.9 is 10.9. Head bolts are specifically TTY so they aren't going to be the same as the hardware store ones (if you can even find them in the right length)

2: I threw a new billet flywheel and clutch at two cars without balancing them together and didn't have any noticeable problems

3: overheating is bad, water flow is good

9: I'd match the master and slave sizes, I think I mismatched mine and the engagement is really high (but I also have the 323i tall throwout bearing). E34 master cylinders are too long for the E28 pedal box, at least the 525i one I used
Panici
Posts: 221
Joined: Aug 07, 2014 2:04 AM
Location: Canada

Re: szacsi72's E28 535i build thread - "The Reddie"

Post by Panici »

6. Should I open up my exhaust ports?


8. Can you recommend me a MATERIAL for heat shielding my underbody tunnel?
Not an exact product - I will probably have problem finding it in my country. I'm just looking for materials that adhere well enough and are heat resistant enough to be used on the outside... Transmission tunnel's right side, where the exhaust is.
6. From what I've read, port matching should be used on intake side only on a street engine. Don't open up your exhaust ports.
You actually do want a "step" between port and runner, something to do with exhaust scavenging and reflection IIRC.
Do some reading on this and decide for yourself.

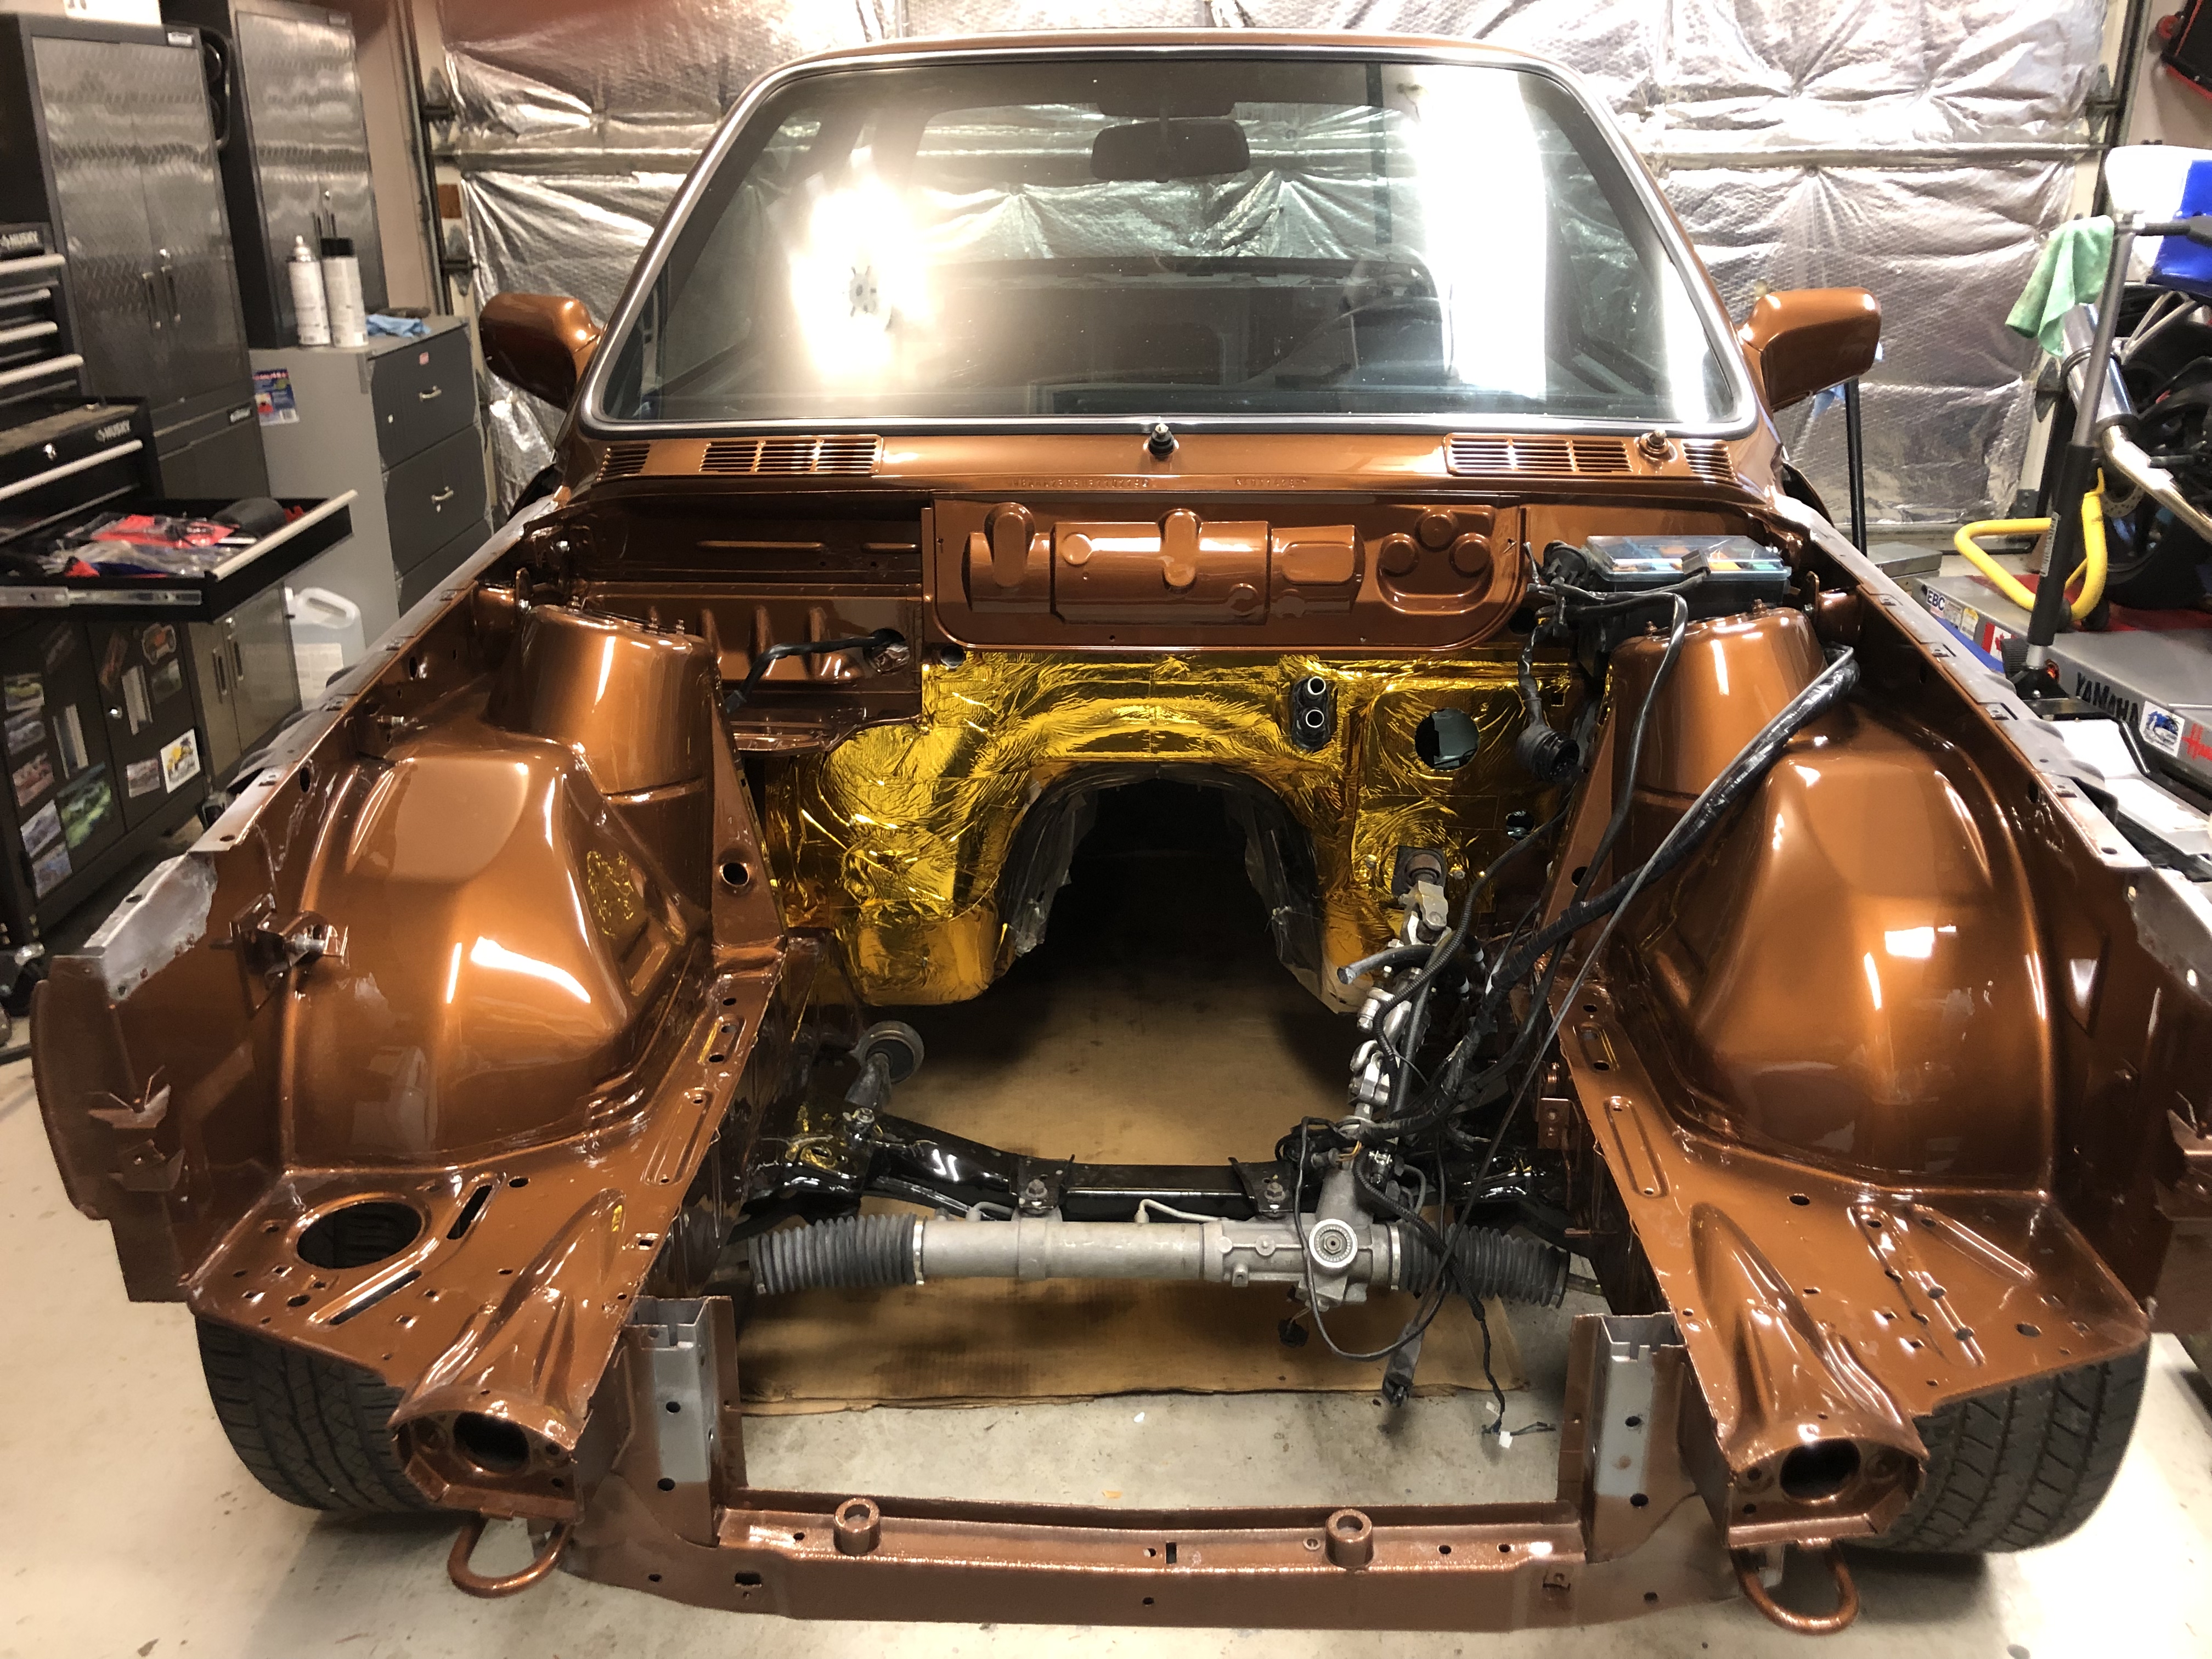
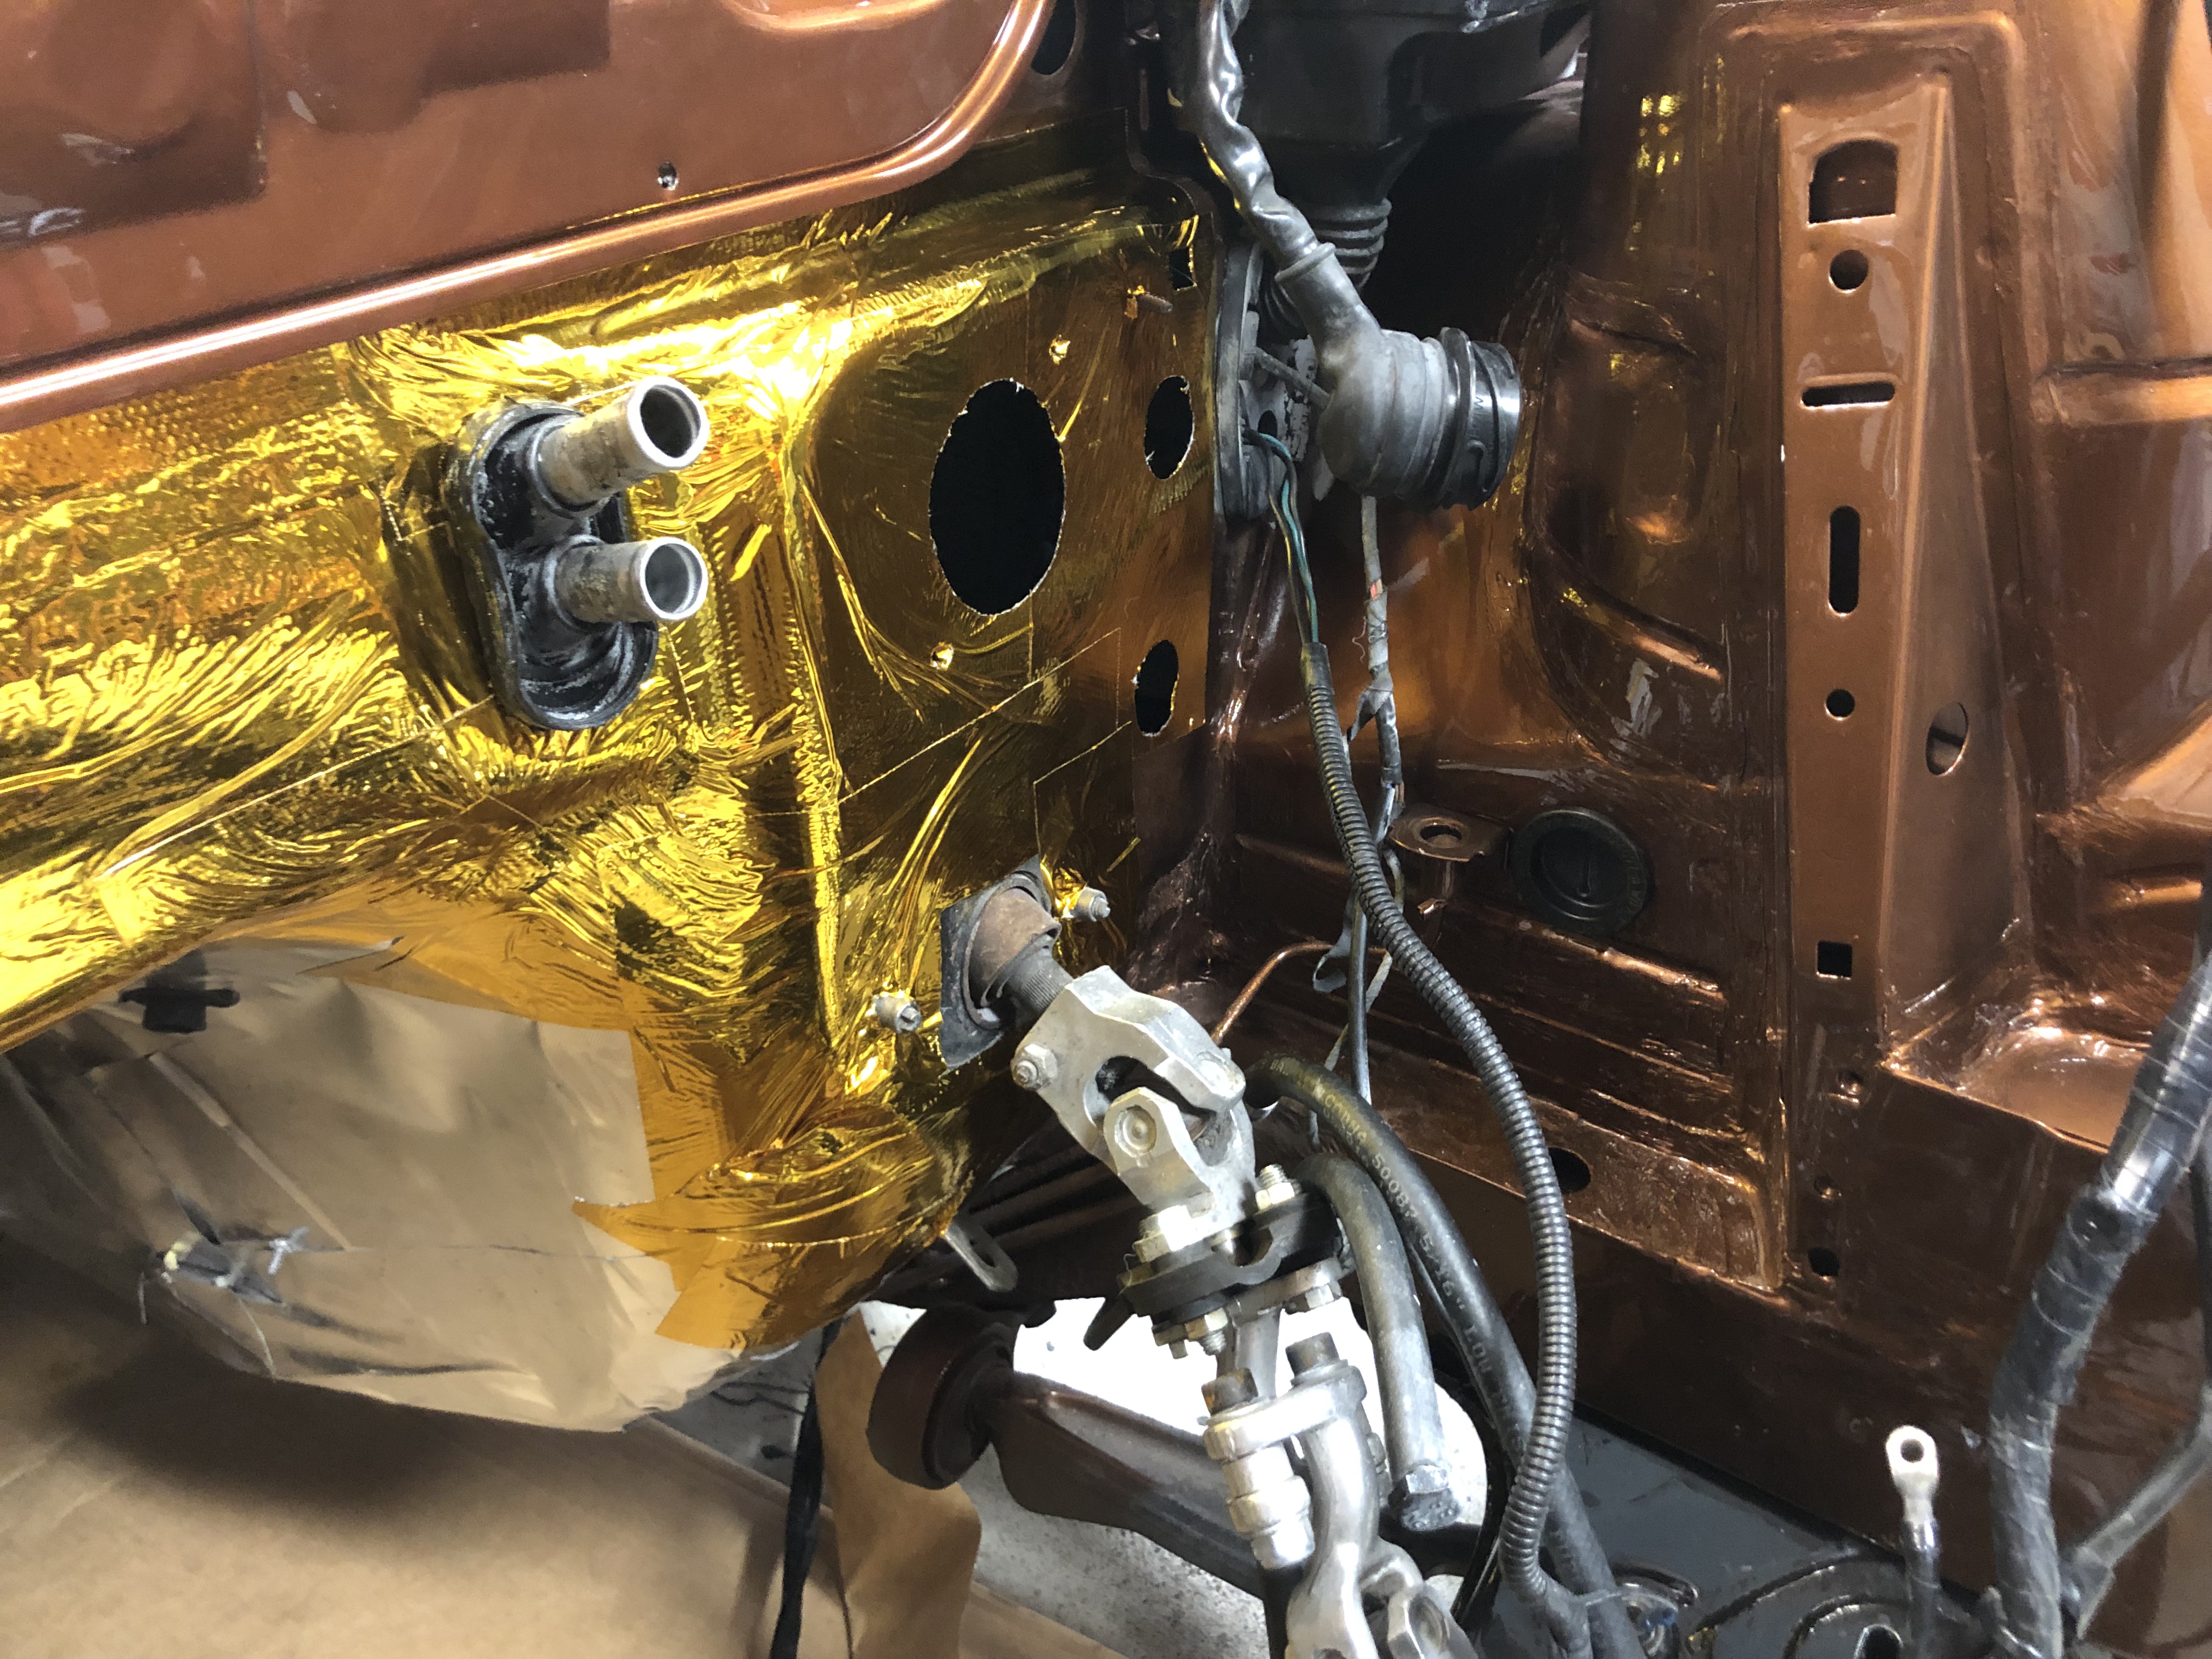
8. You want a "metal" reflective product, rather then an asphalt or butyl-based product used for interior sound/heat.
Something like DEI Reflect-A-Cool or DEI Reflect-A-Gold does the trick.

Here is my E30's engine bay using both of those products. Then I have Hushmat for sound & heat rejection inside the car.

Image

Image
szacsi72
Posts: 287
Joined: Nov 13, 2022 3:41 AM
Location: Hungary

Re: szacsi72's E28 535i build thread - "The Reddie"

Post by szacsi72 »

Galahad wrote: Mar 27, 2024 12:37 AM 9: I'd match the master and slave sizes, I think I mismatched mine and the engagement is really high (but I also have the 323i tall throwout bearing). E34 master cylinders are too long for the E28 pedal box, at least the 525i one I used
The master is actually the same diameter of 19.05mm for the E28 and E34 both, only the slave is larger for the E34. However, I am not sure if their lengths are different... They mount up to the same transmission, so I suspect they are the same. In that case I guess I can choose between lower engagement and softer pedal vs higher engagement and stiffer pedal. I wonder if anyone has tried both?
I tried to find some information but no data on their lengths. Visually judging, they are the same, at least they are not marginally different. The only difference seems to be their diameter.

Panici wrote: Mar 27, 2024 6:57 AM 6. From what I've read, port matching should be used on intake side only on a street engine. Don't open up your exhaust ports.
You actually do want a "step" between port and runner, something to do with exhaust scavenging and reflection IIRC.
Do some reading on this and decide for yourself.
I've seen a lip used on the bottom/floor side on earlier race cars for anti reversal, but they were using race cams and carbs; but never on the roofing. I'll try to read into it a bit more.

Panici wrote: Mar 27, 2024 6:57 AM 8. You want a "metal" reflective product, rather then an asphalt or butyl-based product used for interior sound/heat.
Something like DEI Reflect-A-Cool or DEI Reflect-A-Gold does the trick.

Here is my E30's engine bay using both of those products. Then I have Hushmat for sound & heat rejection inside the car.
There's a company who sells reflect-a-cool and others, but it's pretty expensive. 30x30cm goes for roughly 20 bucks. Instead I've found this product, it's also made by DEI:
https://race-shop.hu/ontapado-hoszigete ... x60cm.html

Looks like it's a cheaper, lower quality product. I think this would be fine, it's not a turbo car, I just want to add some isulation because the tunnel does get really hot in the summer.
Does this product stick OK to underbody coatings? Or do I need to adhere it to paint?

I will also add sound and heat insulation and deadening from the inside too.
szacsi72
Posts: 287
Joined: Nov 13, 2022 3:41 AM
Location: Hungary

Re: szacsi72's 1984 Zinnoberrot 535i Build

Post by szacsi72 »

To my 10th question:
I just remember that I need to heli coil basically ALL exhaust mount threads, as someone before me used bolts instead of studs and managed to rip out the first 5-6mm in EVERY hole. Since helicoils are stainless anways...
Galahad
Posts: 539
Joined: Sep 06, 2016 9:08 PM
Location: Beverly/Worcester, MA
Contact:

Re: szacsi72's 1984 Zinnoberrot 535i Build

Post by Galahad »

On 8: I've used aluminum HVAC tape for reflecting exhaust heat, it sticks quite well to the underbody coating on my 528e. Similar to Panici's gold tape

10: I'd be worried about corrosion, that's messed things up for me (not on a car) in the past. May be fine if you make sure water can't get in
jdb
Posts: 155
Joined: Jan 01, 2007 6:56 PM
Location: Humboldt County, Ca.

Re: szacsi72's 1984 Zinnoberrot 535i Build

Post by jdb »

I will share my opinion, but it is just that.
Don't try to get fancy with hardware like main or head bolts for a street engine,
what BMW used works without fail as long as you clean and lightly oil threads. Clean headbolt holes with a tap, then verify that bolt threads with ease!!
Stainless hardware is a bit tricky. It has no hardness value (like 8.8/10.9/12.9) stainless has its place but be careful. Don't use it in a Helicoil.
Stock black exhaust studs with copper lock nuts are very effective.
Time sert makes a good thread repair that in my opinion might work for all 12 exhaust holes, lock better, install easier to get 12 quality results.

M88/S38 waterpumps are different, A correct M pump has fewer fingers on the impeller. It is a very different system actually from the radiator to the cylinder head and water passages. I would, and do, use quality correct cooling system parts on my High Performance BMW engines and if I were to find an issue, (very hot climate or only track use high RPM) then would look at speeding up or slowing down the coolant possibly.

There you have it, My opinion ...

Jeff
szacsi72
Posts: 287
Joined: Nov 13, 2022 3:41 AM
Location: Hungary

Re: szacsi72's 1984 Zinnoberrot 535i Build

Post by szacsi72 »

11: How shitty are 260/6-s to shift?

I have a really poor quality, overly short shifter in my car. When I shift, it takes time before the shifter pops into gear - I need to wait for the RPM to drop. I started to wonder, is this normal with a short shifter, or maybe that larger E34 master cylinder is causing my clutch to not fully disengage?
No grinding or anything, goes into first OK at a stop.. Just takes time to shift.

My 260/5 I had before was similar, the difference being, that that one would grind when cold.

Thanks
Last edited by szacsi72 on Apr 05, 2024 4:24 PM, edited 1 time in total.
szacsi72
Posts: 287
Joined: Nov 13, 2022 3:41 AM
Location: Hungary

Re: szacsi72's 1984 Zinnoberrot 535i Build

Post by szacsi72 »

szacsi72 wrote: Apr 03, 2024 7:54 AM How shitty are 260/6-s to shift?

I have a really poor quality, overly short shifter in my car. When I shift, it takes time before the shifter pops into gear - I need to wait for the RPM to drop. I started to wonder, is this normal with a short shifter, or maybe that larger E34 master cylinder is causing my clutch to not fully disengage?
No grinding or anything, goes into first OK at a stop.. Just takes time to shift.

My 260/5 I had before was similar, the difference being, that that one would grind when cold.

Thanks
Just to highlight: I swapped a 260/6 from an E34 into my E28. I'm not sure if the clutch slave is transmission specific, or chassis specific..

Thanks
vinceg101
Posts: 4886
Joined: Jun 20, 2007 2:40 AM
Location: Los Angeles, CA

Re: szacsi72's E28 535i build thread - "The Reddie"

Post by vinceg101 »

szacsi72 wrote: Mar 27, 2024 8:03 AM
Panici wrote: Mar 27, 2024 6:57 AM 8. You want a "metal" reflective product, rather then an asphalt or butyl-based product used for interior sound/heat.
Something like DEI Reflect-A-Cool or DEI Reflect-A-Gold does the trick.

Here is my E30's engine bay using both of those products. Then I have Hushmat for sound & heat rejection inside the car.
There's a company who sells reflect-a-cool and others, but it's pretty expensive. 30x30cm goes for roughly 20 bucks. Instead I've found this product, it's also made by DEI:
https://race-shop.hu/ontapado-hoszigete ... x60cm.html

Looks like it's a cheaper, lower quality product. I think this would be fine, it's not a turbo car, I just want to add some isulation because the tunnel does get really hot in the summer.
Does this product stick OK to underbody coatings? Or do I need to adhere it to paint?

I will also add sound and heat insulation and deadening from the inside too.
It will matter just how close to OEM you want to get. Panici's gold reflective material may be extremely effective but isn't really spec. For mine I wanted/needed to match the original as much as possible and chose to install the reflective material in the original configuration (mostly on the passenger side) but I did take some liberties for performance reasons.
I chose a similar material that the Reflect-A-Cool (Cool-It Thermo Tec); it was self-adhering but I added some aggressive high-temp spray adhesive to ensure long-term adhesion.
You can read my write-up here on page 2 of my build thread: https://www.mye28.com/viewtopic.php?f=7 ... 5&start=25

I applied layers of other thermal and acoustic layers to the interior when I did the interior remodel later in that build thread. It all makes a difference; how much? It's hard to tell.
CanadianMiniFan
Posts: 141
Joined: Oct 16, 2011 6:31 PM

Re: szacsi72's 1984 Zinnoberrot 535i Build

Post by CanadianMiniFan »

szacsi72 wrote: Apr 03, 2024 7:54 AM How shitty are 260/6-s to shift?

I have a really poor quality, overly short shifter in my car. When I shift, it takes time before the shifter pops into gear - I need to wait for the RPM to drop. I started to wonder, is this normal with a short shifter, or maybe that larger E34 master cylinder is causing my clutch to not fully disengage?
No grinding or anything, goes into first OK at a stop.. Just takes time to shift.

My 260/5 I had before was similar, the difference being, that that one would grind when cold.

Thanks
I have a 260/6 in my e28, granted it’s likely an e28 trans as it has the holes for the bellhousing sensors, I realize it could have been drilled and tapped, but likely an e28 trans. I would not classify it as a shitty shift at all, it had an unknown short shifter in it as well. I would try a different shifter set up before condemning your trans. What oil is in it?
Panici
Posts: 221
Joined: Aug 07, 2014 2:04 AM
Location: Canada

Re: szacsi72's E28 535i build thread - "The Reddie"

Post by Panici »

szacsi72 wrote: Mar 27, 2024 8:03 AM Does this product stick OK to underbody coatings? Or do I need to adhere it to paint?
Mine stuck decently well. If I recall correctly I degreased and cleaned the surface first, but didn't do any other prep.
szacsi72
Posts: 287
Joined: Nov 13, 2022 3:41 AM
Location: Hungary

Re: szacsi72's E28 535i build thread - "The Reddie"

Post by szacsi72 »

vinceg101 wrote: Apr 03, 2024 4:31 PM
szacsi72 wrote: Mar 27, 2024 8:03 AM There's a company who sells reflect-a-cool and others, but it's pretty expensive. 30x30cm goes for roughly 20 bucks. Instead I've found this product, it's also made by DEI:
https://race-shop.hu/ontapado-hoszigete ... x60cm.html

Looks like it's a cheaper, lower quality product. I think this would be fine, it's not a turbo car, I just want to add some isulation because the tunnel does get really hot in the summer.
Does this product stick OK to underbody coatings? Or do I need to adhere it to paint?

I will also add sound and heat insulation and deadening from the inside too.
It will matter just how close to OEM you want to get. Panici's gold reflective material may be extremely effective but isn't really spec. For mine I wanted/needed to match the original as much as possible and chose to install the reflective material in the original configuration (mostly on the passenger side) but I did take some liberties for performance reasons.
I chose a similar material that the Reflect-A-Cool (Cool-It Thermo Tec); it was self-adhering but I added some aggressive high-temp spray adhesive to ensure long-term adhesion.
You can read my write-up here on page 2 of my build thread: https://www.mye28.com/viewtopic.php?f=7 ... 5&start=25

I applied layers of other thermal and acoustic layers to the interior when I did the interior remodel later in that build thread. It all makes a difference; how much? It's hard to tell.
I'm not super keen on originality, but I don't want it to look out of place. So I'll stick to silver ones
CanadianMiniFan wrote: Apr 04, 2024 11:43 AM
szacsi72 wrote: Apr 03, 2024 7:54 AM How shitty are 260/6-s to shift?

I have a really poor quality, overly short shifter in my car. When I shift, it takes time before the shifter pops into gear - I need to wait for the RPM to drop. I started to wonder, is this normal with a short shifter, or maybe that larger E34 master cylinder is causing my clutch to not fully disengage?
No grinding or anything, goes into first OK at a stop.. Just takes time to shift.

My 260/5 I had before was similar, the difference being, that that one would grind when cold.

Thanks
I have a 260/6 in my e28, granted it’s likely an e28 trans as it has the holes for the bellhousing sensors, I realize it could have been drilled and tapped, but likely an e28 trans. I would not classify it as a shitty shift at all, it had an unknown short shifter in it as well. I would try a different shifter set up before condemning your trans. What oil is in it?
I believe ATF. Since it's an E34, those were filled with ATF. I'm considering going for a mix of 80w and ATF but I'm not sure. Some say go for Redline, some say go for ATF...
Panici wrote: Apr 04, 2024 11:46 AM
szacsi72 wrote: Mar 27, 2024 8:03 AM Does this product stick OK to underbody coatings? Or do I need to adhere it to paint?
Mine stuck decently well. If I recall correctly I degreased and cleaned the surface first, but didn't do any other prep.
Thanks, good news!
szacsi72
Posts: 287
Joined: Nov 13, 2022 3:41 AM
Location: Hungary

Re: szacsi72's 1984 Zinnoberrot 535i Build

Post by szacsi72 »

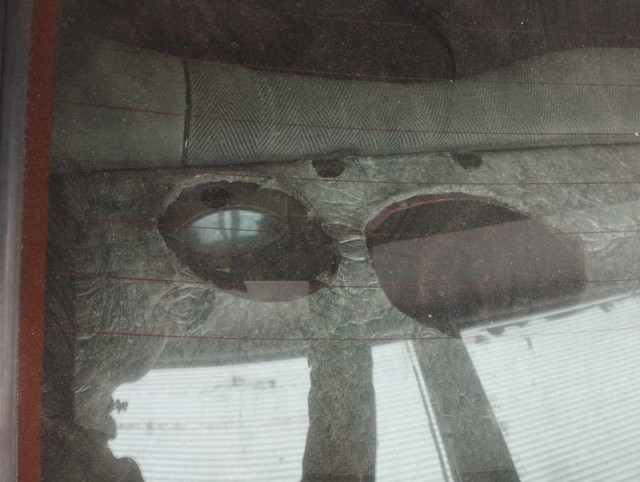
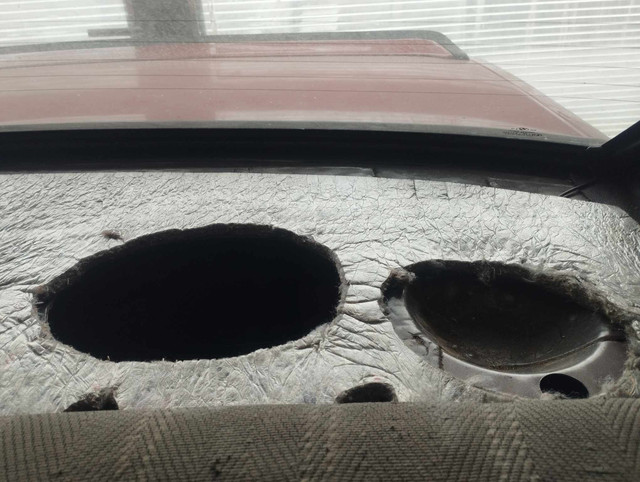
I had some free time and since I couldn't do anything with the engine, or the engine bay (waiting for parts and tools), I played around in the interior.

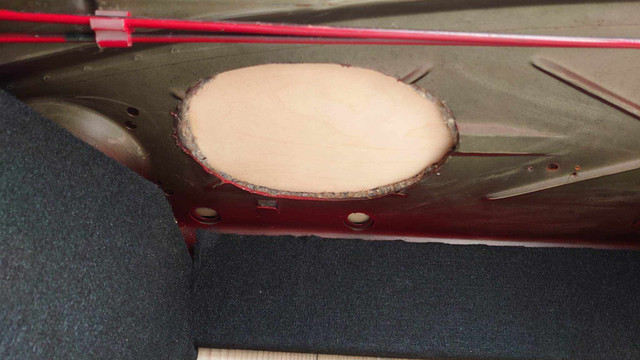
Previous owner left me a surprise :roll:
Image
Image
Image

For the love of god. I understand that the shelf had to be cut for the big 6x9's to install but WHY THERE??
I was debating of making 6x9 to 6.5" round adapter plates but I think that having the speakers so far away from the sides would look awful, + doesn't help with the stereo sound either.
So now I have to somehow fill in these holes, before making new ones.... sigh

Welding is not an option right now, I would have to remove too many parts. I'm thinking of laser cutting a 1mm steel plate, and riveting it into place with some silicone glue to make it airtight. I will then cover the whole shelf with sound deadening so it won't look too awful, but I will have to come back to this later and fix it, because I will know it's there...

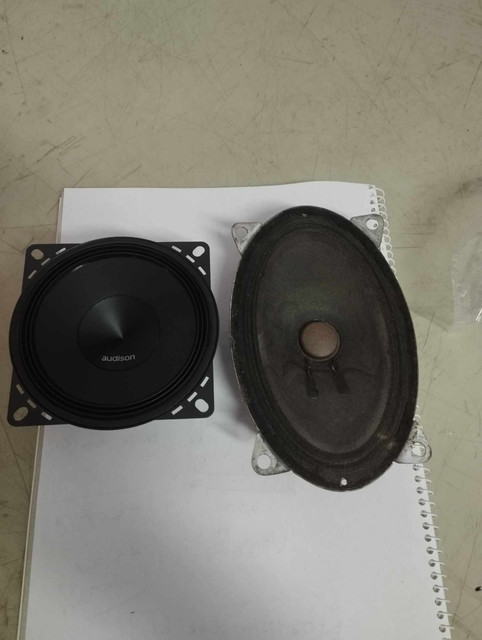
Took some measurements for the adapter plates.
Here are the 100mm Audison AP4s next to the original 6x4s:
Image

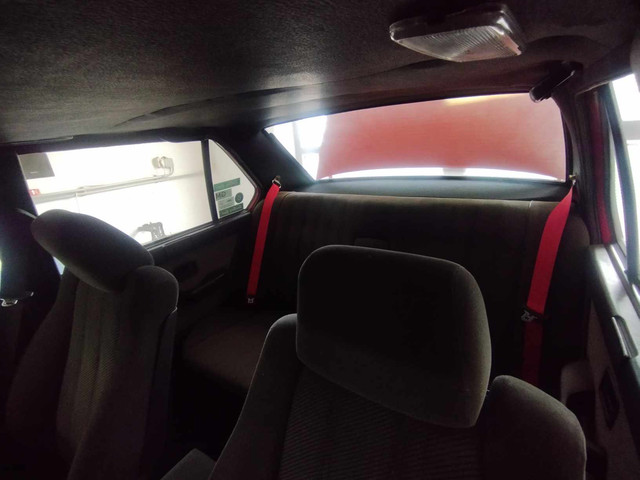
And fitted the read seatbelts in the rear:
Image
They will look much better once the red-stitched, semi-leather, m-rain interior is installed. It feels a bit ouf of place as of now.


Question #12: could you recommend me thicknesses for the sound deadening? Bitumen/butyl (the one that is for reducing vibrations)
I'm trying to place it strategically: thinner where it matters less/isn't that bad and thicker where it matters more.
I was thinking of:
4mm: around the front speakers, and the rear shelf
2mm: most of the underbody, tunnel, and the doors
1.5mm: trunk, and the part behind the rear seats (but not the shelf)
I probably won't do the roof as I've heard removing the headliner is a PITA.

Thanks!
szacsi72
Posts: 287
Joined: Nov 13, 2022 3:41 AM
Location: Hungary

Re: szacsi72's 1984 Zinnoberrot 535i Build

Post by szacsi72 »

Haven't updated the thread in a while.

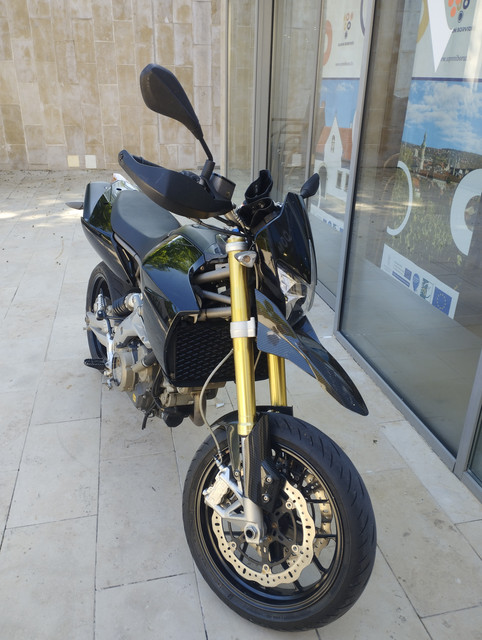
I can finally ride again, so I threw together the street bike.
Image

The track bike needs to wait... I can't do that just yet.

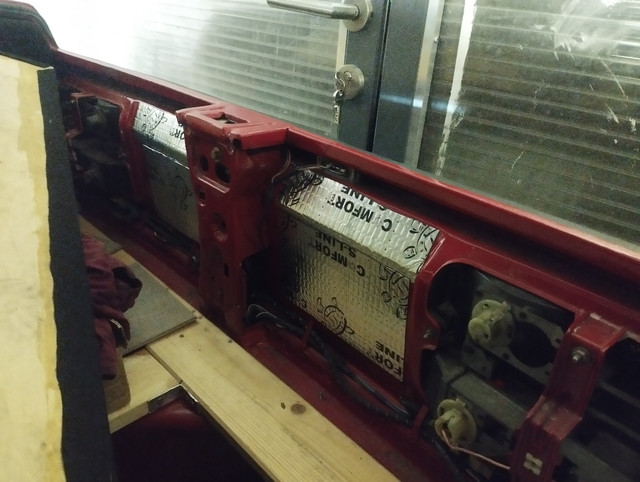
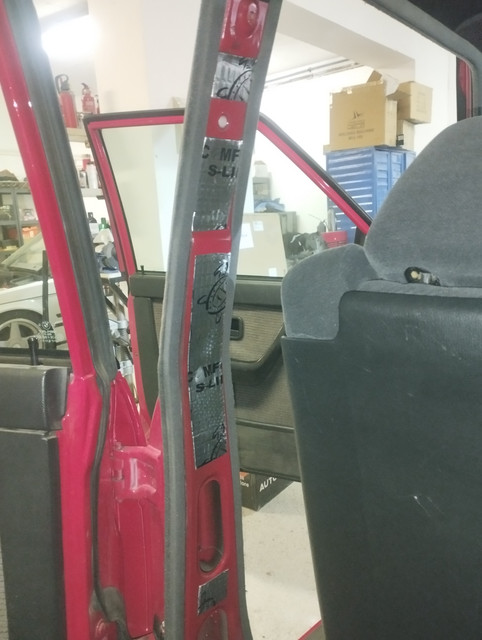
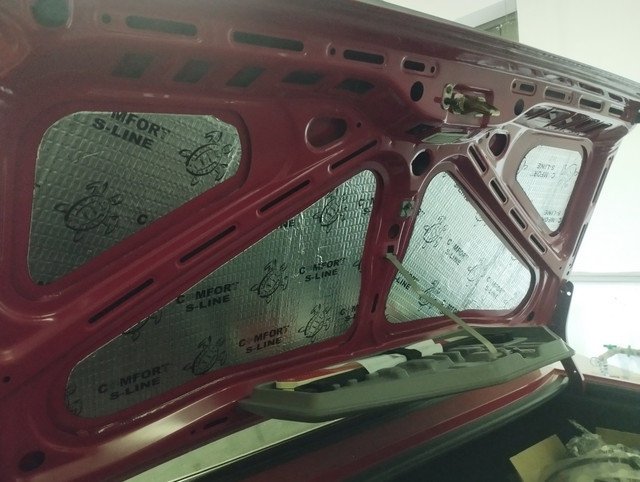
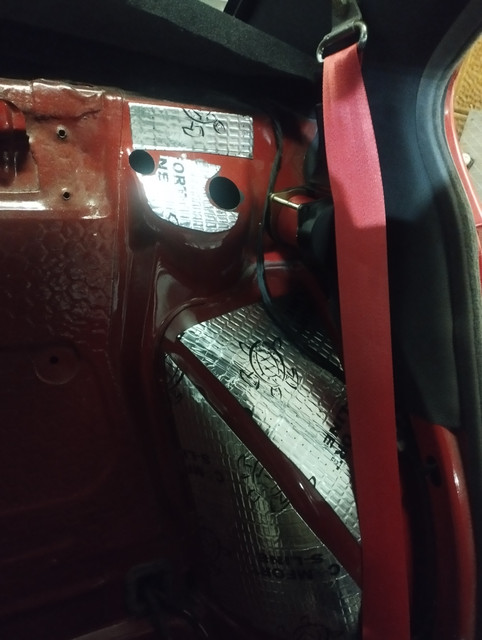
I started with the soundproofing:
Image
Image
Image
Image

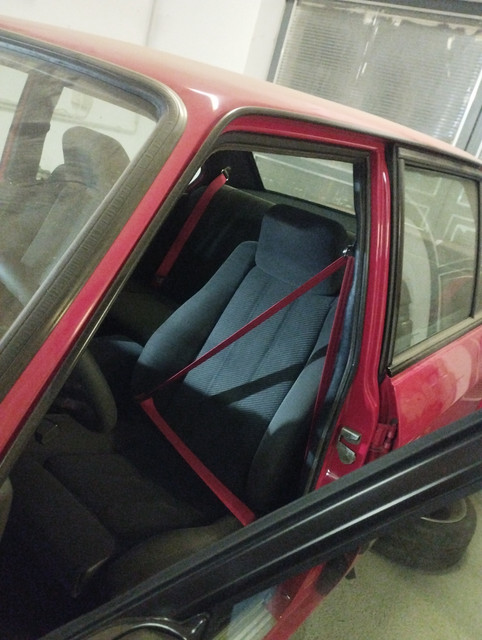
Installed the front seatbelts:
Image

Image
Image
Image

That's about it... these were all just "side quests" I did while I was bored doing something else.

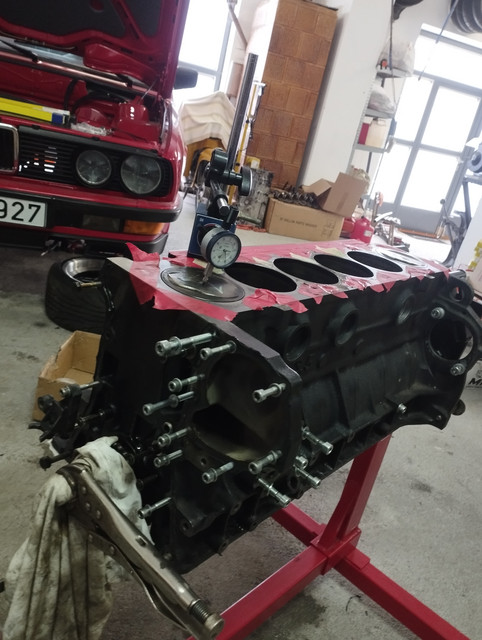
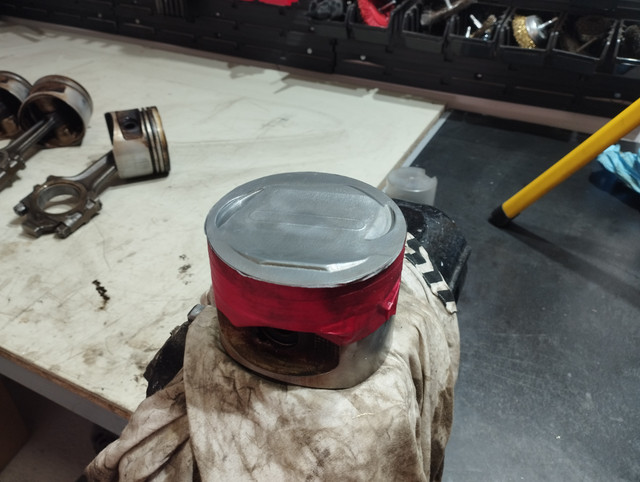
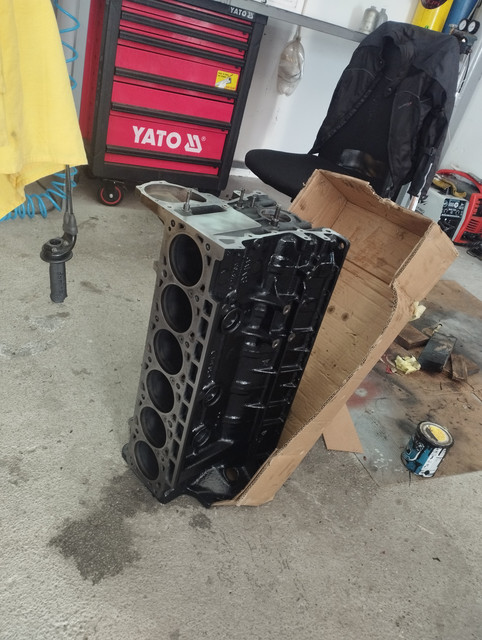
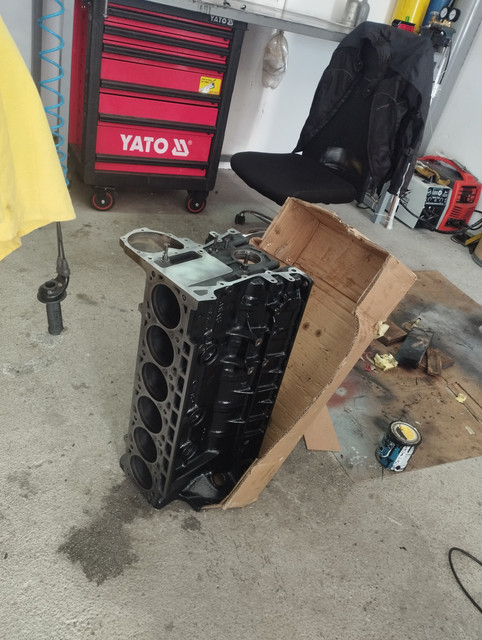
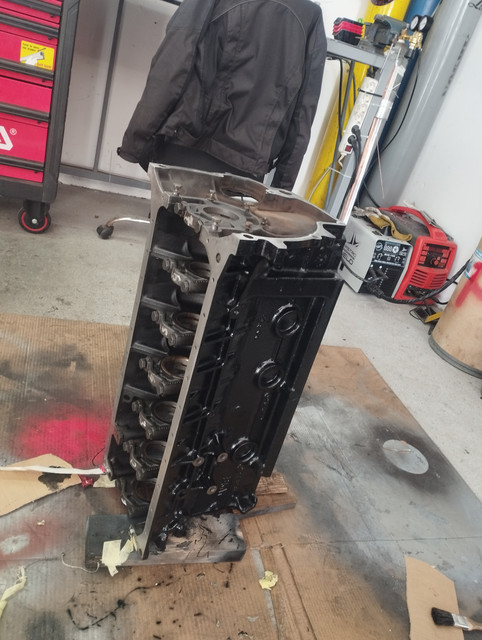
Next week the engine build will finally continue. I threw the block back on the hoist, installed the crankshaft, rods and pistons without rings.
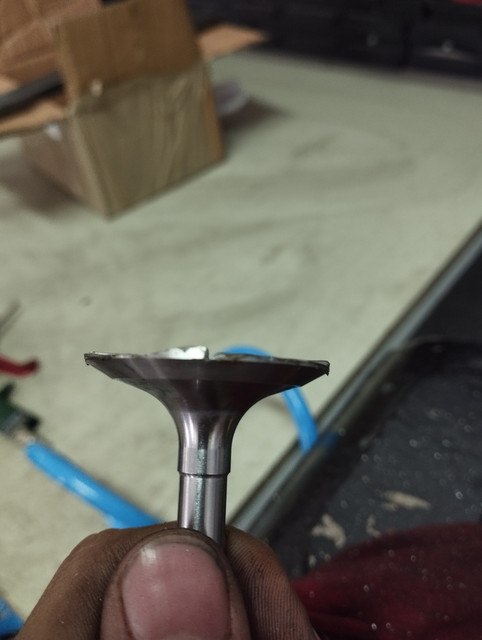
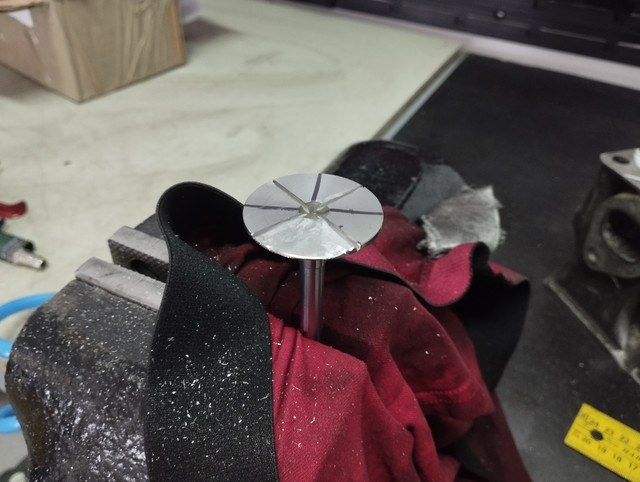
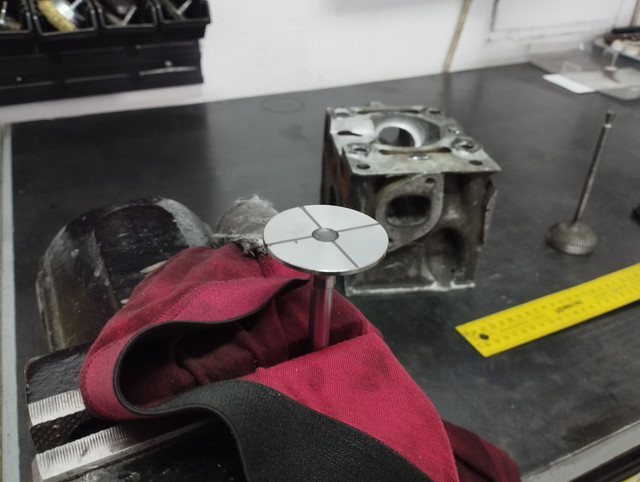
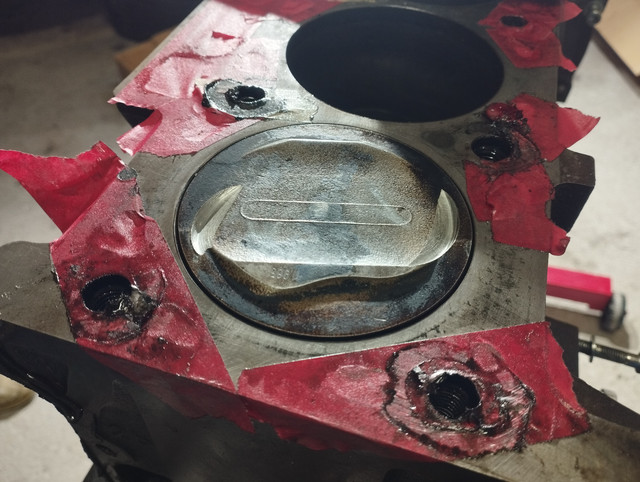
I'm cutting some valve relief pockets into the pistons. 50mm diameter cuts for the intake valves, and 40mm for the exhaust valves.

After that, the block is finally, and ACTUALLY heading to the machine shop.

I'll have quite a lot of tasks while I'm waiting...
1. Collecting the rest of the parts - mostly seals, gaskets, bolts...
2. Preparing all the parts. Cleaning, polishing, painting, machining, welding...
3. Modifying the cam gear to be adjustable (needed for the KMcam)

I'd like everything laid out, ready to installed before I start the assembly. Once cleaned, I like to close the engine as fast as possible. I have a fear of dirt getting into the engine.
Once that's done, I'll do the serpentine conversion, start the wiring loom and re-paint the engine bay, then it's install time.
I'll make an exact to-do list, in priority order, because I'm easily confused and I'll start with the least important bit...
szacsi72
Posts: 287
Joined: Nov 13, 2022 3:41 AM
Location: Hungary

Re: szacsi72's 1984 Zinnoberrot 535i Build

Post by szacsi72 »

Also,

Here are some old pictures if someone is interested.
These pictures are from the previous owner, you can find these on the interwebz (just clarifying that I'm not sharing private photos. :) )

Image
Image
Image
Image
Image
szacsi72
Posts: 287
Joined: Nov 13, 2022 3:41 AM
Location: Hungary

Re: szacsi72's 1984 Zinnoberrot 535i Build

Post by szacsi72 »

Last week's job was cutting valve reliefs into the piston.

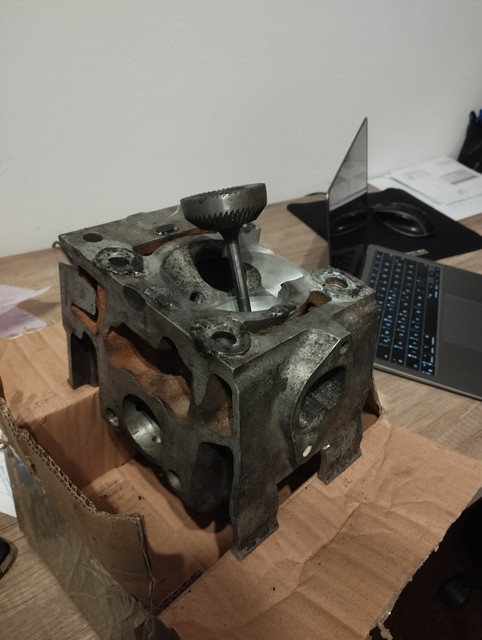
I was given an old, cut-up cylinder head, with a 50mm cutter, which is the perfect size for the B35 intake valves.
Image

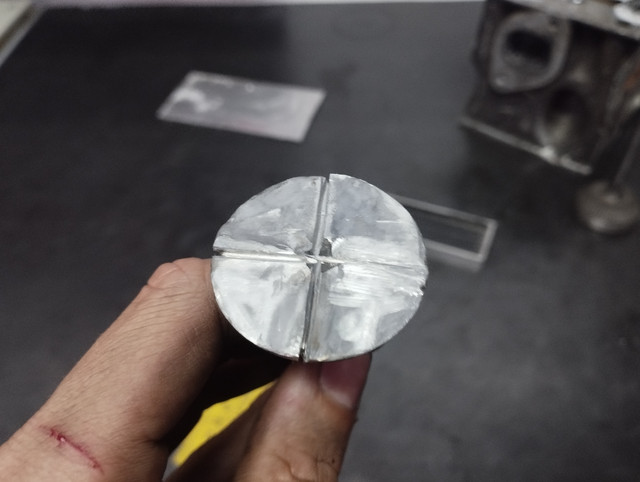
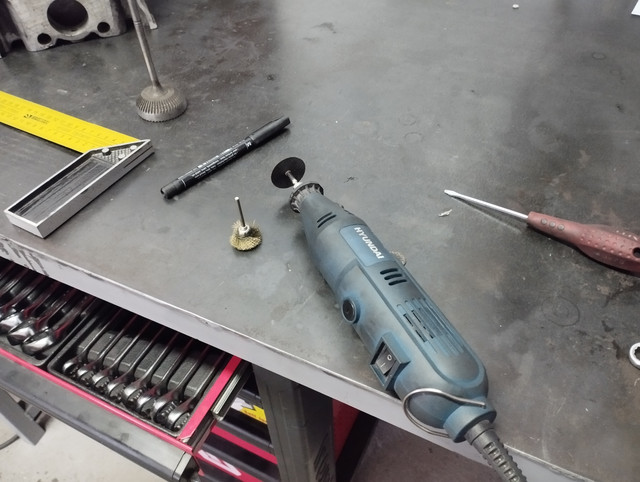
However, that was only the intake side. So I bought a random valve that had a 41mm head, and an 8mm, longer stem, and went oldschool.
Image
Image
Image
Image
Image

It worked surprisingly well.

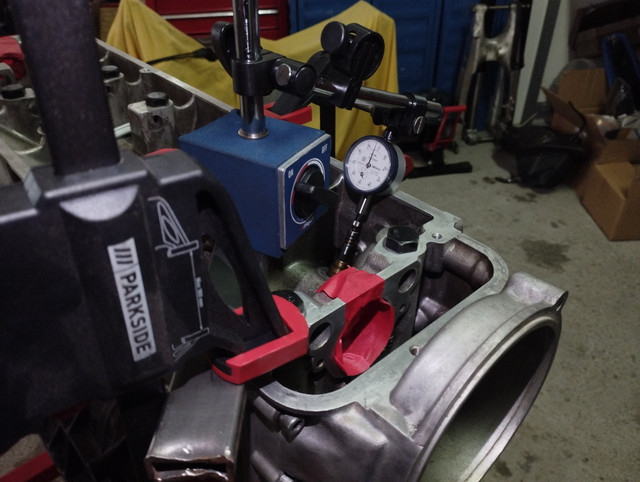
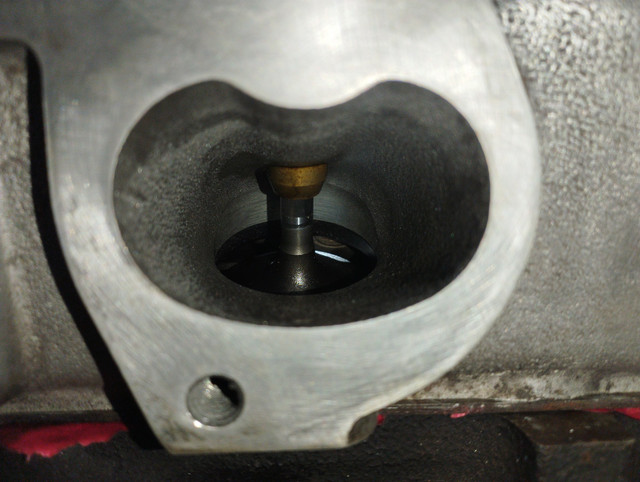
Next, I re-installed the pistons, rods and crankshaft with the old bearings, without the rings. I used my mitutoyo dial indicator to set the pistons at TDC, then installed the cylinder head with two valves to measure the clearances.
Image
Image

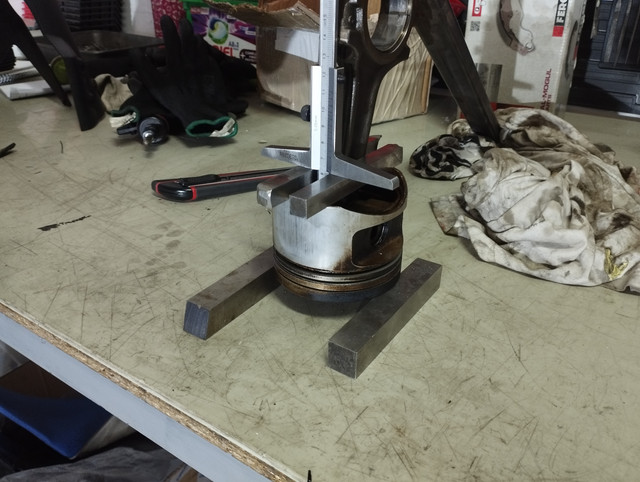
Once I had that, I measured the piston top thickness in a getto way:
Image

Then it was time to cut.
Image

The finished product:
Image
Image

I now have 5.9 and 6.1mm of clearance at TDC. I think that's plenty...

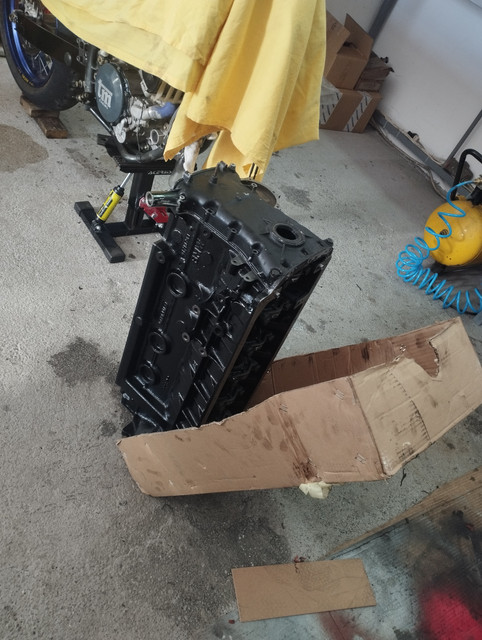
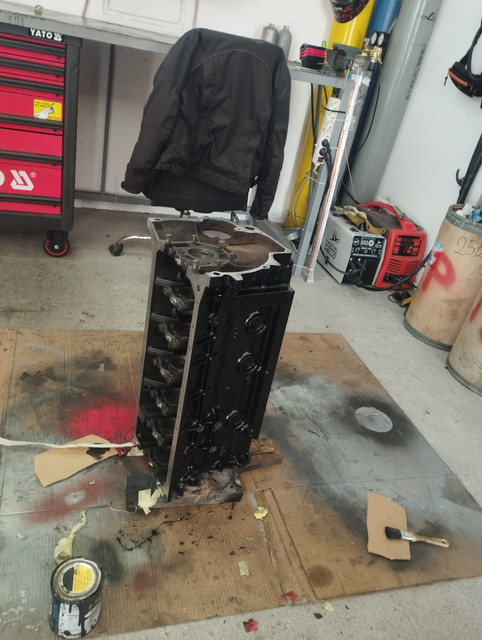
I also finished painting the engine, ready for the machine shop.
The final values I'm bringing:
Hone to 92.02
Decking the block 0.2mm
Decking the cylinder head 0.5mm
My final compression ratio will be roughly 9.7-9.8.

Image
Image
Image
Image
Image
szacsi72
Posts: 287
Joined: Nov 13, 2022 3:41 AM
Location: Hungary

Re: szacsi72's 1984 Zinnoberrot 535i Build

Post by szacsi72 »

Image

Machine shop time.
Chimi-Changa
Posts: 1652
Joined: Nov 08, 2011 11:02 PM
Location: Westboro, MA

Re: szacsi72's 1984 Zinnoberrot 535i Build

Post by Chimi-Changa »

Nice work on the piston cuts! :cool:
szacsi72
Posts: 287
Joined: Nov 13, 2022 3:41 AM
Location: Hungary

Re: szacsi72's 1984 Zinnoberrot 535i Build

Post by szacsi72 »

Chimi-Changa wrote: Jun 26, 2024 10:13 AM Nice work on the piston cuts! :cool:
Thanks!
I'm thinking about getting them coated too. Ceracote C110 dry film for the skirts and C186 for the tops.
1st 5er
Posts: 21855
Joined: Jun 13, 2008 12:15 AM
Location: Cypress
Contact:

Re: szacsi72's 1984 Zinnoberrot 535i Build

Post by 1st 5er »

:wave:
Chimi-Changa wrote: Jun 26, 2024 10:13 AM Nice work on the piston cuts! :cool:
One can only imagine results if I attempted that. 🪓🔨
szacsi72
Posts: 287
Joined: Nov 13, 2022 3:41 AM
Location: Hungary

Re: szacsi72's 1984 Zinnoberrot 535i Build

Post by szacsi72 »

Valve stem seal question.
There are three elring options that fit.
197.378 - black ACM
294.110 - green FPM
553.190 - red FPM

If I put the part number into Bárdi autó (local parts vendor), i get the black and green ones as options.
Elring lists the red one in their catalogue.
Autodoc gives me 774.456, which a 12 pack of red ones.

Which one do you guys use?
Thanks!
11349059170
Mike W.
Posts: 27200
Joined: Feb 12, 2006 12:00 PM
Location: California Whine Country

Re: szacsi72's 1984 Zinnoberrot 535i Build

Post by Mike W. »

It appears the red and green are the same, Viton, which is what you want. I'm used to seeing green so I'd probably go in that direction. I would not use the black, it doesn't appear to have the same heat resistance as Viton.

Viton is the best, you do not want not want Buna N or nitrile or neoprene, they don't hold up.
szacsi72
Posts: 287
Joined: Nov 13, 2022 3:41 AM
Location: Hungary

Re: szacsi72's 1984 Zinnoberrot 535i Build

Post by szacsi72 »

Mike W. wrote: Jun 29, 2024 12:30 PM It appears the red and green are the same, Viton, which is what you want. I'm used to seeing green so I'd probably go in that direction. I would not use the black, it doesn't appear to have the same heat resistance as Viton.

Viton is the best, you do not want not want Buna N or nitrile or neoprene, they don't hold up.
I'll use Viton, that's for sure. The only thing I can't decide on is red or green. I'm not sure if there's any difference between them apart from colouring...


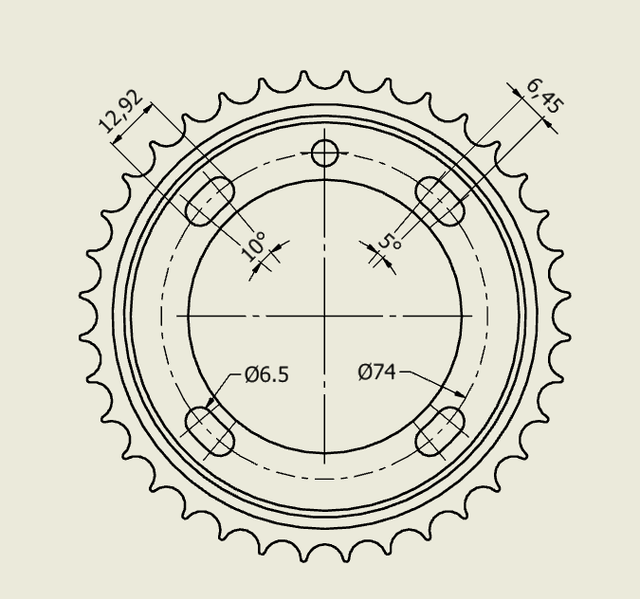
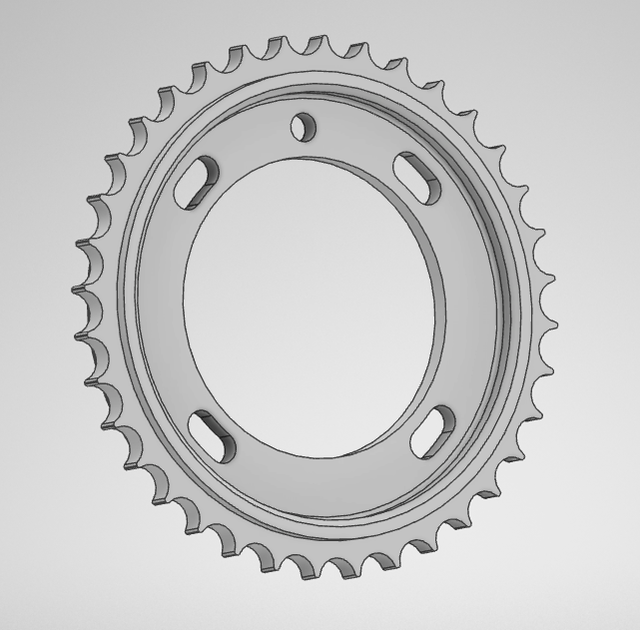
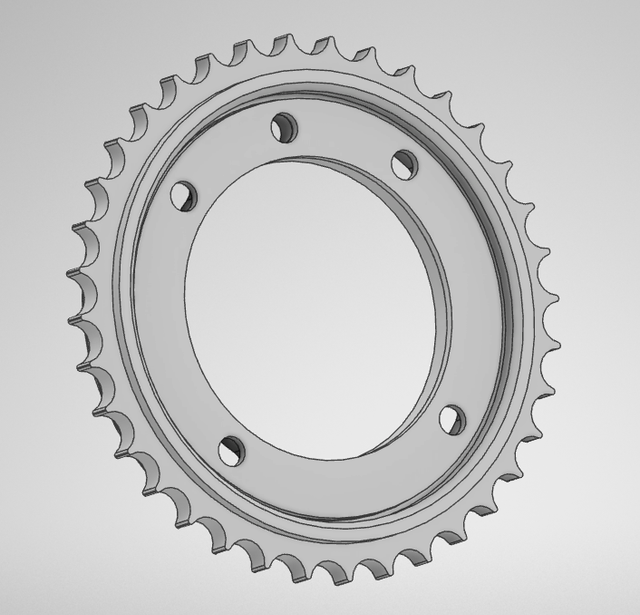
Technical drawing to convert the stock timing chain sprocket to an adjustable one (36 teeth = 10deg/teeth, so you only ever need +/-5 degree to make it 360°. In case onebody needs it. I'm also making a washer out of 2mm stainless to help keep things together. In case anybody will even need this.
Image
Image
Image
photo upload sites

Similar to what Paul Burke did.. just no fancy CNC machining.
Image

Remember to use longer bolts...
Mike W.
Posts: 27200
Joined: Feb 12, 2006 12:00 PM
Location: California Whine Country

Re: szacsi72's 1984 Zinnoberrot 535i Build

Post by Mike W. »

Interesting. What are you doing about the locating pin hole?
szacsi72
Posts: 287
Joined: Nov 13, 2022 3:41 AM
Location: Hungary

Re: szacsi72's 1984 Zinnoberrot 535i Build

Post by szacsi72 »

Mike W. wrote: Jun 30, 2024 10:02 AM Interesting. What are you doing about the locating pin hole?
Nothing, I'm just removing it.
Not much point in a locating pin if the gear is adjustable :)
shizzel669
Posts: 1
Joined: Apr 02, 2024 7:25 AM
Location: Germany

Re: szacsi72's 1984 Zinnoberrot 535i Build

Post by shizzel669 »

Shouldn’t the holes be offset? In your drawing it looks like they aren’t.
szacsi72
Posts: 287
Joined: Nov 13, 2022 3:41 AM
Location: Hungary

Re: szacsi72's 1984 Zinnoberrot 535i Build

Post by szacsi72 »

shizzel669 wrote: Jul 02, 2024 11:49 AM Shouldn’t the holes be offset? In your drawing it looks like they aren’t.
As you see I didn't give exact locations for the bolt holes. They will be milled on a manual machine, locate the hole, rotate CW, CCW, done :)
szacsi72
Posts: 287
Joined: Nov 13, 2022 3:41 AM
Location: Hungary

Re: szacsi72's 1984 Zinnoberrot 535i Build

Post by szacsi72 »

Good and bad news today.

Good news:
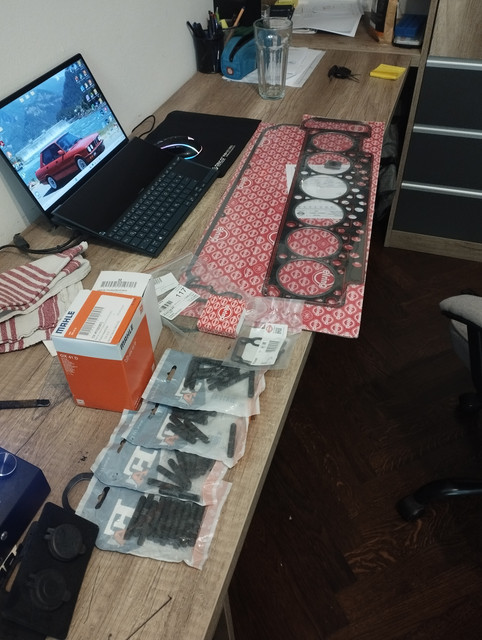
I got the parts back from the machine shop.
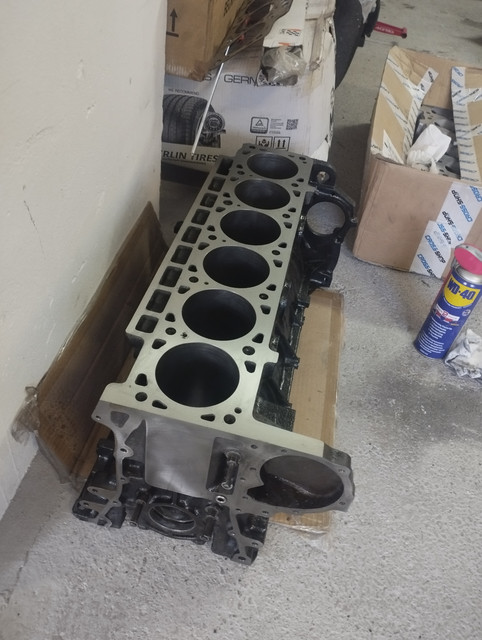
Image
Image

Bad news:
Wasted money, wasted time and no progress at all.
The machine shop fucked up... x2.
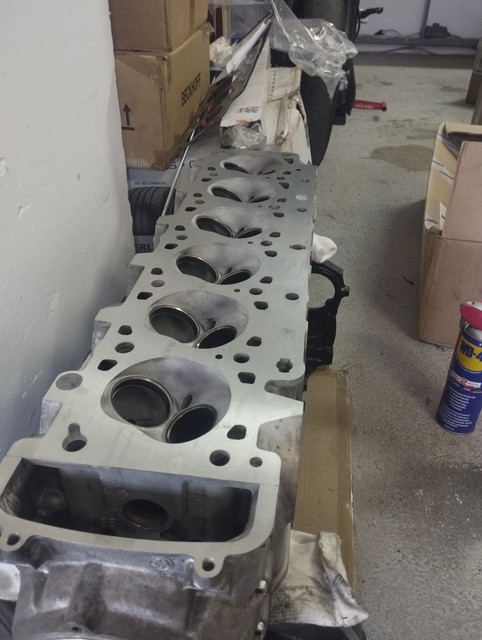
1. I asked them to deck the head 0.4mm. I measured the height to be roughly 128.9~128,95mm. Of course, calipers are not the tool you would use here, but it's accurate enough to tell that it's not 128.6mm as it should be. Also, the maximum decking marks are still showing and I measured ~0.35mm on them... this is upsetting, but at least this is useable and if I really wanted to, I could install it as is.
2. I installed the timing covers on both the cylinder head and the block prior to decking and told them specifically that they need to be cut together as the head gasket goes between them. The upper timing cover was installed and cut, but they removed the lower cover and didn't bother ????
Now I have a 0.3mm step between them! For the love of god. I can't install the head gasket like this!

And the worst part is that I traveled 400km's, and spent a complete day on the trip. Now I have to do that AGAIN, another 400km, another whole day, another favour from a bud to help me, another 100 bucks on fuel, AND, the guy is on vacation until September. SEPTEMBER. I have EVERYTHING laying on my desk, and I mean everything. And now I can't make progress for 2 months because of this.

I'm so frustrated, I don't even know what I should do.
Probably ask for a refund and find someone else... but even then, lot of time wasted.
1st 5er
Posts: 21855
Joined: Jun 13, 2008 12:15 AM
Location: Cypress
Contact:

Re: szacsi72's 1984 Zinnoberrot 535i Build

Post by 1st 5er »

:evil:
Mike W.
Posts: 27200
Joined: Feb 12, 2006 12:00 PM
Location: California Whine Country

Re: szacsi72's 1984 Zinnoberrot 535i Build

Post by Mike W. »

szacsi72 wrote: Jul 11, 2024 3:15 AM
Bad news:
Wasted money, wasted time and no progress at all.
The machine shop fucked up... x2.
Interesting how similar things can be a continent apart. Over the years I've found many marginal or incompetent machine shops. I've learned that if I find a good one, stick with it, don't look at the cost until later, just grin and bear it, it's cheaper to do it properly once than poorly twice. A good machinist is like gold and they seem few and far between.

Over here at least for the longest time all they really wanted to work on was American cast iron V8s. Most but not all would tolerate what they considered odd foreign stuff, but they for the most part didn't like it. And often the results showed. But where you're at I'm surprised, or at least I would think they would have lots of experience with lots of different engines.
szacsi72
Posts: 287
Joined: Nov 13, 2022 3:41 AM
Location: Hungary

Re: szacsi72's 1984 Zinnoberrot 535i Build

Post by szacsi72 »

Mike W. wrote: Jul 11, 2024 3:52 PM
szacsi72 wrote: Jul 11, 2024 3:15 AM
Bad news:
Wasted money, wasted time and no progress at all.
The machine shop fucked up... x2.
Interesting how similar things can be a continent apart. Over the years I've found many marginal or incompetent machine shops. I've learned that if I find a good one, stick with it, don't look at the cost until later, just grin and bear it, it's cheaper to do it properly once than poorly twice. A good machinist is like gold and they seem few and far between.

Over here at least for the longest time all they really wanted to work on was American cast iron V8s. Most but not all would tolerate what they considered odd foreign stuff, but they for the most part didn't like it. And often the results showed. But where you're at I'm surprised, or at least I would think they would have lots of experience with lots of different engines.
That's what I did, this shop was the only one I used in the past 4 years, as they were normally very quick and precise and helped me with everything, even extreme stuff, like modifying the S50B32EU pistons to create a 3.2 stroker M50, or custom conrod bushings.. I think the guy was probably rushing due to him leaving for holiday and hence the mistakes. I would normally not be too upset, it happens. But 2 months waiting time and the 400kms don't help the case. I'll ring him today and see what we can do.
szacsi72
Posts: 287
Joined: Nov 13, 2022 3:41 AM
Location: Hungary

Re: szacsi72's 1984 Zinnoberrot 535i Build

Post by szacsi72 »

I talked to the machinist and now I'm not upset - I'm furious. :x :evil:

Problem 1:
"you must have mis-measured"
That's it. Whatever I told him he didn't listed. I asked him to take 0.4mm from the head. I measured before, and I measured after. I measured other heads. I looked in the book. I measured the dimples. It should be 128.6mm maximum. And it's 128.9mm. The dimples are still 0.3-0.35mm deep........
I'm so f...g angry guys I don't even know what to do.
The sheer arrogance he talked to me with.... He acted like if I was an idiot running around with plastic calipers. I tried to explain to him that I measured with 3 calipers, 2 micrometers, in 3 different ways, at 6 different locations...Mitutoyo, not some chinese garbage... NOTHING.
And other than a bad review, there's nothing I can do.

Problem 2:
"I just can't do it"
Regarding the fact he didn't cut the lower timing cover. That's it. I asked what to do about it... because now there's a bump there.....??? A 0.3mm bump? I don't think it's a great idea to install the HG like that. He doesn't know because he never does them, just the block itself.

Time, money and stress down the drain... Don't you just love reputable shops?
Mike W.
Posts: 27200
Joined: Feb 12, 2006 12:00 PM
Location: California Whine Country

Re: szacsi72's 1984 Zinnoberrot 535i Build

Post by Mike W. »

I've had plenty of bad experiences with machine shops as I said earlier, but I don't know if I've had one that bad. About all I can say is I feel your pain.

Beyond crude, but I've seen upper timing covers cut on a belt sander, a bench unit, not handheld. But I've also got one that's probably got .4MM out of square from front to back. It can be cut on a sander, slowly and carefully with lots of measuring and testing on the block.
szacsi72
Posts: 287
Joined: Nov 13, 2022 3:41 AM
Location: Hungary

Re: szacsi72's 1984 Zinnoberrot 535i Build

Post by szacsi72 »

Mike W. wrote: Jul 16, 2024 12:37 AM I've had plenty of bad experiences with machine shops as I said earlier, but I don't know if I've had one that bad. About all I can say is I feel your pain.

Beyond crude, but I've seen upper timing covers cut on a belt sander, a bench unit, not handheld. But I've also got one that's probably got .4MM out of square from front to back. It can be cut on a sander, slowly and carefully with lots of measuring and testing on the block.
There is a guy who said he could do the lower timing cover for me on a fly cutter. It doesn't matter much if its a bit too low, but if it's too high, I can't properly tighten the cylinder head. So, fly cutter it is.

In the meantime, a couple updatese.

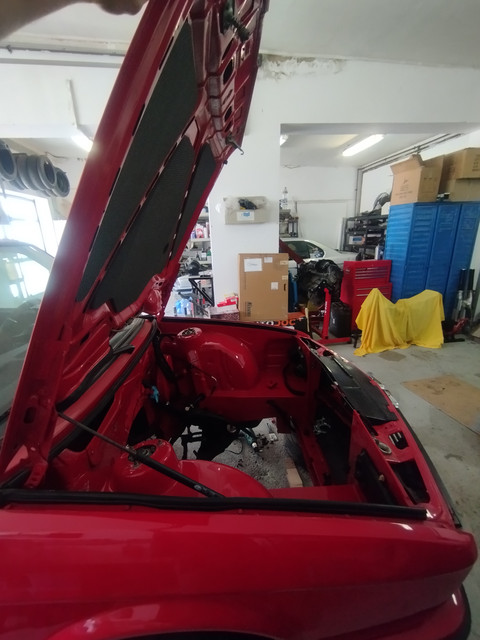
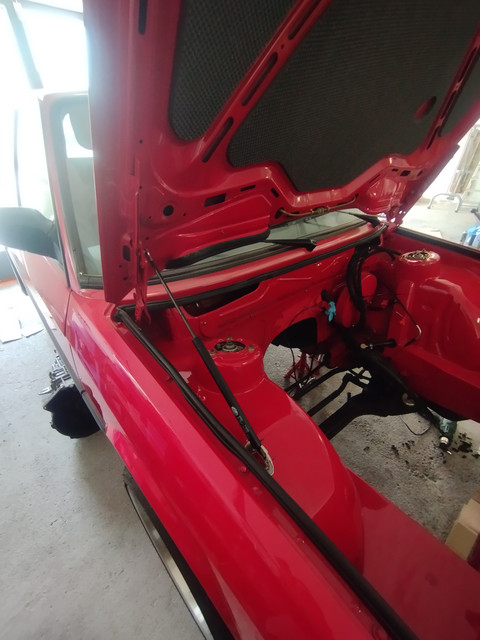
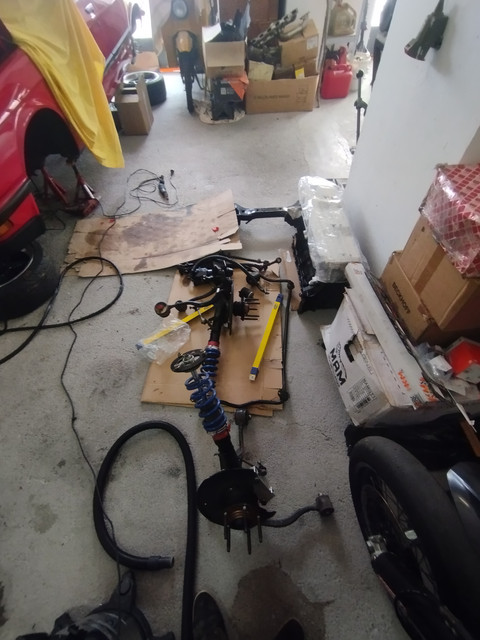
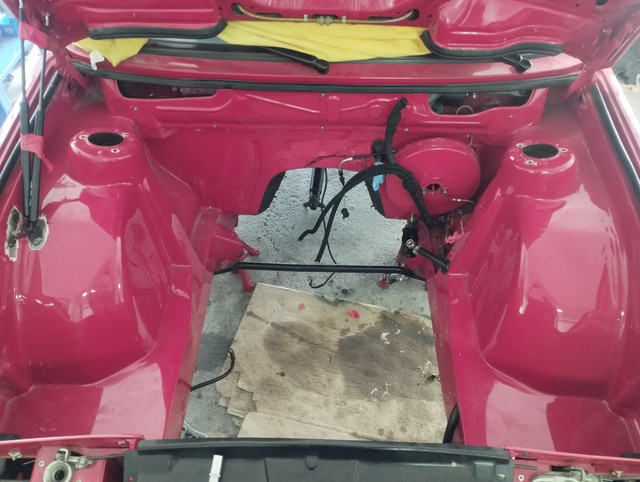
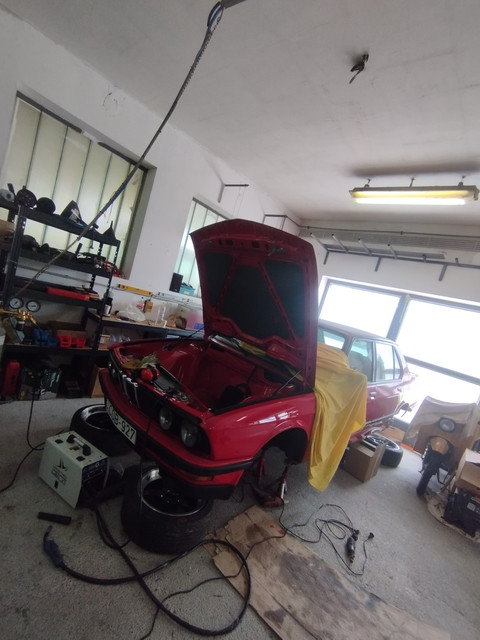
I cleared out the front of the car in preparation for the engine bay paintjob.
Image
Image

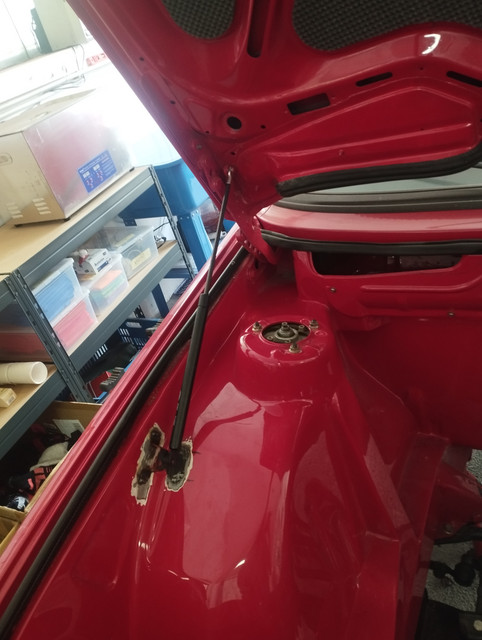
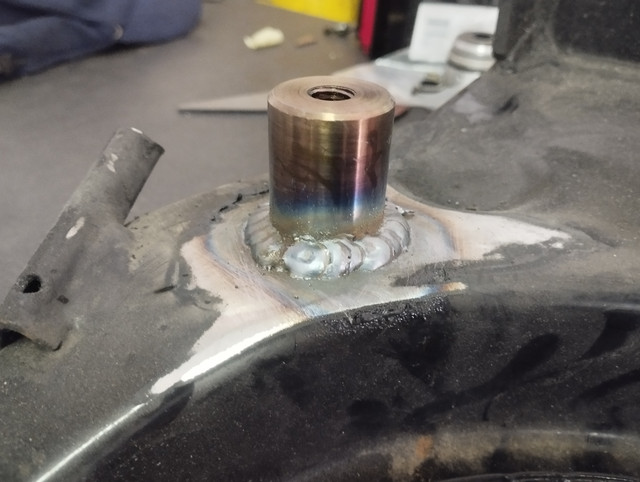
Finished the strut mount on the other side too. Now I can finally open the hood like a normal person...
Image

However I'm not sure what to do about the hood latch wire. It's currently basically deleted, and the lever is mounted under the car body (yes. I know what you are thinking, and I'm thinking the same). I could install a bowden/wire in the originnal place but all the guides have been deleted, + I don't want a wire there, it's such a clean engine bay otherwise. Any tips? I'm thinking of somehow hiding it under the left wing.

Welded in the steering box mount reinforcement..
Image

Some parts..
Image

I'm refreshing the underbody coating first, then I'll move towards the engine bay and start sanding and bondo-ing.

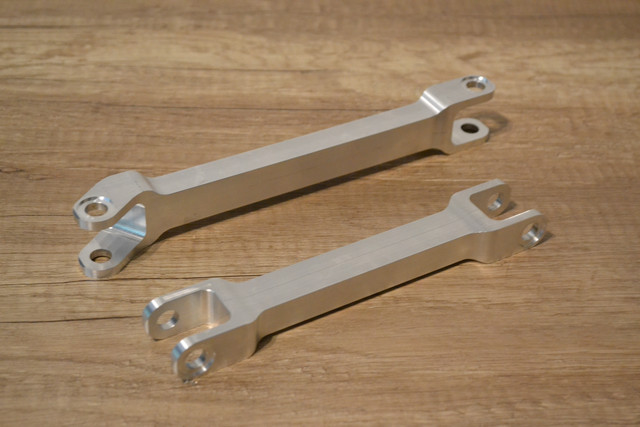
My custom billet DSSR is also in:
Image

Dave
Mike W.
Posts: 27200
Joined: Feb 12, 2006 12:00 PM
Location: California Whine Country

Re: szacsi72's 1984 Zinnoberrot 535i Build

Post by Mike W. »

szacsi72 wrote: Aug 09, 2024 8:24 AM There is a guy who said he could do the lower timing cover for me on a fly cutter. It doesn't matter much if its a bit too low, but if it's too high, I can't properly tighten the cylinder head. So, fly cutter it is.
There's always a way. You could pull the dowels out on the upper cover, I've seen that done before when it wasn't cut but the head was. Or if it was just too much, you could always cut the front "loop" of the HG off and RTV the upper to the lower. But it sounds like you finally have it under control and what I just mentioned are not good ways of doing things, just what can be done just in case.
tig
Posts: 9283
Joined: Mar 18, 2013 6:25 PM
Location: Durango
Contact:

Re: szacsi72's 1984 Zinnoberrot 535i Build

Post by tig »

szacsi72 wrote: Aug 09, 2024 8:24 AM Some parts..
Image
Nice background! ;-)
szacsi72
Posts: 287
Joined: Nov 13, 2022 3:41 AM
Location: Hungary

Re: szacsi72's 1984 Zinnoberrot 535i Build

Post by szacsi72 »

Mike W. wrote: Aug 09, 2024 12:09 PM
szacsi72 wrote: Aug 09, 2024 8:24 AM There is a guy who said he could do the lower timing cover for me on a fly cutter. It doesn't matter much if its a bit too low, but if it's too high, I can't properly tighten the cylinder head. So, fly cutter it is.
There's always a way. You could pull the dowels out on the upper cover, I've seen that done before when it wasn't cut but the head was. Or if it was just too much, you could always cut the front "loop" of the HG off and RTV the upper to the lower. But it sounds like you finally have it under control and what I just mentioned are not good ways of doing things, just what can be done just in case.
Yep, many ways around it but having invested upwards of 4-5k in an Engine, I don't want workarounds.
cek wrote: Aug 09, 2024 12:22 PM
szacsi72 wrote: Aug 09, 2024 8:24 AM Some parts..
Image
Nice background! ;-)
I need to look at your car once in a while to remember my E28 is an actual vehicle and not just a bunch of parts sitting in my garage... :D
Galahad
Posts: 539
Joined: Sep 06, 2016 9:08 PM
Location: Beverly/Worcester, MA
Contact:

Re: szacsi72's 1984 Zinnoberrot 535i Build

Post by Galahad »

szacsi72 wrote: Aug 09, 2024 8:24 AM My custom billet DSSR is also in:
Image
Your own work? I have a custom shift rod but it's one-sided - had Send Cut Send make it for me. Sad they don't have that in Europe
szacsi72
Posts: 287
Joined: Nov 13, 2022 3:41 AM
Location: Hungary

Re: szacsi72's 1984 Zinnoberrot 535i Build

Post by szacsi72 »

Galahad wrote: Aug 12, 2024 11:50 AM
szacsi72 wrote: Aug 09, 2024 8:24 AM My custom billet DSSR is also in:
Image
Your own work? I have a custom shift rod but it's one-sided - had Send Cut Send make it for me. Sad they don't have that in Europe
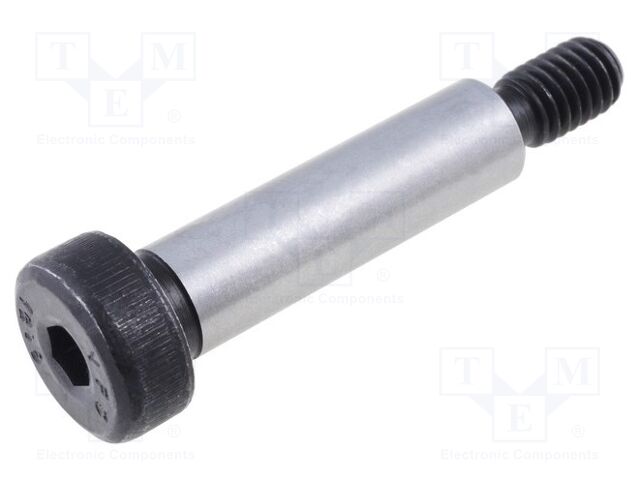
Sure is. I made them double sided so that I could use precision/matched bolts - or whatever their proper name is. It's ISO 7379. Apart from the middle being 10mm-f9, meaning a really nice fit with BMW's selector joint, I can adjust the preload, to dial in slack and tension, or make up for wear over time.
Image
Post Reply