Vlad: The Zinno '87 535is
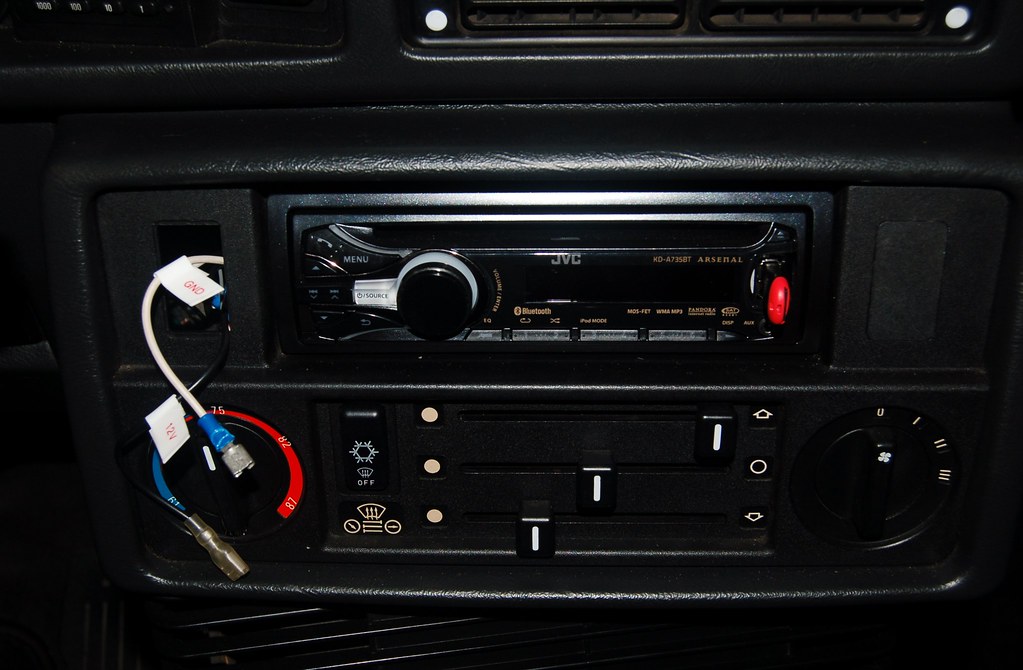
Two issues:
1) The PO had installed window switches in the pop-out slots on either side of the stereo. The one on the right was never connected to anything. The one on the left was previously used to run the remote trunk release, but that was pulled out when the new trunk gasket was installed...it no longer could release I guess.
2) The USB port on the stereo is to be used for a USB memory stick with music on it. I can't use it to power my phone. The 12V cig lighter is for the Valentine One that's on it's way. And even then, 1 power outlet is not enough for a gadget geek like myself.
Other data:
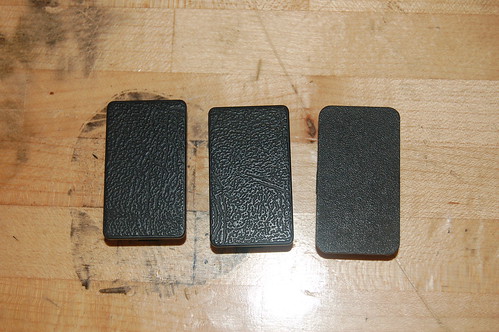
PO left me with both of the original filler plates that go on either side of the stereo. One is un-blemished. The other has a hole in the middle, just the right size of a LED. He also left me two additional filler plates that don't actually match the texture of the console, nor do they fit correctly.
What I'm going to try to do:
Replace the dummy window switch on the right with a two port USB plug, using the insides of this adapter I bought off Amazon for $9.
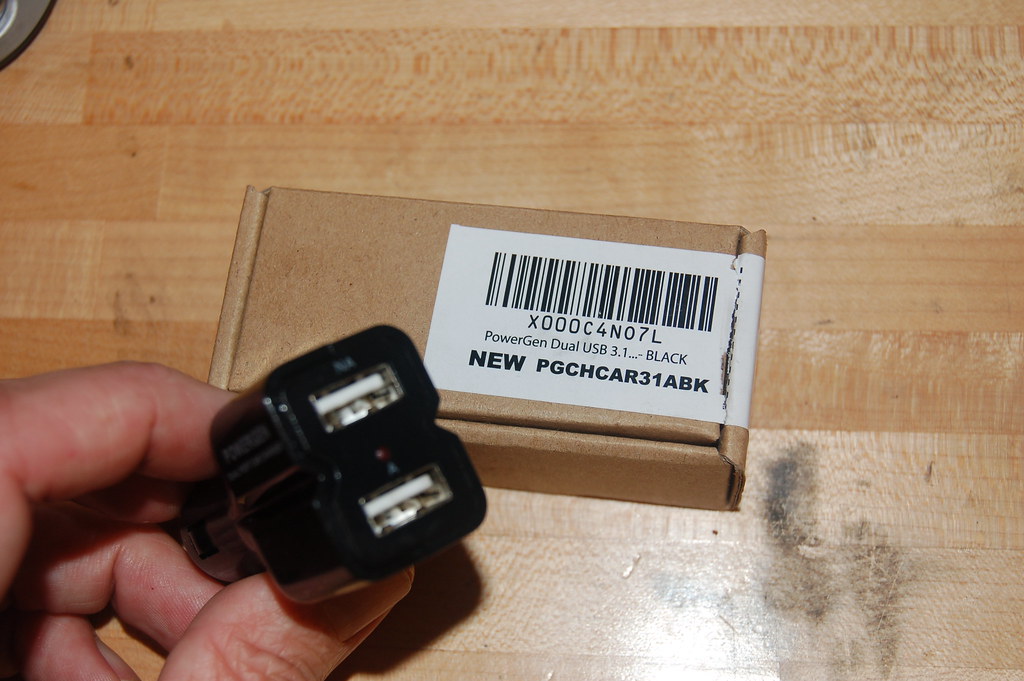
Here's what it looks like on the insides. Nice and clean. 3.1 amps total. I'll put an inline fuse on it and wire it to the power for the stereo so that it's only on when the ignition is on (the 12V you see above is always on).
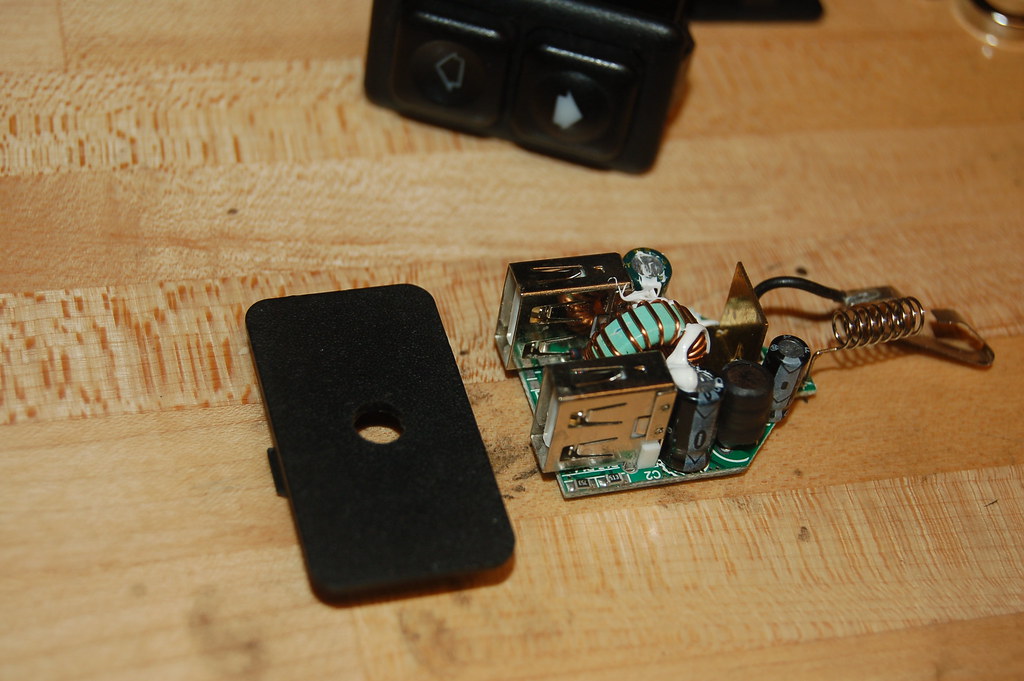
Here's the challenge:
How do I cut the two rectangular holes in the blank cover so they are perfect? The need to fit the size of the USB connectors perfectly and I want it to look sharp.
I plan on using the cover with the LED hole because this Lighter/USB adapter has a red LED and I can put a piece of semi-opaque plastic in the hole, letting the LED shine through when the adapter is hot.
All this raises another question: If I frak up and ruin one of these covers, anyone have more? The PO obviously tried to find some and was unable to (hence the two that don't match/fit). I can't tell you the part # right now because the one without the hole (and readable part #) is in the car and I can't take out until I pull the stereo which I'm not going to do until I have the adapter mounted.
Thanks.
-
Kyle in NO
- Posts: 17638
- Joined: Feb 12, 2006 12:00 PM
- Location: Nasty Orleans------> Batten-Rooehjch------>More Souther LA
The two that don't match go in the rear part of your center console, between the seats. They cover the access holes for the rear console retaining screws.
Also, you don't want to plug your V1 into the cigarette lighter slot. The lighter hole is slightly larger than standard and it will only work intermittently and drive you crazy. Instead, I use one of these:

Plugs into the flashlight socket in your glove box and actually has the proper sized socket for all your accessories.
Also, you don't want to plug your V1 into the cigarette lighter slot. The lighter hole is slightly larger than standard and it will only work intermittently and drive you crazy. Instead, I use one of these:

Plugs into the flashlight socket in your glove box and actually has the proper sized socket for all your accessories.
Ah. I didn't know that because the PO has installed this:Kyle in NO wrote:The two that don't match go in the rear part of your center console, between the seats. They cover the access holes for the rear console retaining screws.
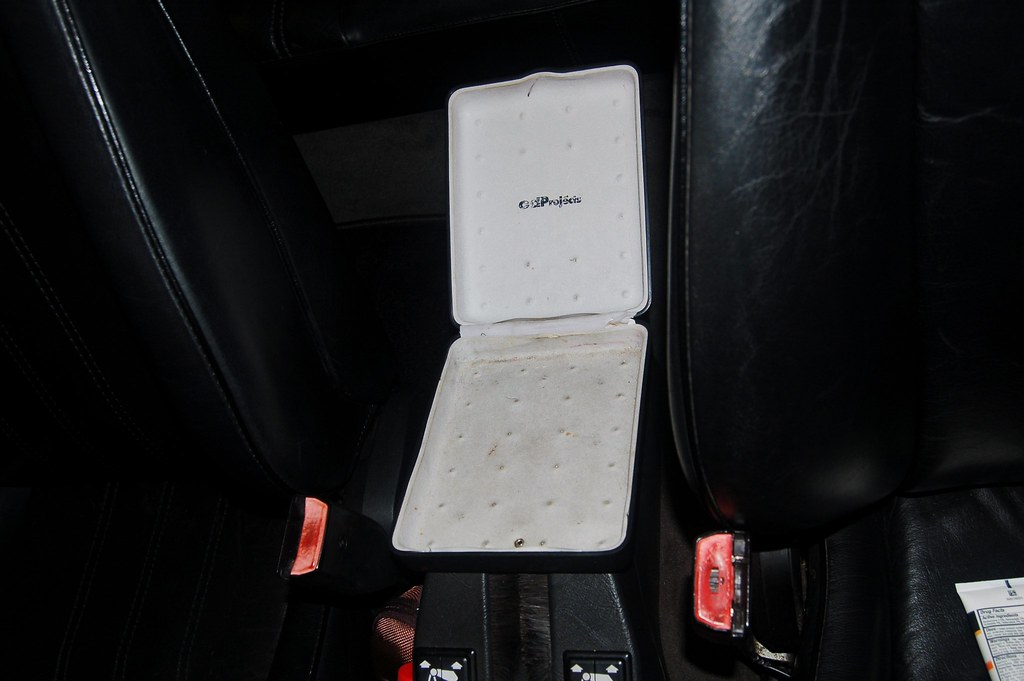
I didn't want to go into it, but I actually am getting a remote display for the V1, so I won't be using the lighter socket except temporarily.Kyle in NO wrote:Also, you don't want to plug your V1 into the cigarette lighter slot. The lighter hole is slightly larger than standard and it will only work intermittently and drive you crazy. Instead, I use one of these:
Neat. Where'd you get?Kyle in NO wrote: Plugs into the flashlight socket in your glove box and actually has the proper sized socket for all your accessories.
FWIW, the BaT comments on this car made a big deal about how disco the LED lighting the PO installed must be.
For the record, it is extremely (perhaps too) muted.
Not quite sure why he bothered as the LEDs he used are so small hardly any light is put off.
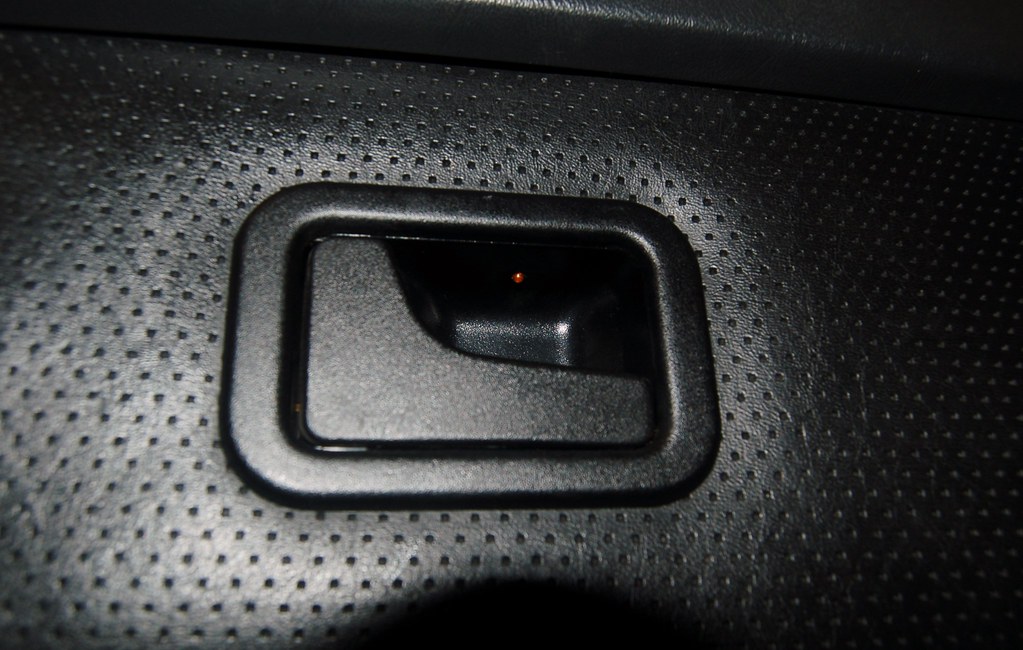
It would have been a really nice touch if he had used slightly brighter LEDs. But I can also understanding wanting to be conservative in light output.
For the record, it is extremely (perhaps too) muted.
Not quite sure why he bothered as the LEDs he used are so small hardly any light is put off.

It would have been a really nice touch if he had used slightly brighter LEDs. But I can also understanding wanting to be conservative in light output.
Love the attention to detail. This seems like it may be something you'd appreciate. Another nice "attention to detail" piece from George Graves.
Interior light delay w/ auto dimming unit.
Interior light delay w/ auto dimming unit.
x2 these are really nice.leadphut wrote:Love the attention to detail. This seems like it may be something you'd appreciate. Another nice "attention to detail" piece from George Graves.
Interior light delay w/ auto dimming unit.
If George is out of them (contact him to be sure) I ended up with an extra one; brand new in the bag from George. PM me for details.
The E28 knowledge level on this board never ceases to amaze me. Case in point:
I read the next post, from Kyle, logged 14 minutes after CEK's that hits the nail on the head:

Jim
I look at the pictures of the differently textured filler plates, and I'm thinking "they're probably extras from different cars, from different years, and the pattern was changed along the way by BMW. Made sense to me.PO left me with both of the original filler plates that go on either side of the stereo. One is un-blemished. The other has a hole in the middle, just the right size of a LED. He also left me two additional filler plates that don't actually match the texture of the console, nor do they fit correctly.
I read the next post, from Kyle, logged 14 minutes after CEK's that hits the nail on the head:
Dayyuumm...........that's good!The two that don't match go in the rear part of your center console, between the seats. They cover the access holes for the rear console retaining screws.
Jim
BaT has done a "success story" on Vlad based on the note I wrote them.
http://bringatrailer.com/2013/04/11/bat ... -bmw-535is
http://bringatrailer.com/2013/04/11/bat ... -bmw-535is
-
tavern gnome
- Posts: 352
- Joined: May 19, 2008 11:14 PM
- Location: Tacoma, WA
- Contact:
Very cool! Looks like you and I were doing a very similar trip around the same time! I even sold my FJ60 to buy mine! Ha. Mine was Phoenix to San Diego and all the way up 101, back home to Tacoma. So much fun. Congrats!cek wrote:BaT has done a "success story" on Vlad based on the note I wrote them.
http://bringatrailer.com/2013/04/11/bat ... -bmw-535is
Tonight I dug into doing the following
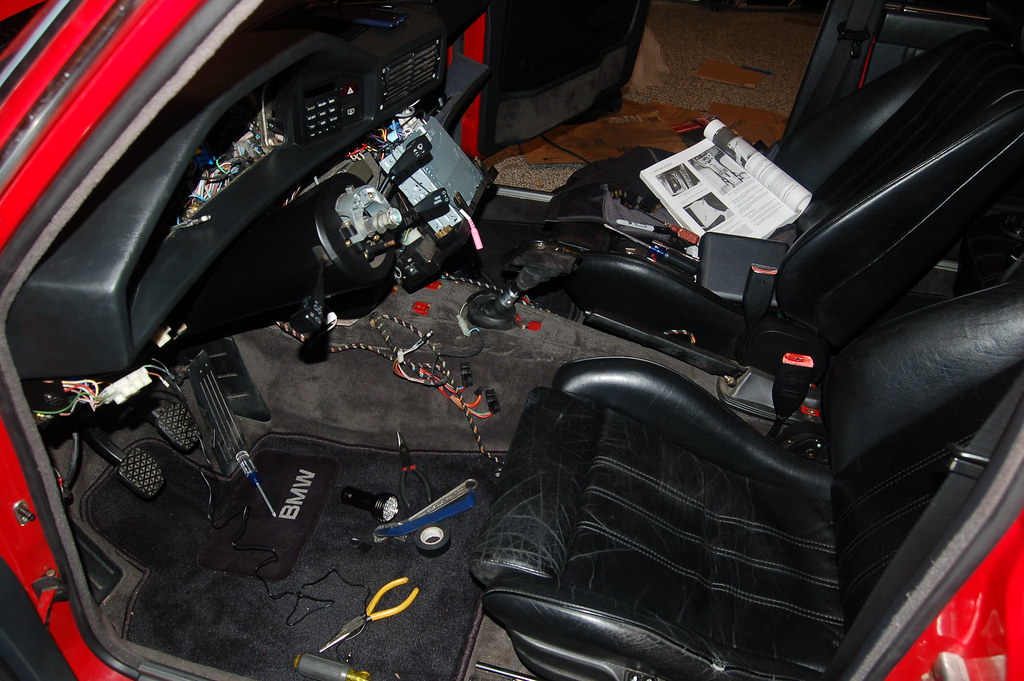
To do all this I need to remove the center console, stereo/hvac control module, and instrument panel. Based on thread's I've read here an my Bentleys it all went pretty smoothly.
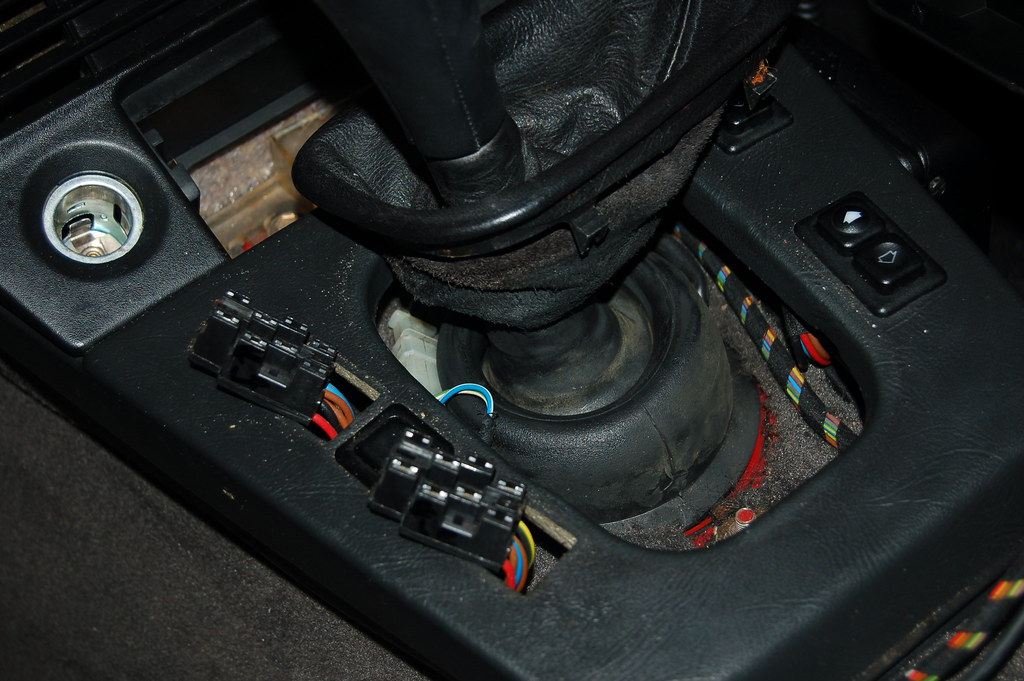
I realized removing the steering wheel would make getting the instrument cluster out easy (possible?) and would generally ease working, so I pulled it off too.
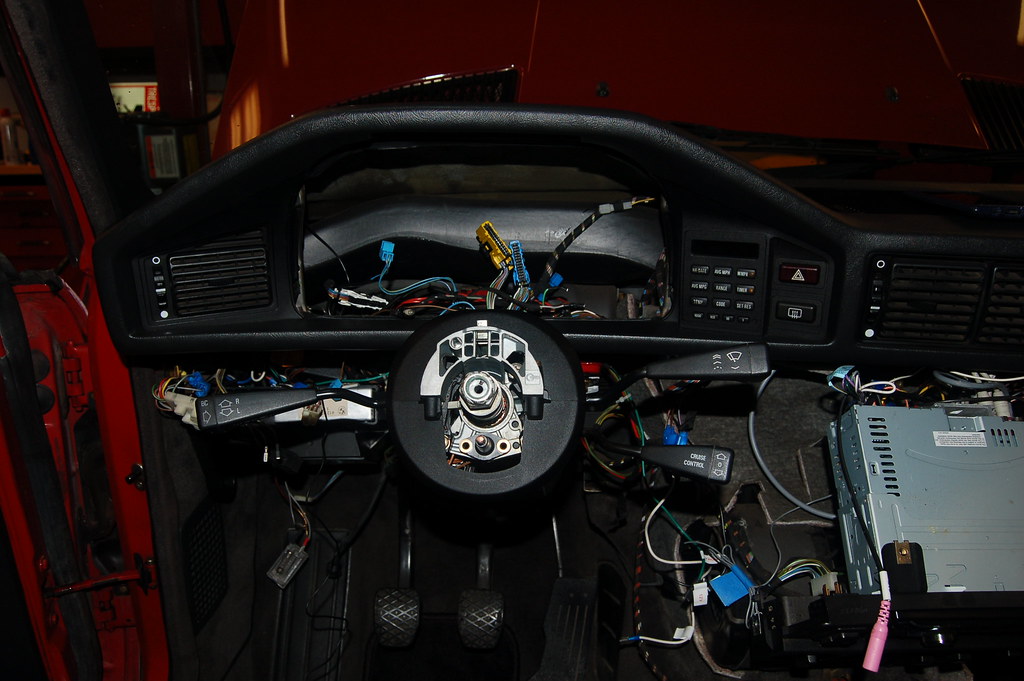
Gawd I love doing shit like this.
Great threads here on mye28 made it clear how to pull instrument cluster apart and get the speedometer out.
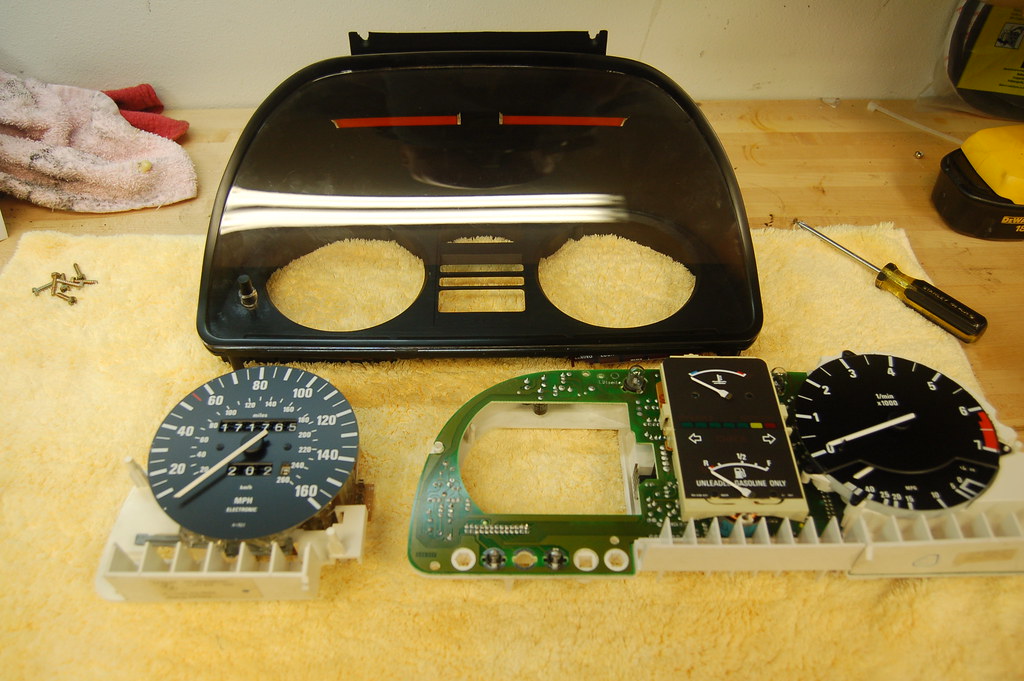
No grease.
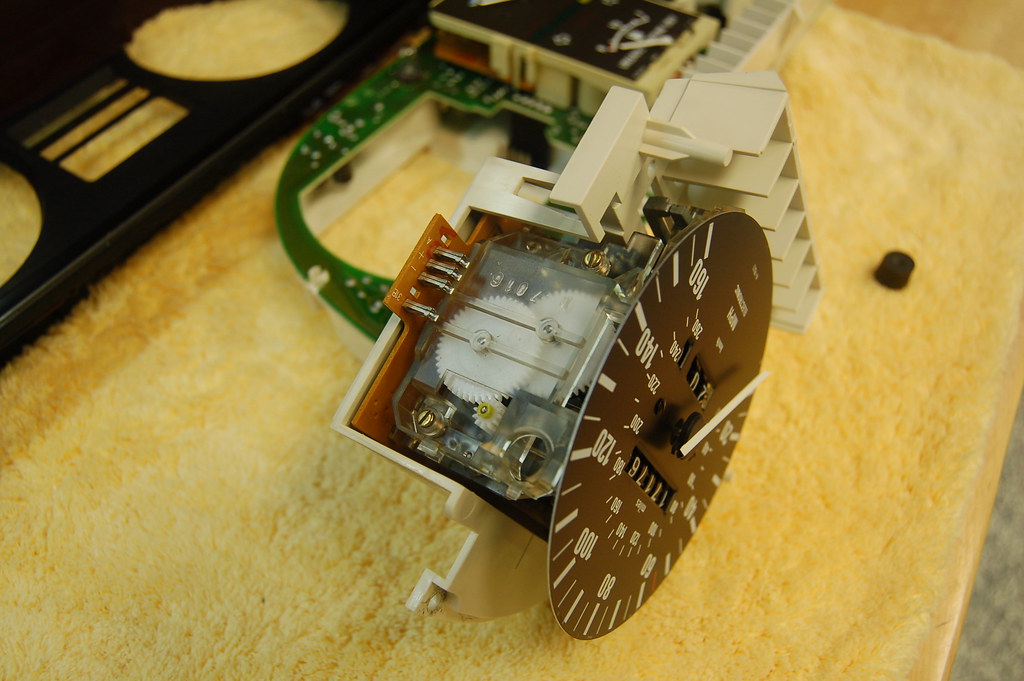
Some grease.
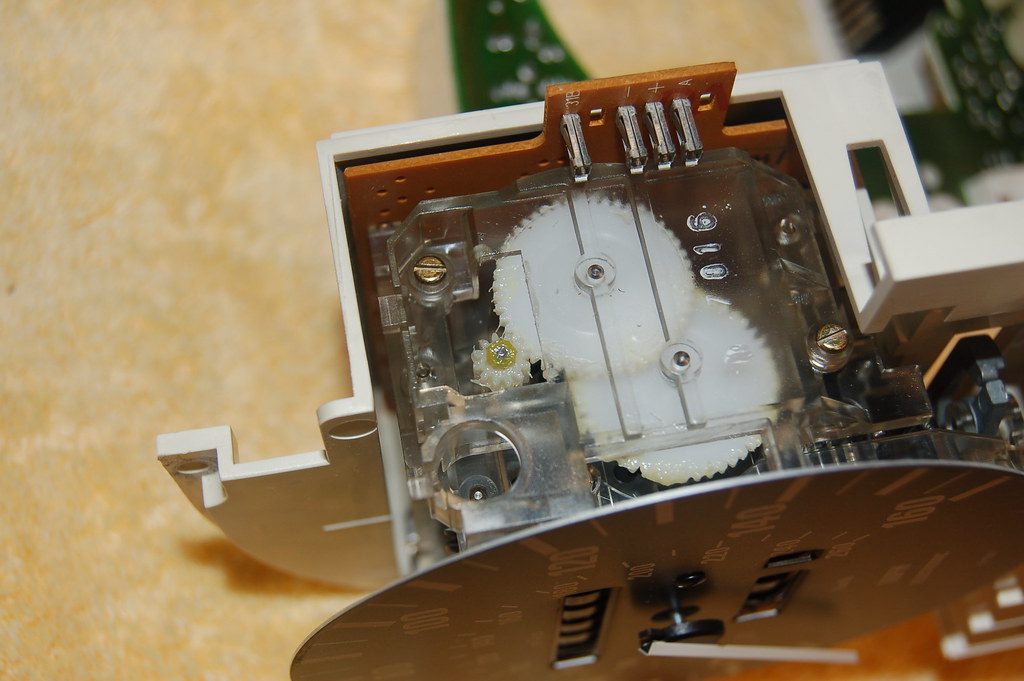
I used a q-tip and dabbed a little grease on the gears as I carefully rotated them with my fingernail. I didn't feel like taking the assembly apart; worked fine.
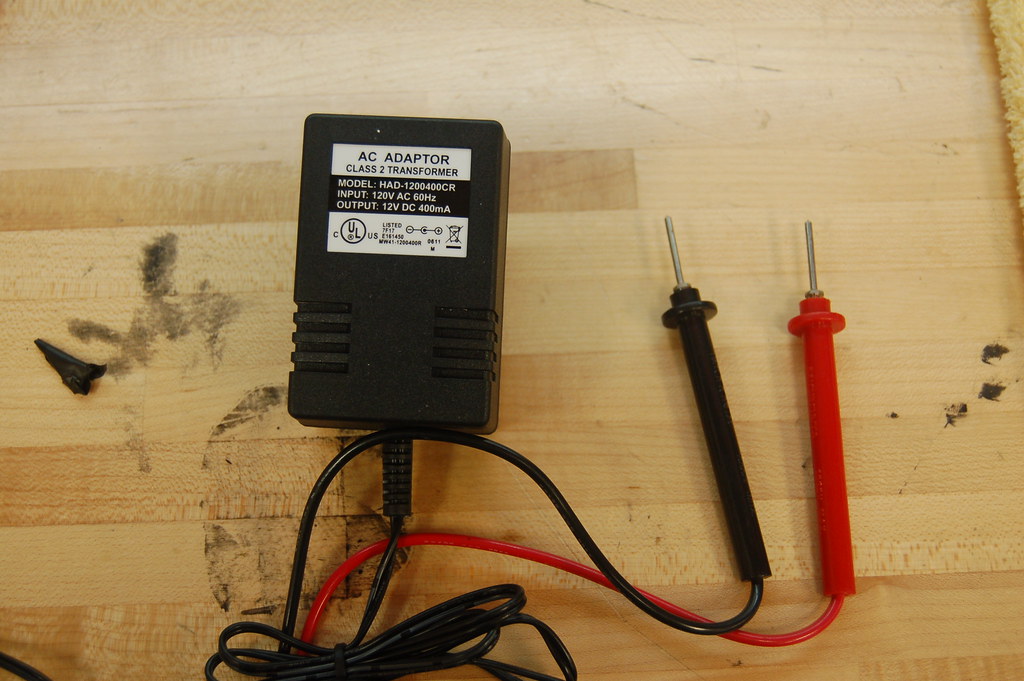
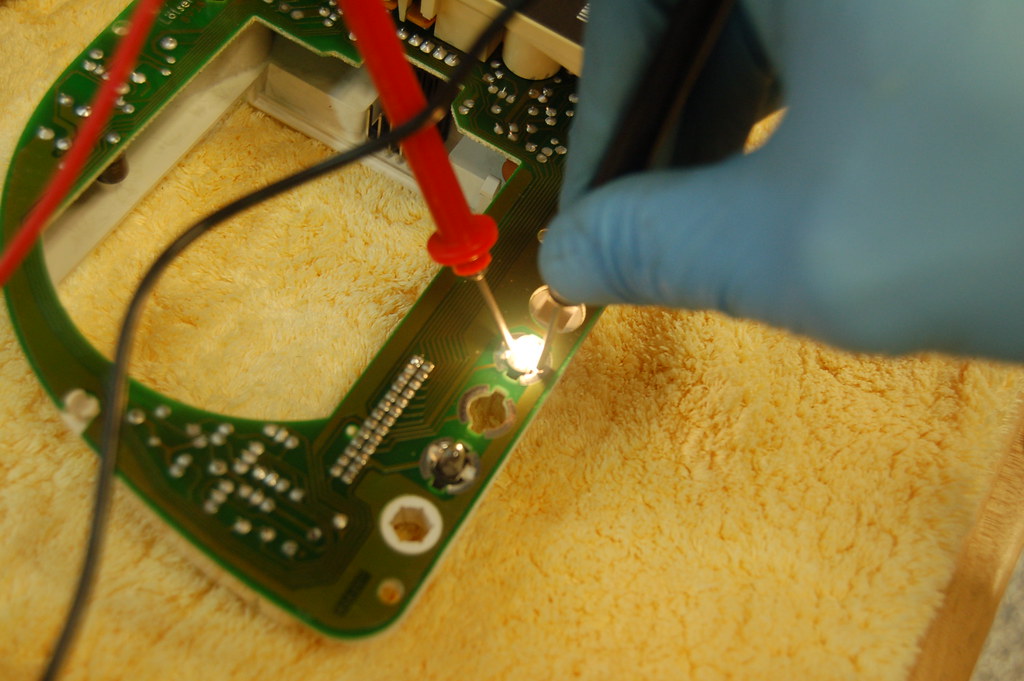
Some of the lighbulbs are clearly burned out (e.g. the one from the headlight switch). Others I wasn't sure so I wanted to test them. An old 12V AC adapter and some voltmeter probes made an instant tester:
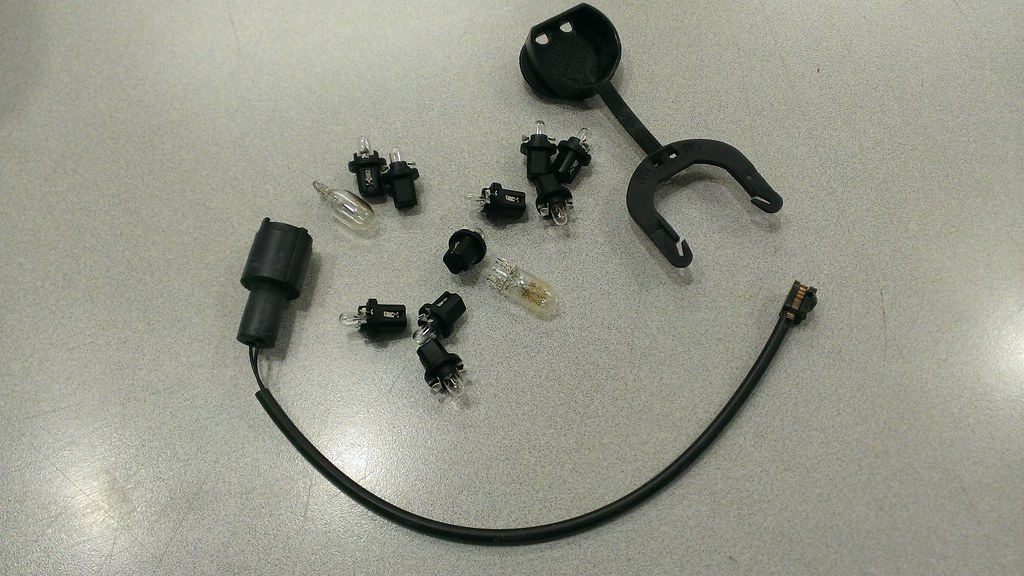
I had no idea what the blubs looked like before I started this project. Here's a pic for others, just so you know.
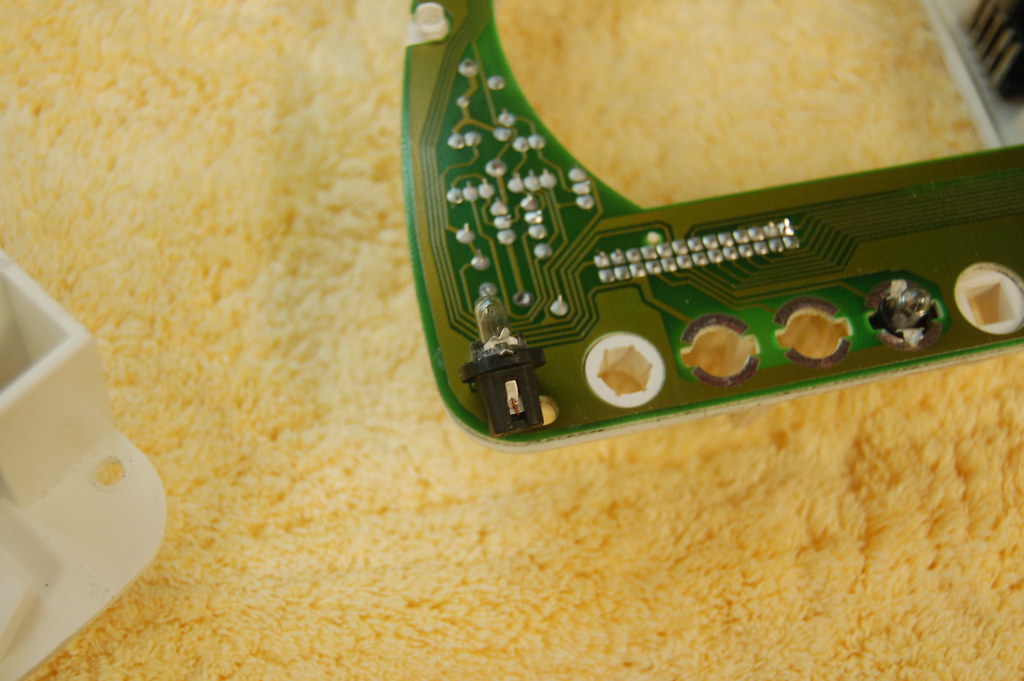
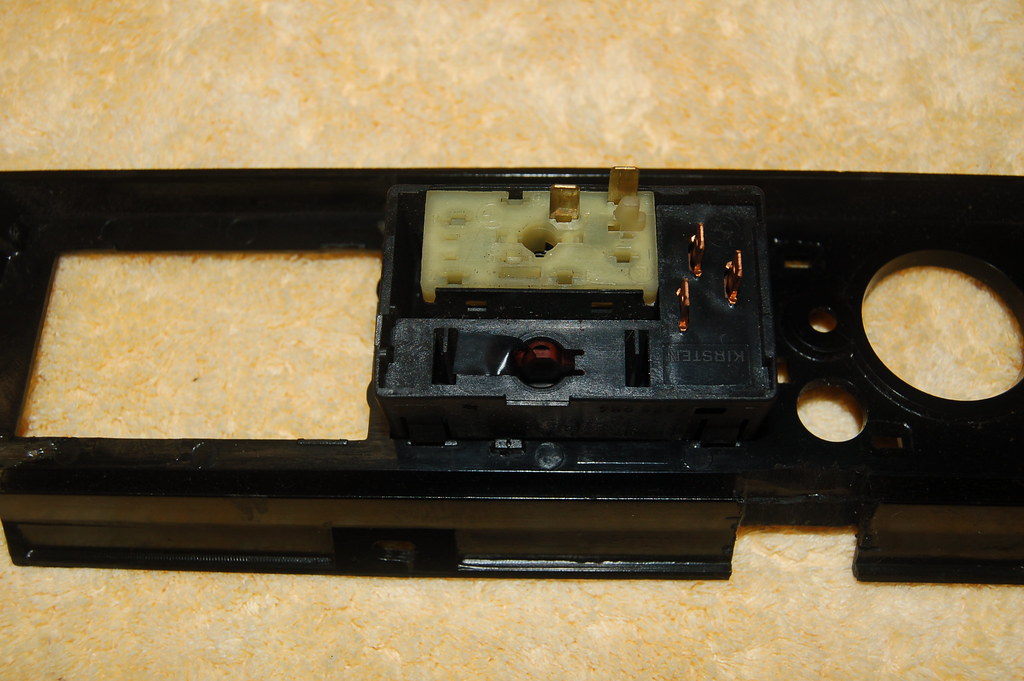
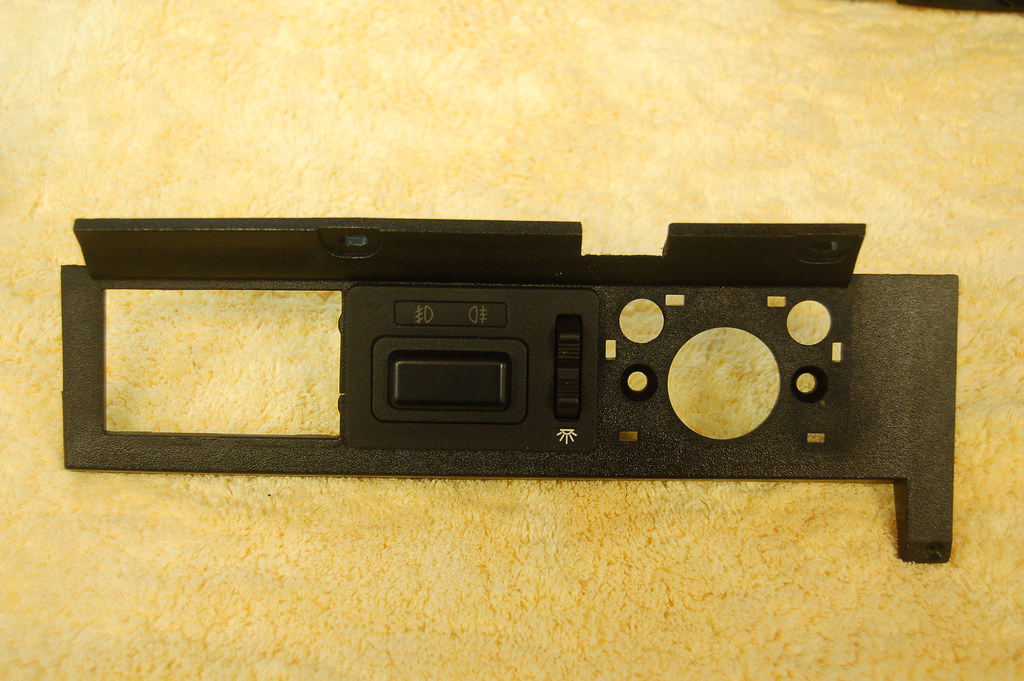
Some sort of PO repair on the foglight switch bulb socket. Also you can see that a PO did some modification to the bracket. There was some old wiring in there too; he tells me back in the day he had an old skool cell phone wired in there somehow.
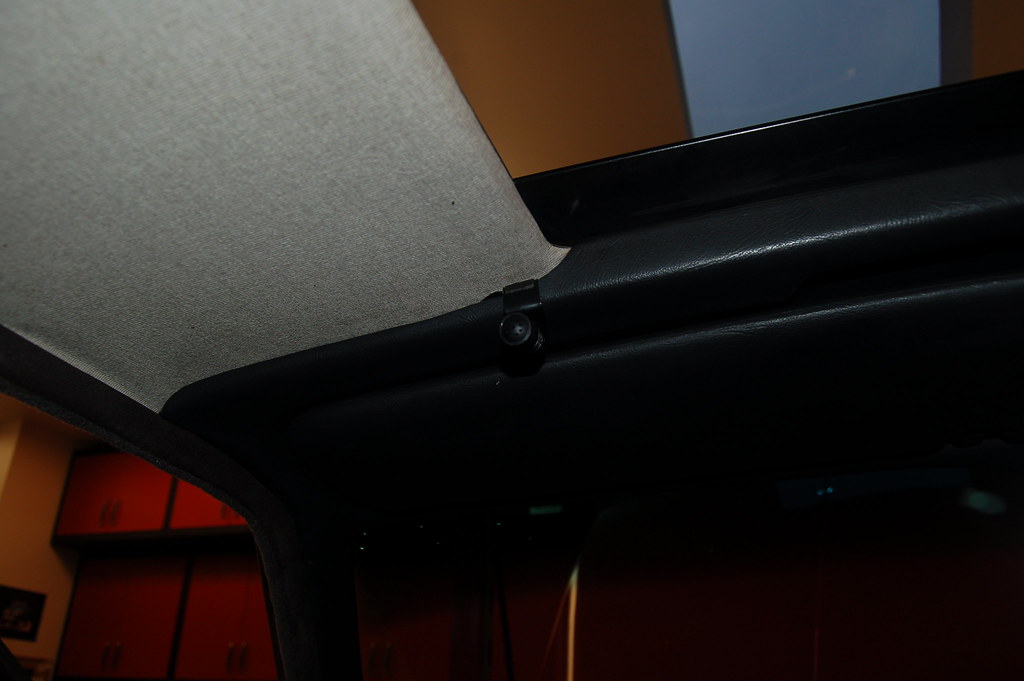
The new location for the BT hands-free mic. I'm hoping this picks up my voice better than it did down on the instrument cluster.
The V1 gets mounted up in front of the rear view mirror. The rear facing sensor sticks out to the right so it can 'see' out the rear window. On my '95 540 M-Sport I mounted an RJ11 jack up there (http://www.kindel.com/bmw/valone.htm). For the E28 I decided to just have the wire come through the slight gap between the headliner and windshield.

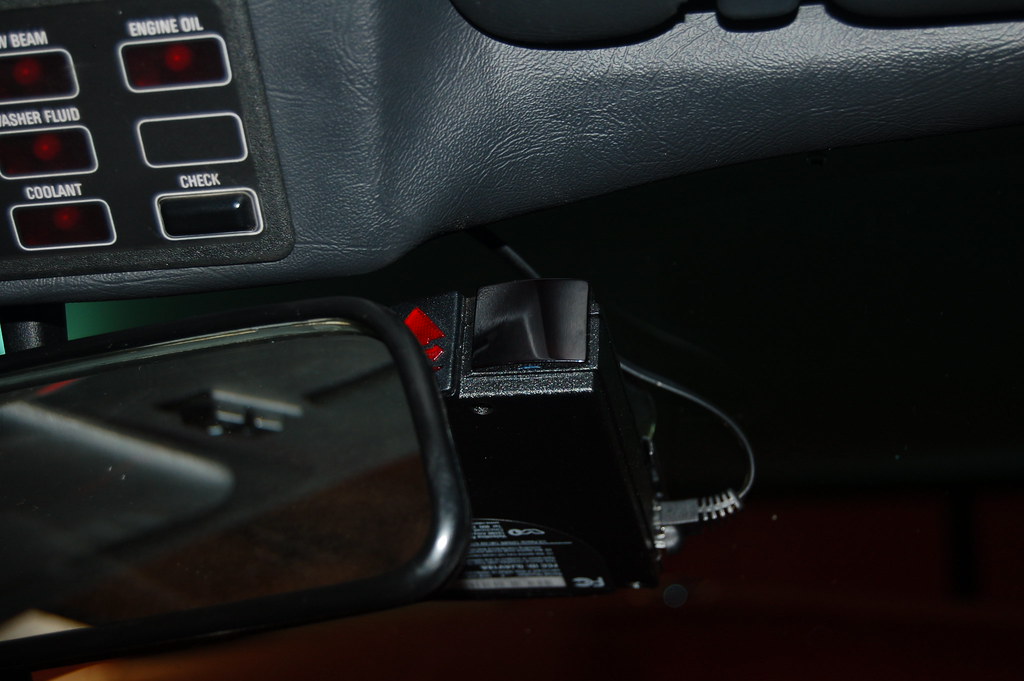
The nice thing about this mount is that the detector fairly inconspicuous from outside the car and completely hidden from the driver (the mirror shields it). The passenger has to see it, but who cares about the passenger?
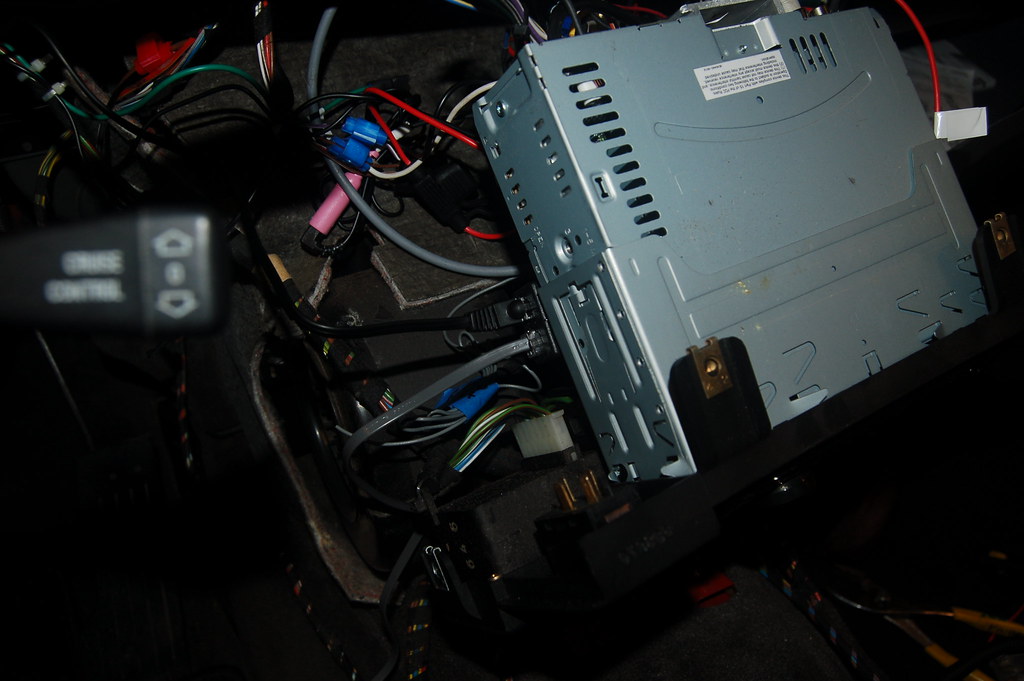
The hard-wired power adapter for the Valentine One is hooked into the ignition switched power lead for the stereo. I mounted it under the left side of the stereo (using the included velcro). You can see it in the center of this picture with the two RJ11s coming out of it. I made a short RJ11 cord to go from the power adapter to the remote display (the gray one).
For the remote display I decided I didn't want it on the instrument cluster shelf like I did on my M-Sport (see pics in link above). Instead I decided I was going to mount it just below the shelf on the right side of the steering wheel. Right above the ejector seat button. With it there it is visible through the steering wheel and the mute button is easy to press with the right hand.
To do this I made a little bracket from an old computer case hard drive bay blank.
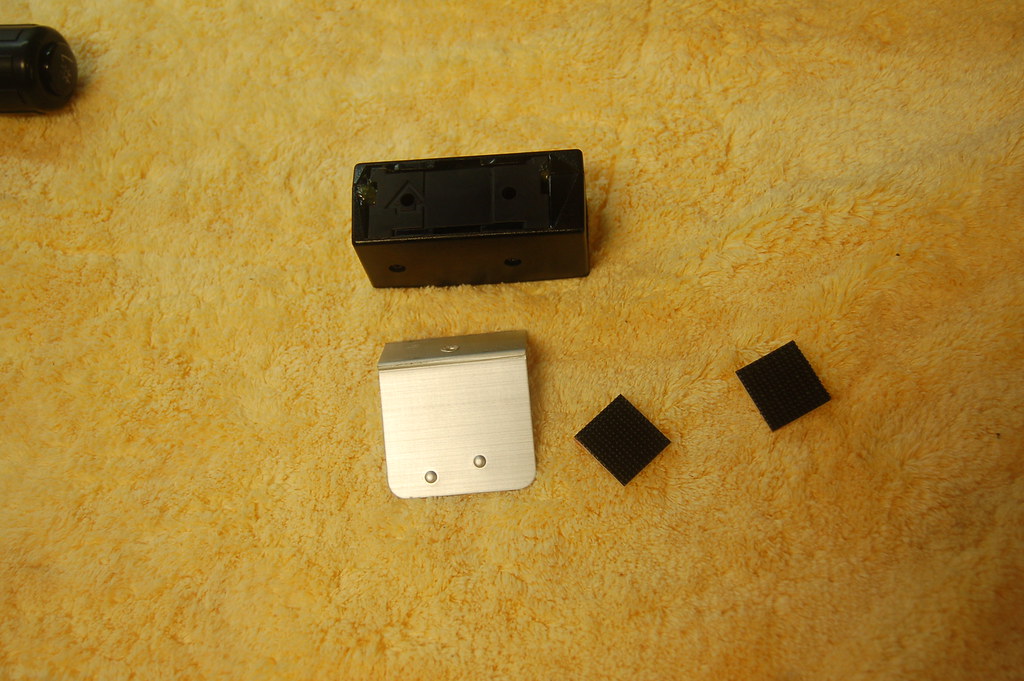
I drilled a hole in the bracket that the screw that holds the dash kick cover in place will go through. The bracket is angled so that when the display is attached to it (with velcro) it is angled toward the driver's eyes.
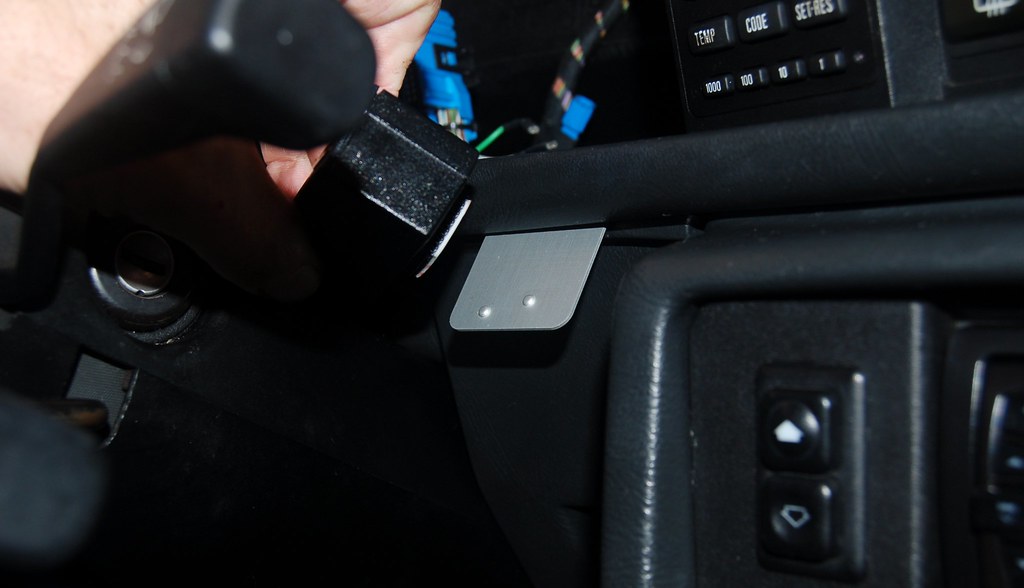
Here's roughly how it will look with the wheel in place. The flash shows off the bottom edge of the silver bracket. If I find it is visible when done, it'll be easy to trim so it is not visible.
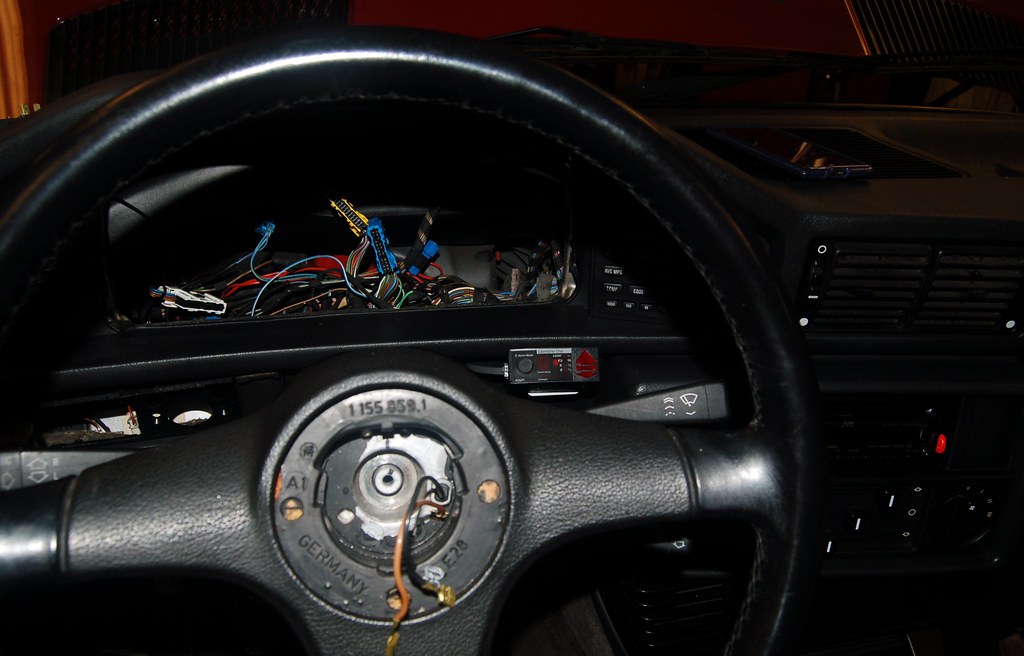
While I had everything apart vacuumed and cleaned everything well. There was some dust and grime build up behind the stereo and under the center console, but it wasn't too bad. I have the center console back in. Tomorrow I'll put the instrument cluster back in after a trip to the auto-parts store for bulbs.
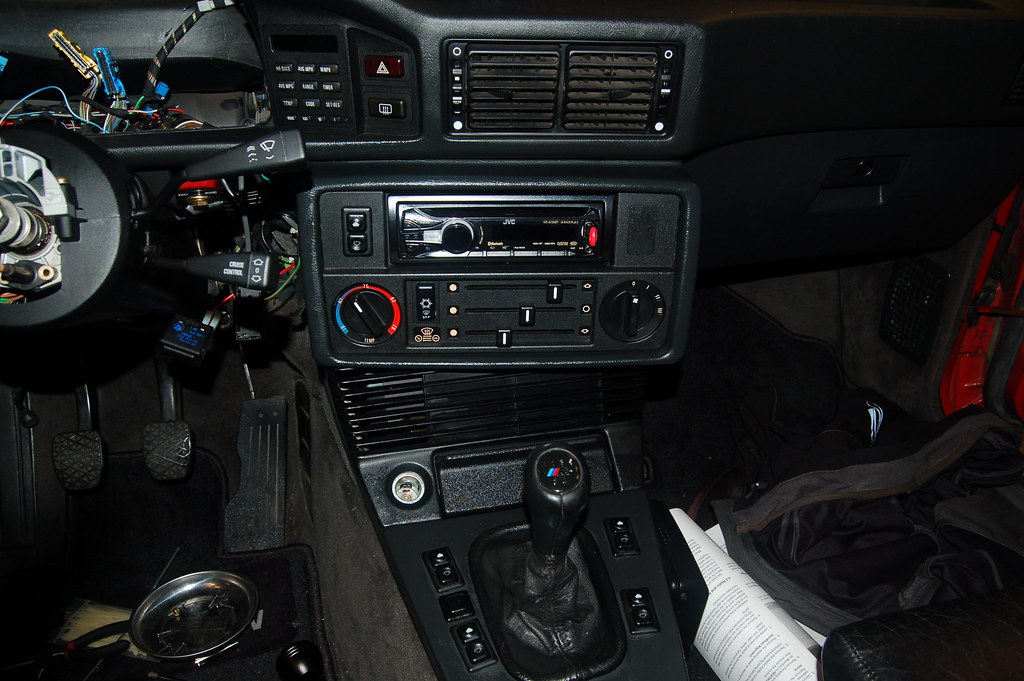
Fun stuff!
- Fixing the burned out bulbs in the instrument cluster and headlight/foglight switches
- Greasing the new odometer gears the PO recently installed that are making that annoying grinding noise.
- Moving the bluetooth hands-free mic from above the instrument cluster to up by the driver's sunshade
- Installing the remote display for my new Valentine One radar locator
- Preparing the wiring for my USB power plug adapter i'm going to install next to the stereo.
To do all this I need to remove the center console, stereo/hvac control module, and instrument panel. Based on thread's I've read here an my Bentleys it all went pretty smoothly.

I realized removing the steering wheel would make getting the instrument cluster out easy (possible?) and would generally ease working, so I pulled it off too.

Gawd I love doing shit like this.

Great threads here on mye28 made it clear how to pull instrument cluster apart and get the speedometer out.

No grease.

Some grease.

I used a q-tip and dabbed a little grease on the gears as I carefully rotated them with my fingernail. I didn't feel like taking the assembly apart; worked fine.
Some of the lighbulbs are clearly burned out (e.g. the one from the headlight switch). Others I wasn't sure so I wanted to test them. An old 12V AC adapter and some voltmeter probes made an instant tester:


I had no idea what the blubs looked like before I started this project. Here's a pic for others, just so you know.

Some sort of PO repair on the foglight switch bulb socket. Also you can see that a PO did some modification to the bracket. There was some old wiring in there too; he tells me back in the day he had an old skool cell phone wired in there somehow.


The new location for the BT hands-free mic. I'm hoping this picks up my voice better than it did down on the instrument cluster.

The V1 gets mounted up in front of the rear view mirror. The rear facing sensor sticks out to the right so it can 'see' out the rear window. On my '95 540 M-Sport I mounted an RJ11 jack up there (http://www.kindel.com/bmw/valone.htm). For the E28 I decided to just have the wire come through the slight gap between the headliner and windshield.


The nice thing about this mount is that the detector fairly inconspicuous from outside the car and completely hidden from the driver (the mirror shields it). The passenger has to see it, but who cares about the passenger?
The hard-wired power adapter for the Valentine One is hooked into the ignition switched power lead for the stereo. I mounted it under the left side of the stereo (using the included velcro). You can see it in the center of this picture with the two RJ11s coming out of it. I made a short RJ11 cord to go from the power adapter to the remote display (the gray one).

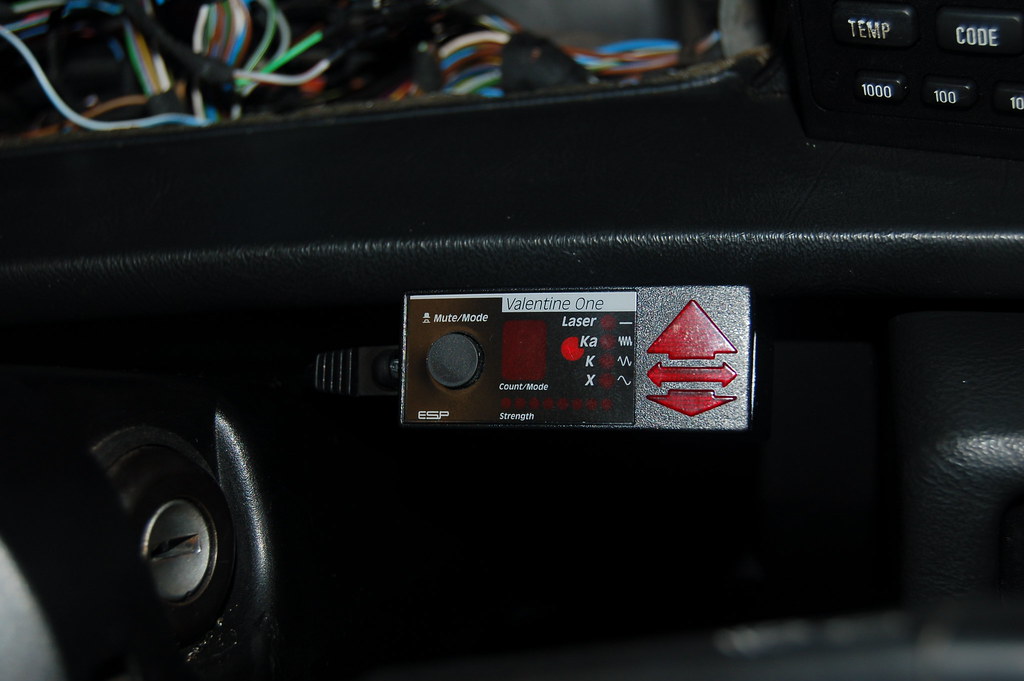
For the remote display I decided I didn't want it on the instrument cluster shelf like I did on my M-Sport (see pics in link above). Instead I decided I was going to mount it just below the shelf on the right side of the steering wheel. Right above the ejector seat button. With it there it is visible through the steering wheel and the mute button is easy to press with the right hand.
To do this I made a little bracket from an old computer case hard drive bay blank.

I drilled a hole in the bracket that the screw that holds the dash kick cover in place will go through. The bracket is angled so that when the display is attached to it (with velcro) it is angled toward the driver's eyes.

Here's roughly how it will look with the wheel in place. The flash shows off the bottom edge of the silver bracket. If I find it is visible when done, it'll be easy to trim so it is not visible.

While I had everything apart vacuumed and cleaned everything well. There was some dust and grime build up behind the stereo and under the center console, but it wasn't too bad. I have the center console back in. Tomorrow I'll put the instrument cluster back in after a trip to the auto-parts store for bulbs.

Fun stuff!
E30Pierre wrote:Did you find a source for the window switch bulbs? I need some and I don't know what to ask for when I go to the auto parts/electronics store
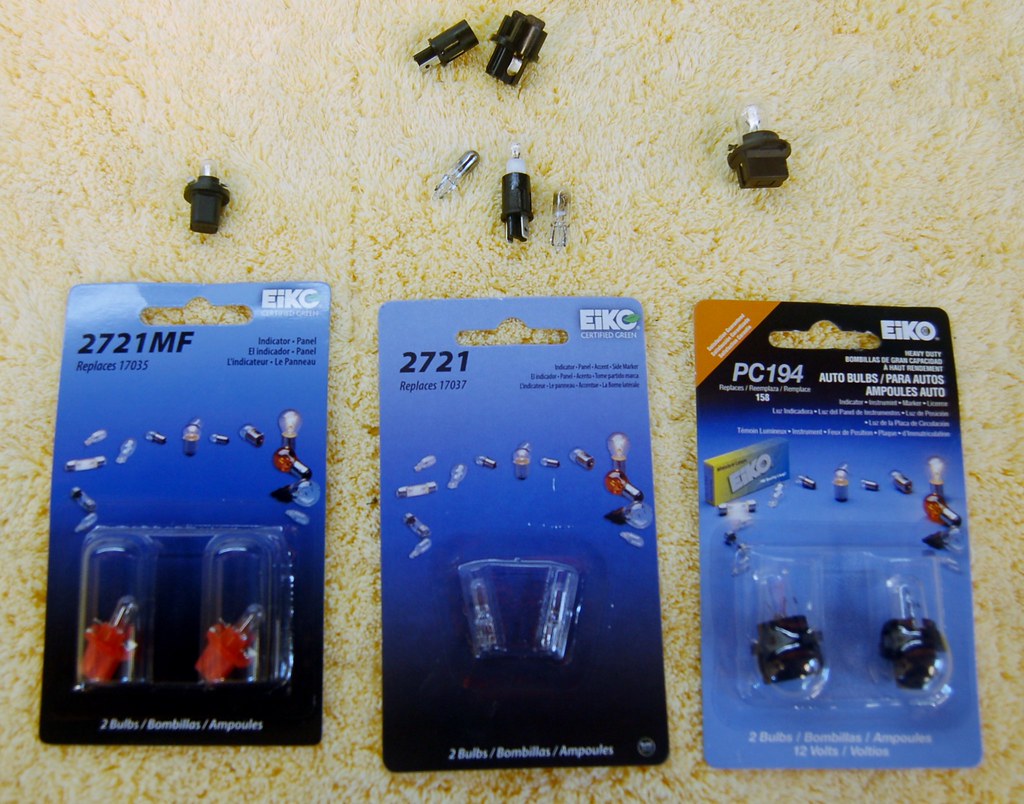
I found that O'Reilly auto parts carries the 2721 bare bulb which works great any of the applications where the bulb pulls out of the holder (as seen in the middle of the pic above).
However the 2721MF which look like they might work for the instrument cluster bulbs (on the left) do NOT work. The red plastic base is too large a diameter and they don't screw in correctly.
Also the PC194 seen on the right, which I thought would work to replace the upper two builbs the illumniate the dials also do not work.
Tomorrow I'm going to the BMW dealer to see if can source the bulbs from them.
Finished up the instrument cluster/console/radar detector project this morning (sans new bulbs in the instrument cluster).
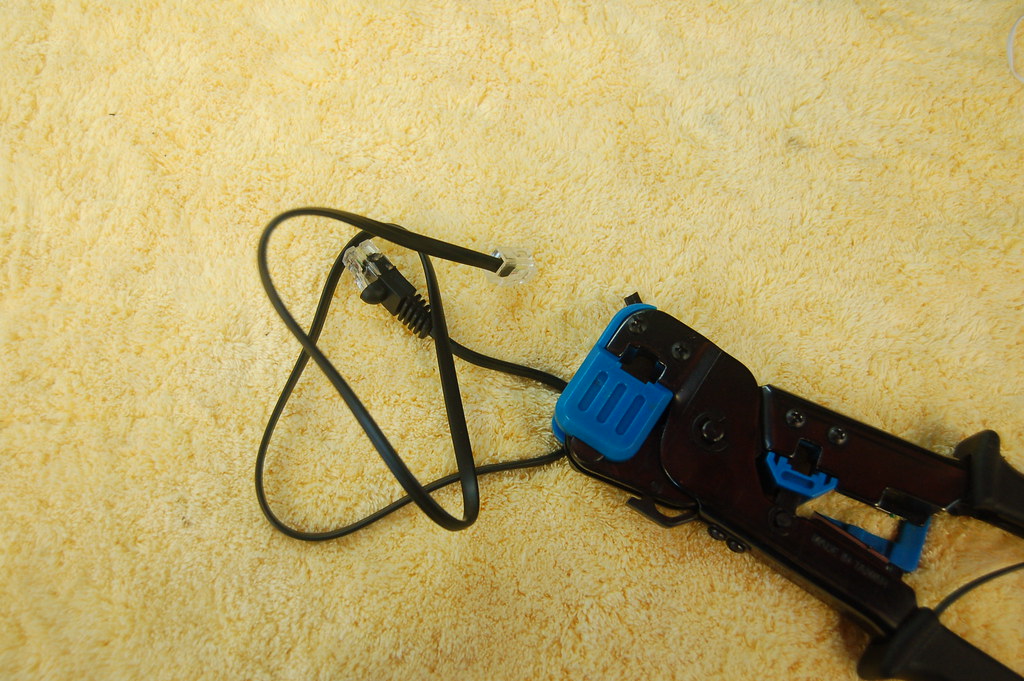
First, the pics I took last night made it clear the gray RJ11 wire I built for the V1 remote display looked like crap. So I hacked the one that came with the V1 to be shorter.
I made the bracket smaller so it was not visible at all too. Here's how the display looks installed.
Cluster back in. Everything works except the one burned out bulb for the fog light on indicator.
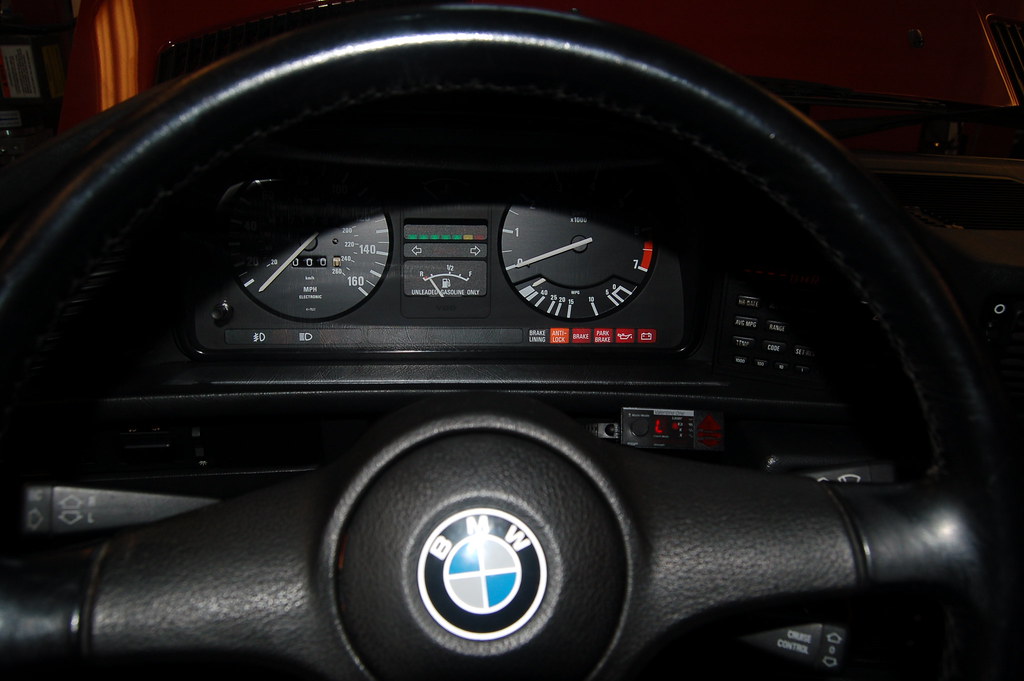
Makes me happy to see these lit up.
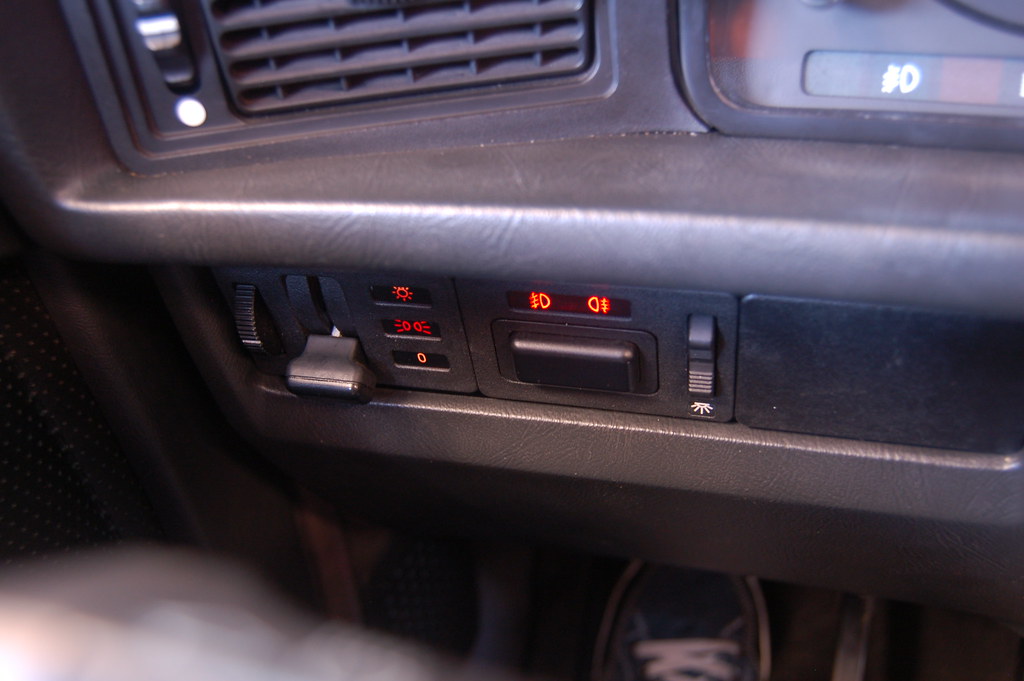
All done!
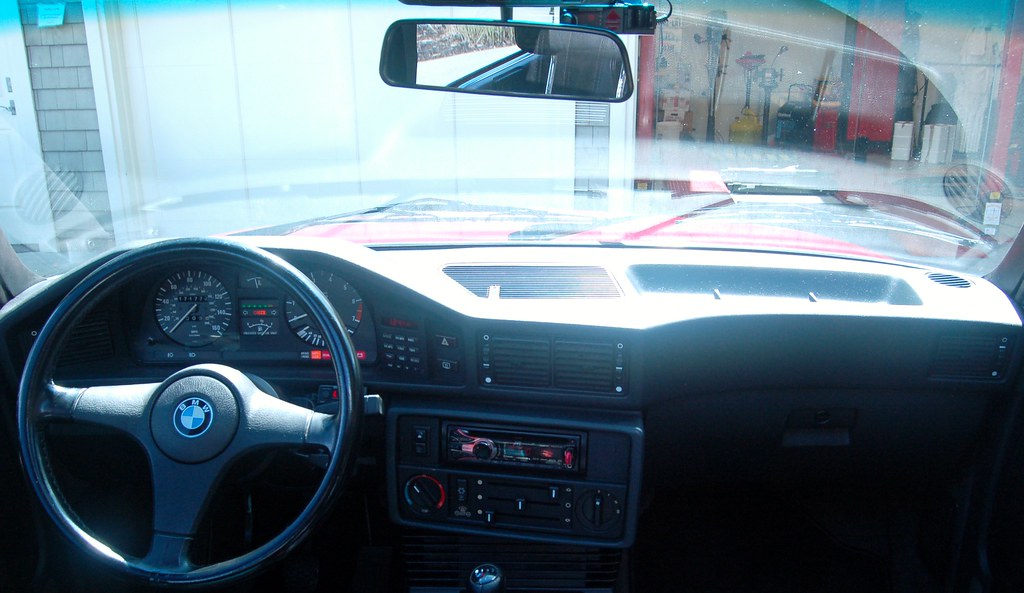
First, the pics I took last night made it clear the gray RJ11 wire I built for the V1 remote display looked like crap. So I hacked the one that came with the V1 to be shorter.

I made the bracket smaller so it was not visible at all too. Here's how the display looks installed.

Cluster back in. Everything works except the one burned out bulb for the fog light on indicator.

Makes me happy to see these lit up.

All done!

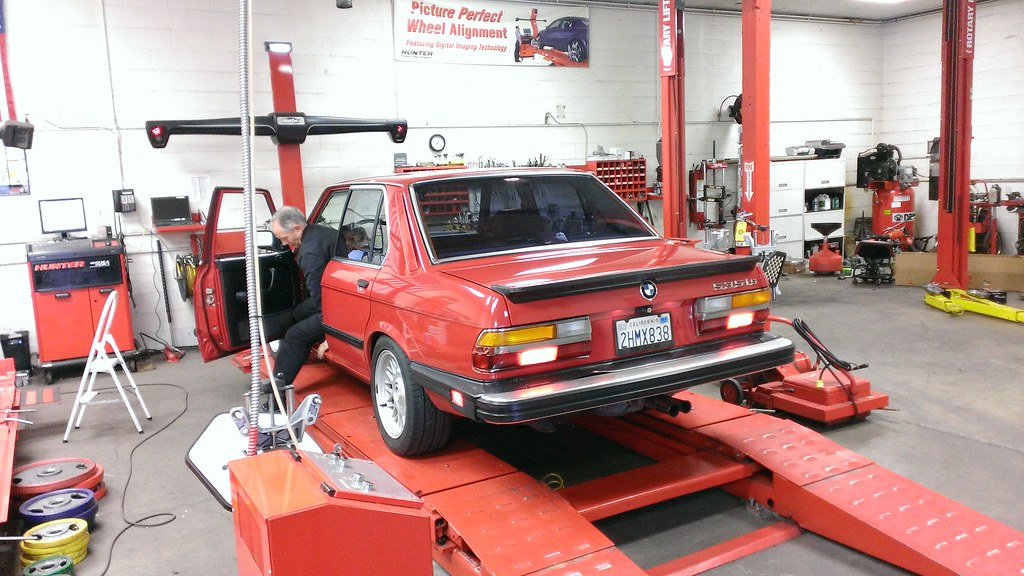
Took care of two things this morning. First, I dropped by my favorite suspension/wheel/tire guy, Byron at Tru-Line Seattle (in Bellevue) to have him do an inspection and advise me on my planned suspension refresh/upgrade. Byron is amazing. I've gone to him for years and won't let anyone else touch my 911. Great attention to detail.
He looked everything over, said he was super impressed with the car, and recommended the following:
I then went by the BMW dealer for some parts. They had all the instrument bulbs I needed, the diagnostics port cover, and a new brake wear sensor in stock. The replacement headlight/foglight switch bracket should be here Wednesday.
I needed a new brake wear sensor, because one of the ones in front is apparently too short for the 740iL brakes and is currently not connected (according to the PO... I haven't taken the wheels off yet to look myself). The one in this pic is from a 740iL and should be long enough. If not, I'll just modify the existing one and return this one.
While I already have some strong opinions, I'll happily take other's thoughts on what parts I should buy, and where I should buy them for the following:
He looked everything over, said he was super impressed with the car, and recommended the following:

- REPLACE FRONT TIE ROD ASSEMBLIES
- ADJUST THE STEERING GEAR SECTOR BEARINGS.
- INSTALL NEW END LINKS IF DESIRED, THEY ARE PERFORMING WELL BUT HAVE THE GREASE BOOT ISSUE.
- REPLACE REAR SUSPENSION SUB-FRAME MOUNT BUSHINGS, DIFFERENTIAL MOUNT AND WHILE DOING THESE ITEMS INSTALL A CAMBER/TOE CORRECTION KIT AS WELL.
- INSTALL NEW FRONT AND REAR STRUTS, COILS AND FRONT UPPER STRUT MOUNTS, IDEALLY WITH A FULLY ADJUSTABLE UNIT.
- NEW TIRES AND WHEELS AS YOU HAVE PLANNED
- FULL FOUR WAY ALIGNMENT
I then went by the BMW dealer for some parts. They had all the instrument bulbs I needed, the diagnostics port cover, and a new brake wear sensor in stock. The replacement headlight/foglight switch bracket should be here Wednesday.

I needed a new brake wear sensor, because one of the ones in front is apparently too short for the 740iL brakes and is currently not connected (according to the PO... I haven't taken the wheels off yet to look myself). The one in this pic is from a 740iL and should be long enough. If not, I'll just modify the existing one and return this one.
While I already have some strong opinions, I'll happily take other's thoughts on what parts I should buy, and where I should buy them for the following:
- Lowering springs. I don't want anything stiff, just lower. H&R or Eibachs.
- Front tie-rod assemblies
- Steering gear sector bearings
- End links (or just the grease boots)
- Rear sub-frame mount bushings
- diff mount
- Camber/toe correction kit
- Front upper strut mounts, fully adjustable
- Front strut tower brace (used is fine for this).
Suspension parts inbound:
Also, inbound from @alpinass:
Also not yet decided on tires. Need something with good wet performance given where I live. Loved the Vredestien Sessanta's I had on my C63 (ooh, how I miss THAT car).

- Powerflex Rear Subframe Bushings (via Pelican)
- Idler Arm Bushings (via Pelican)
- End Links (via Pelican)
- Bilstein Sport / H&R Spring Package (via Turner Motorsports)
- Tie-rods (via Turner Motorsports)
- K-MAC Stage 1 Street front strut camber plates/mounts (via Turner Motorsports)
- K-MAC Stage 1 Street rear camber and toe kit (via Turner Motorsports)
- Diff mount (via www.rmeuropean.com)
Also, inbound from @alpinass:
- Style 32s with OEM finish 17x8.
- Shadowline trim kit
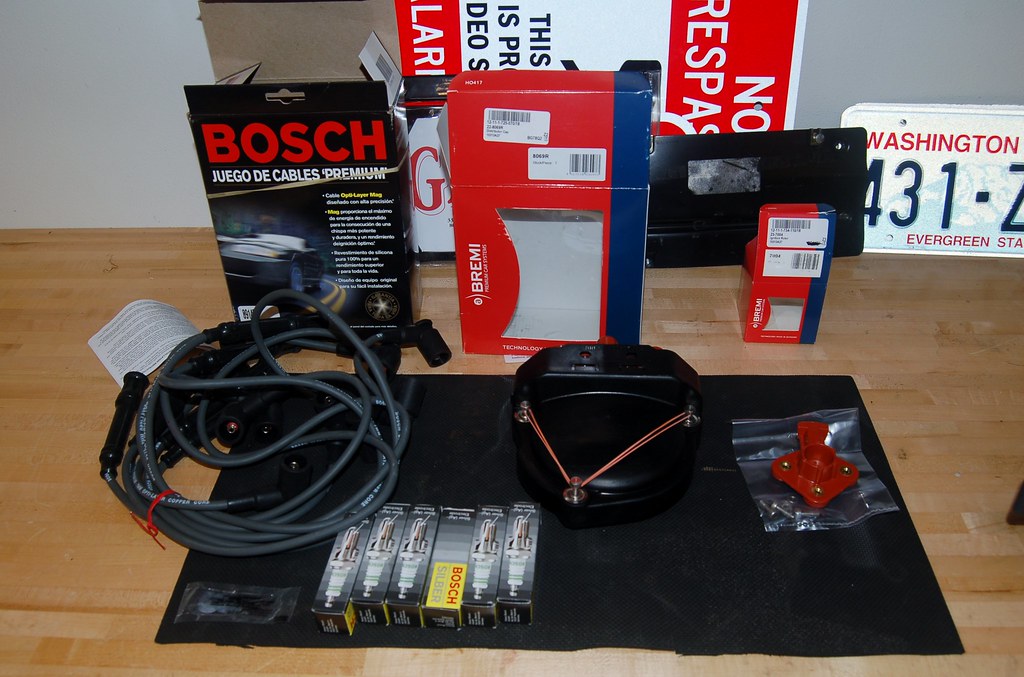
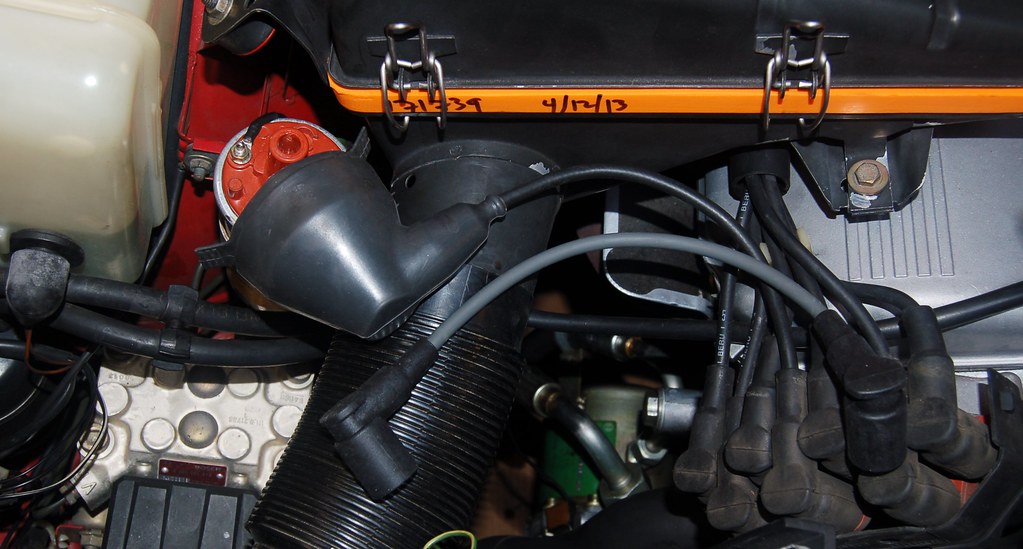
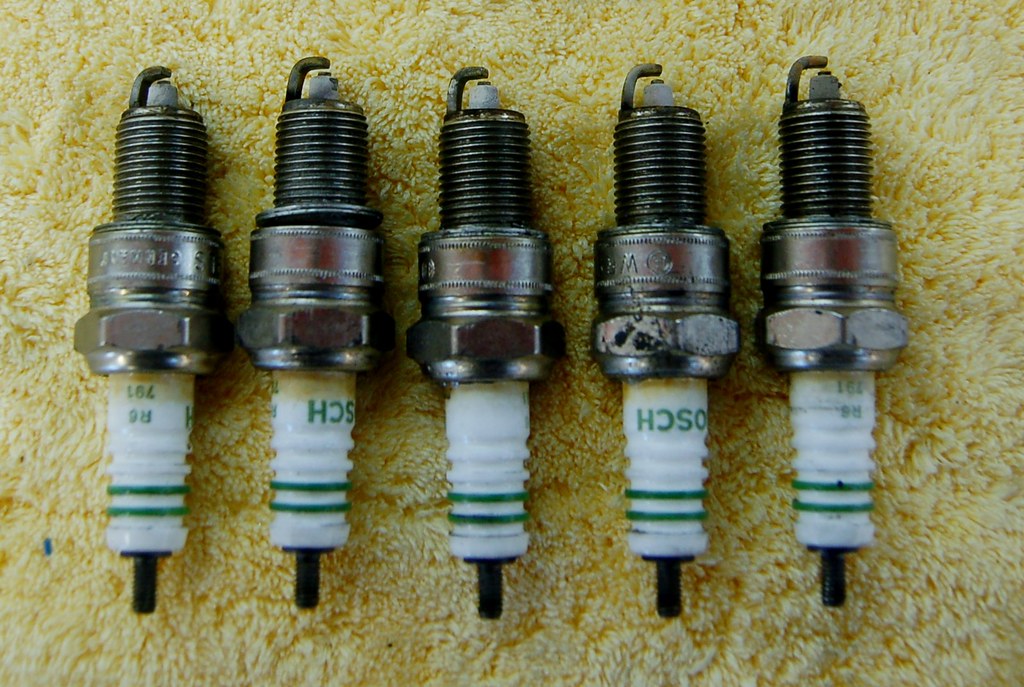
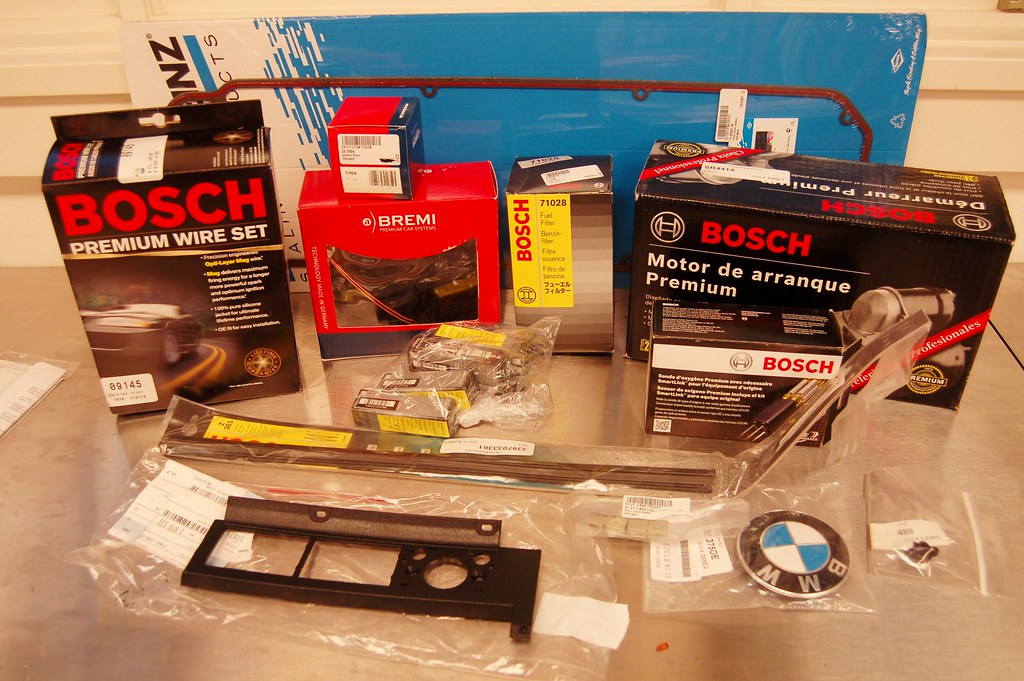
- New plugs
- New cap/rotor
- New plug wires
- New Ox sensor
- New fuel filter
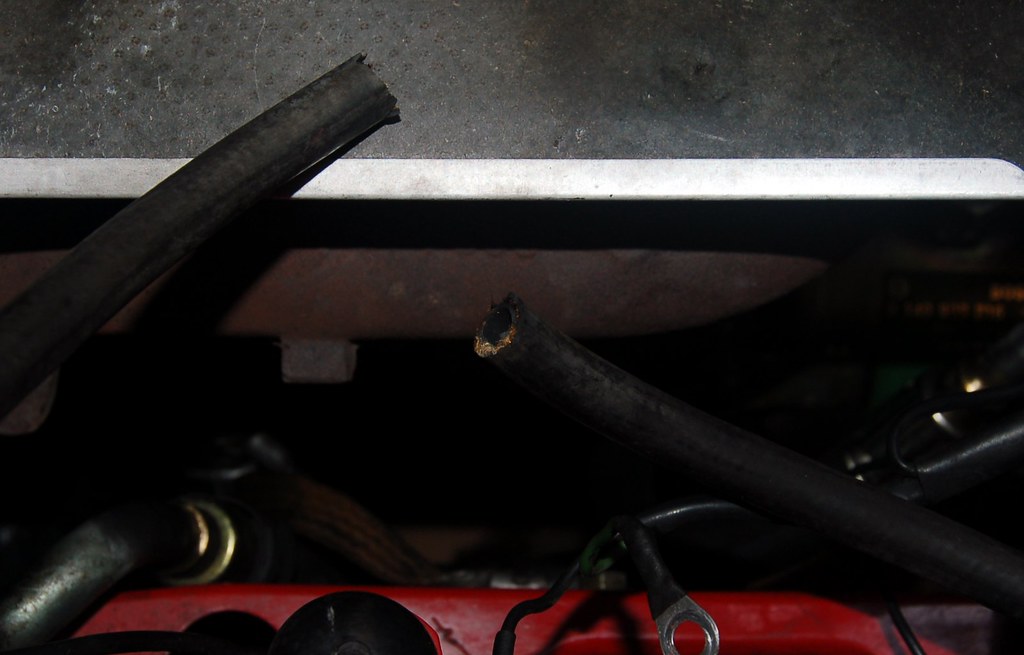
- Valve cover gasket
- M30B35 Starter (dreading this one, given what I've read)
Also not yet decided on tires. Need something with good wet performance given where I live. Loved the Vredestien Sessanta's I had on my C63 (ooh, how I miss THAT car).

I couldn't figure out why I could never get hot air to come out of the dash vents. It was hot from the defroster and foot wells. I thought to myself "That can't be right. Who would design a car that couldn't blow hot air on your hands? Something must be broken."
I found this in another thread with search (this forum is awesome!).

I guess the answer is BMW. What. The. Frak?
I found this in another thread with search (this forum is awesome!).

I guess the answer is BMW. What. The. Frak?
Cool air on the face keeps the driver alert and no cup holders keeps both hands on the wheel.cek wrote:I couldn't figure out why I could never get hot air to come out of the dash vents. It was hot from the defroster and foot wells. I thought to myself "That can't be right. Who would design a car that couldn't blow hot air on your hands? Something must be broken."
I found this in another thread with search (this forum is awesome!).
I guess the answer is BMW. What. The. Frak?
Ultimate driving machine.
Vlad has a cup holder. Neener.leadphut wrote:Cool air on the face keeps the driver alert and no cup holders keeps both hands on the wheel.cek wrote:I couldn't figure out why I could never get hot air to come out of the dash vents. It was hot from the defroster and foot wells. I thought to myself "That can't be right. Who would design a car that couldn't blow hot air on your hands? Something must be broken."
I found this in another thread with search (this forum is awesome!).
I guess the answer is BMW. What. The. Frak?
Ultimate driving machine.
A pile of goodies showed up today.
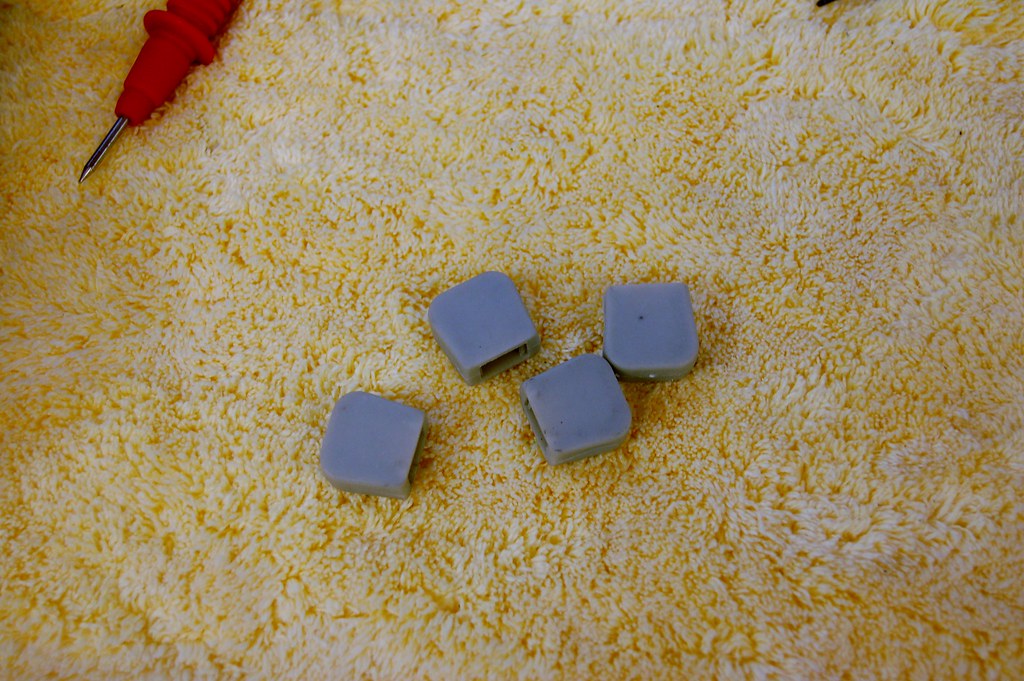
Instead of diving into the real work, I did some easy stuff. New door latch buffers (left rear door was squeaking while driving).
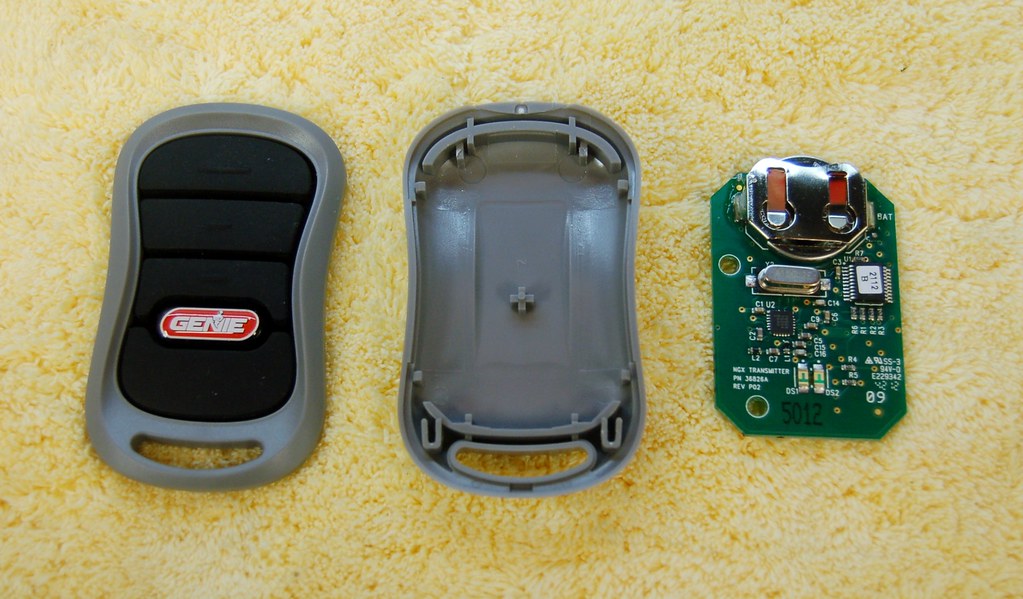
Found a keyfob door opener in a drawer and decided to hard-mount it. Usingthis threadto ask questions and show.
Installed the replacement headlight/foglight bracket too.

Instead of diving into the real work, I did some easy stuff. New door latch buffers (left rear door was squeaking while driving).

Found a keyfob door opener in a drawer and decided to hard-mount it. Usingthis threadto ask questions and show.

Installed the replacement headlight/foglight bracket too.


