Project evil e30: m30 build up
Posted: Apr 07, 2006 11:24 AM
My recent decision to swap a 85' m30 into my previously m10 turbo equppied e30 has started taking shape. After picking up the m30 2 weeks ago I have been gathering parts and info as to what I should rebuild to make this motor hold up to 15-20 psi from a HX45W Holset turbo. Hopefully reaching my 300-400 hp. Come to find out, not much.
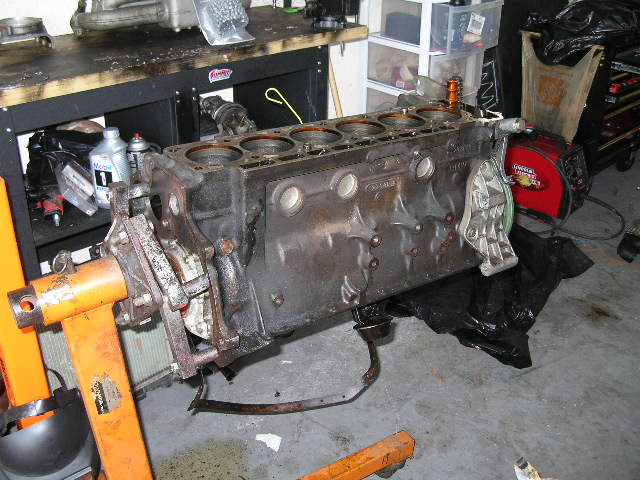
The rods, pistons, and crank are all forged. 8:1 compression and all around solid as a rock. So I have decided to do a stock bottom rebuild and just use ARP head studs and a MLS head gasket.
The head was rebuilt buy the previous owner with bigger valve, 288 Shrick cam, and opened up intake ports. So no need to mess with that.
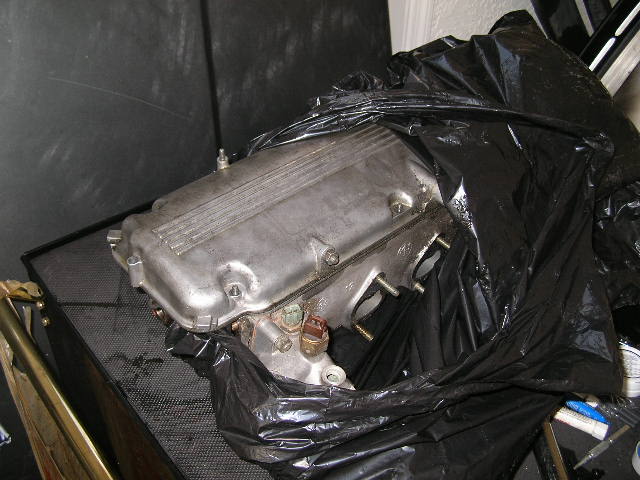
After picking up the engine and disassembling it I found all the internals to be in excellent specs. Only thing missing was a good crosshatch on the piston walls. Which concurs with the PO's assement as to why the motor was using too much oil (See previous thread). So I needed to have the cylinders honed.
Being the DIYer that I am I decided to read up on the process and ask a few questions around here (thanks guys). I found that a Flex hone aka. dingleberry or grape hone was the best way to do it. So I bought a new one off ebay for $40 (the machine shop wanted $75 plus I had to pull the crank out). Here's a play by play:
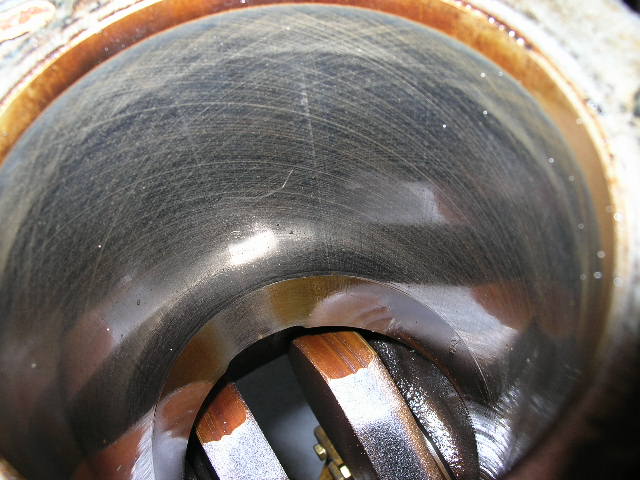
Still a pattern on the original cross hatch but not texture to it:
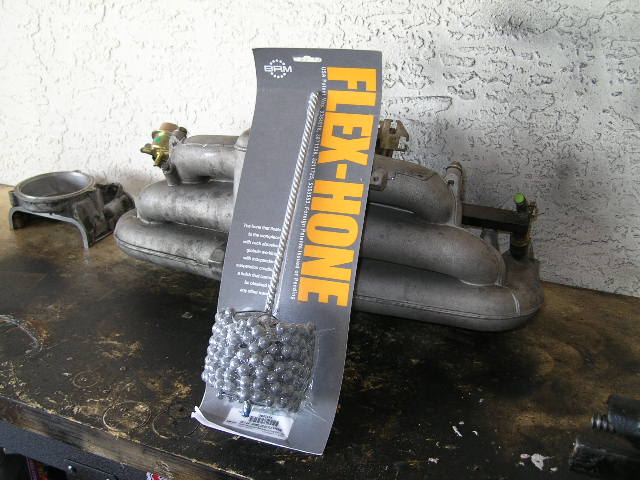
95mm (3 3/4") 220 grit Flex hone:
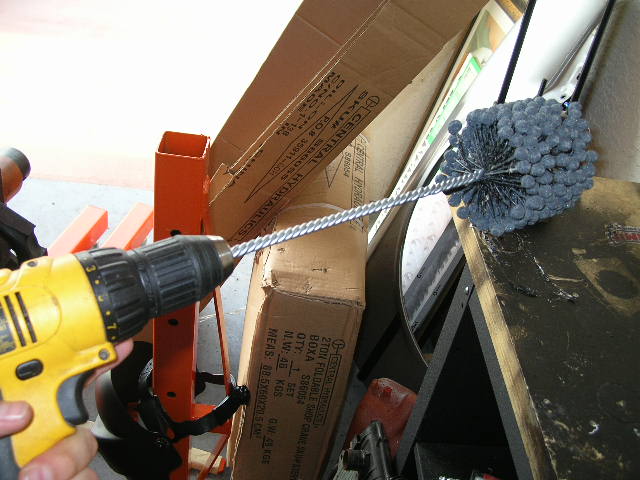
Hone on drill:
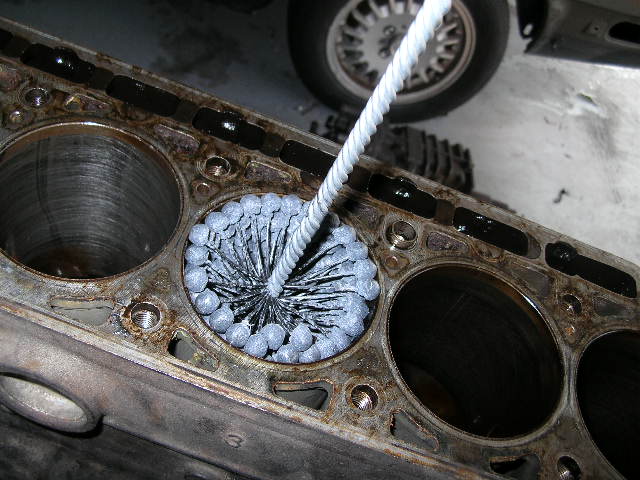
The advice give to me was insert the hone in the cylinder and then make three pass throught the cylinder. I also cut out a piece of card board to lay down in the cylinder bottom to protect the crank. Worked alot better than the garbage bag I used on the first cylinder, lol.
I used standard motor oil to lubricate the cylinders. Some say use ATF, some motor oil. Never use WD-40 because it has a cleaning agent that can harm your cylinder walls.
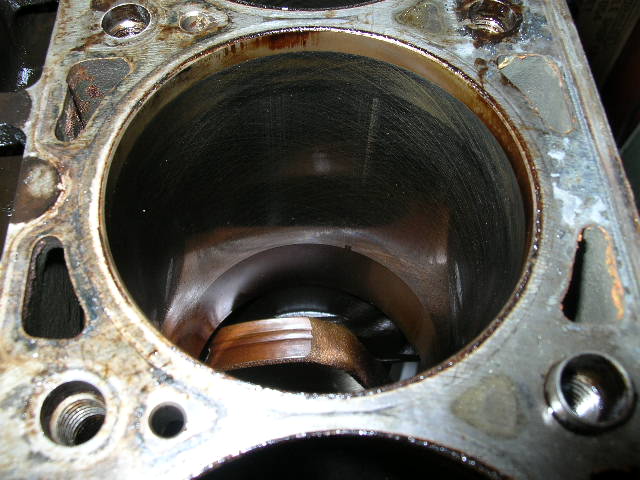
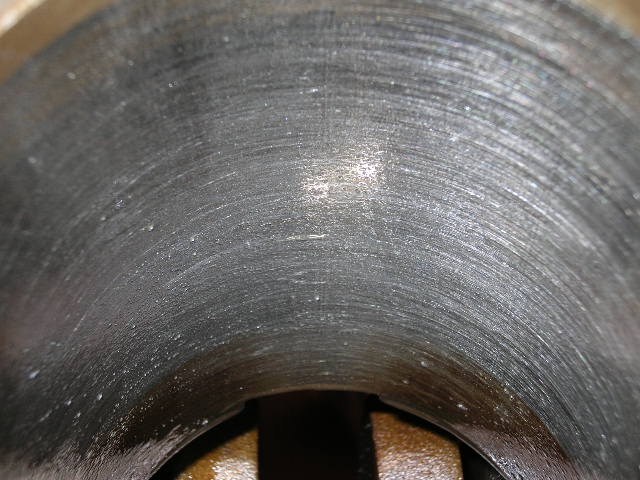
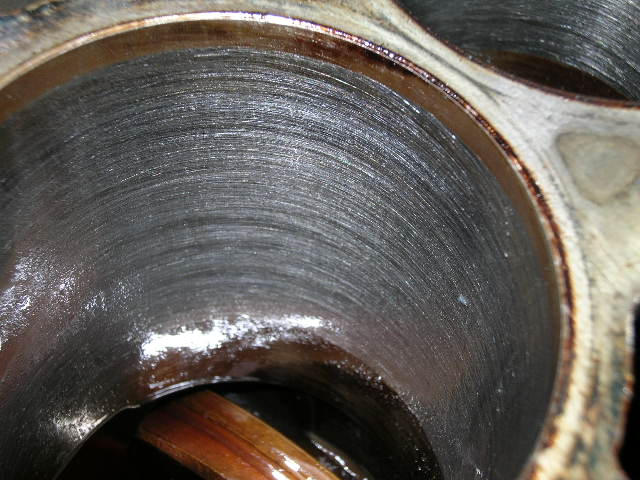
After 3 passes on each cylinder this was the final product. Not a perfect 60 degree hatch like recommend but it should do fine:
Then came a major was down with soft soap and water. Some of the honing stone had broken apart and left grit in the cyndlers and down on the crank. Took about 1hr to clean and dry. Then I relubed the motor making sure the no parts that would rust.
Now I'm waiting for my new connecting rod bearings, piston rings, head studs, and gaskets.
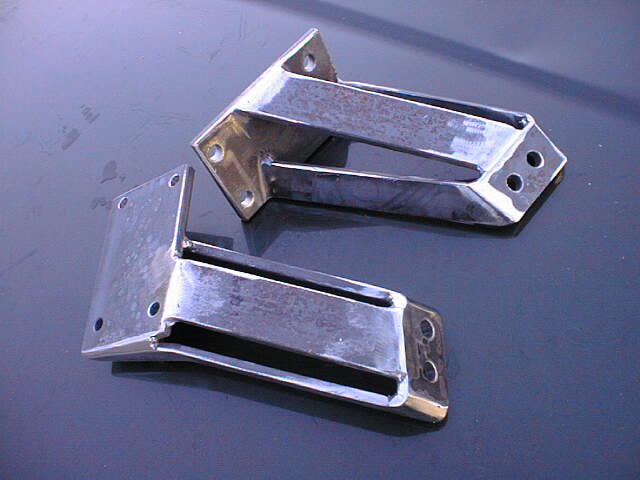
I also order the m30-e30 motor mounts from e30.de. Not the cheapest part but will most likely save me some fitting and aligning troubles in the future.

The rods, pistons, and crank are all forged. 8:1 compression and all around solid as a rock. So I have decided to do a stock bottom rebuild and just use ARP head studs and a MLS head gasket.
The head was rebuilt buy the previous owner with bigger valve, 288 Shrick cam, and opened up intake ports. So no need to mess with that.

After picking up the engine and disassembling it I found all the internals to be in excellent specs. Only thing missing was a good crosshatch on the piston walls. Which concurs with the PO's assement as to why the motor was using too much oil (See previous thread). So I needed to have the cylinders honed.
Being the DIYer that I am I decided to read up on the process and ask a few questions around here (thanks guys). I found that a Flex hone aka. dingleberry or grape hone was the best way to do it. So I bought a new one off ebay for $40 (the machine shop wanted $75 plus I had to pull the crank out). Here's a play by play:
Still a pattern on the original cross hatch but not texture to it:


95mm (3 3/4") 220 grit Flex hone:

Hone on drill:

The advice give to me was insert the hone in the cylinder and then make three pass throught the cylinder. I also cut out a piece of card board to lay down in the cylinder bottom to protect the crank. Worked alot better than the garbage bag I used on the first cylinder, lol.
I used standard motor oil to lubricate the cylinders. Some say use ATF, some motor oil. Never use WD-40 because it has a cleaning agent that can harm your cylinder walls.

After 3 passes on each cylinder this was the final product. Not a perfect 60 degree hatch like recommend but it should do fine:


Then came a major was down with soft soap and water. Some of the honing stone had broken apart and left grit in the cyndlers and down on the crank. Took about 1hr to clean and dry. Then I relubed the motor making sure the no parts that would rust.
Now I'm waiting for my new connecting rod bearings, piston rings, head studs, and gaskets.
I also order the m30-e30 motor mounts from e30.de. Not the cheapest part but will most likely save me some fitting and aligning troubles in the future.

