My 535is Turbo Buildup Thread! - update 11/26//09

Discussion pertaining to positive pressure E28s.
Post Reply
Brad D.
Beamter
Beamter
Posts: 10735
Joined: Feb 12, 2006 12:00 PM
Location: San Antonio, TX
Contact:

My 535is Turbo Buildup Thread! - update 11/26//09

Post by Brad D. »

Well, I decided years ago that I would own a turbo BMW. I never quite wanted to buy a kit ( partly due to the initial cost, partly because I love to do it myself) so I set out on making my own setup.
The platform is my '87 535is which I have owned since '99. I originally bought a bunch of 745i parts but ended up selling them to help fund my turbo 240sx project. About 2 years ago I installed a m30b35 and all of the associated wiring. Unfortunately Motronic 1.3 does not take well to being turboed. I would later find a solution for this.
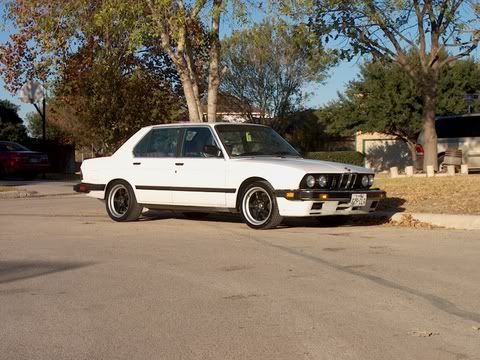
Image
Here's another pic of the car (11/'08 ).
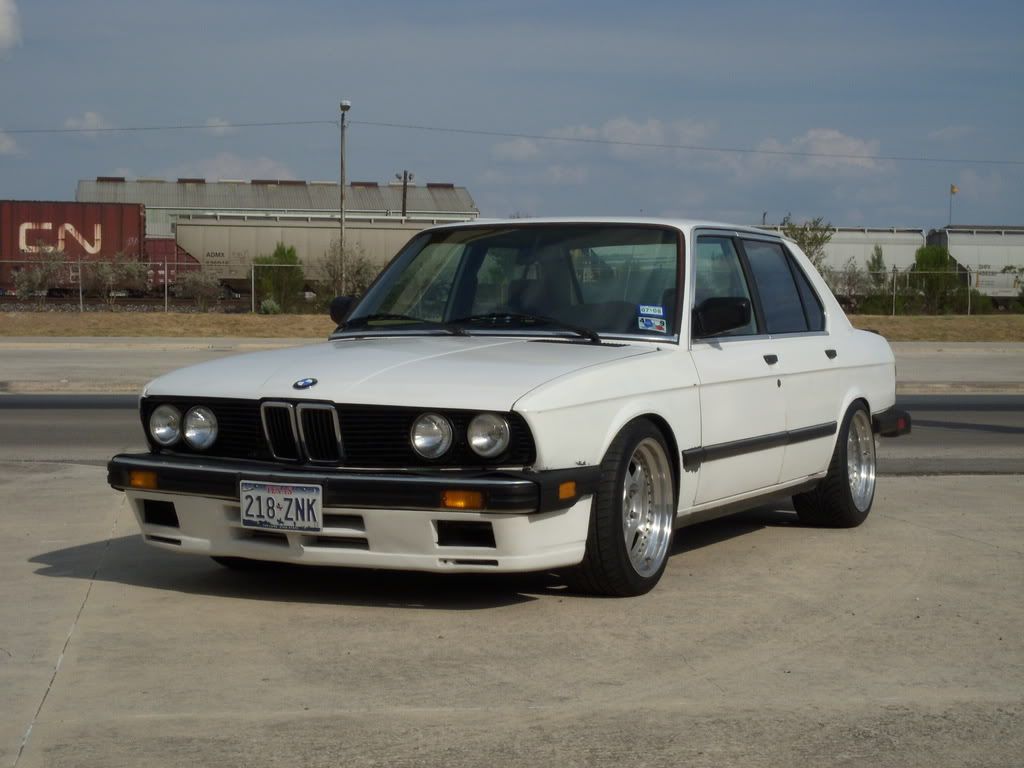
Image
With new Spax suspension 12/'08
Image

While all of my fabrication isn't quite complete I wanted to start a buildup thread to outline my work so far and add to it as I go.
I have boxes of parts and pretty much everything I need to make it happen has been purchased. Everything else I have made.
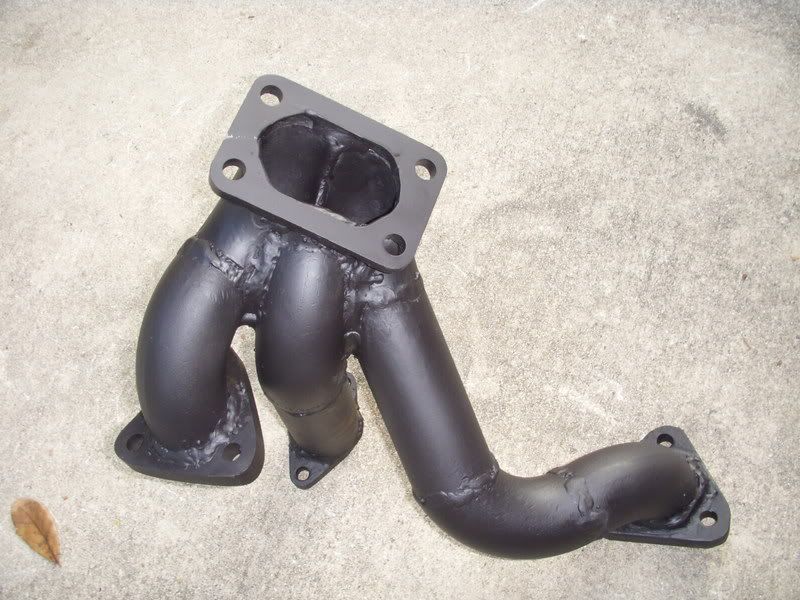
I fabricated my own manifold adapter out of weld-els.
Image
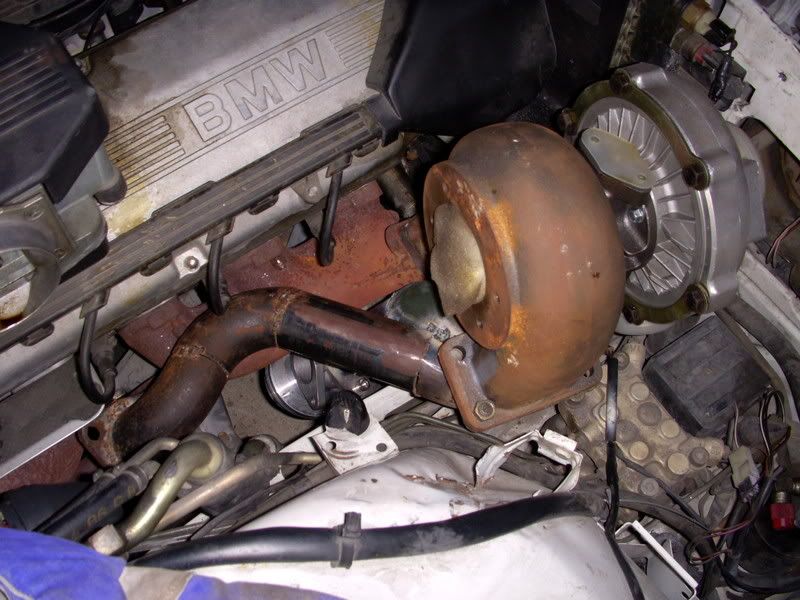
The center tube is for my 38mm Tial WG. The stock manifold will be flipped and have been gasket matched to the head. You can sorta see the WG mounted during mockup.
Image

Image

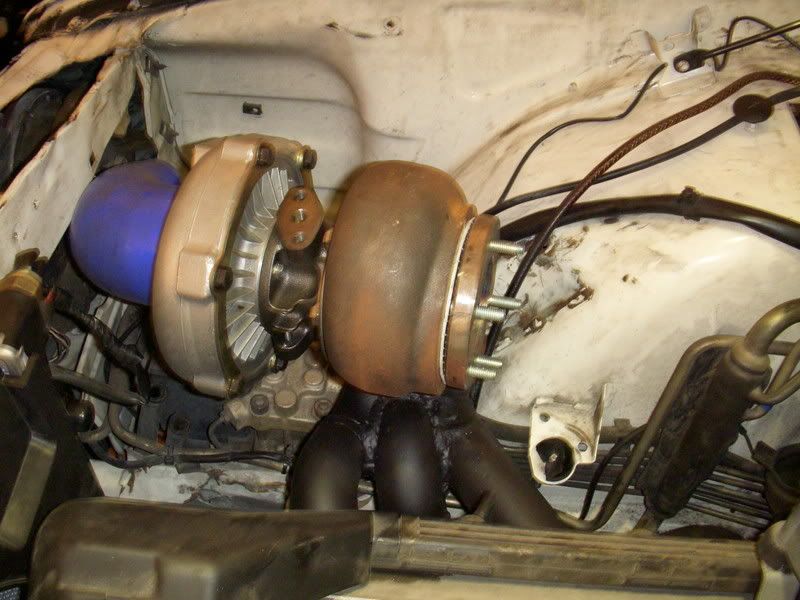
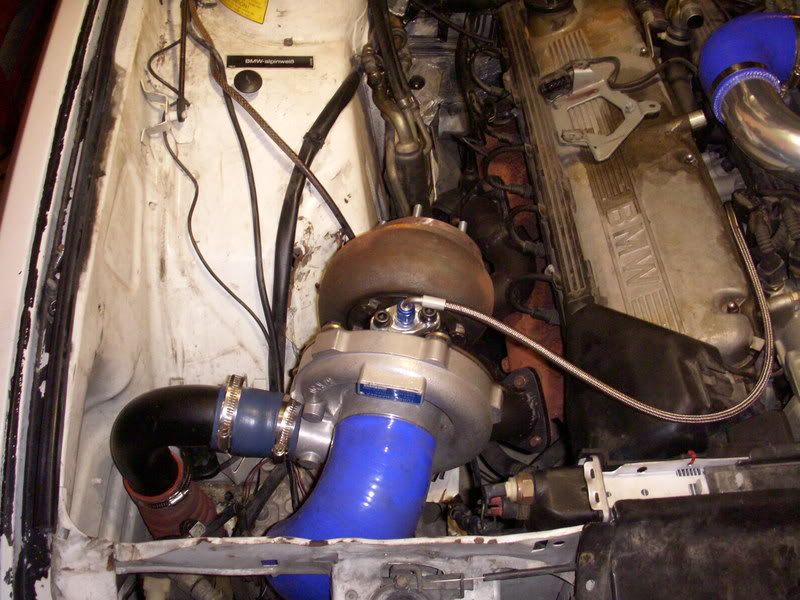
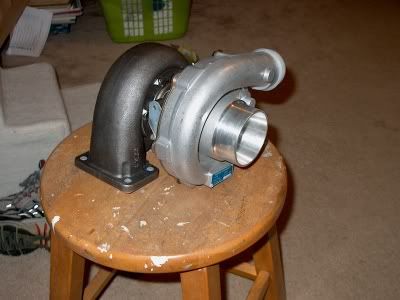
Turbo has a GT40 compressor wheel in a .50AR housing. Turbine is a T4 P-Trim wheel in a .84AR Euro T4 housing (has a T3 footprint).
Image

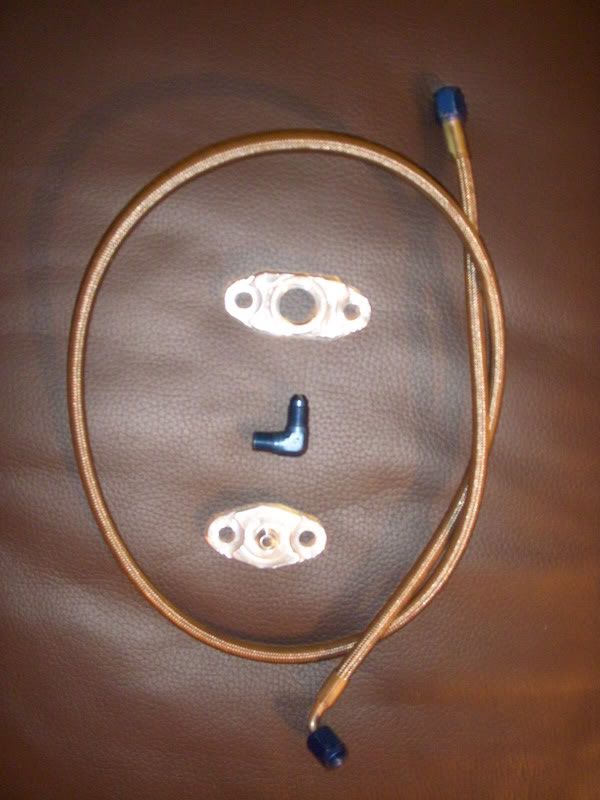
Function 7 oil flanges and -4AN oil feed line.
Image

Installed
Image

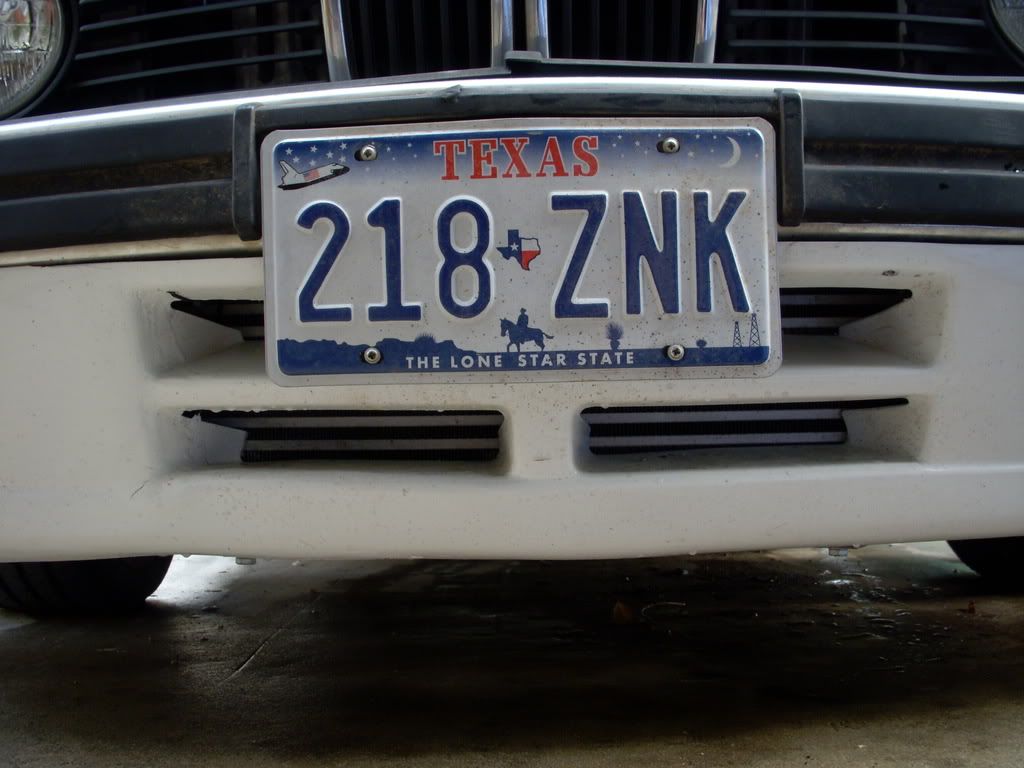
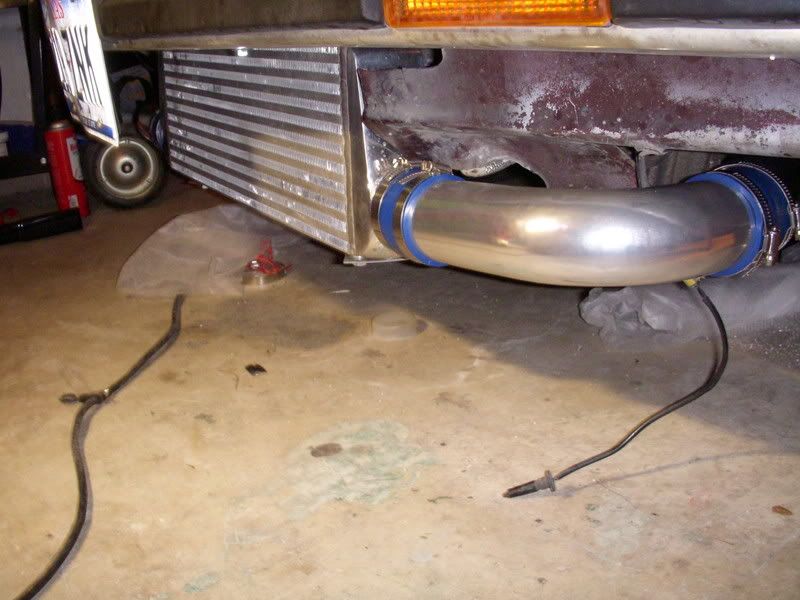
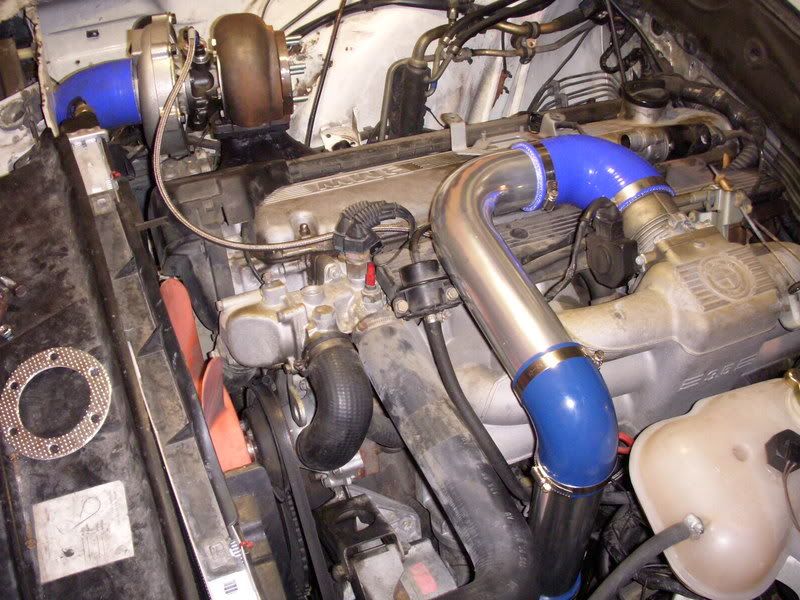
I decided that I wanted to run a front mount IC. While it is possible and fits very nicely behind the factory IS airdam, major valance trimming is required.
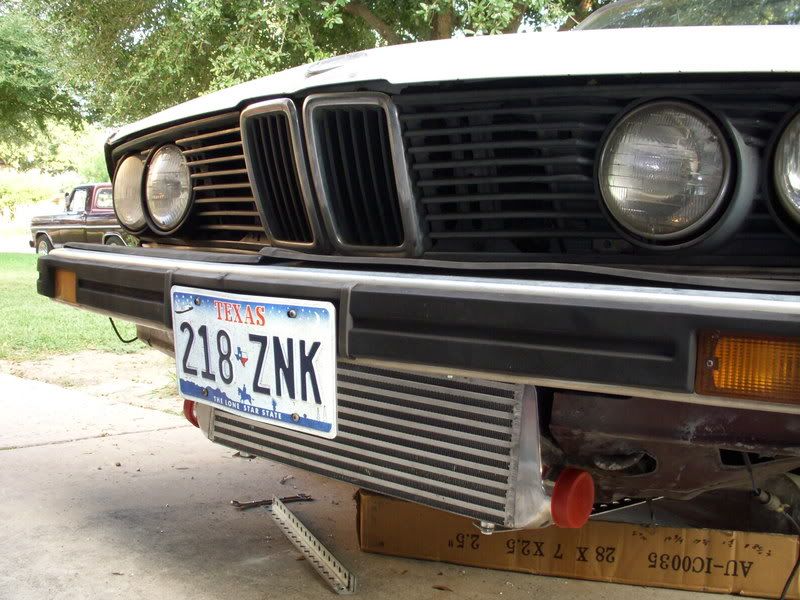
Image

Image

IC piping installed.
Image
Image
Image

Thats where I am currently. I have a box full of 3" mandrel bends to build my downpipe and a new exhaust with a Magnaflow muffler and cat which shoul show up this week.

As for other items that are of importance I will be running 42lb/hr injectors and have already finished building my MS2 and a Glens Garage idle board. I still need to finish my Motronic adapter harness but that shouldn't take too long to finish. While its got a ways to go I am past the point of no return and am confident that it will be a success and look professional when it is completed. I would love to hear everyones comments and feedback.
Last edited by Brad D. on Nov 28, 2009 12:05 AM, edited 9 times in total.
chrism
Posts: 1411
Joined: Feb 12, 2006 12:00 PM
Location: Ct

Post by chrism »

Cobbled together turbo cars ROCK! :alright:

Looks pretty good. Good luck!
clevertd
Posts: 70
Joined: Dec 29, 2006 11:54 AM
Location: Raleigh, NC

Post by clevertd »

Looks good so far, good luck and keep us updated. Threads like these give me hope for my E34.
skip535i
Posts: 5186
Joined: Oct 26, 2006 2:27 PM
Location: Lynchburg, VA

Post by skip535i »

AWESOME CAR!!

One question though...if you had that engine comepletely OUT of the car before the swap, why not clean it a little???

Good luck man!
SilverBullet
Posts: 120
Joined: Feb 12, 2006 12:00 PM
Location: brisbane, australia

Post by SilverBullet »

looking good mate!
How did the flipping the manifolds go? Did they line up alright or did u have to massage the ports, elongate the bolt holes a bit? That is a great idea congrates!
good luck with the rest of the build, keep us posted :)
T_C_D
Posts: 7733
Joined: May 27, 2009 11:42 AM
Location: Twin Cities
Contact:

Post by T_C_D »

Great project! I love to see this kind of project. Over 6 years ago I was attempting to do the same with my 535is. There was almost no useful information available on the internet and hardly anyone that even had a turbo e28. Those that had were not sharing information (except for RussC).

Currently there is a wealth of information (mostly good), that makes this kind of project more achievable. As a DIYer, I appreciate the shared knowledge of this board.

Good luck.
rundatrack
Posts: 454
Joined: Feb 12, 2006 12:00 PM

Post by rundatrack »

Very cool

Question....dont take offense but I wanted to know if it would be better for performance to cut the intake manifold on the other side so that you dont have those extra bends going to the throttle body?

Just asking

Regards
gM
turbodan
Posts: 9207
Joined: Jan 09, 2007 10:19 PM

Post by turbodan »

I doubt the bends have any real effect on power.

Ideally, you would use smaller diameter tubing to keep the intake air velocity up. You dont need anything much larger than the diameter of the turbo outlet.
Brad D.
Beamter
Beamter
Posts: 10735
Joined: Feb 12, 2006 12:00 PM
Location: San Antonio, TX
Contact:

Post by Brad D. »

Thanks for all of the complements guys. This board has a wealth of knowledge, especially regarding forced induction and has proved to be an invaluable resource.
One question though...if you had that engine comepletely OUT of the car before the swap, why not clean it a little???
Well, the engine and engine bay were clean when I swapped it in almost two years ago. I'll clean it all up when Im done mocking everything up.
How did the flipping the manifolds go? Did they line up alright or did u have to massage the ports, elongate the bolt holes a bit? That is a great idea congrates!
It seems that it works out great. I gasket matched the manifolds ports but overall it works out suprisingly well. They are a direct fit if flipped - no bolt hole elongation of mods required. Maybe not the most elegant solution, but I still think it turned out ok and is very functional, strong and should work well. Best part is cost about $50 for all of the weld els and the turbo flange. I made the other three bolt manifold flanges.
Question....dont take offense but I wanted to know if it would be better for performance to cut the intake manifold on the other side so that you dont have those extra bends going to the throttle body?
Like turbodan said, I don't think there would be all that much to be gained by changing the piping. I have entertained the idea of machining the "back" side of the intake mani to accept the throttlebody for a straighter shot, but thats for another day. I just want to get everything up and running first.
clevertd
Posts: 70
Joined: Dec 29, 2006 11:54 AM
Location: Raleigh, NC

Post by clevertd »

Big Bronze Rim wrote:
It seems that it works out great. I gasket matched the manifolds ports but overall it works out suprisingly well. They are a direct fit if flipped - no bolt hole elongation of mods required. Maybe not the most elegant solution, but I still think it turned out ok and is very functional, strong and should work well. Best part is cost about $50 for all of the weld els and the turbo flange. I made the other three bolt manifold flanges.

666fab did something similar with the M20, didn't flip the manifolds though.

Image
philip1
Posts: 733
Joined: Jun 02, 2007 5:21 PM
Location: Charlotte NC

Post by philip1 »

DAMNIT you are making me want to break my promise to not turbo my 535 grrrrrr
chrism
Posts: 1411
Joined: Feb 12, 2006 12:00 PM
Location: Ct

Post by chrism »

Do it

Do it

Do it

Do it

Do it

Do it

Do it
philip1 wrote:DAMNIT you are making me want to break my promise to not turbo my 535 grrrrrr
philip1
Posts: 733
Joined: Jun 02, 2007 5:21 PM
Location: Charlotte NC

Post by philip1 »

I've already sized up where the intercooler will fit.....
Brad D.
Beamter
Beamter
Posts: 10735
Joined: Feb 12, 2006 12:00 PM
Location: San Antonio, TX
Contact:

My 535is Turbo Buildup Thread! - Update 10-6-07

Post by Brad D. »

Progress Update -
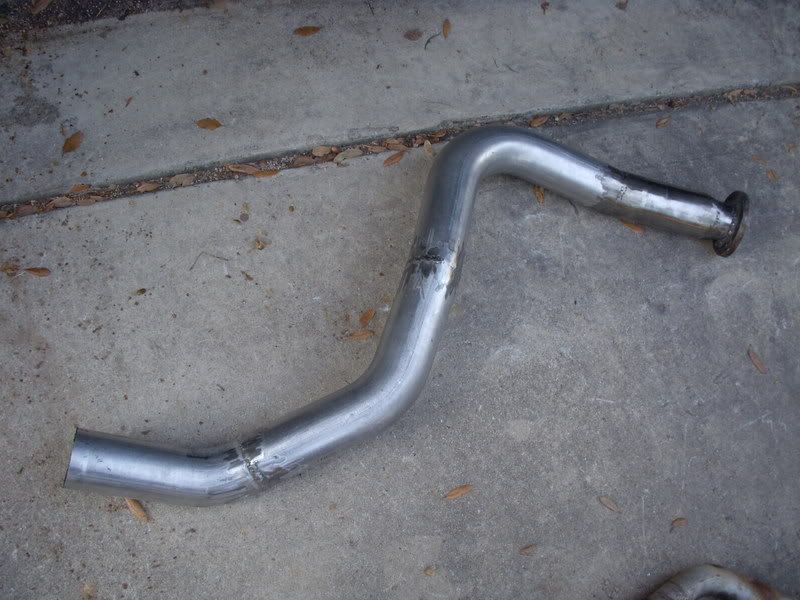
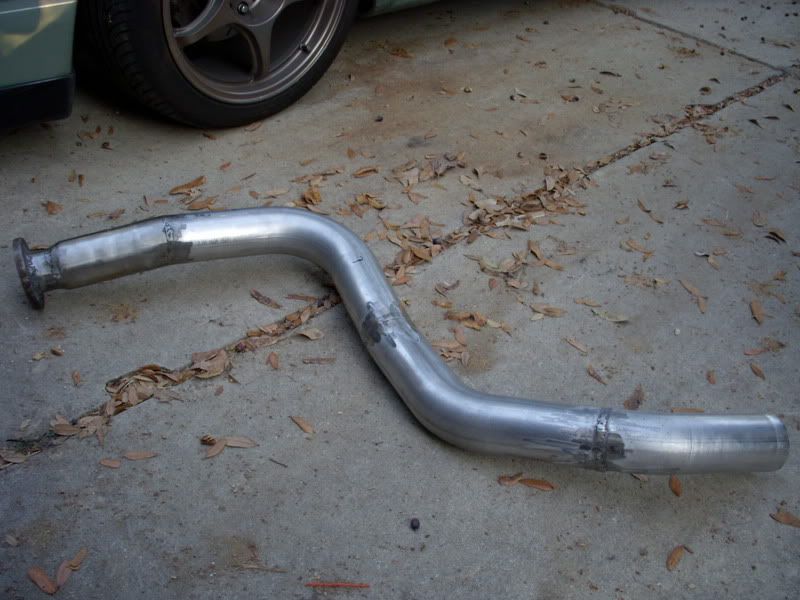
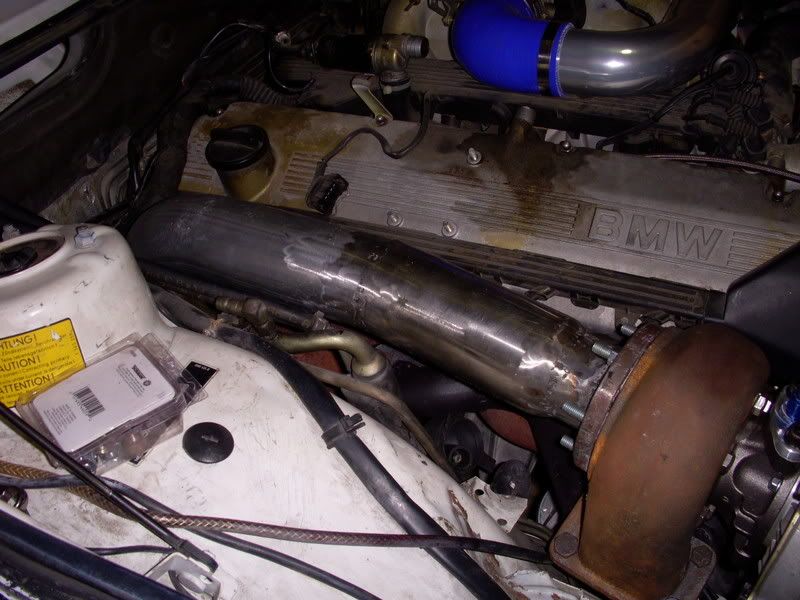
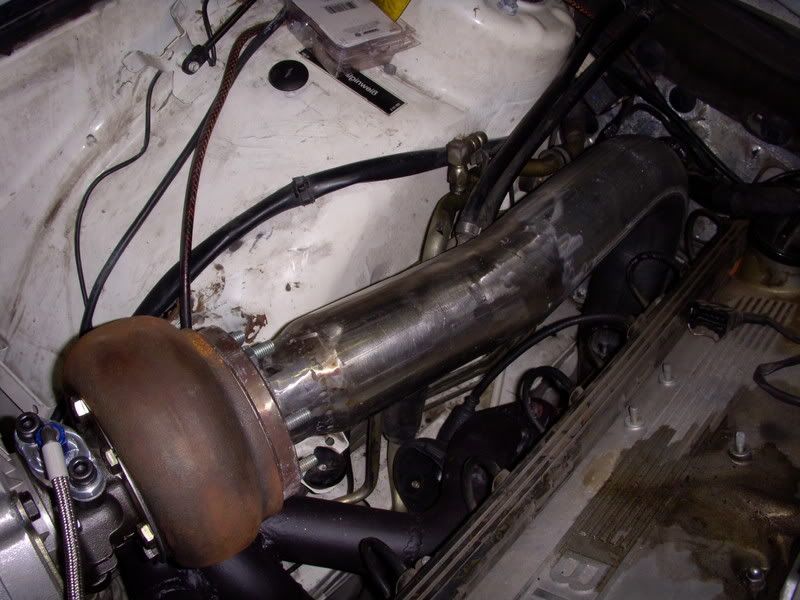
Had a little time today to begin working on the downpipe. Its 2.5" out of the turbo transitioning into 3" all the way back. I'm pretty proud of it. I still need to add the wastegate return but now that its where it is, that should be easy. Tomorrow I should finish it up back to the cat flange and get the wastegate dump plumbed in.
Image

Image

Image

Image

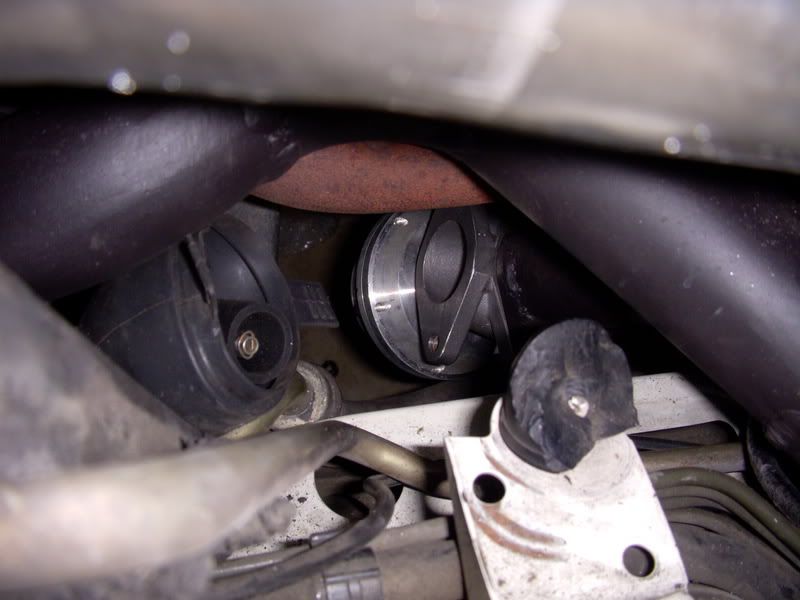
Here is how the wastegate mounts. The dump will be straight shot right into the downpipe (don't mind the coil wire).
Image
Rich Euro M5
Posts: 6098
Joined: Mar 10, 2006 6:20 AM
Location: Klein, Texas

Post by Rich Euro M5 »

Sometimes pictures can be deceiving, but it sure looks like your downpipe is extremely close to the A/C lines. Are you going to add a heatshield, or ditch the A/C ?Also, what about changing the spark plugs, looks like the rear plug could be a PITA.

"Inquiring minds want to know."

Rich
Brad D.
Beamter
Beamter
Posts: 10735
Joined: Feb 12, 2006 12:00 PM
Location: San Antonio, TX
Contact:

Post by Brad D. »

It is fairly close the the ac lines, maybe half an inch at the closest point. The downpipe will be wrapped as well as some thermal barrier sheething around the lines, I just havent installed it yet. I also have turbine blanket tha will be installed to keep underhood temps down. As for the rear plug, you cannot use the factory tool. I used a thin wall socket and a ratched and, while tricky (you can't back it all the way out with the ratchet still on the socket), it can be removed with the exhooassed in place . Its not perfect, but its still less comprimised for plug acess or a valve adjustment than an m20 with a 524td manifold and a big turbo.
chrism
Posts: 1411
Joined: Feb 12, 2006 12:00 PM
Location: Ct

Post by chrism »

How big is the outlet of the turbo? is it 2.5 or 3?
Kyle in NO
Posts: 17638
Joined: Feb 12, 2006 12:00 PM
Location: Nasty Orleans------> Batten-Rooehjch------>More Souther LA

Post by Kyle in NO »

You'd better bypass that AC line fuel cooler, those rubber hoses are gonna cook! Awesome buildup BTW!!!
Brad D.
Beamter
Beamter
Posts: 10735
Joined: Feb 12, 2006 12:00 PM
Location: San Antonio, TX
Contact:

Post by Brad D. »

chrism wrote:How big is the outlet of the turbo? is it 2.5 or 3?
The downpipe is 2.5" and it transitions into 3". The turbine exducer bore is just under 2.5". I wanted to do a conical transition as I have read this helps flow expansion exiting the turbine, but I didn't want to pay $30 for one cone transition so I just swaged some 3" pipe down to 2.5" in the bender.
Kyle in NO wrote: You'd better bypass that AC line fuel cooler, those rubber hoses are gonna cook! Awesome buildup BTW!!!
I think thats what im going to do, just bypass the cooler all together. It will clean things up and its one less thing to worry about.
turbodan
Posts: 9207
Joined: Jan 09, 2007 10:19 PM

Post by turbodan »

Big Bronze Rim wrote:Its not perfect, but its still less comprimised for plug acess or a valve adjustment than an m20 with a 524td manifold and a big turbo.
No shit. I did these things this afternoon. Big suck. :(
Brad D.
Beamter
Beamter
Posts: 10735
Joined: Feb 12, 2006 12:00 PM
Location: San Antonio, TX
Contact:

Post by Brad D. »

Well, I made more progress this weekend, but I didn't take any pics. I'll get around to getting some soon though as everything is coming together nicely. I got my turbo oil drain in the oil pan drilled and tapped. I got the wastegate dump plumbed into the downpipe. I also fabbed up an inlet pipe with a fitting for the bosch bypass valve I will be using. I also plumbed the IACV back into the IC piping so I can have idle control. Its down to all the little nitty gritty details now. I still need to drill my oil filter block for my oil feed, fab up my exhaust, heat wrap stuff, paint things, install MS and add a few wiring circuits. No sweat! 8)
Jimmie G
Posts: 452
Joined: Feb 12, 2006 12:00 PM

Post by Jimmie G »

Hey what part of SA do you live going to pass through on the way to tucson soon.

Jimmie
Brad D.
Beamter
Beamter
Posts: 10735
Joined: Feb 12, 2006 12:00 PM
Location: San Antonio, TX
Contact:

Post by Brad D. »

I live in north central SA near the airport. If you are passing through let me know so we can meet up.
bmwfan1957
Posts: 525
Joined: Feb 12, 2006 12:00 PM
Location: Meridian, ID

Post by bmwfan1957 »

just curious... how much are you looking at spending total doing this project yourself??? I would love nothing more than to be able to do a project like this... and i know it would save me money.. it's just i would have to learn how to weld first!! which right now i'm a little too busy for... haha
Last edited by bmwfan1957 on Oct 15, 2007 5:36 PM, edited 1 time in total.
Brad D.
Beamter
Beamter
Posts: 10735
Joined: Feb 12, 2006 12:00 PM
Location: San Antonio, TX
Contact:

Post by Brad D. »

Well, I've been keeping a loose record of what everything has cost and right now I've spent close to $1700. There are a few more incidentals that I will inevitably buy, but I would say that I will spend around $2k when its all said and done. Mind you some of the little stuff was cheap or free and I did all of my own fab work throughout the project.
Post Reply