

Replacement Windows
 |
|||||
Replacement Windows |
|||||
|
This page updated/revised September 18, 2010
(click this link to go to this update location. You may have to refresh your browser cache to see the update) Replacing old windows using the Anderson "Insert" product...
Comments on replacing the original window sashes
and window counter weights with Anderson 400 Series Woodwright Double-Hung Insert Replacement Windows,
along with removing 1960's vintage aluminum triple-track storm windows, to greatly improve the energy efficiency of these north
facing windows.
Why, after advocating old window
restoration, are you replacing these old windows with new ones?
After a lot of work reglazing and weather stripping these
single window pane sashes on the north side of the house, the non-insulated window sash weight pockets (cavities) are
simply incapable of dealing with strong winter weather coming from the north, as are the triple-track storm windows, in terms
of the amount of energy efficiency that they don't provide. Further, the aluminum triple track units installed
were an inexpensive, light weight system of flimsy construction with their epoxied corner joints, with several
broken on each frame and always a hassel to open and close, along with moving the window screen up or down. Having struggled
with this cold windows and wall cavity winter problem along with the difficult operation for the past 26 years, plus
heat and humidity seeping in during the summer, it was time to deal with it, involving a replacement window system. A system
that would work with as much of the original fabric as possible, not requiring any modification to the existing window
frames and trim... which this Anderson Insert system provided, as shown below.
The second floor south facing windows in the other bedroom, were replaced much earlier (1980's)
with Anderson double glazed windows, of a stock size, since 'custom' size Anderson Insert window systems was not a product
at the time. The original windows were simply cooked to death, by 58 years of south sun exposure and poor maintenance. They
could not be rebuilt. The new Andersons, because they were not the exact same size, required all new framing and exterior
and interior trim, which had to be created as the original pattern was no longer available. A very expensive installation,
compared to the cost of the current Anderson Insert system, used here as shown below, which I was able to install by myself,
completing the installation of two windows in one day, with the exception of painting, since all the applied sealant was still
curing.
Lastly, you might want to take a look at a short film
produced by Green Building Advisor.com about window air leakage and how to insure it isn't part of your window installation. Read the comments toward the end of the page, too.
 Original 2-over-2 (on the left) north facing bedroom windows, the
only 2-over-2 windows in the house and the last ones that have not had the aluminum triple-track storm windows removed. These
two window systems are now being removed and replaced with 6-over-6 Anderson Insert double glazed sashes and tracks systems,
to fit the existing frame and to match the rest of the house windows, which are 6-over-6, originally installed in 1927.
 Note the very small amount of gap between the Anderson track
frame and the original window frame, as shown above during the test fitting, with the upper trim piece tacked in place to
hold the window against the outside stop. Careful measurements and discussion about fitment with your local supplier
is important, as is the fact that these old window frames are still square. My supplier is Loudoun Lumber in Purcellville,
who has suggested and supplied materials for a number of our other house projects and have been great to work with.
 After the old aluminum triple-track storm window frame is removed,
you can see that the Anderson Insert fits very close to the old exterior window stops, as shown above. (this was my test
fitting and no sealent had yet been applied to the window perimeter) Nothing was specified as a measurement in terms
of the exterior window stop bead size or position, but Anderson clearly has done some homework in making sure these inserts
fit older windows and their typical stop bead size and placement. I did specify the original sub-sill pitch angle for
the new Anderson Insert window sill, which fits perfectly with the old sub-sills... which are still level after all these
years.
 Test fitting of the Anderson Inserts completed, the windows will
now be removed to insulate the empty window sash weight pockets and to make the final shimming for alignment and completion,
including sealing the exterior perimeter of the Insert window with the original external window stops.
 After having removed the aluminum triple track storm windows, to
permit the test fitting of the Anderson Insert windows, a careful inspection of the original exterior window stops showed
that they needed repair, due to failed caulking/sealant over the years. I hate to see the use of silicone sealant used on
bare wood, which some brands say is okay, or on top of failing painted surfaces. It fails to actually seal and leads to water
damage, which I saw too much of during my widow restoration work. It is not the "magic" sealant the makers would like you
to believe. Not in my experience, anyway. Nothing is ever simple once you get started on a project such as this, is it.
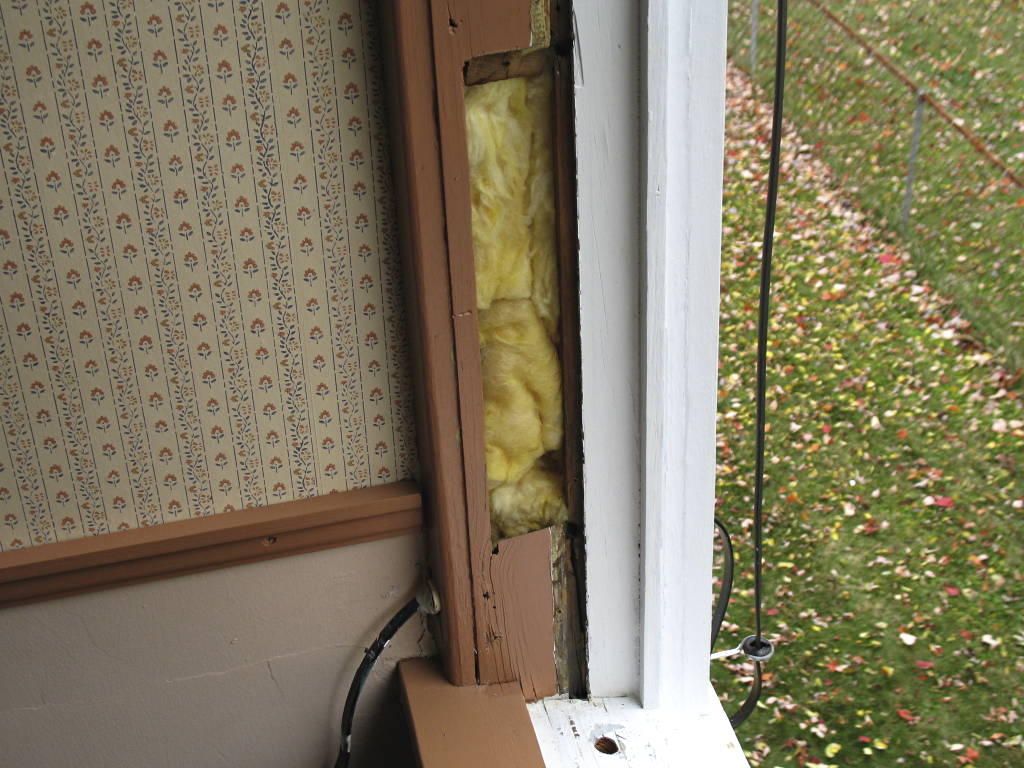 While repairs and primer is drying on the exterior window stops,
I filled the old window counter balance weight pockets with insulation, starting on the more difficult one, which could not
have its face trim removed, because about 2/3 of it is covered by the wall. I had to carefully "thread" the insulation
into the cavity, all the way to the pulley holes at the top of the window frame. You have to work carefully, so as not to
compress the insulation, as that would reduce its 'R' factor.
The hole in the sub-sill is where the outside TV antenna lead-in
(old 300 ohm flat ribbon style) came into the house... down into this hole and out below through the lower interior apron
window trim. It came through a hole in the triple-track base. I drilled a new 5/8-inch hole in the side trim, drilled at a
slight down angle from the inside to the outside, so that a potential leak will go outside, not inside. I used a
5/8-inch PVC pipe, protruding 3/16-inch outside of the inner and outer trim face, with the pipe sealed to the outer trim and
capped at both ends with Thermwell Mortite Caulking Cord, so that different cable types, such as a coaxial cable with an F
connector, can be easily installed in the future.
Update May 20, 2010
I have recently found two videos, produced by This Old House, which shows several ways to deal with the
weight pocket cavity insulation improvements. This video shows a method to use if the weights are still used in the window and this second video, shows a method of insulating if the weights have been removed, such as I did. Good info.
The much larger north facing kitchen window over the sink, is now
in the process of also being replaced with an Anderson Insert window, which is discussed here.
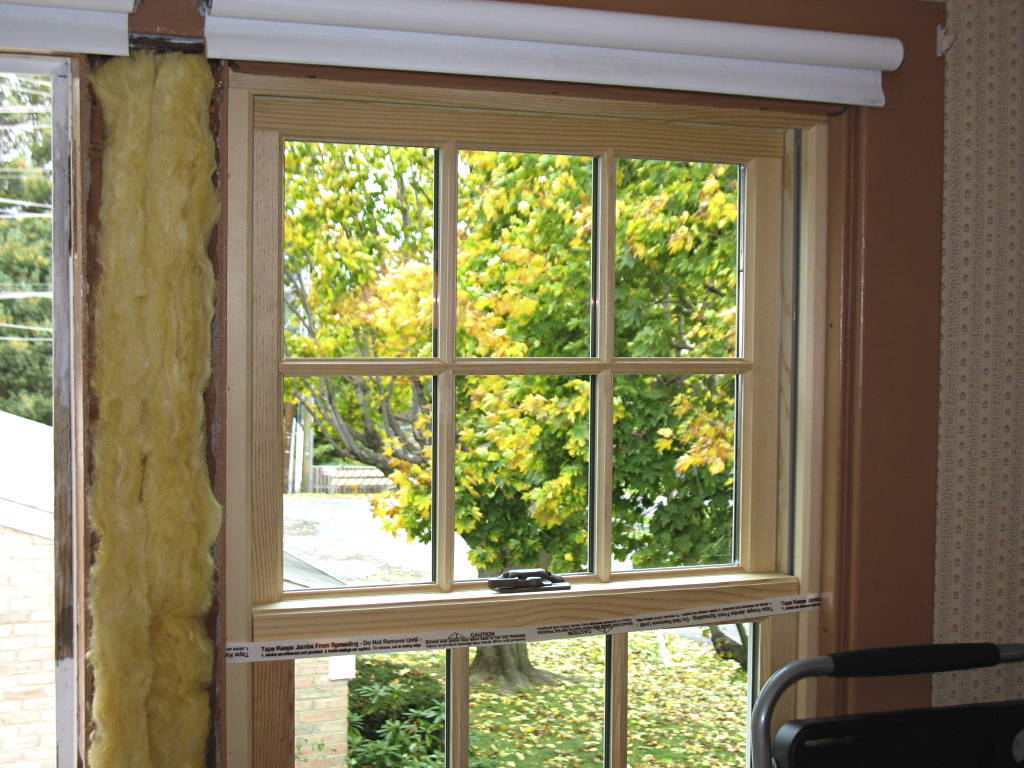 The center and right side cavities were much easier to insulate,
since the interior face trim casing pieces could be carefully removed and replaced, as shown with the center cavity, above.
The backside of the exterior trim was given two coats of primer to help seal the wood, before the insulation was installed.
With insulation in place, 6 mil plastic is used to cover the insulation, stapled to the perimeter and the face trim replaced
on top of it.
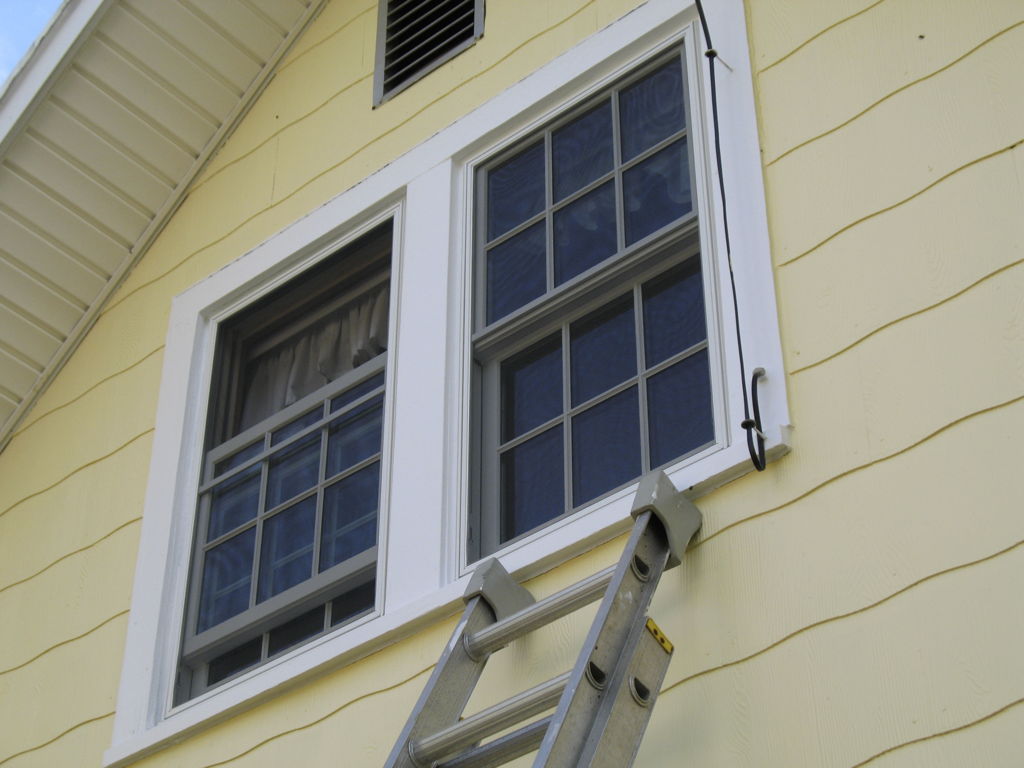 With the outside trim cleaned up and primed, the window perimeter
has been sealed and painted, resulting in a weather proof installation with a nice clean look, not involving plastic trim
filler pieces, but using only the old original exterior trim pieces. I like the look and will no doubt like the energy efficiency
improvement. It is also a much quieter room, with the window weights gone and the cavities filled with 6-inch insulation.
Anybody need some window weight pulleys?
12F (-11.1C) and 35 MPH N.E. wind gusts, showed us that these Anderson Inserts did the job we expected
of them, keeping the room warm and pleasant with no drafts and no cold interior window trim, which covers the now insulated
window weight pockets in the walls. While I really didn't want to get rid of the original windows, there was no way to otherwise
effectively deal with the window counter-weight cavities and the energy losses they permitted. Further, these insert
window systems allowed us to remove the two-over-two odd balls and have 6-over-6 windows like the rest of the house. The Anderson
Inserts are showing us to be a very effective improvement, since the early December snow storms moved in, soon after
the installation of these Anderson Inserts.
Update July 4, 2010
A third Anderson Insert window has been installed in the kitchen north wall above the sink, replacing the
old double-hung which did not have a counter weight system as the others did. Its window sash positions were determined by
the placement of a pin in the side of the sash, placed in the side frame. However, this window has been painted shut for at
least the two previous owners and after freeing up the bottom sash, it was found that it is way too heavy to try and raise
up, while leaning across the sink.
 With the old window removed and the exterior window stops removed,
which required sawing them out of the frame, since they were not otherwise removable, like the ones in the other window frames,
the window frame is ready for the Anderson Insert window.
 This window sill had some major damage, as shown here, which has been repaired as shown in the above photo.
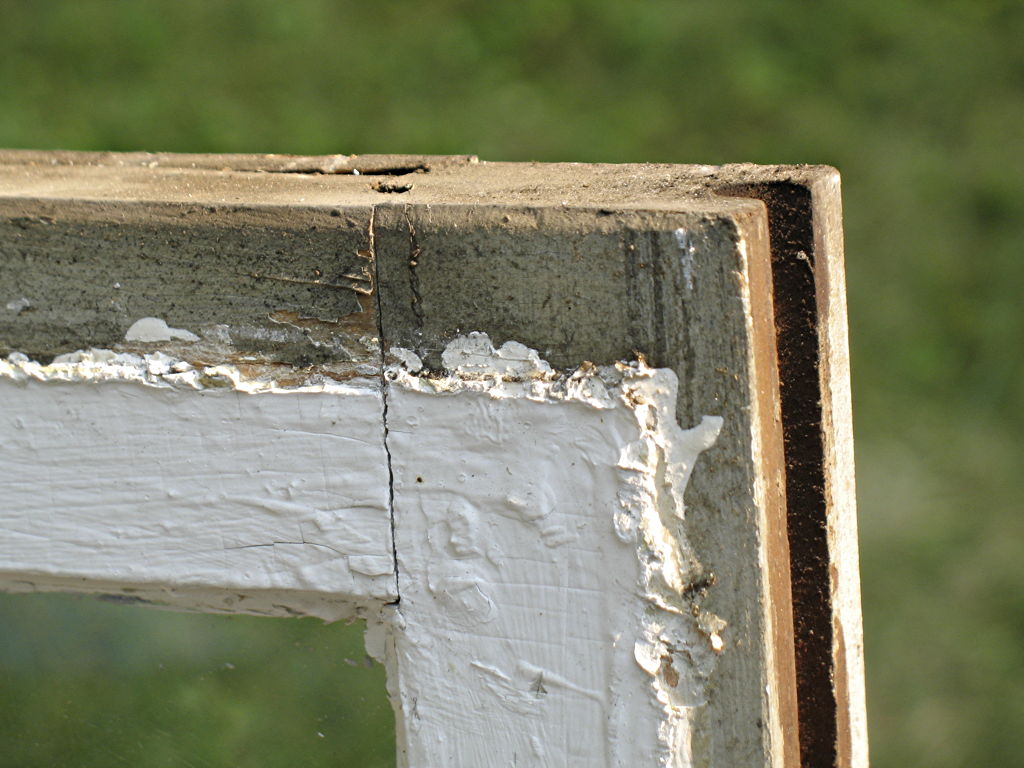 Outside upper right corner of removed top sash, showing the paint
build up at the intersection of the frame and sash stops, typical of what was around the perimeter of both of the sashes,
which had to be cut away (using a Windo-Zipper) inorder to lower and remove the sashes. Additionally, like some of the other windows, the screws holding the aluminum triple
track window frame to the window, were too long, penetrating the exterior upper sash window stop and screwed into the upper
window sash face, holding it from opening at all!
While the sash has cut-out channels for ropes along its sides
to attach to counter weights, the frame does not have the associated weight pockets needed to use counter weights. Window
glazing is a combination of original glazing compound, several types of caulk, plaster and other stuff, applied over the decades,
in attempts to deal with failing glazing. All the old wavy glass will be removed and saved.
 With the new Anderson Insert window in place, the window
frame is sealed and the inside of the frame primered. The window frame face trim will be sanded and primered next, then
painted. The final step will be to attach the non-functioning vinyl shutters, positioning them so to appear as functioning
window shutters with fabricated mounting hardware. They will not be attached to the walls next to the window trim,
such is done on most installations, which looks awful!
Very nice to have a window that now opens easily! And, from
ten feet away, it looks pretty much like the original windows, sans the wavy glass, of course.
Update September 18, 2010
And comments about using vinyl shutters
The north kitchen window installation is now complete, including the use of inexpensive vinyl shutters,
mounted to appear functional from the street view. The total cost of the window (Anderson Woodwright maximum performance model
with full federal tax credit) and screen was $827 plus $208 for the two pair of open louver (not one piece solid) vinyl shutters
from ACCENT Building Products, for the two windows on this side of the house. Installation labor and painting was DIY.
 These windows are on the north side of the house and originally
had shutters, which we wanted to replace. But, since they would not actually be used, such as our real wood shutters
are, during the summer, we chose to use properly sized low cost vinyl shutters and mount them to appear as the real wood window
shutters appear on the east and south sides of our house, which we installed in 2009 and are used during the summer, greatly reducing sun heat gain and minimizing sun damage to
the windows.
The primered 'hinge' pieces on these vinyl shutters will receive
additional treatment, to make them look more like a real hinge. The size of these pieces are identical to a Lull
& Porter #2 hinge, so that the vinyl shutter is positioned just as it would be, if mounted to a Lull & Porter hinge.
Yes, the shutters are upside down with the louvers open at the bottom, but the visual effect makes these vinyl shutters
look more like real shutters because they do not have solid louver areas and the house wall can be seen behind them,
giving them a more realistic look, in my opinion. If I mounted the shutters like real shutters, with the louver
openings facing up while open, which I tried, you would not be able to see through the louver openings and the effect
would be lost.
In the meantime, viewed from the street from 50 feet away as shown
below, this mounting method looks like real hinged shutters... certainly much better looking then being screwed
to the house wall, beside the exterior window trim! Especially those vinyl shutters that aren't even the correct width! And
they call them a 'decorative feature'? What an ugly treatment, to say the least.
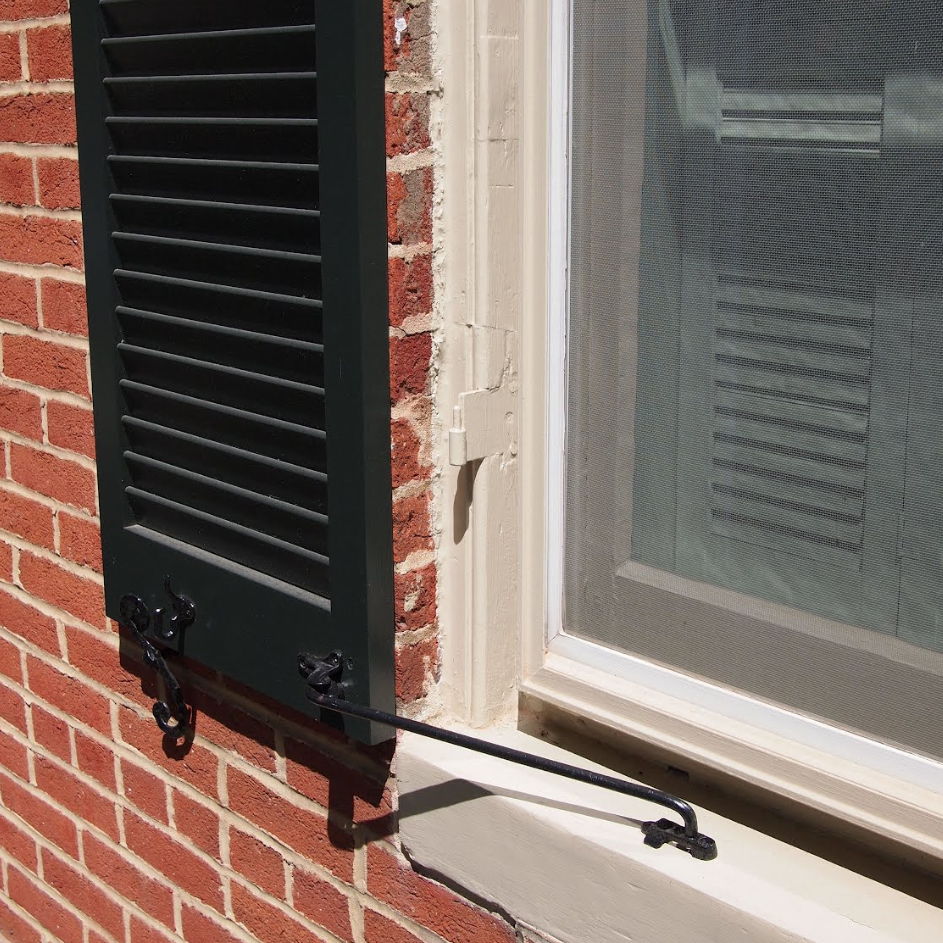 And here is an installation of an expensive real wood shutter, but
it is mounted in such a way that it can't be used at all, since they are screwed to the brick wall! The whole front of this
house is fitted with these wooden shutters in this way! Enough said.
|
||||||||