External links now open in a new browser tab - turn this off in your UCP - Read more here.
Crack-free dash
Crack-free dash
I removed all the cracks from my dash, and it will never crack again. Drives great, looks great. Check it out!


Re: Crack-free dash
Zip tie love!!!
-
muleskinner
- Posts: 1341
- Joined: Sep 08, 2007 11:17 AM
- Location: John Graham ATL
Re: Crack-free dash
AKA "For sale 535i. Interior is in excellent condition, but has slight cosmetic issues" 
Re: Crack-free dash
Kinda looks like my f800gs after hitting a cow in baja.
Re: Crack-free dash
"Crack-free dash"
See also: 8 tranny participants in the final heat of the( formerly) women's 100 meters @ the Oh-limp-dicks.
See also: 8 tranny participants in the final heat of the( formerly) women's 100 meters @ the Oh-limp-dicks.
Re: Crack-free dash
are you selling the dash?
Re: Crack-free dash
Is the emperor selling his new clothes?
Re: Crack-free dash
Actually I am going to try to follow this tutorial and post my results: https://www.mye28.com/viewtopic.php?t=155327
I picked up a spare dash too to learn on. So, maybe eventually there will be something to sell, but I have to finish the project first.
I picked up a spare dash too to learn on. So, maybe eventually there will be something to sell, but I have to finish the project first.
Re: Crack-free dash
Oops! I just realized I posted the wrong link. This is the tutorial I mean to follow: https://www.bimmerforums.com/forum/show ... -Pic-Heavy .
-
the_illermiller
- Posts: 103
- Joined: Jun 30, 2015 4:45 PM
- Location: Phoenixville, PA
Re: Crack-free dash
Looking forward to seeing your results! This is... tentatively on my list of things to do.
Re: Crack-free dash
So, I finally got to this project and I've spent some time in the past week following the process outlined in the bimmerforums post I linked to earlier. I also watched a handful of other videos put out by Polyvance (the company that makes the padded dash filler) and any other resources I can find. This is a time intensive process, which I guess I knew going in, but I put it in bold anyway because, well, it's a lot of effort.
The first thing I did was pick up a spare dash from the junkyard. I figured I would learn first on this one, and then do it all again on the "real thing".
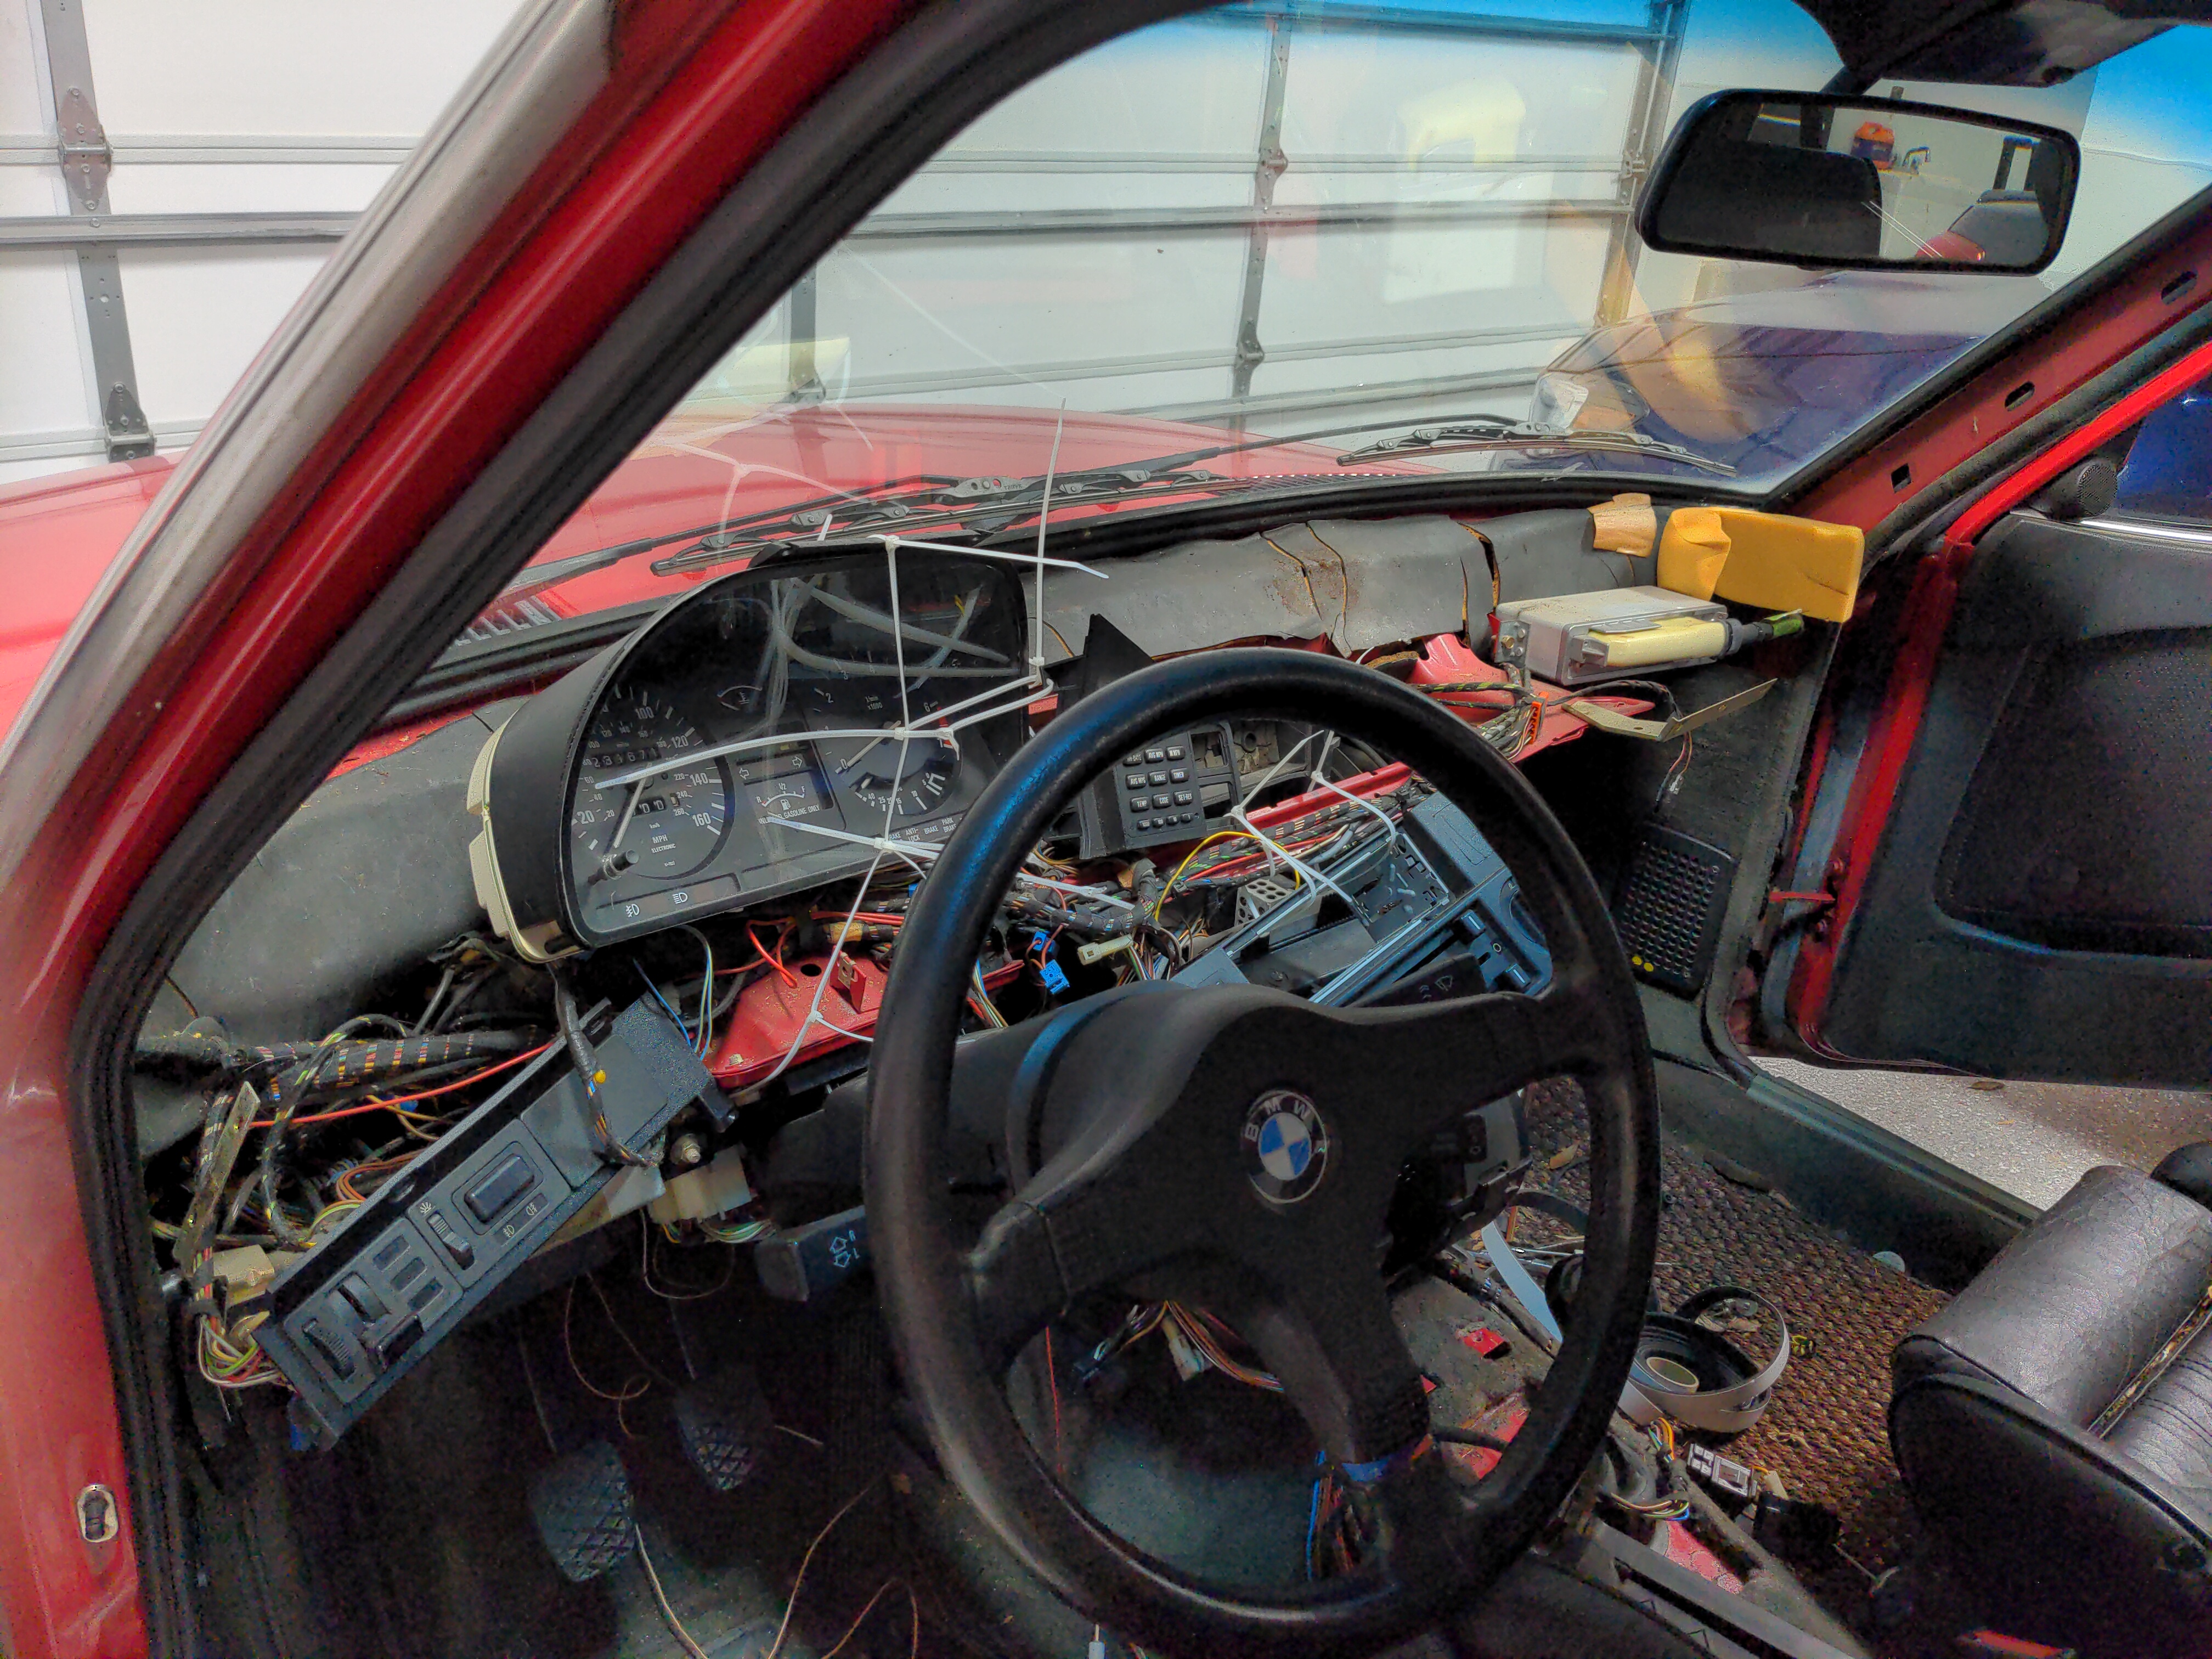
Here's my dash:
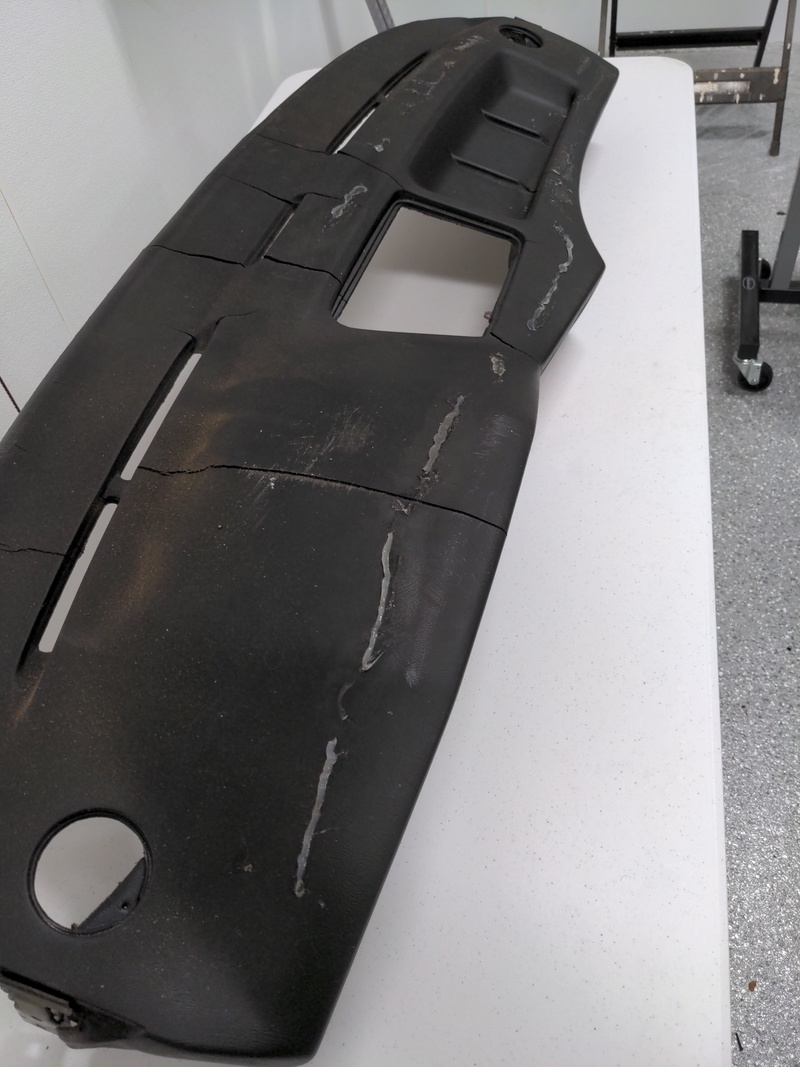
and here's the one I got from the junkyard:
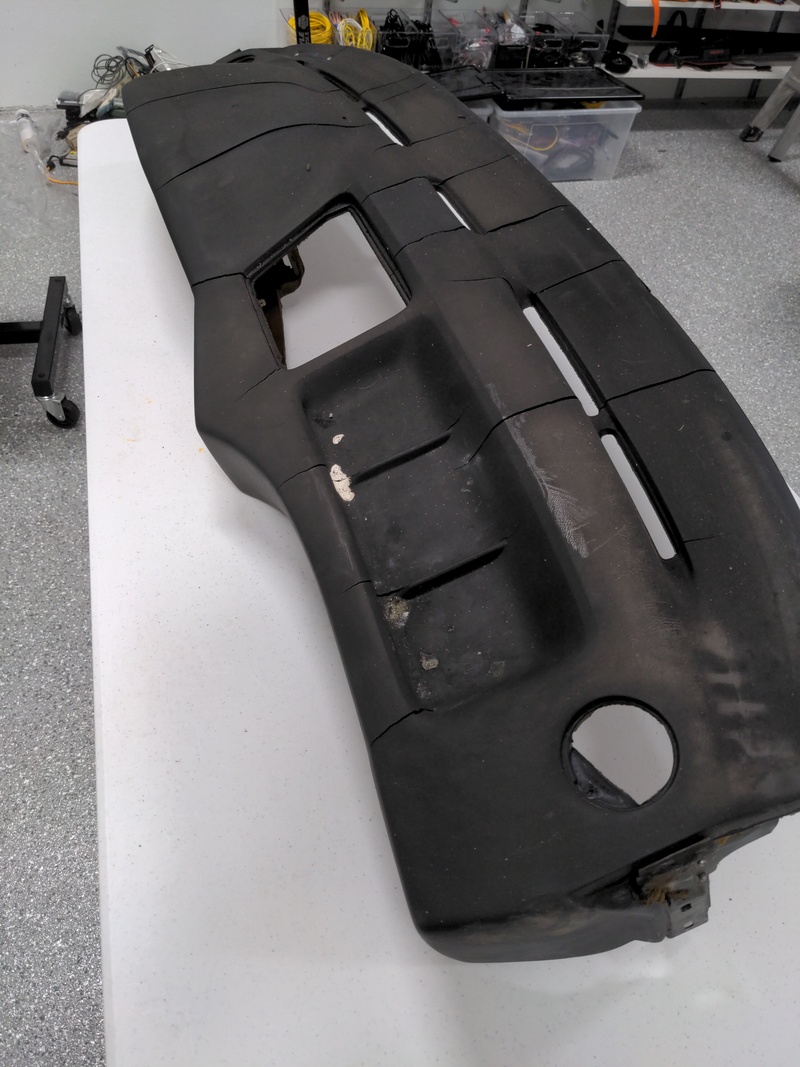
I have no idea what that white stuff was. Bird poop? Who knows. I tried not to think about it too hard.
Some really bad cracks in both dashes (I pictured the junkyard one here):
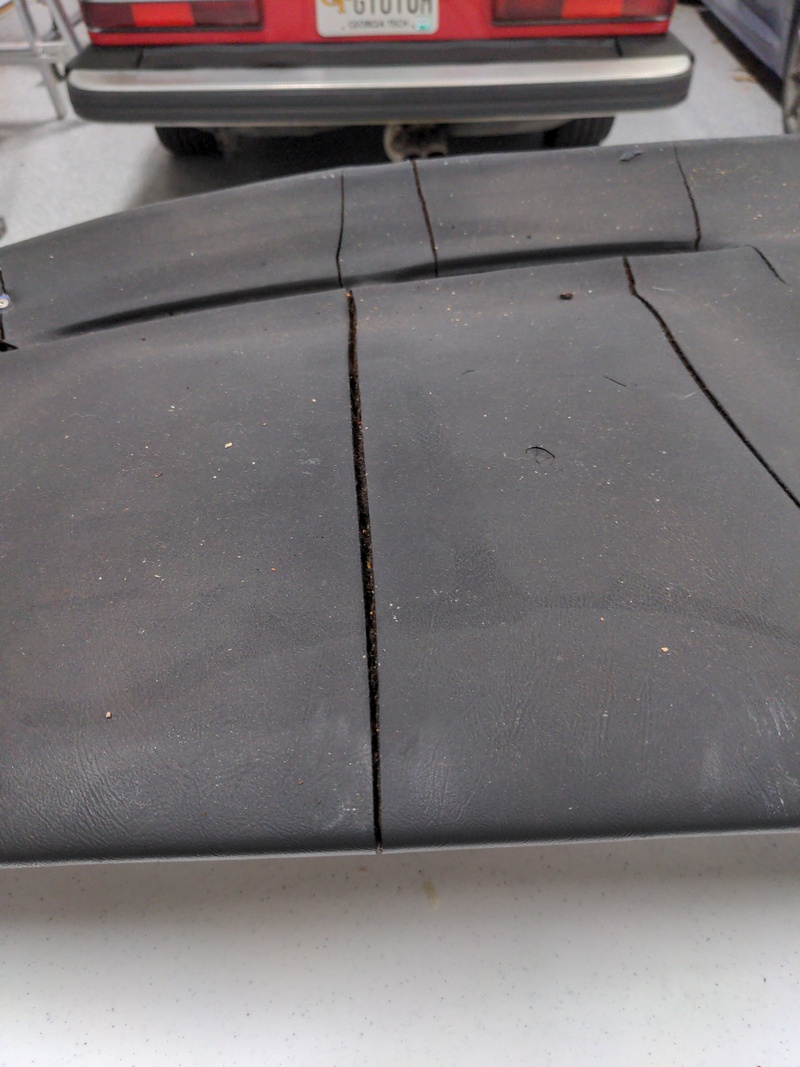
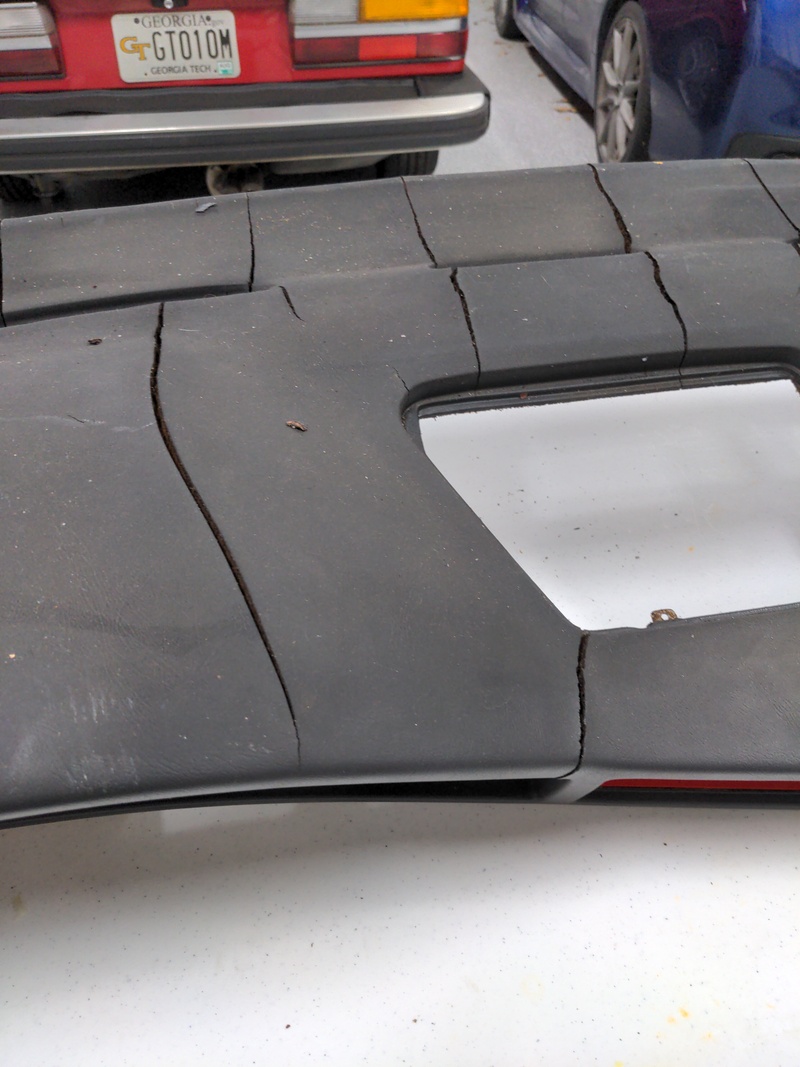
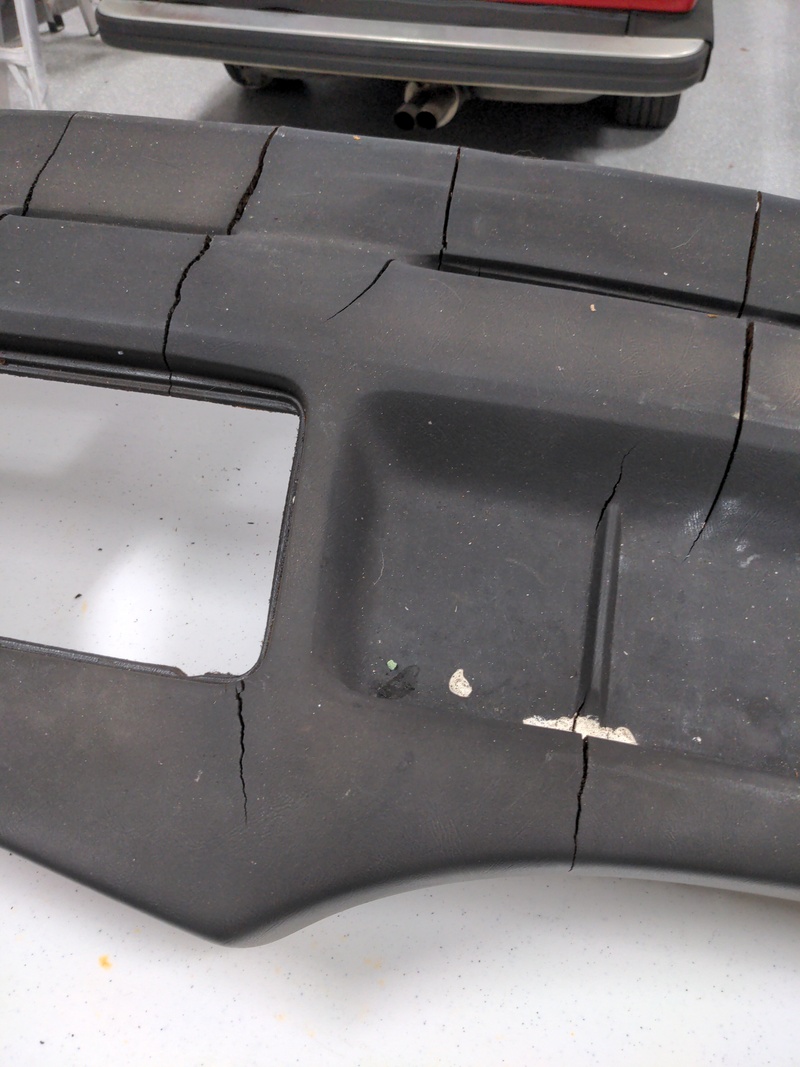
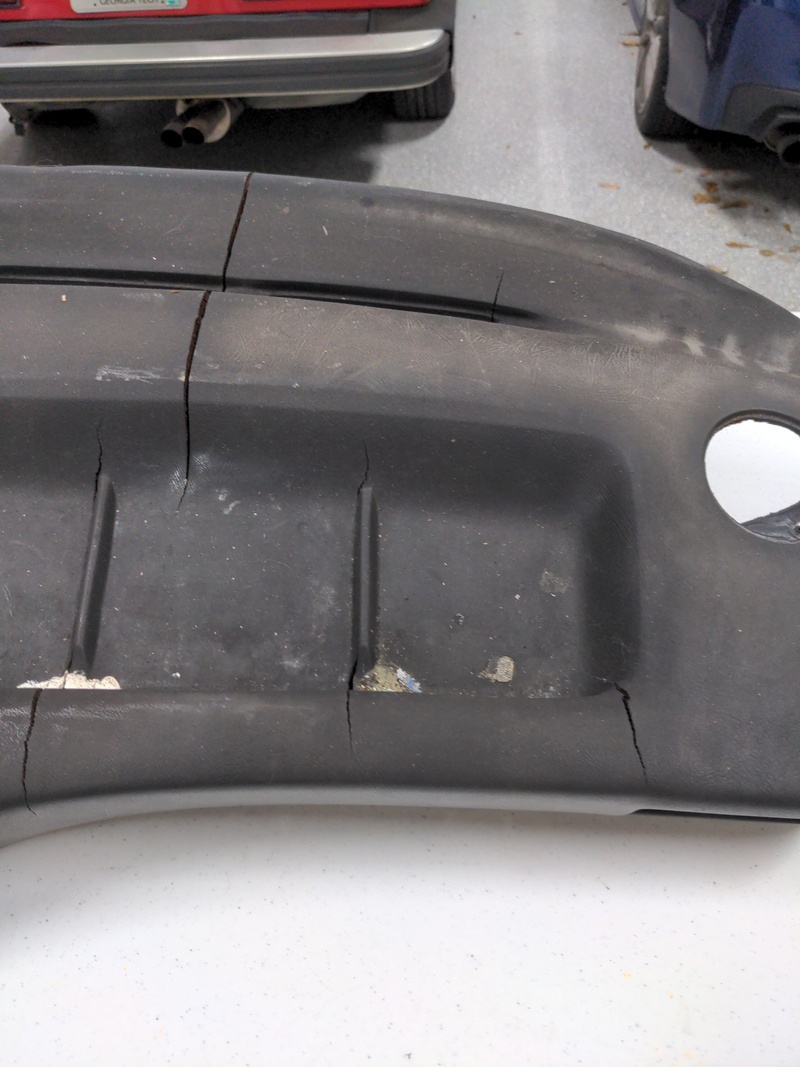
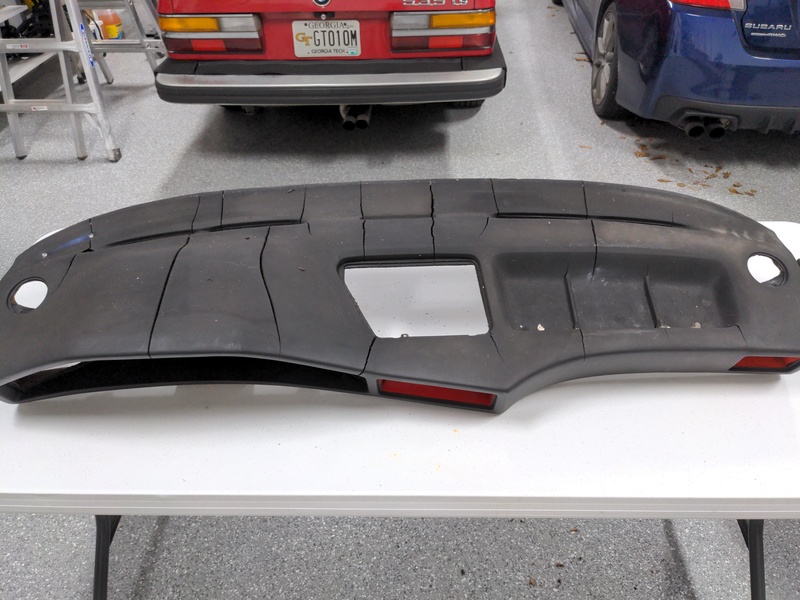
Also, when your dash is out, perfect time to replace the 30 year old cracked-to-hell insulation.
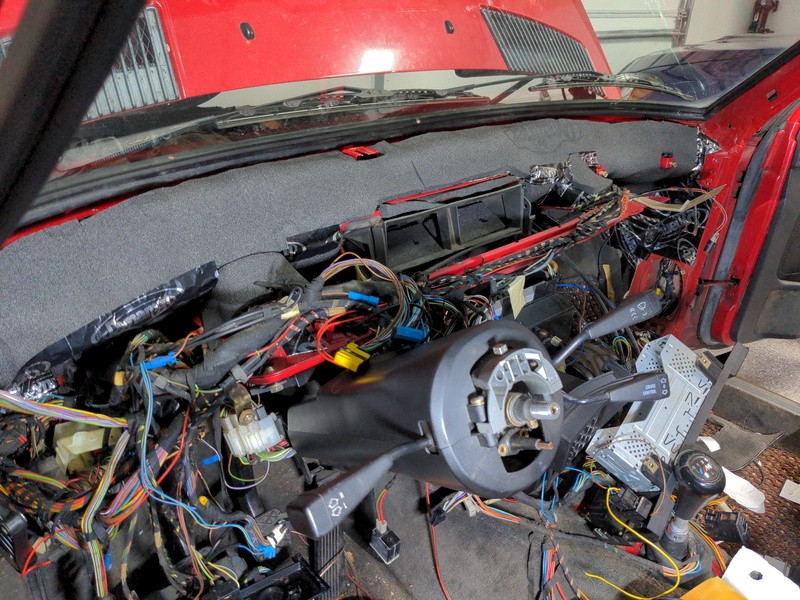
(The car is drivable in this state, by the way! You may want to just keep one hand on the instrument cluster so it doesn't fly away when you go around a turn.)
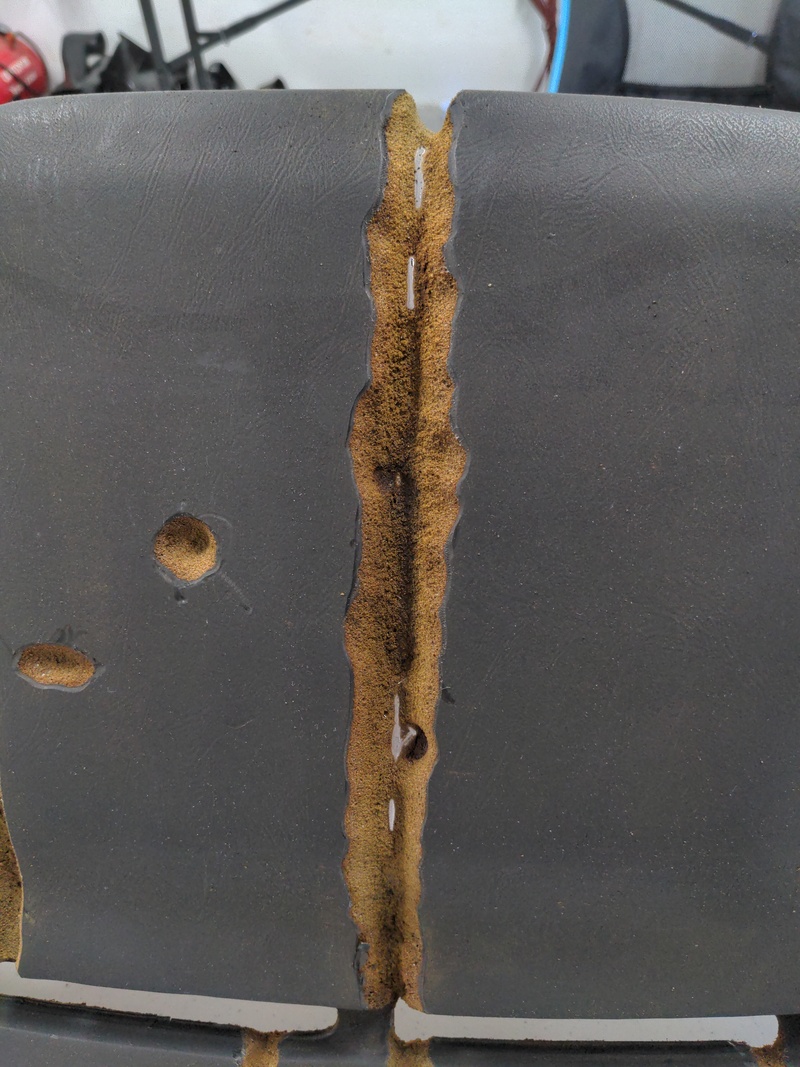
The first step is to dremel out the cracks to the bottom of the cracked foam. You can see the crack in the foam, so it's pretty easy to know when you've gotten to the "bottom": it'll have a uniform texture.
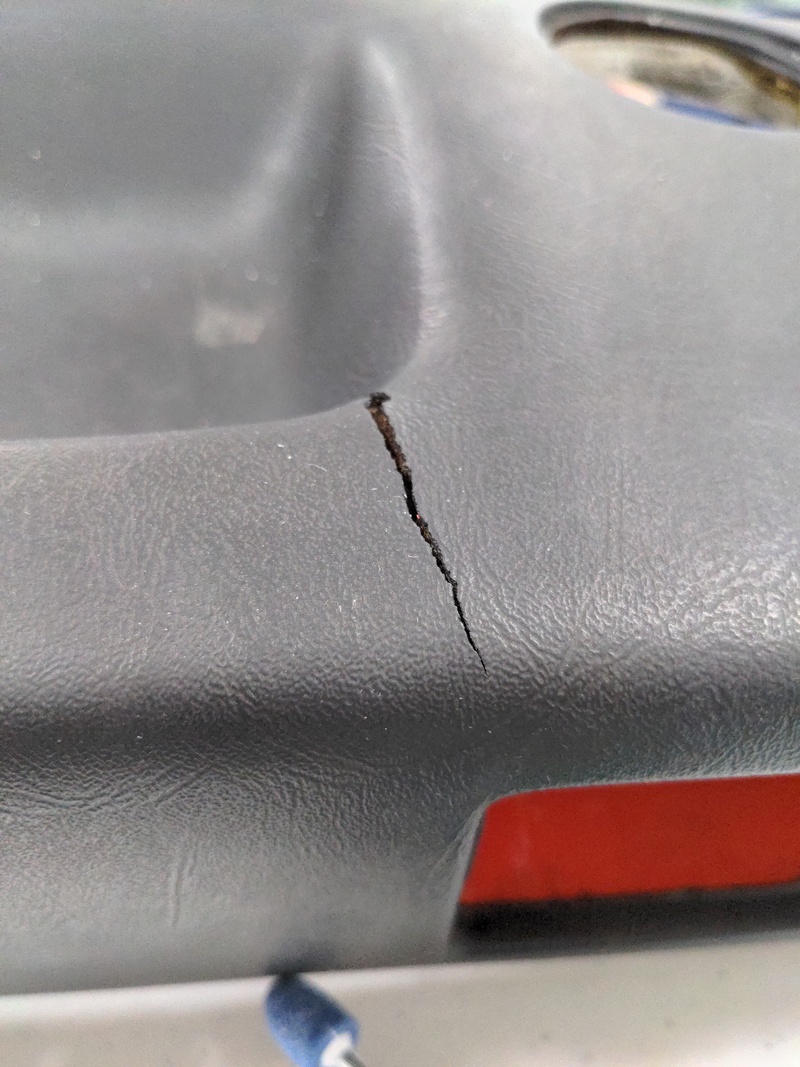
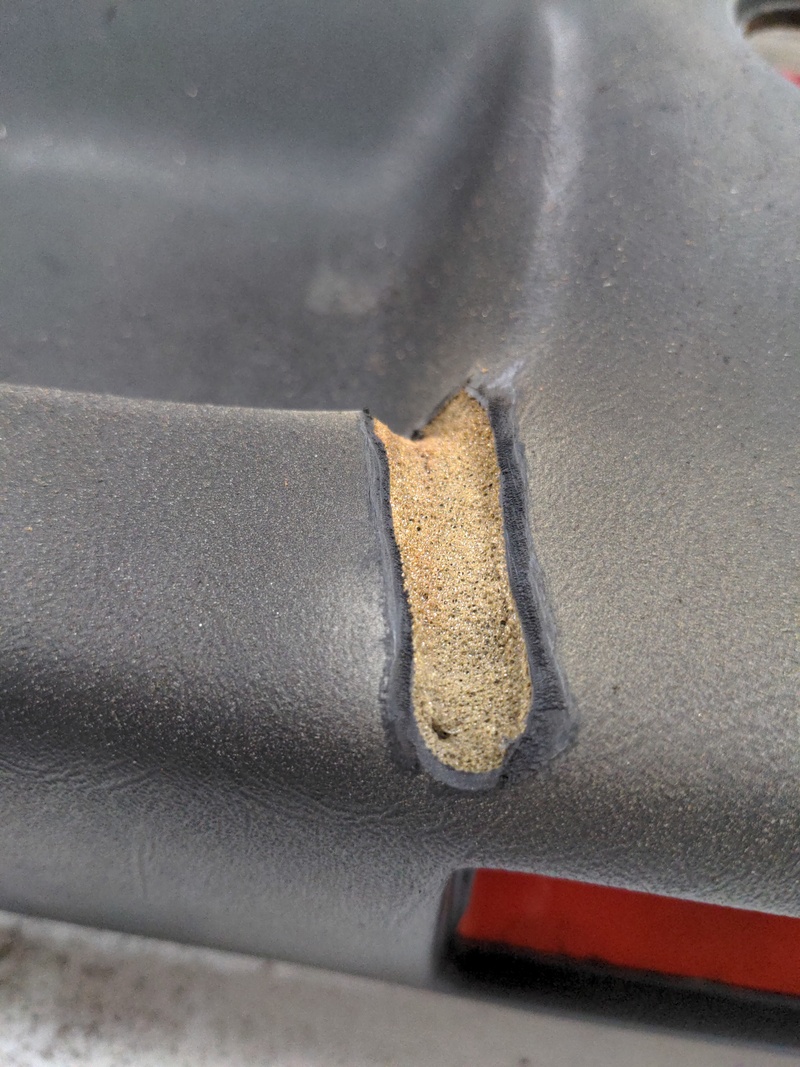
The process takes a long time, but it's at least not too much manual labor.
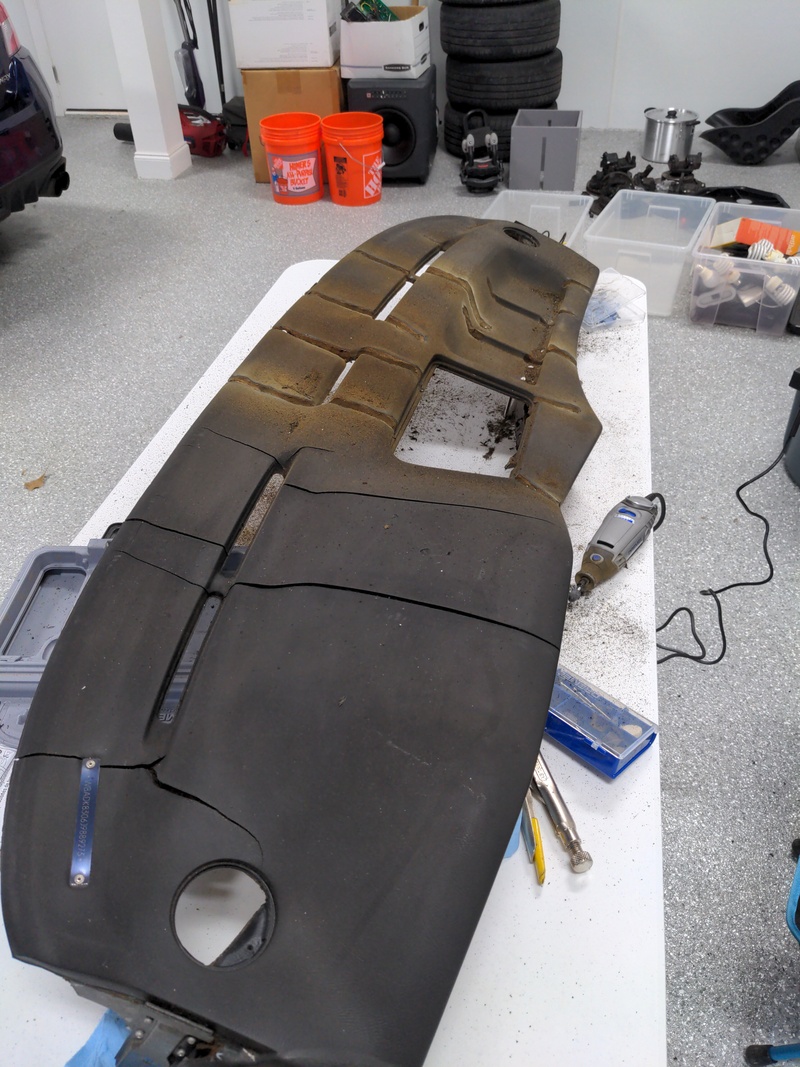
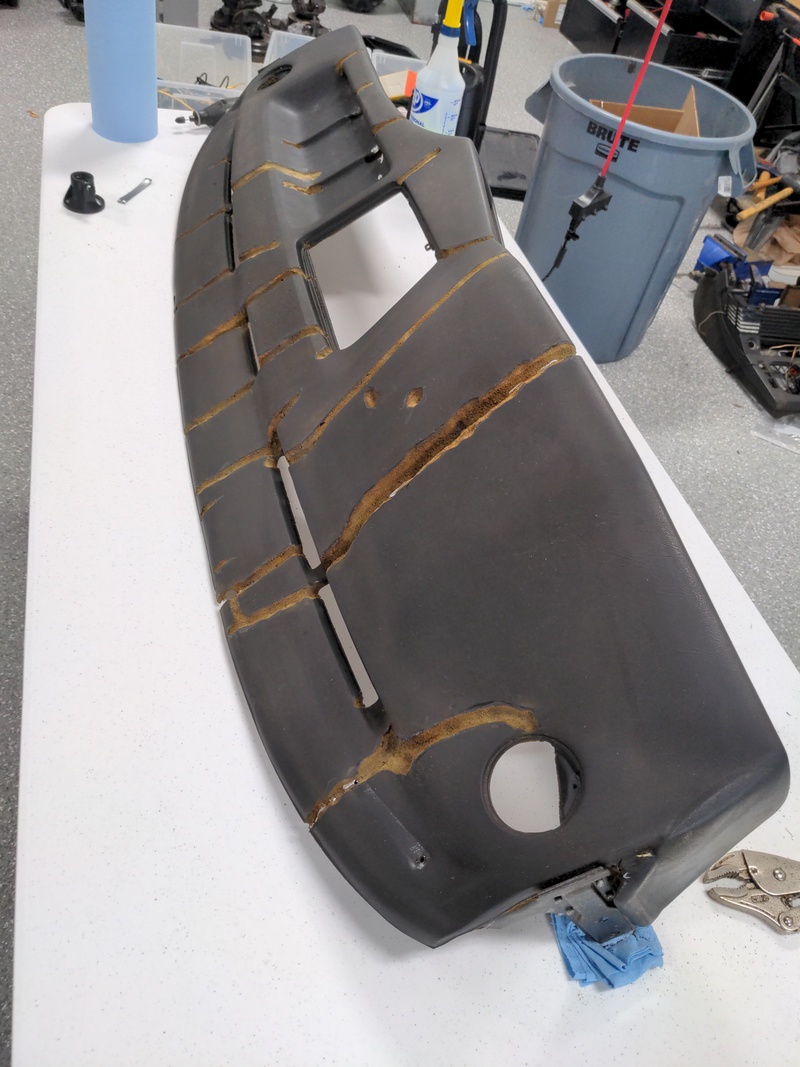
Sometimes the crack may go so deep that I had to cut down all the way to the metal under the foam. I guess that's ok.
The next step is to use the plastic welder to fill all the grooves with the FiberFlex sticks.
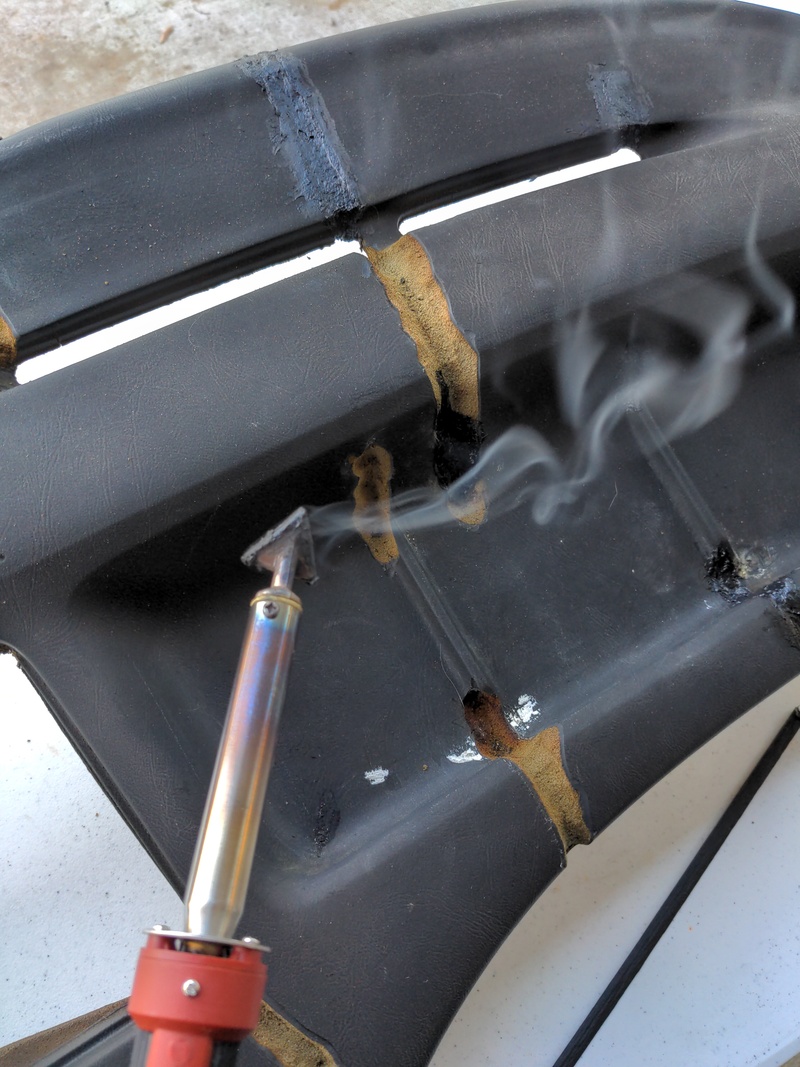
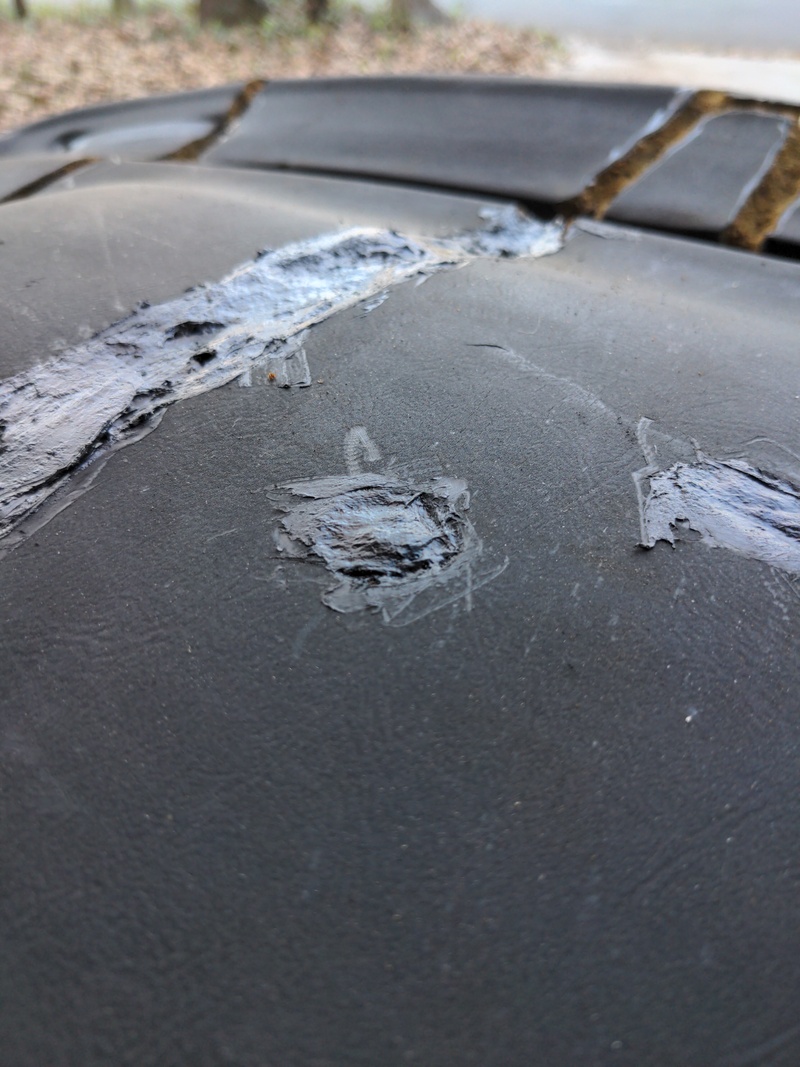
I may have overfilled those a little bit---ideally I think we want the dash filler to "top off" the grooves, not the plastic weld.
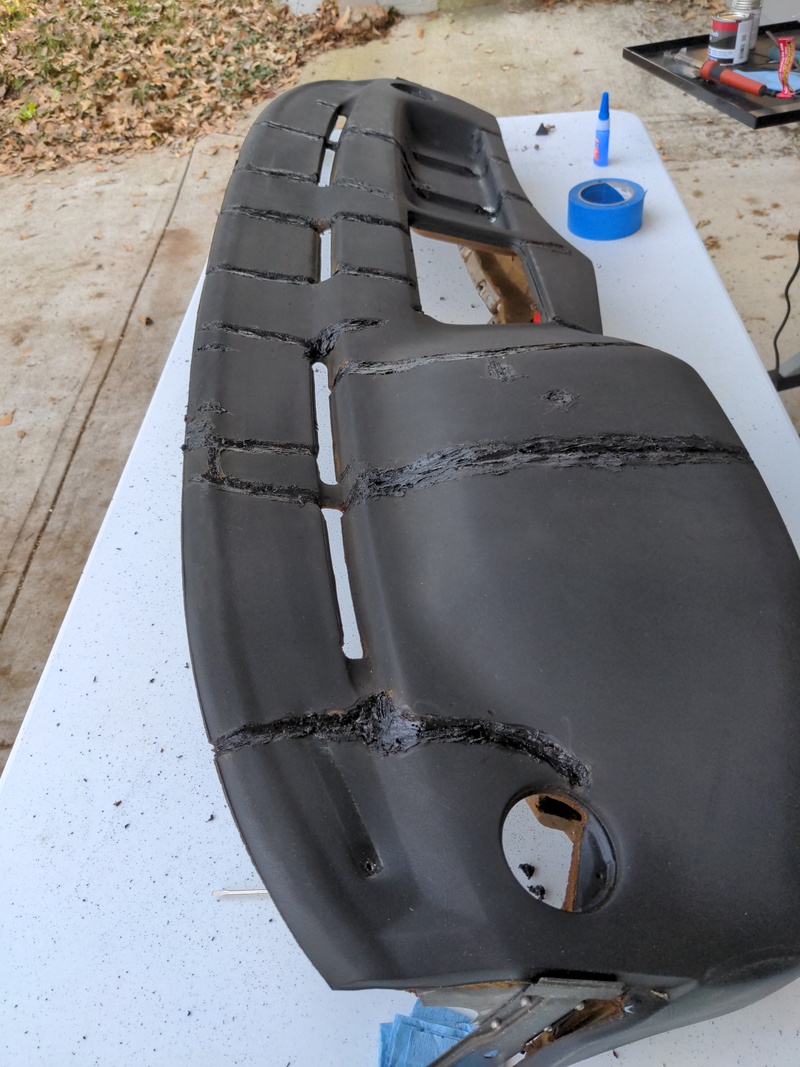
I used pretty much every stick of FiberFlex in one package for this dash because it was in such bad shape. It's really hard to shape around the tougher corners, like by the vents, but luckily nobody can even see back there anyway.
Then some sandpaper over the plastic weld... this part took a while.
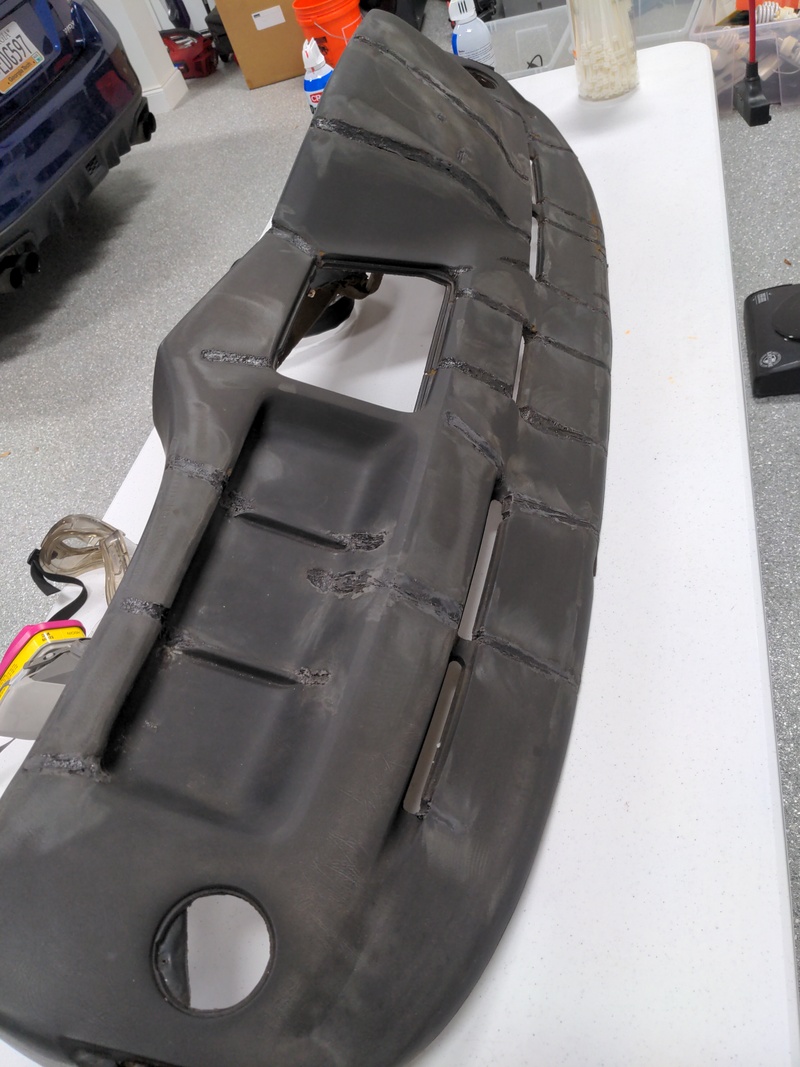
After that, it's ready for dash filler. At the beginning of this process, I wasn't very good with a putty knife:
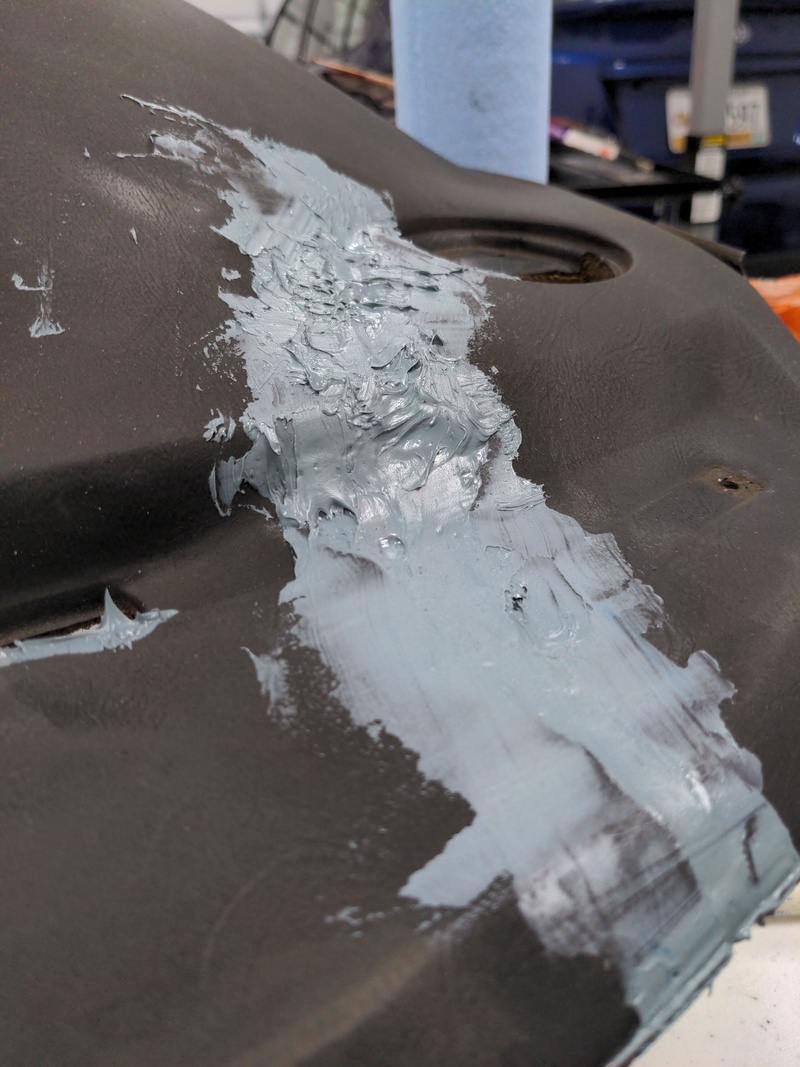
The dash filler does harden quite fast, so I was filling maybe two or three cracks at a time per mixture! It's pretty easy to tell when it's hardening---it starts to get stuck to the putty knife and doesn't stay in the grooves. I had many problems with small air gaps (this is after sanding, which I did a lot of and my hands hurt):
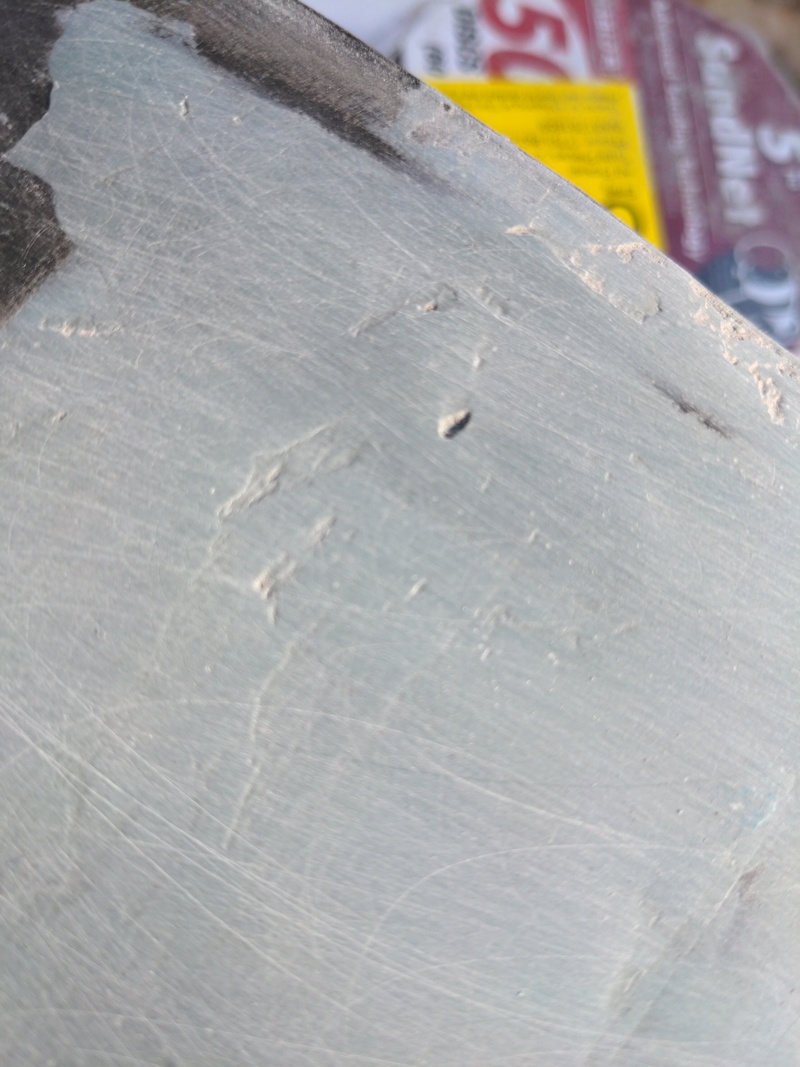
One of the big issues with the dash filler is that it's hard to fill up a lot at once, so I found that especially the corner areas needed multiple coats:
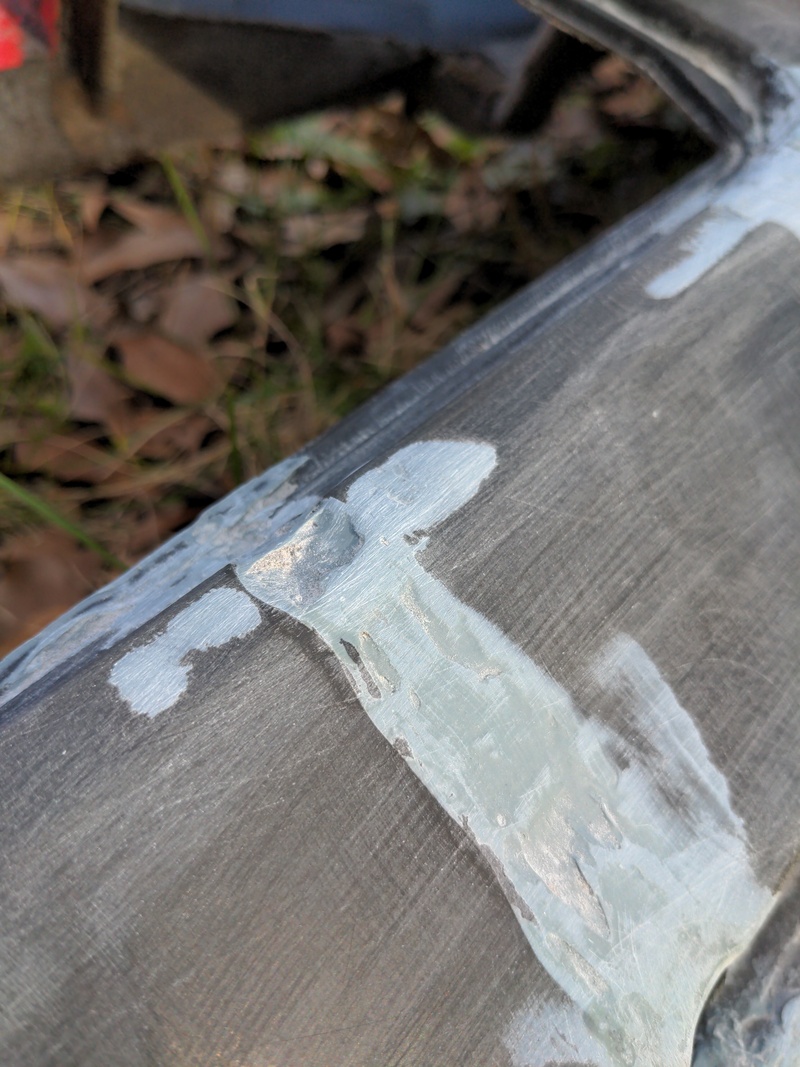
Overall it took probably four "rounds" of 'apply dash filler everywhere' followed by 'sand by hand everywhere' followed by 'inspect'. Also that stuff is noxious! Wear a respirator and don't do it inside.
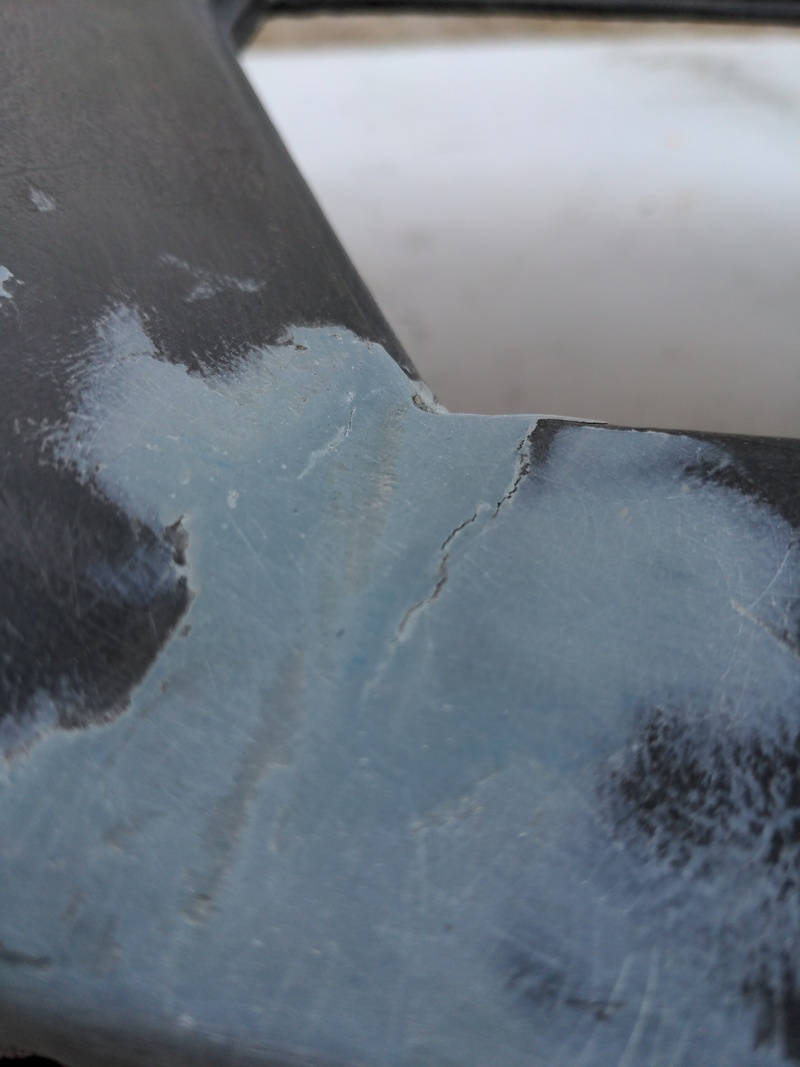
In one place, I unexpectedly found cracking, so I guess the filler did not adhere. I cut this out with a Dremel and re-filled it.
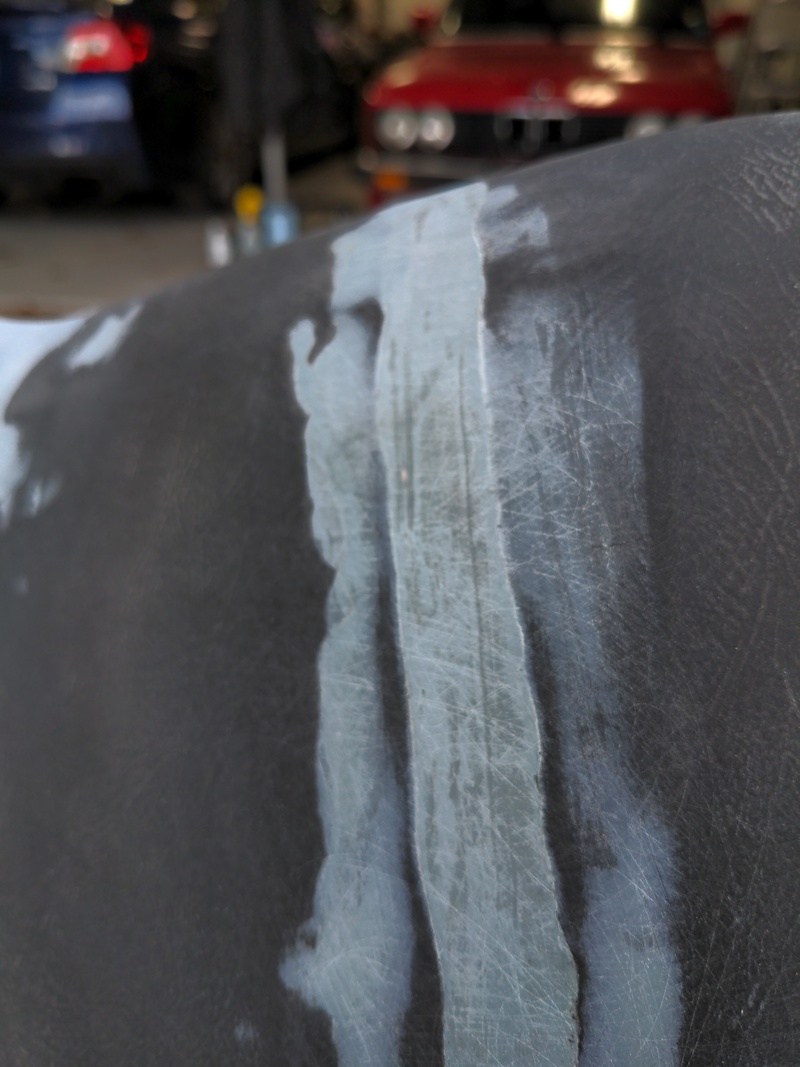
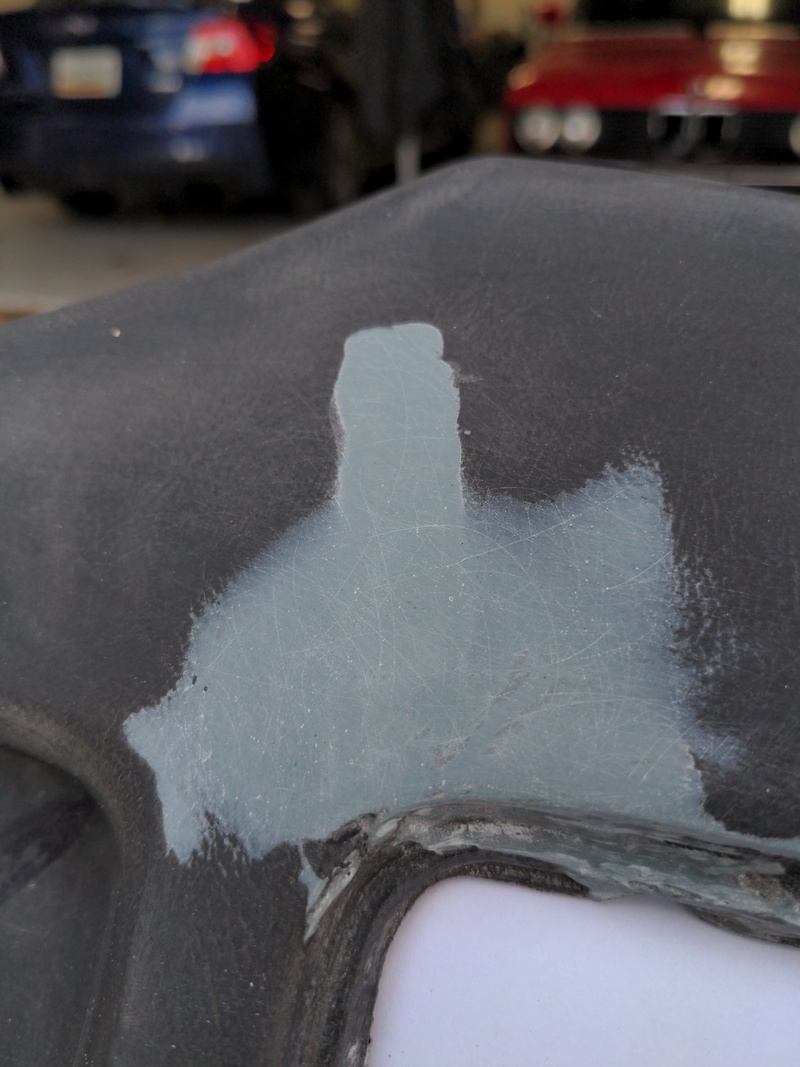
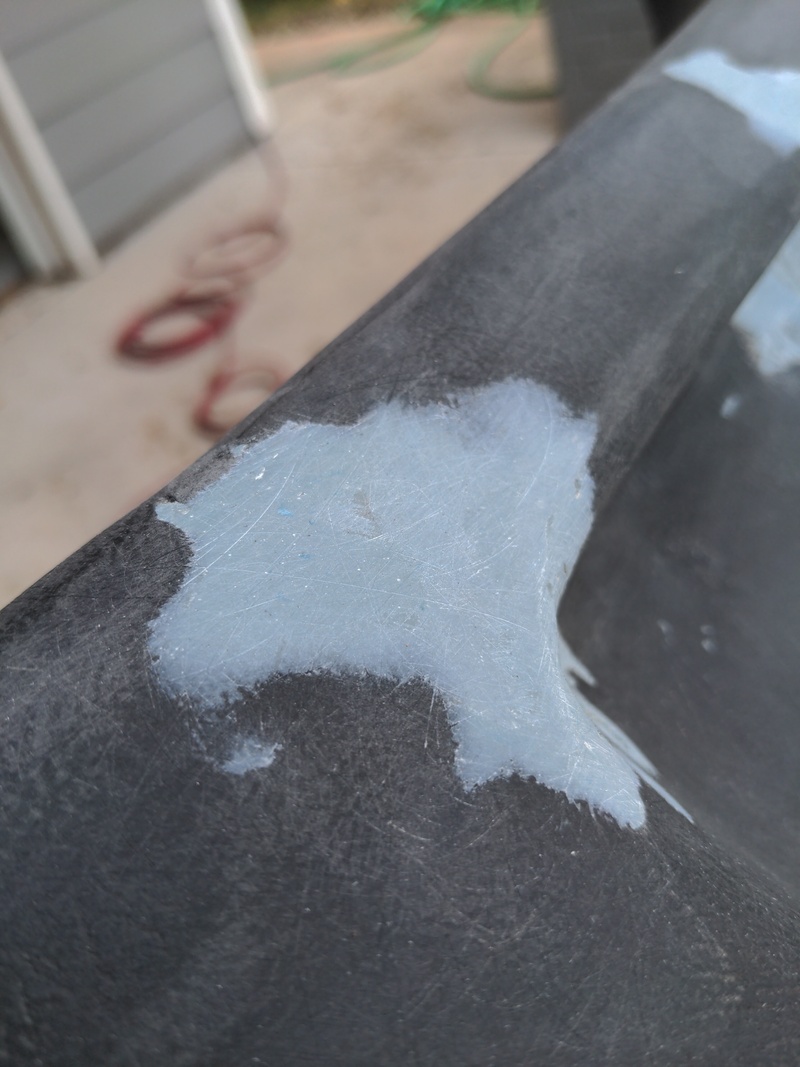
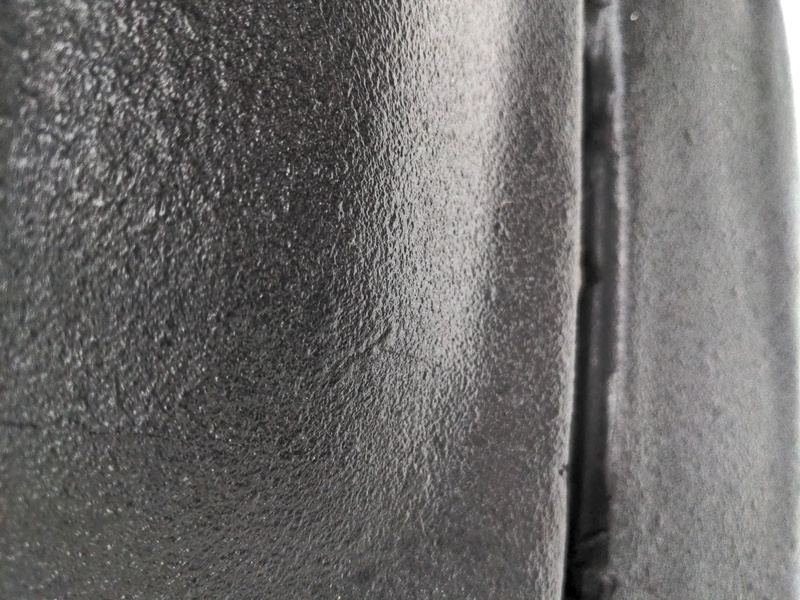
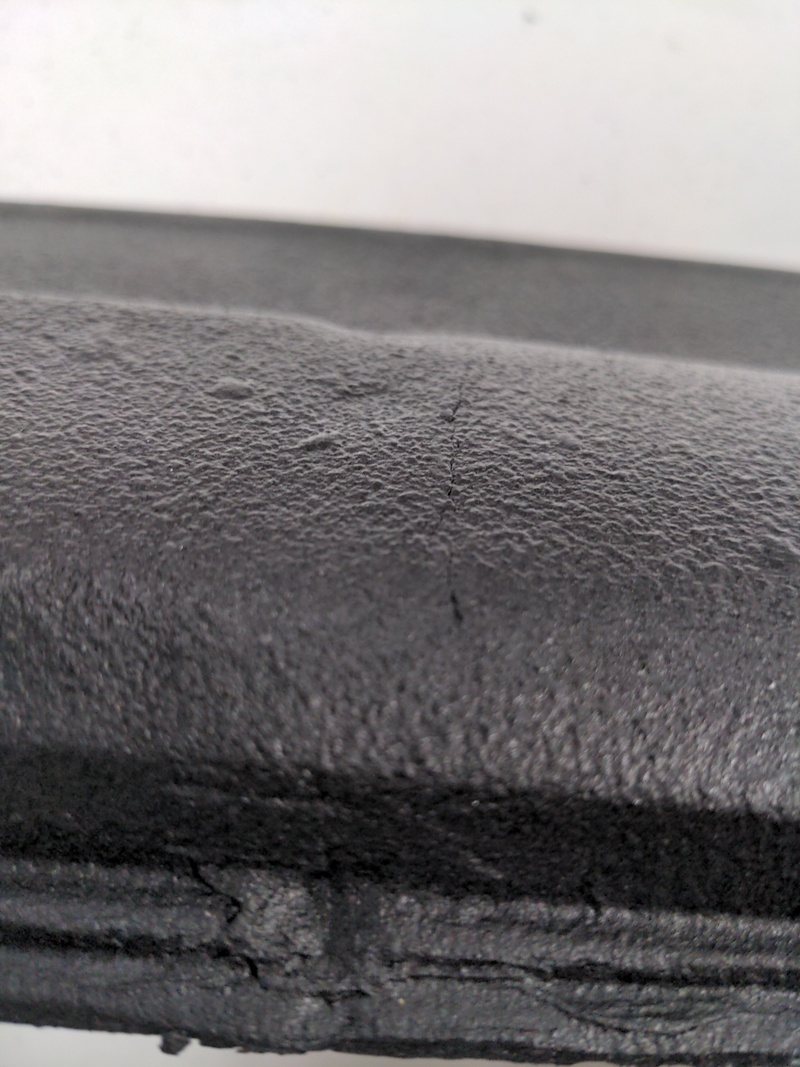
Eventually it was ready for paint. Take a look closely at the three pictures below: I think it's an area for improvement. Only in ~1.5 of those patches did I get the dash filler to taper. The rest had hard edges with the original dash, and while it was smooth with sanding, it did end up being visible after painting (though quite subtle).
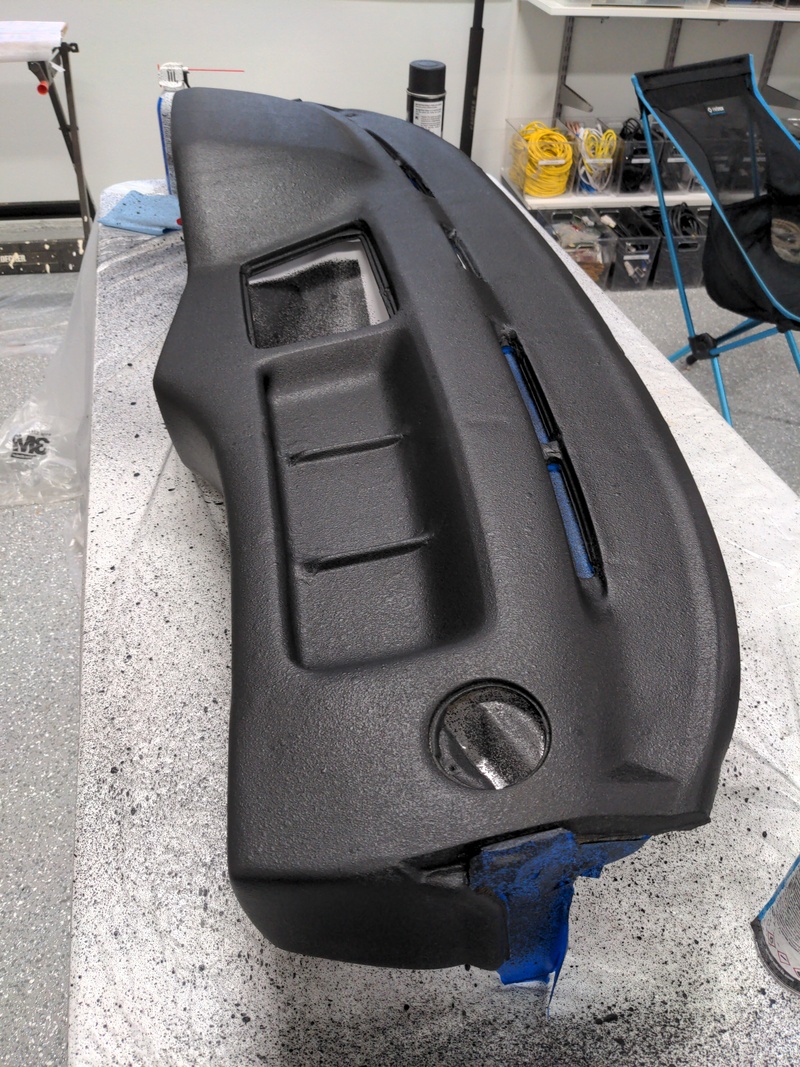
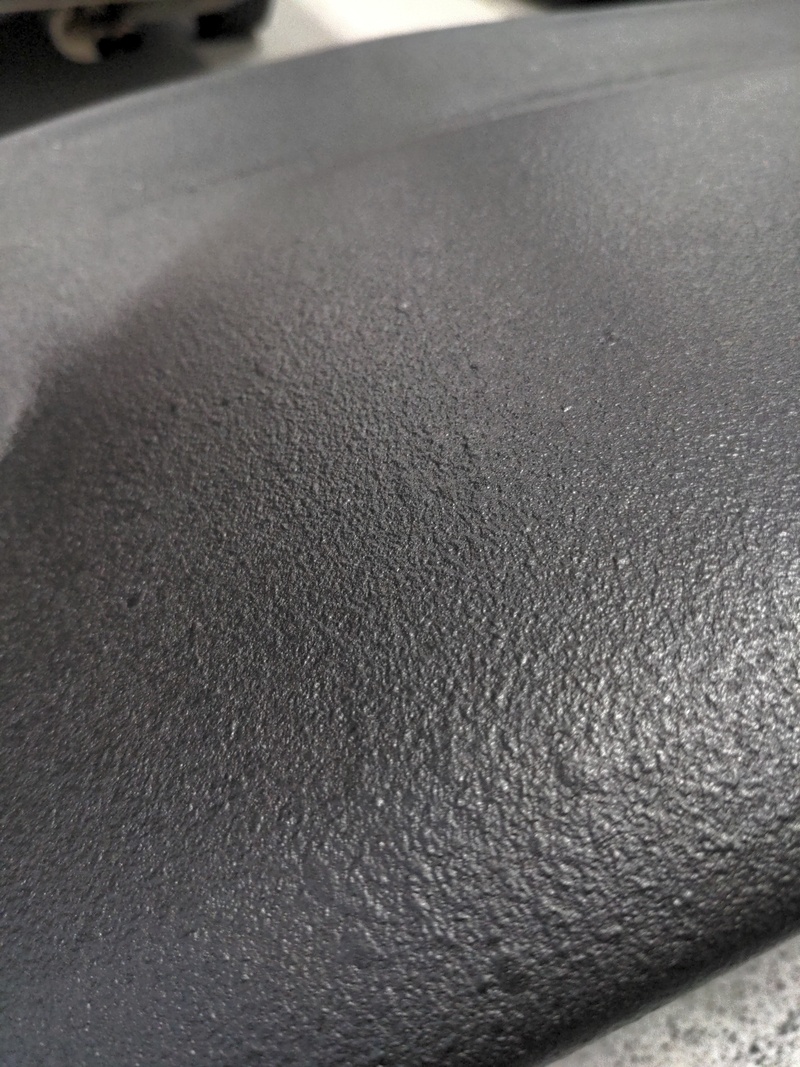
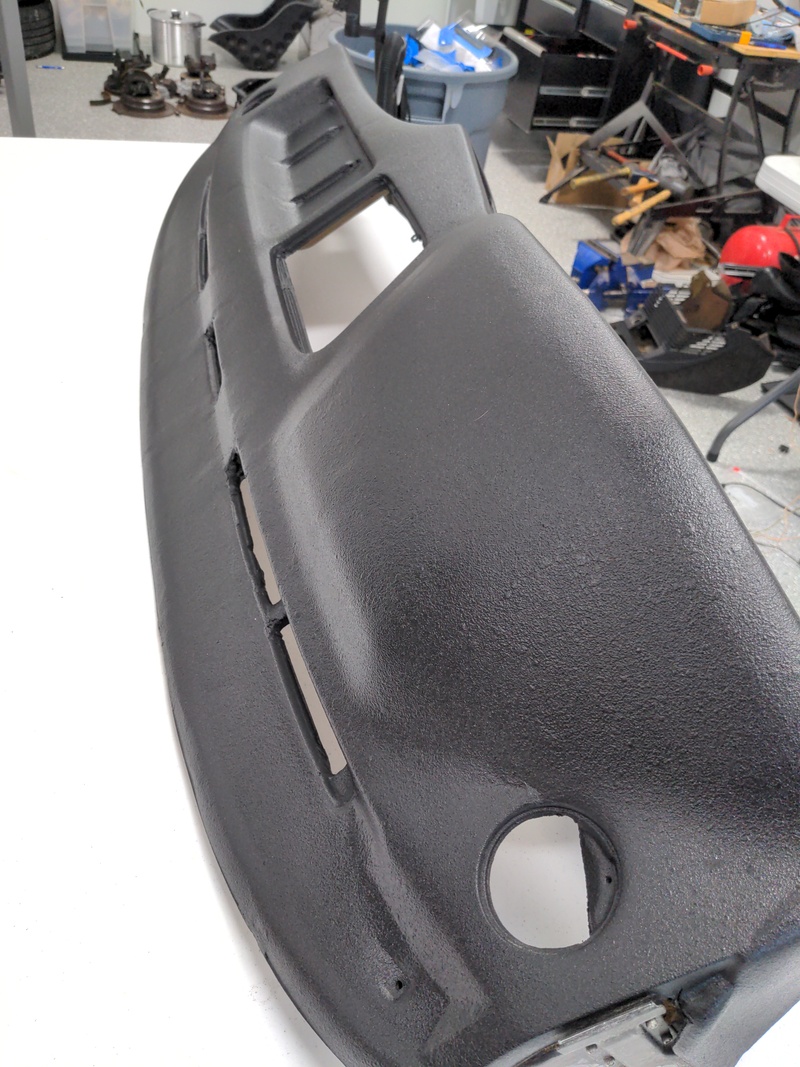
Here it is after the rubber undercoating, primer, and final paint was applied. I was pretty happy with the texture although it's definitely not the original. But, it's inoffensive and acceptable, in my eyes. It was quite cold outside when I sprayed the undercoating, and I think this may have had an adverse effect on the particle size---when I do the next one, I'll probably wait until it's a bit warmer.
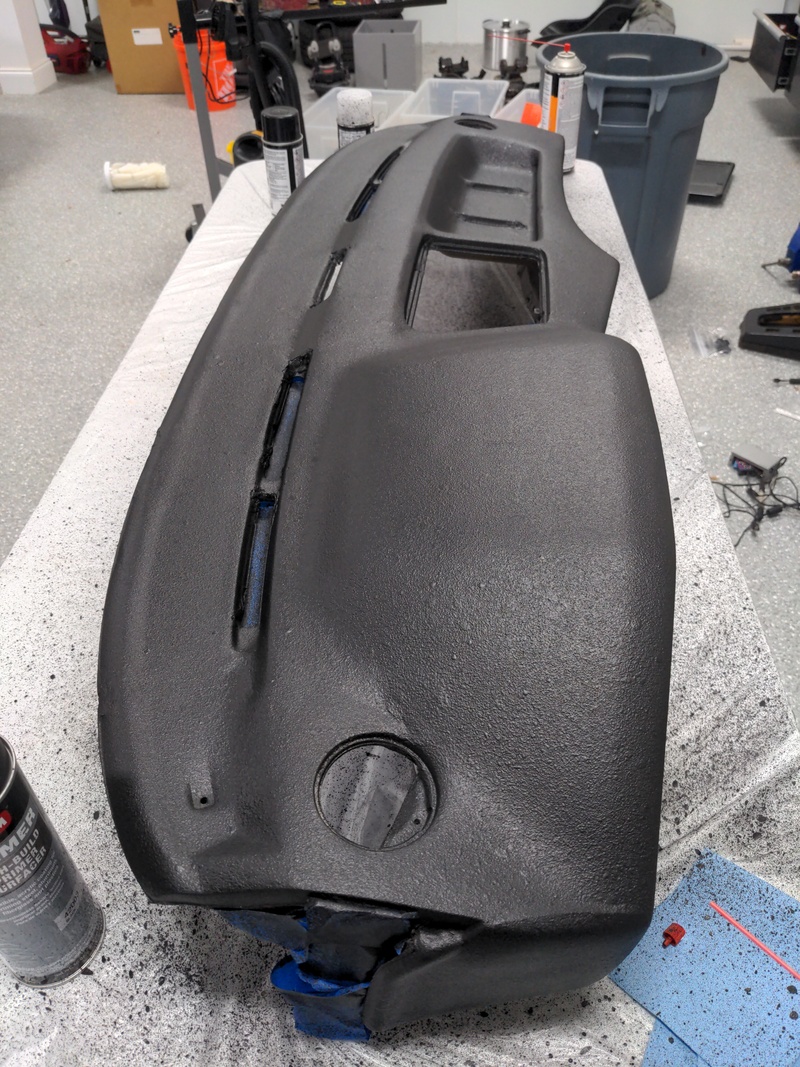
The color overall is just a bit darker than the old dash, but I think it looks just fine. Of course... I'm not reinstalling this one (and my interior is a wreck anyway ) so I don't have any installed pictures.
Now I did noticed that in a few places, there are some hairline cracks! These were here pretty much immediately from spraying. They're subtle enough that if I didn't point them out, they're not really noticeable, but I'm thinking that application temperature, and properly tapered dash filler are the culprits here. I suspect these might get a little worse as time goes on, but nothing like the original dash cracks (due to the plastic weld).
Overall, though, I'm quite satisfied with this.
I'm really happy that I got one to practice on. I feel a lot more confident about each of the steps---and I also feel like I've learned a handful of pitfalls that take away from the end result. What I'm not excited about is doing all that sanding again. An orbital is kind of out of the question because nowhere on the dash is flat. So, lots of finger pain seems to be the only way...
The first thing I did was pick up a spare dash from the junkyard. I figured I would learn first on this one, and then do it all again on the "real thing".
Here's my dash:

and here's the one I got from the junkyard:

I have no idea what that white stuff was. Bird poop? Who knows. I tried not to think about it too hard.
Some really bad cracks in both dashes (I pictured the junkyard one here):


Also, when your dash is out, perfect time to replace the 30 year old cracked-to-hell insulation.

(The car is drivable in this state, by the way! You may want to just keep one hand on the instrument cluster so it doesn't fly away when you go around a turn.)
The first step is to dremel out the cracks to the bottom of the cracked foam. You can see the crack in the foam, so it's pretty easy to know when you've gotten to the "bottom": it'll have a uniform texture.


The process takes a long time, but it's at least not too much manual labor.


Sometimes the crack may go so deep that I had to cut down all the way to the metal under the foam. I guess that's ok.

The next step is to use the plastic welder to fill all the grooves with the FiberFlex sticks.


I may have overfilled those a little bit---ideally I think we want the dash filler to "top off" the grooves, not the plastic weld.

I used pretty much every stick of FiberFlex in one package for this dash because it was in such bad shape. It's really hard to shape around the tougher corners, like by the vents, but luckily nobody can even see back there anyway.
Then some sandpaper over the plastic weld... this part took a while.

After that, it's ready for dash filler. At the beginning of this process, I wasn't very good with a putty knife:

The dash filler does harden quite fast, so I was filling maybe two or three cracks at a time per mixture! It's pretty easy to tell when it's hardening---it starts to get stuck to the putty knife and doesn't stay in the grooves. I had many problems with small air gaps (this is after sanding, which I did a lot of and my hands hurt):

One of the big issues with the dash filler is that it's hard to fill up a lot at once, so I found that especially the corner areas needed multiple coats:

Overall it took probably four "rounds" of 'apply dash filler everywhere' followed by 'sand by hand everywhere' followed by 'inspect'. Also that stuff is noxious! Wear a respirator and don't do it inside.
In one place, I unexpectedly found cracking, so I guess the filler did not adhere. I cut this out with a Dremel and re-filled it.

Eventually it was ready for paint. Take a look closely at the three pictures below: I think it's an area for improvement. Only in ~1.5 of those patches did I get the dash filler to taper. The rest had hard edges with the original dash, and while it was smooth with sanding, it did end up being visible after painting (though quite subtle).


Here it is after the rubber undercoating, primer, and final paint was applied. I was pretty happy with the texture although it's definitely not the original. But, it's inoffensive and acceptable, in my eyes. It was quite cold outside when I sprayed the undercoating, and I think this may have had an adverse effect on the particle size---when I do the next one, I'll probably wait until it's a bit warmer.


The color overall is just a bit darker than the old dash, but I think it looks just fine. Of course... I'm not reinstalling this one (and my interior is a wreck anyway
Now I did noticed that in a few places, there are some hairline cracks! These were here pretty much immediately from spraying. They're subtle enough that if I didn't point them out, they're not really noticeable, but I'm thinking that application temperature, and properly tapered dash filler are the culprits here. I suspect these might get a little worse as time goes on, but nothing like the original dash cracks (due to the plastic weld).


Overall, though, I'm quite satisfied with this.

I'm really happy that I got one to practice on. I feel a lot more confident about each of the steps---and I also feel like I've learned a handful of pitfalls that take away from the end result. What I'm not excited about is doing all that sanding again. An orbital is kind of out of the question because nowhere on the dash is flat. So, lots of finger pain seems to be the only way...
Re: Crack-free dash
I've been thinking of doing something similar for my 84' 745i, That turned out awesome!
Re: Crack-free dash
Wow! That's definitely a solid improvement on a dash that was certainly bound for the dump before.
-
Bonsaibacker
- Posts: 967
- Joined: Oct 26, 2017 3:36 PM
- Location: Fleming Island FL
Re: Crack-free dash
Total time invested? How much for materials?
Incredible improvement but wanting to know the total input before tackling. And kudos for taking this on and documenting. Thanks.
Incredible improvement but wanting to know the total input before tackling. And kudos for taking this on and documenting. Thanks.
-
alkalineom3n
- Posts: 48
- Joined: Nov 15, 2013 4:33 PM
- Location: Rochester NY
- Contact:
Re: Crack-free dash
Nice work! I'm in the process of doing the same to mine now, but I think I'm going to go the flocking route. What'd you use to replace the insulation? That's a good idea I didn't consider.
Re: Crack-free dash
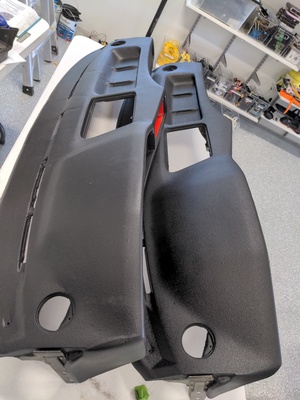
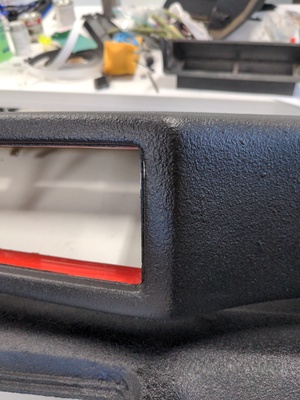
An update here---I did a second dash, and it came out better. I applied several more coats of the rubberized undercoating, and this made the finish much more uniform. The second dash is on the right:
First try:
Second try:
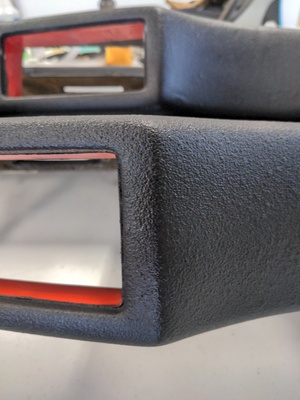
I did pretty much everything the same, but I took extra time and care with the sanding. It was a lot of sanding...
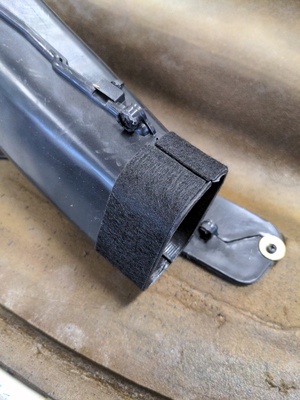
During reinstallation I put some felt tape on the various underdash pieces, because I read someone write somewhere that this could help make the interior a little less noisy, since plastic wouldn't be rubbing against plastic every bump you went over. I have no idea if it actually makes a difference but it makes me feel better about myself to have done it.
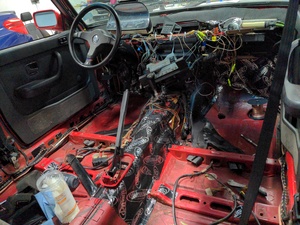
I also, uh, pulled apart the entire rest of the interior, replaced the entire audio system and ran new cables, cleaned the carpet, installed a new head unit, replaced cracked trim pieces, found new sport seats to install that aren't ripped to shreds. "While you're in there"...
And it looked absolutely great when I got it back in!
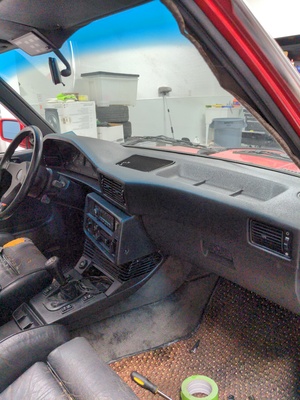
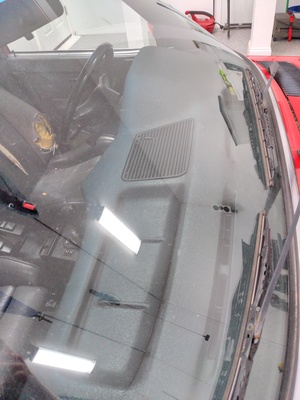
(sorry for the glare)
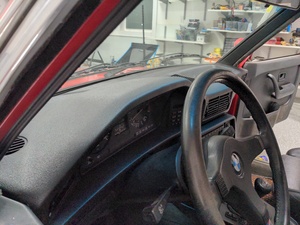
I felt pretty cool! Then, I took it outside the next day for a trip, and one single reasonably warm day in the sun somehow destroyed the dash! This resulted in me feeling less cool.
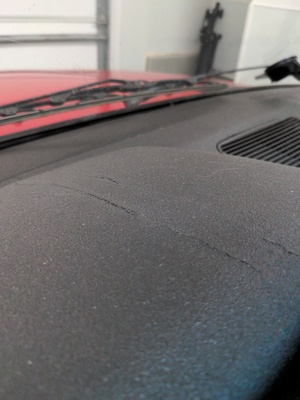
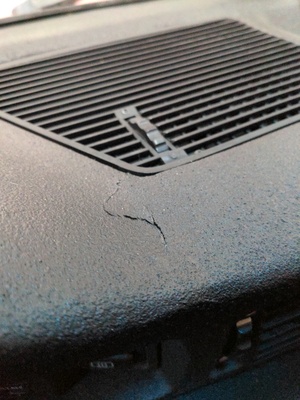
Specifically, the rubberized undercoating seemed to flex and crack exactly on the edges of the dash filler. I am unsure of exactly what I did incorrectly to cause this, but, I'm not gonna lie, it's pretty frustrating to have had this happened! On the up side, the cracking appears to be surface level only, and I doubt that it will ever open up into huge cracks like the original dash did. So, overall, the whole thing is still an improvement, but I have yet to identify what it is that I did wrong...
The original tutorial I followed, the poster there reported that the dash held up in the hot Arizona sun for a decade with no real issues. So I'm scratching my head. Maybe I will leave the first dash I tried out in the sun one of these days, just to see if maybe the number of coats of rubberized undercoating made a difference or something.
 For the insulation, I used Dynamat, Dynaliner, and some Dynatape. I have not noticed any particular difference from the old cracked stock insulation, but hey whatever.

First try:

Second try:

I did pretty much everything the same, but I took extra time and care with the sanding. It was a lot of sanding...
During reinstallation I put some felt tape on the various underdash pieces, because I read someone write somewhere that this could help make the interior a little less noisy, since plastic wouldn't be rubbing against plastic every bump you went over. I have no idea if it actually makes a difference but it makes me feel better about myself to have done it.

I also, uh, pulled apart the entire rest of the interior, replaced the entire audio system and ran new cables, cleaned the carpet, installed a new head unit, replaced cracked trim pieces, found new sport seats to install that aren't ripped to shreds. "While you're in there"...

And it looked absolutely great when I got it back in!


(sorry for the glare)

I felt pretty cool! Then, I took it outside the next day for a trip, and one single reasonably warm day in the sun somehow destroyed the dash! This resulted in me feeling less cool.


Specifically, the rubberized undercoating seemed to flex and crack exactly on the edges of the dash filler. I am unsure of exactly what I did incorrectly to cause this, but, I'm not gonna lie, it's pretty frustrating to have had this happened! On the up side, the cracking appears to be surface level only, and I doubt that it will ever open up into huge cracks like the original dash did. So, overall, the whole thing is still an improvement, but I have yet to identify what it is that I did wrong...
The original tutorial I followed, the poster there reported that the dash held up in the hot Arizona sun for a decade with no real issues. So I'm scratching my head. Maybe I will leave the first dash I tried out in the sun one of these days, just to see if maybe the number of coats of rubberized undercoating made a difference or something.
Probably about $150-200 for materials (per dash), and time? Well, let's put it this way, you better be bored and like sanding a lot. I would guess I put easily 20-30 hours into sanding, filling, sanding, filling, sanding, filling, painting, etc., etc..Bonsaibacker wrote:Total time invested? How much for materials?
Incredible improvement but wanting to know the total input before tackling. And kudos for taking this on and documenting. Thanks.
Post about how it turns out please! I'd be happy to watch.alkalineom3n wrote:Nice work! I'm in the process of doing the same to mine now, but I think I'm going to go the flocking route. What'd you use to replace the insulation? That's a good idea I didn't consider.

