Background -
October 2004 - Having struggled with an inexpensive roll-up garage door
on our 1.5 car garage, for some 20+ years, trying to keep summer heat and humidity and winter cold out of the garage and provide
a better environment for using the garage for my projects, as well as protecting my classic automobile, I gave up trying to
"insulate" the wooden roll up door and use something different.
My first approach was, of course, to purchase a wooden carriage door system, which would replace the
current roll up door and actually make the garage look like the original garage in the 1930's, which had carriage doors. Good
luck! Most new "carriage doors" are actually roll up doors, made to look like carriage doors. Such things still have big problems
in the way that they don't seal well at their perimeter and protect against the environment getting in. In fact, here is a recent article that addresses this very problem and also the difficulty of simply trying to compare garage door
performance, like you would if buying replacement windows.
Bottom line is that I decided to build my own, since it's pretty straight forward for such a common "one
car" door opening. Right?
 The frame is a simple 2x3 lumber frame with hinge blocks. Everything
is Poly glued and screwed together, to resist racking and sag. Not shown is the galvanized metal strap that runs diagonally
from the top hinge side of the doors to the bottom outside edge, where the doors meet when closed. The strap is behind the
cedar boards sitting in lightly notched areas of the 2x3 frame, where it passes over them. The surface is 1x6 cedar tonge
and groove, face nailed to the frame.
With the cedar facing in place, 2-inch R-16 double foil faced polyisocyanurate
foam panels are installed and sealed in place with SoudaSeal FC sealent, around their perimeter.
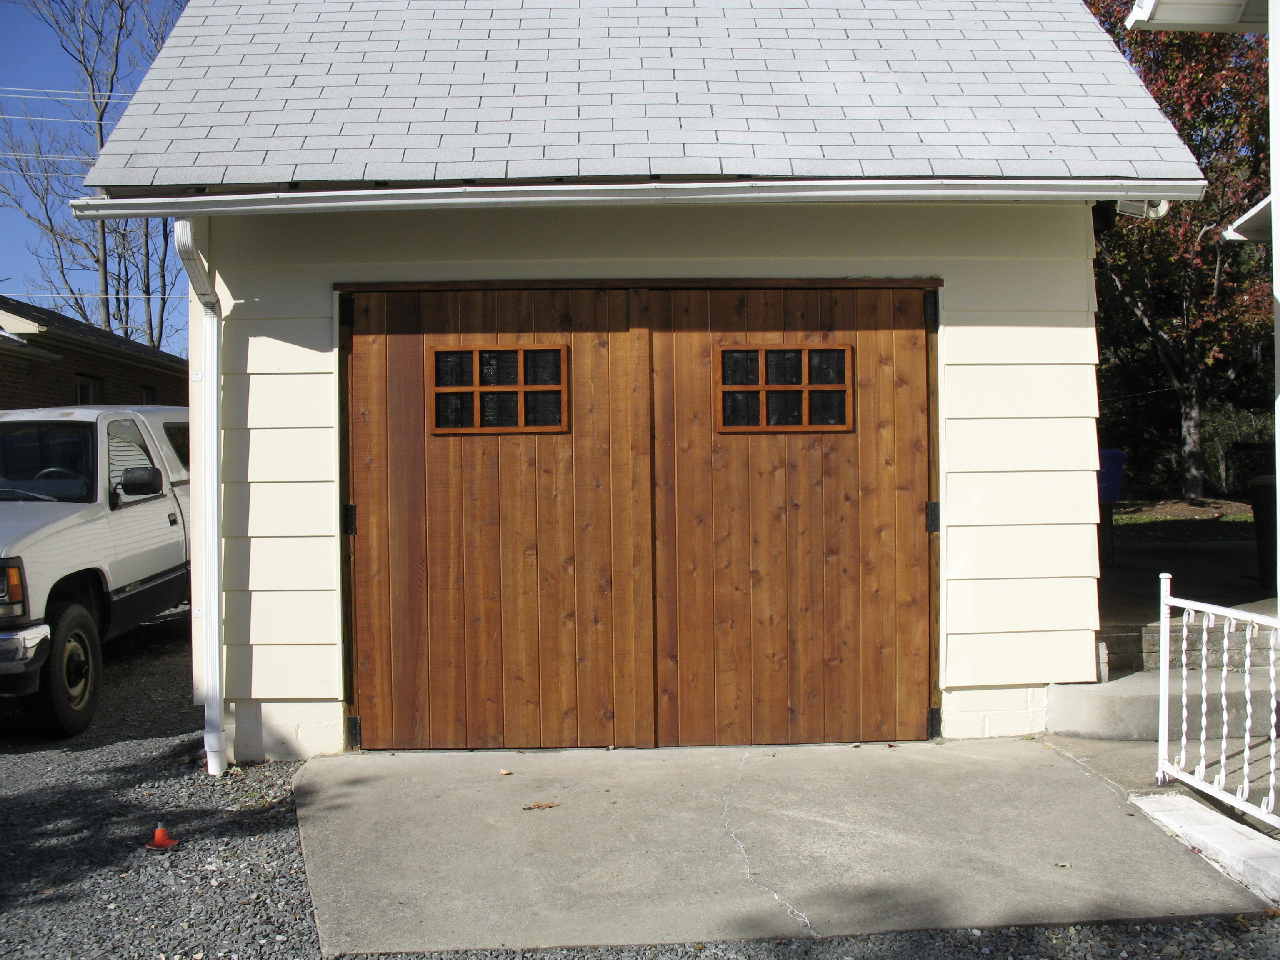
Nice fresh cedar panels, with a couple of coats of Cabot clear finish. The
look is a bit too plain, as we later make up some fake windows to give the doors a more pleasing, older style look, shown
below. But first, I have to concentrate on sealing the door against the elements, which will be fairly easy since the doors
can be weather stripped just like any outward opening exterior door.
Update March 14, 2011 -
(additional info about the lighting, requested by recent multiple Emails)
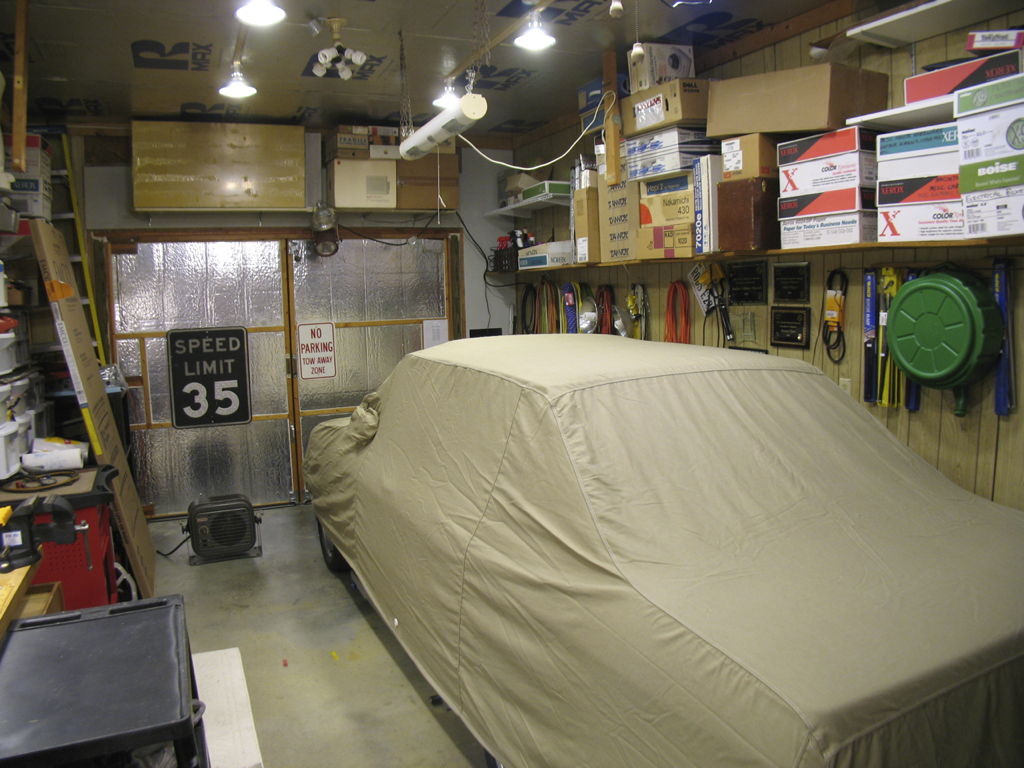
 We've left the inside foil faced panels unfinished, as their reflective
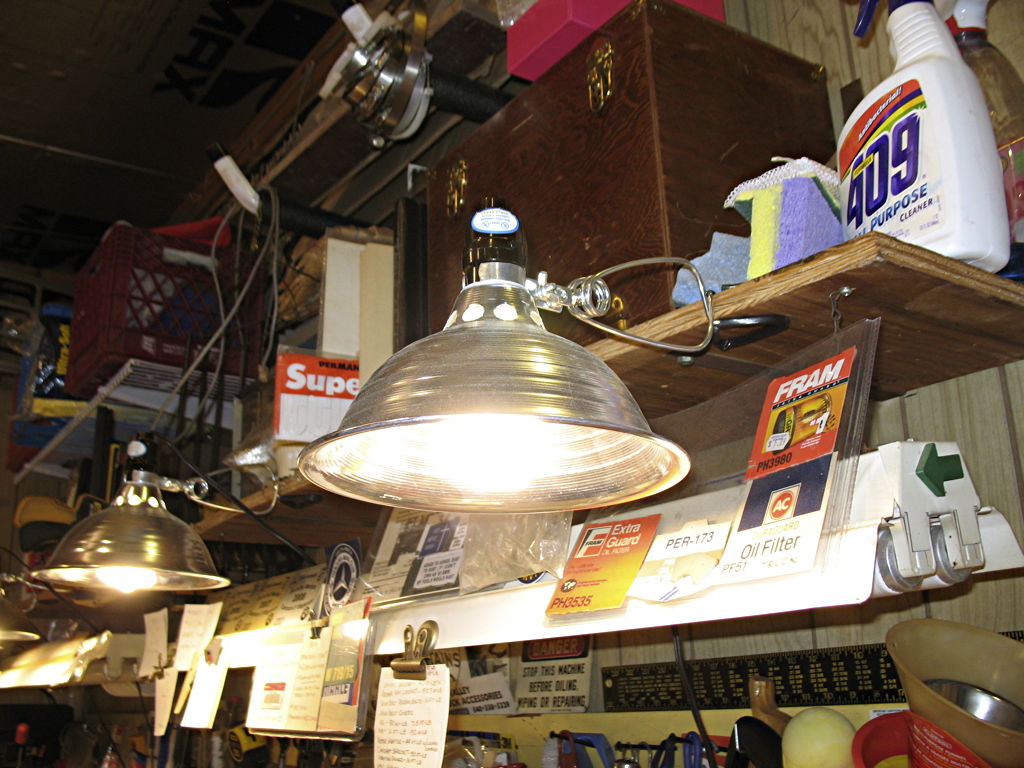
surface helps reflect the heat back into the garage. The overhead lamps are now simple 8-inch aluminum reflectors (6 each)
off of inexpensive clamp-on lamps (as shown below), using 23 watt 3000K CFL lamps on surface mounted sockets. The earlier
CFL lighting arrangement was simply a group of four CFLs on two "Y" adapter sockets, as can be seen in the above picture.
They replaced 75 watt tungsten lamps, Very inefficient and no longer used. The type of 240 volt electric heater seen on the
floor, is noted below further down this page.

The lamp shade has been modified to add additional ventilation holes, since
current products only had three holes and created an over heating problem, even for a low wattage CFL. Watch out for this!
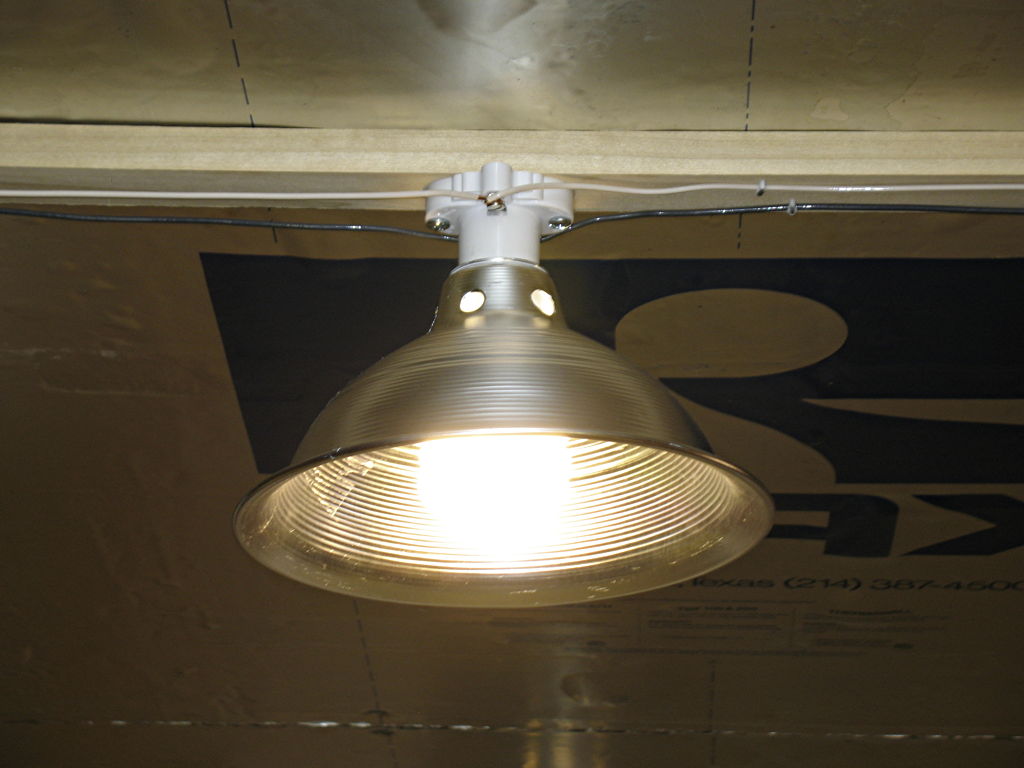
The lamps are mounted on 1x3 inch 8 foot poplar wood, using surface mount
standard size AC sockets, wired in parallel, as shown below. Make sure you observe correct socket polarization, with the white
neutral wire attached to the socket shell connection (silver screw) and the black hot wire attached to the center socket connection
(brass screw). The lamps produce a superior amount of illumination coverage, using just 138 watts of energy, compared
to using six 75 watt tungsten lamps at 450 watts!

Looking into the garage from the doorway. Certainly would like more space,
but keeping it well organized the space is fully workable.
 One of the bigger reasons for replacing the door, was the original door
frame construction consisted of two 2x4 untreated pieces going down through the concrete floor right into the earth below,
at each corner of the frame. Yup, termites were having a feast. You can see we replaced the 2x4s with treated 4x4s that now
sit in a concrete pocket and not on the dirt and 2x4s that sit on top of the 18-inch foundation wall, at each side of the
vertical framing.
The 1x2 poplar is glued and screwed to the side and top frame members and
serve as the door stops which the 3M V-Seal is attached to, providing a very tight seal when the doors are closed against
the V-Seal. The V-Seal is attached to the door stops with the open end of the V facing toward the outside. If wind blows
against the door, it causes the V to expand and seal tighter. I've tried a number of synthetic rubber type seals, but they
don't return to their original thickness too well after a year or so of compressed use, such as with my garage door. I am
still looking.
 Unfortunately, 3M V-Seal is no longer available and my private stock of
it is nearly gone. But, I have some v-seal type stuff somewhat like the 3M V-Seal product, that I am life testing, called
"Ice-O-Tac". It has only been 6 months since I placed it in test, so not long enough for
any meaningful results yet.
 I came up with a very simple and effective way to seal the door bottoms
from driving rain and other stuff, as well as permitting the car to be driven in and out without damge to the seal. I
use some simple aluminum bar stock and a good quality roll up door bottom seal... as shown above. These seals vary greatly
in thickness and quality! Pick up several different brands and look at them carefully, especially their ends, where you can
see their differences in thickness. Buy the most robust one you can find, as most of the DIY stores carry some really poor
junk... one tore when I rolled a big floor jack over it. The current material isn't bothered at all by my floor jacks rolling
over them.
As I indicated near the top of this page, we found that the doors were
too plain, so I made some simple Popular frames to replicate what a window frame would look like and mounted them to each
door, painting the window areas gloss black. I think it helps and sure looks real from the street.
 These doors have been in operation since the summer of 2006 and I've had
no problems at all with them. The garage is 322 sq. ft. with a 10' ceiling and a large ceiling fan and is easily cooled and
humidity lowered with a cheap 5,000 btu window air conditioner, even during our 100+ F degree 98% humidity days.
UPDATE Feb. 12, 2012 -
Best of all I only have to use the 3300 watts setting on my 240v electric
portable heater, to keep the garage at 60 degrees in 2F degree weather, cycling about
every 30-40 minutes for 10-12 minutes. However, the heater's thermostat has continued to creep up in terms of its minimum
temperature setting, now currently a minimum of 72F, way too far above the 55-60F minimum I was using when it was new. A number
of other owners of this heater have also noted a thermostat problem, not being able to set a lower minimum temp, which is
spec'd at 40F. I have ordered a replacement thermostat from Marley Engineered Products, who builds this heater marketed under
several different names, such as Qmark, Marley MUH-35A, etc.
The thermostat is available from Marley at 1-800-654-3545 and is Part Number
5813-2013-000. The new thermostat arrived last week. I noted that this thermostat has two adjustment screws on the back, under
a drop of sealant on each one. The original thermostat only had one adjustment. This replacement is only able to control the
heat setting down to a minimum of 54-56F and not the 40F minimum it is claimed to be its lowest setting. I would prefer to
be able to set the thermostat at 48F. When time permits, I will try the rear adjustments to see if I can lower the minimum
temperature. In the meantime, I am using a 40 amp 240 volt Intermatic hot water heater switch, to limit the on times of the
heater. I will report my adjustment results, after I have experimented with them.
-Rod
Copyright 2010 - 2013 by Rod Paine. All rights reserved.
|
 |
|
|
 |
|
|
 |
|
|
|

