Here is the inside view of my south facing office window (outside shown
above), on the second floor of my garage office. It's a 1984 Anderson Series 200 double glazed unit, one of the lowest cost
models, which I installed in order to gain additional illumination in the room, which had no window on the south wall. Unfortunately,
the summer sun and its radiant heat coming through this window, was greater then this 1984 window could handle, given its
technology at the time. Pretty good in the winter, terrible in the summer.
 I tried a number of ideas to stop the heat gain, but this was the
best one I came up with. It is simply a 1/2-inch piece of foil faced foamboard (Rmax brand in my case) with its edges covered
with aluminum tape to protect the exposed foam core from sun damage and consisting of three sections, held together
on the backside with DUCT tape, as shown. I cut this panel 1/8-inch smaller then the window frame opening, where the foam
panel would be placed, to allow for thermal expansion.
 The DUCT tape serves to hinge the panels to fold together for storage,
but more importantly it allows the panel the flexability to be placed between the the outside of the double hung window and
the inside of the window's exterior screen. On windows with very little space between the window outside surface and the screen,
you can use large silver mylar automobile windshield sun shades, cut in two pieces, with the upper piece taller then the lower
piece, so that it will overlap the bottom piece to allow rain to run off. Two pieces also allows one to be removed
for ventilation, such as at the top or bottom of the window.
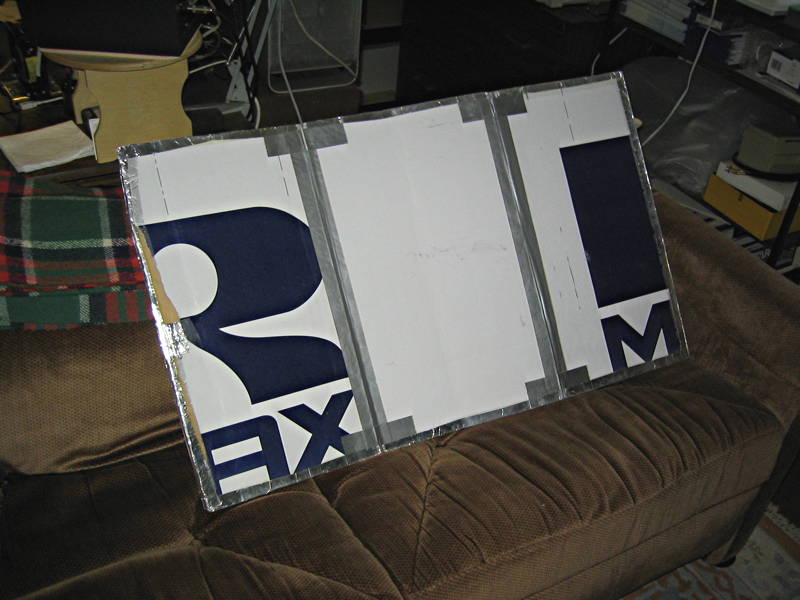
This is the foil faced side, which has aluminum tape reinforcing the hinged
areas as well as protecting the foam from the sun. You have to apply the aluminum tape with the panels folded together, so
that their exposed foam core material will be properly covered, as shown below.
Here you can see what the panel looks like in its folded state, with the
foil surface on the outside. I used pieces of cardboard as templates to first determine how big the sections should be, so
that they could easily be maneuvered into place between the window and screen, or storm window, from the inside. A few were
constructed to go in from the bottom sash, because the upper sash wouldn't open... later found to be screwed shut by overly
long aluminum triple-track storm window frame screws!
With panels completed, lower the window top sash and place the first panel
section in the window in front of the bottom sash as shown.
With two of the three sections now in front of the lowered sashes, you
can use this configuration for ventilation, leaving the upper sash in the lowered position, reducing the amount of sunlight
entering the window. This really works well in the late spring and early fall, when the air is cool, but the sunlight is very
warm.
With the final section placed at the top, hold it in that position while
you close the upper sash. The window is now totally shielded from the sun. The small bluegreen thing in the bottom sash between
the window and the foam panel, is a piece of packing foam material, which holds the panel against the window screen and keeps
it from moving back toward the lower sash window, allowing daylight in at the top of the window.
With my heavy drapes closed, there is no heat or light entering from this
window. The heavy drapes are used for acoustical treatment because I do audio work in this room. And they provide additional
protection against winter cold, too.
Questions or comments? Get back to me.
Rod Paine
Back to Top
Copyright 2010 - 2013 by Rod Paine. All rights reserved.
|
 |
|
|
 |
|
|
 |
|
|
|


