This page updated/revised
July 21, 2010
(click this link to go to this update location)
- Special Note -
Rob Anderson has published a pdf document named "Headlight_Thesis.pdf" (still floating
around on the Internet), which suggests it corrects many errors in my test results, below, and offers correct information.
Unfortunately, Rob did not contact me about any issue he had with my data, but did, in fact, make many assumptions about my
tests and their results, strongly suggesting they are wrong. I have contacted Rob and have asked that we get together via
E-mail and revise our individual documents, to better reflect what it is we were trying to say, doing it without assumptions
and errors.
In the meantime, my data stands as originally presented, with a few edits (in
red) made Dec. 3 and Dec. 6, 2005 to clarify items that Rob took issue with and to elaborate on items not
clear to several people who E-mailed me.
-Rod
Installing Euro headlights?
The Hella Euro lamps add a distinctive look to your BMW and are capable of making some significant
improvements over the stock feeble sealed beam headlights. My Euro headlights installation comments are here. But, simply pluging them in is not really the best way to insure they deliver better lighting, with their higher wattage
bulbs. If you're planning on using 80-100 watt bulbs, forget about using the stock wiring, as it will not deliver the
full voltage to these bulbs, contrary to what other BMW owners have said... it simply isn't true!
Here are the results of accurate voltage drop tests conducted on my BMW.

Rob Anderson questioned the ".001" data shown above, in the LB Fuse to LB Bulb data, indicating
it was "completely incorrect" and "should be 1/4 or 1/5 of the stock." This was the measured voltage drop for the 12ga.
path (versus his calculated value) and had nothing to do with the stock wiring! Probably not a very good place to note this
data in the chart, but I did not expect people to interpret the data in this way... or would I expect to be "fired" for such
a measurement of data.
The rear of the left front 7-inch Hella lowbeam lamp is shown here, with the lamp rear
socket cap removed to permit access to the H4 bulb terminals, with the stock U.S. bulb socket attached. The new Hella socket
wired with 12 ga. wire (blue, yellow, black) is sitting just behind the H4 bulb, next to the sealedbeam headlight.
The Euro lamp socket cap is fitted to the back of the lamp and the new socket is
attached to the socket cap. You can see the original stock bulb socket resting against the sealedbeam bulb.
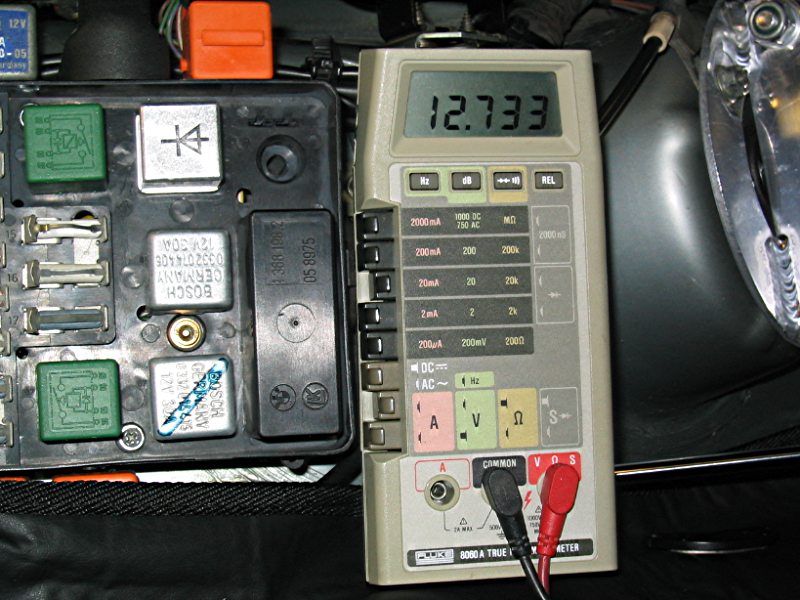
 A high quality digital volt meter was used for all tests, the Fluke 8060A which is a 0.05%
accuracy meter measuring DC volts. Initial tests were run with a small battery charger connected, to help minimize the drain
of the battery and keep measured voltages within an acceptable range. Since the vehicle was in a closed garage and could not
be run, the battery voltage was dropping. Unfortunately, the charger couldn't keep up and tests were delayed, awaiting a warmer
day to move the car outside and have it running during tests, which is reflected above in the final test results. The
reading on the meter is simply the battery voltage, with the engine off, during the time I took this picture of the meter brand
and model used to make my measurements. Showing the brand and model was the purpose of the picture, not what the
meter was displaying at the time the picture was taken!
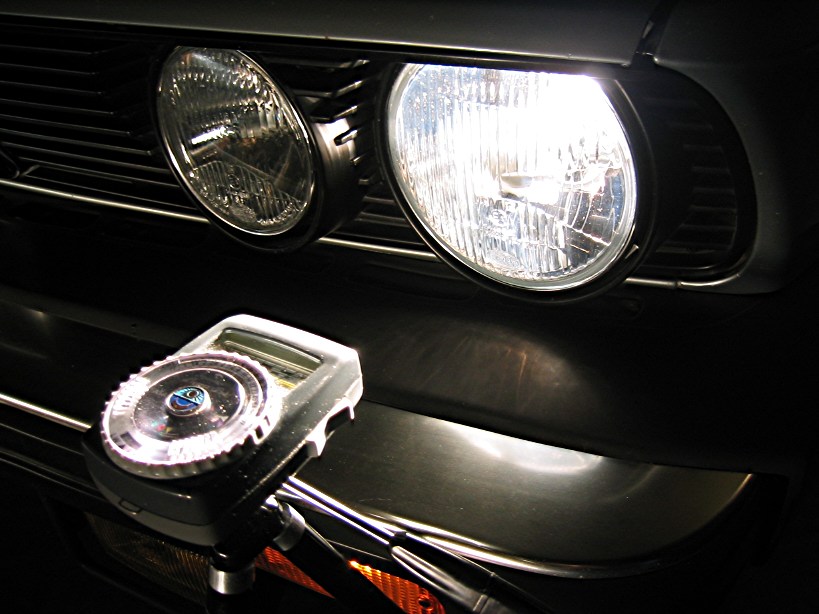
 Lastly, I wanted to try and "quantify" the illumination differences I was seeing between the
different bulb types and wiring used, beyond posting just the DC voltage drop numbers. I used a good quality incident light
meter (Gossen Luna-Pro) placed about 10-inches from the lamp on a tripod and positioned for maximum reading with the 90w H4
powered by the 12ga. wiring and relay circuit. The stock H5006 was hand positioned at 10-inches from the Gossen at the point
of maximum reading on the meter. Placing the meter at this distance helped make sure that the lens
beam pattern was not a factor, although I was not testing with multiple lamp brands or interested in lamp optics beam patterns. The
sole purpose of this measurement was to try and attach some form of illumination value to what I was seeing, swapping the
bulb wattage and bulb feed circuits (stock and 12ga.) while measuring the voltages discussed. I was seeing the brightness
change, as I swapped bulbs and circuits, but how best to describe it, other than dumb terms like "stock", "medium bright",
"brightest", etc. How could I help the reader better understand the brightness change I was seeing?
Further, I tried taking photos at night, attempting to show the illumination differences
of the different bulb and wiring combinations, but the differences shown in the digital photos was hard to see, because of
the limited low light sensitivity of the digital camera. Otherwise, I would have included such photos.
Lastly, my intent was never to have these cp illumination numbers
serve any other purpose, including comparing them to isocandela pattern data, which would be absurd and not within the scope
of my data. If you don't understand the term "relative" as used below, look it up, please!
This gave me relative readings between each test, providing something more than simply
a DC voltage number. I used the Gossen's meter candlepower notation, which indicated:
H5006 with stock wiring - 2000 cp
H4 60/55 stock wiring - 8000 cp
H4 60/55 12ga. wiring - 12000 cp
H4 90/100 stock wiring - 24000 cp
H4 90/100 12ga. wiring - 32000 cp
Please keep in mind that these are relative numbers, that
only apply to my vehicle and tests. They should not to be misconstrued as some form of "industry standard" measurement.
They aren't, but they are a fully repeatable illumination measurement, currently better than anything I've been able
to find on this specific equipment setup, for the E28.
I hope you find these test findings useful. If you have questions or comments about
anything I've posted above, please contact me via E-mail, so that we can discuss them.
Update December 13, 2009
Some recent comments by Daniel Stern, about the Osram Night Breakers bulbs and what the +30, +50, etc., "plus" bulb names actually mean. Probably not what you thought they mean.
UPDATE July 21, 2010
Headlight Plastic Lens Polishing
While this process does work, the removal of the original but failed surface
protection causes the headlight lenses to become cloudy again, quite soon, after this polishing. They will respond to polishing
again, but the cloudy/foggy surface will return. The only known way to prevent this surface deterioration from occurring so
rapidly, is to replace the lenses with new units, that have a factory fresh surface protection, able to hold off the deterioration
much longer. I've experienced this on our own 2002 VW Golf TDI as well as on my friends Honda shown below,
which now has new lenses. So, this restoration method is not a long term fix and it will be necessary to repeat the process,
quite frequently, to maintain headlight lens surface clarity, compared to replacing the lenses and the length of time new
lenses typically remain in good shape.
Lastly, I've noted that car wash brushes/scrubbers and/or dirty recycled water
really takes a toll on headlight lenses, as it does on the vehicles paint surface. Watch out for such services.
---------------------------------
May 2008
The E28 does not use plastic type headlight lenses,
but we do have friends that have newer model BMWs and other makes that use a polycarbonate type lens, which becomes scratched
and finely pitted from normal use and exposure to UV light.
My wife's 2002 VW Golf TDI had suffered the same wear and a reduction in illumination
that the headlights were able to produce, with their scratched/cloudy lenses. I had tried several plastic polish products,
but all these did was produce a shiny pitted lens with no real improvement in lens clarity.
I asked a friend who details cars to concours level, what he used for dealing
with pitted/cloudy plastic headlight lenses and he recommended using a DIAMONDITE product, made specifically for hard plastics, using two componds and applied with an electric drill motor or small power
buffer running at 1800 RPM. You can see the results of a friends 2000 Honda Accord, that was recently rejected during its
annual Virginia Safety Inspection, due to cloudy headlight lenses.
I reduce the amount of polishing compound required, by sanding first using 2000
grit wet/dry paper, which I feel results in a better surface, but requires that you know how to wet sand, properly, using
lots of water. If you don't know how to wet sand, simply use the supplied compounds, and you'll still get a much better result
then using a single product hand applied approach. It's surprising how much light is lost by cloudy lenses, until you restore
them. The more I look, the more I see a lot of lenses with this problem.

|
| - CLICK ON THE PICTURE TO EXPAND IT - |

|
| - CLICK ON THE PICTURE TO EXPAND IT - |
|

